Invoicing and invoice management are important aspects of a company, and they should be done with at most care and precision with dignified tools and solutions. The Invoice generations and management are the responsibilities of the Accounting as well as the Financial department of every organization. The Odoo Accounting module supports the operations of the Invoicing and invoicing management with the help of a supporting Invoicing module which is embedded along with the Accounting module of the Odoo platform. The Invoicing module is auto-installed when the Accounting module is installed.
Along with the Invoicing module, there are various configurations available in the Accounting module of Odoo to support the operations, which are available under the Configuration tab of the Accounting module. In the Configuration tab, numerous menu options are available which will support the aspects of Invoicing. Let's now move on to understanding the various aspects of Invoicing configuration one by one.
Payment Terms and Early Payment Discounts
The Payment Terms feature in the Odoo 16 Accounting module allows you to manage your payment terms and conditions. This feature is useful for businesses that need to track and manage their payment terms and conditions. With this feature, you can add a new payment term, edit an existing payment term, delete a payment term, view a list of all payment terms, and search for a specific payment term. It will be very beneficial for businesses to specify the terms under which they will receive payments from their customers. This feature can help businesses to better manage their cash flow by specifying when they will receive payments and by providing a clear record of what payments have been made.
You can find the Payment Terms menu under the Invoicing section of the Configuration tab of the Accounting module. The menu will help you to reach out to the Payment Terms window, as shown in the screenshot below.
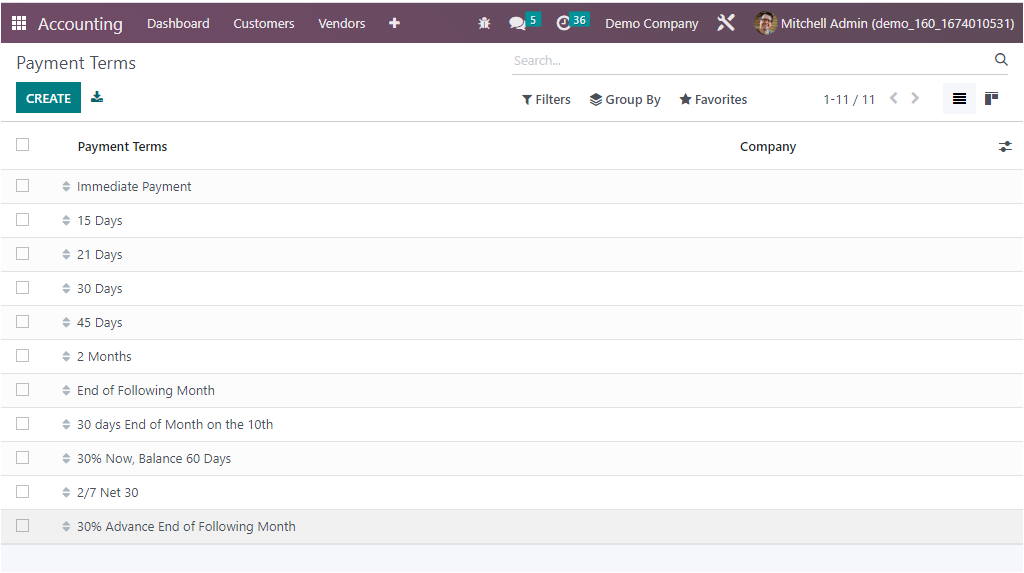
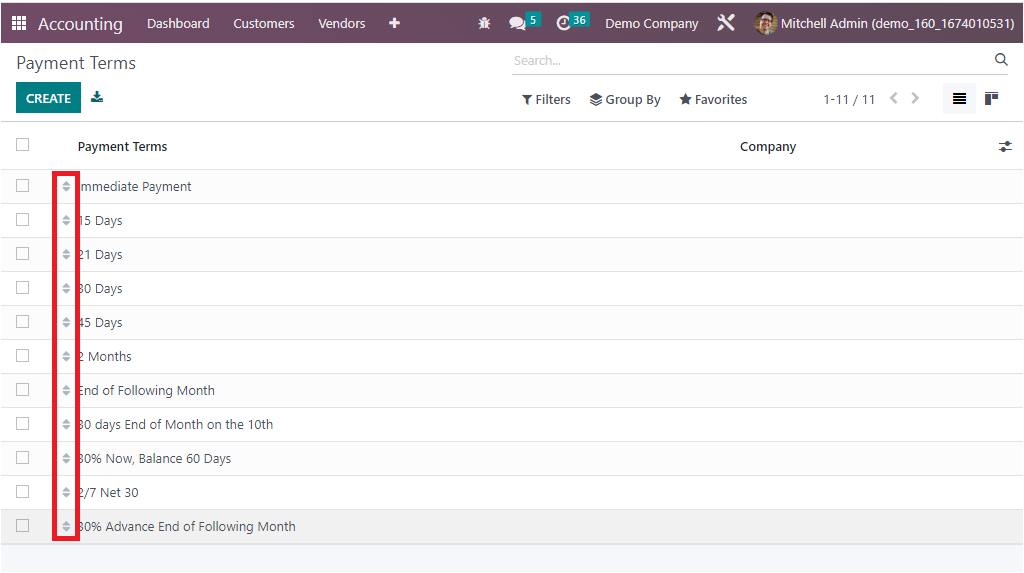
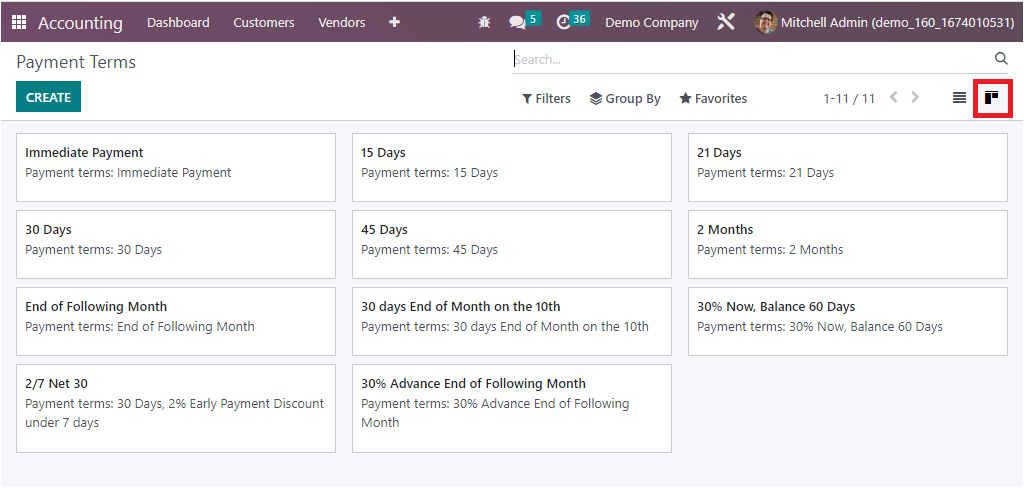
The Payment Terms window will occupy all the details regarding the configured Payment Terms in addition to the default and customizable options. Each payment rems will be listed along with the essential tools. Each of these defined payment terms can be selected and viewed in detail. If you want to make edits to it, it can also be possible. The window offers the sequencing feature, which allows you to drag and drop your payment terms to your desired order.
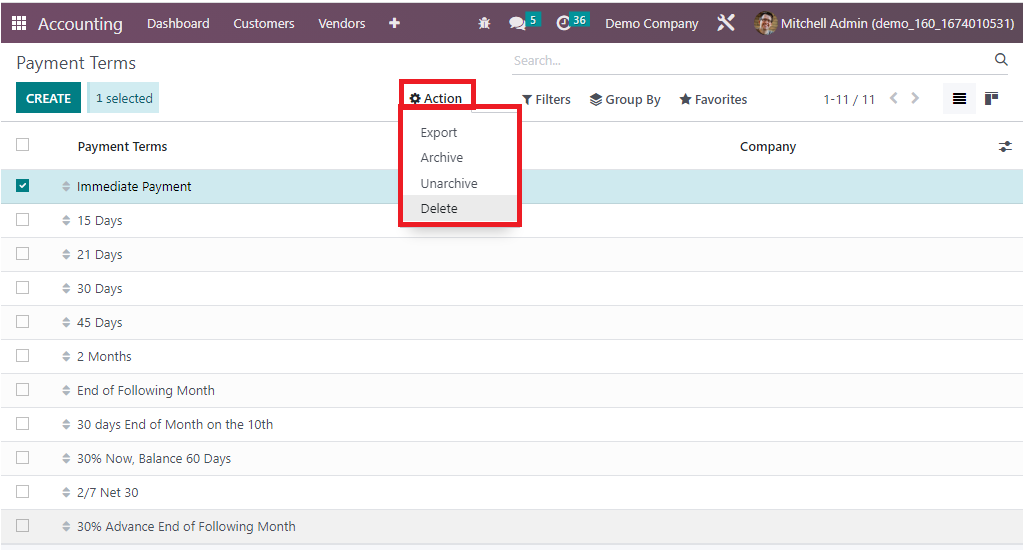
In addition, the check box available in each payment terms record on the extreme left can be checked for performing various actions. When you check the box, you will depict the Action button under which you have different menus, such as Export, Archive, Unarchive and Delete, as highlighted in the given screenshot.
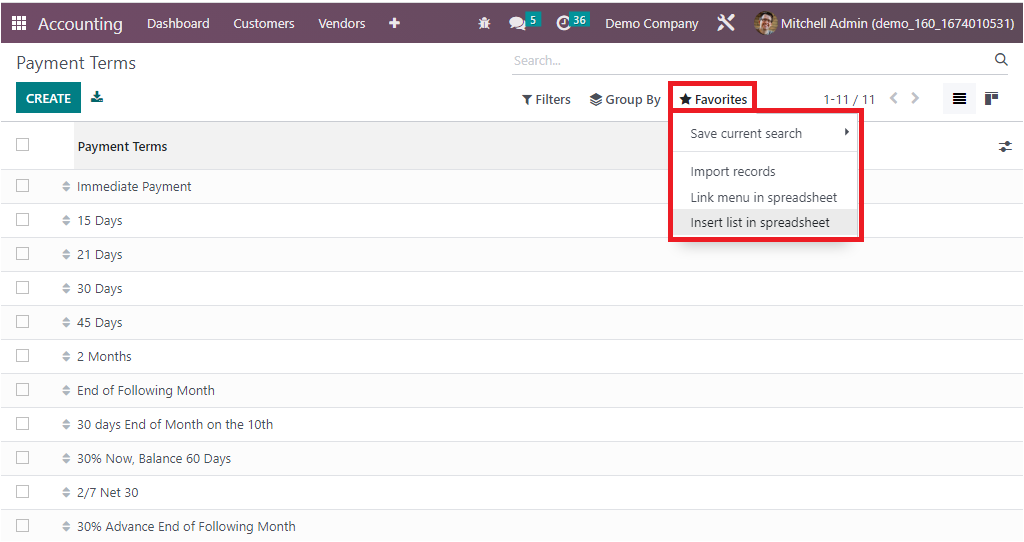
In addition, the Filters option makes the searching process easier, and the various default and customizable filters can be used for better search results. The Group By option allows you to configure various customizable payment terms groups to make the data processing easier. The Favourites tab embraces various additional options such as Save current search, Import records, Link menu in spreadsheet, and Insert list in spreadsheet.
The Payment Terms can be considered as the period that the organization puts forward to the customers to make the payments for the corresponding purchases or services. If the customer doesn’t pay the payment within the payment terms, the corresponding payment will be marked as due. In addition, the respective payment will be depicted in the Aged Reports, which means in the aged payable or aged receivable, based upon the sales payment term or purchase payment term according to the due date. Furthermore, you are able to access the window in Kanban format by using the Kanban menu icon on the top right corner, as highlighted in the screenshot below.
When you focus on creating new Payment Terms, you can choose the CREATE button, which will take you to the creation form, just as showcased in the following screenshot.

In the form view, first, you can specify the name of the payment terms in the Payment Terms field. Then you can mention the payment term explanation for the customer in the ‘ Description on the Invoice’ field. A description of payment terms can be added, which will appear in the invoices. On enabling ‘Display details,’ the payment deadline and respective due amounts will be detailed on the invoices. Under ‘Due Lines’, due type, value, months, days, discount, and discount days are defined. Here you can define multiple Terms of operations, and you have to be careful of one aspect is that the last line computation should be balanced.
The Due Type can be selected as Balanced, Percentage, or Fixed Amount. Furthermore, the Due Date Computation details of the Terms can also be defined, proving the respective fields on a date as well as the computation details. Odoo 16 introduced new fields discounts and discount days in the due lines, which add the feature of providing early discounts. Once a customer makes payment before the payment term, a discount is applied to the total amount. The discount and no. of days for which the discount is available can be added at field discount days. After defining, these payment terms can be used in Invoices/Bills
The Odoo platform provides you the right to edit and delete the required Payment Terms that you have configured by selecting them. Now it is clear about the Payment Terms configuration in Odoo and now let us discuss the Follow Up Levels management feature existing under the Invoicing management in the Configuration tab in the coming section.
Follow UP Levels
The Follow-Up Levels feature available in the Odoo Accounting module allows you to configure and manage follow-up levels for customer invoices. The menu is located in the Accounting module, under the Configuration tab in the Invoicing section. It is an excellent way to categorize and track customer invoices. This can be useful for businesses that want to keep track of which invoices are overdue and for customers that want to see a breakdown of their invoices by follow-up levels. Further, this option enables you to see which customers are on which level and to set the level for each customer. And also it helps you to set up automated follow-up emails and messages.
The Follow-up Levels menu that allows you to manage and configure the follow-up levels for your company can be accessed from the Configuration tab of the Accounting module. To define the Payment Follow up of the Accounting operation, we can click on the respective menu. The next moment you will depict the Payment Follow up window as pictured below.
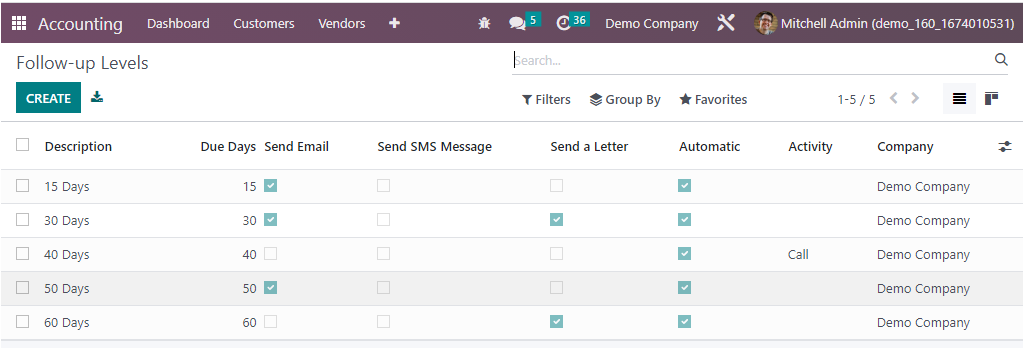
This feature is highly favorable to ascertain that you have proper tools to track the unreceived payments on invoices that are developed for the customers. The Follow-up Levels window will depict the preview of all already defined Follow-up Levels along with significant information such as Description, Due Days, Send Emails, Send SMS Messages, Send a Letter, Automatic, Activity, and Company in a polished manner. The follow-up actions on the Send Emails, Send SMS Message, Send a Letter, and Automatic can be activated or deactivated based on user preferences.
The other default options available in almost all windows of Odoo, such as Filters, Group By, Favorite, Search, Kanban view icon, and Export All icons, are also available here.
You can offer a gentle mouse click on the CREATE button to access the creation form for configuring new Follow up Levels. The screenshot of the creation window is given below.
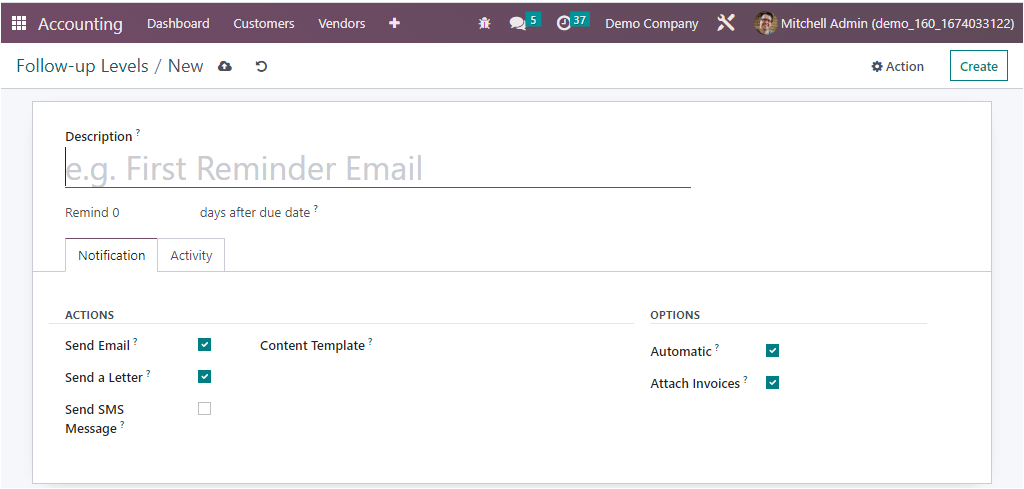
Here initially, you can configure the Follow-up action name in the Description field and can allocate the due date of the follow-up in the provided space. It is the number of days after the due date of the invoice to wait before sending the reminder. This can be set as a negative value if you want to send the reminder before the invoice due date. You can enable the Actions for the respective to follow up, such as the Send an Email, Send an SMS Message, Send a Letter, Manual Action options can be defined under the ‘Activity’ tab, where you can check ‘schedule activity’ and add the sign activity to the assigned person. Moreover, the Options for the Payment Follow-ups, such as the Automatic and Attach Invoices, can be enabled as well as disabled based on the need.
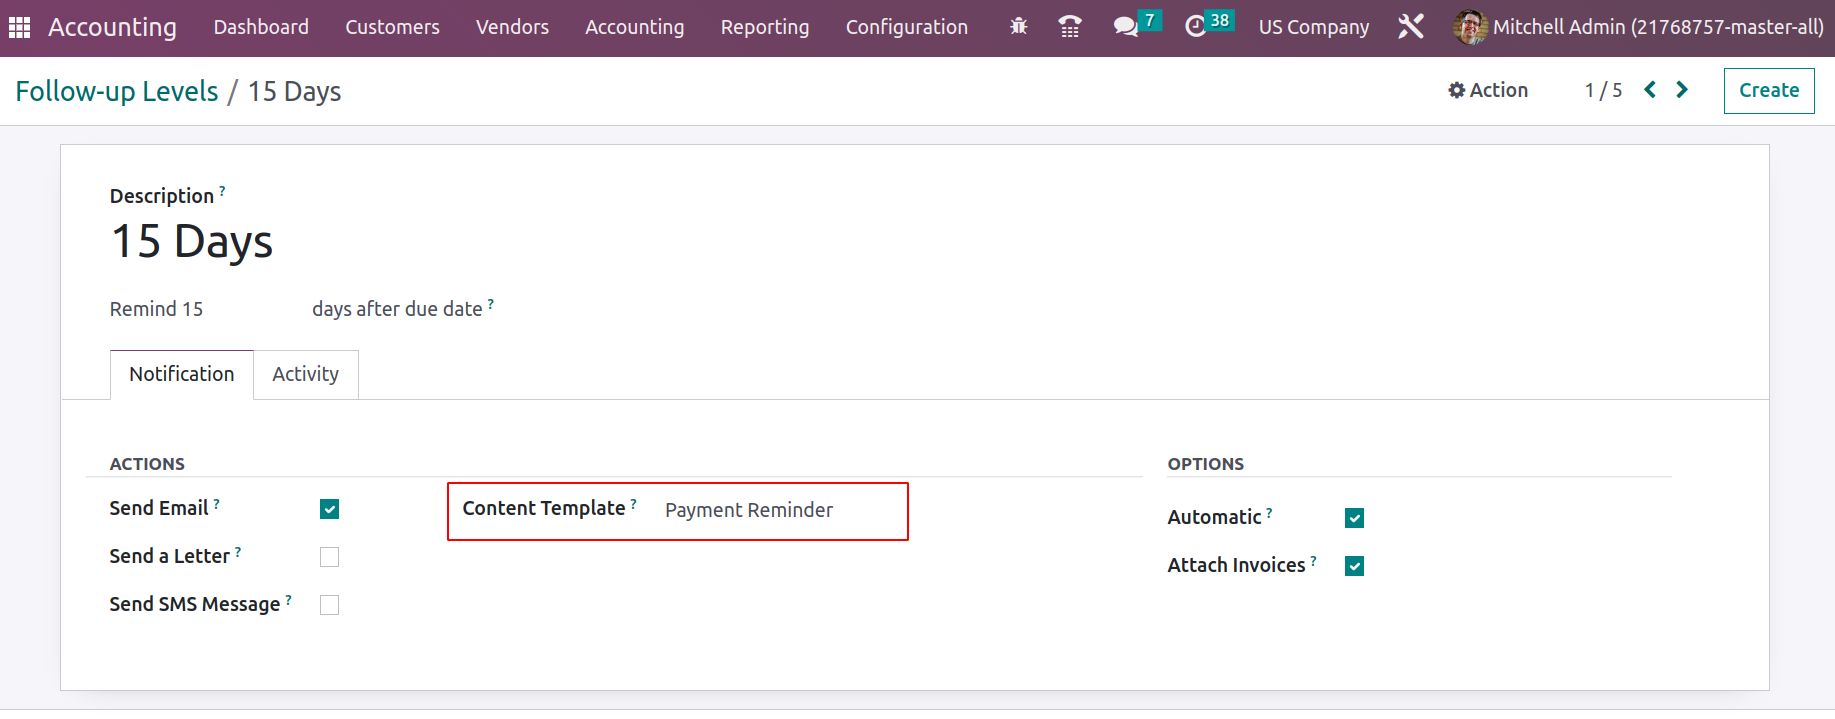
Additionally, the message upon the Payment Follow-ups being operations will be depicted in the content template ‘Payment Reminder’. Based on this follow levels set, a follow-up report generates as invoices become due.
As we clear that the Follow-up Levels feature is adequate to manage and customize the follow-up levels for customer invoices, and this powerful tool allows you to keep track of customer invoices and ensure that they are paid on time. Let's now move on to the next section, where the Incoterms configuration menu will be described.
Incoterms
The Incoterms are the international commercial terms that define the responsibilities of buyers and sellers for the delivery of goods. They are used to clarify which party is responsible for paying the freight and other transportation charges, and they also specify when the title to the goods passes from the seller to the buyer.
In Odoo 16 Accounting, Incoterms are used to automatically populate fields in the Sales Order and Purchase Order forms that are related to shipping, such as the Incoterms and the shipping address. They are also used to generate the correct accounting entries when goods are shipped.
The most important thing to remember about Incoterms is that they are only meant to be used for international shipments. For domestic shipments, the terms and conditions are typically different, and Incoterms should not be used.
The Incoterms menu is situated in the Invoicing section of the Configuration tab, and a gentle press on the menu will guide you through the Incoterms window as furnished below.
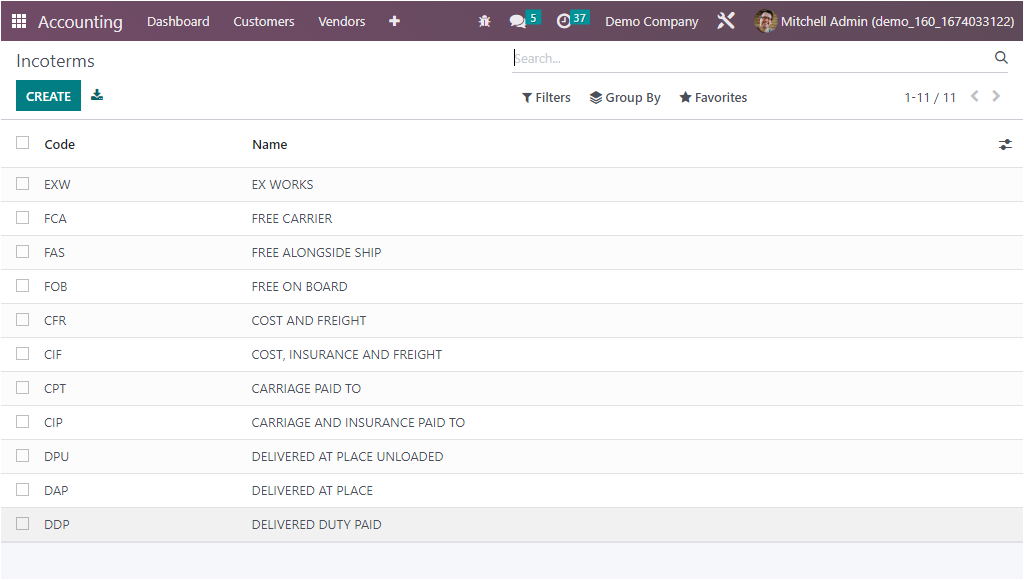
This window will depict all the aspects of Incoterms operations that are formerly illustrated in the platform. The platform foresees the need for sorting functionalities and occupies all the default and customizable sorting and other functional menus such as Filters, Group By, Favourites, Search and Export All as seen in the screenshot.
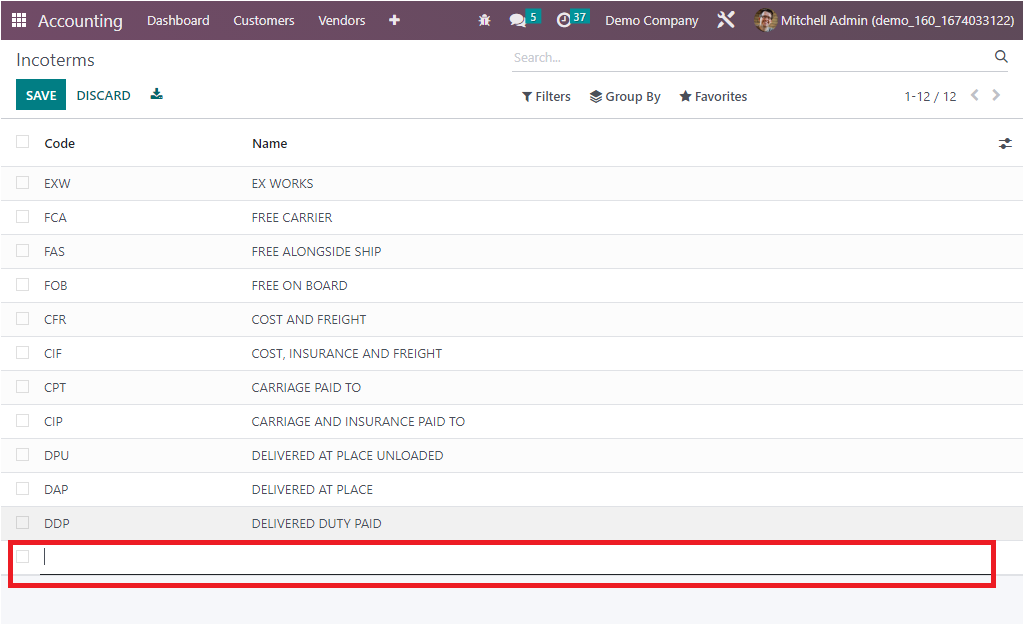
You can effortlessly create new Incoterms with the direction of CREATE button. The new Incoterm can be configured in the new creation line, which is depicted in the same window at the moment you select the CREATE button.
Incoterms can be applied to invoices, and even default incoterms can be set in the accounting configuration settings under the customer invoices section.
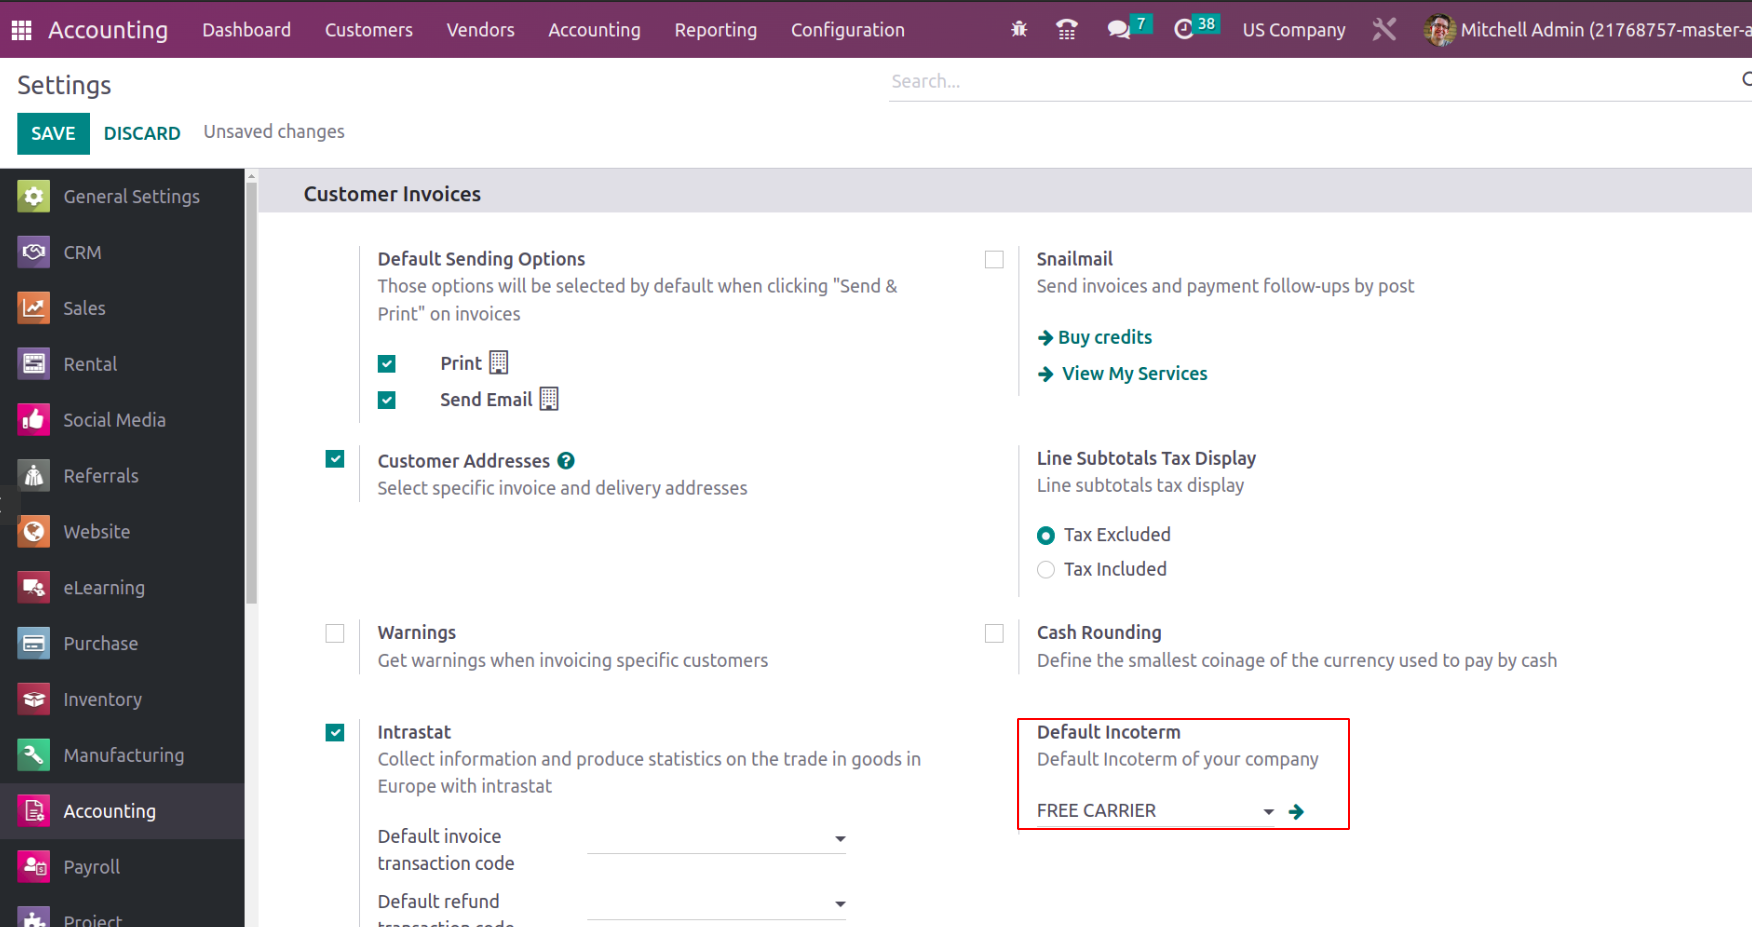
The applied incoterm will appear on the invoice as well.
As we clear on the Incoterms management in the Odoo Accounting module, now let us switch to the configuration aspects of the Intrastat Code in the platform.
Intrastat Code
The Intrastat Code is a code that is used to identify goods that are traded between countries within the European Union. This code is used to track the movement of goods and to determine the correct tariffs and taxes that are due on the goods. The Intrastat code is also used to calculate the value of goods that are traded between countries. It acts as the identification code that is used to track the movement of goods between different countries. This code is used by customs authorities to track the value of goods that are imported and exported.
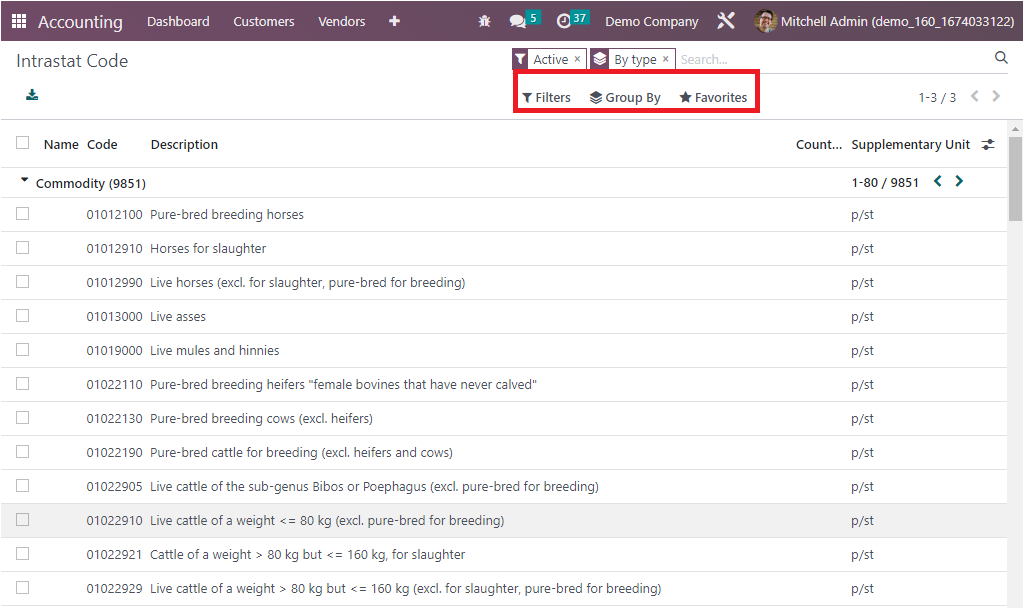
The Intrastat Code is an eight-digit code that is assigned to a product by the European commission. The code is used to identify the product for statistical purposes. The Intrastat Code menu is located under the Invoicing section of the Configuration tab. As soon as you click on this menu, you will reach the Intrastat Code window, which will look like the screenshot below.
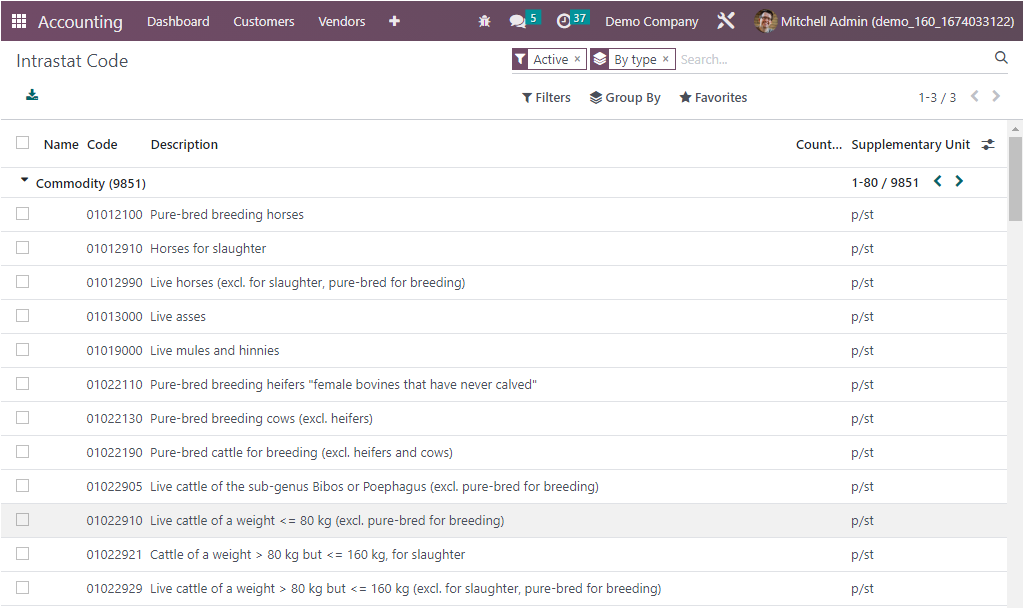
The Intrastat Code menu will depict all aspects of the Intrastat Code that have been defined in the platform. The preview itself gives you an overall description of each code defined. You can view the Name, Code, Description, Count, and Supplementary Unit as displayed in the screenshot above. Here you have different default as well as customizable filters under the Filters tab. You can use it to quickly obtain your required Intrastat code. The default filters available here are Active, Commodity, Transport, Transaction, and Region. The Group By tab includes the default grouping options such as By type, By country, and Supplementary Unit. In addition, the Favourites tab includes the Save current search, Link menu in spreadsheet, and Insert list in spreadsheet menus.
Each of these defined Intrastat Codes is selectable and it can be viewed in detail
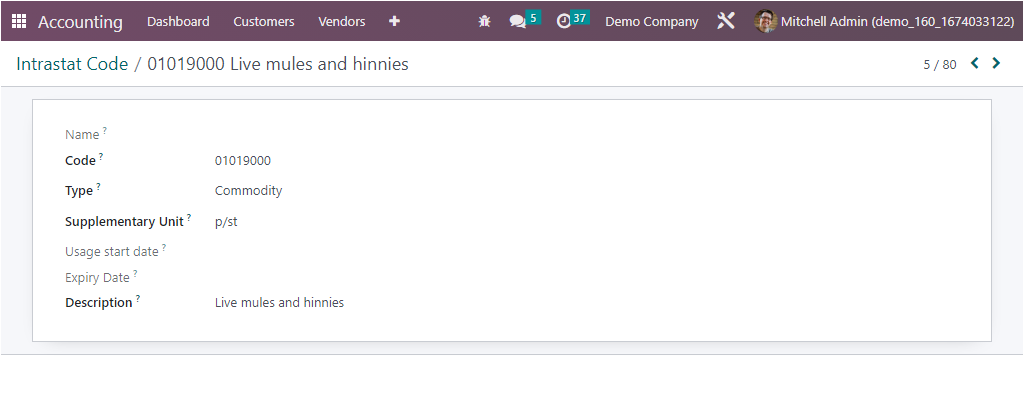
Here in the extension form, you can view the Name, Code, Type, Supplementary Unit, Usage start date, Expiry Date, and Description, as seen in the screenshot above.
Up to now, we have been examining the configuration options that come under the Invoicing section of the Odoo 16 Accounting module. Now, let us switch over to the last management tool of the Odoo Accounting platform, the configuration of bank payments.