The management of vendors must be effective in order for the business to run smoothly, much as the management of customers is essential in a firm. Every product in a business has a variety of vendors to choose from, and the likelihood of there being many vendors for the same product is also significant. The best vendor for your company will be determined by a variety of operational factors, including price, quality of the product or service, and other important factors.
For business operations, it is essential to have management solutions that can efficiently deal with the challenges of managing multiple vendors. The effectiveness of managing the accounting component will be key, and this can only be done with the aid of a specialised accounting application. The management of both single and many vendors in business operations will be supported by the Odoo Accounting module. Additionally, the Odoo platform contains a tab for Vendor management that is specifically designed to increase its efficiency through the use of special, standout tools and menus.
The options for managing vendor bills, refunds, vendor receipts, bill payments, batch payments on vendor bills, products based on vendor descriptions, and a dedicated vendor management menu are all found under the Vendor management page. From the following part, let's proceed to understanding each of these menus and options under the Vendors tab of the Accounting module..
Vendor bill management
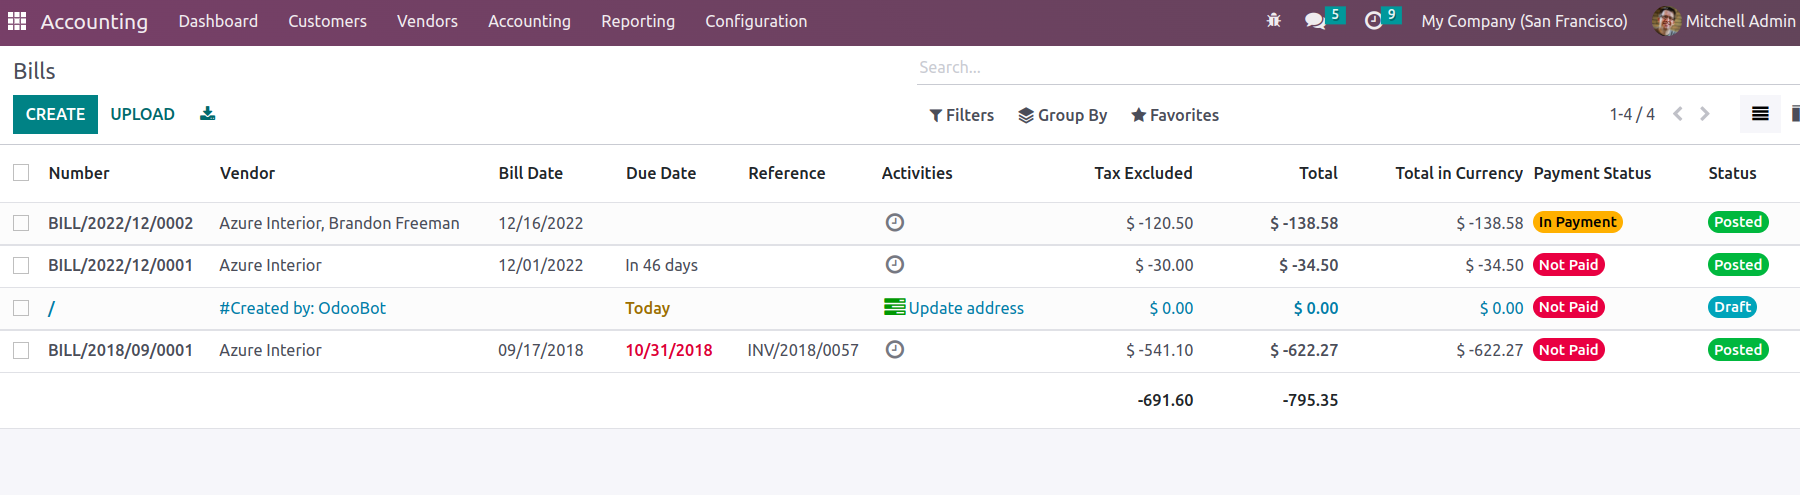
The management of the bills for the completed purchases is a crucial component of the operations. The suppliers will produce the invoices based on the terms that have been agreed upon regarding the product pricing and the quantities that have been or will be supplied. The Vendors tab of the Odoo Accounting module provides access to the Dedicated Vendor Bill management menu. All of the vendor bills that have been created and sent to the company will be seen here. The bills' number, vendor, bill date, due date, reference, next activity, information about taxes that weren't applied, total amount due, and status will all be supplied. By selecting the appropriate Bill and using the edit option, you will have the option to change the defined bill details.
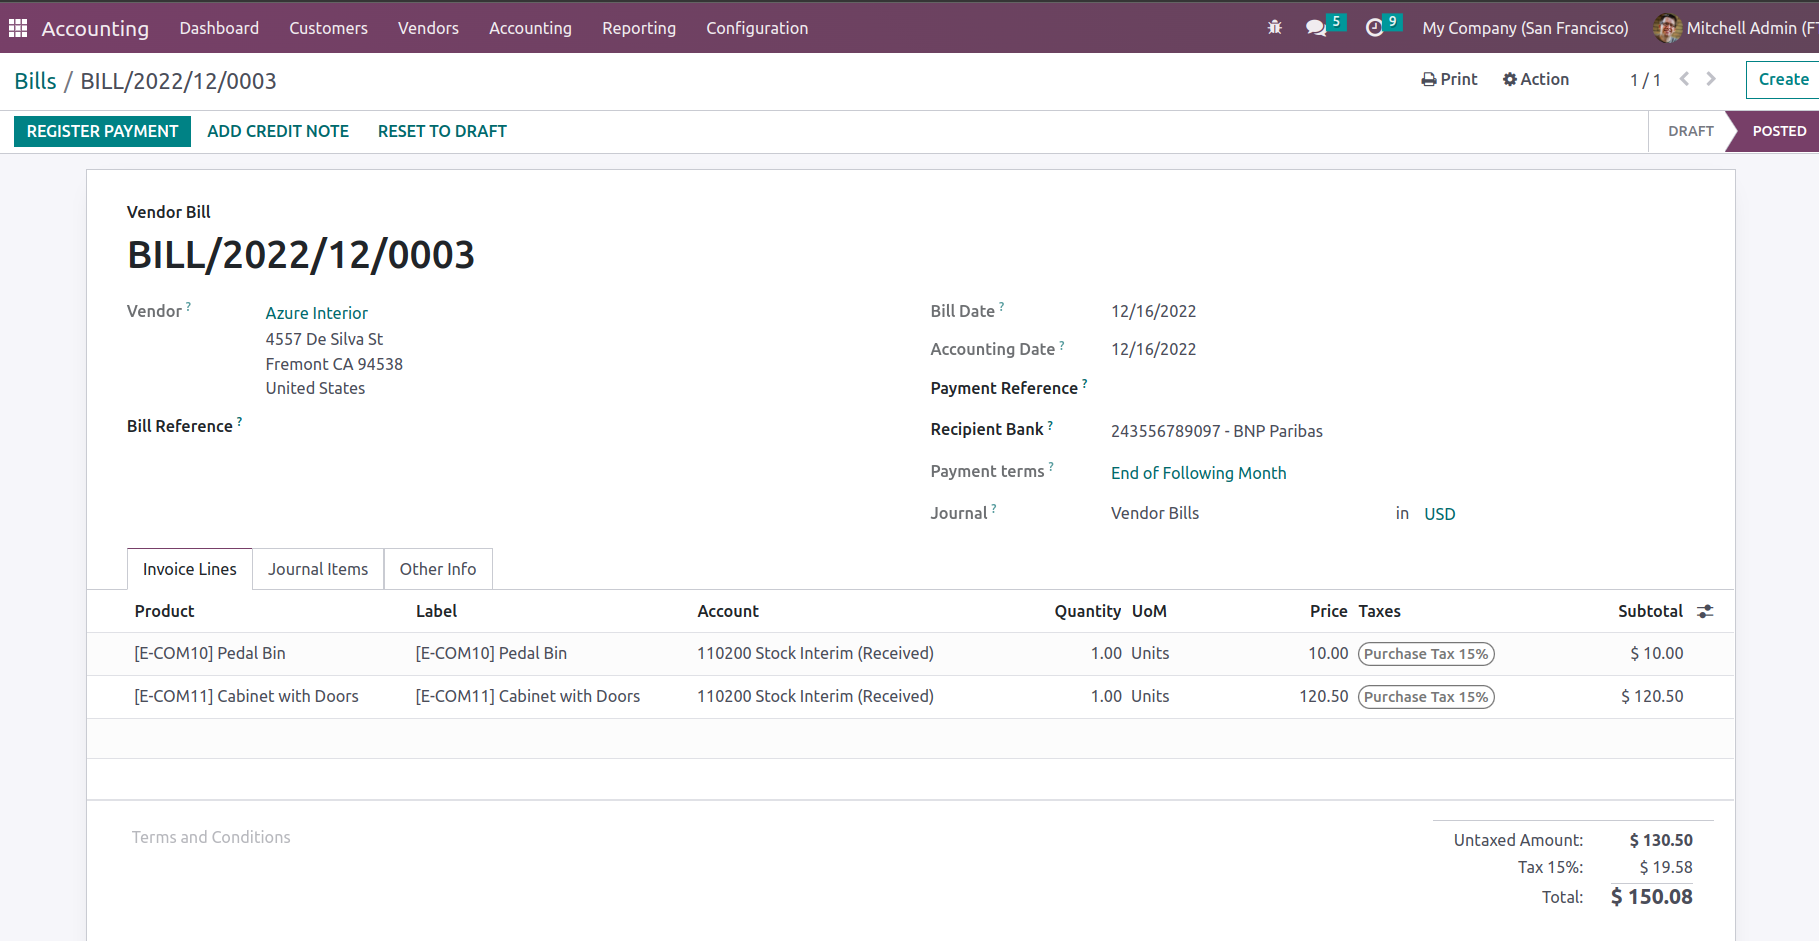
The Create option will present you with the Bill creation window seen in the accompanying screenshot if you want to create a new bill. The vendor bill number will be automatically displayed, but you'll need to specify the vendor's information, including the bill reference, payment reference, receipt bank, and auto-complete information. Bill Date, the date the bill is created, Accounting Date, the date the entries are to be recorded in the ledger, Due Date, Journal Details, and the Currency in which the transactions are carried out are all examples of dates that should be noted. Furthermore, by choosing the Add a line option, the Invoicing lines for the relevant Vendor Bill can be specified. Here, the product information, label, account information, analytical accounting information, Quantity, Price, Tax information as well as the Subtotal will be defined. By choosing the Add a Section option, new sections can be created, and the Add a Note option can be used to add notes to the invoices.
Additionally, the bill of purchase orders can be quickly generated using the Autocomplete fields. We can select Purchase Order from the Autocomplete form rather than entering the Products, Quantities, Price, and other details one at a time in the Order Line. As a result, the Bill form will automatically receive updates to all the Purchase Order data. A single bill against several purchase orders for the specific vendor can be generated if we include multiple purchase orders as well.
The Vendor Bill Number is generated automatically after we save all of this data, and the source document for the generated bill, which is the Purchase Order numbers separated with a comma, is shown in the list view of the bill.
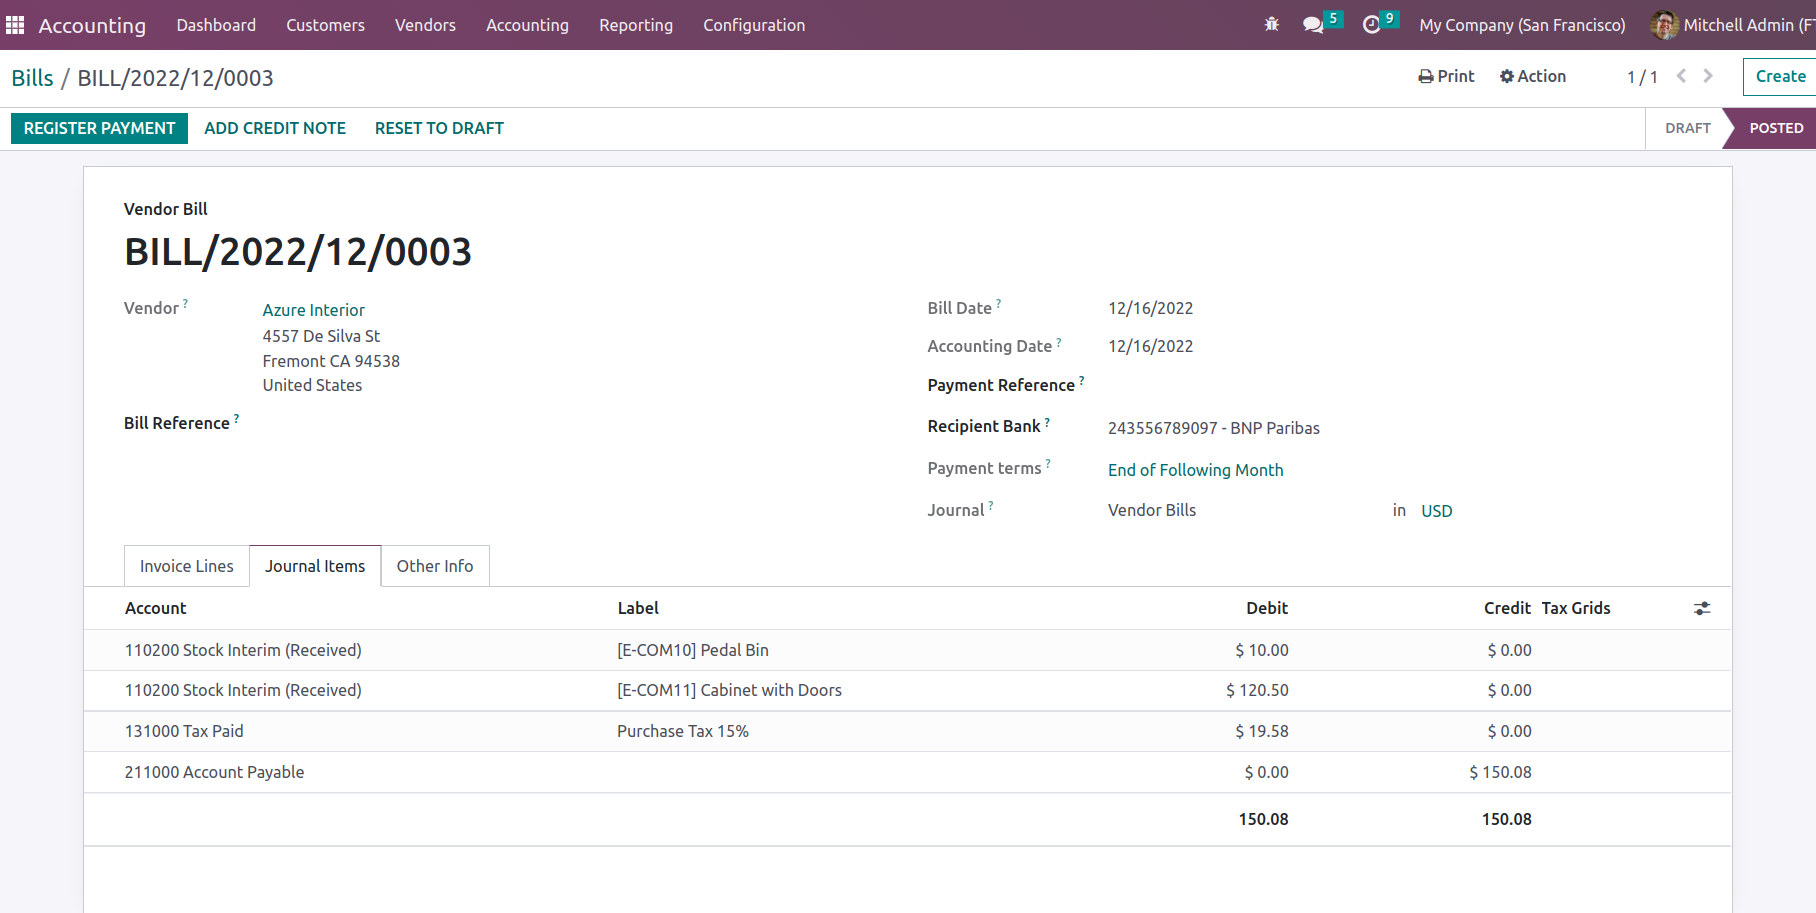
Once the products have been added to the Order line, the Journal Items page will automatically display the Accounts that are affected and the amounts that are credited or debited. The Ledgers involved during the Bill production can be seen here. Furthermore, the Account Payable, Expense Account, and Tax Account are impacted in Continental accounting throughout the Bill preparation process. Because the Account Payable is an asset by nature and the asset is losing value, the Account Payable gets credited. Additionally, the expense account is by its very nature an expense, and as the expense rises, the expense account is debited together with the tax account.
While in Anglo-Saxon Accounting, the Ledgers are affected when a bill is created. Here, the stock input account and tax account will be debited while the Account Payable will be credited. because after the sales have been confirmed, the Anglo-Saxon Accounting Expense Accounts will be impacted.
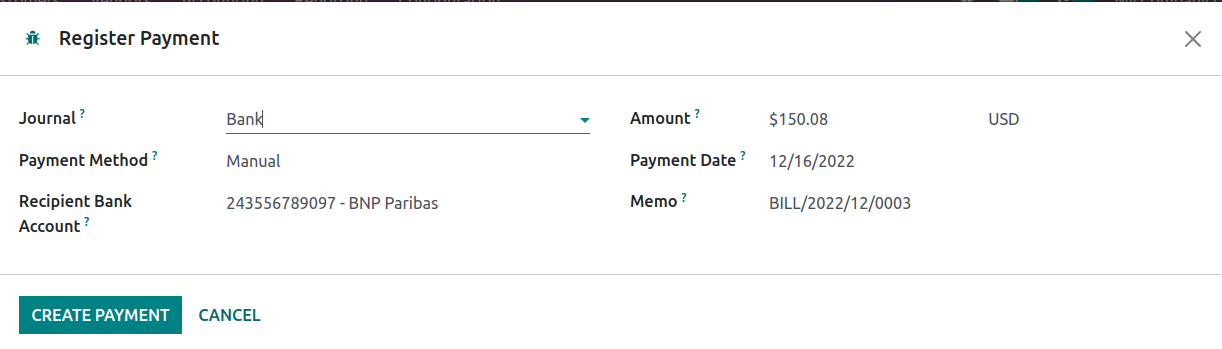
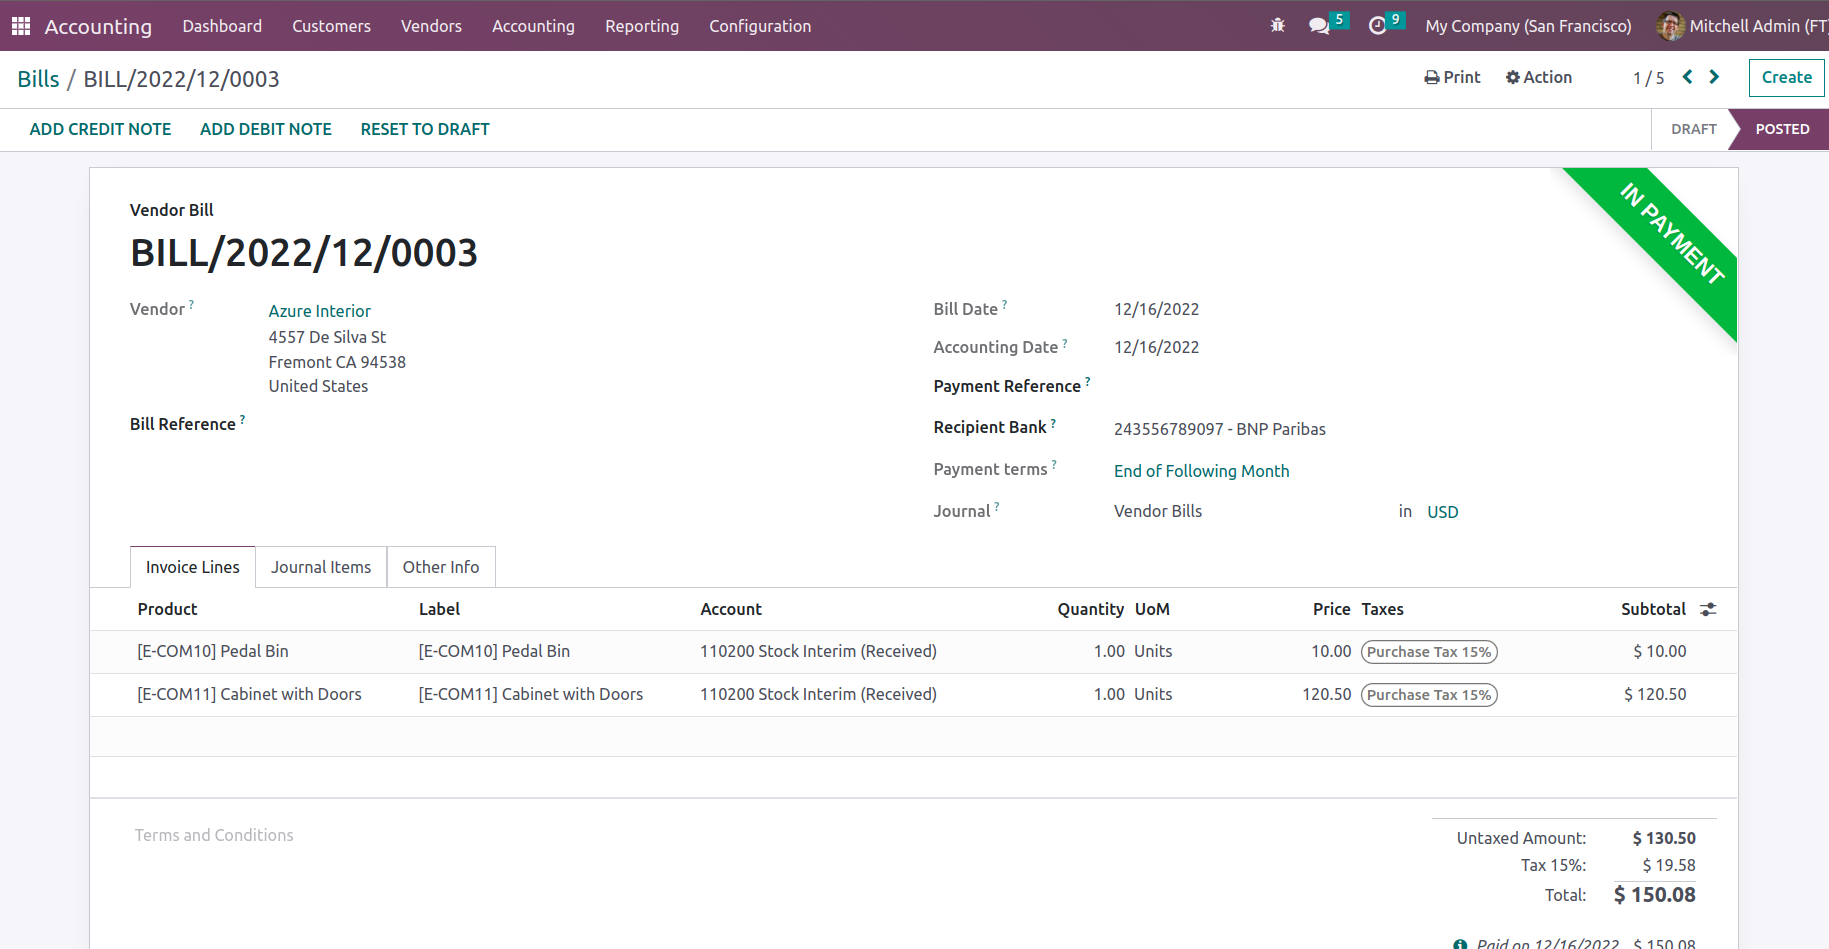
Once the vendor bill has been generated, you can choose to confirm the payment by selecting the option to register the payment. The Register Payment menu will appear for you, as shown in the accompanying screenshot. In this case, the payment mechanism can be either manual, SEPA credit transfer, or checks. It is possible to define the Receipt Bank Account information as well as the Amount, Payment Date, and Memo information. You should choose from the various Create Payment choices once all the aspects have been defined.
The Account Payable will be debited once the payment has been made, and the Outstanding Payments Account will be credited. This Outstanding Payments Account will be included in the setup of the Bank or Cash Journal for which the entries are transferred to the Outstanding Payment Account, and only after a bank statement reconciliation will the amount be transferred to the bank. This means that the outstanding Payment Account will be used for reconciliation rather than the Account Payable.
Thus, after reconciliation, the Bank Account is credited and the Outstanding Payments Account is debited. The relevant Vendor bill will be provided with a label as In Payment once the payment has been registered and completed, as illustrated in the screenshot below. The label will show as Paid if the payment has been completed.
By choosing one of the Debit Note options from the menu, it is also possible to define the Debit Note for the specific vendor bill. You will be led to the pop-up window seen in the following screenshot after choosing to create a debit note. Here, the Use Precise Journal section allows you to specify the specific journal to be used, the Debit Note Date, and the Reason for the Refund. Additionally, the Copy Lines option can be enabled, which is helpful for copying the Credit lines when necessary for adjustments.
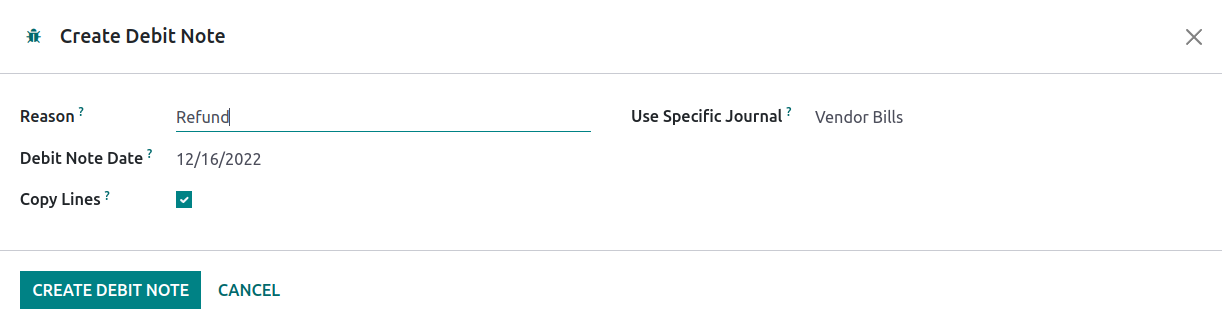
Once the description of the debit note is complete, you can choose one of the alternatives to reverse the produced vendor bill payment and send the credit note to the appropriate vendor. For the accounting operations management of the specific vendor operation, the Credit Note function, which is available in the Customer's configuration here as well as in the Vendor menu, is a beneficial tool. Let's proceed to the Refunds option in the following section, which is the next highlighted menu under Vendor management.