The dedicated administration menu in the Odoo Accounting module may be used to efficiently handle the Vendor bills and associated payments. With regard to the company's product procurement activities, the management of vendor bill payments takes precedence, necessitating the requirement for a special system of operations. You will be able to define the elements of the Vendor Bill Payments management in a coordinated and methodical way part of the business operations with the Odoo Accounting module.
The Vendor Bill Payments administration menu of the Odoo Accounting module is shown in the following screenshots. All payments made on vendor bills will be shown here. You can see the specifics of the payment, including the date and the bill number. Additionally, information about the journals, payment methods, vendors, batch payments, embedded amounts and payment currencies, payment statuses, and the SDD scheme will be covered. You can sort the necessary Payment information using the usual Filter and Group by settings. Additionally, you can set up unique filtering and grouping options as Favorites for later uses based on the filter requirements.

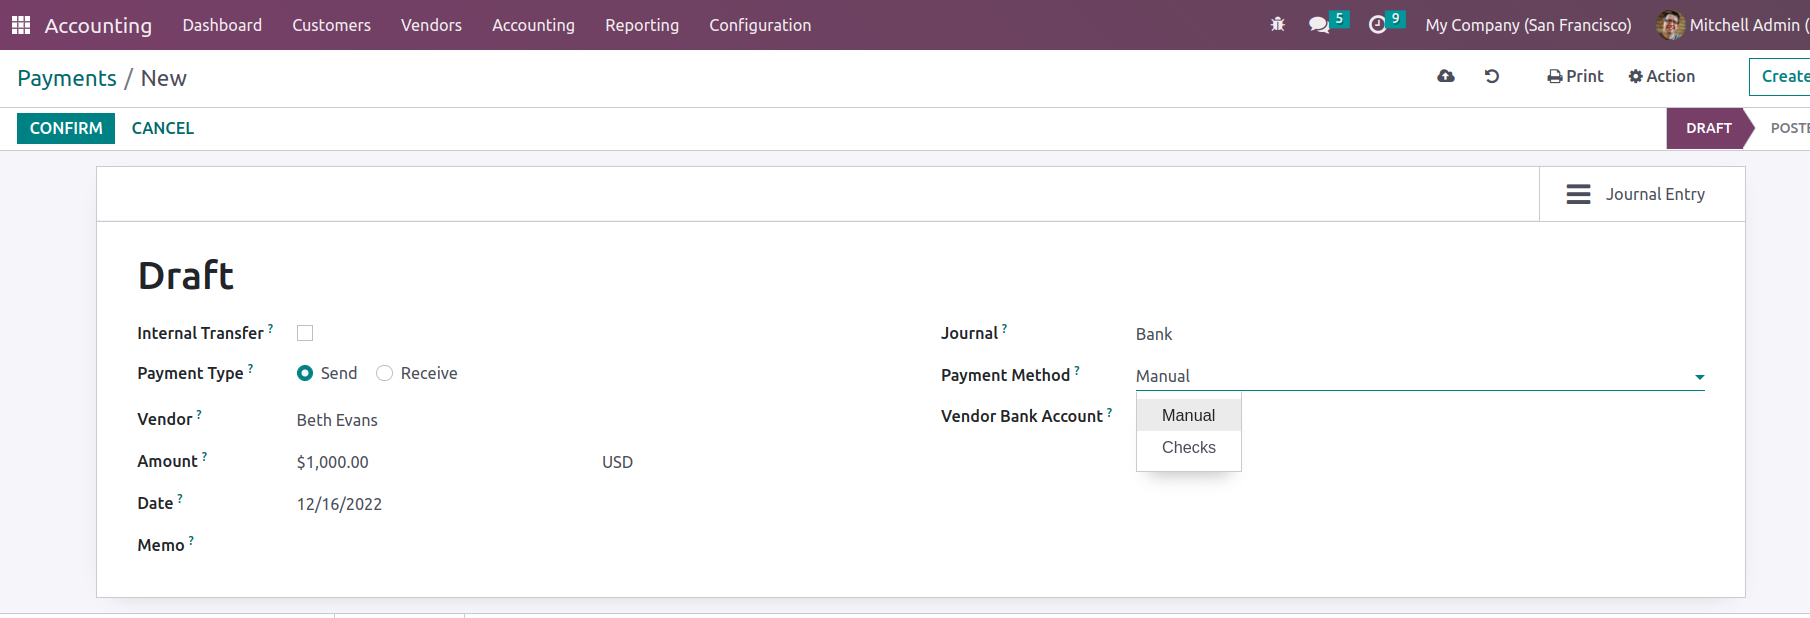
By choosing the Create option, you can make new payments. This will show you the creation menu shown below. Here, the Payment Type must be originally specified as either Sent Money or Received Money. The Partner Type, Customer/Vendor Information, Destination Account Information, Allocated Amount and Currency Information, Date of the Payment, and Memo can all be defined after that. You may also choose to define the Payment as an internal transfer by selecting the Is Internal Transfer option. The Payment Method, which can be either Manual or Checks, and the Journal can both be chosen from a drop-down menu. Depending on the situation, the Recipient's Bank Account Number may also be defined.
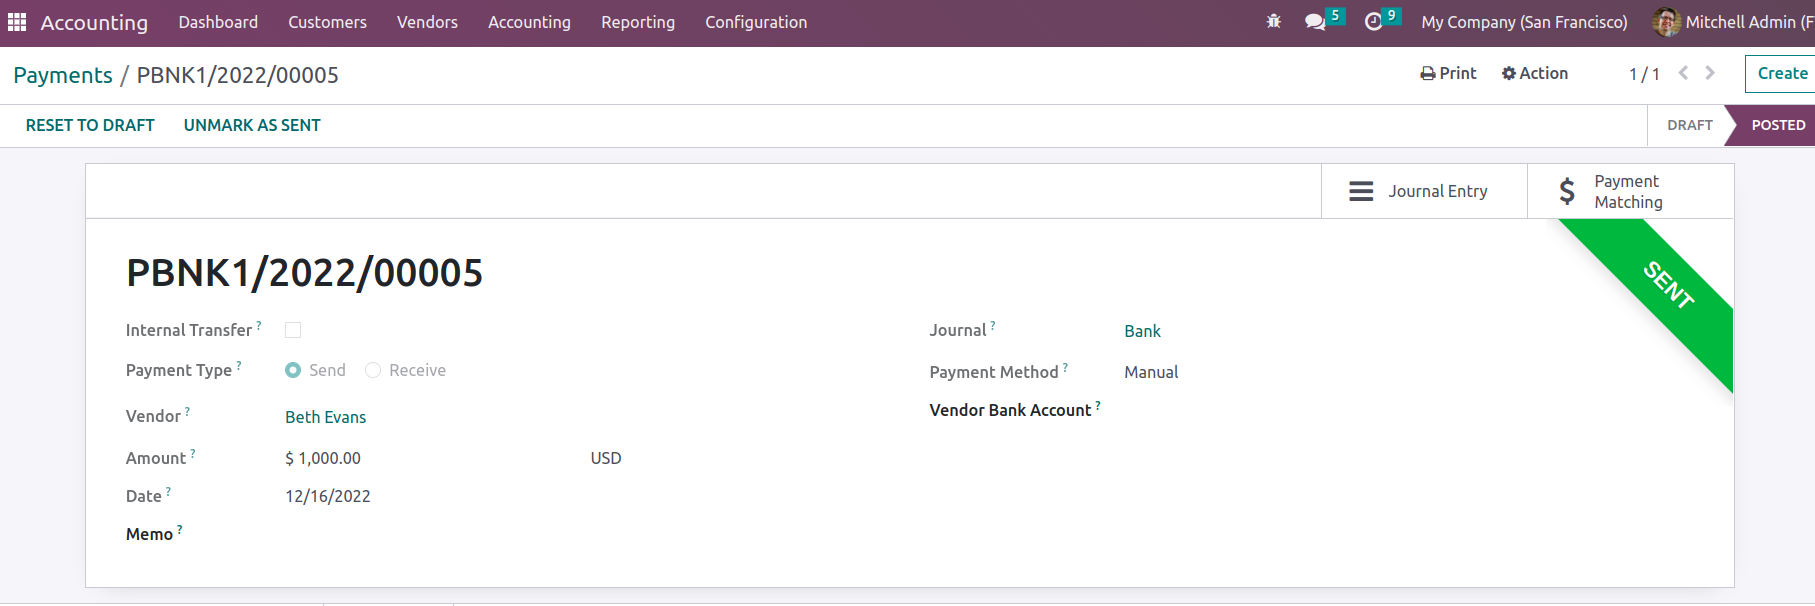
As soon as the payment setup is finished, the following step is to confirm the defined payments. This may be done by choosing the Confirm option, and these vendor payments can then be added to the vendor's vendor bills. As shown in the accompanying screenshot, a label marked "Send" will appear after the Payments have been confirmed.
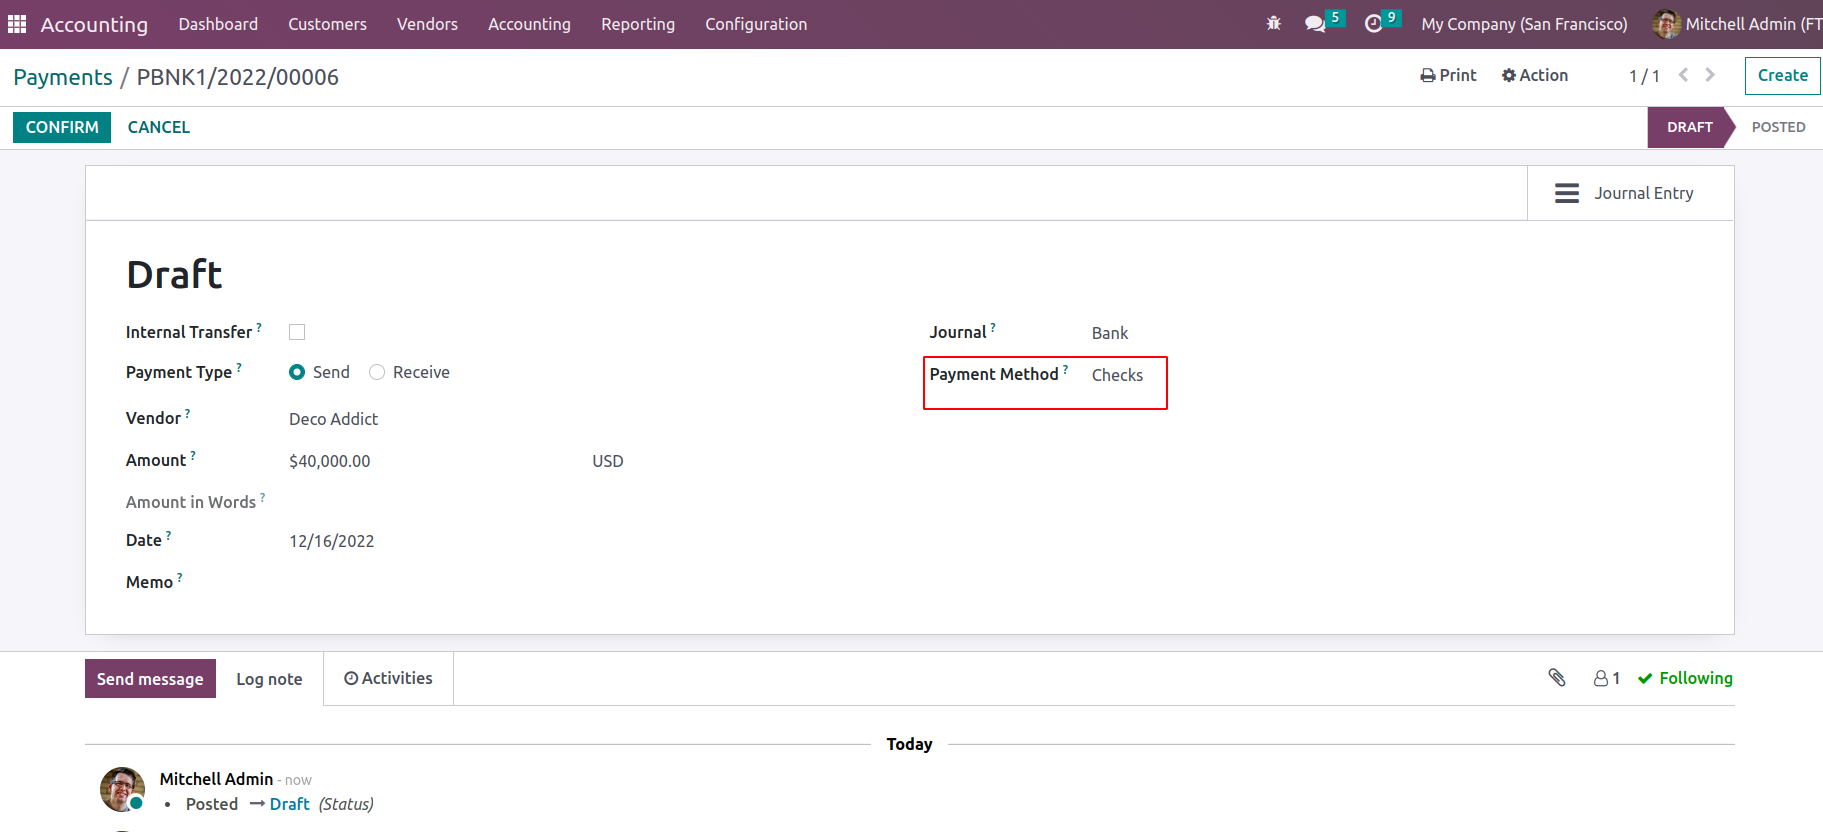
Now, if the payment is made using checks, you must choose the Checks payment method, as seen in the accompanying screenshot.
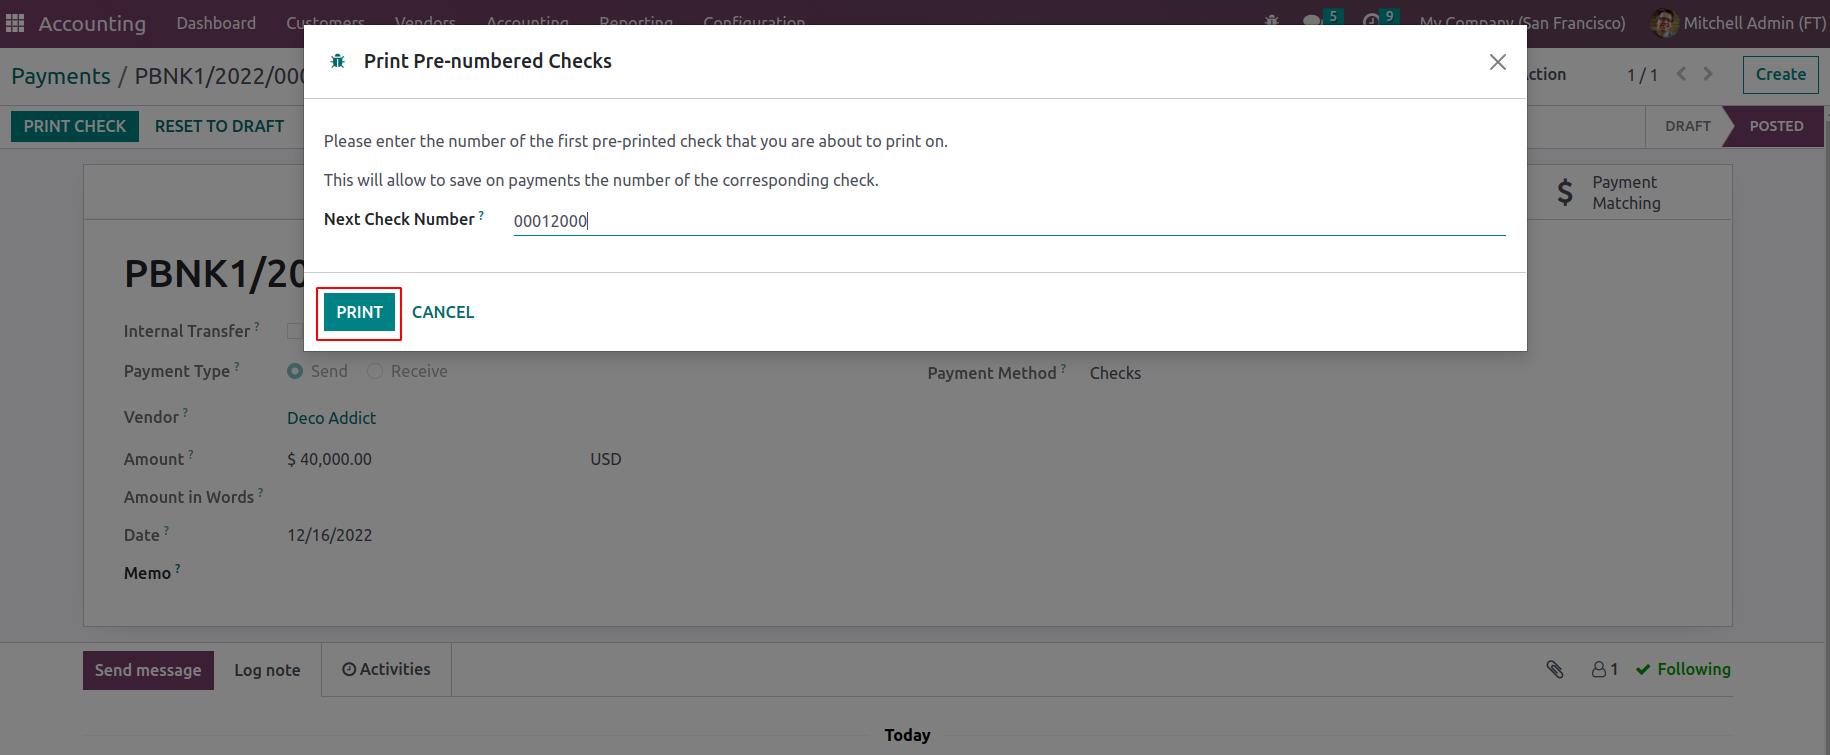
Once the payment aspects have been set up to use checks, you can choose the Confirm option to see the print pre-numbered checks and define the next check number. The Print option can be chosen once the Print Pre-Numbered Checks are defined.
The following warning message will appear if the Check Layout has not been defined, as shown in the following image. The Go To The Configuration Panel option is available.

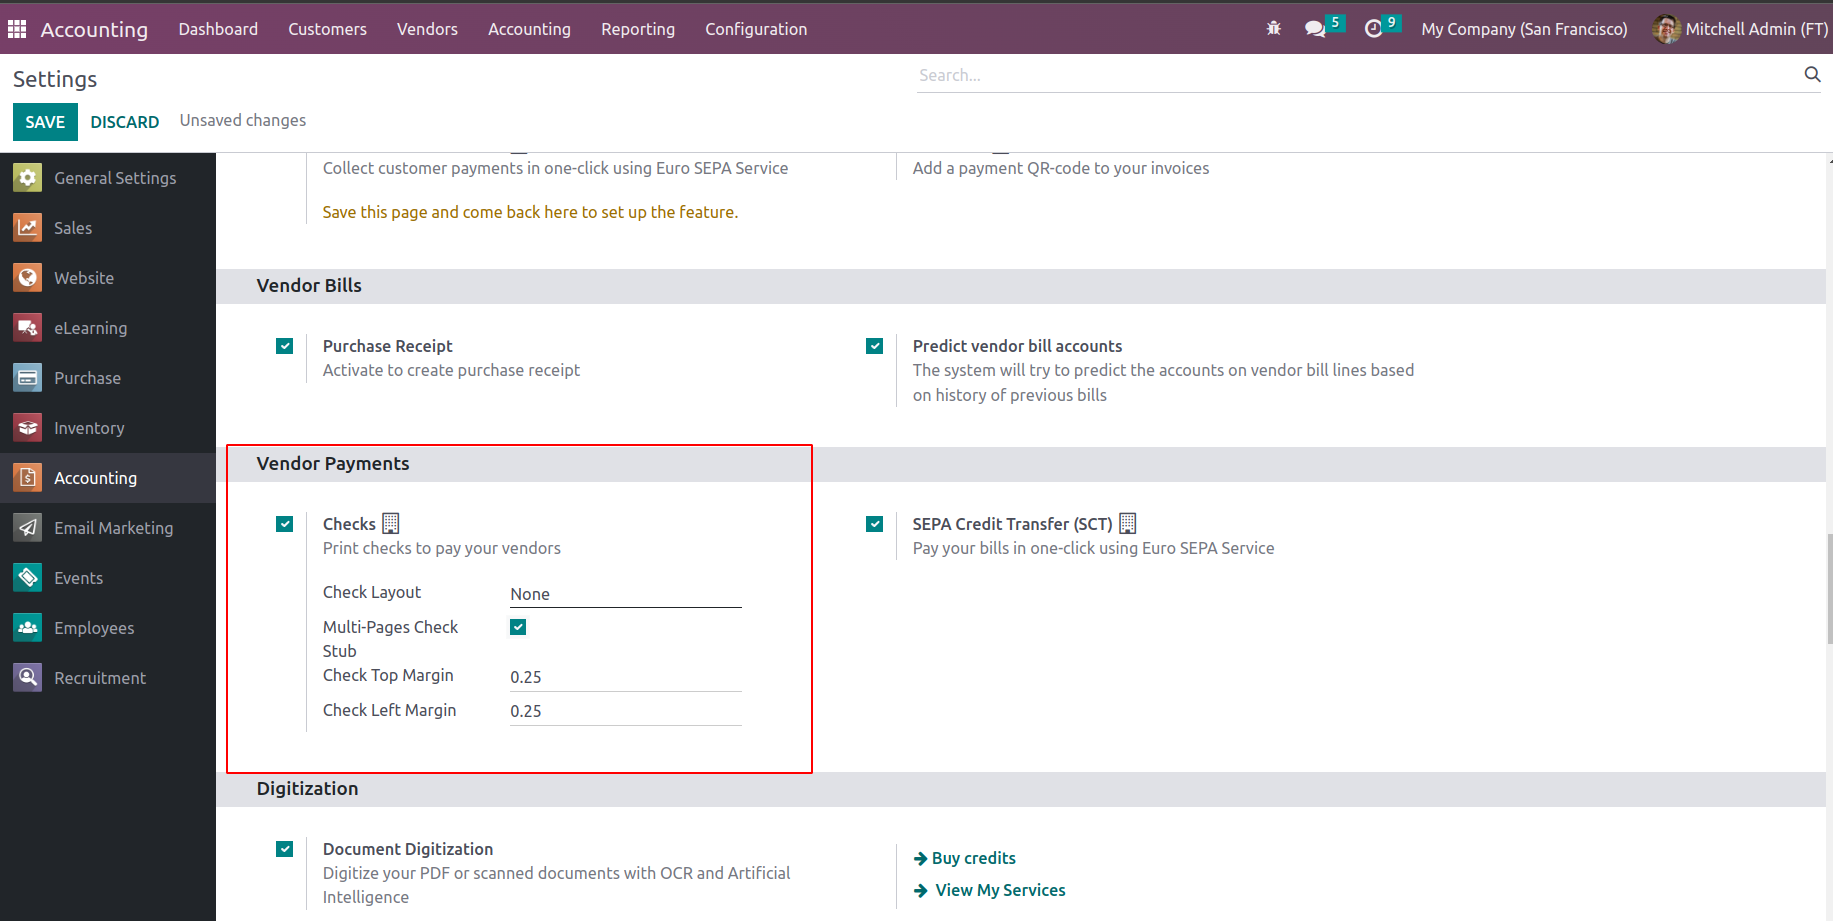
This will lead you to the Accounting module's Settings menu, where you can set the Checks elements under the Vendor Payments option. The Check Layout can be enabled here, and one of the three options available is Print Check (TOP), Print Check (MIDDLE), or Print Check (BOTTOM).
By doing this, you can make new payments to vendors or ones that are created from them towards the company. The administration of Odoo Payments functions as the greatest instrument for managing the Accounting operations connected to the financial component of these Payments. Let's move on to the part after this, where the components of the vendor bill batch payments are defined.