Incoming Email Configuration
We can streamline the connection between emails and Odoo by configuring incoming
emails. After setting up the incoming email configuration, emails will be received
in Odoo. To configure incoming mail, navigate to Settings > Technical > Custom Email
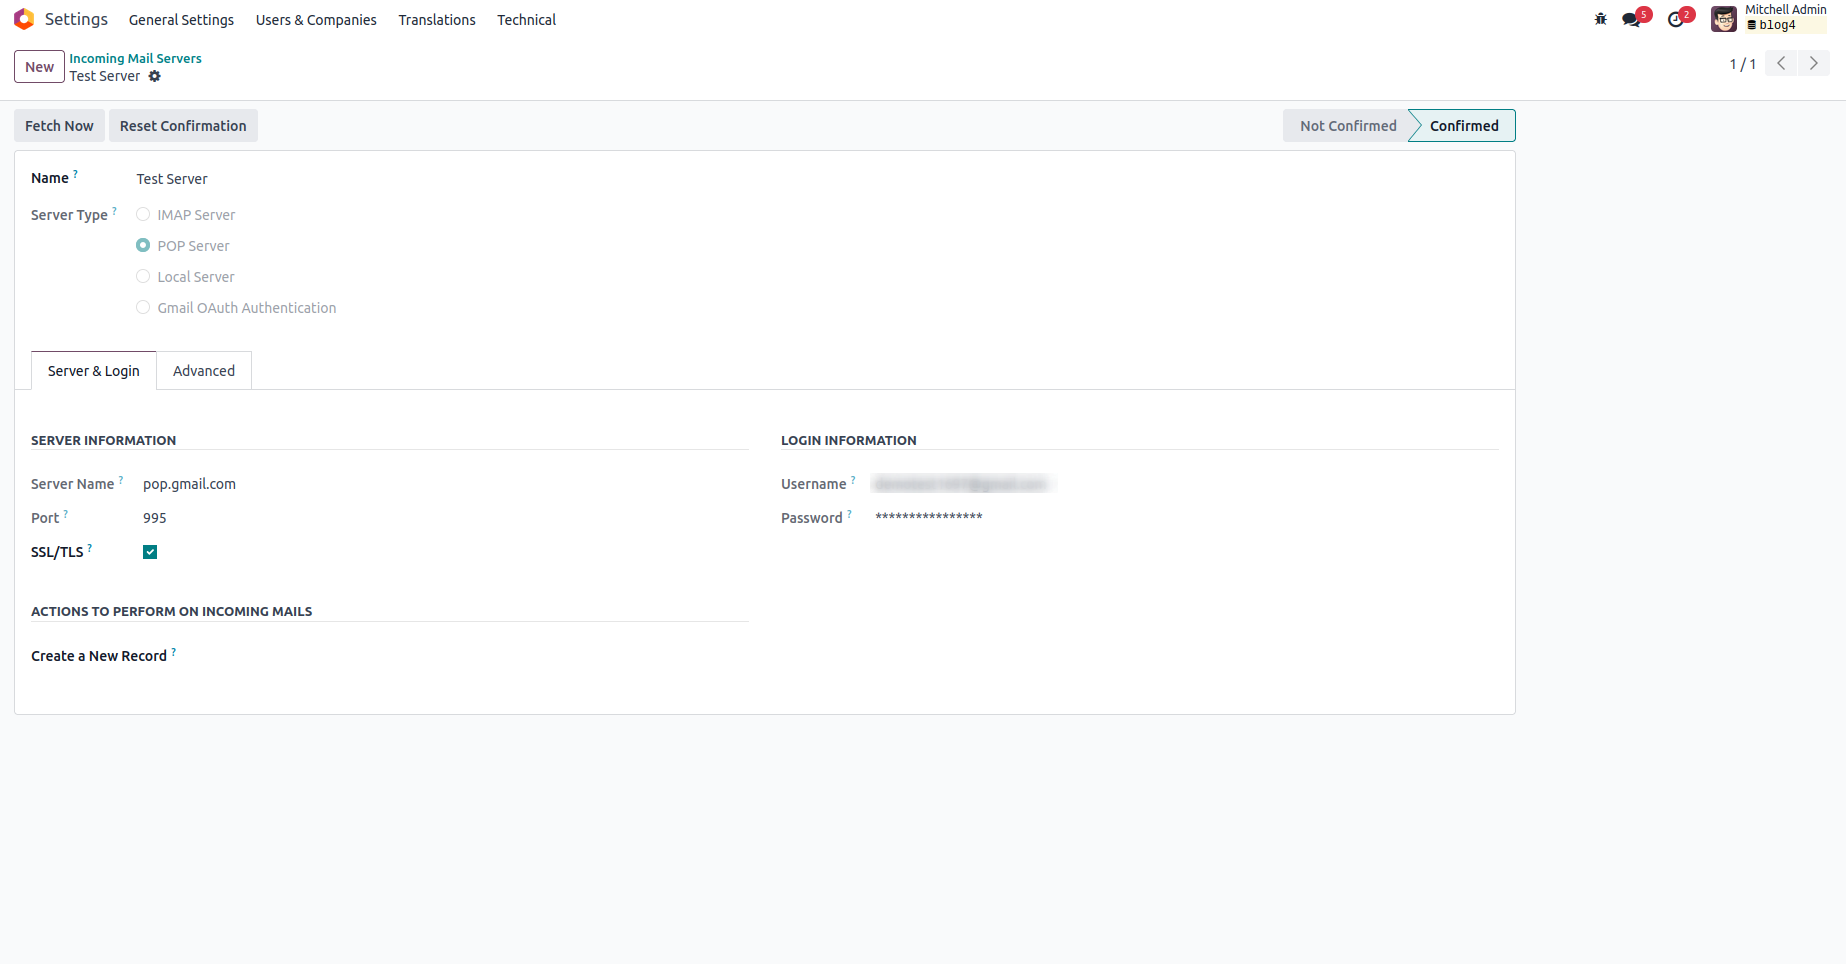
Servers > Incoming Email Servers. Click the create button, and you will be presented
with a window as illustrated below.

Let's explore the essential fields to be filled in when creating an incoming email
server.
- Name: Provide a distinctive name for the email server to easily
identify its purpose.
- Server Type: This refers to the server that houses your emails
and acts as the source from which emails are delivered to the client. There are
three main server types: POP server, IMAP server, local server, and Gmail AUth authentication.
Among these, POP servers are commonly utilized.
- Server Name: Specify the IP or Hostname of the mail server.
- Port: Indicate the port number associated with the email server.
- SSL/TLS: Enabling this option ensures encrypted connections using
dedicated ports (995 for POP3S and 993 for IMAPS).
- Username: Enter the email address for which the system will retrieve
emails.
- Password: Provide the password corresponding to the specified email
address.
Once the necessary information has been entered into the document, click the 'Test
& Confirm' button to authenticate the credentials. If the authentication is successful,
the state will transition to 'Confirmed.' Otherwise, a popup will appear indicating
a user error.