Odoo offers different types of buttons. Form buttons are
created on form views and trigger specific actions or items
when clicked. Another type is the smart button, which is
employed when you want to incorporate pertinent records from
another model into your own.
Form Buttons
To create a form button in Odoo, start by defining the view.
Within the view, you can generate the buttons using the
<button> tag.
For example:
<record id="hospital_patient_view_form" model="ir.ui.view">
   <field name="name">hospital.patient.view.form</field>
   <field name="model">hospital.patient</field>
   <field name="arch" type="xml">
       <form string="menu">
           <header>
               <button name="action_confirm" string="Confirm"
                       class="oe_highlight" type="object"/>
               <field name="state" widget="statusbar"/>
           </header>
           <sheet>
               <group>
                   <group>
                       <field name="name"/>
                       <field name="age"/>
                   </group>
                   <group>
                       <field name="email"/>
                       <field name="phone"/>
                   </group>
               </group>
           </sheet>
       </form>
   </field>
</record>
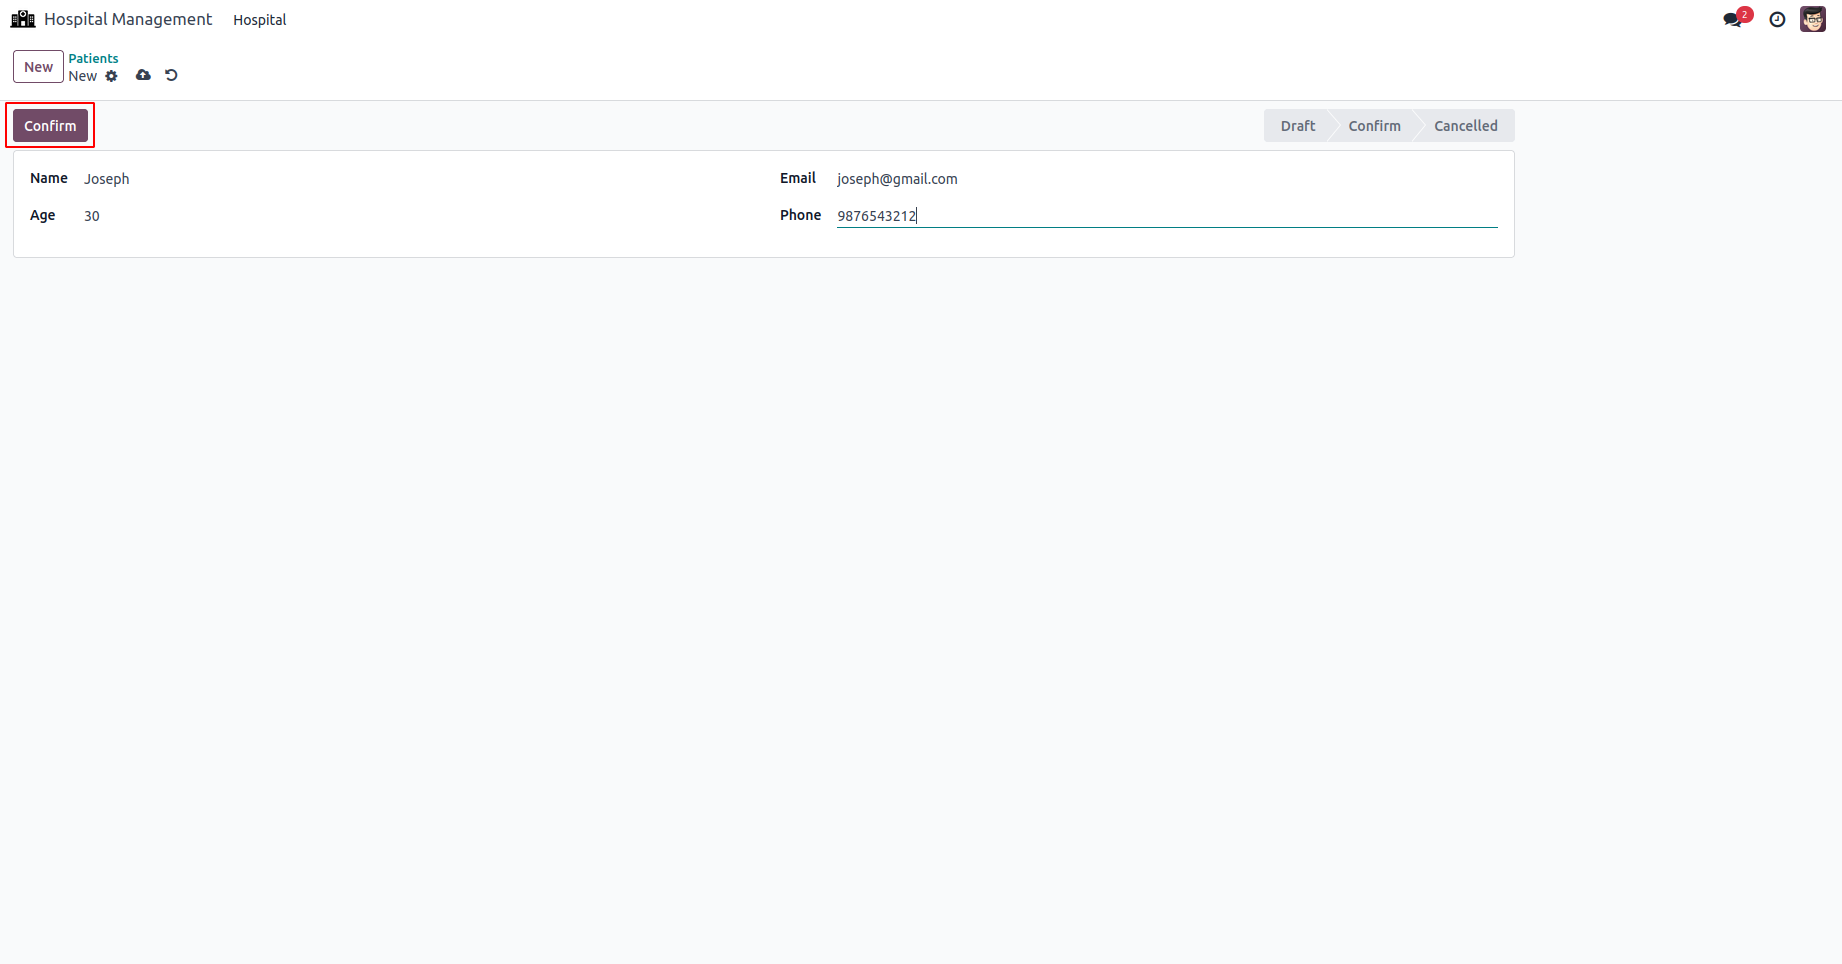
Here, a form view is initially defined. Within the form view,
a button object type named action_confirm is established. The
corresponding function for the model can be defined in the
Python file under the name action_confirm.
def action_confirm(self):
      self.write({'state': 'confirmed'})
It's crucial to define this function; otherwise, an error
would be encountered. The preview of the button is shown
below.
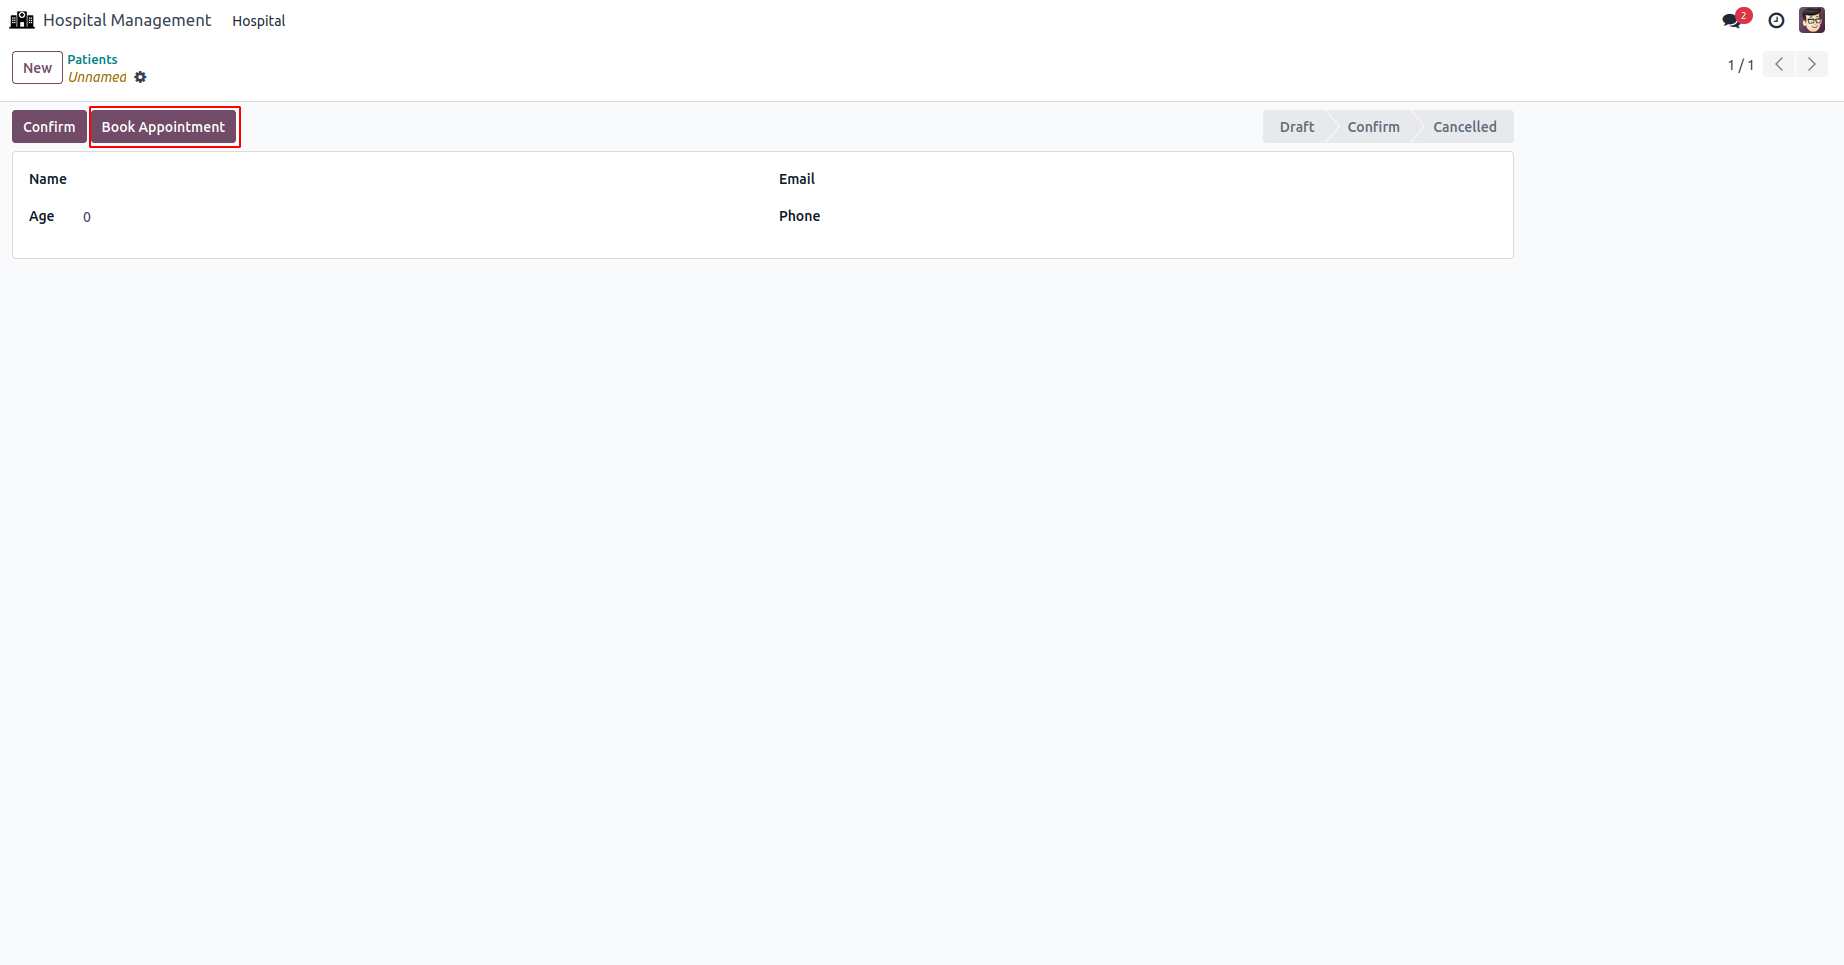
In Odoo, there are also action-type buttons available. An
action button indicates that clicking the button will trigger
a specific action. The action button is particularly useful
when you want to launch a wizard in response to a button
click.
For example:
<record id="hospital_patient_view_form" model="ir.ui.view">
   <field name="name">hospital.patient.view.form</field>
   <field name="model">hospital.patient</field>
   <field name="arch" type="xml">
       <form string="menu">
           <header>
               <button name="action_confirm" string="Confirm"
                       class="oe_highlight" type="object"/>
               <button name="%(action_add_patient)d" string="Book Appointment" type="action" class="oe_highlight" />
               <field name="state" widget="statusbar"/>
           </header>
           <sheet>
               <group>
                   <group>
                       <field name="name"/>
                       <field name="age"/>
                   </group>
                   <group>
                       <field name="email"/>
                       <field name="phone"/>
                   </group>
               </group>
           </sheet>
       </form>
   </field>
</record>
The next step involves specifying the action that should be
taken when the button is clicked.
<record id="action_add_patient" model="ir.actions.act_window">
   <field name="name">Book Appointment</field>
   <field name="res_model">patient.booking</field>
   <field name="view_mode">form</field>
   <field name="target">new</field>
</record>
The below image shows the updated appearance with the newly
configured button and its functionality.
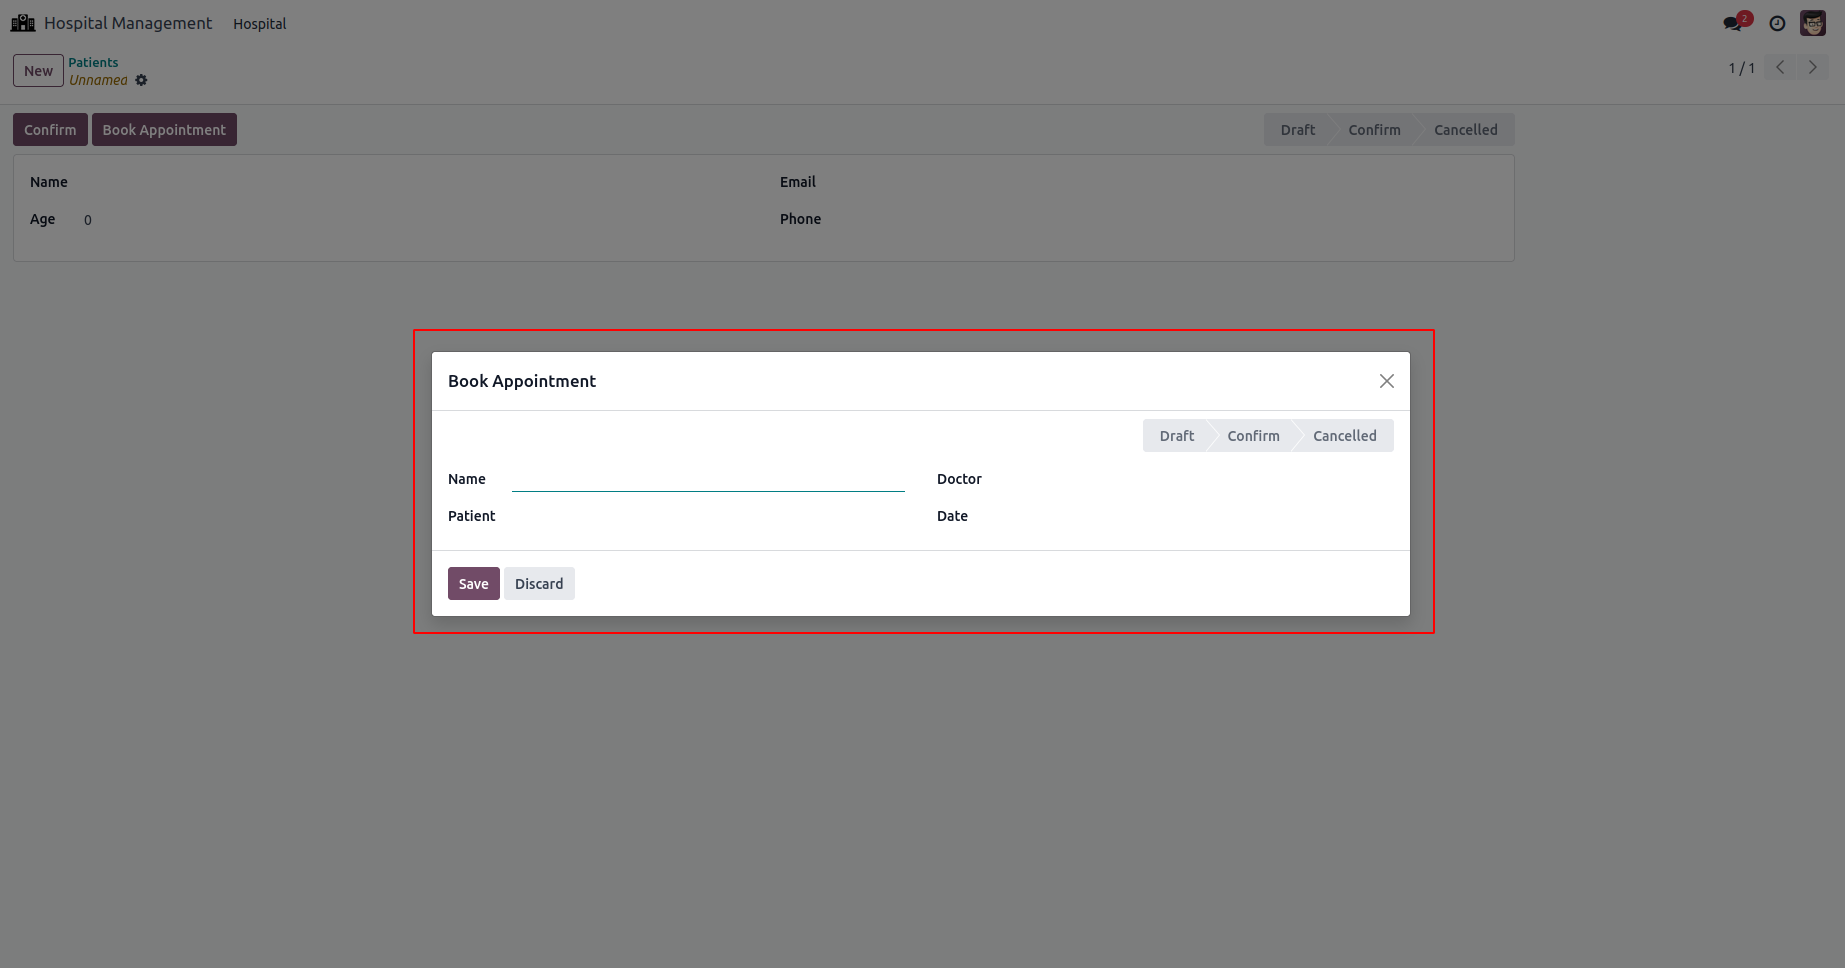
Clicking the button will prompt the display of a wizard, as
illustrated below.
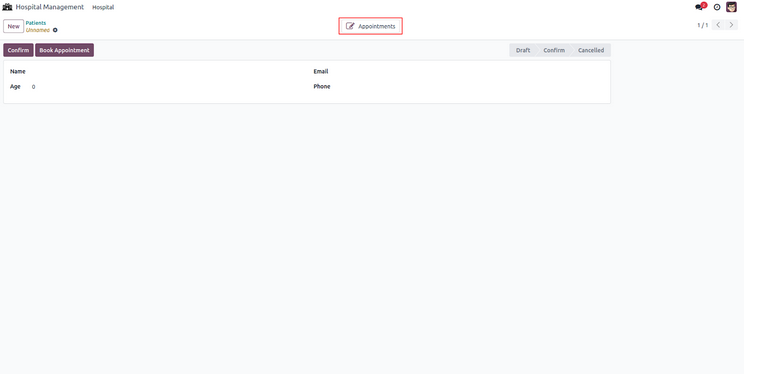
Smart Button
Form views in Odoo define smart buttons, and they possess
permissions to access all records associated with that
particular form view.
For example:
<record id="hospital_patient_view_form" model="ir.ui.view">
   <field name="name">hospital.patient.view.form</field>
   <field name="model">hospital.patient</field>
   <field name="arch" type="xml">
       <form string="menu">
           <header>
               <button name="action_confirm" string="Confirm"
                       class="oe_highlight" type="object"/>
               <button name="%(action_add_patient)d"
                       string="Book Appointment" type="action"
                       class="oe_highlight"/>
               <field name="state" widget="statusbar"/>
           </header>
           <sheet>
               <div class="oe_button_box" name="button_box">
                   <button class="oe_stat_button" type="object"
                           string="Appointments" name="show_appointments"
                           icon="fa-pencil-square-o">
                   </button>
               </div>
               <group>
                   <group>
                       <field name="name"/>
                       <field name="age"/>
                   </group>
                   <group>
                       <field name="email"/>
                       <field name="phone"/>
                   </group>
               </group>
           </sheet>
       </form>
   </field>
</record>
Within the form view, a new smart button has been added. It is
essential to define a function with its name since the button
is of the object type. The term "icon" is used to refer to the
smart button's visual representation.