Card definitions can be divided into more than one template, however the Kanban view defines at least one master template Kanban box that is presented once for each record. A Kanban box template defines the Kanban cards. For the footer, this content section may also have a sub-container. There could also be a button in the upper right corner of the map to access the action menu. The kanban box's bottom should have a
element in the footer with the CSS class oe_kanban_bottom. By using the CSS classes oe_kanban_bottom_left and oe_kanban_bottom_right, it may be further separated into left and right footer sections. Additionally, you may put left- or right-aligned items anywhere on the card, even in the oe_kanban_bottom footer, by using the Bootstrap-provided Pull-Left and Pull-Right classes.
Template for our Kanban card:
   <t t-name="kanban-box">
  <!-- Set the Kanban Card color: -->
   <div t-attf-class="
    oe_kanban_color_#{kanban_getcolor(record.color.raw_value)}
    oe_kanban_global_click">
       <div class="o_dropdown_kanban dropdown">
           #Top-right drop down menu here
       </div>
       <div class="oe_kanban_body">
         # Content elements and fields go here
      </div>
       <div class="oe_kanban_footer">
         <div class="oe_kanban_footer_left">
             #Left hand footer
         </div>
         <div class="oe_kanban_footer_right">
             #Right hand footer
         </div>
      </div>
      <div class="oe_clear"/>
  </div> #end of kanban color
</t>
This establishes the Kanban card's general structure. To dynamically change the colour of the map, use a colour field in the top < div> element.
   <div class="oe_kanban_body">
            #Content elements and fields go here.
   <div>
     <field name="tag_ids" />
   </div>
   <div>
     <strong>
         <a type="open"><field name="name" /></a>
     </strong>
 </div>
   <ul>
     <li><field name="user_id" /></li>
     <li><field name="date_deadline" /></li>
   </ul>
 </div>
We're going to add the priority widget to the left-hand footer:
  <div class="oe_kanban_footer_left">
  #Left hand footer
  <field name="priority" widget="priority"/>
</div>
As in a form view, we can see that the priority field has been added here.
The avatar and the Kanban status widget will be positioned in the right footer.
      #Right hand footer
< div class="oe_kanban_footer_right">
  <field name="Kanban_state" widget="state_selection"/>
  <img t-att-src="kanban_image(
    'res.users', 'image_small', record.user_id.raw_value)"
    t-att-title="record.user_id.value"
   width="24" height="24"
   class="oe_kanban_avatar" />
< /div>
Similar to standard form views, a element is used to add the Kanban state. The ![]() element is used to insert the avatar image. Sometimes, like in the Contacts example, we would wish a small representative image to appear on the Kanban board. The following code may be added to do this:
element is used to insert the avatar image. Sometimes, like in the Contacts example, we would wish a small representative image to appear on the Kanban board. The following code may be added to do this:
   < img t-att-src="kanban_image(
  'res.partner', 'image_medium', record.id.value)"
  class="o_kanban_image"/>
Activities and Kanban Cards
Activities are used by Odoo to schedule actions on records. The Kanban view can be used to manage these activities.
To manage activity from the Kanban view, we must first add mail dependencies to the manifest file and inherit the activity mixin into our model. Then, in the Kanban view, add the activity_state field.
<field name="activity_state"/>
Then, within the kanban template, include the activity_ids field.
<field name="activity_ids" widget="kanban_activity"/>
We included the activity widget. It makes use of the activity_ids field. With regard to the activity widget you can schedule, edit, and process the action straight from the Kanban card.
Interactive Kanban Cards
Kanban cards accept all HTML elements, so you may create them the way you like. Odoo has various built-in features for making Kanban cards more interactive.
To the Kanban view, add a colour field:
<field name="color">
Add a colour selection dropdown to the Kanban view:
   <t t-name="kanban-box">
   <div t-attf-class="oe_kanban_color_#{kanban_getcolor(record.color.raw_value)}oe_kanban_card oe_kanban_global_click">
   <div class="o_dropdown_kanban dropdown">
       <a role="button" class="dropdown-toggle o-no-caret btn"
          data-toggle="dropdown" href="#" aria-label="Dropdown menu"
          title="Dropdown menu">
           <span class="fa fa-ellipsis-v"/>
       </a>
       <div class="dropdown-menu" role="menu">
           <t t-if="widget.editable">
               <a role="menuitem" type="edit" class="dropdown-item">Edit
               </a>
           </t>
           <t t-if="widget.deletable">
               <a role="menuitem" type="delete" class="dropdown-item">
                   Delete
               </a>
           </t>
           <div role="separator" class="dropdown-divider"/>
           <ul class="oe_kanban_colorpicker" data-field="color"/>
       </div>
   </div>
</t>
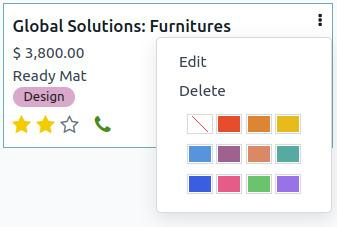
We added t-attf-class="#{kanban_color(record.color.raw_value)}" to the Kanban card. This will be used to display the Kanban card's colour. It takes the value of the colour field and creates a class based on it. For example, if a Kanban record has a colour field value of 2, it will add kanban_color_2 to the class. Following that, we added a drop-down menu with choices like Edit, Delete, and the Kanban colour picker. The Edit and Delete options are only shown if the user has the necessary access rights.
Add tags and a priority field to the Kanban view:
<span class="oe_kanban_list_many2many">
  <field name="category_id" widget="many2many_tags" options="{'color_field': 'color'}"/>
</span>
<field name="priority" widget="priority"/>
On the priority field, we utilised the priority widget, which shows the selection field with star icons. We used the many2many_tags widget in the category_id field, which shows the many2many field as tags. To enable the colour functionality on tags, the color_field option is passed. The value of this option is the field name where the color index is stored.
Activities and kanban cards
It's crucial to schedule your activities appropriately if you want to stay on top of your work. Activities are scheduled to arrange future events and serve as a reminder of the work that needs to be done. With Odoo, activities can be handled from any location. As a result, it can monitor and control the tasks from a kanban perspective. Let's examine the kanban view's usage of the activities.
To achieve this, we require the dependent ‘mail’ to inherit the model activity mixin.
  class HrEmployeePrivate(models.Model):
   _name = "hr.employee"
  _description = "Employee"
   _order = 'name'
   _inherit = ['mail.thread','mail.activity.mixin']
The fields that are defined on these models can now be used. Therefore, it is acceptable to add the field activity_state to the kanban view as usual.
<field name="activity_state"/>
To view and manage the activities directly from the view, insert the field activity_ids into the kanban template.
<field name="activity_ids" widget="kanban_activity"/>
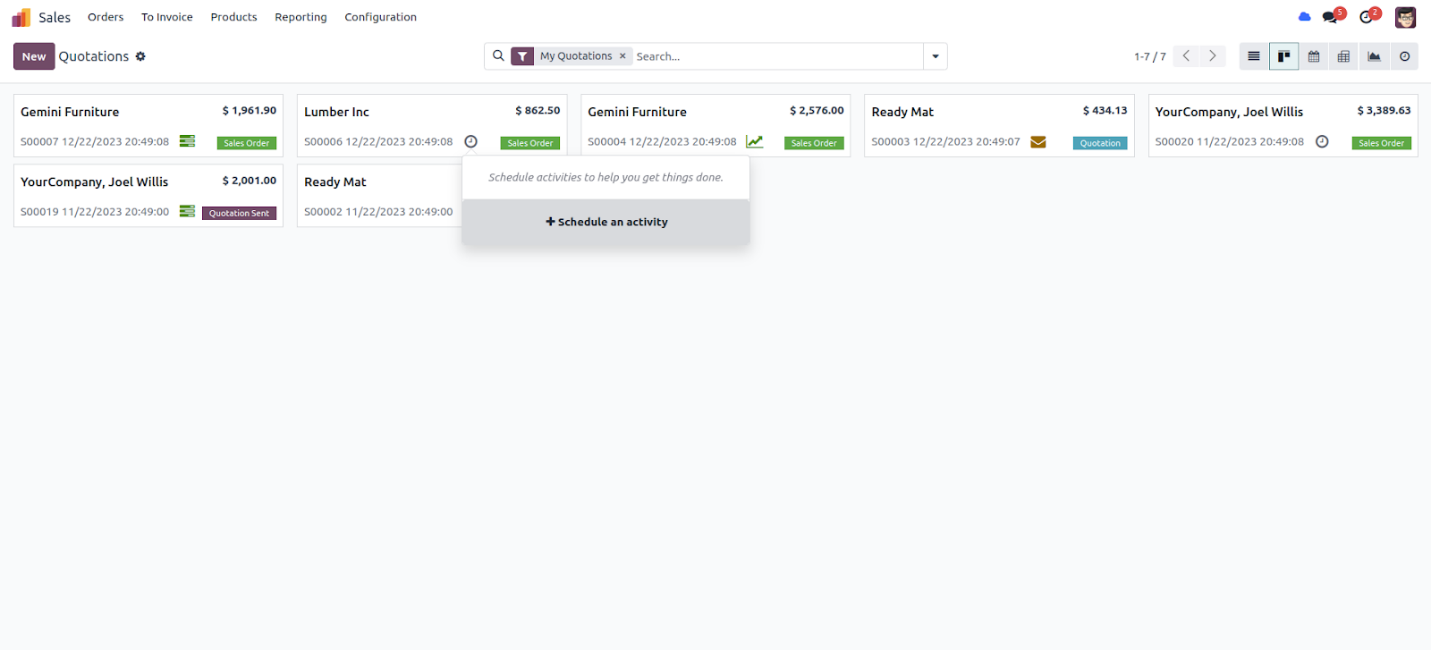
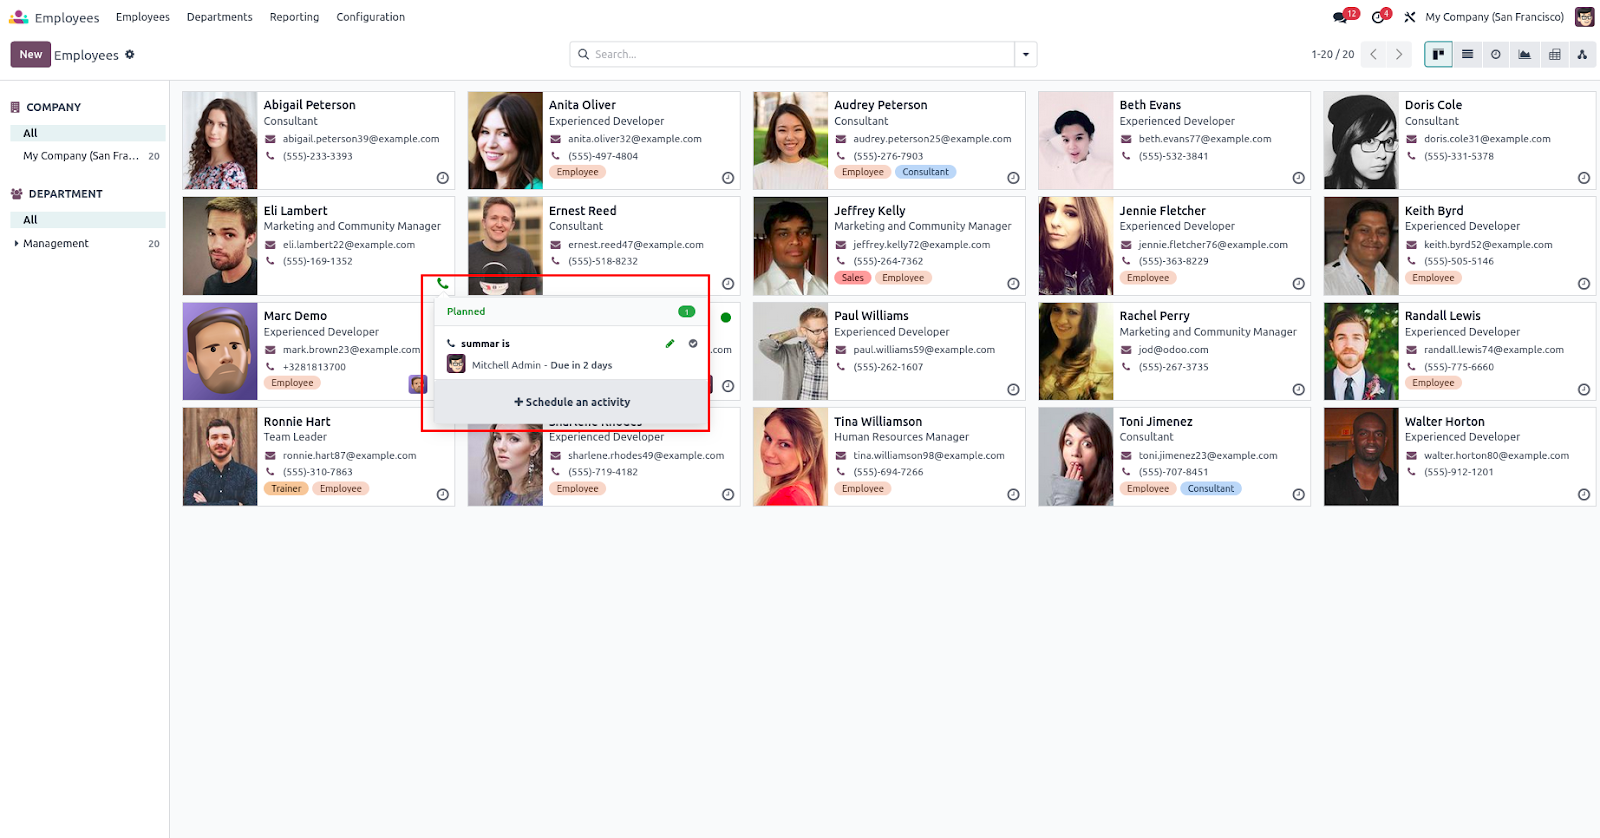
After adding these in the kanban view template, the view will be like this;
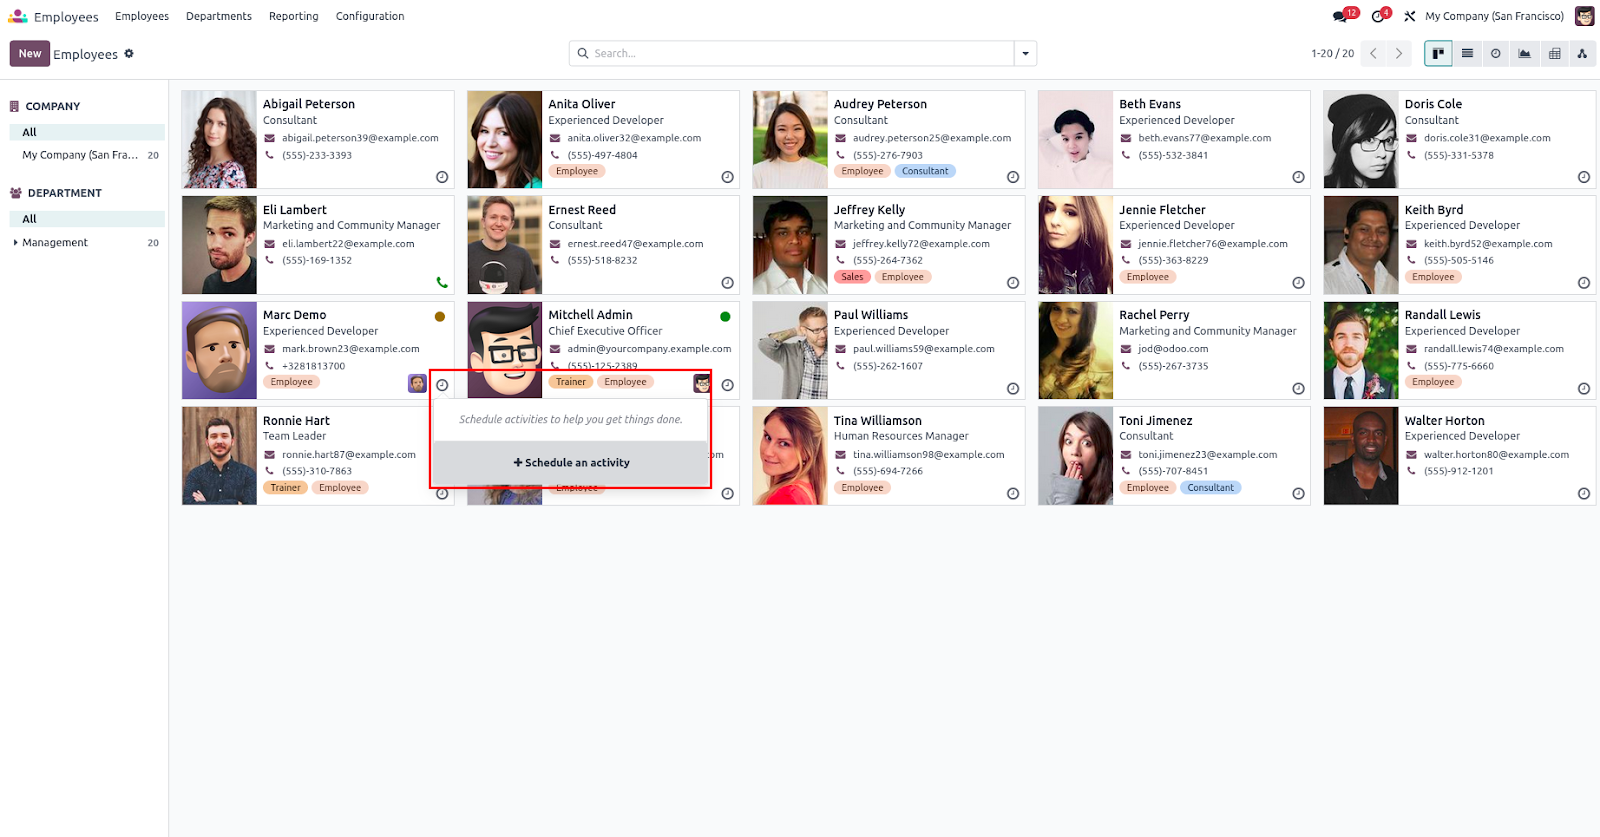
From here, we can create the activities in Kanban view.Also we can see already created activities.
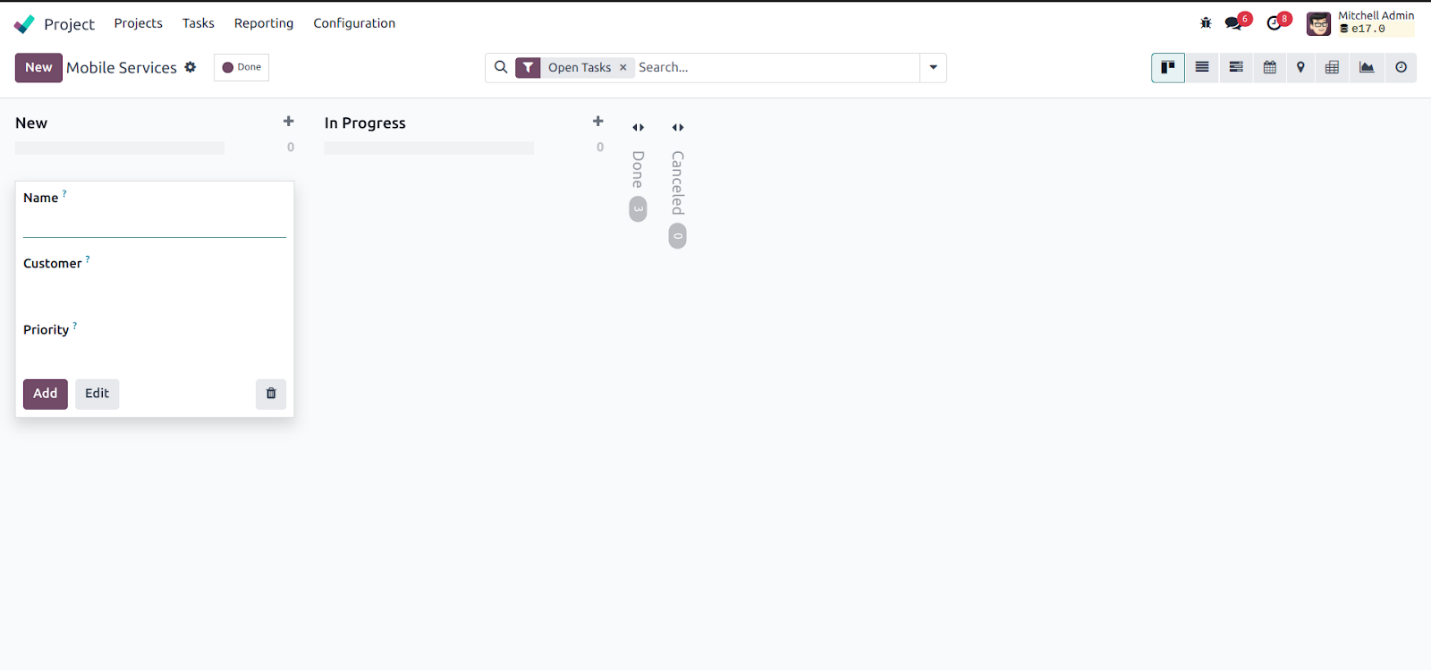
Quick create
Quick create is a feature that is available only in the kanban view of Odoo. It allows you to create records of any particular model from the kanban view without rendering the form view. Instead, it brings up a minimalist form from the kanban. To use this feature, click on the ‘+’ icon shown on the right top of each column. Here are the steps to create a quick create form:
Create a new form view for the custom module with fields that need to be shown in the quick create form.
 <record id="mobile_service_view_form_minimal" model="ir.ui.view" >
   <field name="name" >Field Service Form </field >
   <field name="model" >mobile.service </field >
   <field name="arch" type="xml" >
    <form >
        <group >
            <field name="name"/>
            <field name="partner_id"/>
            <field name="priority"/>
        </group >
    </form >
   </field >
</record >
After creating the form view, in the next step, this view needs to be mentioned in the kanban view declaration. Here we use the attribute quick_create_view, which refers to the view’s external id
  <kanban
default_group_by="service_state"
quick_create_view="mobile_service.mobile_service_view_form_minimal"
on_create="quick_create">
After creating the form view, in the next step, this view needs to be mentioned in the kanban view declaration. Here we use the attribute quick_create_view, which refers to the view’s external id 1. This will add the view to the kanban view. Thus when the plus icon is clicked, a small form view will appear to create the record from the kanban view.