Configuring Invoicing
Invoicing and invoice management are important aspects of a company and they should
be done with at most care and precision with dignified tools and solutions. The
Invoice generations and the management are the responsibilities of the Accounting
as well as the Financial department of every organization. The Odoo Accounting module
supports the operations of the Invoicing and invoicing management with the help
of a supporting Invoicing module which is embedded along with the Accounting module
of the Odoo platform. The Invoicing module is auto-installed when the Accounting
module is installed.
Along with the Invoicing module, there are various configurations available in the
Accounting module of Odoo to support the operations which are available under the
Configuration tab of the Accounting module. In the Configuration tab, numerous menu
options are available which will support the aspects of Invoicing. Let's now move
on to understanding the various aspects of Invoicing configuration one by one.
Payment Terms
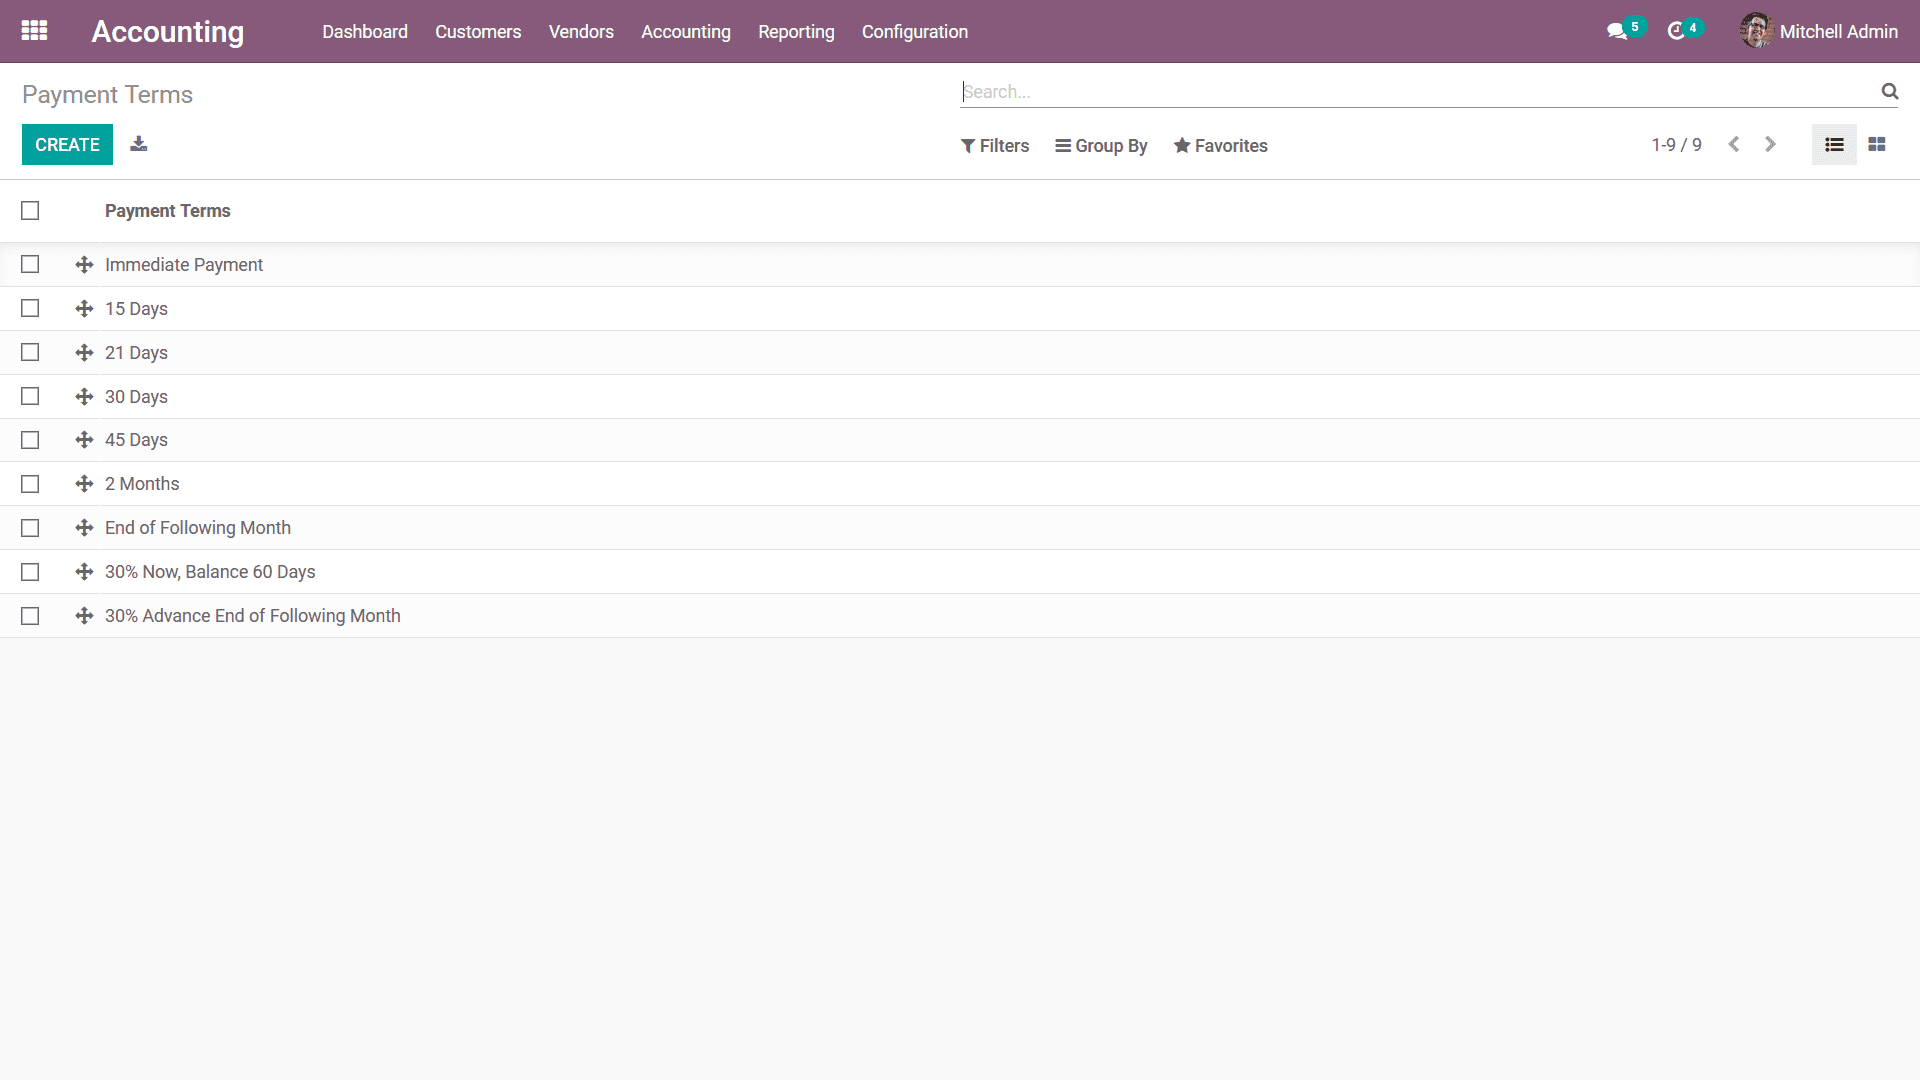
In the initial configuration menu which you can configure is the Payment Terms regarding
the Invoicing management aspects. The Payment Terms menu can be accessed from the
Configuration tab of the Accounting module. In the Payment Terms menu, all the Terms
of payment that have been already defined will be described. Moreover, you can define
multiple Payment Terms to be operational at a time. With the help of Filter as well
as Group by options the respective Payment Terms can be sorted out from the large
group of them being defined in the menu.
The Payment Term is the period that the company offers to customers to make payments
of the respective purchases or the services. Once the customer has not made the
payment even after the payment term offered, the respective payment will be considered
as due. Moreover, the respective payment will be shown under the Aged Reports (in
aged payable or aged receivable: based on sales payment term or purchase payment
term) as based on the due date.
To create a new Payment Terms, you can select the Create option that is available
which will direct you to the creation window just as depicted in the following screenshot.
Here initially you should provide the Name of the Payment Term and provide a Description
of the Invoice regarding the Payment Term to be depicted in them. Once both these
aspects are configured the next step is to define the terms under which the Payment
should be conducted which can be done by selecting the Add a line option available
under the Terms section. Here you can define multiple Terms of operations and you
have to be careful of one aspect that is the last line computation should be balanced.
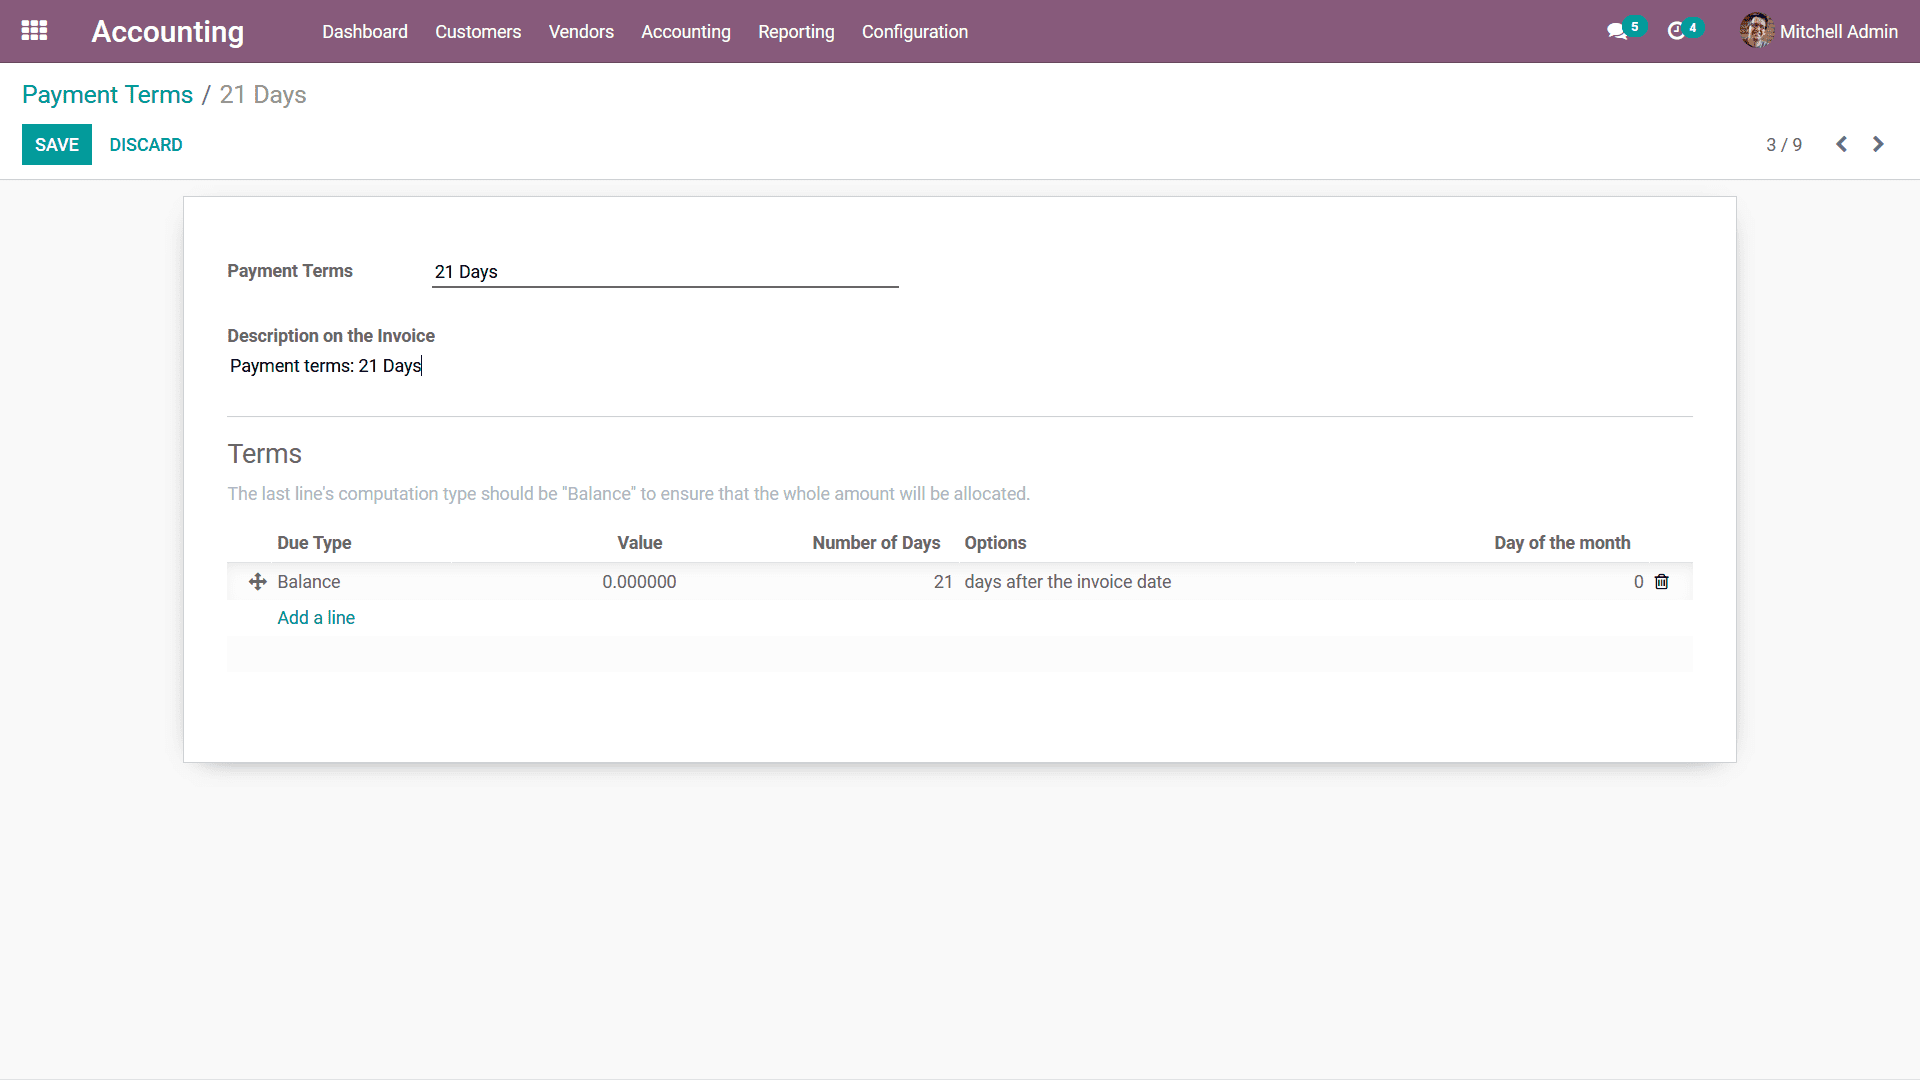
You have the provision to delete terms by selecting the delete option available
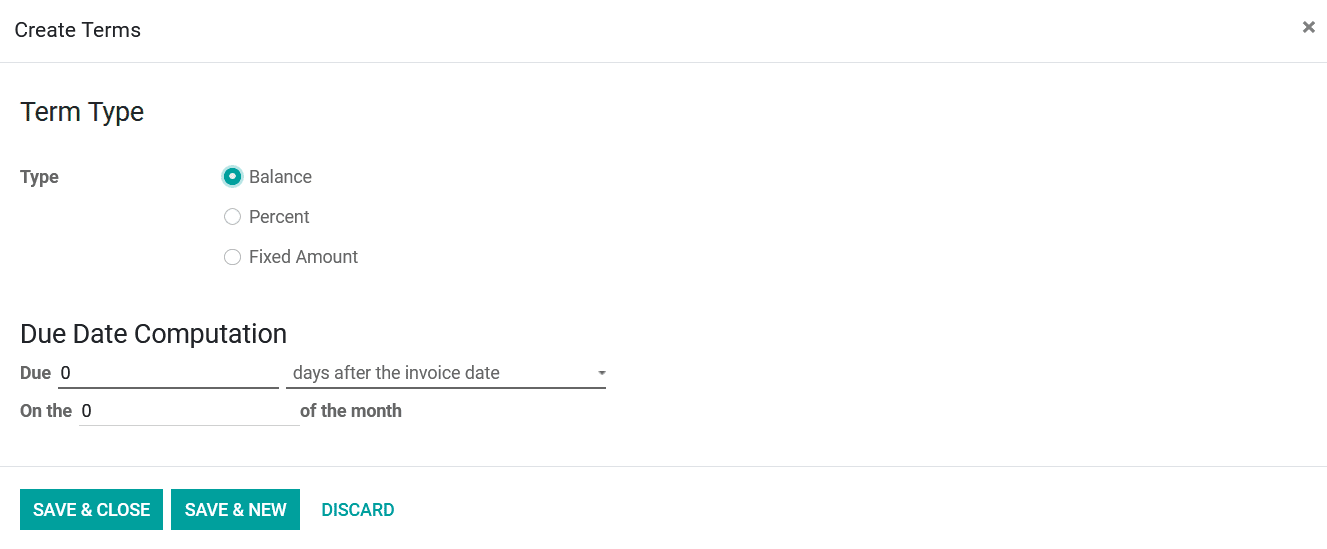
in respect to the Terms which have been defined. Upon selecting to add Terms using
the Add a link option you will be depicted with the pop-up window as depicted in
the following screenshot here you can Create Terms by defining the Term Type and
the Type can be selected as Balanced, Percentage, or Fixed Amount. Furthermore,
the Due Date Computation details of the Terms can also be defined proving the respective
fields on a date as well as the computation details. Once the details are being
described you can select the Save & Close button to return to the respective Payment
Term menu or the Save & New to create a new Term for the Payment Term that has been
defined.
You will also have the provision to edit the respective Payment Terms which you
have defined by selecting them from the Payment Terms menu. As we are clear on the
configuration aspects of the Payment Terms let's now move onto the next management
tool under the Invoicing management in the Configuration menu the Follow UP Levels
in the next section.
Follow UP Levels
The next management tool under the Configuration menu of the accounting module is
the Follow UP Levels where the Payment Follow UP of the accounting operations can
be defined. The Follow-up feature will ensure that you have proper tools to follow
the un-received payments on invoices that have been generated to the customers.
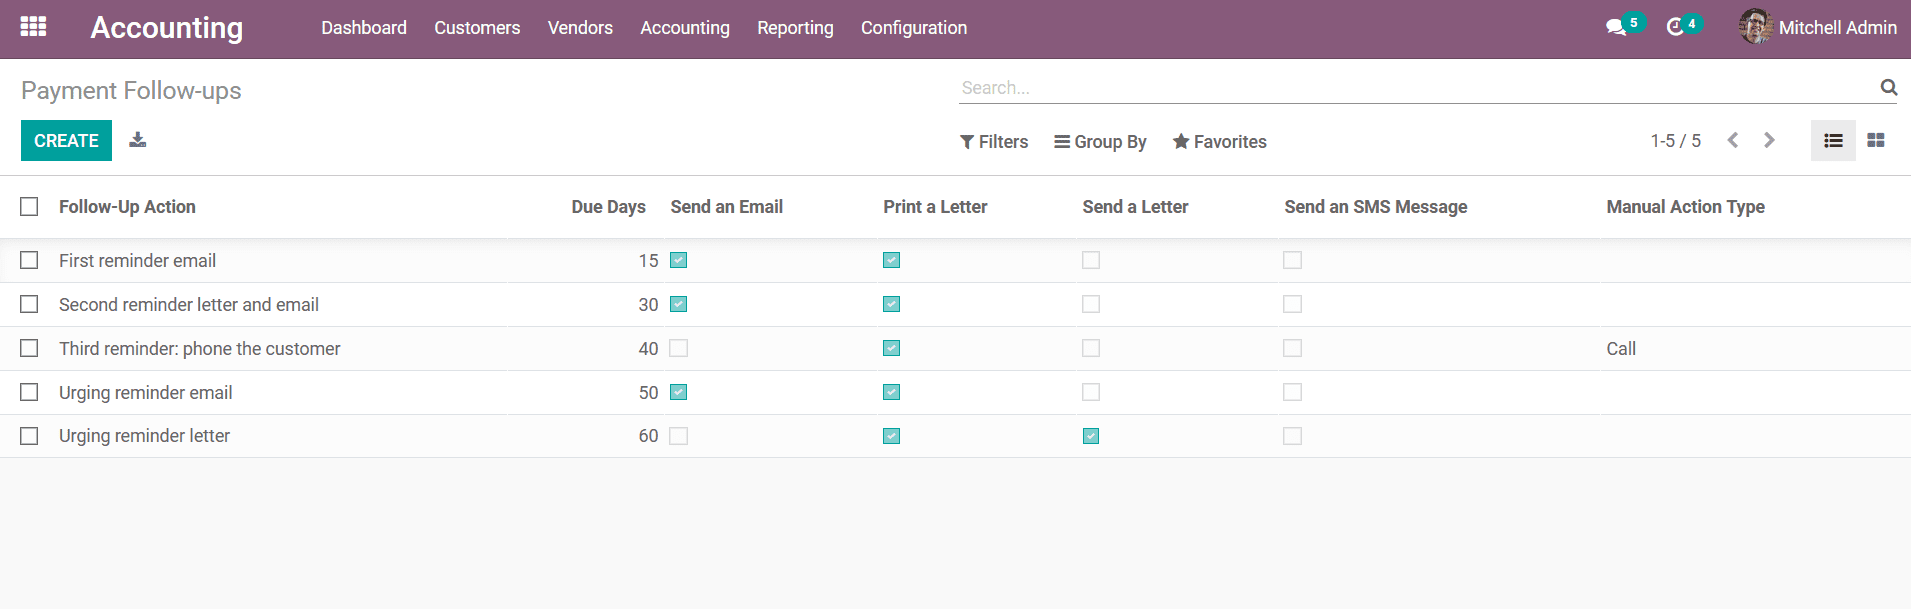
The Payment Follow UP menu can be accessed from the Configuration tab of the Accounting
module and you will be depicted with the menu as in the following screenshot.
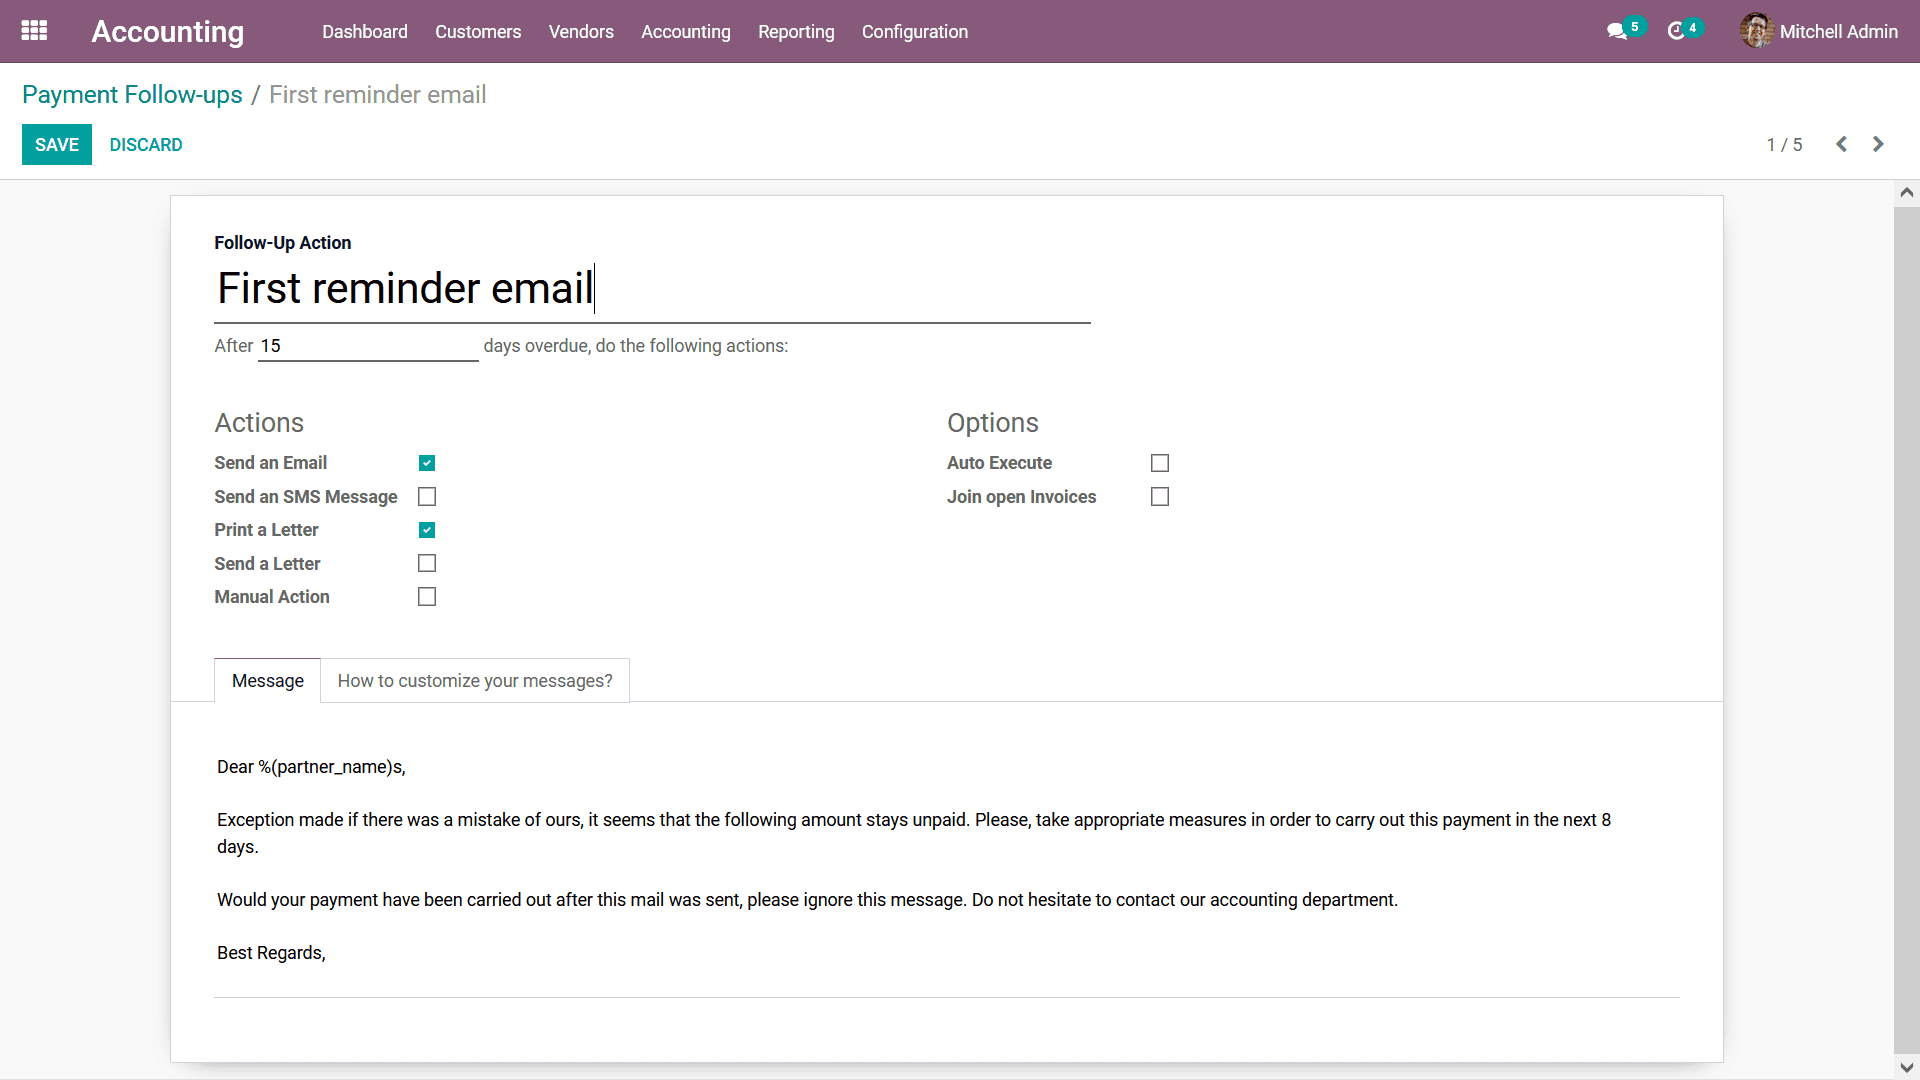
Here the Follow Up Actions along with the Due Date, and the follow up action configuration
on Send an Email, print a Letter, Send an SMS Message can be enabled or disabled.
Furthermore, the Manual Action Type on the respective Payment Follow-ups can be
defined. Furthermore, as in all the other menus of the Odoo platform, Filtering
as well as Group options are available.
To create a Payment Follow-ups, you can select the Create option available which
I'll direct you to the menu as depicted in the following screenshot. Here, the Follow
Up Action name and the due date of the respective follow-up can be defined. You
can enable the Actions for the respective to follow up such as the Send an Email,
Send an SMS Message, Print a Letter, Send a Letter, Manual Action options can be
enabled. Upon enabling the Manual Action, you need to define the respective Action.
Moreover, the Options of the Payment Follow-ups such as the Auto Execute and Join
Open Invoices can be enabled as well as disabled based on the need.
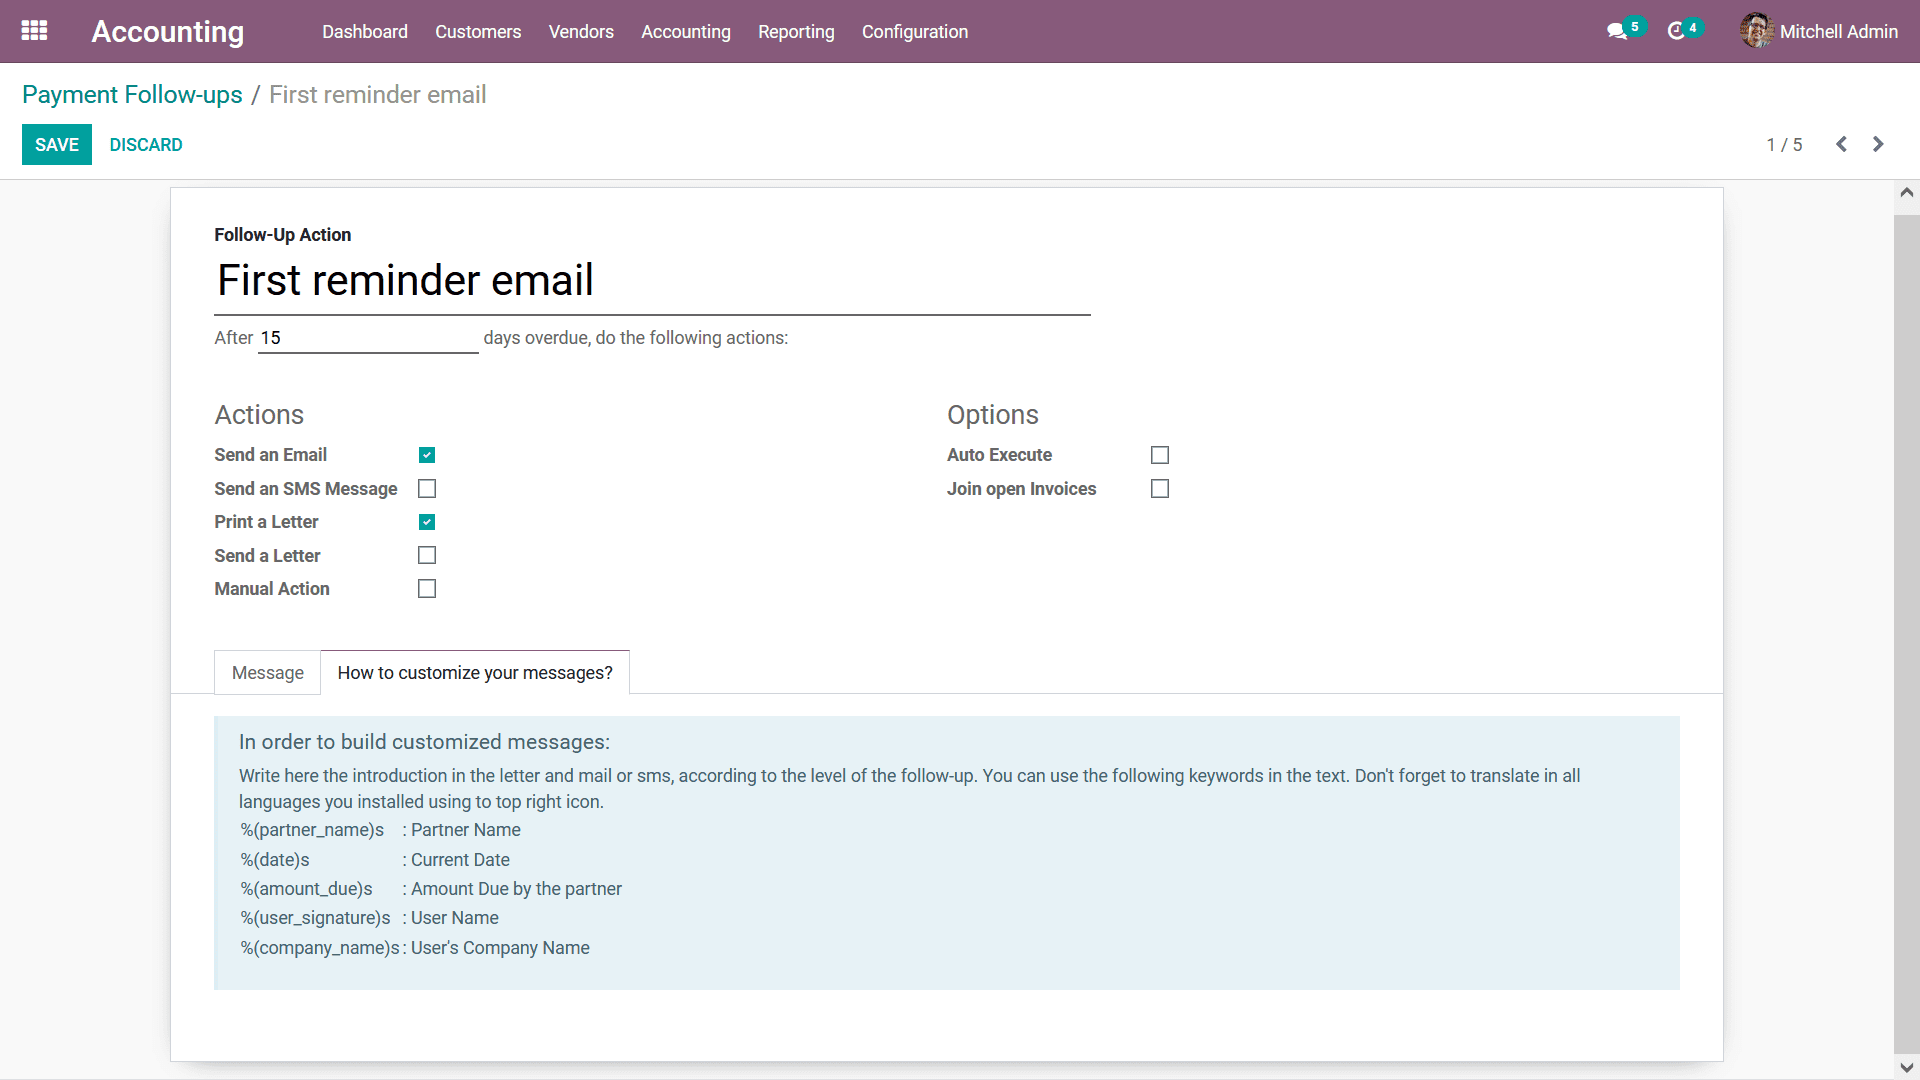
Additionally, the message upon the Payment Follow-ups being operations will be depicted
in the Message tab of the menu.
To more on how to customize the message you can select the ‘How to customize your
messages?’ tab available will provide you a description of the aspects of defining
the custom messages.
As of now, you will be having an understanding of how the Payment Follow-ups option
should be configured in Odoo for the management of the follow-ups on payments. Let's
now move on to the next section where the Incoterms configuration menu will be described.
Incoterms
The Incoterms of the Odoo Accounting will be described to operations in the Configuration
menu of the Accounting module. The Incoterms stands for International Commercial
Terms which will describe and characterize a transaction between the seller and
the buyer. In the Incoterms menu, all the aspects of Incoterms operations that have
been defined in the Odoo platform will be depicted as shown in the following screenshot.
You will have Filter as well as Group by options which are available in default
as there are provisions to customize them as per the need.
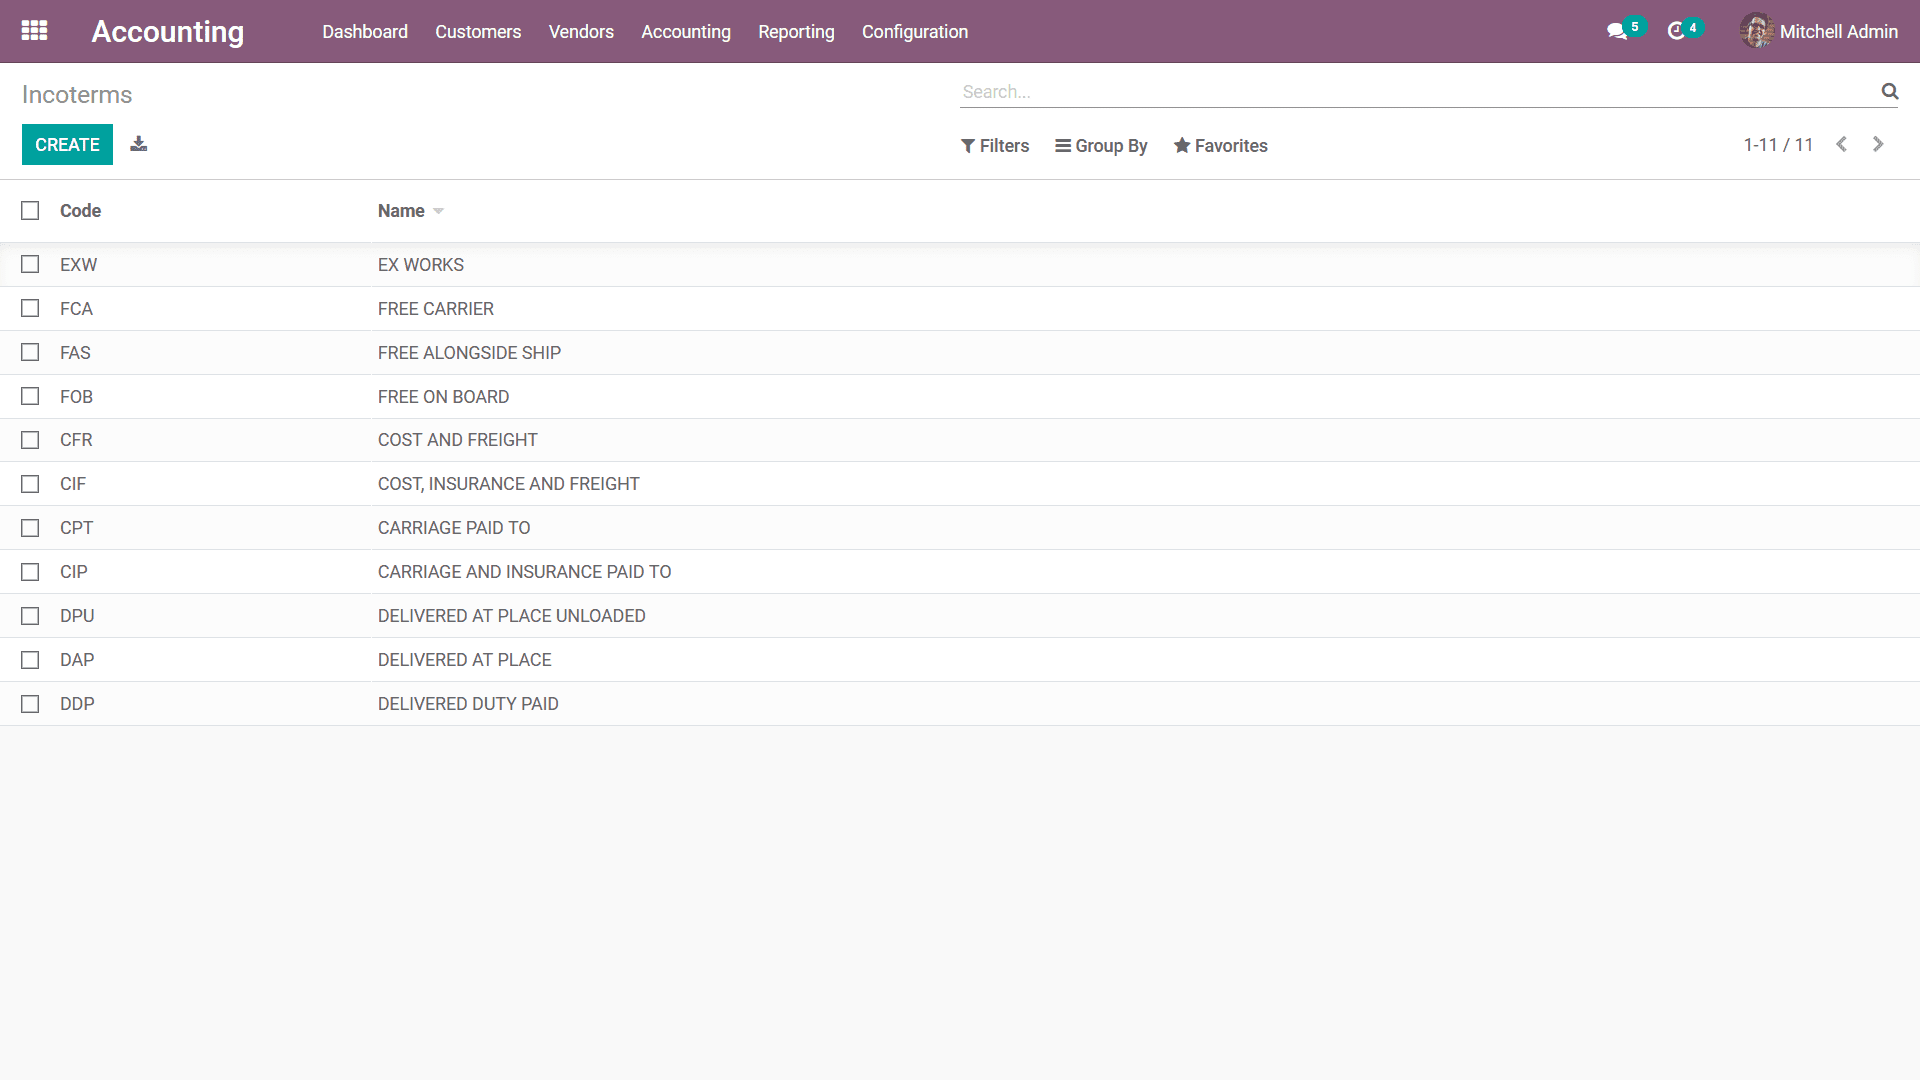
You can Create New Incoterms using the Create option available in the menu and a
creations line will appear where you can configure the same. Let's now move on to
the next section where we will be discussing the next management and configuration
tool Intrastat Code.
Intrastat Code
The next management tool under the invoicing aspects of the Odoo Accounting will
be the Intrastat Code which can be selected from the Configuration tab. The Intrastat
acts as a system for collecting statistics on the trade of goods between the European
Union member states. In the Intrastat Code menu, all the aspects of it that have
been defined in the Odoo platform will be described. The Name, Code along Description
of each will be depicted based on the type of each being defined. You can dialect
each of the classifications to view the extensions of it. Moreover, each of the
Intrastat codes is selected to view complete details of each of them.
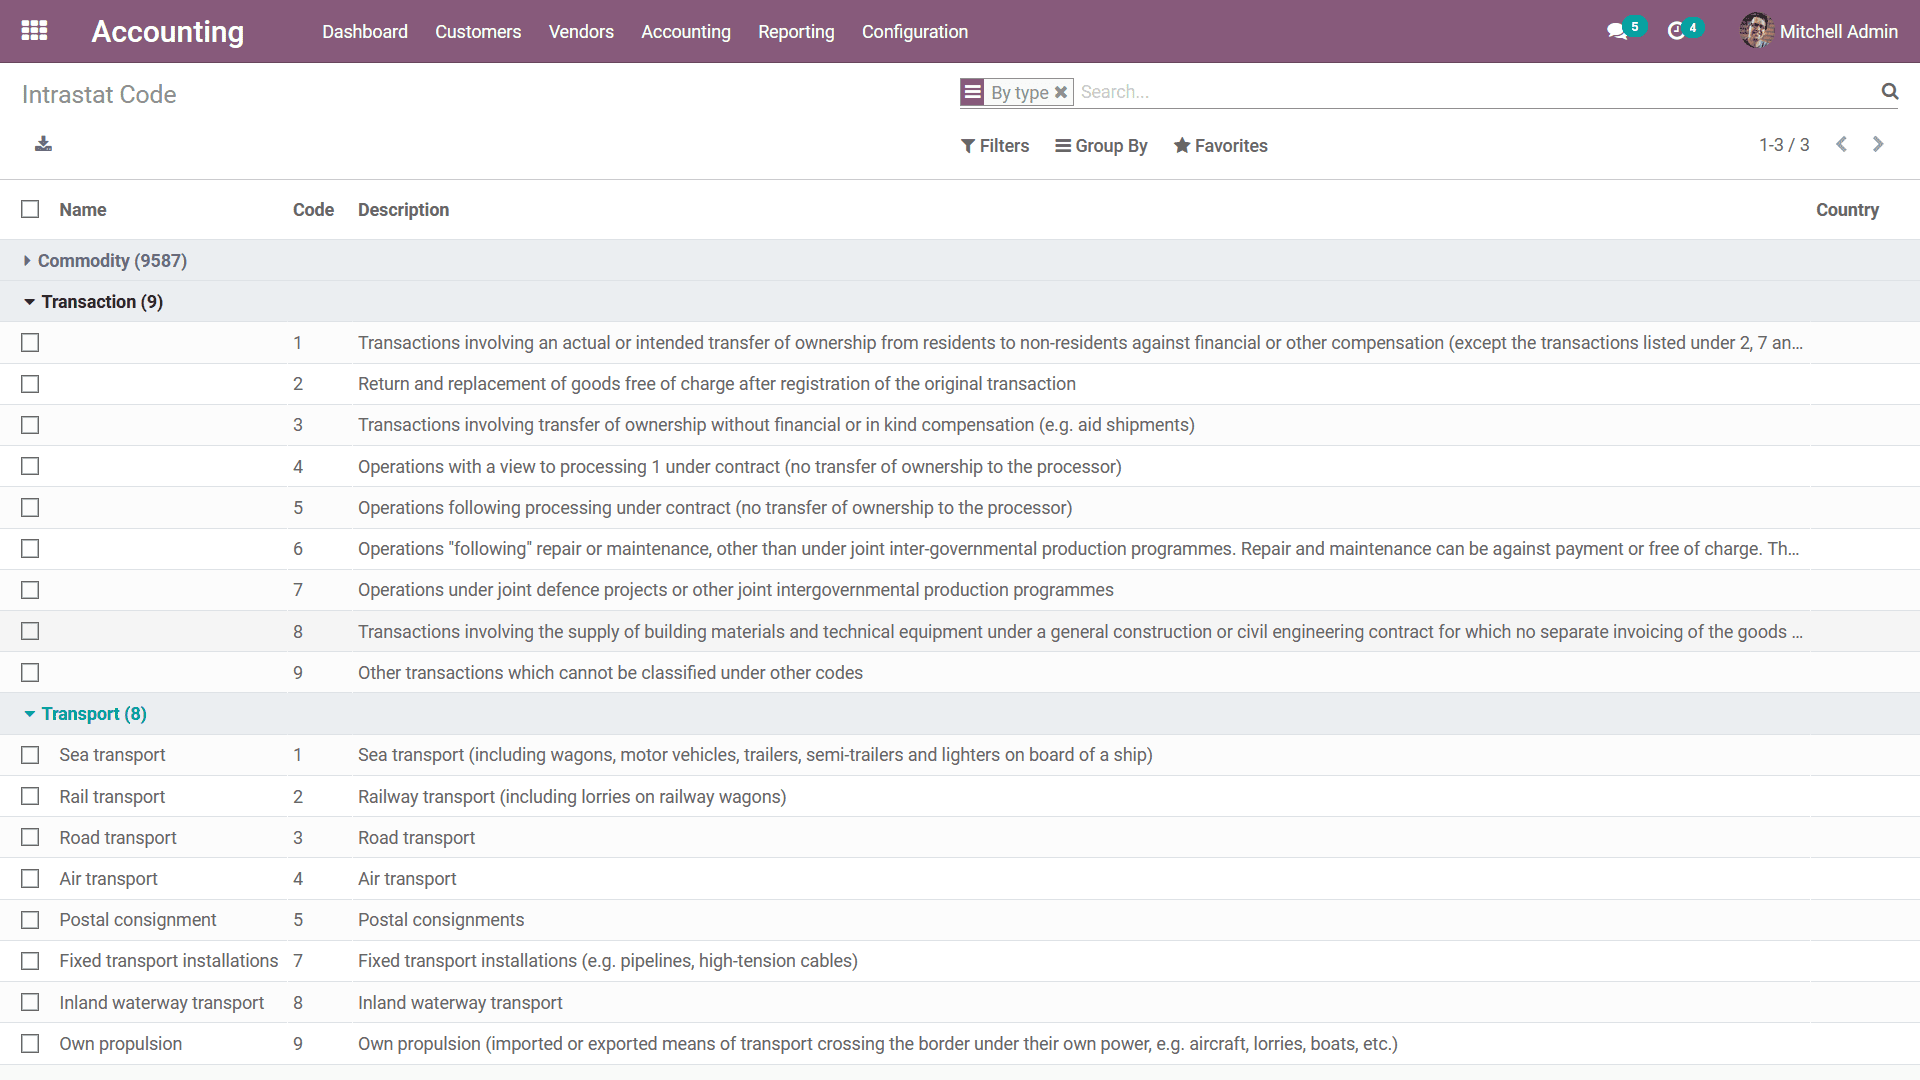
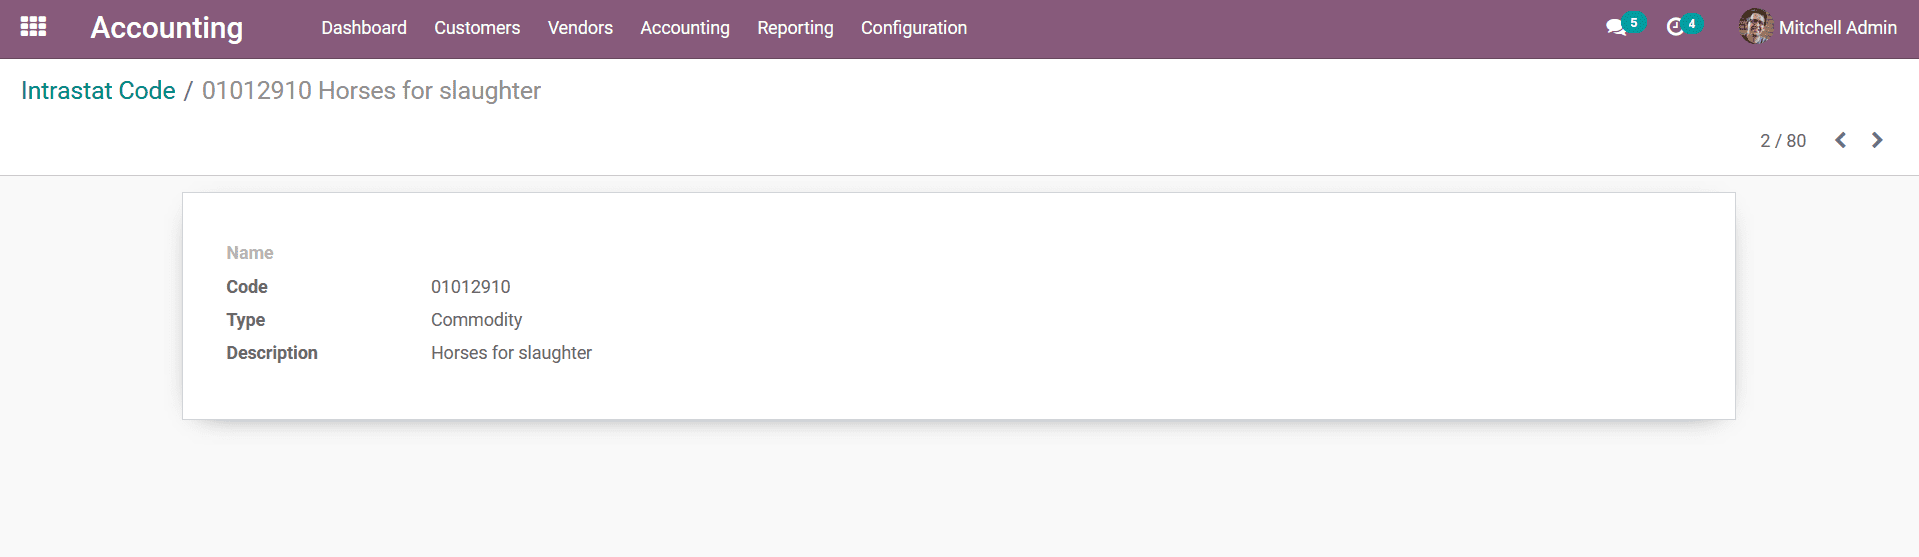
Upon selecting the respective Intrastat Code menu, you will be depicted with the
description menu of each as shown in the following image. Here the Name, Type, Code,
and Descriptions will be defined.
Up until now, we were discussing the aspects of the Configuring Invoicing aspects
of the Accounting module in the Odoo platform. Let's now move on to the next section
where the final management tool of the Odoo Accounting the Configuring Bank Payments
option is being described.