Vendor Management
Just as the management aspects of the Customer are vital in a business the need
of efficient Vendor management operations is required for the smooth functioning
of the company. In a business there are multiple vendors of options for all the
products and the chances of having multiple vendors for the same product is also
high. Choosing the right vendor for your business will be based on different parameters
of operations such as cost, quality as the service provided are certain of the prominent
aspects that the business will consider.
The vitality of management tools that help with the aspects of multiple Vendor management
and that too effectively is vital for business operations. The main vitality will
revolve around the effectiveness in the management of the Accounting aspect which
is only possible with the help of a dedicated Accounting tool. The Odoo Accounting
module will support the aspects of Vendor management as well as the management of
multiple Vendors in operations in a business. Moreover, the Odoo platform has a
dedicated Vendor management tab which will aid in the effectiveness in operation
with the dedicated and distinctive tools and menus which will be supporting it.
The Vendor management tab has tools for the Vendor bills, Refunds, Vendor Receipt
management, Bill payments, Batch payments on vendor bills, Products menu based on
vendor description, and a Dedicated vendor management menu. Let's now move on to
understand these menus and options in the Vendors tab in the Accounting module one
by one from the next section.
Vendor bill management
The vital aspect regarding the operations is the bill management for the purchases
which have been done. The vendors will generate the bills based on the agreed-up
terms on the product cost and the quantities which have been delivered or will be
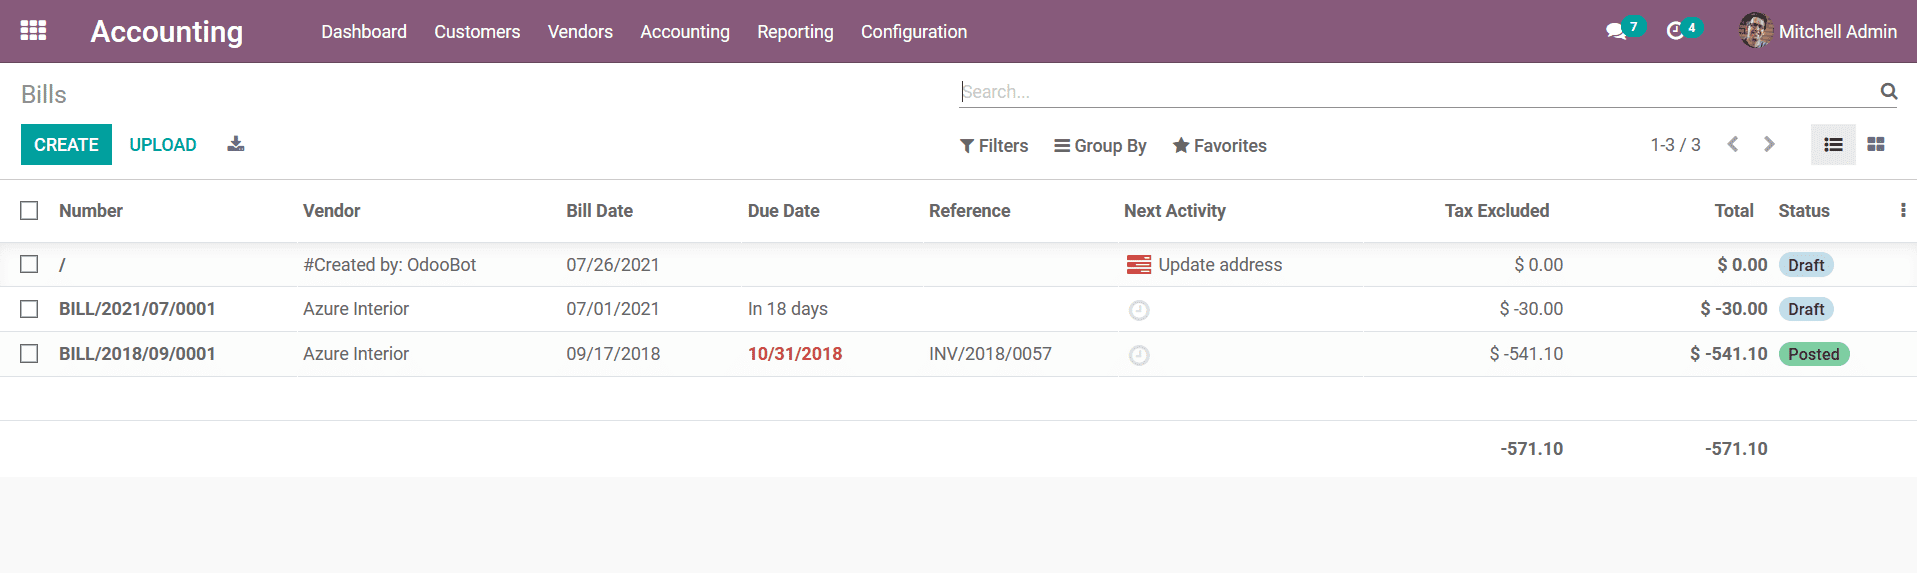
delivered. The Dedicated Vendor Bill management menu can be accessed from the Vendors
tab of the Odoo Accounting module. Here all the Vendor bills which have been generated
towards the company will be depicted. The Bills will be defined with the Number,
Vendor, Bill date, Due Date, Reference, Next Activity, Tax Excluded details, Total
amount on the bill, and the Status of the bill be defined. You will have the provision
to edit the bill details that have been defined by selecting the respective Bill
and choosing the edit option available.
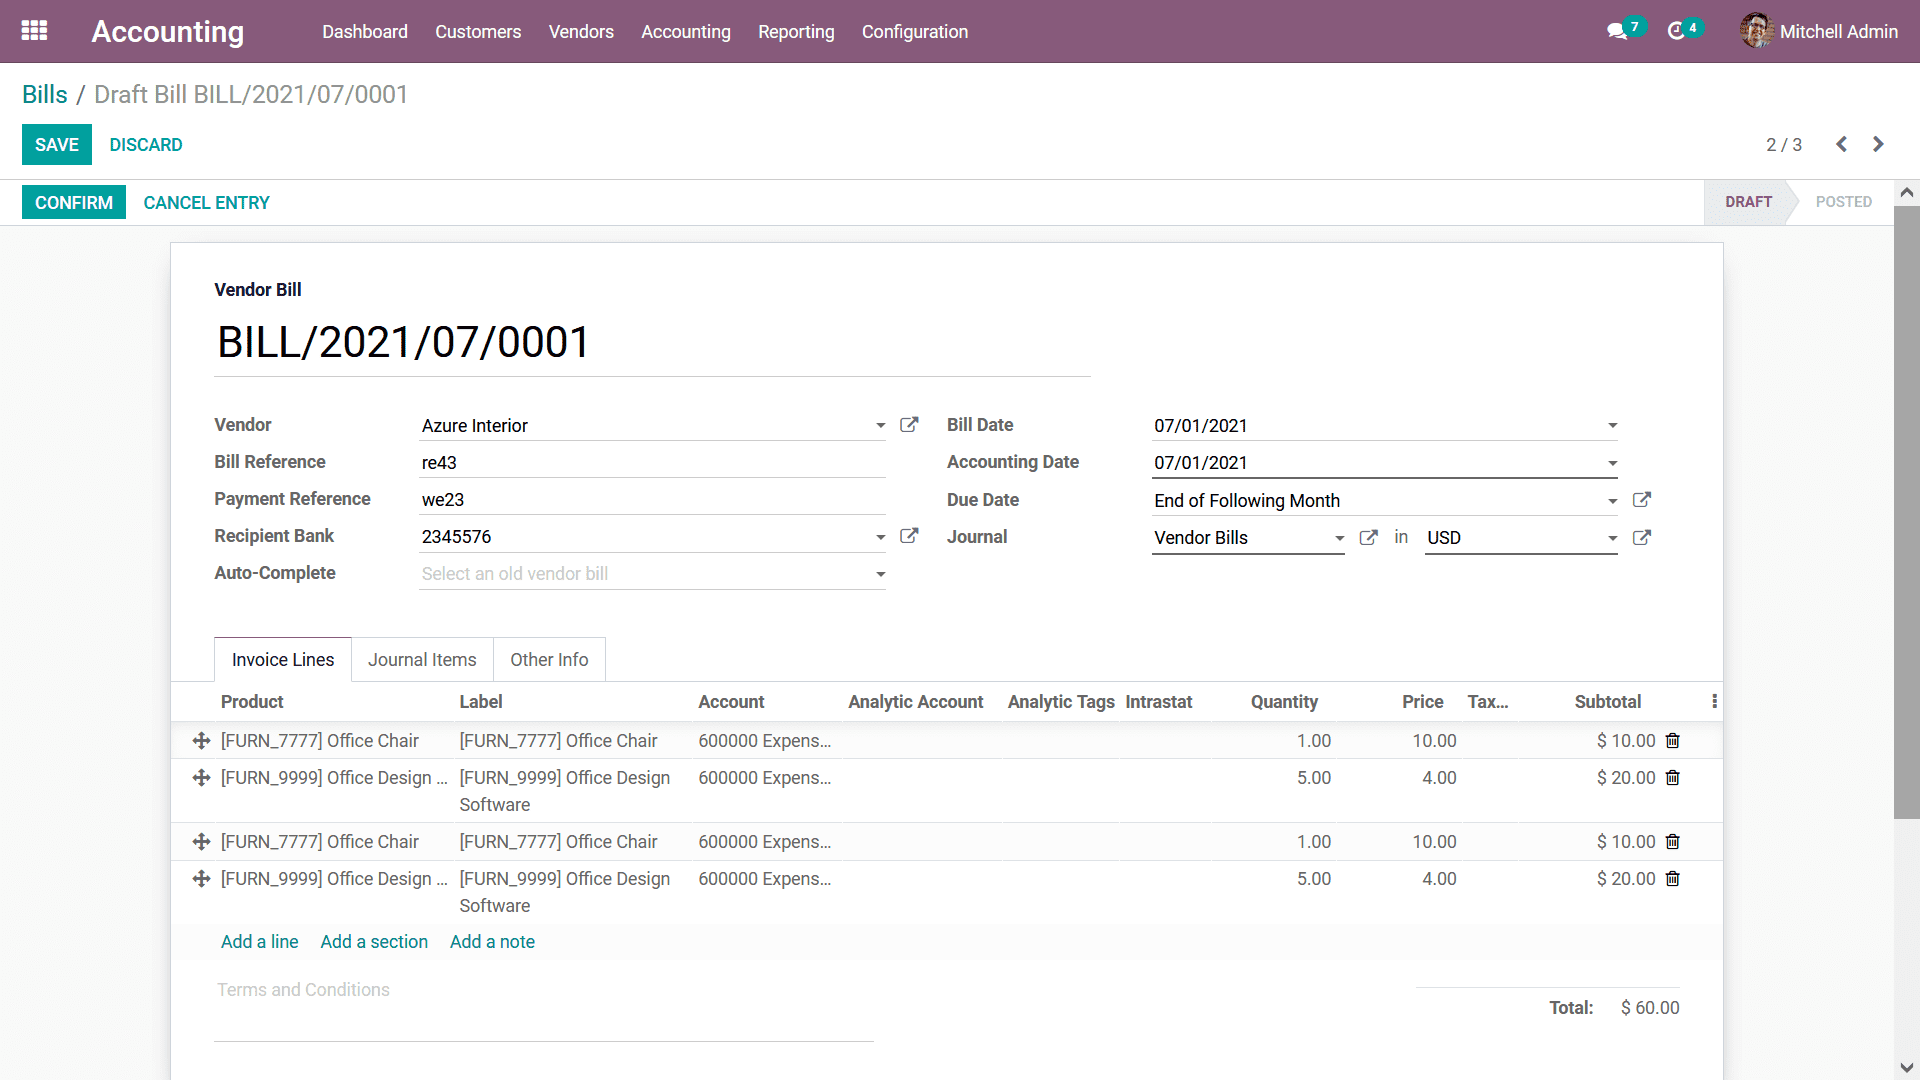
To Create a new bill, you can opt for the Create options which will depict you with
the Bill creation window depicted in the following screenshot. The Vendor Bill number
will be auto depicted and you will have to define the Vendor details, Bill Reference,
Payment Reference, Receipt Bank, Auto-Complete details, Bill Date which is the date
on which the bill is created, Accounting Date is the date at which the entries are
to be recorder in the Ledger, Due Date, Journal details, and the Currency in which
the operations are conducted. Moreover, the Invoicing lines for the respective Vendor
Bill can be defined by selecting the Add a line option available. Here, the Product
details, Label, Account details along with Analytical Accounting information, Quantity,
Price, Tax information as well as the Subtotal will be defined. New sections can
be added by selecting the Add a Section and notes can be added to the bills by selecting
the Add a Note option available.
Furthermore, the Autocomplete fields can be used to generate the bill of purchase
orders in a quick manner. Instead of adding the Products, Quantities, Price, and
other aspects separately in the Order Line, we can choose the Purchase Order at
Autocomplete field. So all the details of the Purchase Order will be auto-updated
to the Bill form. Additionally, we can also add multiple Purchase Orders, so that
a single bill against multiple purchase orders for the specific vendor can be generated.
Once we save all this data, the Vendor Bill Number is generated automatically and
the source document in the list view of the bill shows the source documents i.e.
the Purchase Order numbers separated with a comma for the generated bill.
Under the Journal Items tab, the Ledgers affected during the Bill creation can be
seen and once the Products have been added to the Order line, the Journal Items
will automatically depict the Accounts that are affected and the amounts which are
credited or debited.
Moreover, in Continental accounting during the Bill creation process, Account Payable,
Expense Account, and Tax Account get affected. The Account Payable is in the nature
of Assets and since the Asset is decreasing, the Account Payable is credited. Additionally,
the Expense Account is of nature Expense and as the expense is increasing and thus
Expense Account gets debited and the tax account is also debited.
Whereas for Anglo-Saxon Accounting the Ledgers get affected at the time of bill
creation differs. Here, the Account Payable will be credited and the stock Input
Account and Tax Account will be debited. because Anglo Saxon Accounting Expense
Accounts will be affected once the Sales have been validated.
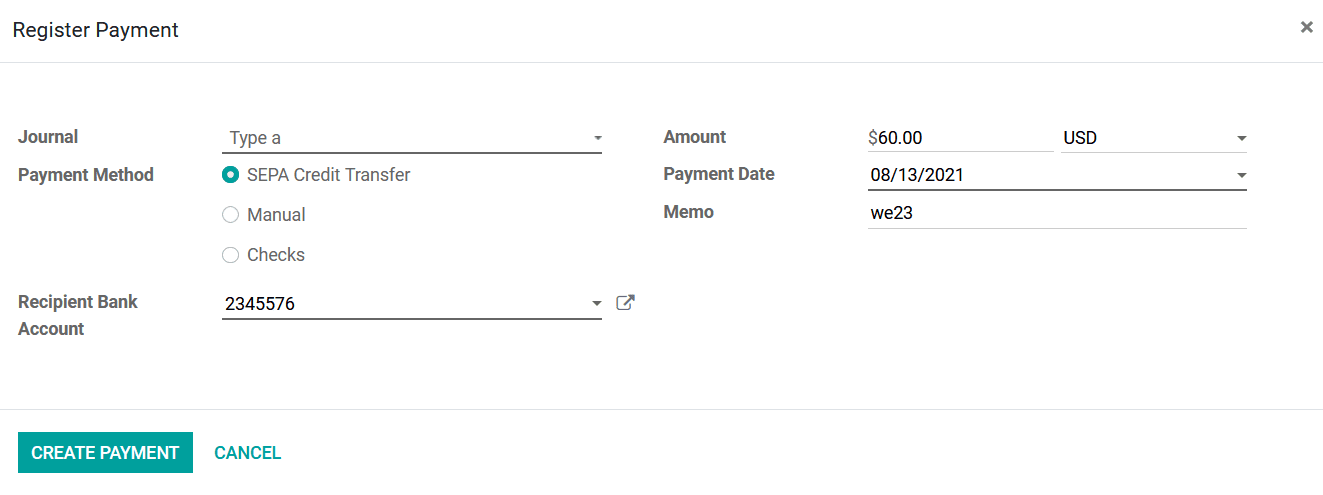
Once the Vendor bill has been defined you can select to Register the Payment of
the vendor bill on selecting the Confirm option available. You will be depicted
with the Register Payment menu as Shown in the following screenshot. Here the Journal
details and the Payment method can be defined as SEPA Credit Transfer, Manual, or
Checks. The Receipt Bank Account details along with the Amount, Payment Date, and
the Memo details can be defined. Once all the aspects have been defined you should
select the Create Payment options that are available.
Once the payment has been completed the Account Payable will be debited and the
Outstanding Payments Account gets credited. This Outstanding Payments Account will
be added in the Bank or Cash Journal configuration for which the entries are moved
to Outstanding Payment Account and only after reconciliation with Bank Statement
the amount will be moved to the bank. That is instead of reconciling Bank Transaction
with Account Payable it will reconcile with outstanding Payment Account.
So after reconciliation, the Outstanding Payments Account gets debited and Bank
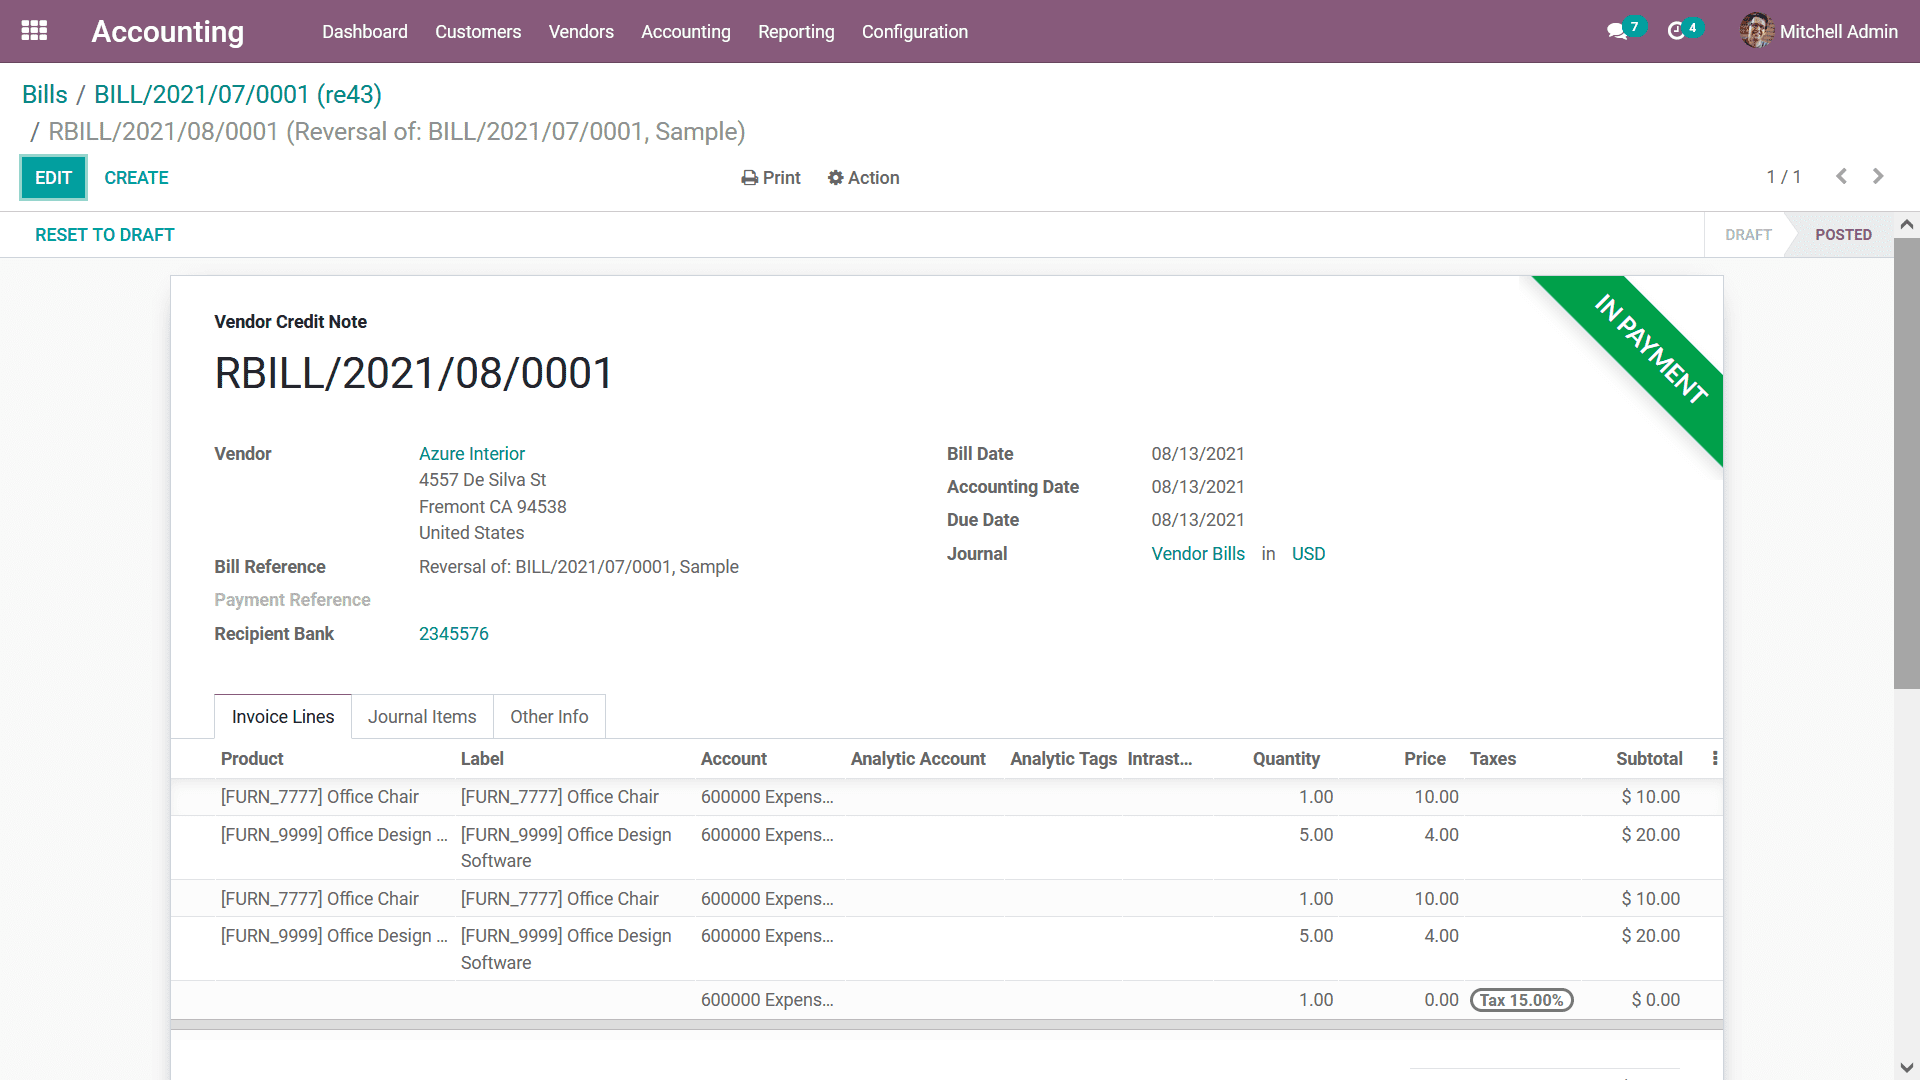
Account is credited. Once the payment has been registered and the payment has been
processed the respective Vendor bill will be depicted with a label as In Payment
as shown in the following screenshot. If the payment has been completed the label
will be depicted as Paid.
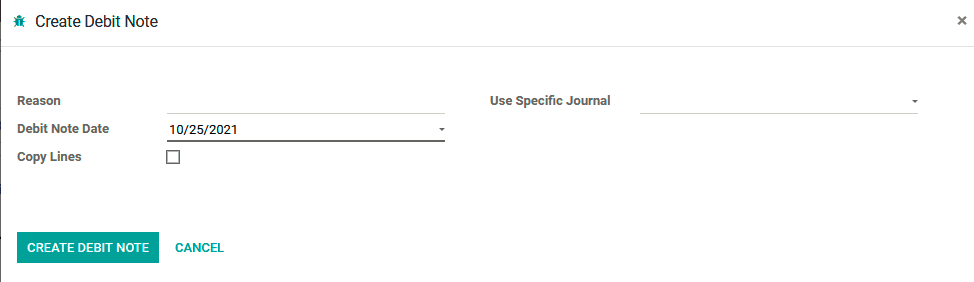
Furthermore, there is also an option to define the Debit Note for the respective
vendor bill by selecting the Debit Note options available in the menu. Upon selecting
to create a Debit note you will be directed to the pop-up window as depicted in
the following screenshot. Here, the Reason for the refund along with the Debit Note
Date and the specific journal to be used can be mentioned under the Use Specific
Journal. Moreover, the Copy Lines option can be enabled which will be beneficial
in the aspects of copying the Credit lines in case of requirement of corrections.
As the Debit Note description has been completed the next you can select the Reverse
options available which will reverse the Vendor Bill Payment generated and send
the Credit Note to the respective vendor. The Credit Note feature as available in
the Customer's configuration here also in the Vendor menu is a useful feature for
the Accounting operations management of the respective vendor operation. Let's now
move on to the next featured menu under the Vendor management, the Refunds menu
in the next section.