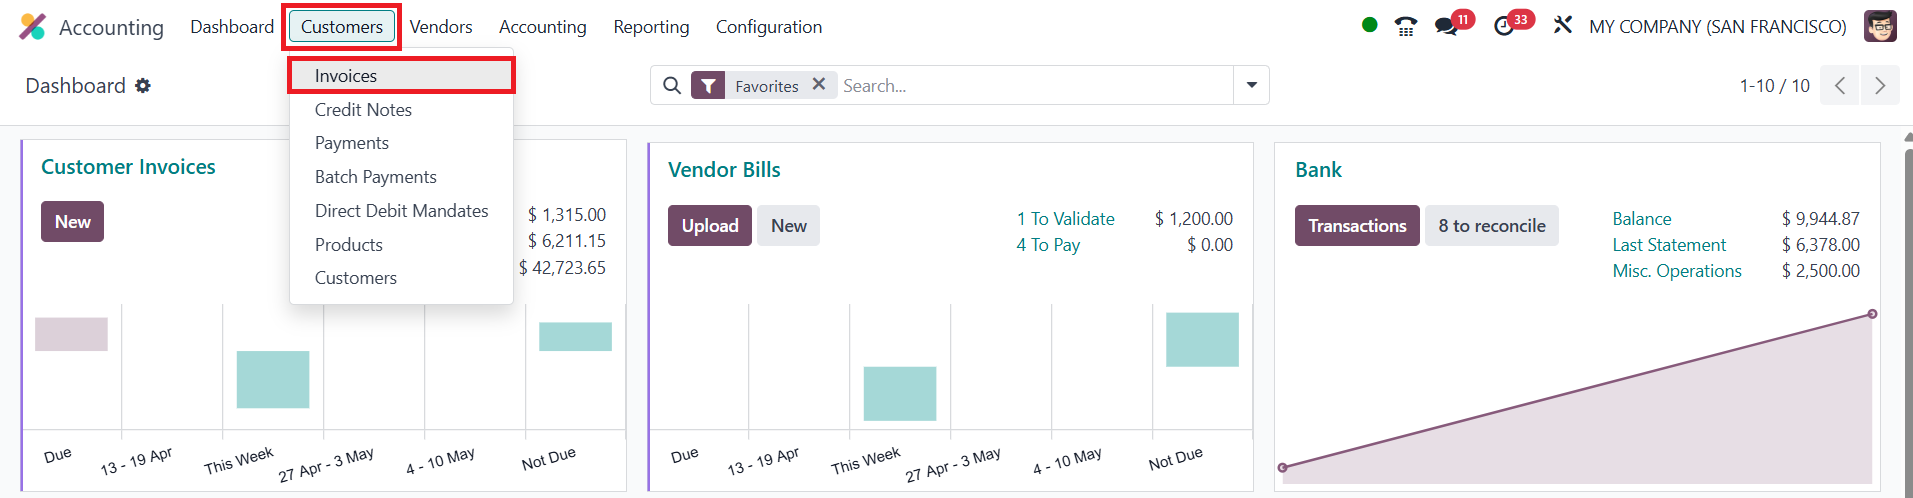
1. Customer
Invoices
Odoo 18 continues to streamline
business workflows by
offering multiple methods for
automating the generation of
customer invoices based on
the nature of operations and
the modules in use. In the
Sales module, once a sales
order is confirmed, Odoo 18
automatically generates a
draft customer invoice, ready
for verification. Users can
review these drafts before
finalizing and dispatching
them to customers. All
automatically and manually
created invoices are then
centralized in the Invoices
dashboard found under the
Customer menu of the
Accounting module.
In the Odoo 18 Accounting module,
users can view a
comprehensive list of all
invoices.
This list view displays critical
information such as Invoice
Number, Customer Name,
Invoice Date, Due Date,
Tax-Excluded Amounts, Total,
and Invoice Status. Moreover,
this view is fully
customizable, users can
expand the columns to display
more fields relevant to their
workflow.
By using the small icon located
next to the Status field, one
can enable or disable various
fields, including Accounting
Date, Source Document,
Activities, Salesperson,
Sales Team, Reference,
Company, Amount Due, Invoice
Currency, Electronic
Invoicing Status, and more.

To efficiently manage large
volumes of invoices, Odoo 18
offers powerful sorting and
filtering capabilities. The
default Filters allow users
to categorize invoices based
on criteria such as My
Invoices, Draft, Posted,
Canceled, Not Sent, Invoices,
Credit Notes, Debit Notes, To
Check, SDD Mandate, To Pay,
and In Payment. Additionally,
the Add Custom Filter option
empowers users to define
specific conditions tailored
to their unique invoicing
processes. The Group By
functionality enhances
visibility by enabling
grouping based on
Salesperson, Status, Sales
Team, Payment Method, Invoice
Date, Referrer, and other
fields. The option to create
custom groups is also
available for advanced
segmentation.
The module provides multiple
viewing options for invoices.
Apart from the list view, the
Kanban view offers a visual
workflow interface.
Within this view, users can
quickly access options to
upload existing invoices
using the Upload button or
create a new invoice from
scratch by selecting the New
button. Clicking "New" opens
the invoice creation form,
where essential details are
filled in.
While drafting a new invoice,
users must specify the
Customer Name and the
Delivery Address, followed by
entering the Invoice Date and
a Payment Reference. Based on
customer configurations, the
Payment Terms may auto-fill,
but a manual Due Date can
also be set if needed. It’s
crucial to select an
appropriate Journal for
recording the invoice.
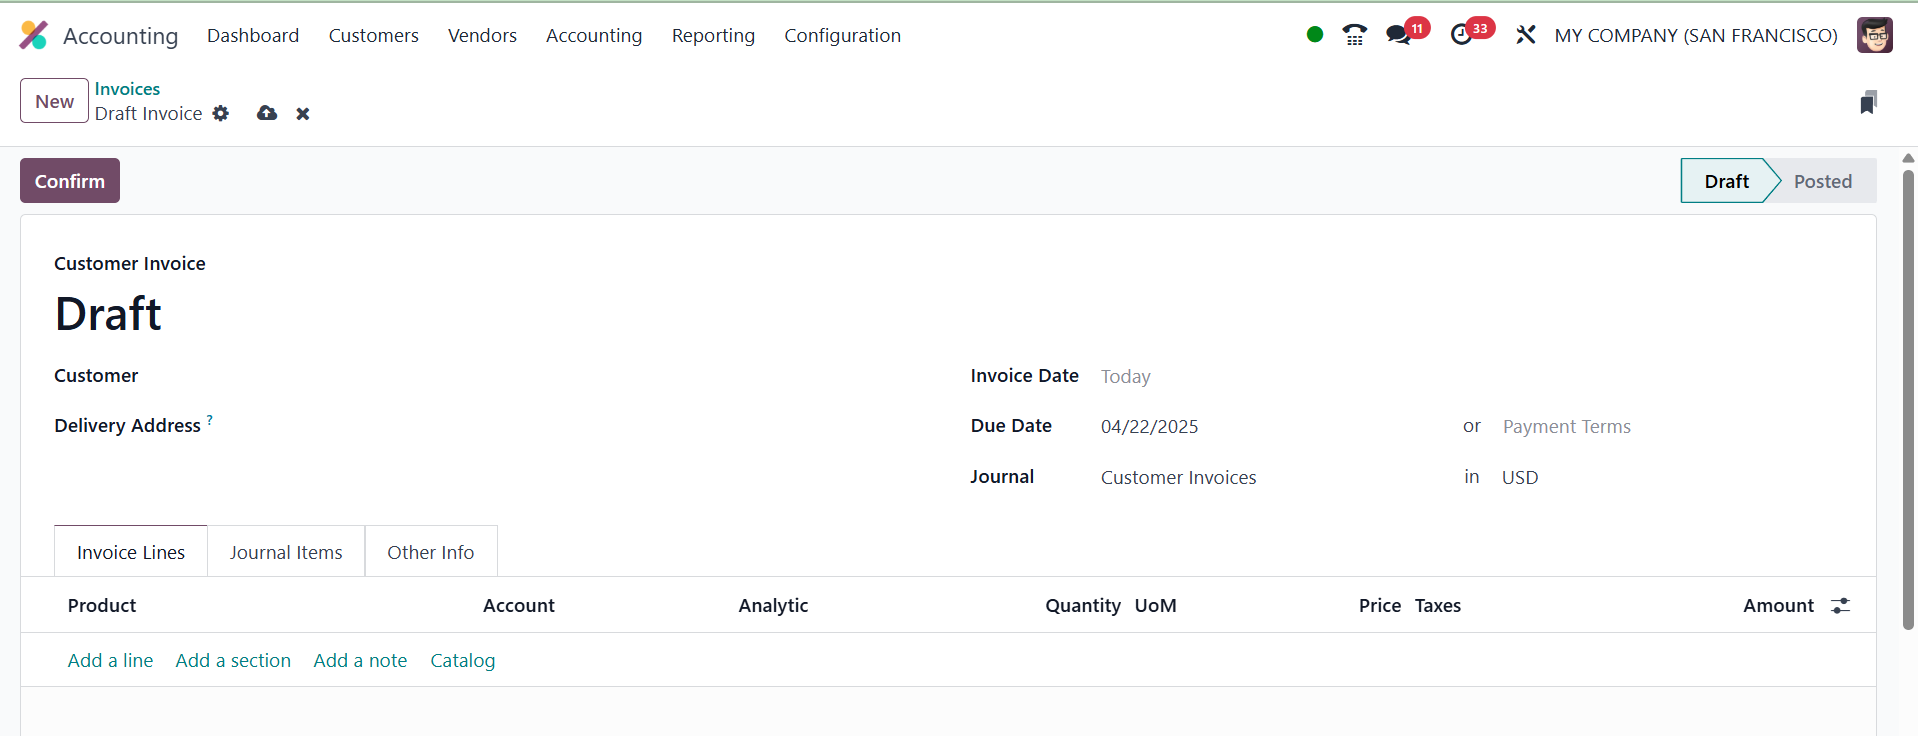
The invoice form is divided into
three primary tabs: Invoice
Lines, Journal Items, and
Other Info. In the Invoice
Lines tab, individual product
or service items can be added
using the Add a Line button.
Each line entry includes
fields for Product, Account,
Analytic Account, Quantity,
UoM, Price, Taxes, and
Amount. If the invoice is
auto-generated from a sales
order, these fields are
automatically populated from
the order lines. For better
clarity, users can use Add a
Section to insert headers or
Add a Note for additional
comments. The Untaxed Amount,
Taxes, and Total are
automatically calculated and
displayed at the bottom of
this section.

Under the Journal Items tab, the
system displays accounting
entries linked to the
invoice. It includes details
such as Account, Label,
Analytic Distribution, Debit
and Credit amounts, and
applicable Tax Grids. Users
can manually modify these
entries, add new lines, or
delete existing ones using
the provided buttons.

The Other Info tab consolidates
all auxiliary information.
Users can assign the invoice
to a Salesperson, Sales Team,
and Referrer. The Customer
Reference and Recipient Bank
Account for receiving
payments can also be
configured.
Furthermore, the Marketing
section allows input for
Campaign, Medium, and Source.
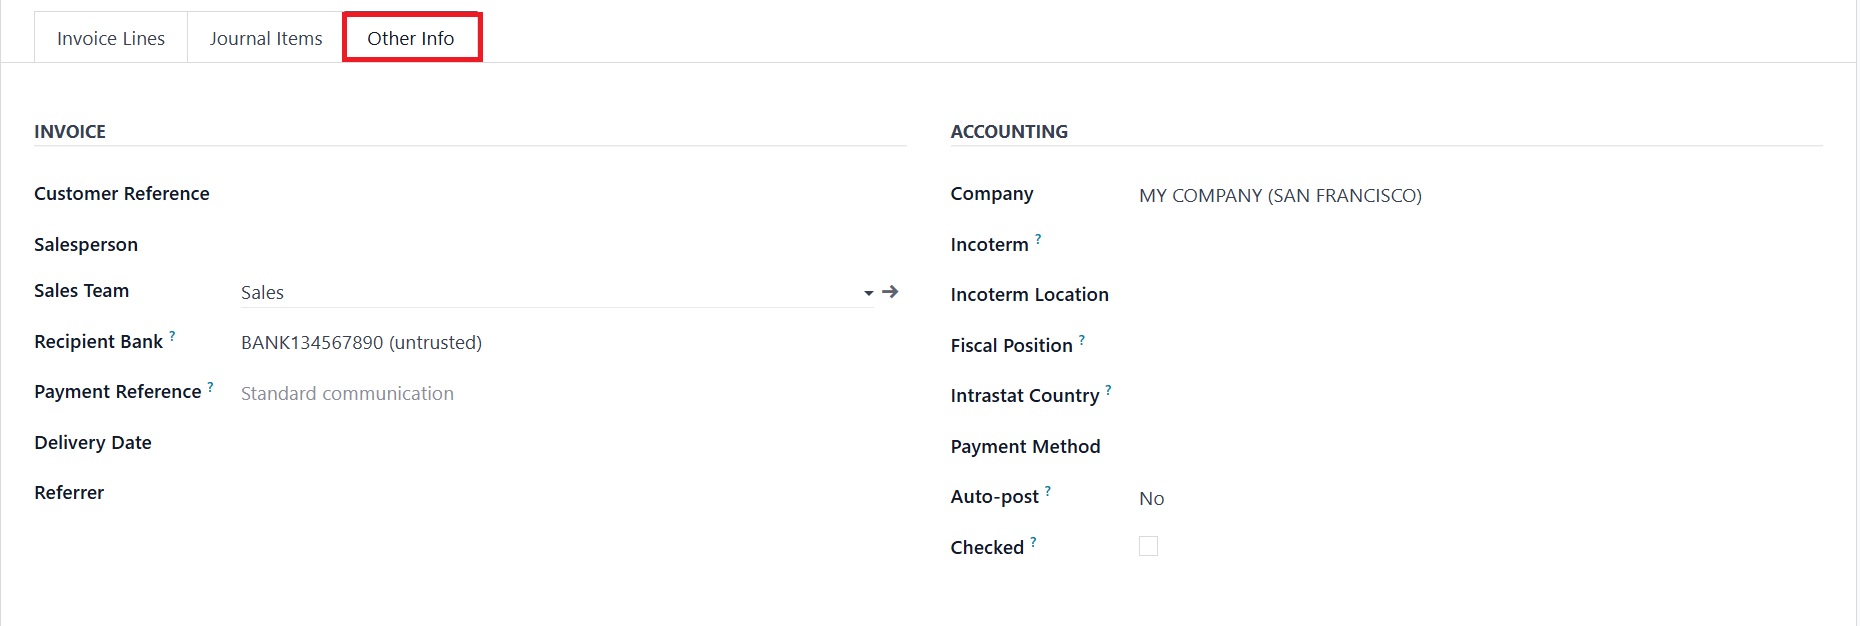
Under Accounting, users can
specify Company, Fiscal
Position, Incoterms, Incoterm
Location, Payment Method, and
Intrastat Country to
fine-tune tax rules and
compliance settings. For
entries needing further
review, the To Check flag can
be activated.
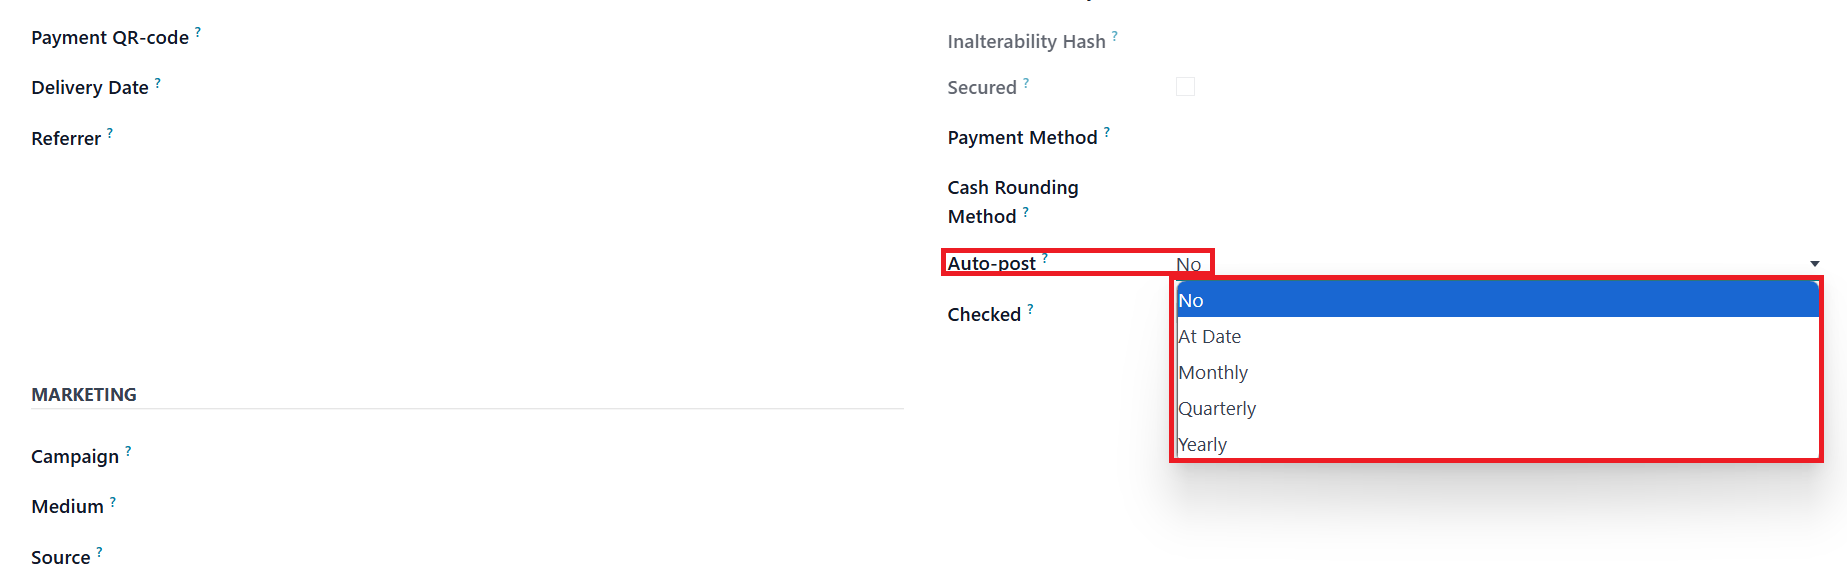
A notable enhancement in Odoo 18
is the Auto Post feature.
Users can choose a periodic
schedule; Monthly, Quarterly,
or Yearly, for automatically
posting invoices.
Alternatively, users can opt
for manual posting by setting
Auto Post to “No.” The Auto
Post Until field can define
how long the automation
should continue.
Once all the details are entered,
the draft invoice can be
finalized by clicking the
Confirm button.
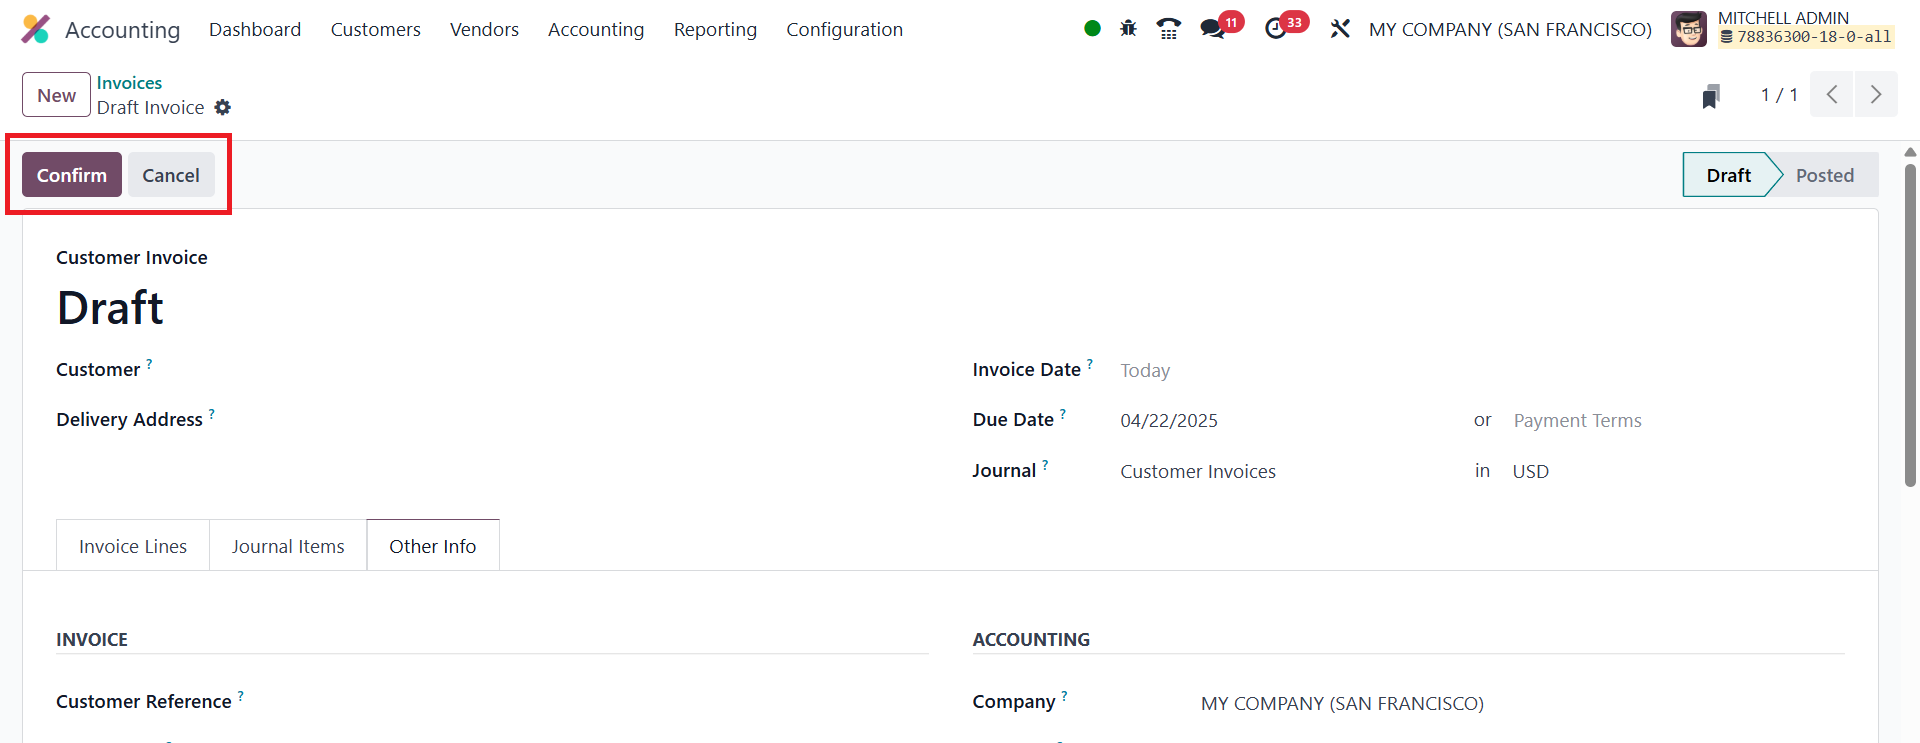
This action changes the status
from Draft to Posted.
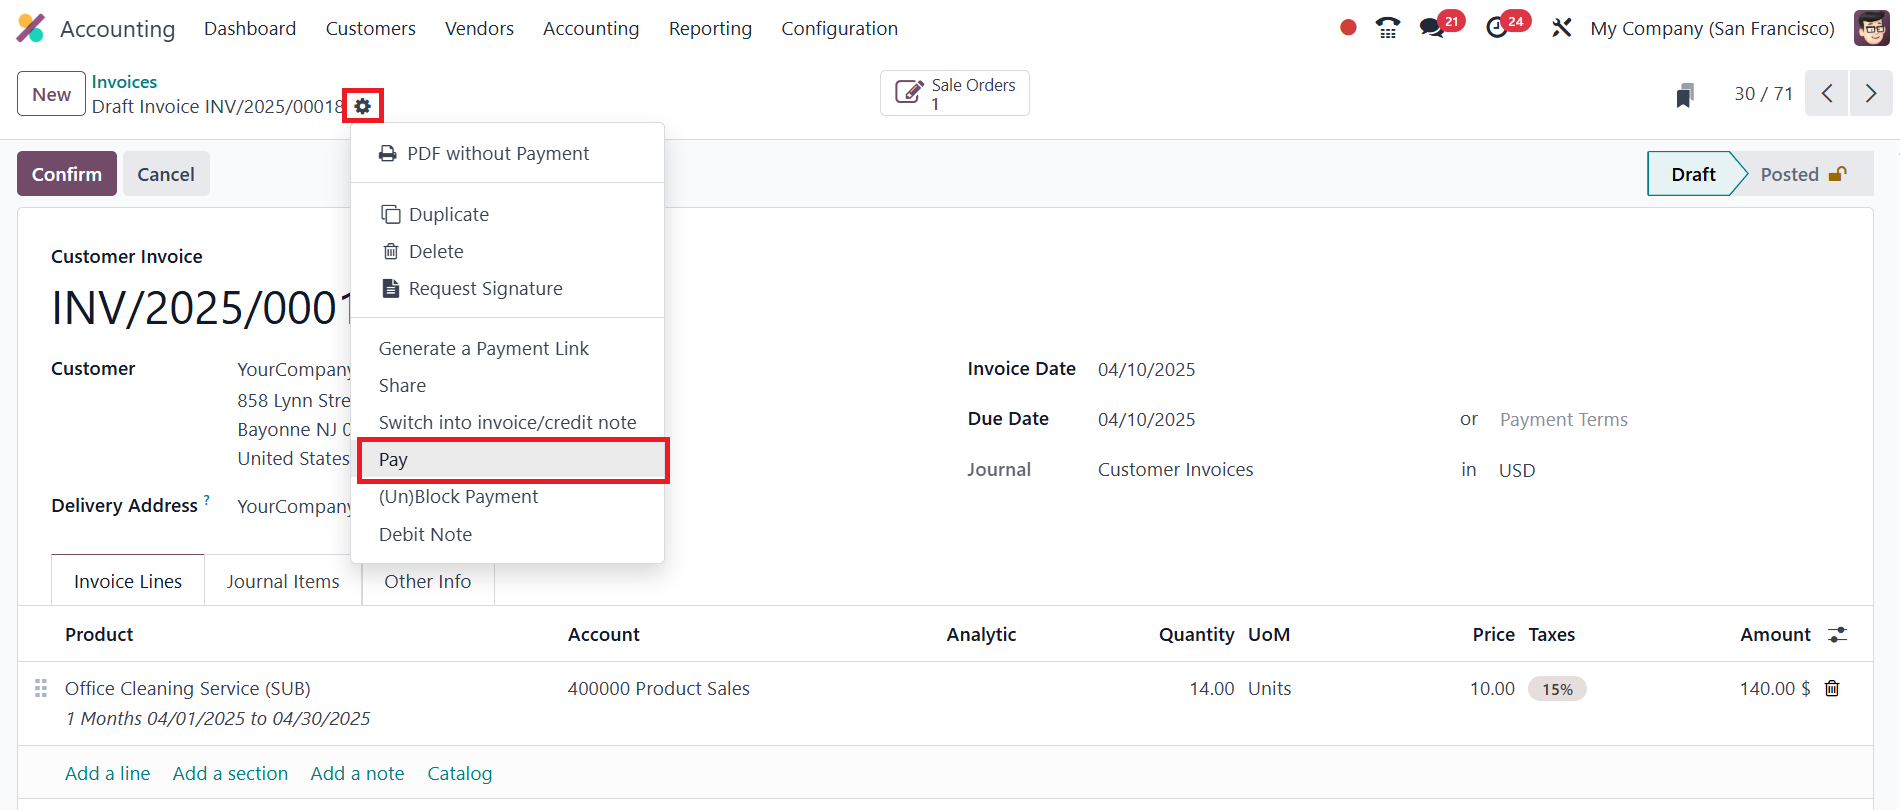
In Odoo 18, payments can now be
registered for draft invoices
directly from the Actions
menu.
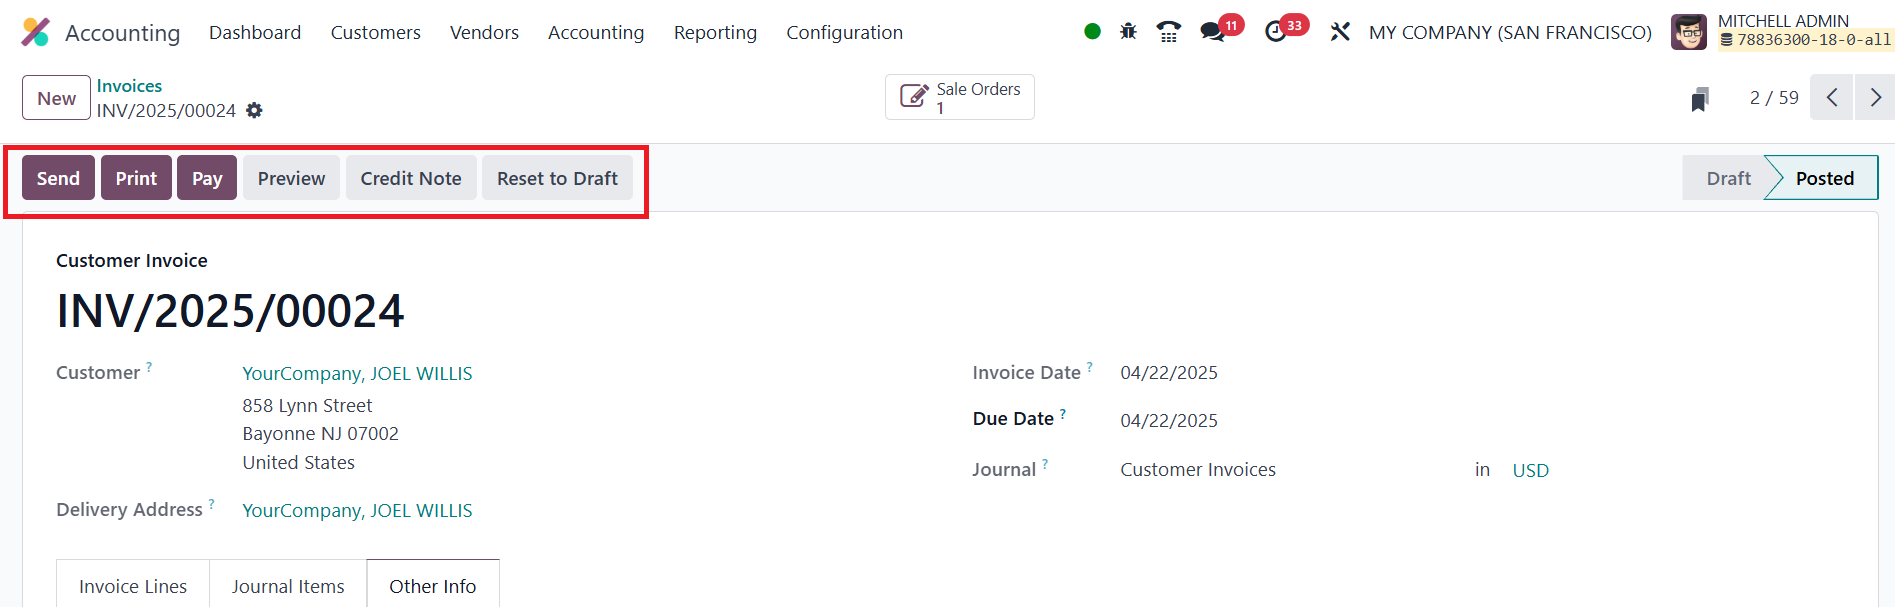
If necessary, a posted invoice
can be reverted to draft
using the Reset to Draft
option. The Preview button
allows users to view the
invoice as the customer would
see it.
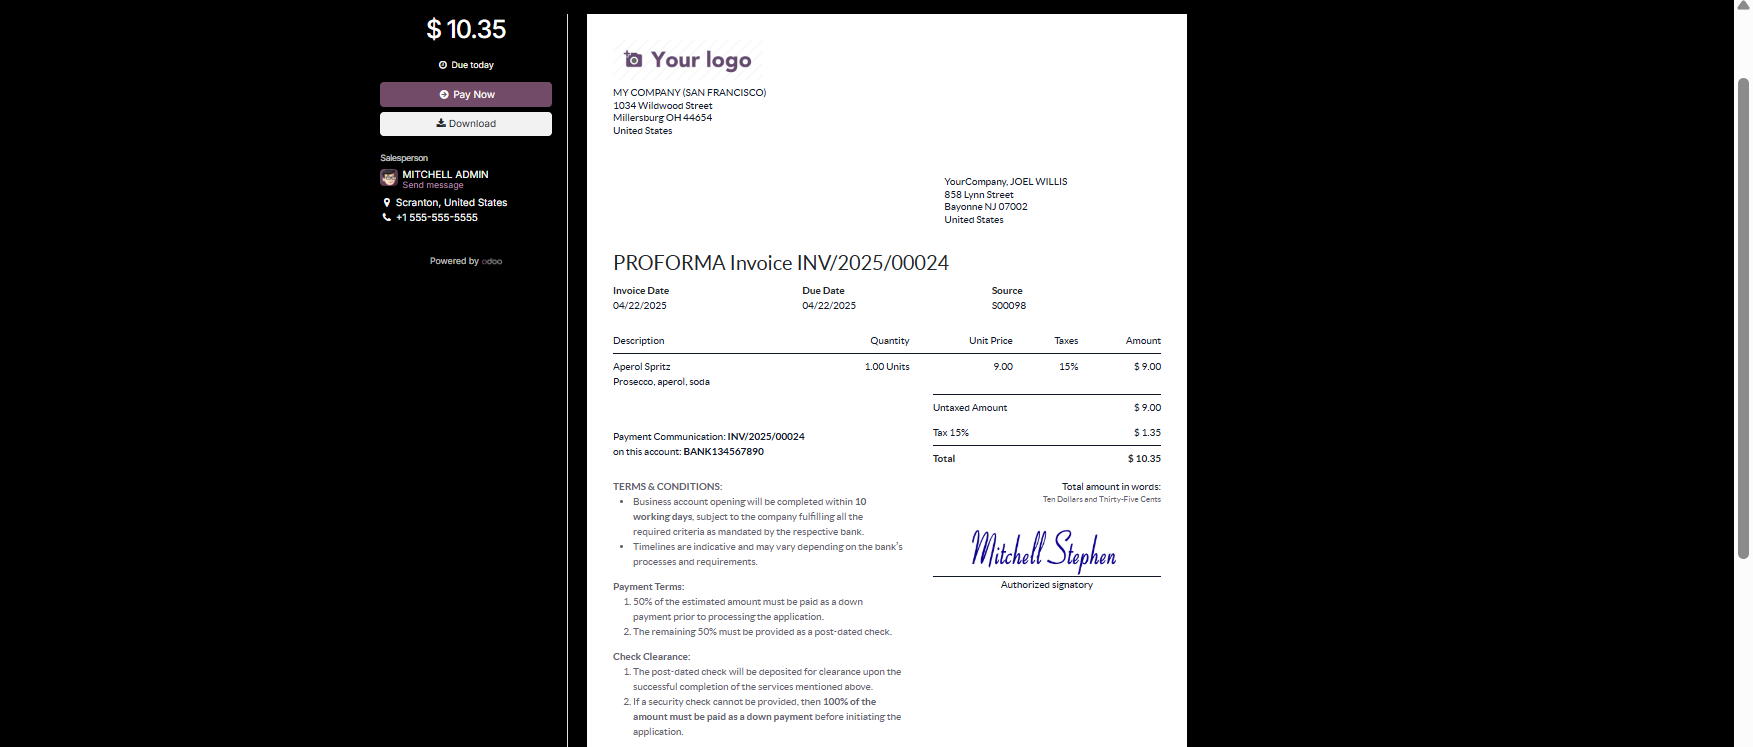
The client preview page gives
customers the ability to
view, download, print, and
pay the invoice using their
preferred payment method.
Customers can also send
messages directly to the
assigned salesperson through
this interface. To email the
invoice, users can select the
Send option, which opens an
auto-generated email template
where recipients, subject
lines, and body content can
be customized.
Once the invoice is attached and
email fields are finalized,
clicking Send will deliver
the invoice to the customer.
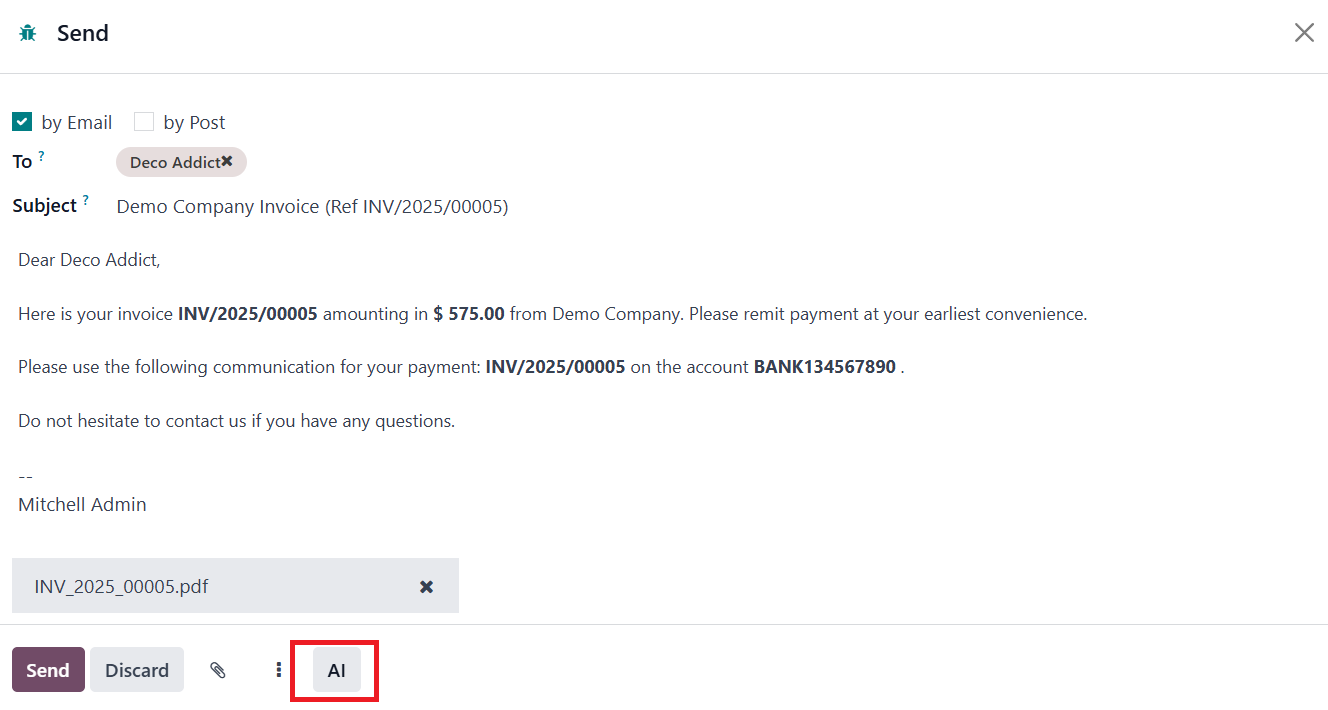
When you click on the Send option
for a customer invoice in
Odoo 18, a popup window
appears allowing you to
manage the email content
before sending it to the
customer. The AI feature
helps you generate a
professional email message
using AI assistance.

Clicking the AI option will open
a new pop-up window as shown
above, where you can generate
email content with the help
you AI.
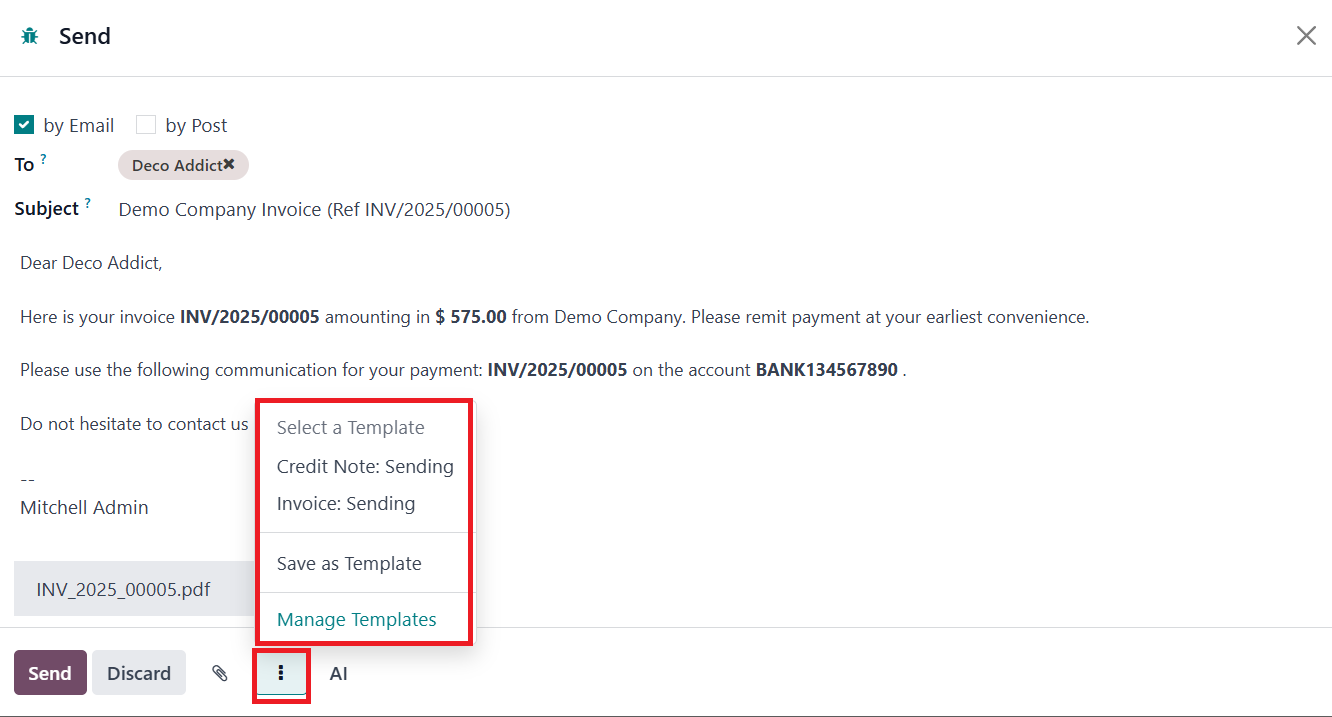
By clicking on the three dots
icon, you can access a menu
to choose from existing email
templates. If you've created
a new email draft that you
want to reuse in the future,
the Save as Template option
lets you save it as a new
template. All saved templates
can be accessed and organized
through the Manage Templates
option.

A new window will appear as shown
above, where you will get the
Email Templates recorded in
your system. Use the New
button to create a new
template.
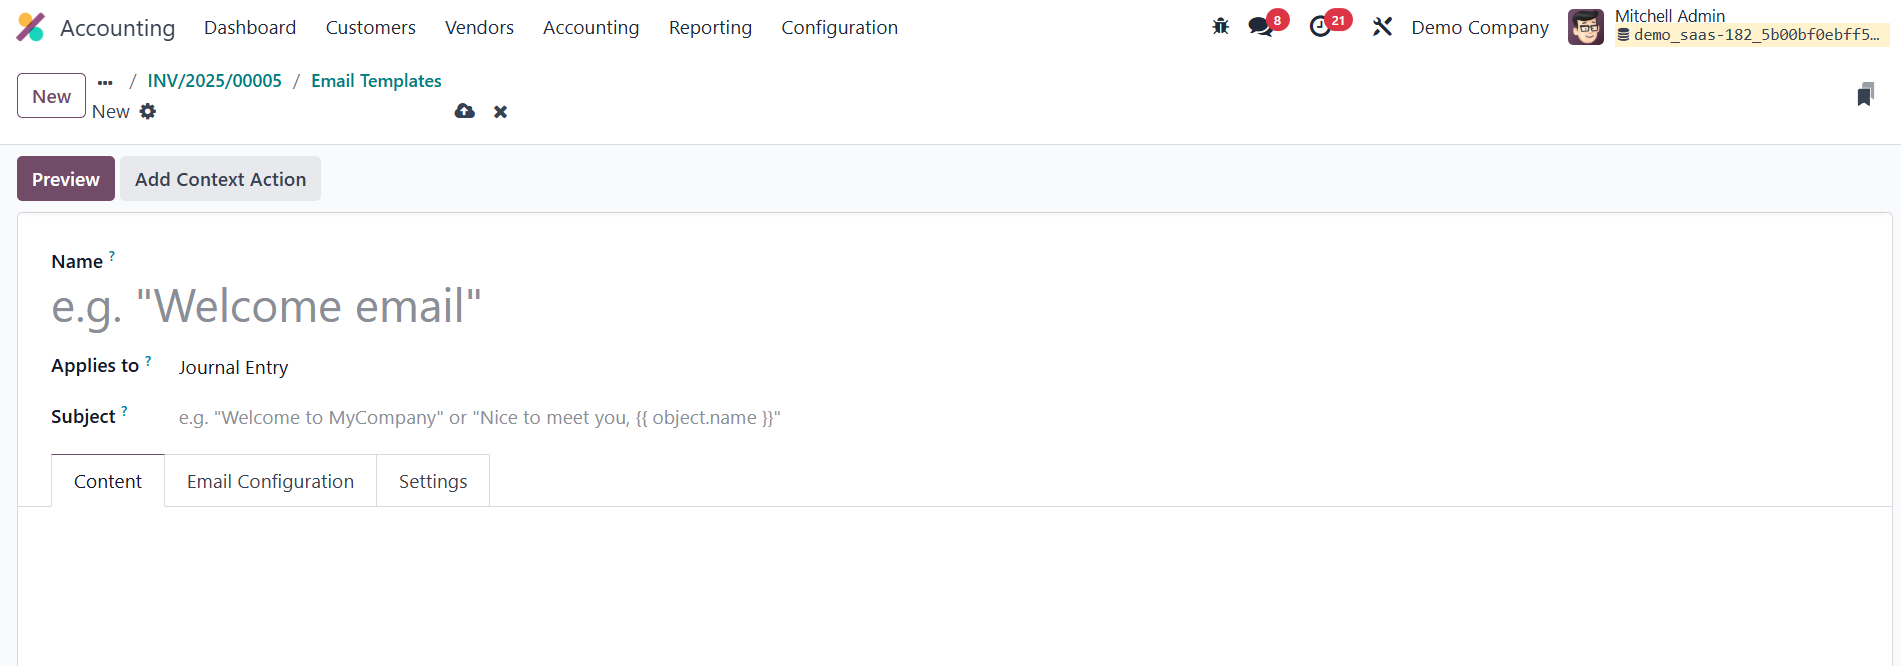
Here, you can assign a Name to
the template. The Applies to
field in the email template
creation window is used to
specify the model or document
type to which the email
template will be linked. In
the Subject field, you can
specify the subject of the
mail content. The mail
content can be added under
the Content tab of the Email
Template.

Under the Email Configuration
tab, mention the From,
Default Recipients, Reply To,
and Scheduled Send Date.
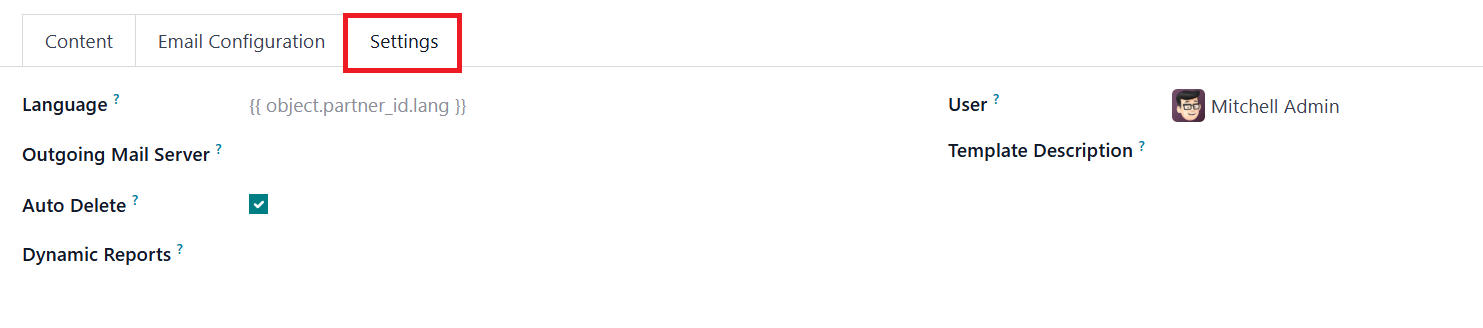
Using the Settings tab, you can
set the Language, Outgoing
Mail Server, Dynamic Report,
User, and Template
Description. The Auto Delete
option in email templates
determines whether the email
generated using the template
should be automatically
deleted after being sent.
Upon successful customer payment,
the Pay option is used to
record the transaction.
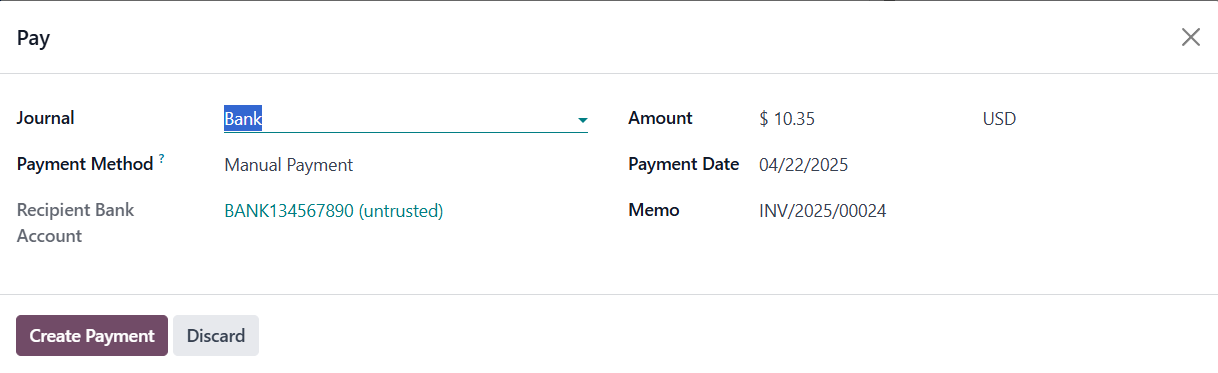
Odoo 18 opens a pop-up window
showing the Journal, Payment
Method, Recipient Bank
Account, Amount, Payment
Date, and Memo. These fields
can be edited if necessary.
Clicking the Create Payment
button completes the
registration process, and the
invoice status updates to In
Payment.
In cases where customers return
products, receive damaged
goods, or reject services,
businesses can issue a Credit
Note.
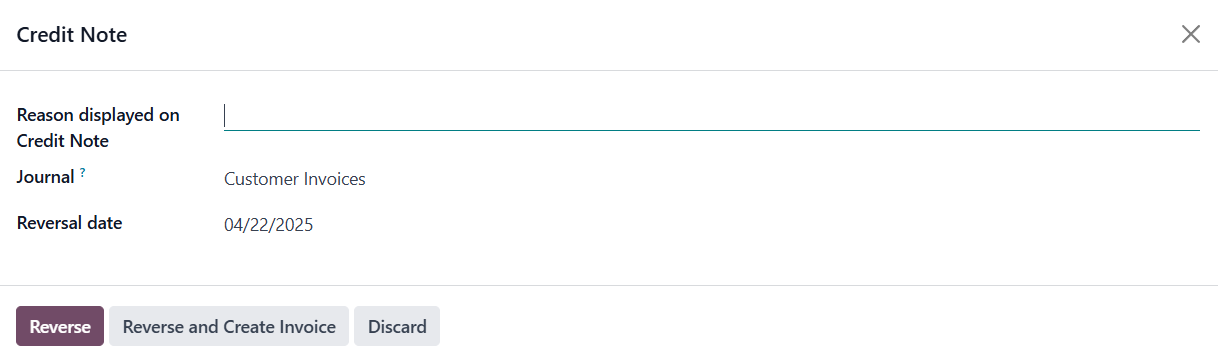
The Add Credit Note button
initiates this process,
bringing up a wizard where
users must specify the Reason
for the credit note. The
Reversal Date can be either
the original journal entry
date or a specific date.
There’s also an option to
select a specific journal via
the Journal field. Once the
reversal details are set,
clicking Reverse generates a
draft credit note.
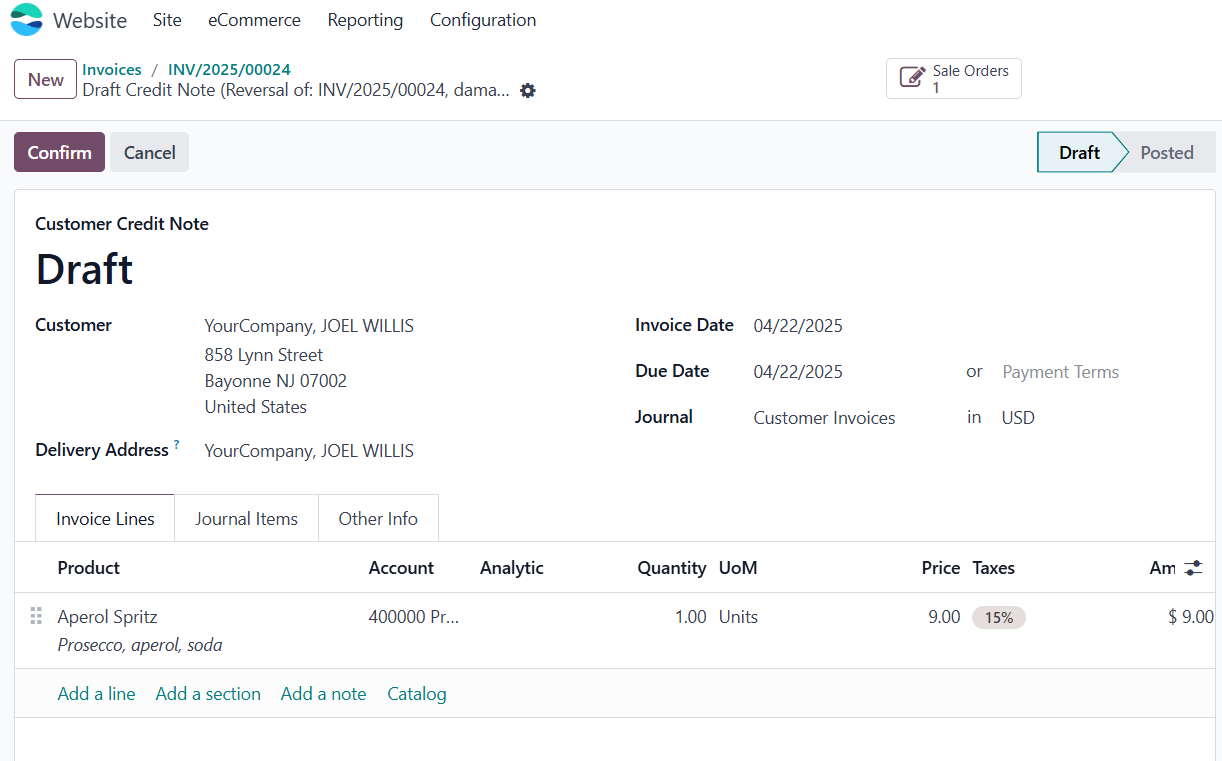
The system will then direct the
user to a new window where
the draft credit note is
displayed. Clicking Confirm
validates it, and users can
later use the Pay option to
handle the credit note
payment process.