33. Payment
Providers
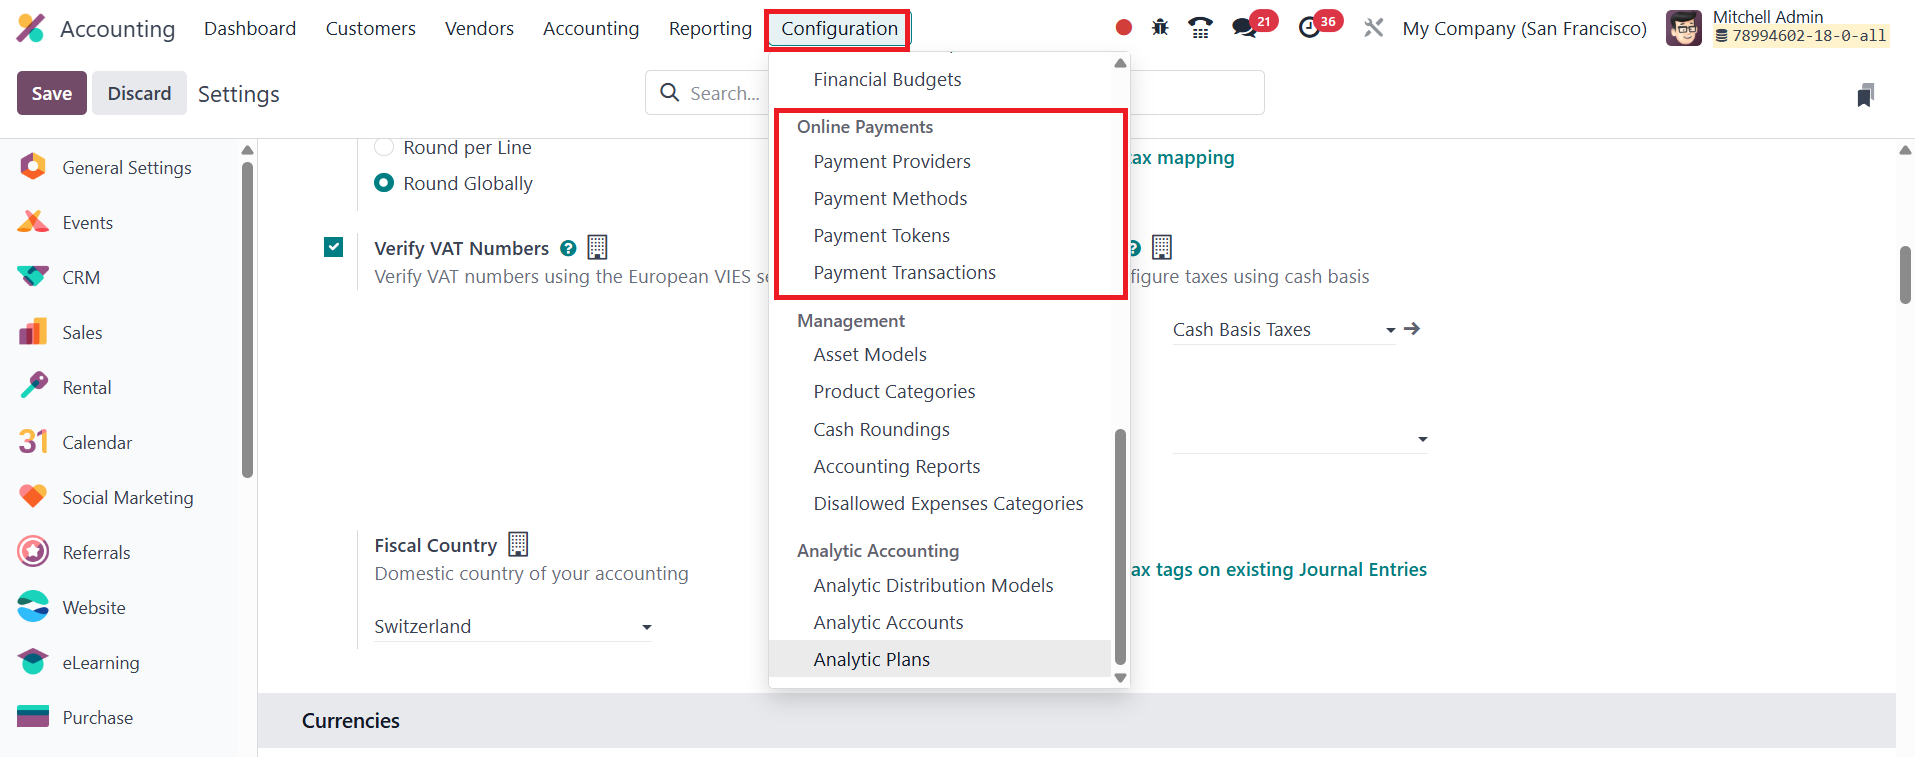
Within the Configuration menu of
Odoo 18’s Accounting module,
you’ll find a suite of tools
that let you control every
facet of how your company
accepts and tracks payments.
Four key elements live here;
Payment Providers,
Payment Methods,
Payment Tokens, and
Payment Transactions, and
each one plays a
complementary role in
smoothing the journey from
invoice to cash in the bank.
Payment Providers are at the
heart of Odoo’s e‑payment
ecosystem. By enabling
providers such as Stripe,
PayPal, Adyen, and others,
you give customers the
freedom to settle invoices
online, around the clock,
through the portal that best
suits them.
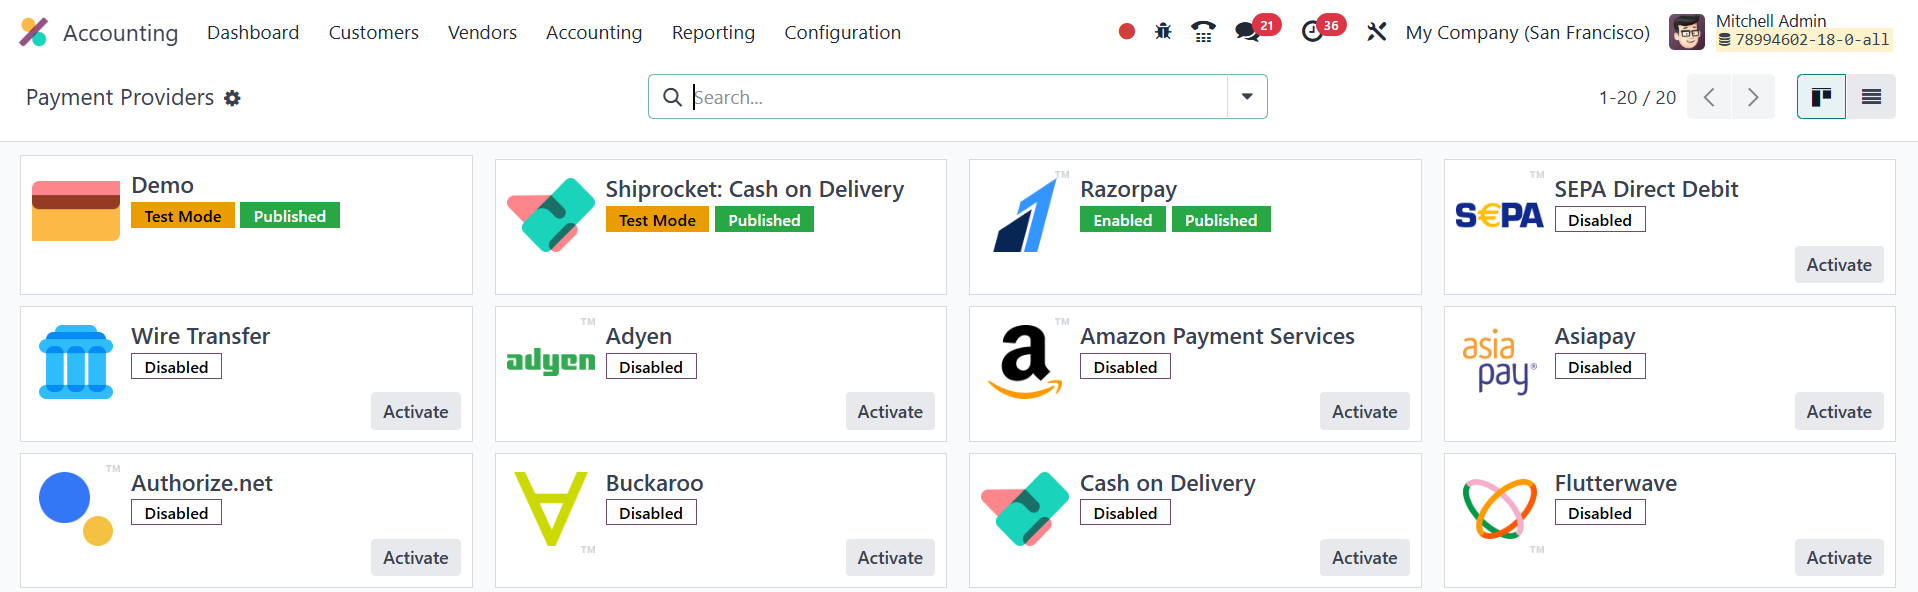
Activating a provider is as
simple as clicking Activate
on the list you see under
Configuration › Payment Providers;
from there you can dive into
its form view to fine‑tune
settings.
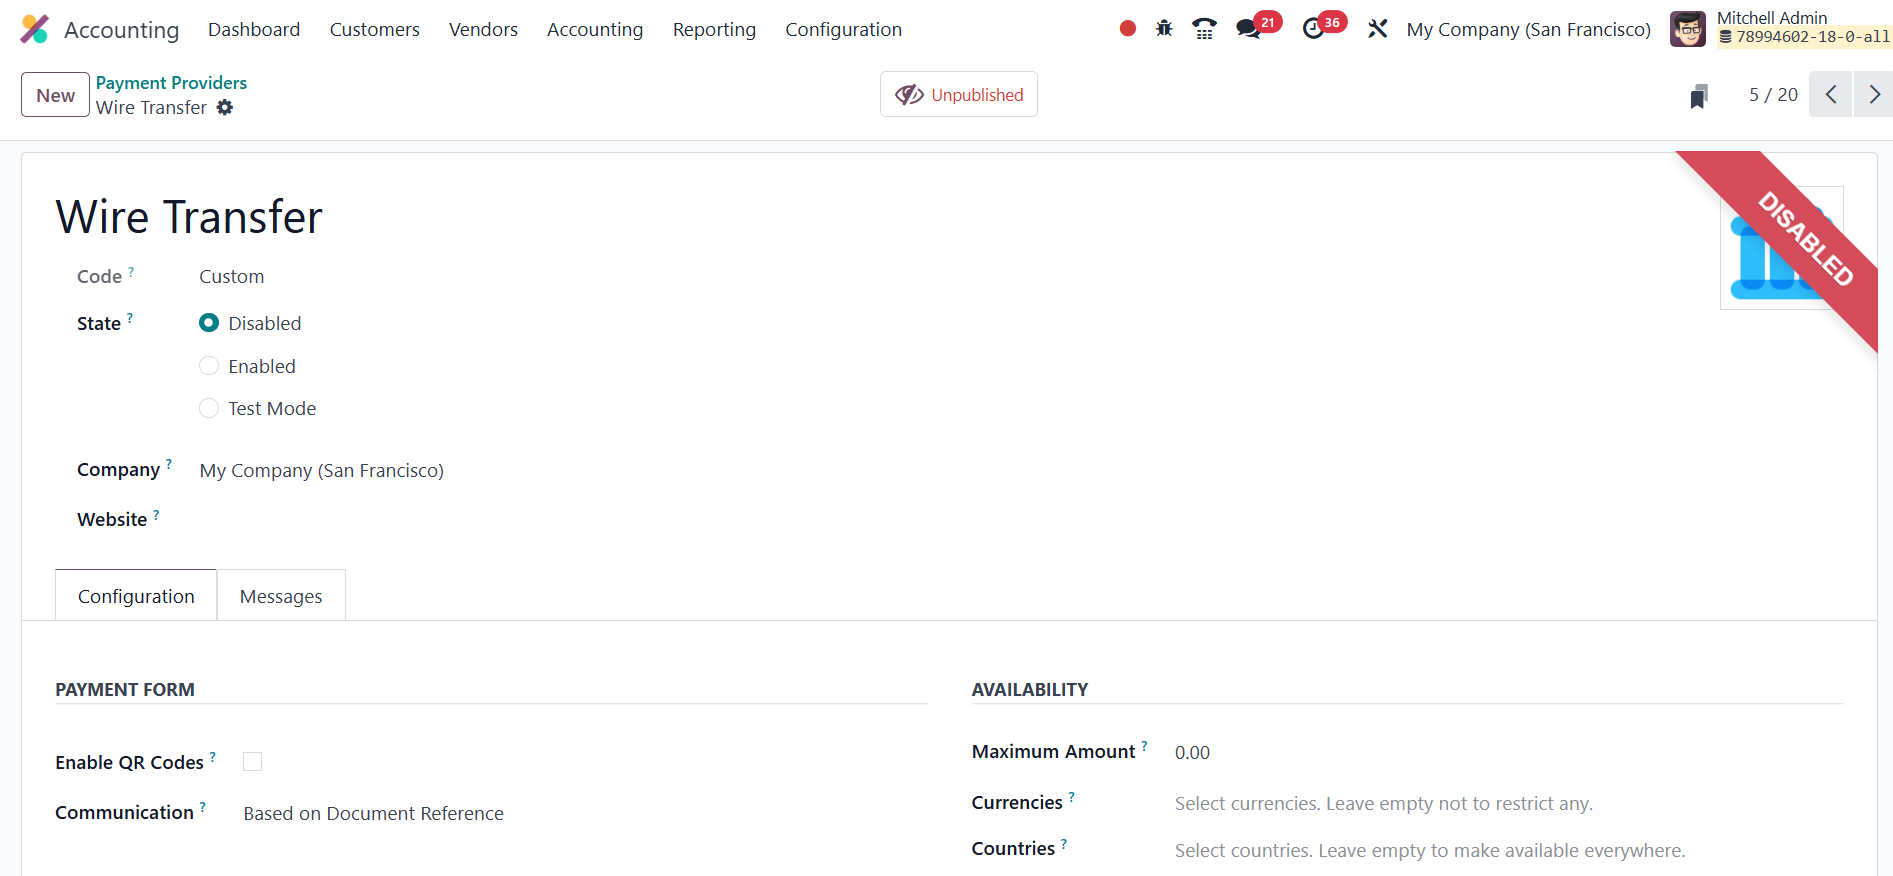
The form begins with the
provider’s Name and its
technical Code. You decide
whether the provider runs in
Disabled, Enabled, or
Test Mode, ideal for dry‑runs
before going live. If you
leave the Company and Website
fields blank, the provider
will be available to every
company and website stored in
your database; otherwise, you
can restrict it precisely.

If you want to accept QR‑code
payments, simply toggle
QR Codes. Use Communication
to define the explanatory
text shown on sales orders
when customers pick this
method, and Maximum Amount to
cap how much can be paid
through it. In Countries,
list any regions where the
provider should be offered,
or leave the field empty to
make it global.
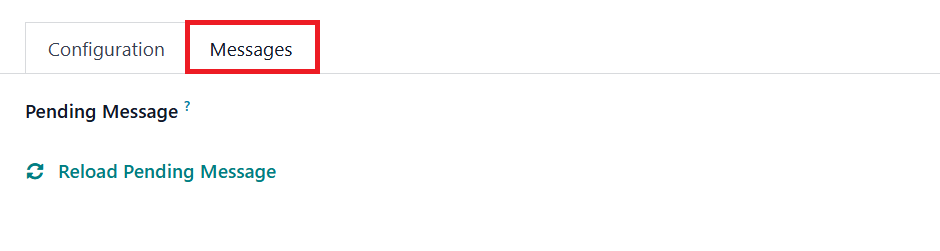
Finally, the Pending Message lets
you craft what customers see
if an order remains pending
after they submit payment,
ensuring clarity at every
step. Because Odoo ships with
built‑in support for
mainstream providers that
work via API, you can even
simulate transactions in
Test Mode without entering
real credentials, perfect for
rehearsing end‑to‑end payment
flows before the stakes are
real.
33.1 Payment Methods
To make online checkouts
crystal‑clear for shoppers,
Odoo 18 lets you define
custom Payment Methods, small
icon sets that act as
instantly recognizable badges
for the gateways your site
accepts (Visa, MasterCard,
PayPal, and so on). You will
find this feature in
Accounting › Configuration › Payment Methods.
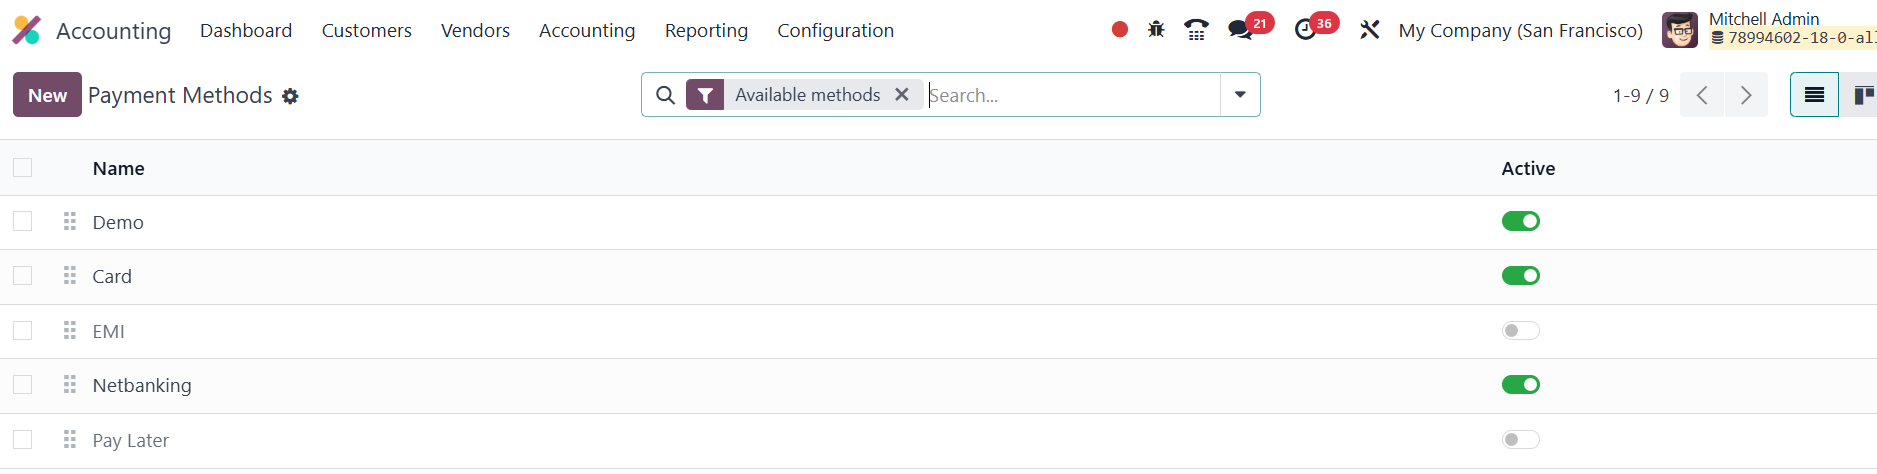
The view opens with a list of
every payment icon already
configured. Click New to
design another.
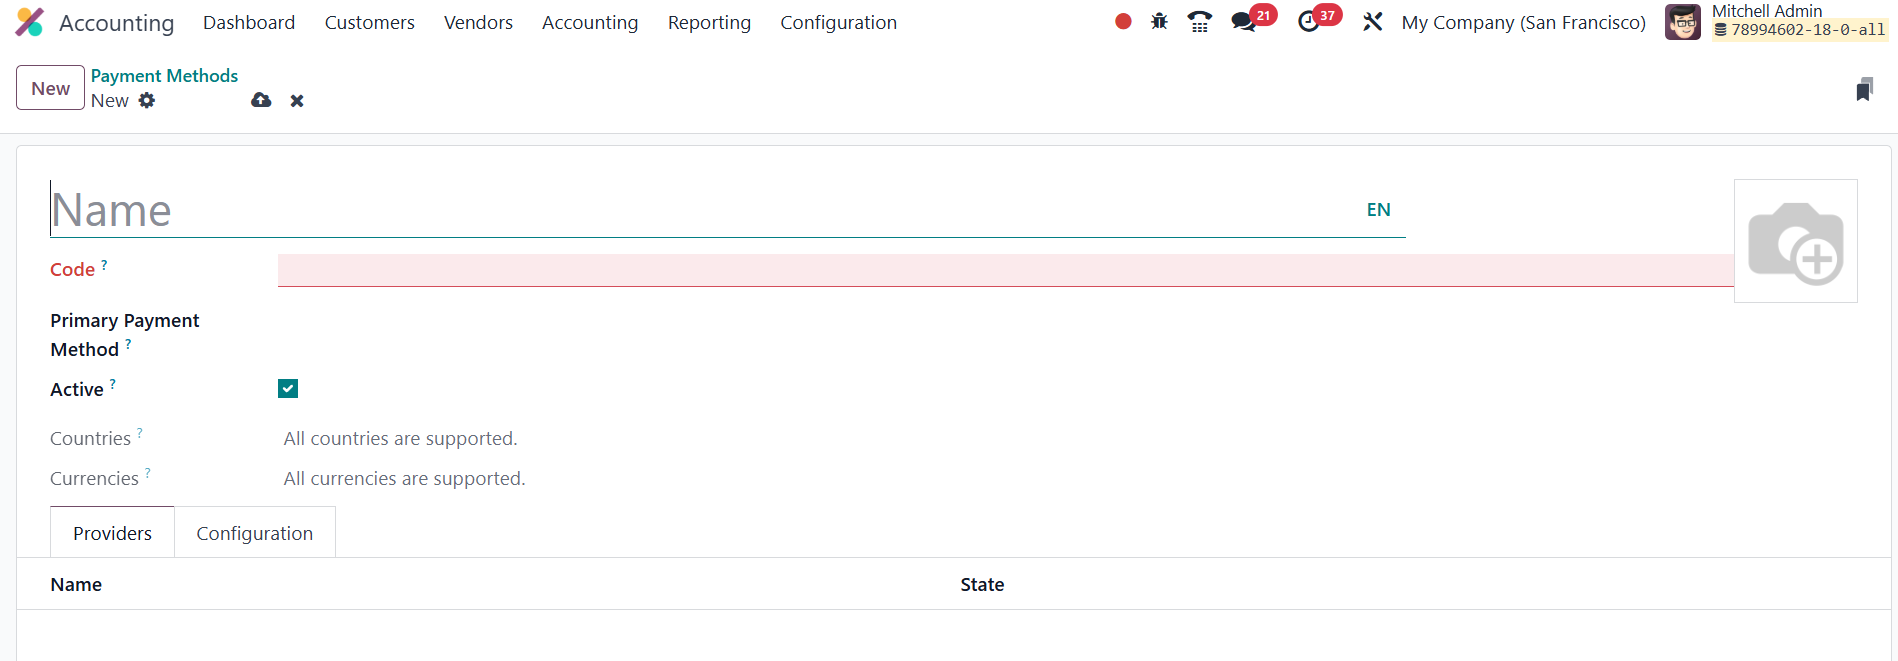
Odoo immediately presents a clean
form: give the method a
descriptive Name, then switch
to the Providers List tab to
link it with one or more
active payment providers.
Mention the Primary Payment
Method in the given space.
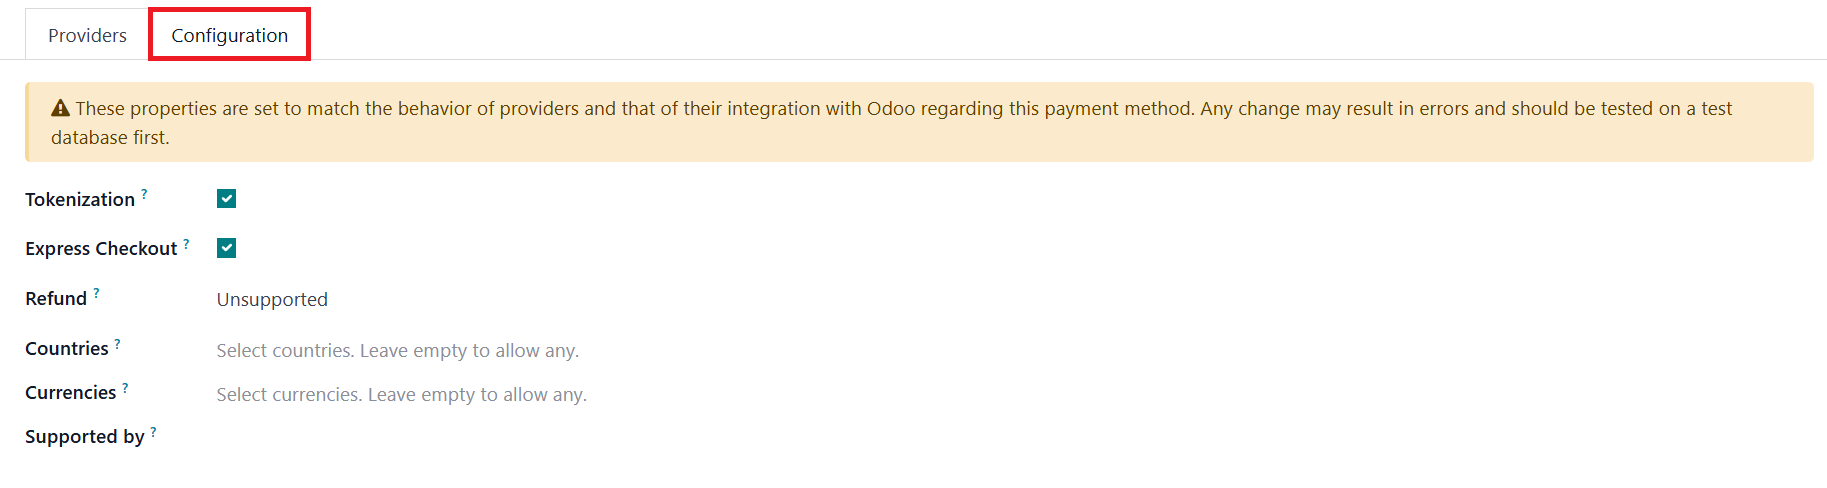
Under the Configuration tab, you
can activate the Tokenization
and Express Checkout fields
if needed. By enabling the
Tokenization, you can create
a payment token the moment a
customer completes a
transaction. The token stores
the card’s credentials
securely with the payment
provider, so on subsequent
purchases Odoo can charge the
card automatically, no need
for the buyer to re‑enter
their details. In the
corresponding fields, mention
Refund,Countries, Currencies,
and Supported By. Repeat the
process to create as many
payment symbols as you need,
ensuring a polished,
transparent checkout
experience.
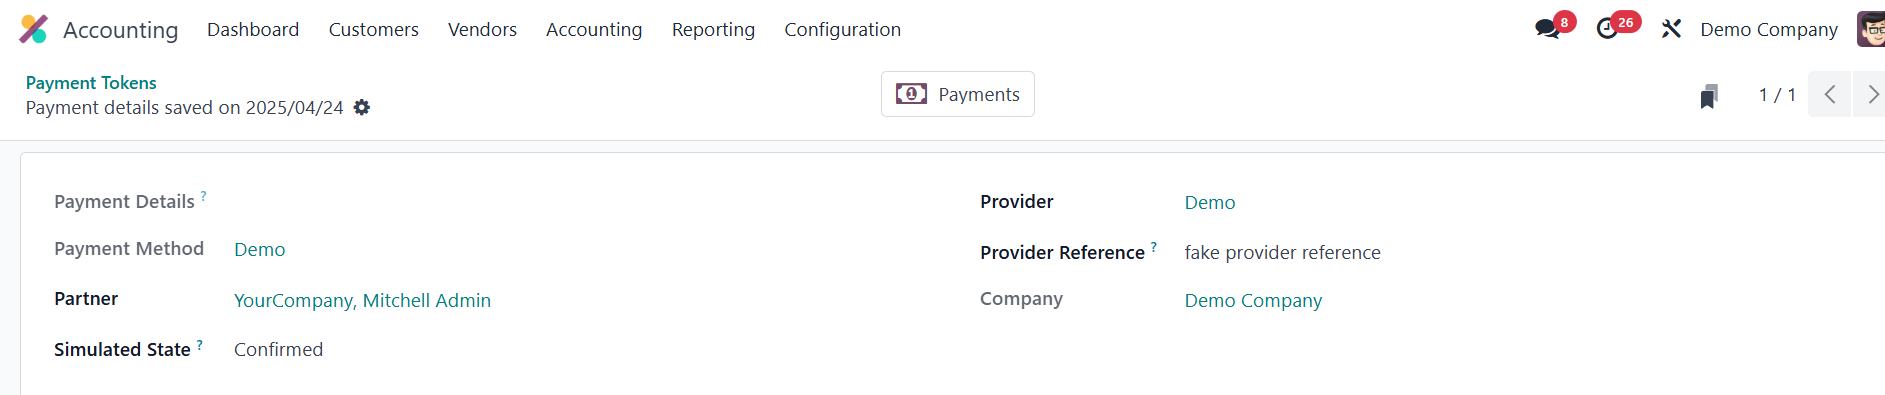
33.2 Payment Tokens
When a shopper checks out on your
Odoo 18 e‑commerce site, they
first pick one of the active
payment providers; Stripe,
PayPal, Adyen, and so on. As
soon as a card‑based method
is chosen, Odoo shows a Save
my payment details checkbox.
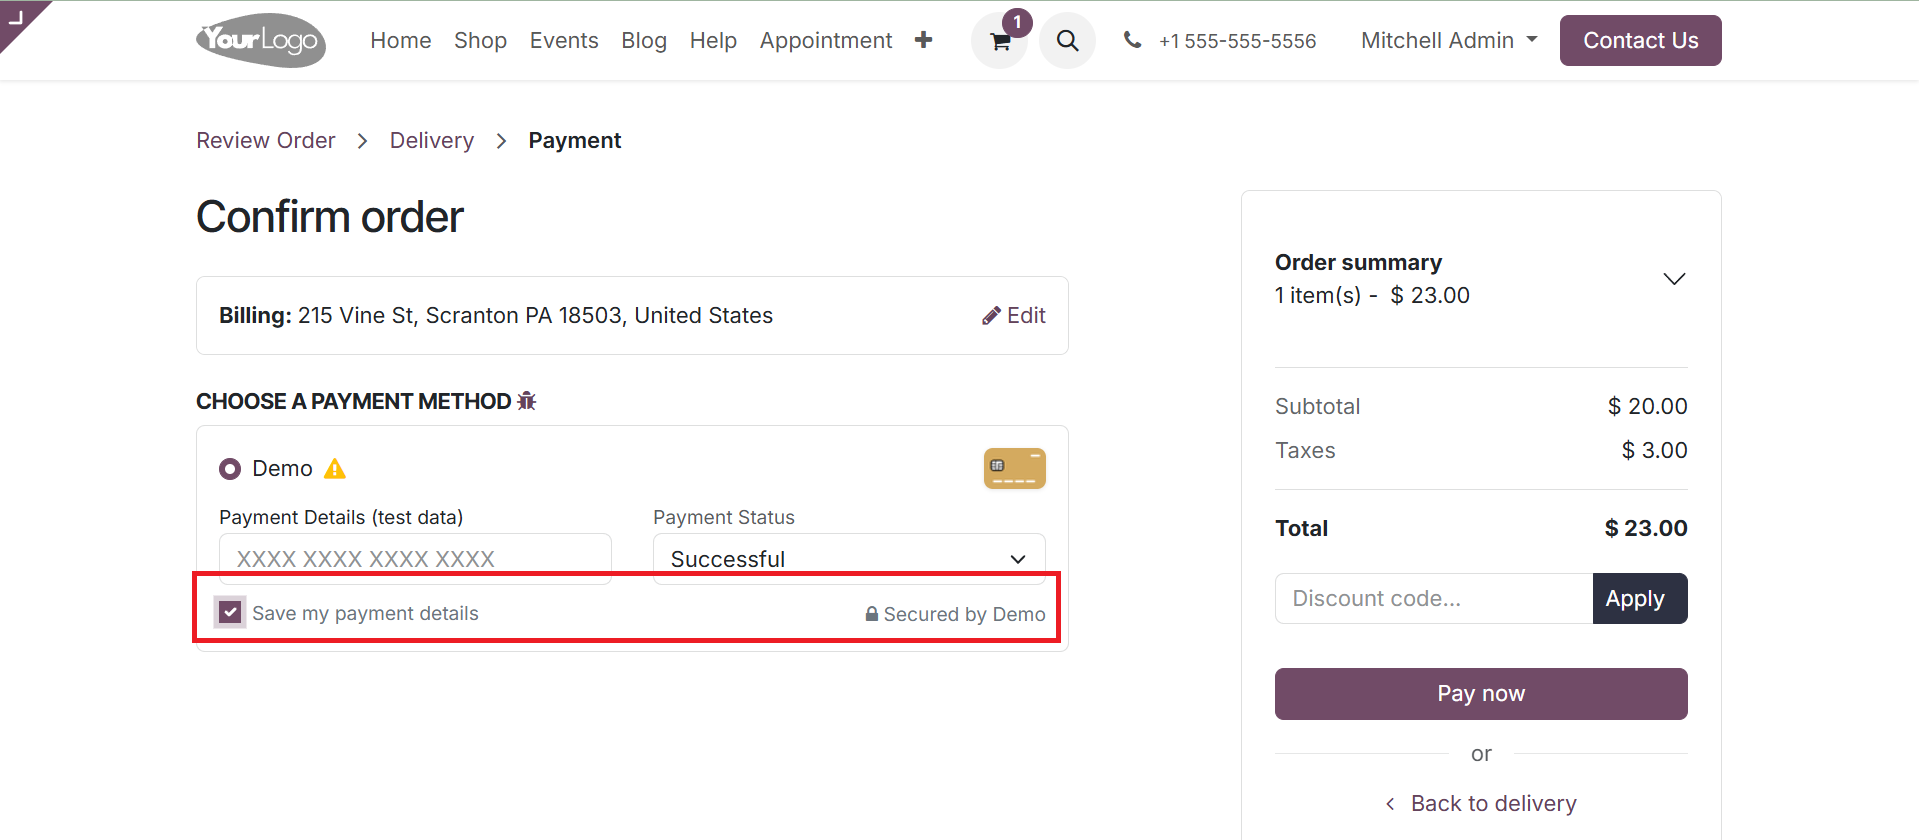
If the customer ticks it, the
provider returns a secure
token that represents the
card; Odoo saves that token
in the
Accounting › Configuration › Payment Tokens
list along with the company,
customer (partner), provider,
and provider reference.

On the customer’s next purchase
the stored token appears as a
one‑click option, letting
Odoo charge the remembered
card automatically.
This streamlined flow is perfect
for subscriptions or any
other recurring‑payment
model, eliminating the need
to re-enter card data and
reducing friction at
checkout.
33.3 Payment Transactions
To review the full history of
online payments, head to the
Accounting module and select
the Configuration menu. You
can find
the Payment Transactions
here.

This log aggregates every charge
processed through your active
gateways and presents key
details at a glance: the
internal Reference for each
transaction, Created on date,
Provider,
Customer/Partner Name,
Amount, the current Status
(authorized, posted, failed,
etc.), and the Company that
booked the sale. Having all
gateways reflected in one
list makes audits,
reconciliations, and customer
inquiries far quicker to
handle.