Based on the presence of clients and employees in the company, you
can easily set up online appointments using the Calendar module of
Odoo18 ERP. After installing the Odoo18 Appointment module, which is
available through the Odoo18 Software's app store, you can easily
manage and handle the appointments. Their role helps you reduce the
risks when you meet with coworkers and other people.
1. Appointments
The option is located on the home page of the Calendar module. The
page contains specific information, as shown below.
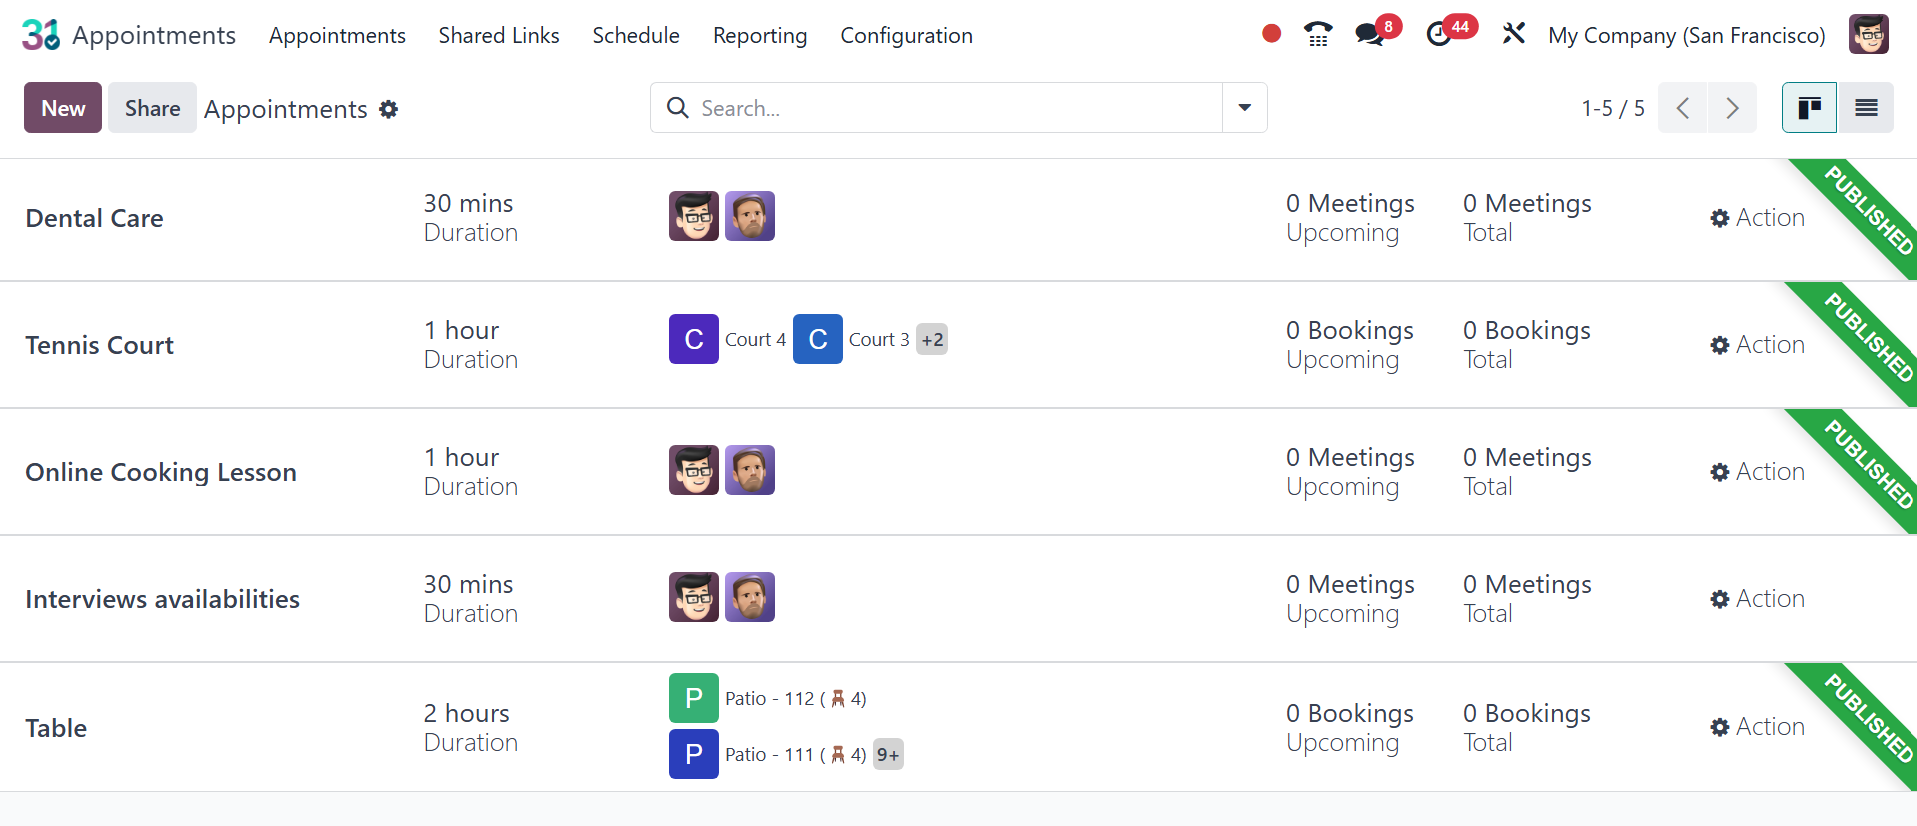
As shown in the screenshot above, a list of previously made online
appointments will be shown to you. There, you can have options like
appointment title, duration, user, scheduling window, and action.
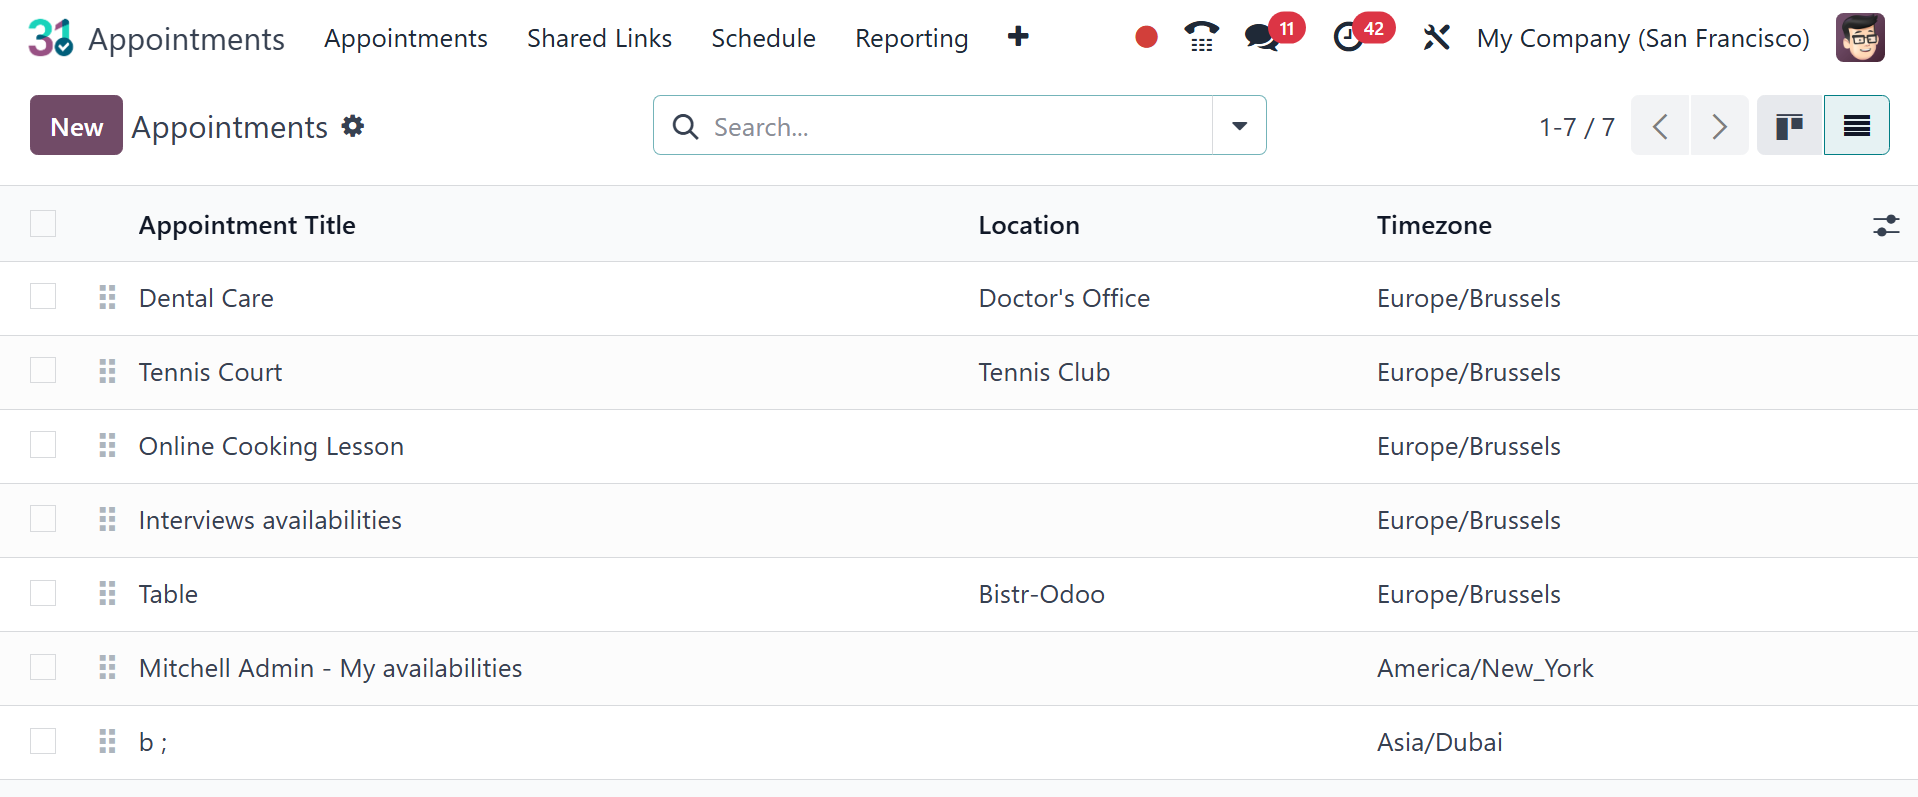
You can view the page in list view as well.
Just click the New button, as seen in the above image, to make a
comparable appointment.
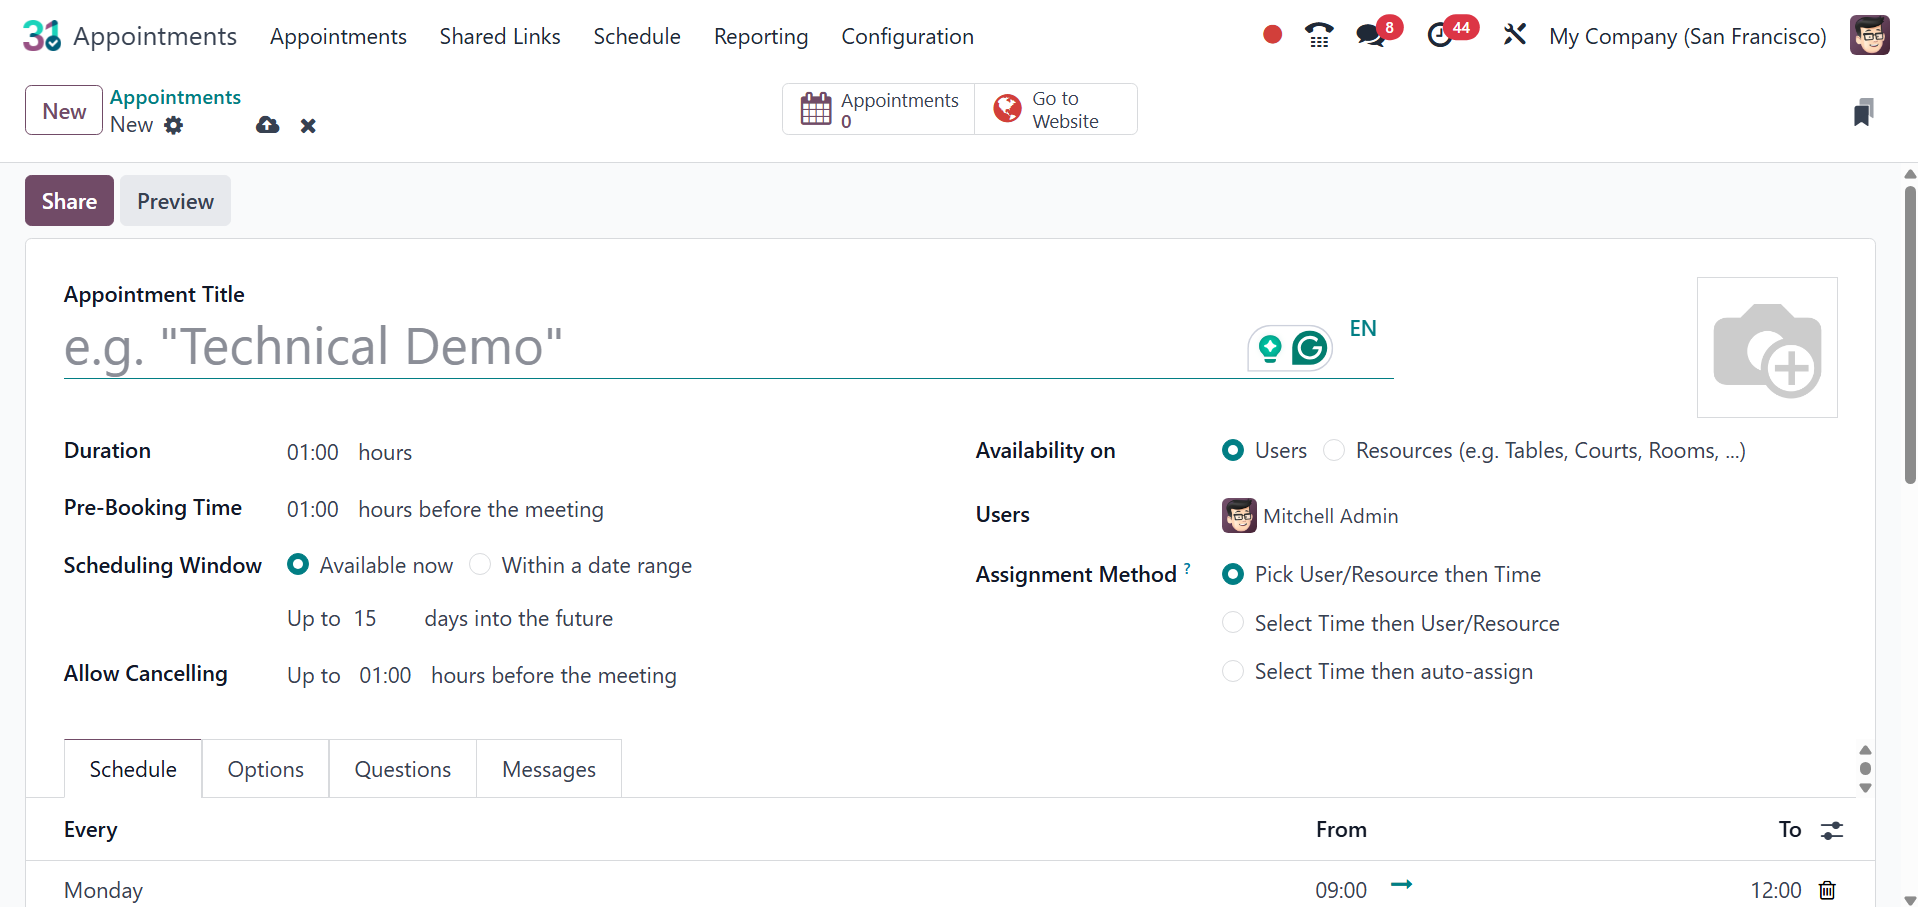
The creation page has an area where you may provide specific details
regarding setting up online appointments. The name of the
appointment must be entered under the Appointment Title option. You
can set the duration of the meeting using the Duration option.
Depending on how long the appointment takes, you can set up the
meeting in the assigned location. You can provide a scheduling
window as available now within a date range. You can also allow
canceling prior to particular hours before the meeting. You can also
select the allow canceling option if you must cancel the appointment
within the given period. Users can either leave the front-end
display blank or show their own photos. You have the option of
availability with users and resources. You can mention the users and
assignment method as “Pick User/Resource, then Time”, “Select Time,
then User/Resource” and “Select Time, then auto-assign”.
- Pick User/Resource, then Time: customers select from a list of
available users/resources, then select an open time slot.
- Select Time then User/Resource: customers choose a date and
time, then select from the list of available users/resources.
- Select Time, then auto-assign: customers select a time slot and
are automatically assigned a user/resource.
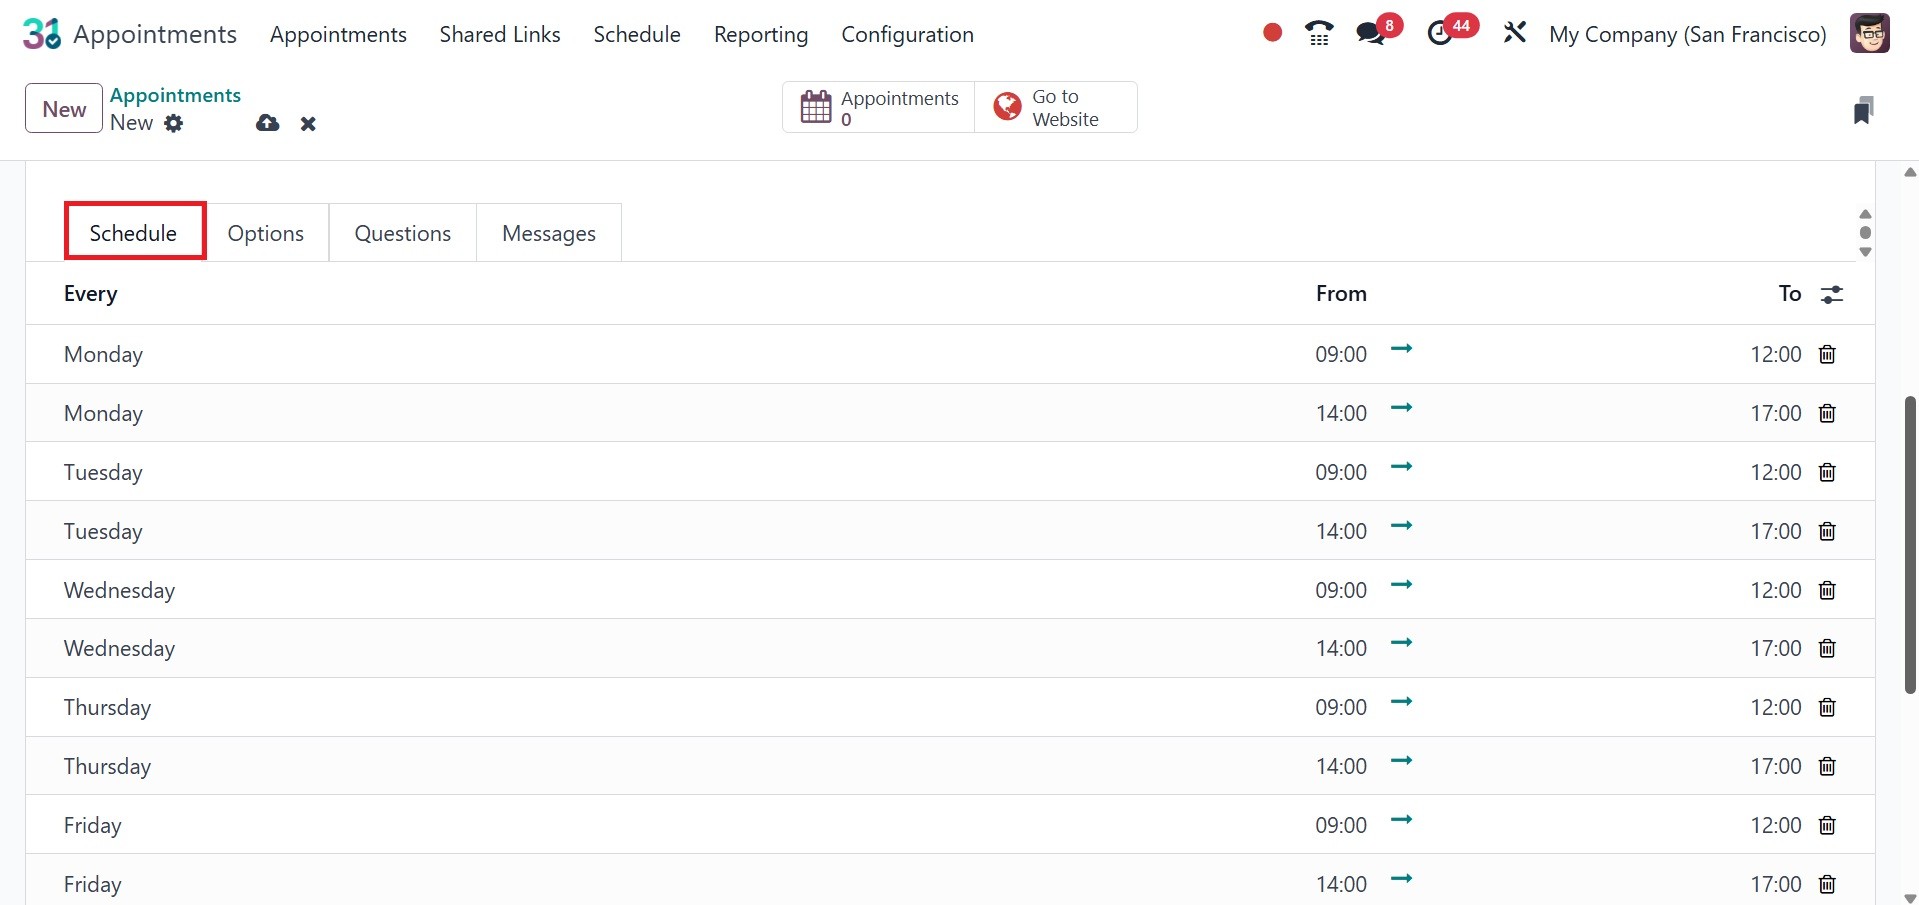
You can indicate which days of the week the appointment is available
by using the ‘Add a Line’ option located under the Schedule Tab.
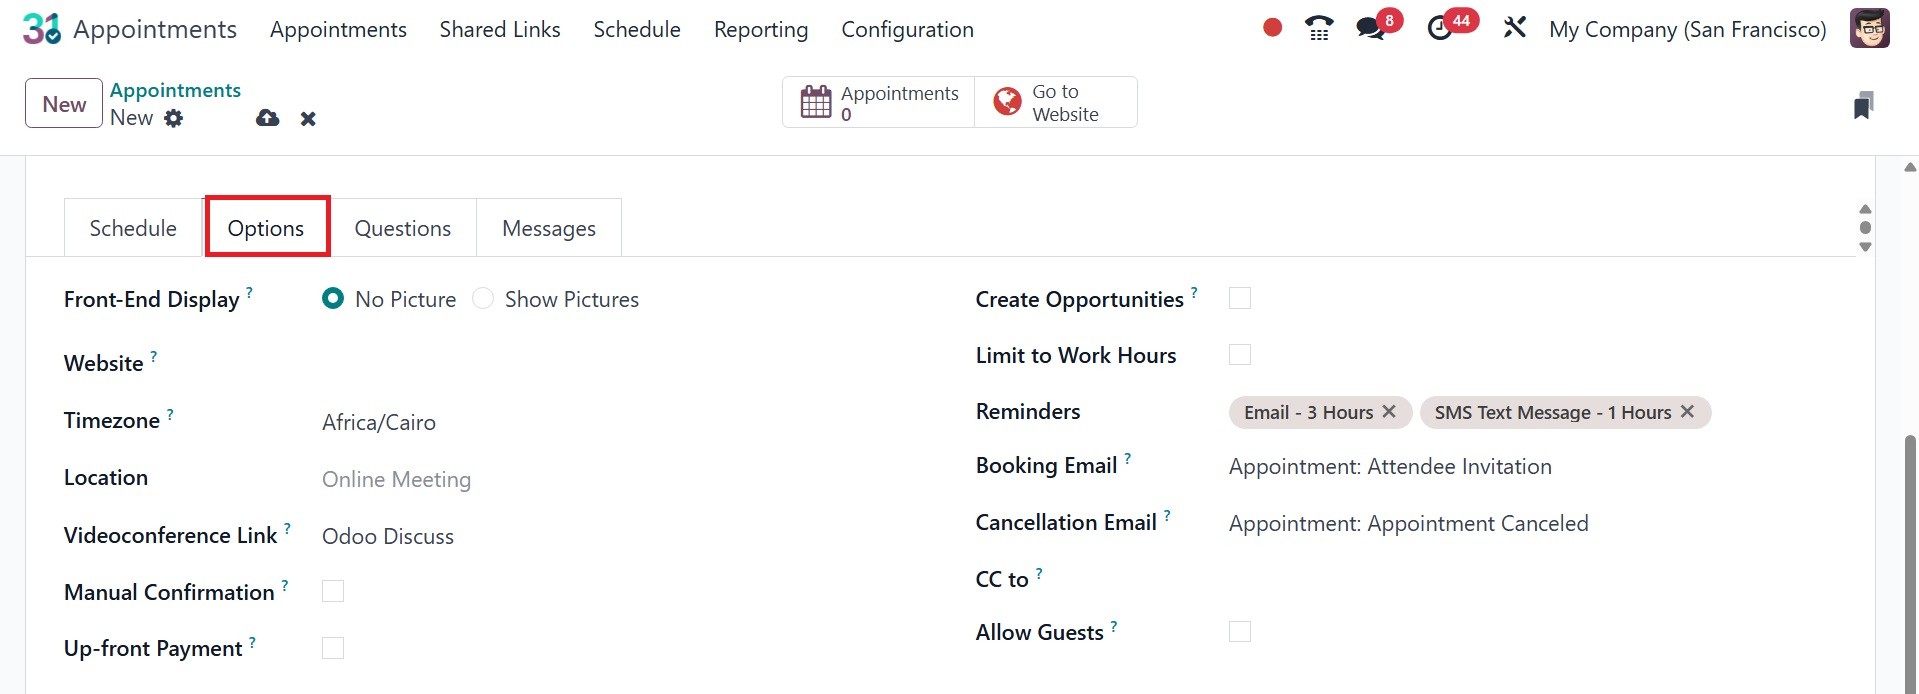
In the appropriate places under the Options Tab, the Front-End
Display field controls how clients see the appointment on the
website. To post the user's or the resources' default images for
this appointment on the website, use the Show Pictures radio button.
Depending on the resource's location, the Timezone and Location
fields for resource appointments automatically fill up. The location
parameter for user-based appointments automatically generates a
videoconference link and defaults to an online meeting.
Choose a different option in the Location area if this meeting
shouldn't be conducted online.
To demand approval prior to a meeting being approved, tick the Manual
Confirmation checkbox. The appointment time slot is still regarded
as reserved if this functionality is enabled until it is accepted or
denied. If you want to accept meetings made from this appointment
automatically, leave this checkbox empty.
For every planned appointment, the Create Opportunities function
assigns a lead or opportunity to the appropriate person and adds it
to the CRM software. To make this option available, click the Create
Opportunities checkbox.
Customers can specify how they want to be contacted prior to their
appointment time in the Reminders section. Choose one or more
options from the drop-down menu according to the time frame and the
communication mode.
When clients register for an appointment, they can add more visitors
by checking the Allow visitors checkbox. Then you have the options
like CC to, booking email, and cancellation email as well. The
up-front payment option allows you to pay the booking fees. You can
make use of the configure payment providers options, which appear on
activating the up-front payment option.
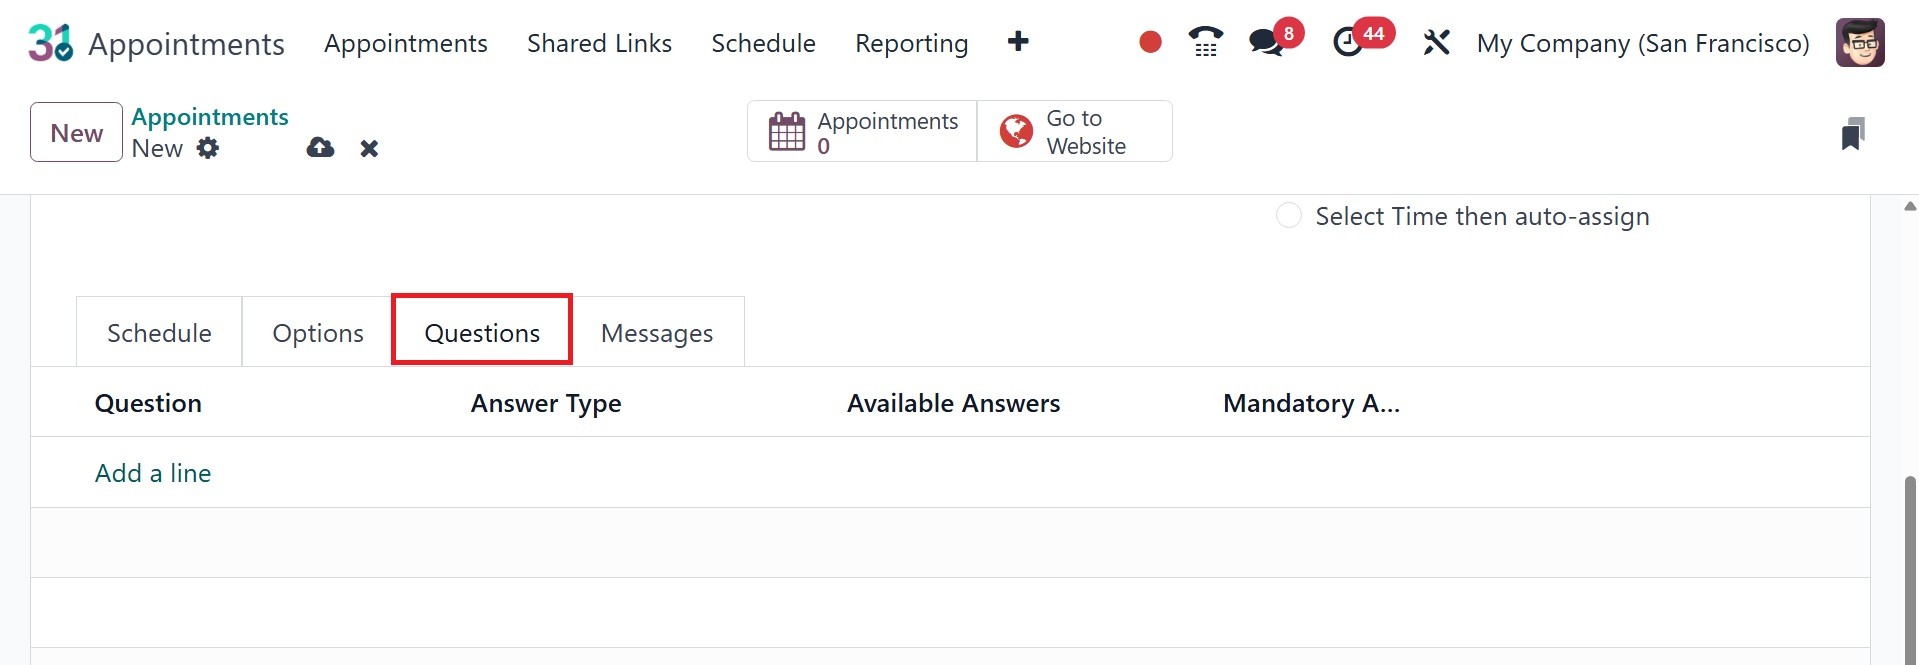
As shown in the above image, you will see the Questions Tab, where
you can enter questions regarding the next visit. To add the
questions, you can choose the Add a Line option, which will open a
new page as seen below.
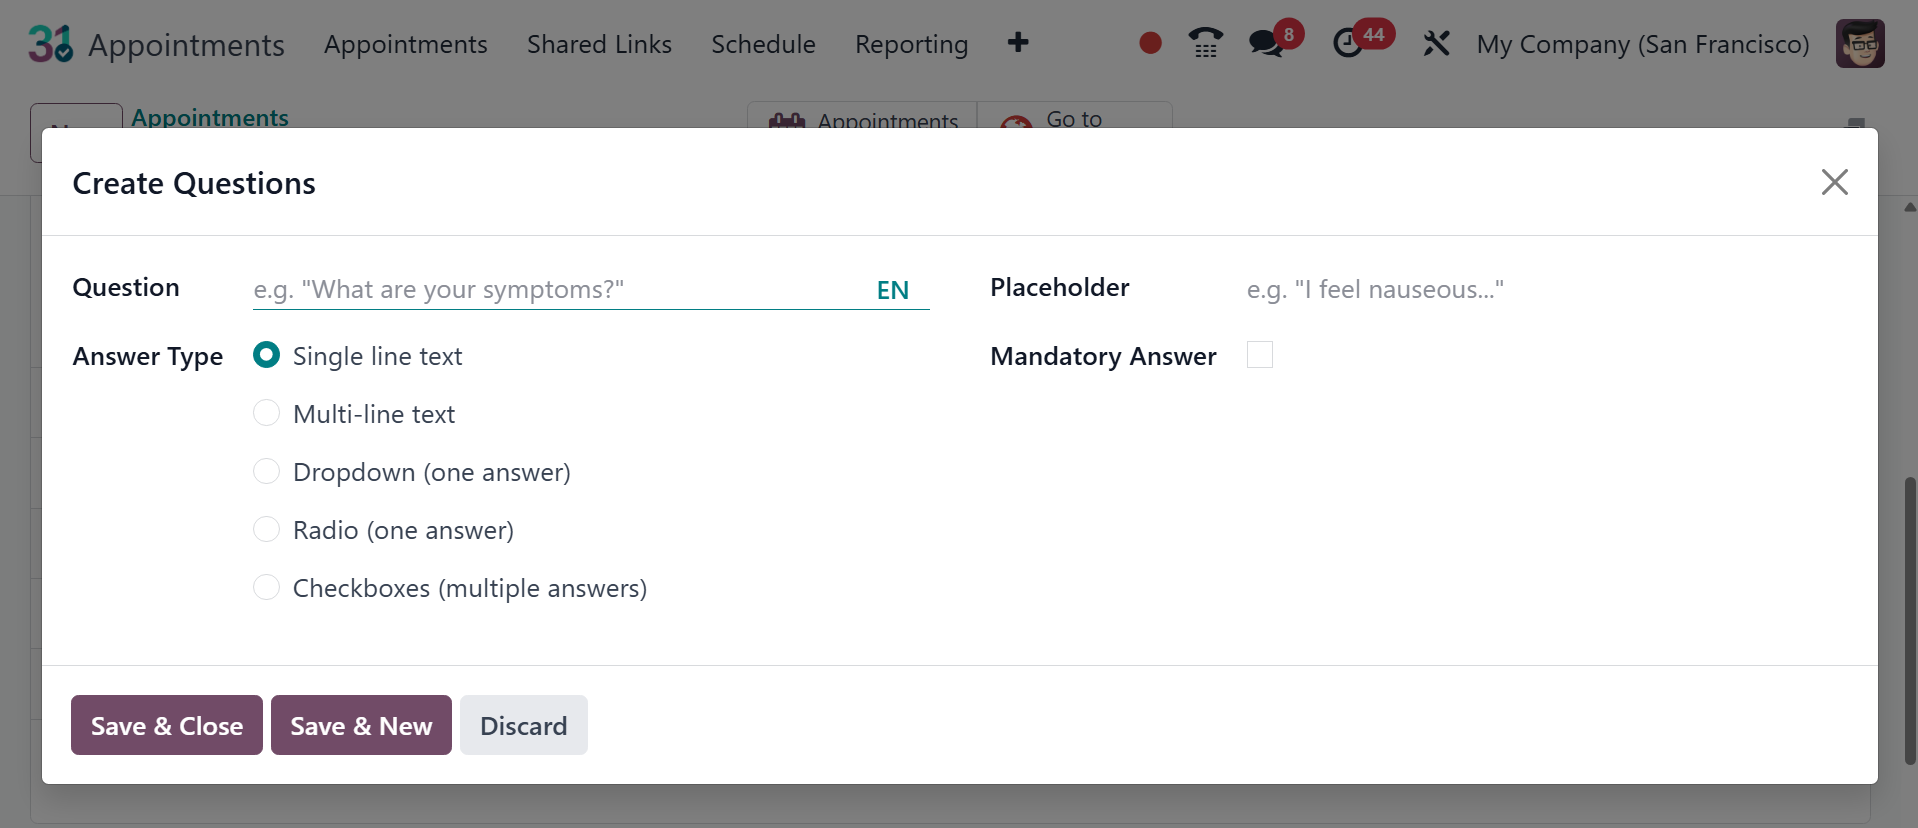
On the question creation page, you can mention the questions in the
space provided. The question type can be adjusted to radio,
dropdown, checkboxes, single-line text, or multi-line text. You can
choose the required answer choice and respond to the question if it
calls for one.
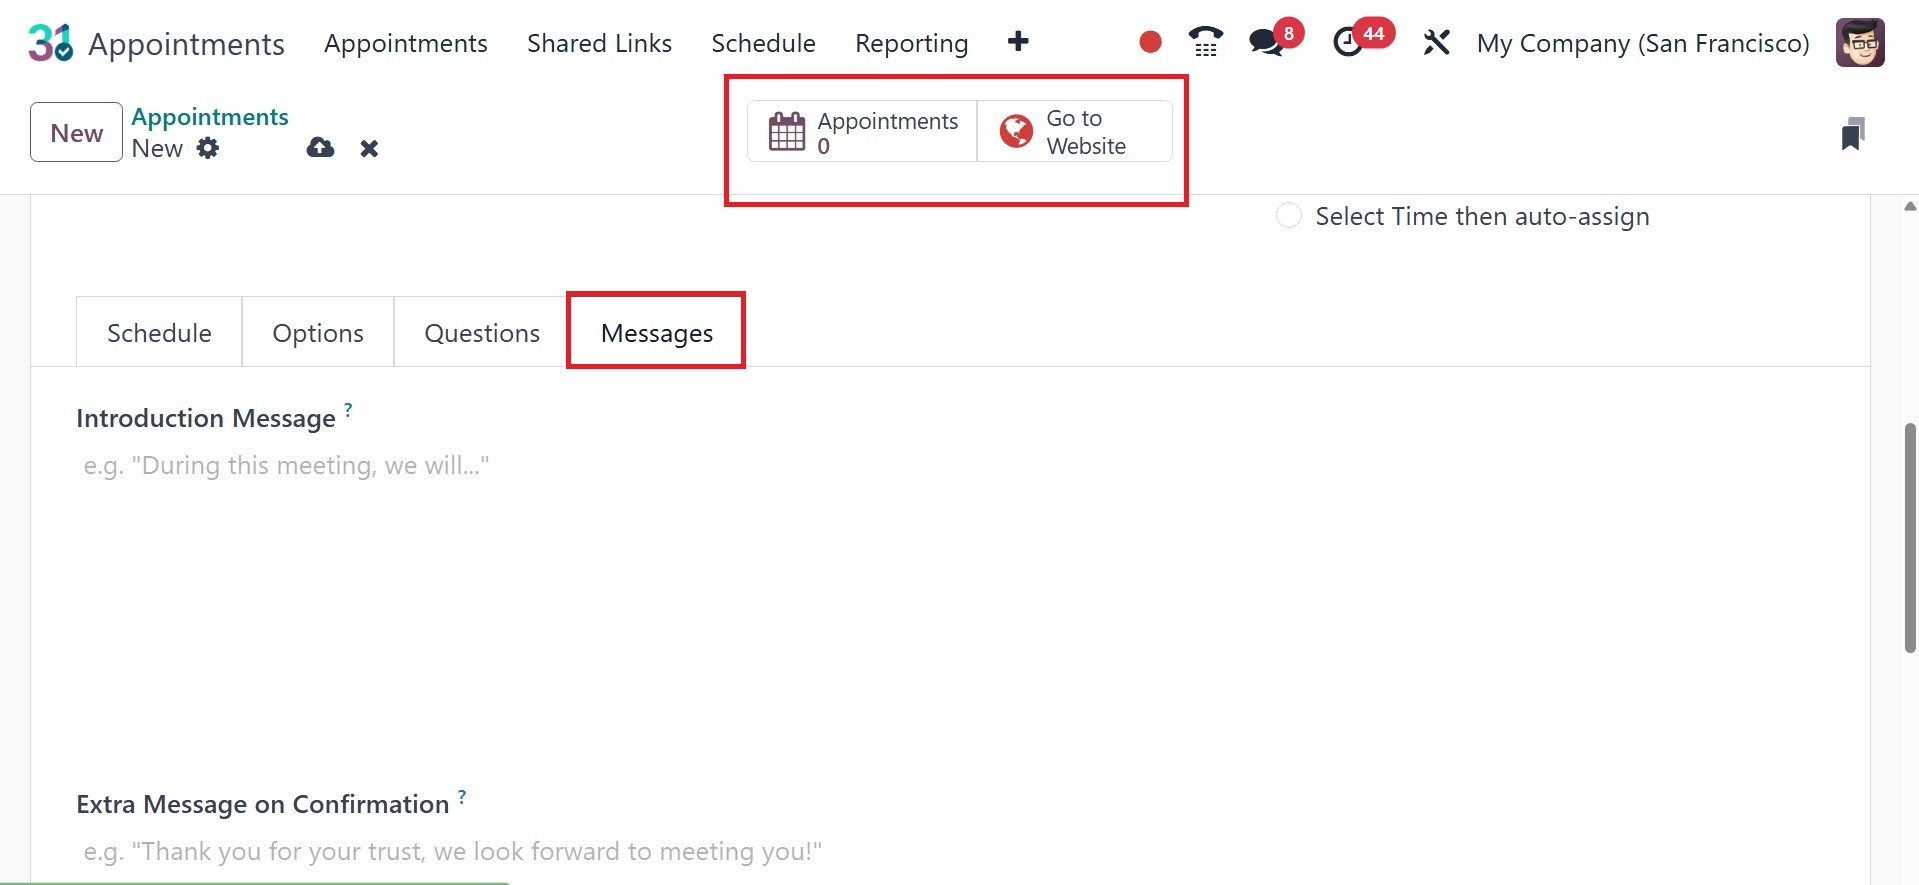
The following tab on the online appointment creation page is now the
Messages Tab. This option allows you to confirm the appointment you
have set up and include an introduction. The Save icon can be chosen
once the creation process is complete.
If you want this appointment to be put on the website, just click the
Go To Website option, as seen in the image below.
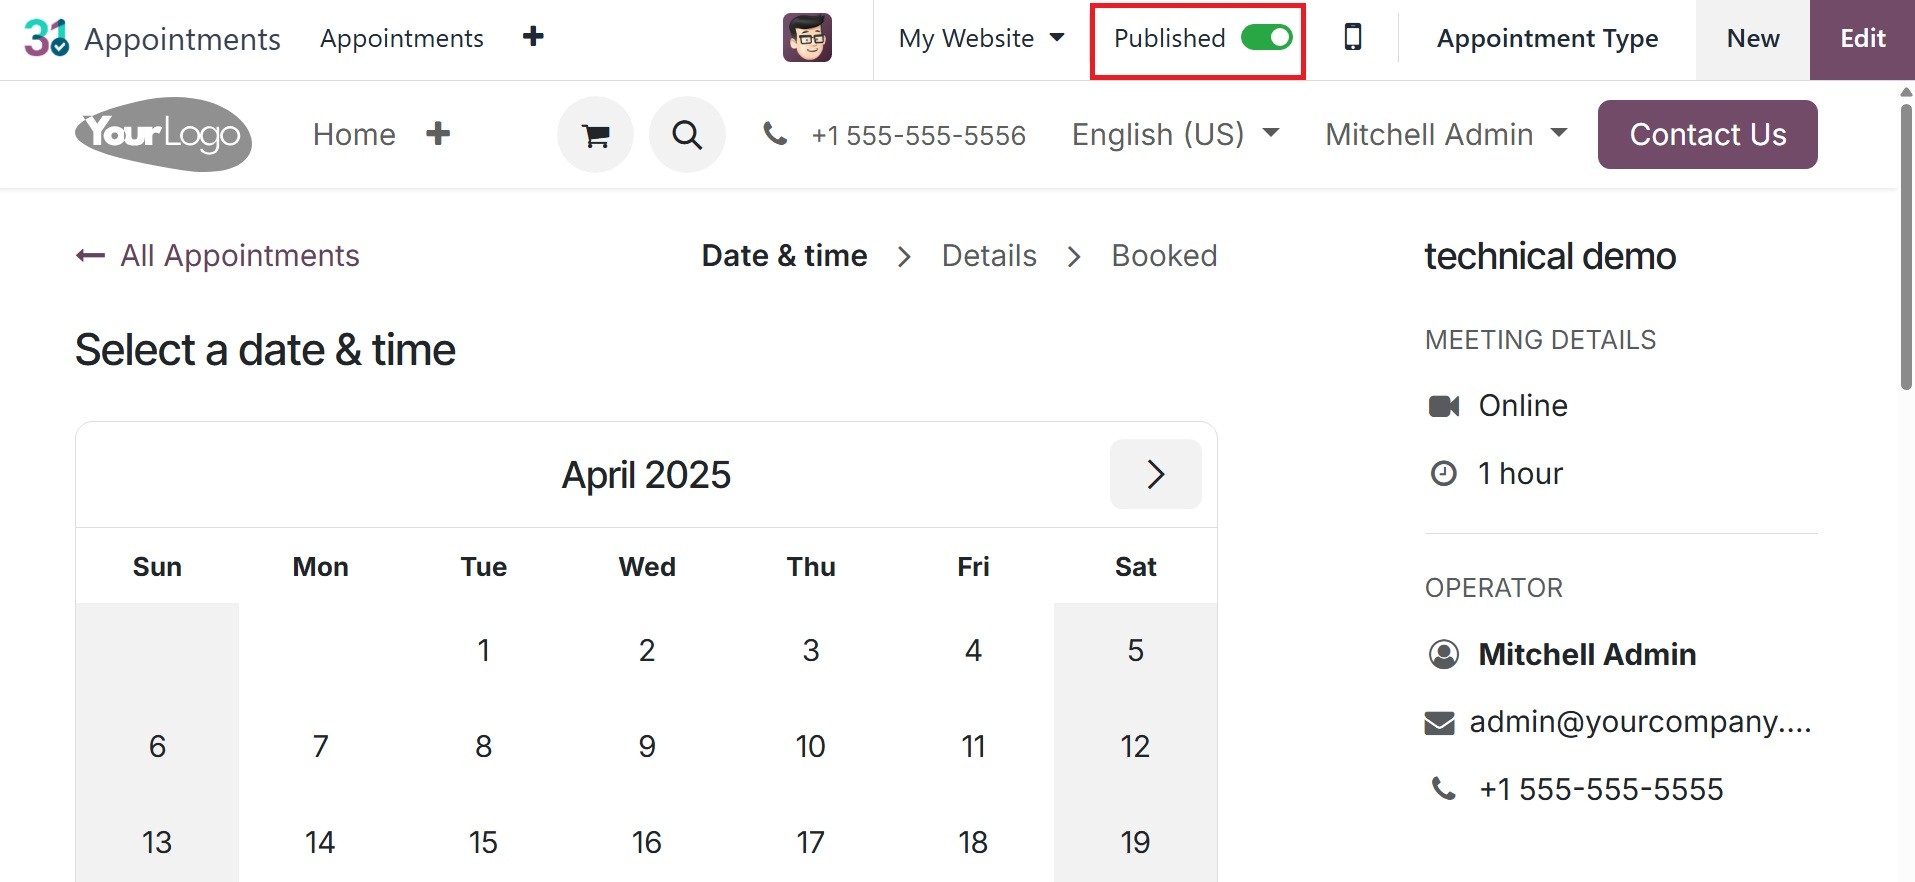
The location where you can make the page's unpublished status appear
to be published is illustrated in the image below.
Following the publication of the online appointments, you will have
the opportunity to share.

Using the share option, you may provide other business members with
the URL to the online appointment you made.
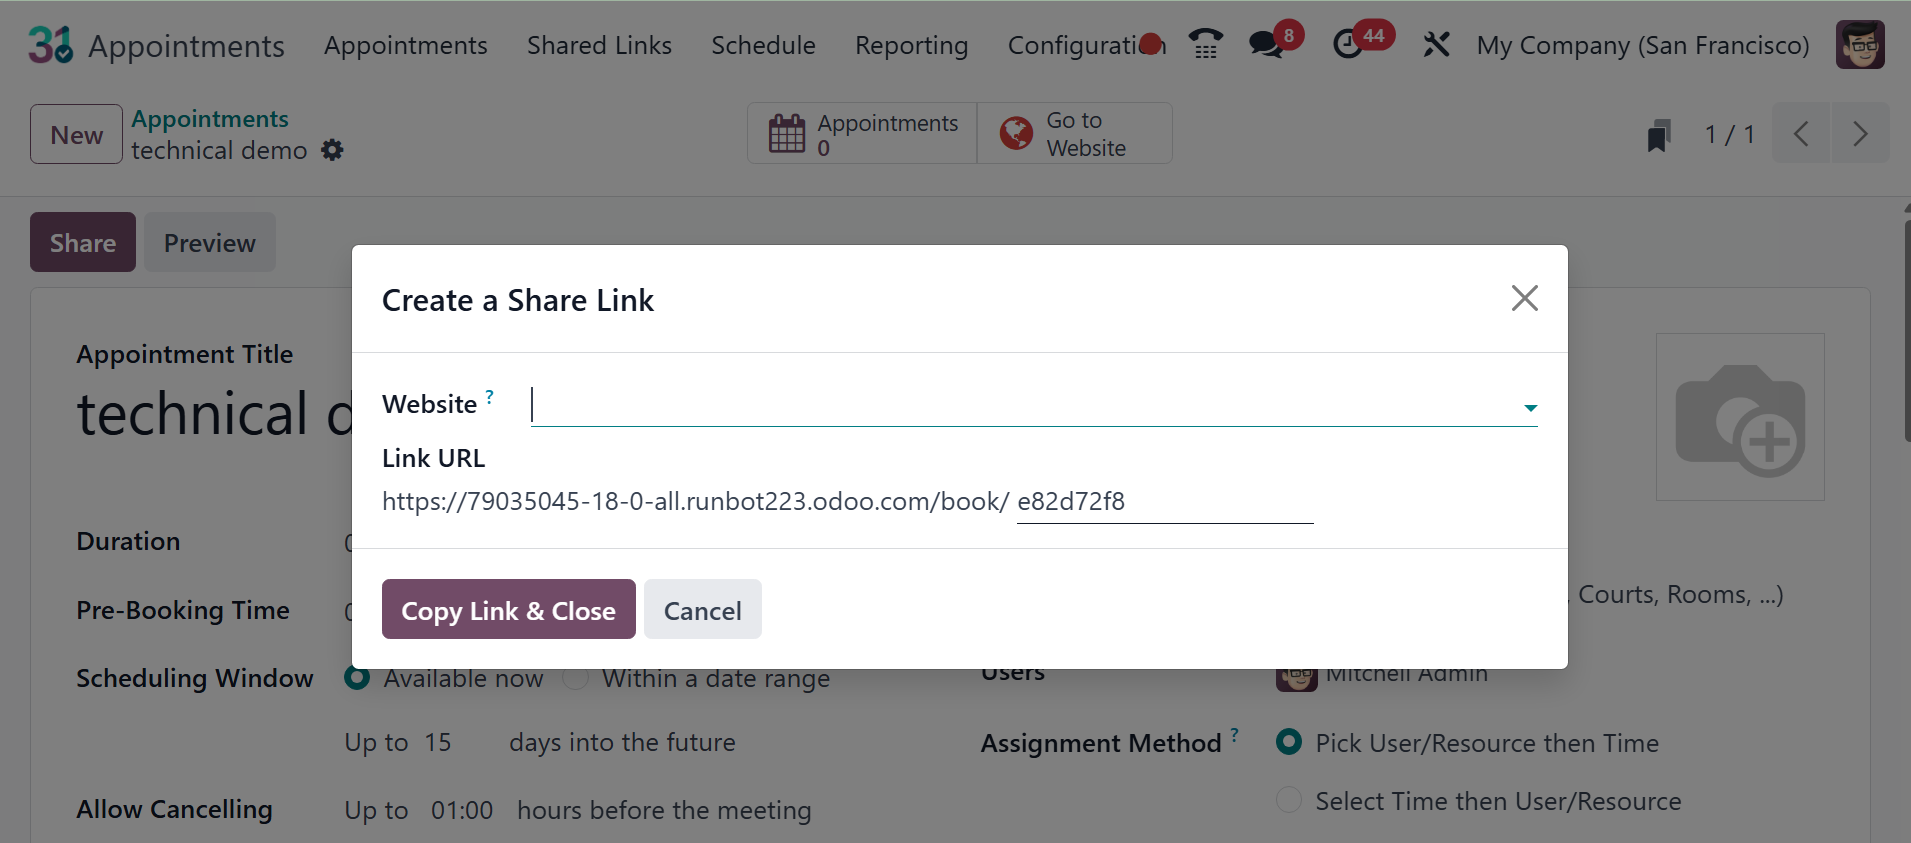
Like the image, the provided URL can be copied and shared with
others.