1. Appraisal
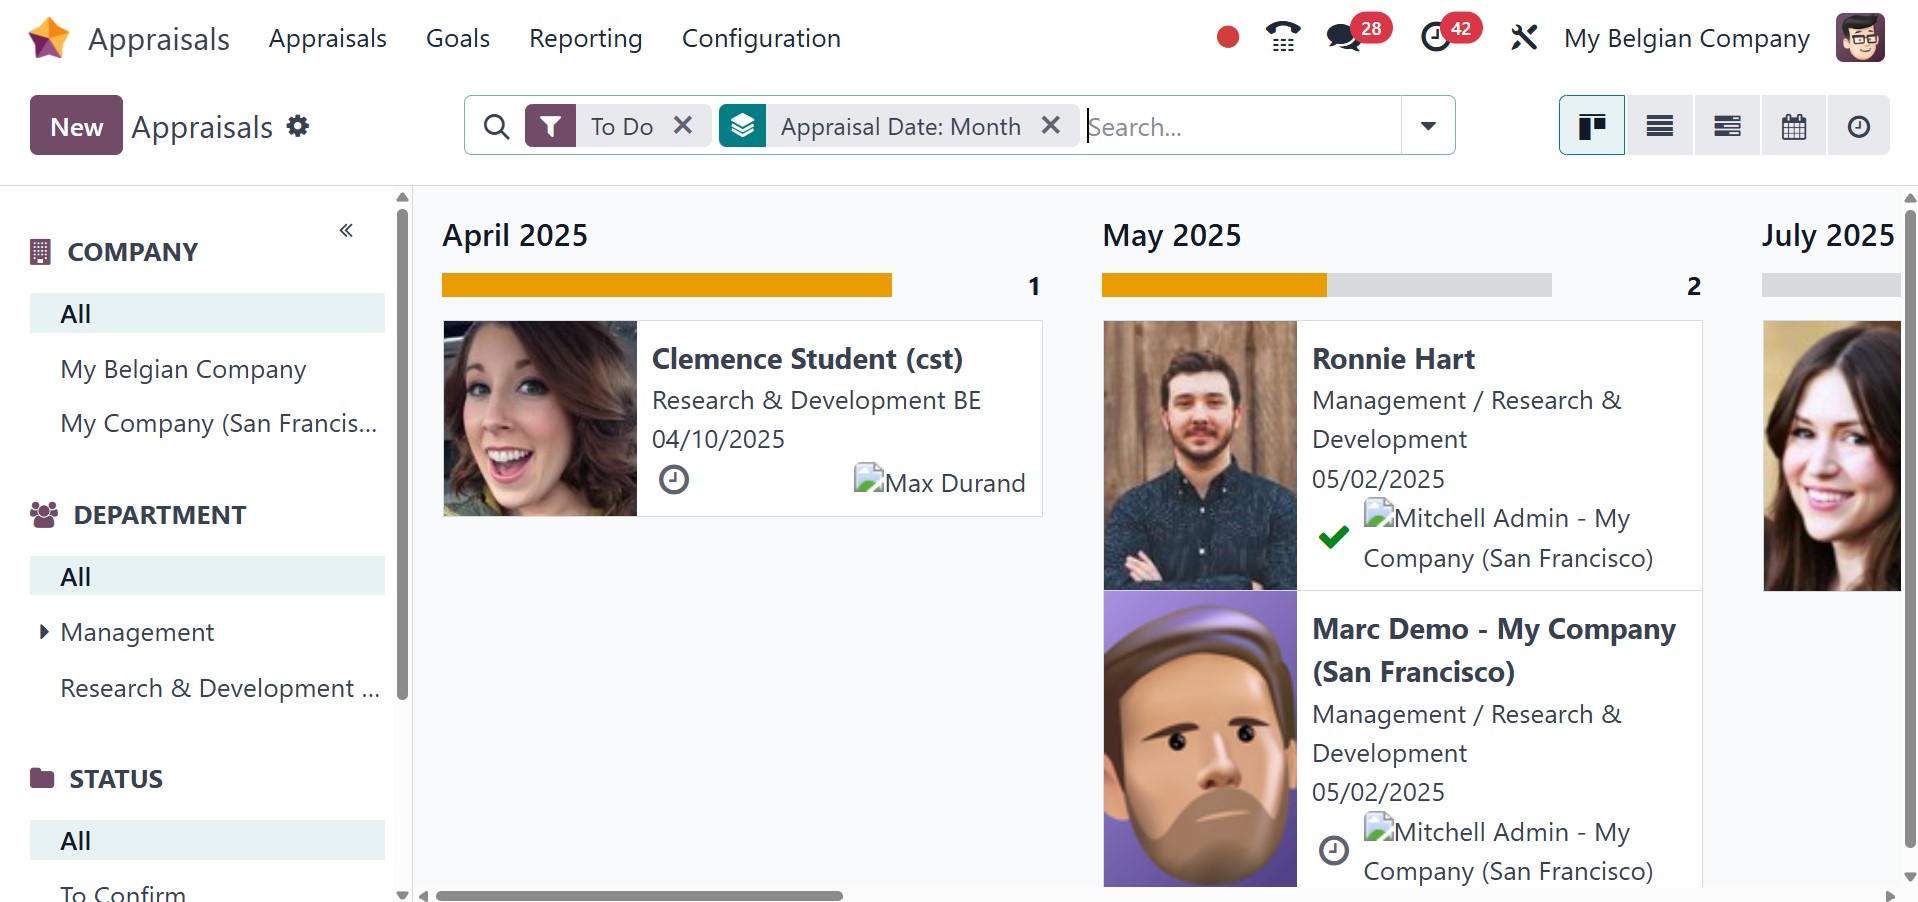
The Kanban view of the appraisal window displays each employee's profile, including dates, names, and departments. On the left side of the screen, you can sort appraisals by COMPANY, STATUS, and DEPARTMENT.
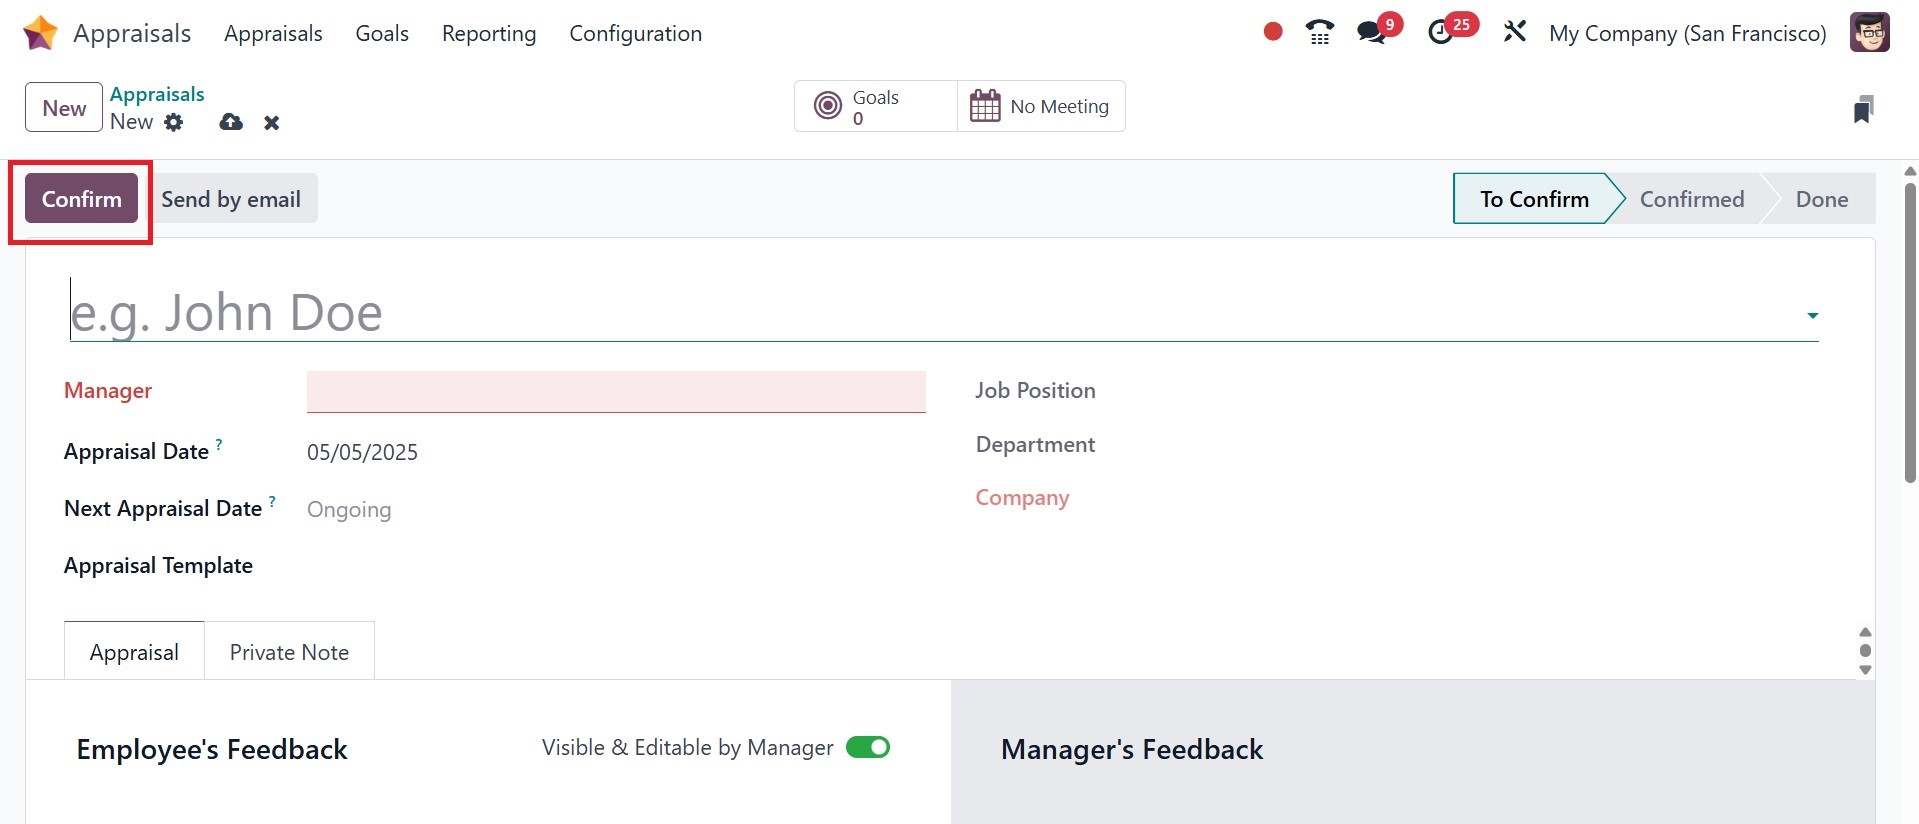
By choosing the New icon, we may generate a completely new employee appraisal.
In the window that now appears, enter the name and manager of the chosen employee. The appraisal date can also be set by users within the Appraisals panel. You have the next appraisal date and appraisal template to add in the allotted spaces. There are job positions, departments, and company spaces as well. After adding the employee, the rest of the configuration page will be automatically filled on the basis of the info collected from the selected employee.
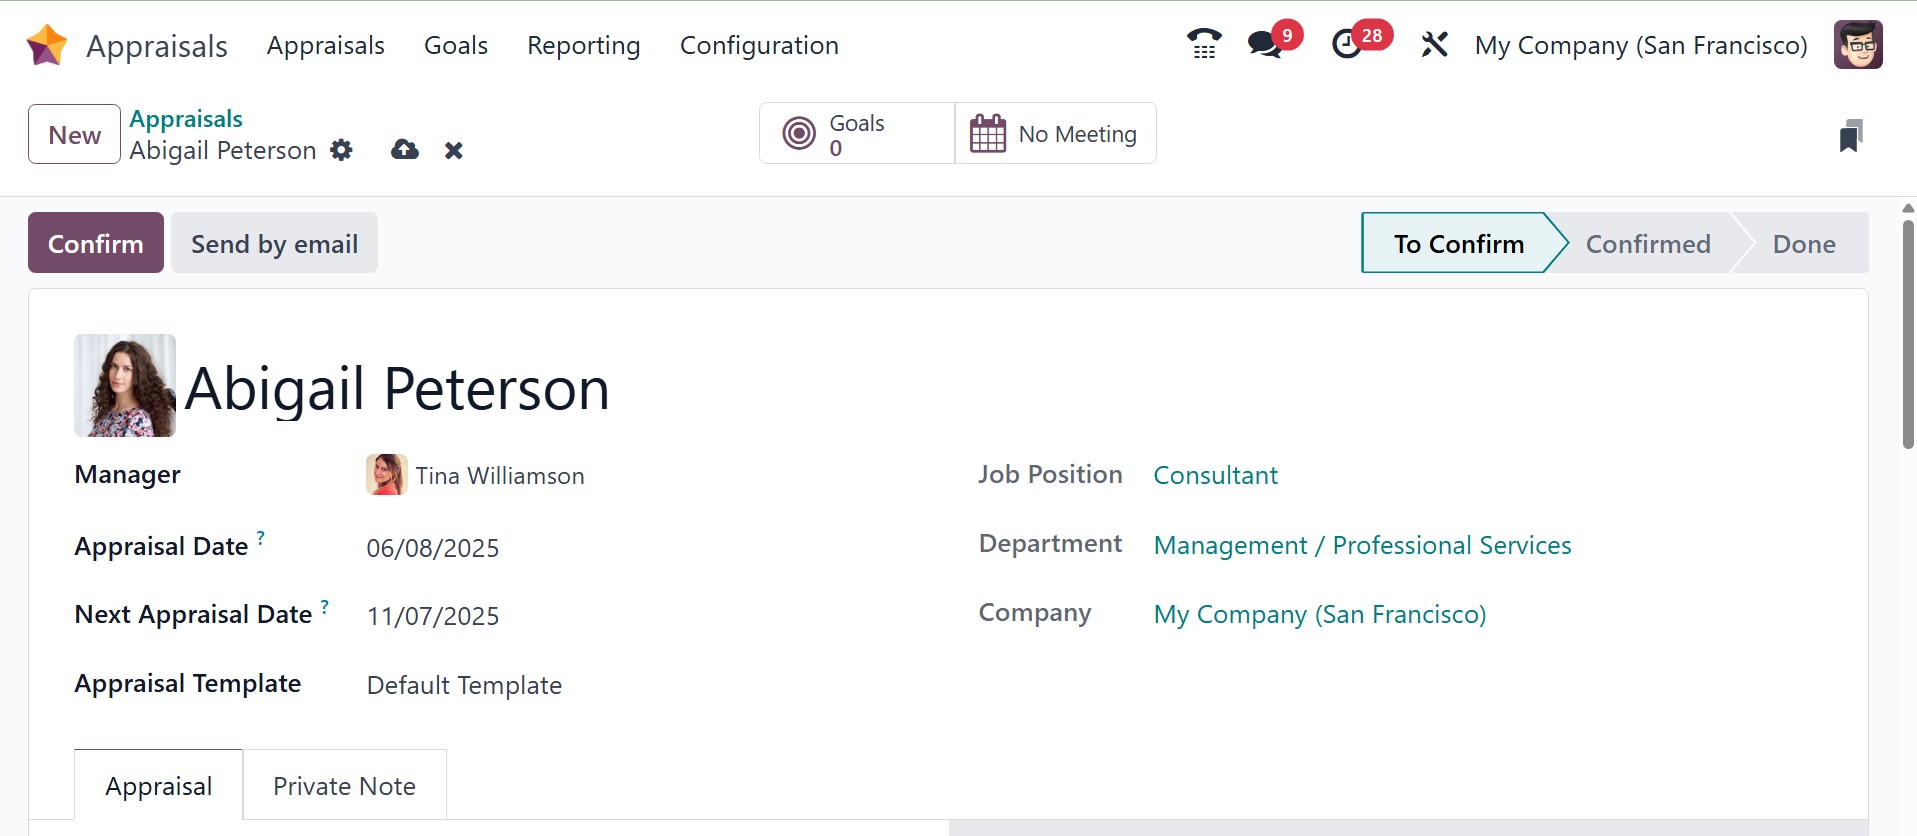
Information about the company and the evaluation department is displayed right away in the window.
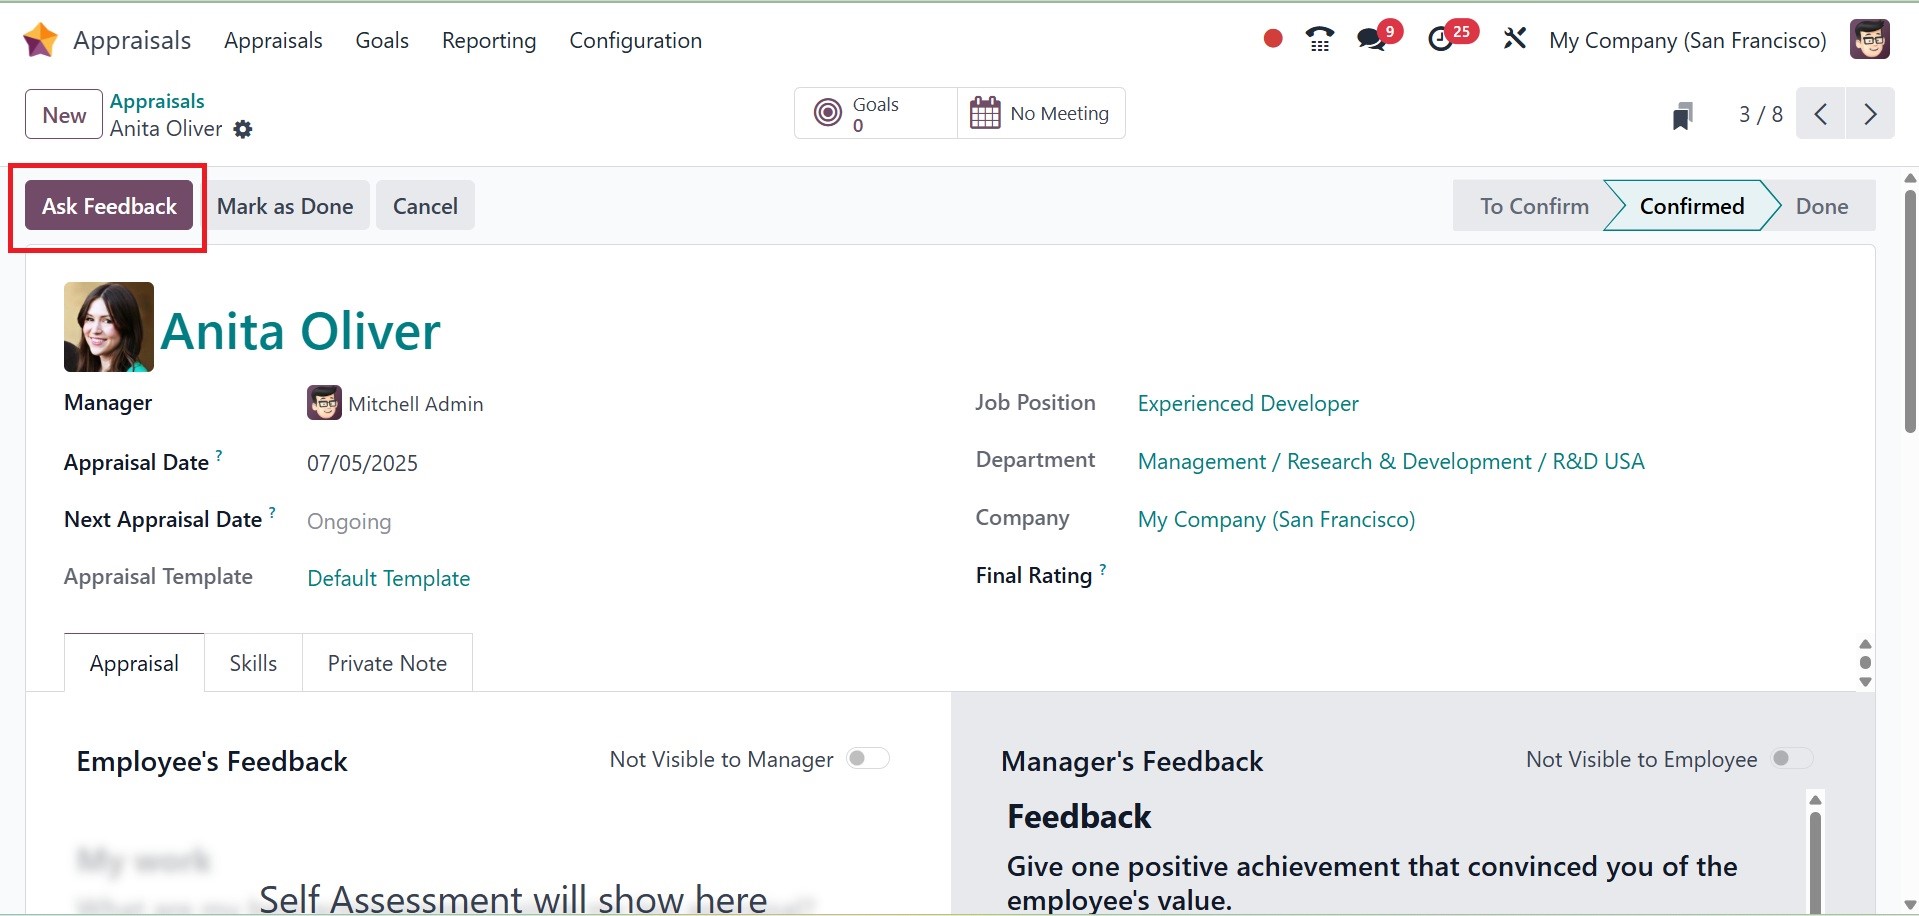
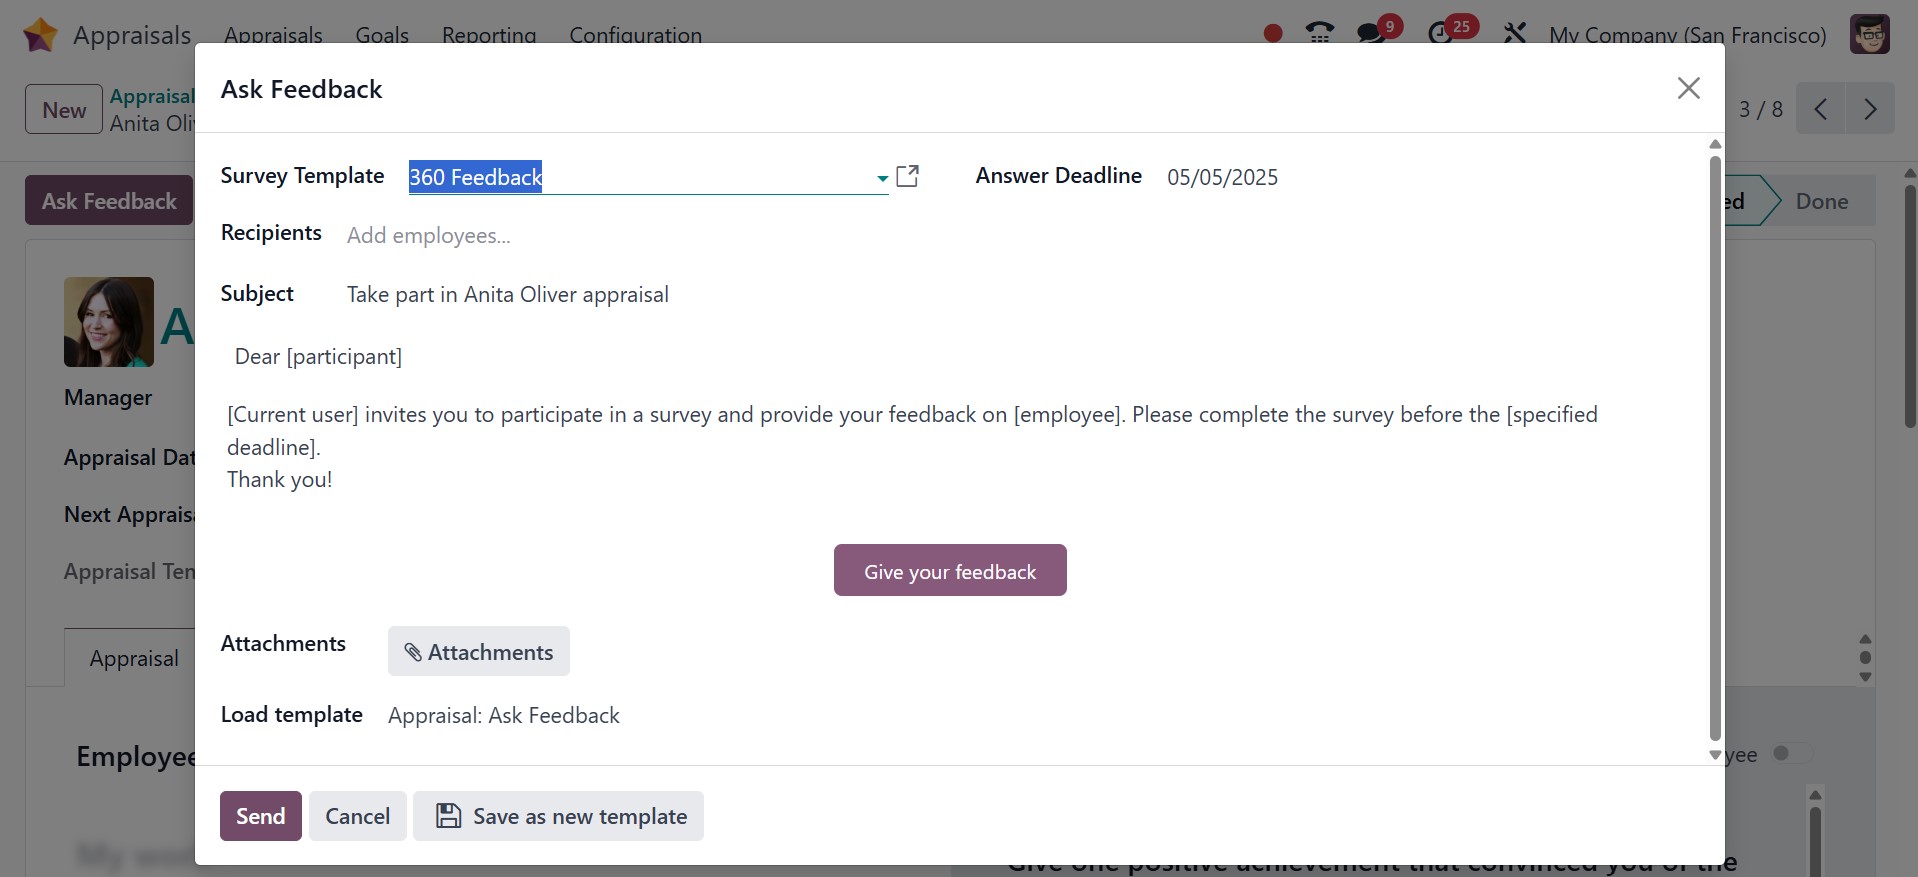
By using the Confirm icon, it is easy to verify the employee evaluation. Once the appraisal has been confirmed, click the "Ask Feedback" button to get input from the company's employees.
The pop-up window with the email template will then open, which shows the survey template, the message, and the deadline for the subject response. Click the Send button after adding the personnel to the Recipient section to gather their input.
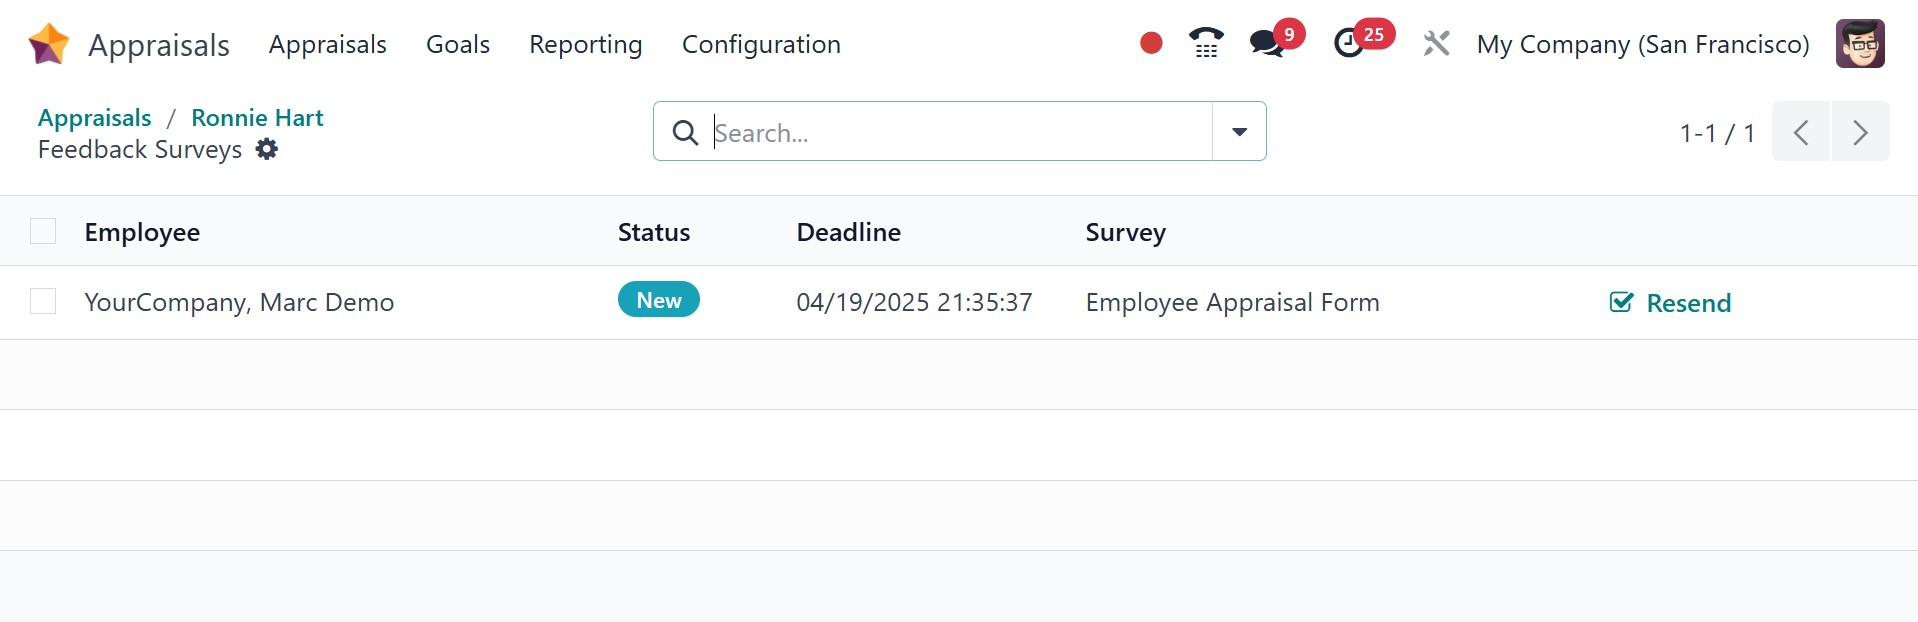
After that, a new smart tab named Feedback will appear on the appraisal form. From that smart tab, you will be able to access all of the feedback information.
Details like the employee, status, deadline, and survey are shown. Based on the status, the user can instantly understand the feedback stage. By selecting the Resend option, you may then decide to send the employee's feedback email once more.
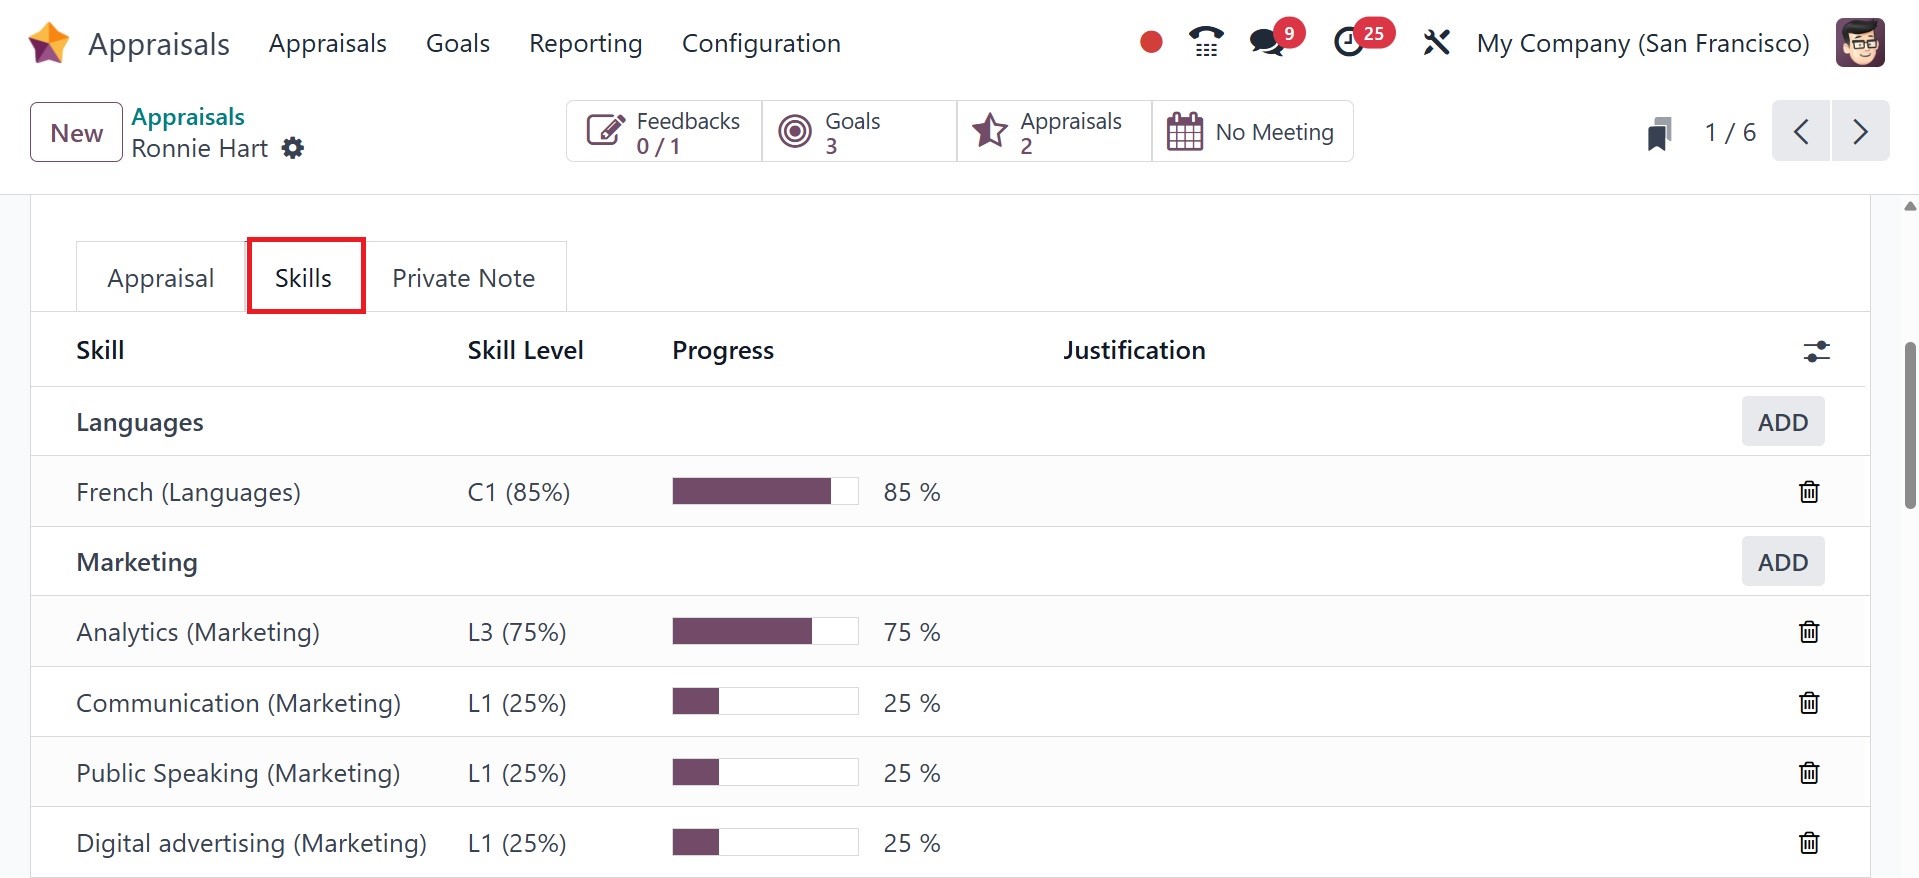
After choosing the CONFIRM button, the employee's skill under the Skills tab becomes active. Users can check each skill level an employee has and create a new one by clicking the create icon.
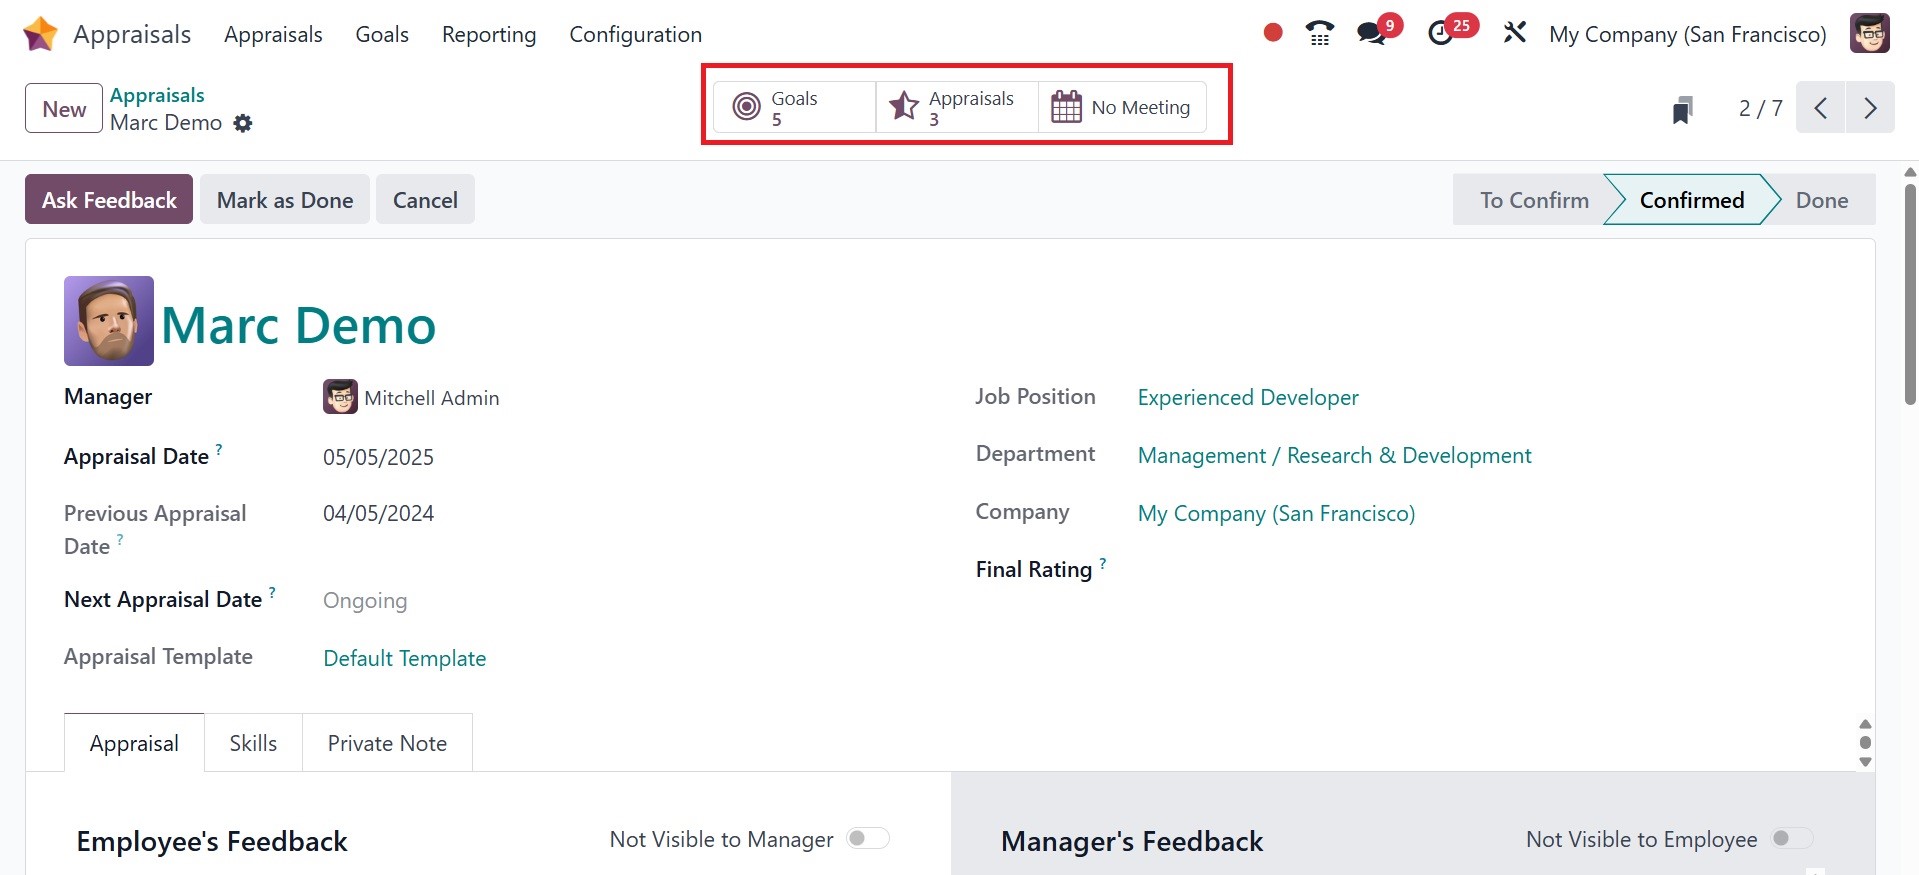
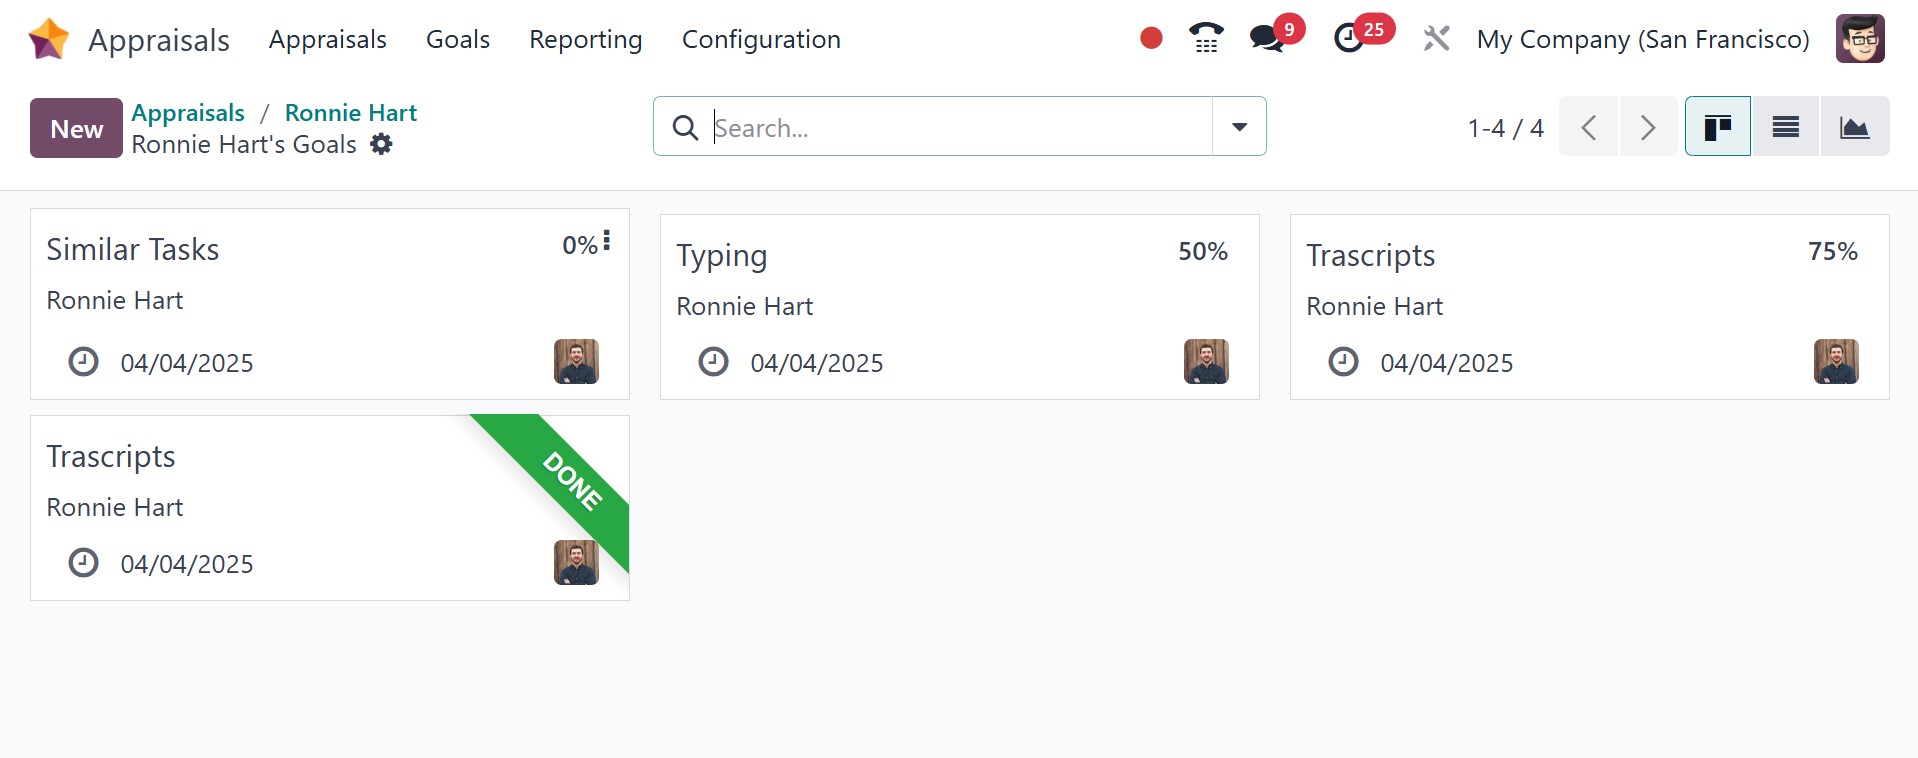
Underneath the appraisal area, management and employee feedback can be managed. The total number of appraisals is also accessible through the Appraisals smart button. We may view the goals for employees by clicking on the Employees Goals smart button.
Additional information regarding the appraisal can be added in the Private Note section. To schedule a meeting, click the Appraisals form’s No Meeting smart button. Once you have control over every aspect of your appraisal, you can use the Mark as Done symbol to indicate that it is finished.
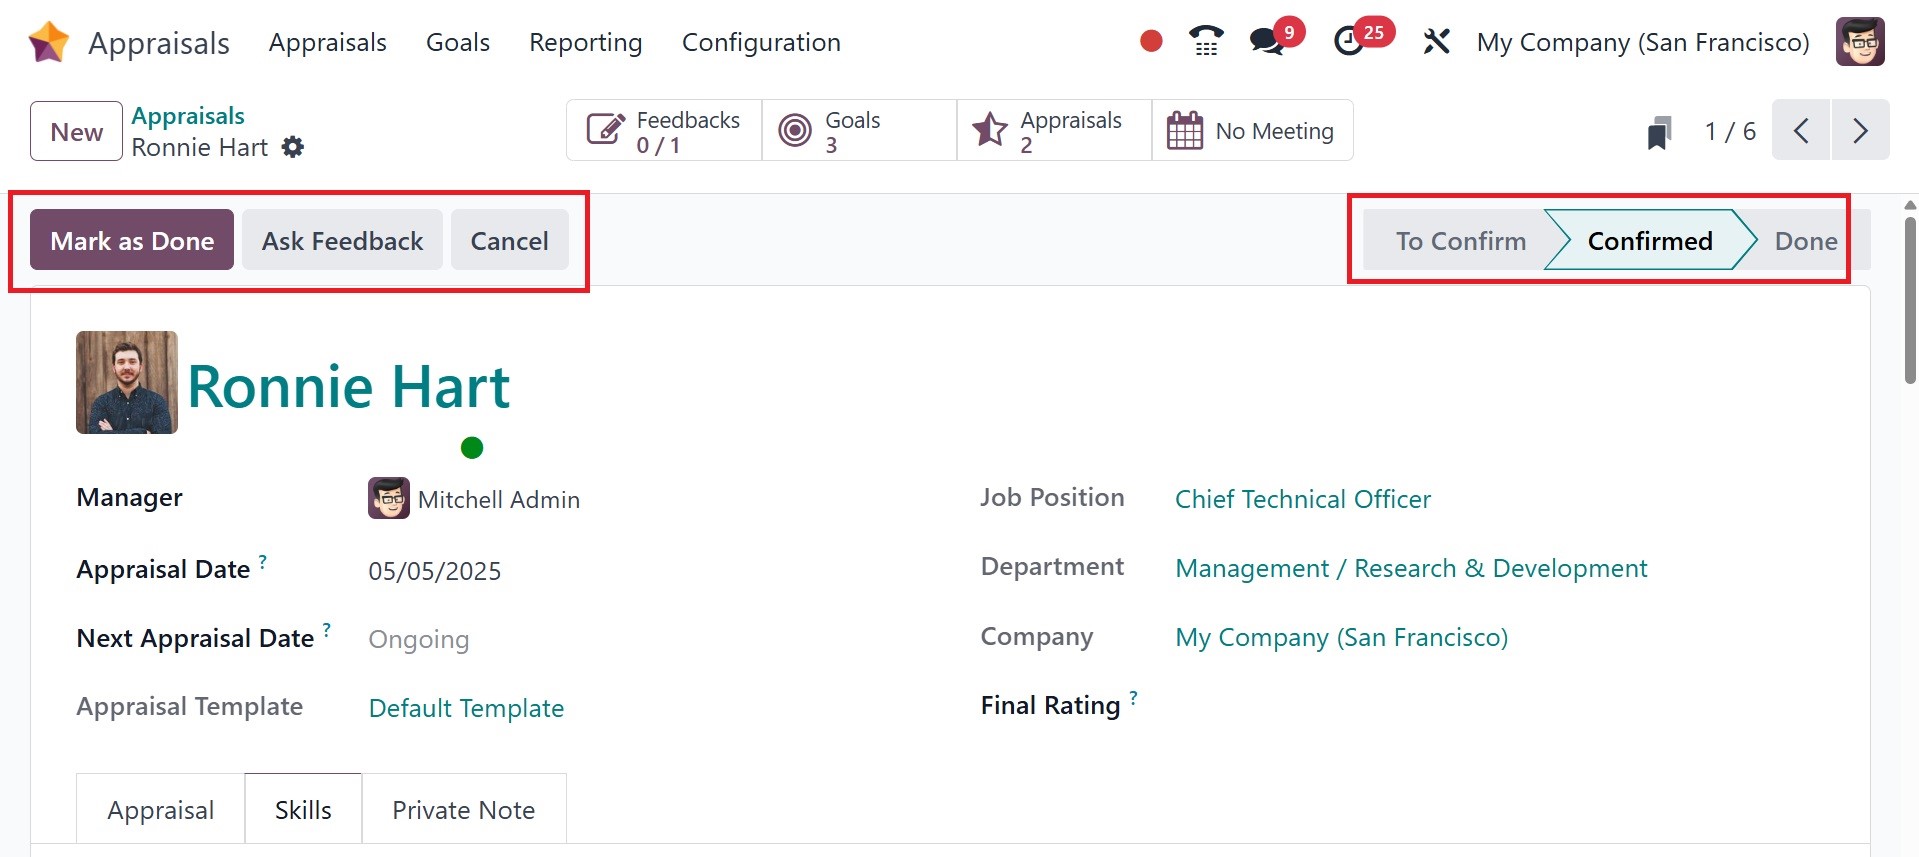
This will mark the appraisal stage as completed. To get any feedback, click the Ask Feedback option in the Appraisals window.
As such, defining employee assessment in Odoo 18 is straightforward.