The Approval module in Odoo 18 offers a structured and
efficient system for managing employee permission requests within an
organization. It introduces a streamlined, paperless process that
enhances collaboration and simplifies communication between staff
and management. By digitizing approval workflows, it ensures greater
transparency and operational consistency.
To begin using the module, users must first configure Approval
Types by selecting the corresponding menu from the
‘Configuration’ menu. After opening the module, you will be
directed to a dashboard of all the available approval requests in a
Dashboard window, as illustrated in the screenshot below.
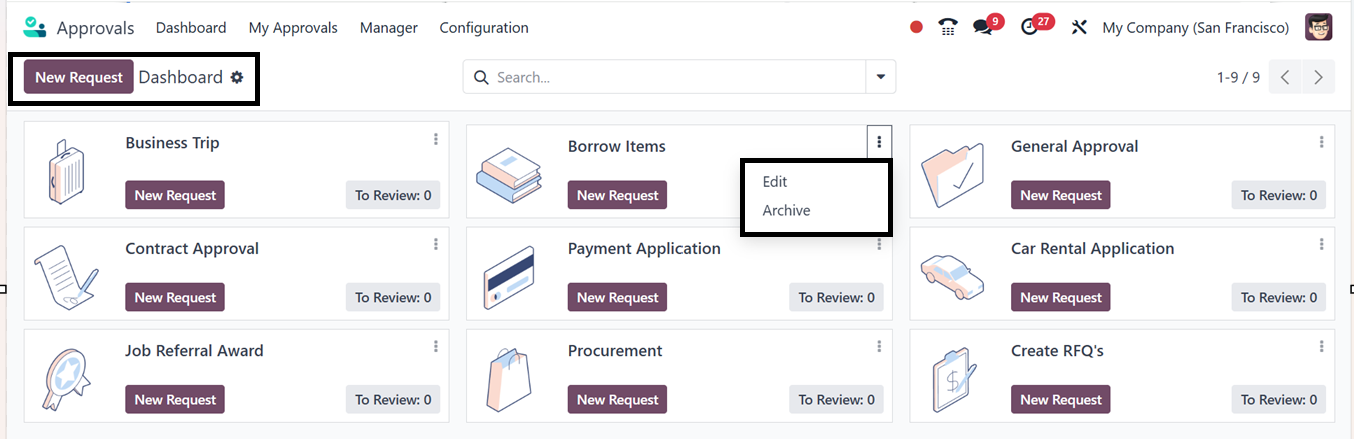
Viewing various types of approval requests arranged in Kanban views
according to different categories and goals. This facilitates their
management and classification for improved approval control. Among
these are requests for business trips, contract approvals,
borrowings, procurement requests, general approvals, RFQ creation,
and more. The ‘To Review’ button will show the pending
approvals that need to be reviewed.
Each Kanban card has a three-dot menu that you may use to change or
archive the approval type as necessary. You can also create a new
approval request associated with that particular approval category
by selecting the 'New Request' option. The dashboard also
provides tools for organizing approvals through various filtering
and grouping options inside the advanced search bar.
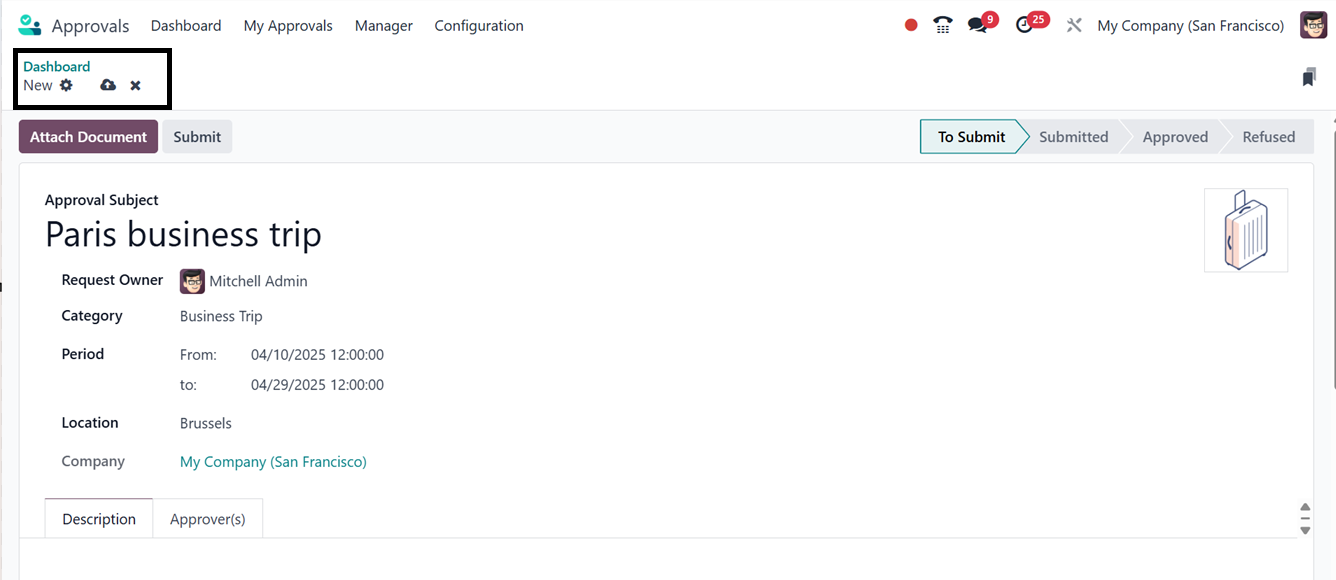
1. New Approval Request
When creating a new approval type using the ‘New Request’
button, you can define its Approval Subject, Category, and
Request Owner as per the requirements in the request form.
Then, provide details such as Period and Location, as
depicted in the screenshot below.
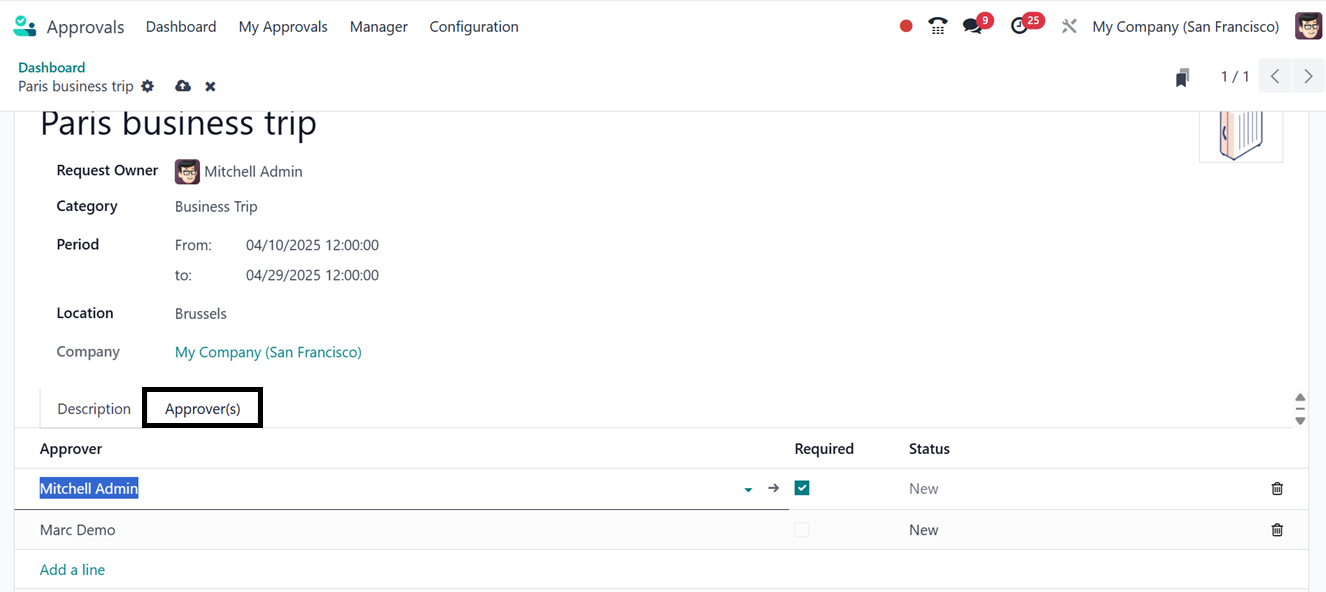
You can provide specific details about the approval subject using the
'Description' option. Users can choose the minimum number of
needed approvals, approver persons, and designate certain approvals
as mandatory using the 'Required' option. Also assign the
required internal or external approvers under the 'Approvers'
tab using the ‘Add a line’ button.
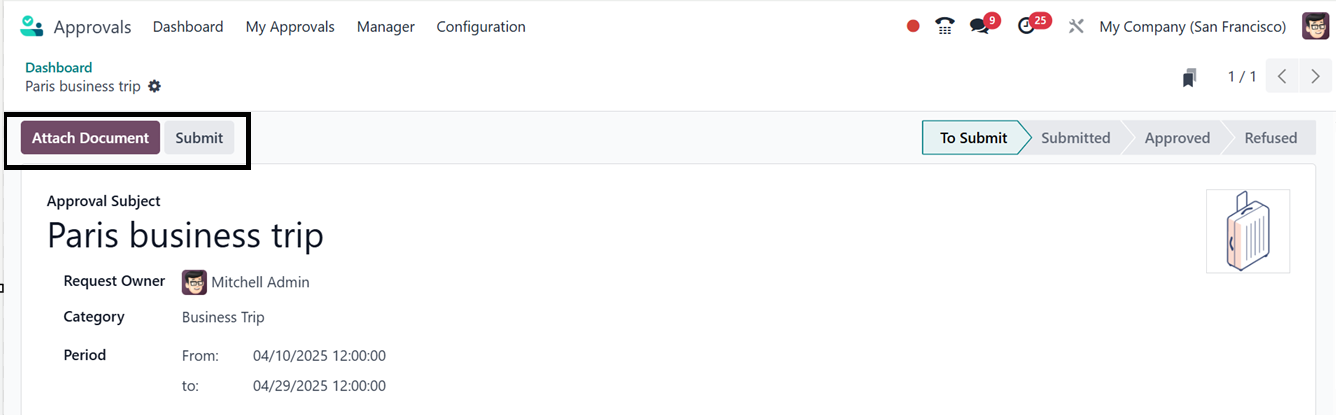
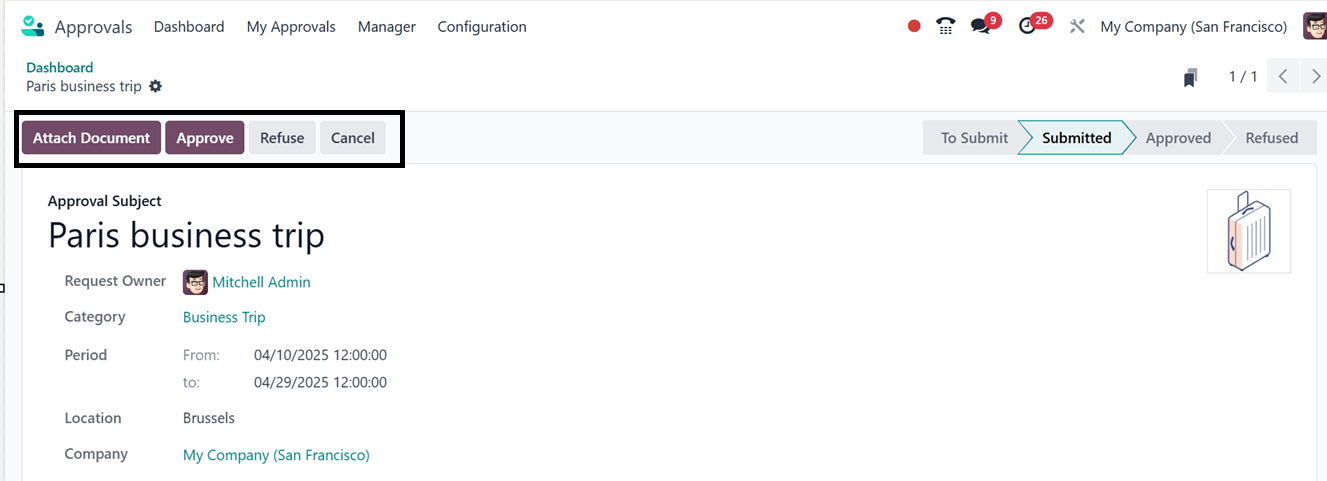
You can also utilize the ‘Attach Document’ button to attach
the supporting documents regarding the request. After reviewing the
details, the request can be saved and submitted using the
‘Submit’ button.
Managers can then access submitted requests through their Approval
Requests menu. Upon review, they have the ability to
Approve, Refuse, or Cancel the requests.
Through the form's Action button, you may see related
documents, to print the corresponding Approval Request,
Delete, and Request Signature choices, respectively.