1. Exploring the Barcode App Features
Upon clicking the Barcode App,
users will be redirected to a
new window where they can
utilize the barcode
functionality for various
operations, inventory
management, and batch
transfers.
2.1 Operations
Clicking on the ‘Operations’ button will open the dashboard of all the available operations in a kanban view. Users can manage barcode operations by clicking the Operations tab. Here, they will find options for Deliveries, Internal Transfers, POS Orders, Dropshipping, and Receipts, as as shown in the screenshot below.
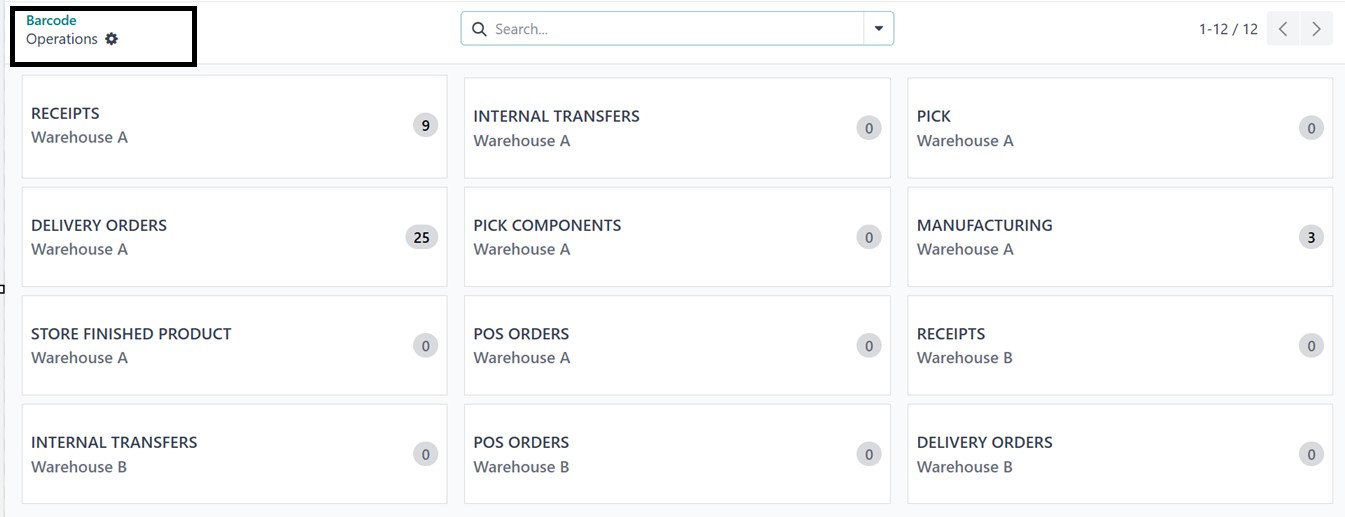
you can manage or create any type of new barcode operations by selecting and opening the appropriate tab. For example, we can open the ‘RECEIPTS’ operation section to check the functionality.
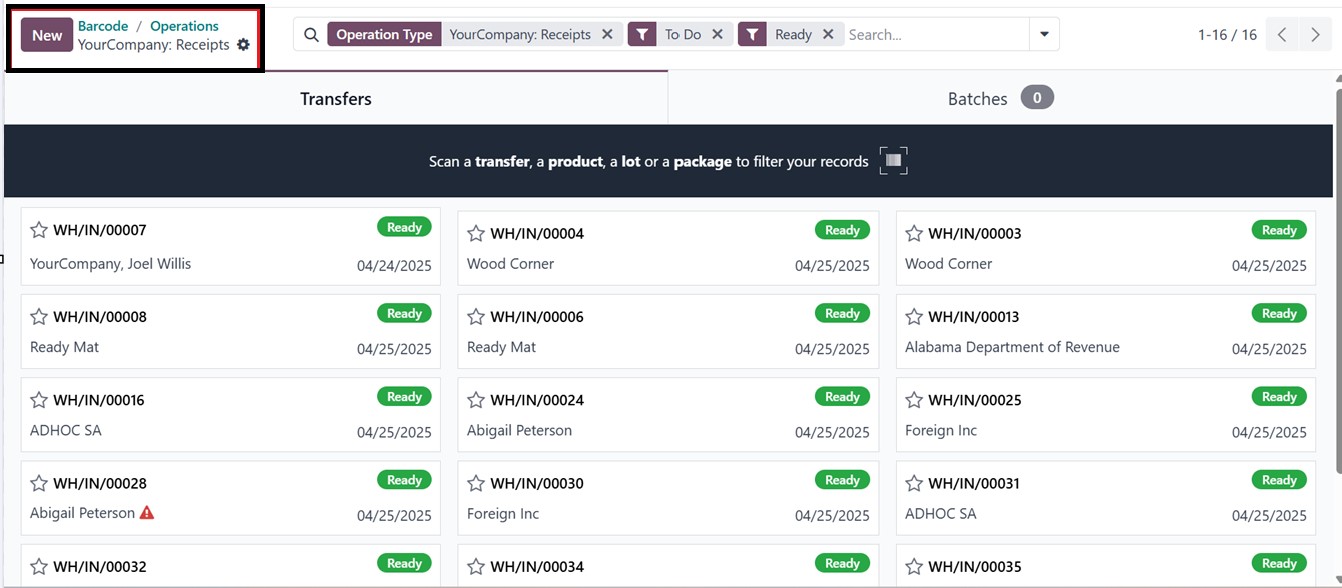
2.2 Receipt Management
By clicking on the RECEIPT tab, you will see the dashboard of all the available receipts containing barcodes in a kanban view, as depicted in the screenshots below. From here, you can create barcode-enabled receipts.
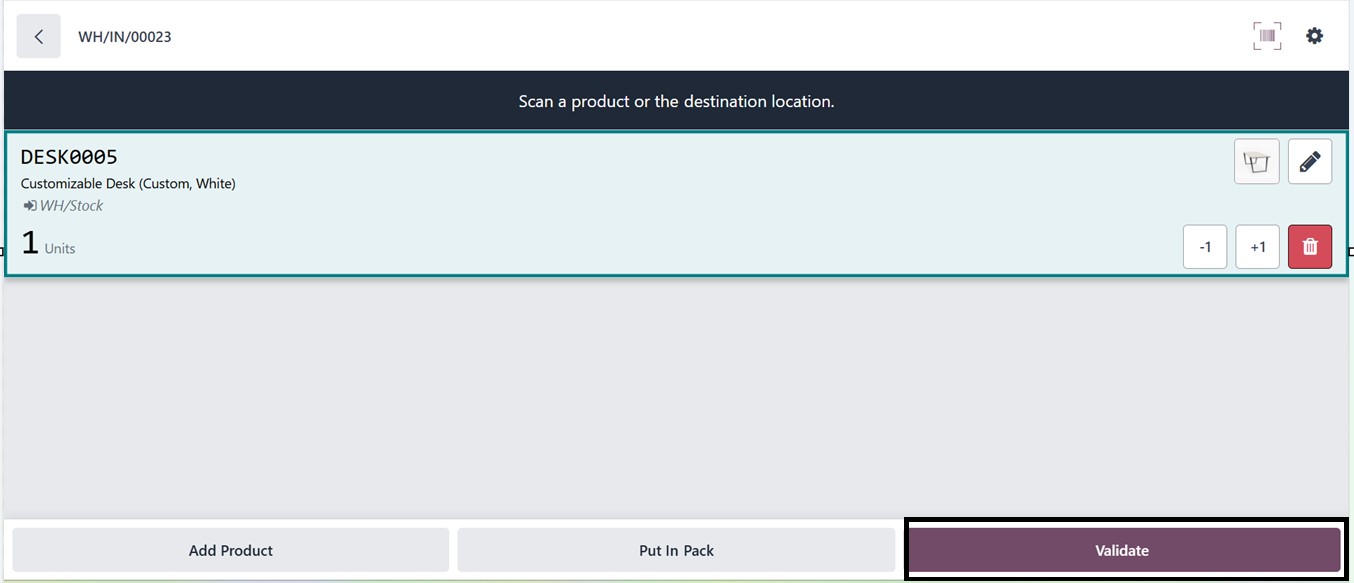
Clicking on the ‘New’ button generates a new receipt, allowing barcode scanning to add products automatically while updating product names and warehouse locations.
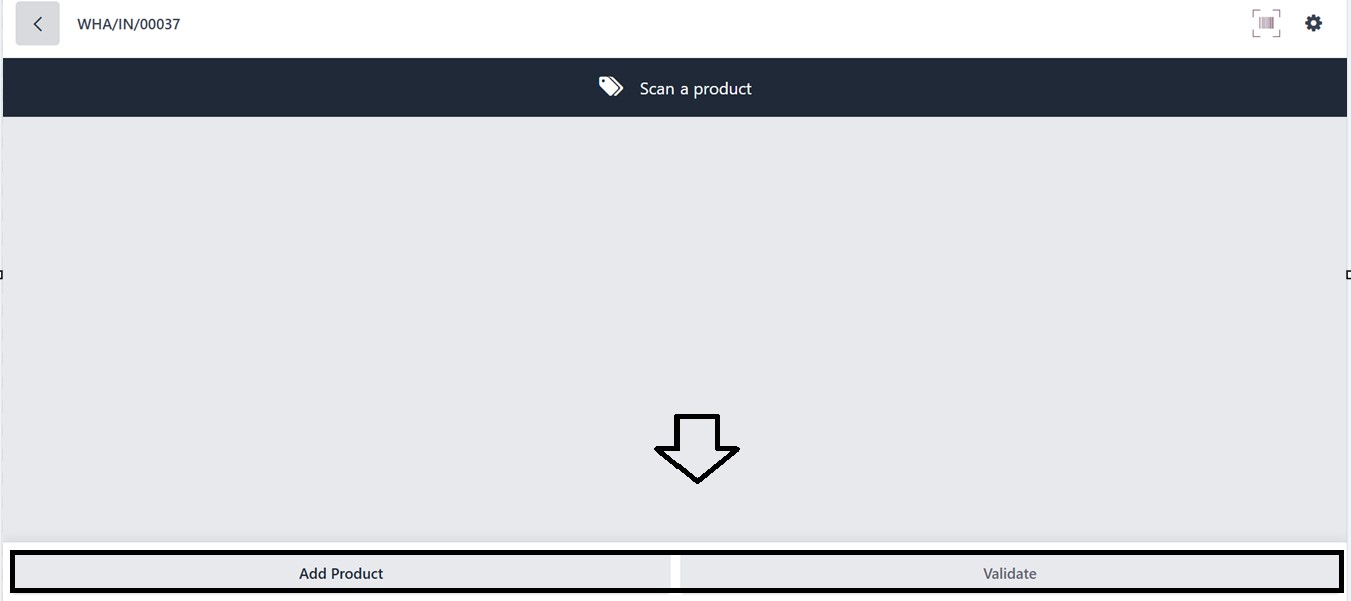
The correct product quantity is displayed, allowing users to confirm barcode entries.
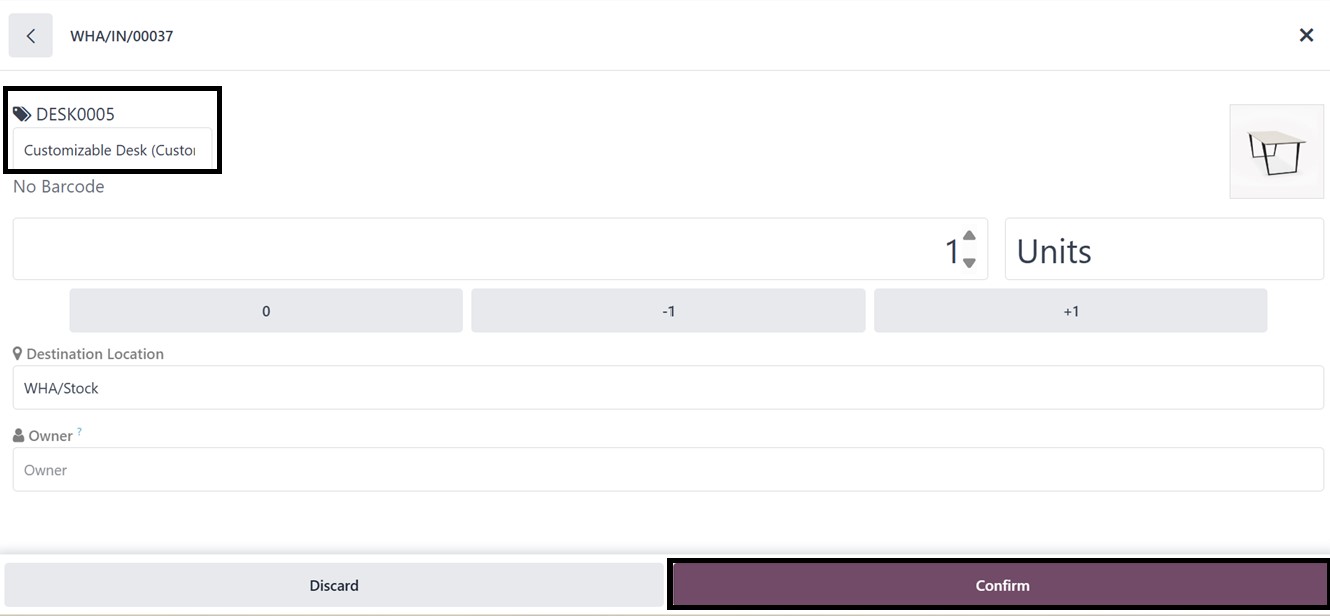
Clicking Validate finalizes the barcode entry. If the entered quantity is insufficient, a pop-up notifies the user to continue adding products until the required quantity is met.
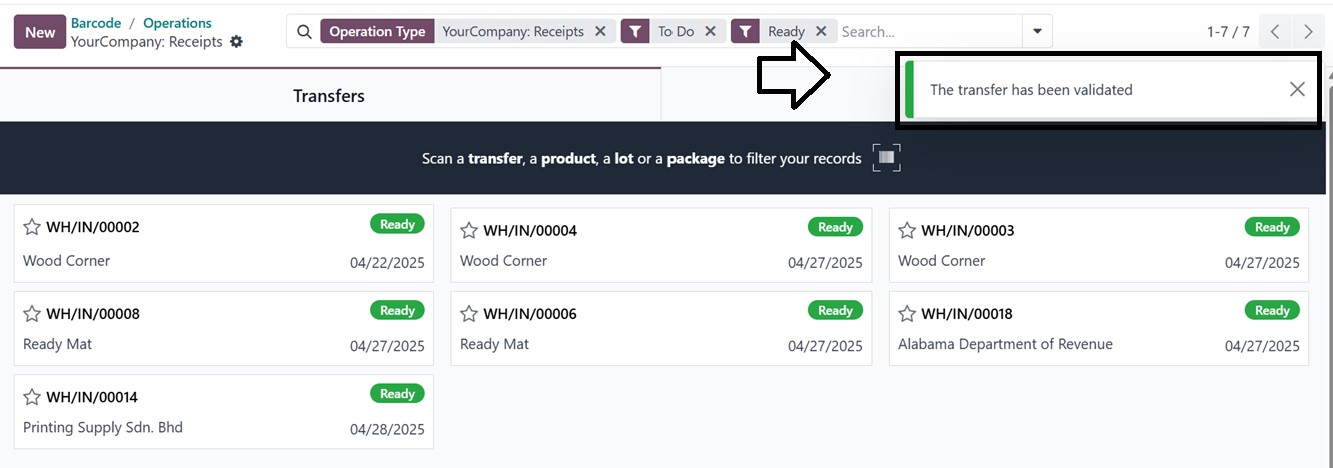
After clicking on the Validate button, it will validate the process and you will get a notification pop-up message saying “The transfer has been validated, as highlighted in the screenshot below. Using this method, you can also manage products under different categories using the same process.
22.3 Additional Barcode Operations
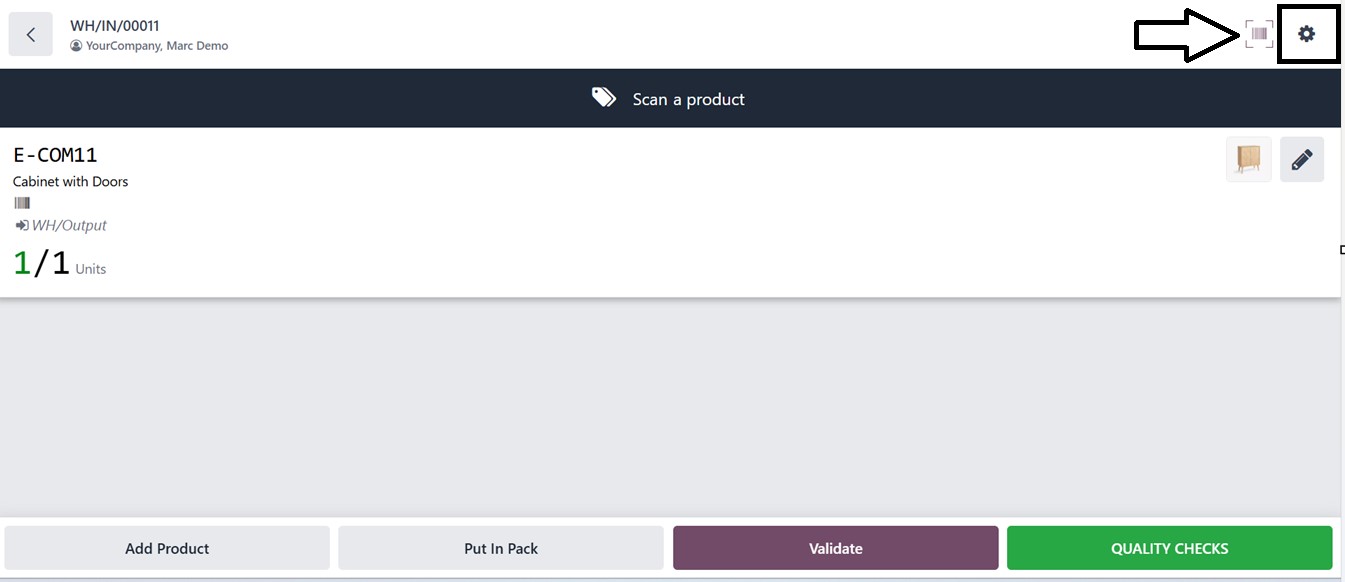
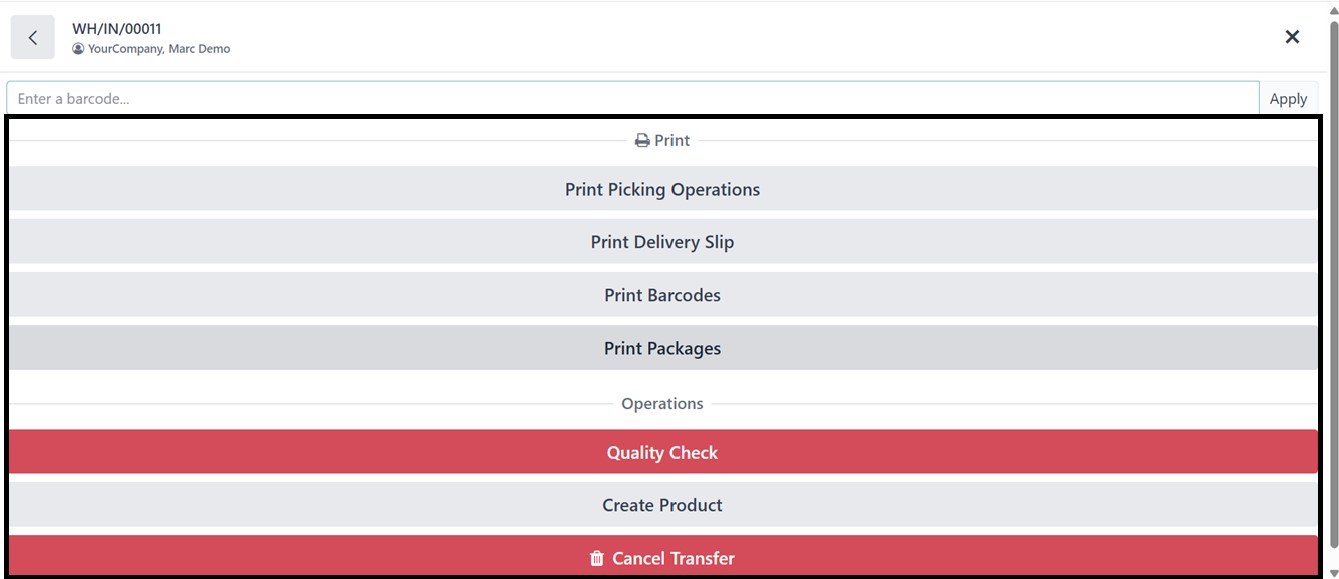
You can access more options by clicking the Settings icon in the top-right corner of a barcode operation window after opening the respective operation.
In the ‘Settings’ area, you can see some additional functionalities include printing Picking Operations, generating Delivery Slips, exporting Barcode PDFs, managing Packages, scrapping damaged inventory, and canceling transfers. Clicking PRINT PICKING OPERATIONS allows users to select the document layout and print barcodes in various formats.
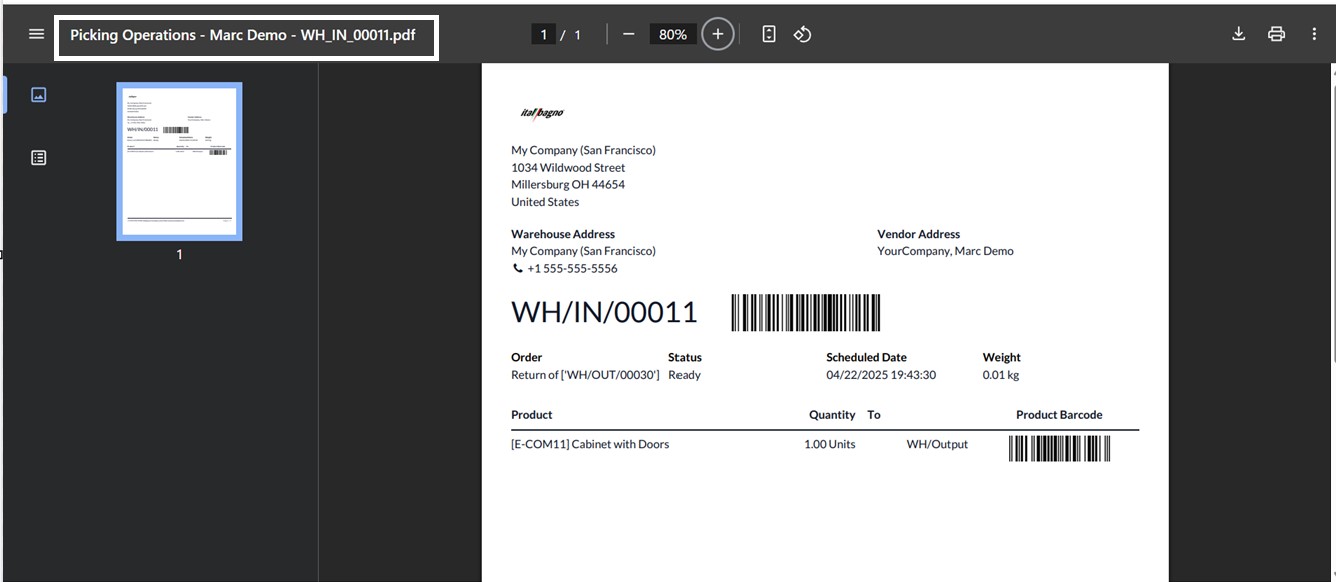
The 'Print Picking Operations' button generates a detailed PDF report for warehouse operations, including product names, quantities, barcodes, and lot/serial numbers, aiding warehouse workers in picking routes and manual verifications, as illustrated in the screenshot below.
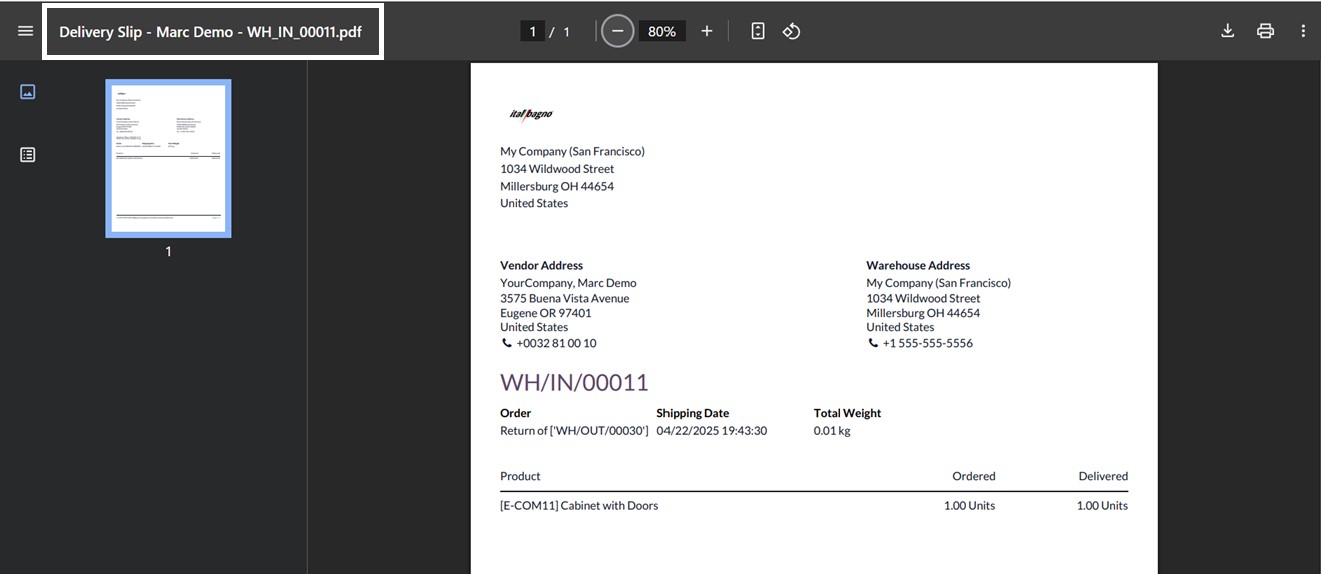
As seen in the screenshot below, clicking the "Print Delivery Slip" button will produce the delivery slip for the chosen operation, together with the Order, Shipping, Warehouse, Vendor, and Product data.
The ‘Print Barcodes’ button can be used to print the barcode labels for the particular operation. Clicking on this will open a pop-up window that can be used to customize the barcode labels layout with the Quantity to print, Format, Pricelist, and Extra Content options, as depicted below.
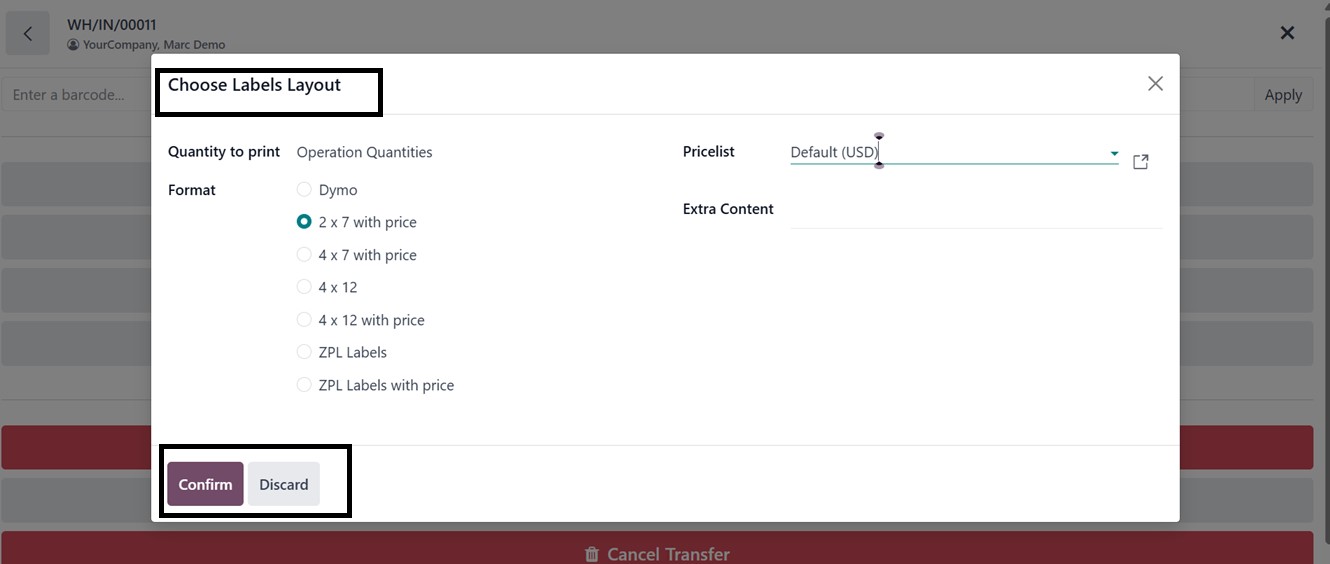
After choosing the label layouts, click on the ‘Confirm’ button to proceed. This action will generate a printable barcode label as shown below.

Likewise, you can print the product package information involved in the procedure by clicking the "Print Packages" button. Depending on the product and its designated quality checkpoint, the "Quality Check" button is used to request a quality check for the chosen procedure.
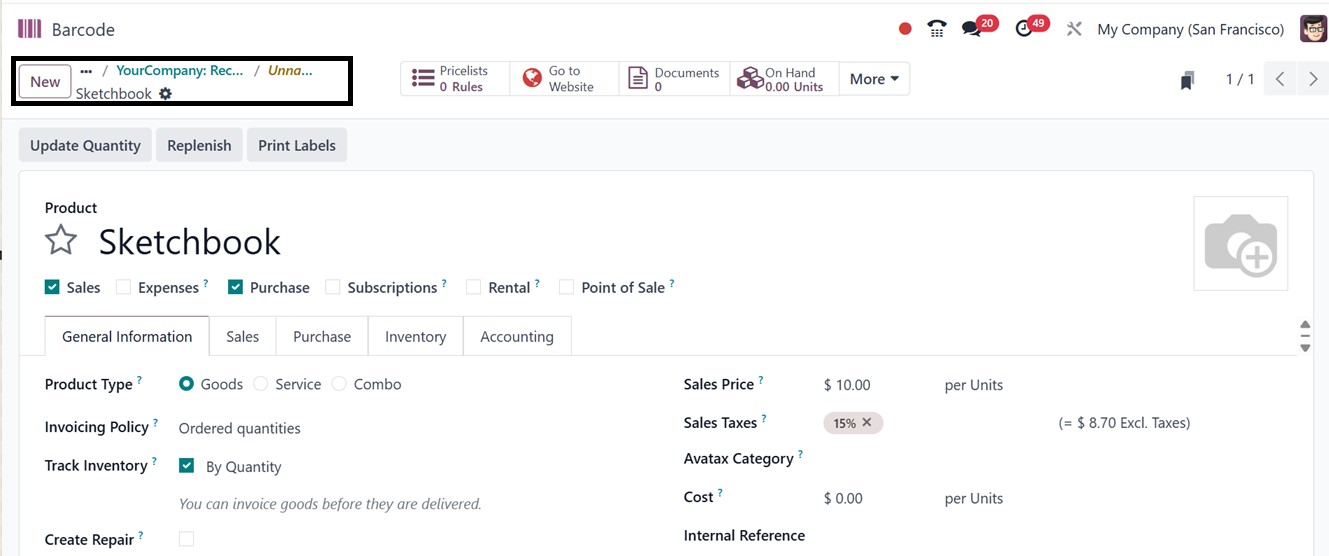
You can instantly create a new product from the operations window without having to go to the Inventory application by using the Barcode module's "Create Product" button. A pop-up window asking you to provide the necessary details for the new product displays when you click this button. Fields like Product Name, Barcode, Sales Price, POS Category, Color, and other fundamental characteristics required for the first product setup are included in this. By allowing users to quickly update missing goods during barcode scanning processes, this feature optimizes productivity, reducing disruptions and guaranteeing a more seamless warehousing process. The screenshot that follows provides an illustration of this pop-up interface.
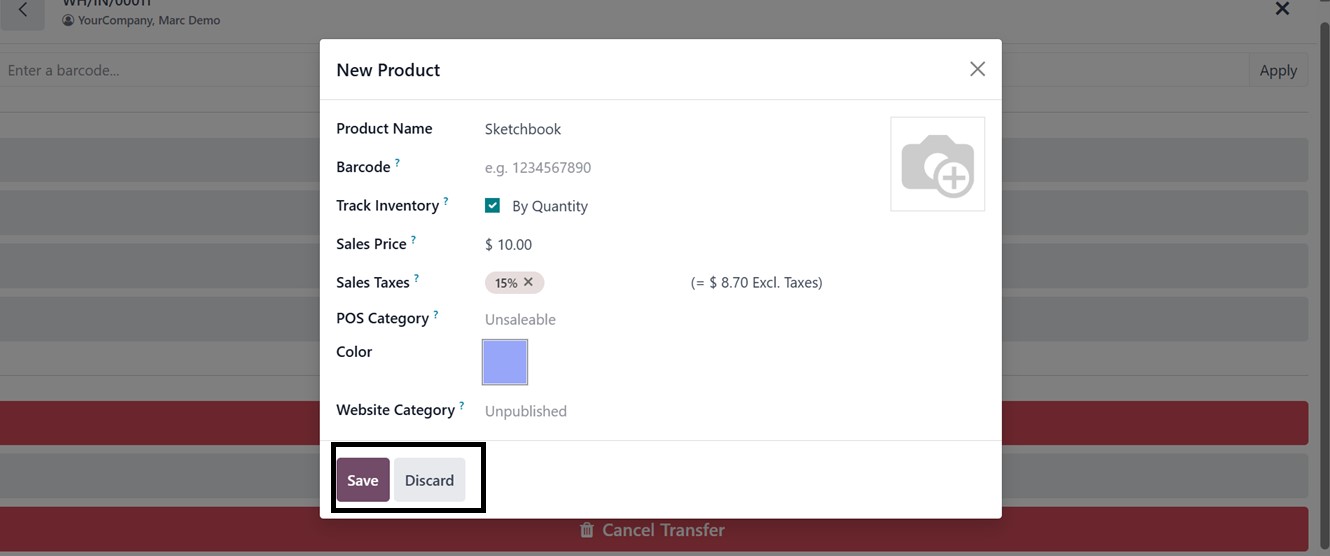
Once the necessary forms have been filled out, you can then save the product details, and the new item will be automatically added to the Barcode inventory database. Following creation, the product is instantly accessible for selection in further barcode procedures. You can click the interlink button adjacent to the product field during the barcode operation if you need to manage or change more product data than just the basic fields.
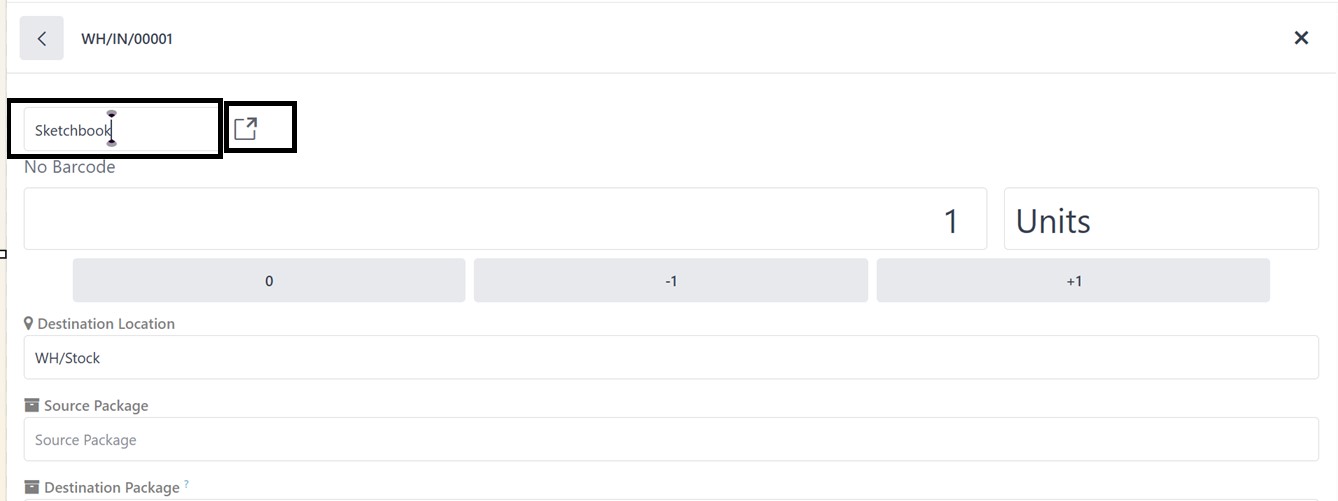
The picture below shows how to use this shortcut to rapidly enter the entire product form view in the Inventory module, where you can edit more options like accounting, inventory tracking, sales statistics, and more.