Contacts Management
The Contacts module of the Odoo18 ERP solution allows you to sync all of your
contacts in one place. Your contacts will be managed via this module, which is
essential for company management. The primary dashboard of Odoo provides access
to the Contact module. The instructions shown below will appear in a new window
that opens in Odoo 18.
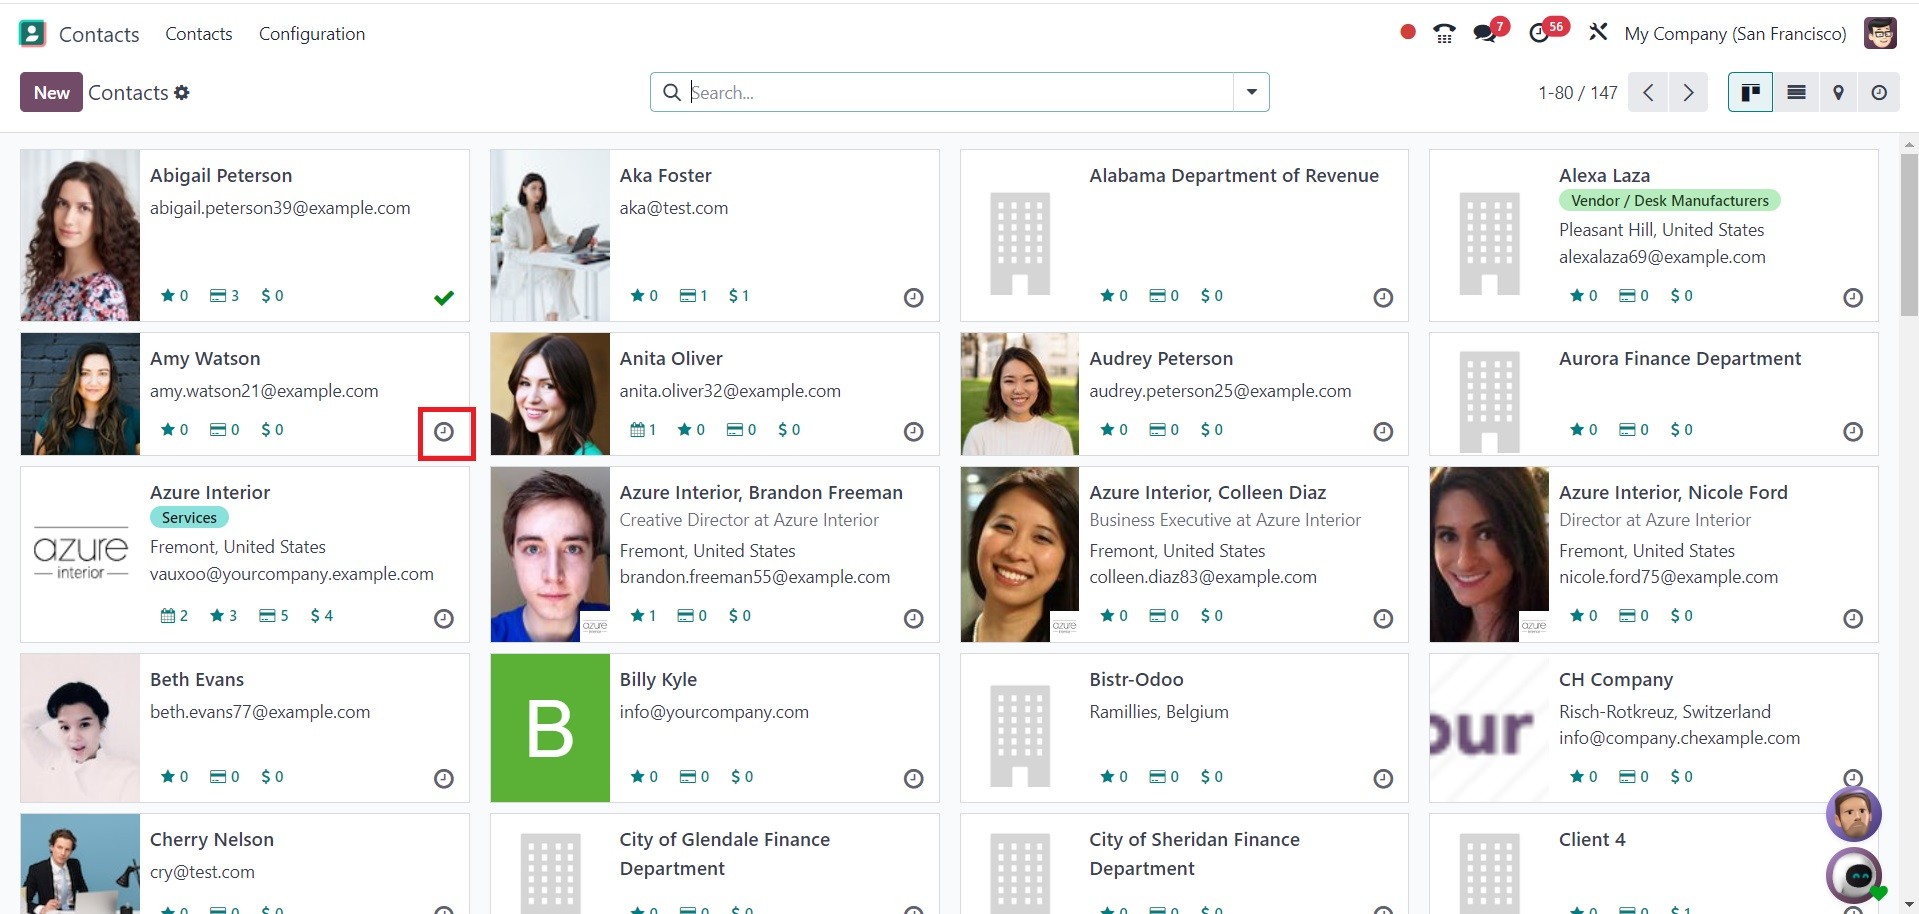
This is the Kanban view of the Contact dashboard. As seen in the screenshot, you
will be able to see a preview of the contacts that are stored on your computer.
On each profile, you can see the contact's photo along with their personal
details. The number of Opportunities, Planned Activities, Sales Orders, Shopping
Carts, and Purchases on each tab may be indicated by little icons. By clicking on
the small clock icon, you can arrange a meeting with the chosen contact, as in
the image above.
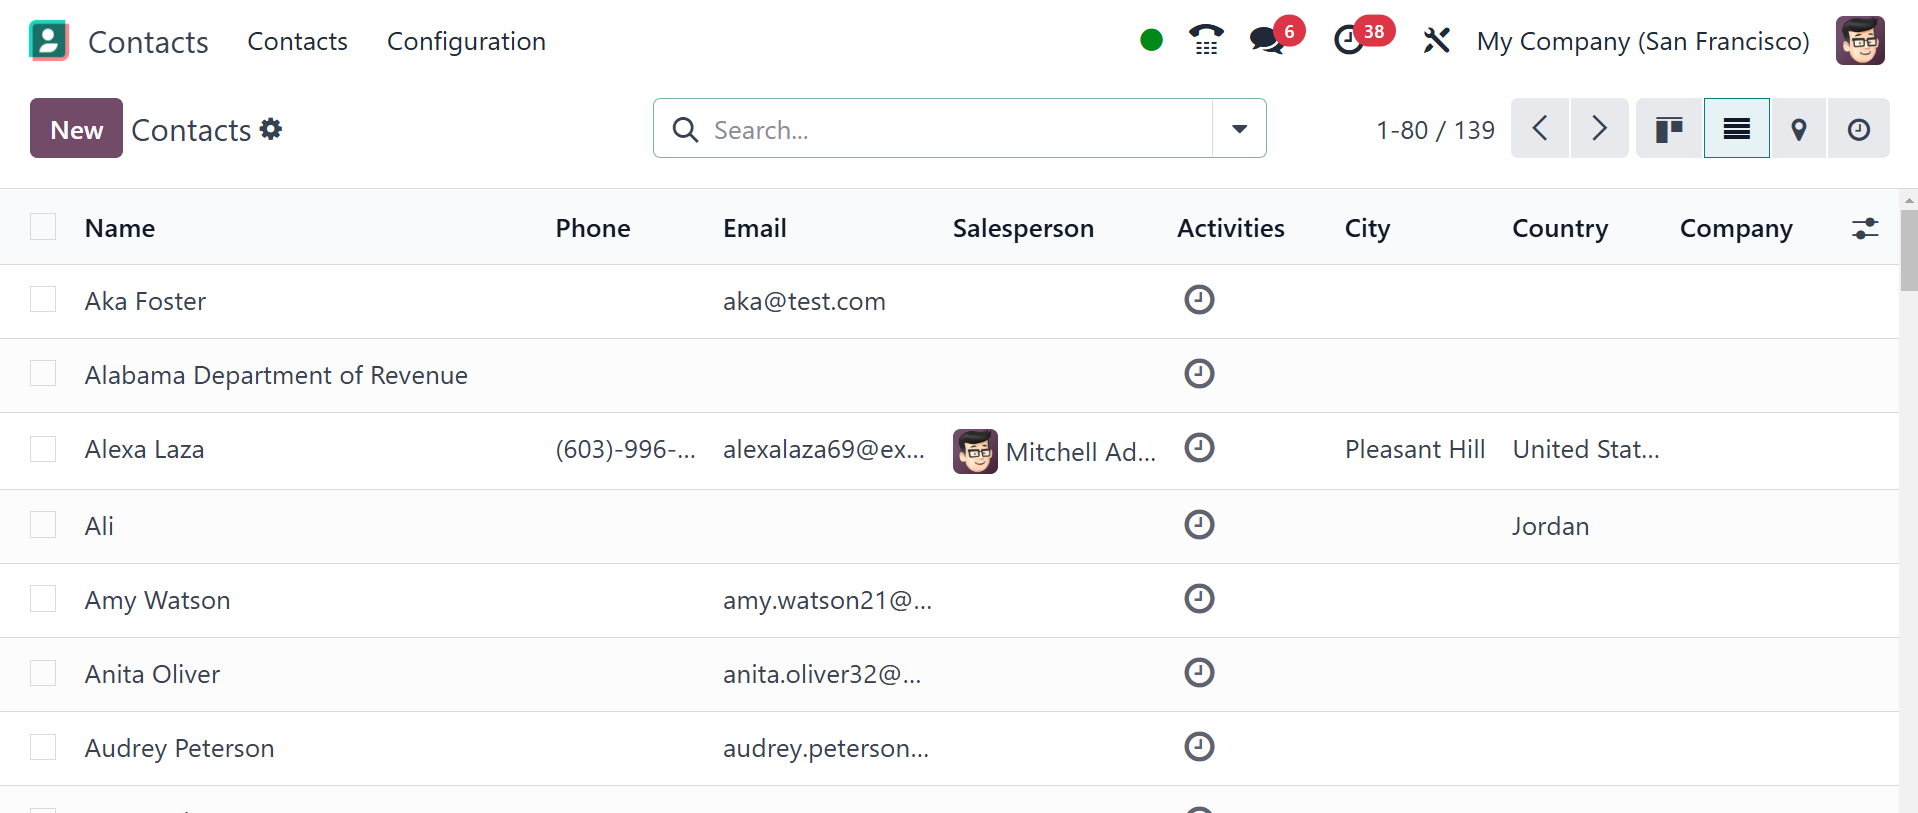
The contact dashboard's list view shows the following information: Name, Phone,
Email, Salesperson, Activities, City, Country, and Company.
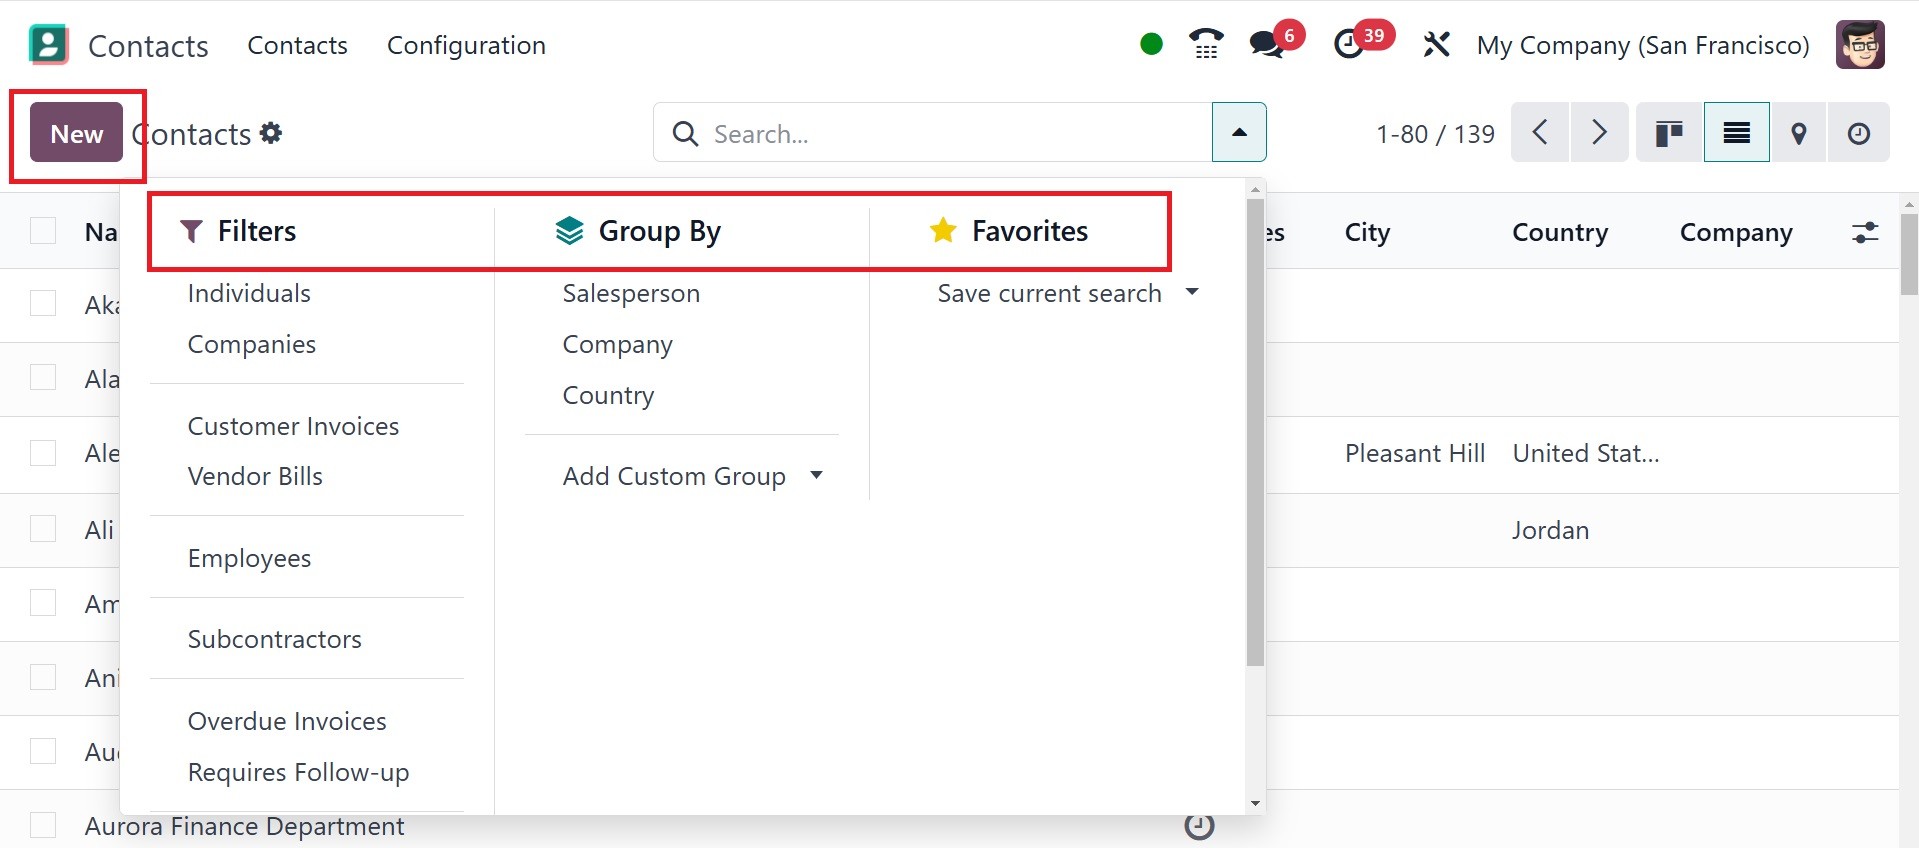
The Filters option offers the following filters: Individuals, Companies, Customer
Invoices, Vendor Bills, Employees, Subcontractors, overdue invoices, and requires
follow-up. You can make use of the Group By option according to Salesperson,
Company, and Country. You can use the favorite option, where you can save the
current search as well. Click the New button now to add a new contact to the
module.
Clicking the New button will bring up a new form view, as shown in the screenshot
below. In terms of settings, creating a new contact in Odoo 18 is the same as
adding a new customer.
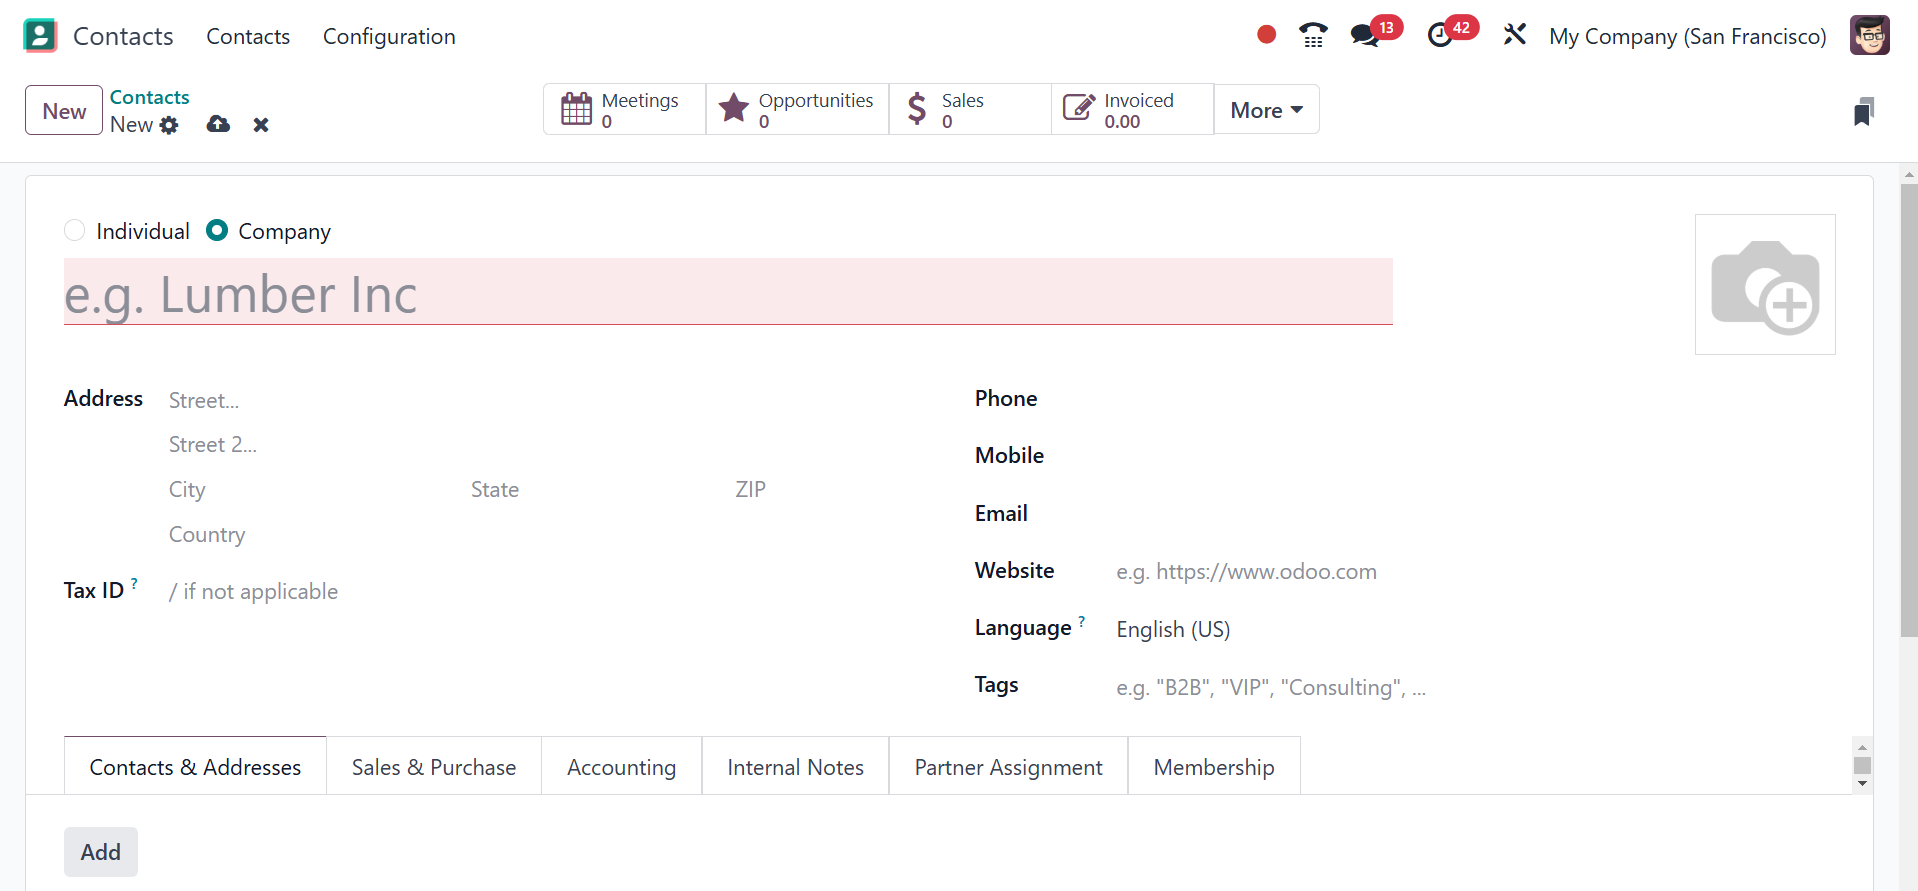
You can enter the name of the new contact in the designated field. Before
creating the contact, you may select how it will be entered into Odoo 18. You can
save it as either Individual or Company by selecting the appropriate choice from
the field provided. The contact's address, Tax ID (Tax Identification Number),
phone number, mobile number, email address, website, language, and tags can then
be entered in the corresponding areas. You can add more Contacts & Addresses
linked to this Contact to the record by using the Add button. This will cause a
pop-up window to appear, as shown below.
This pop-up allows you to add a Contact, Invoice Address, Delivery Address,
Private Address, Other Address, or Follow-Up Address that is associated with the
current contact.
- Contact Address: expands the current contact form by adding a new contact.
The address helps you to add another individual or entity related to the
primary contact.
- Invoice Address: updates the current contact form with a given invoice
address. This address specifies the address to which invoices are sent.
- Delivery Address: updates the current contact form with a specific delivery
address. It defines the location where goods or services should be delivered.
- Follow-up Address: updates the current contact form with a different address.
It ensures that such communications are directed to the correct person or
department within a company.
- Private Address: gives the current contact form a private address. It is a
confidential address linked to a contact, typically visible only to authorized
users.
Now, let's configure each address separately. Firstly, we can develop a contact
address by choosing the Contact option. It is easy to organize the contact
details of employees of an organization using the Contact address. After clicking
on the Contact option, enter the name in the Contact Name field, as presented in
the screenshot below.
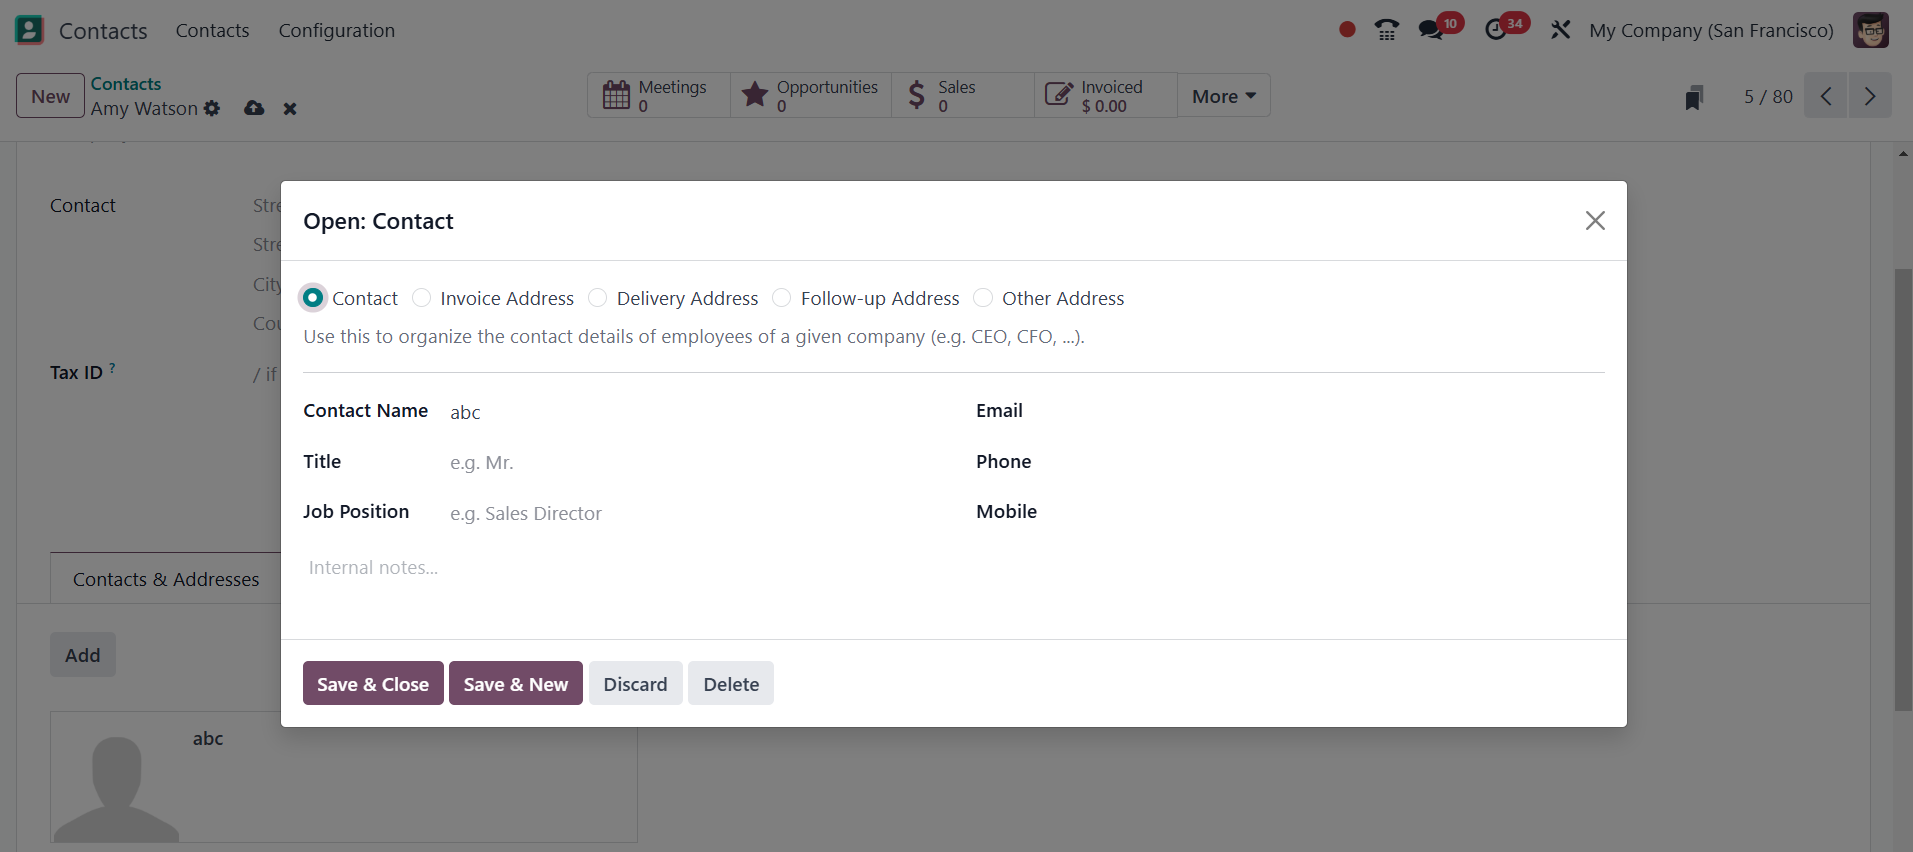
In the designated fields, you can enter the contact's name, address, phone
number, email address, and cellphone number. Go to the menu and choose "Save &
Close".
Next, we are creating an invoice address that will be the address for all
invoices. Choose the Invoice Adress option in the Create Contact window and enter
the Contact Name.
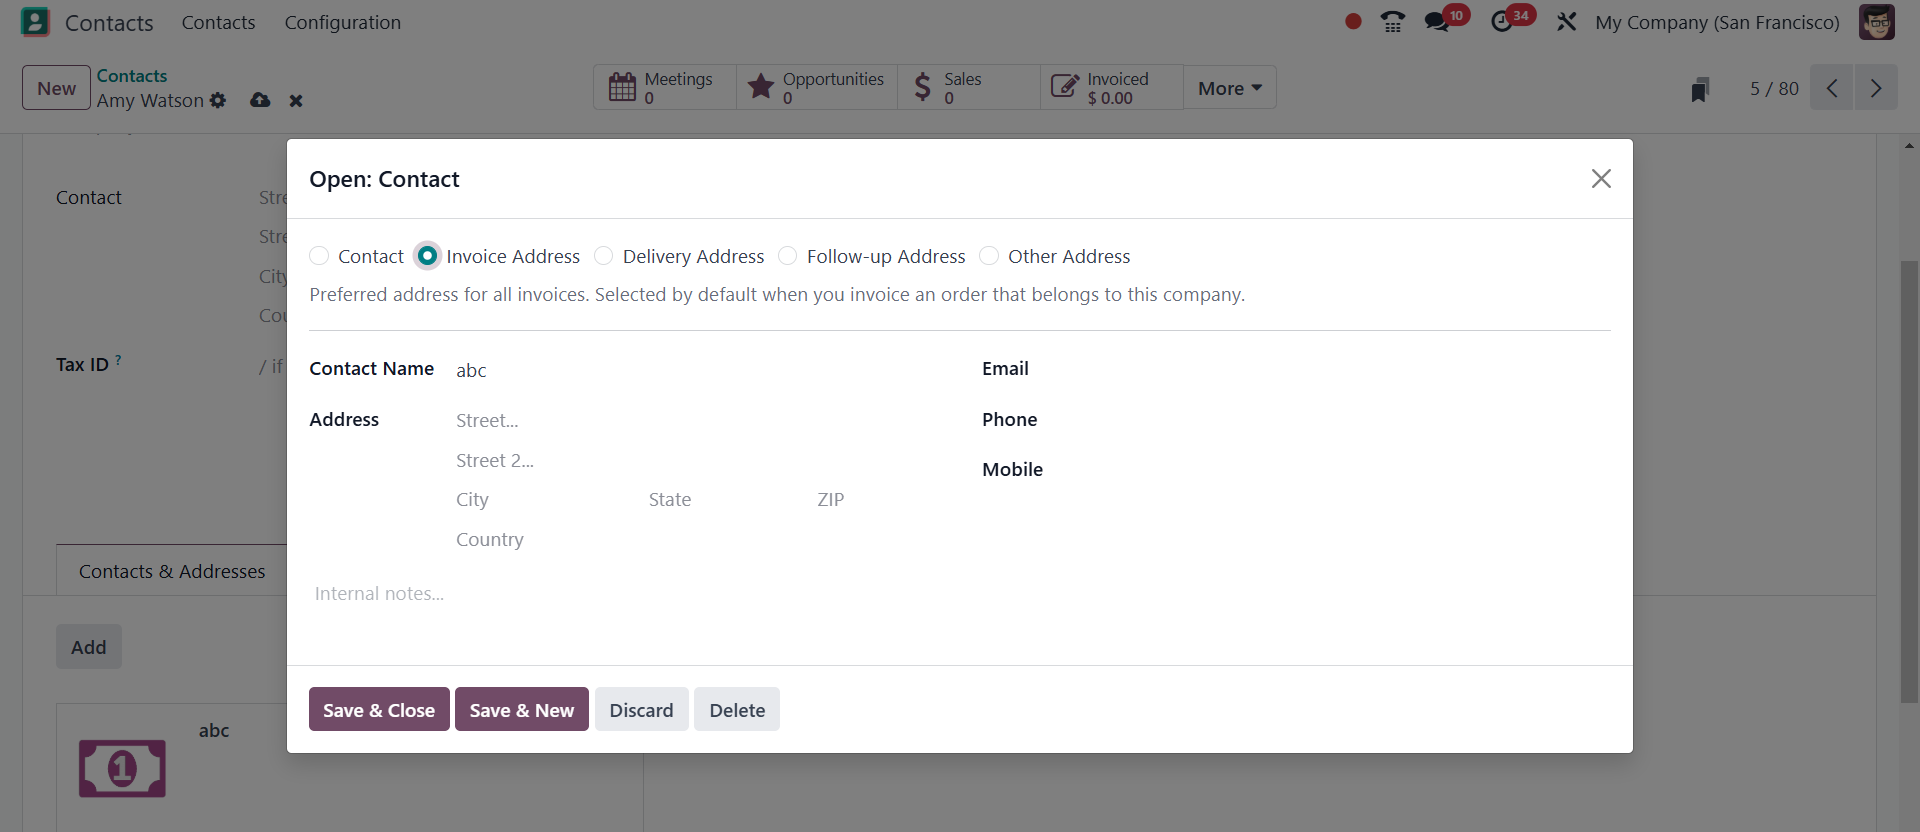
When you invoice a company's order, the invoice address is displayed. Enter the
address related to your contact after applying the contact name. Additionally, a
user must include the contact person's email address and phone number.
Once all of the invoice address information has been entered, click the SAVE &
NEW button. Let's then create a delivery address for a certain contact. To change
the contact person's preferred address for all deliveries, click the Delivery
Address option. When you deliver an order related to the business, the delivery
address is set as the default. After selecting the Delivery Address option, enter
the Contact Name.
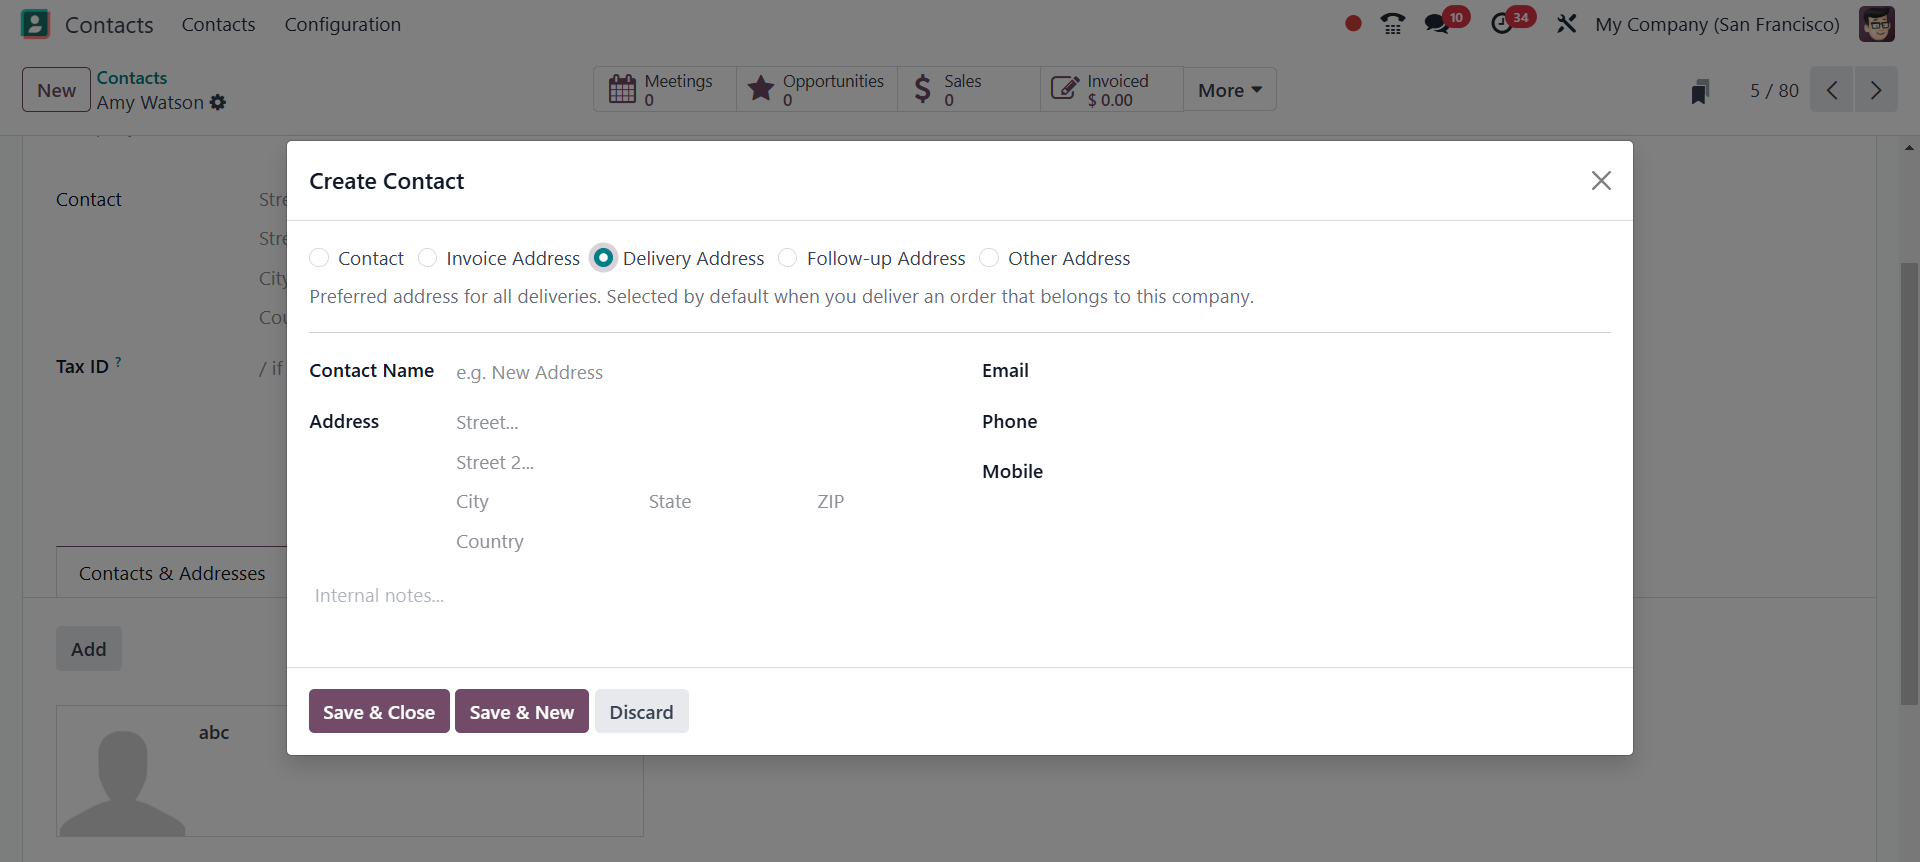
As seen in the screenshot above, users can also enter the delivery address inside
the Address area. After entering other information like your phone number, email
address, and mobile number, click the SAVE & NEW option.
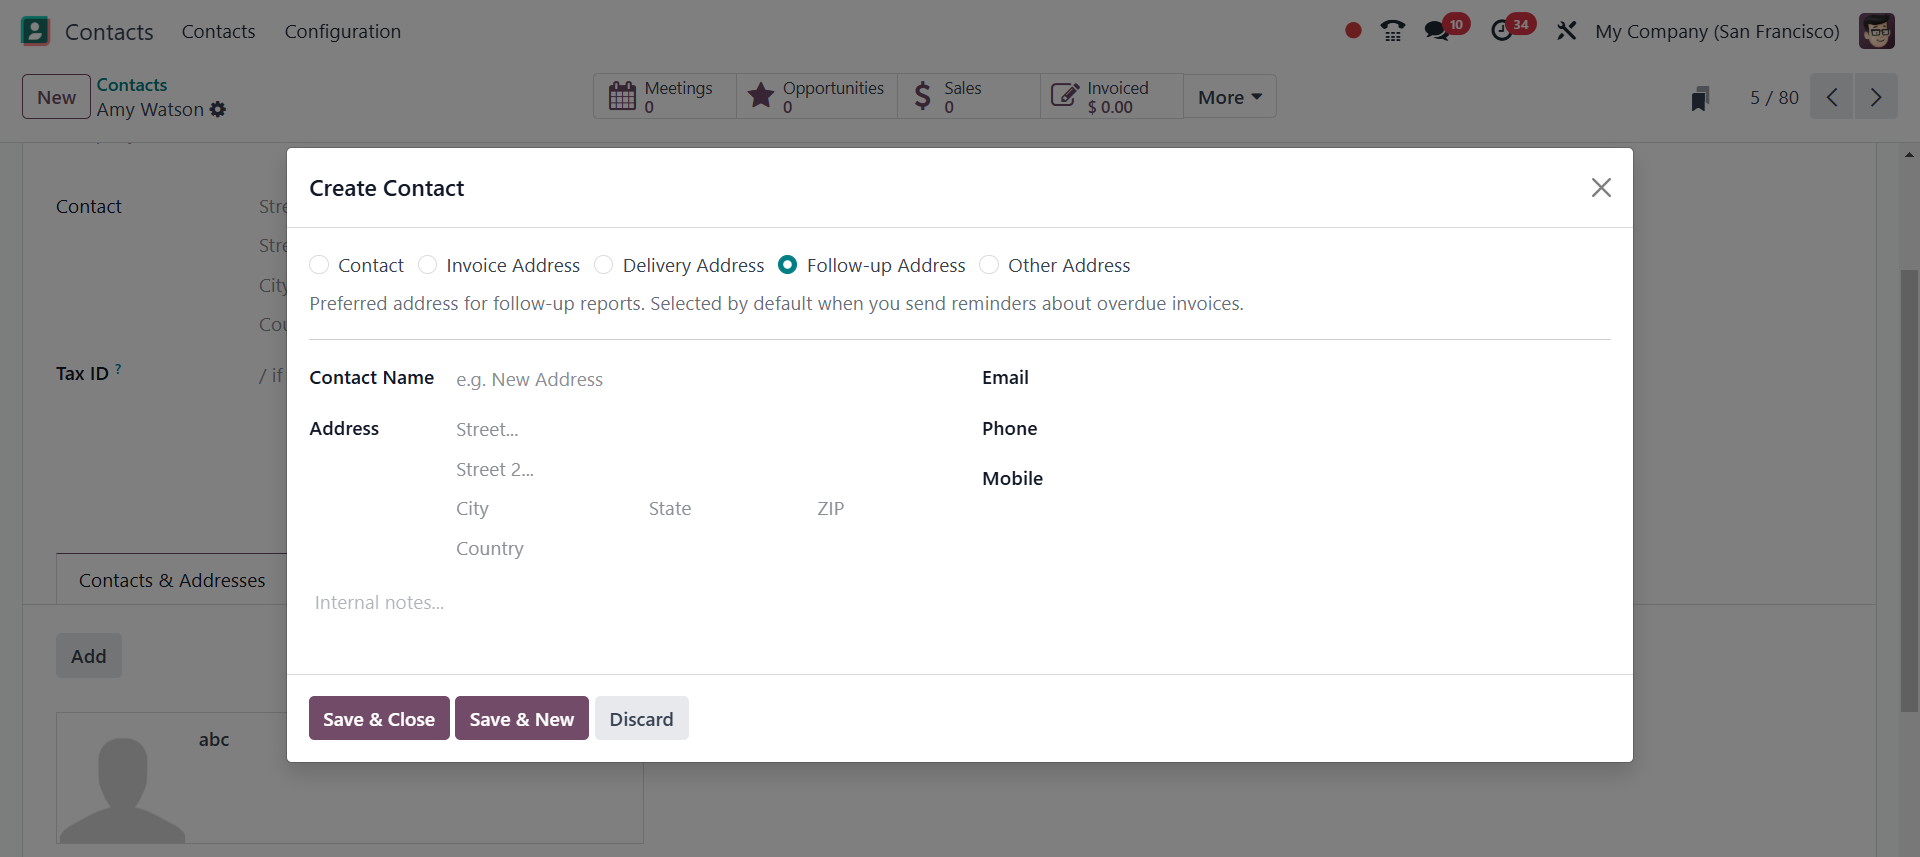
Then, you have the Follow-up address option, the Preferred address for follow-up
reports. Selected by default when you send reminders about overdue invoices. This
address allows you to send the payment follow-up reports to a different email
address. This feature can be particularly useful when you have multiple email
addresses associated with your company and need to maintain consistency in your
communication with customers. For instance, you may have a generic email address
for general inquiries and a separate address for invoicing or shipping-related
matters.
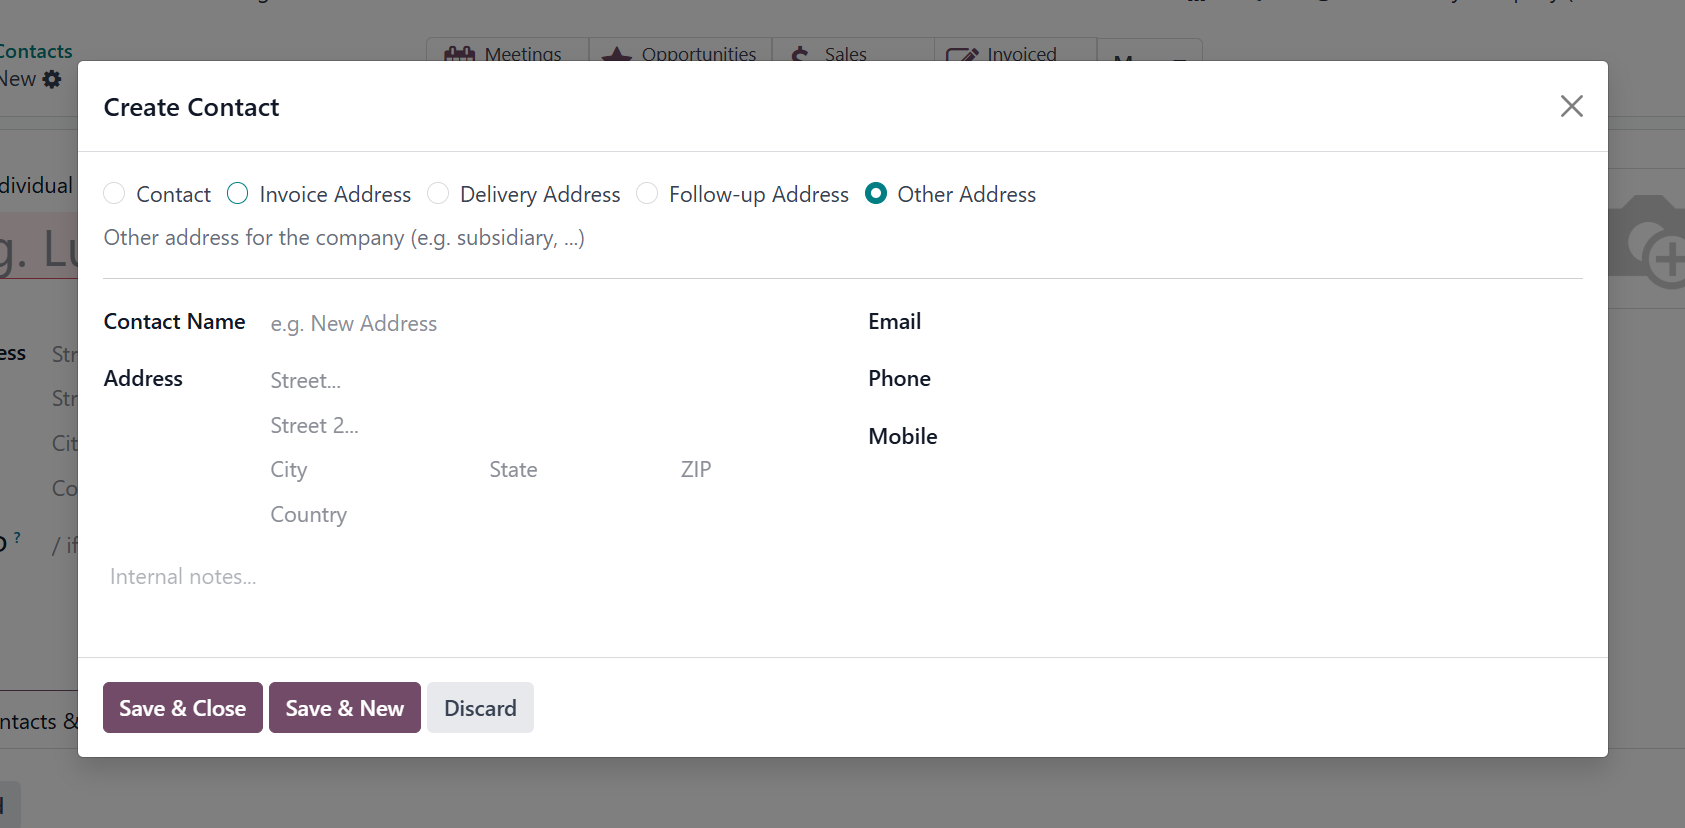
By selecting the Other Address option, we can also create an additional address.
The user can apply a different address associated with a business or person by
choosing the Other Address option. In the Create Contact window, choose Other
Address and enter your Contact Name.
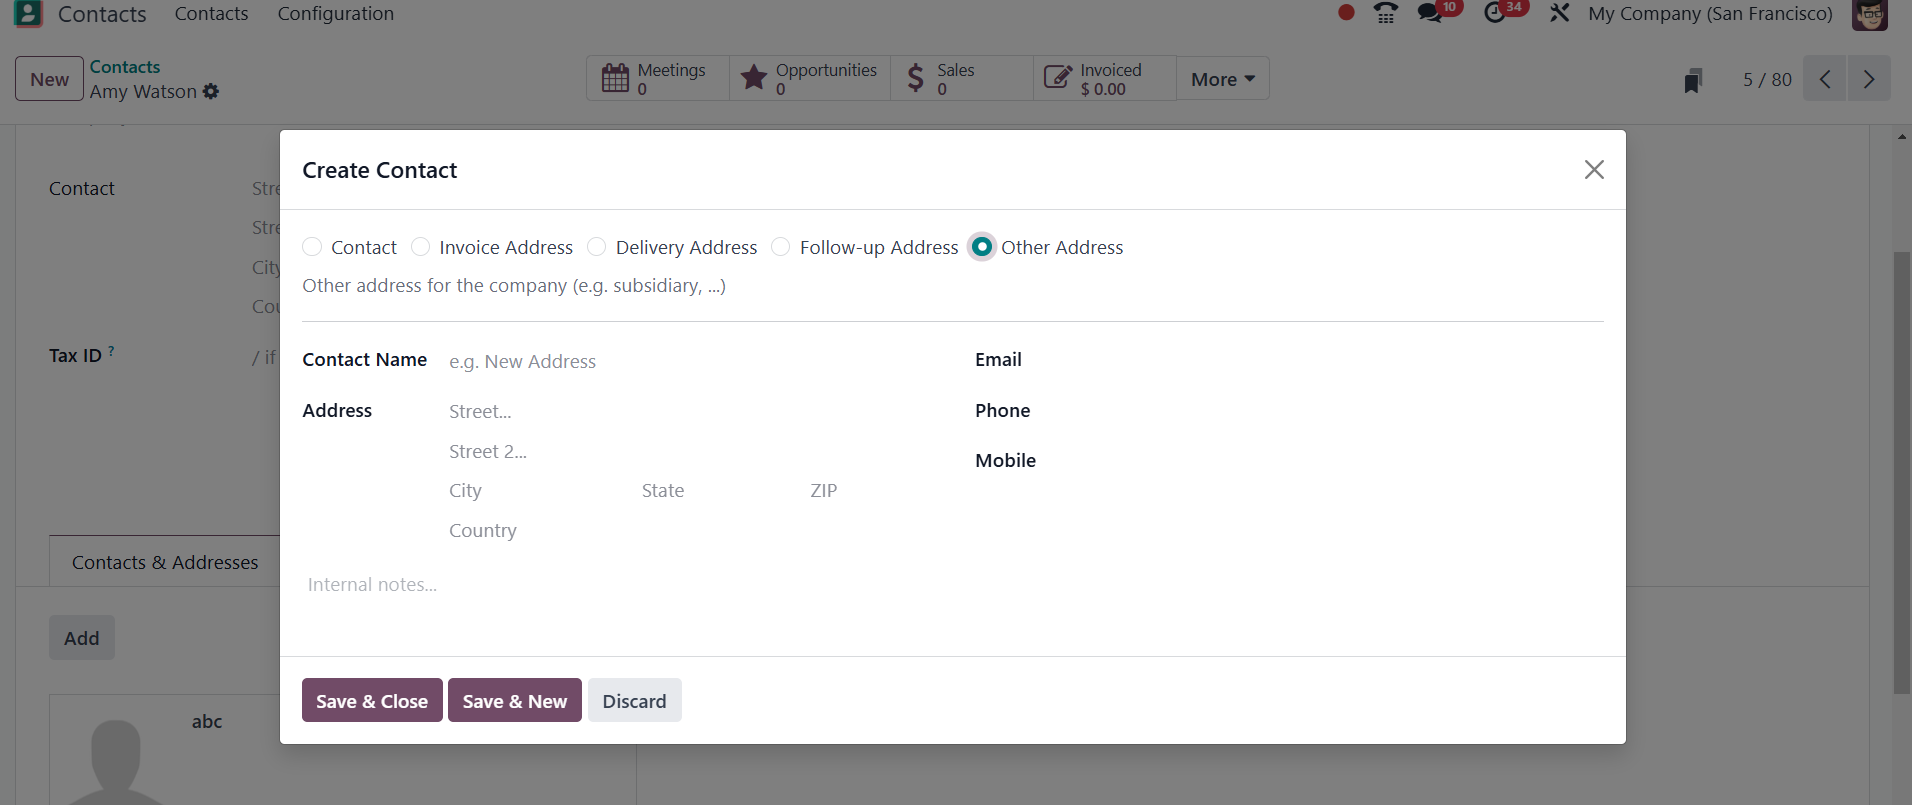
Enter the Contact person's address, email, phone, and mobile number after
choosing the Other Address option. After adding all details, click the SAVE &
CLOSE button, as indicated in the screenshot below.
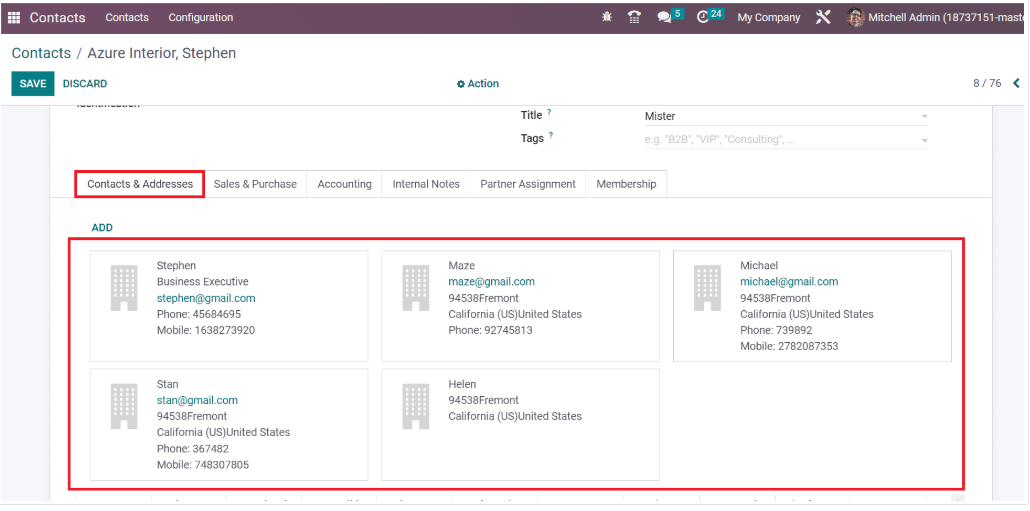
Now, we can access all created addresses inside the Contacts & Addresses tab in
the Contacts window.
Now, you have the next field, sales, and purchase, as in the screenshot below.
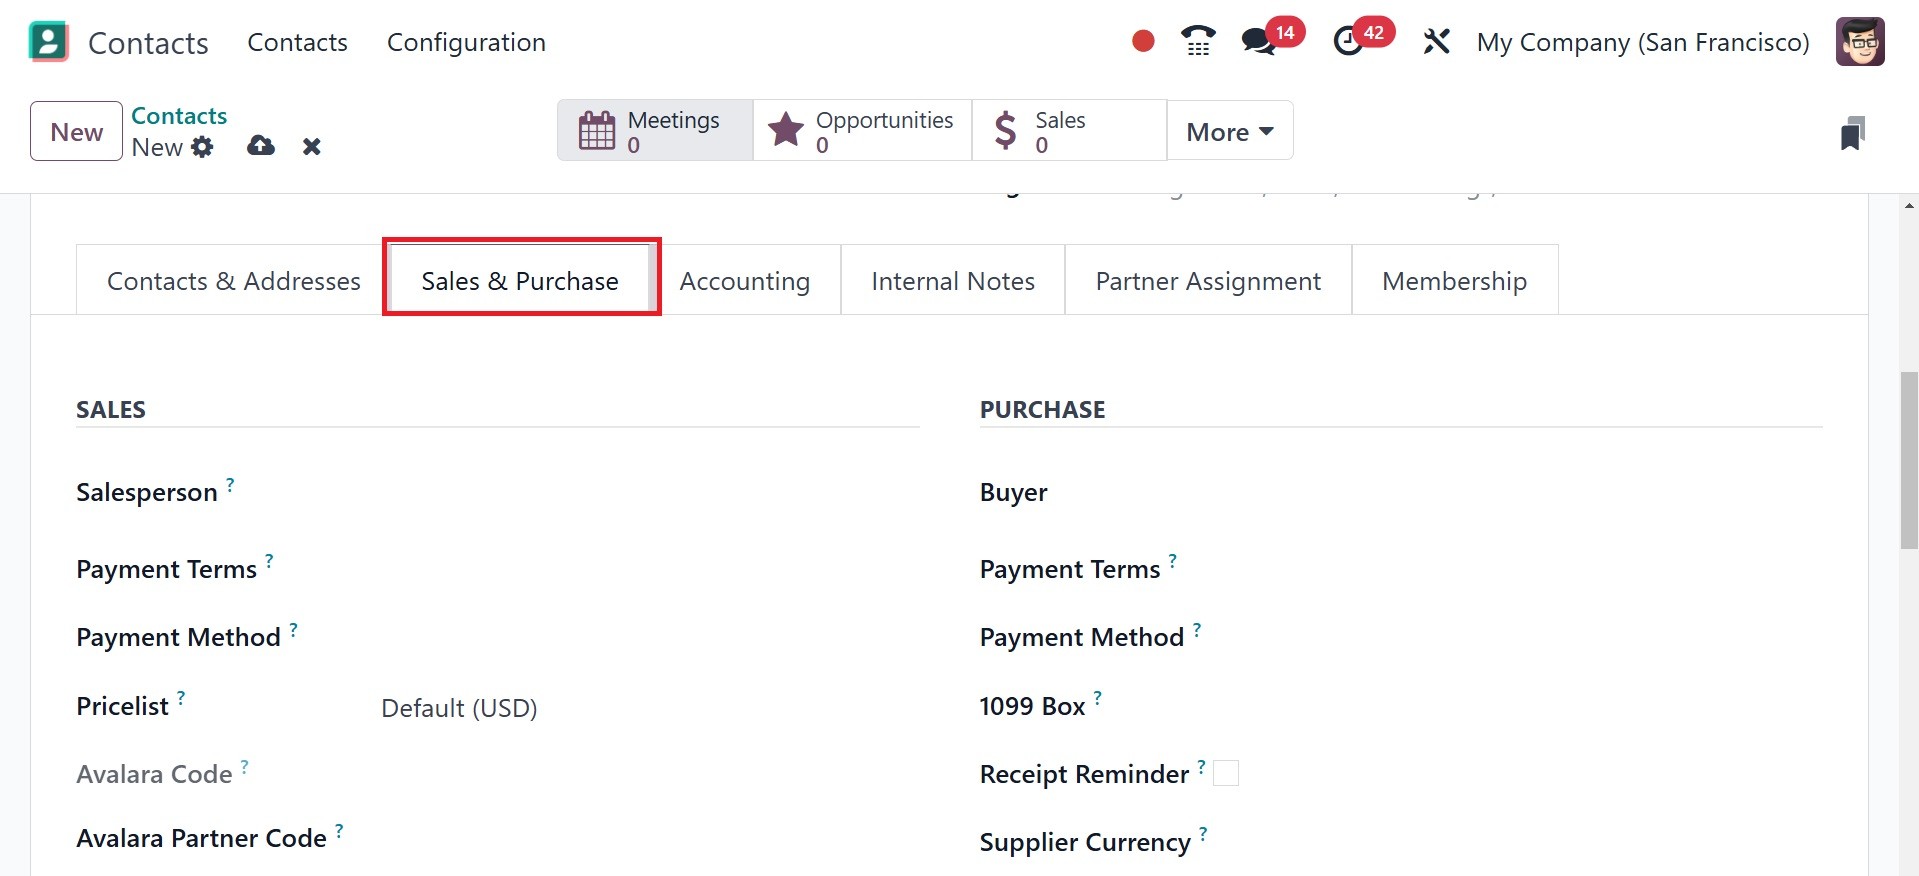
On the Sales & Purchases tab, you can assign a salesperson to oversee the sales
procedures related to the contact. Instead of using the default Payment Terms,
the contact's sales orders and invoices will use the ones you select here. To
execute sales to the contact, you can put an appropriate Price List in the box.
The customer code that has been entered in Avalara for this partner may be
referenced by both the Avalara Partner Code and the Avalara Exemption. The code
contained in the Avalara Code can be cross-referenced using the Avalara gateway.
You can designate the delivery method that will be used for this contact's sales
orders in the Delivery Method section.
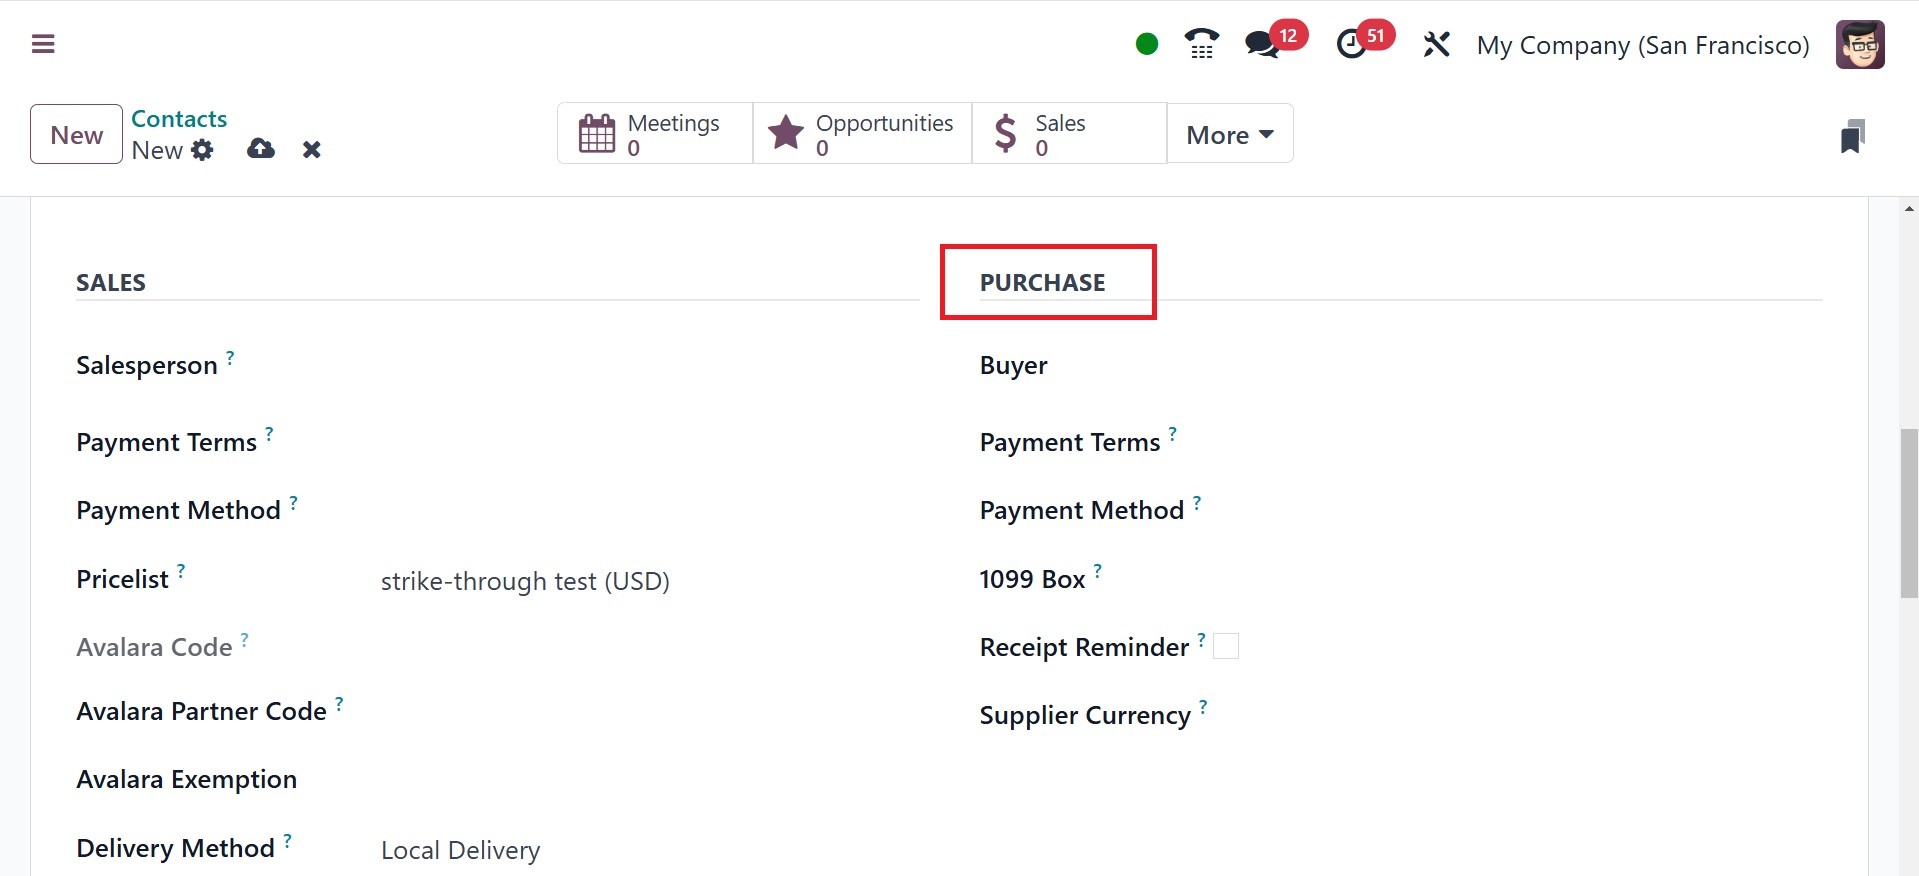
The 1099 Box (the journal entries of this contact will be summed up in the
selected box of the 1099 report), Supplier Currency, Payment Terms used for the
purchases and vendor bills under the Purchase section, and the preferred Payment
Method for paying this contact can all be filled up. By activating the receipt
reminder, the contact will receive an email asking them to confirm the exact time
before the expected receipt date.
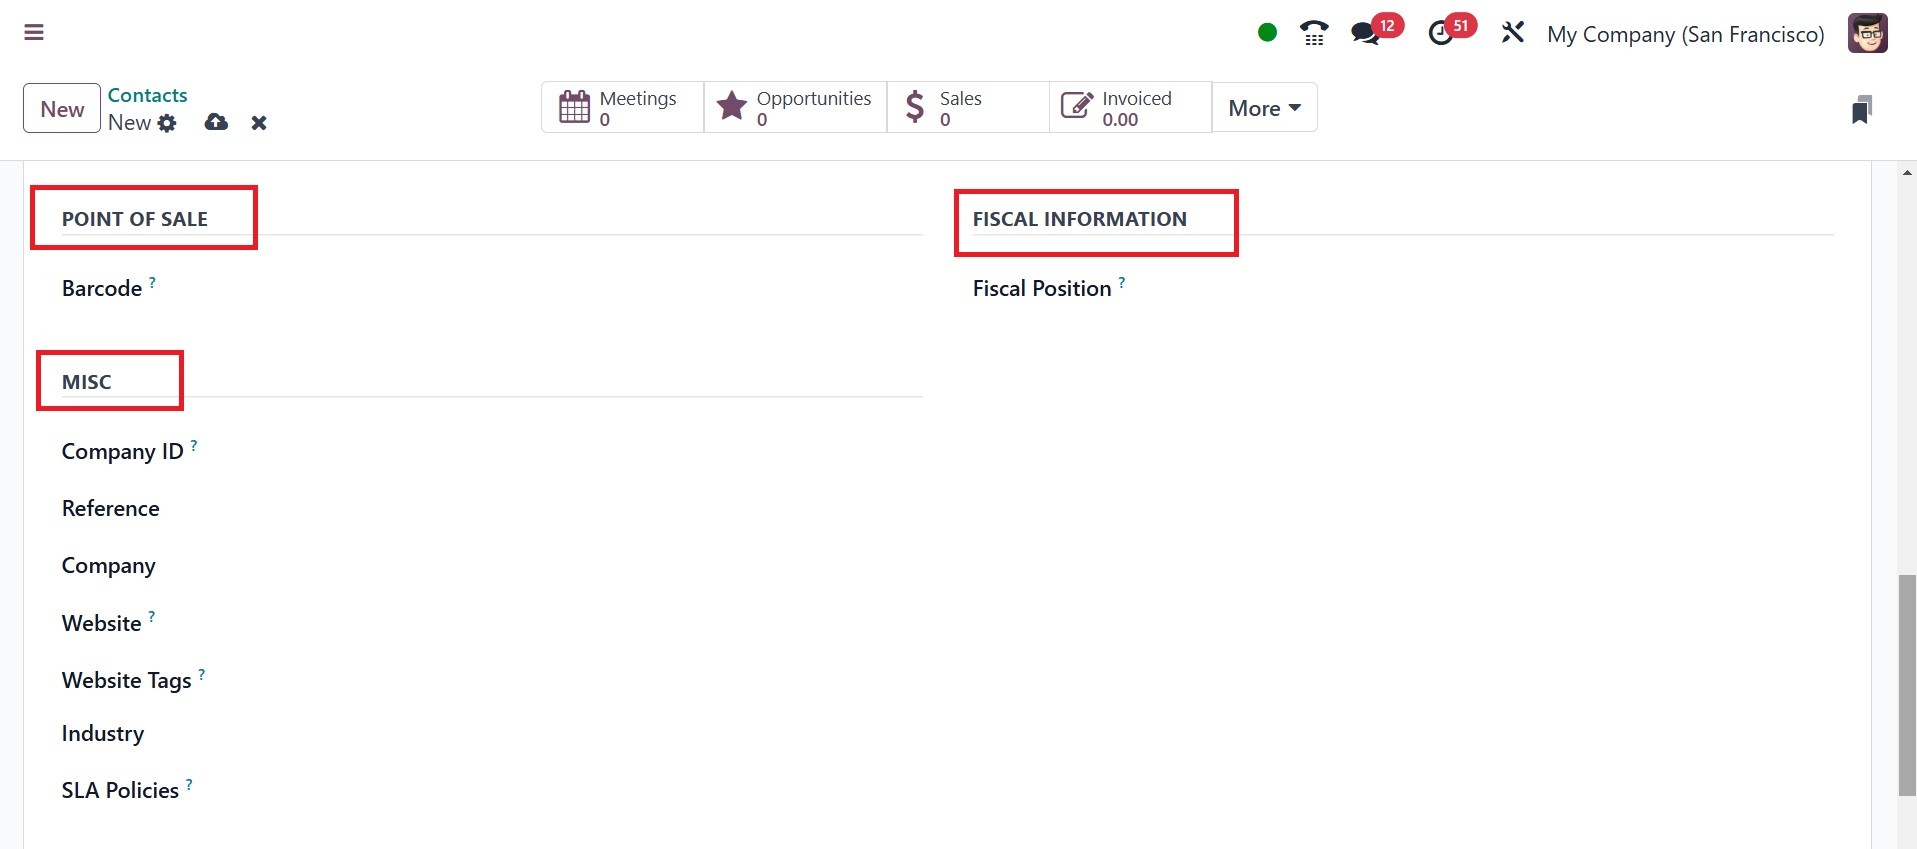
In the Point of Sale section, you can set a barcode to identify this contact.
Enter your fiscal position in the Fiscal Information section. For the Company ID,
Reference, Company, Website, Website Tags, Industry, and SLA Policies, you can
complete the corresponding fields in the Miscellaneous section, such as Add any
other details about this contact in the Reference area. In a multi-company
database, choose this contact from the Company field drop-down list if it should
only be available to one firm. If you are working with a database that has many
websites, you can limit the publication of this contact to only one website by
using the Website drop-down menu. To help filter published customers on the
/customers website page, choose one or more Website Tags. Use the drop-down menu
to choose an industry for this contact. To assign a Helpdesk SLA policy to this
contact, use the SLA Policies field.
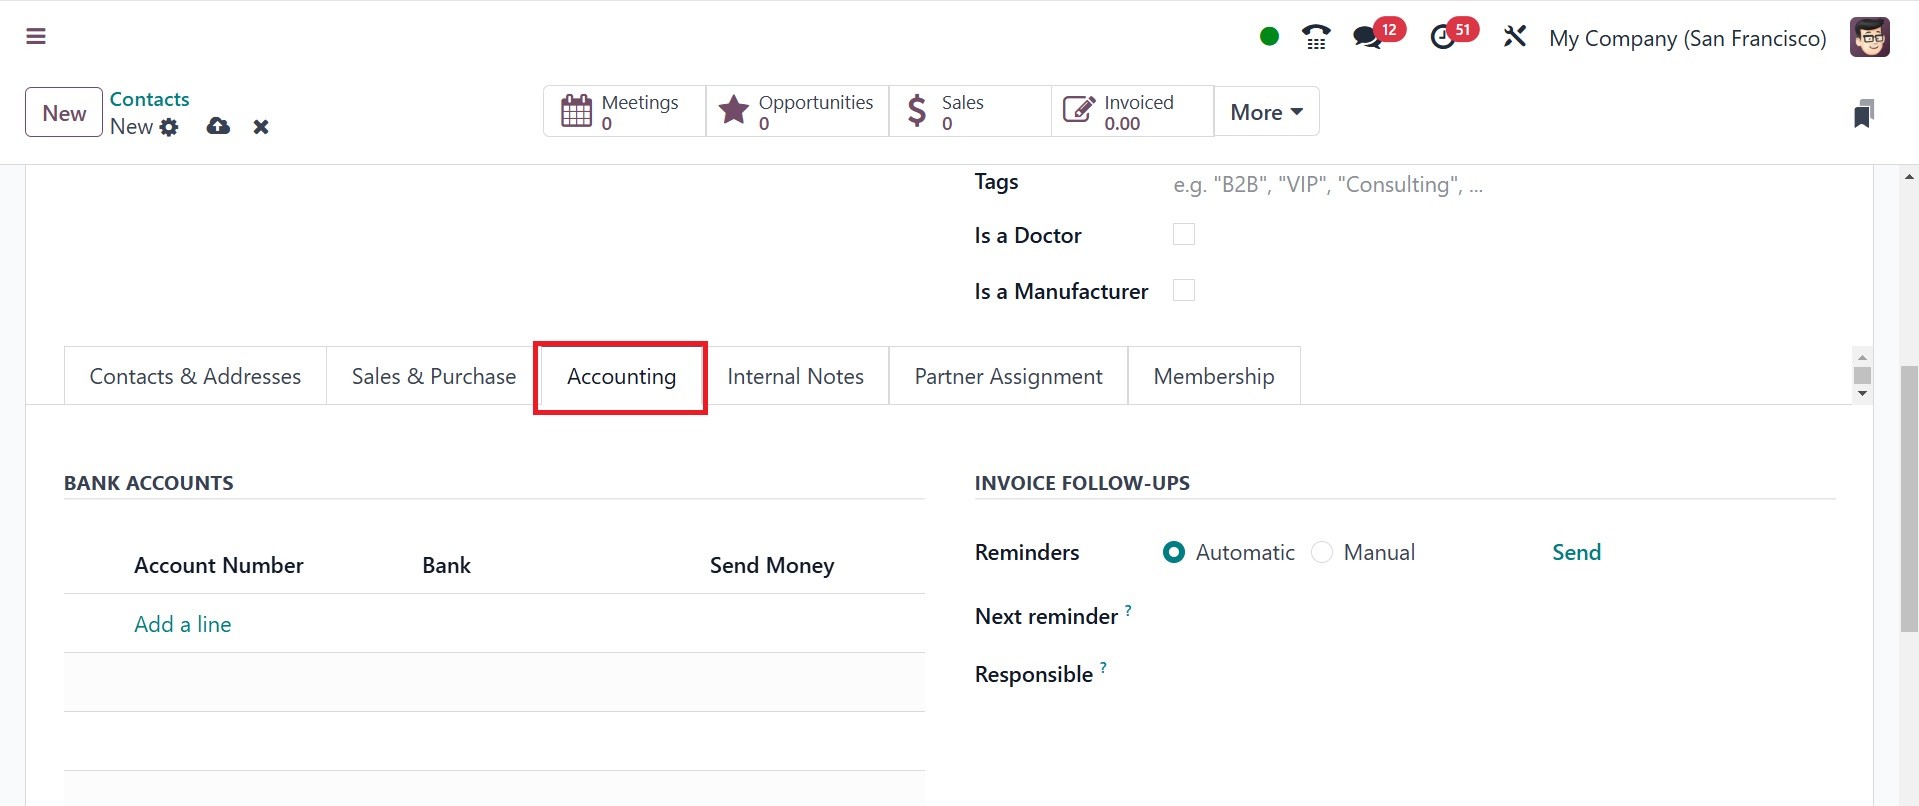
You can define the details required for the contact's accounting procedures under
the Accounting tab. By selecting the Add a Line option, you may include the Bank
and the Account Number.
The payment payable and receivable accounts can be specified in the Account
Payable and Account Receivable fields, in Accounting Entries field respectively.
Account payable is the account used to track the money your company owes to
vendors or suppliers. Account receivable is the account used to track the money
your customers owe to your company. You can also specify a Default Vendor Payment
Reference for vendor invoices. You have the invoice follow-up option, under which
you have the options, like follow up status to Indicates the current status of
follow-ups for the customer, reminders to track the number of follow-up reminders
sent to the customer for overdue invoices, next reminders to show the scheduled
date for the next follow-up action or reminder, and responsible field which
indicates the user or team in charge of managing the customer’s follow-ups,
respectively.
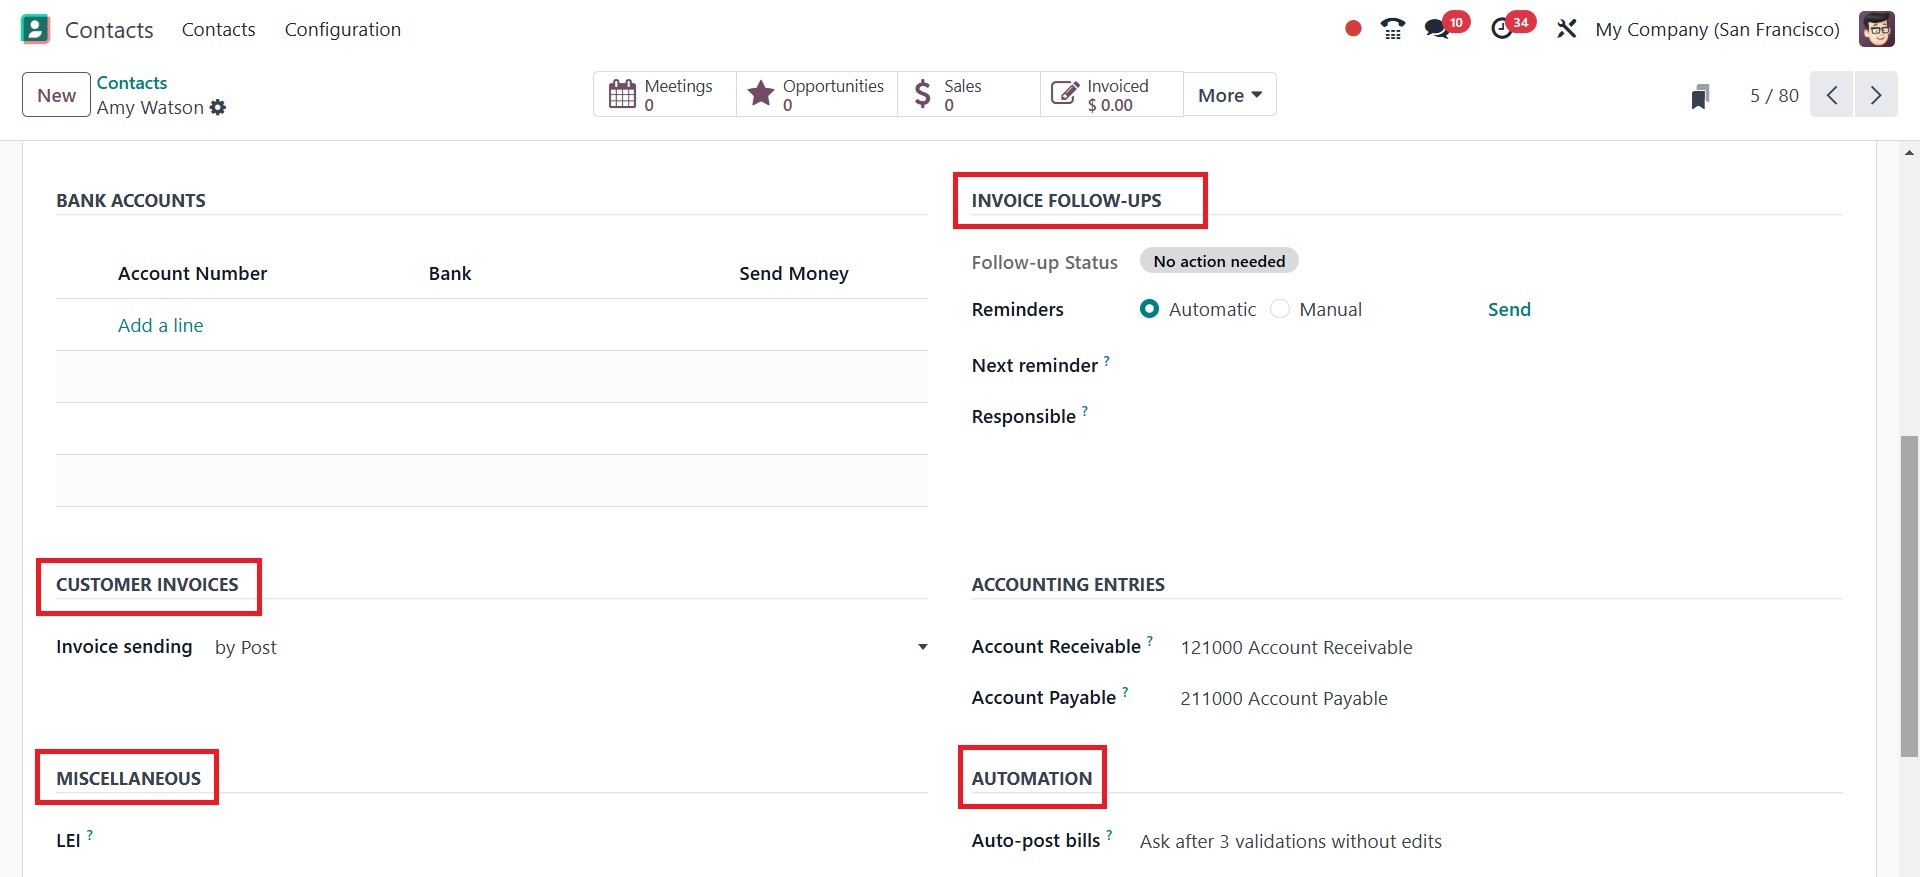
Under the Customer Invoice option, you can set the invoice sending as by
download, by email, or by post. It can be chosen between Email, Print, or Portal.
Under the Automation field, you can add the Auto post bill. Here, it checks or
unchecks based on preference. It automates the creation of customer invoices from
sales orders or delivery orders. Below that, you have the Ignore Abnormal Invoice
Amount which checks to disable amount validations. Then, below that, you have the
Ignore Abnormal Invoice Date option to check to disable date validations.
Under the Miscellaneous heading, use the LEI field to enter a Legal Entity
Identifier, if necessary. You can also see an option of Send, which will lead you
to a page, as in the screenshot below.
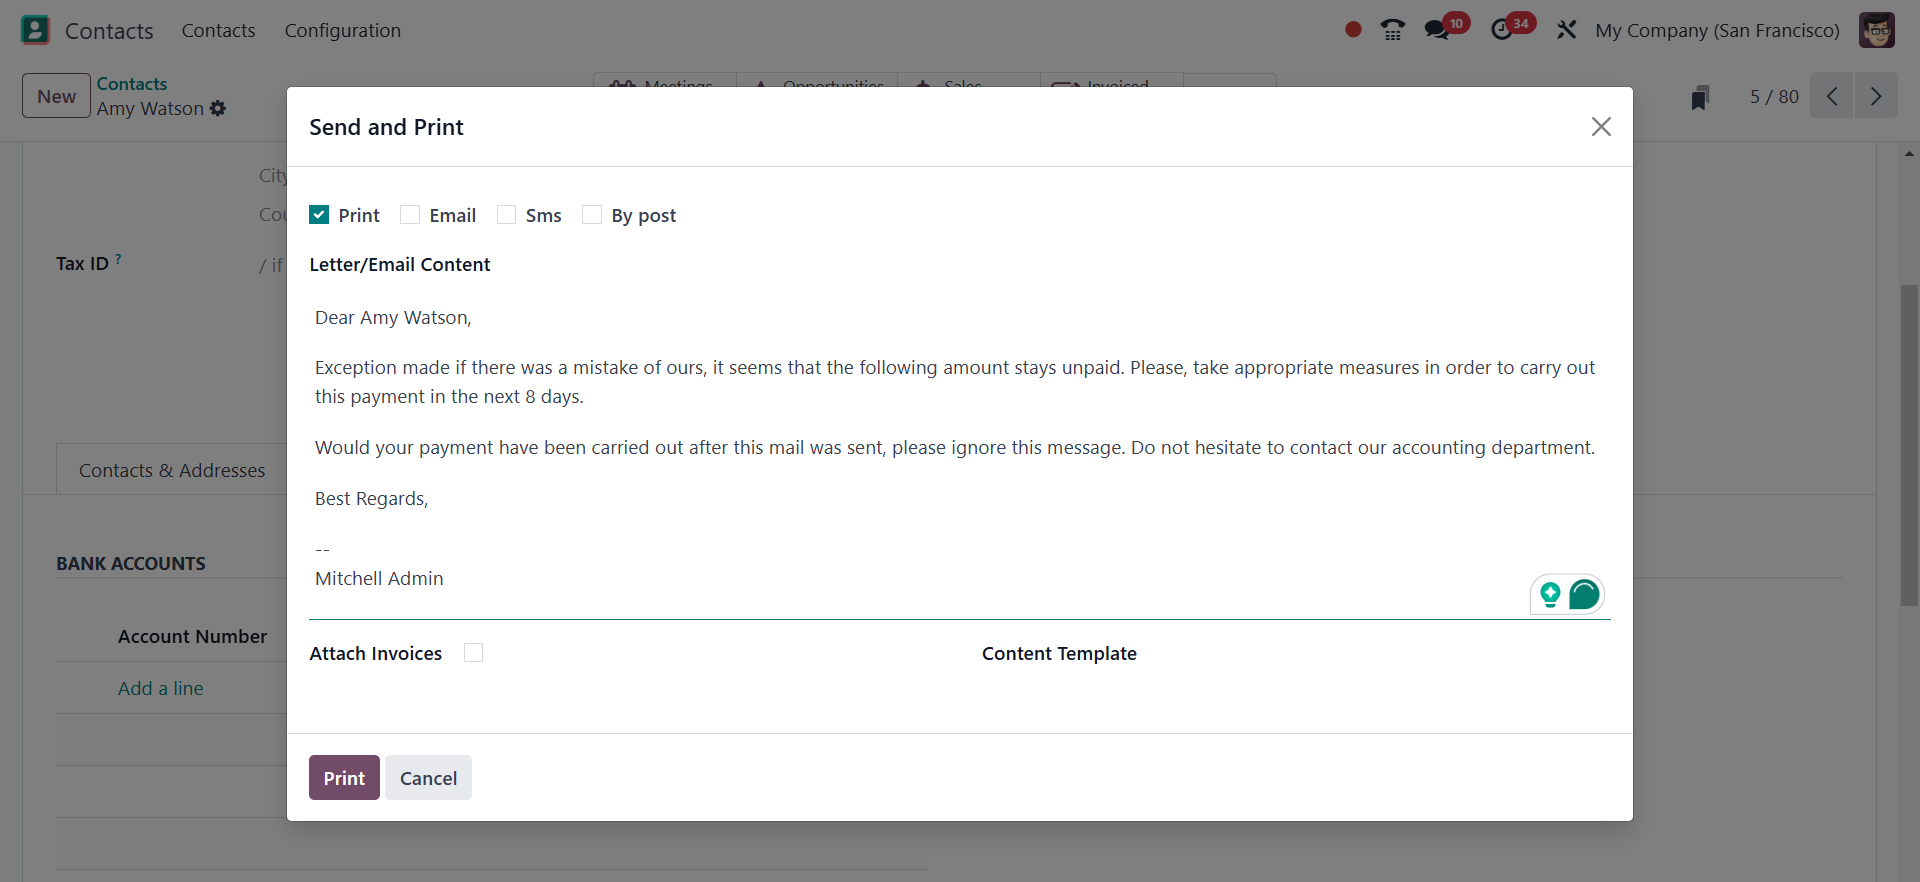
Here, you can make use of the print, email, sms, or by post accordingly.
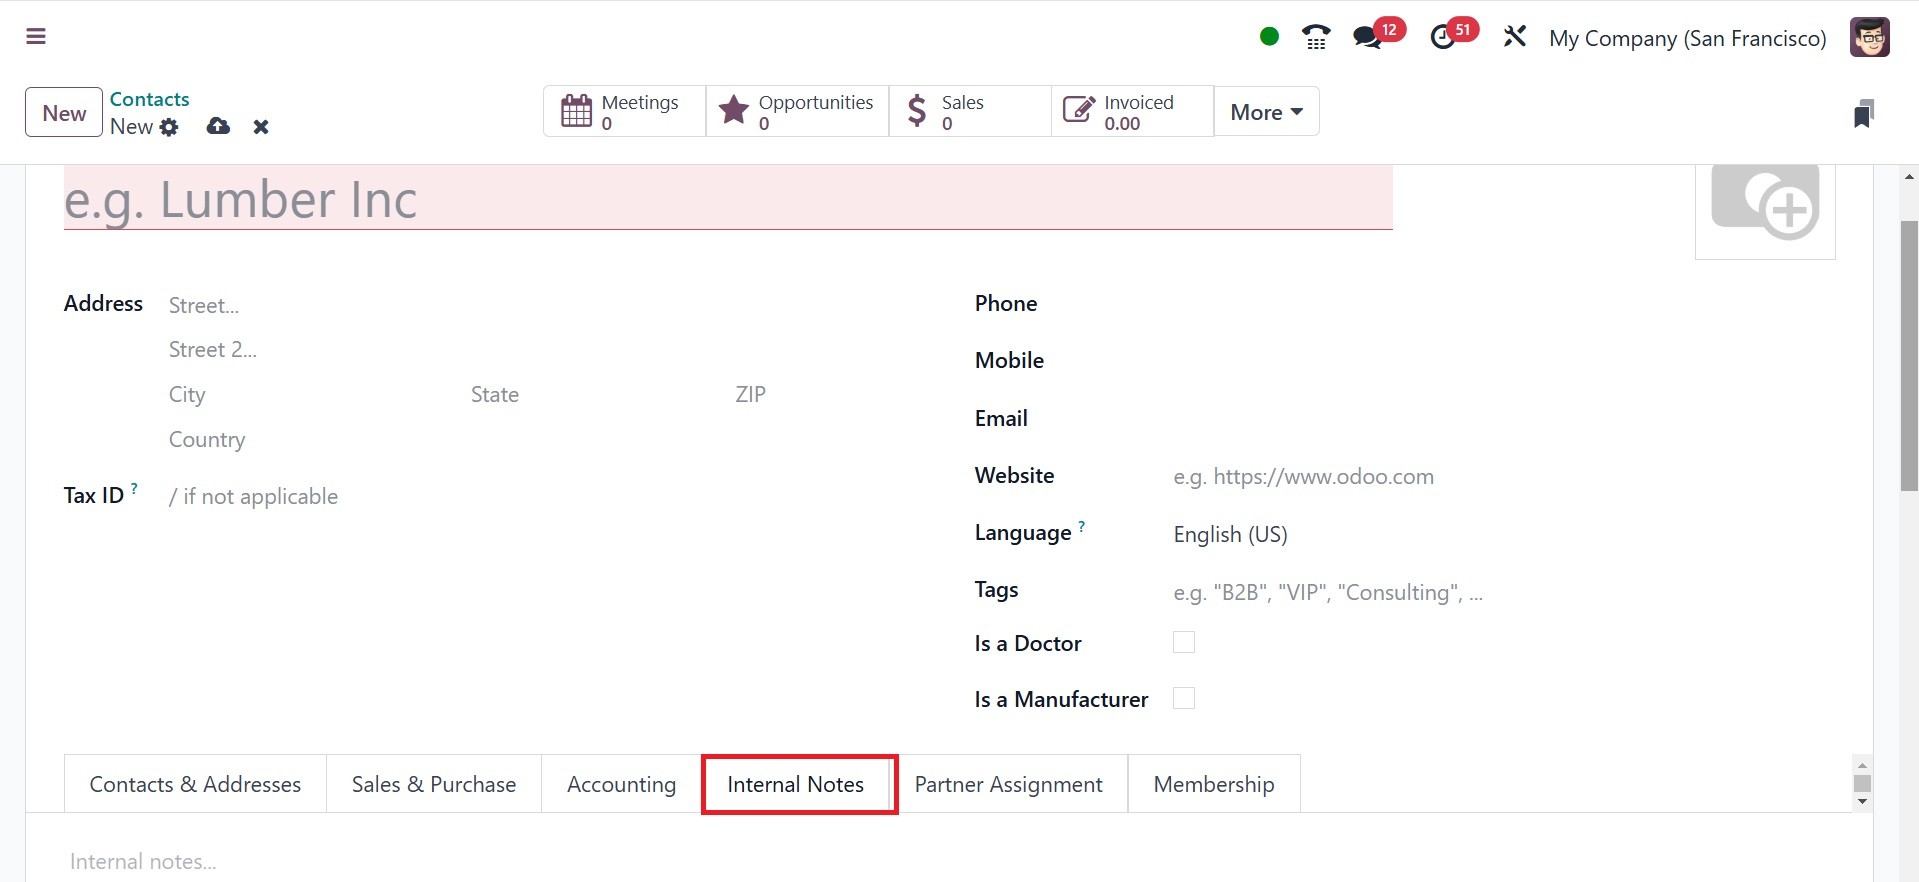
You can add any further contact-related remarks in the Internal remarks area. The
Partner Activation and Partner Review details can be added under the Partner
Assignment tab. The Partner Level, Commission Plan, Activation, Level Weight,
Most Recent Partner Review, Most Upcoming Partner Review, and Partnership Date
can all be entered in the appropriate areas. In the specified area, set the
contact's geolocation.
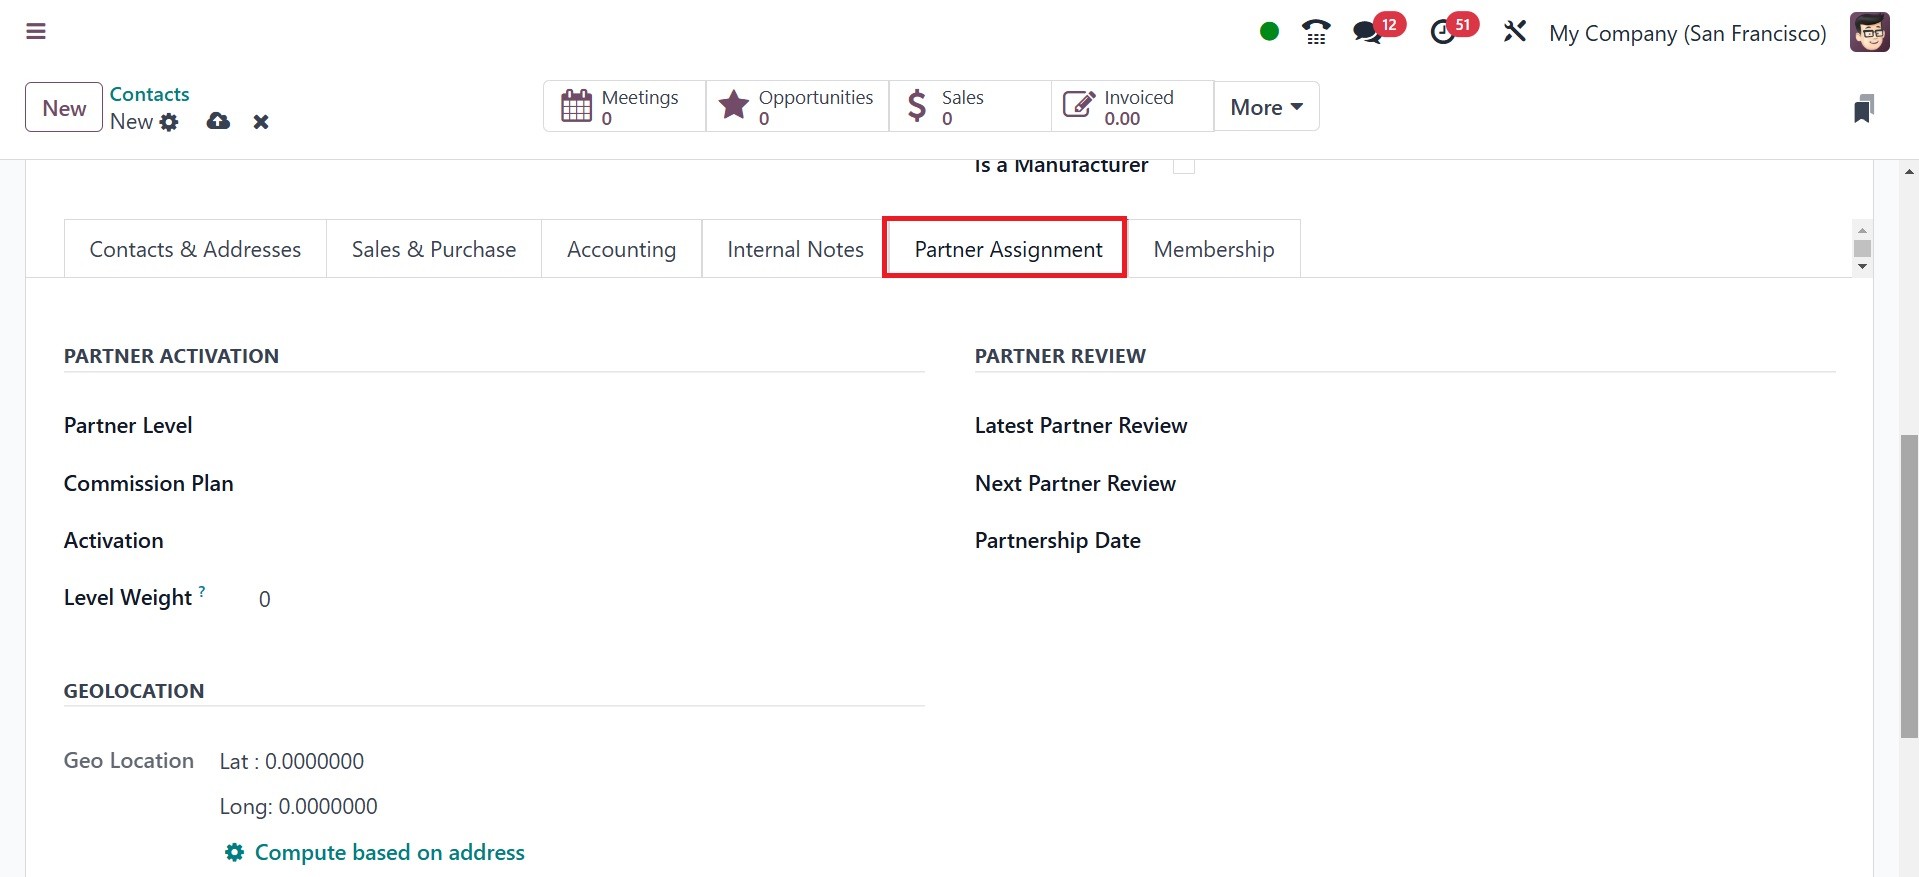
The Partner Assignment page follows, which by default has a Geolocation section
along with additional partner choices including Partner Review and Partner
Activation setups. Only when the Resellers module is installed do these appear.
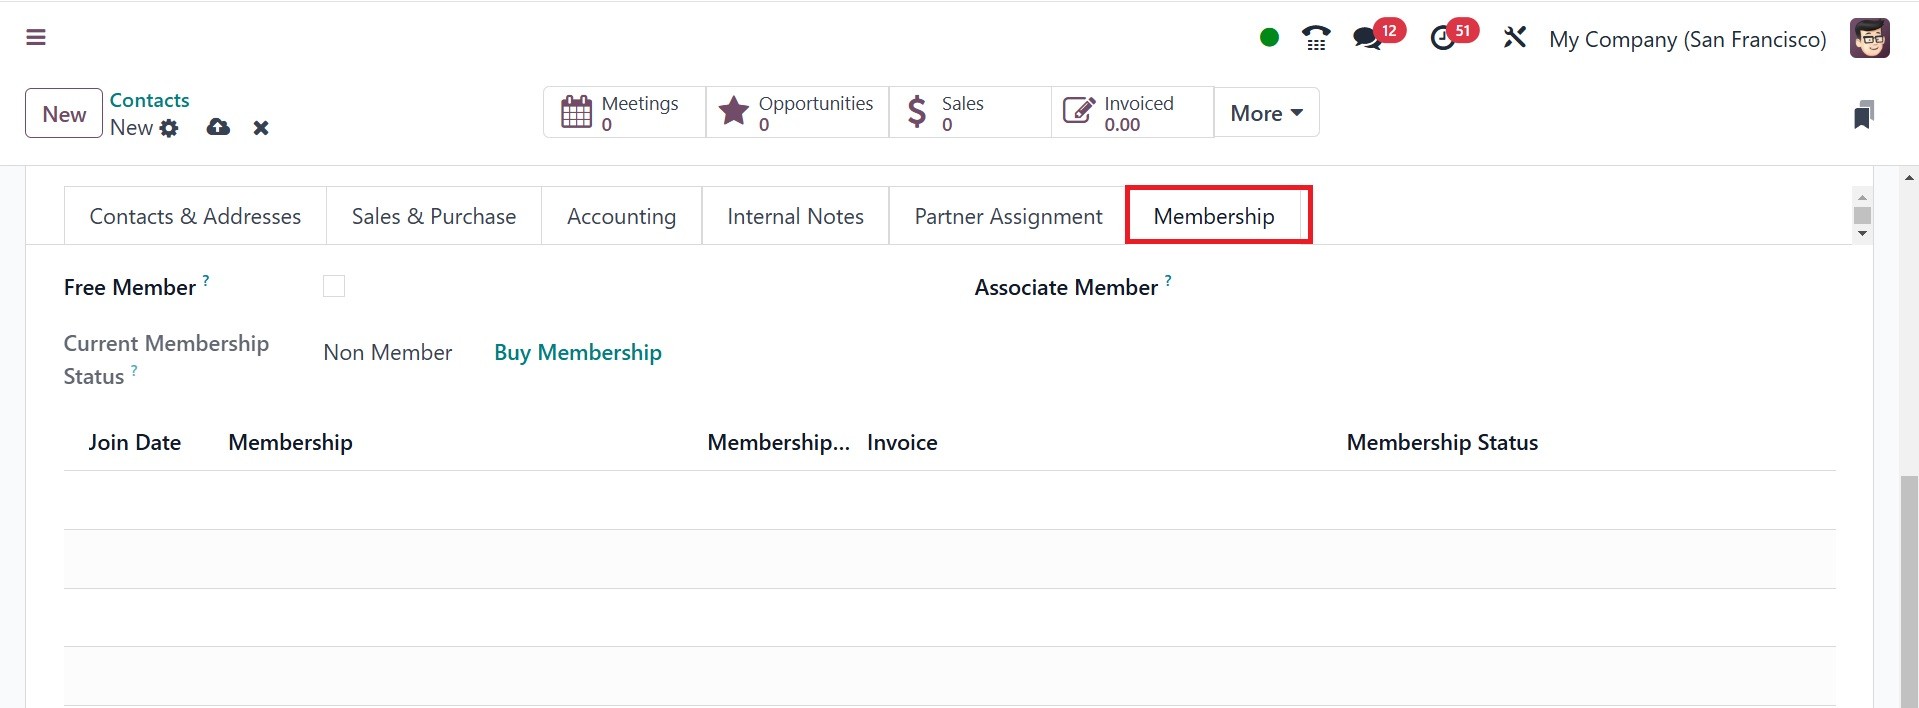
Lastly, users can manage any memberships that are being offered to this
particular contact by using the Membership tab on contact forms. Note that only
after installing the Members program does this tab show up.
Turn on your membership. In the Membership tab of a contact form, select Buy
Membership to activate a contact's membership. From the drop-down option in the
resulting pop-up window, choose a Membership. Next, set up a Member Price. Once
both fields have been completed, click Invoice Membership.
On the Membership tab of a contact form, you may also check the Free Member
checkbox to provide a free membership.
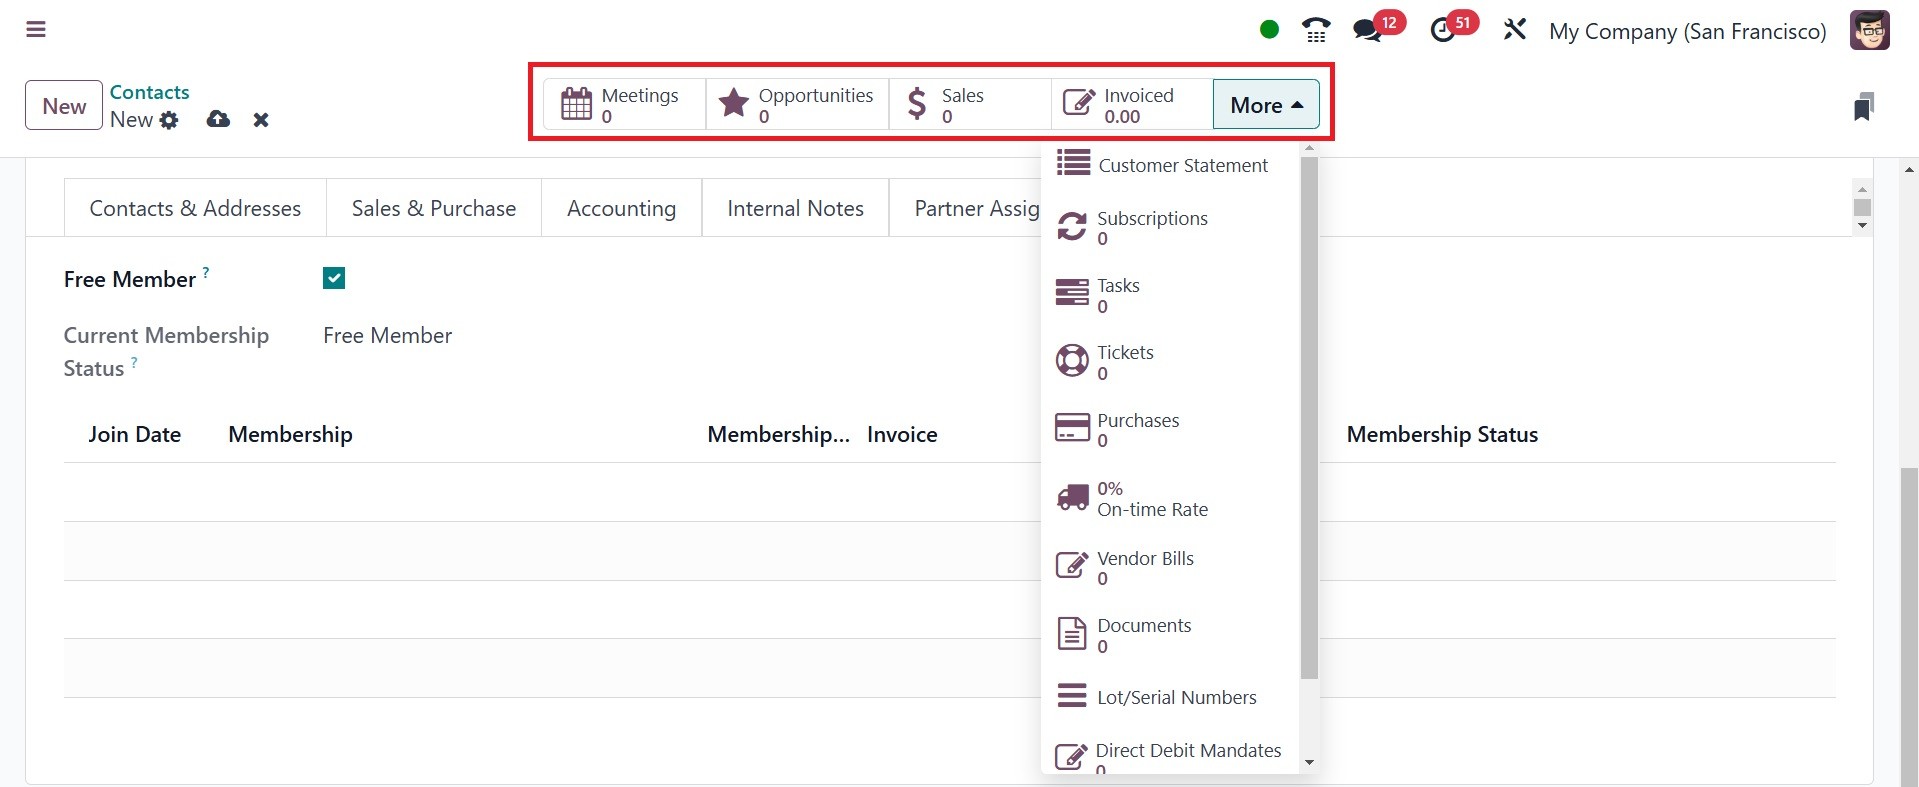
Any meetings, sales, POS orders, subscriptions, and project tasks are visible to
the user, and the More smart button opens a drop-down menu with more
possibilities, as in the above screenshot. Additionally, a user can easily access
the Partner Ledger linked to this contact, Purchases, Helpdesk duties, On-time
Rates for deliveries, Invoiced information, and Vendor Bills. The Partner Ledger
provides a detailed statement of all financial transactions for each partner. The
option is available under the action icon, customer statement.
If there are any overdue or on-file payments for this contact, smart buttons like
this one are also connected to deliveries, papers, loyalty cards, and direct
debits.
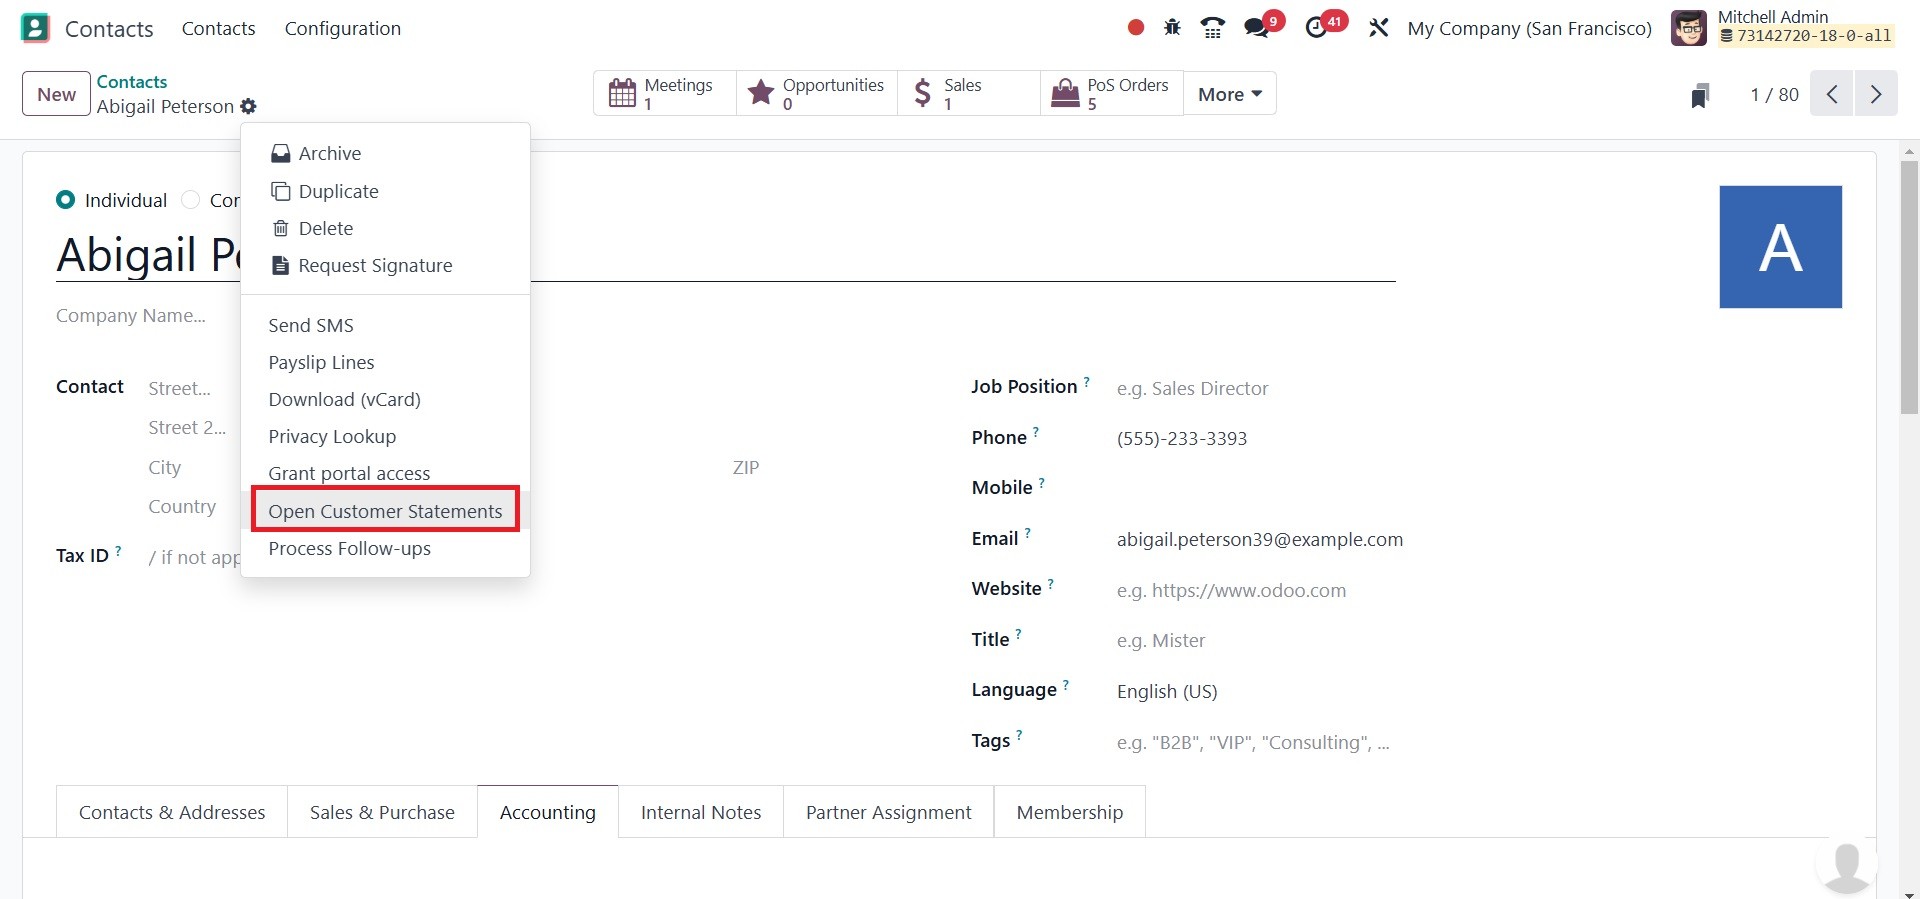
If the contact is a partner, clicking the Go to Website smart button will take
the user to their partner page on the Odoo-built website. You can have the Action
icon near the New option, where you have got a new option of open customer
statement, as in the image below.
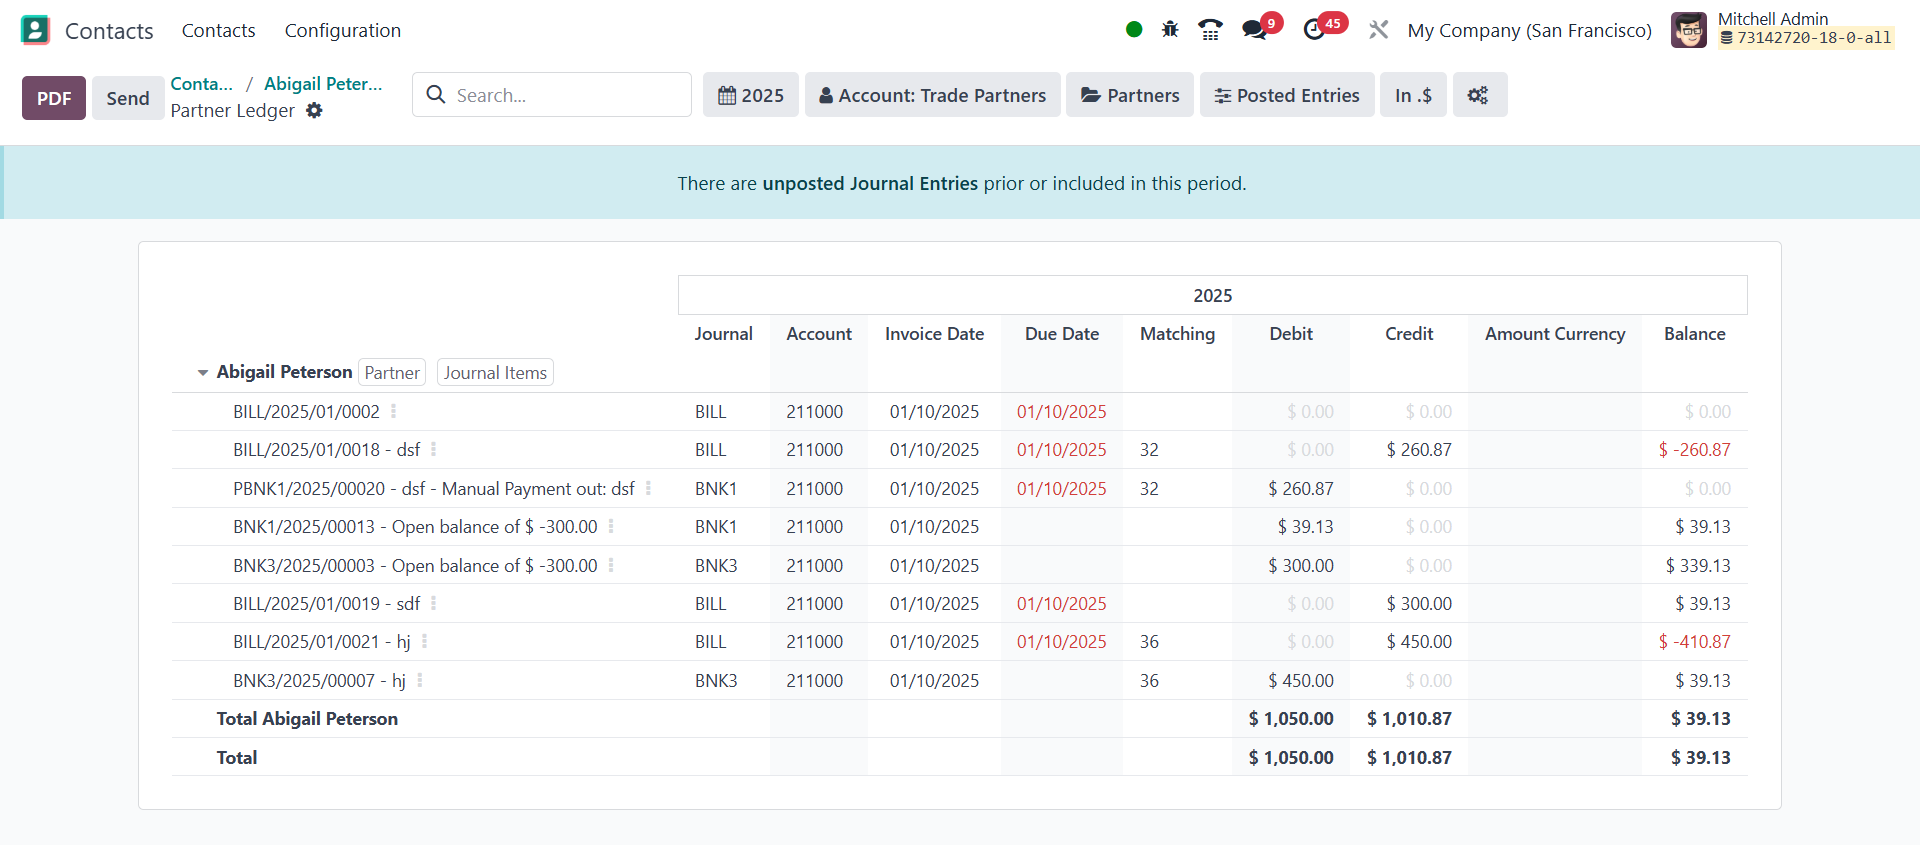
Selecting the open customer statement option will direct you to the partner
ledger page, as in the image below.
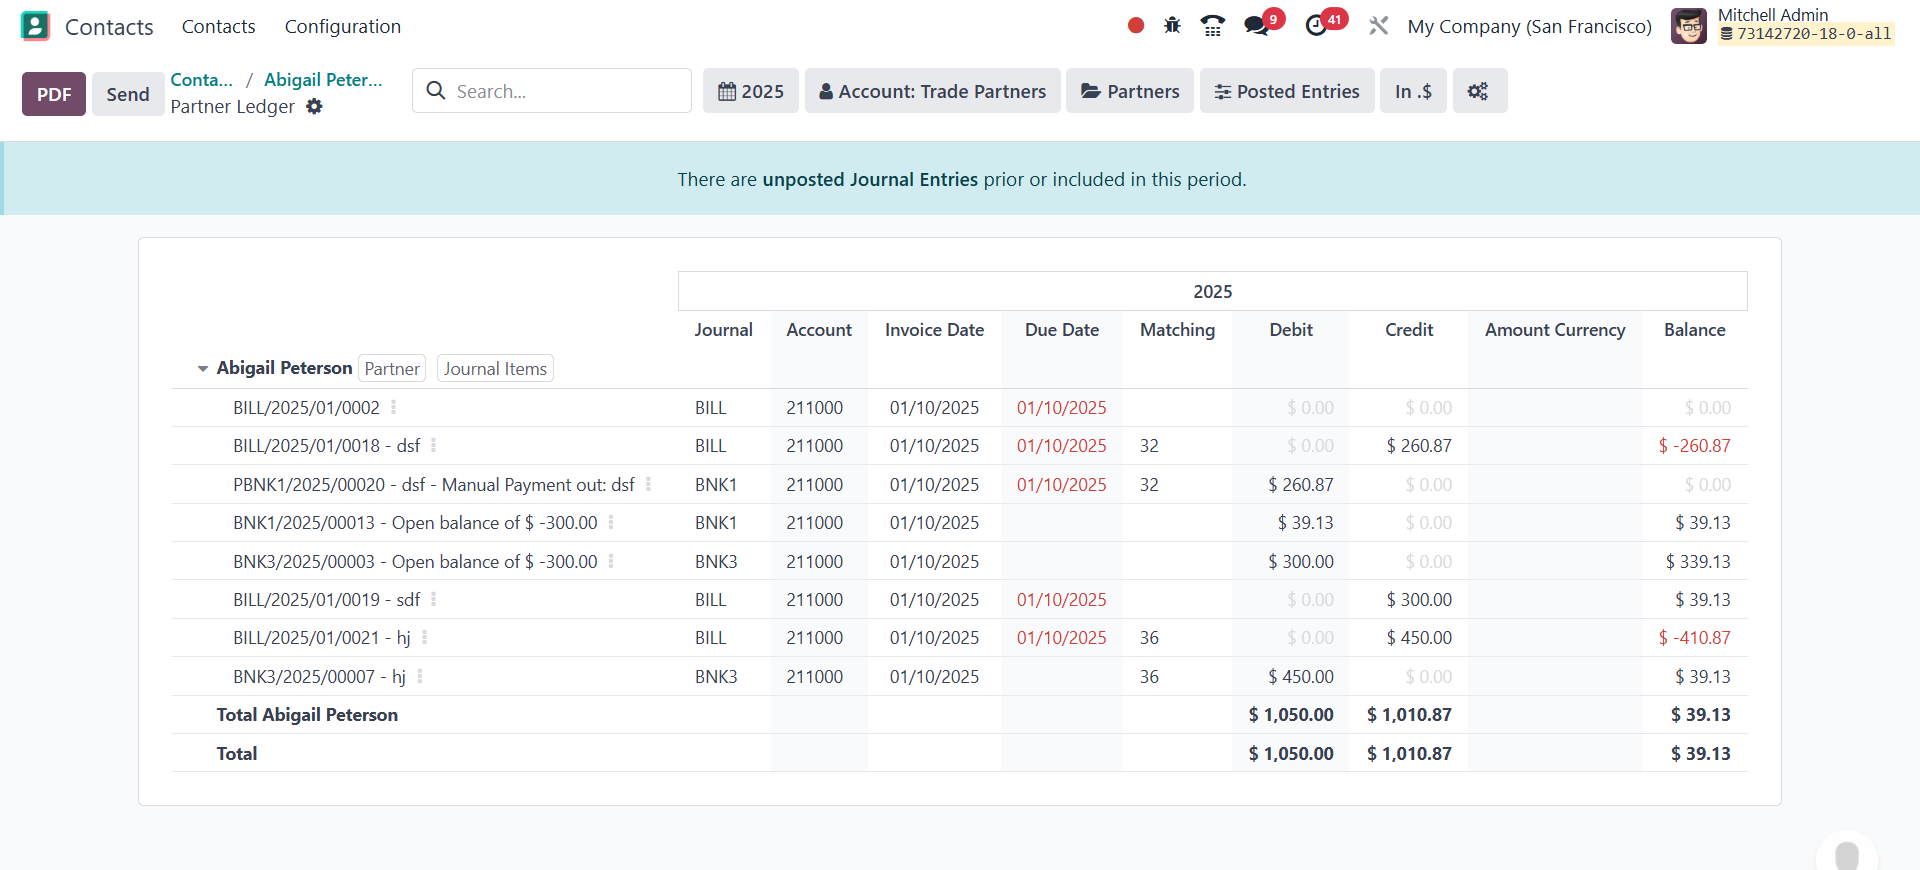
Here, the journal, account, invoice date, due date, matching, debit, credit,
annual currency, and balance options are on the ledger page. You can also have
some smart filters like current view, account: trade partners, partners, posted
entries, currency option, and a gear icon. You have the page for selecting the
gear icon, as in the image below.
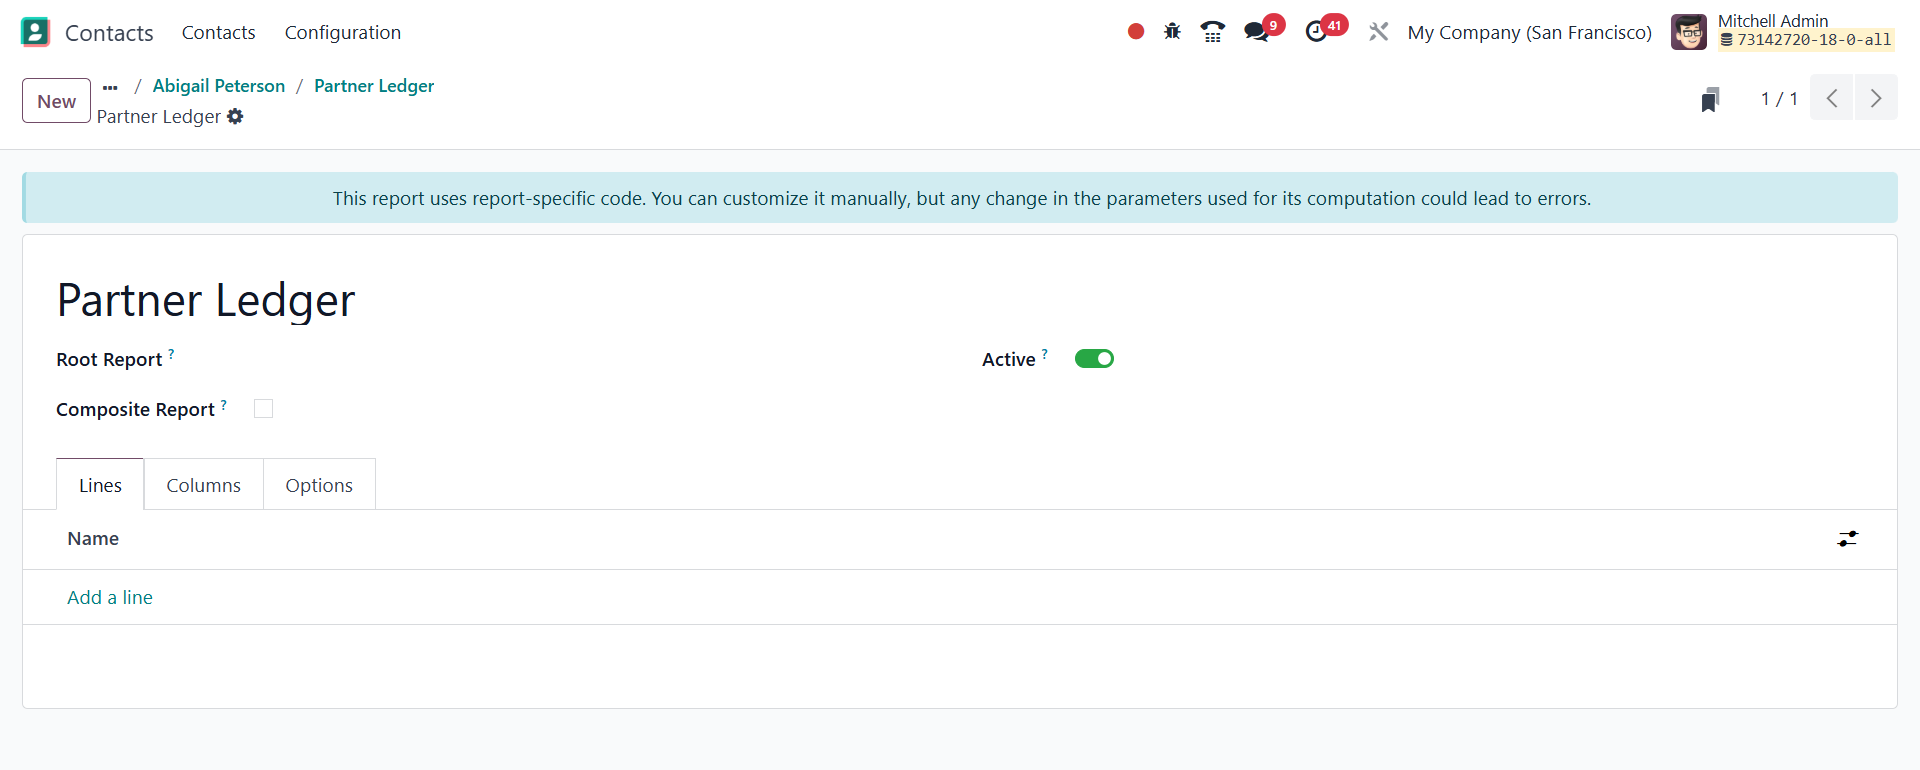
Here, you can add the root report, composite report option to activate, and an
active icon as well. This report uses report-specific code. It can be customized
manually, but those changes in the parameters that are used for the computation
can lead to errors as well.