1. CRM
Leads/Opportunities Pipeline
The window that opens when you
enter the CRM module is the
main dashboard. One way to
think about the pipeline
activity is as staged.
Opportunities and leads in
Odoo 18 are arranged
according to their stage of
the sales funnel. The company
website, social media
accounts, live chat, email,
SMS, and several more
channels may all be used to
collect leads thanks to
Odoo's highly integrated
design. Leads from any of
these outlets may be
effectively managed using
Odoo18 CRM. These leads may
eventually develop into
opportunities and,
ultimately, sales quotes,
contingent on the customer's
response. The CRM module has
a big impact on a company's
capacity to attract more
customers.
As can be seen in the screenshot,
the CRM module has three main
menus: Sales, Leads,
Reporting, and Configuration.
Each of these menus in Odoo
18 offers a range of options
for doing different tasks
connected to customer
relationship management.
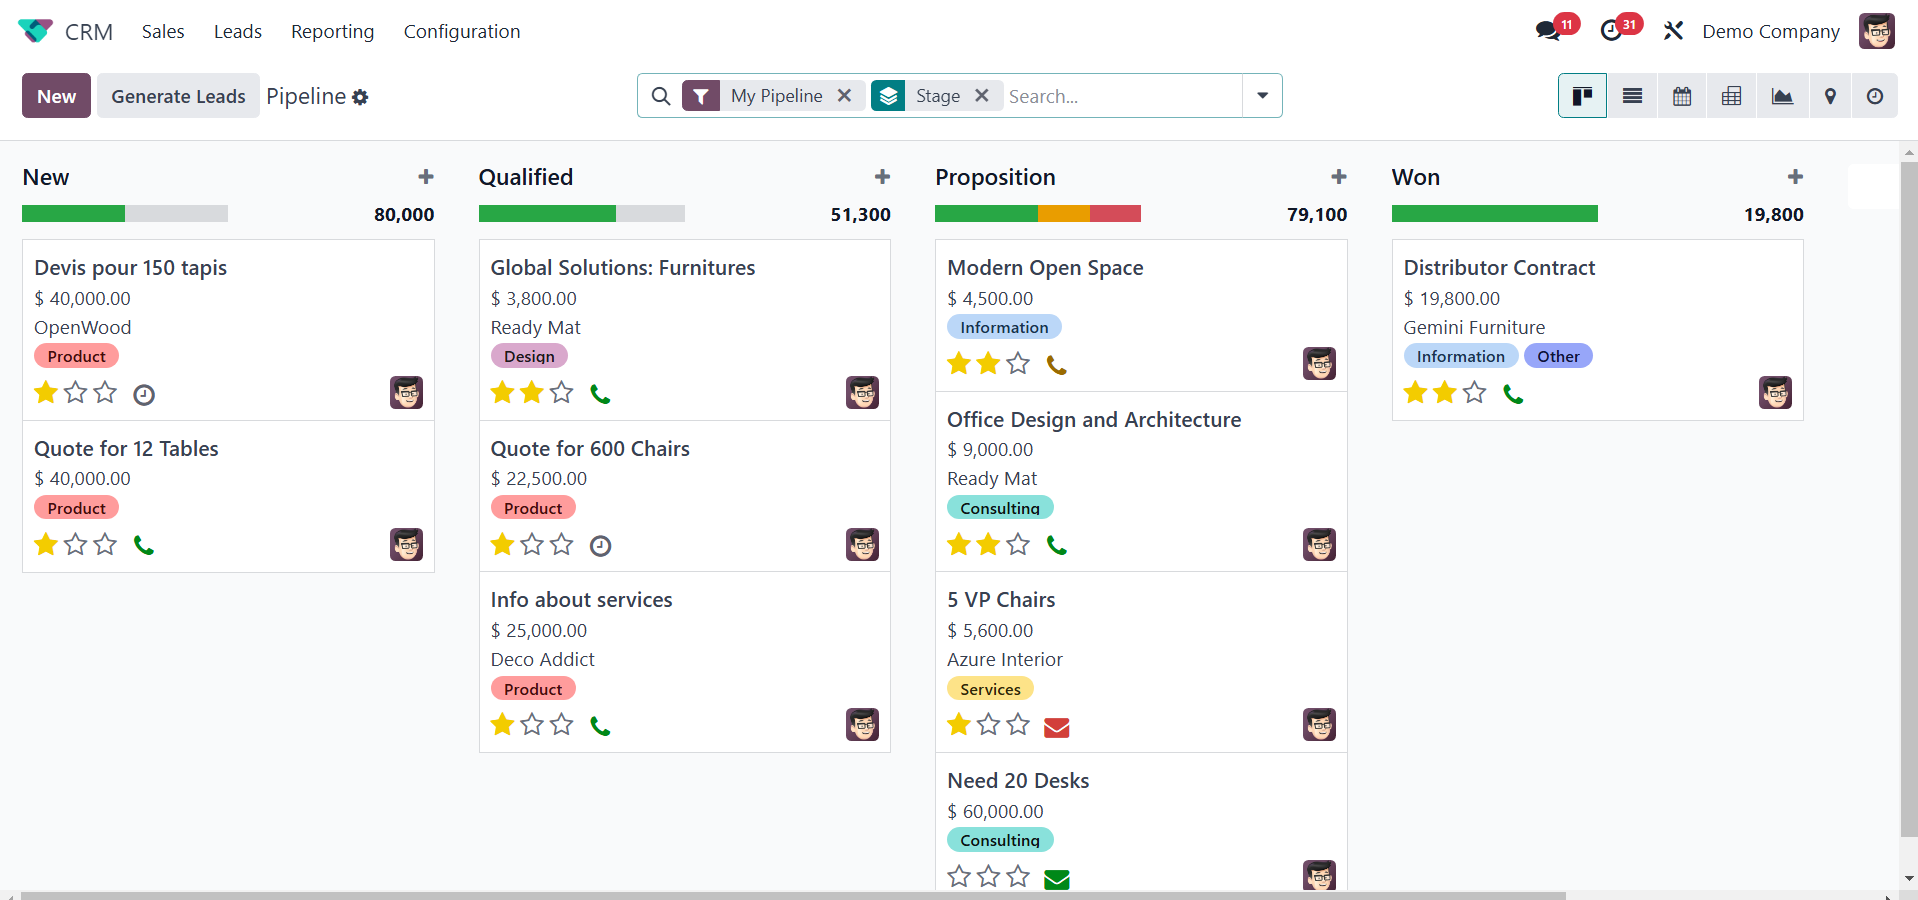
The screenshot shows the main
dashboard for the Odoo 18 CRM
module. This platform is
accessible through the My
Pipeline option in the
module's Sales menu. A list
of every opportunity produced
via various channels will
appear in the My Pipeline
window.
The updated colored interface of
the Odoo 18 CRM module
dashboard is seen in the
image above. Odoo 18
completely changes the look
of the screen. Similar to
previous iterations of Odoo,
you may customize the
platform's presentation to be
a Kanban, List, Calendar,
Pivot, Graph, Map, and
Activity.
When we look at the Kanban view
of the CRM pipeline, we can
see that all of the records
are grouped in the window
based on how far along they
are in their processes. The
arrangement of the leads
makes it easy for the user to
track each one's development.
The CRM feature makes it easy
to allocate leads to
different stages. Depending
on your business needs, you
can change the stages and
group leads into the relevant
stages.
The screenshot shows the New,
Qualified, Proposition, and
Won stages. As the stage
titles imply, all new
opportunities will appear
under the New stage. The next
step, the Qualified stage,
will only be reached by
qualified leads from the new
leads.
Profitable business leads can
proceed to the "Won" stage if
the corresponding customer
has verified it.
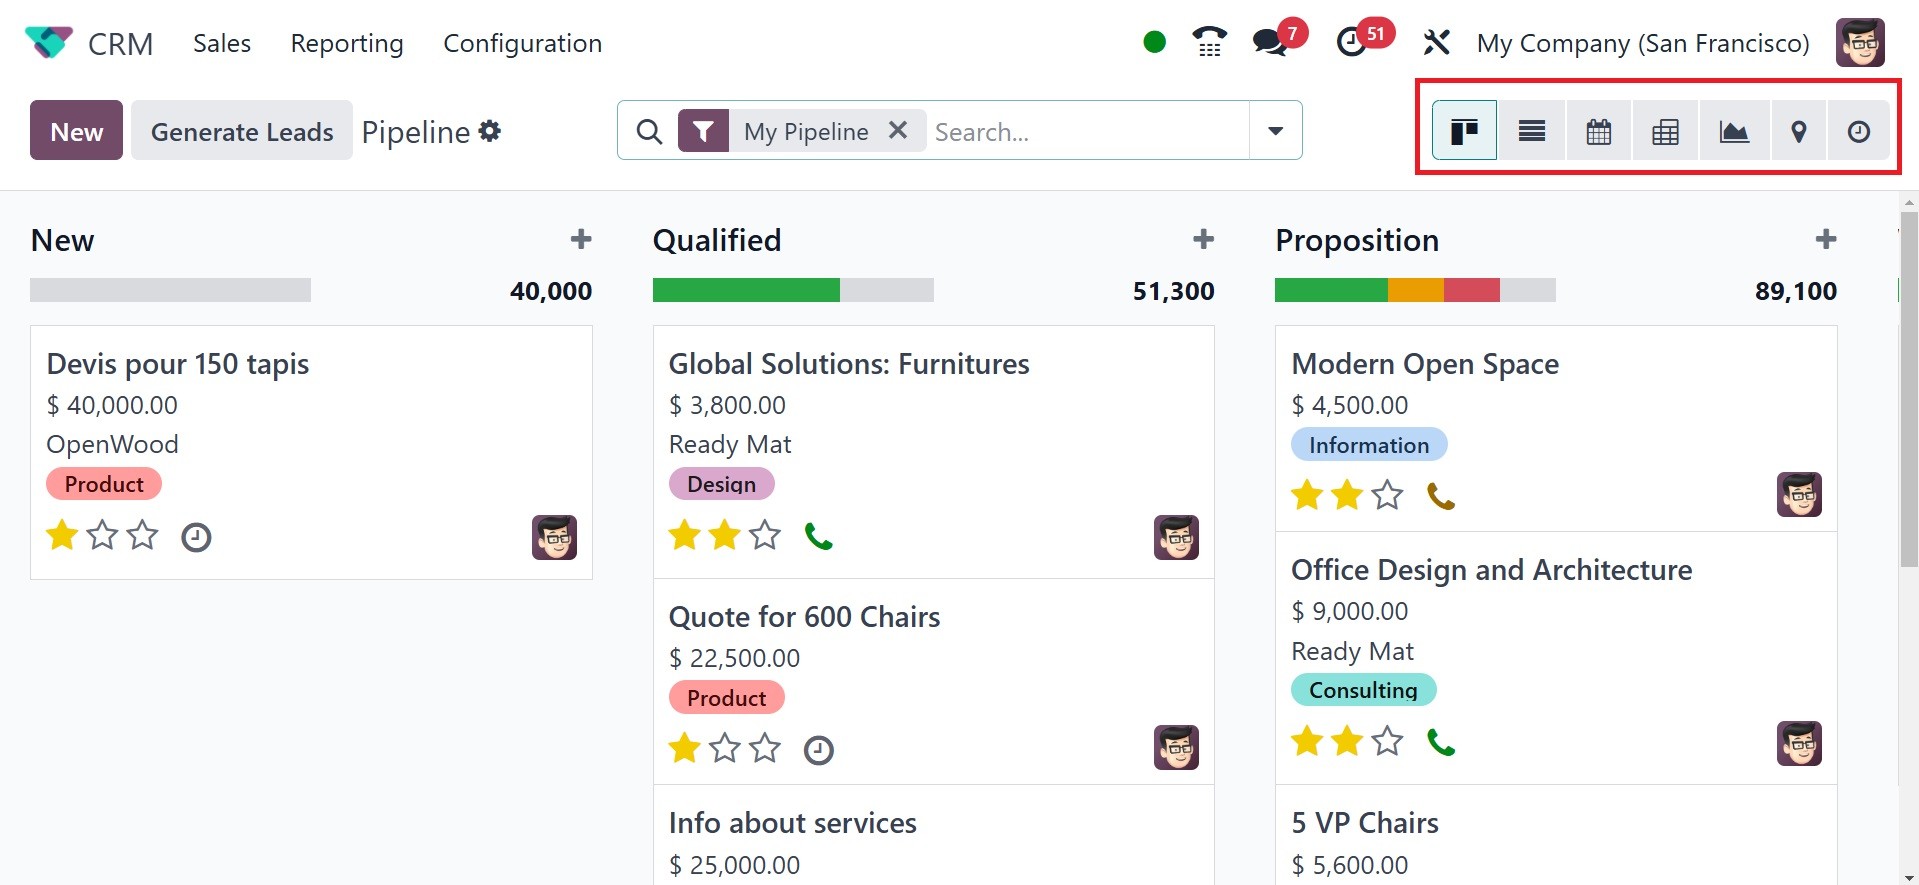
In the same way, you can easily
create the stages that the
leads require by using the
+Stage button. As seen in the
image, clicking this button
will create a new area where
you may enter the new stage's
name.
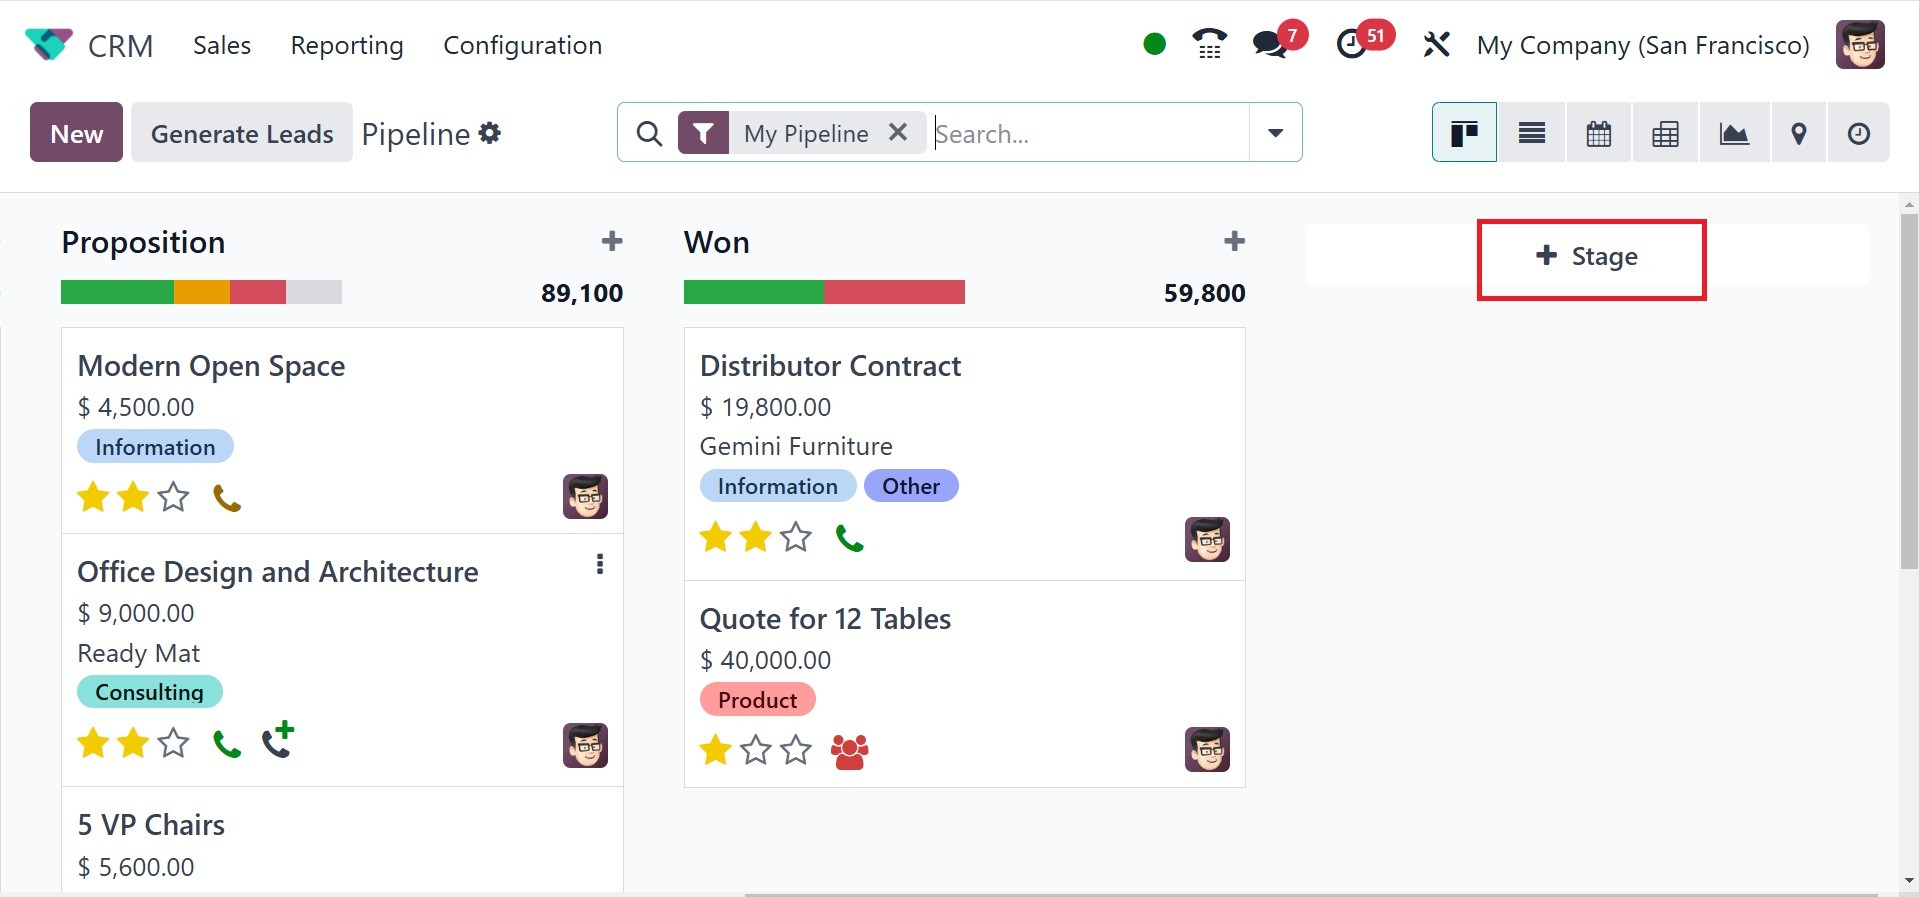
Press the Add button after
entering the title in the
designated field. You can add
as many new tiers for leads
as you like with this method.
After creating a new stage, you
can change its parameters by
clicking the gear icon that
appears next to the stage's
title, as shown in the
screenshot below.
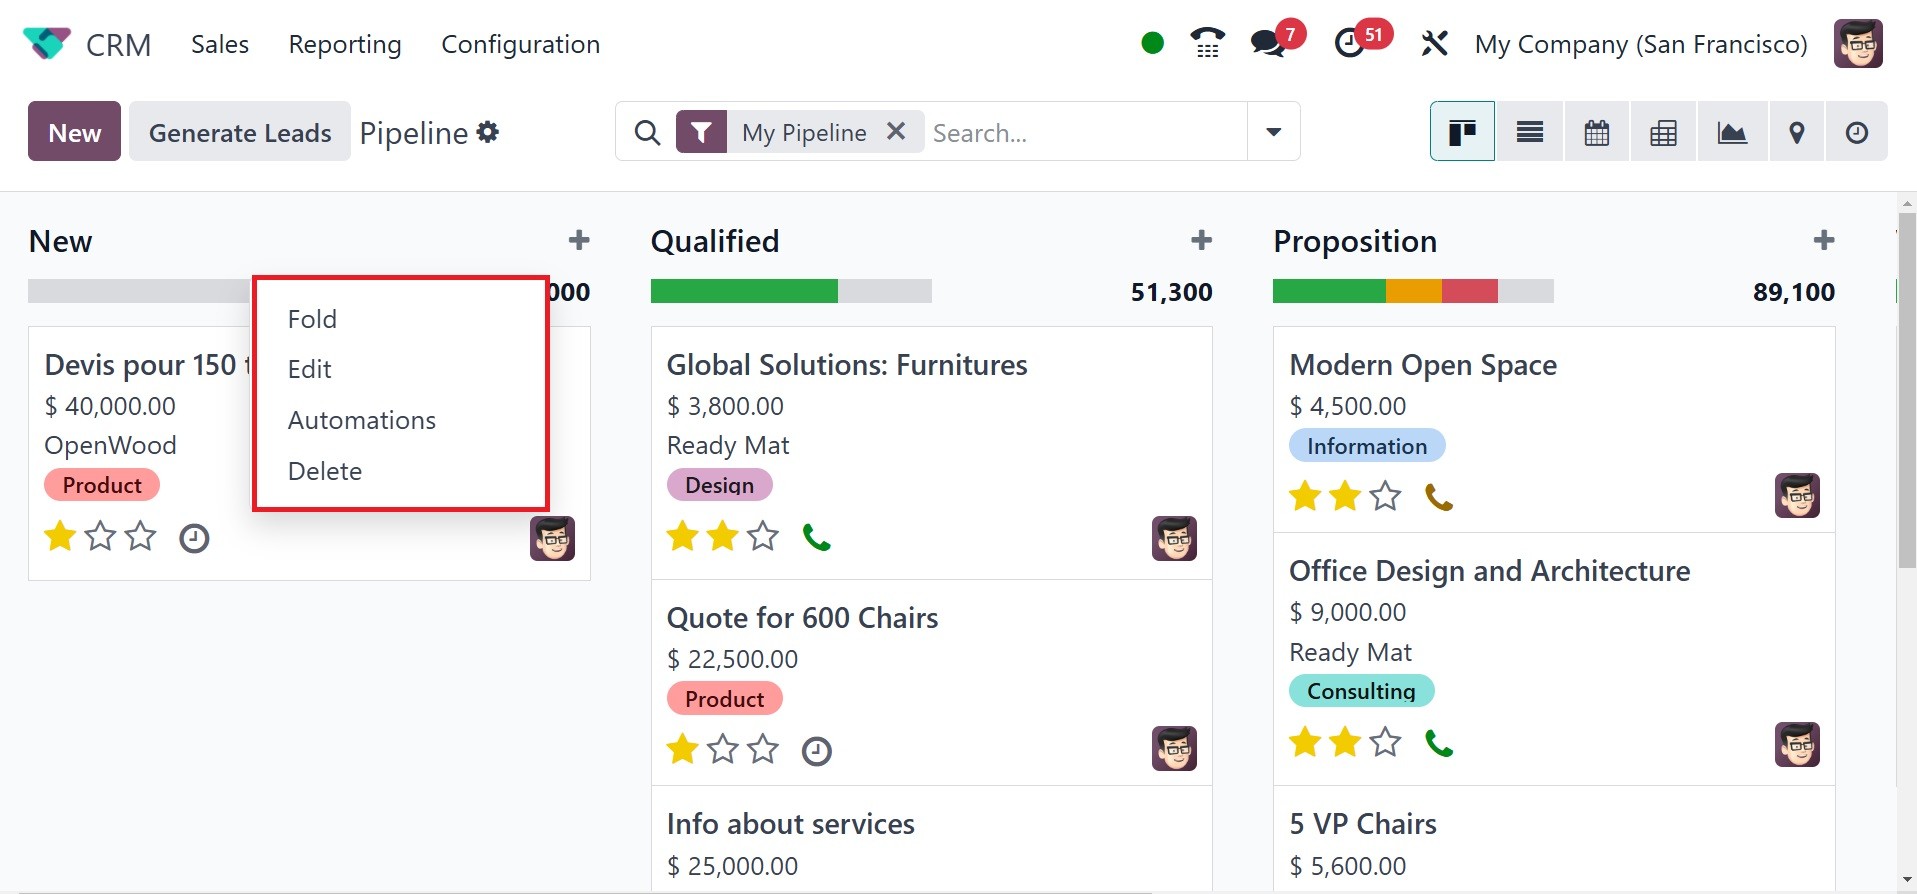
You can use this symbol to Fold,
Edit, Automation, and Delete
the stage based on your
needs. Clicking the Edit
button will bring up a pop-up
box where you may edit the
relevant stage.
If you want to treat the selected
stage as the Won Stage for
leads, you can activate the
Is Won Stage? field. The
related stage can be folded
in the Kanban view by turning
on the Folded in Pipeline
field. In the Sales Team
area, you are allowed to
specify which sales team uses
this stage. This stage won't
be seen or usable by other
sales teams that aren't
explicitly mentioned in the
provided field. The
requirements to move leads to
this stage might be included
in the criteria section so
that the team members are
fully aware of the
requirements for this
particular stage. When you're
done editing the column,
remember to click the Save
button to save all of your
changes.
The Expected Revenue from each
step is shown in the upper
right corner of the pertinent
stages, as highlighted in the
image below. You can modify
the lead phases by utilizing
the drag and drop feature. By
changing the stage of one
lead, the predicted revenue
will be instantly modified
based on the new record.

You can find three stars to
indicate the lead's Priority
on each lead record. You can
assign Medium, High, or Very
High stars based on the
lead's priority. This will
make it easier to find
high-value leads.
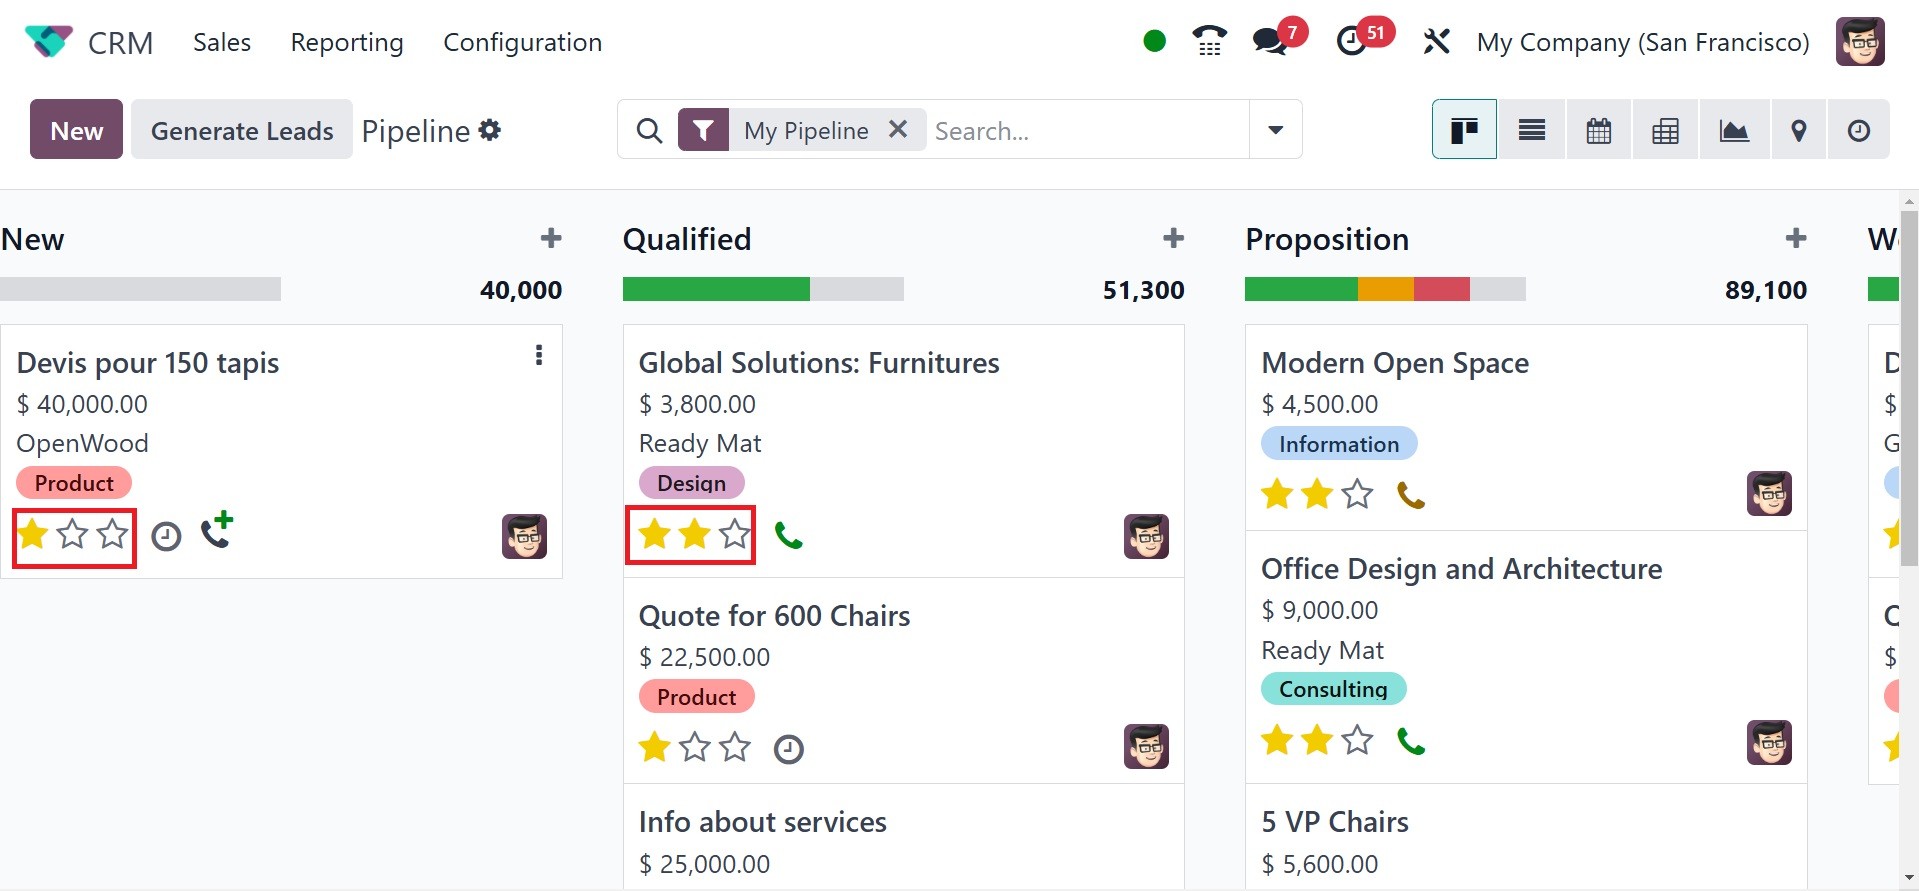
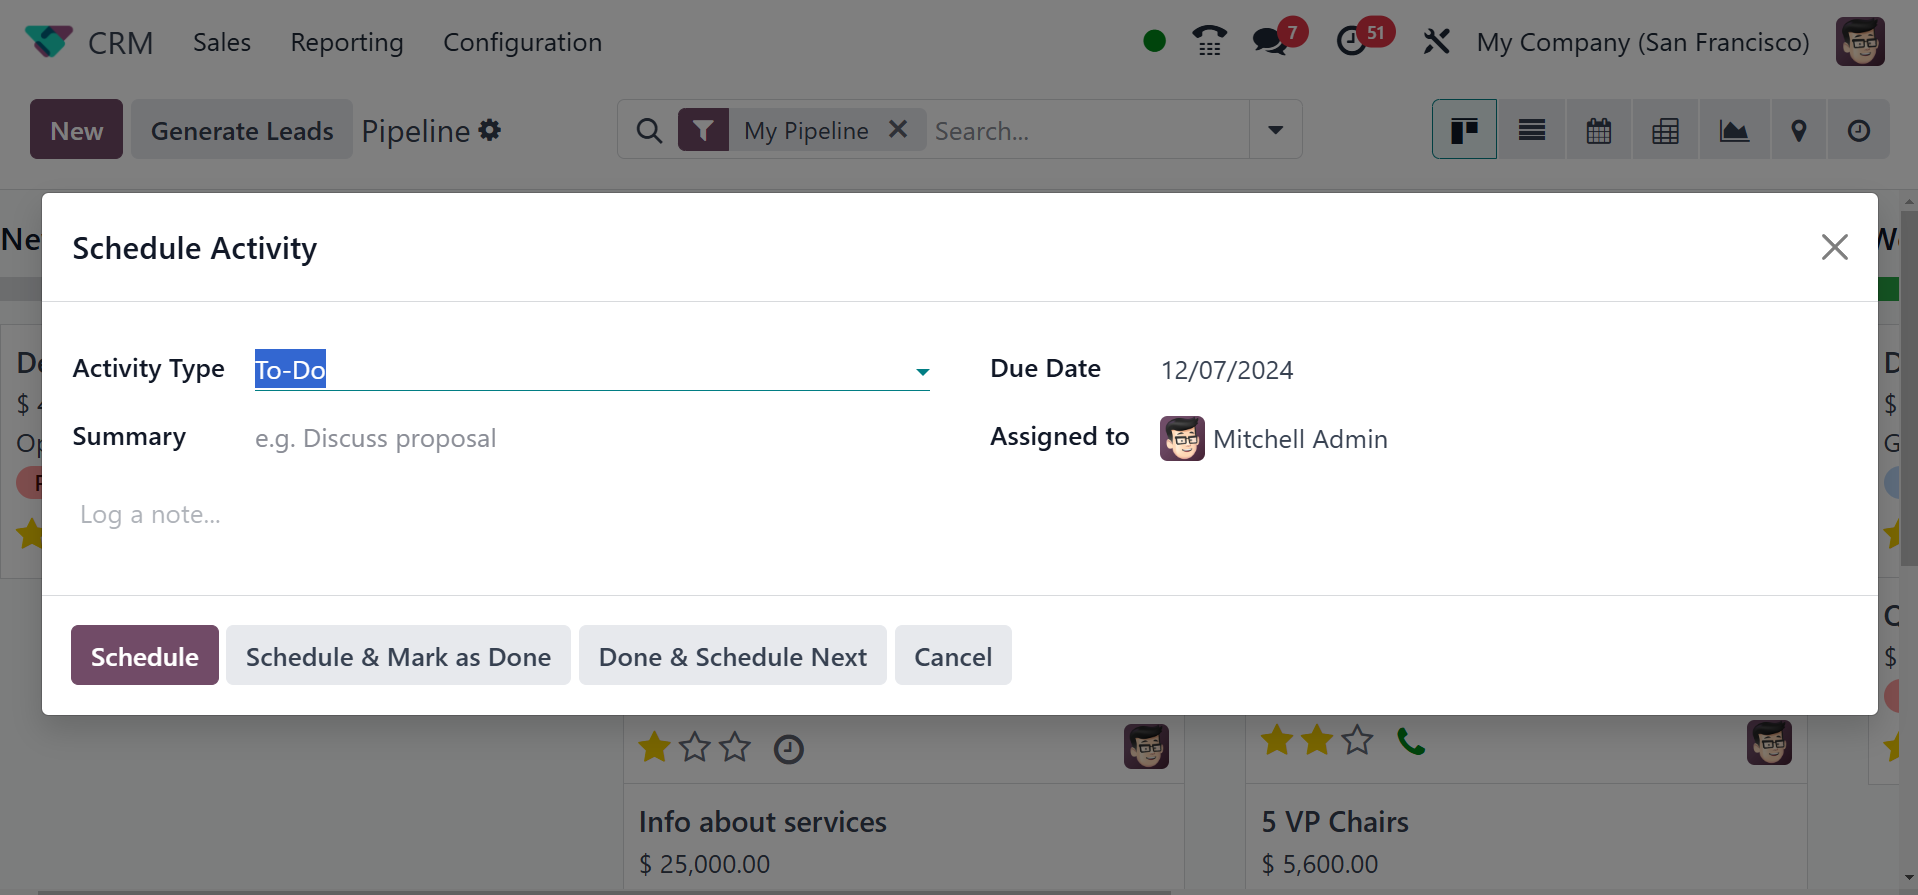
Several lead activities can be
scheduled directly from the
main dashboard. You can
schedule different activities
using the small clock
indication, which is seen in
the figure below.
You can choose the Schedule an
Activity button to create a
new one. Odoo 18 will direct
you to a new wizard where you
may create new activities.
In the Configuration menu, which
we shall discuss later, Odoo
18 gives you a specific
platform for configuring
different kinds of
activities.
The new activity schedule
dialogue's Activity Type
field allows you to select
the essential activity you
want to schedule.
Additionally, you may use the
area provided to write a
quick description of the
activity's summary. Choose a
worker to monitor this action
in the Assigned To section.
Finally, don't forget to
provide the Due Date for the
activity. Lastly, you may add
the activity to your schedule
by clicking the Schedule
option.
When the task is complete, you
can click the Mark as Done
button. If you have already
completed one scheduled task
and would like to set up
another, you can utilize the
Done & Schedule Next button.
To end the scheduled
activity, click the Discard
option. Green highlights
indicate the scheduled
activities. Red indicates
tasks that are past due. The
planned events for today will
be shown in brown.
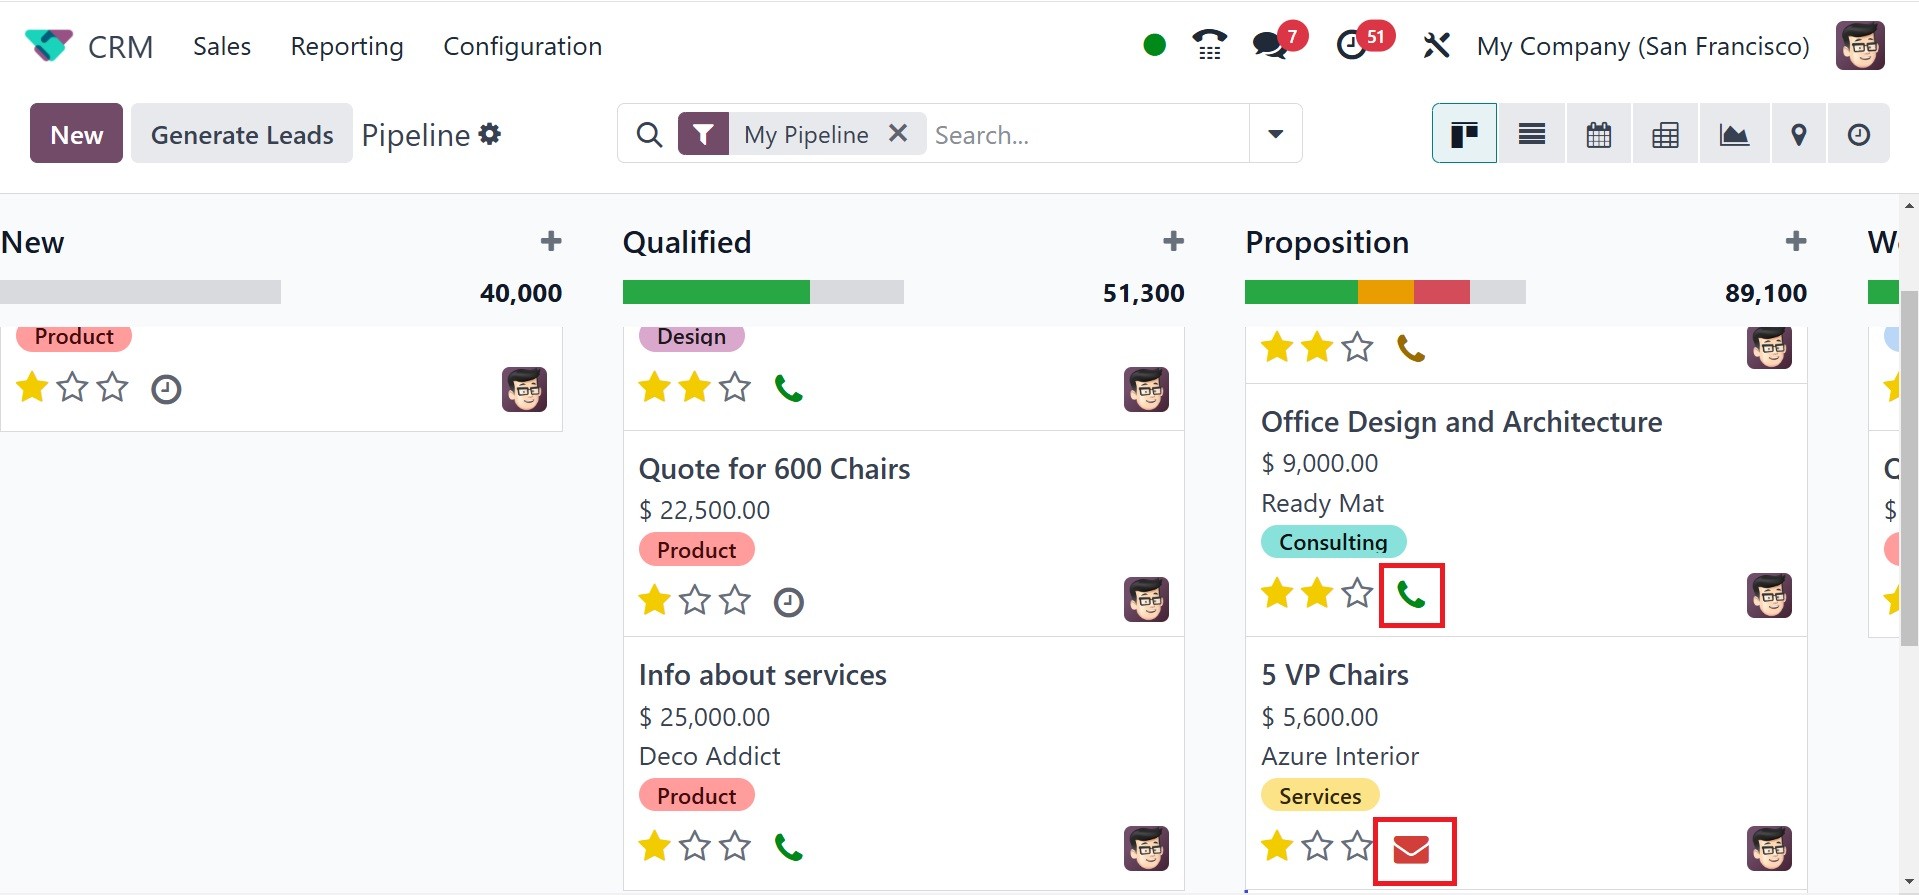
The Odoo 18 CRM module has a new
feature that allows you to
add clients to the call
queue. This option is similar
to the clock icon, which is
used to plan activities. It
merely takes one click to add
opportunity to the call
queue. The option is
available once you install
the VoIP module. The symbol
will be deleted from the call
queue if you click it once
more. There will be a Quick
Add option in each column
that lets you add leads under
specific phases fast. As
shown below, this option will
appear as a "+" icon next to
the title of each state.
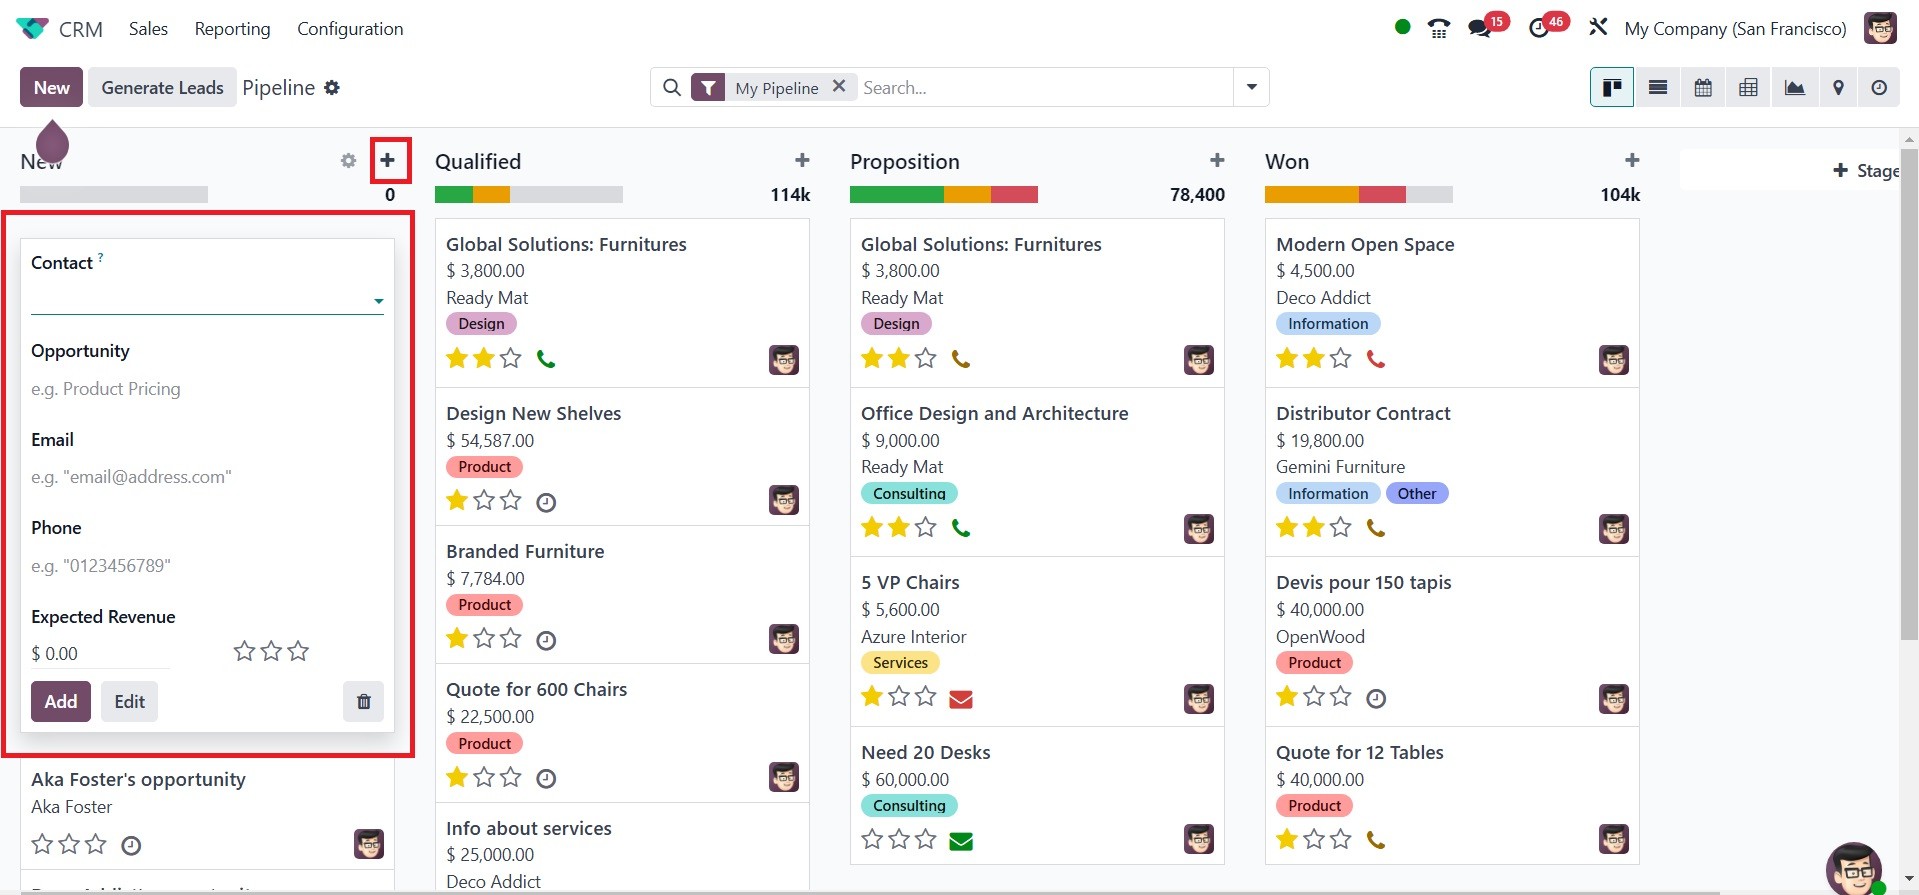
The addition of advanced sorting
options will facilitate the
search function of Odoo. on
selecting the created
opportunity from the list,
you will be directed to the
below page, as in the image.
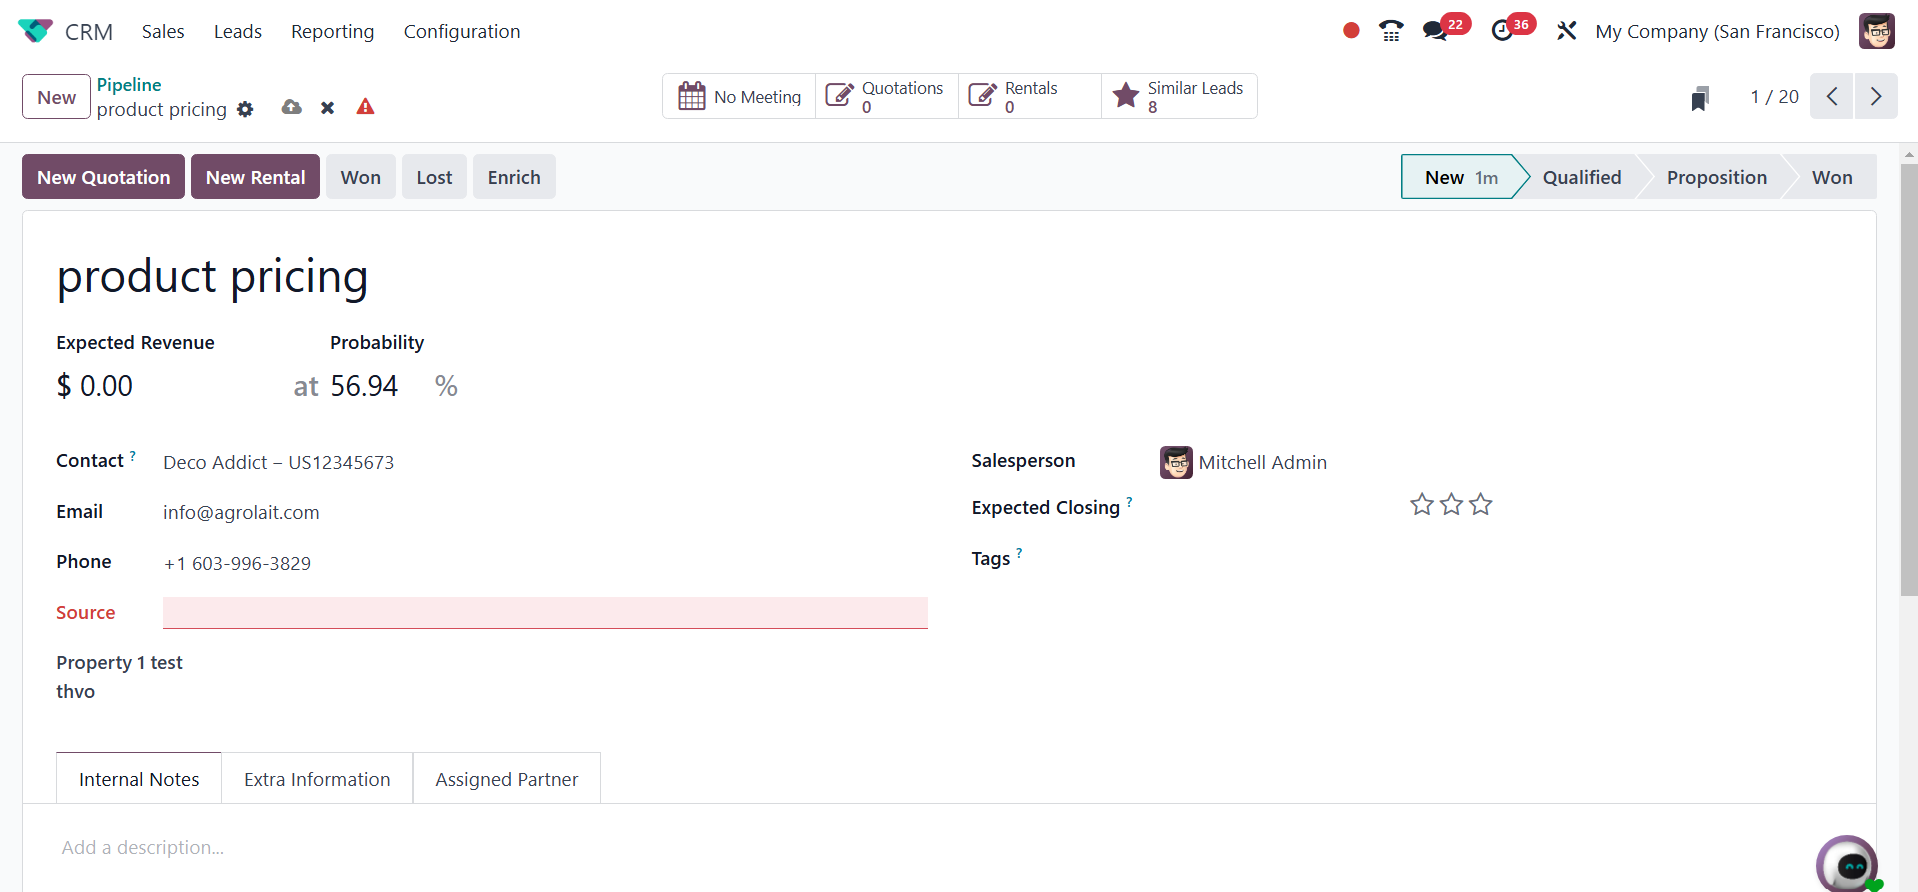
here, you can provide the extra
details regarding the
opportunity like, expected
revenue, probability,
contact, email, phone,
source, salesperson, expected
closing, and tags.
Under the filters option, you
have the options, such as my
pipeline, usassigned, my
assigned partner, open
opportunities, creation date,
closed date, won, ongoing,
lost, and add custom filter.
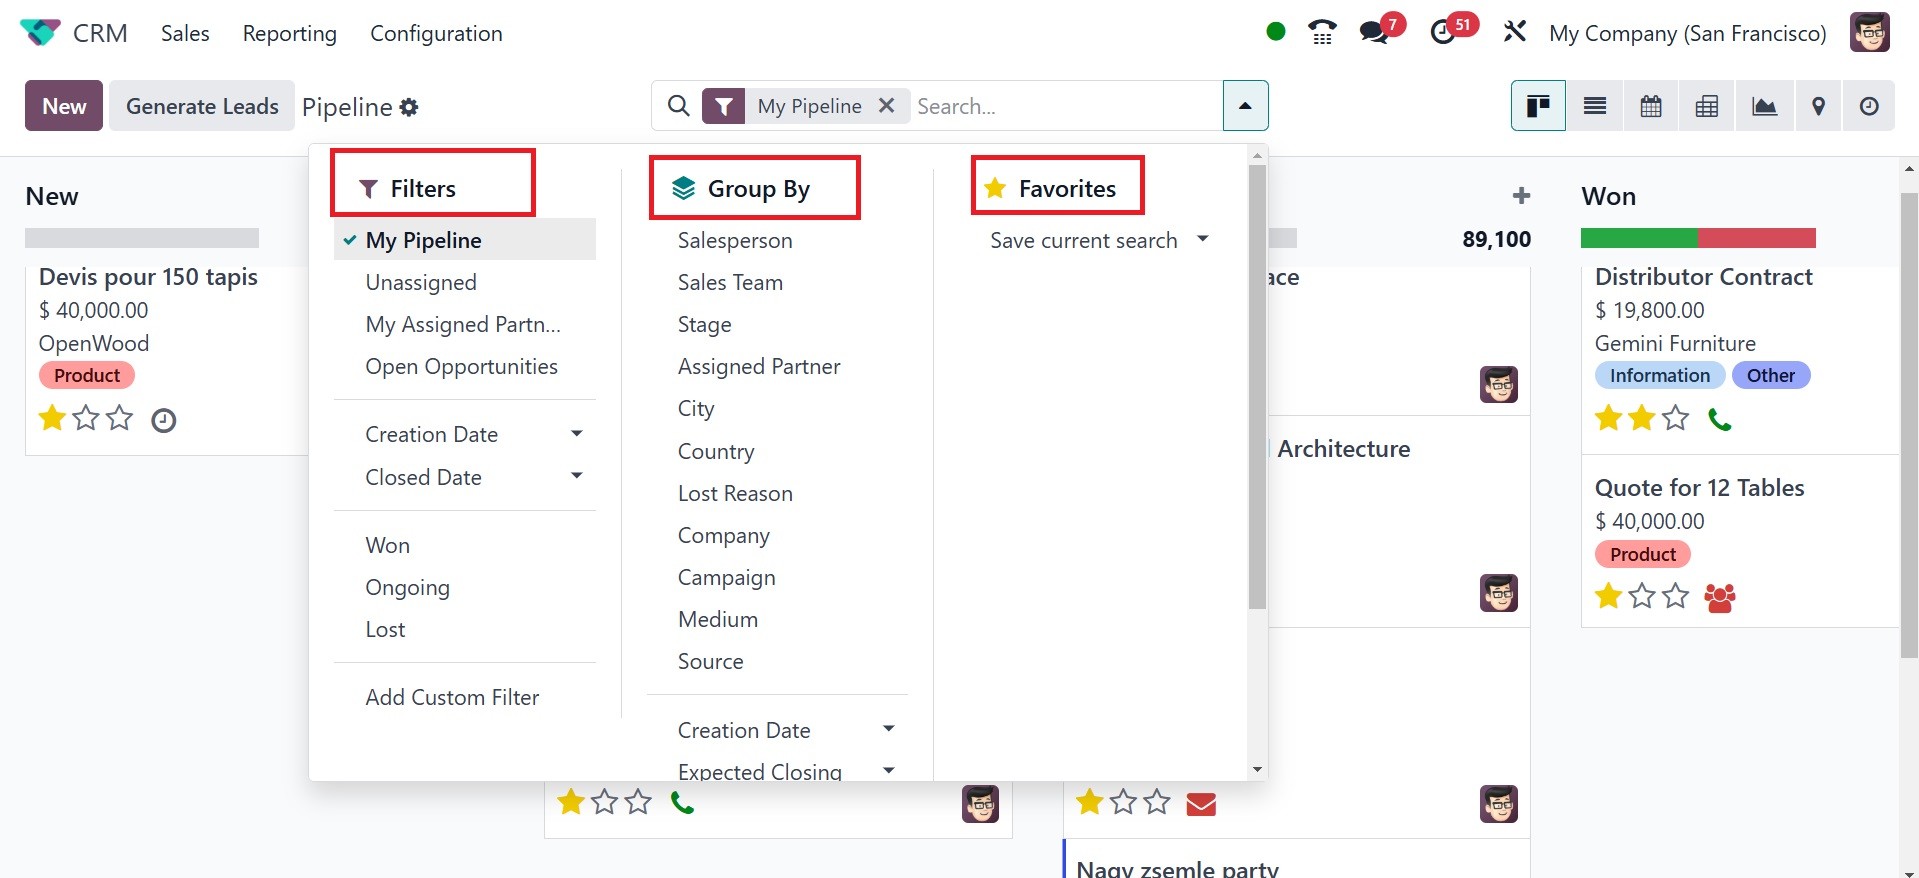
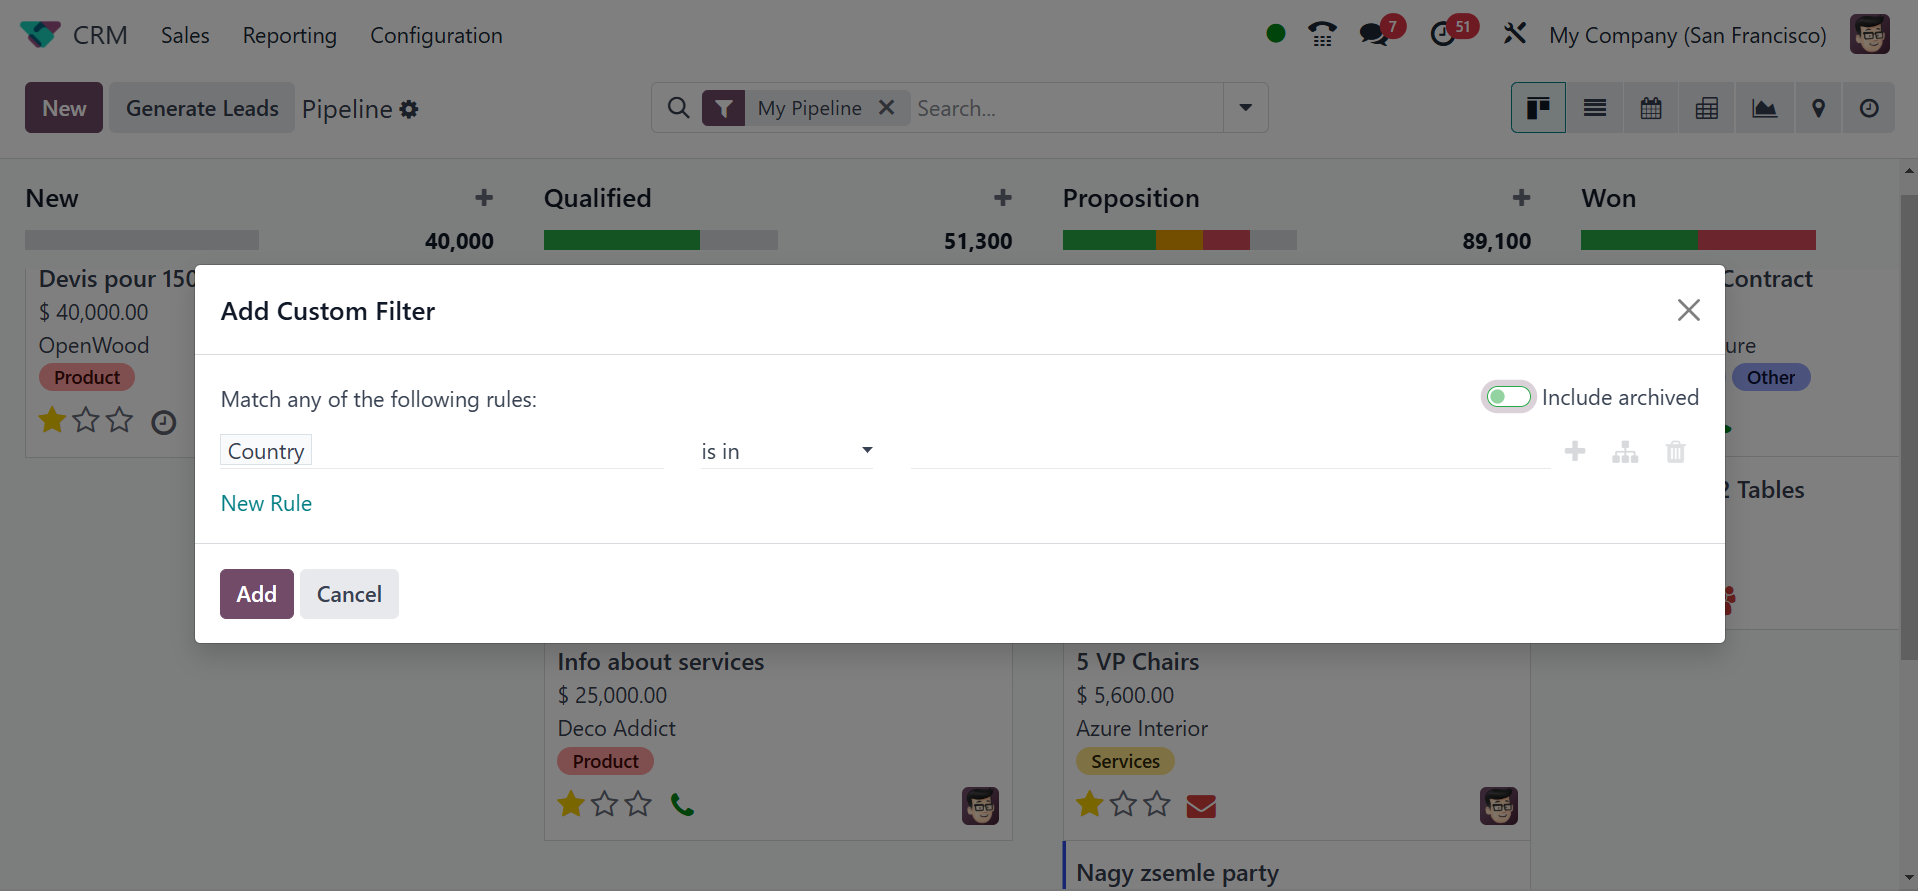
The user can add specific
filtering rules in a new
popup window that appears
when they select the Add
Custom Filter option.
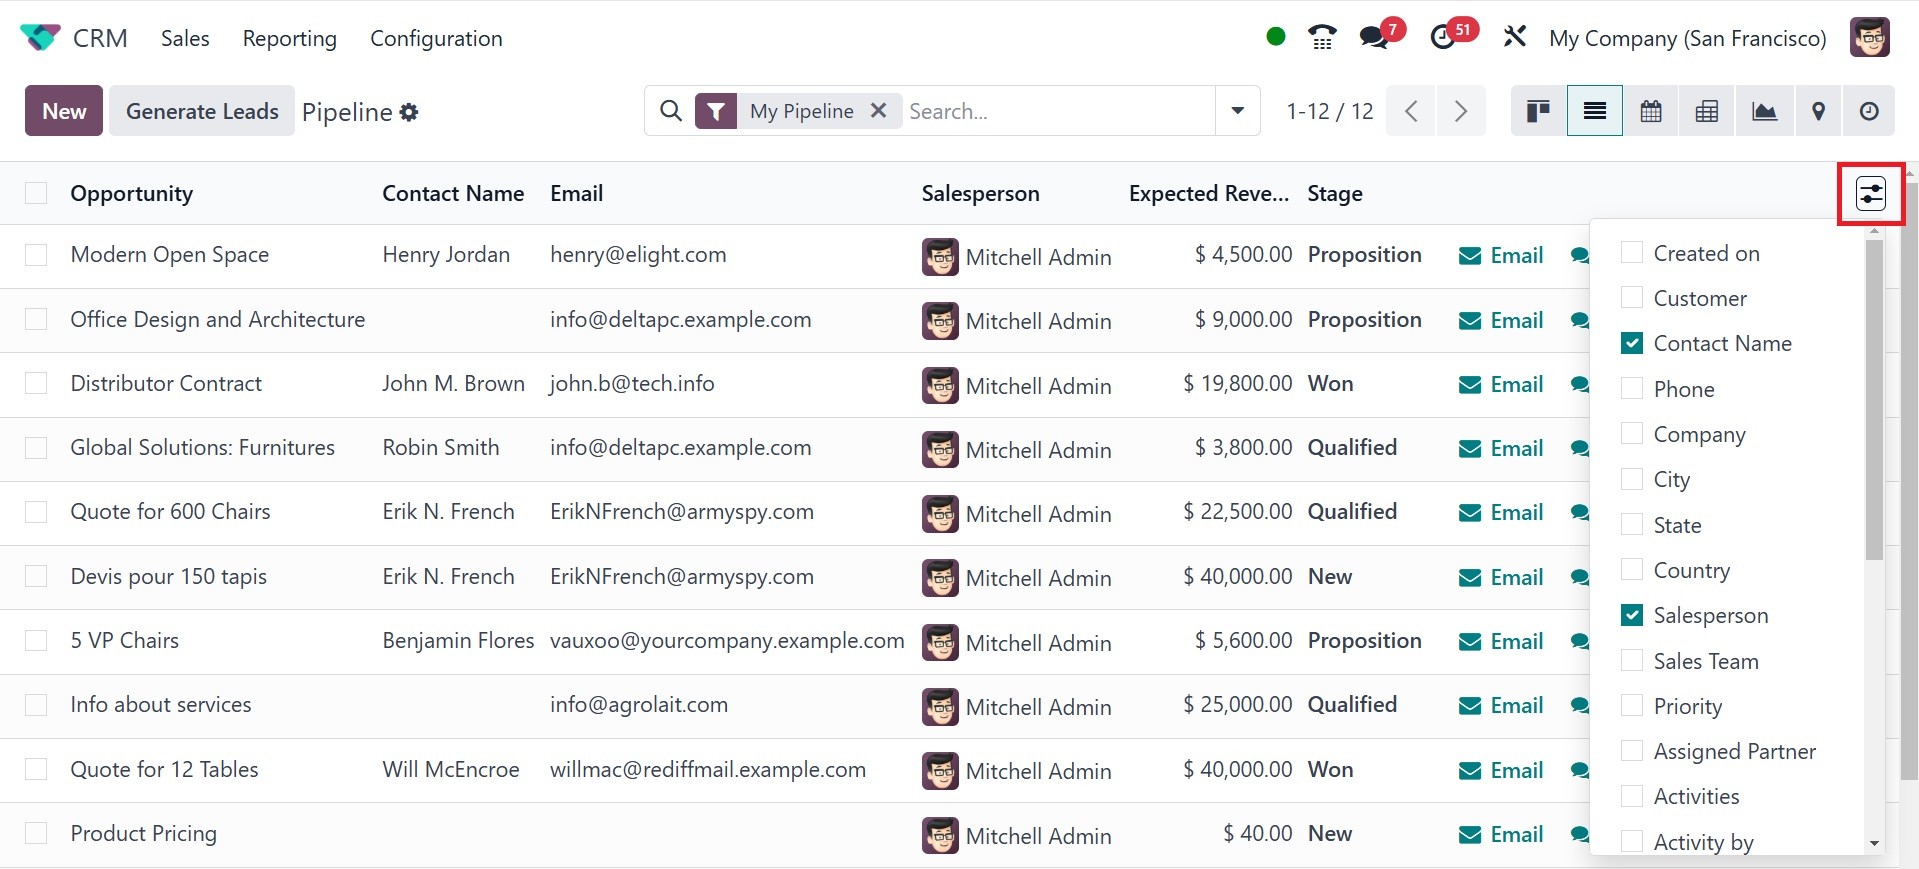
When we examine the List view of
the CRM pipeline, you will
see an advanced preview in
addition to details about the
Opportunity, Contact Name,
Email, Phone, Company,
Salesperson, Next Activity,
My Deadline, Expected
Revenue, and Stage.
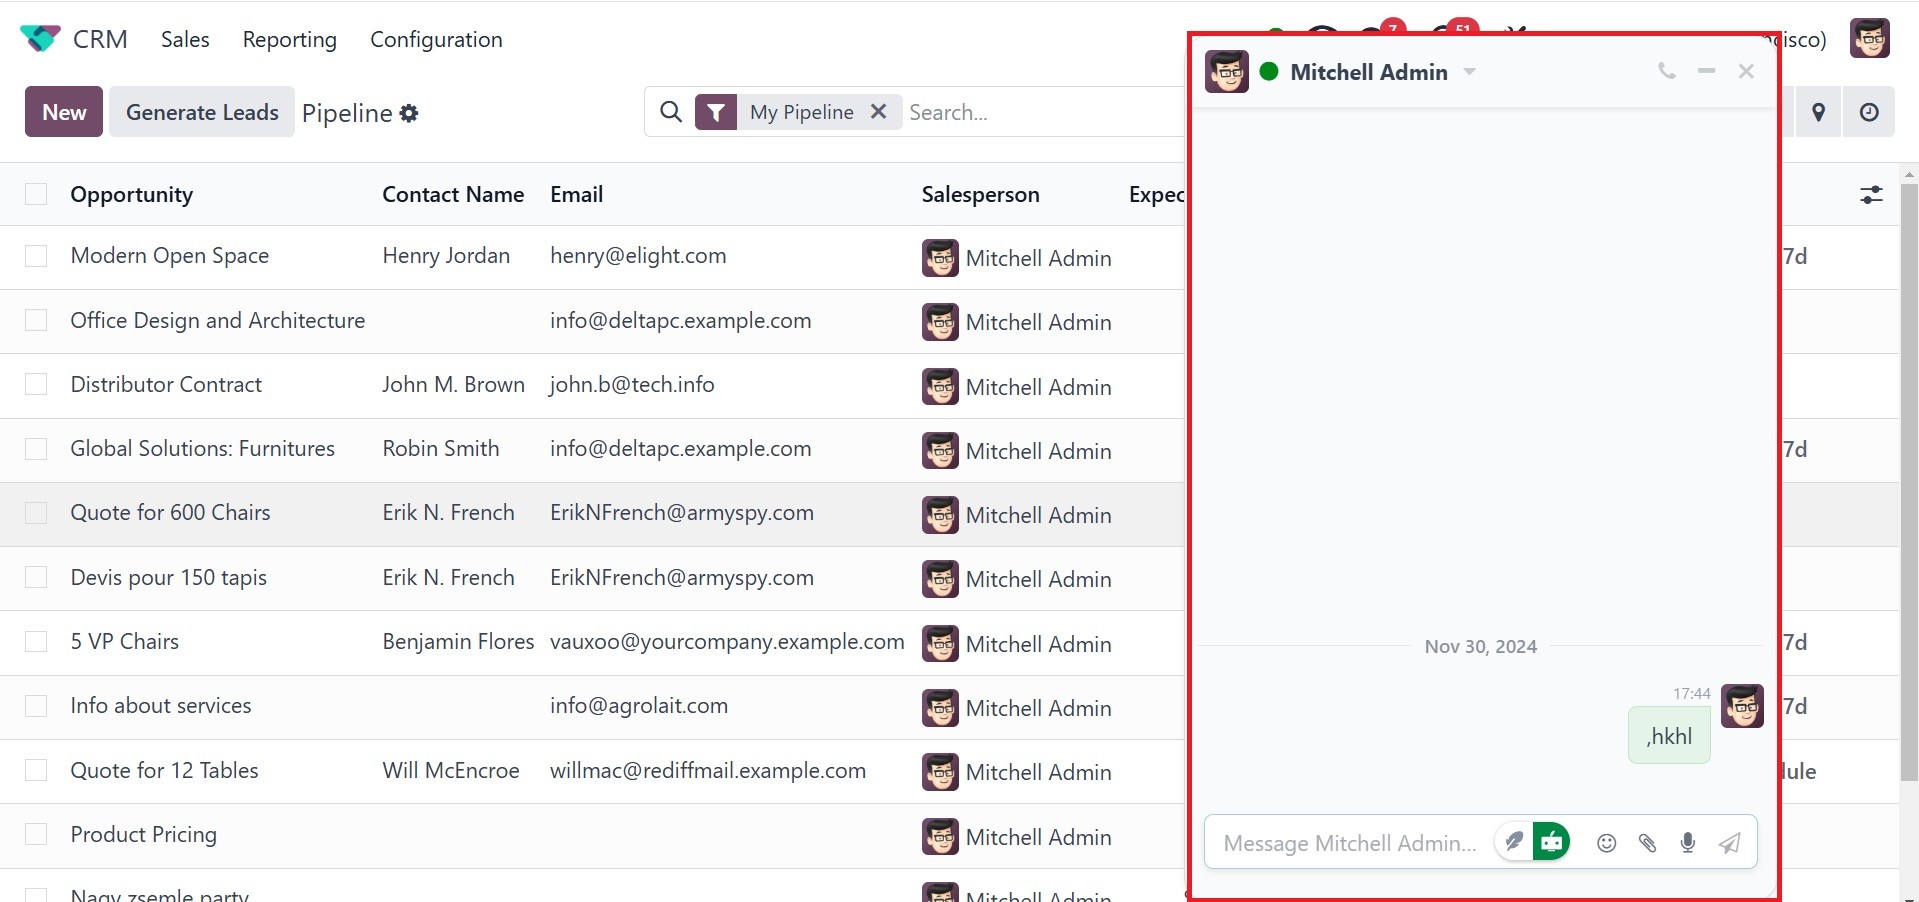
If you wish to contact a
salesperson, clicking on
their avatar will open a
message box that will connect
you with them immediately.
Each lead will also have
email and SMS options that
you can utilize to get in
touch with the appropriate
client.
By including more information
about a lead, such as Created
On, Customer, Contact name,
phone, company, City, State,
Country, Sales person, sales
Team, Priority, Assigned
Partner, Activity By,
Campaign, Medium, Source,
Expected Revenue, Expected
Closing, Stage, Probability,
Lost Reason, Tags, and Add
custom field. And you can
improve the list's preview.
So far, we have discussed the My
Pipeline window in the CRM
module. Now let's examine the
My Activities window.
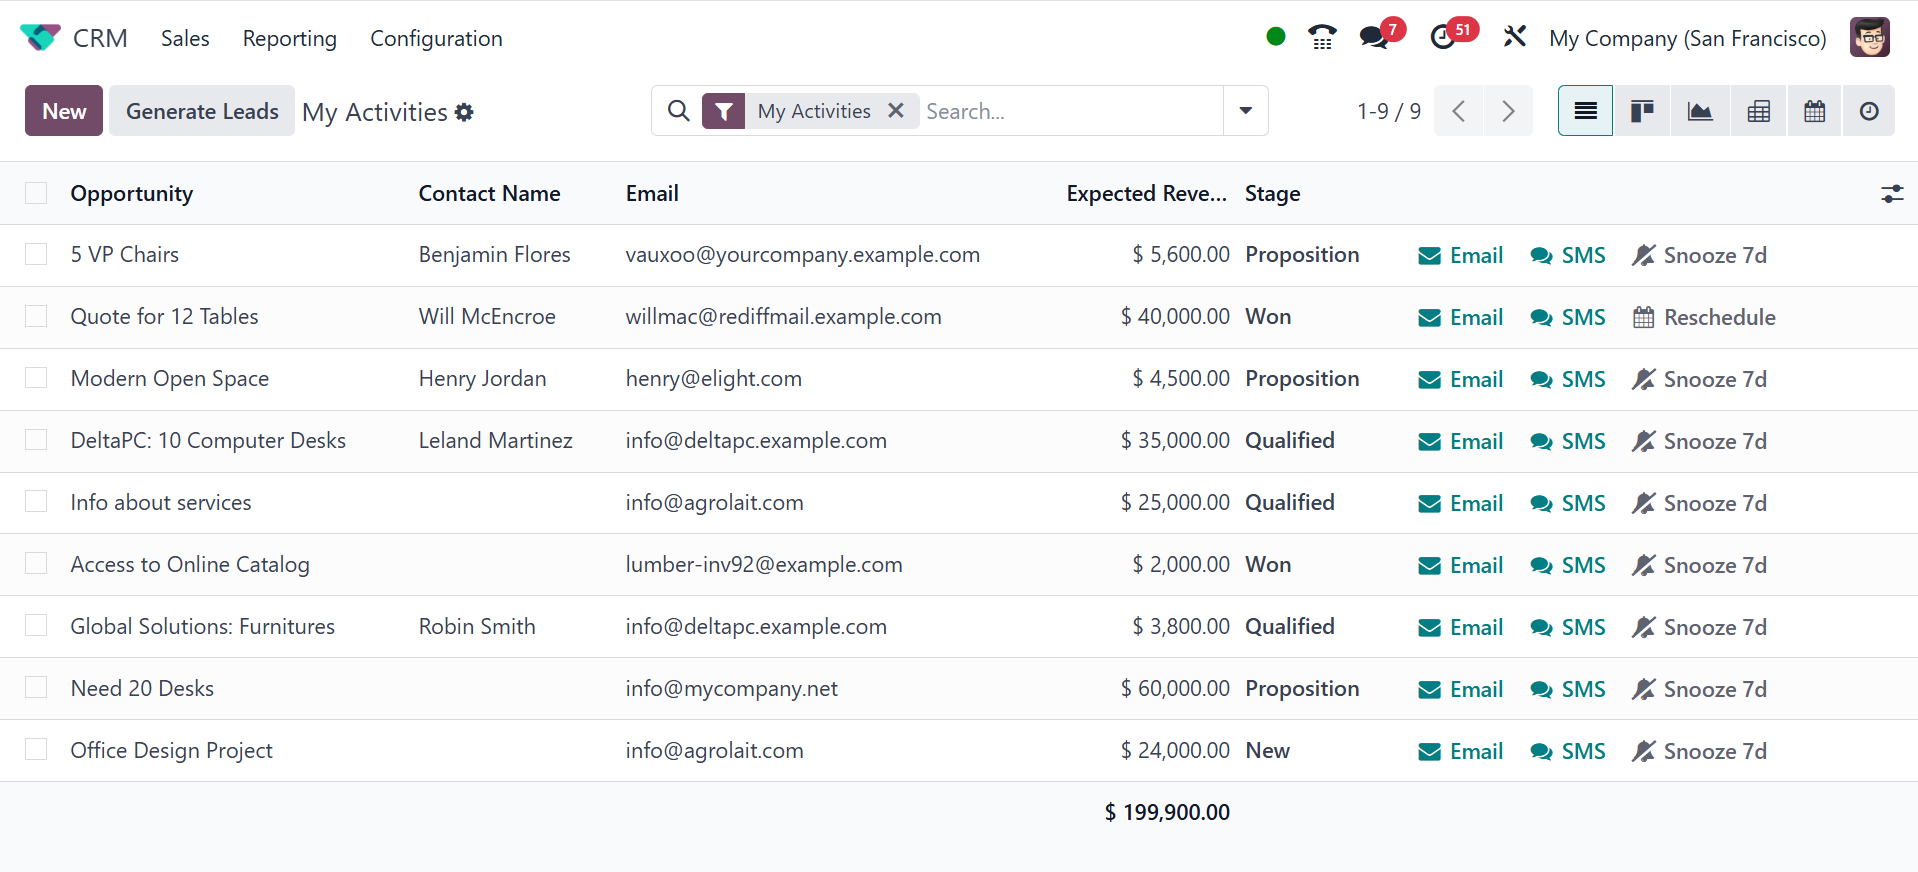
There is little difference
between the My Activities and
My Pipeline windows. However,
this is only where you can
find the leads and
opportunities that are
provided to you.