2. Leads
One way to think of leads is as
the initial step in starting
a business connection with a
customer or company. If
someone or a group shows
interest in your business,
you might be able to convert
that curiosity into a lead,
which could subsequently lead
to a sales opportunity. The
Odoo 18 CRM may be used to
collect leads from a number
of sources. Inquiries
conducted through phone
calls, SMS, emails, live
chat, help desk tickets,
events, contact forms, and
many more methods can
generate leads in Odoo18. The
best care and attention must
be used while managing leads
produced by these platforms
in order to maximize the
chances of success. Odoo 18
offers a specific platform
for the management of the CRM
module.
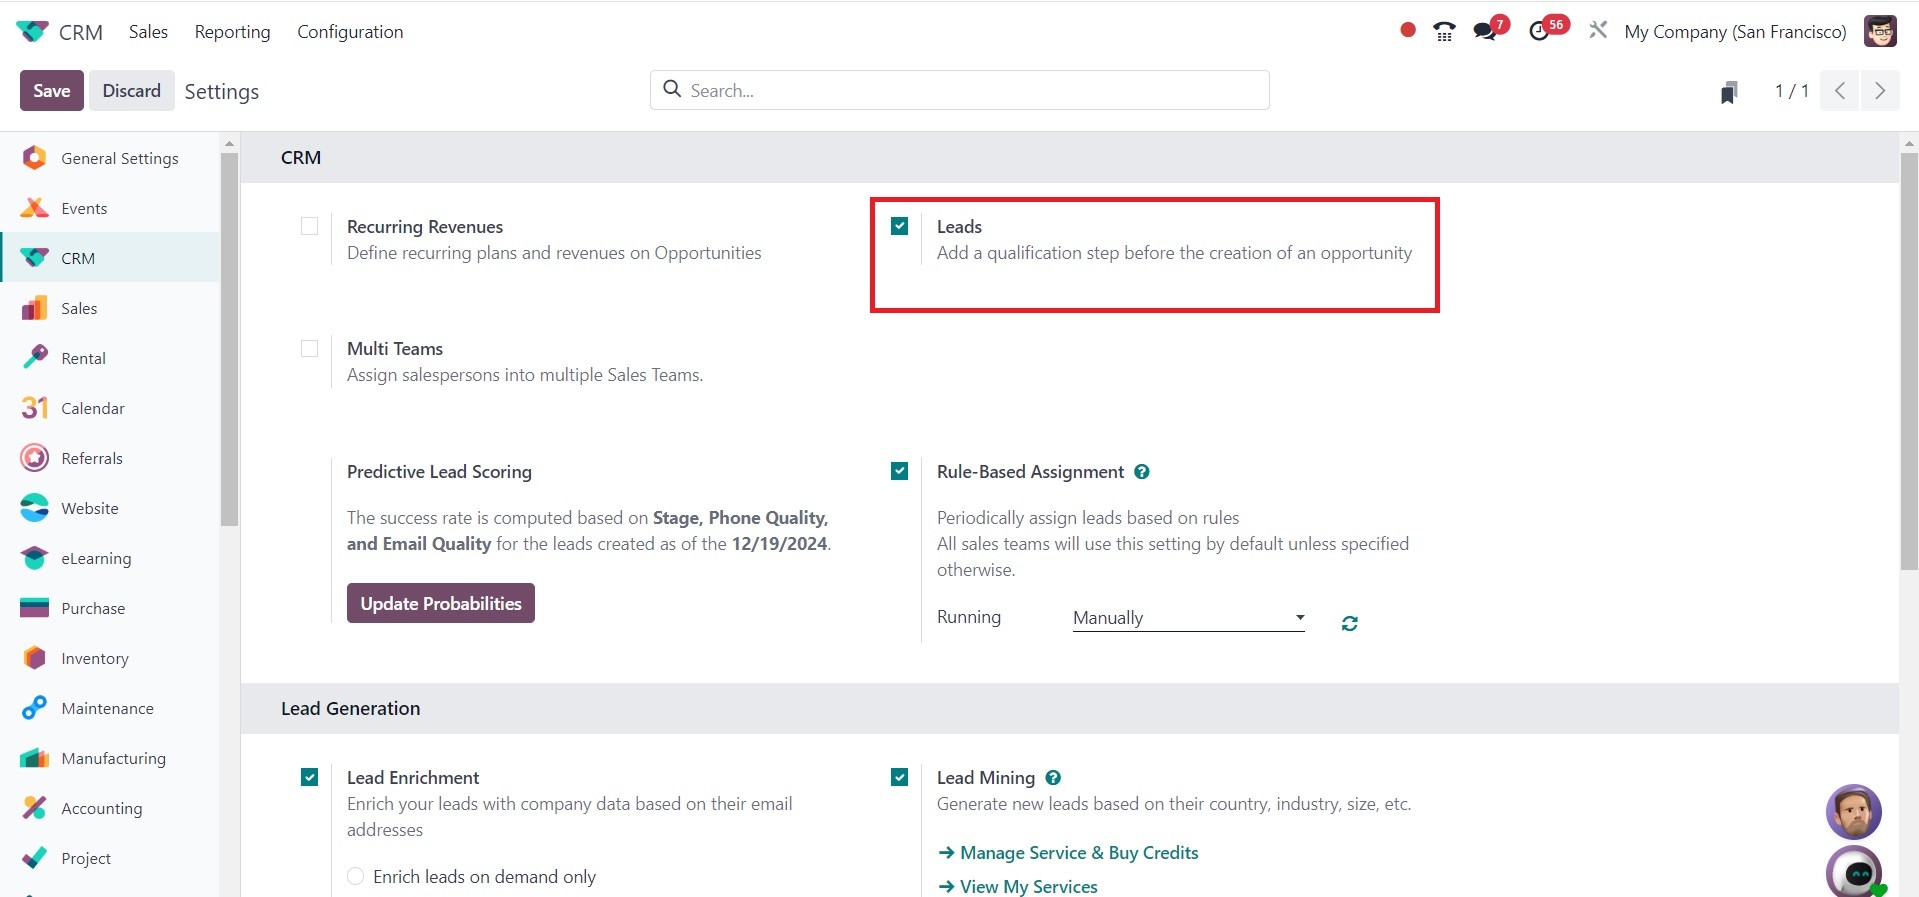
By selecting the Settings menu in
the module, you may open the
lead management window. As
shown in the screenshot
below, you can enable the
Lead option under the CRM
tab.
A new menu item called Leads will
show up in the main menu bar
when this option is enabled.
A list of every lead
generated by Odoo 18's many
platforms will be shown on
this platform.
The list of leads contains the
following details: lead,
email, phone, firm, city,
country, allocated partner,
salesperson, and sales team
on the lead page, as in the
screenshot below. You can
alternate between the
platform's Calendar, Pivot,
Graph, Activity, and Kanban
views based on your
requirements.
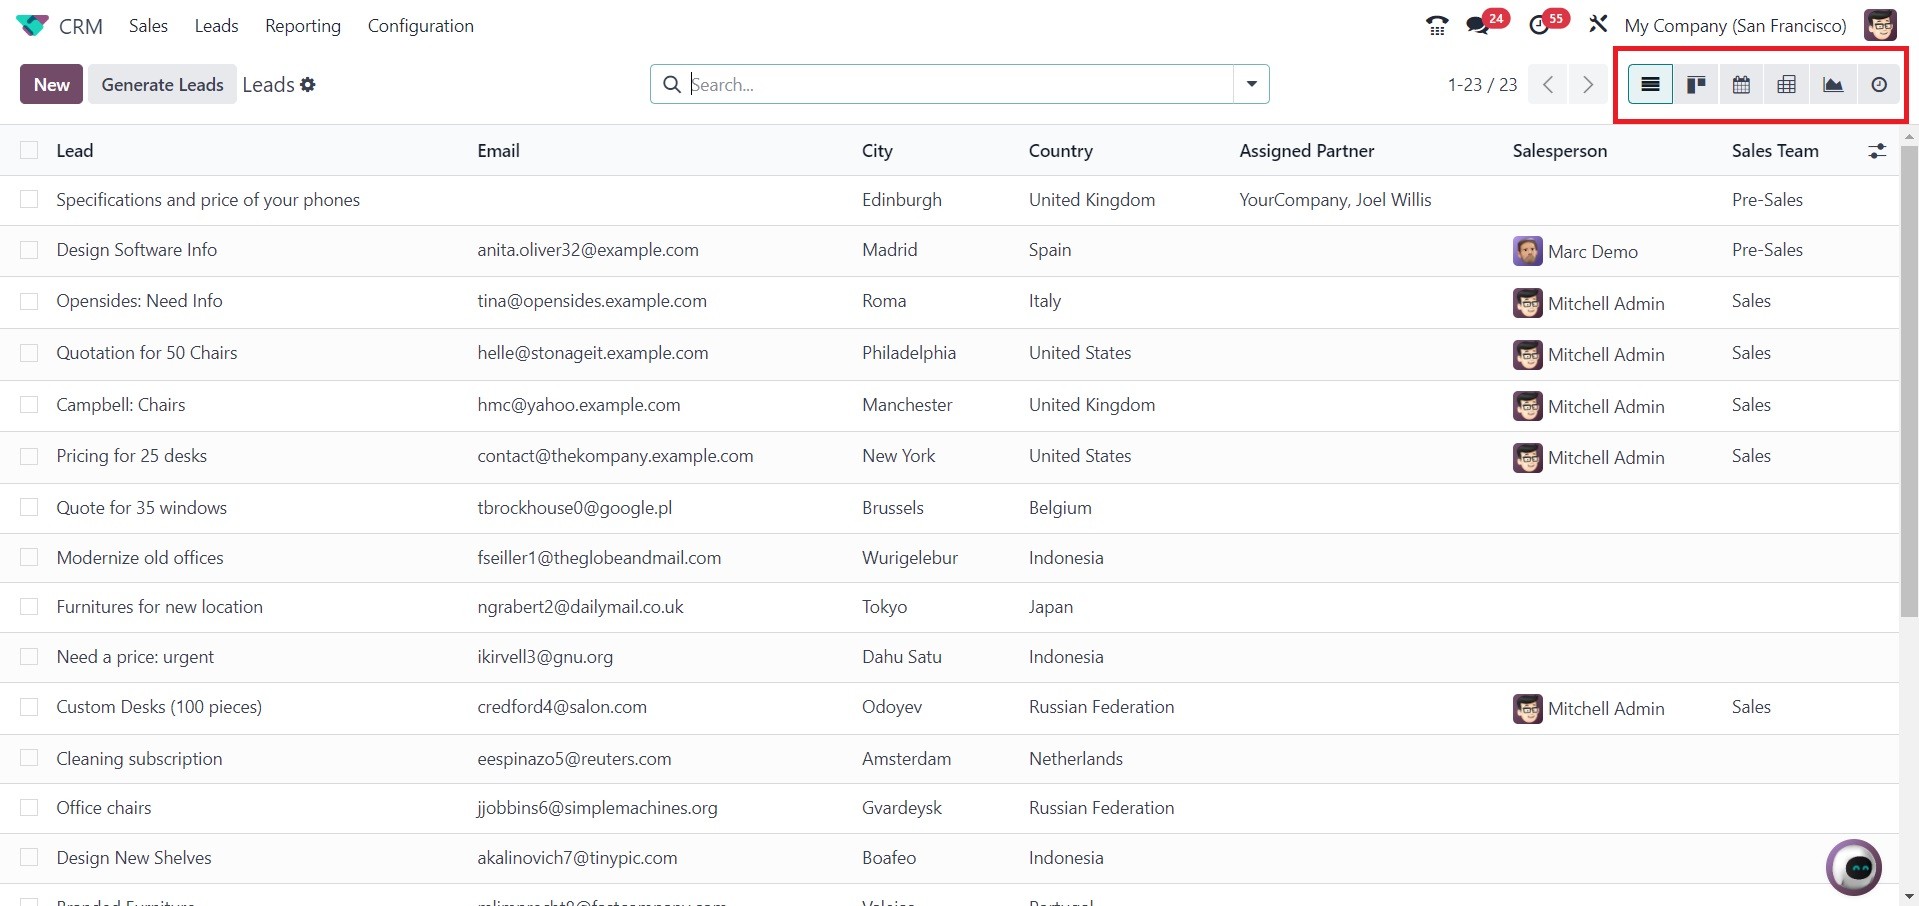
While the Generate Leads button
will automatically produce
leads based on preset
parameters, the New button
allows you to manually record
new leads.
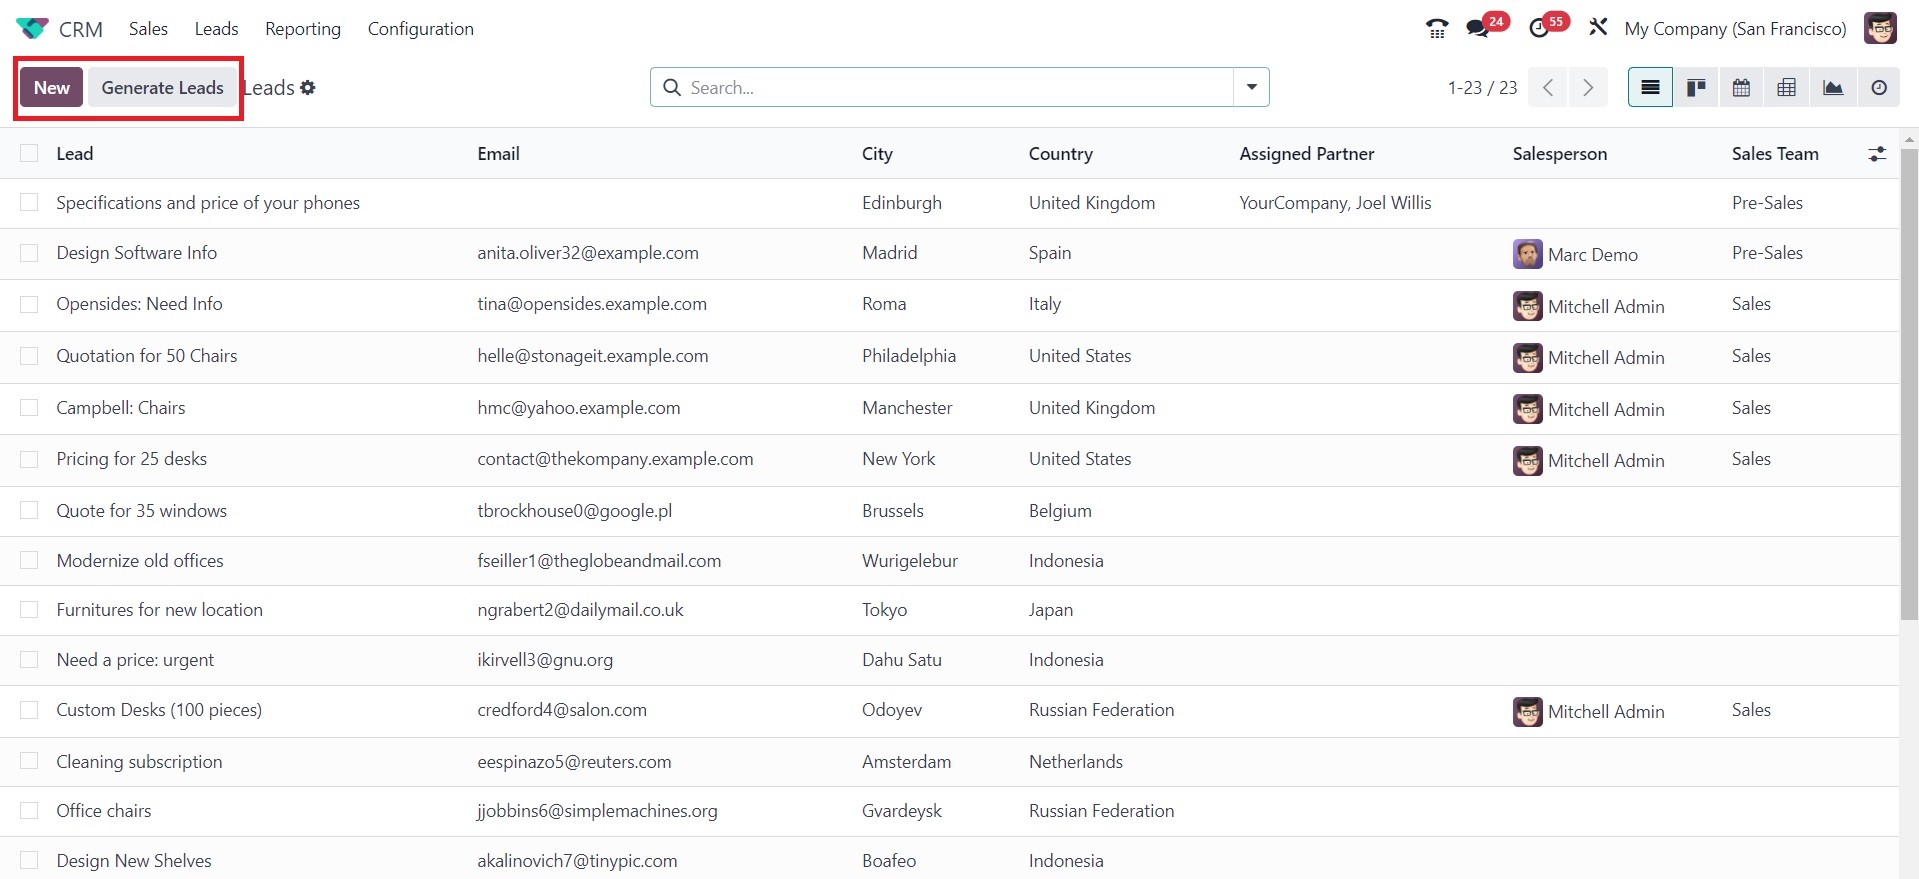
First, let's look at the Odoo 18
CRM module's manual lead
creation process. In the
upper left corner of the
screen is the New button. To
get started, click it. As
seen in the screenshot below,
clicking this button will
bring up a new window with
the lead's details.
Additionally, Odoo 18 will save
the information entered in
this field automatically
without requiring you to
select the Save option. By
choosing the Save Manually
option, you can decide to
manually store the data. The
Discard button has also
undergone modifications. Odoo
18 has given Discard Changes
a new icon. The latest
version of Odoo does not
include an Edit button, but
you can click on the field
you want to change by moving
your mouse pointer over it.
You can provide the title of the
lead in the appropriate
field. The name of the
prospective business partner
that will be formed if the
lead is converted into an
opportunity can be specified
in the Company Name section.
In the Address field, type the
business's address. The
contact's website can be
added to the Website section.
Additionally, enter the
Language, Contact Name,
Email, Email Cc, Job
Position, Phone, and Mobile
in the appropriate fields.
You can nominate a team and
an employee for the lead
management under the Sales
Team and Salesperson areas,
respectively. The lead stars
might be given based on their
priority. Enter the relevant
tags for the leads in the
designated field.
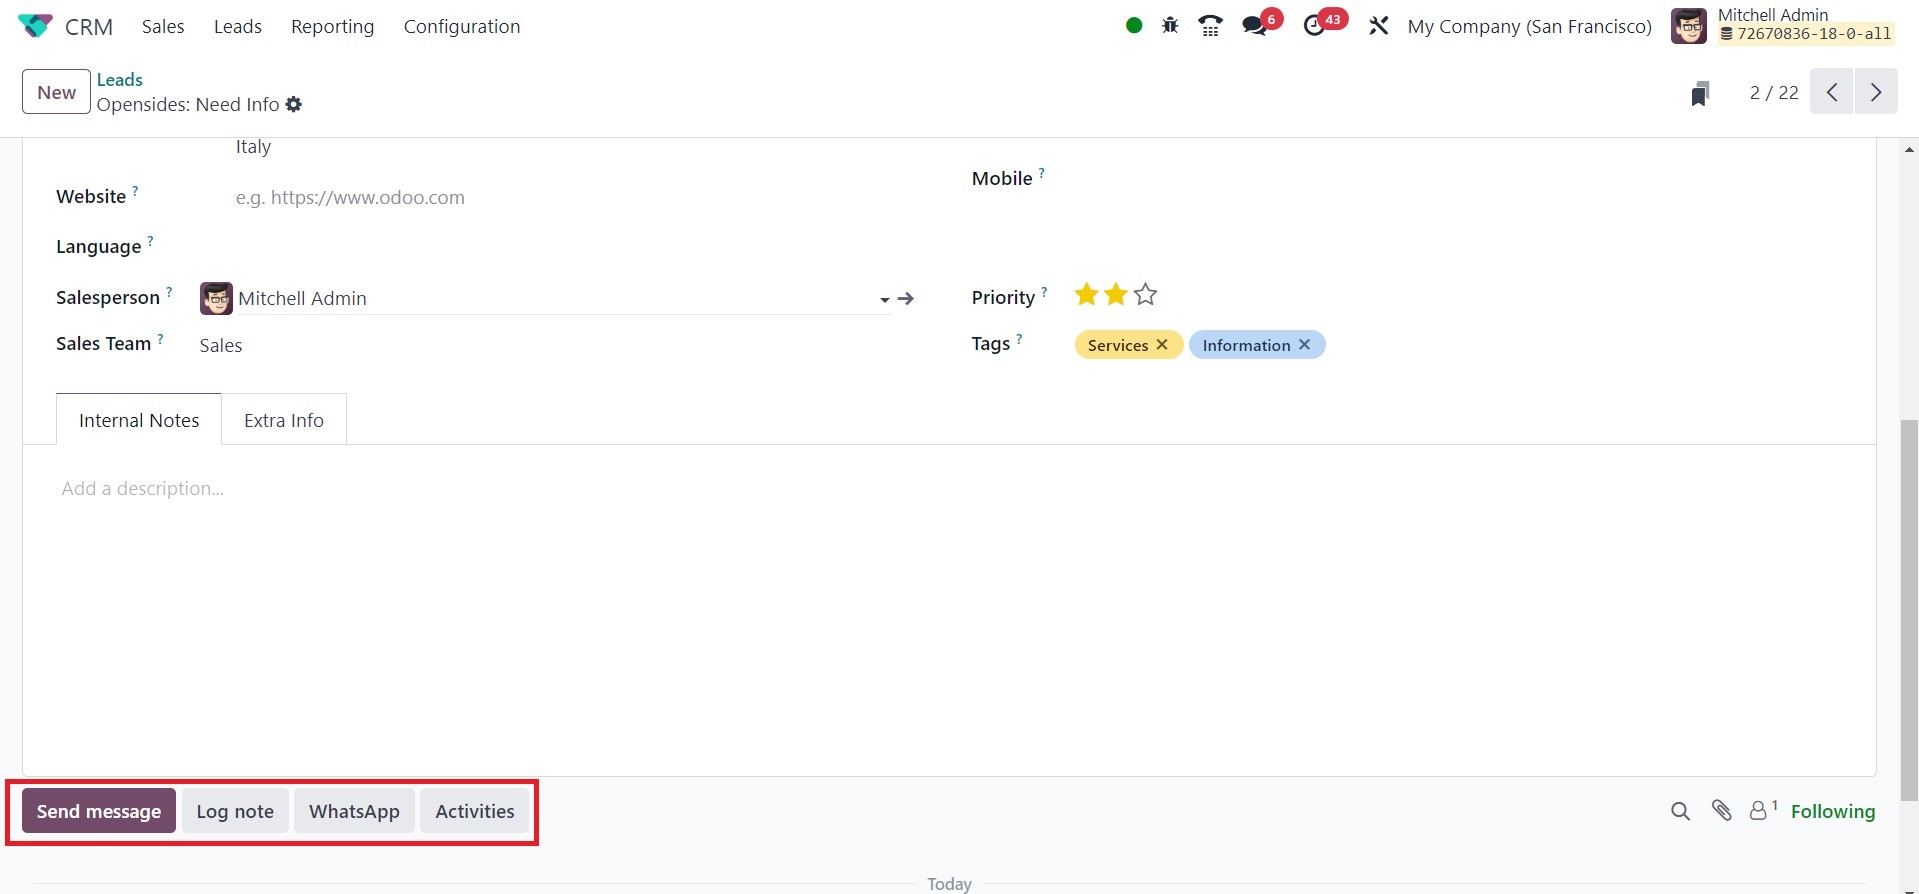
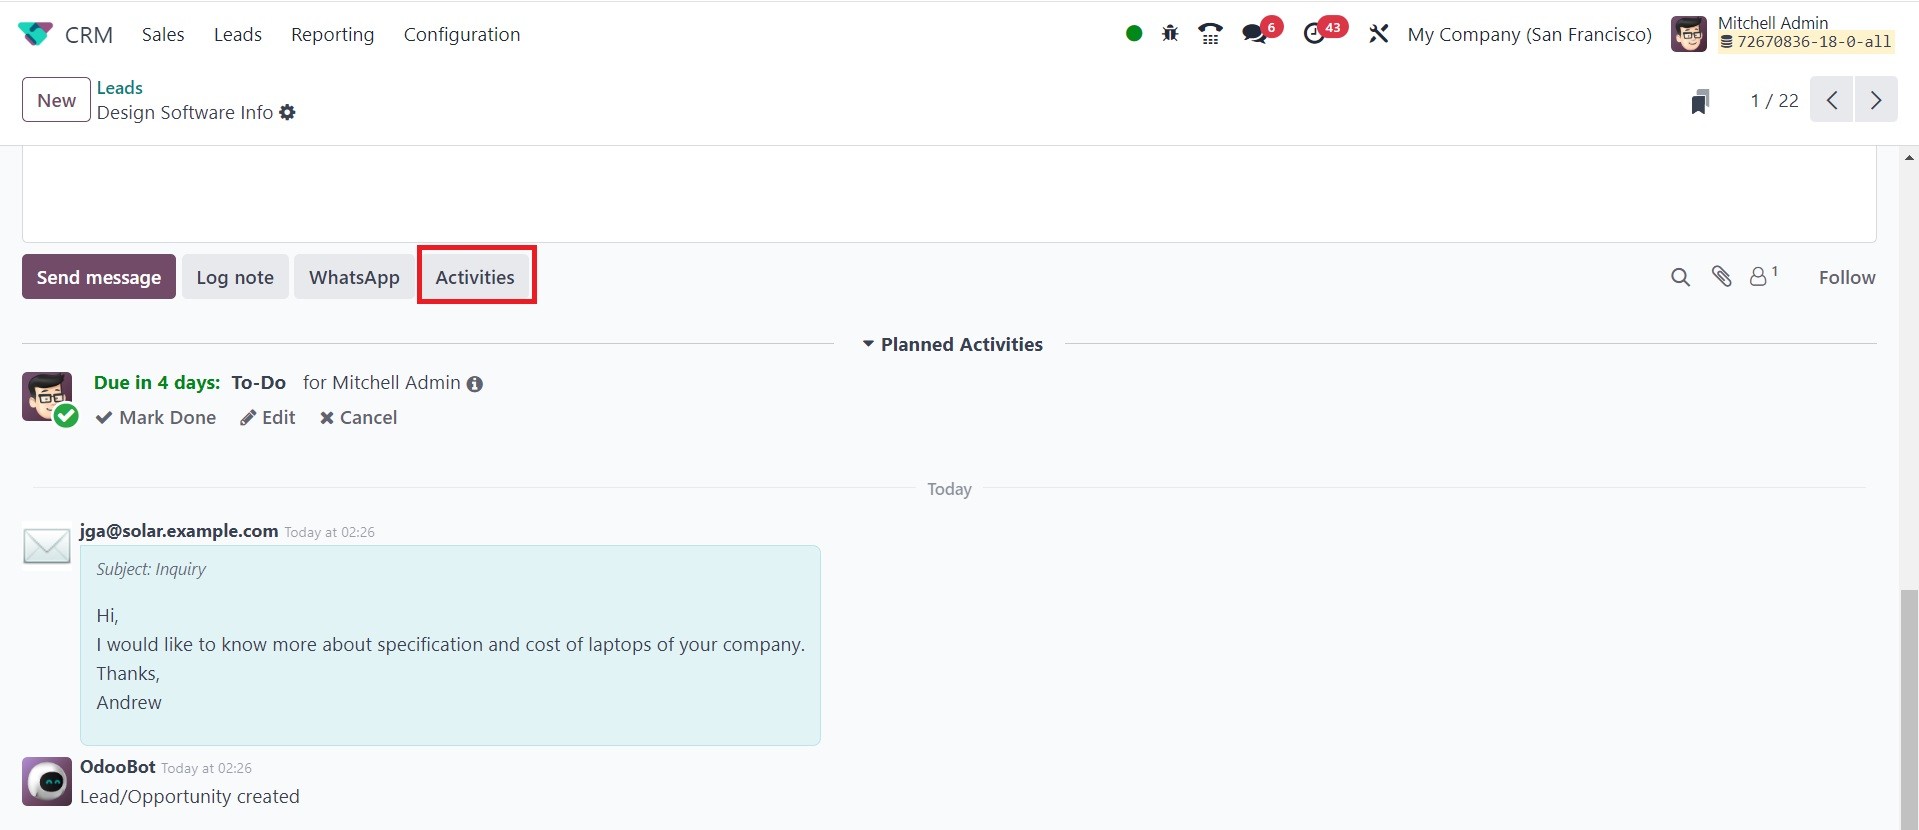
When you scroll down the window,
four options appear. which,
as indicated in the
screenshot below, are Send
Message, Log Notes, WhatsApp,
and Activities.
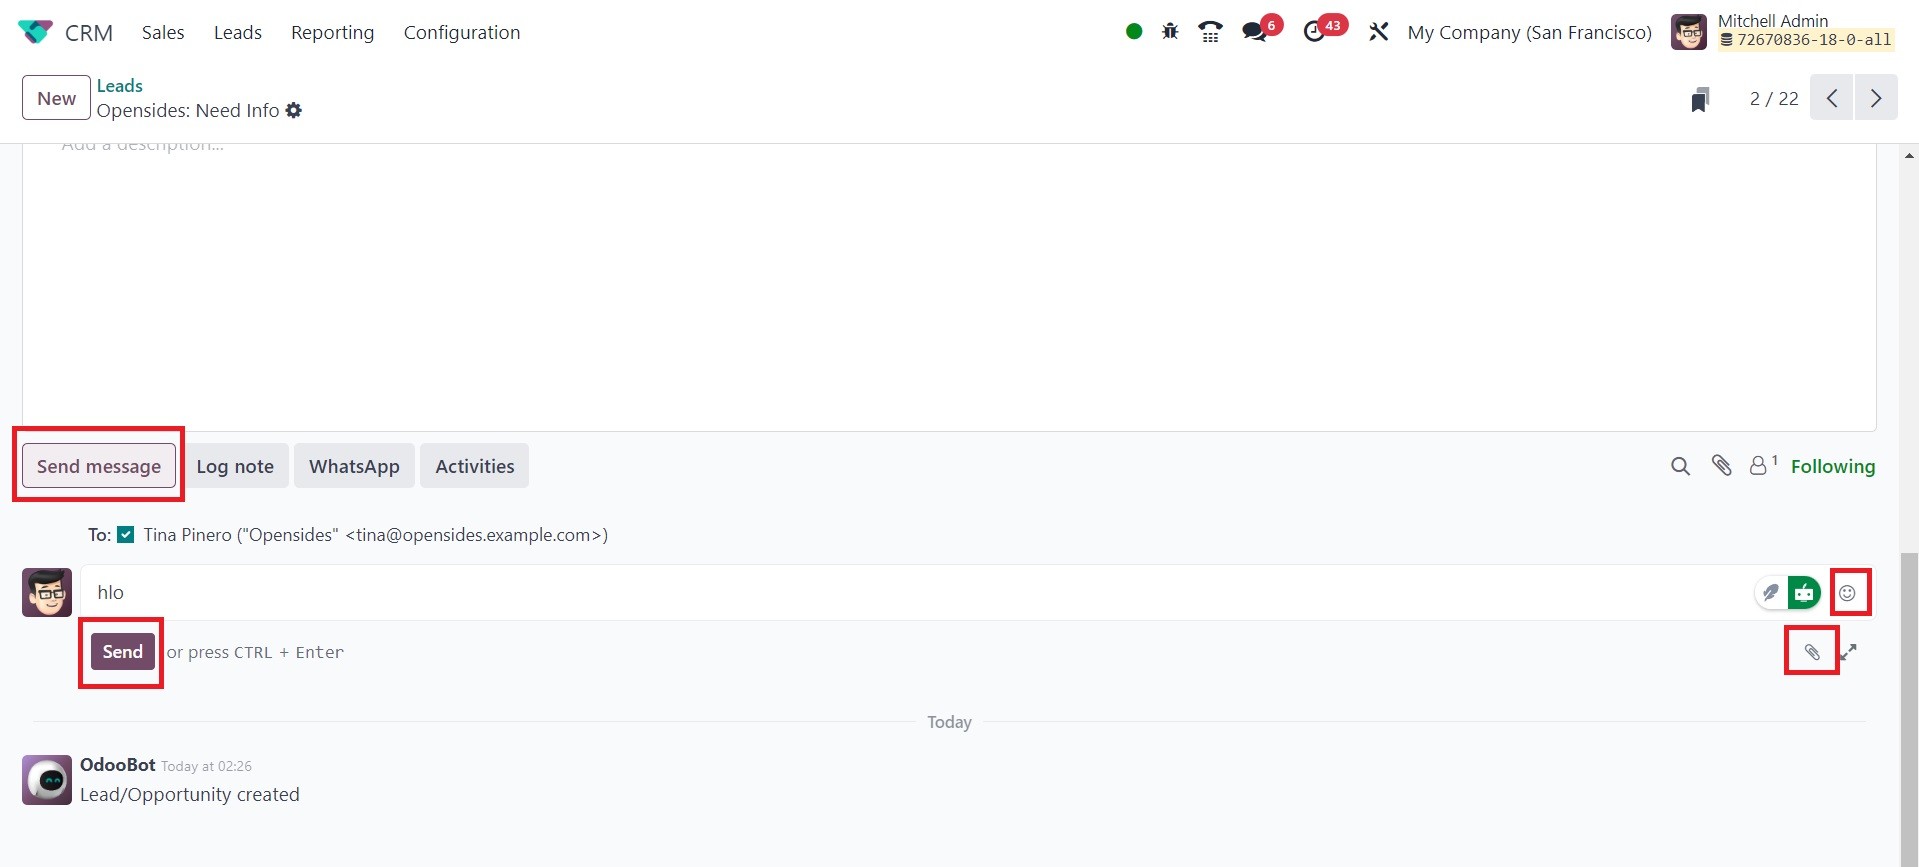
Clicking the Send Message button
will bring us a new section
where we can add messages to
the Followers. Smilies and
attachments can be added to
the message box. Then send
the message by clicking the
Send button.
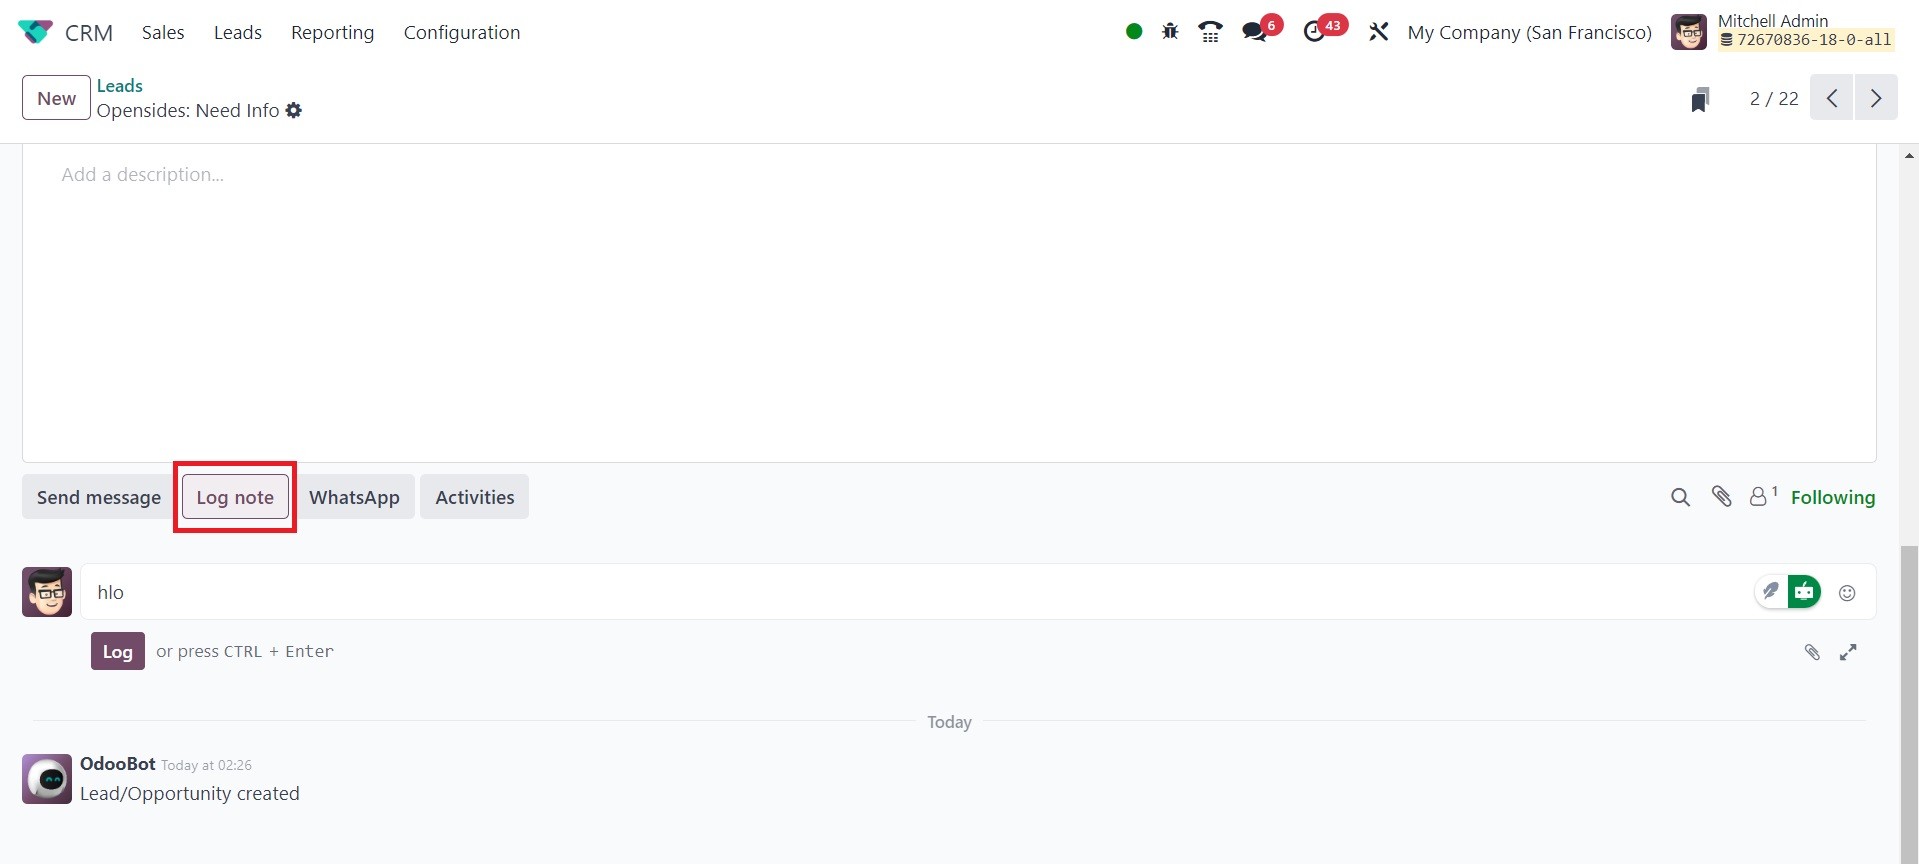
Clicking the Log note button will
bring up a section that is
exactly like this one. Log
notes are nothing more than a
tool for user-to-user
communication.
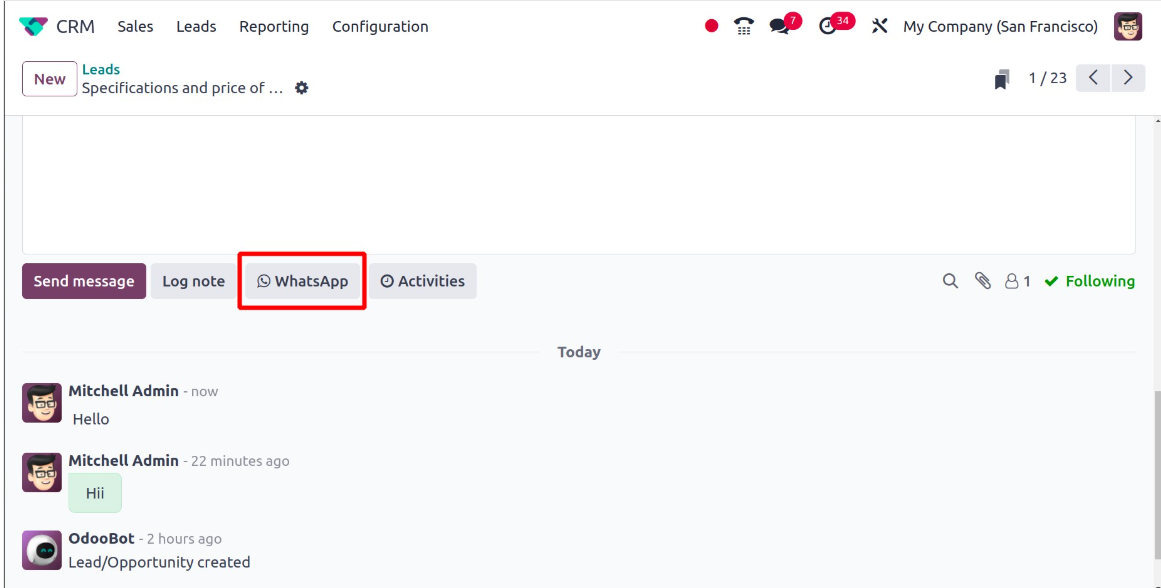
There is a feature in Odoo 18
called WhatApp. This version
also allows Odoo to integrate
WhatsApp. With this, users
may reach out to customers
directly and receive their
reactions.
The final option is activities.
Consequently, users can also
use this to schedule
activities, which is similar
to what we discussed earlier.
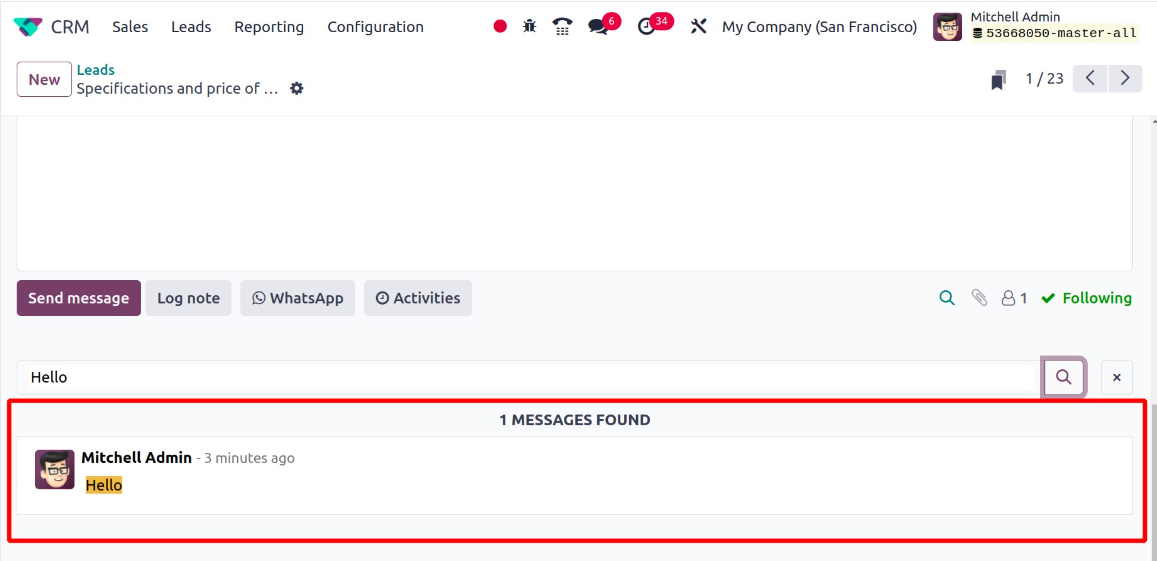
In the discussion, Odoo 18
introduced a new search
function. It facilitates
finding particular messages.
To access the search option,
click the "searching" sign,
as shown in the screenshot
below.
When you add text and search for
it, the results will appear
as they do in the screenshot
below.
This window displays a recently
added feature to Odoo called
Add a Property. You can add
customized fields to the form
view with this function.
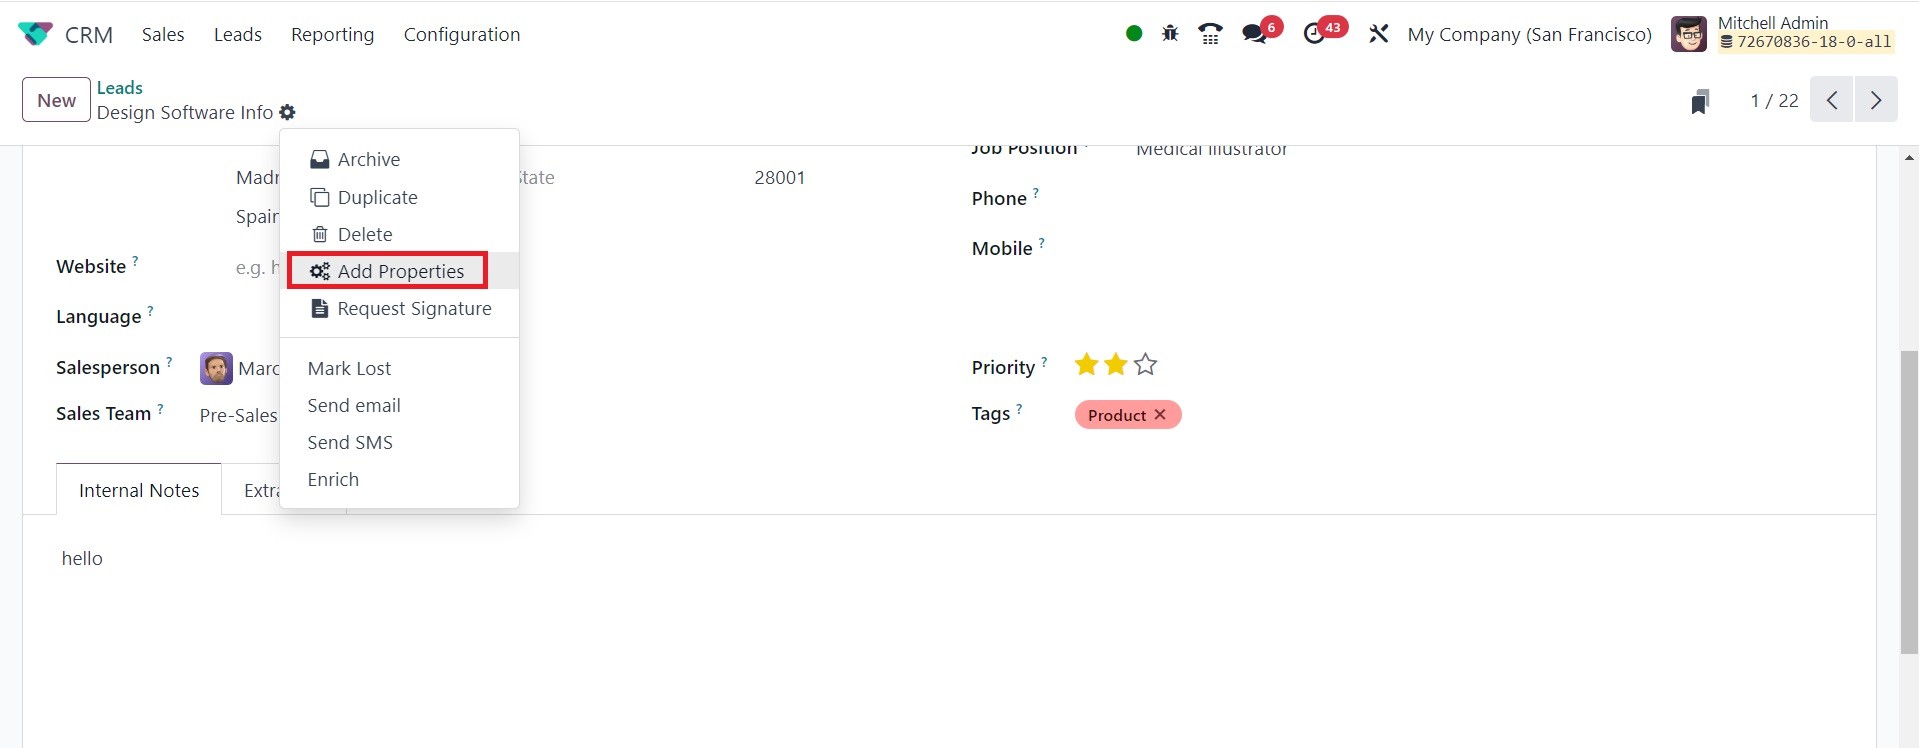
Clicking the Add a Property
button will bring up a pop-up
window like the one below.
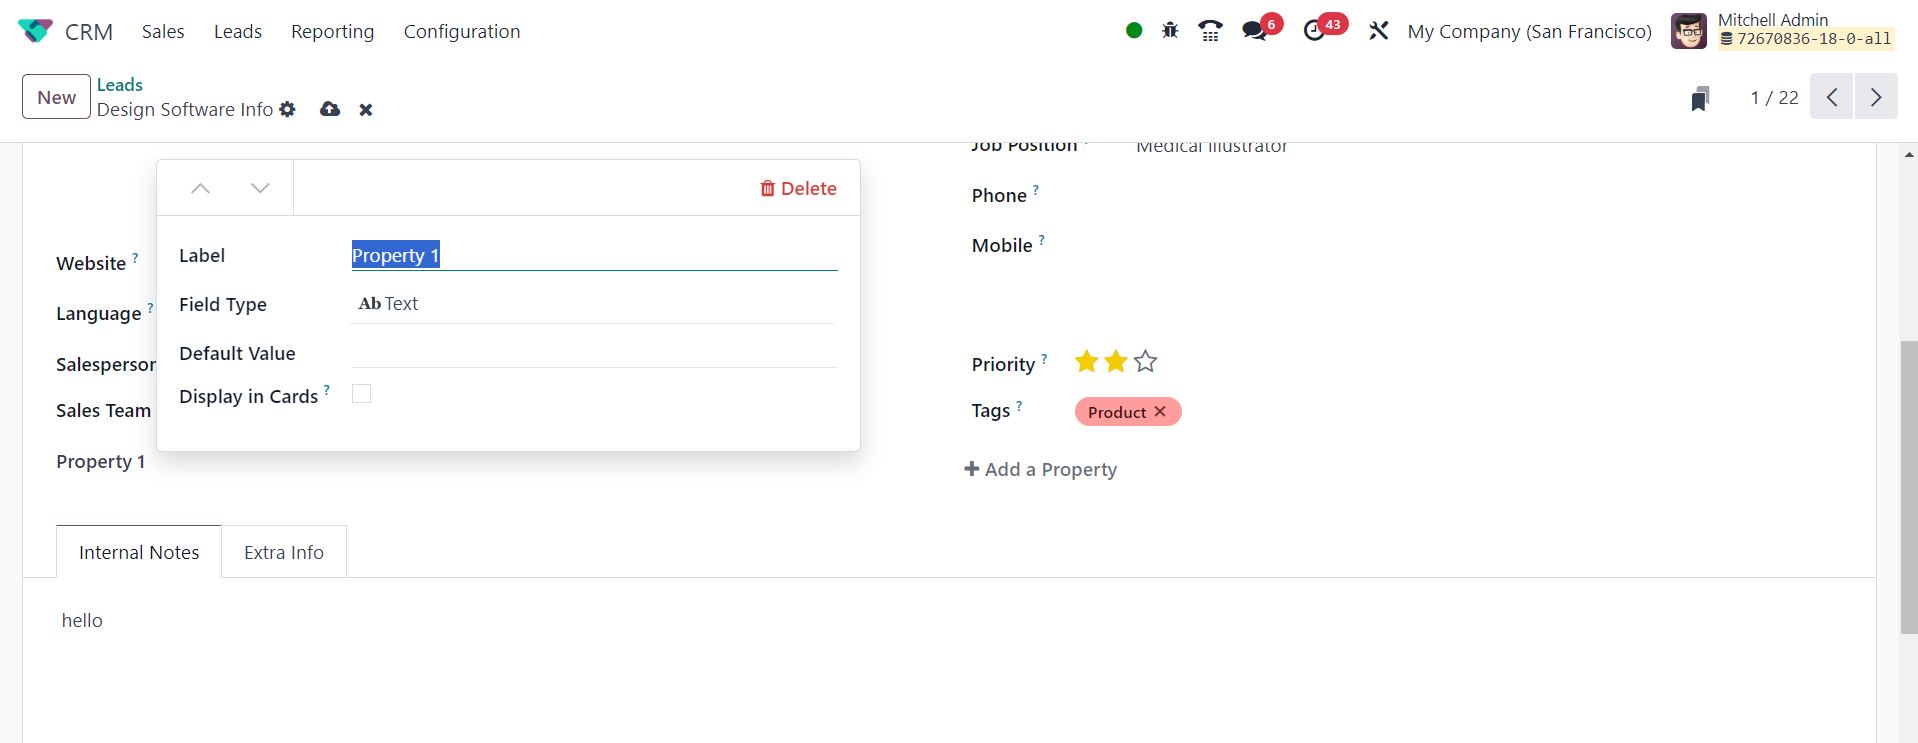
You can mention the new field's
name in the designated space.
For example, if you want to
add the Country field to the
form view, you can call the
field Country.
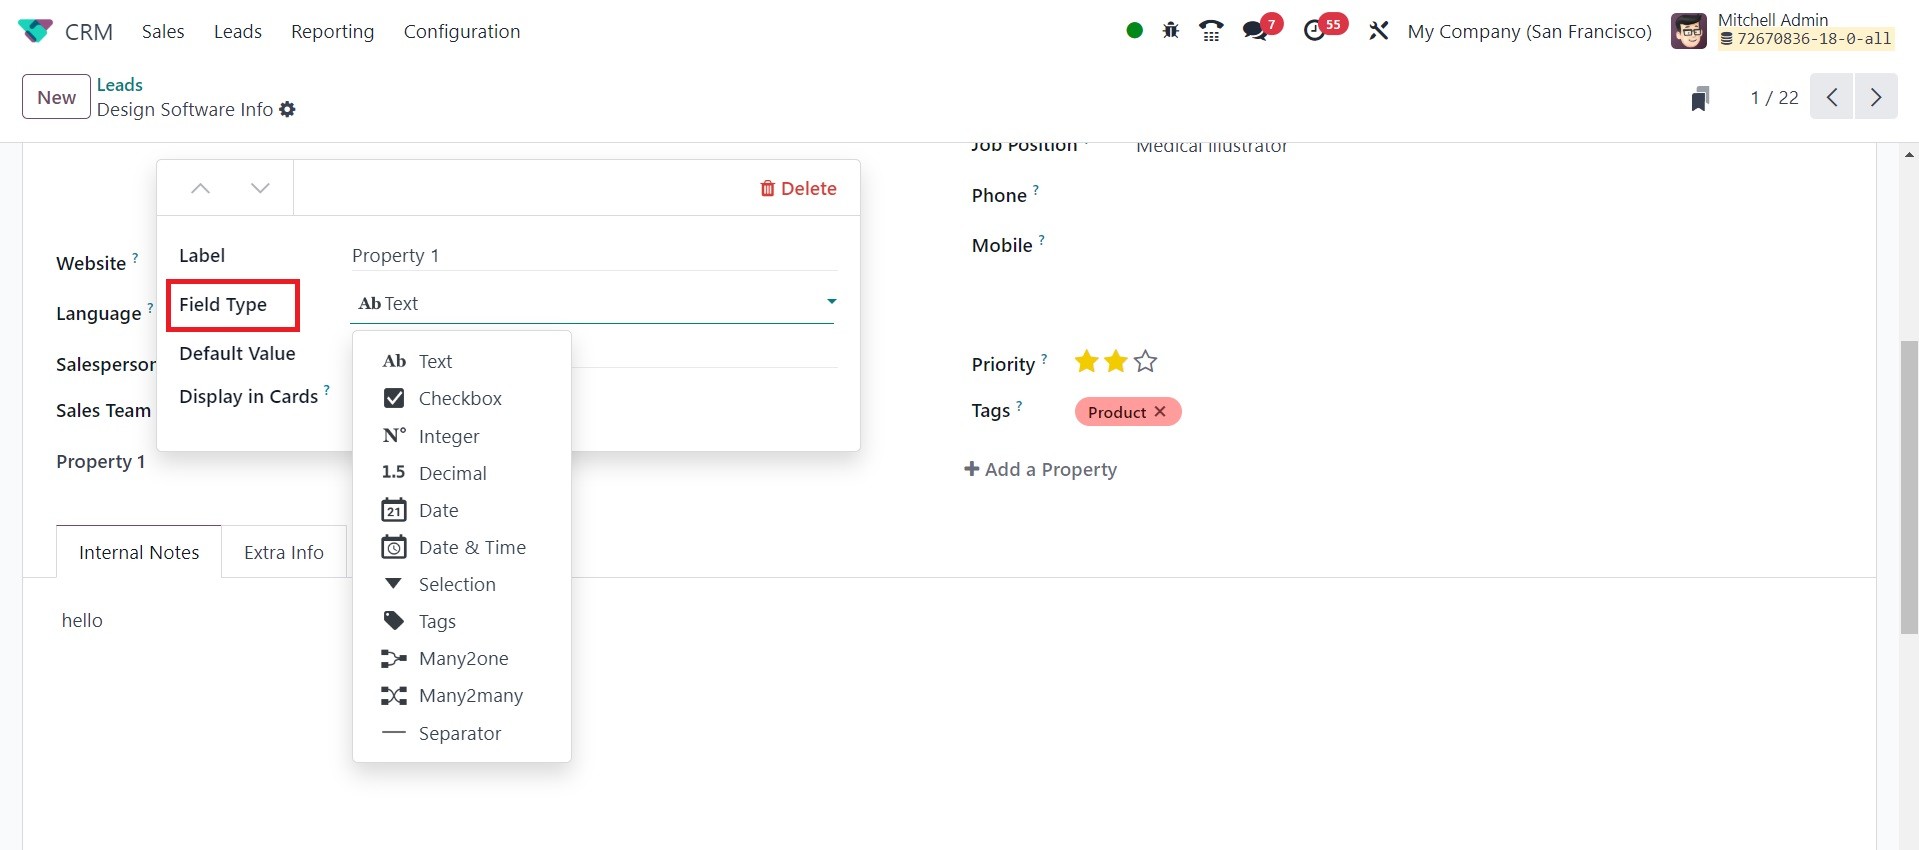
You can select the new
field's type from the
drop-down menu that appears
under Field Type. The field
type may be Text, Checkbox,
Integer, Decimal, Date, Date
& Time, Selection, Tags,
Many2one, or Many2many,
depending on your
preferences.
Once the Field Type has been
established, you may provide
a Default Value for this new
field in the corresponding
field.
You can add a number of these
fields to the form display by
clicking the Add a Property
button.
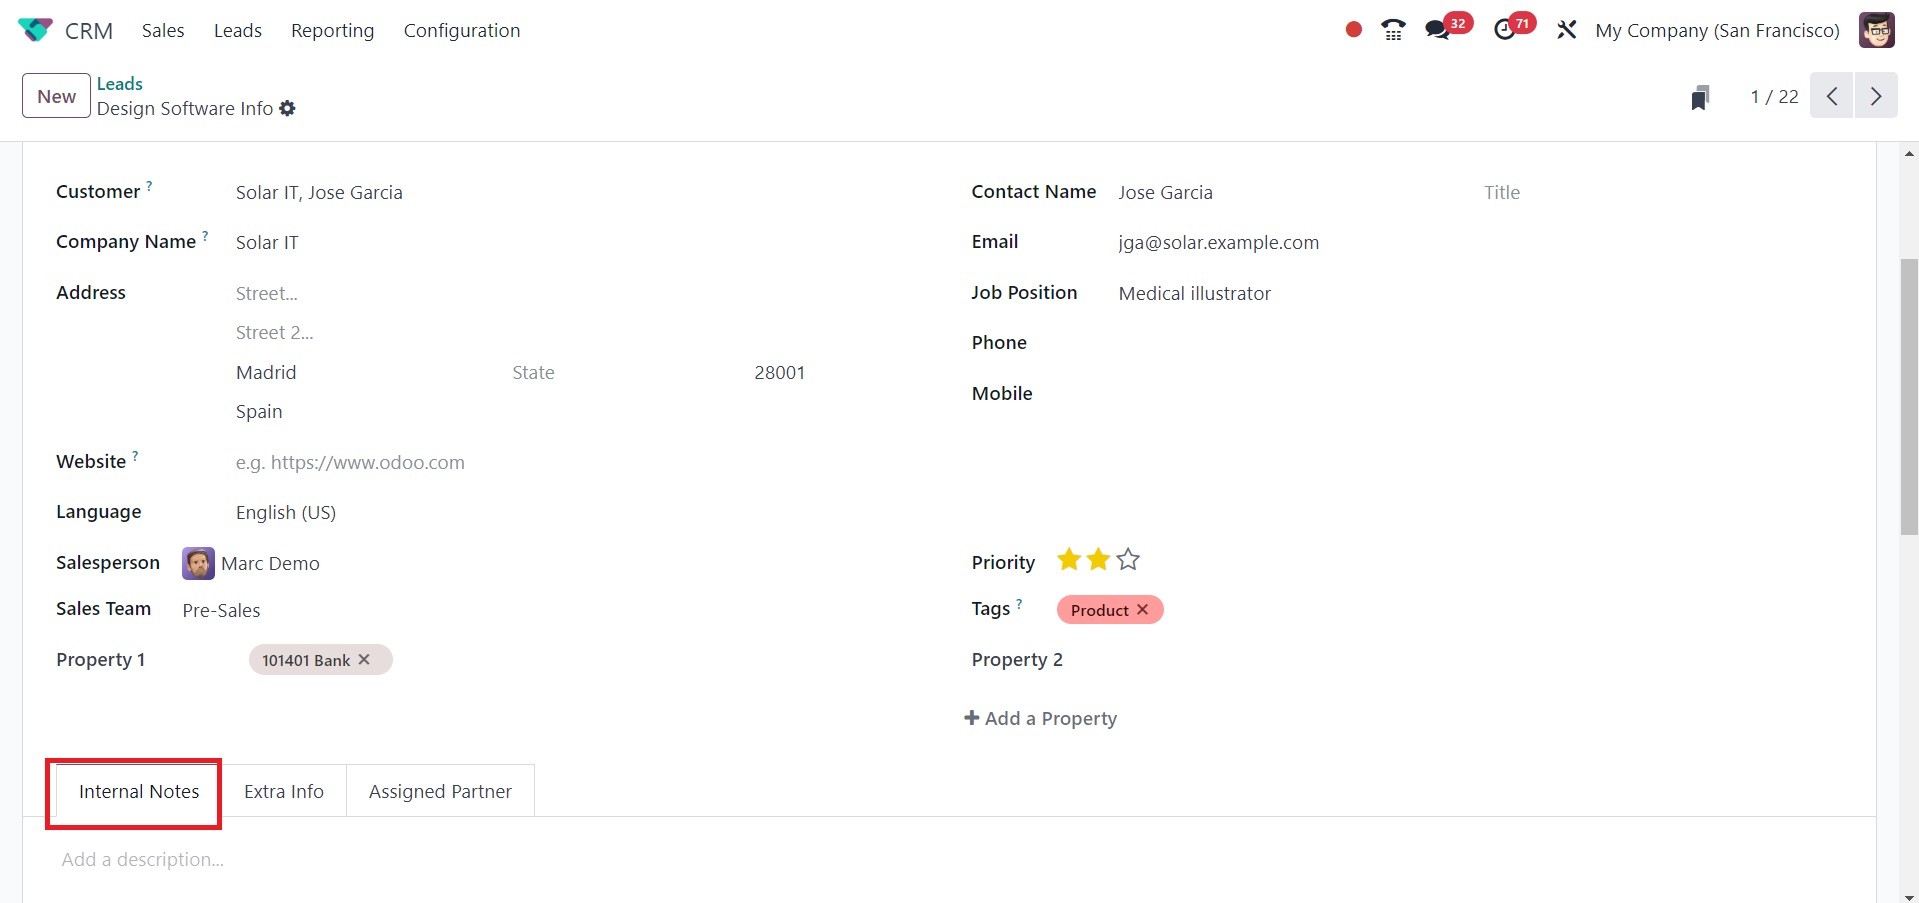
Any further notes you may
have regarding the lead can
be included under the
Internal Notes tab.
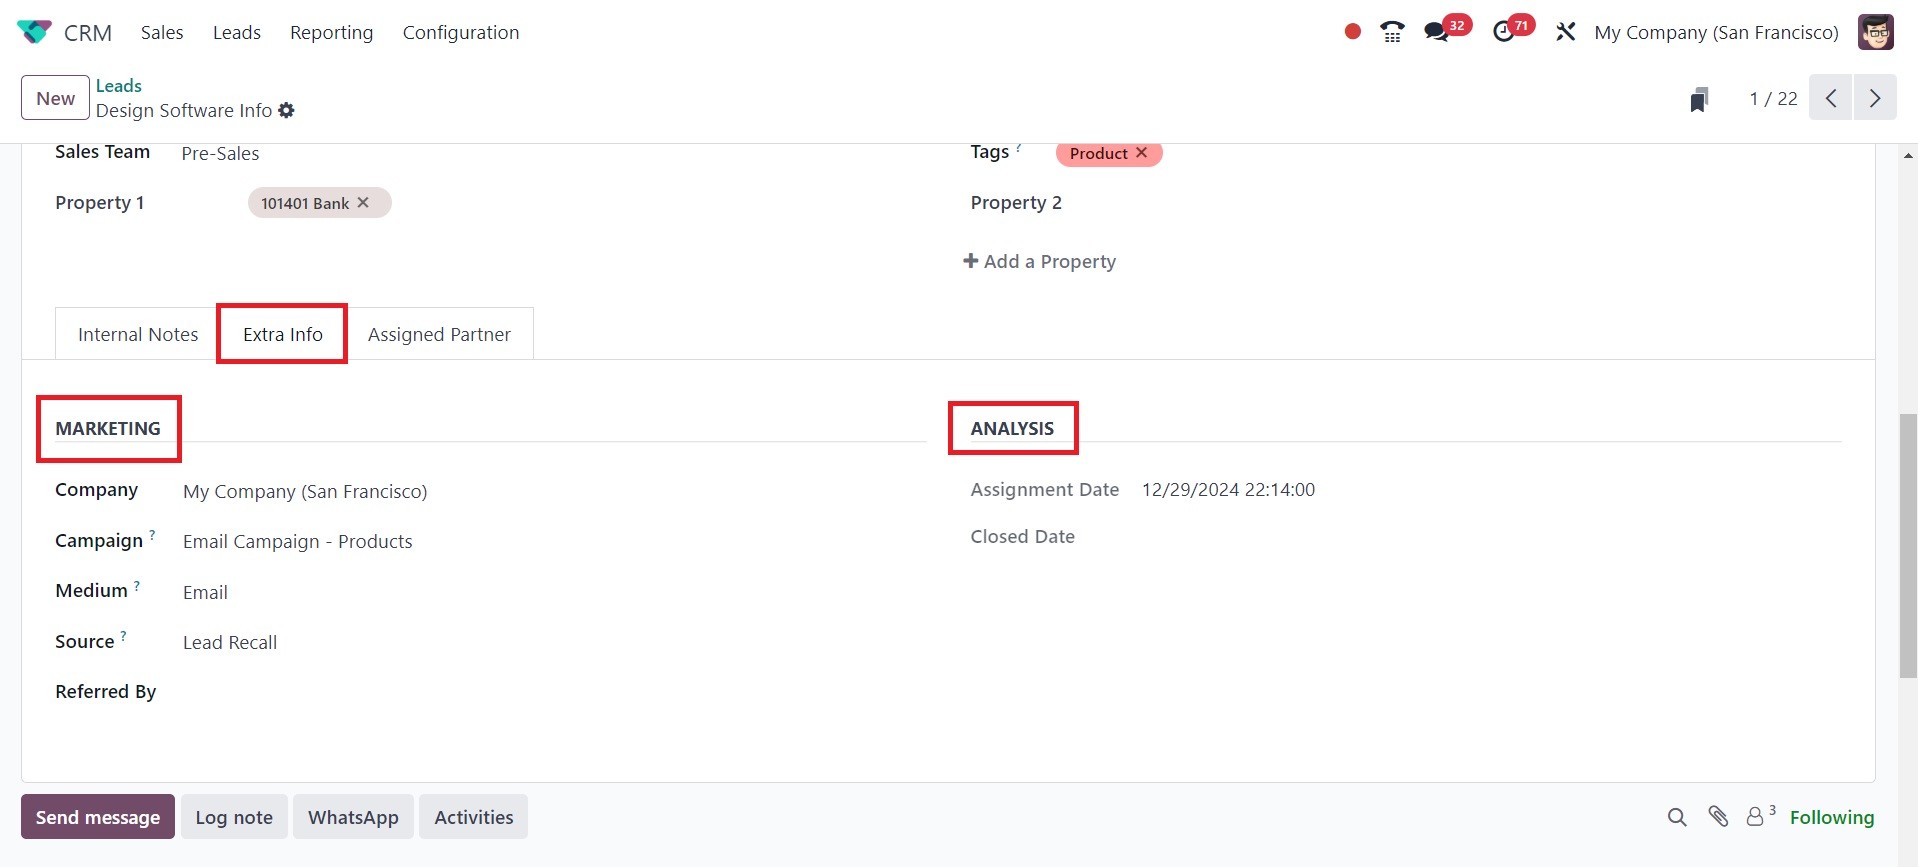
The Marketing and Analysis
information can be added
under the Extra Info tab. In
the Marketing area, list the
Company, Campaign, Medium,
Source, and Referred By.
Under the Analysis field, you
may see details about the
Assignment Date and Closed
Date, as in the image below.
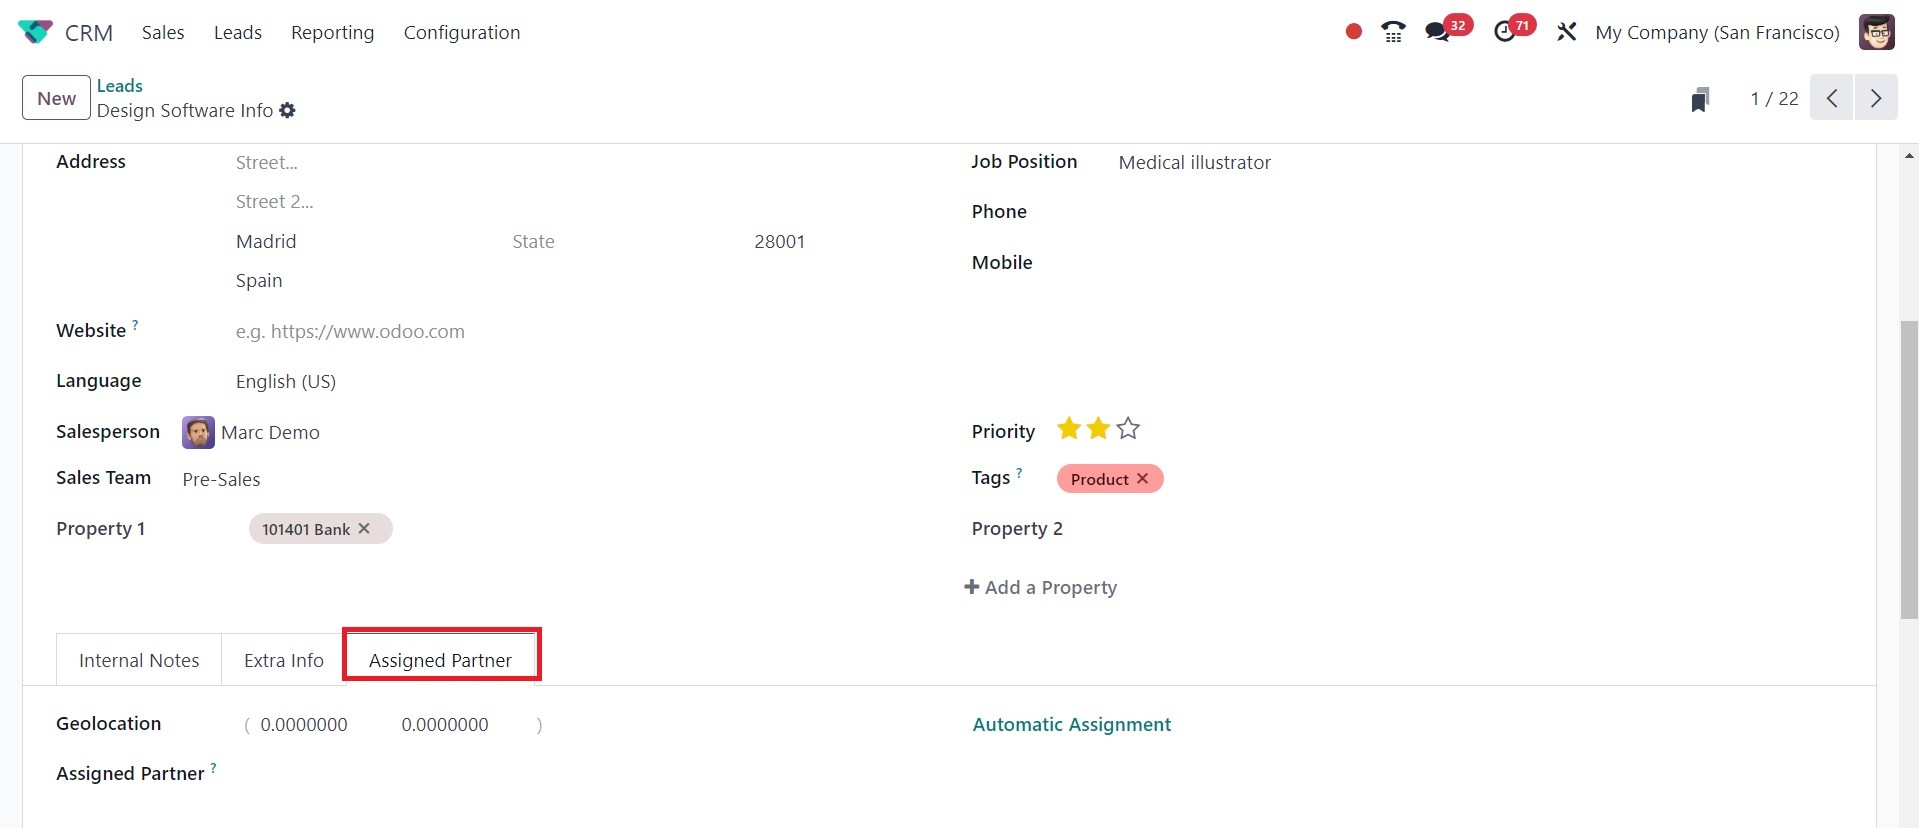
The Assigned Partner tab in the
new lead creation box is
where you can add the
geolocation and Assigned
Partner information.
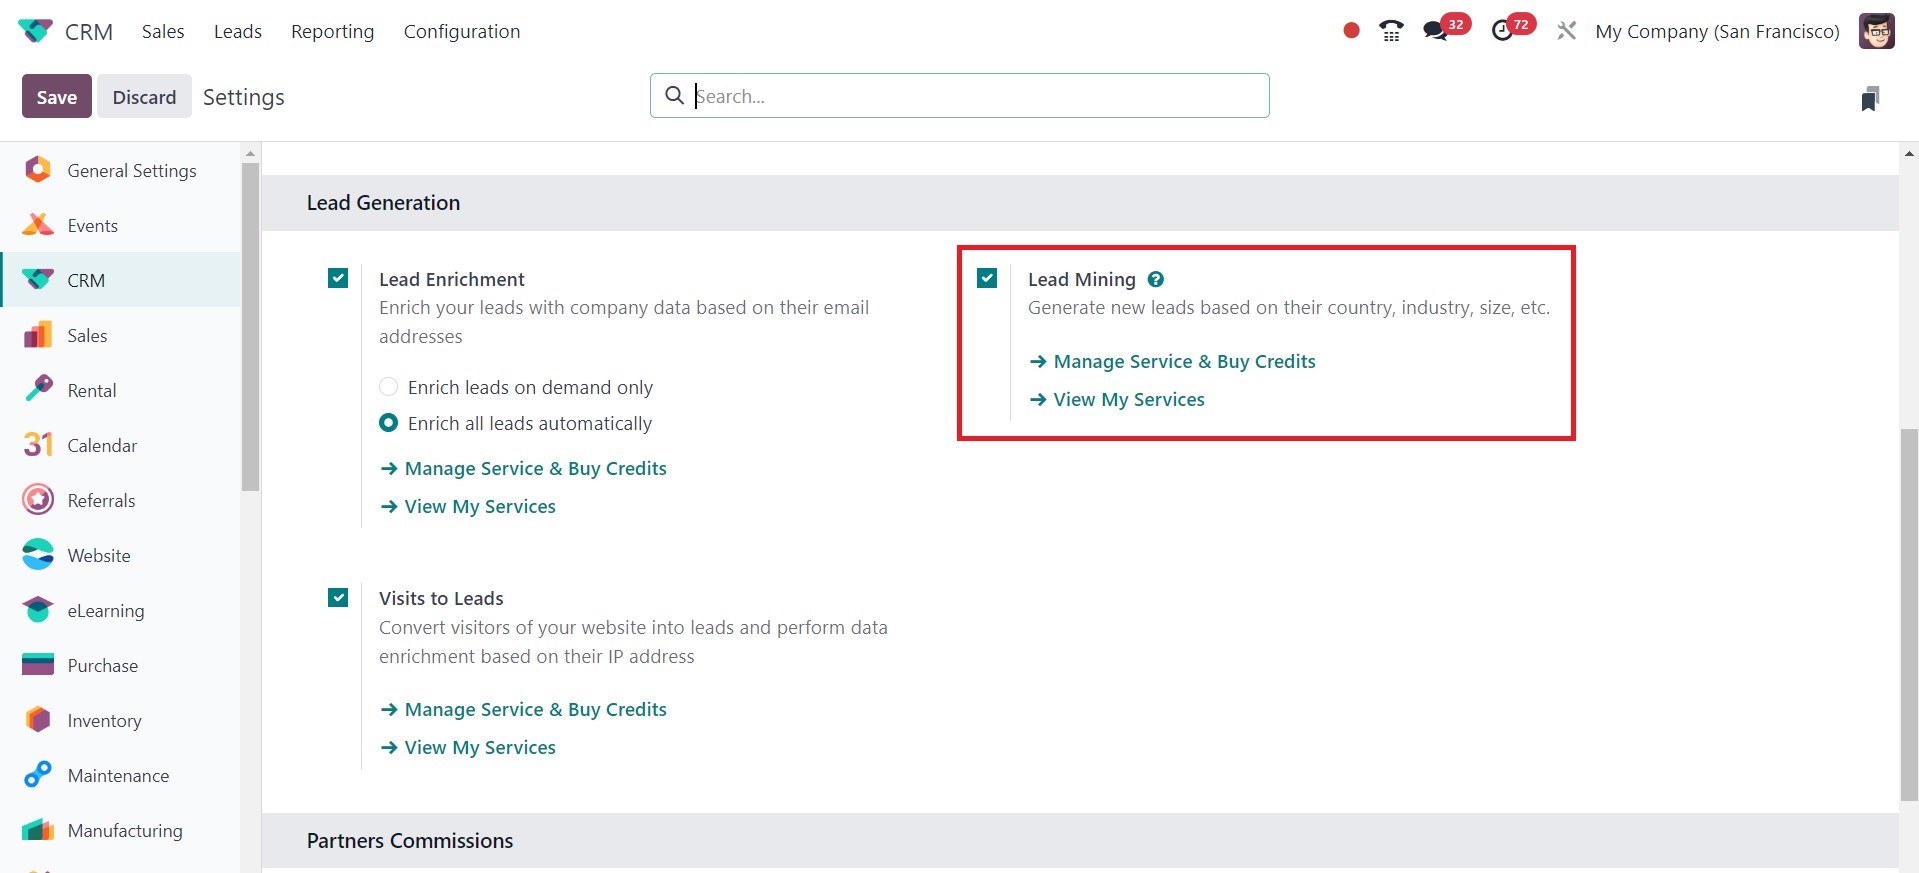
2.1 Generation of Leads
A straightforward technique for
producing leads straight from
the CRM module is offered by
Odoo 18. This feature is
exclusive to the enterprise
edition. To enable this
feature in your CRM module,
select the Lead Mining option
from the Settings menu. This
option can be found under the
Lead Generation tab, as seen
in the figure below.
This feature can be used by Odoo
18 Enterprise users to
improve the lead creation
process. As you can see in
the screenshot below, the
Generate Leads button will
assist you in automatically
generating leads from the
Leads management box.

By selecting the "Generate Leads"
button, you can now establish
lead rules. When you click
this button, a pop-up window
outlining the lead generation
criteria will appear. The
pop-up window will look like
this.
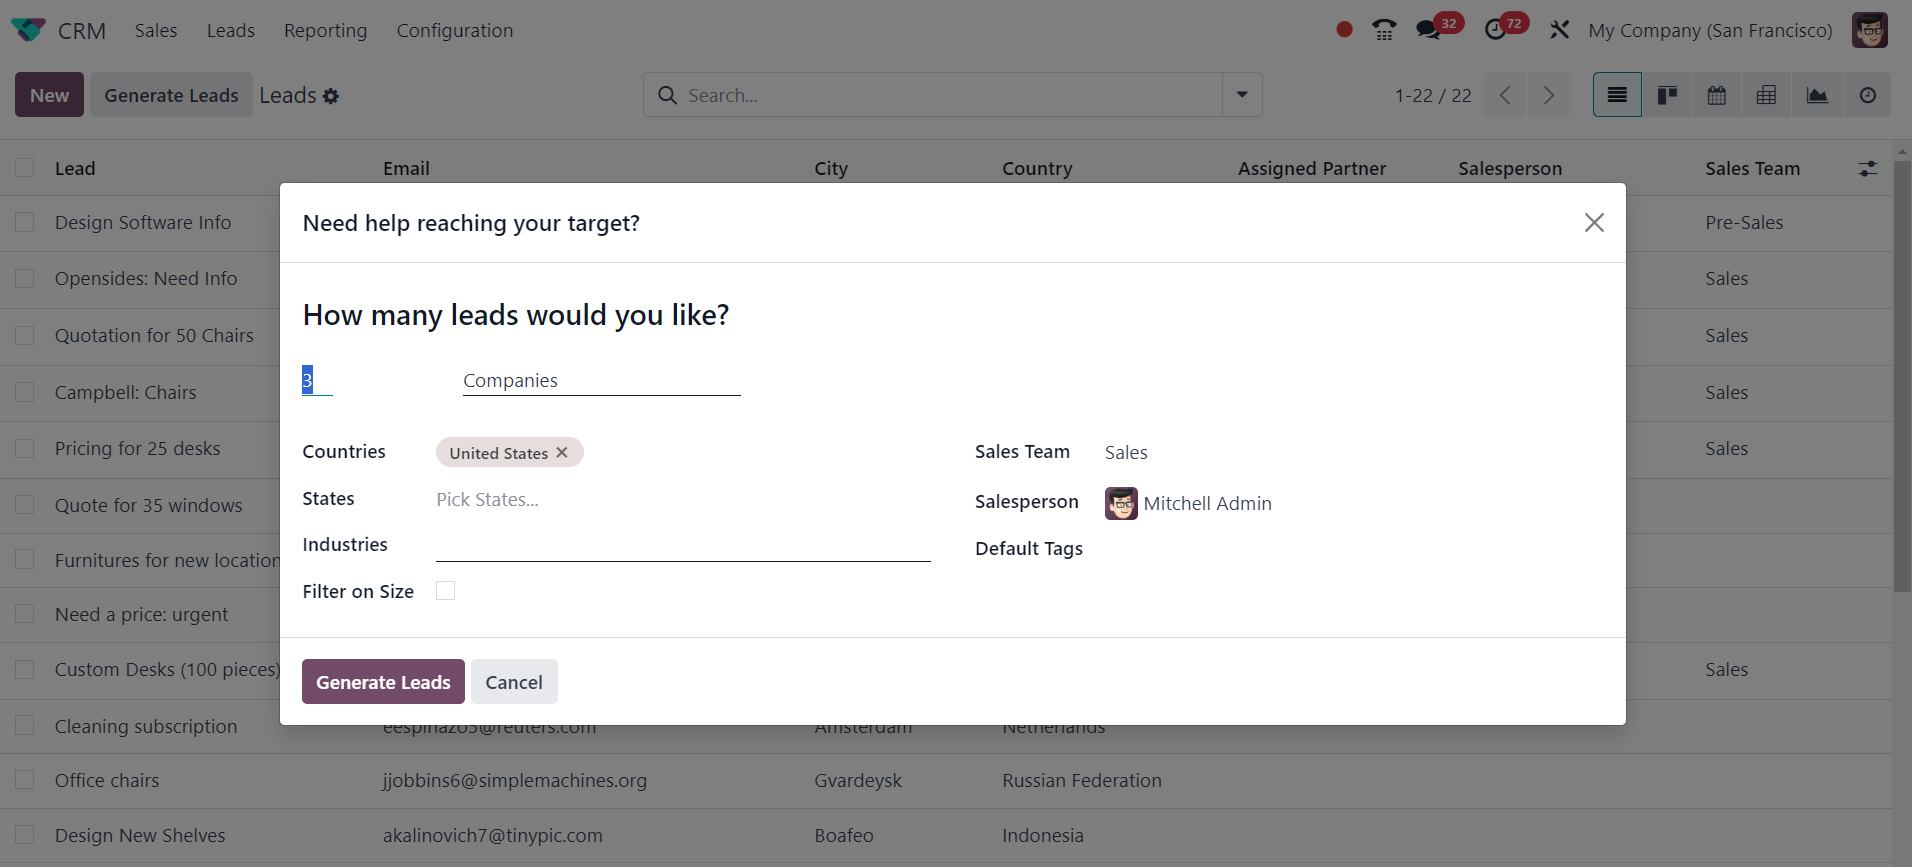
Here, the number of leads
required from a certain
target may be indicated.
Companies or companies and
their contacts can be
targets. Along with these
details, you can also include
the target lead's countries,
states, and industries.
Activate the Filter on Size
option to filter the leads
based on their size. You can
assign a sales team and a
salesperson in the
appropriate areas to handle
the leads. Enter the relevant
tags for the leads in the
Default Tags section. Click
"Generate Leads," once you
have completed all the
fields. Based on the data you
have entered, leads will be
created.
Keep in mind that creating
leads in the CRM module
requires a specific quantity
of credits and that this is a
paid service.