1. Channels
The Discuss module in Odoo 18 Enterprise Edition provides users with
the flexibility to create customized communication channels tailored
to various team requirements, such as departments, projects, or
specific topics. To initiate the creation of a new channel, users
can simply click the “+” (Add) button located on the left side of
the main Discuss window.
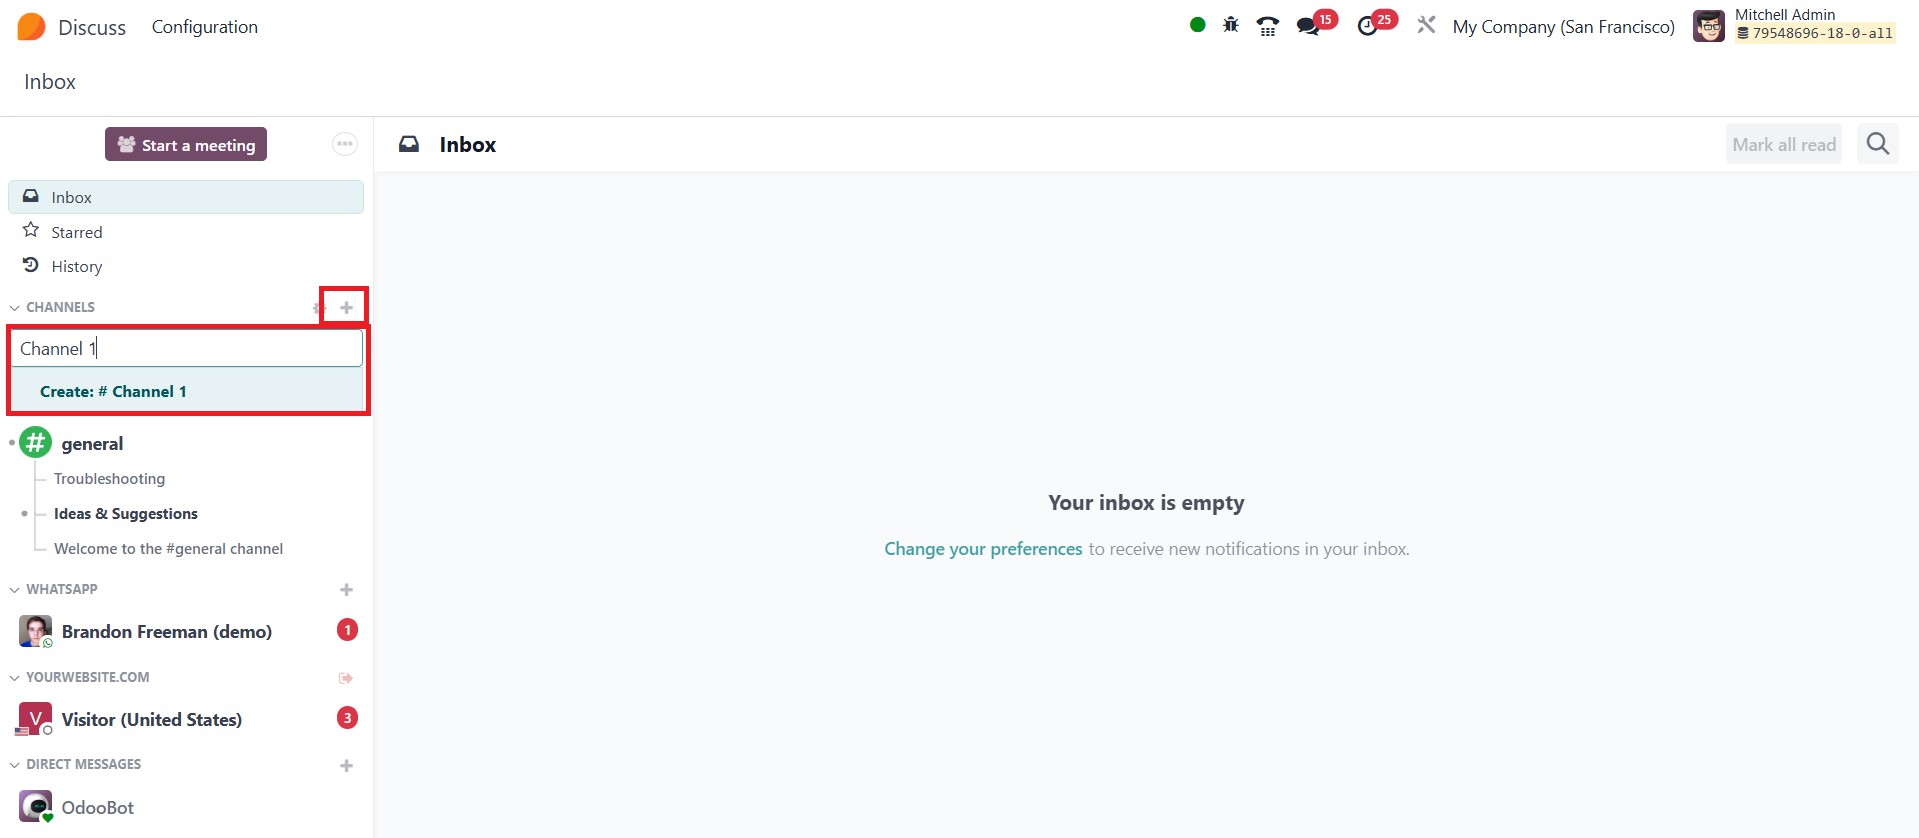
This action prompts an editable field where users can enter the
desired Channel Name. Once the name is specified, clicking the
‘Create: #(Channel Name)’ button instantly generates the new
channel. Additionally, users have the option to add a short
description in the “Add a description” field, which appears near the
channel title, to clarify the purpose or subject of the channel.
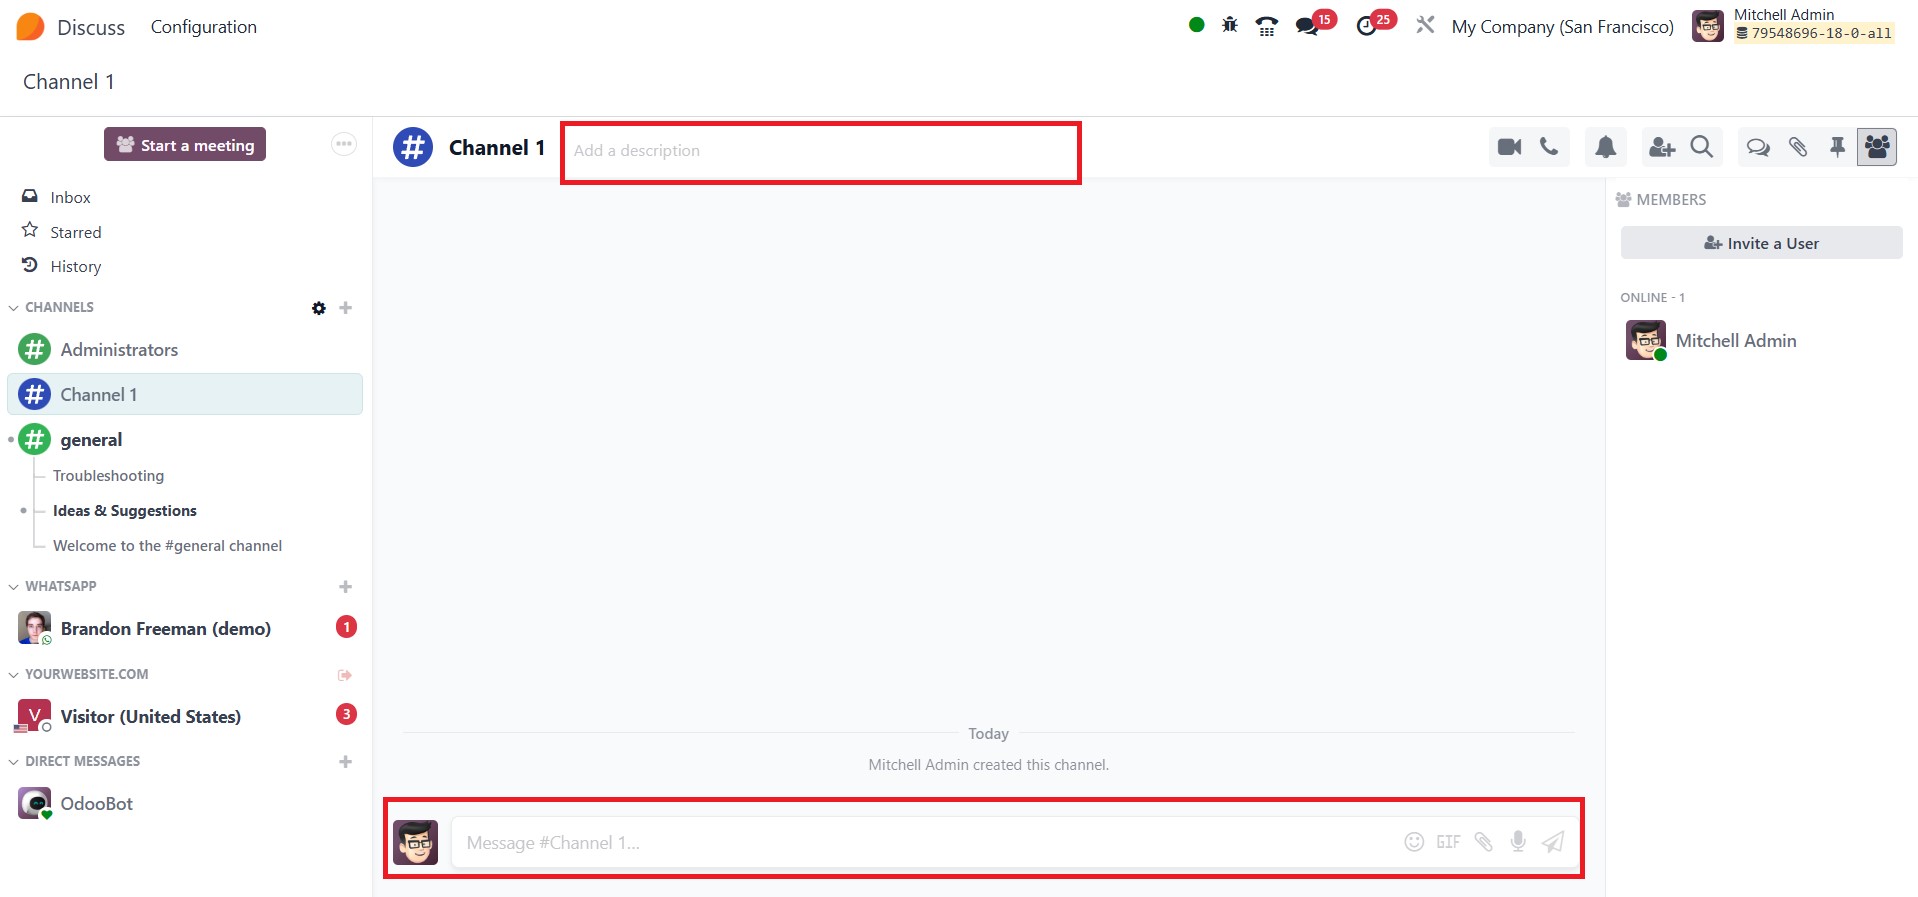
Once the channel is created, users can begin communicating by typing
messages into the “Message#(Channel Name)” input field, thus
initiating a focused discussion within the new group. The module
also offers a Settings button placed next to the add channel button,
which provides access to all previously configured channels.
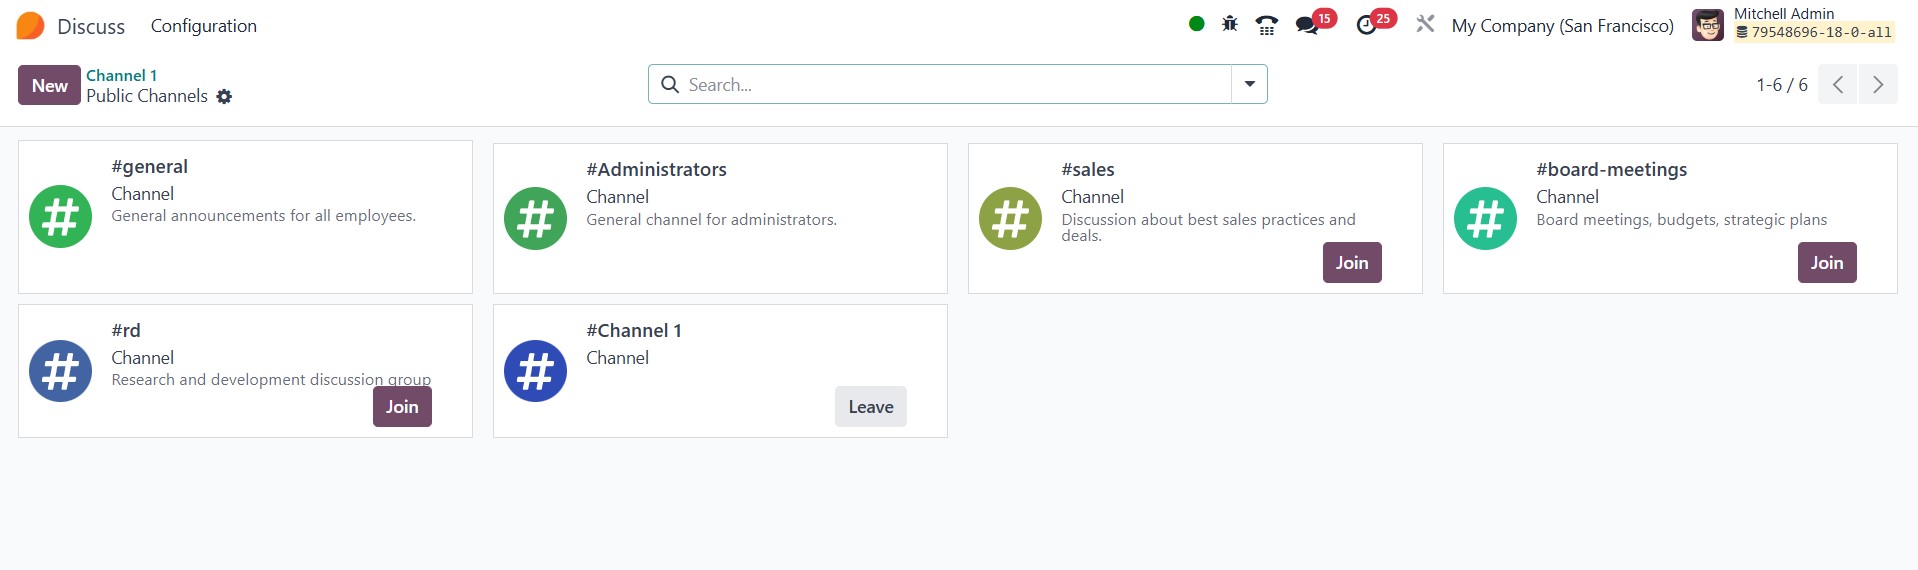
From this settings interface, users can join or leave channels
effortlessly using the ‘Join’ and ‘Leave’ buttons, which become
visible when hovering over specific channels. To streamline
navigation and enhance organization, the Discuss module includes
‘Filters’ and ‘Group By’ options in the advanced search bar. These
features help users narrow down the list of channels based on
criteria relevant to their workflow. Furthermore, frequently used
channels can be saved under the ‘Favourites’ section for quicker
access.
An alternative method to create a channel involves clicking the New
button, which opens a detailed channel configuration form.
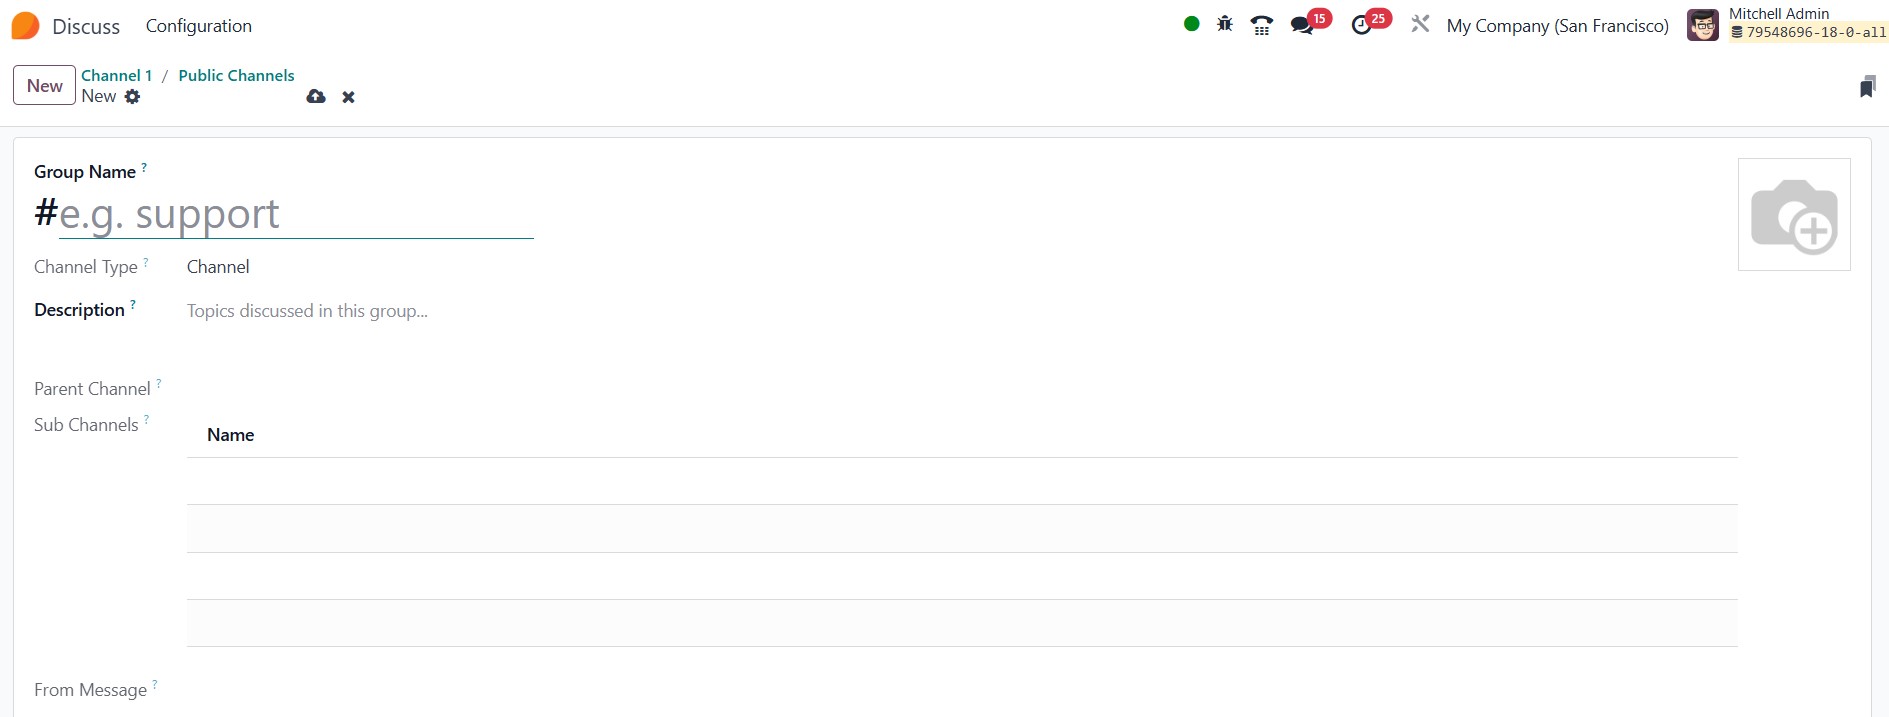
In this window, users can define the Group Name and provide a more
elaborate Description to convey the intent or objectives of the
channel.
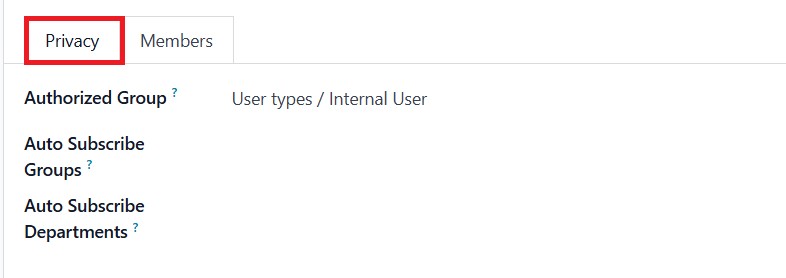
Under the Privacy tab, administrators can set rules such as Auto
Subscribe Departments, Authorized Subscribe Groups, and Authorized
Groups. These settings ensure proper access control, automatically
adding designated users to the group and managing visibility based
on roles or departments.
In the ‘Members’ tab of the configuration form, new members can be
added manually by selecting the ‘Add a line’ option.

This allows users to include specific team members who should
participate in the conversation. Channels can be designated as
public or private, giving administrators the ability to control who
can view and engage in the discussion. Once all configurations are
in place, users can save the new channel setup, making it
immediately available for team collaboration.