8. Configuration
The Settings menu in the Odoo 18
Document module offers a wide
range of configurable
options. To access the
Settings panel, navigate to
the Configuration Settings of
the Document module.
You can see two tab sections in
this settings window
including Trash Management
and Files Centralization, as
illustrated in the
screenshots below.
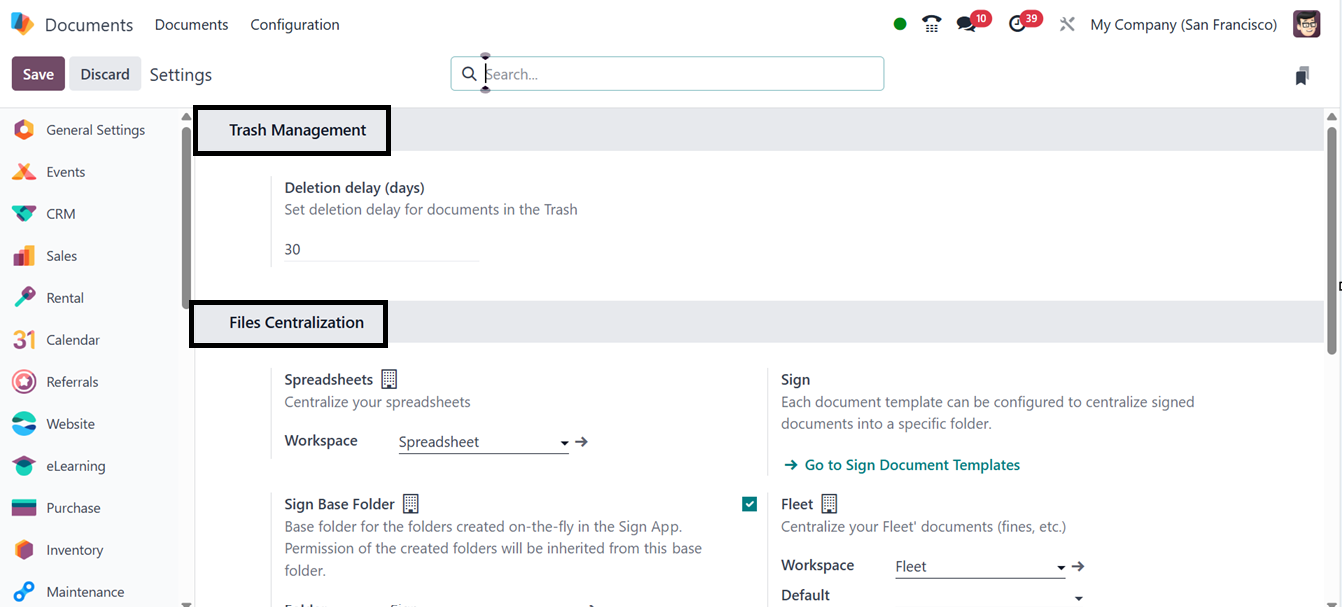
In the ‘Trash management’
section, you can specify
deletion delays in days is
one of its primary features.
Setting this option will
display a notice window
alerting users that a
document has been relocated
to the trash and will be
completely erased after 30
days is displayed when a
document is destroyed. The
deleted document is still
viewable in the trash during
this time, which is visible
via the dashboard.
With the help of this feature,
users may choose how long
papers in the trash should be
kept before being permanently
deleted.
Within the Files Centralization
section, various options are
available. Here, each
document template can be
configured to store signed
documents centrally in a
designated workspace. The
available options for
centralizing files include
Human Resources, Product,
Project, Approvals,
Recruitment, and Accounting.
These settings facilitate the
centralization of files
uploaded by customers along
with their purchases. The
system offers several choices
for centralizing different
kinds of documents,
including:
- Human Resources: To
consolidate
employee-related
documents, including
contracts and pay
stubs, activate this
option by checking the
box and then clicking
the SAVE button. Use
the dropdown option to
set up Workspace,
Payroll Workspace,
Default Payslip Tags,
and Contracts.
- Products: Turn on this
feature to handle
product-related files,
along with extra
workspace and default
tag settings.
Spreadsheet
centralization is also
supported by the
system.
- Recruitment: By turning
this field on,
documentation
pertaining to
candidates and open
positions is
centralized. For
improved organizing,
users can specify
Workspace and Default
Tags.
- Accounting: Accounting
files and
documentation are
centralized when this
option is enabled.
Through the journal
function, users may
choose a workspace and
create journals to
synchronize with the
system.
9.1 Spreadsheet Templates
The Configuration menu also
contains an option for
Spreadsheet Templates,
facilitating the management
of spreadsheet templates.
This section provides a
centralized space for all
created spreadsheet templates
and offers options to create
a new spreadsheet, modify an
existing template, or
duplicate a spreadsheet
template.
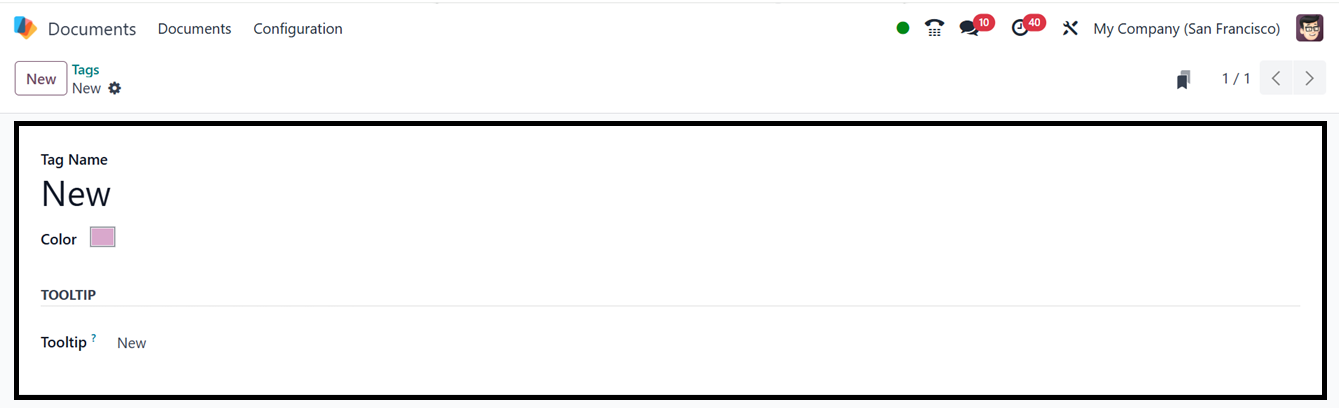
9.2 Tags
To configure new tags for each
category in the Odoo 18
Document module, navigate to
the Tags option under the
Configuration tab. By
selecting the Tags menu,
users can access the Tags
window, which displays all
pre-existing tags in the
system. Each tag can be
selected for detailed
inspection and modification.
To create a new tag, simply
click the New button.
When the ‘New’ button is clicked,
a creation form is displayed,
allowing users to choose a
Tag Name and Color. Users may
additionally specify
hover-over text for
particular tags or categories
using the Tooltip option, as
illustrated in the screenshot
below.

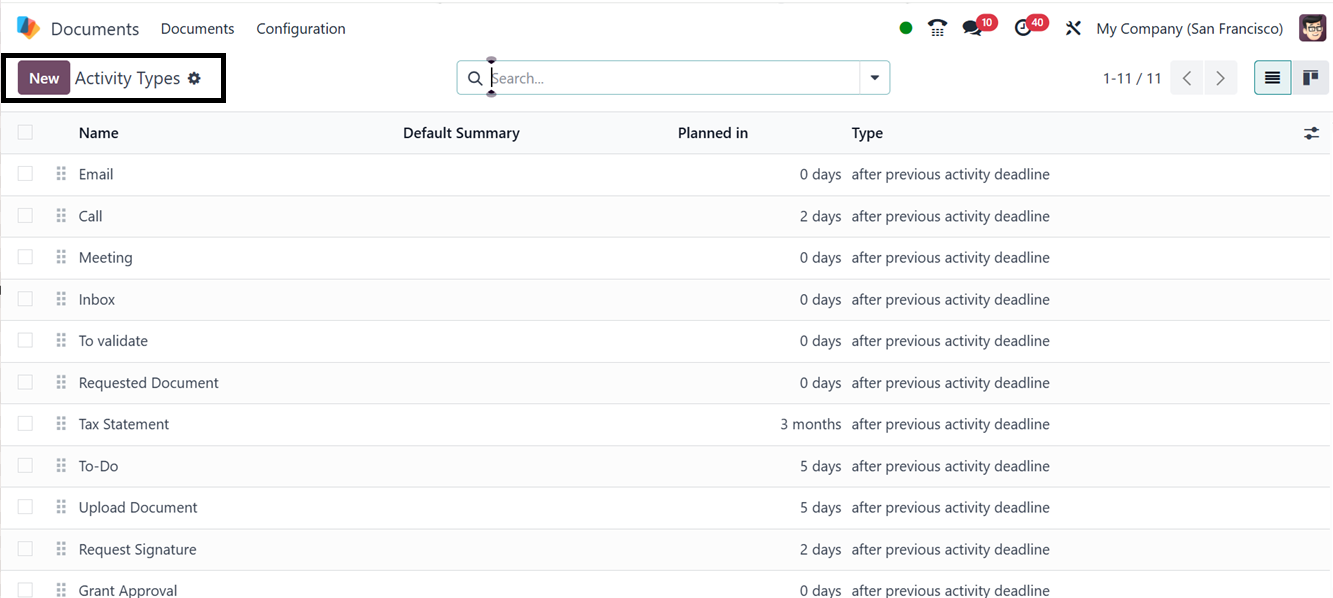
9.3 Activity Types
The Odoo 18 Documents module
offers Activity Types, which
define actions for document
processing, simplifying job
management. Users can set up
various activity types, such
as calls, meetings, emails,
and document reviews, to
ensure an organized workflow.
The Configuration menu allows
companies to design processes
to meet their unique
requirements. The dashboard
displays the names, default
summary, planned in date, and
type.

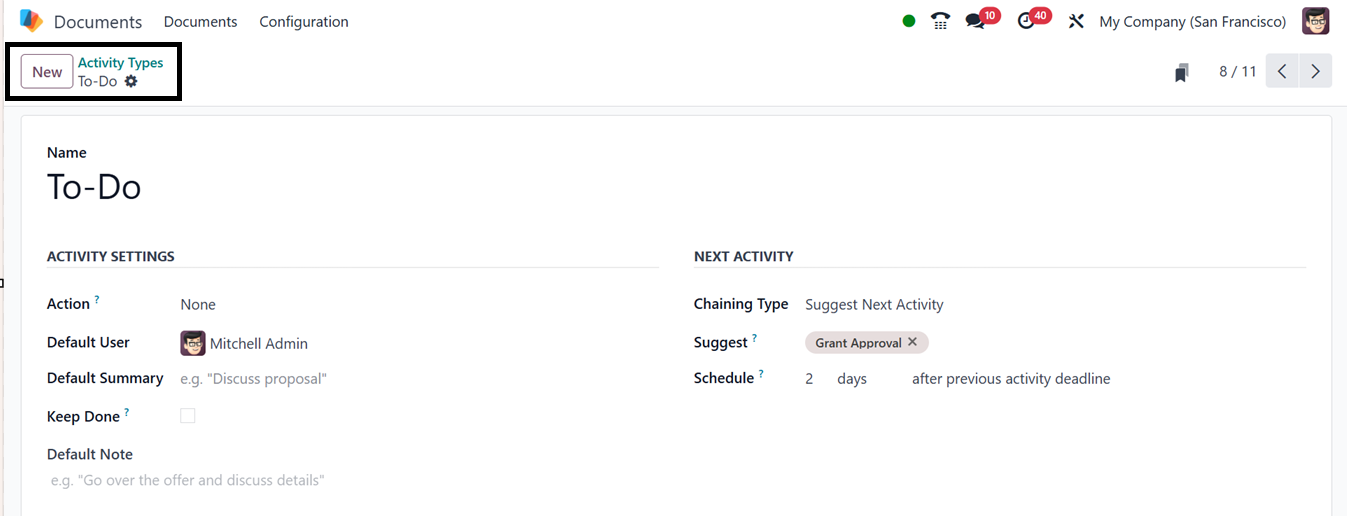
To create new Activity Types,
click on the ‘New’ button and
Choose an Action Type (e.g.,
Call, Email, Meeting, or
To-Do) and add a Name (e.g.,
Review Document or Approve
Contract) . Task allocation
is guaranteed automatically
when a Default User is
assigned. Then, provide a
Default Summary and Default
Note. To keep the activity as
done in the activity view,
you can enable the ‘Keep
Done’ option.
The Next Activity tab allows you
to define follow-up actions.
Under Chaining Type,
selecting Suggest Next
Activity prompts Odoo to
recommend the next step once
the current task is
completed. Choosing Trigger
Next Activity automatically
starts the next task upon
completion of the current
one. Users can also set email
templates for customer
communication and define due
dates in the Schedule box,
specifying delays in days,
weeks, or months. This
ensures a seamless workflow
by automating task
progression. The ‘Chaining
Type’ (linking activities
sequentially) is are example
of scheduling rules that may
be established.

The ‘Suggest’ field shows either
Suggest or Trigger based on
what is chosen for the
Chaining Type. Choose the
recommended or scheduled
activity from the drop-down
menu by selecting the
activity type. Then, from the
drop-down option provided in
the ‘Schedule’ field, select
a time frame: days, weeks, or
months to ensure exact
process timing, indicating
whether the activity should
be scheduled according to the
earlier activity's completion
date or its deadline.
Lastly, click the Save icon to
put the changes into effect,
improving workflow efficiency
and document management.
While scheduling a new
activity, you can see this
Activity Type from the
dropdown list, as illustrated
in the screenshot below.
9.4 Activity Plan
An Activity Plan is a systematic
sequence of tasks that
automates and optimizes
document procedures, ensuring
a disciplined process. It
allows users to schedule
actions like approvals,
evaluations, and follow-ups,
increasing workflow
efficiency by assigning
responsible users, setting
deadlines, automating task
sequencing, and connecting
activities for
synchronization.
The ‘Activity Plan’ dashboard
will show the available plans
in a list view, as depicted
in the screenshot below.
To create a new Activity plan,
click on the ‘New’ button and
edit the Plan Name in the
newly displayed configuration
form with the activity plan
Model and Company details as
shown in the screenshot
below.
Using the ‘Add a line’ button
provided under the
‘Activities To Create’ tab,
choose the activities to add
to this plan as per your
requirement. Then, include a
Summary, Assignment, Assigned
to, Interval, Unit, and
Trigger option, as you can
see from the above
screenshot. After saving the
data, you can utilize this
plan for future document
handling plans.
By consolidating files into a
single platform, cutting down
on paperwork, and increasing
productivity, the Odoo 18
Documents module simplifies
document management. It makes
it possible for companies to
switch to a digital
workspace, which improves
departmental cooperation,
accessibility, and
organization.