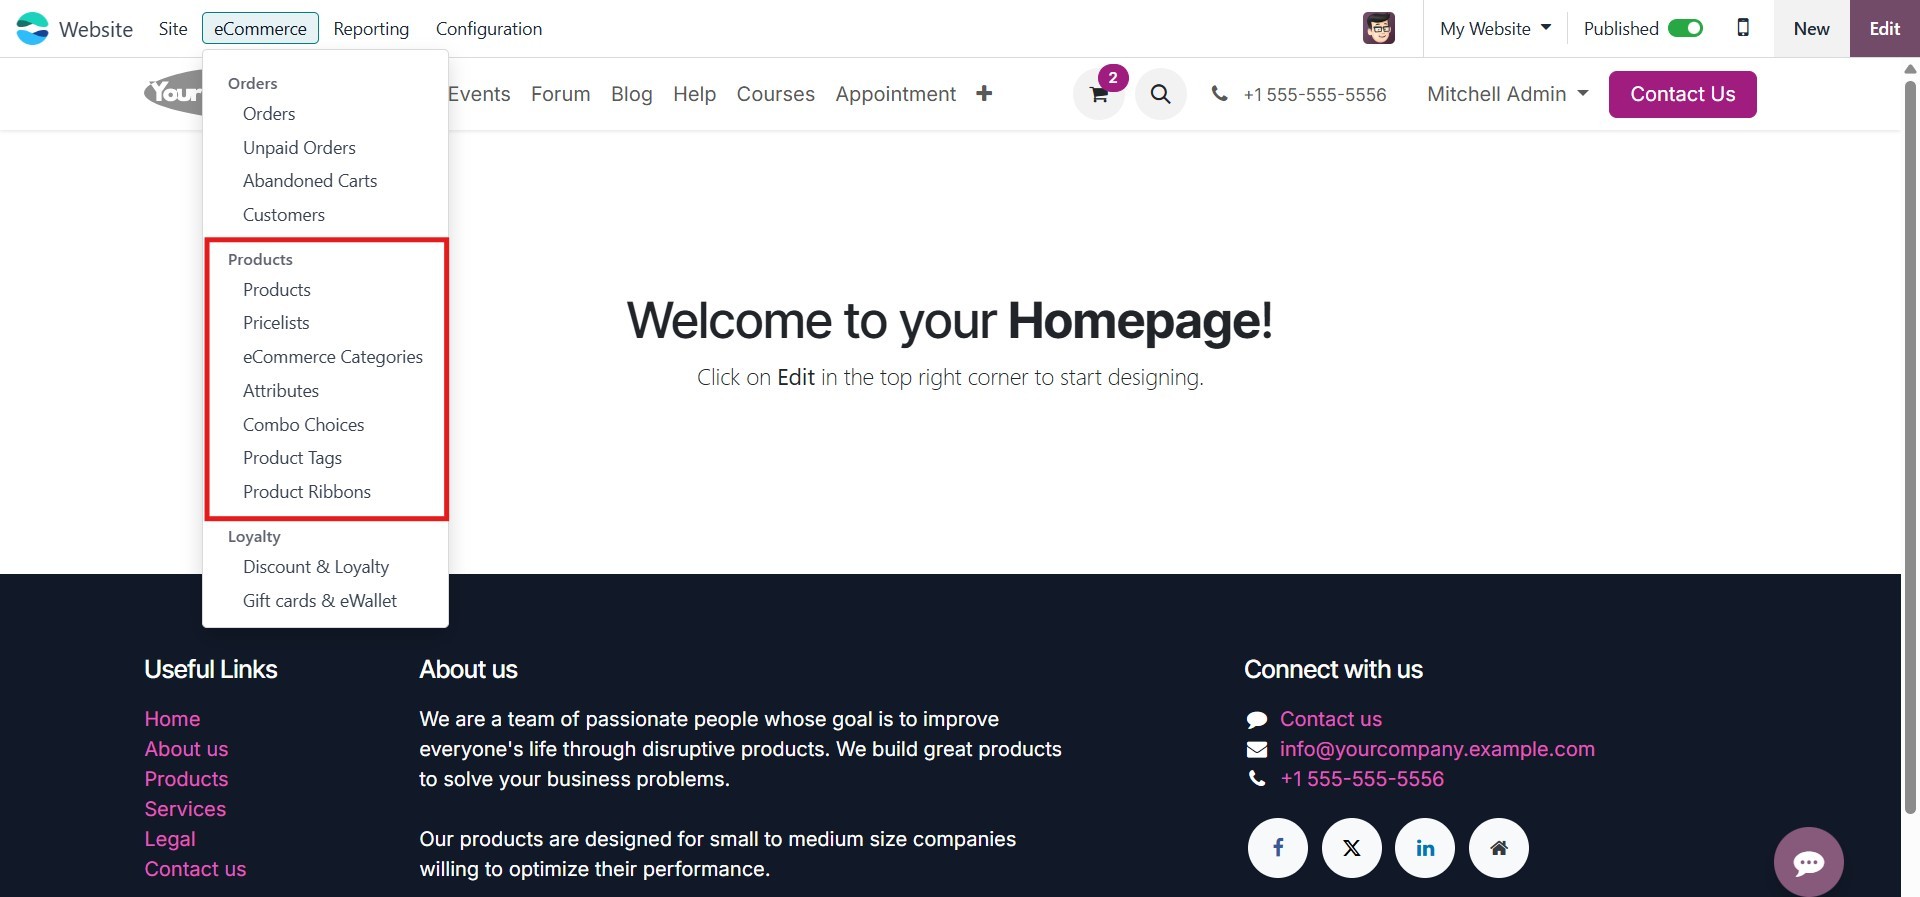
3. Products
Under the Configuration tab in
the Product section, you can
access various settings that
support both backend product
management and eCommerce
integration. These include
Pricelists, eCommerce
Categories, Attributes,
Product Tags, Combo Choices,
and Product Ribbon. While
some of these configurations
are used primarily in sales
operations, they also play a
vital role in shaping how
products are displayed and
managed in the online shop.
Within the product form, the
Sales tab provides fields to
define Optional Products,
Alternative Products, and
Accessory Products.
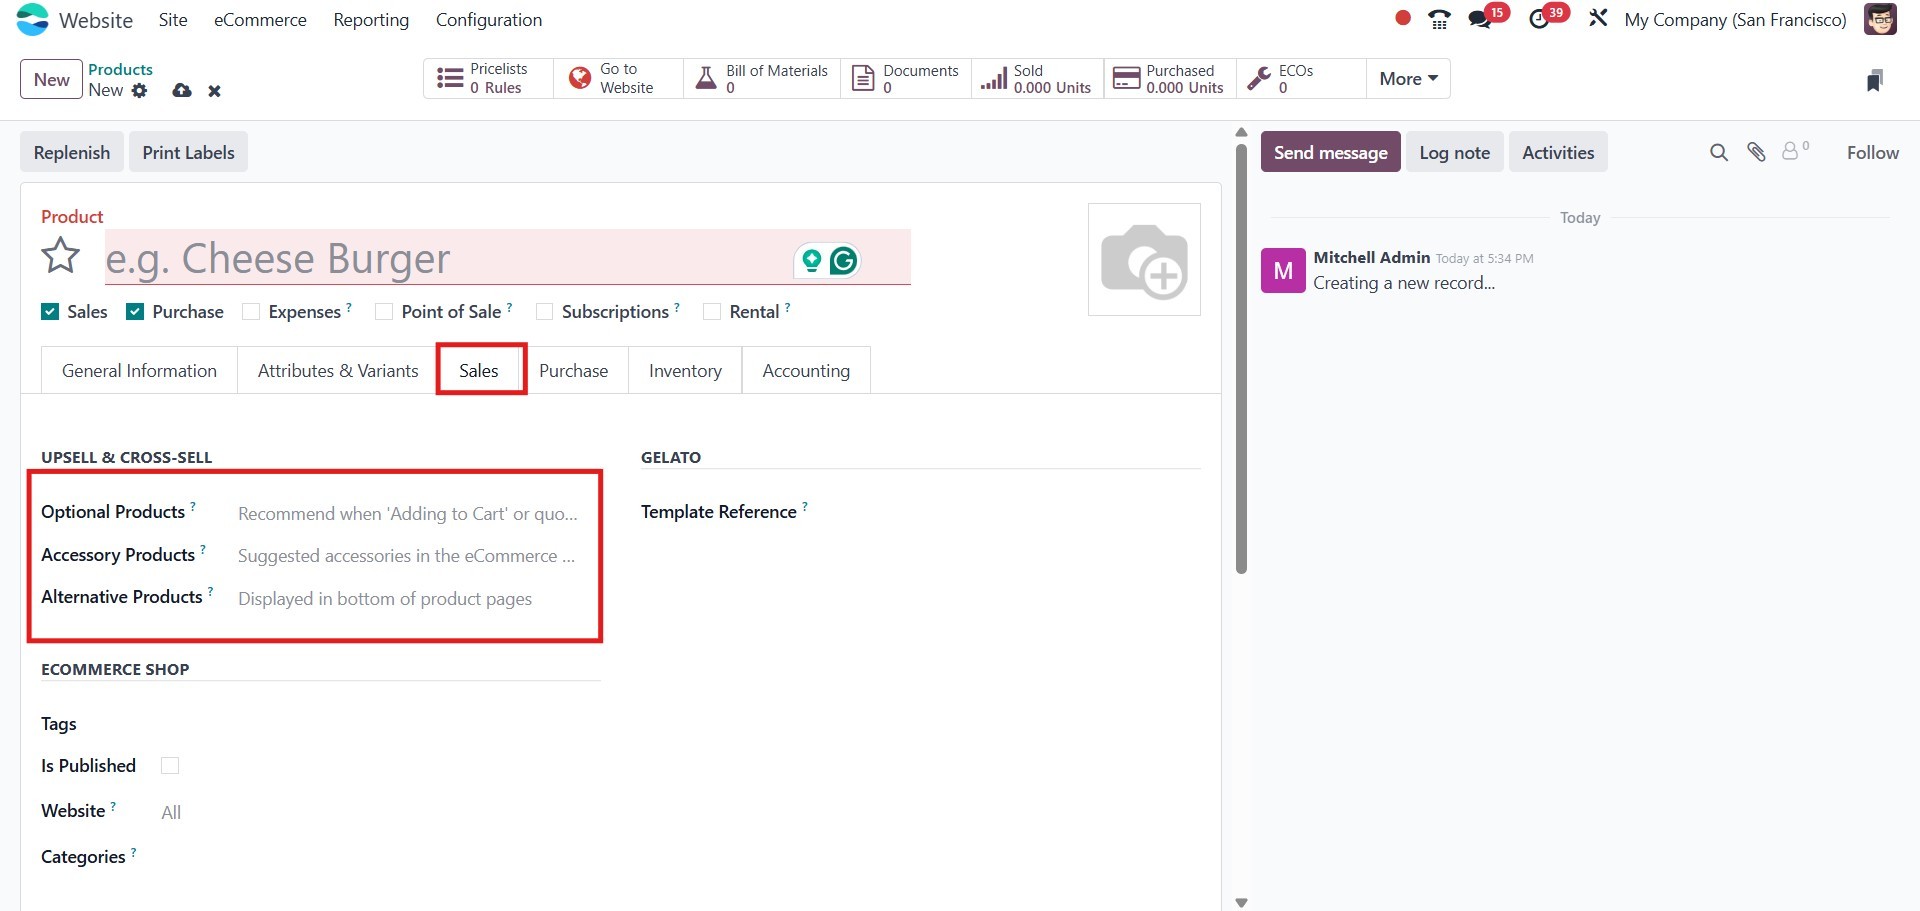
Optional products are shown
during checkout as additional
items that the customer might
find useful. Alternative
products are displayed on the
product page as suggestions
if the original product is
unavailable or to offer
variety. Accessory products
are complementary items
intended to enhance the main
product, encouraging
customers to purchase related
items together. These options
serve as effective tools for
cross-selling and upselling
in an online store.
Additionally, Odoo provides
dedicated sections for
managing eCommerce media and
descriptions. You can upload
specific images or videos to
visually represent the
product in the online store,
ensuring that your
presentation is appealing and
informative. The eCommerce
Description field allows you
to write content that is
specifically targeted toward
online shoppers, separate
from the internal description
used for backend users. This
helps in optimizing the
product page for clarity,
engagement, and SEO
performance. To add this
description, open the product
form, go to the Sales tab,
and scroll down to the
eCommerce Shop section.
There, you will find the
E-commerce Description field.
Enter the desired text and
click Save to apply it. This
description will appear on
the product page of your
website.
The eCommerce Shop section within
the product form allows you
to assign products to
specific Website Categories,
control their availability in
the online shop, and manage
visibility settings.
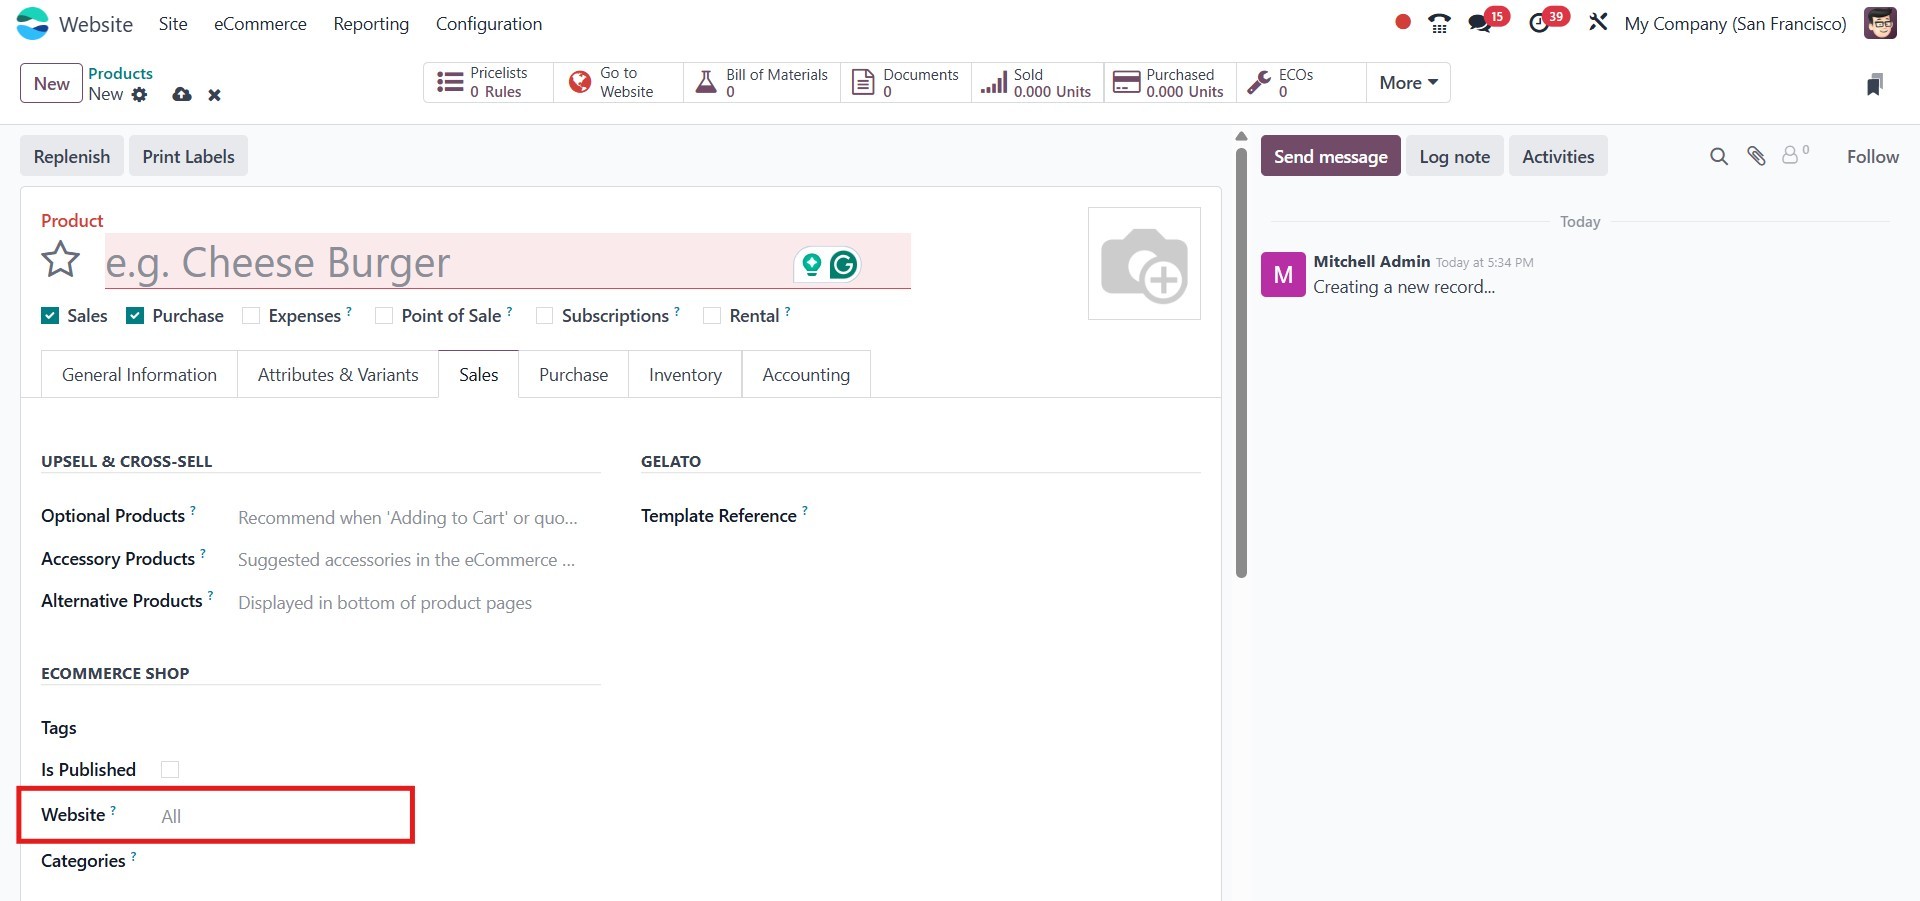
You can also define custom URLs
for better SEO and
user-friendly navigation.
These options ensure that
your product is properly
positioned and searchable in
your online storefront.
For a more detailed explanation
of product-related options
and advanced configurations
such as pricing strategies,
units of measure, or variant
handling, please refer to the
Sales module.
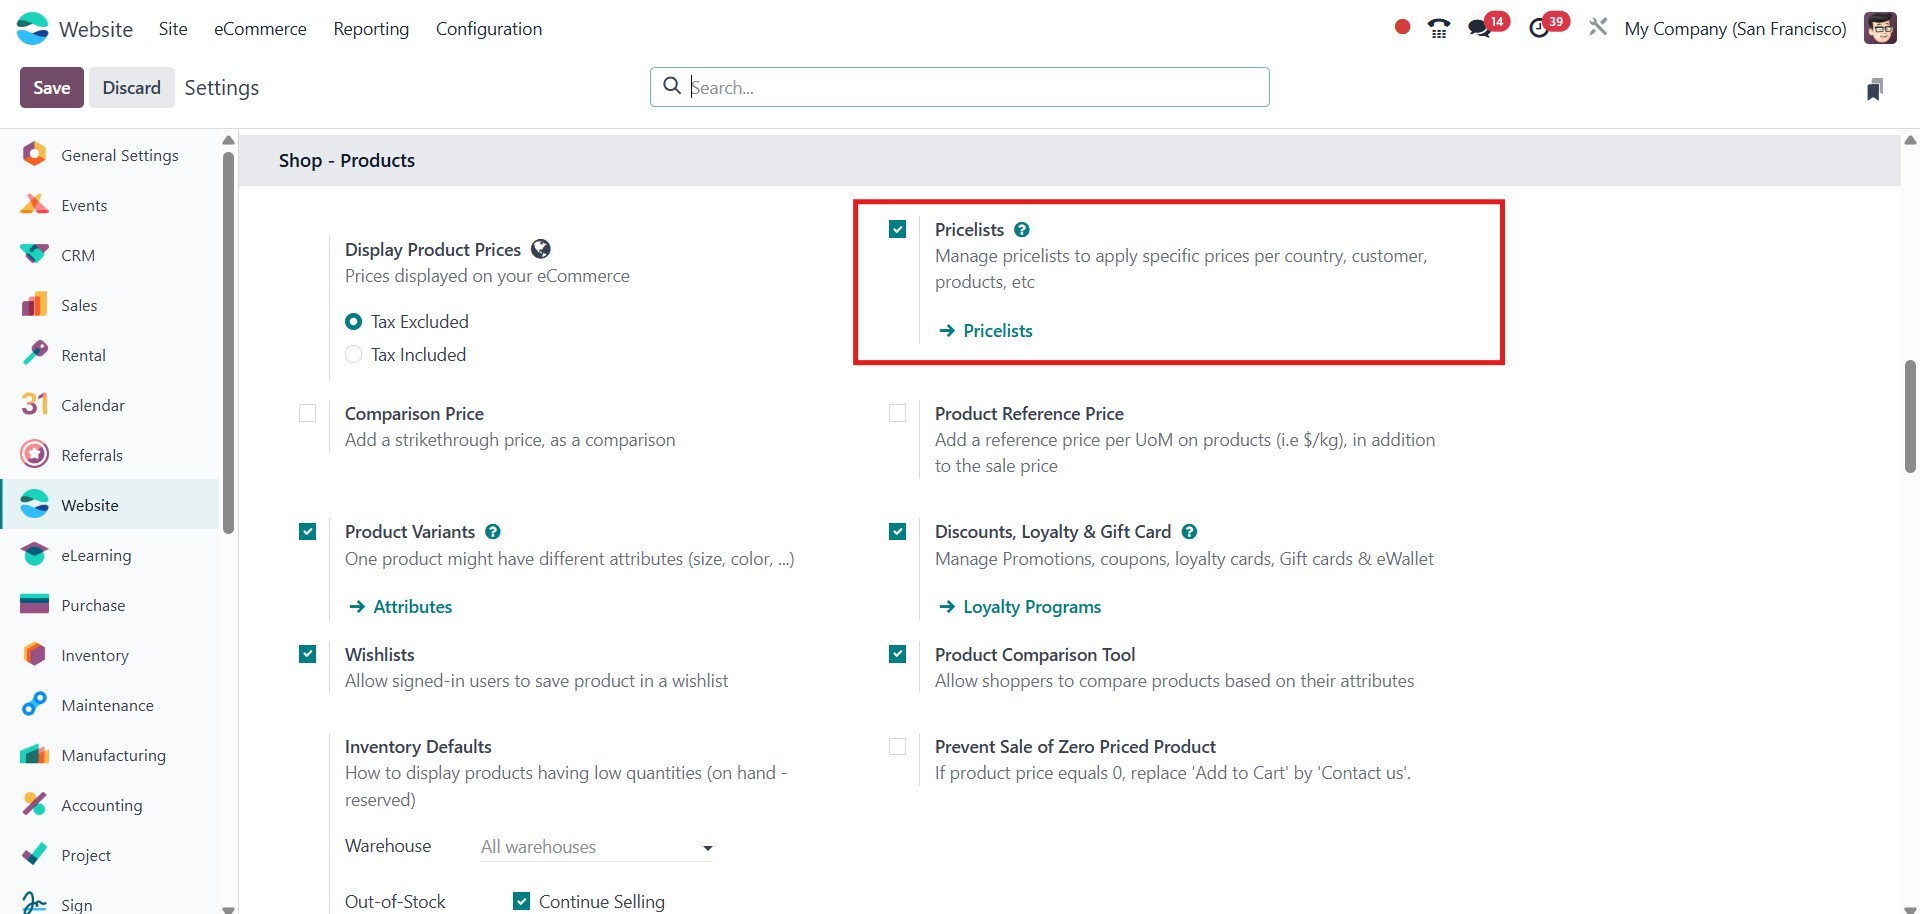
3.1 Pricelist
In Odoo 18, the Pricelist feature
enables businesses to easily
define various pricing
methods for their products or
services. Think of pricelists
as a set of pricing rules
that determine the cost of a
product based on factors such
as customer discounts,
country of purchase, or even
the season.
Moreover, the Pricelist
functionality acts as a
powerful localization tool,
allowing you to set different
prices for the same product
based on who is buying it.
For example, you can create a
separate pricelist for your
loyal customers to offer them
special discounts or
promotions.
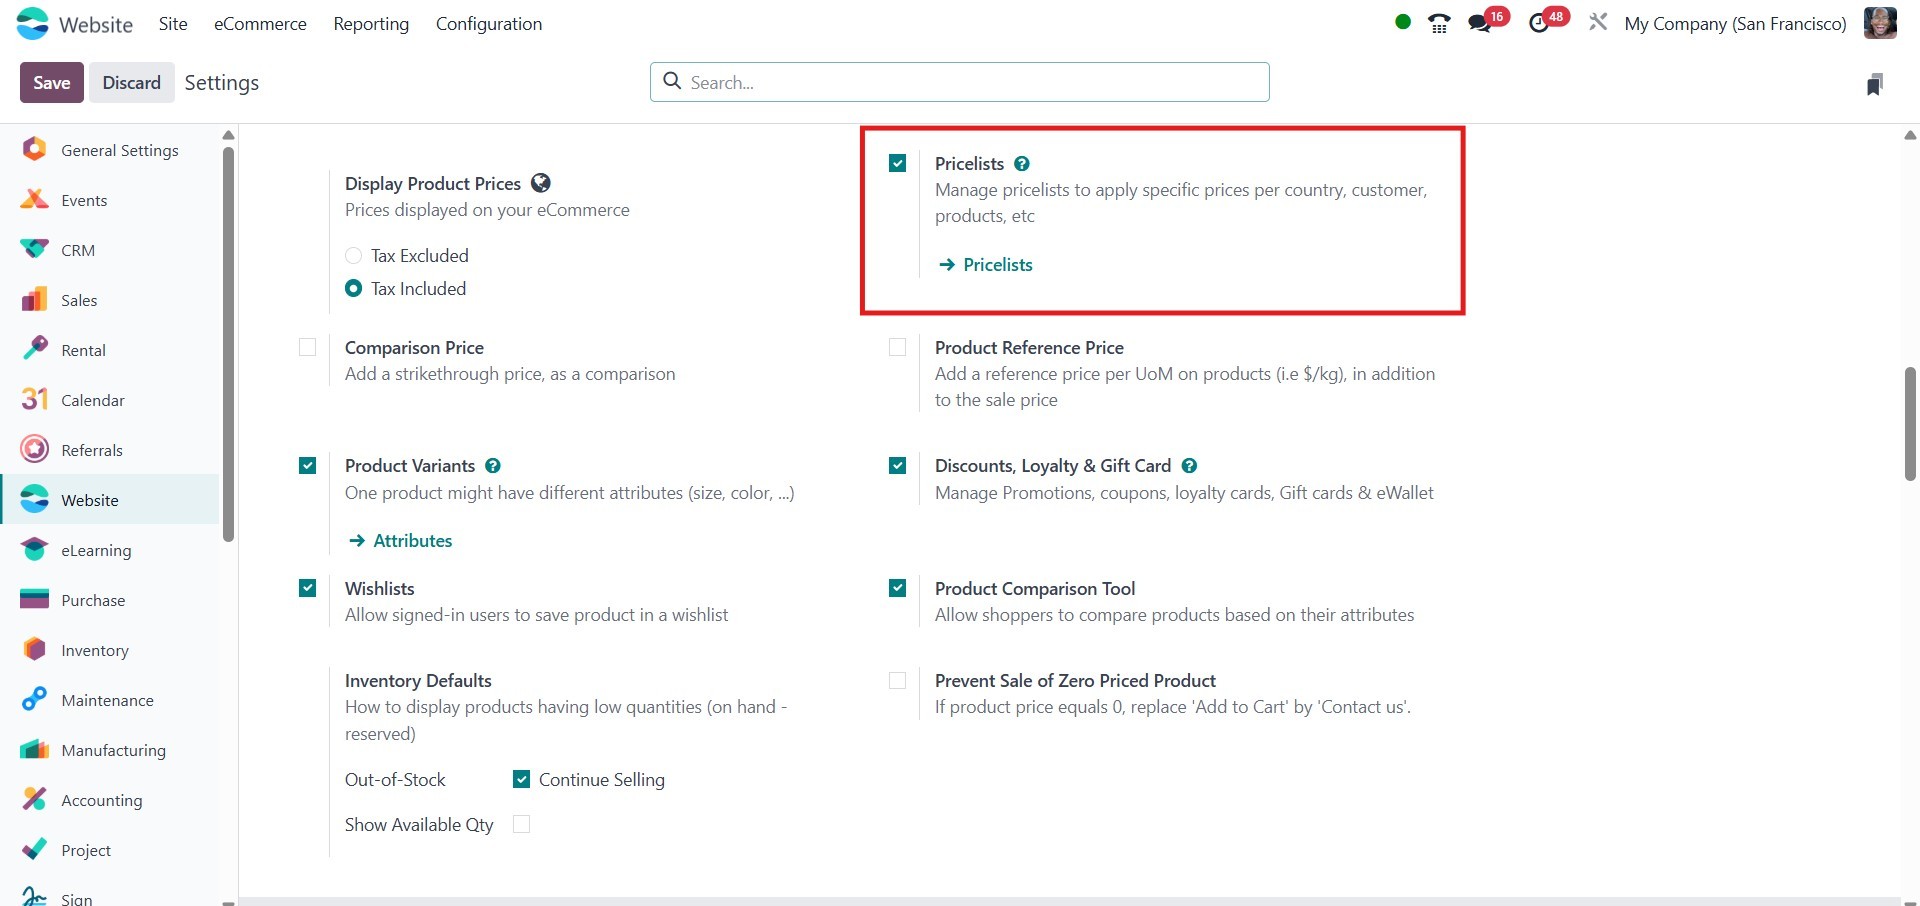
To access the Price Lists menu,
go to the eCommerce tab in
the Website module. Just make
sure the Pricelist option is
enabled in the Settings
window before proceeding.
In Odoo 18, pricing for products
is managed through a unified
pricelists system that
incorporates both multiple
pricing options per product
and advanced pricing rules
within a single
configuration. This means
that instead of separate
methods, Odoo 18 allows you
to define various pricing
strategies directly from the
pricelist itself. You can
assign different prices for
the same product based on
specific customer segments,
countries, currencies, or
minimum quantities.
Additionally, advanced
pricing rules can be applied,
including discounts,
cost-based formulas, price
rounding, and margin
adjustments. This flexibility
enables businesses to tailor
pricing dynamically without
managing multiple separate
pricing systems.
In the eCommerce tab of the
Website module, you can find
the Pricelist menu. To use
this feature, first enable
the option in the Settings
window. The window will
display fields for Price List
Name, Currency, Selectable,
Website, and Company. You can
create new price lists by
clicking the New button, and
configure price rules under
the Price Rules tab.

Clicking the New button will take
you to the creation window.
In this window, you can
assign a name to the price
list and fill in the required
fields, such as Company and
Currency. Additionally, you
can configure Price List
Rules under the Price Rules
tab.
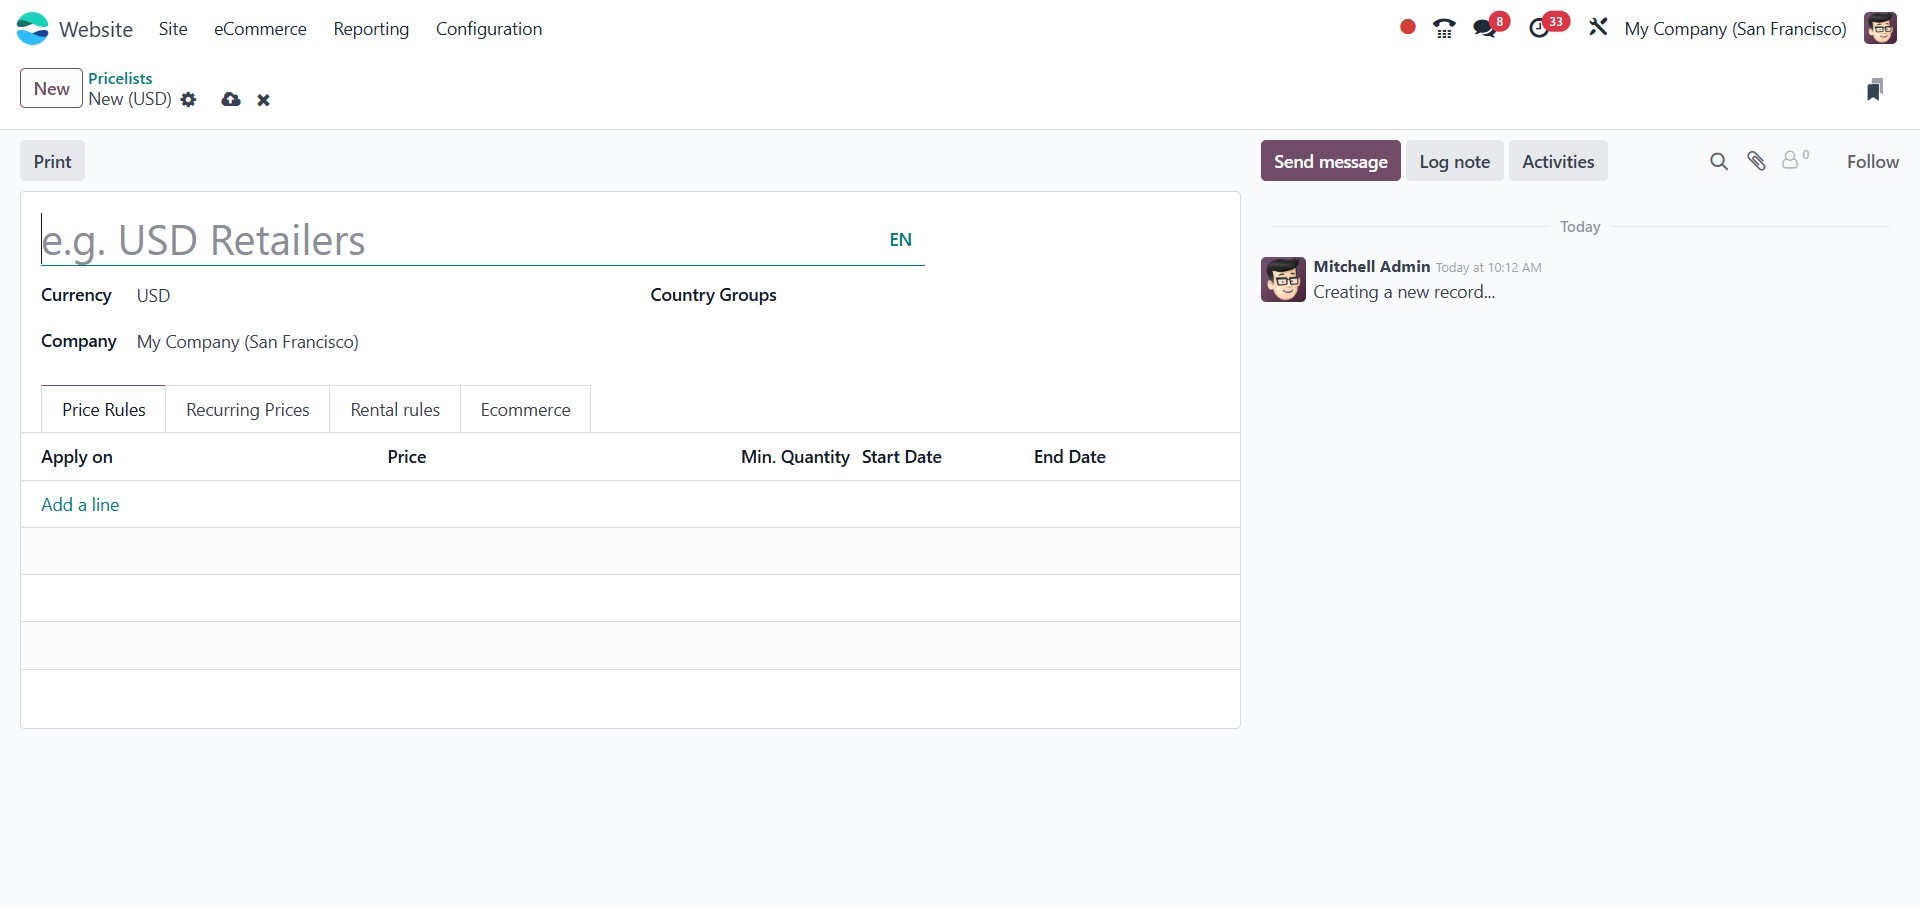
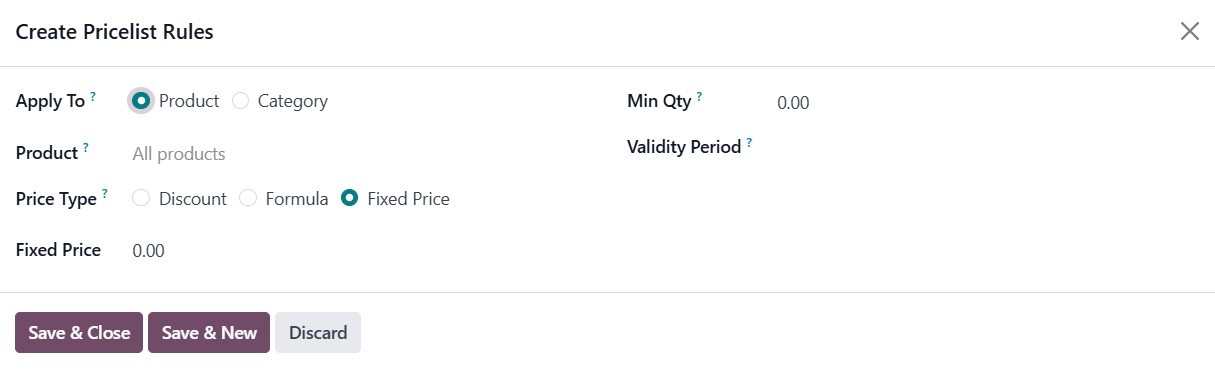
To add a price rule, click the
Add a Line button. This
allows you to enter details
about the product and its
variations. You can also
define the Minimum Quantity,
which ensures that the
pricing rule only applies to
orders with a quantity equal
to or greater than the
specified value.
Additionally, use the calendar
pop-up to set the Start and
End dates for the price list
item’s validity.
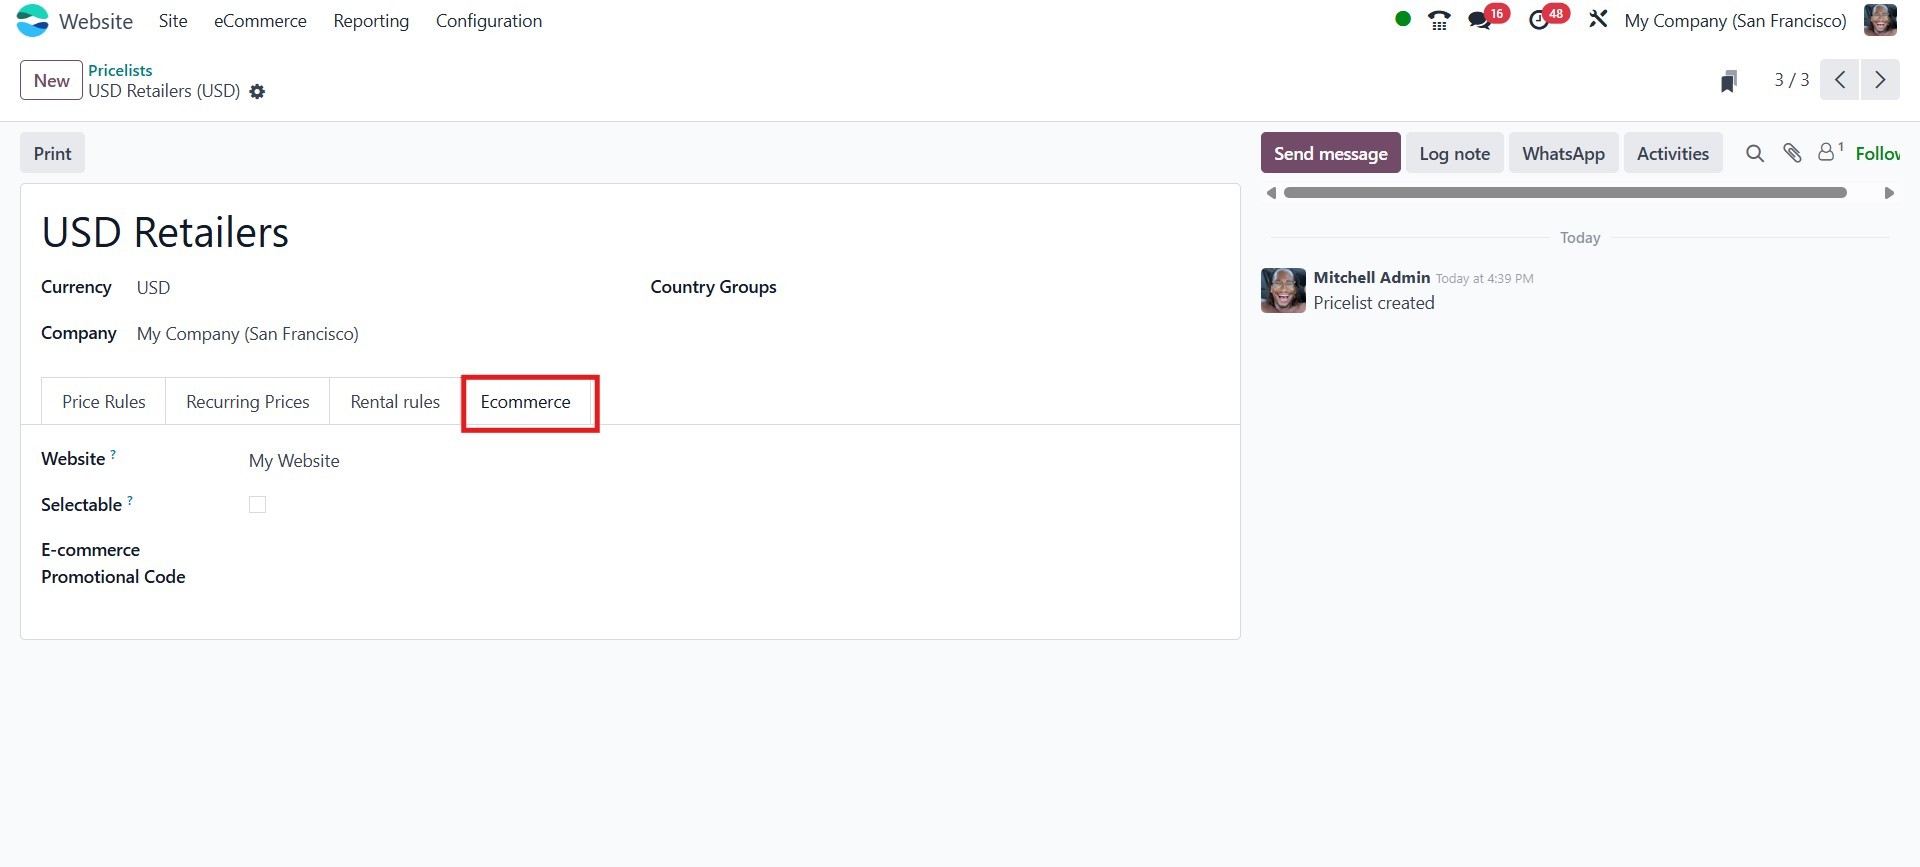
In the E-commerce Promotional
Code field, you can enter a
promotional code that will be
used on the e-commerce
platform. This allows you to
offer discounts that are
directly linked to the
configured price list.
In Odoo 18, the way discounts are
displayed on sales order
lines is handled
automatically by the system
when discounts are applied
through Pricelists or
promotions. The discounted
amount is clearly shown
alongside the original public
price, ensuring transparency
for the customer. Unlike
previous versions, there's no
longer a separate Discount
Policy setting to manually
configure this; the system
now includes this
functionality by default.
Once all the necessary
information has been entered
and configured, click the
Save button to store the
newly created pricelist.
Let’s now take a closer look at
the Pricing Rules for the
Pricelist method. To activate
this feature, go to the
Settings menu in the Website
module.
Once the feature is enabled, you
can access the Pricelist
creation window, as
previously described.
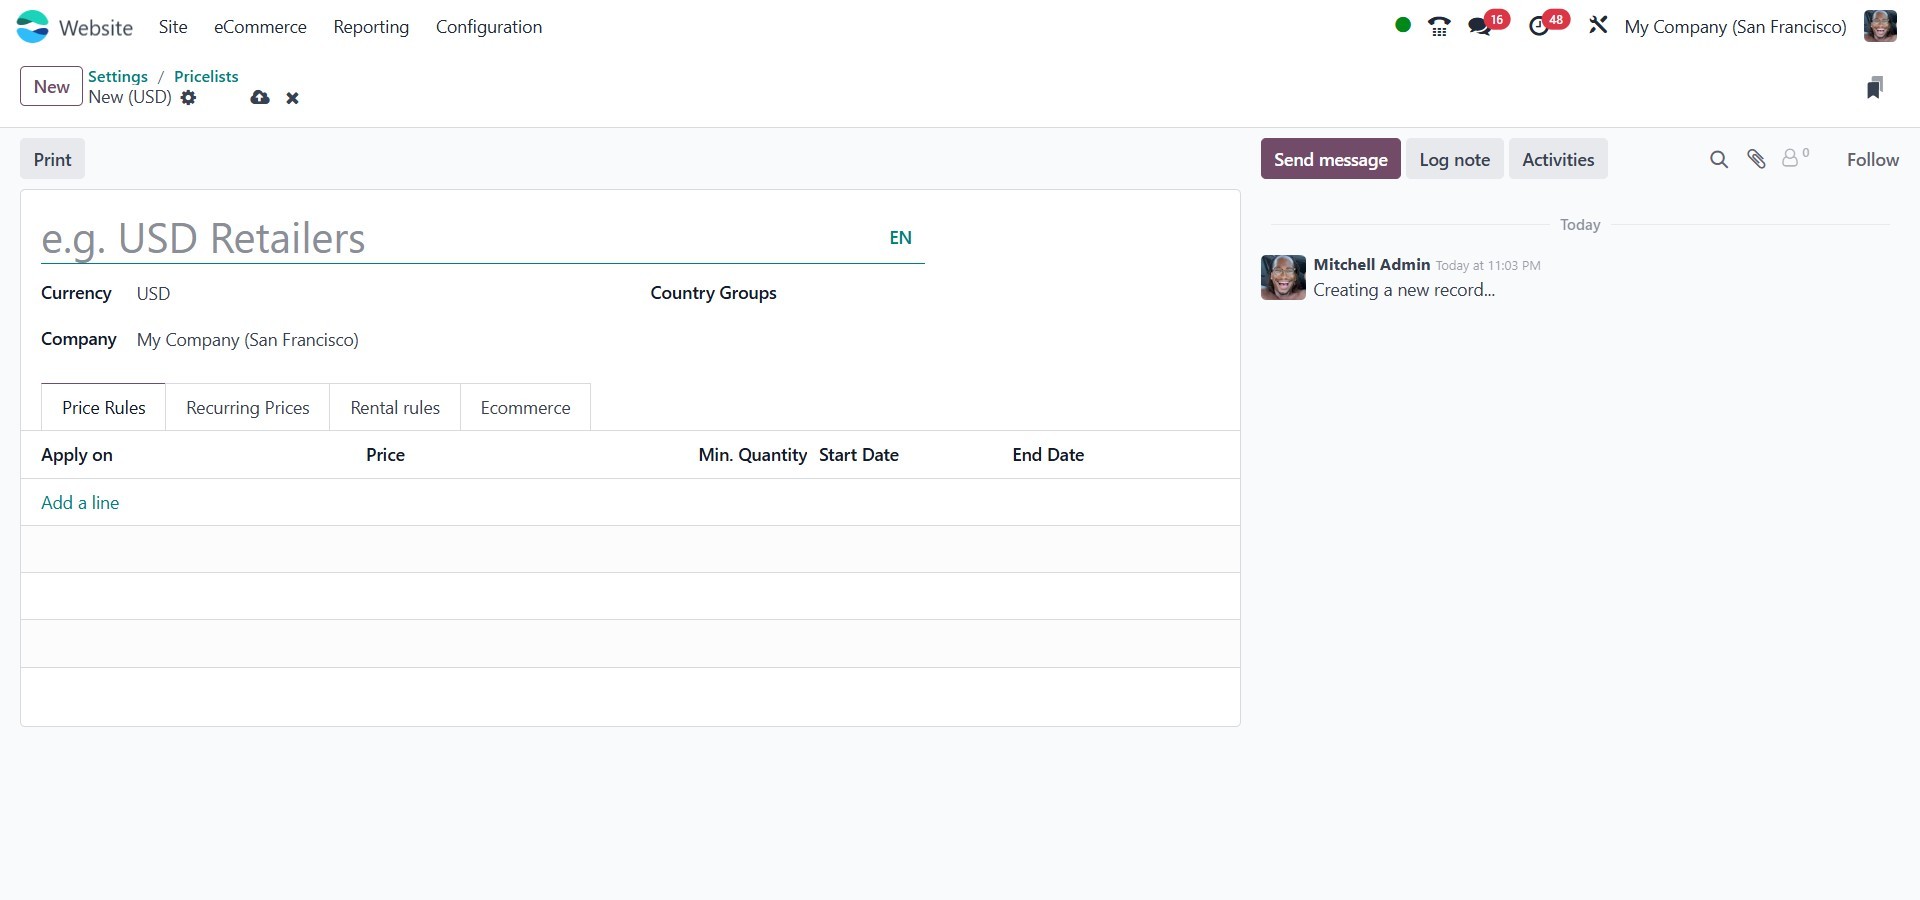
After specifying the Pricelist
Name, Currency, and Company,
you can define pricing rules
by clicking the Add a line
button under the Price Rules
tab. This action will open a
pop-up window, as illustrated
in the image below, allowing
you to configure the desired
rule settings.
In the pop-up window, you can
specify the price computation
method. Depending on your
selection, the rule can be
applied to a specific
product, product category, or
product variant by adding the
relevant item.
Odoo provides multiple pricing
computation methods to suit
various pricing strategies:
- Fixed Price: Allows you
to set a specific
price for the selected
item. Once selected,
an additional field
will appear for
entering the fixed
price value.
- Discount: Enables you to
apply a
percentage-based
discount. Choosing
this option will
display a Discount
field where you can
specify the discount
percentage.
- Formula: Offers advanced
pricing logic based on
cost, public price, or
another pricelist,
with options for
applying discounts,
surcharges, and
rounding rules.
When selecting the Formula
option, additional fields
will appear, as shown in the
image below, allowing you to
configure the pricing rule in
greater detail.
When the Formula method is
selected for price
computation, several
additional configuration
fields become available:
Based on, Discount, Surcharge
(Extra Fee), Rounding Method,
and Margins.
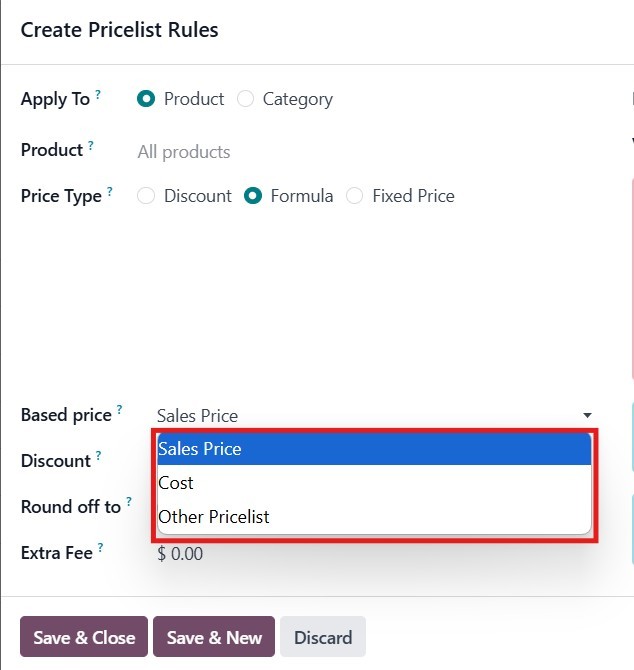
In the Based on field, you can
define the base price upon
which the pricing rule will
be calculated. This field
includes a drop-down menu
with the following options:
- Sales Price – Select this
option to use the
product’s public
(sales) price as the
base.
- Cost Price – Choose this
to base the
computation on the
product’s internal
cost.
- Other Pricelist – This
allows you to
reference another
existing pricelist to
determine the base
price.
These options enable flexible
pricing strategies tailored
to various business needs.
You can configure a markup by
entering a negative value in
the Discount field. This
allows you to increase the
price relative to the base
amount. Following this, the
Surcharge (Extra Fee) field
can be used to add or
subtract a fixed amount from
the computed price after
applying the discount.
Entering a positive value
will increase the price,
while a negative value will
decrease it.
The Rounding Method enables you
to adjust prices to the
nearest specified multiple.
The system applies rounding
after the discount and before
the surcharge. For instance,
if you want the final price
to end in 9.99, set the
rounding value to 10 and the
surcharge to -0.01. This
allows the pricing to conform
to consistent,
psychologically appealing
figures.
By selecting the Product Variant
option, you can define
specific variants of a
product to which the pricing
rule will apply. This option
allows for more granular
control over pricing when
dealing with product
variations, such as size or
color.
Once the Conditions have been
set, you can specify the
Minimum Quantity required for
the rule to apply. The
quantity entered here must be
met or exceeded for the
pricing rule to be triggered.
This value is based on the
product's default unit of
measurement.
Finally, you can set the validity
period for the pricing rule.
The start date and end date
for the price list item's
validity can be defined. The
system will consider the time
zone you have selected to
determine the exact start and
end times for the rule's
activation.
The process for configuring
Multiple Prices per Product
and Advanced Price Rules
follows the same steps,
ensuring consistency across
your pricing strategies.
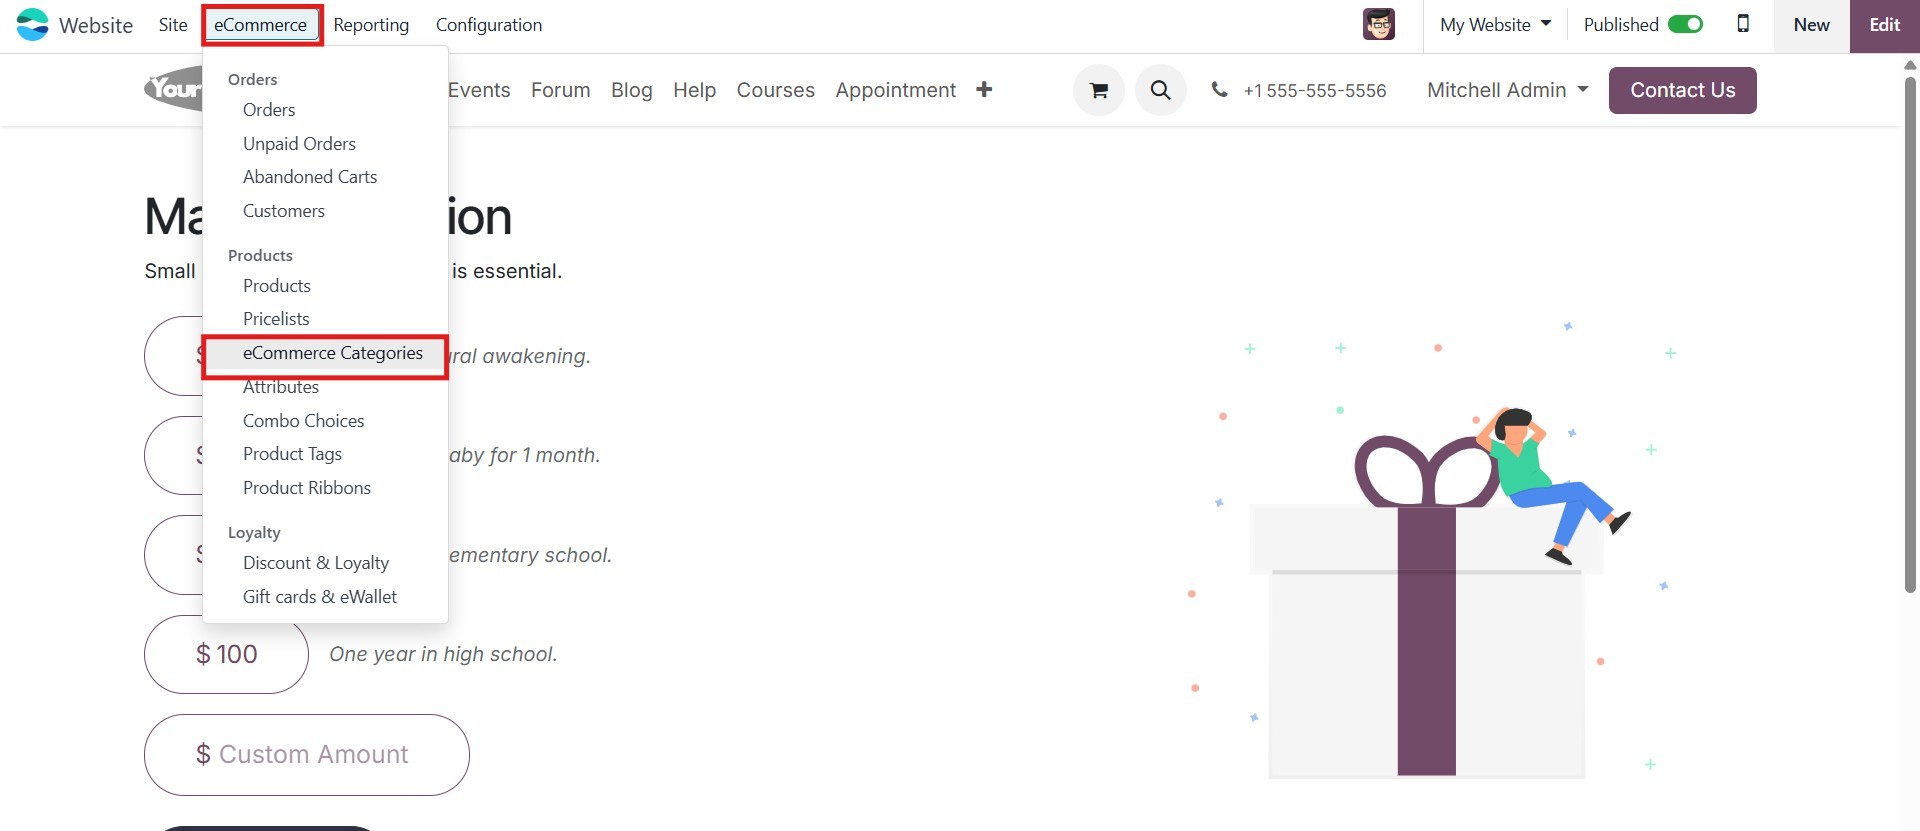
3.2 eCommerce Categories
In Odoo 18, you can configure
eCommerce Categories to
organize and classify
products on your online
store. This feature is
essential for categorizing
and differentiating products,
improving product
discoverability, and
navigation on your eCommerce
website.
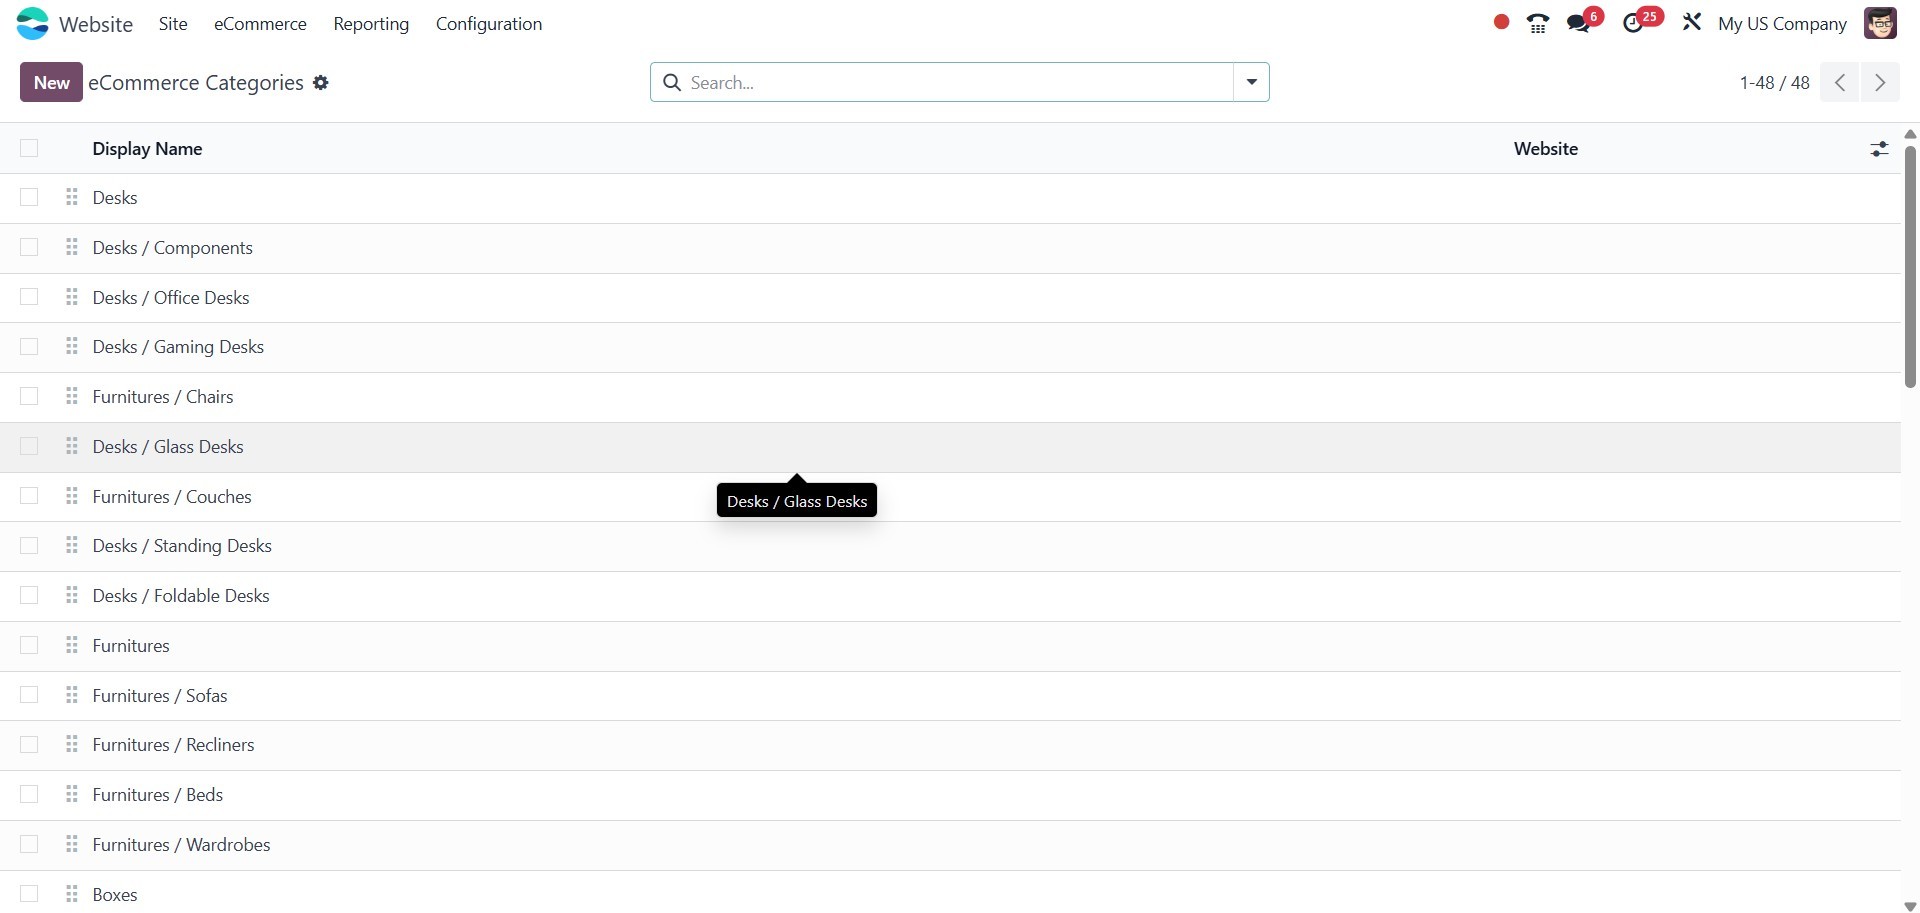
To access the eCommerce
Categories, navigate to the
eCommerce Categories option
under the Website module.
Upon selecting this option, you
will be directed to the
eCommerce Categories window.
This window allows you to
view and manage all the
eCommerce categories
available on the platform.
The window provides a
comprehensive view of all the
existing categories, making
it easier to organize your
products in a way that aligns
with your store's structure
and customer experience.
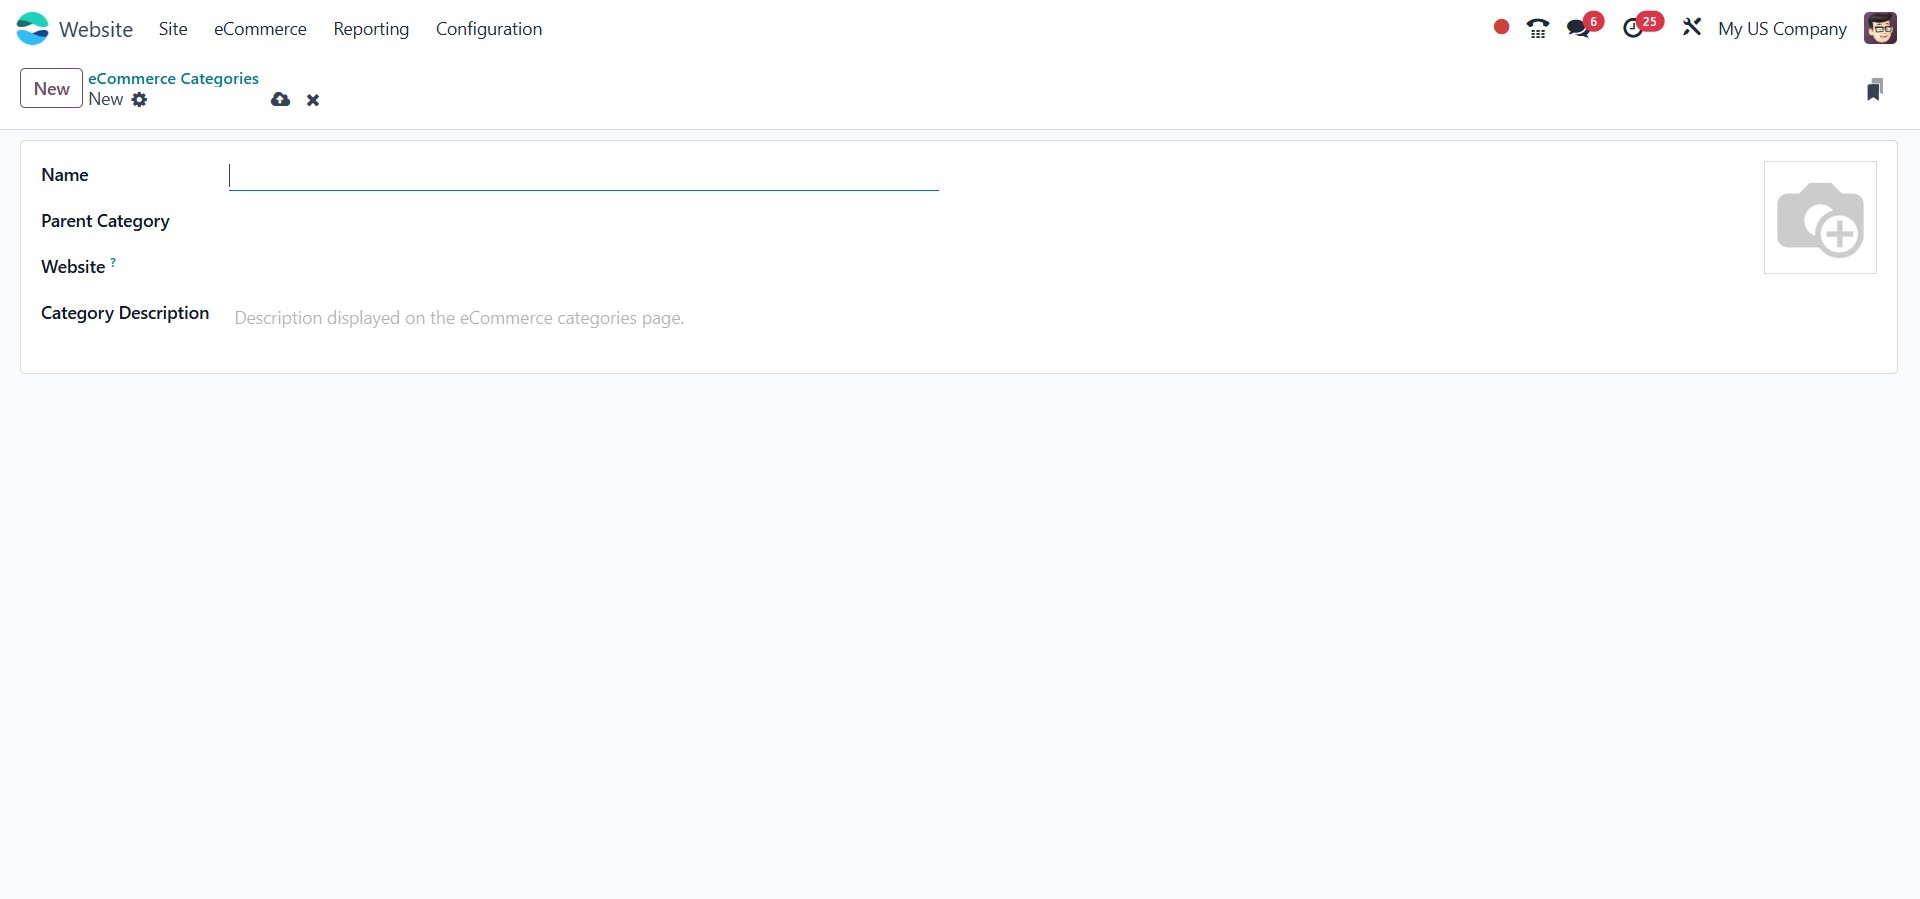
You can click the New button,
which is located in the upper
left corner of the window, to
start a new one.
Here, you may provide the name
and a picture of the
e-commerce Category. You can
include the Parent Category,
the relevant Website, and the
Sequence number in the
designated boxes. Save the
information for the new
eCommerce Category after
supplying all the necessary
information.
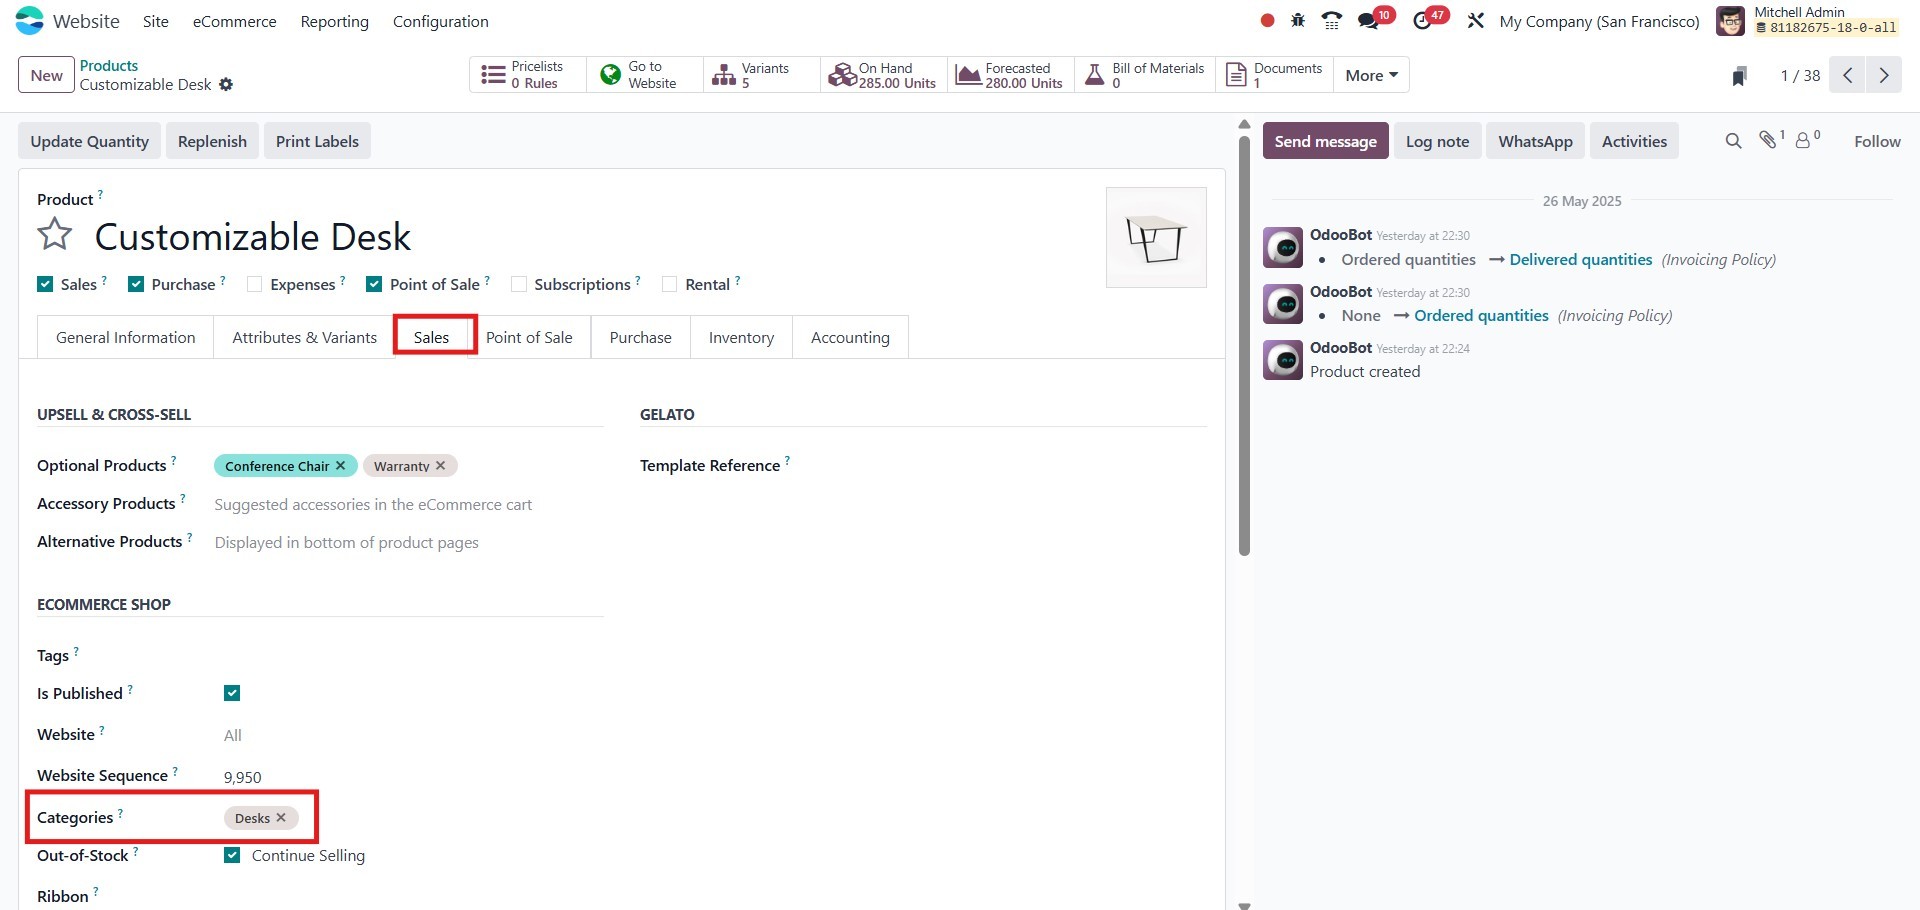
To assign a product to an
eCommerce category, navigate
to the Website module and
open the product you want to
edit. In the product form, go
to the Sales tab, and under
the eCommerce Shop section,
you will find the Website
Categories field. Here, you
can select one or more
eCommerce categories under
which the product should
appear. This allows the
product to be displayed under
multiple categories on your
online store if needed. Once
the desired categories are
selected, click Save to apply
the changes.
On the website, when customers
filter products by a specific
category, all products
assigned to that category,
including the one you just
added, will be displayed
automatically, improving
navigation and product
discoverability.
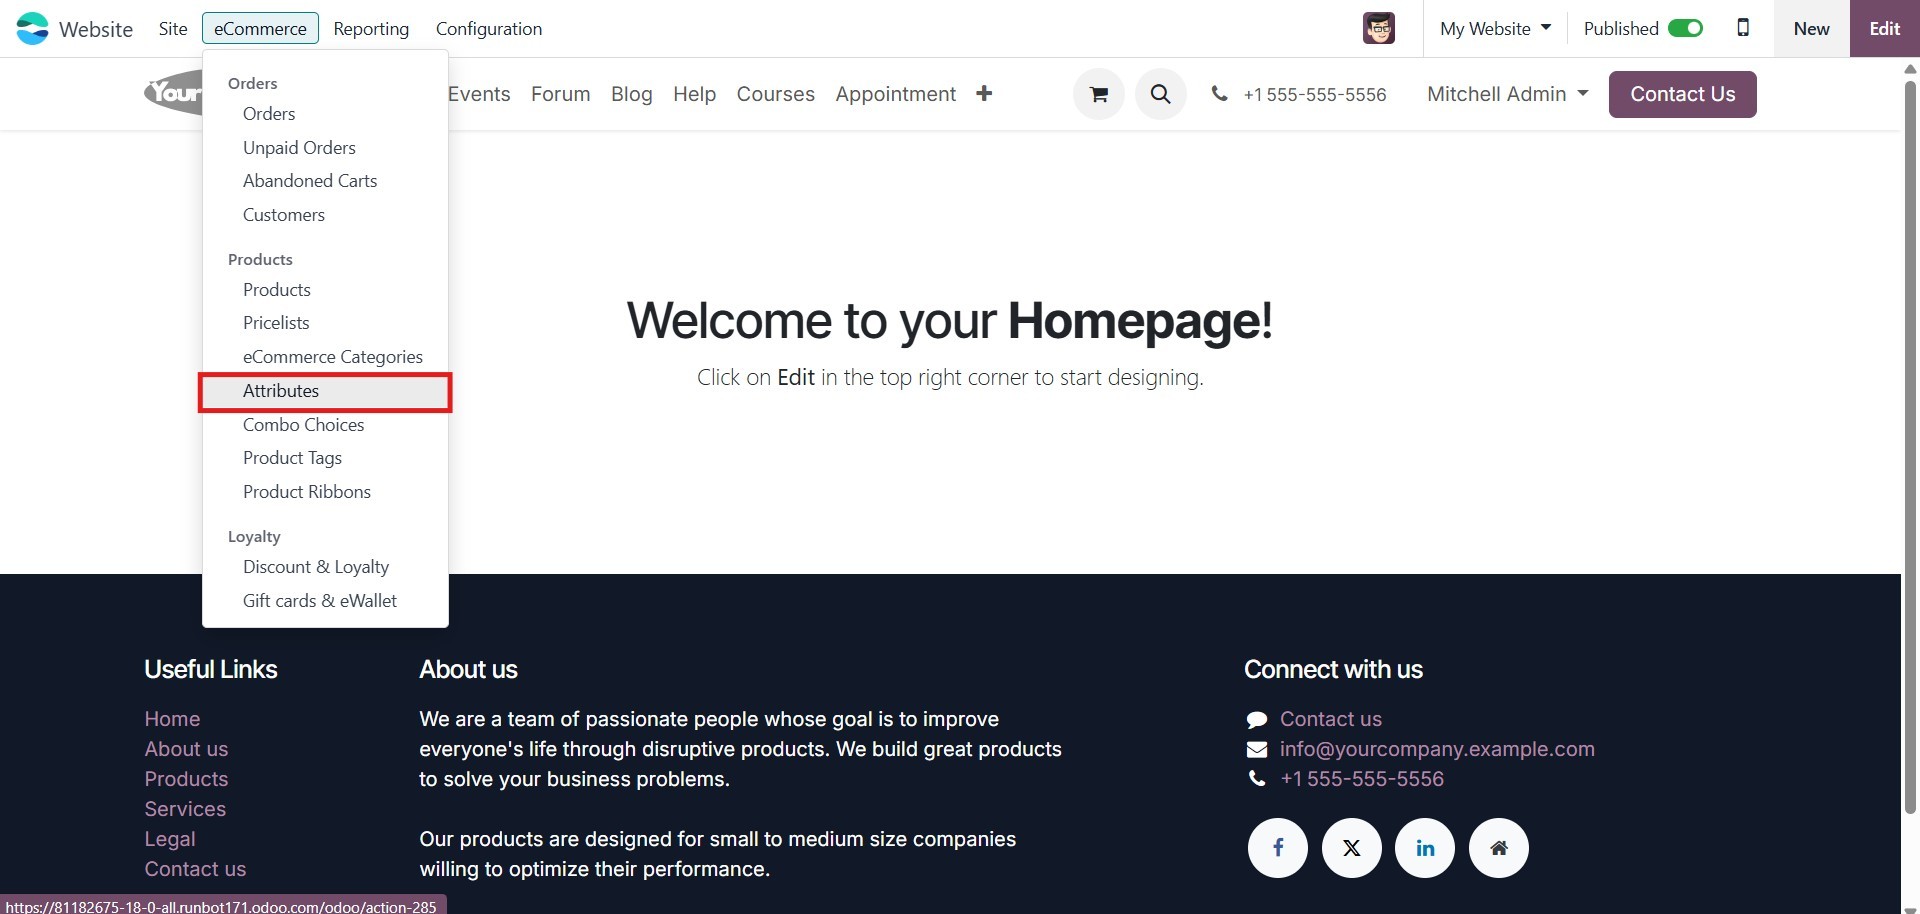
3.3 Attributes
The Attributes menu, located
under the eCommerce tab of
the Website module, allows
you to define various product
attributes with ease.
This functionality is
particularly beneficial for
managing products in an
e-commerce environment, where
variations such as size,
color, or material are
commonly used to enhance
product options.
By configuring attributes, you
can offer customers a more
flexible and personalized
shopping experience while
streamlining your product
management workflow within
the system.
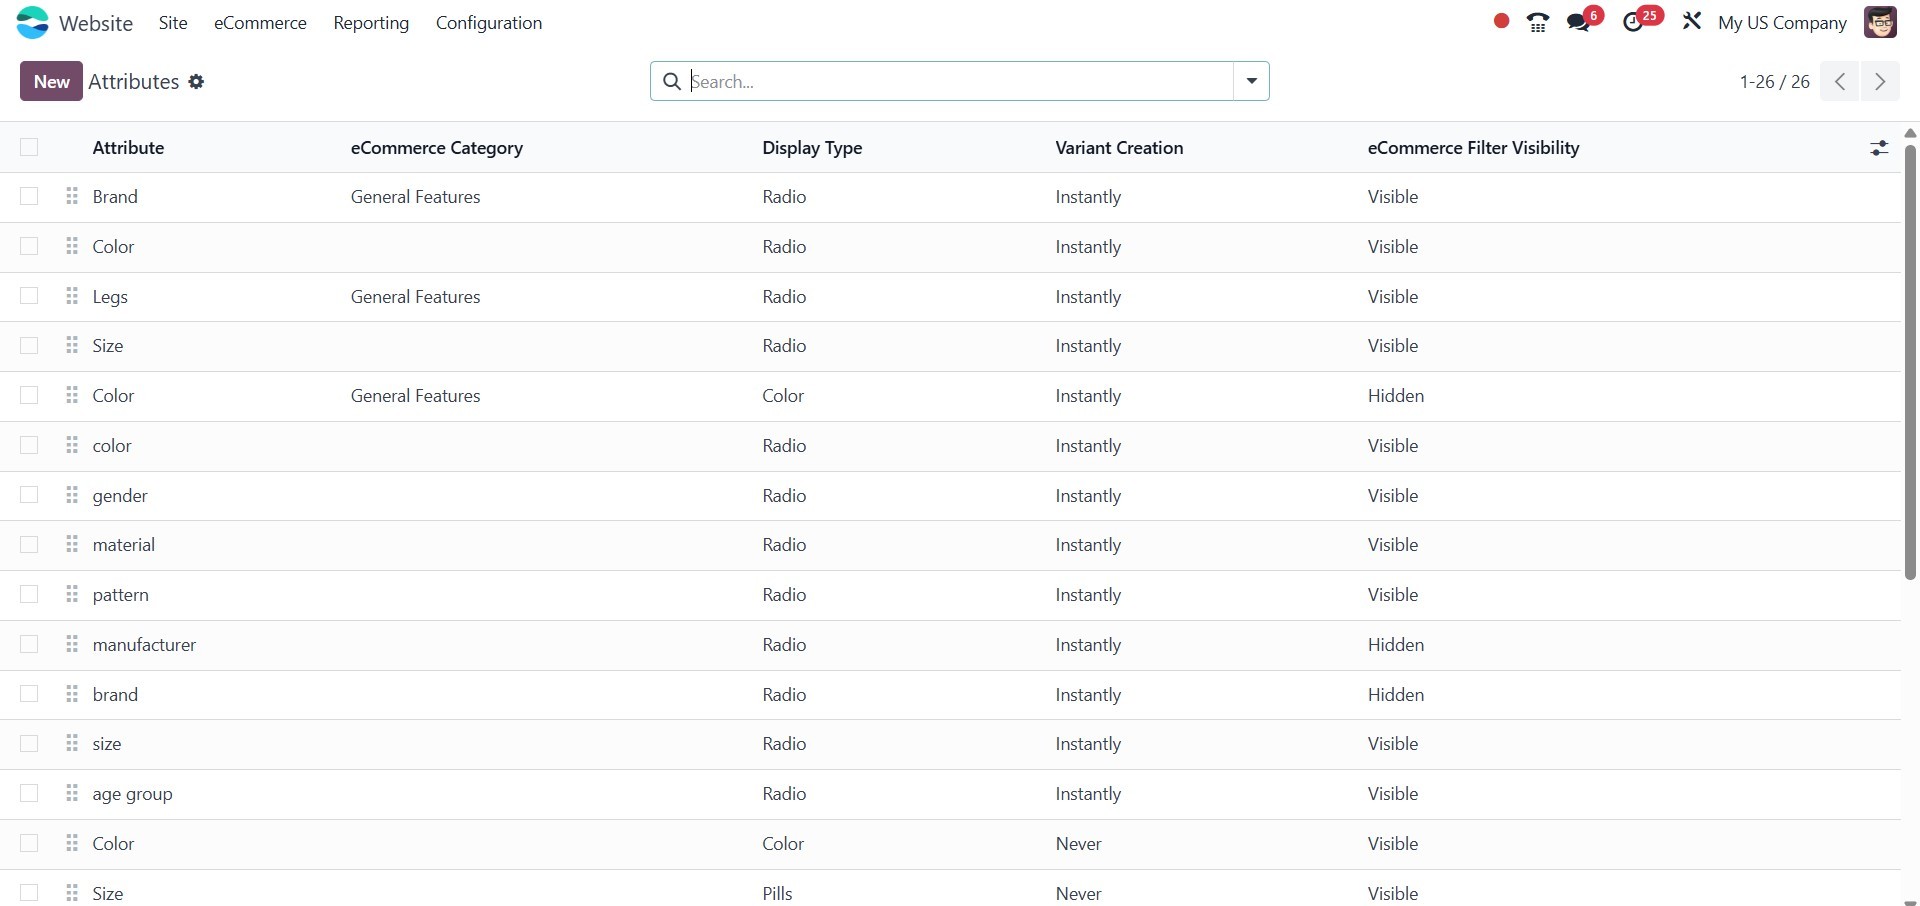
You can examine a preview of
every attribute that is
described in the platform by
opening the Attribute pane.
The window shows the key
information about each
attribute, including the name
of the attribute, the
category, the display type,
the creation mode of
variations, and the
visibility of the eCommerce
filter. Click on the
corresponding record to view
the preset attribute in
detail. You can click the New
button to create a new
attribute. Below is a picture
of the creation window.
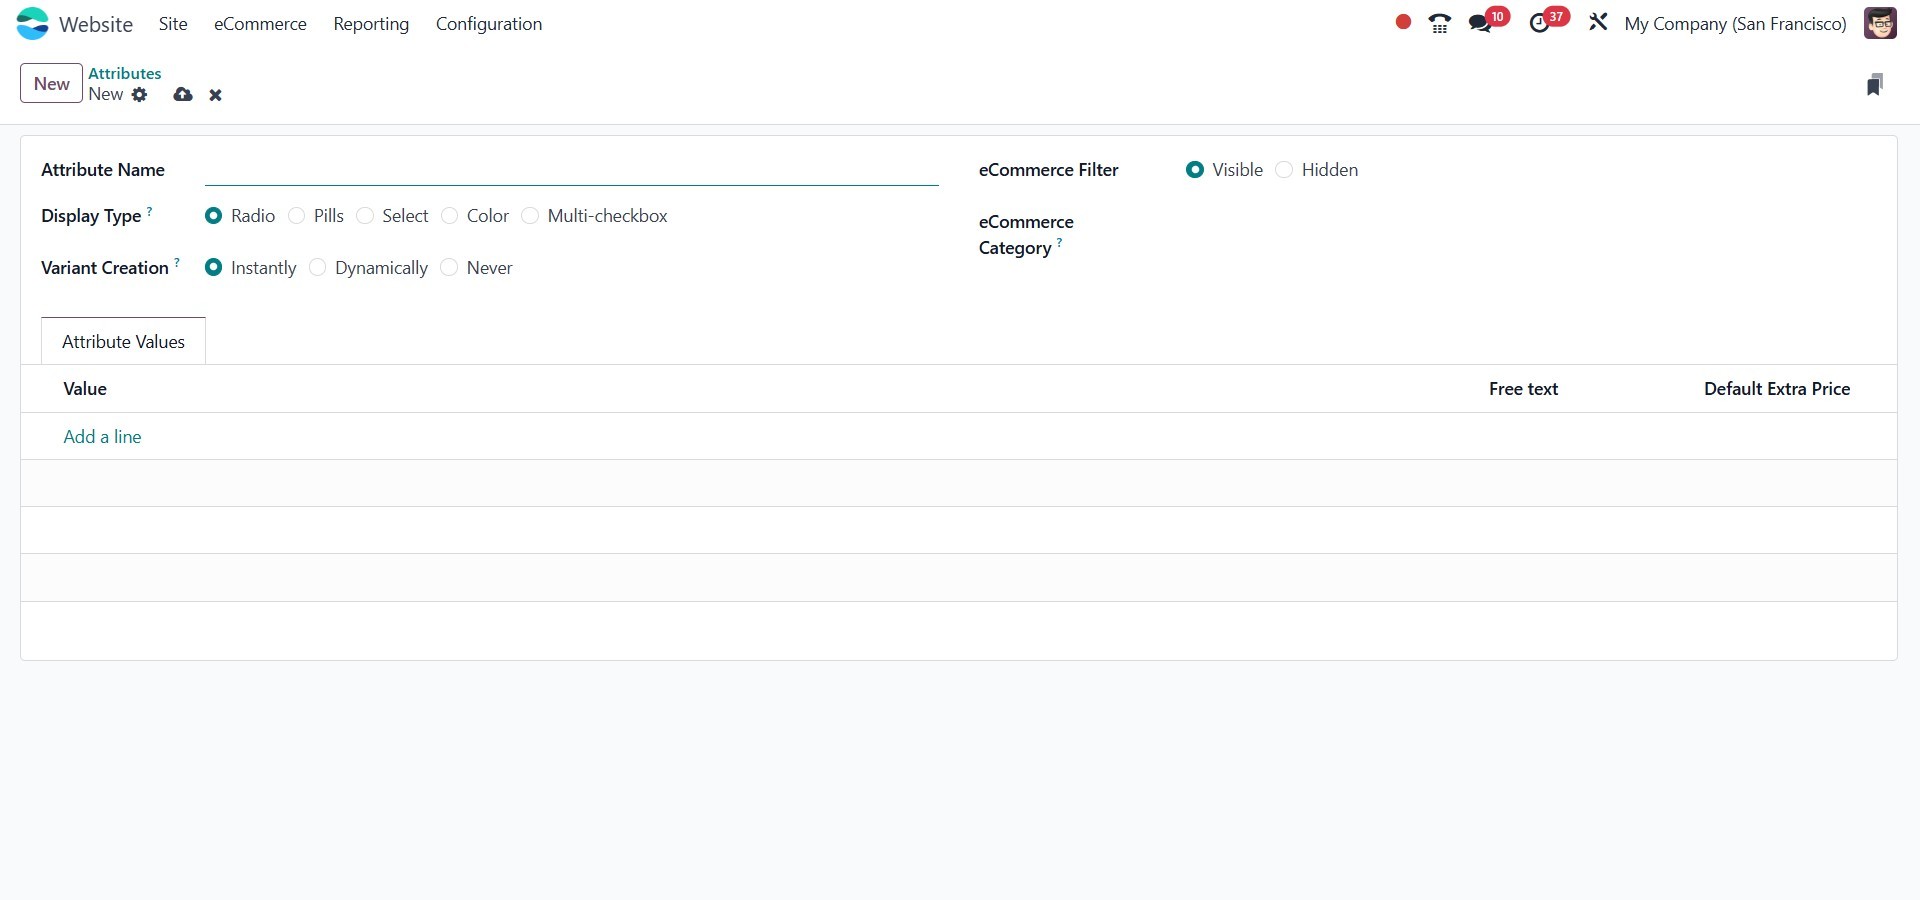
In Odoo 18, when configuring a
new attribute from the
Attributes menu under the
Website module’s eCommerce
tab, you will begin by
entering the Attribute Name
in the appropriate field. You
may also assign a Category to
the attribute, which helps
group similar attributes
together under a single
section on the eCommerce
comparison page, making
product comparisons more
intuitive for customers.
The Display Type field lets you
choose how the attribute is
presented in the product
configurator. Available
display types include Radio,
Pills, Select, and Colour,
allowing you to tailor the
selection interface to suit
the nature of the attribute
and enhance the shopping
experience.
Odoo 18 also provides three modes
under the Variants Creation
Mode:
- Instantly, all possible
product variants are
generated when the
attribute and its
values are added to a
product.
- Dynamically: Variants are
only created when
their corresponding
attribute values are
added during a sales
order.
- Never: The attribute will
not generate any
product variants.
You can also define the eCommerce
Filter Visibility to either
Visible or Hidden, depending
on whether you want the
attribute to appear as a
filter on the website. Under
the Attribute Values tab, you
can use the Add a Line option
to define specific values for
the attribute.
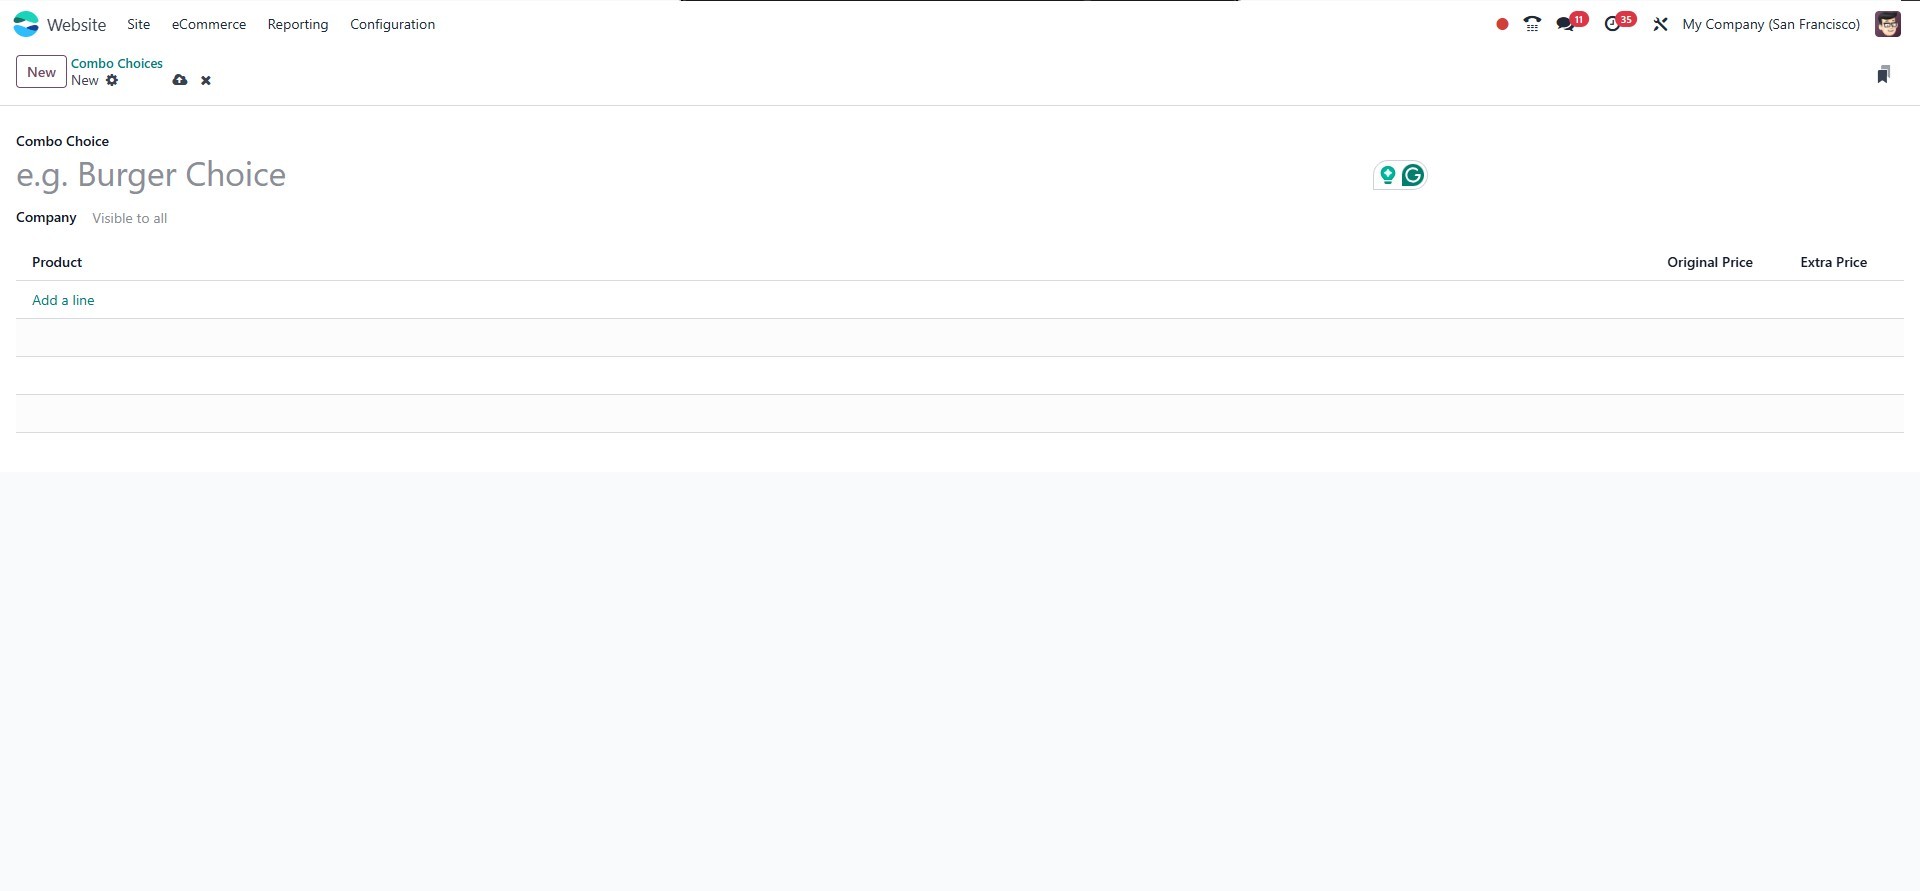
3.4 Combo Choices
The Combo Choices feature lets
you create product bundles
that customers can buy as a
single unit on your eCommerce
site. This is ideal for
product kits, gift sets, or
promotional combos.
To access it, go to the Website
module → Products → Combo
Choices. You’ll see a list of
existing combos with details
like Combo Name, Website, and
Company. Click New to create
a combo.
The Combo Choice field at the top
is where you can enter a name
for the combo, for example,
“Burger Choice” or “Desk
Accessories Combo.” This
label helps identify the
combo across the platform.
Just below, the Company field
indicates which company the
combo is associated with; if
set to "Visible to all," the
combo will be available
across all companies in a
multi-company environment.
In the Product section, you can
use the Add a line option to
include multiple products as
part of the combo. Each
product line you add displays
two key pricing fields:
Original Price and Extra
Price. The Original Price
reflects the standard price
of the individual product,
while the Extra Price allows
you to apply a custom price
adjustment for that product
within the combo. This
configuration provides
flexibility in defining
special pricing for bundled
offers, making it easy to
create attractive deals for
your eCommerce customers.
These combos can be displayed on
the website product page,
making it easier for
customers to buy multiple
related products at once.
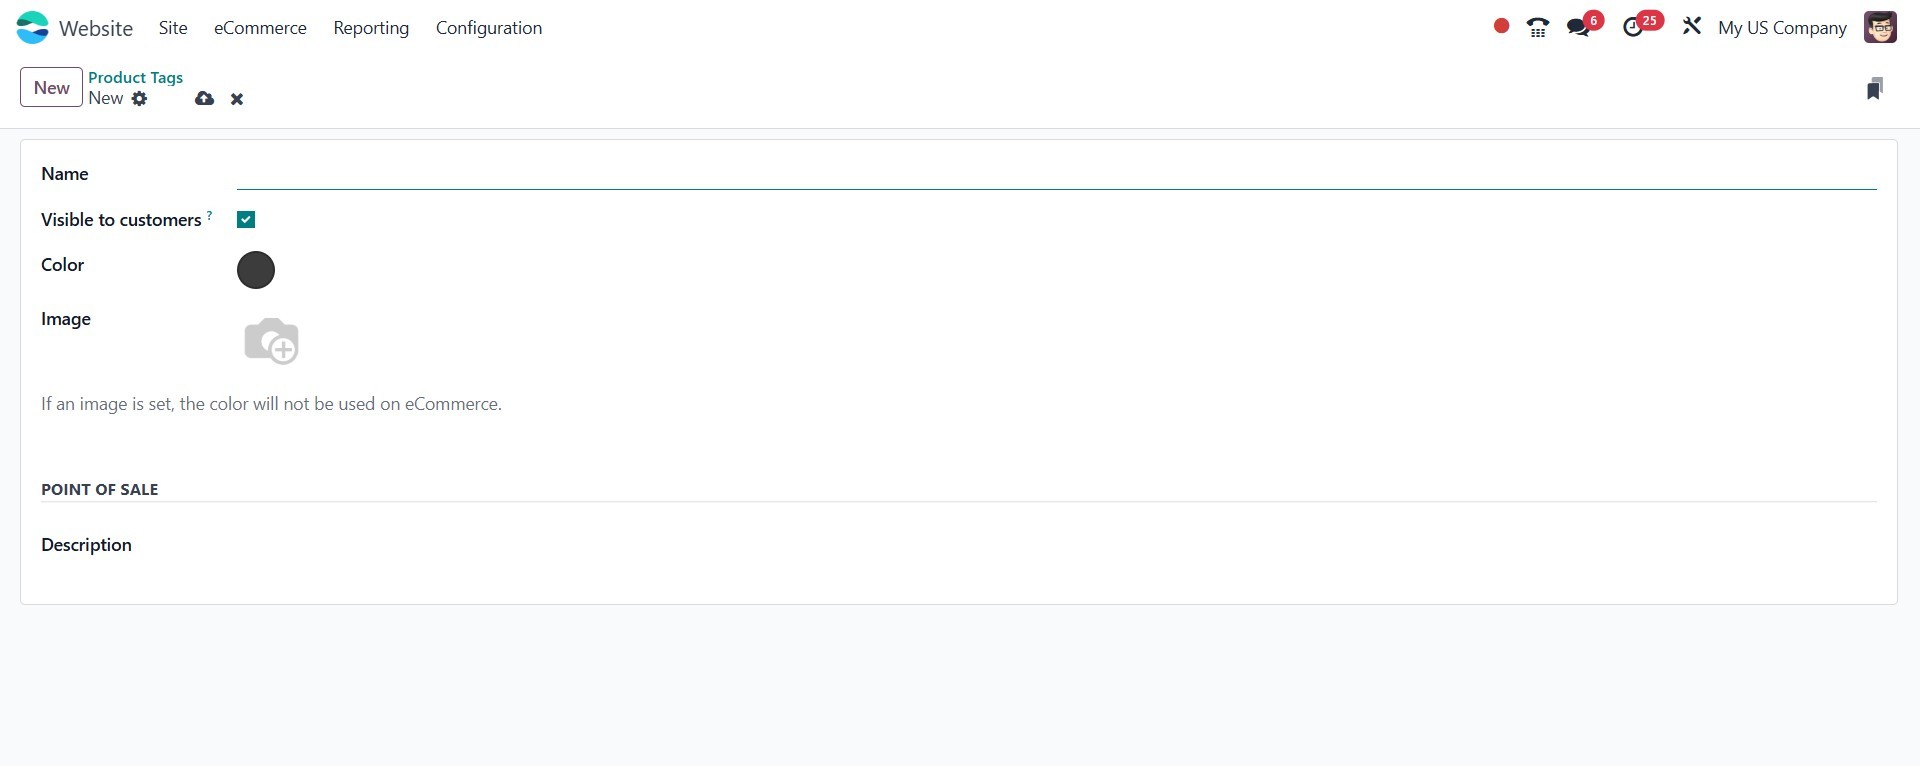
3.5 Product Tags
Under the Product section of the
ecommerce menu, you will find
the Product Tags option. To
create a new product tag,
click the New button. In the
creation form, you can define
the Tag Name, and assign a
Colour for visual
identification.
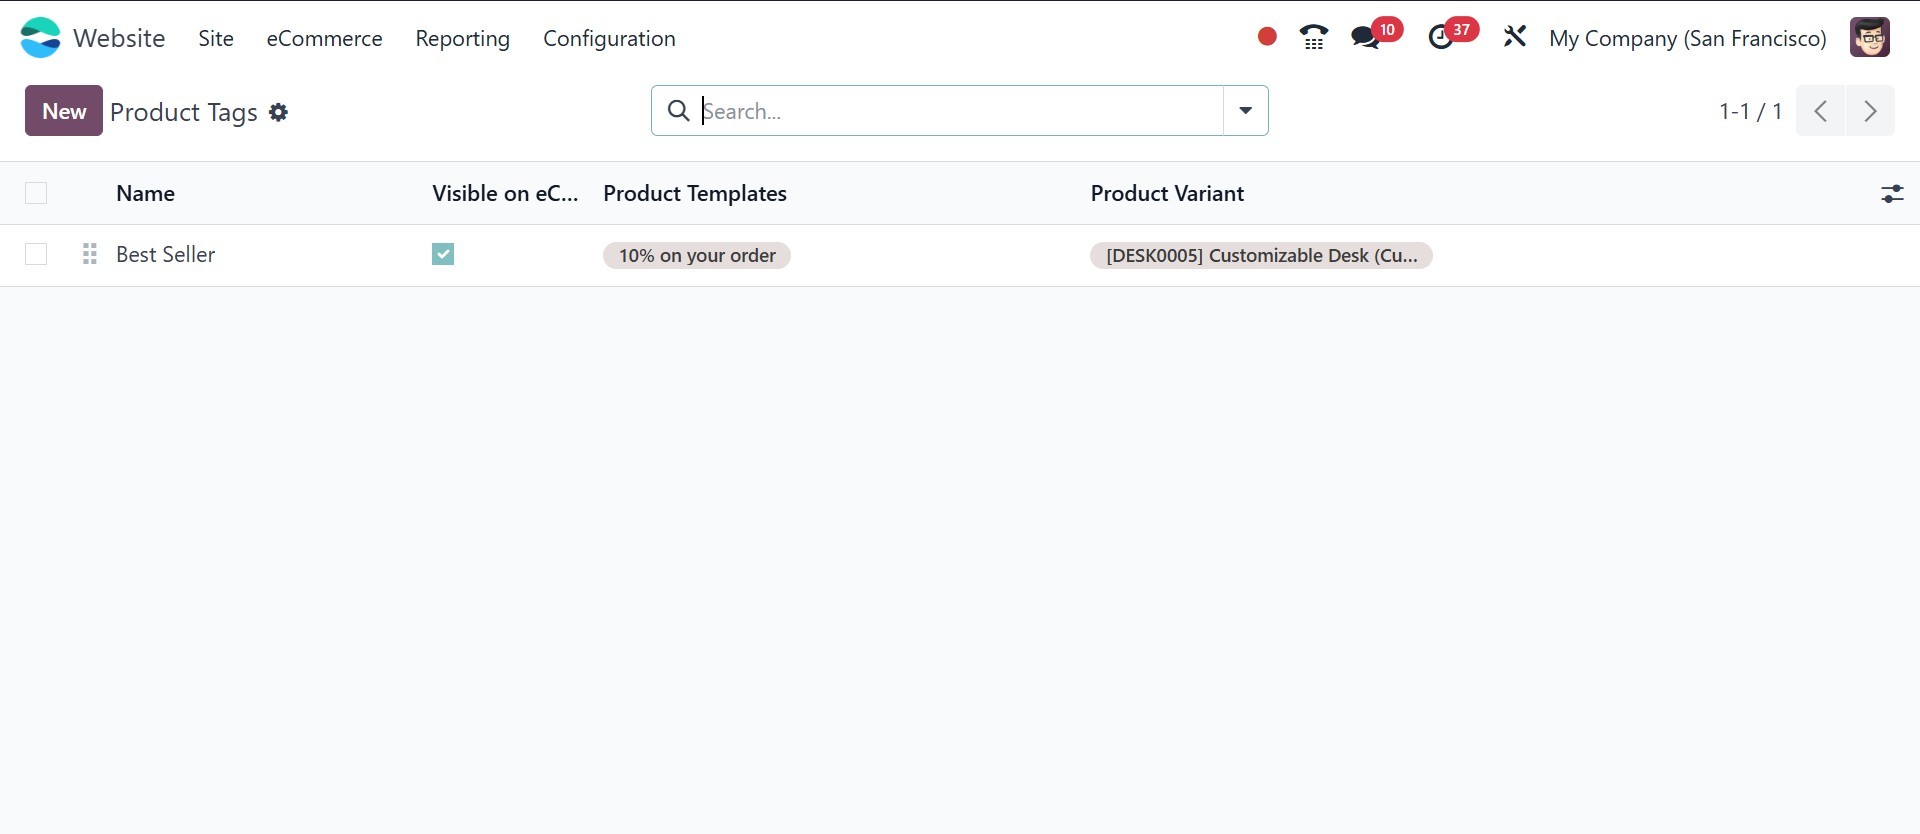
Additionally, you can specify the
Product Variants to which
this tag applies in the
designated field. This
feature allows for better
organization and
categorization of your
products, enhancing both
internal management and
customer navigation on the
website.
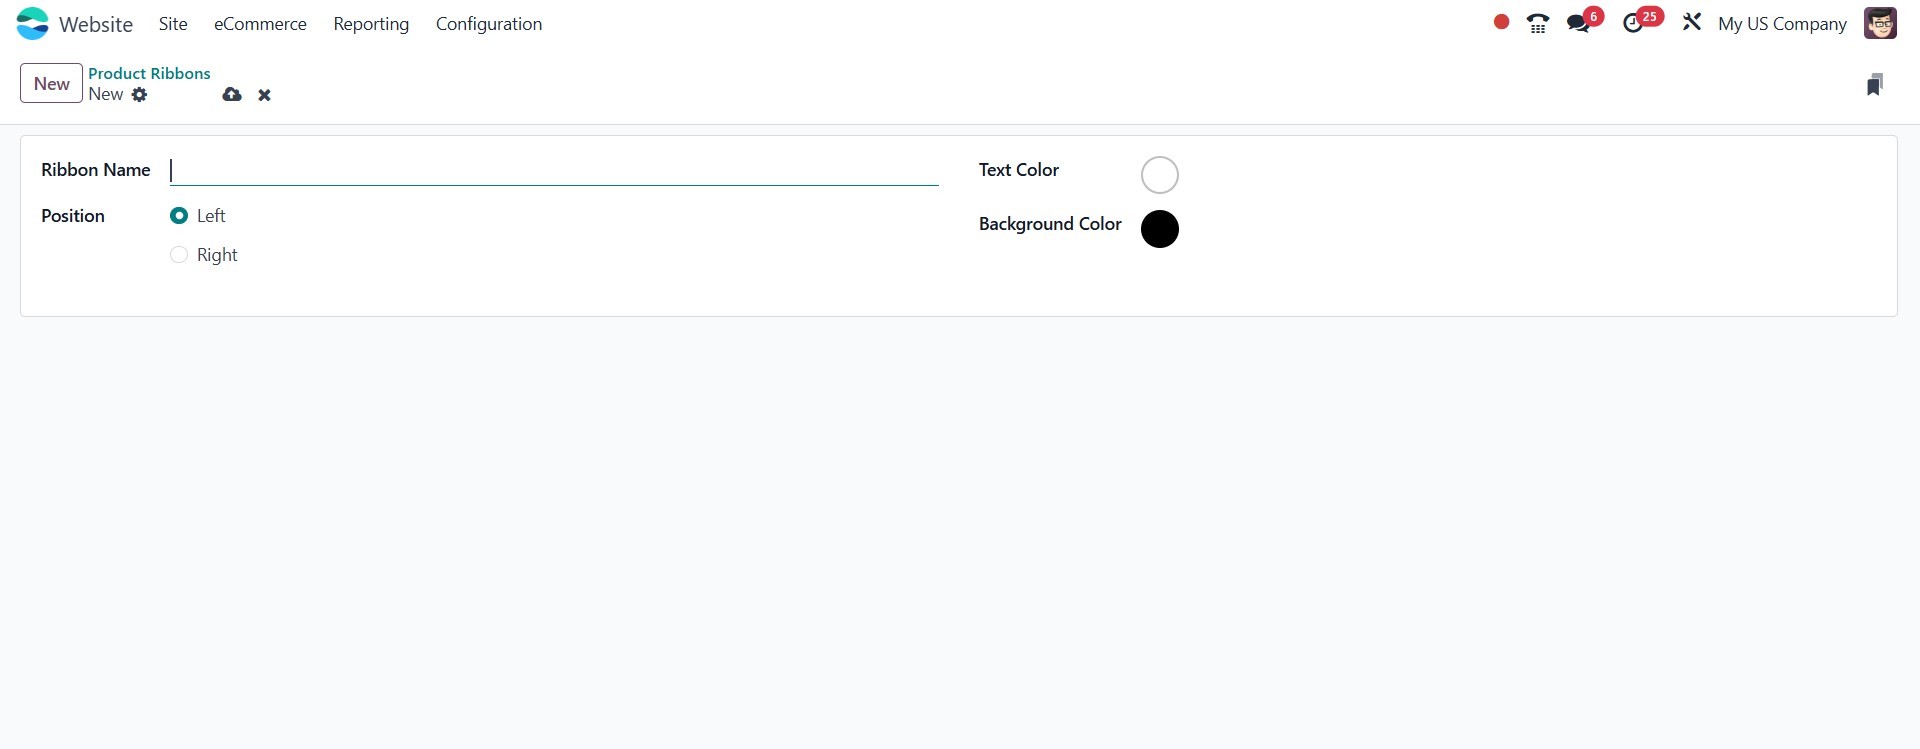
3.6 Product Ribbons
The Product Ribbon feature in
Odoo 18 lets you highlight
products on your e-commerce
site using custom labels.
This helps grab customer
attention and promote special
items.
To configure it, navigate to the
Website module →
Configuration → Product Tags.
Click New to create a ribbon.
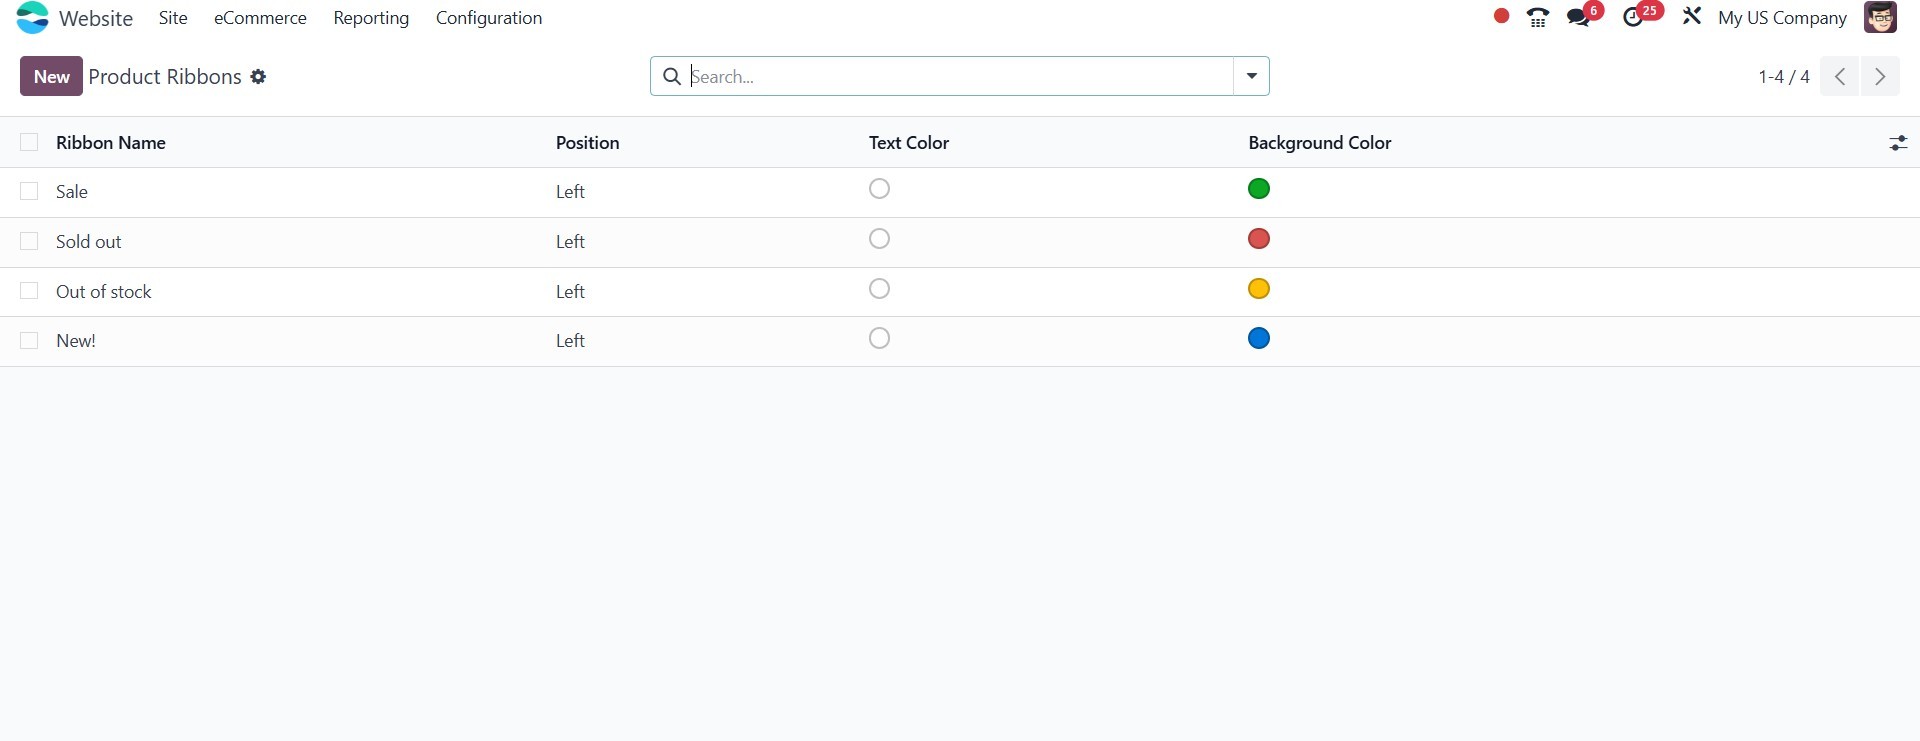
Enter the Ribbon Name, choose a
Ribbon Text (e.g., “Best
Seller”), select a Ribbon
Color, and link it to
specific product variants
using the Add a line option.
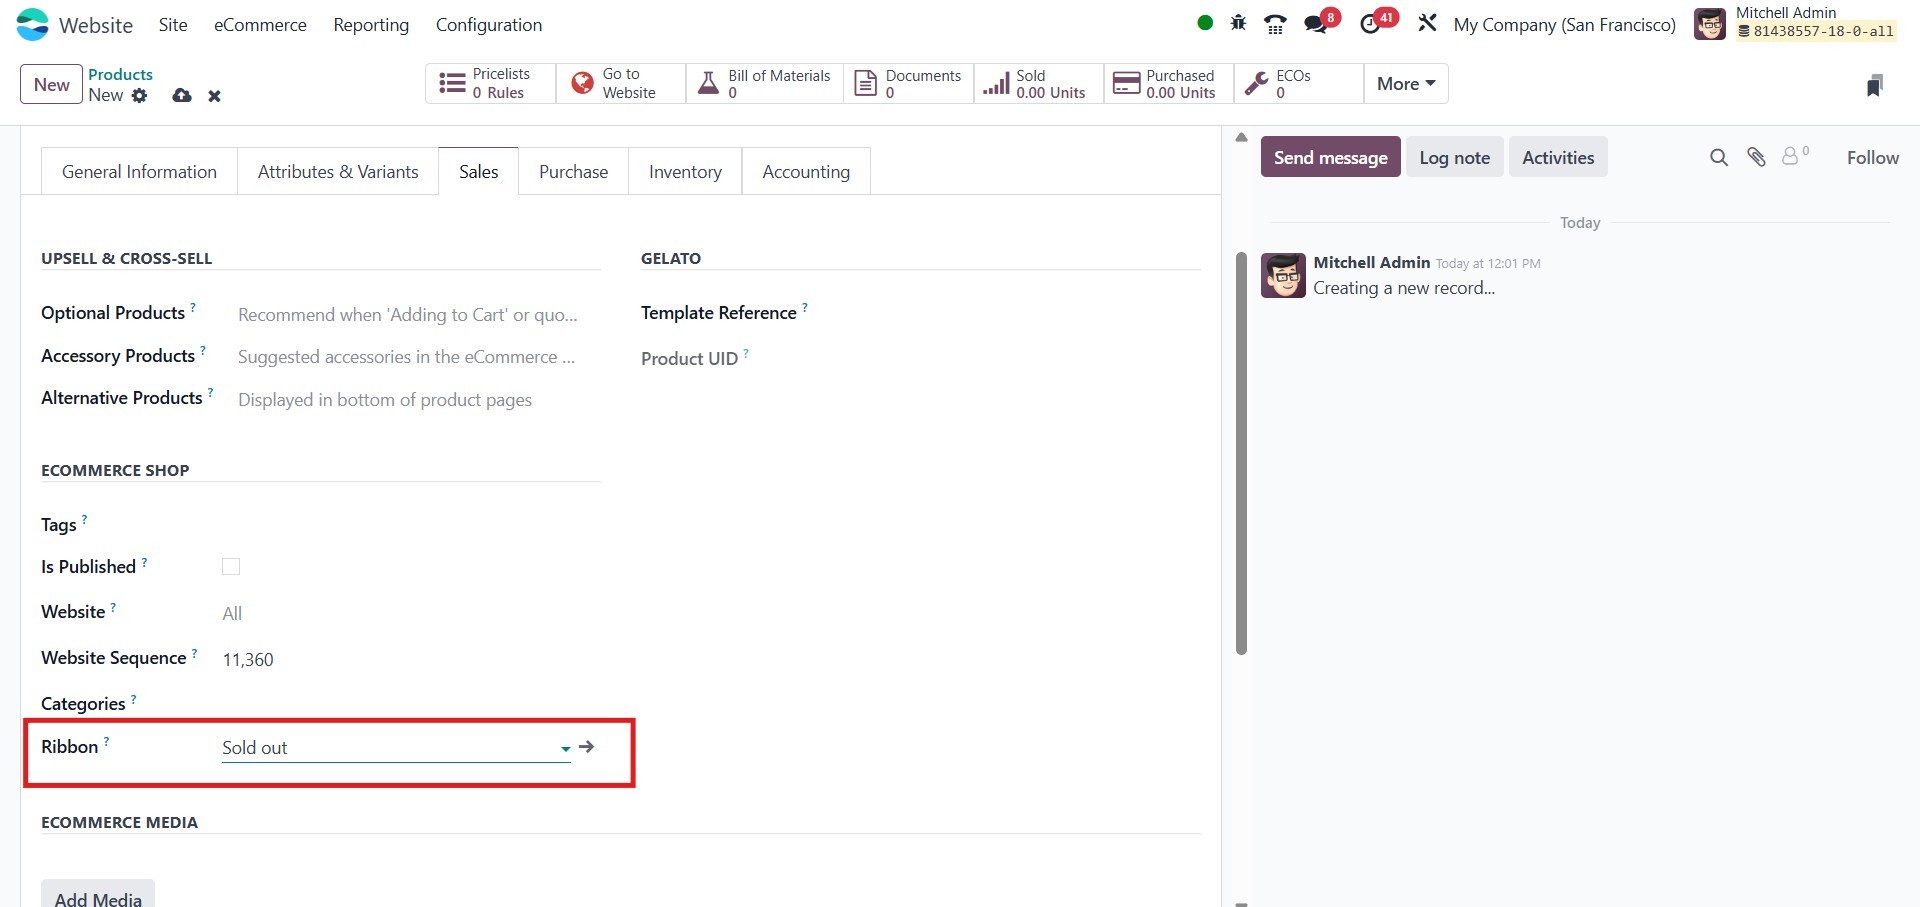
Once the ribbon is created and
saved, you can add it to a
product by opening the
product form from the Website
module. In the Sales tab
under the eCommerce Shop
section, you will find the
Ribbon field. Select the
appropriate ribbon from the
dropdown list and click Save.
After saving, the ribbon will
appear over the product image
on the website, helping it
stand out and attract
customer attention.
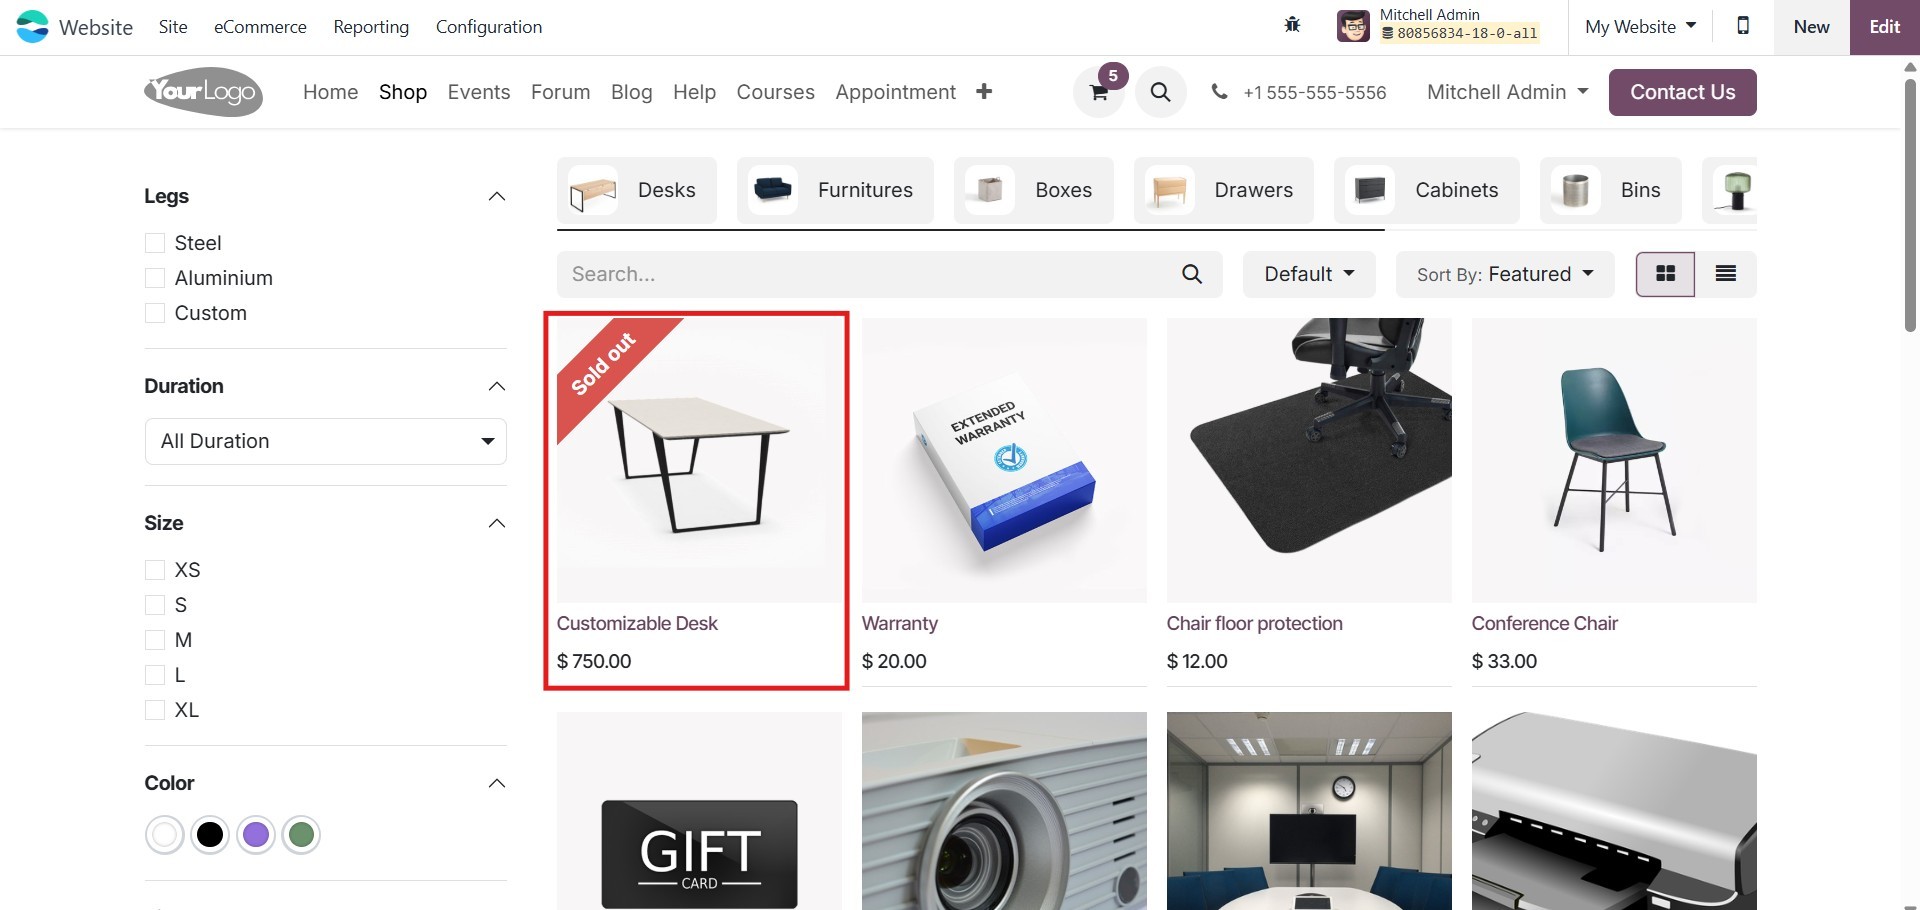
Once configured, the ribbon will
appear on the product image
on the website.
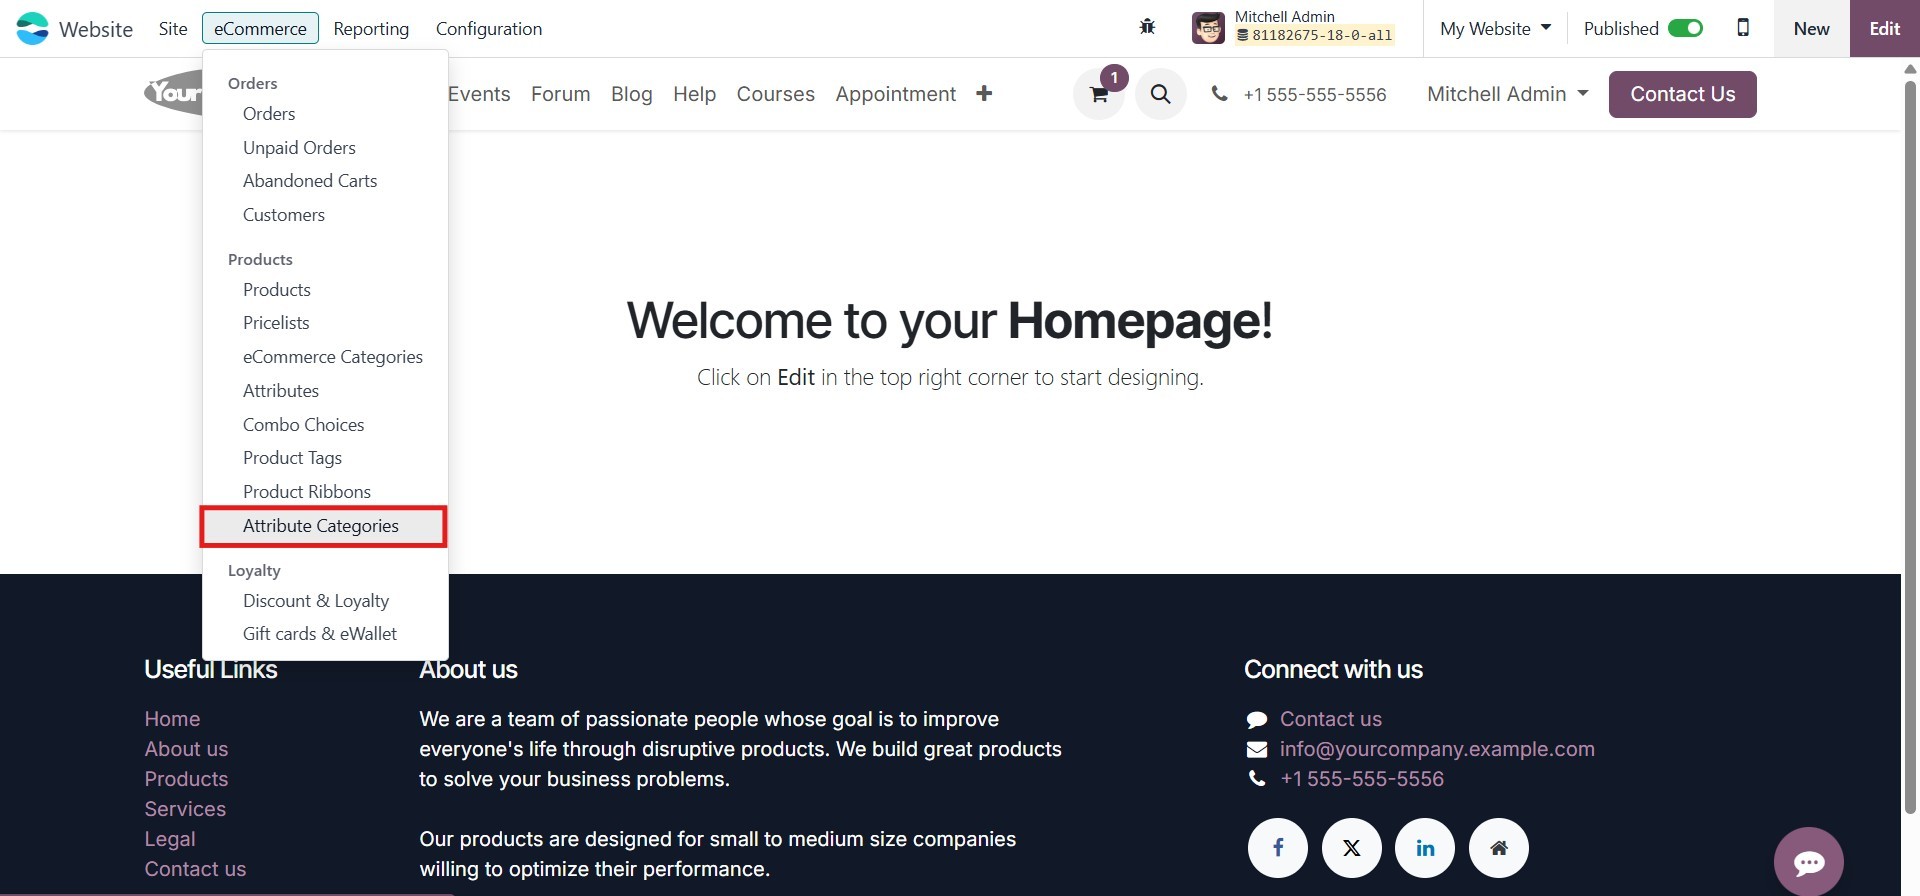
3.7 Attribute Categories
Odoo allows you to organize and
manage product attributes
more efficiently using the
Attribute Categories submenu.
This option can be found
under the Website > Products
when the eCommerce module is
installed.
Attribute categories help group
related attributes together,
improving product filtering
on the website and providing
a better shopping experience
for customers.
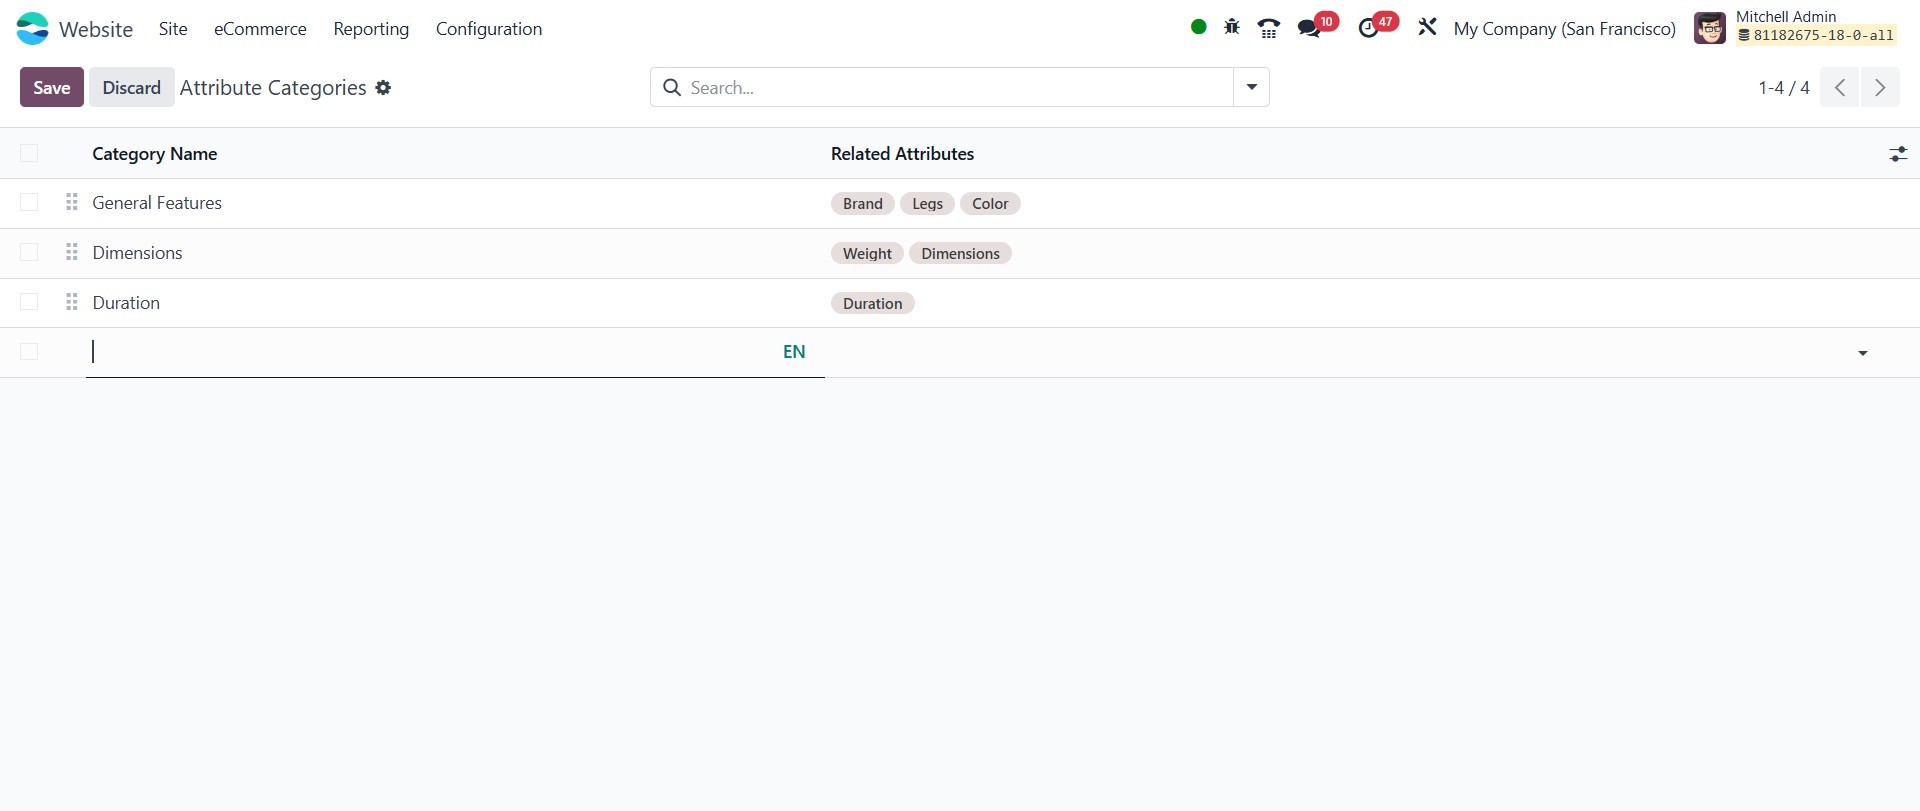
By categorizing attributes such
as color, size, or material,
you ensure that products are
easier to compare and select
during the purchase journey.