6. Shop Management
The Shop page is made available
on the website through the
eCommerce module, allowing
customers to browse and
purchase products with ease.
To explore this feature,
navigate to the Shop section
of your eCommerce website.
Before doing so, you can add new
products directly to the
website. Click the + New
button located in the upper
right corner of the screen to
initiate the process. With
just a few clicks, this
option enables you to add a
new product seamlessly to
your online store.
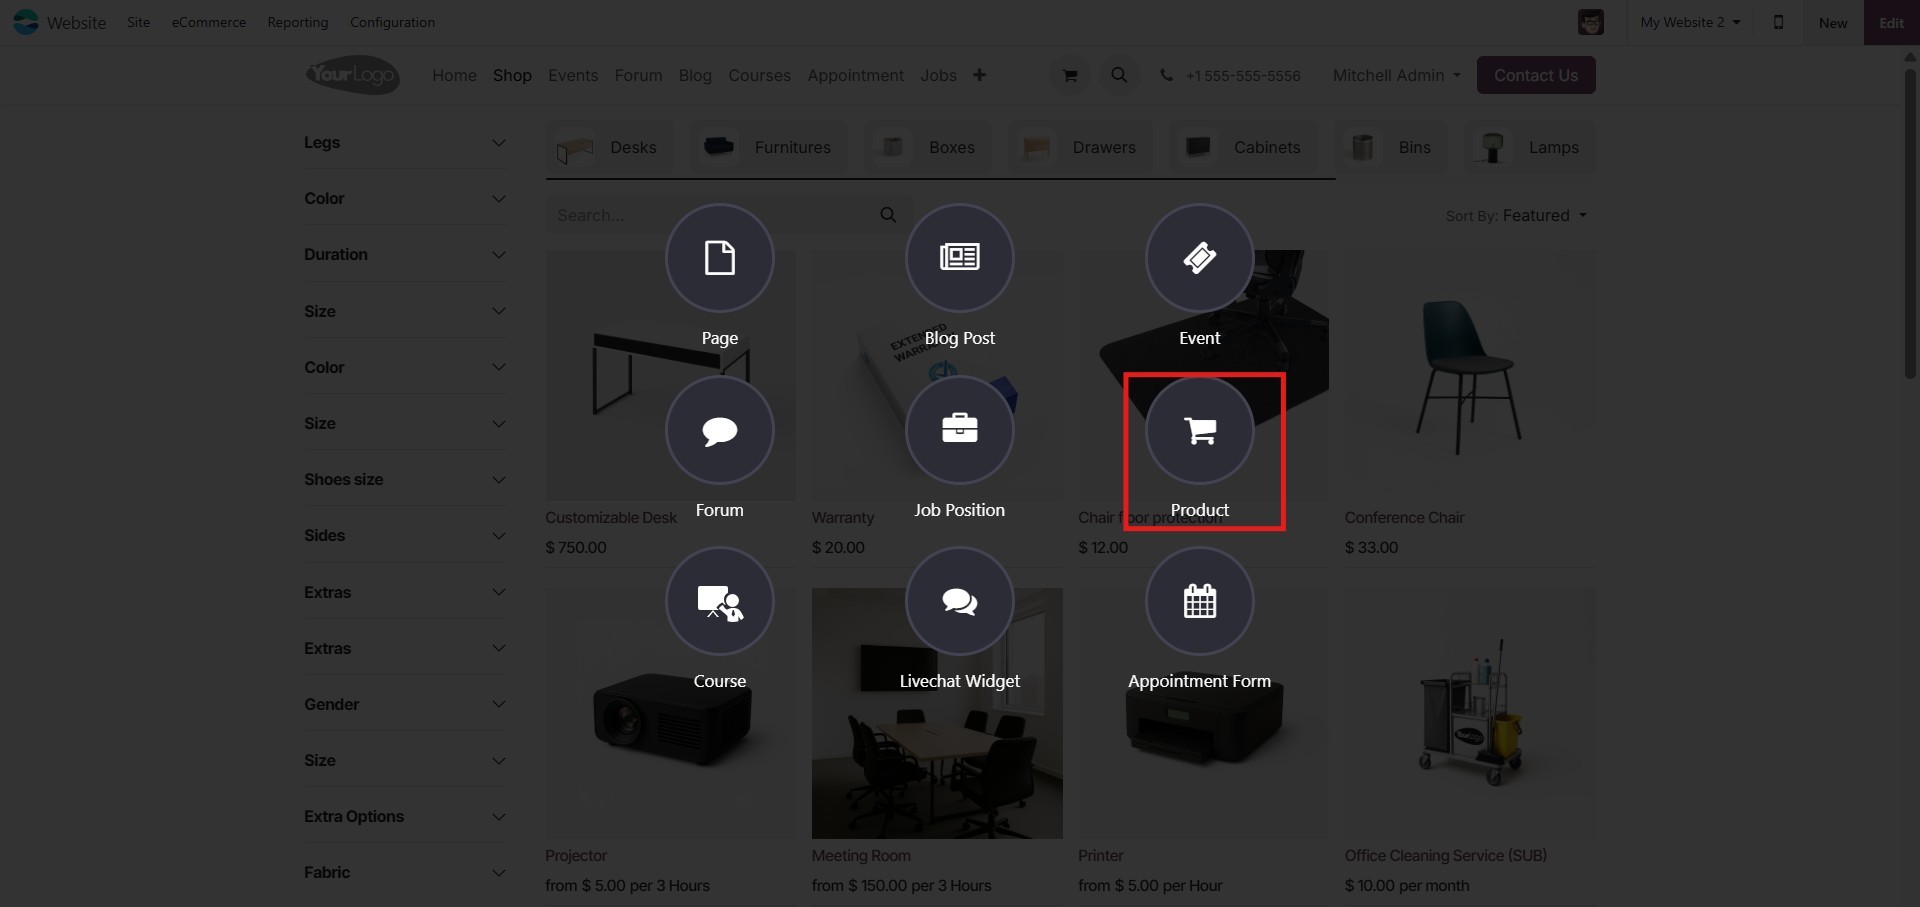
Clicking on the + New button will
open the Product menu. From
there, select the Product
option to launch a pop-up
window where you can begin
entering the product details.
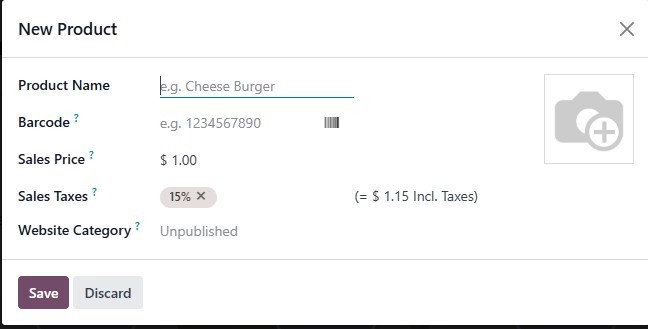
You can enter the Product Name in
the designated field. Just
below the name, a brief
description of the product
can be added to provide a
quick overview for customers.
You may also configure key
details such as the product
image, available quantity,
and price. To upload an
image, double-click on the
image placeholder. A pop-up
window will then appear,
allowing you to add the
desired product image. Once
the necessary details are
entered, click Save to
publish the product on your
website.
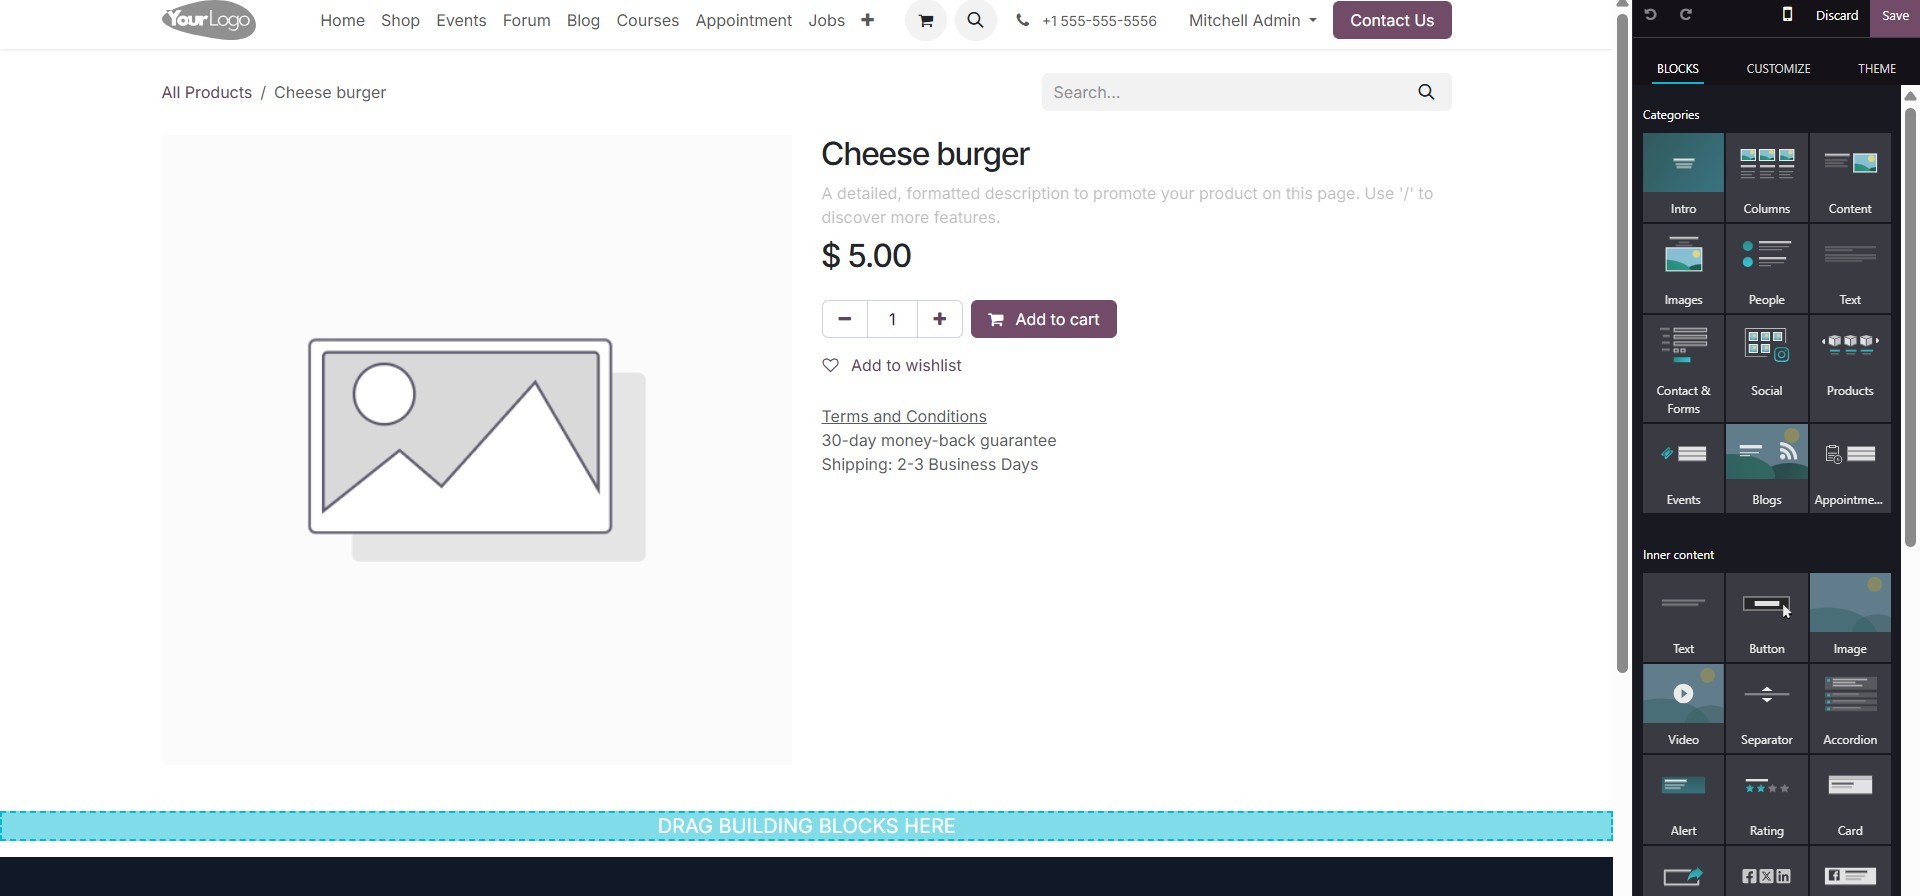
The editing tools available in
the image pop-up window help
you refine your product
visuals, contributing to a
more polished and
professional product page
layout. After completing the
edits, click the Save button
to publish the product on
your website. This action
will take you to the
product’s website page, where
you can make it publicly
visible using the Publish
button. To further modify the
product details, click on the
Product button in the upper
right corner.
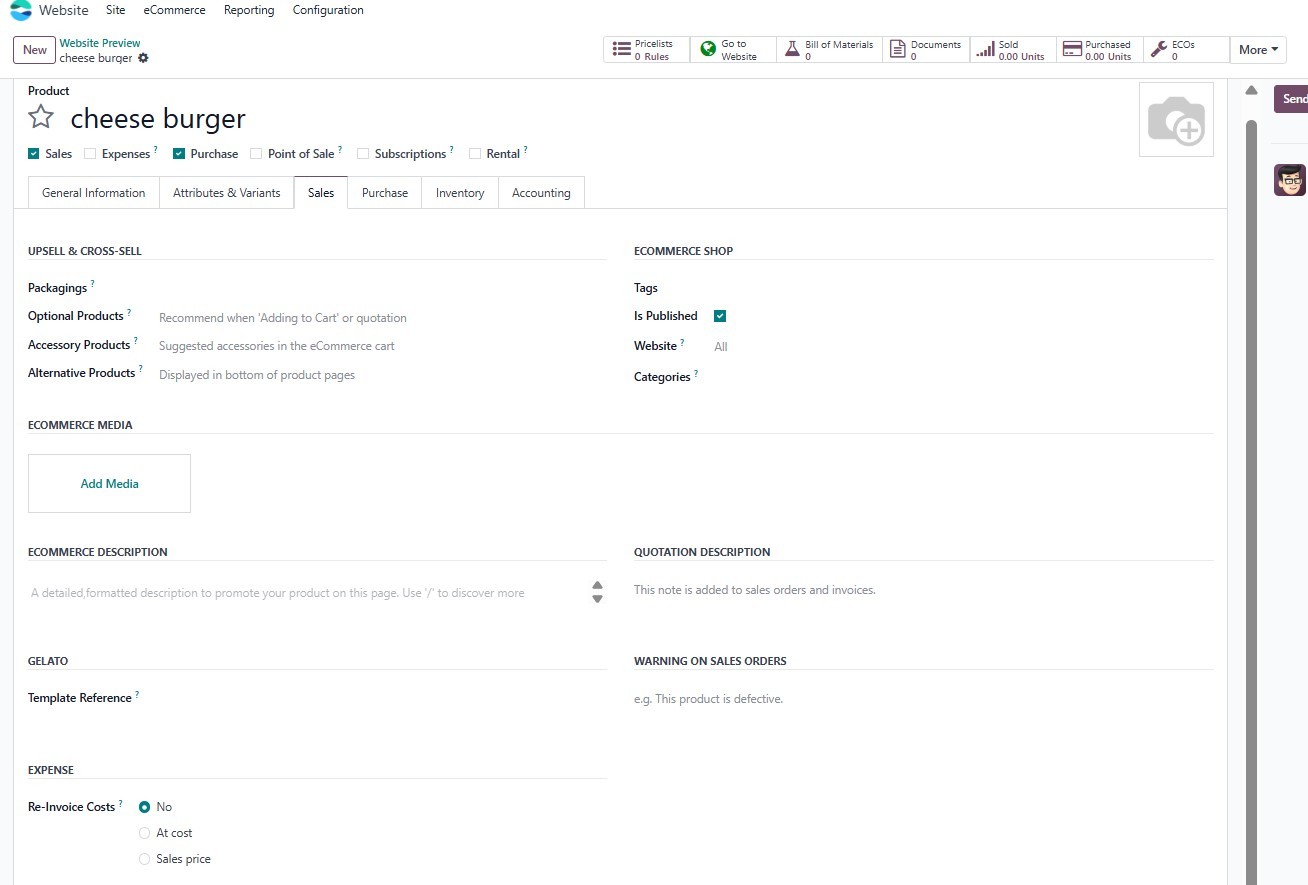
To add a detailed product
description, use the Product
Description option. This
feature allows you to clearly
communicate essential product
information to potential
customers. To manage this
from the backend, open the
Product form in the Inventory
module. Under the Sales tab,
you'll find the eCommerce
Shop section where you can
input or update the product
description specifically for
your online store.
In this section, you can list the
relevant websites that
feature or showcase the
specific product. This allows
you to link the product
across multiple platforms,
enhancing its visibility and
providing customers with
additional information or
purchase options.
When you select the Website
option, a drop-down menu will
display all the websites you
have created on the platform.
You can also specify the
categories in which the
product will be listed. If
you choose specific
categories, the product will
be available in all the
e-commerce categories you
define. To enhance user
experience, you can enable
features like Show Available
Quantity, Out-of-Stock, and
Out-of-Stock Messages, which
provide real-time stock
information to your
customers.

If you want to list the same
product across multiple
websites, Odoo provides an
option to copy the product
description for each website.
This can be done easily by
using the Actions button,
which gives you access to the
Duplicate option. This allows
you to streamline the process
of product management across
various websites while
maintaining consistency in
product information.
6.1 Product Catalog
Customization
The Website module in Odoo makes
it easy to customize the
Product Catalog displayed on
your business website. This
customization can be tailored
to meet the specific needs of
your company or business.
Odoo offers a variety of
advanced customization
options to ensure seamless
management of all activities
related to your online store.
To access the customization
options, navigate to the
online catalog, where you'll
find multiple possibilities
for adjusting how your
products are showcased. You
can view and manage your
website's product catalog by
going to the Shops tab in the
dashboard, where you can
fine-tune the layout,
categories, and other
elements to align with your
business requirements.
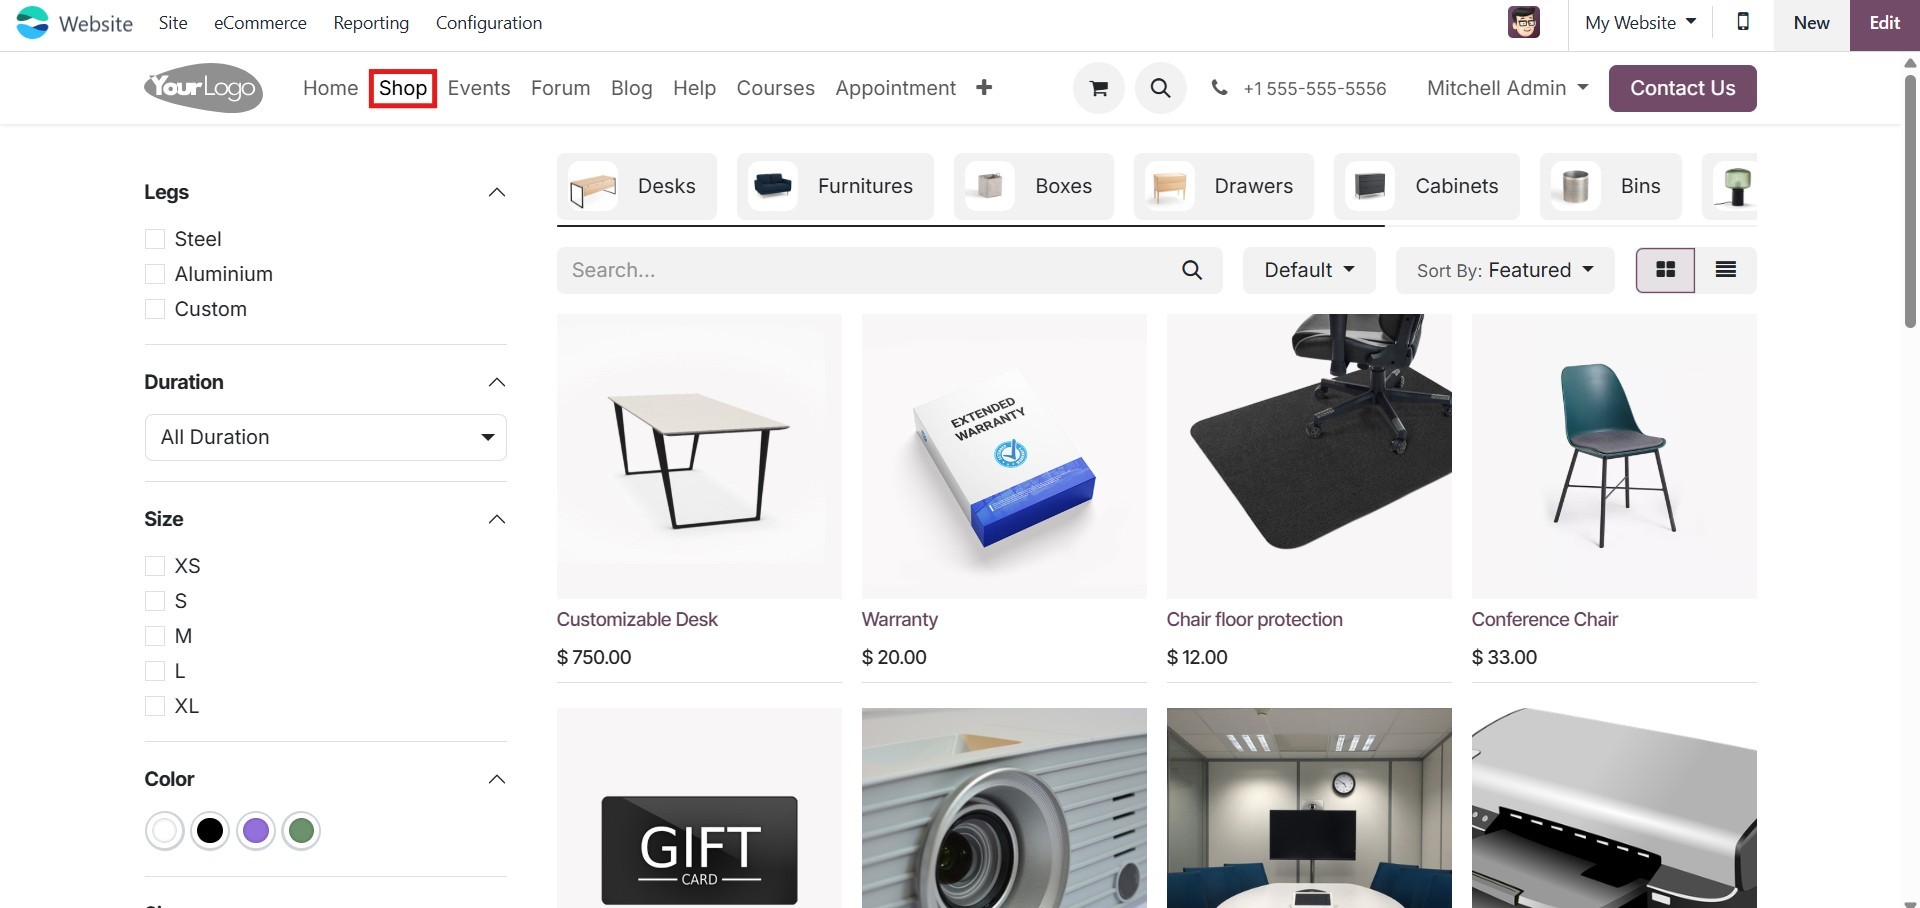
All of the products listed in
your catalog will be
displayed in the product
catalog pane, as illustrated
above. You can easily find a
specific product using the
search feature provided on
the page. Additionally, the
catalog allows you to sort
the products based on various
criteria such as Name, Newest
Arrival, and Price (either
from high to low or low to
high). These sorting options
can be accessed using the
Sort By menu, making it more
convenient for customers to
browse and filter products
according to their
preferences.
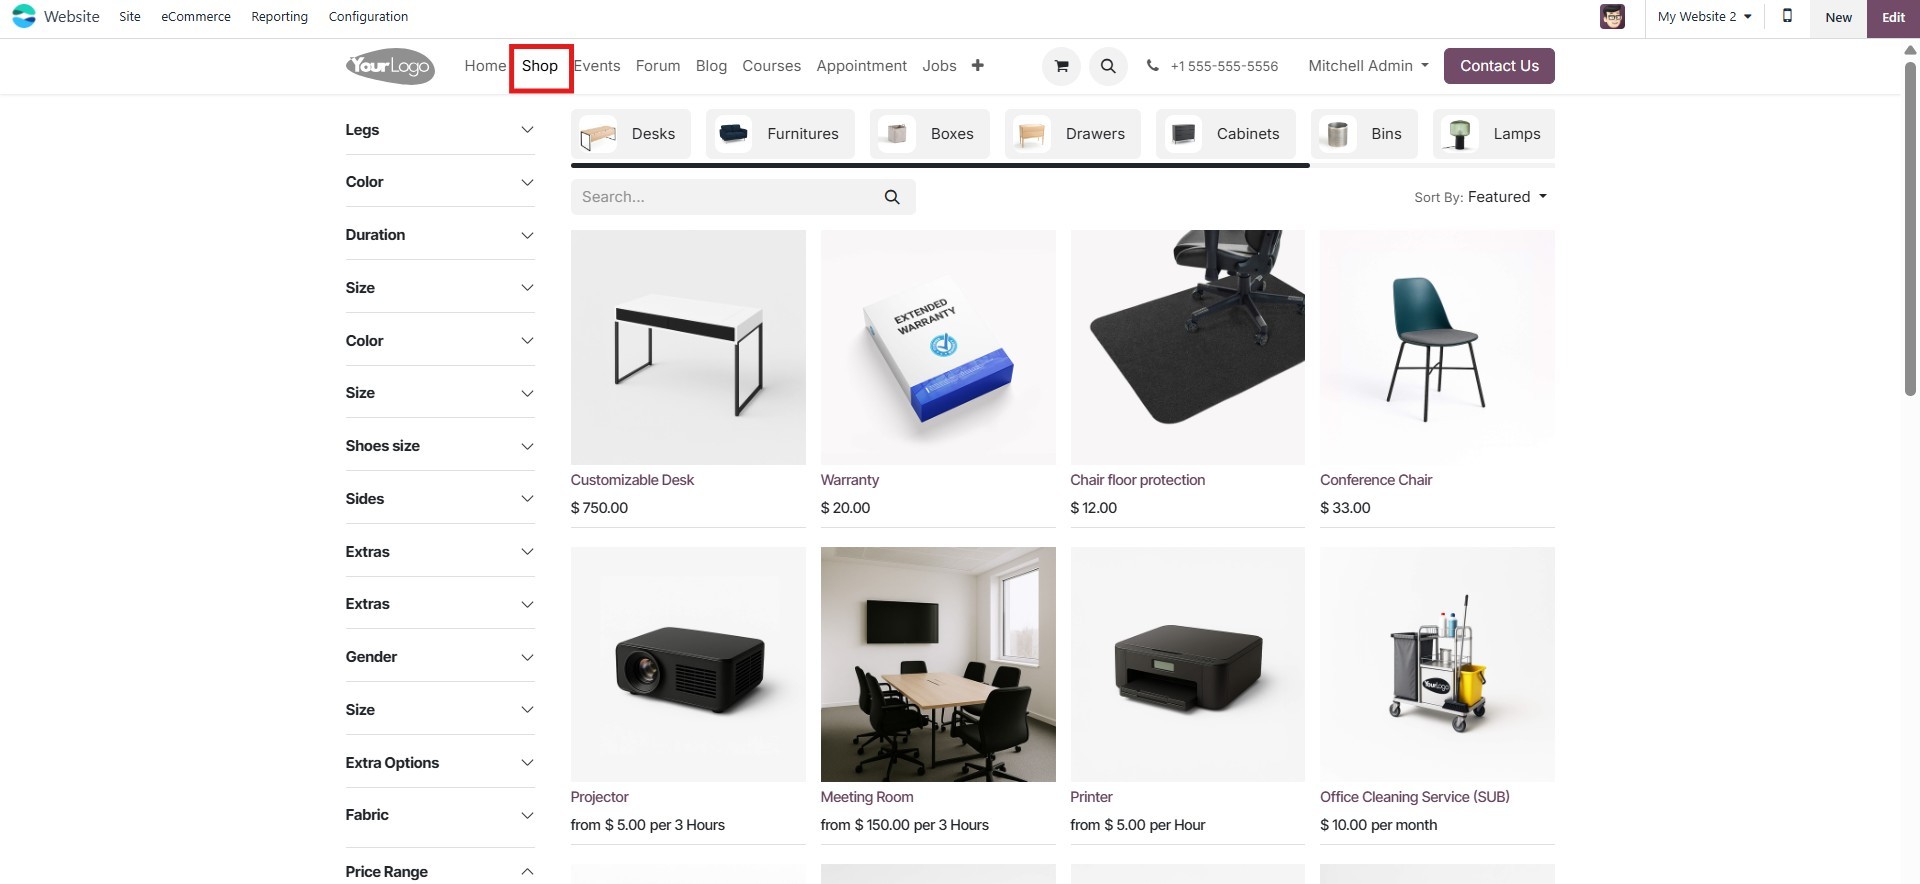
The Shops page can be viewed in
both List and Grid formats,
providing flexibility in how
product information is
displayed.
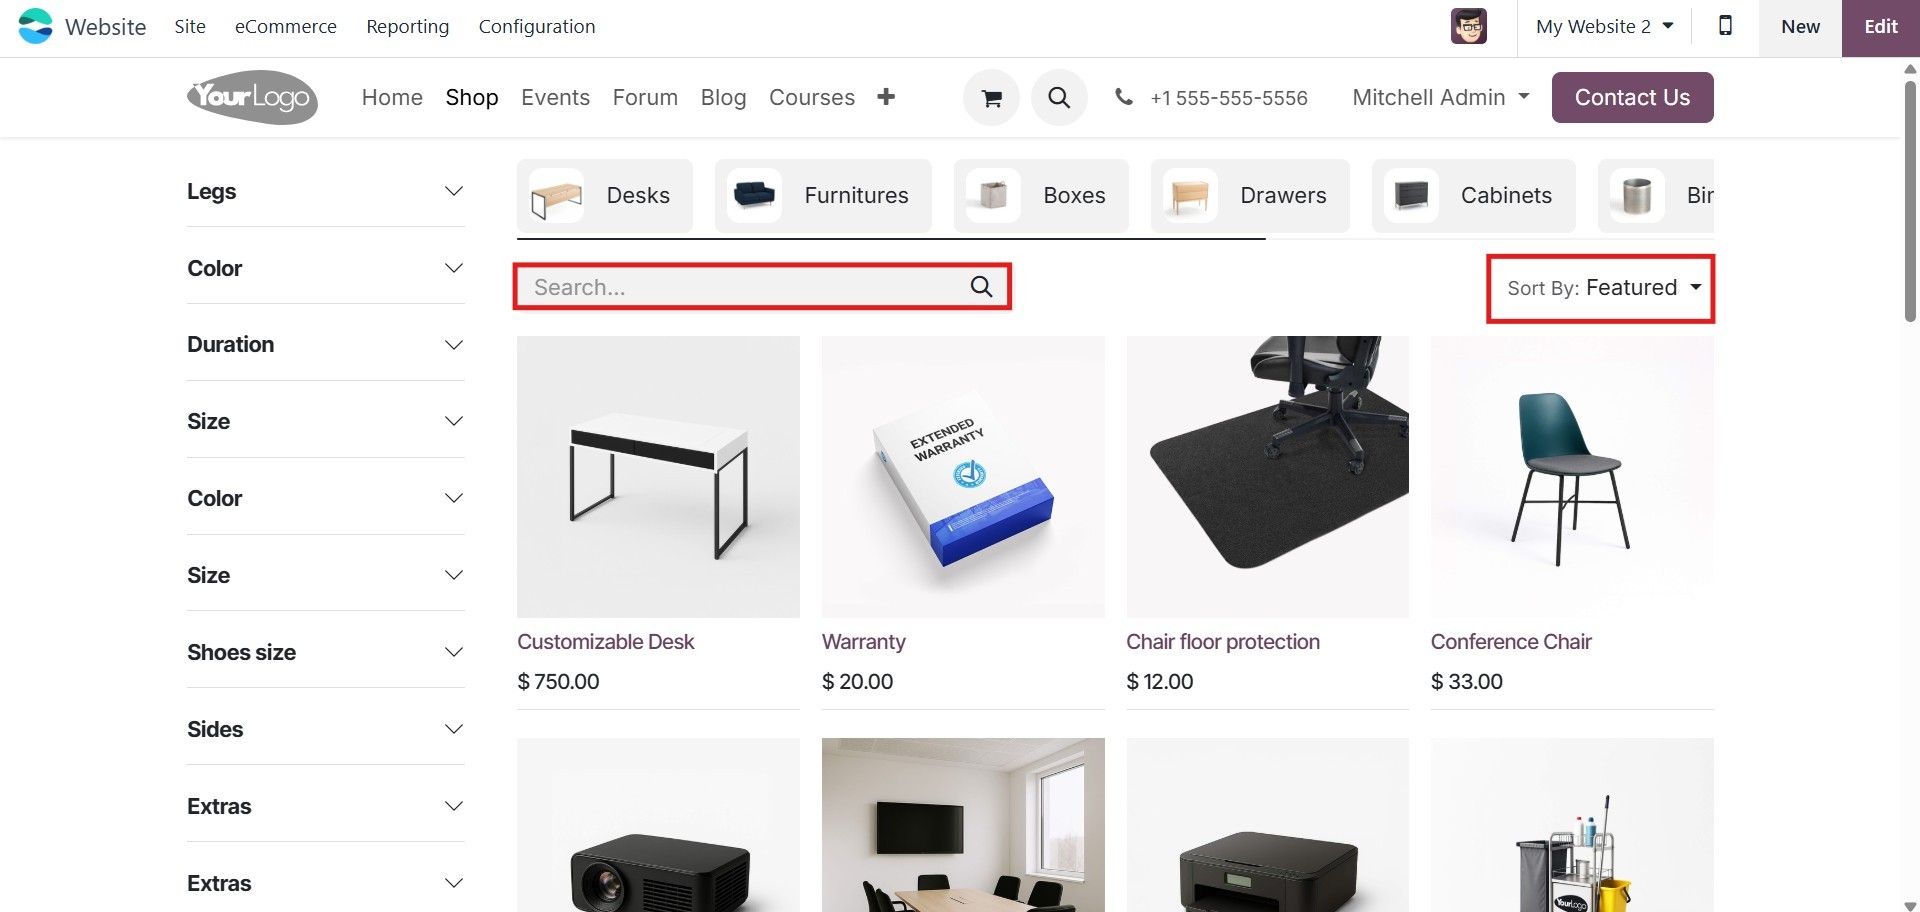
Every product on the list has its
name, picture, and cost
provided. The icons for
completing different tasks,
such as adding items to a
wish list, comparing, and the
shopping cart, are always
visible.
The several filtering choices are
shown when you look at the
left side of the page. In
addition to many other
criteria, you can filter the
list by Attributes: Legs,
duration, size, gender, and
fabric. On top of the window,
you can see icons to access
My Cart, Facebook, Twitter,
and Instagram.
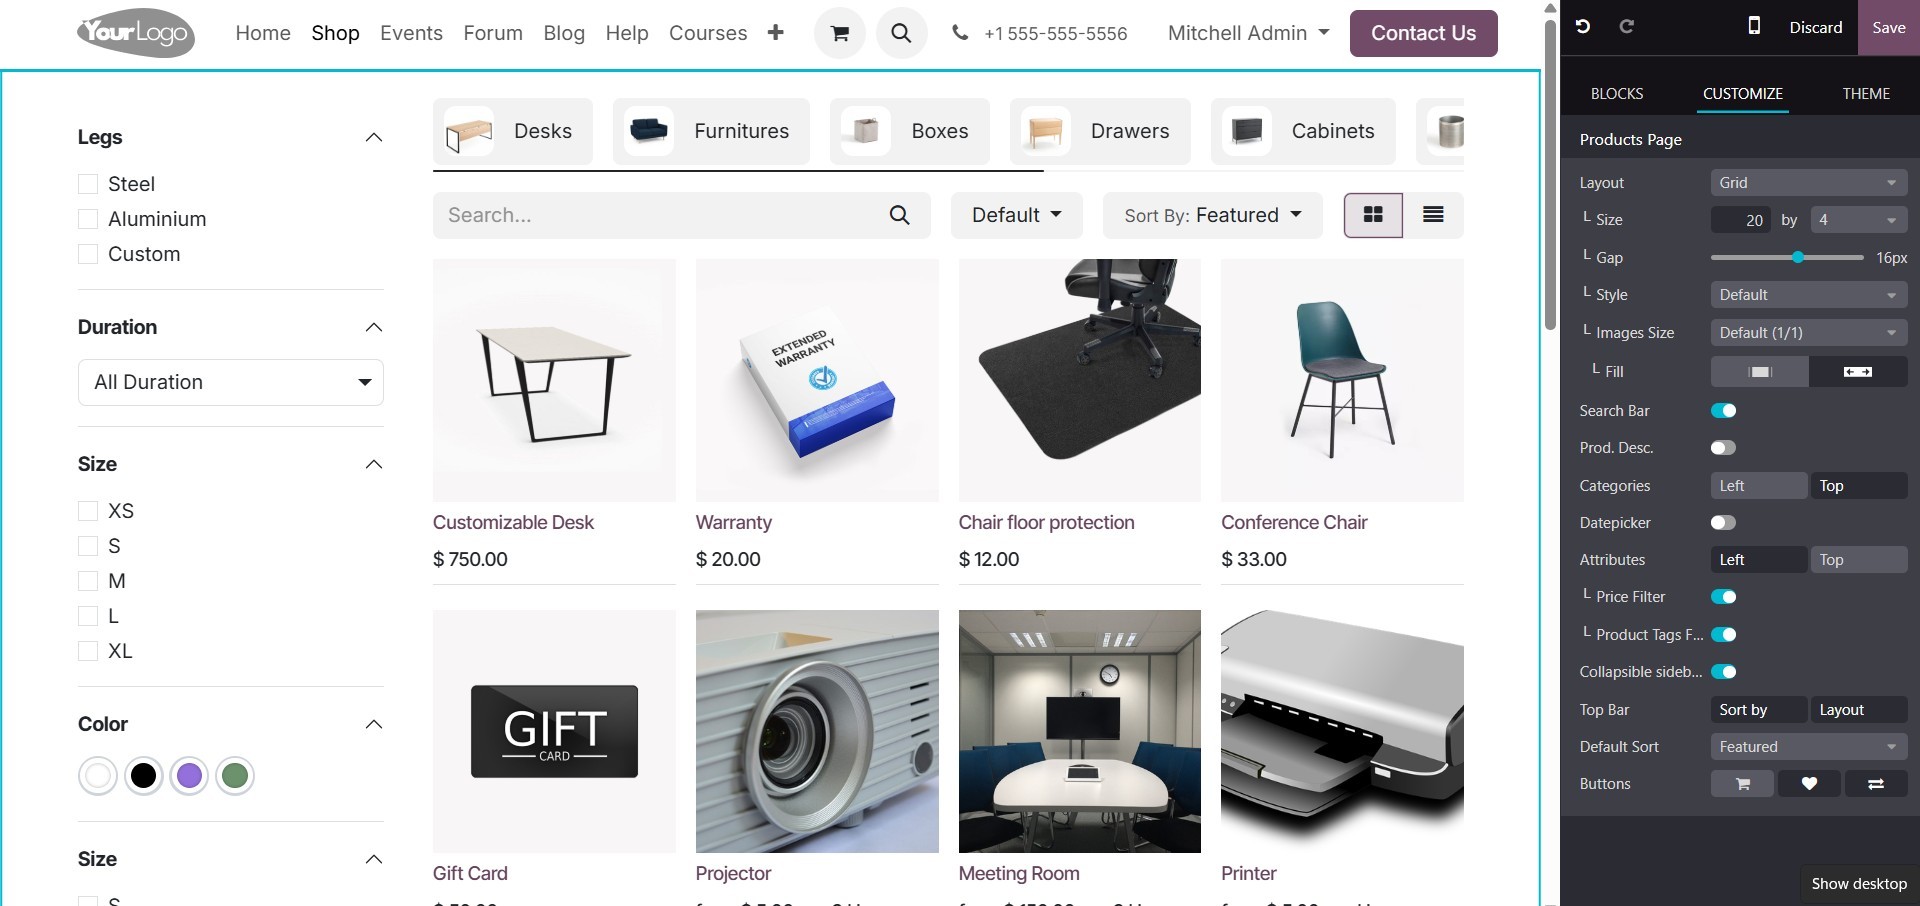
To add more customisations, click
on the Edit button.
The Product Layout offers two
viewing options: Grid View
and List View. You can
customize the display by
selecting the preferred Size,
Style, Image Type, and fill
options. Additionally, the
Search bar and Product
Description can be enabled by
activating the Product. Desc.
Toggle.
Categories can be positioned
either at the top or on the
left side of the screen,
based on your preference.
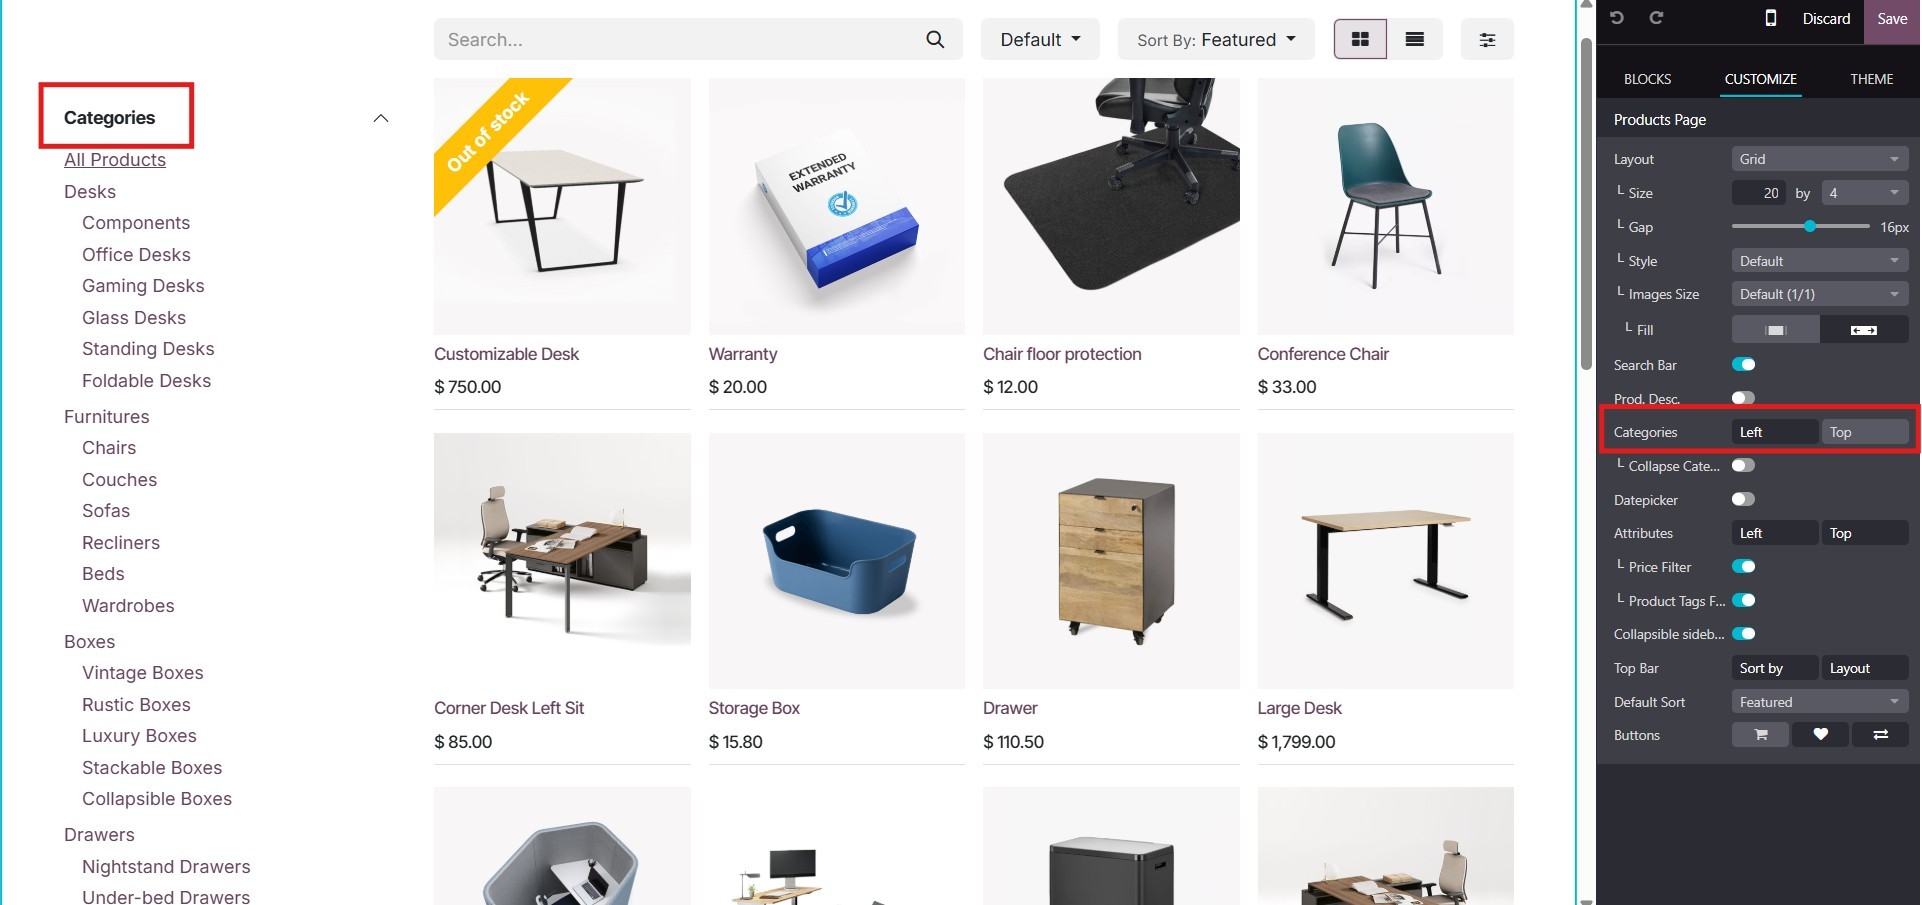
The Price Filter and Product Tags
will only be visible once
they are enabled.
Furthermore, this
customization page allows you
to configure additional
elements such as the
available Buttons, Default
Sorting, and the layout of
the Top Bar, offering
complete control over how
your product catalog is
presented.
6.2 Product Comparison Option
Shoppers can compare two products
directly from the website by
enabling the Product
Comparison Tool. This feature
is found under the Shop -
Product section in the
Configuration settings. Once
activated, it allows users to
easily evaluate products side
by side, enhancing their
decision-making process.
The Stores page provides an
option to compare products.
Under each product
description, you'll find a
double arrow icon labeled
"Product Comparison."
Clicking this allows
customers to select multiple
products for a side-by-side
comparison, making it easier
to evaluate features, prices,
and specifications.
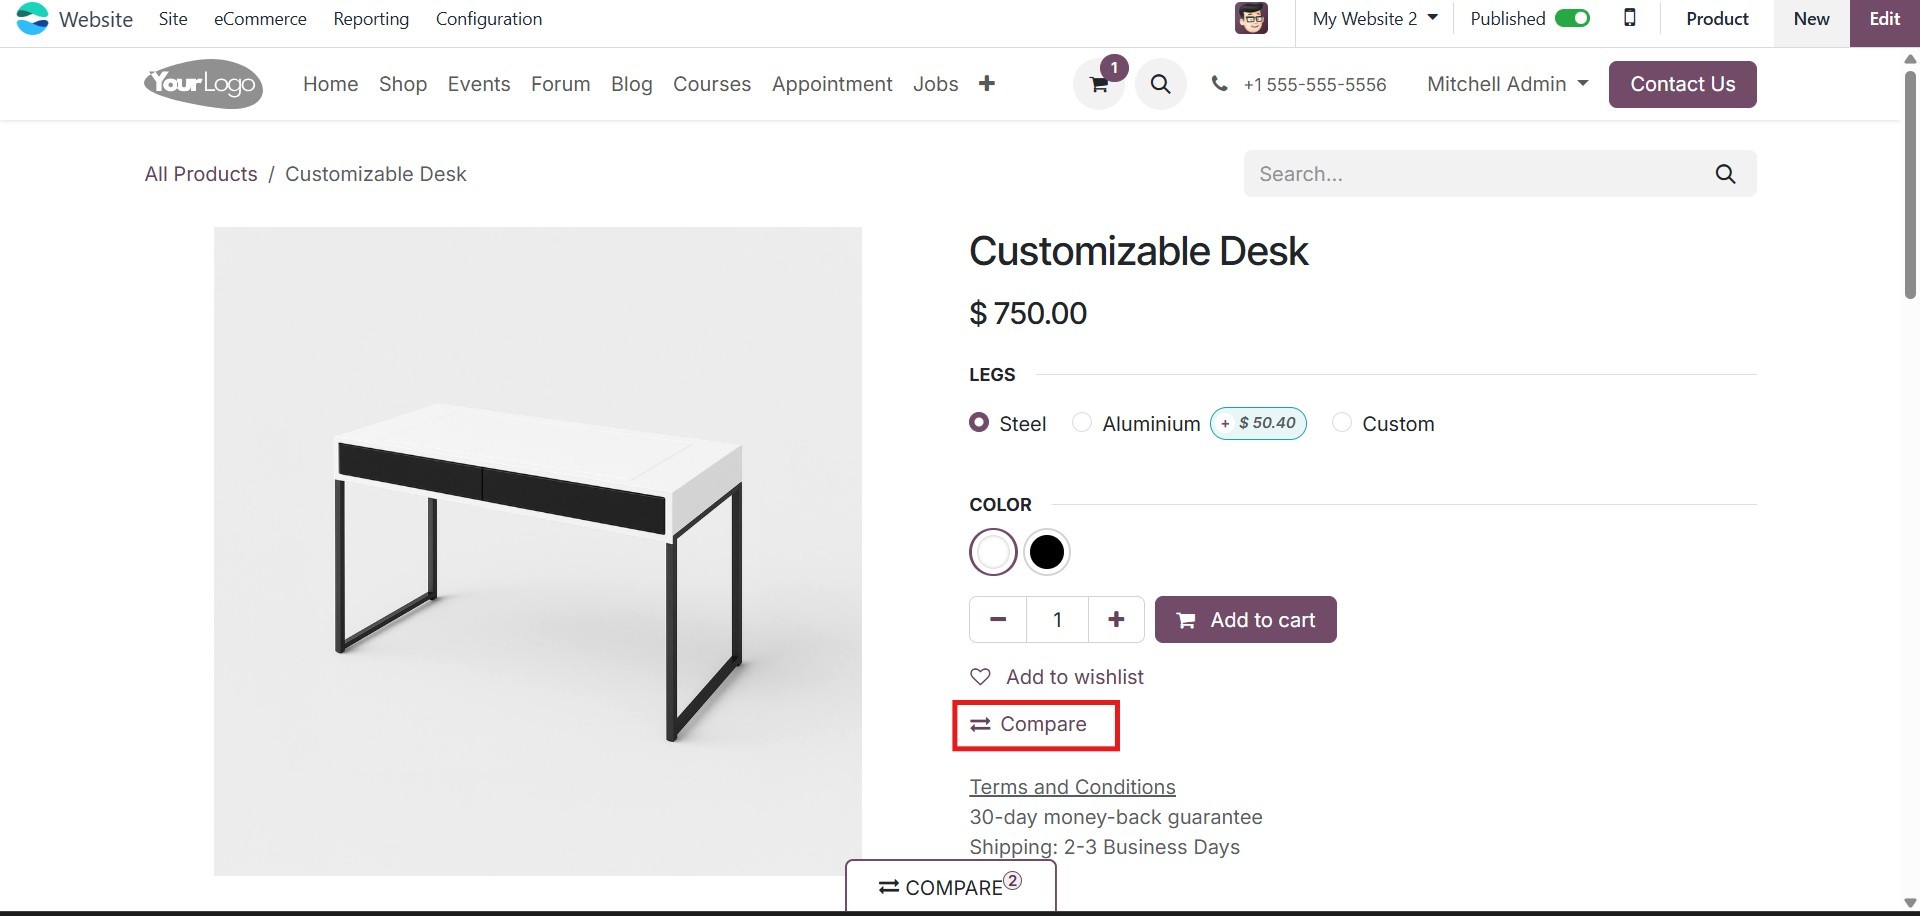
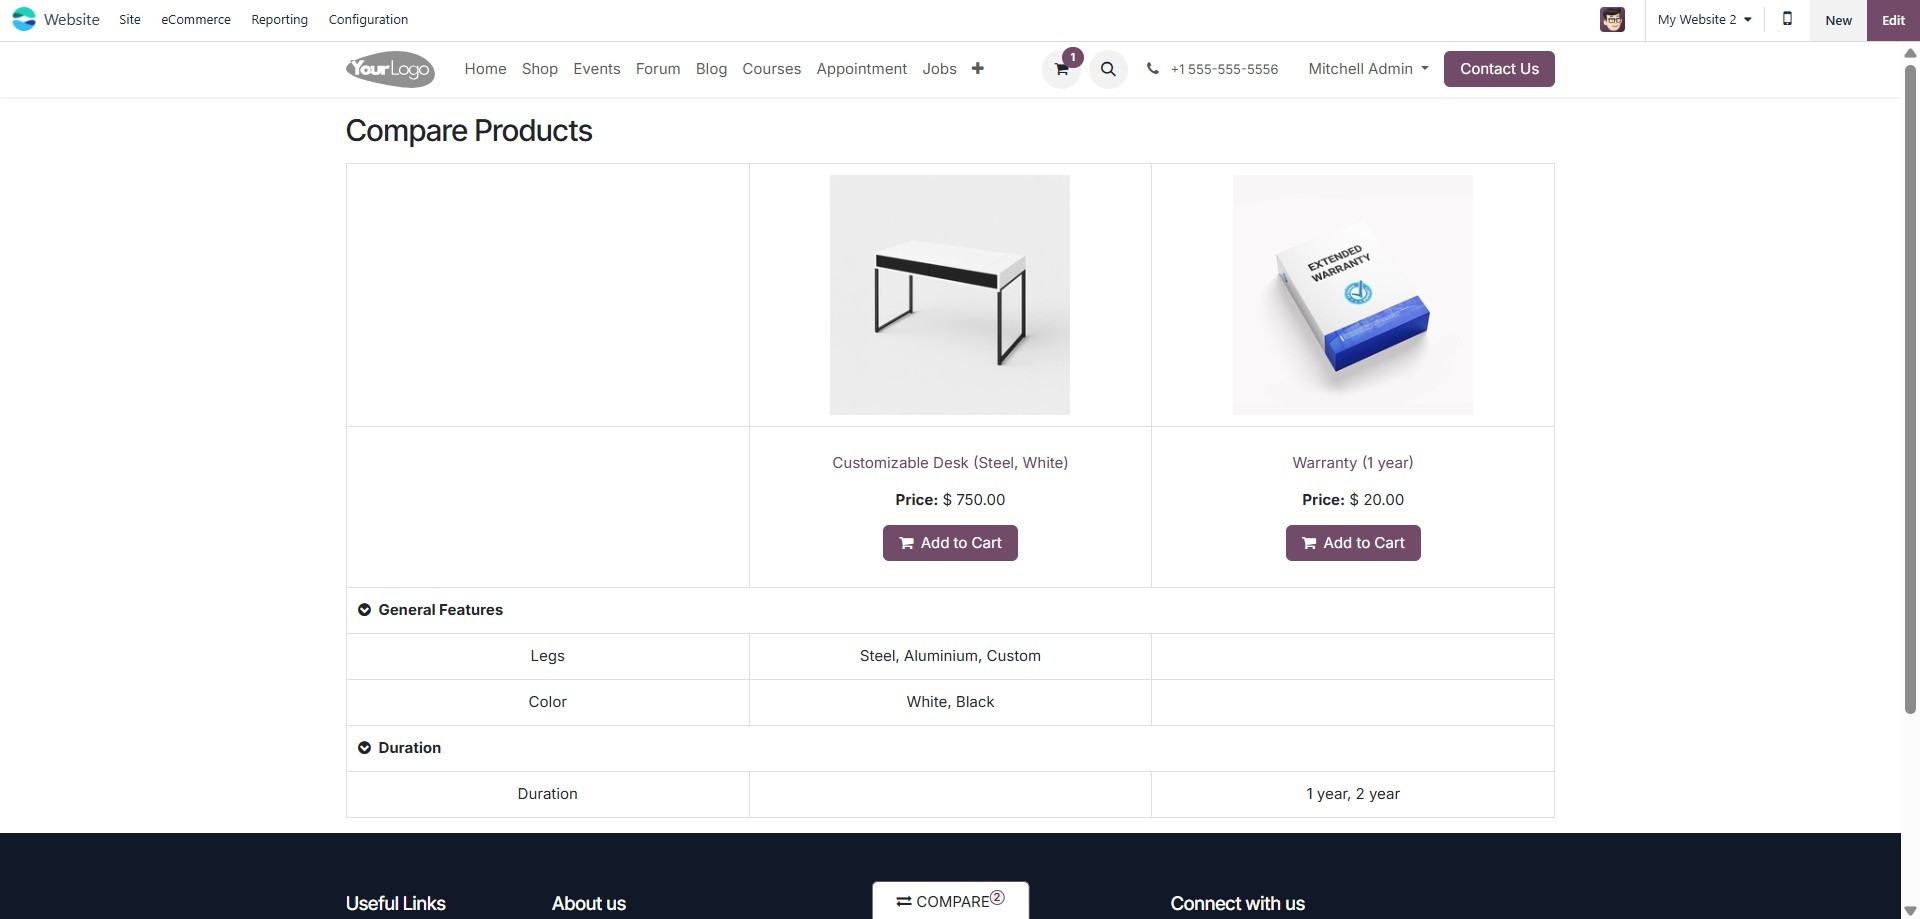
When you click on the Compare
menu, the selected product
will be added to the Compare
Products page. This page
displays a detailed
comparison table showing the
features, prices, and
specifications of each chosen
item, helping customers make
informed purchasing
decisions.
As illustrated in the image
below, a pop-up window will
appear showing all the
products selected for
comparison.
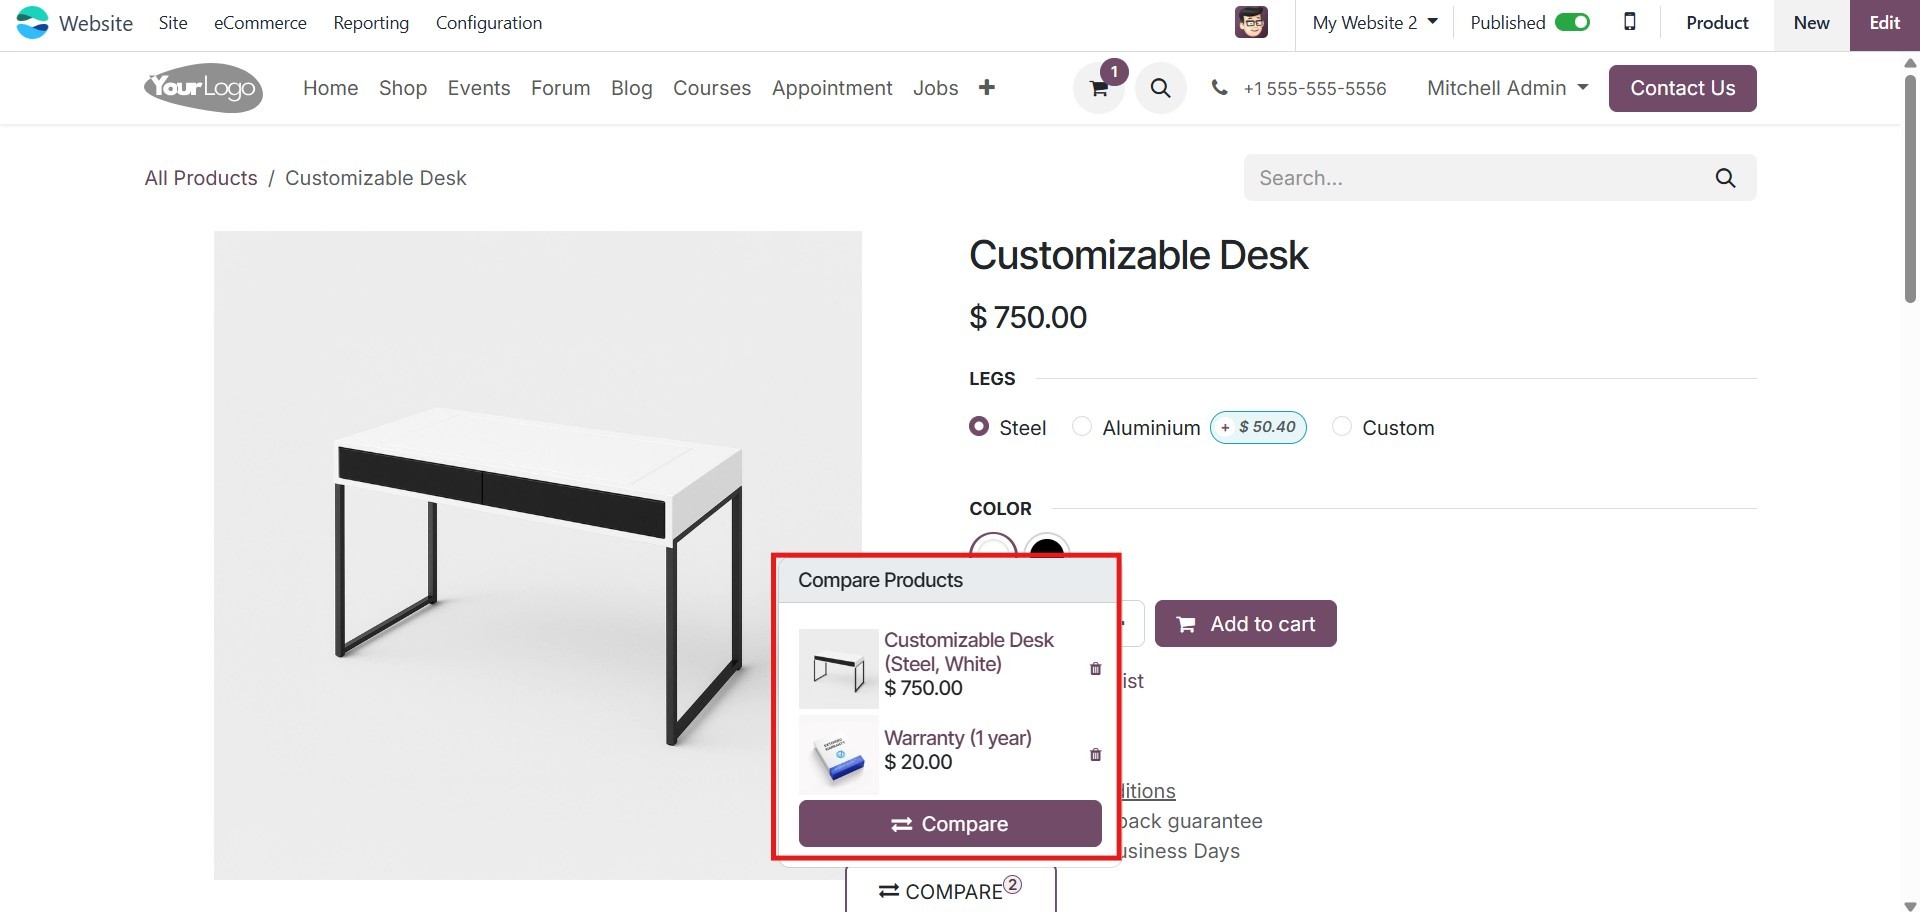
By clicking the Compare button in
this pop-up, you’ll be
directed to a separate page
where each chosen product is
displayed side by side,
allowing for a detailed
comparison of features,
prices, and other attributes.
Now that the product comparison
feature of the Website module
is clear, let's move on to
exploring the Wishlist
functionality.
6.3 Wishlist
The Wishlist feature, introduced
alongside the Product
Comparison tool, enhances the
shopping experience by
allowing customers to save
items they are interested in
for future purchases. This
not only helps users keep
track of products they may
want to buy later but also
serves as an effective
marketing strategy,
encouraging return visits and
potential sales.
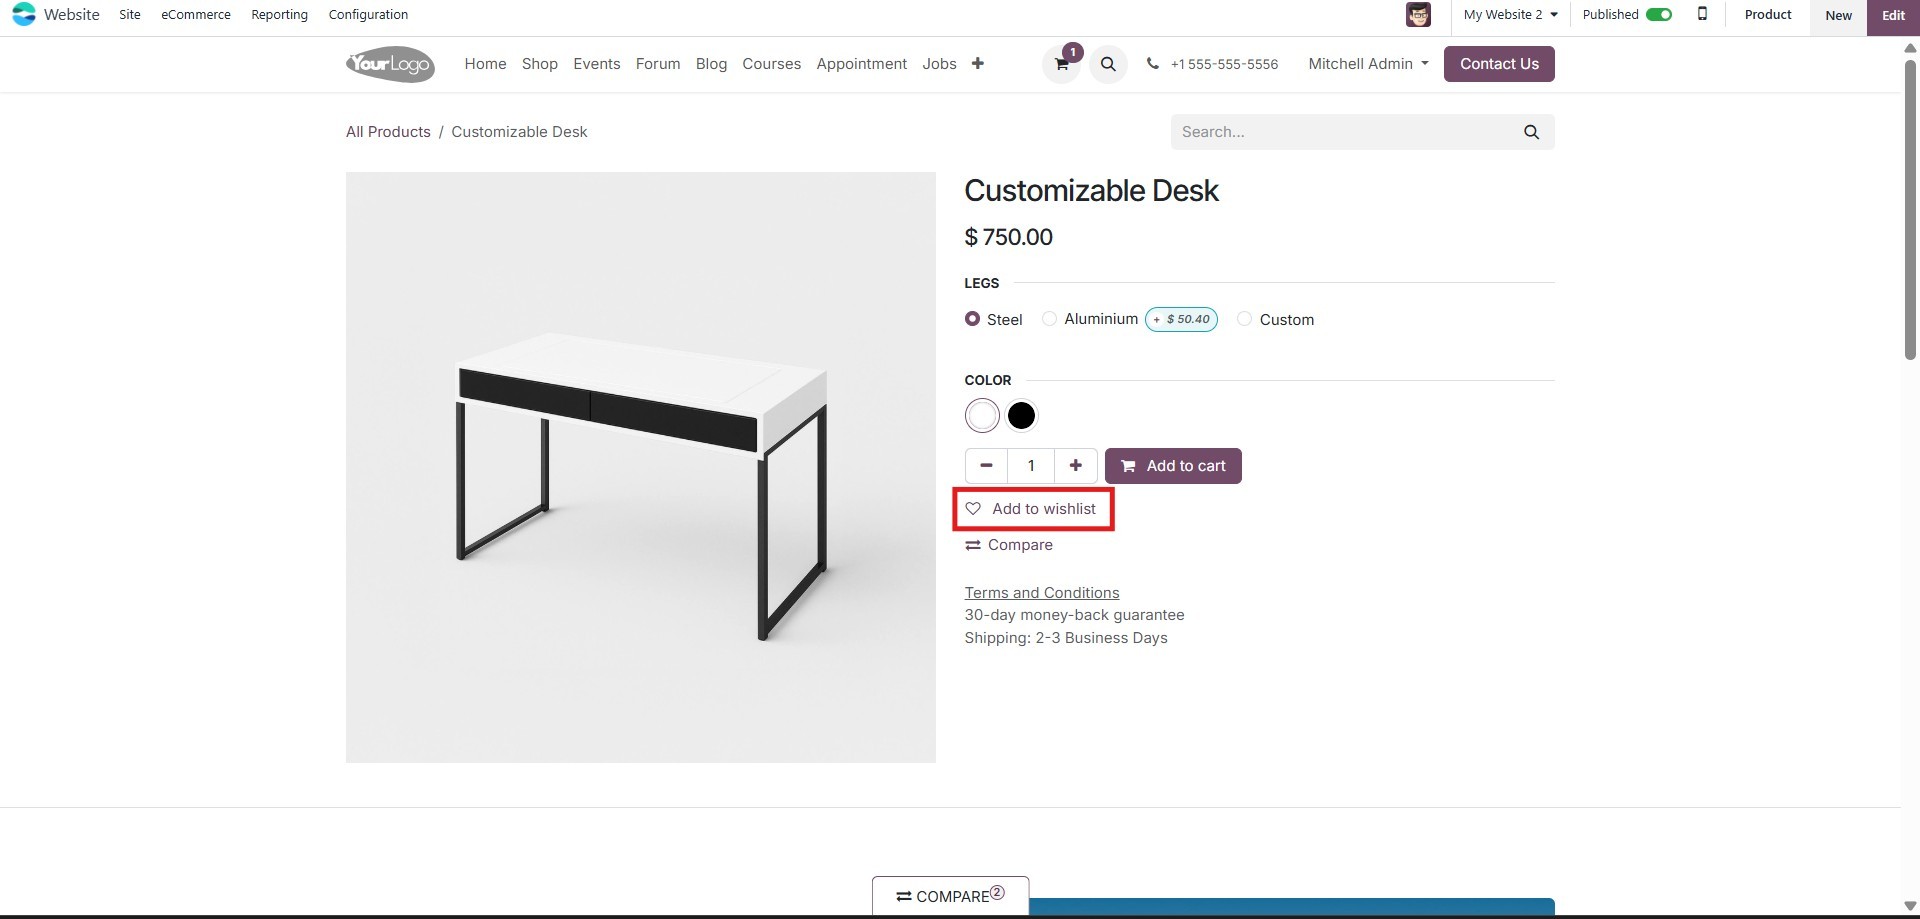
Customers can curate a
personalized list of products
without the pressure to buy
immediately. Each product
description on the website
includes a Wishlist icon,
making it easy to add items
to the list with a single
click.
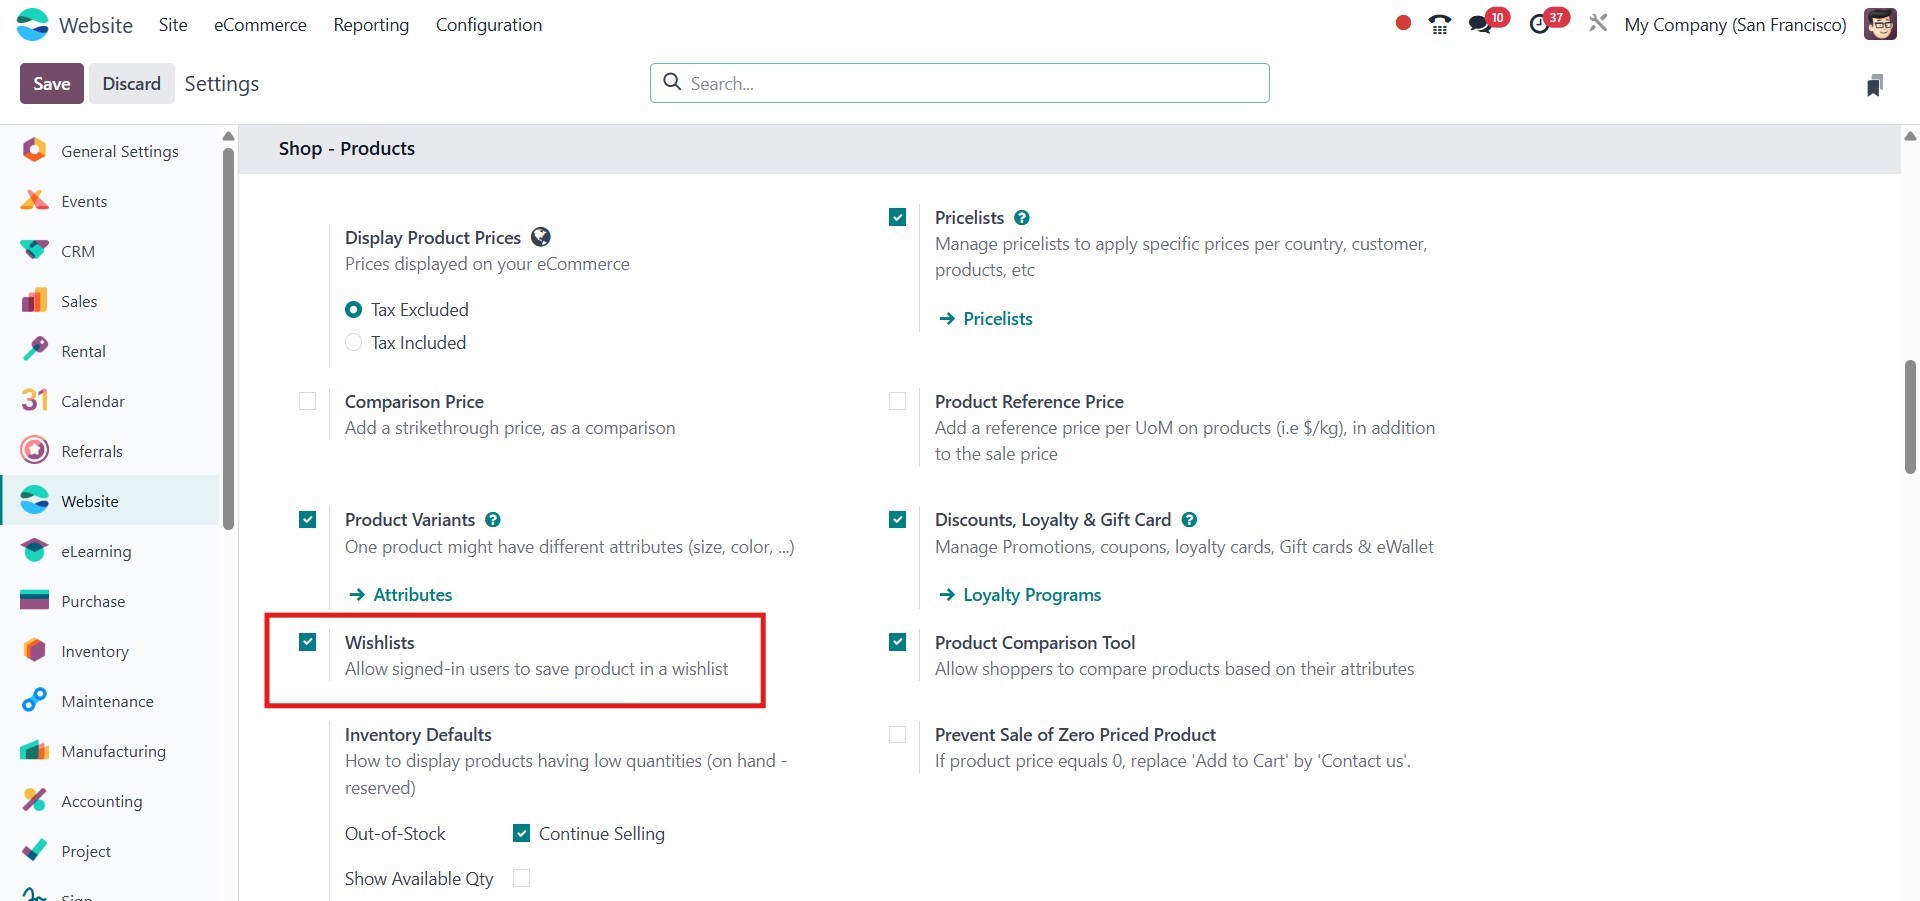
To use this feature, first enable
the Wishlists option from the
Settings menu under the
Configuration section.
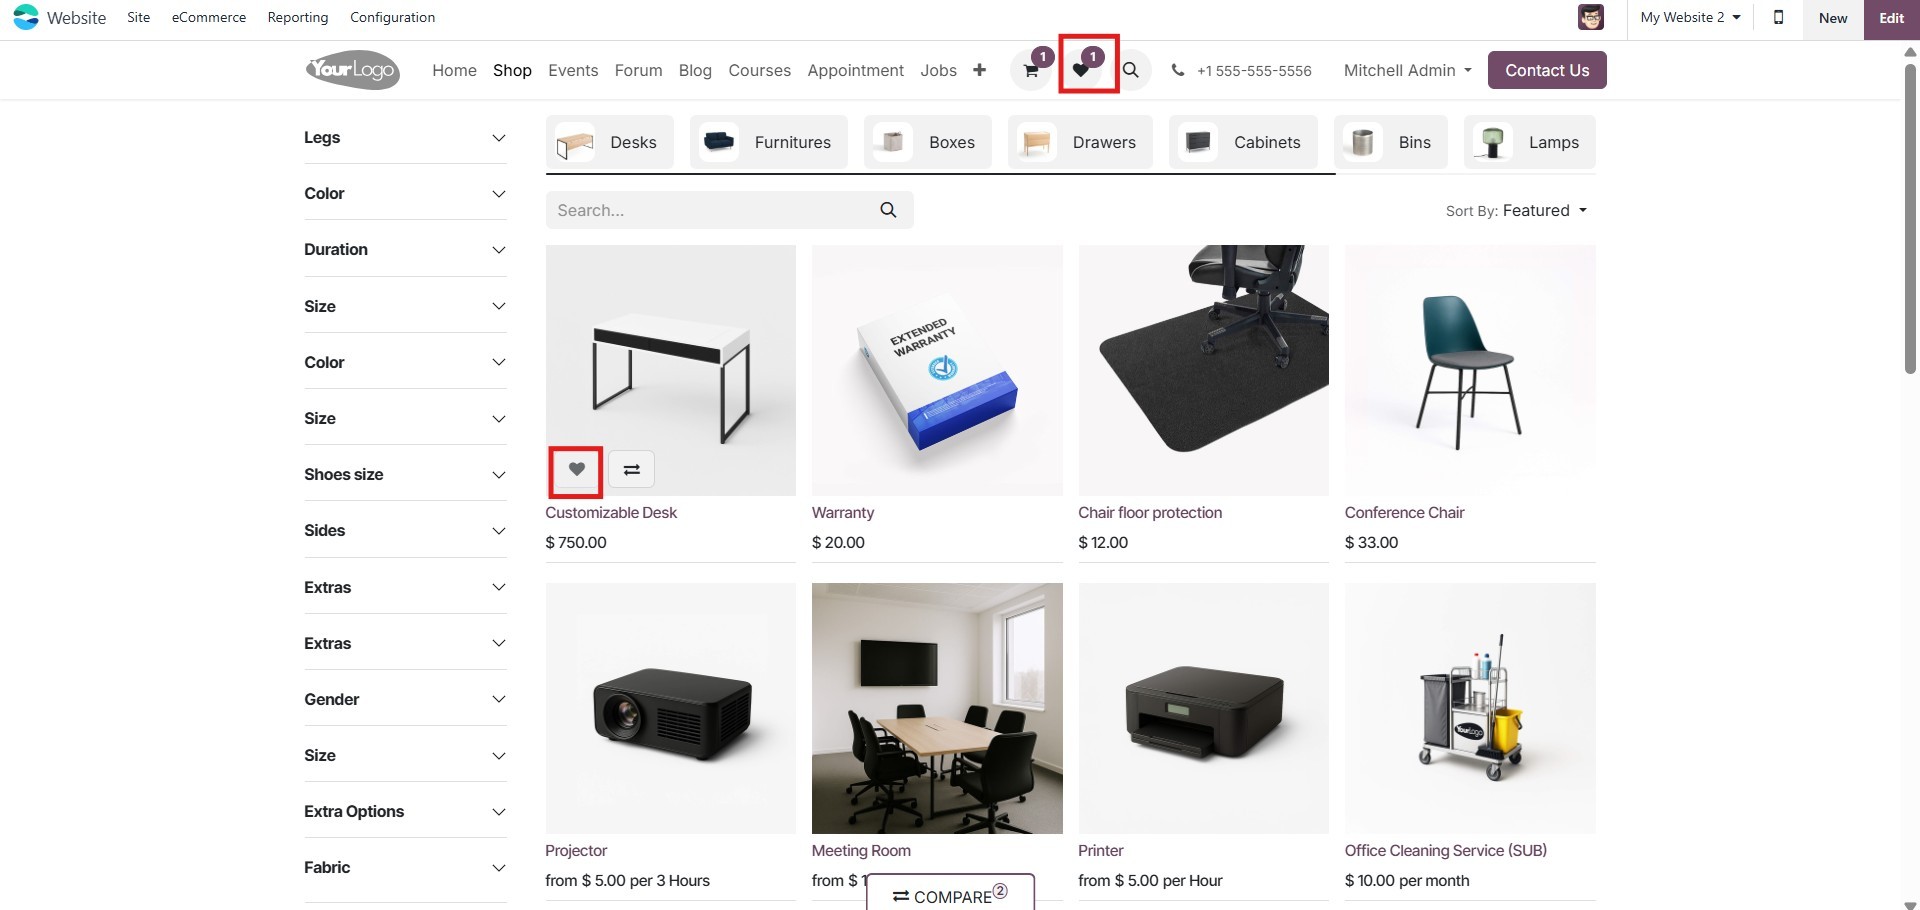
You can add as many items as you
like to your Wishlist. Each
time a product is added, the
heart icon at the top of the
page, which represents the
Wishlist, will reflect the
updated count. This allows
customers to easily keep
track of all the products
they’ve saved for future
purchases, ensuring a smooth
and personalized shopping
experience.
Let's now examine the Cart
option.
6.4 Add to cart
The Add to Cart feature is an
essential element for any
e-commerce business. It
provides shoppers with a
convenient way to temporarily
list the products they intend
to purchase, allowing them to
manage multiple items in a
single transaction. From the
customization menu of the
website, you can enable the
Add to Cart option, which
will display the button
beneath each product on the
website. Additionally, from
the configuration settings,
you must specify the action
to be performed when the
button is clicked.
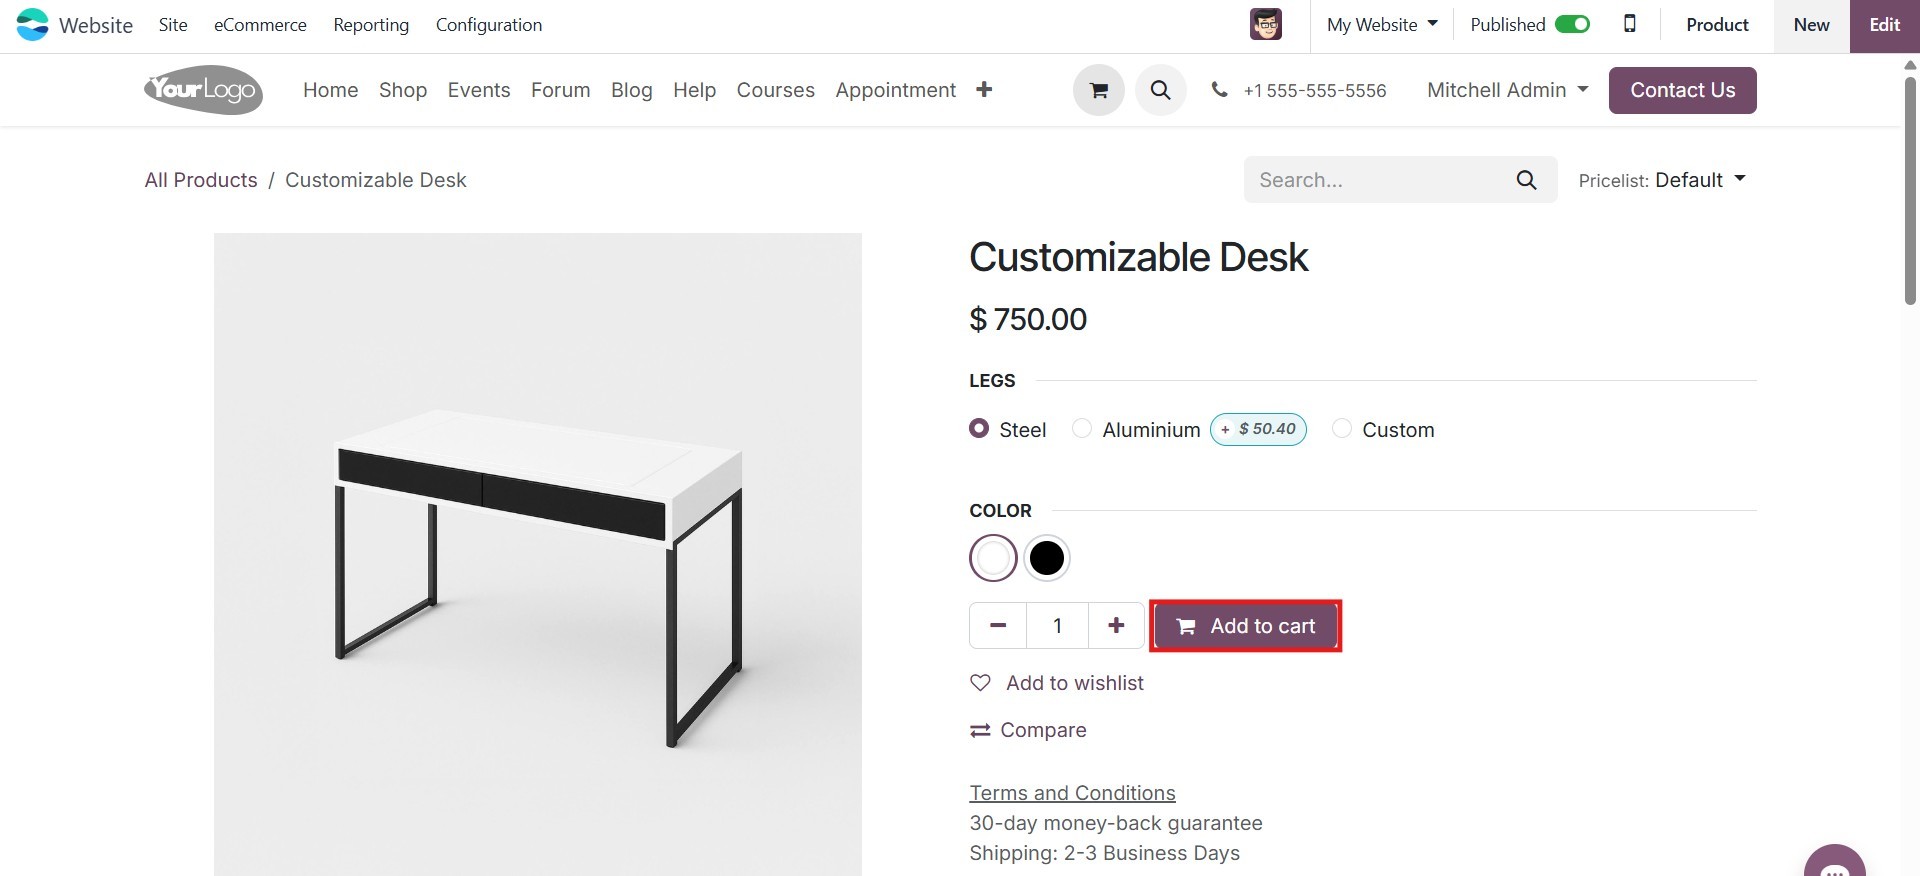
To add an item to your cart,
simply click the Add to Cart
button. Afterward, click the
Cart icon located at the top
of the page to view all the
selected products. This cart
view makes it easy for
customers to review their
selections before proceeding
to checkout.
The cart page can also be
customized as needed. You can
do this by clicking the Edit
button. Features such as
Extra Image allow you to add
multiple images per product
and adjust their layout.
These additional images can
be displayed as thumbnails
either at the bottom or on
the left side of the product
image, enhancing the visual
appeal and providing
customers with a better
understanding of the product.
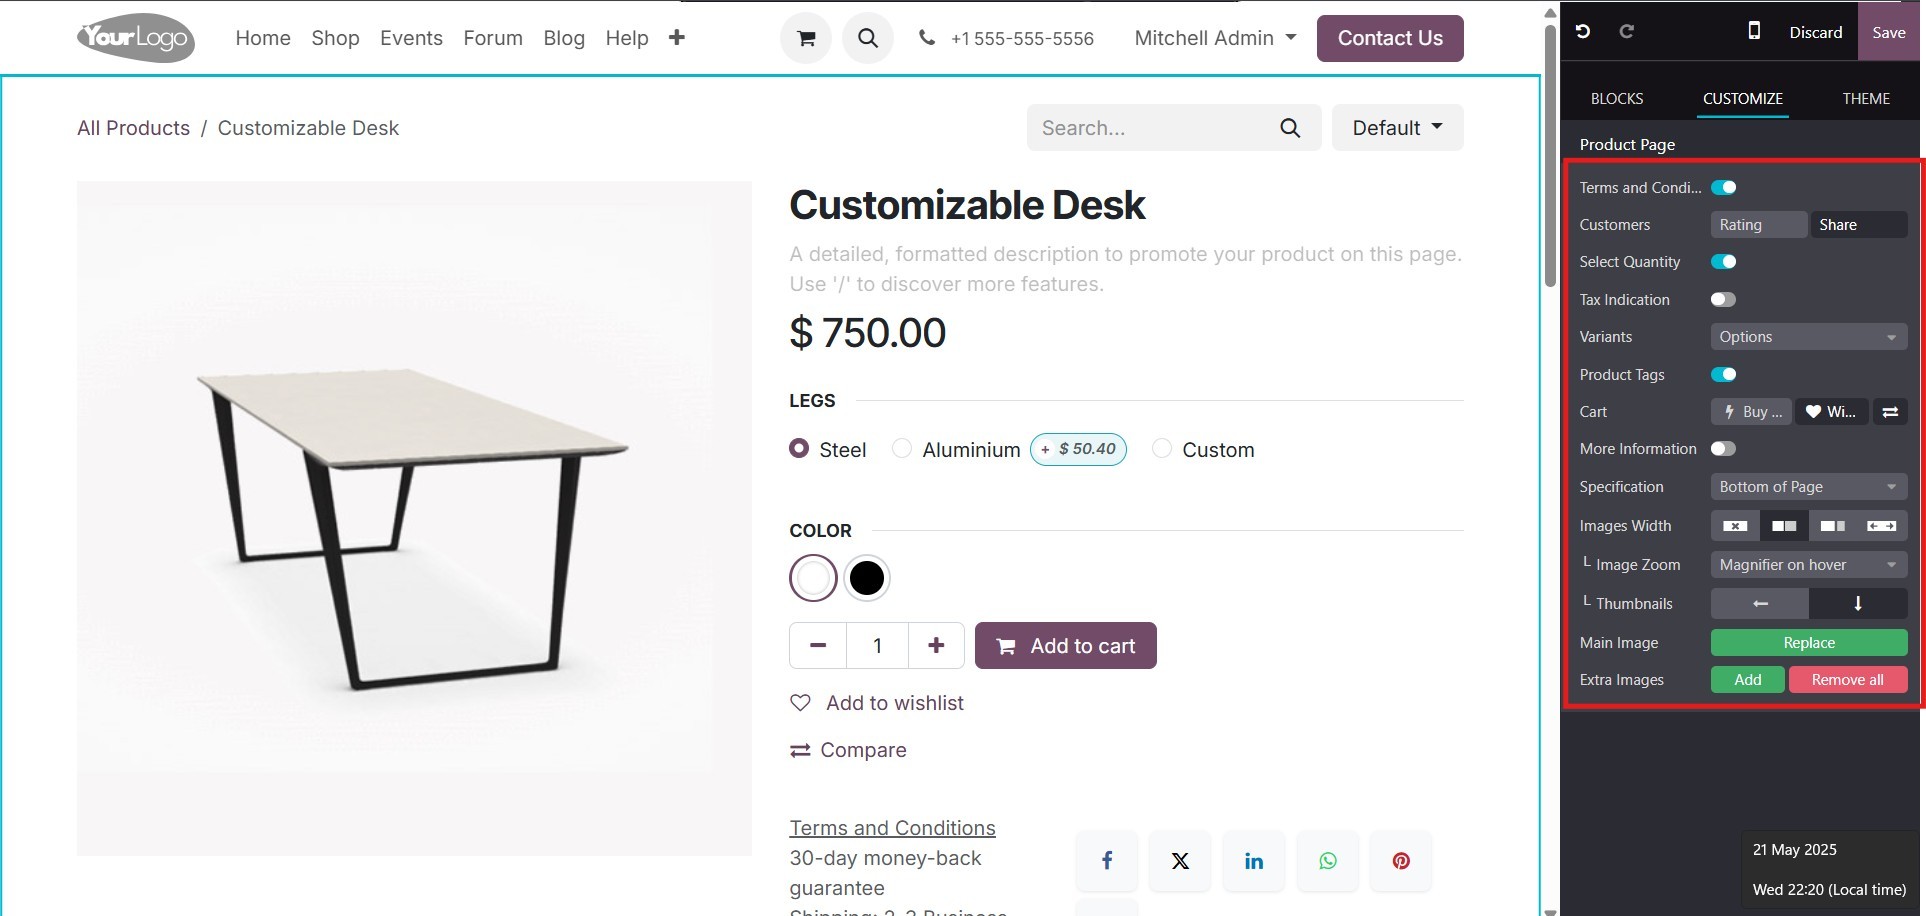
The product page in your
eCommerce website can also be
customized using various
options available under the
Customize tab. You can enable
the Terms and Conditions
checkbox to ensure customers
agree to your policies before
purchasing. The Customers
section allows you to display
customer ratings and social
media sharing buttons to help
promote your products.
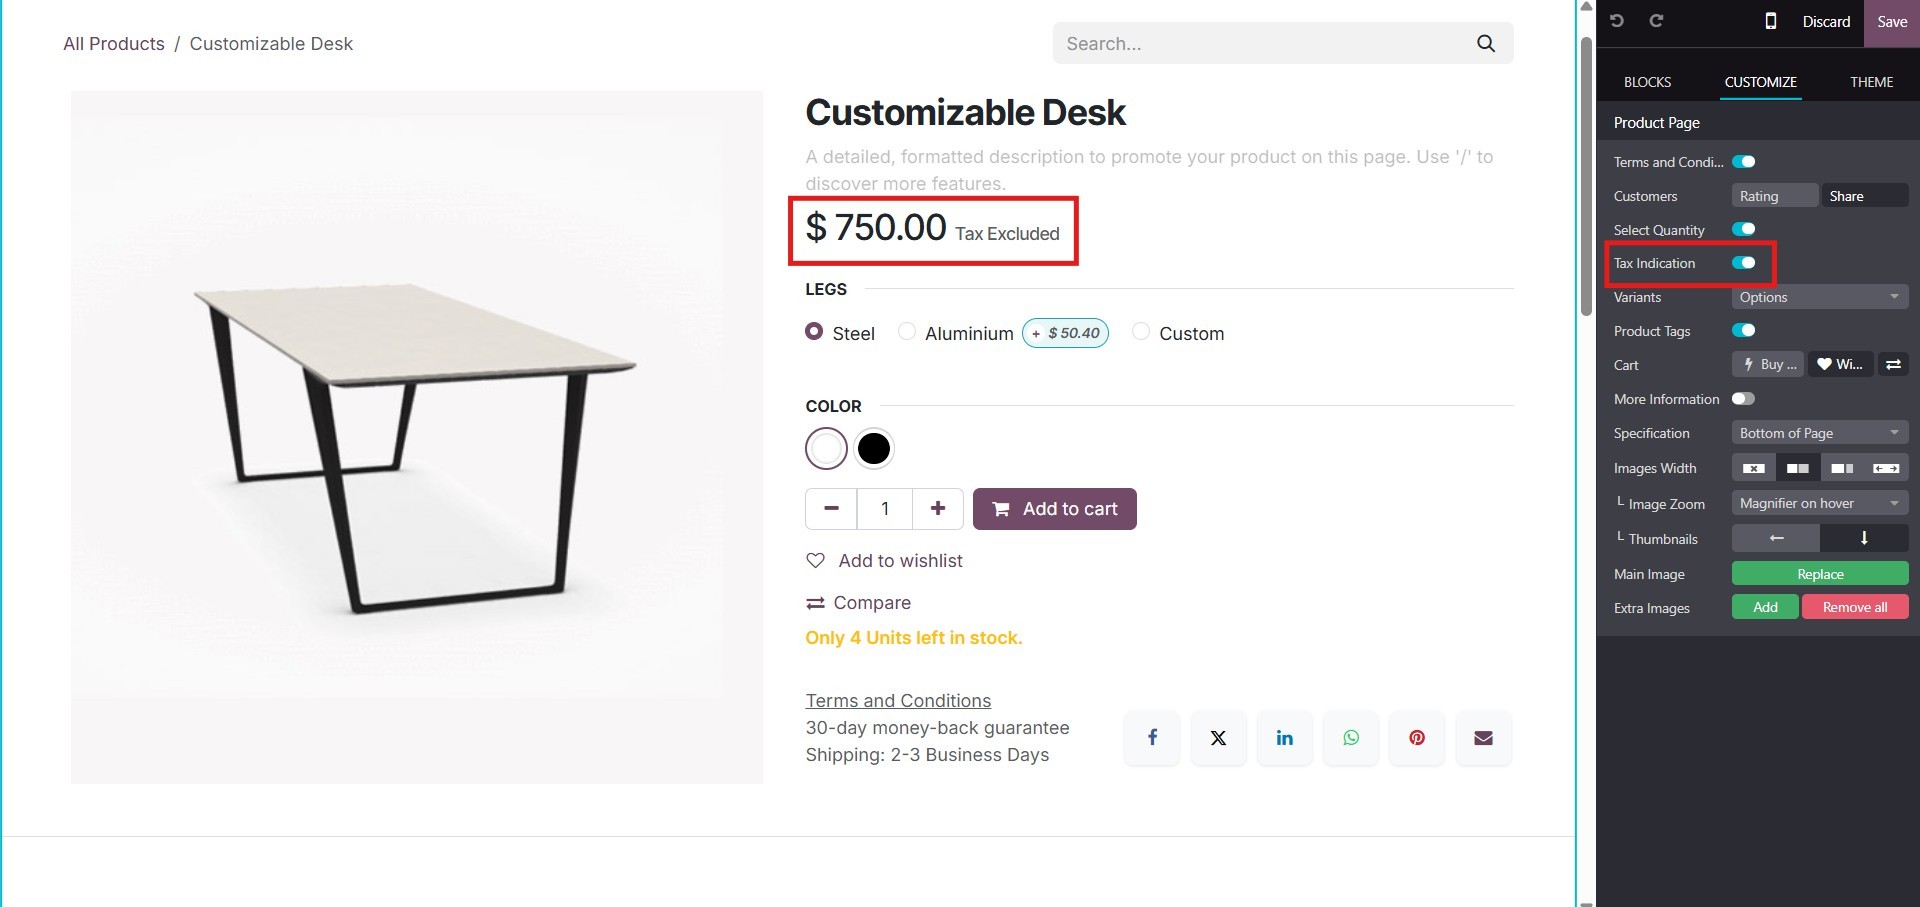
Enabling the Select Quantity
option allows users to choose
how many units of a product
they want to buy, while Tax
Indication can be turned on
to show whether the product
price includes or excludes
taxes.
If your products have variations
like size or color, the
Variants option helps display
these choices as drop-downs
or selection buttons. You can
also enable Product Tags to
make it easier for users to
find related products through
tags. The Cart section gives
the option to display a Buy
Now button and an Add to
Wishlist button, offering
more flexibility during the
purchase process. The More
Information toggle shows
additional product details
that help customers better
understand what they are
buying.
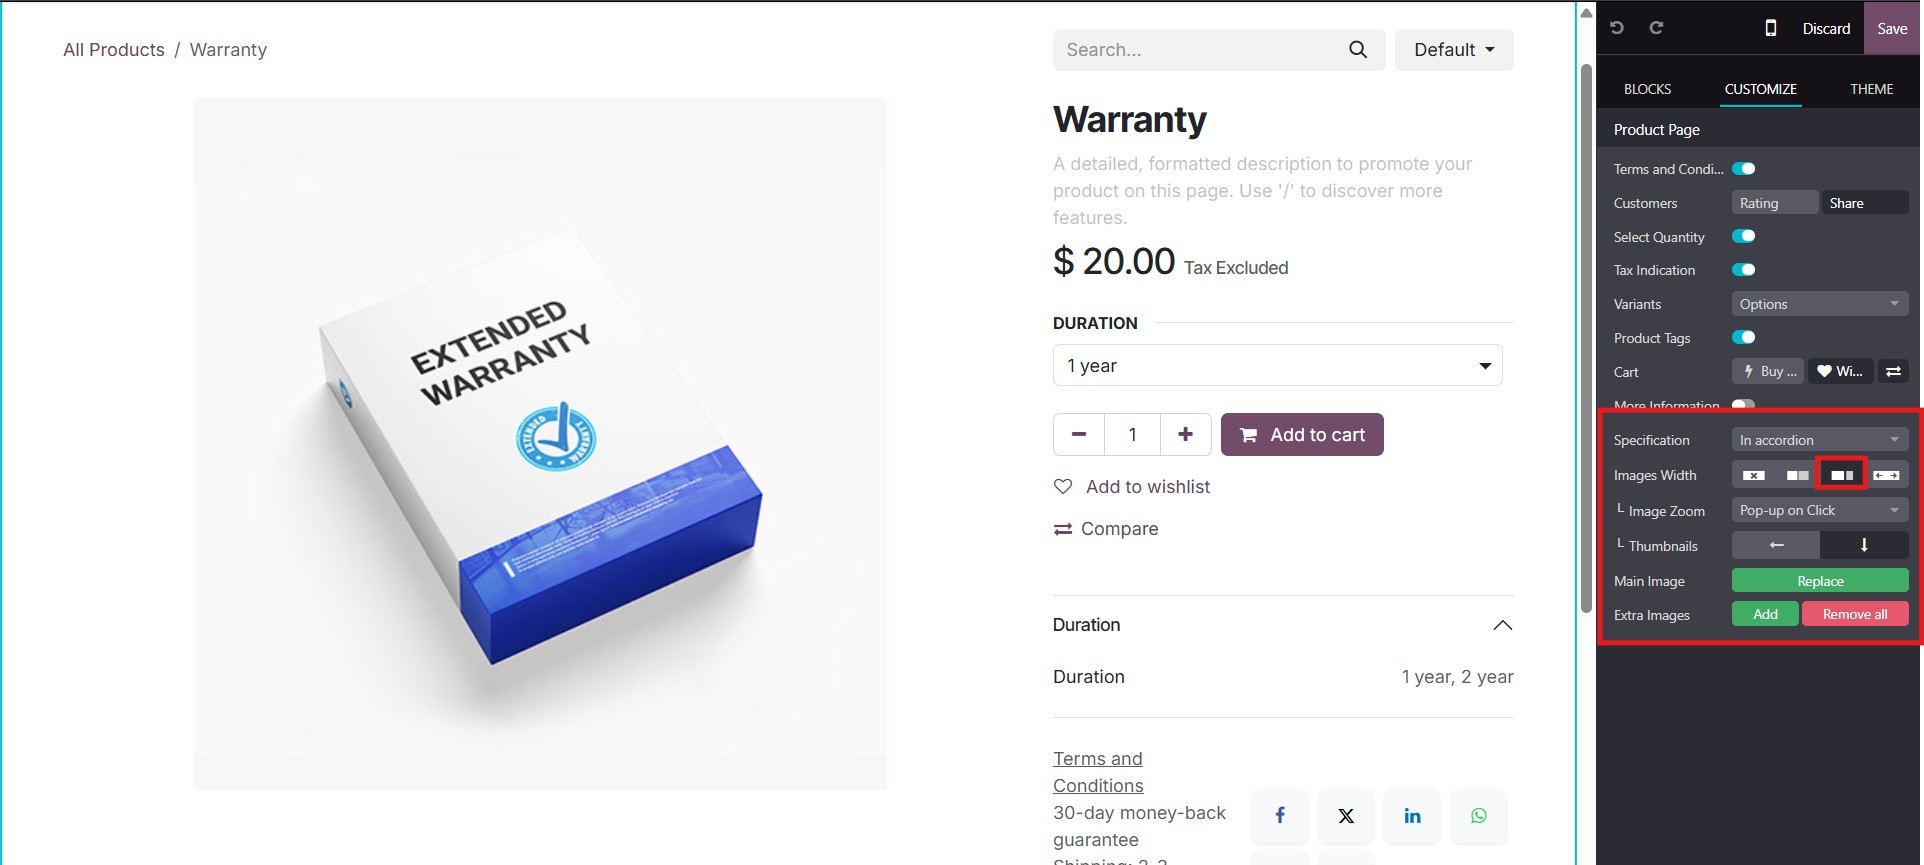
You can choose where to place the
product specifications,
either at the bottom or side
of the page, using the
Specification setting. The
Images Width option lets you
adjust how wide the product
images appear on the screen.
For a better shopping
experience, you can enable
Image Zoom to allow users to
see a closer view of the
product when they hover over
it. The Thumbnails setting
lets you arrange the
additional product images
either below or to the left
of the main image. To manage
product visuals, use the Main
Image option to replace the
primary image and the Extra
Images option to add or
remove more product pictures.
These customizations improve
the appearance of your
product pages and help
customers make informed
buying decisions.
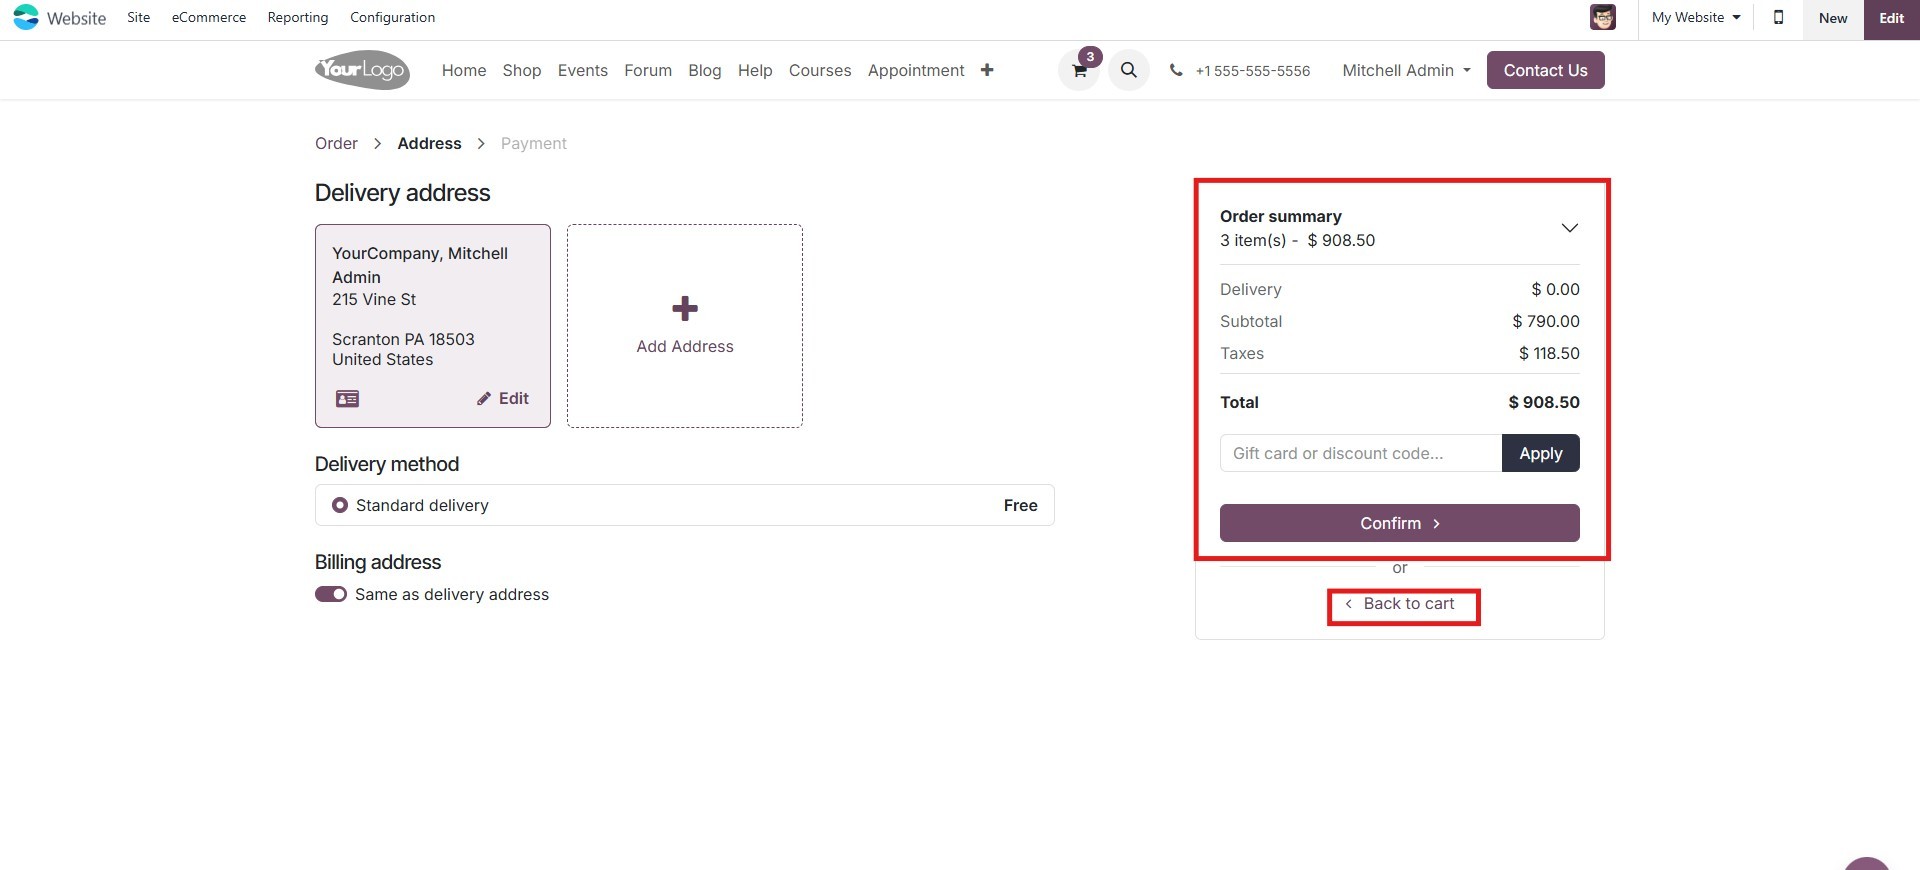
As illustrated in the cart page
view, all the items added by
the customer are clearly
displayed. This view includes
essential product details
along with any applicable
discounts or promotional
offers. If the main product
is associated with optional
items, suggested additions
that enhance or complement
the primary product will also
be shown below the product
description, providing
customers with the option to
include them in the order.
To manage the cart contents,
users can click the Remove
icon to remove an item or use
the plus (+) or minus (−)
buttons to adjust the
quantity of a product. You
can also use the save for
later to buy it later. The
pricing details, such as
Subtotal, Taxes, Total Price,
and any applied Promo Codes,
are also visible in the same
window. These details can be
viewed by scrolling down
within the cart window.
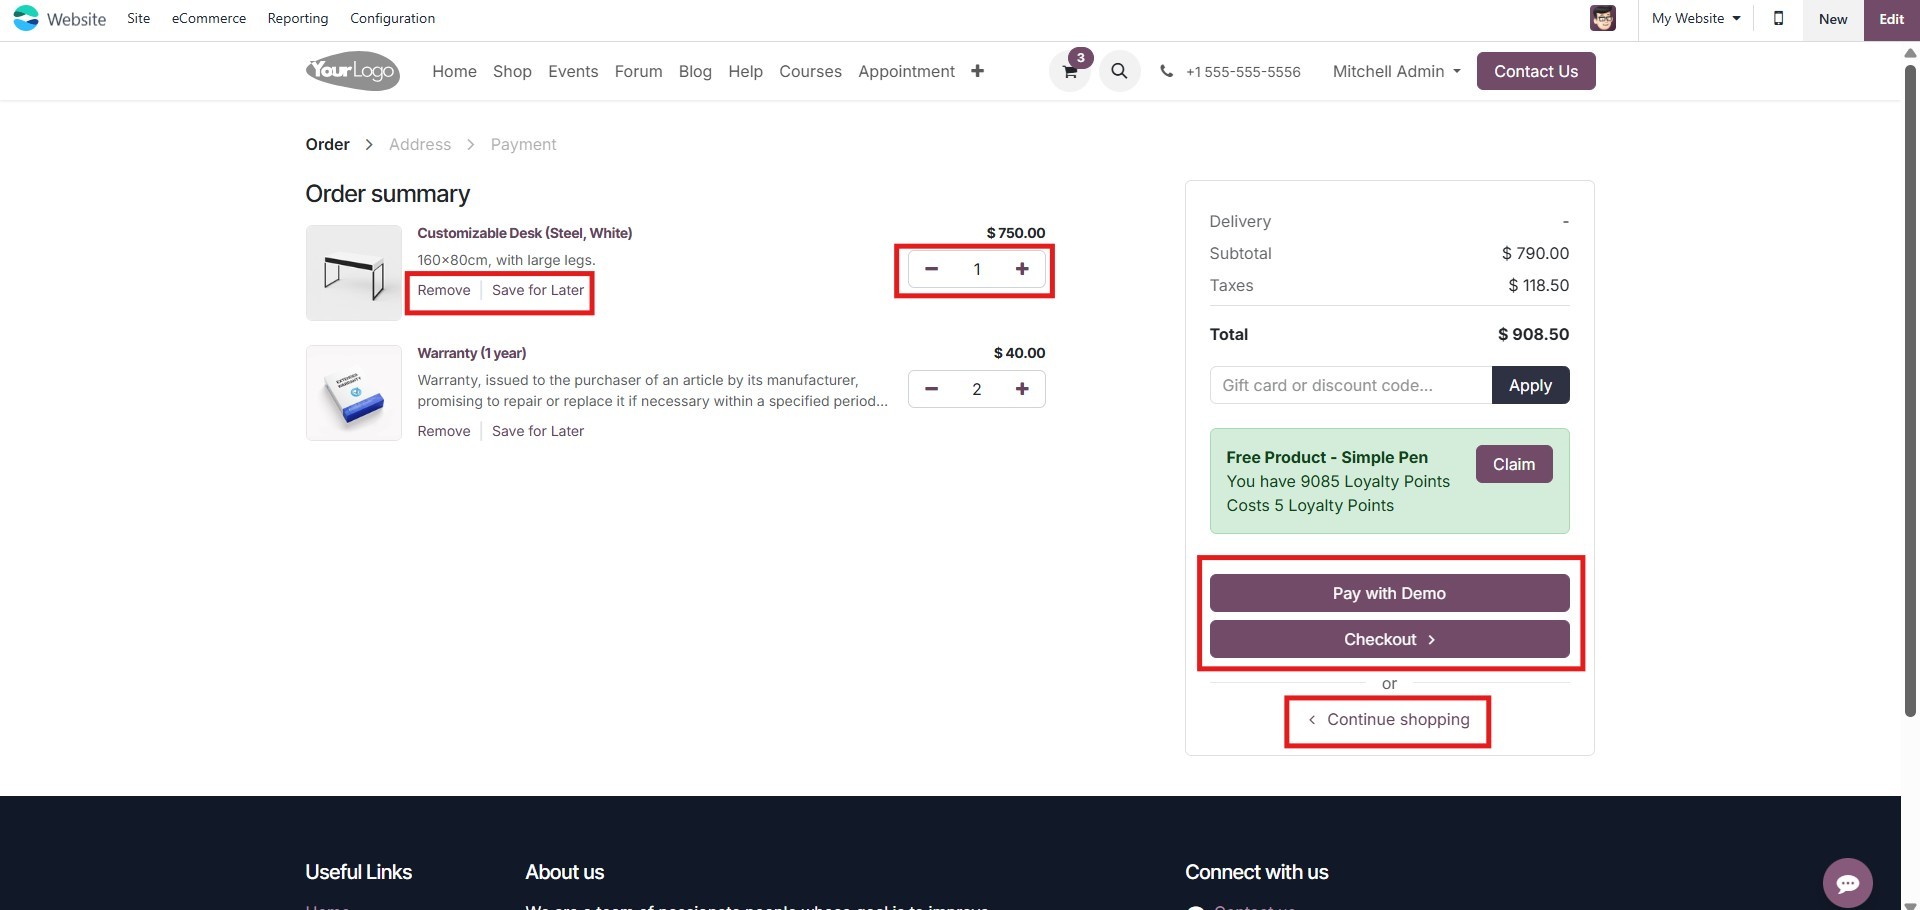
If the customer wishes to
continue browsing for more
products, the "Continue
Shopping" button, located at
the bottom left corner of the
page, can be used. This
action will redirect them
back to the product listing
page. Once all items have
been reviewed and finalized,
the customer can click the
"Process Checkout" button,
located at the top right of
the page, to proceed. This
will lead to the next step,
where the user can confirm
order details, review invoice
information, and provide or
confirm payment details and
delivery address to complete
the transaction.
The payment page offers various
options, including wire
transfers and credit card
payments. If you choose to
pay by credit card, you can
fill in the required details
directly in the provided
fields. At the bottom of the
window, you’ll find two
buttons: Pay Now and Return
to Cart. After verifying the
entered information, click
Pay Now to complete the
transaction. If the payment
is successful, the next
window will display your
payment confirmation details.
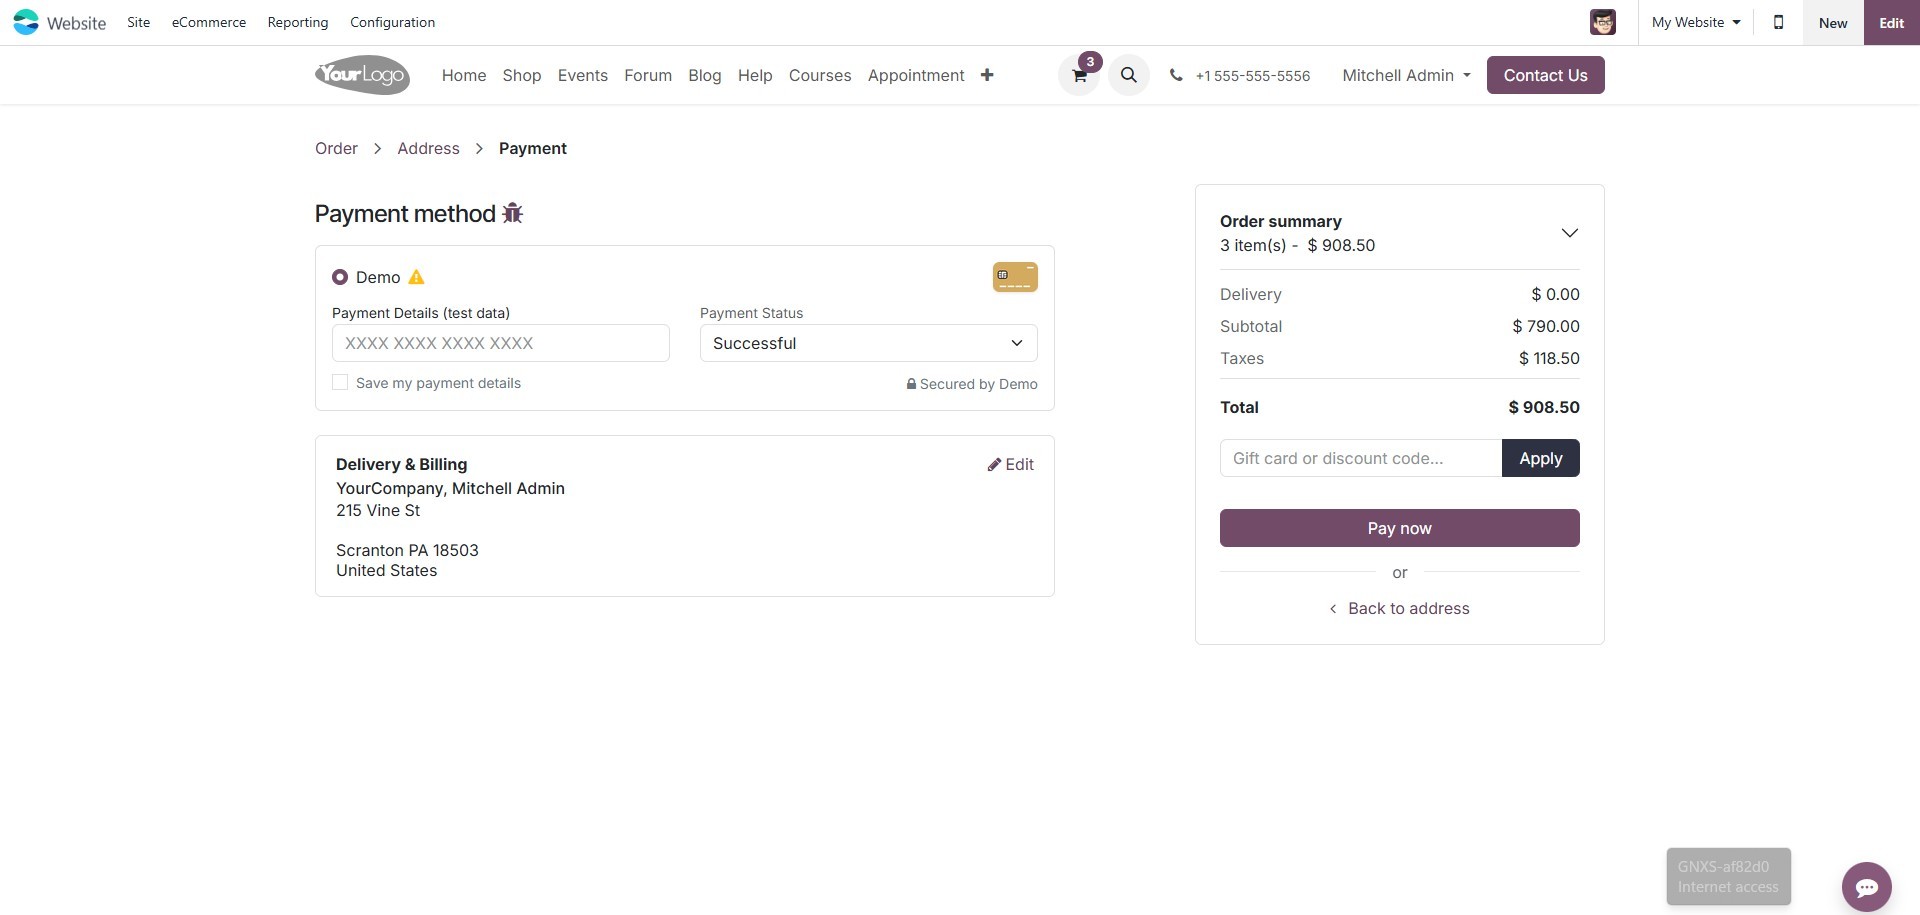
The platform also supports
integration with multiple
payment gateways, which can
be installed and configured
as needed. These gateways
correspond to the available
payment acquirers defined in
the backend, allowing
businesses to tailor payment
methods according to customer
preferences.
Once the Add to Cart
functionality and payment
processing have been explored
in detail, the next step is
to take a closer look at the
Settings menu within the
eCommerce module, which
governs various aspects of
website behavior and
functionality.