1. Course
Management
The Odoo 18 eLearning module has
made managing these eLearning
really easy.
1.1 Courses
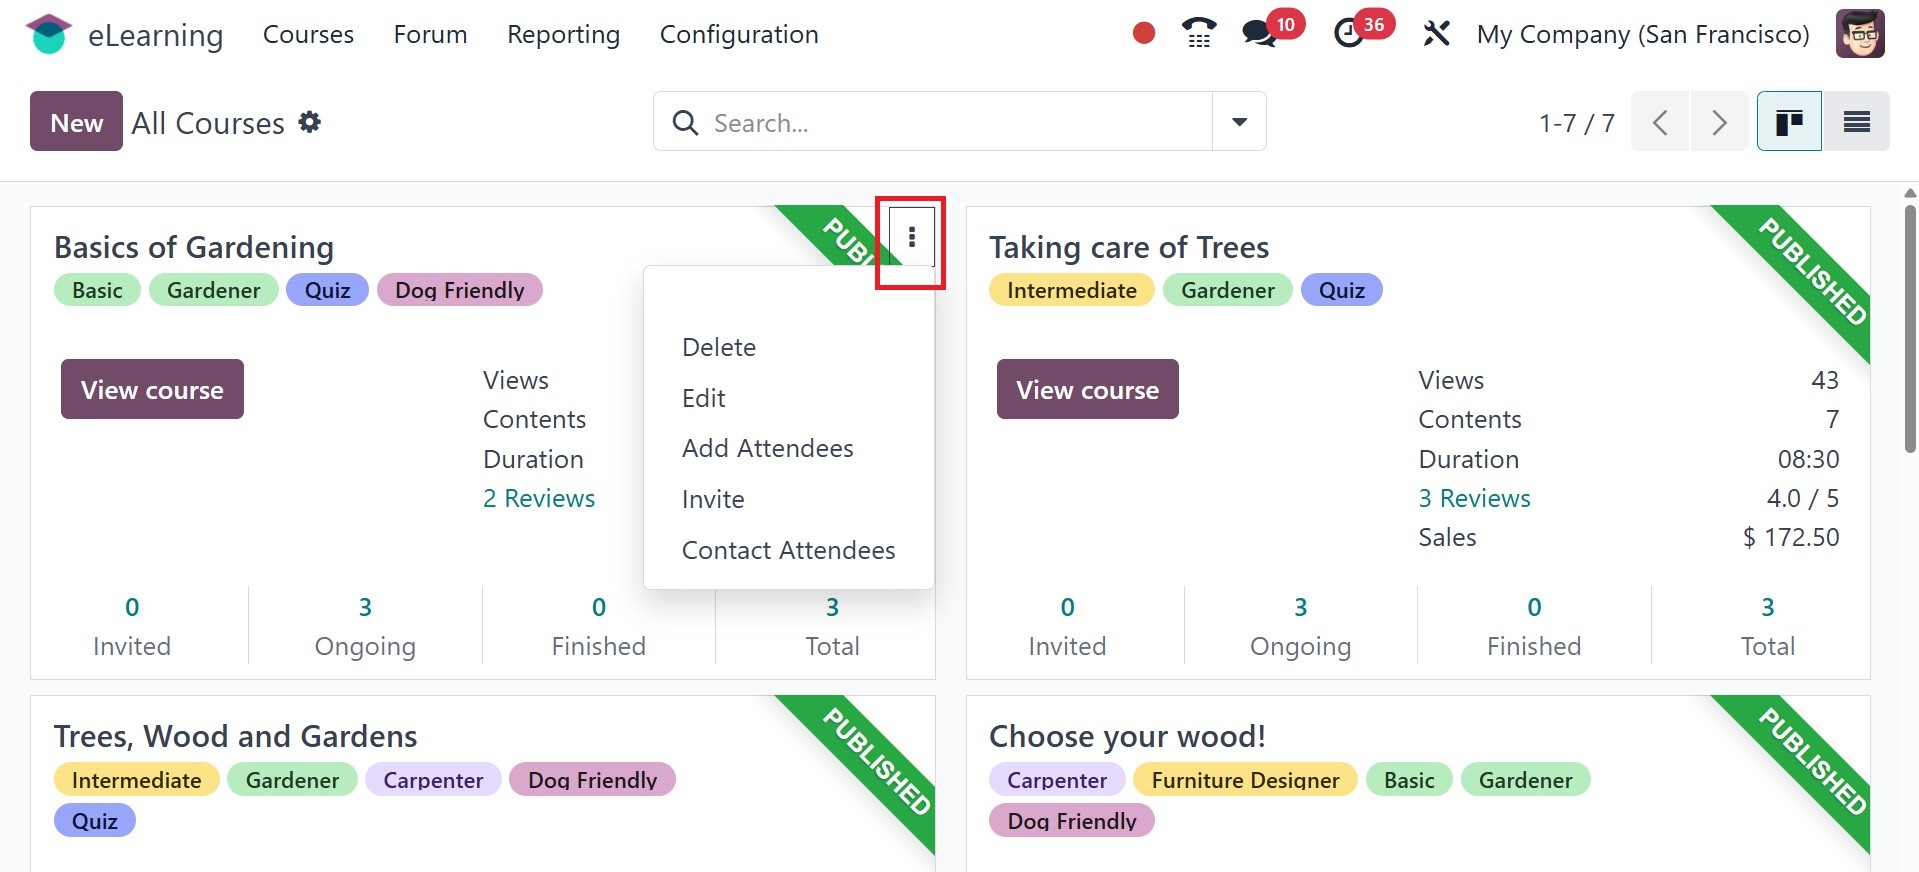
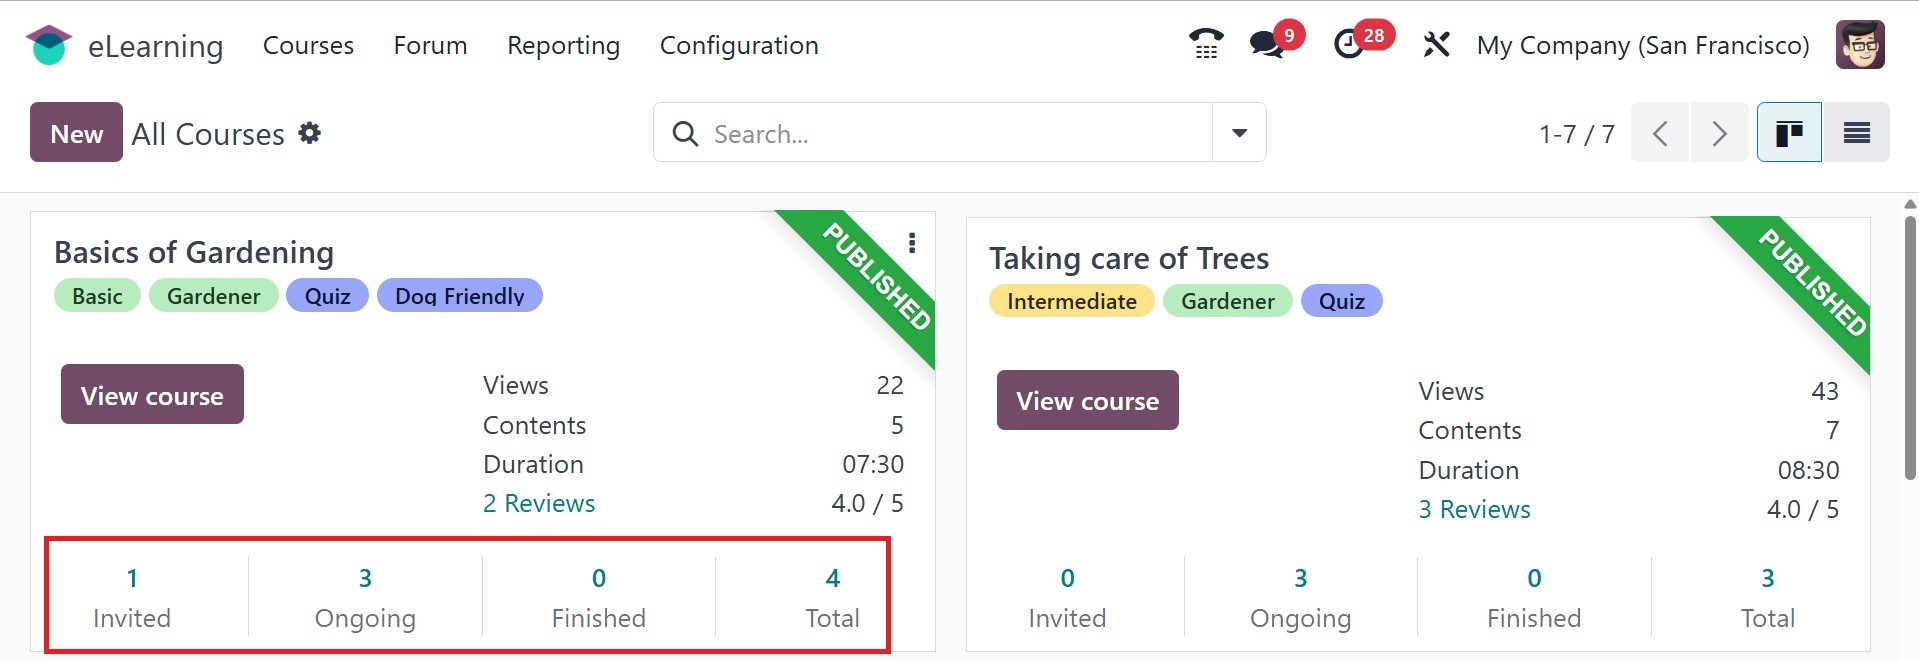
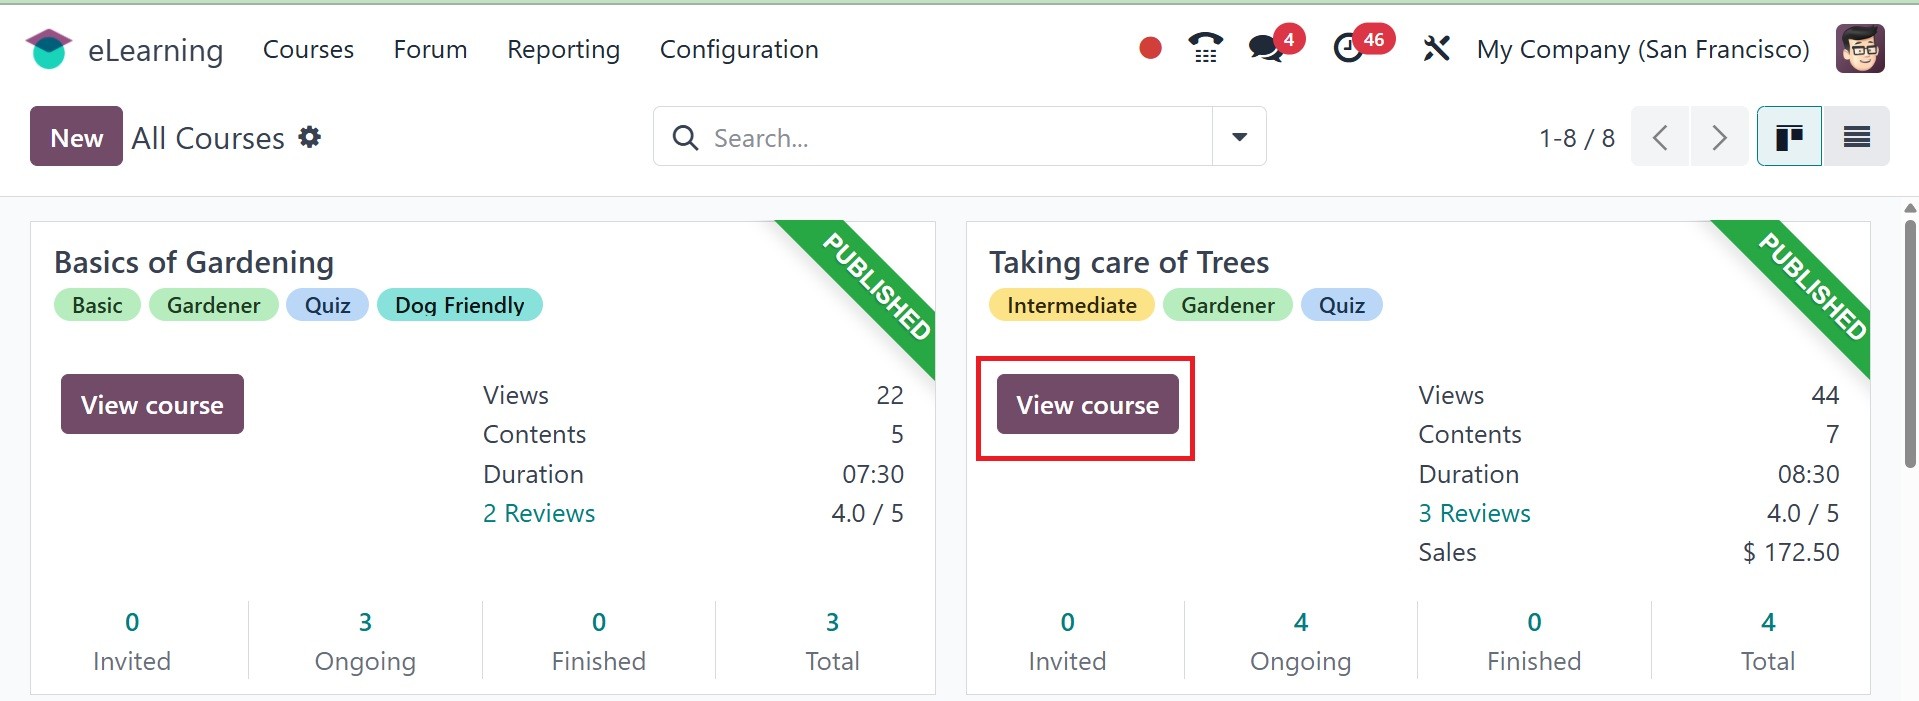
The dashboard view is displayed
in the screenshot above. All
of the developed courses are
shown on the dashboard. The
view shows details about the
course, such as the duration,
contents, total views, and
user information. On the
dashboard, you can know the
number of invited, ongoing,
finished, and the total as
well. You can also see the
banners published on the
page.
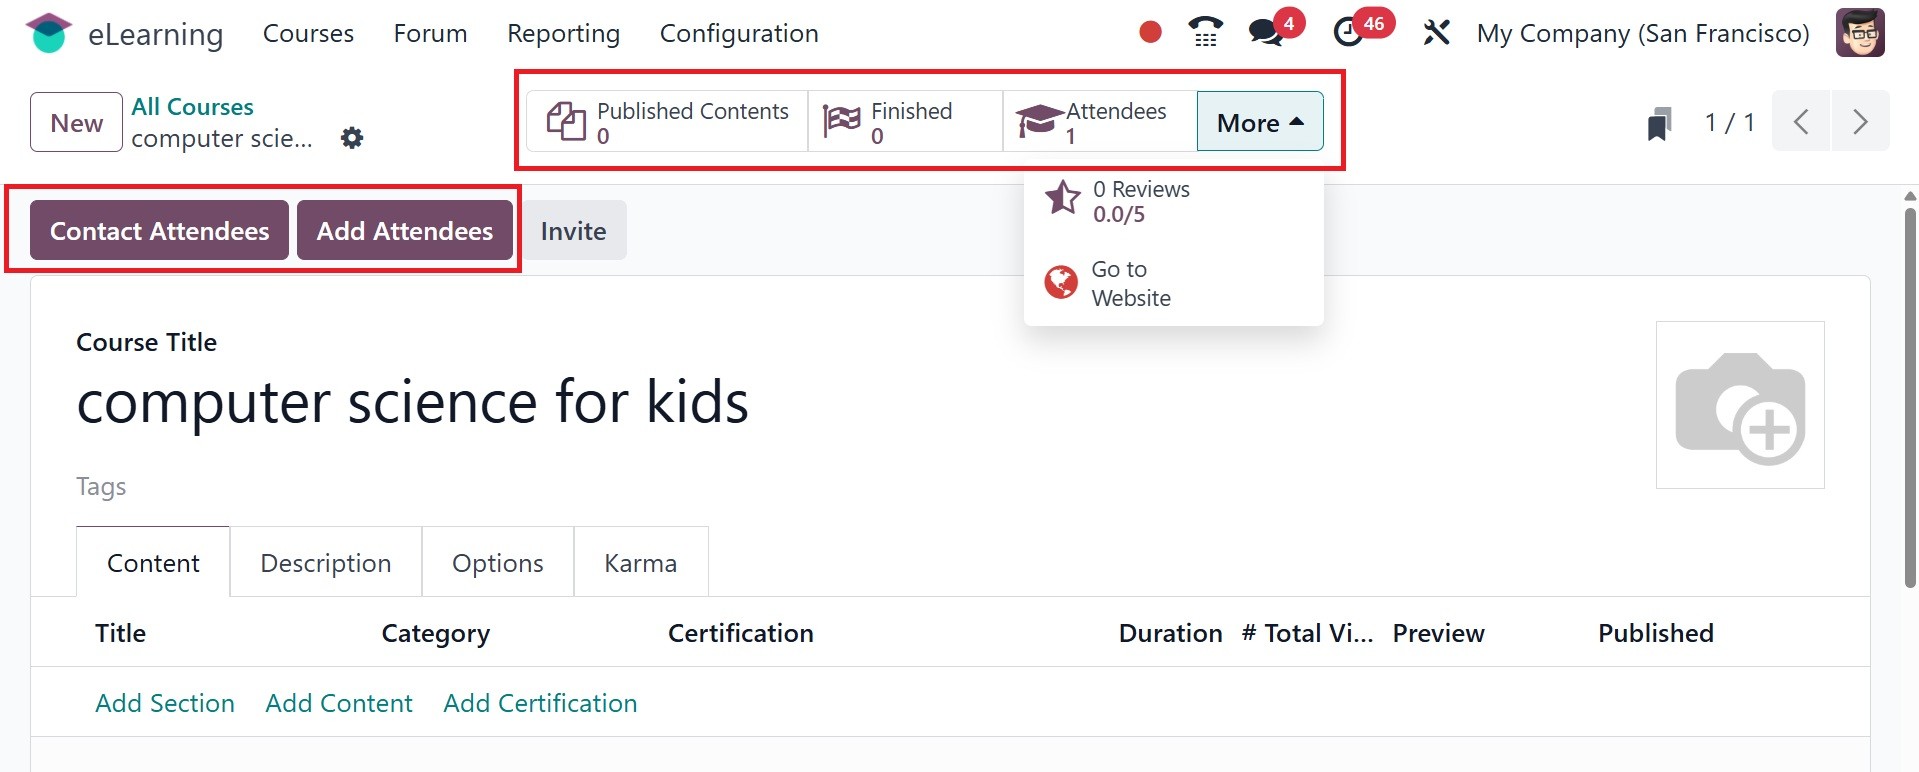
By clicking the three dots on the
right side of the screen, you
may access the buttons to
Delete, Edit, Add Attendees,
Invite, and Contact
Attendees. After that, you
may select the View Course
option to see the generated
course.
The List View for the course is
also accessible. The list
view shows information such
as Name, Responsible,
Website, Course Type, Show
Course To, Published, and so
on.
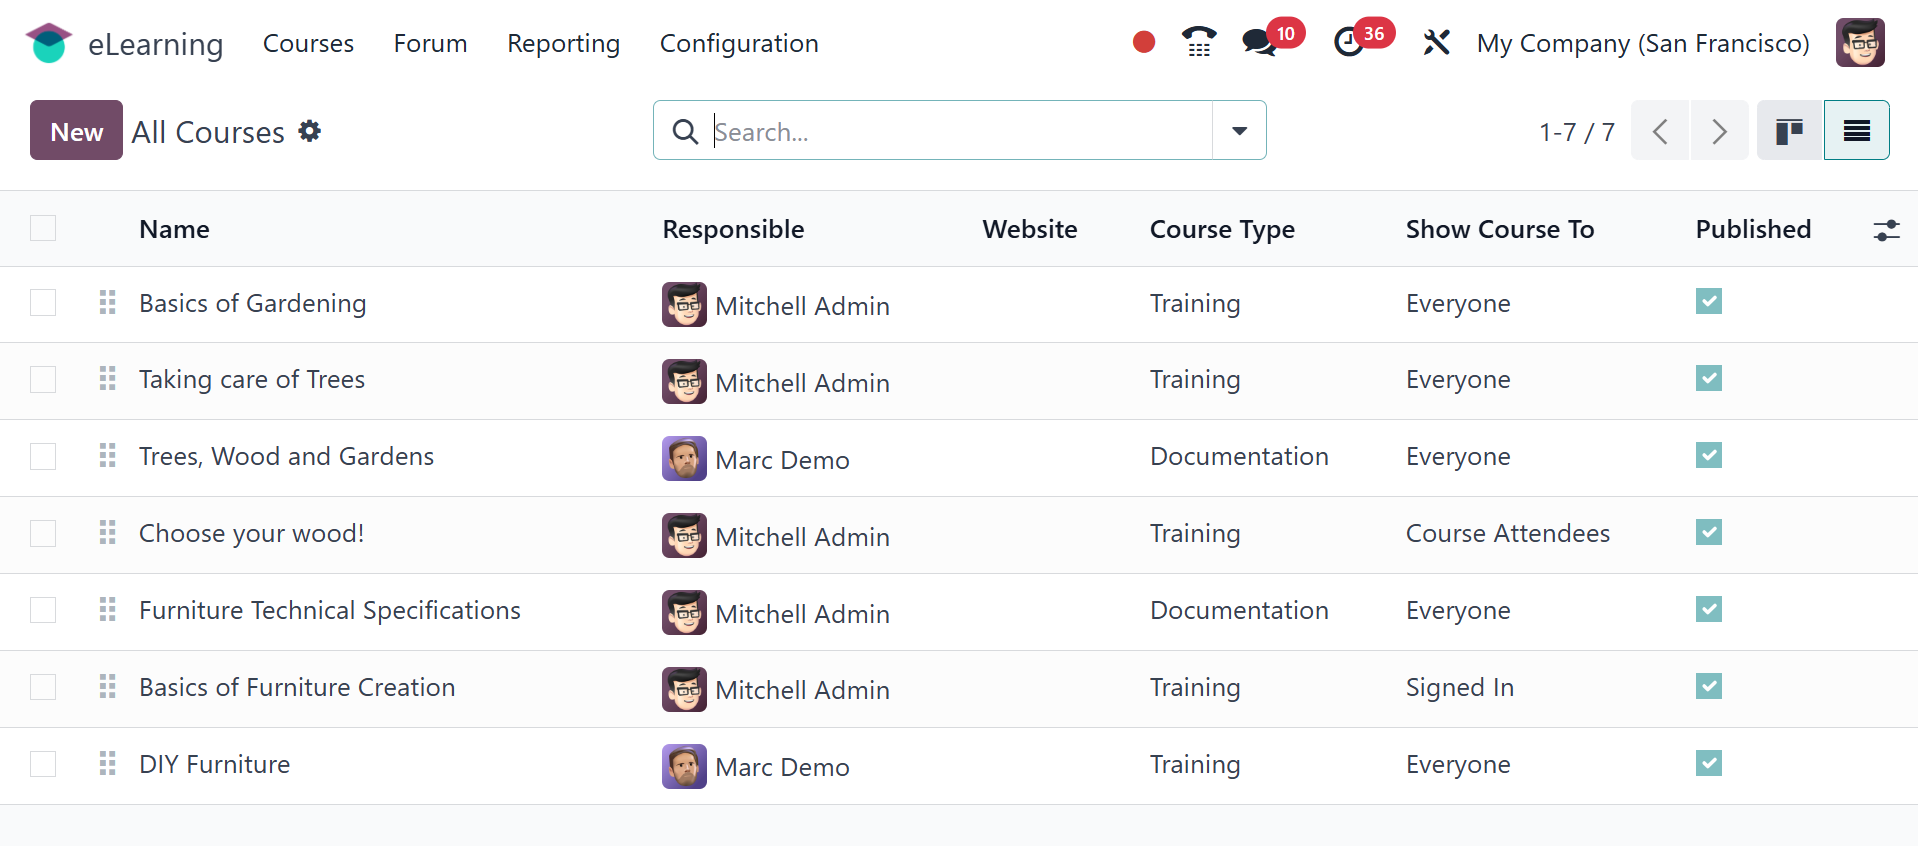
Additionally, there are Search,
Filter, Group By, and
Favorite choices on this
screen. To add a new course,
click the New button. After
that, the creation form will
show up.
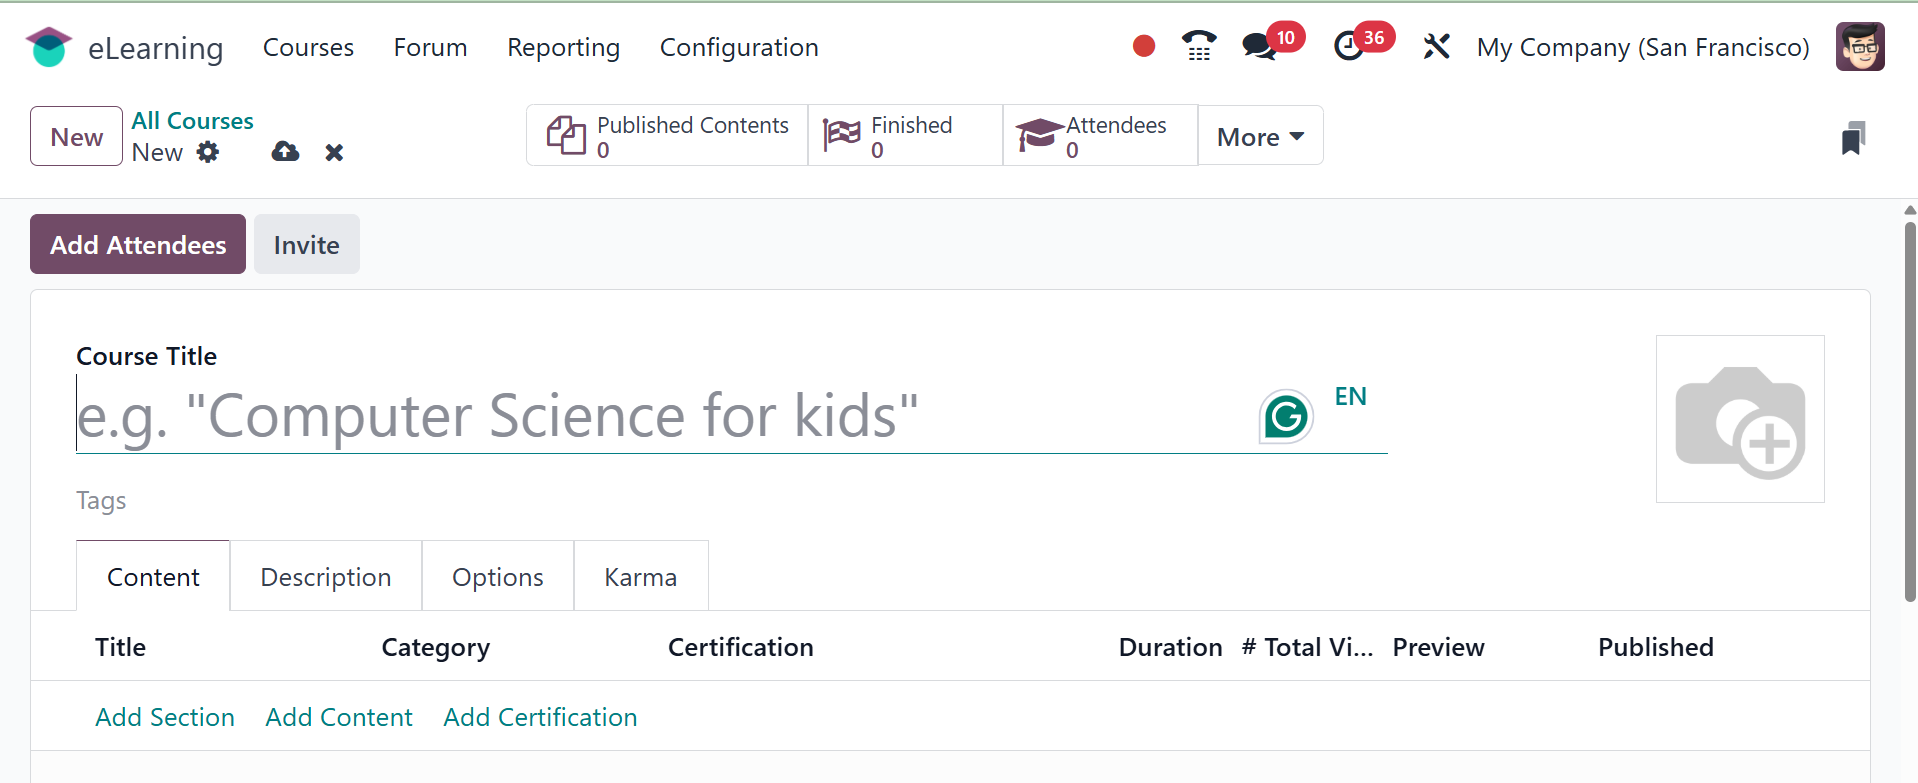
Add the course title and choose
the appropriate tags. There
are four tabs in the form
view. Options, Karma,
Content, and Description. The
course's contents are entered
into this material tab, which
also features buttons for
adding certification,
material, and sections.
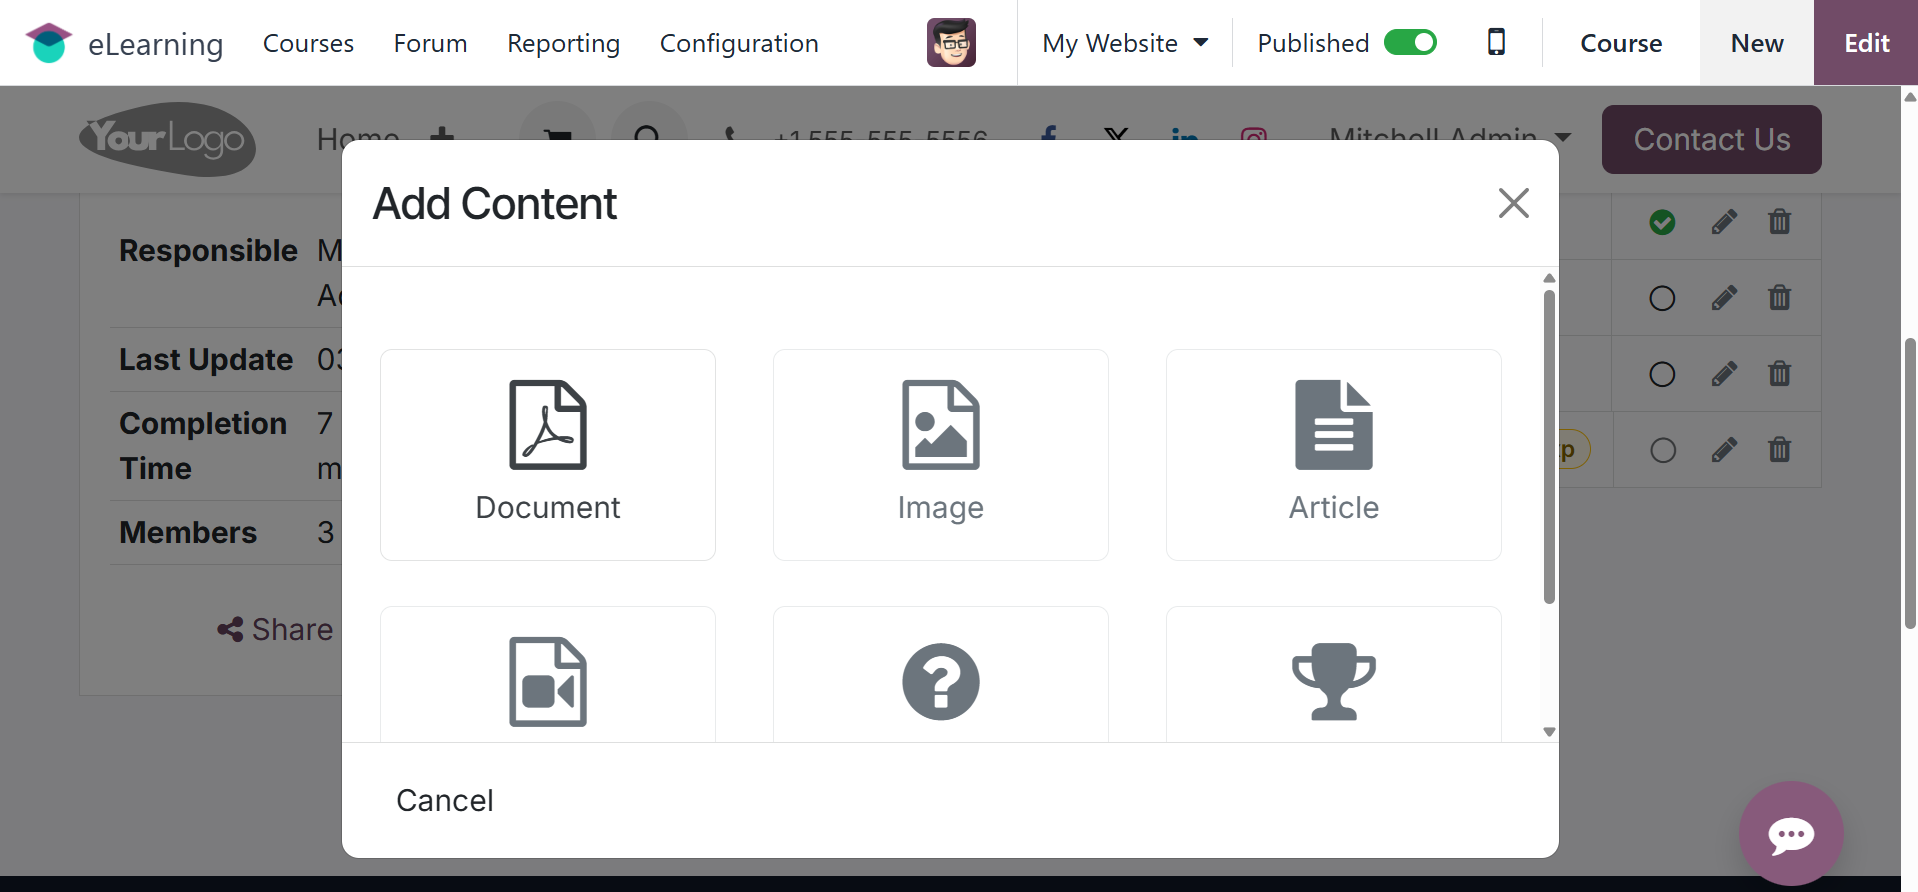
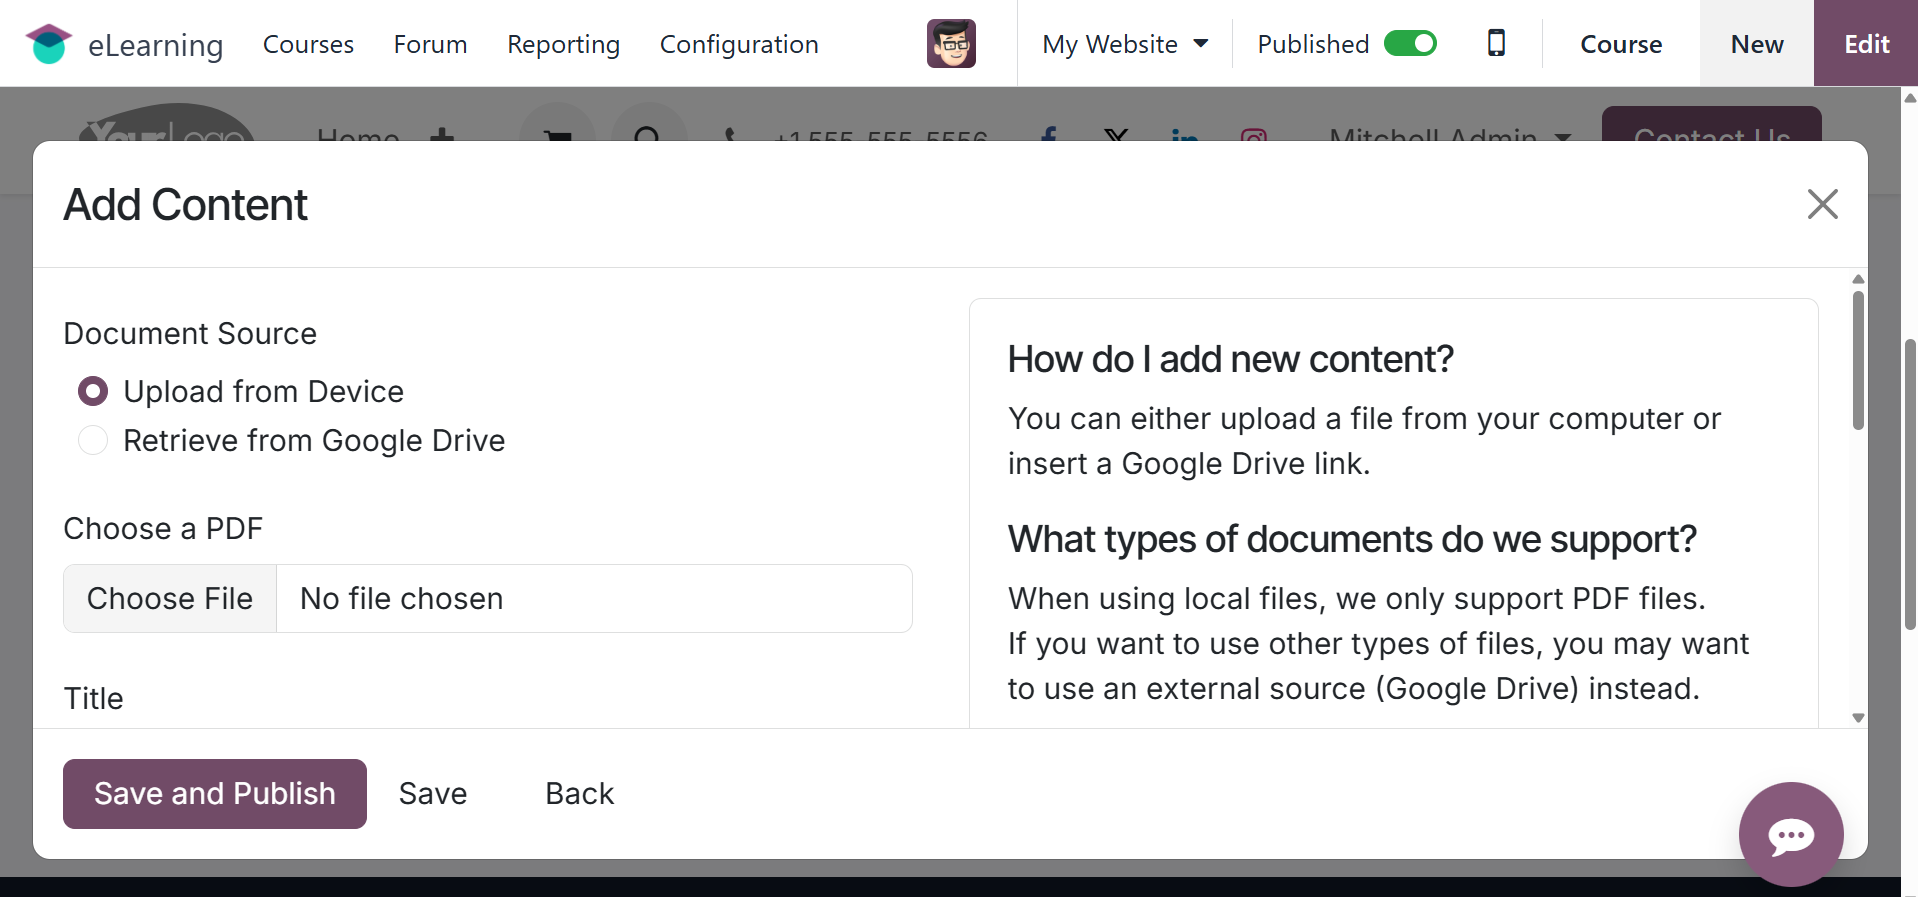
When you click the Add Content
button, a pop-up window will
appear. Display the content
title and tags. Next, click
on the Document tab and
choose the Content type. The
material is provided in a
wide variety of categories,
such as pictures, articles,
documents, videos, tests, and
certifications. Add the
duration of the material and
the responsible party. Then,
to allow a preview of the
content to be shown, choose
the Allow Preview option.
Here, you can add the
responsible user, duration,
and allow the download option
to activate as well.
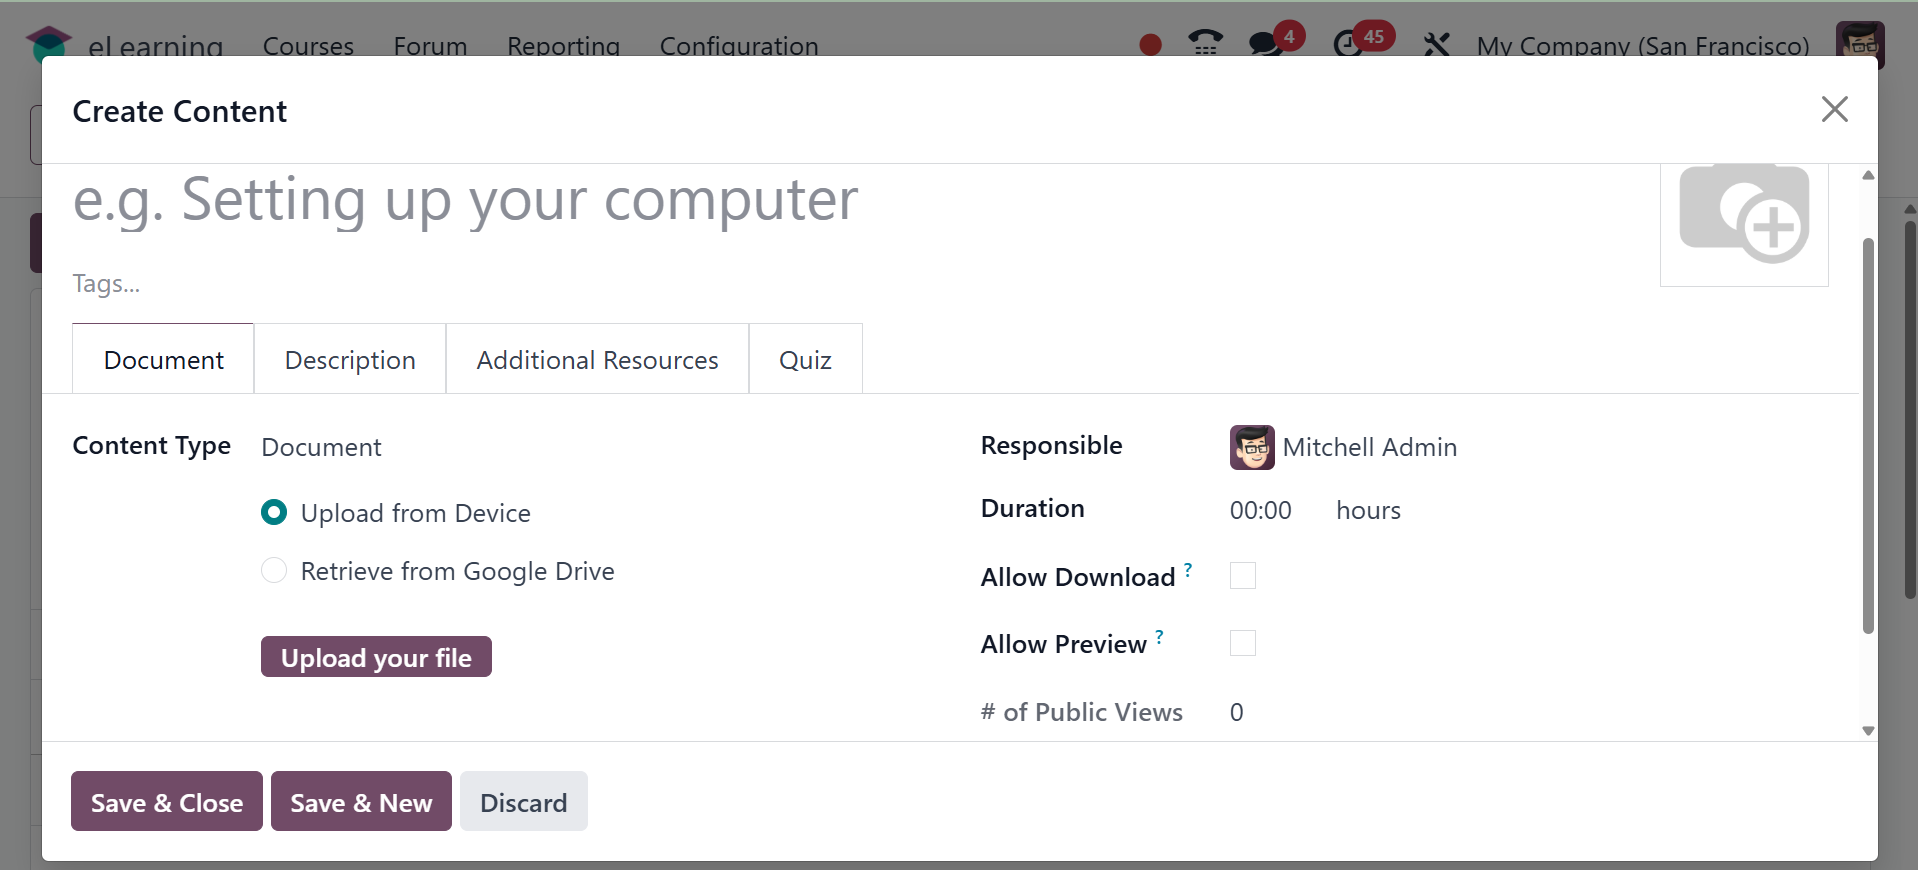
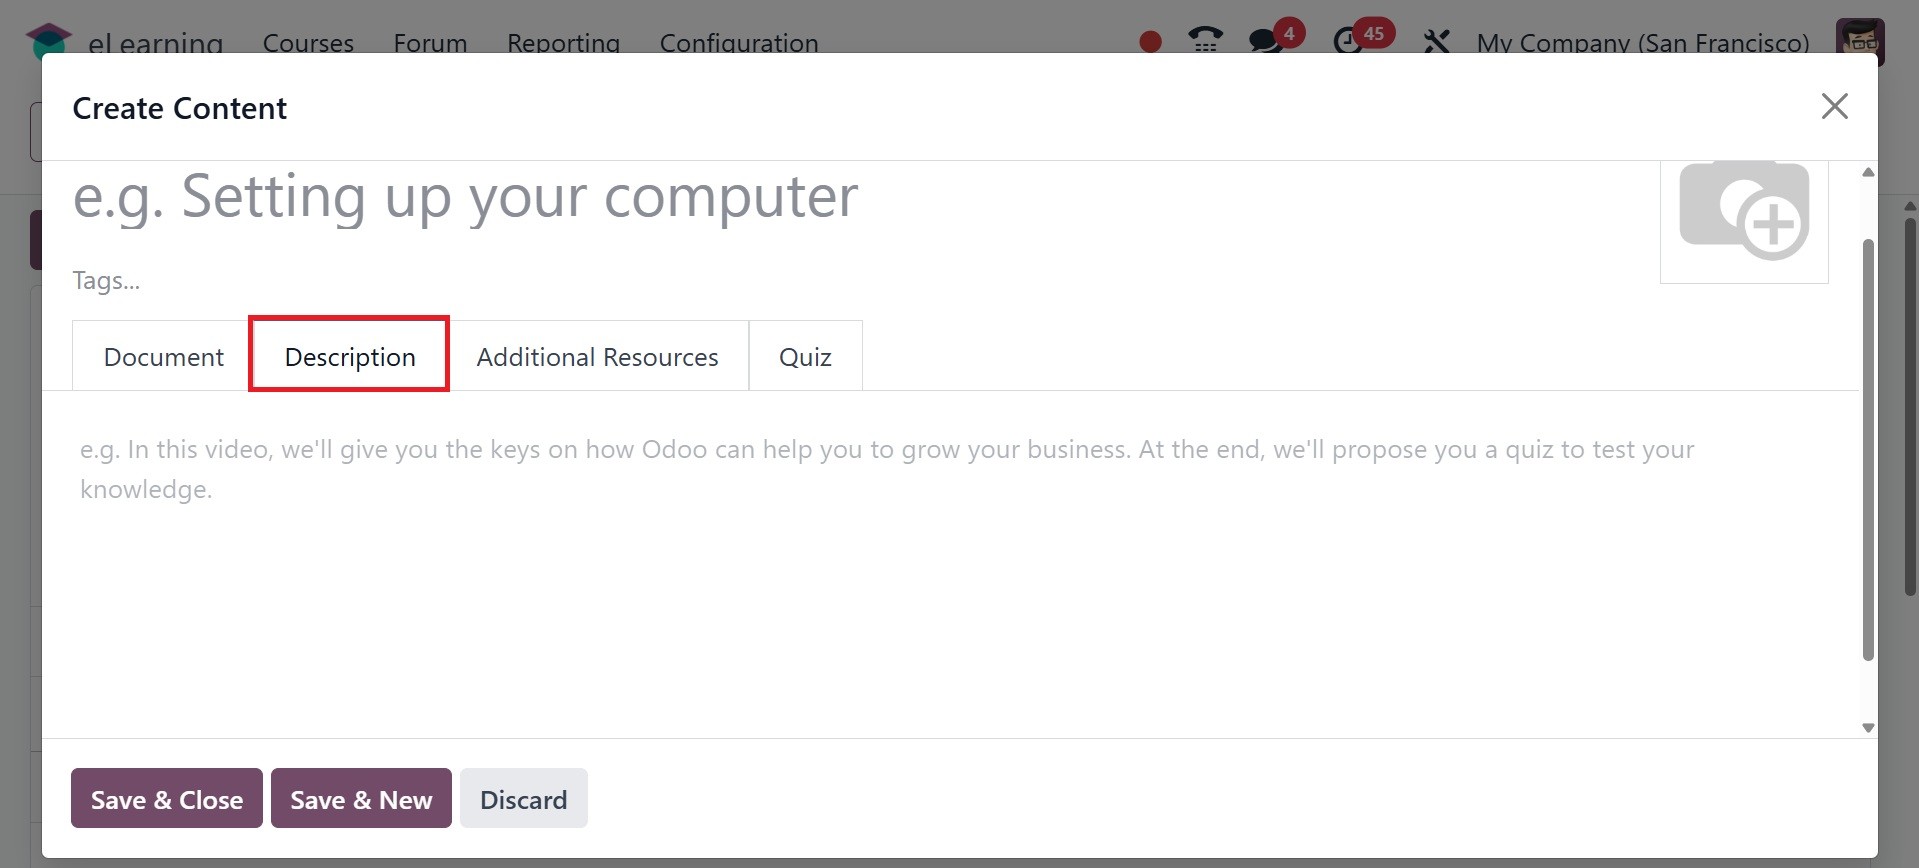
Include a description of the
content in the Description
tab.
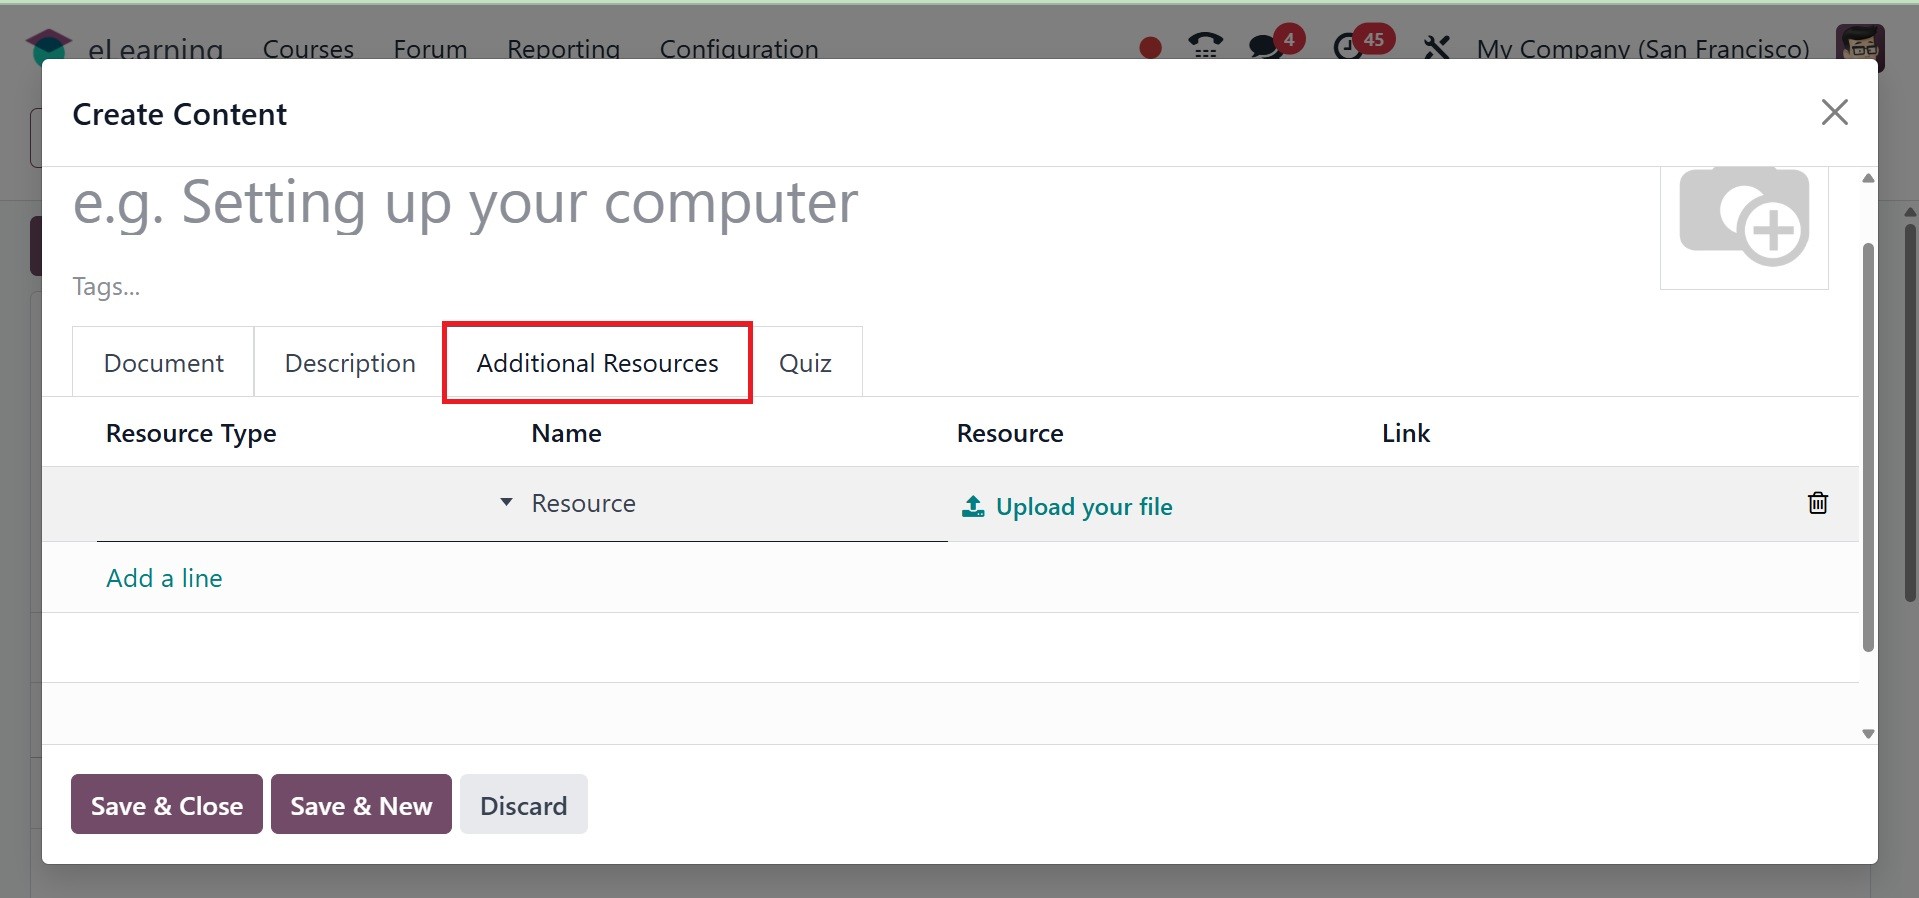
Using the "Additional Resources"
menu, you can include any
additional items you'd like
in the form of a file or
link. After choosing the
appropriate format, upload a
file or include a link.
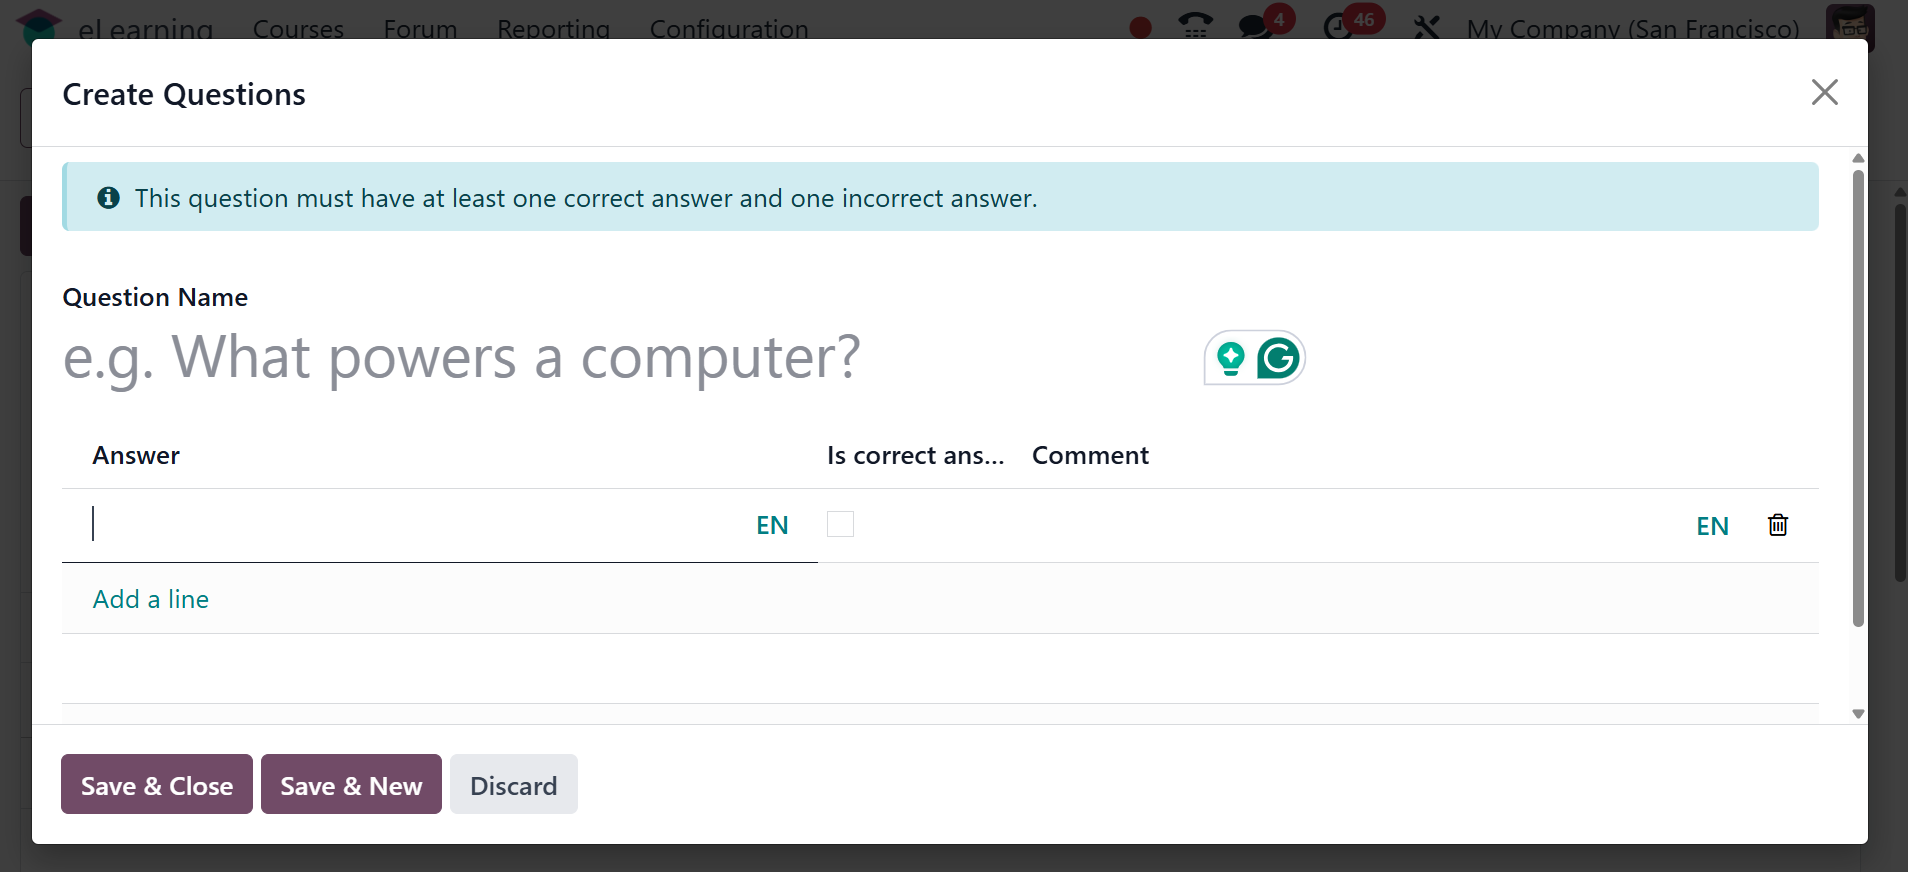
The quiz tab allows us to
personalize the questions and
points that are awarded. In
the First section, users have
the option to contribute
points for their initial try
rewards. In the Second Try
section, they can also accrue
points for their second try
incentives. Lastly, in the
POINTS REWARDS section, users
can add points for their
Third, Fourth, and More
tries.

To construct quiz questions and
answers, utilize the Add a
Line tool located in the
QUESTIONS section. After
adding questions, add options
in the Answers section. To
ensure that the answer is
correct, check the Is Correct
box. A question must have at
least one correct answer.
Click the Save & Close button
to end the session. Click the
Save & New button to add
another question.
Click the "Add Certification"
button to add a new
certification. The
aforementioned window will
then open. In this case, the
course type is certification;
select the relevant
certification.

After saving the course, there
are two buttons: Contact
Attendees, Add Attendees, and
Invite. Published Contents,
Finished, Attendees, Reviews,
and Go to Website are a few
examples of smart tabs.
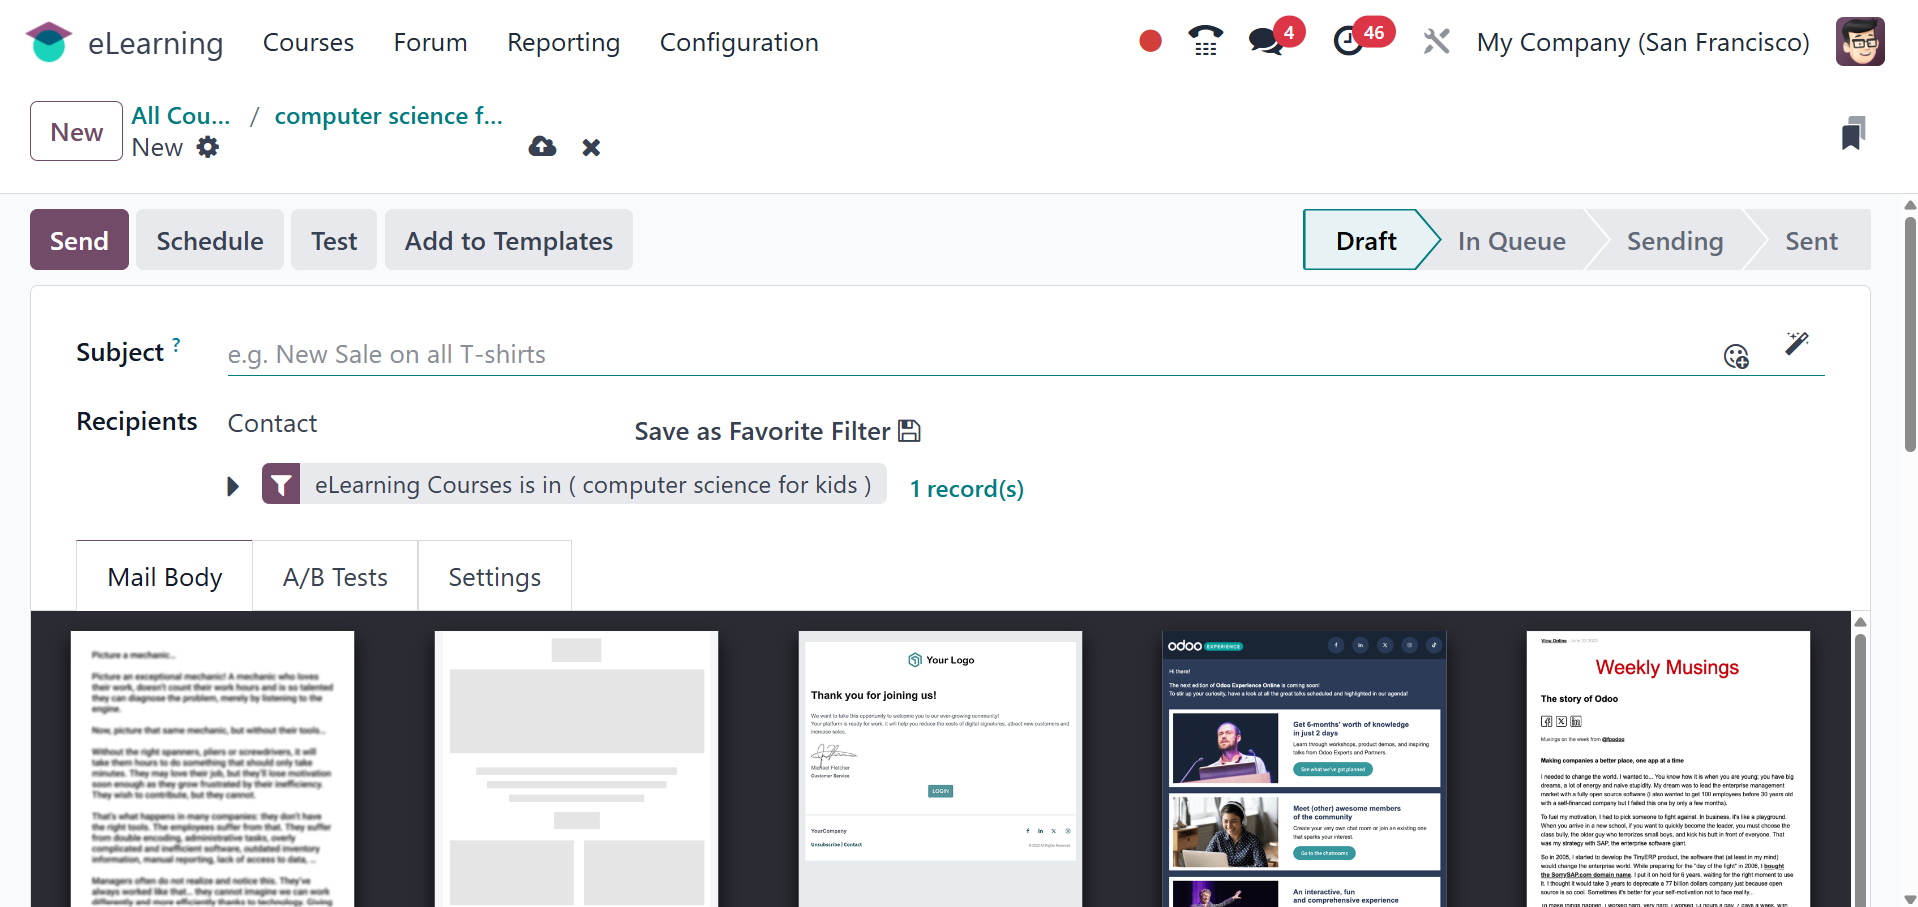
Email marketing is accessed by
selecting the Contact
Attendees option. Press the
"Send" button.
Users are notified via email that
they have been enrolled in
this specific course when
they click the Add Attendees
button, which opens a pop-up
window. To send the email,
click the Send button.
The developed course is
accessible through the
dashboard. Clicking the
button will take you to the
website, where you may click
the View Course icon to view
the course online.
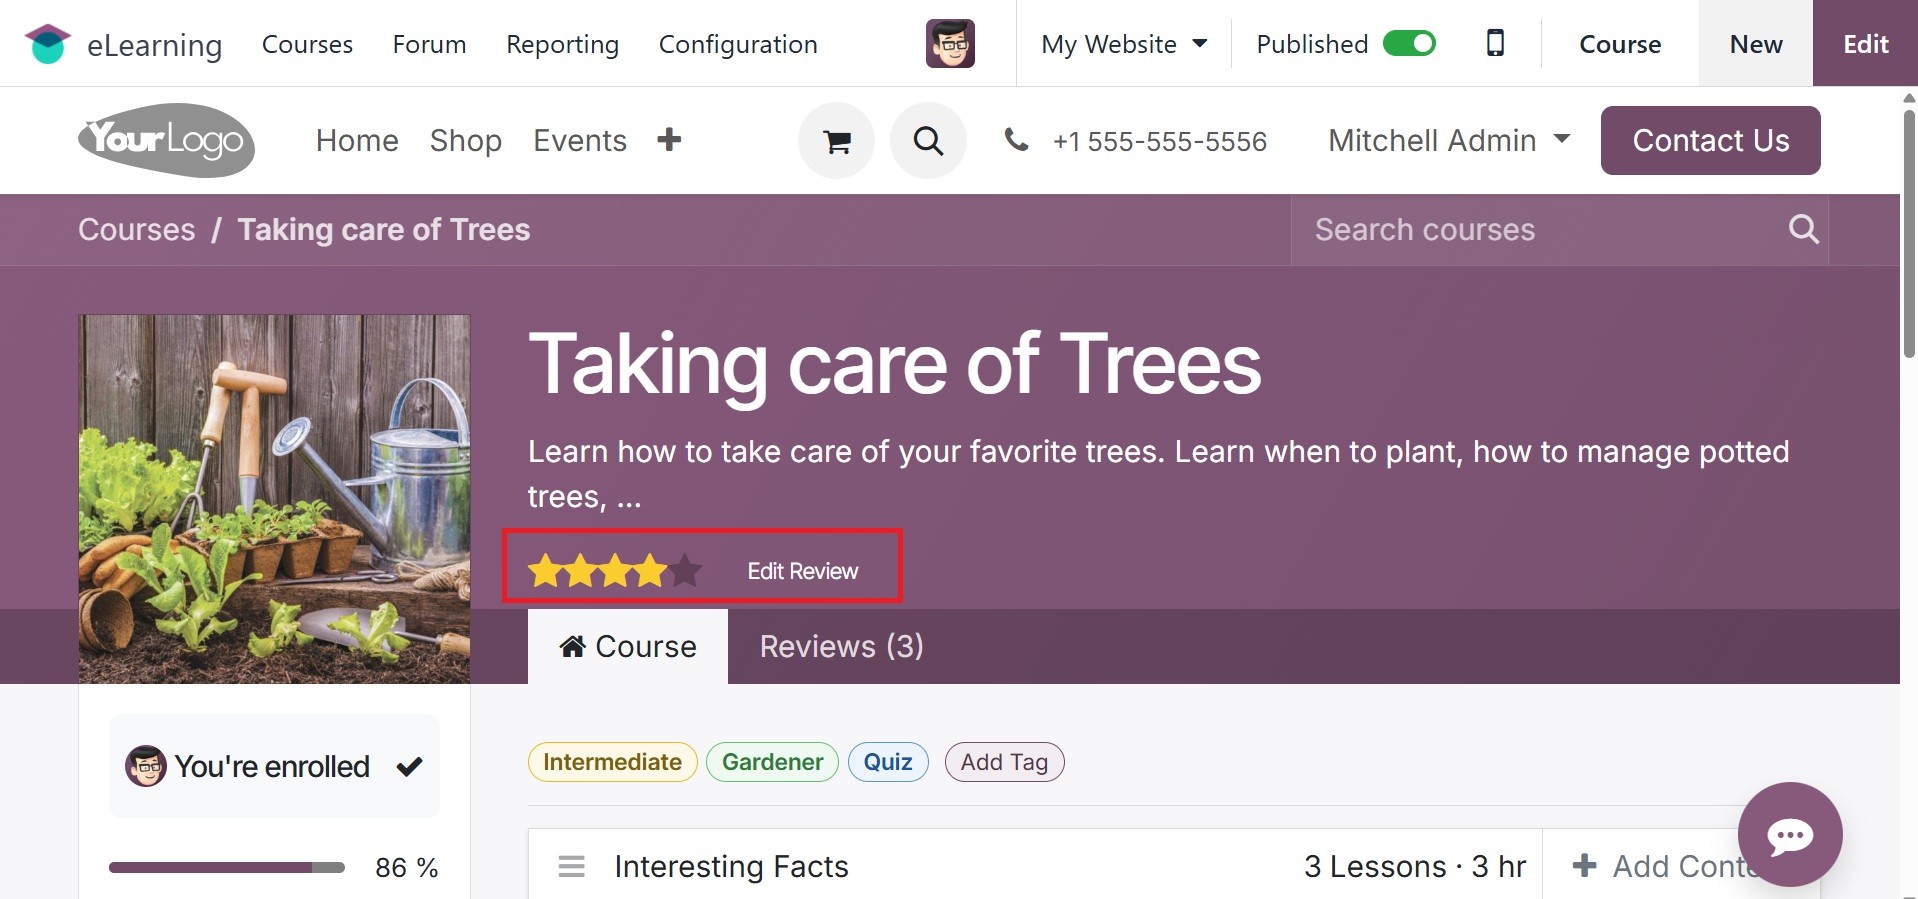
The produced course looks like
this on the website. All of
the certificates and
additional documentation are
shown in this view. The Add
Review tool allows users to
add user reviews to the
course.
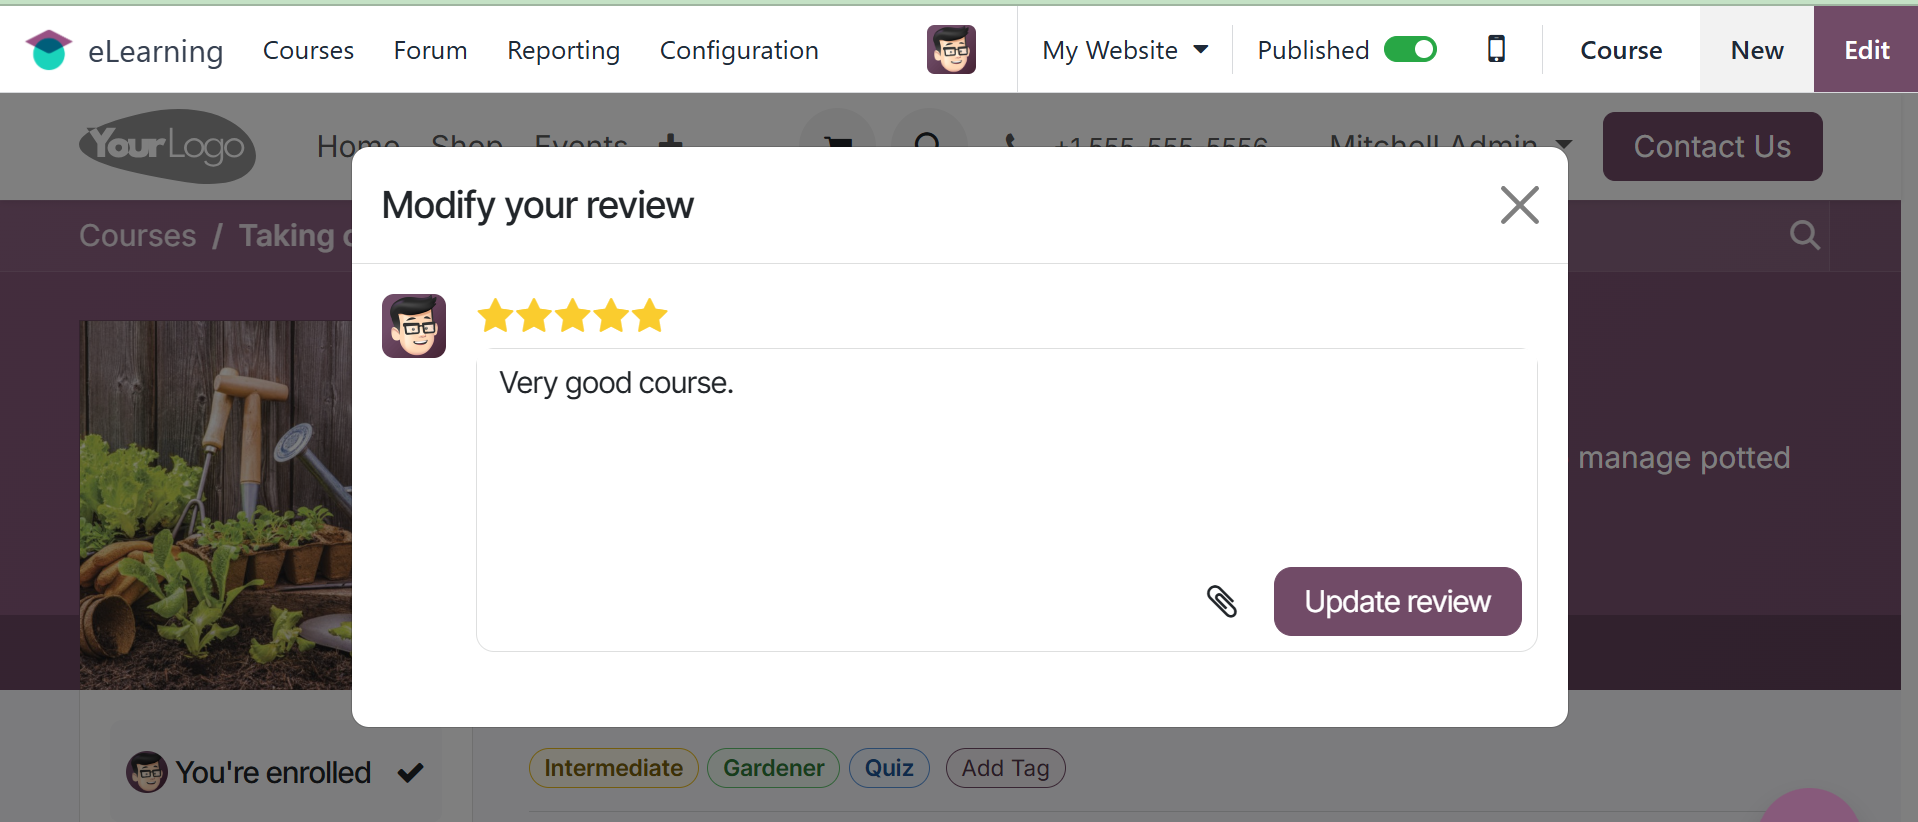
As you click the Add Review
button, the popup to add
reviews will appear. Add
stars and leave a remark in
the box. It is also possible
to add attachments. Then
click the "Send" button.
The review will be updated on the
page. The review can be
altered by you. The Review
tab is where you may leave
comments on the review.

On the right side of the screen
are the number of members,
the last update date, and the
responsible party.
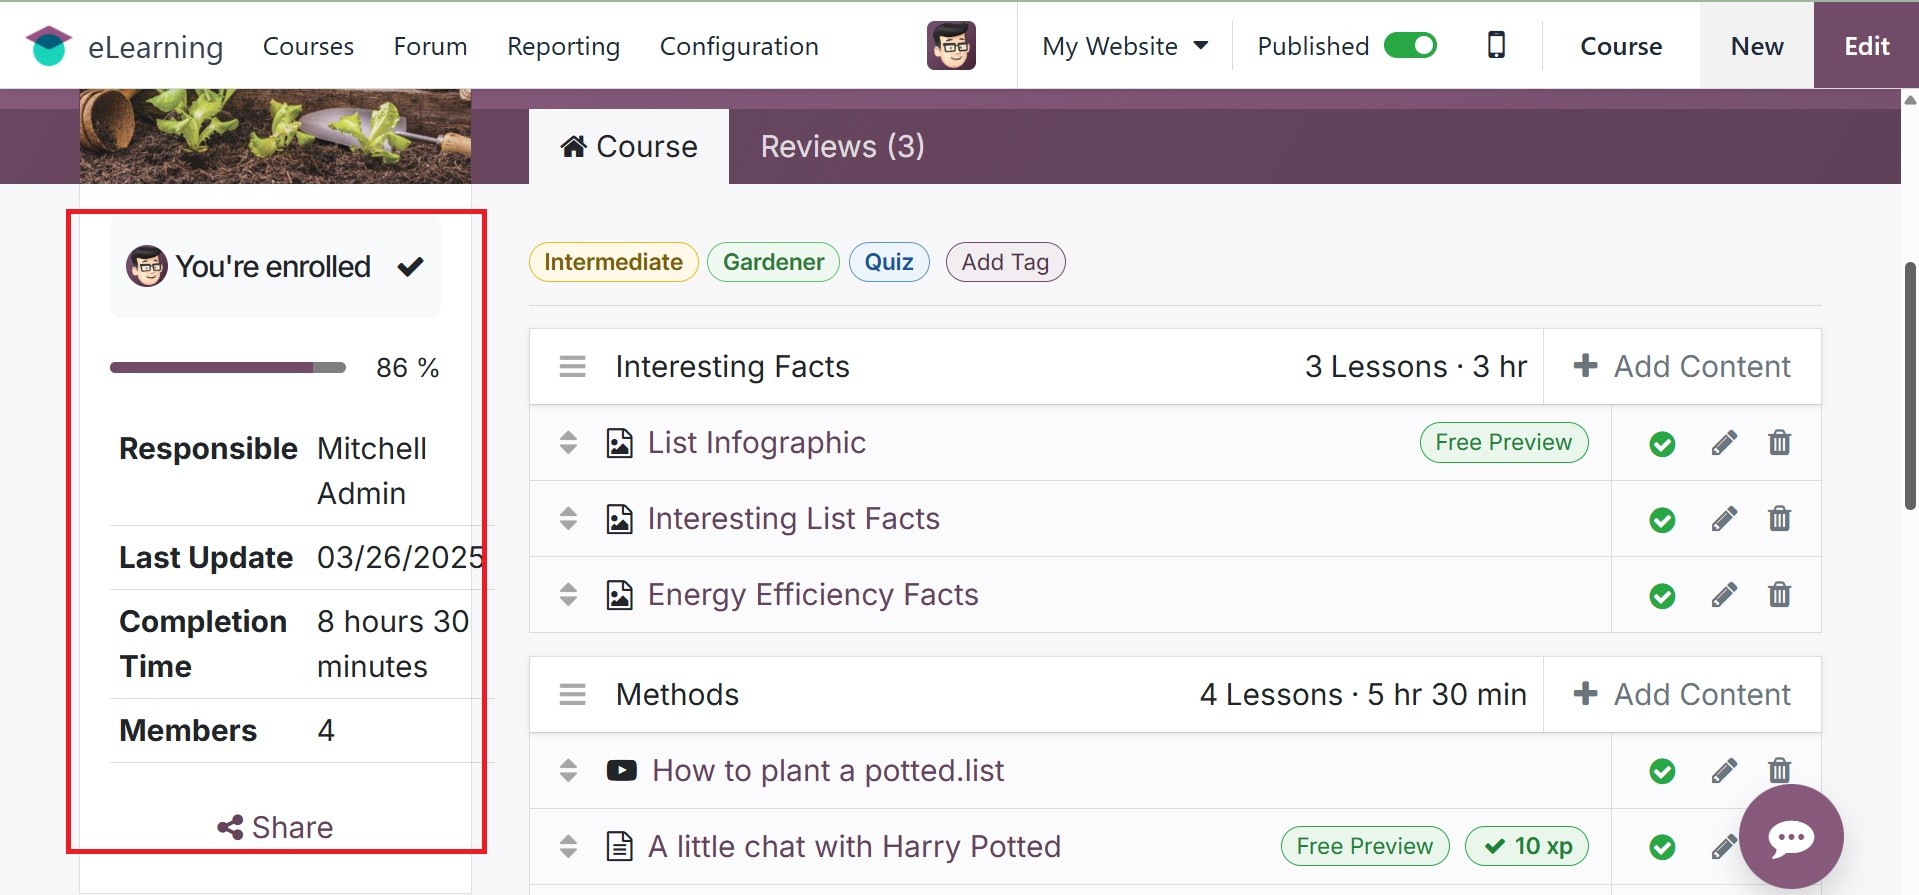
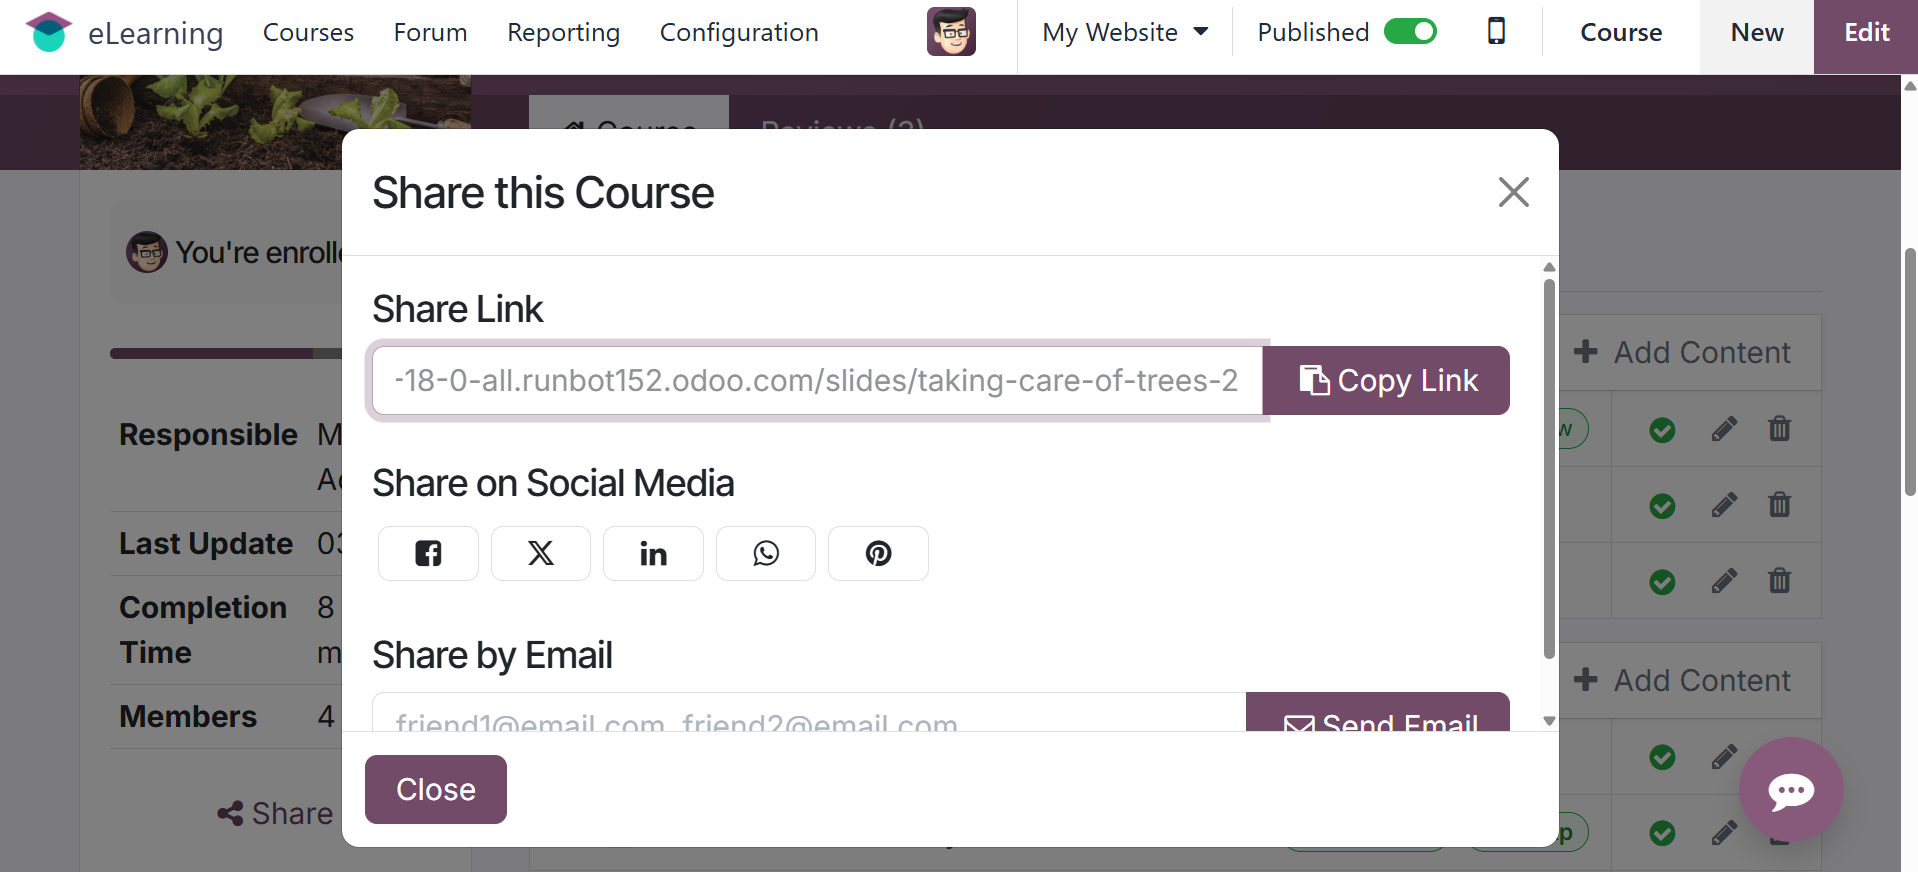
Clicking the Share option will
allow you to share the course
link.
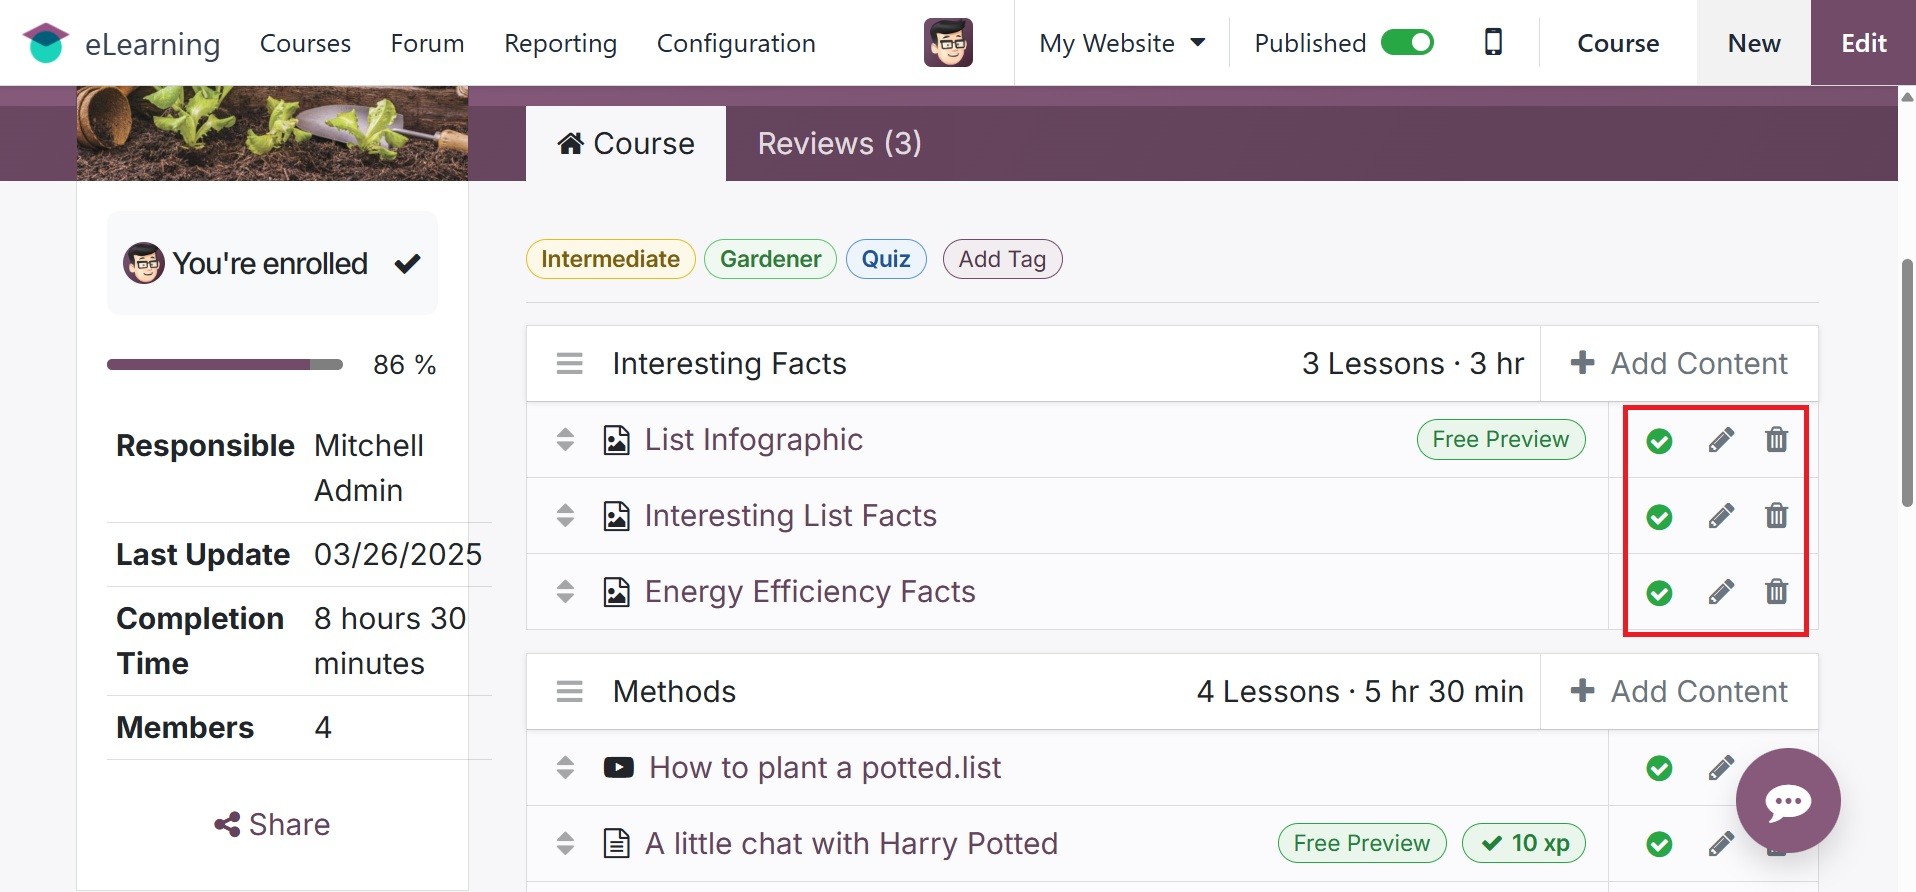
Let's go on to the section on
courses. It displays all of
the produced materials and
certifications. The produced
material may be changed or
removed from the website.
Click the edit sign to make
changes to the content. A
delete button is located next
to the edit sign, which
facilitates content deletion.
Click on the programs to begin a
certification program. You
can add content from the
website by clicking the +Add
Content button. As seen in
the screenshot, a new window
will open when you click the
+Add Content button.
Users can create content from
this by choosing the
appropriate Content Type from
the pane above. Then, add
content information such the
section title, tags, and
anticipated completion time.
the menu, and choose "Save &
Publish" after that.
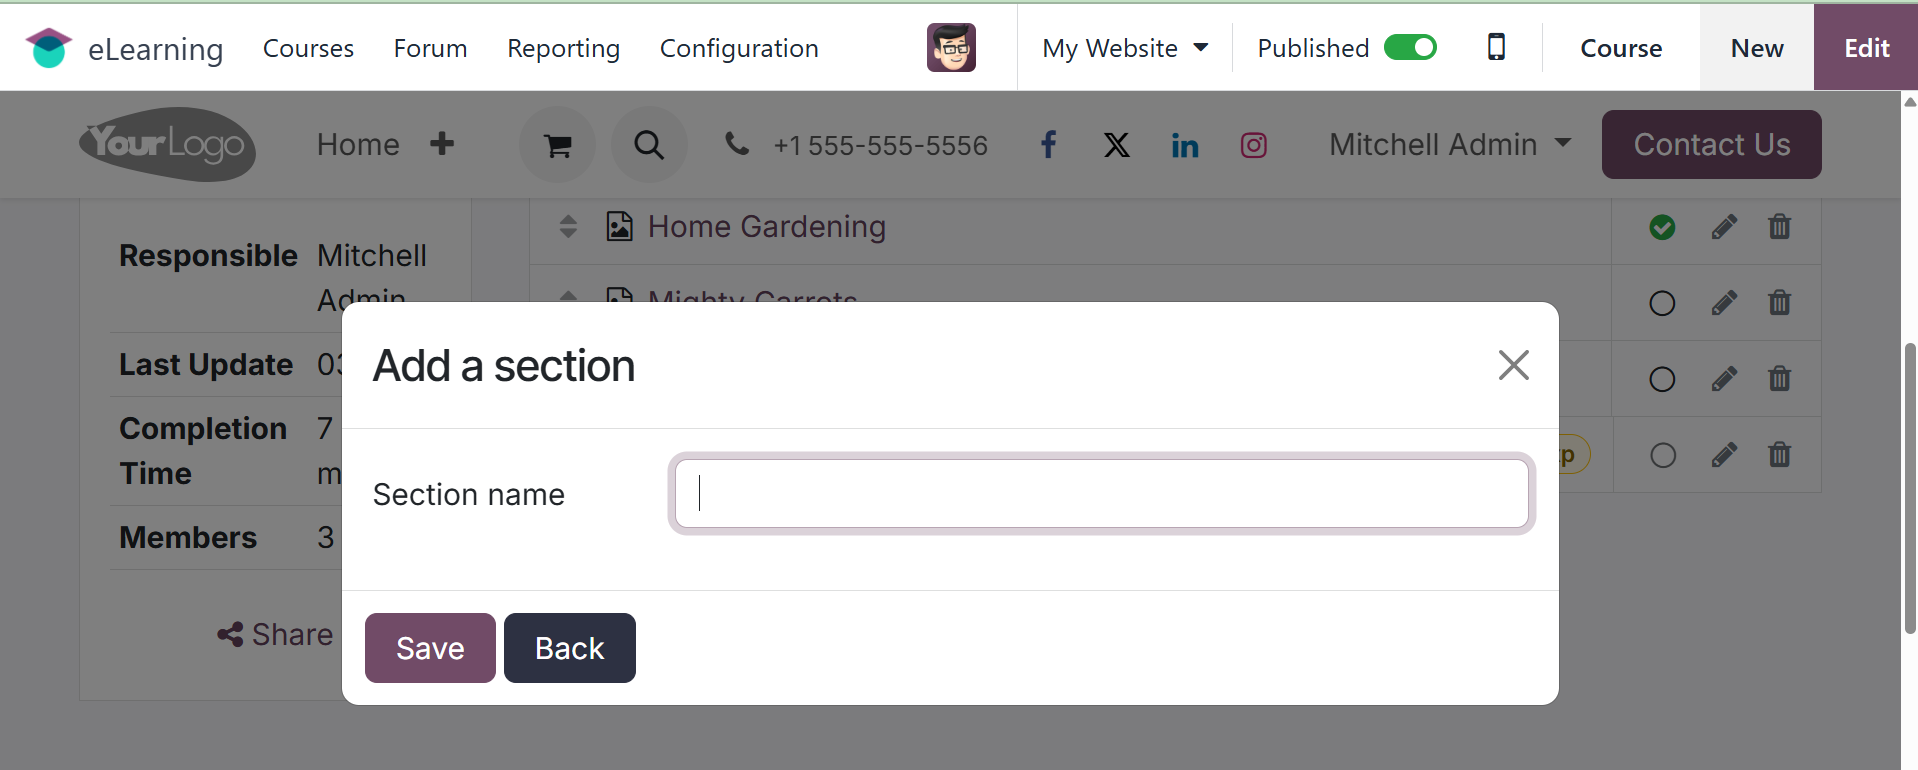
You may add a new section by
selecting the +Add Section
button. After adding the
section name, press the
"Save" button.
Thus, return to eLearning and
select the course you
designed once more. This
displays a few intelligent
tabs.
A glimpse of every course that
has been produced is
available through the
website's courses option. The
Course page can be changed.
Click the Edit button in the
top right corner to bring up
the modification choices for
that.
Details about the login person's
current rank are displayed on
the right side of the window.
About badges, points, and
other requirements to advance
to the next rank.
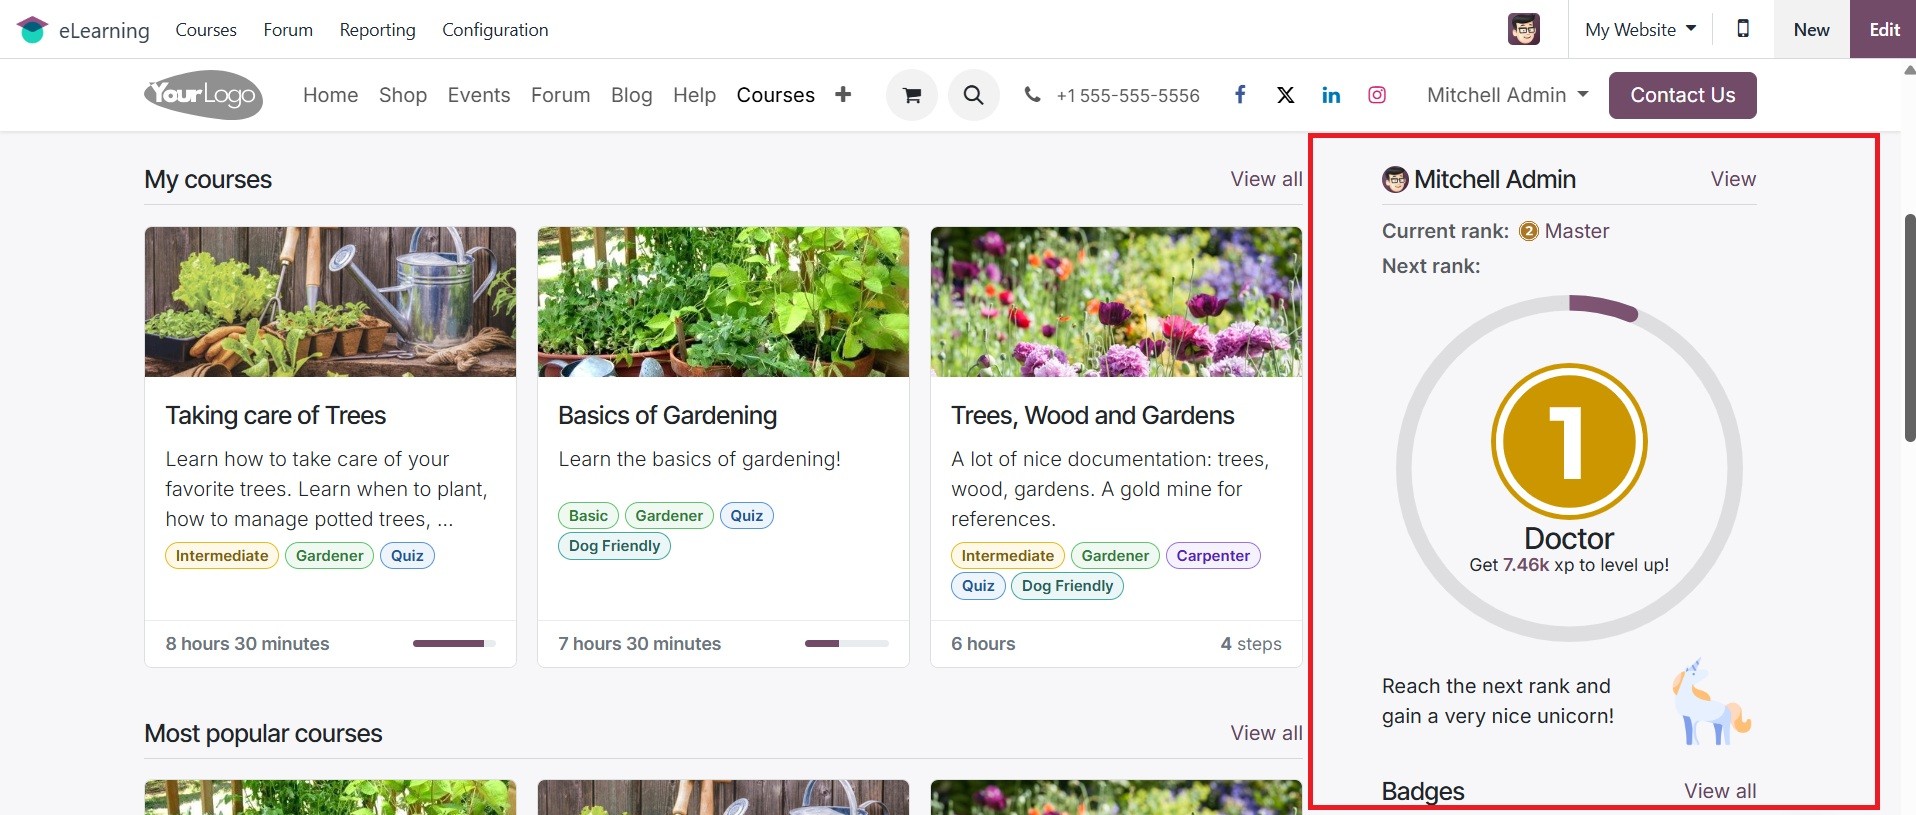
You can add customizations in the
CUSTOMIZE area.
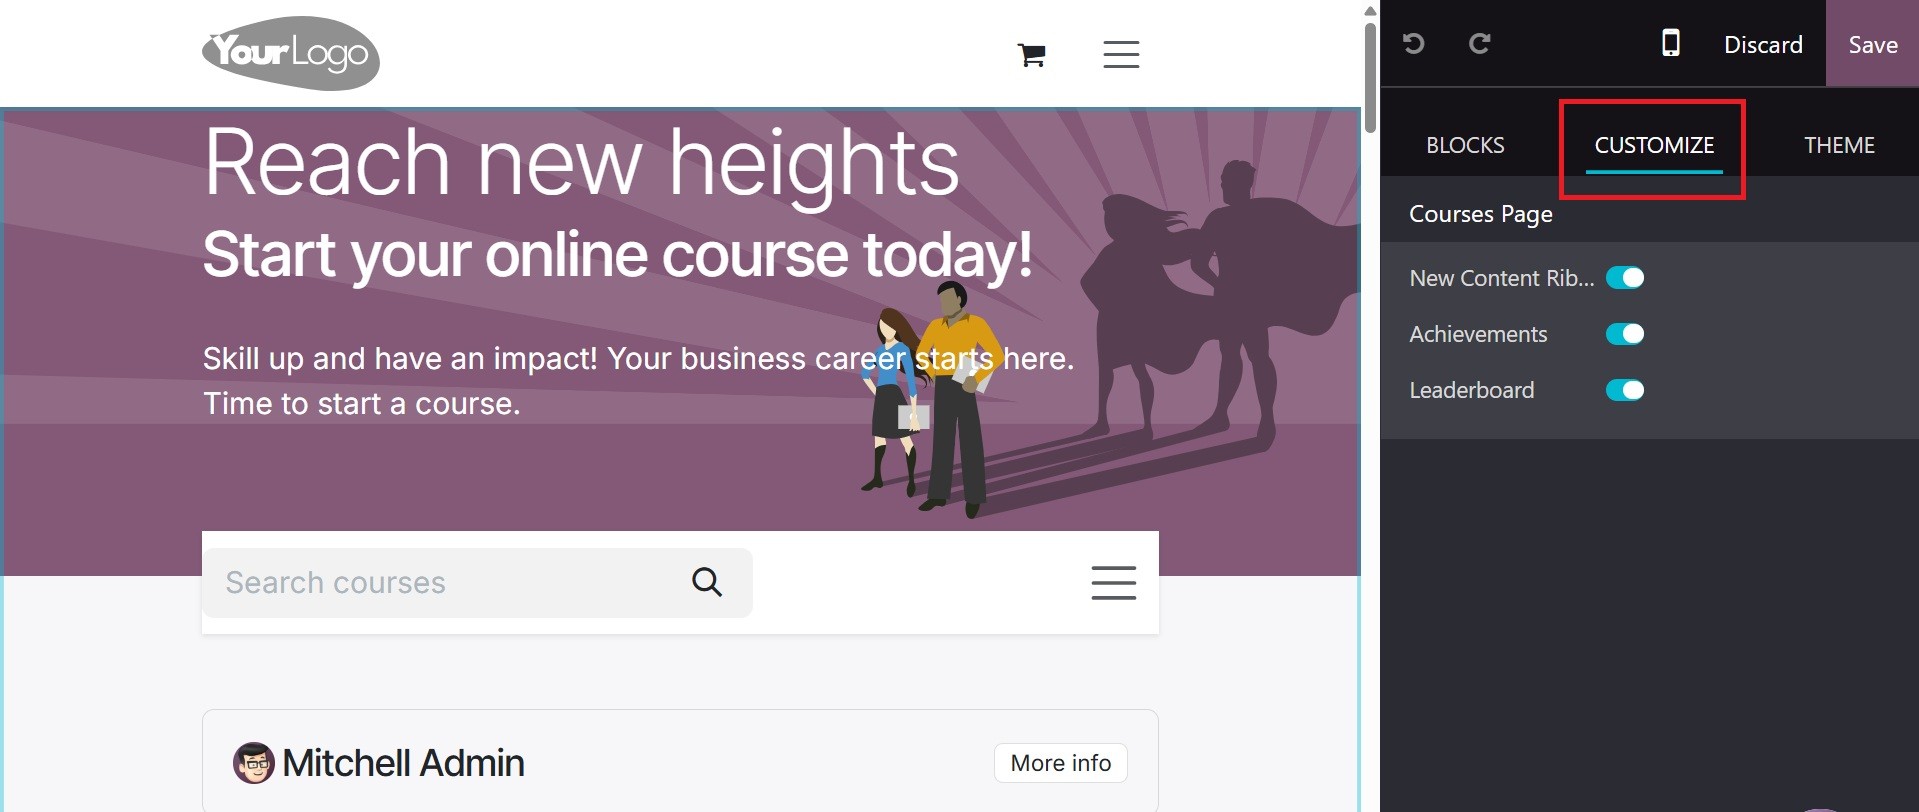
The Achievements will appear on
the course page if the
Achievements option is
activated. The course page
will now show the most recent
Achievements.

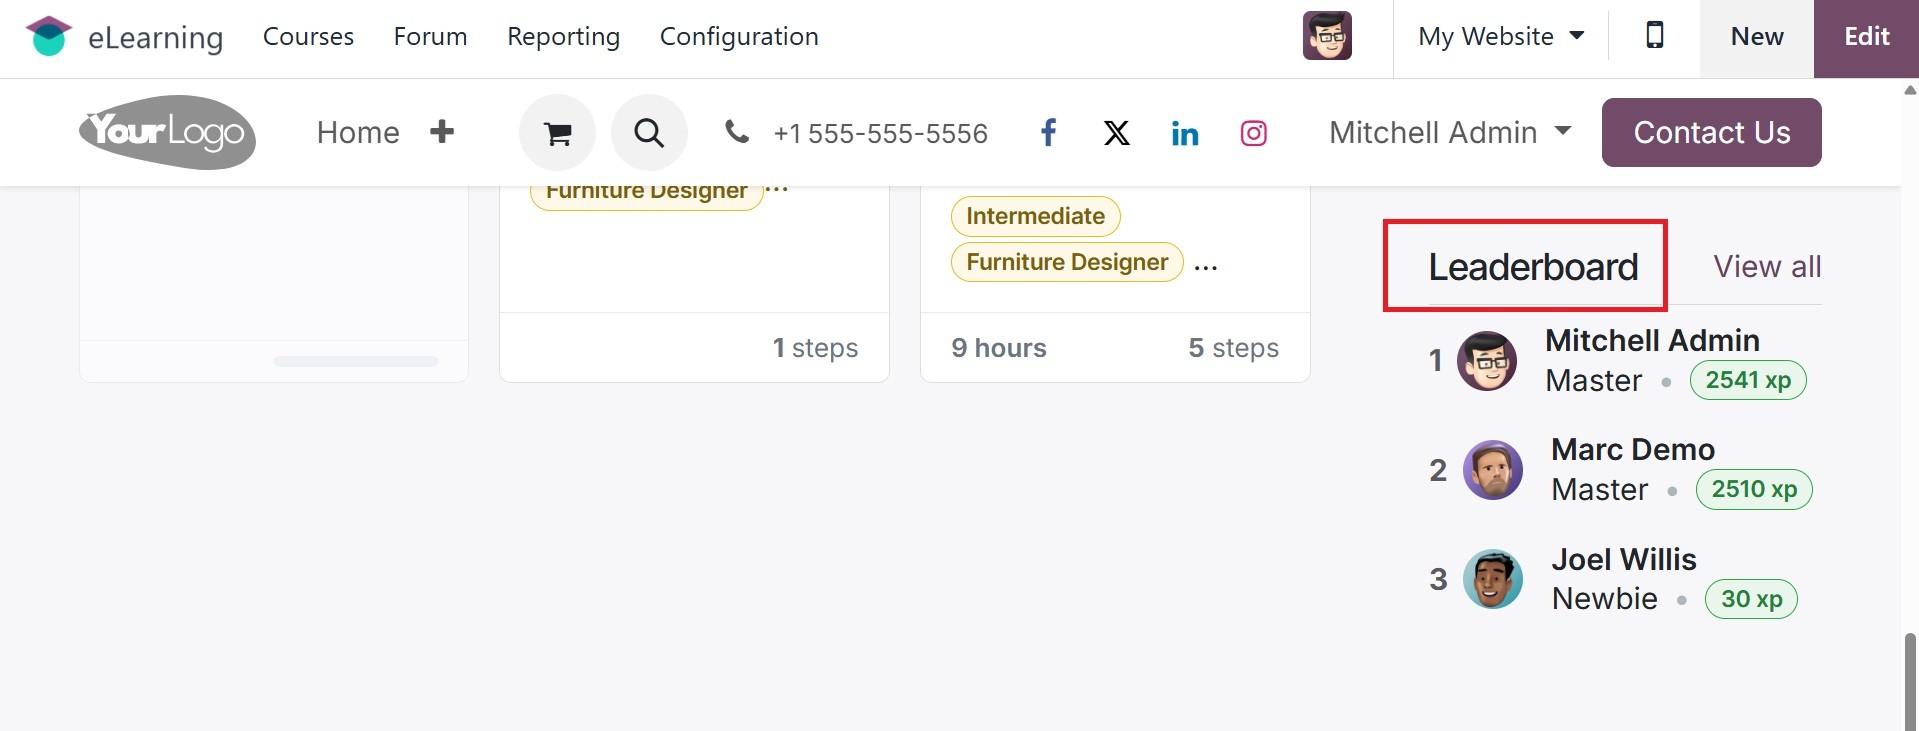
The leader board will appear on
the course page as indicated
below if the Leader board
option is enabled from the
Customize menu.
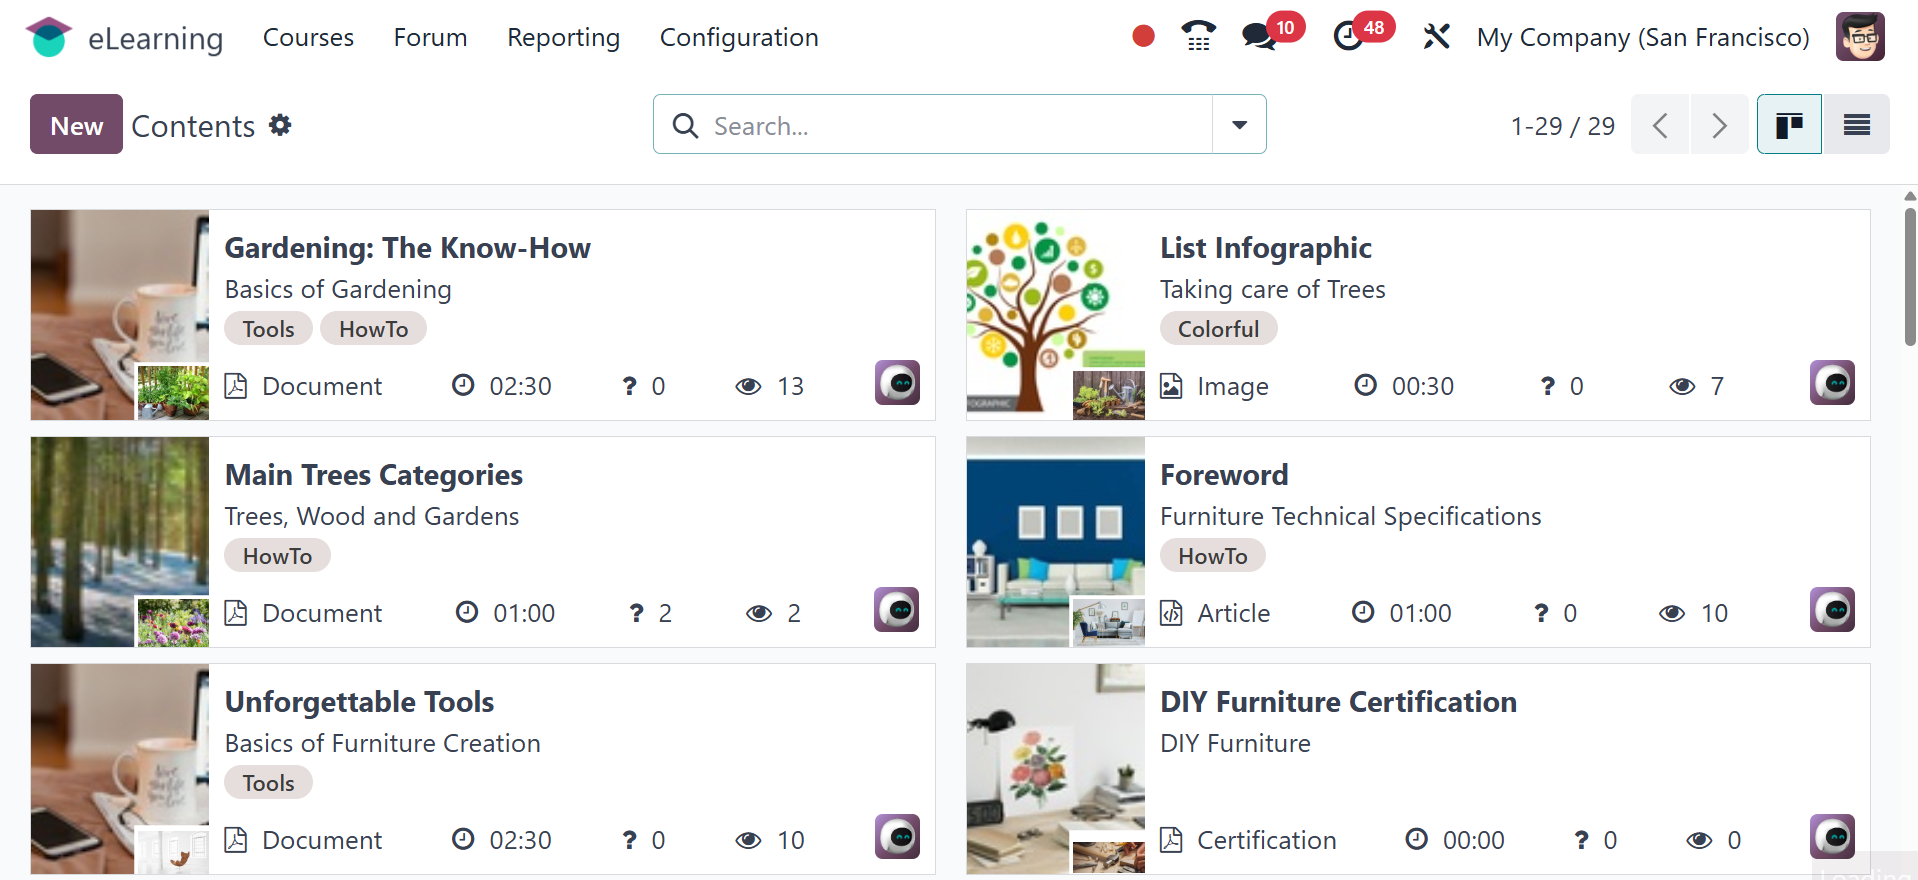
1.2 Content
All of the produced content may
be found in the Courses
menu's Contents menu item. A
kanban view of all the
produced content is
accessible, as may be seen
below.
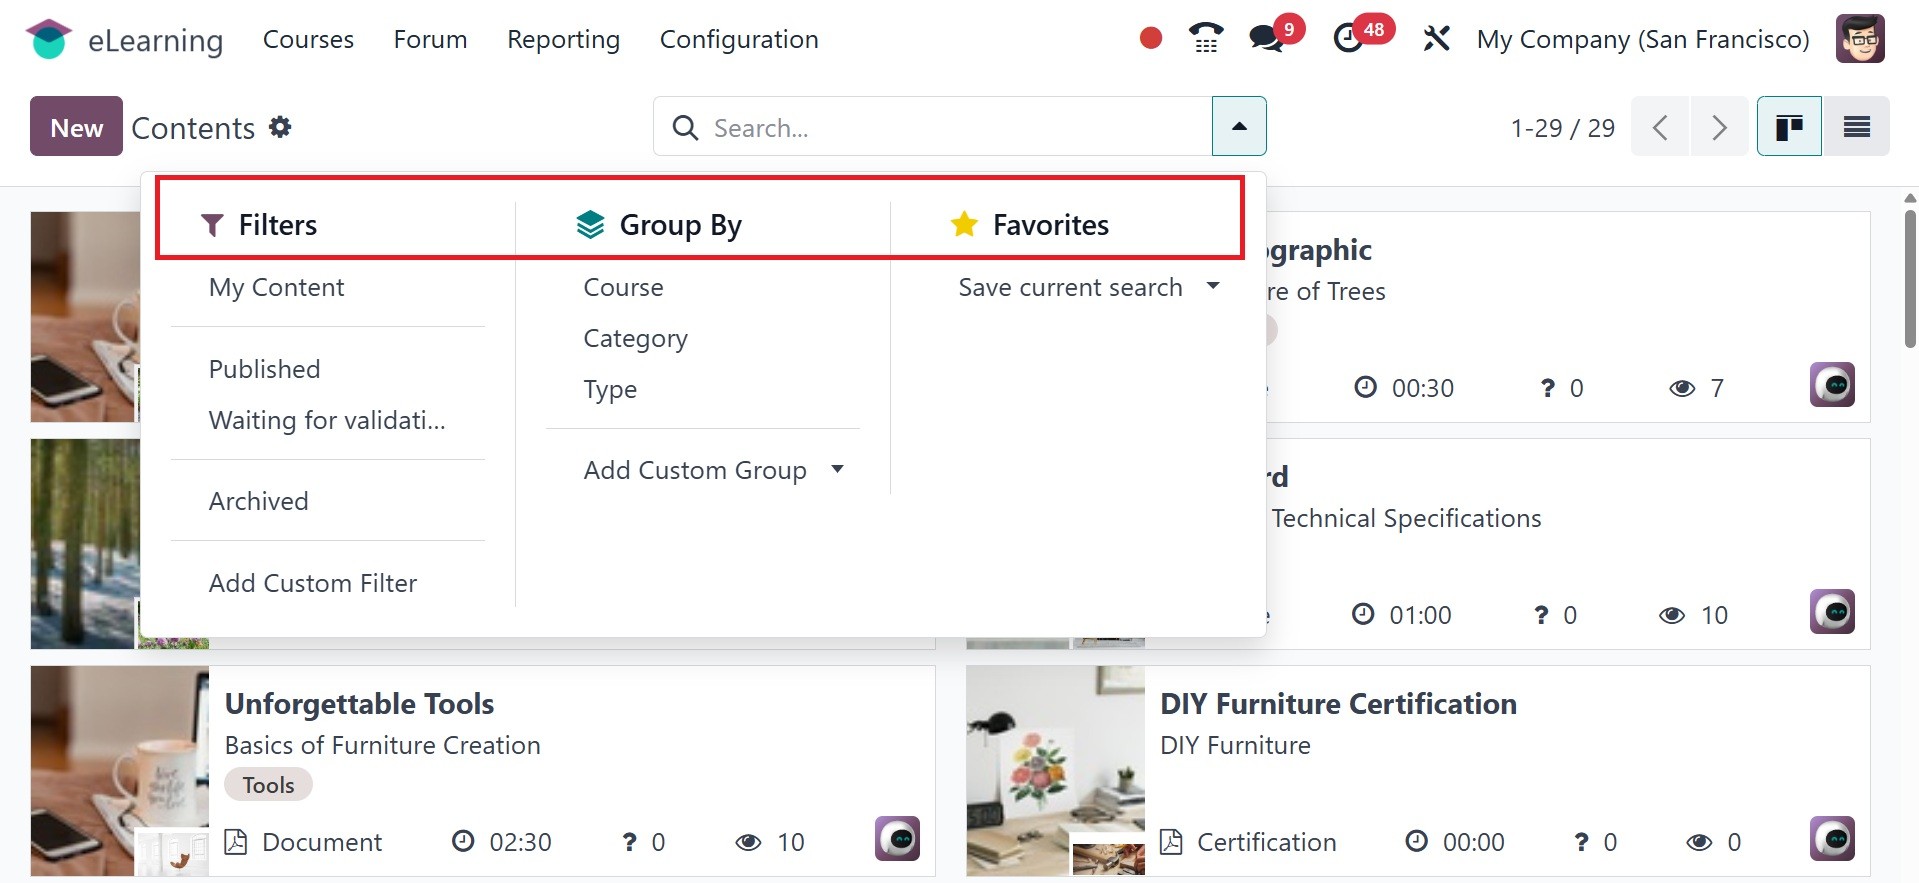
Search, group by, filter, and
favorite options are
available on the content
page. Archived, My Content,
Published, and Waiting for
validation are the ways to
sort content. It can be
organized by Course,
Category, and Type. The
custom group and custom
filtering are also included.
You can store the search as a
favorite by selecting the
store current search option.
Details like Title, Course,
Uploaded by, Is Published,
Publish Date, and Duration
are displayed in the contents
list view.
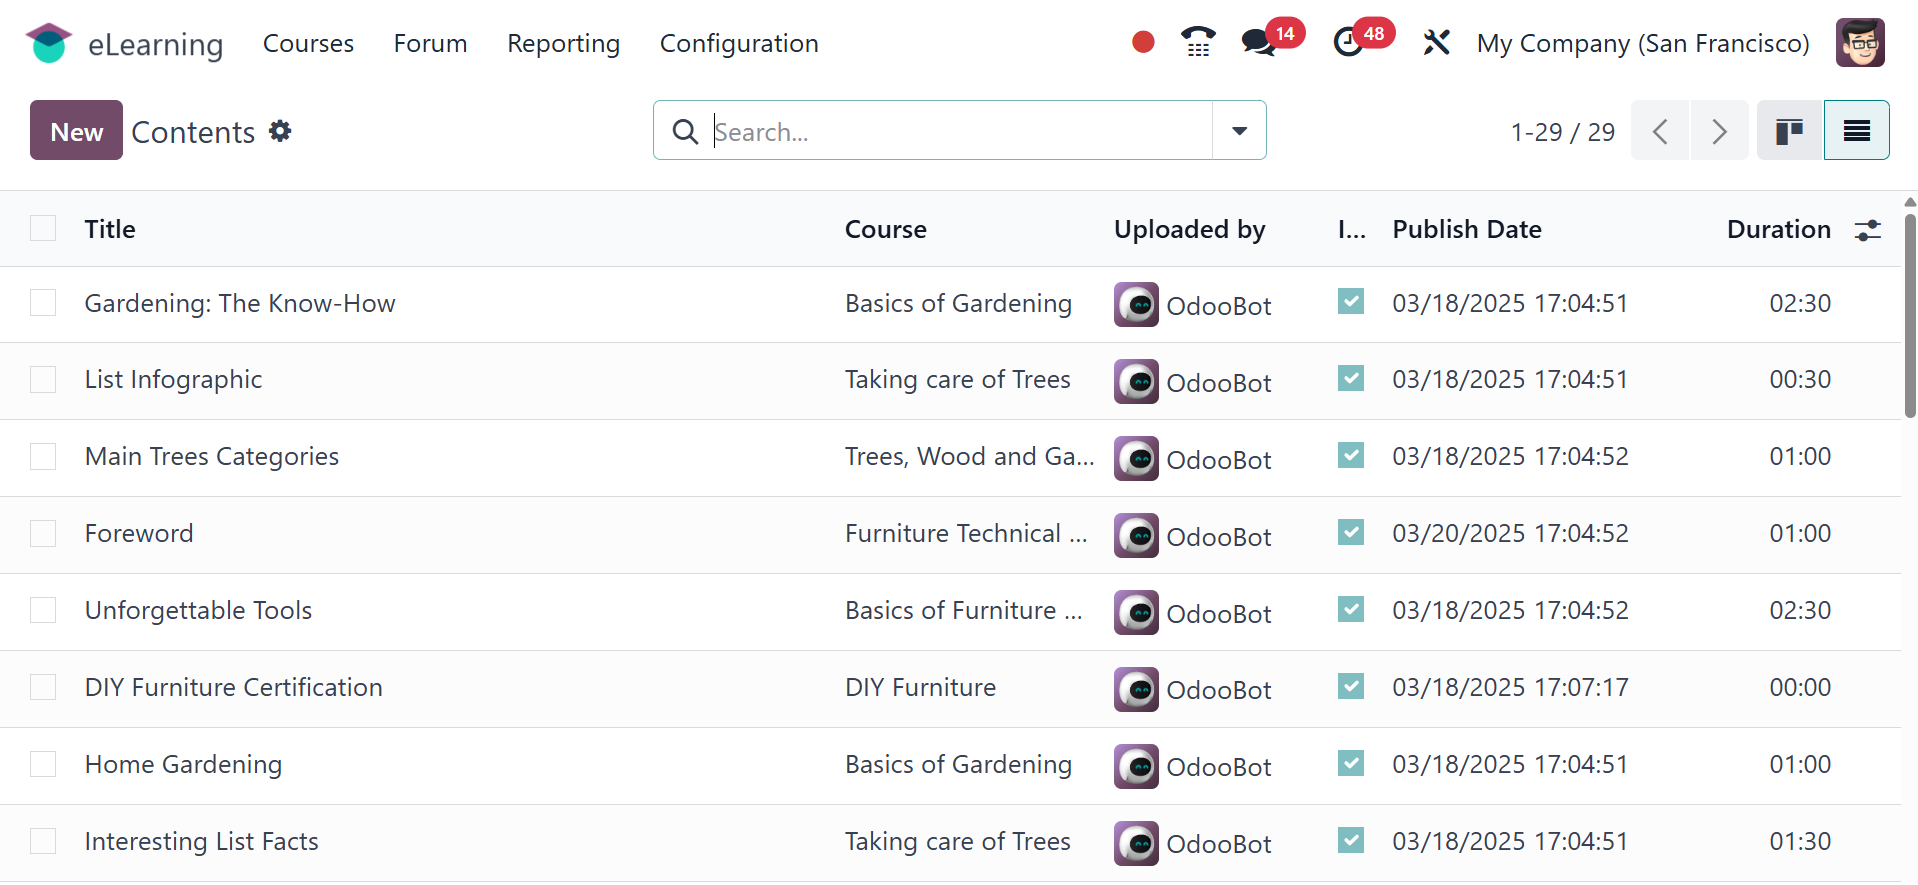
The New button can be used to add
new items.
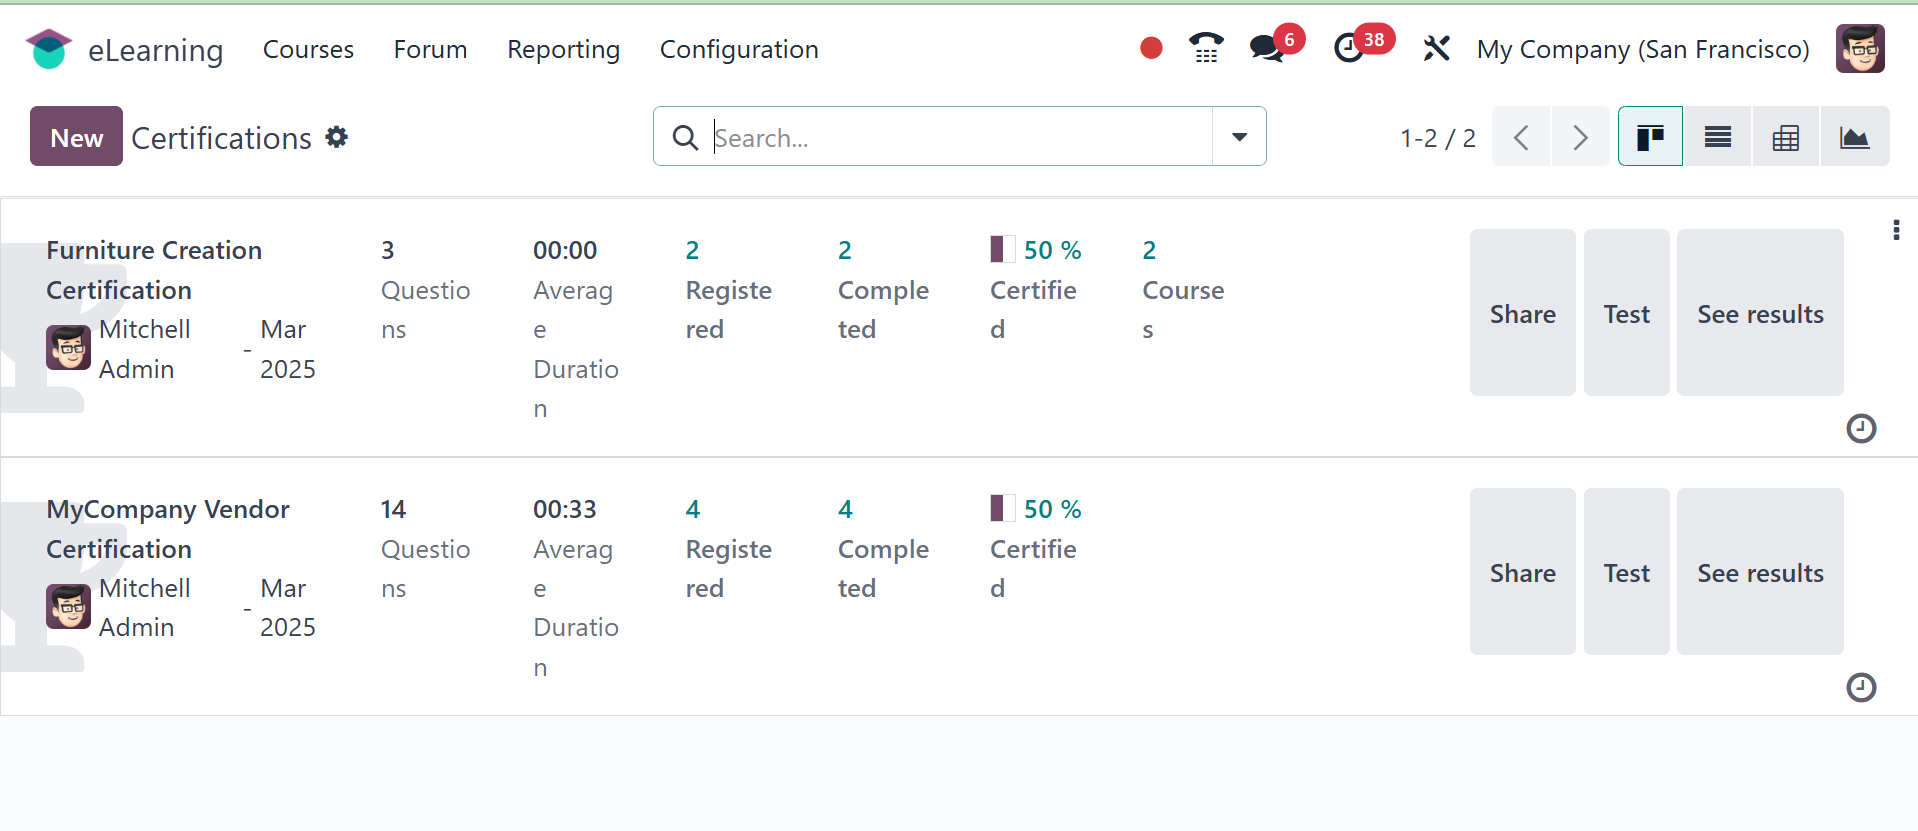
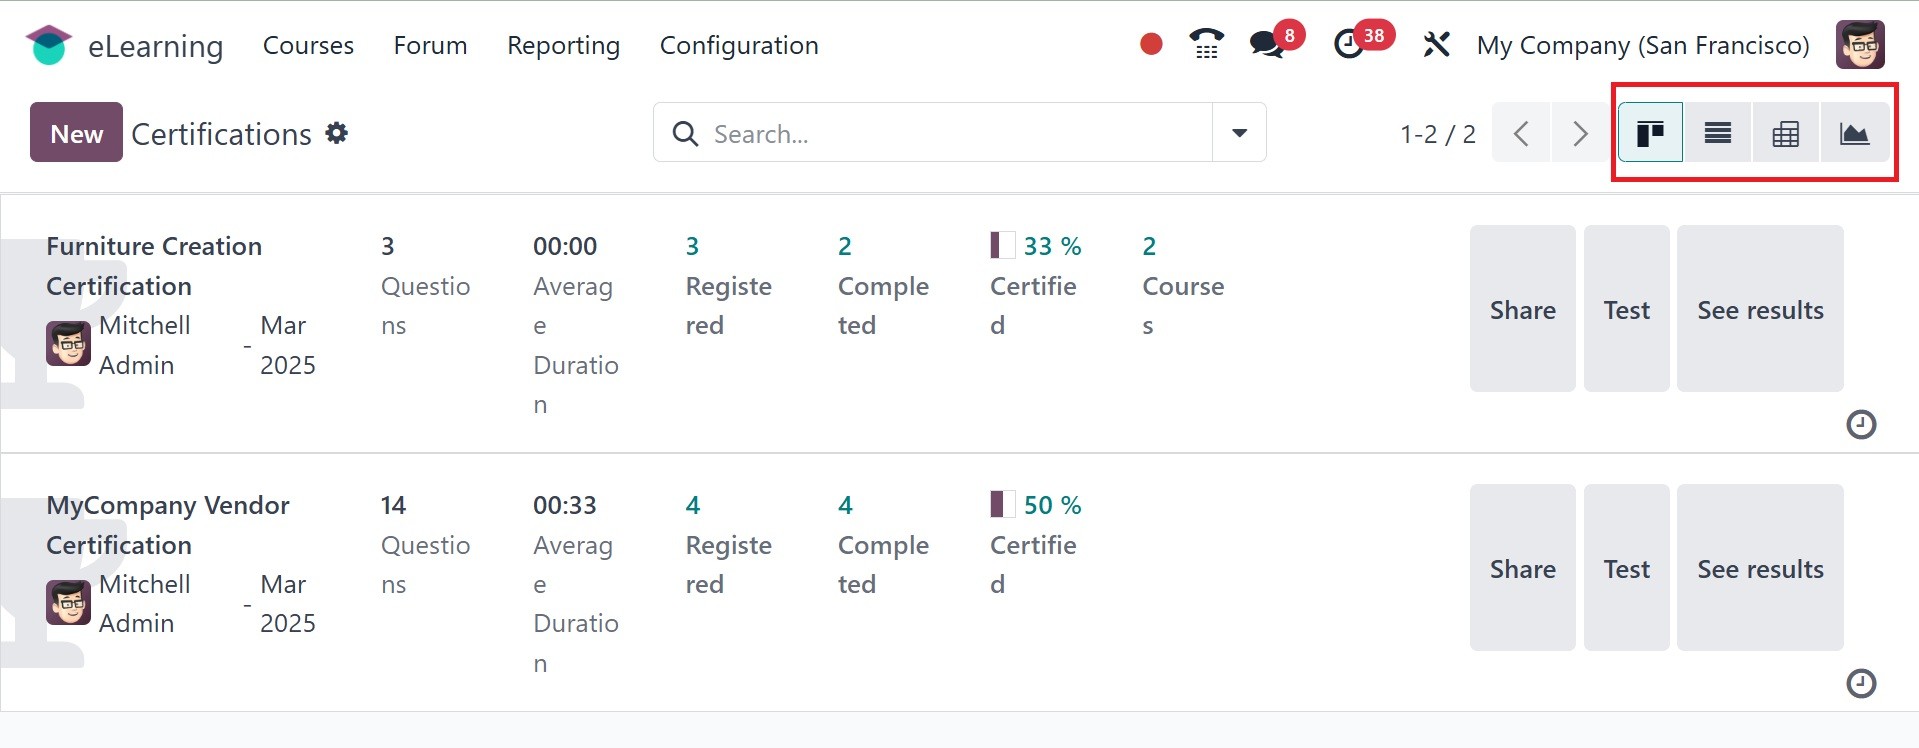
1.3 Certifications
On enabling the option of
certifications from the
settings page only, you will
get the option in the courses
menu. On the page, you will
get the name of
certification, responsible,
restricted to, questions, and
other updates as well. The
page can be viewed in list,
kanban, pivot, and graphical
views as well.
All certificates are shown
together in the certification
field, and each
certification's options to
Share, Test, and See results
are shown after the
certification's details
(e.g., average time, number
of questions, courses, etc.)
are accessed from the Kanban
view.
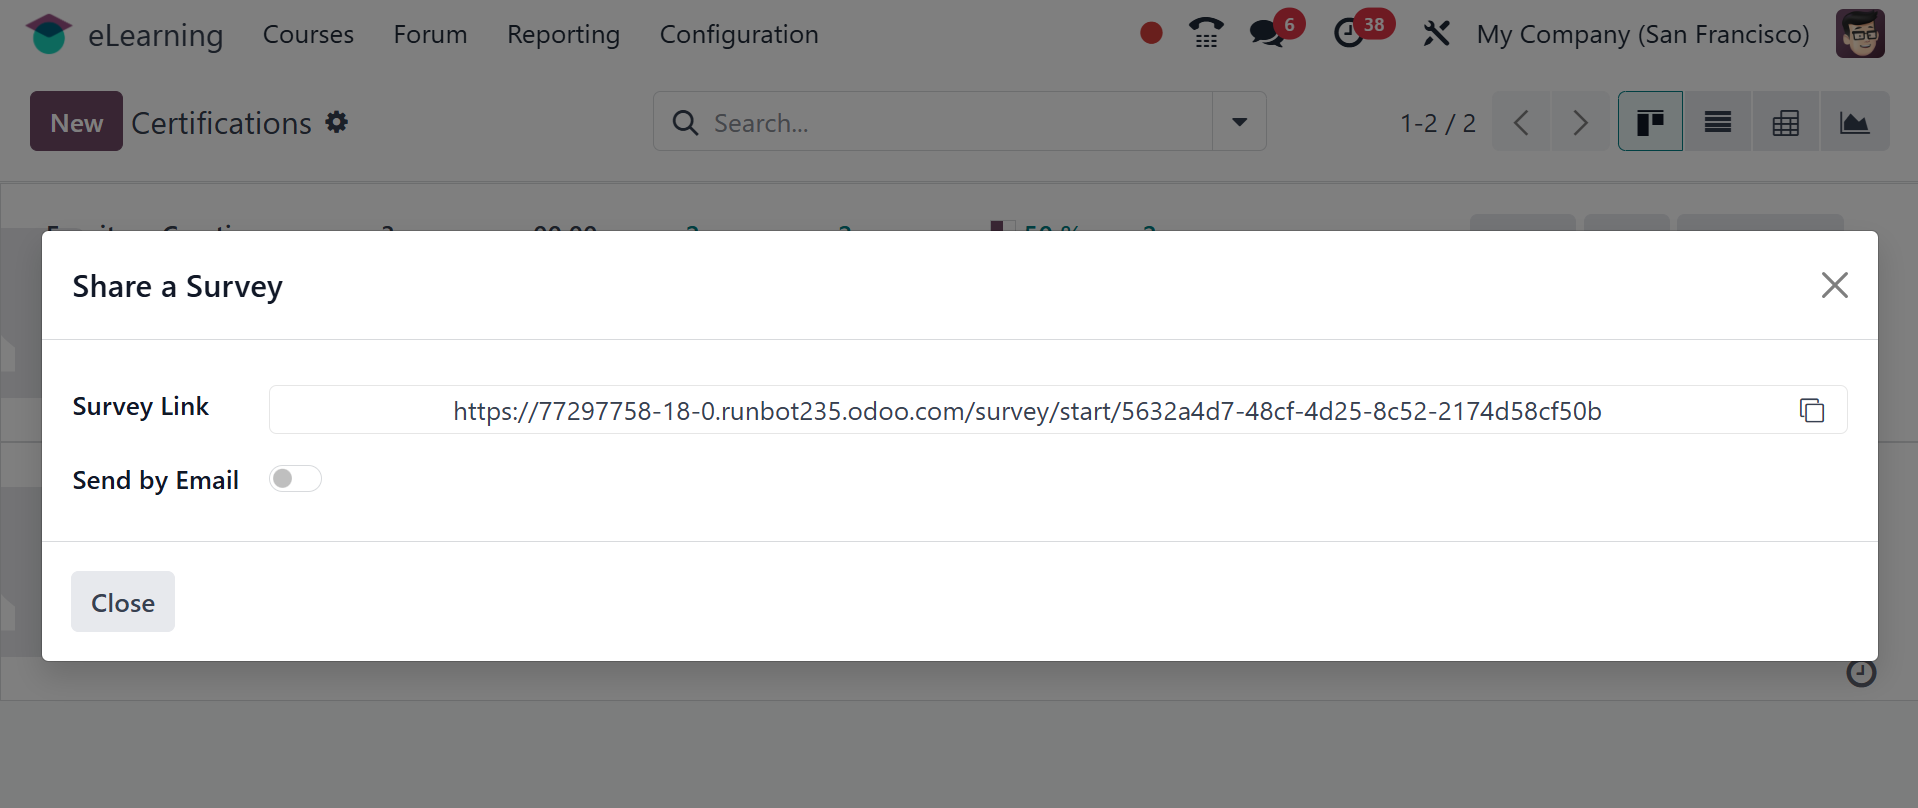
Clicking the Share option opens a
new popup window with the
survey URL, which you may
email.
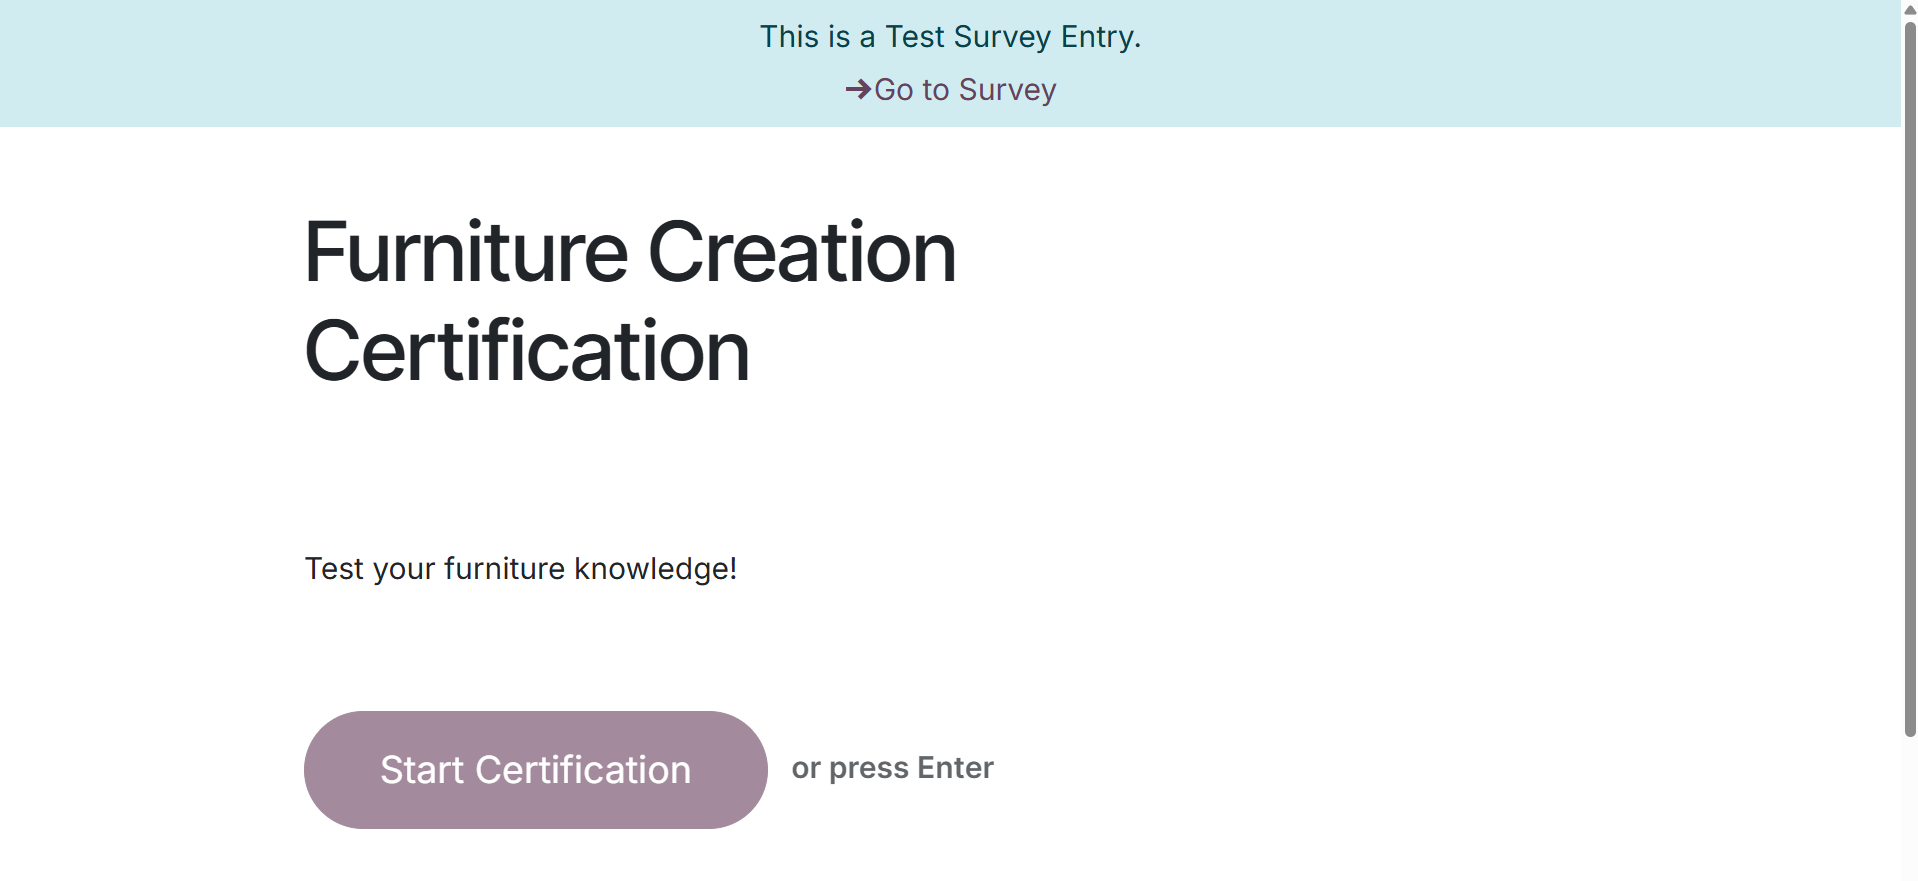
The user can test the
certification program by
clicking the Test button.
Users can begin testing by
selecting the Start
Certification option.
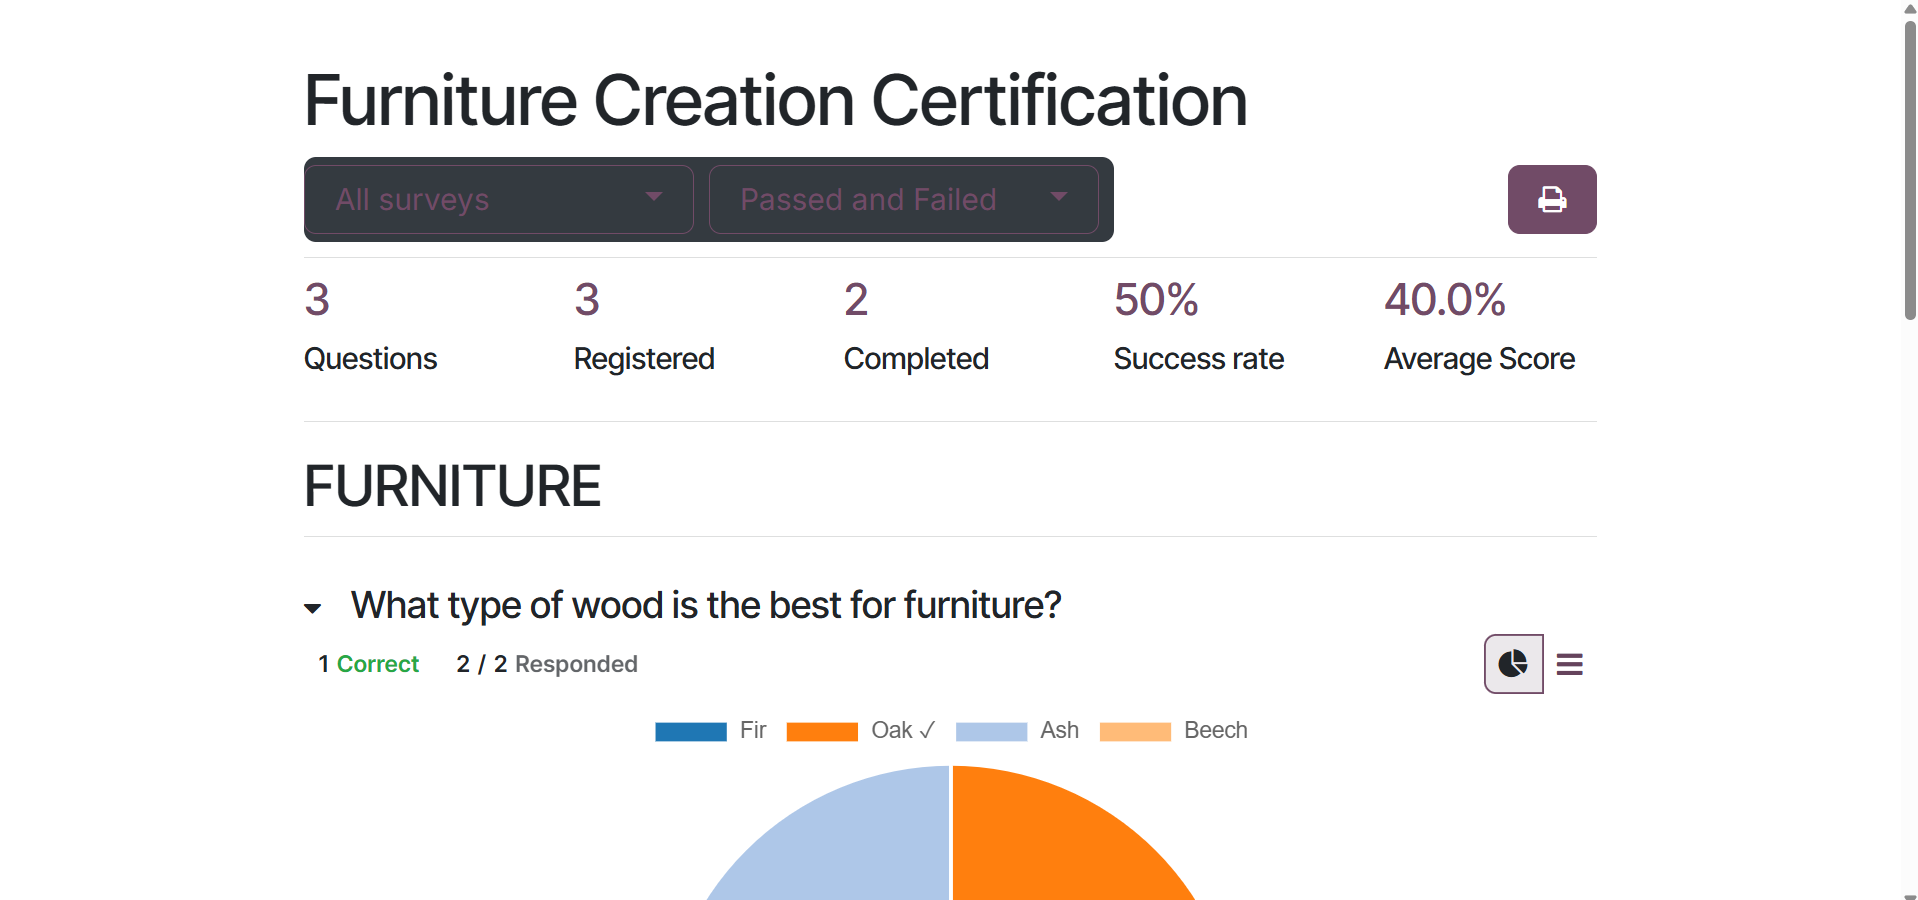
You may then examine the result
overview, user reaction, and
other details on the screen
by selecting the "See
Results" option.
Among the available viewpoints
are list view, pivot view,
kanban view, and graph view.
Click the New button to start a
new Certification.
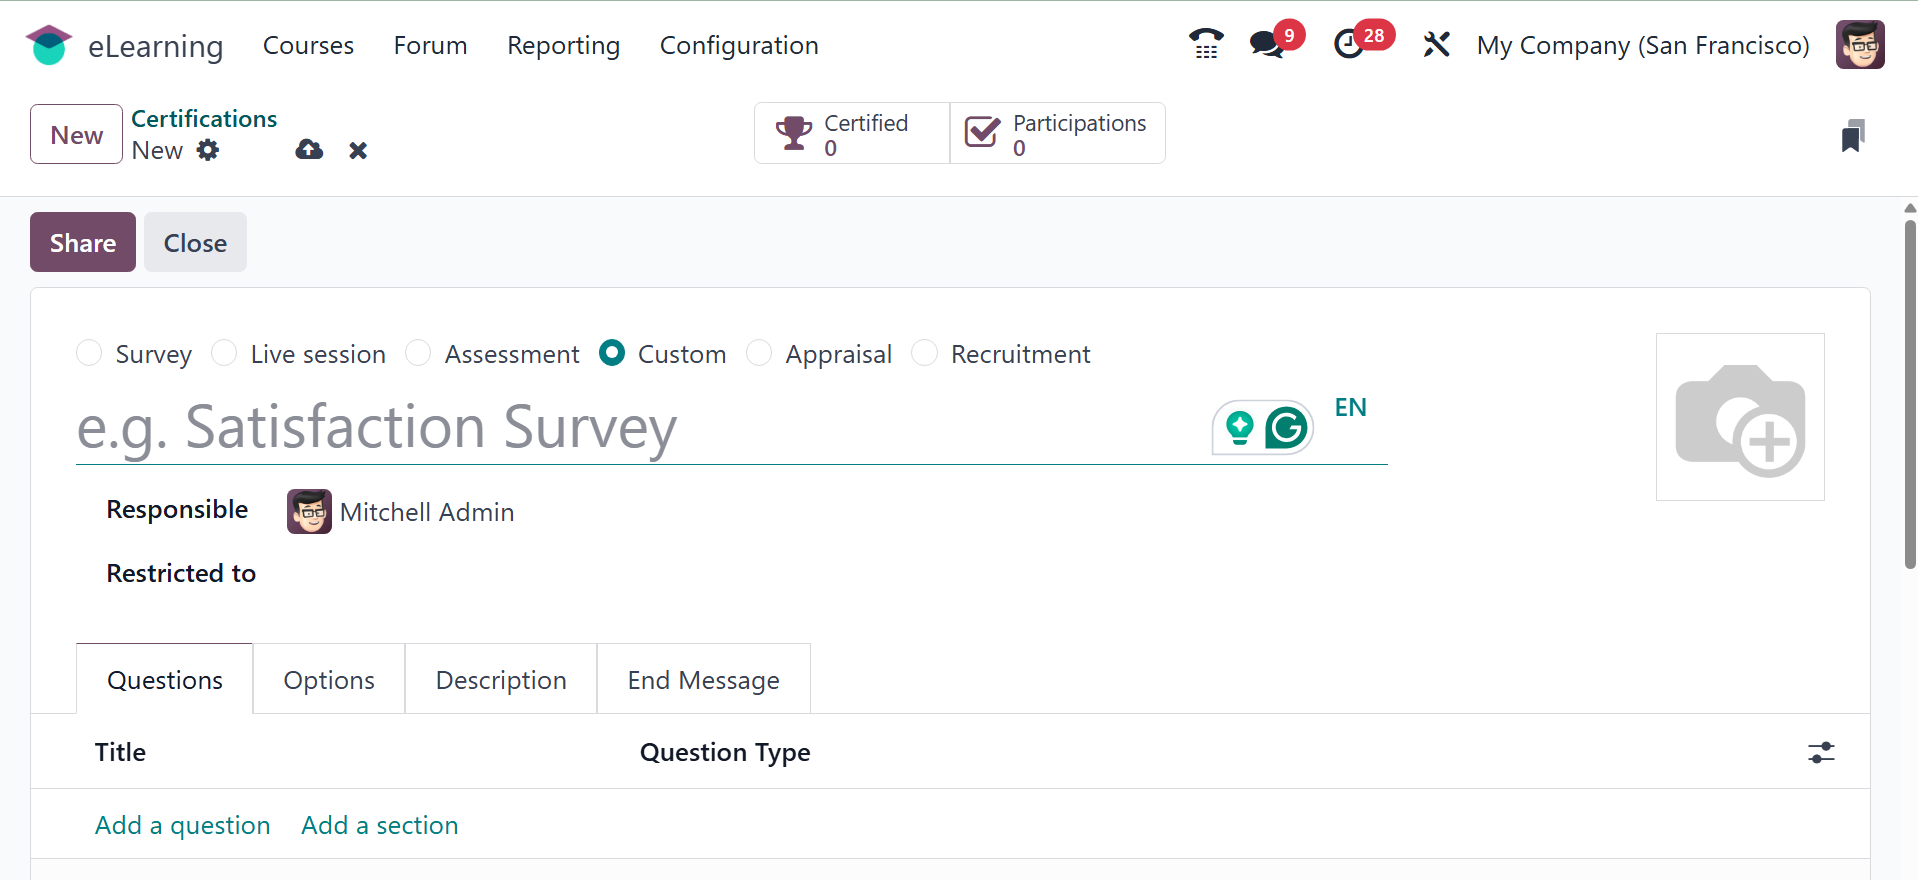
Here, you can provide the name of
the certification,
responsible, and restricted
to options, all the details
can be aded accordingly.