1.Mailings
Let's examine the various functions that this module's options serve
in more detail.
After choosing the module, the main dashboard will appear, as seen
below.

Emails that have already been sent to you will be emailed to you,
together with details on when they were sent, what was in the
subject line, who sent it, whether it was delivered, and whether it
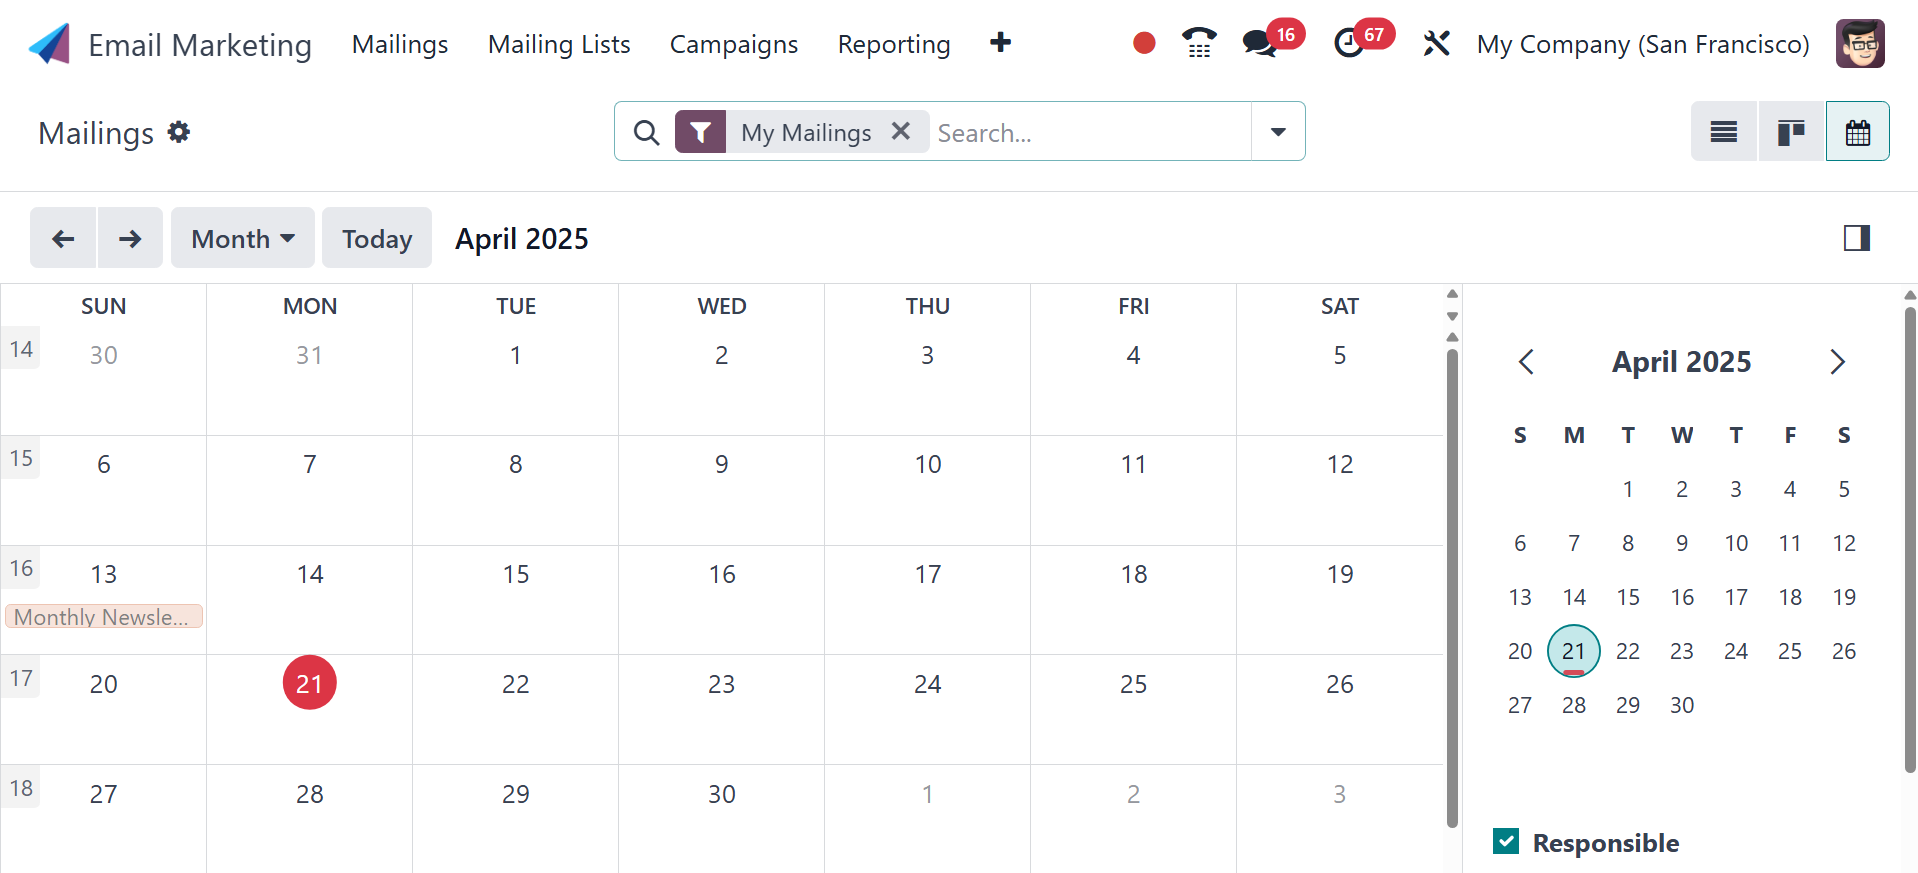
was clicked, opened, or responded to. The page can also be seen in
Calendar, List, and Kanban formats. The calendar view will be, as in
the image below.
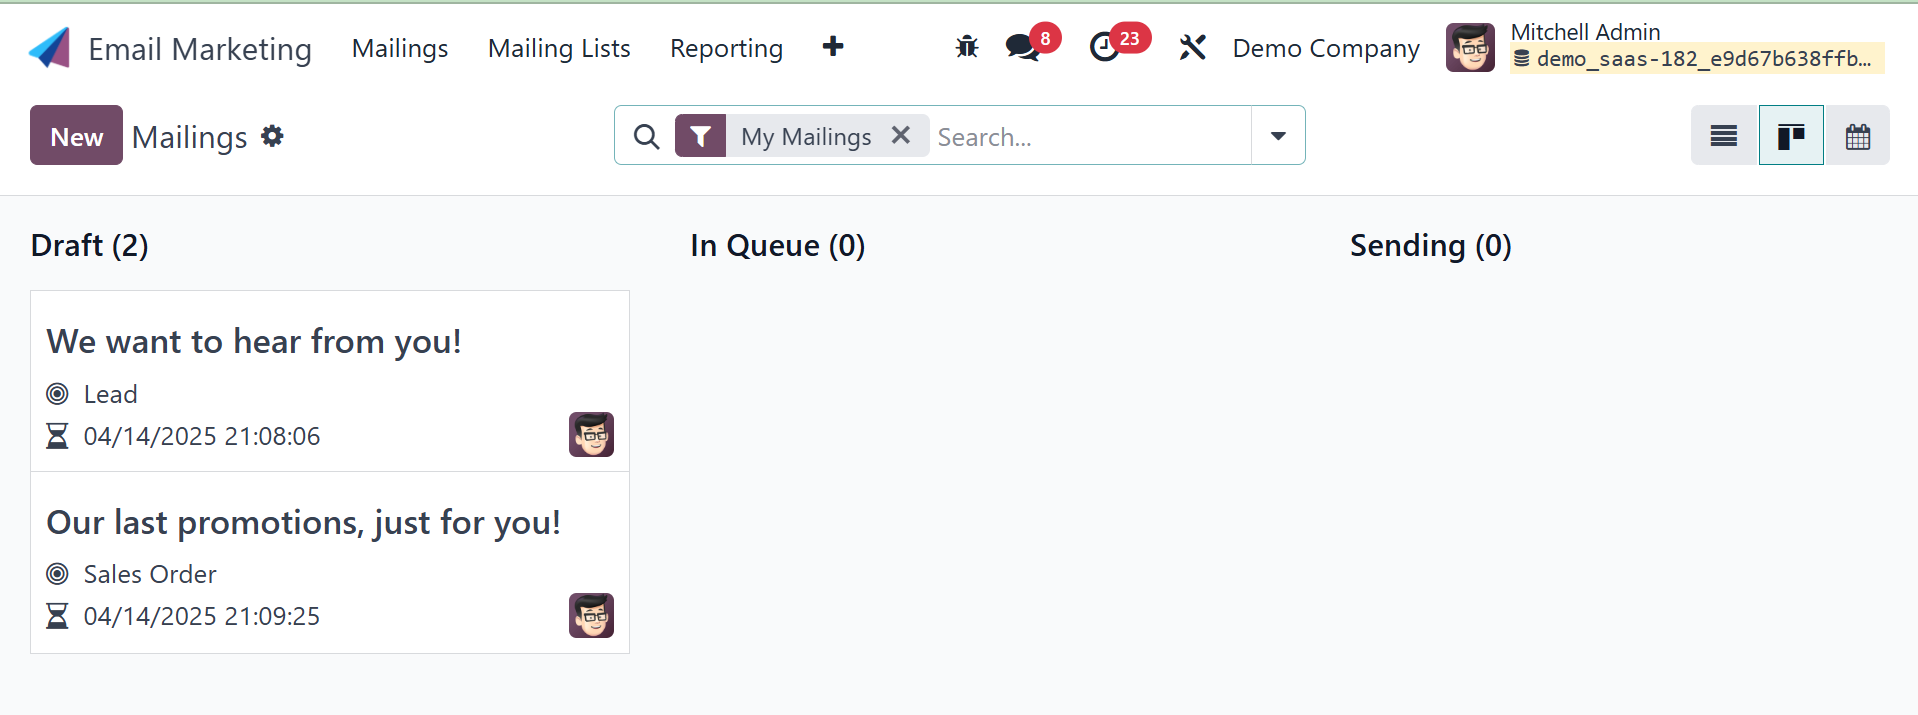
And the kanban view will be, as in the image below.
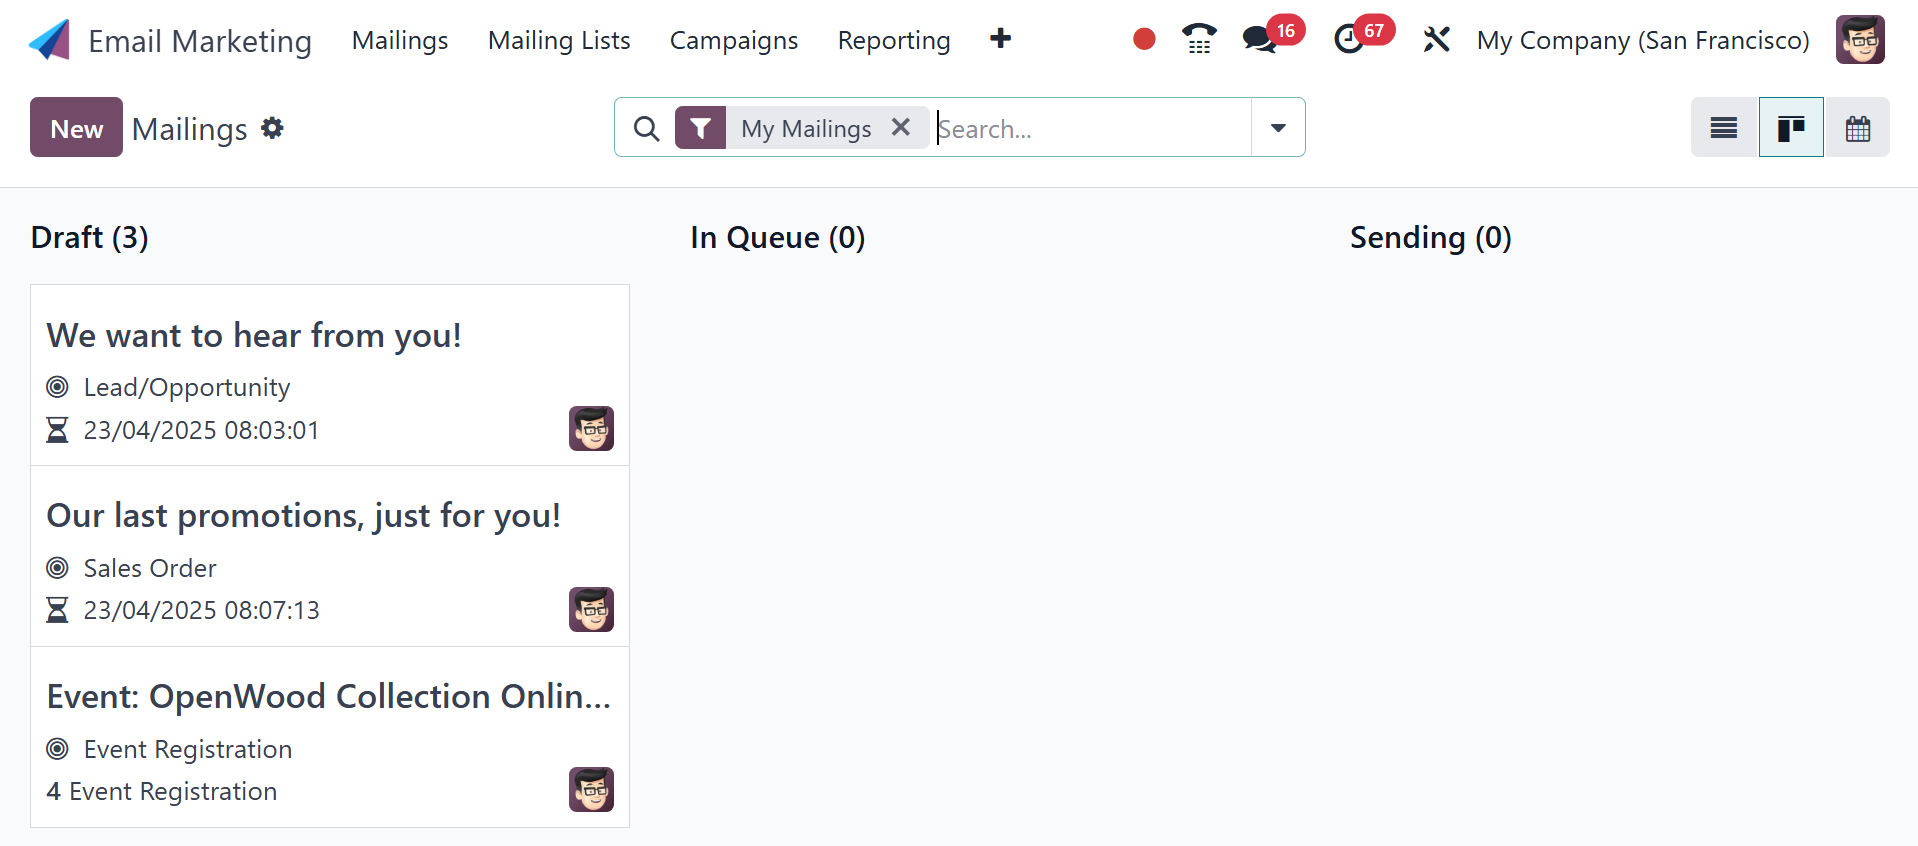
The options for such perspectives are located on the right side of
the page.
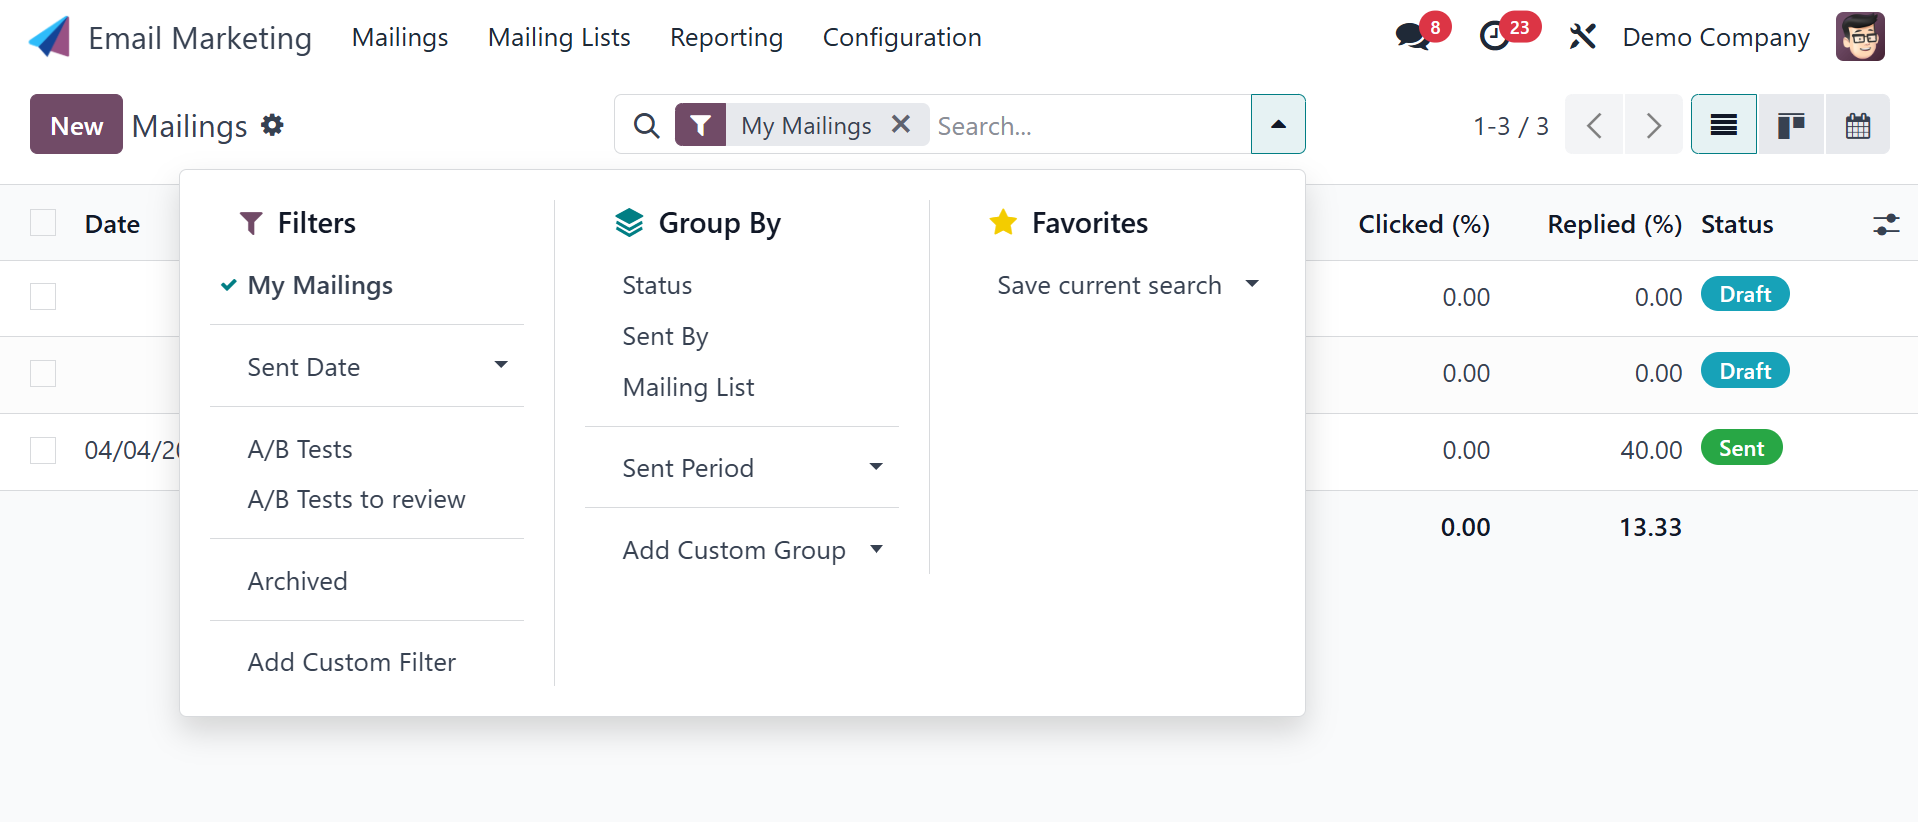
Depending on your needs, you can sort using the Group By and Filters
options. When you select a particular responsible user from the
list, as seen below, the person's chat box will open.
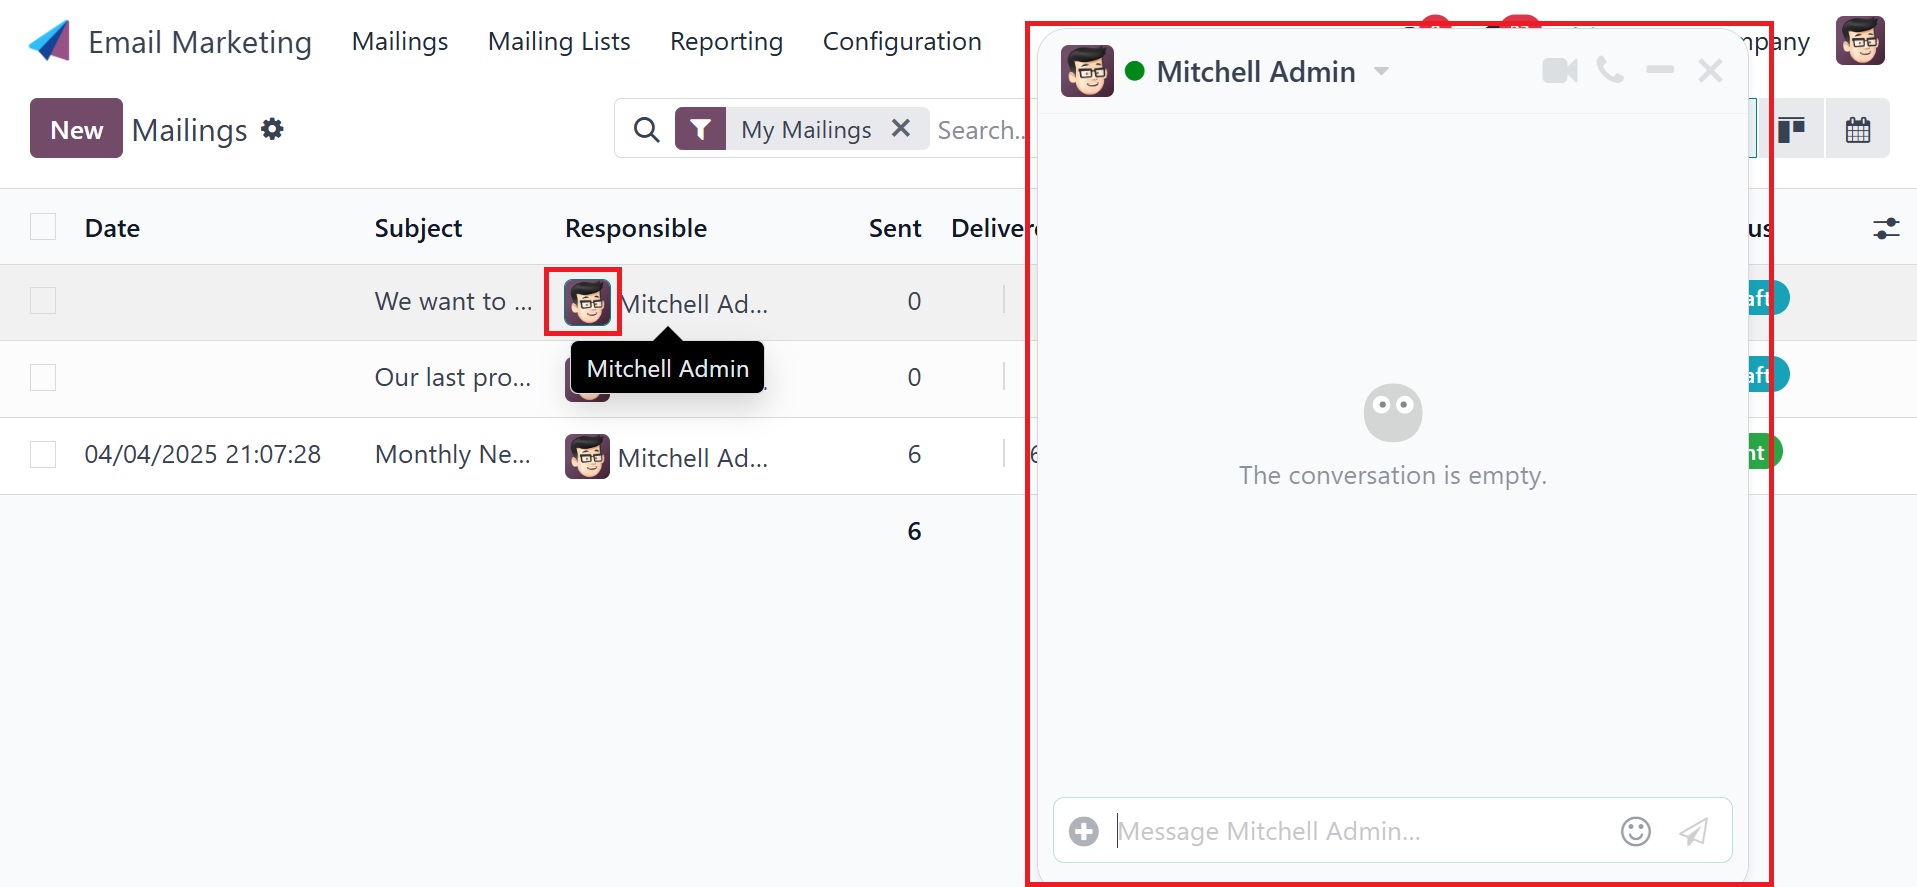
This responsible user can be contacted here. By selecting the desired
data record, we may examine and examine it in further detail across
all of the data records in the picture below.

The image provided below represents one of the records on the mailing
list. Depending on the particular email, you will undoubtedly obtain
all the information. To do more tasks, you can use the Action icon,
which can be seen in the image below. Under the Archive option, you
can also use the Duplicate, Delete, and Archive choices as
necessary.

Under the criteria option, you can now select from a number of
criteria, such as My Mailings, Send date, A/B test, A/B tests to
review, and Archived. Under the Group By option, you may also select
Status, Send By, Send period, and Add Custom group options.
Additionally, the particular message can be added to Favorites,
which offers the following options: Add to My Dashboard, Insert View
in the Article, Insert Link in the Article, and Save a Current
Search.
Now, if you like to produce a similar type of mailing, choose the New
option on the left side of the window.
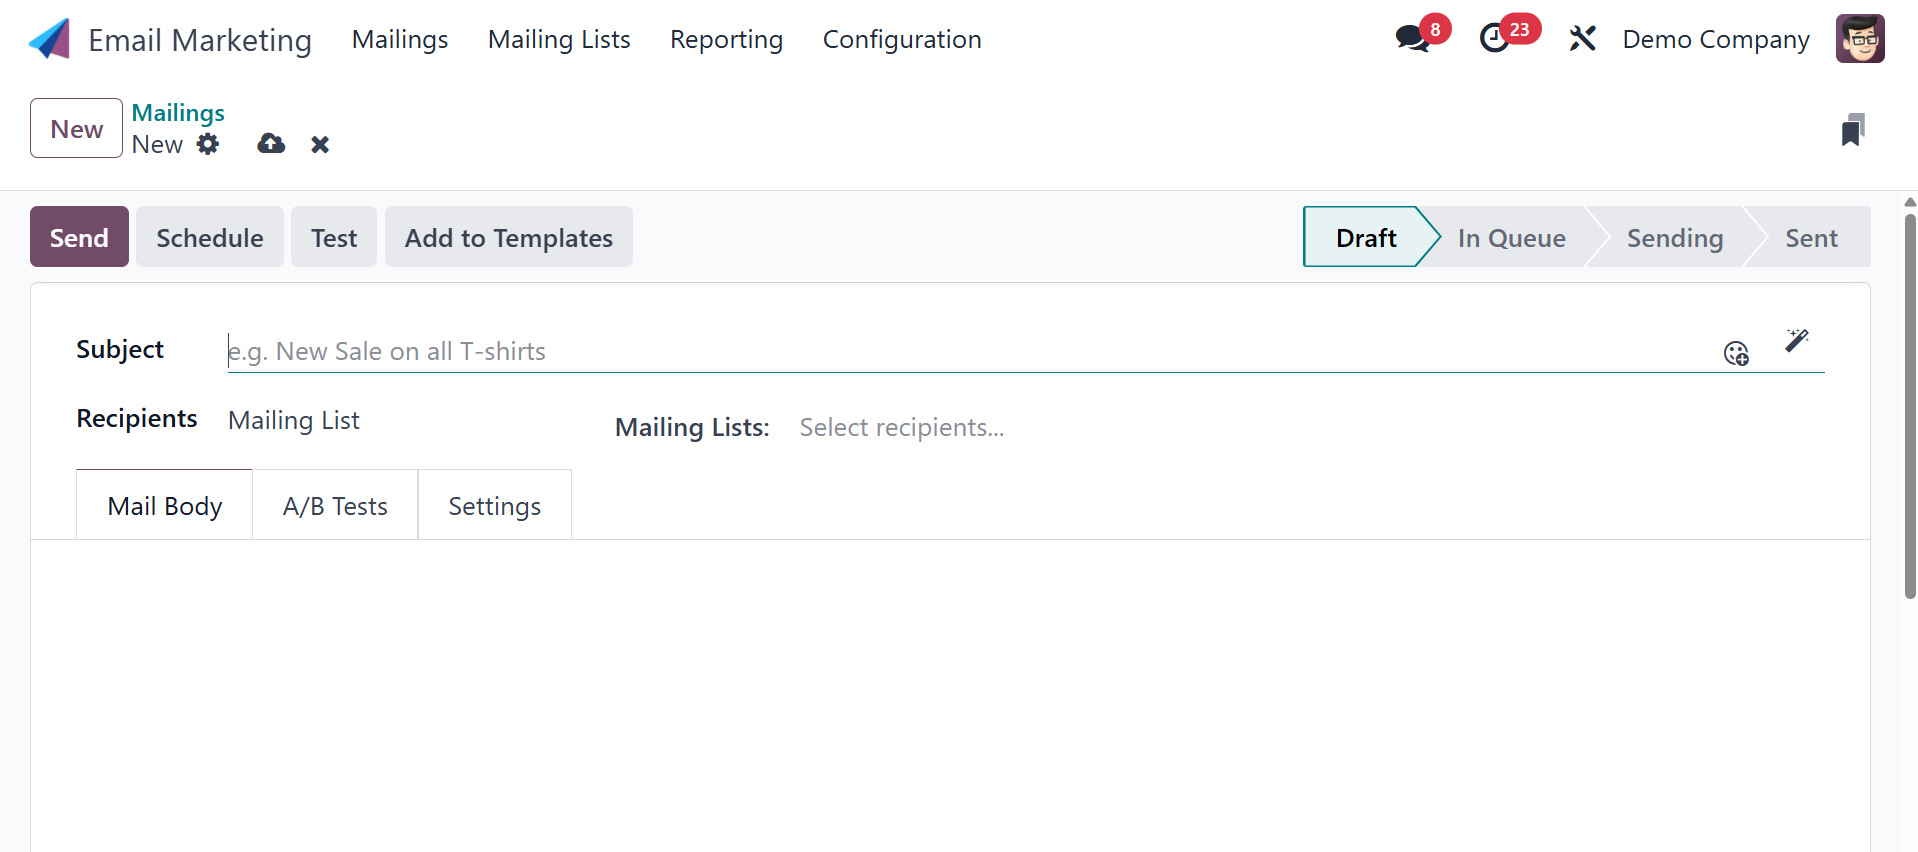
On the creation page, there is a space to write the subject of the
email. Emojis can also be used in the topic if needed. By clicking
on it, you can select the Recipients option from the drop-down box
directly beneath it.
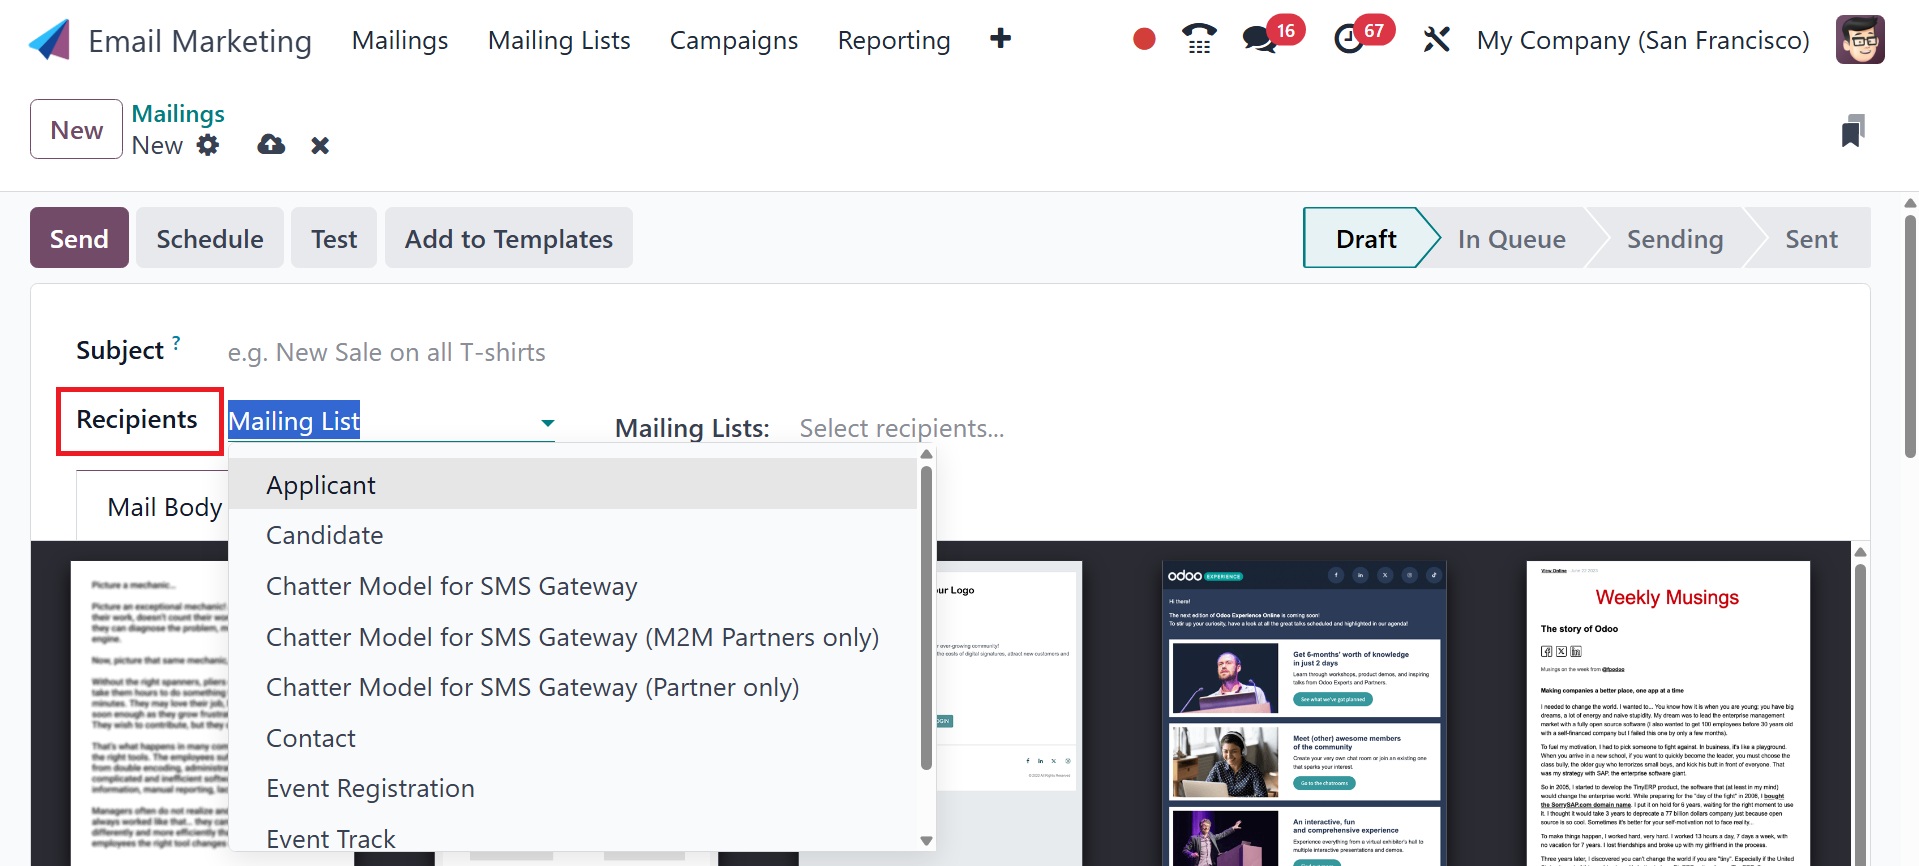
The types of the recipients include, applicant, candidate, chatter
model for SMS gateway, chatter mode for SMS gateway( M2M partners
only), chatter model for SMS gateway( partner only), contact, event
registration, event track, and so on.
Applicant : Job applicants from the Recruitment module.
Candidate : Similar to Applicant; may refer to specific
applicants or filtered records.
Chatter Model for SMS Gateway : Any record with a message
thread that supports SMS (via mail.thread).
Chatter Model for SMS Gateway (M2M Partners Only) : Records
linked to multiple partners via Many2Many fields for SMS.
Chatter Model for SMS Gateway (Partner Only) : Records linked
to a single partner (contact) for SMS via a Many2One field.
Contact : Individual contacts or companies from the Contacts
app.
Event Registration : People who registered for an event.
Event Track: Speakers or tracked sessions in an event or
conference.
Now you can select the mailing list option in the given field. There
are options under the drop-down menu for the mailing list that need
to be chosen. You can also access a customizable mailing list from
the main menu.
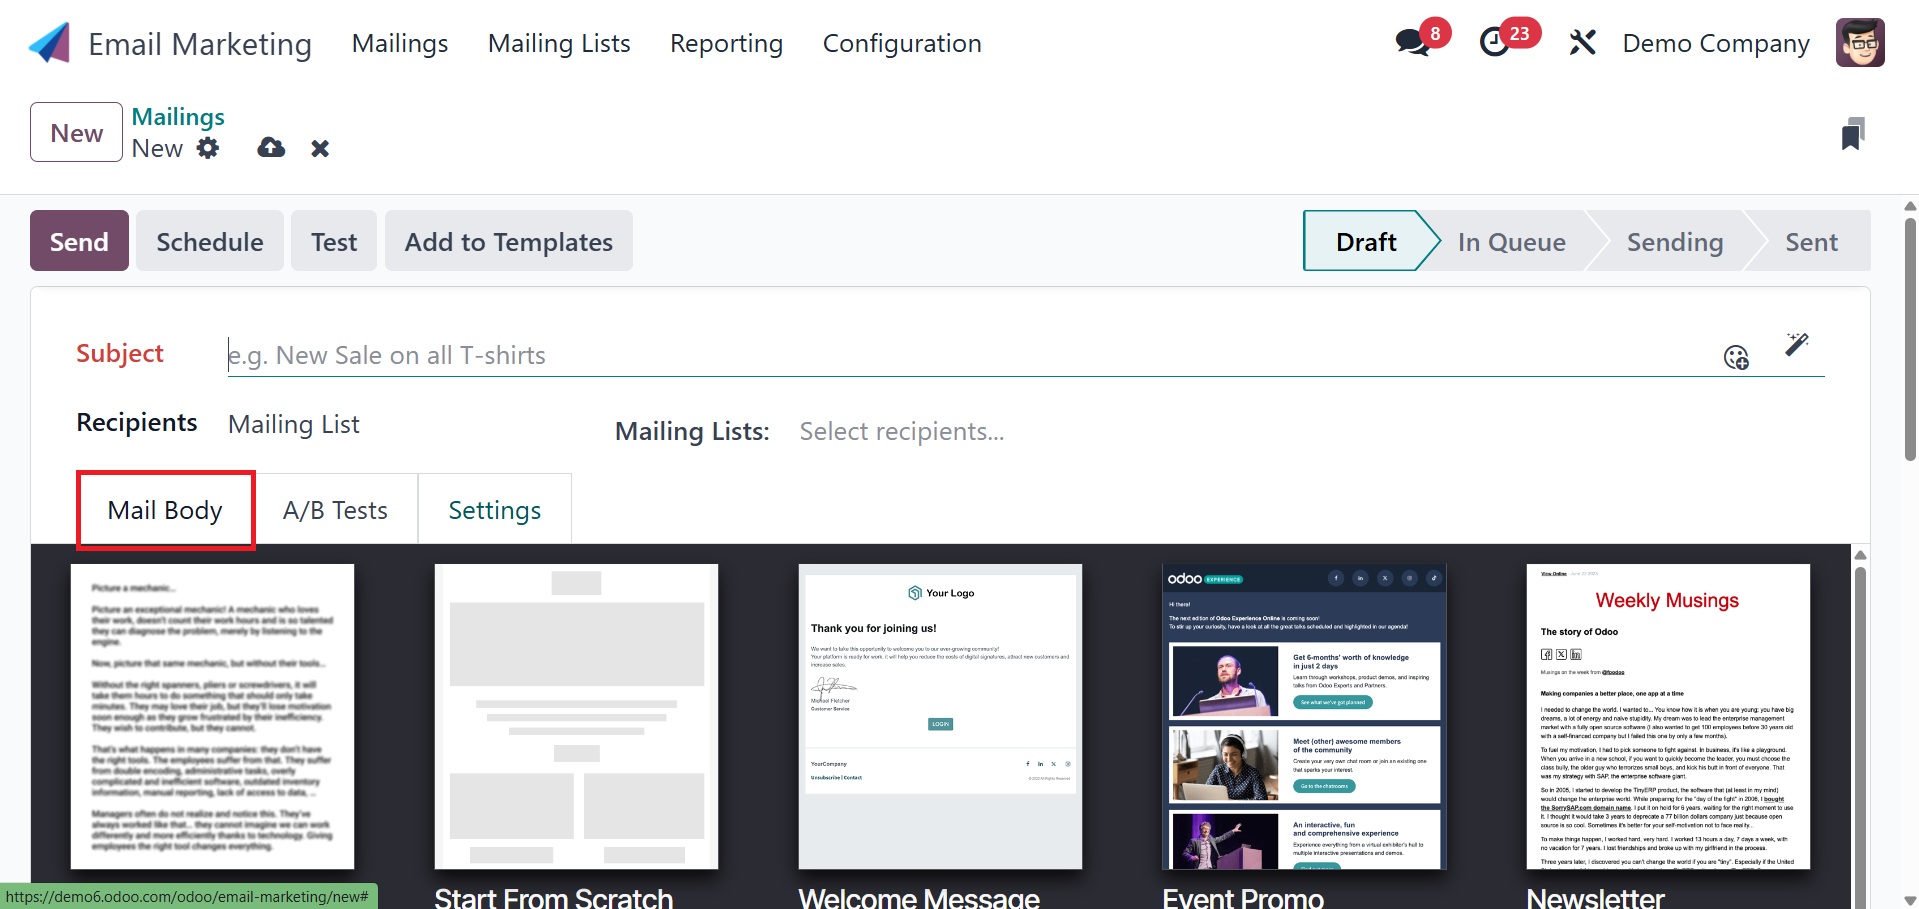
The Mail Body tab displays a number of mail bodies from which you can
select for the mailing. After selecting a certain one from that
list, you can alter and personalize it. On selecting a particular
block, you can customize, as in the image below.
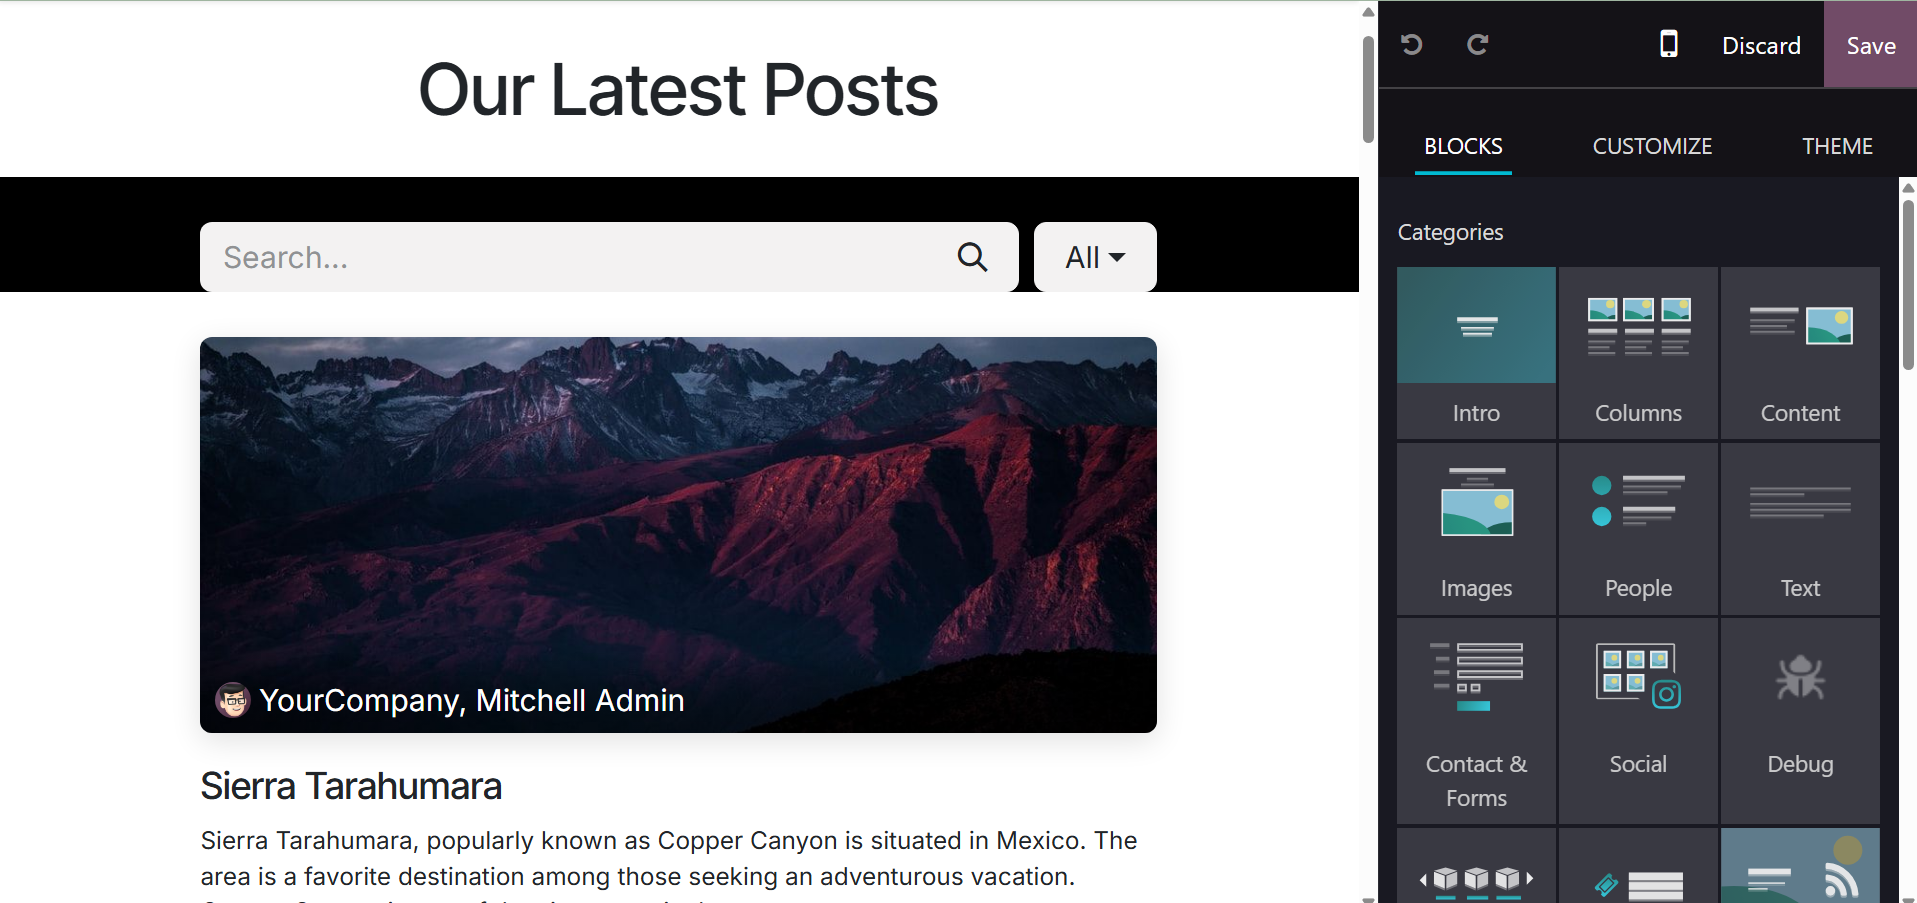
Additionally, our new snippet will open when you click the preview.
After that, we can alter the theme by using the snippet tools. In
this manner, we may generate fresh email snippets for Odoo 18 email
marketing. There, you can make use of the blocks, customize, and
designs according to our model.
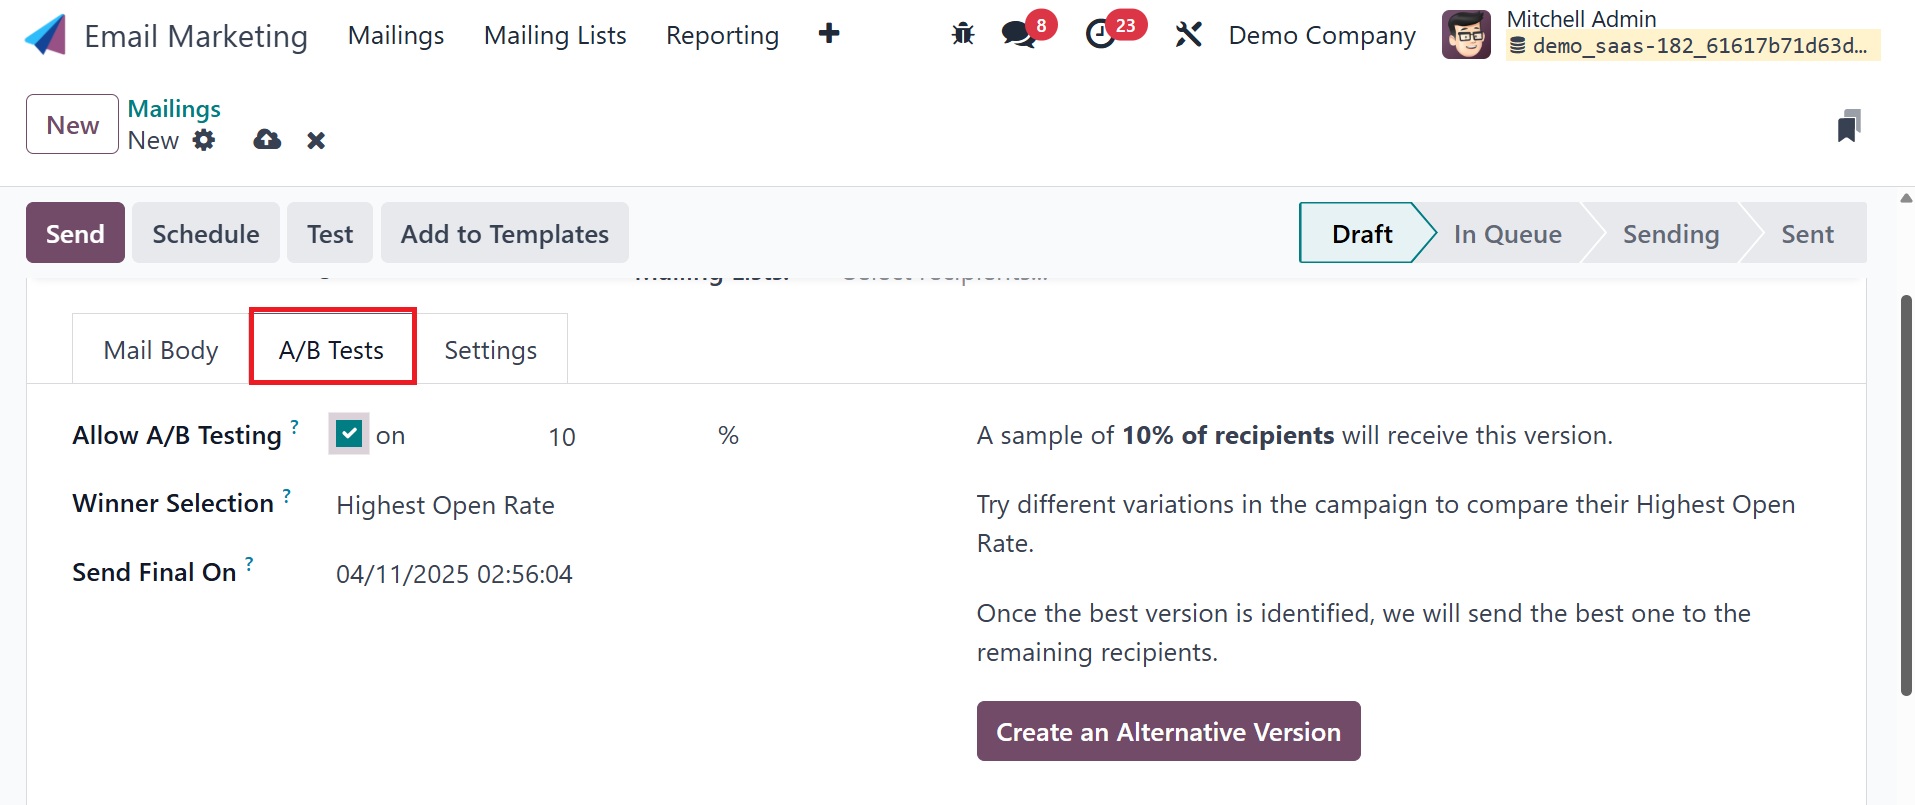
As seen in the above graphic, you can now decide whether to activate
the A/B test under the A/B Tests area. Sending different copies of
the mail to a group of people on the mailing list and monitoring
their replies is possible using A/B testing. This will assist in
determining the kind of mail that receives the most responses from
recipients and is regarded as having the highest open rate. You can
use these emails to target audiences. Under this A/B test, you have
the Allow A/B Tseting option to trigger, winner selection, and send
fime on option to add the date. After the A/B test is over, Odoo
will select the winning email version to send to the remaining
recipients based on the "Winner Selection" option. Under winner
selection, you have different criteria, as in the screenshot below.

- Manual: allows the user to determine the “winning” version of
the mailing. This option removes the Send Final On field.
- Highest Open Rate (default): the mailing with the highest open
rate is determined to be the “winning” version.
- Highest Click Rate: the mailing with the highest click rate is
determined to be the “winning” version.
- Highest Reply Rate: the mailing with the highest reply rate is
determined to be the “winning” version.
- Leads: the mailing with the most leads generated is determined
to be the “winning” version.
- Quotations: the mailing with the most quotations generated is
determined to be the “winning” version.
- Revenues: the mailing with the most revenue generated is
determined to be the “winning” version.
Users can select the date in the Send Final On field, which tells
Odoo when to identify the "winning" email and send that version of
the message to the other recipients. A button to "Create an
Alternative Version" is located to the right of those fields. When
clicked, Odoo opens a new Mail Body tab where the user can draft a
different email draft for testing.

Additionally, you can input specific information using the Settings
menu, as shown in the screenshot above.
Preview text is one option that entices readers to select the mail.
The preview content appears next to the mailing's subject line. To
boost the opening rate, the preview text message will show up beside
the email subject. Furthermore, the responsible party will be in the
area alone and could be replaced if necessary. Below are the Send
From and Reply To choices, which are displayed correctly. If you
want to bolster the email's subject, you can attach files by
selecting "Attach a File." near to that, you have the TRACKING
option, where you can add medium, source, and responsible as well.
Click the Save icon to add the mailing to the previously created list
after providing all the information needed to make it. The Save
option has Send, Schedule, and Test options, as can be seen on the
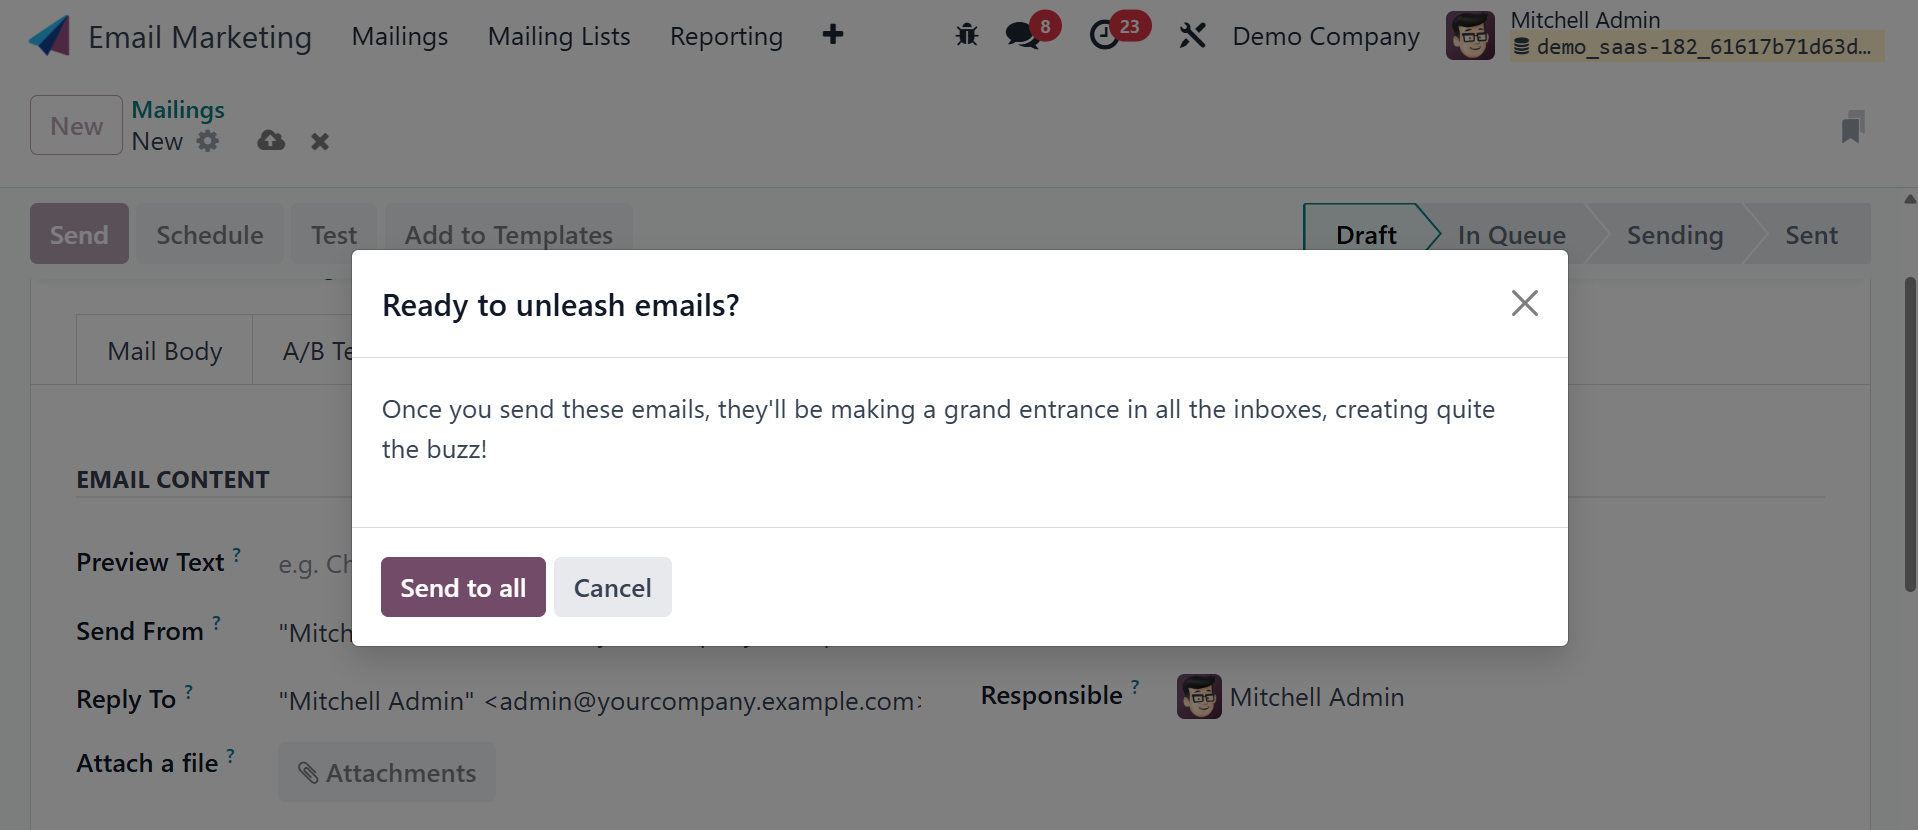
page provided above. Selecting the Send option will result in a page
that looks like the one below.
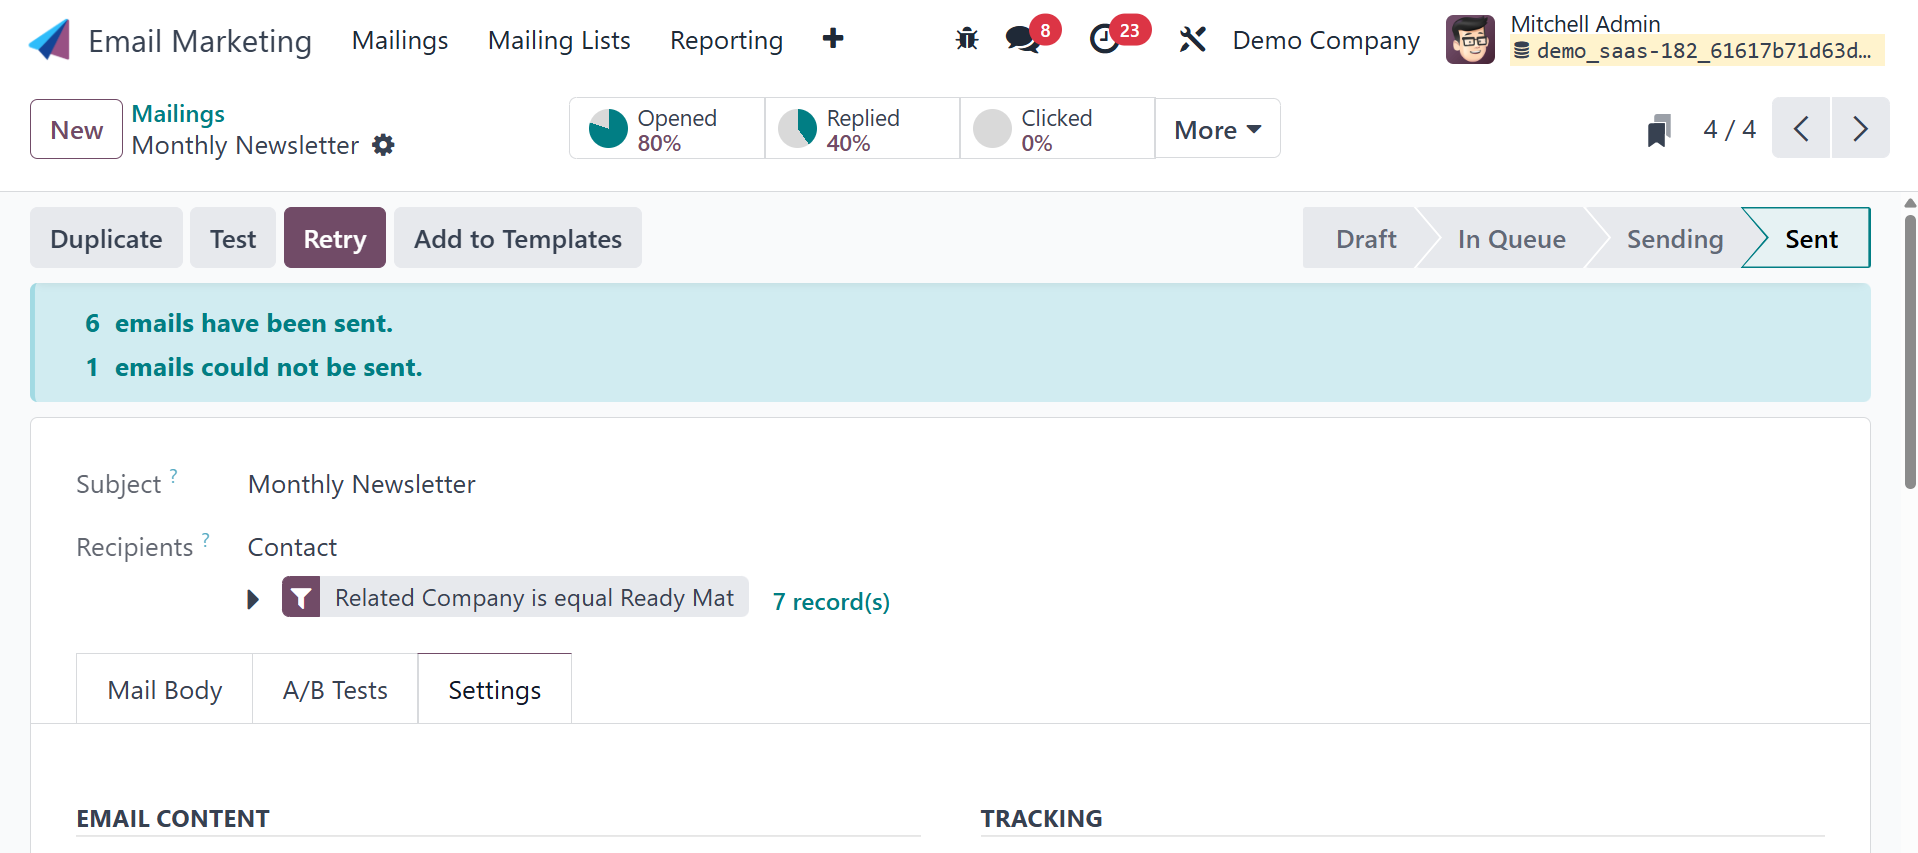
Here, on selecting the Send to all option, your status will change to
sent, as in the image below.
You can now choose the day on which the mail should be delivered to
the designated recipient by selecting the Schedule option, which
will bring up a screen.
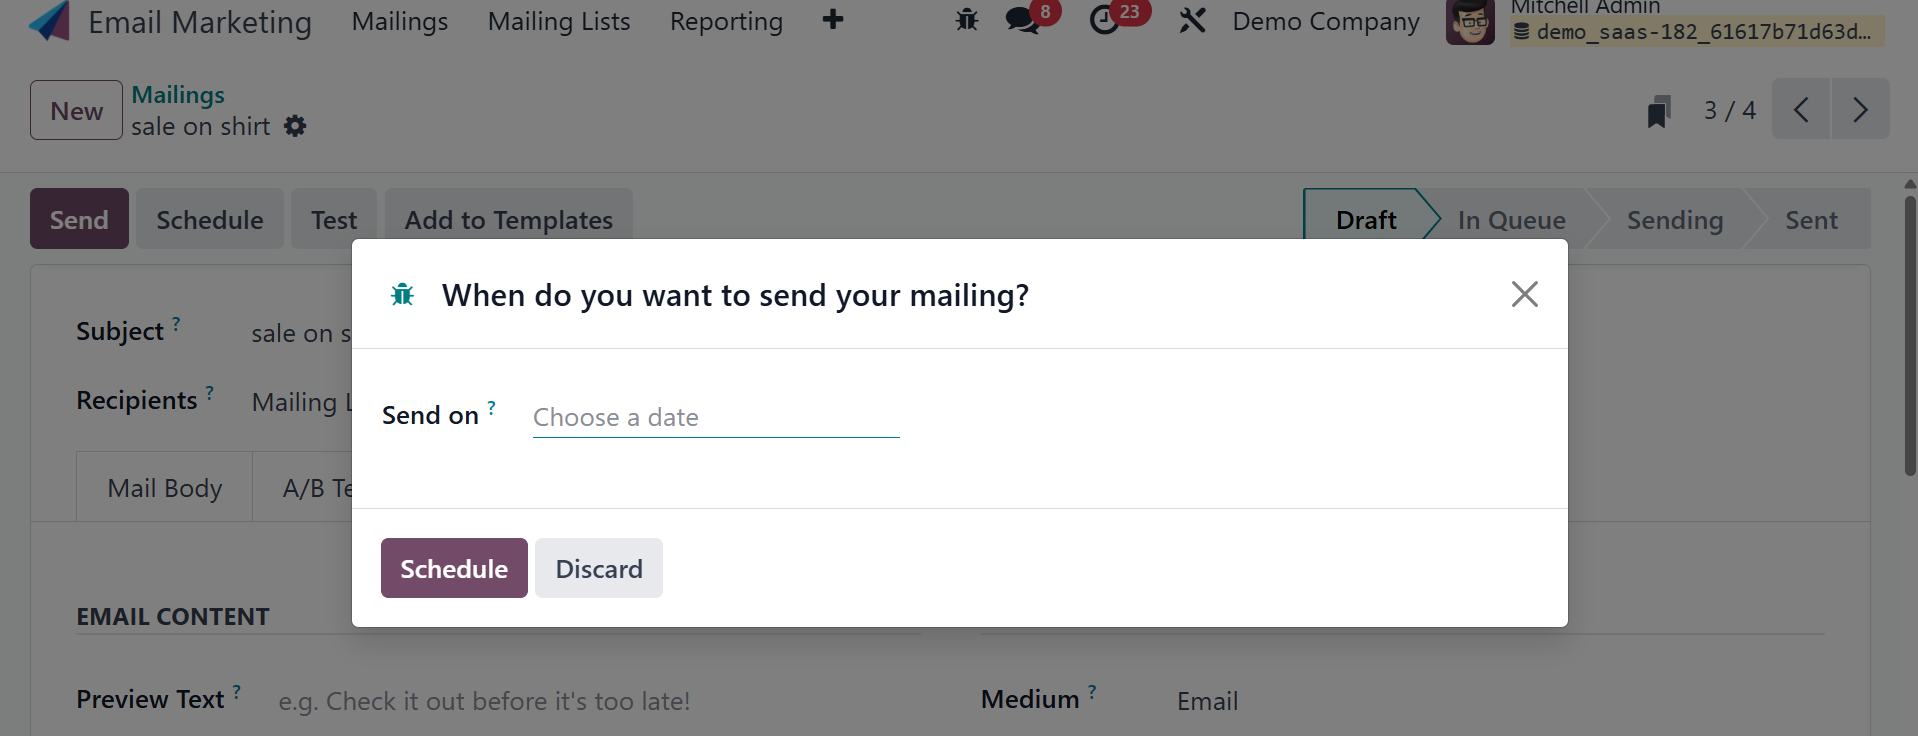
The Send on option allows you to input the date. After that, choose
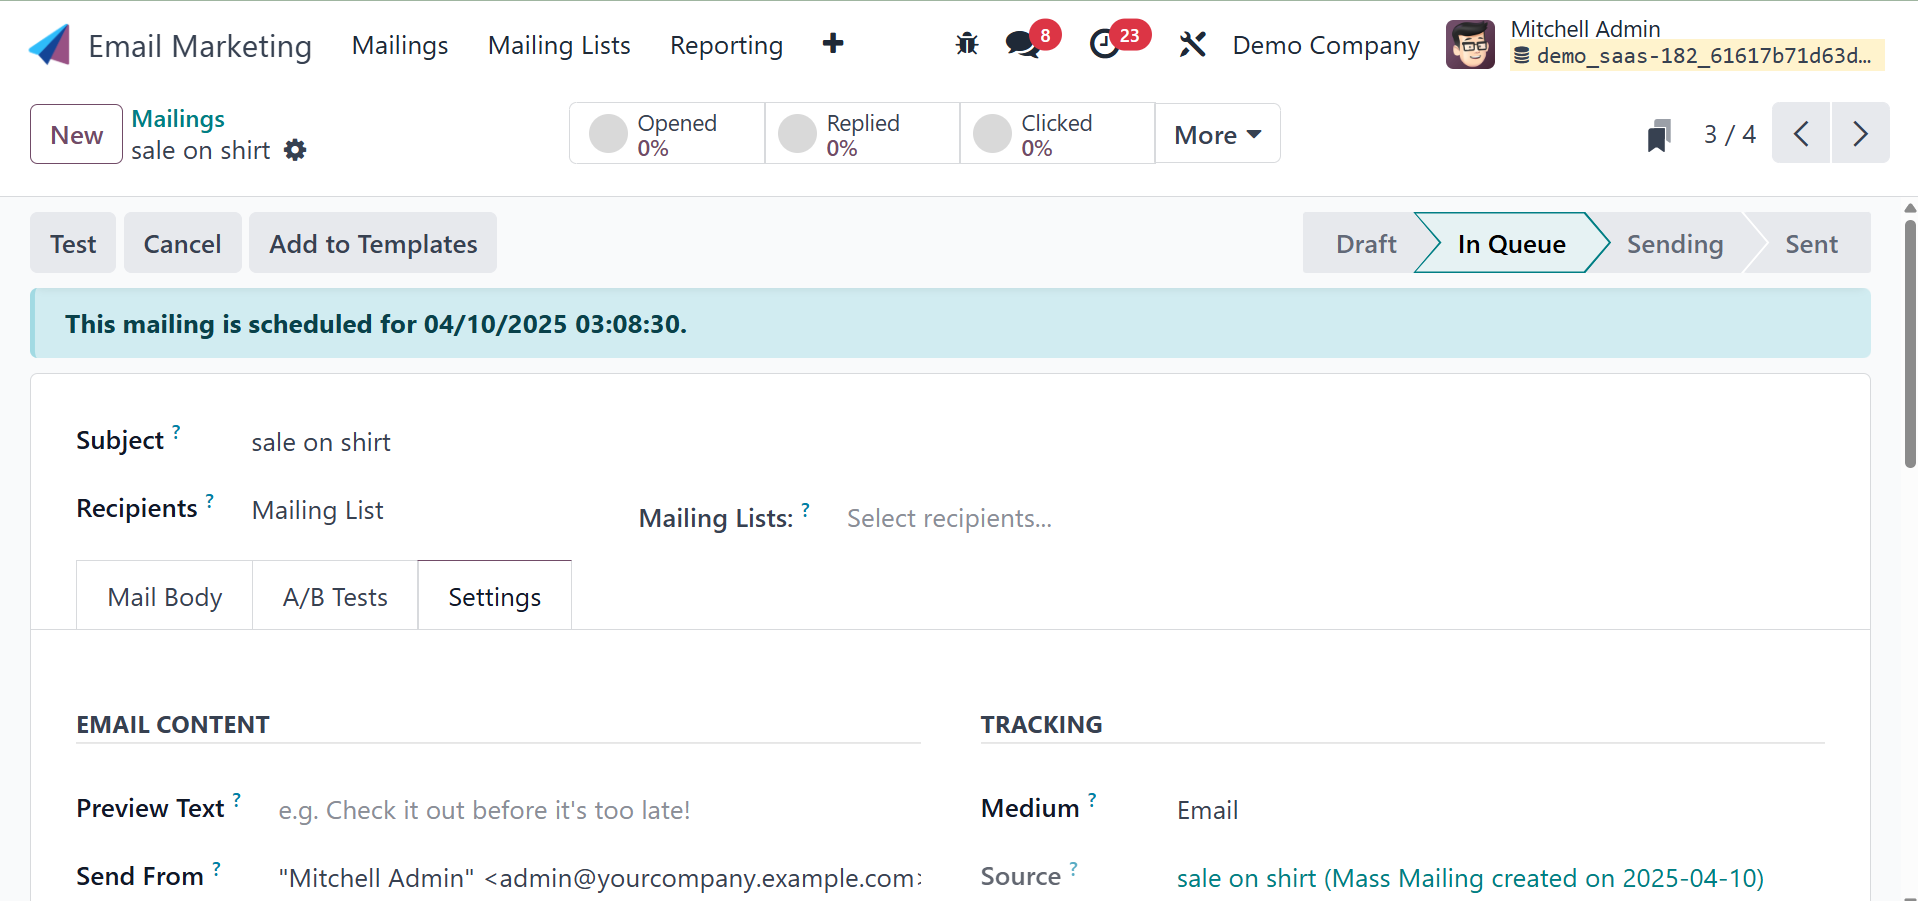
Schedule from the menu. The main page will now display the scheduled
date with the status IN QUEUE. Additionally, the email will be
delivered automatically on the specified day.
You may also test your mail at the given address by using the TEST
option.

As shown in the screenshot below, after you have finished all of
those processes, you will be presented with a number of smart
buttons, including Leads, Opportunities, Quotations, Invoiced,
Received, Opened, Clicked, Replied, Bounced, Sent, and Ignored.
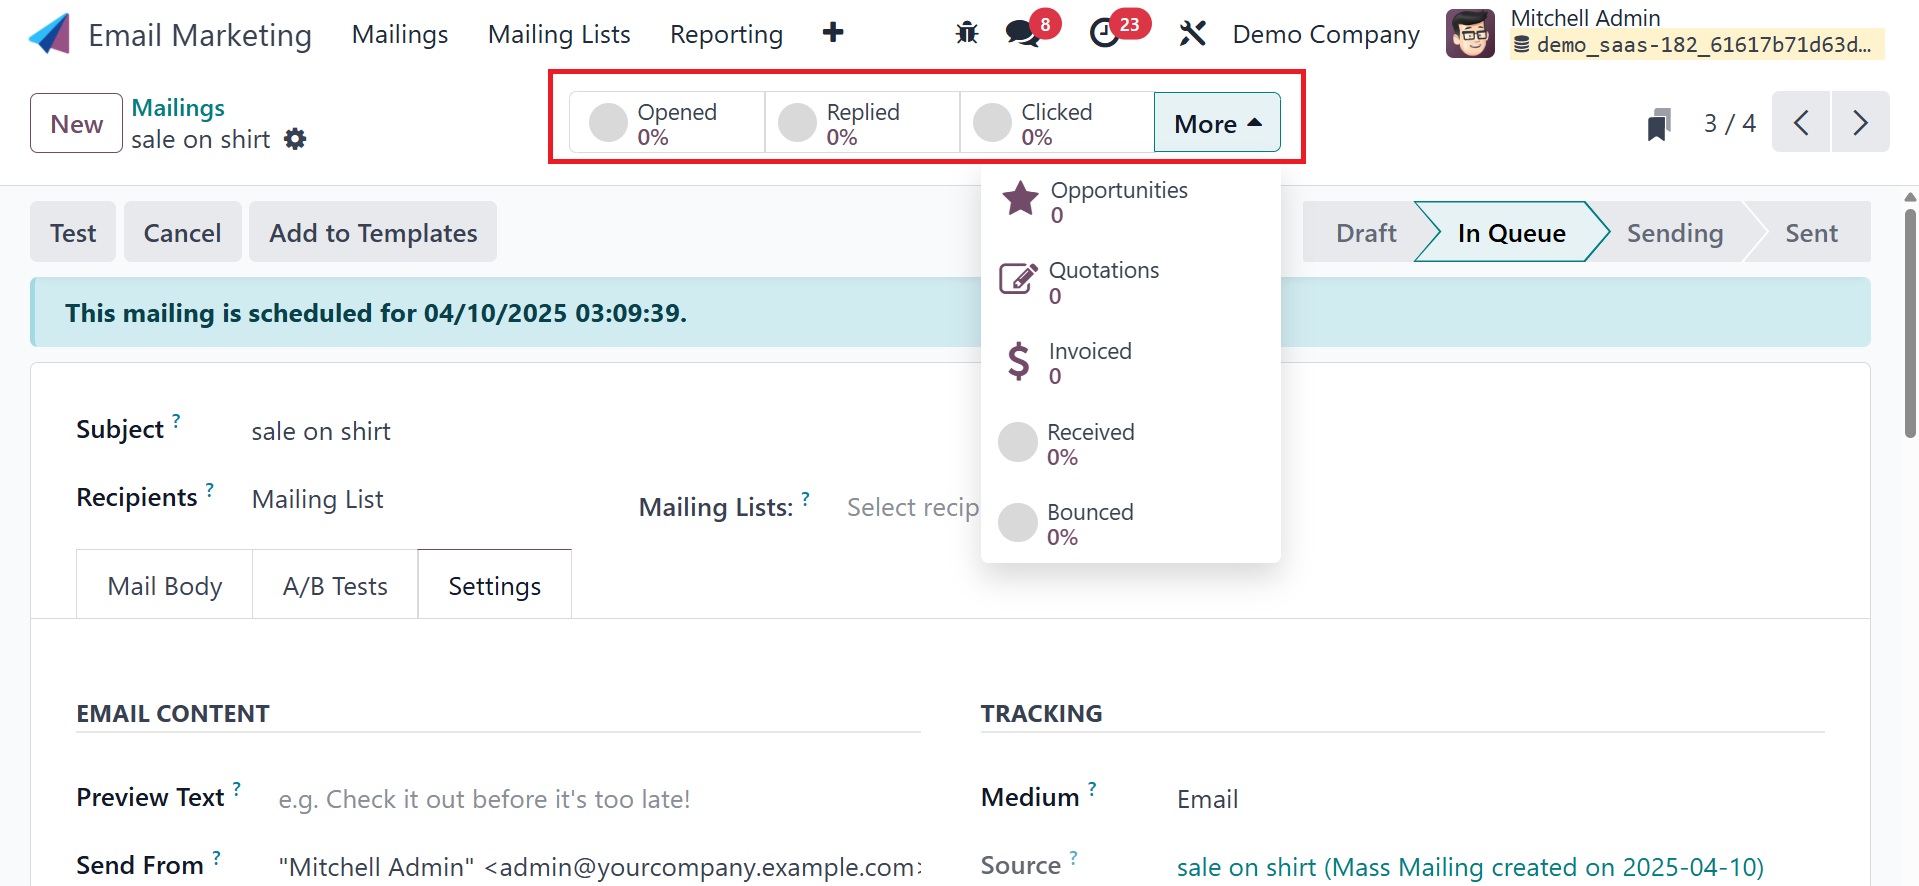
To help you, the Lead button offers a link that will take you
straight to the lead page, where you can find all the information
you need about the leads this email has generated. Quotations,
invoices, and the percentage of people who received, opened,
clicked, replied, bounced, sent, and ignored will then be available
beneath these smart buttons. The status view that we created is
displayed clearly on the Kanban view. The reason behind this is that
the kanban perspective is built around those stages. The Kanban view
is then shown in the screenshot below.