v>
3. Reporting
The reporting option under Email Marketing can help you generate
reports on a large number of emails. The mass mailing analysis view
will appear, as seen in the picture below.
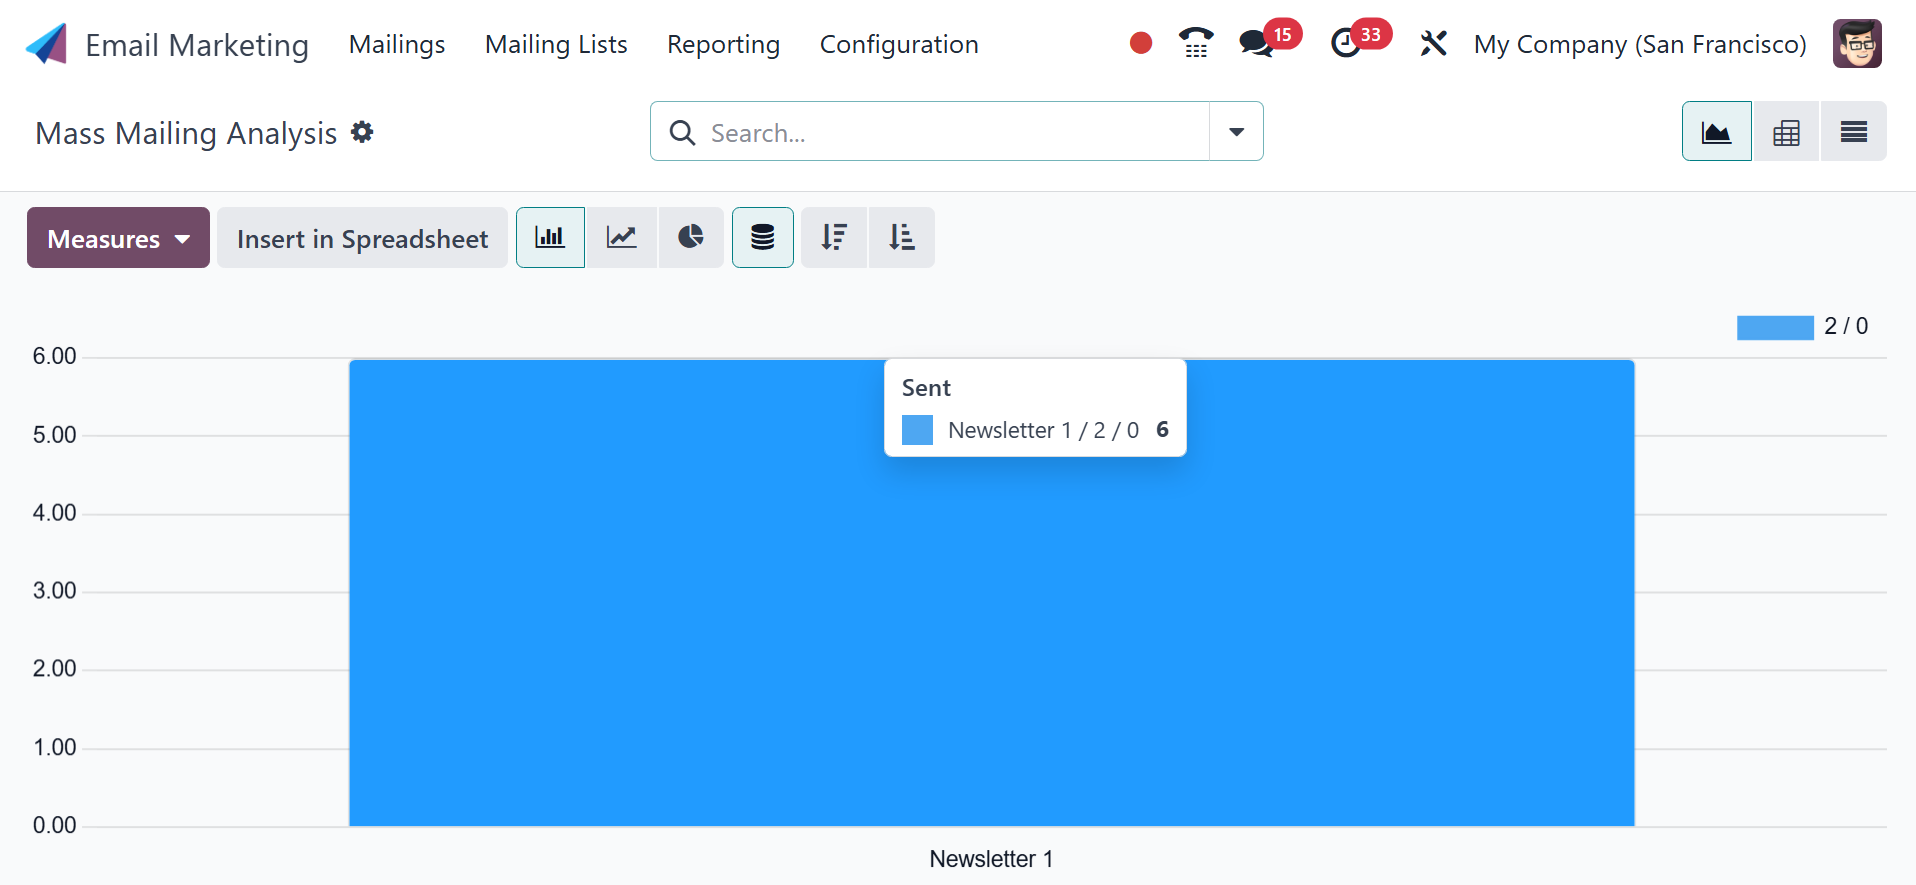
The bulk mailing list is represented graphically here. The graphical
view is also displayed in the Pivot, List, and Bar views. In
addition to the Graphical view, you may see the page in Kanban,
List, and Pivot views.
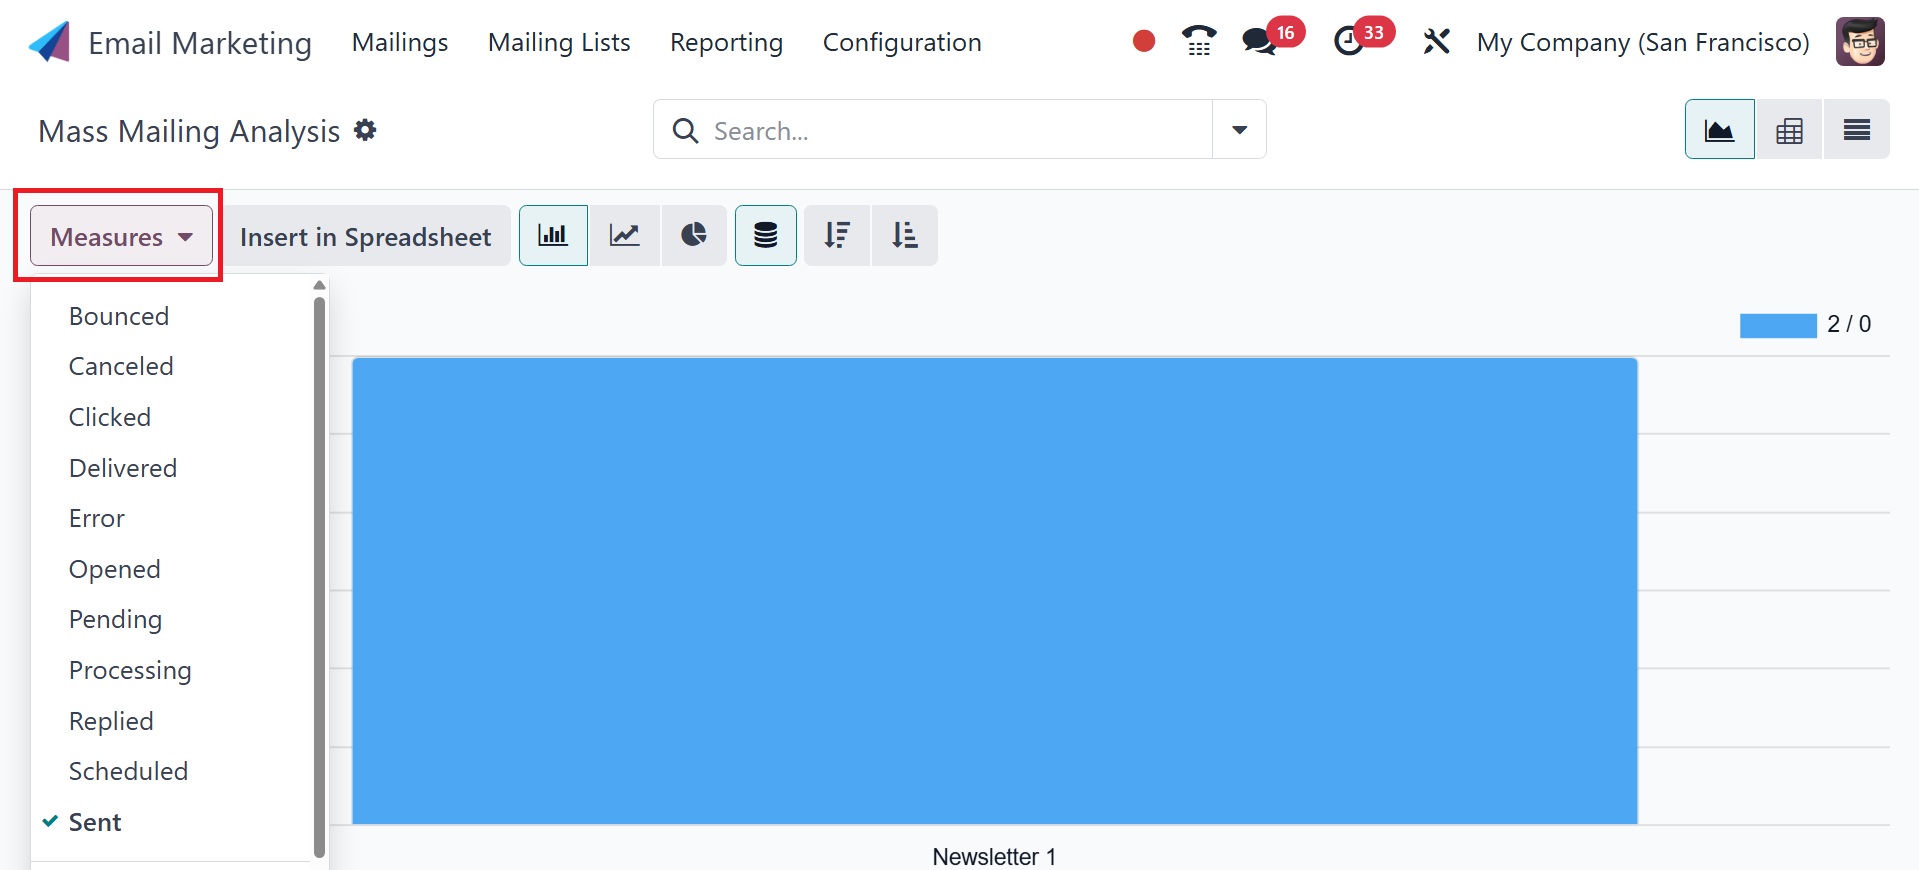
Choose from possibilities such as bounced, canceled, clicked,
delivered, error, opened, answered, scheduled, and sent by using the
several Measures options provided below. Either ascending or
descending order can be used to arrange the reports. You can use the
Filters and Group By option to group the bulk message if necessary.
The Group By option includes State, Sent By, Scheduled Period, and
Mass Mailing Campaign.
The bulk mailing analysis's List view will display the reports in
List format, as shown below.
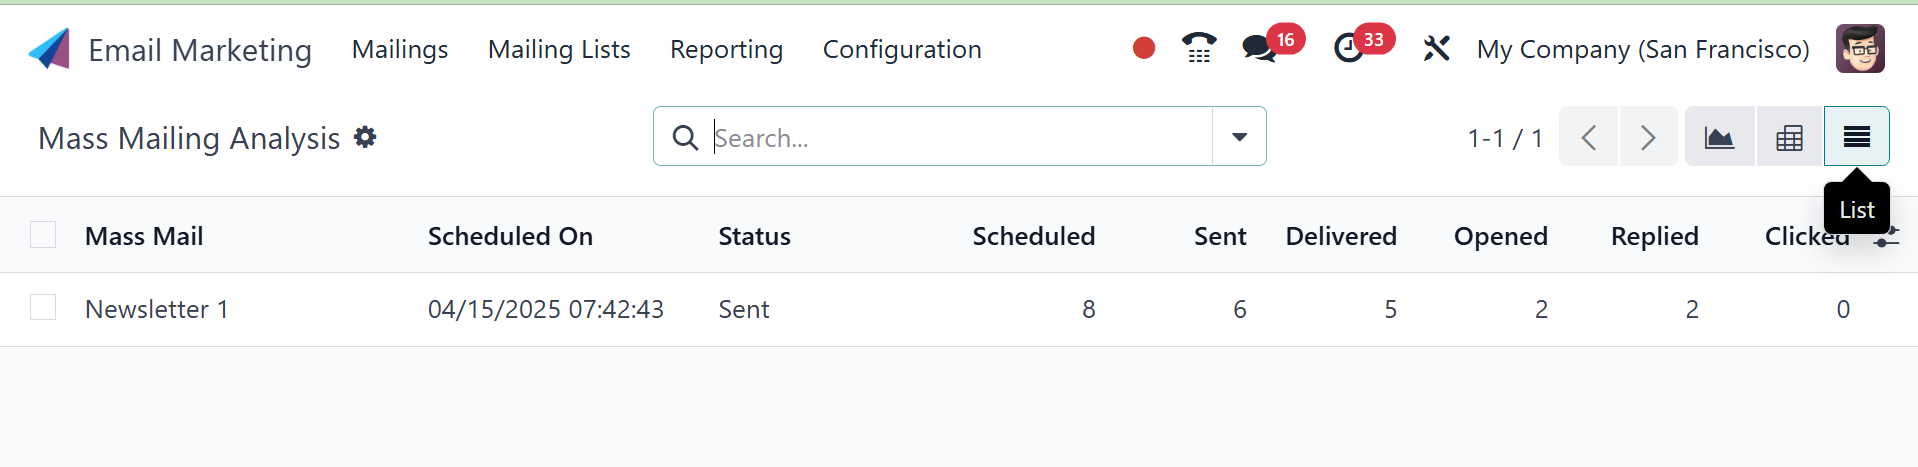
On the website's list view, information like Sent, Scheduled,
Delivered, Opened, Replied, and Clicked options are shown in tabular
style.
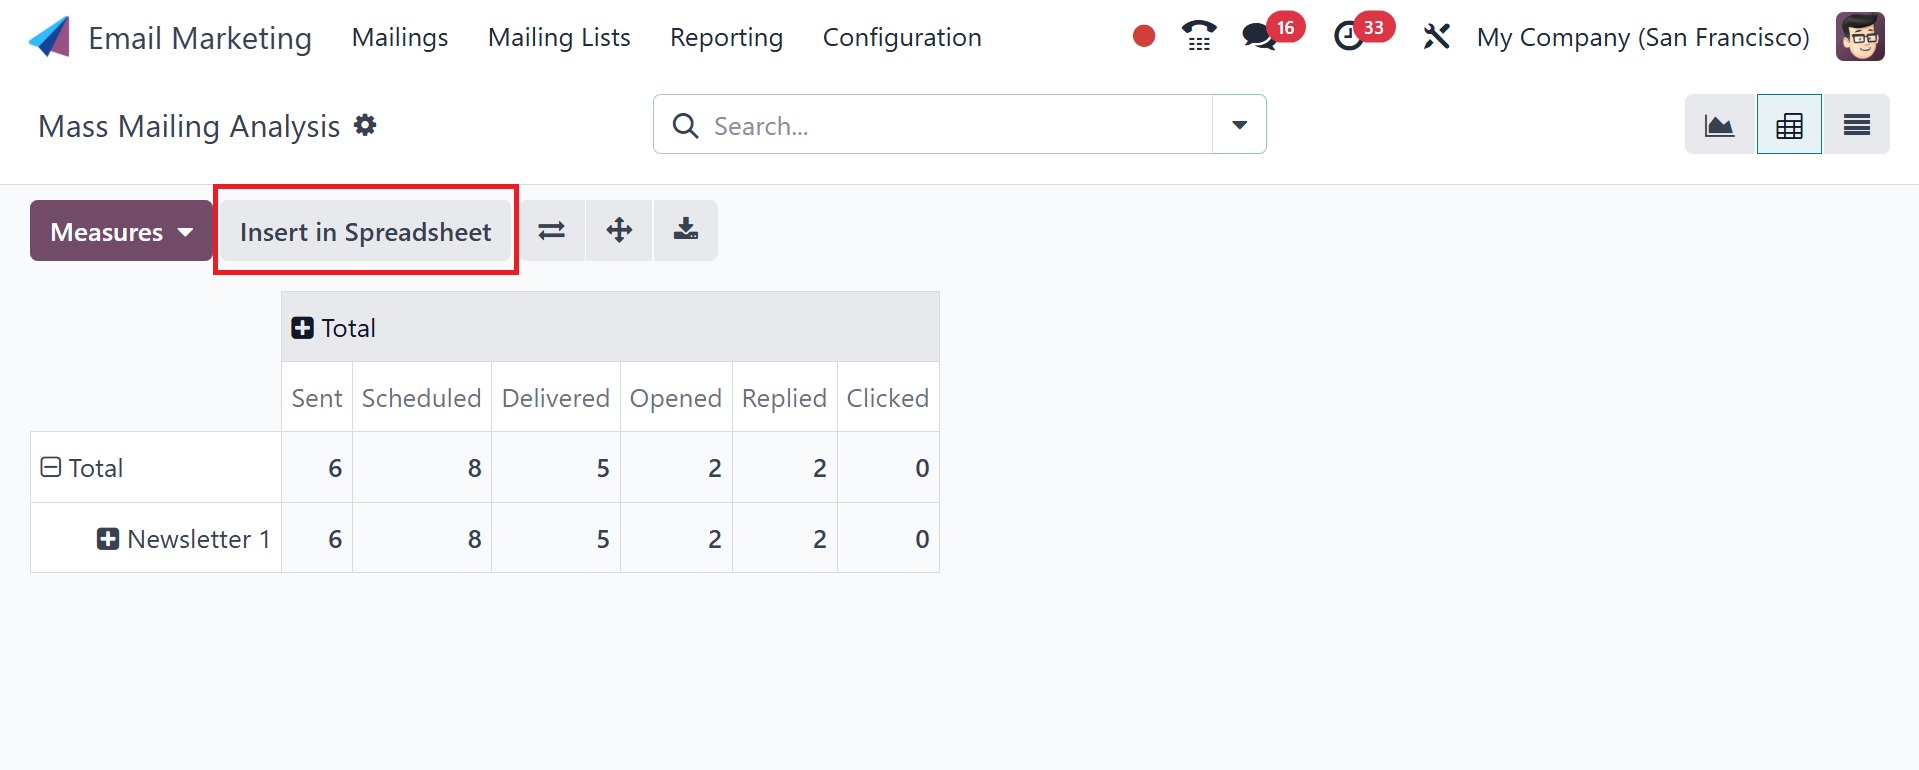
You will also be given access to the Pivot view. Using the reporting
tool located beneath the mailing list contact, you may examine the
mailing list of a particular contact and make any necessary changes.
Using the Insert In Spreadsheet option, you can add the contact
beneath the spreadsheet. These are the components of the Odoo17
software's Email Marketing reporting option.
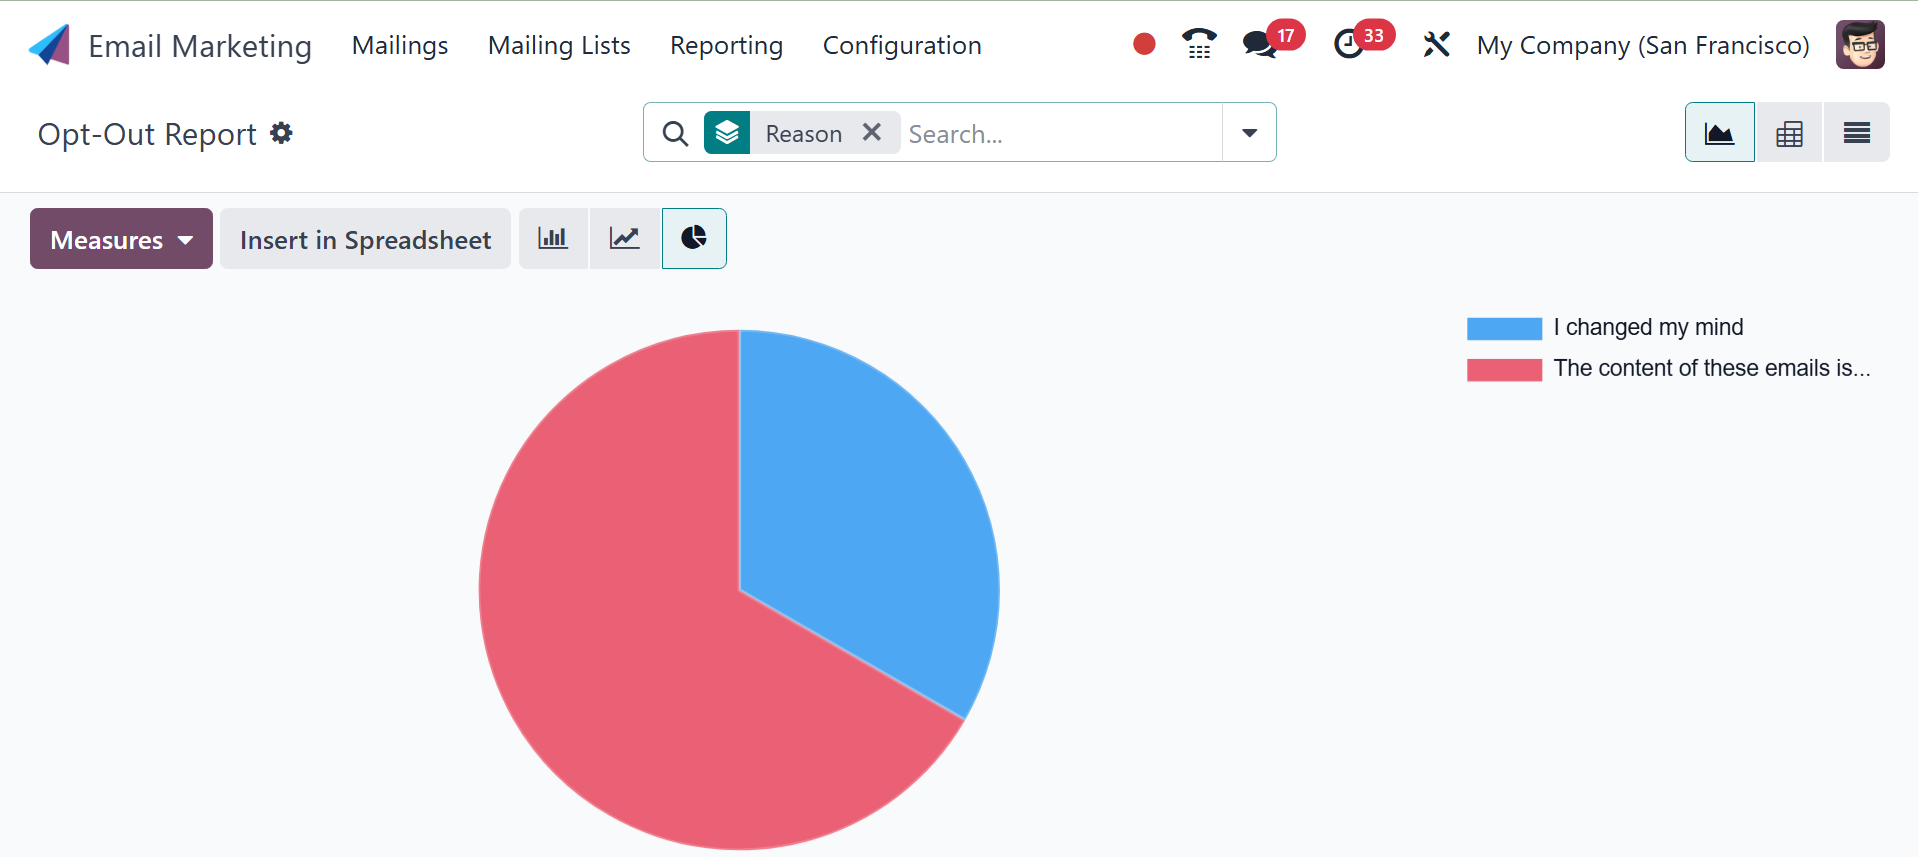
Additionally, the Reports menu now includes a new report named Opt
Out. The report makes it simple to comprehend the subscription's
specifics. The list view shows the contact, Subscription Date,
Mailing List, Opt Out, Reason, and Unsubscription date.