3. Configuration
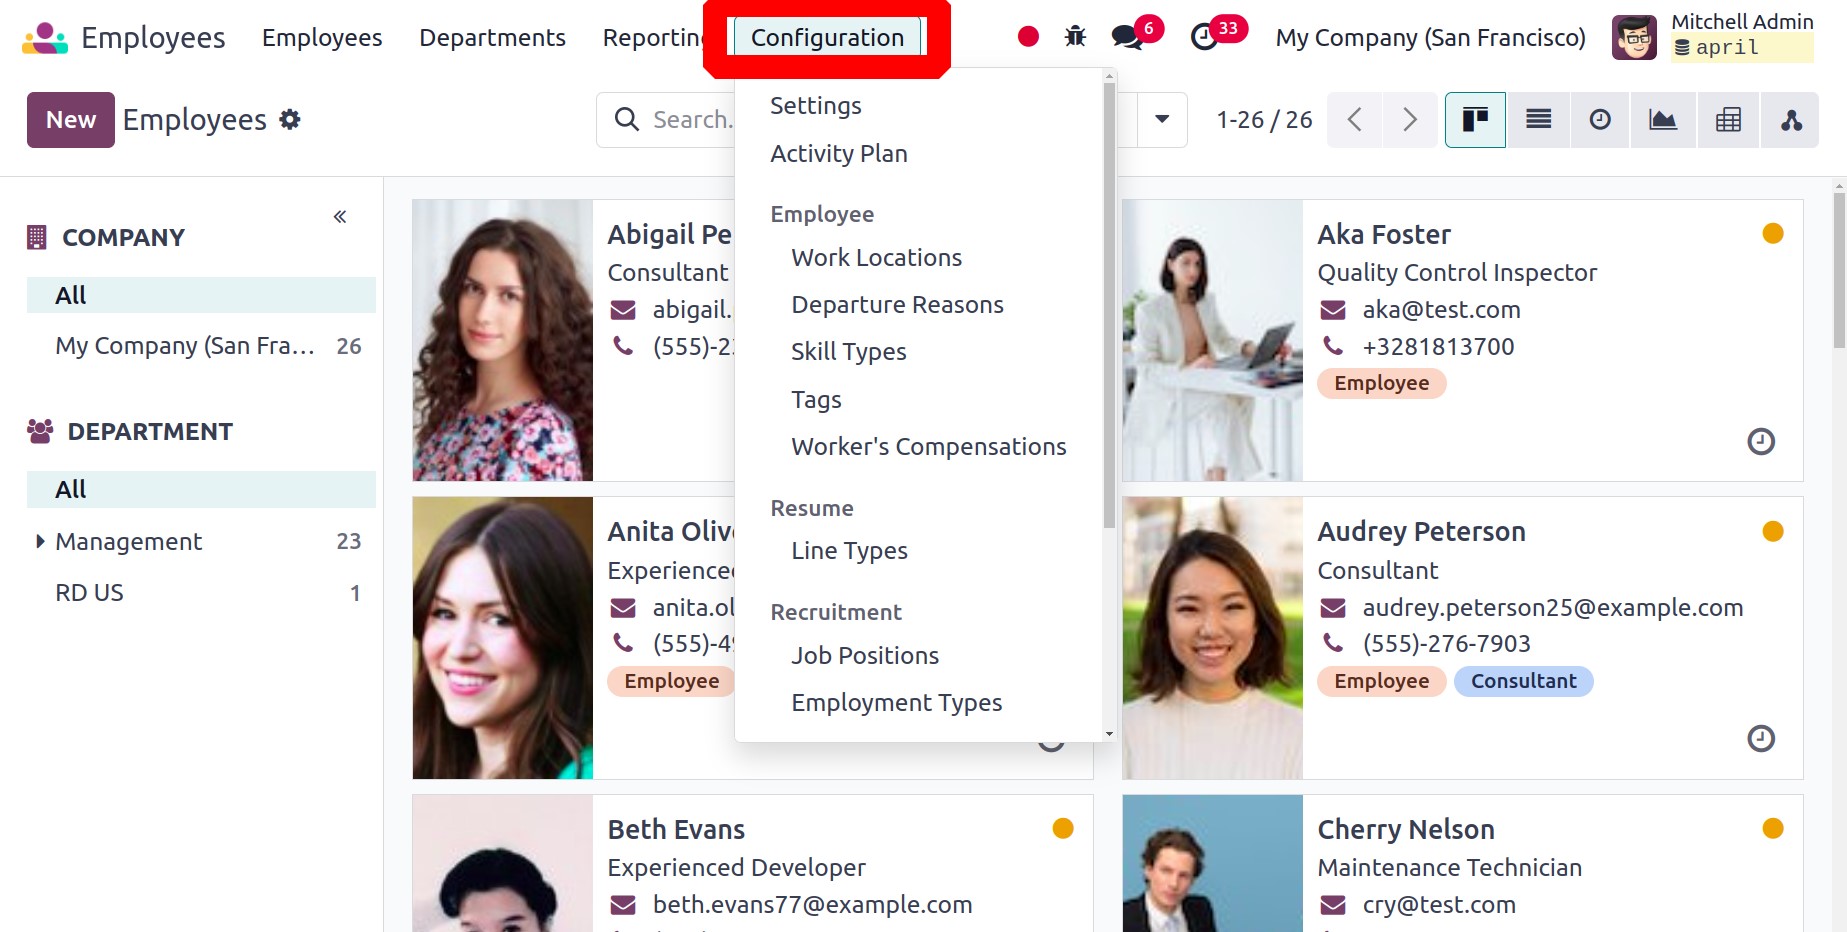
3.1 Activity Plan
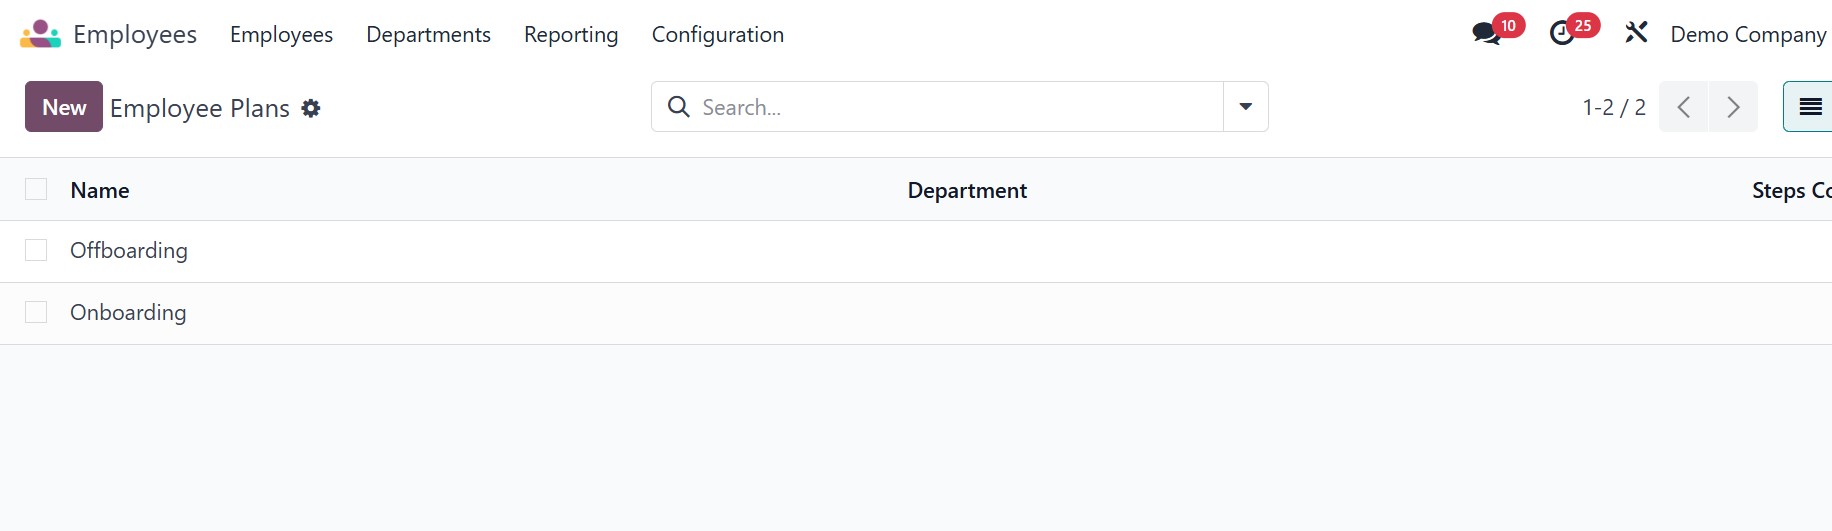
Choose the Activity Planning option from the Configuration menu in the Employee module. Similar to how onboarding and offboarding procedures operate in a company, this option can be used to create various activity schedules for the employees. The Plans window will display the list of previously configured plans, as seen below.
By selecting the New button, a new form view will appear, allowing you to build a new activity plan for the staff.
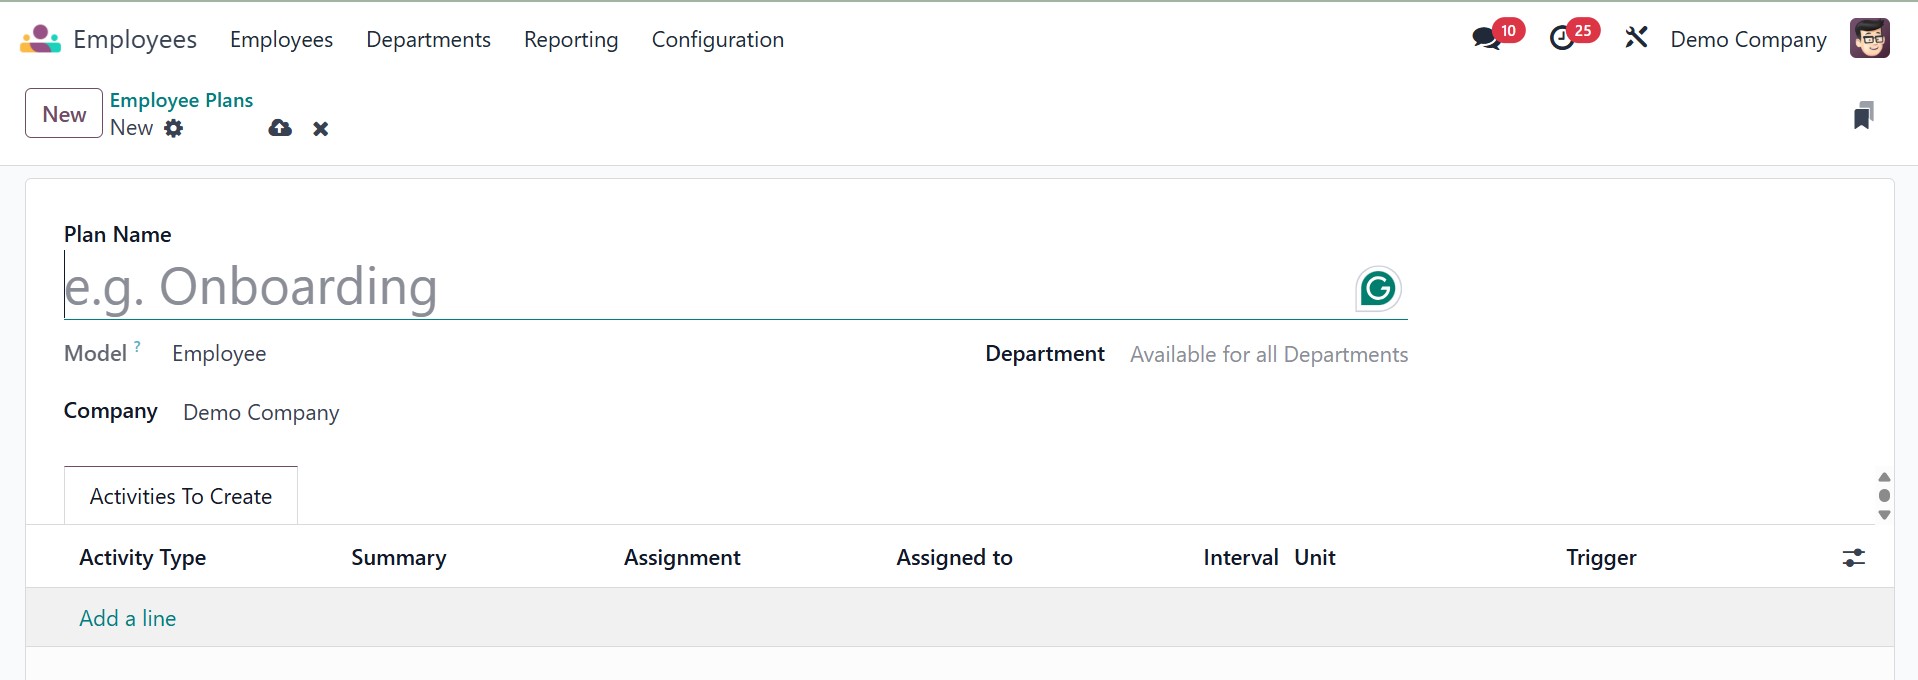
After choosing the Plan Name, you may enter the Department and Company in the appropriate boxes. You can add activities to the Activities To Create tab by clicking the Add a Line button.
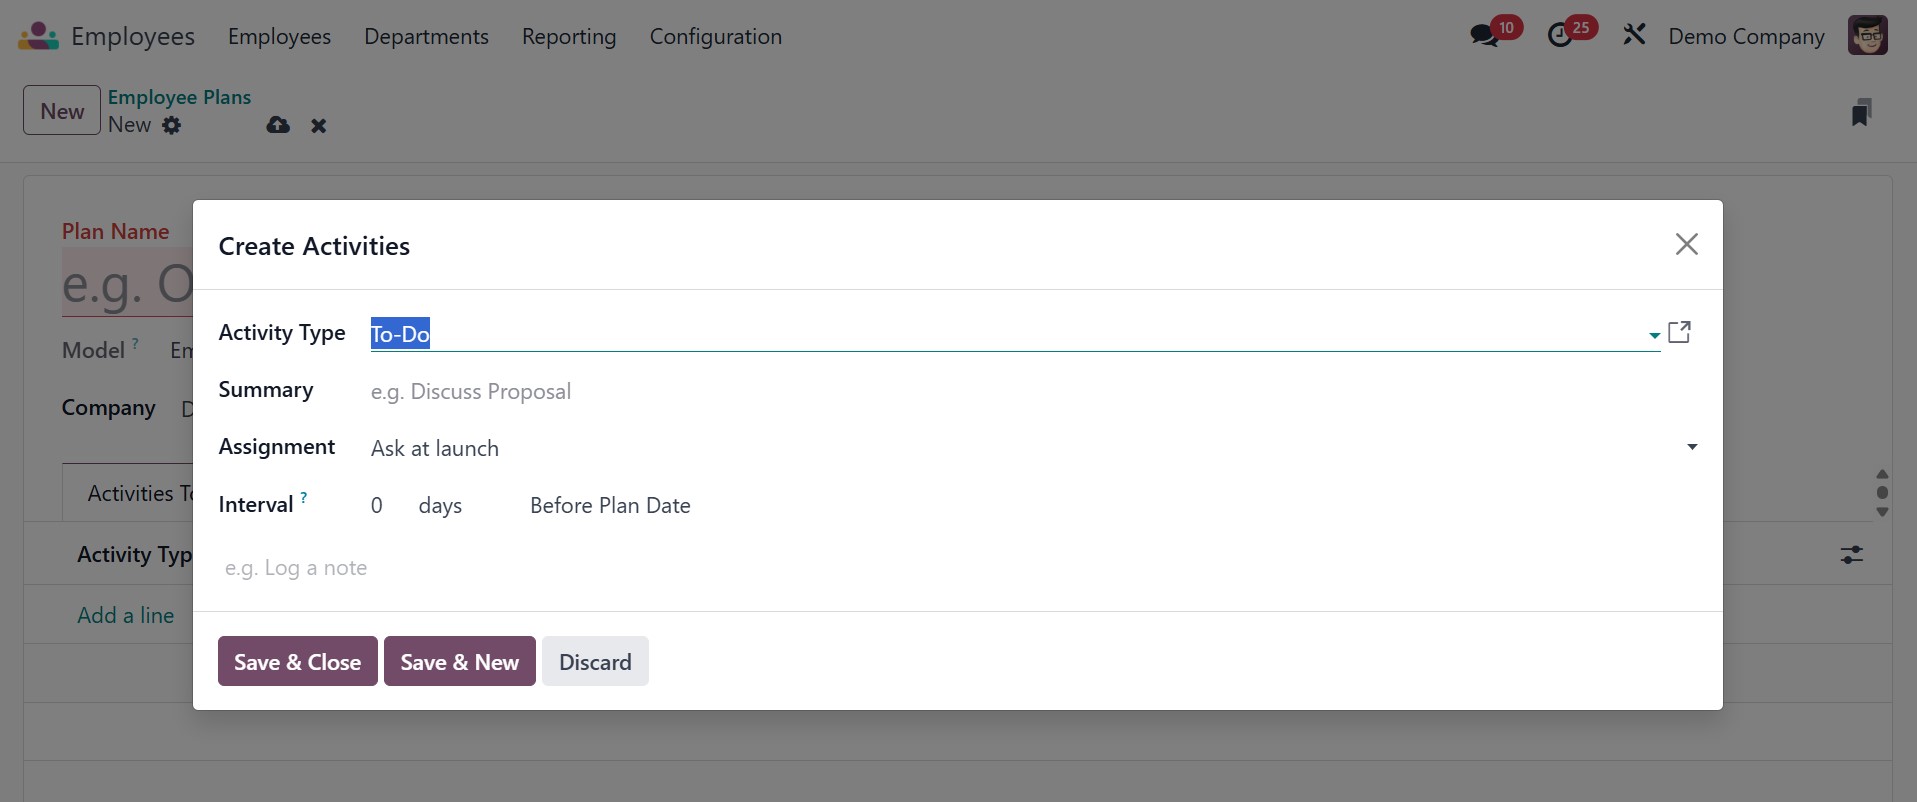
As seen above, a pop-up window will appear here. In the appropriate areas, enter details about the activity's Type, Summary, Company, Responsible, and Note. Once the required tasks have been added to the new plan, it will be saved in your database.
3.2 Work Location
If your company has many branches and offices, you may make distinct entries for each location using the new Odoo18 Employees module. From the Configuration menu, you can select the Work Location option to set up multiple locations for your company.
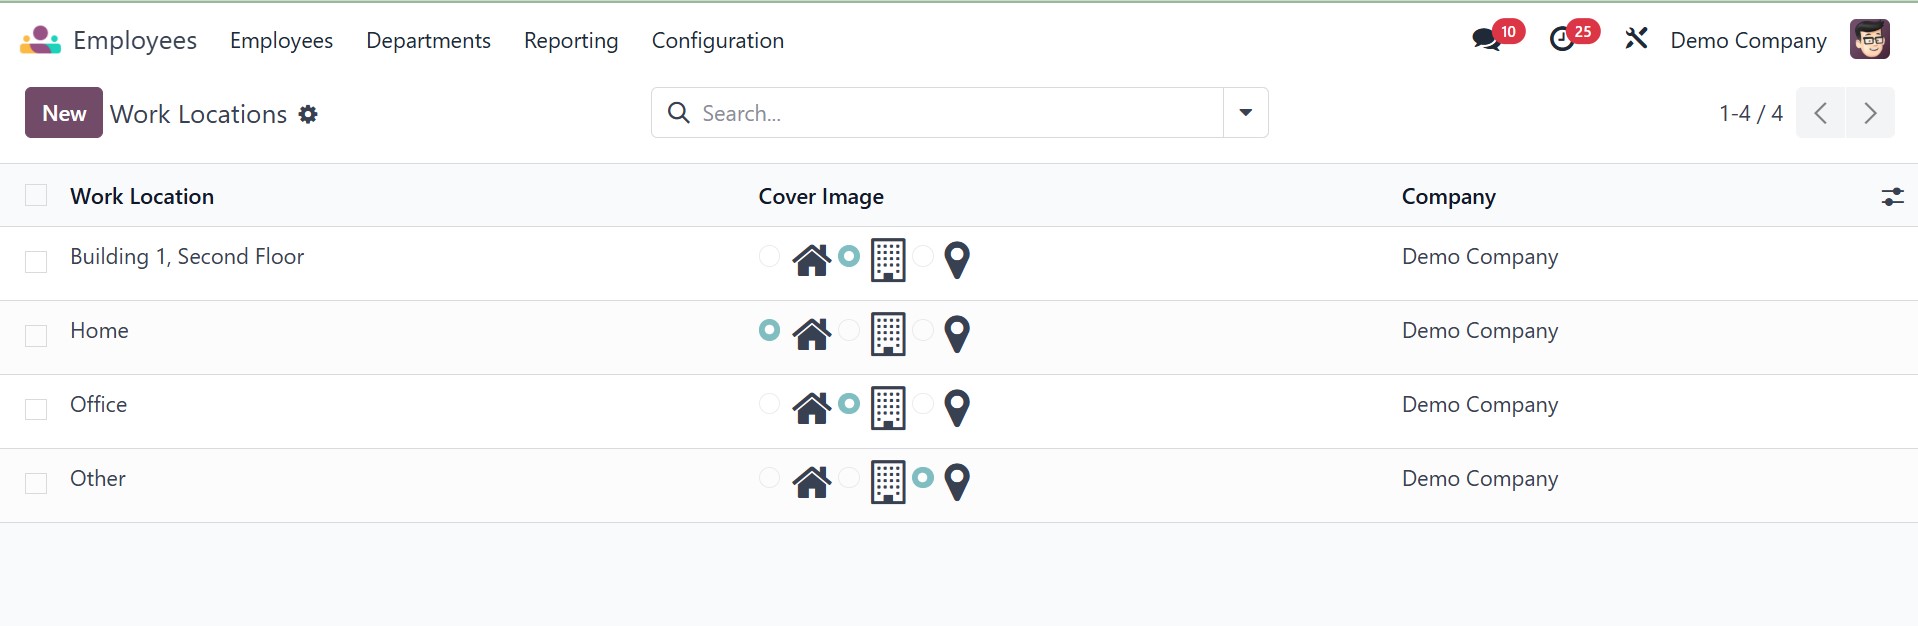
The list view of the Work Location contains the details about the Work Location, Work Address, and Company. Clicking the New button will cause Odoo18 to open a new window where you can configure the new work location.

The Work Location form can be completed here. Fill in the relevant fields with the Work Location, Work Address, Location Number, and Company. After the configuration is finished, the work location details will be stored in your database.
3.3 Departure Reason
Use the Departure Reasons option from the Configuration menu to provide the reasons behind an employee's departure from the company. Writing the departure explanations is easy using the Odoo18 Employees module. It just takes a few steps. First, select Departure Reasons from the Configuration menu. As shown in the screenshot below, a popup containing the details of the pre-configured departure reasons will appear.
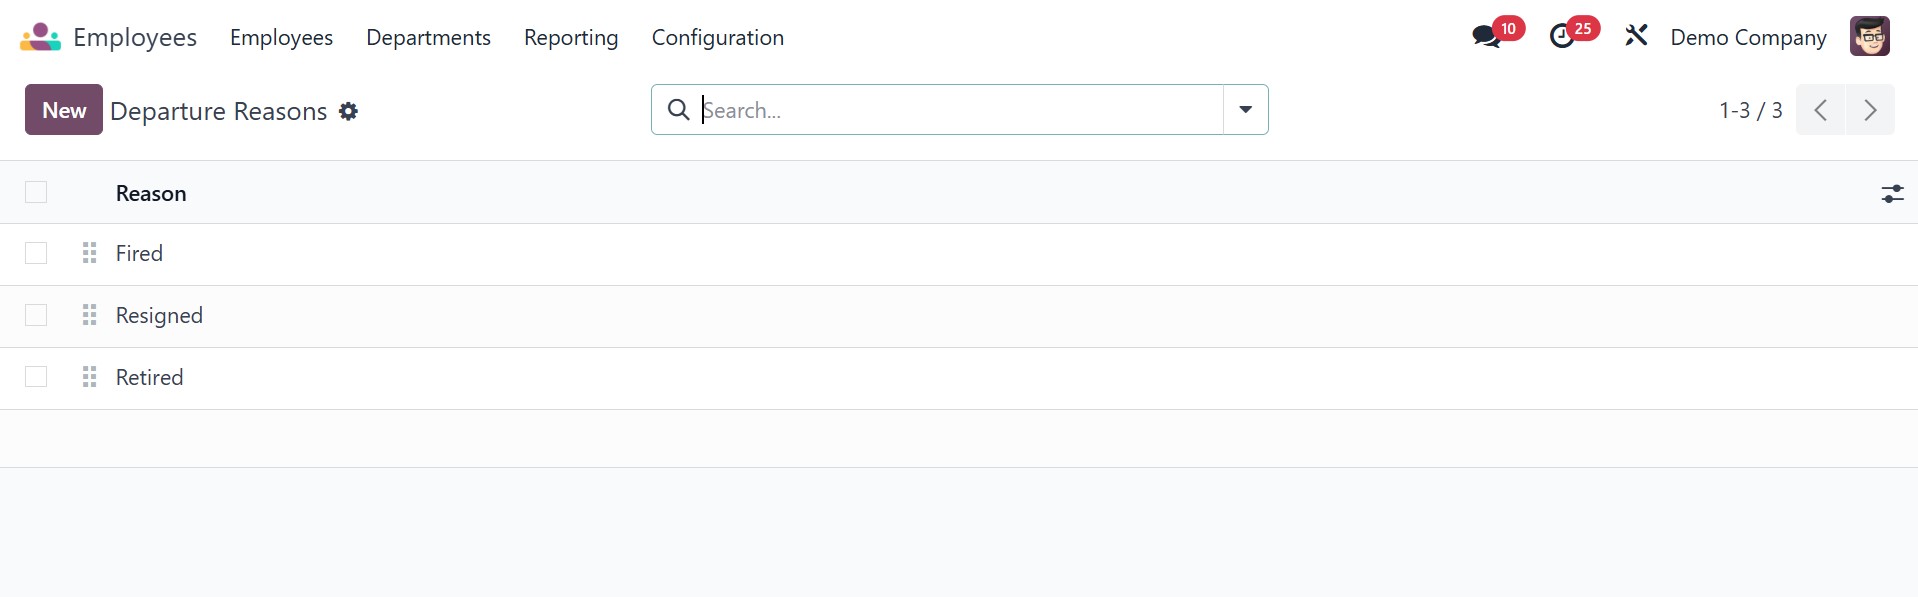
You can add a new rationale to the existing list by clicking the New button. Clicking the New button will instantly create a new line beneath the existing list, where you may enter the new reason. Clicking the Save button is all that is required.
3.4 Skill Type
When creating an employee profile, we provided guidance on how to add new skills to the resume line. When describing an employee's skills, you will be asked to include the skill type. The Configuration menu's Skill categories option allows you to establish a wide variety of skill categories.
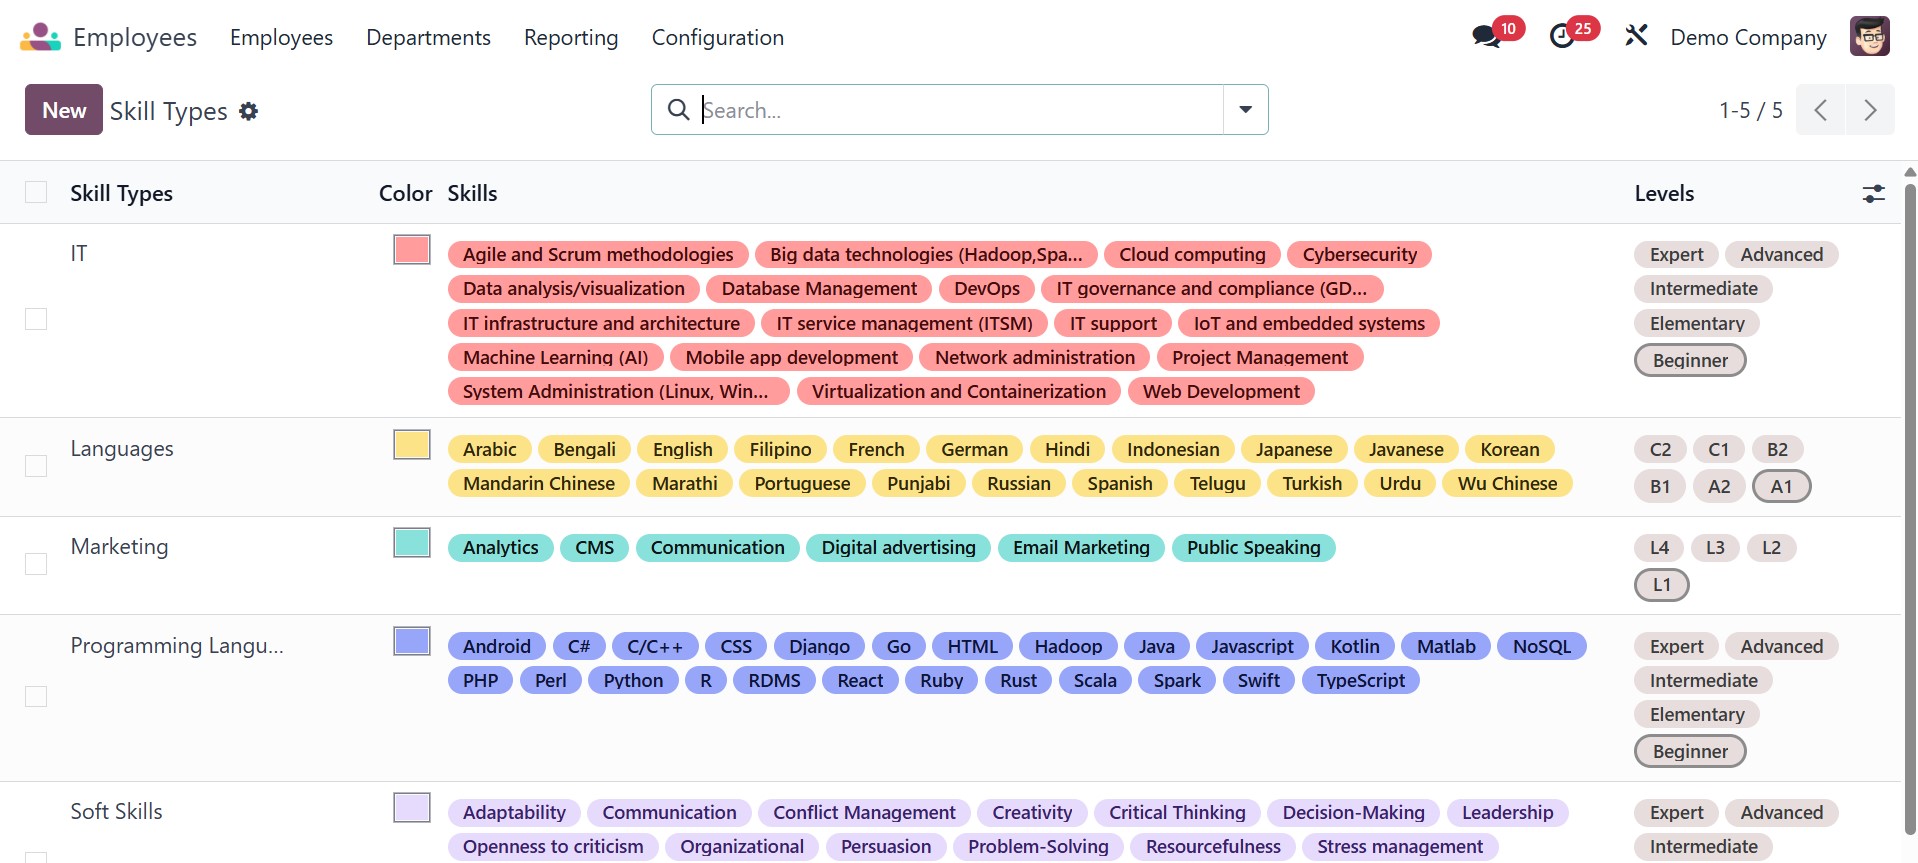
The window will show a list of skill types along with their names and associated skills. Click on "New" in the menu. You can enter the name of the skill type in the new form view that appears, as shown in the image below.
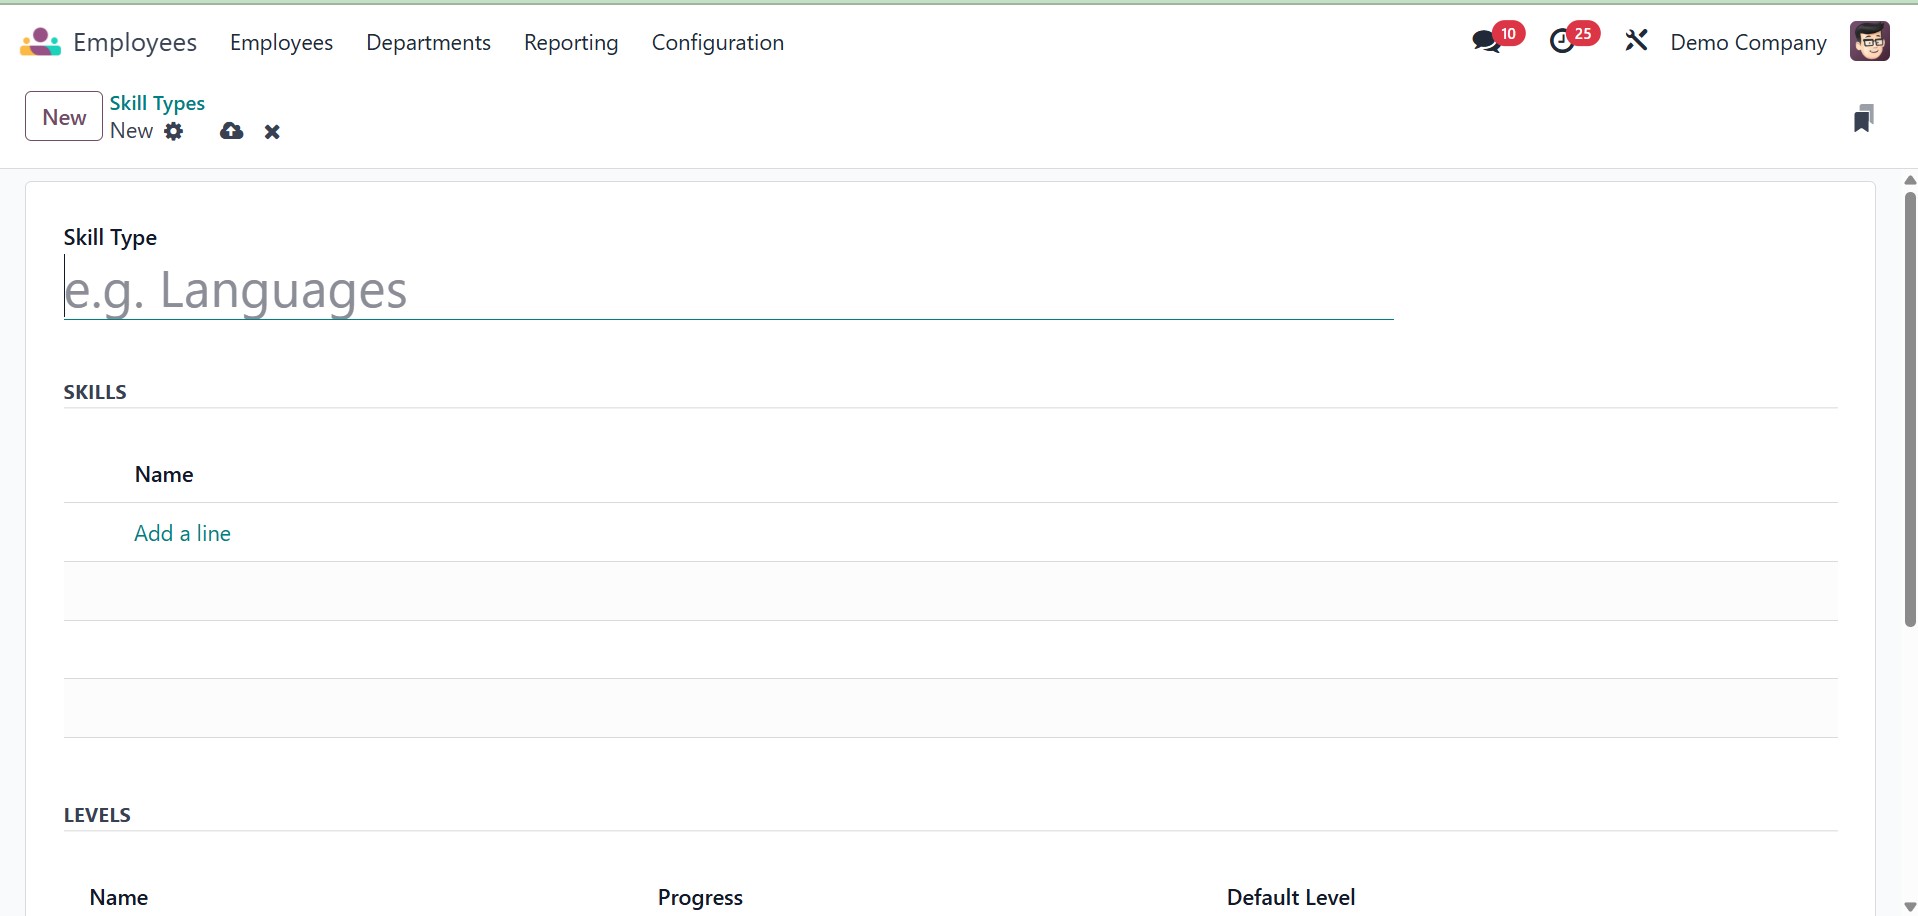
The talents now need to be listed in the available area using the Add a Line button. You can set up multiple talent levels under the Levels tab. Use the Add a Line option to specify varying ability levels. You will see a new pop-up as seen below.
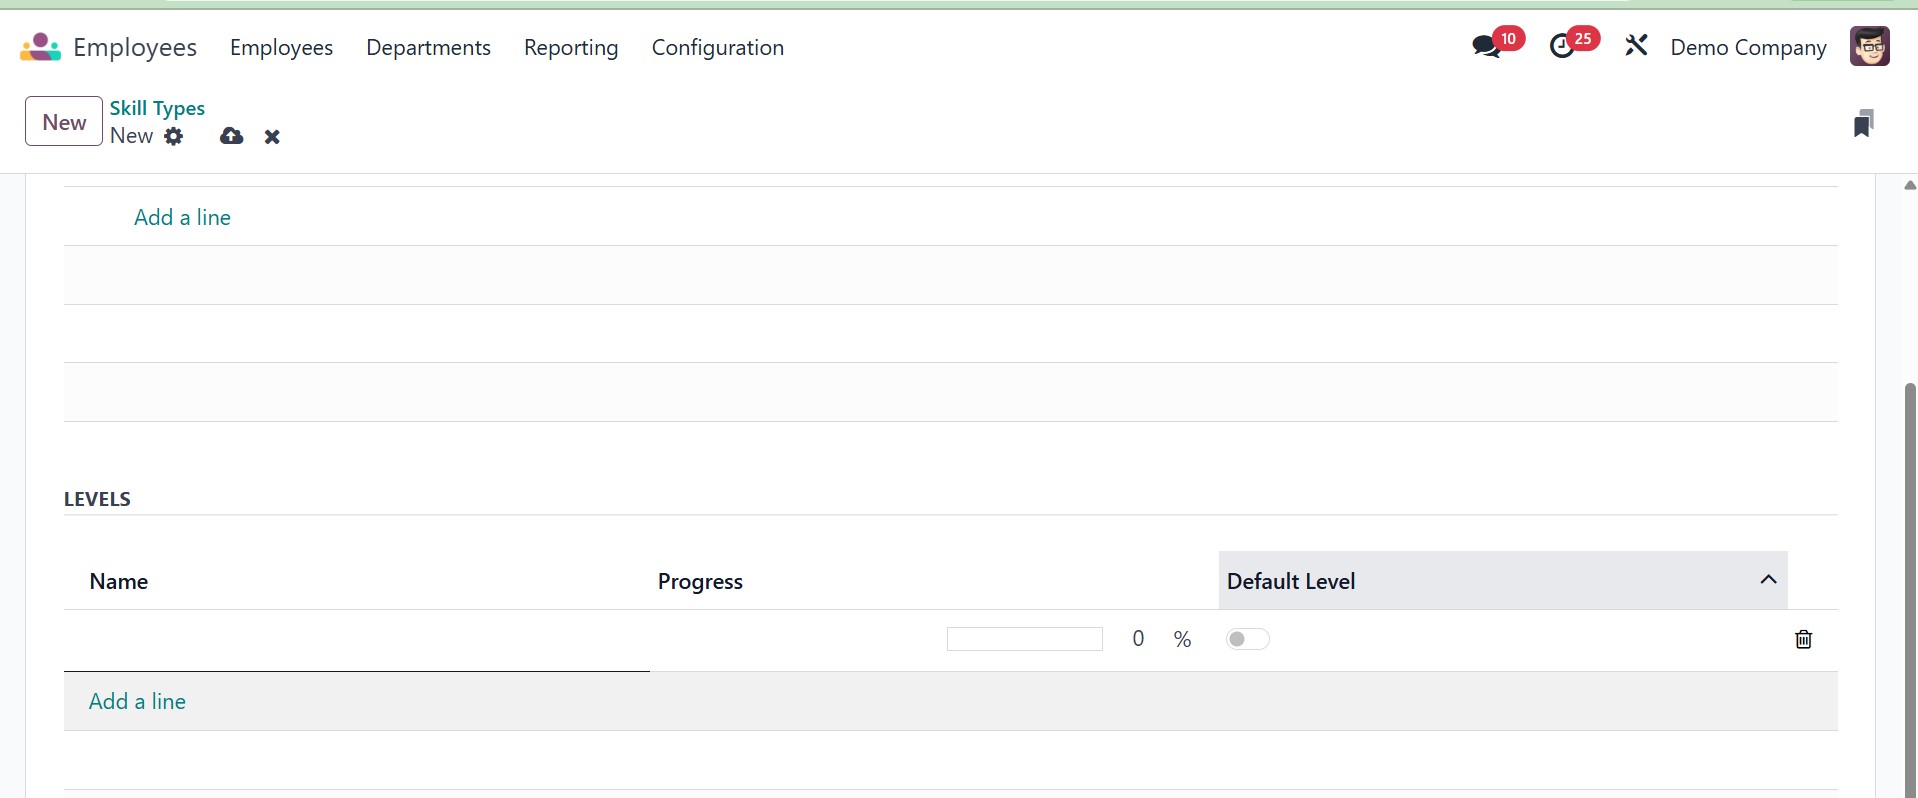
Here, you can designate the Progress level and set its name.
You can set several levels for this talent. If you wish to set a particular level as the default, you can activate the Default Level field for that level.
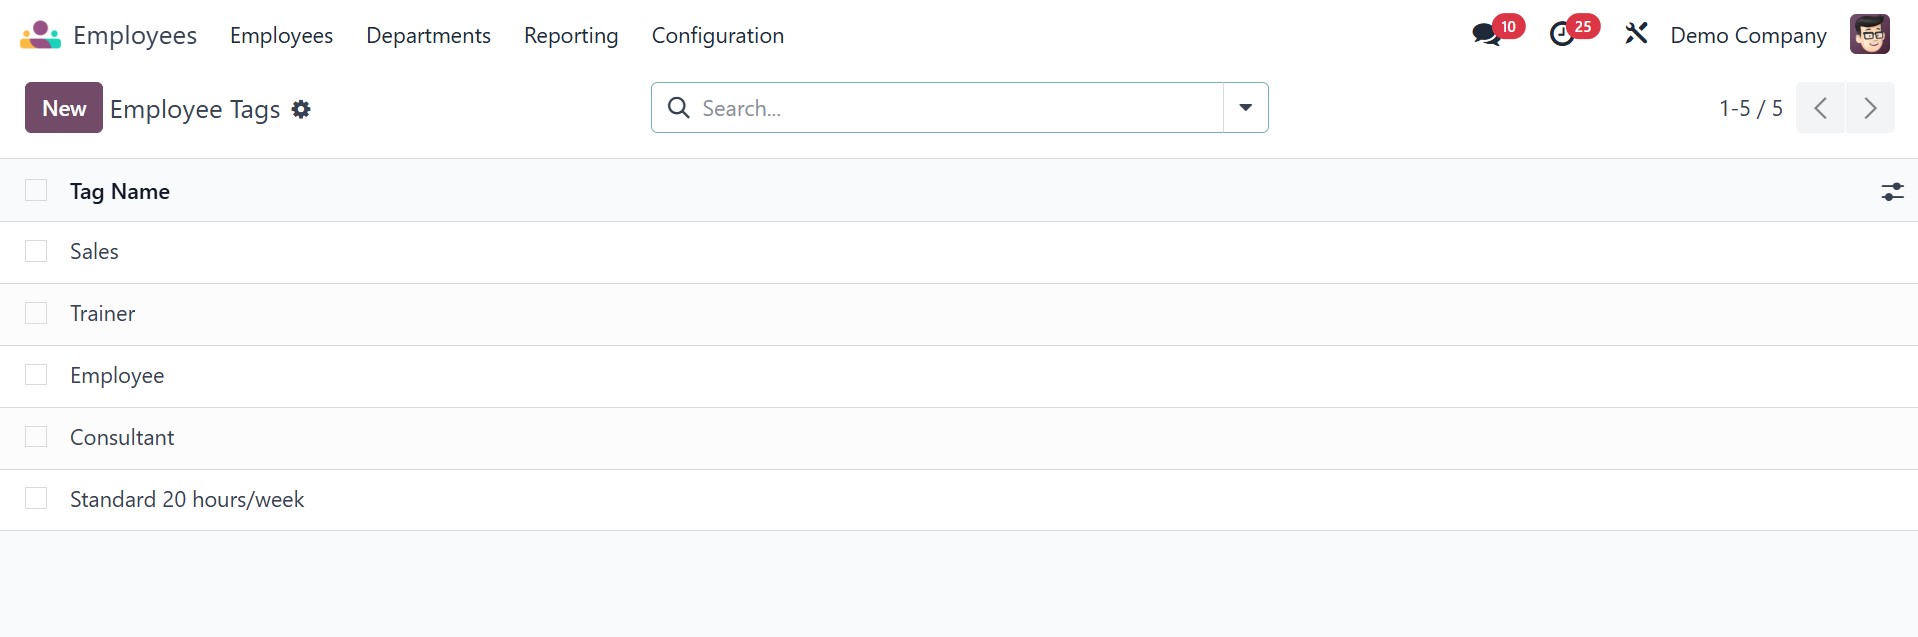
3.5 Tags
Employee Tags that are searchable can be configured under the Configuration menu. To add a new tag, click the New button.
3.6 Line Types
You can set up multiple Resume Line categories for the employee profile from the Employees module's Configuration menu, just like we did with skill categories.

All you have to do is click the New button and fill in the newly created line with the Name of the Resume Line Type. After you click the Save button, you may utilize your new resume line on employee profiles.
3.7 Job Position
When creating an employee profile, the position held must be mentioned. Let's look at the structure of various job roles in a company. To accomplish this, select the Configuration menu's Job Positions option.
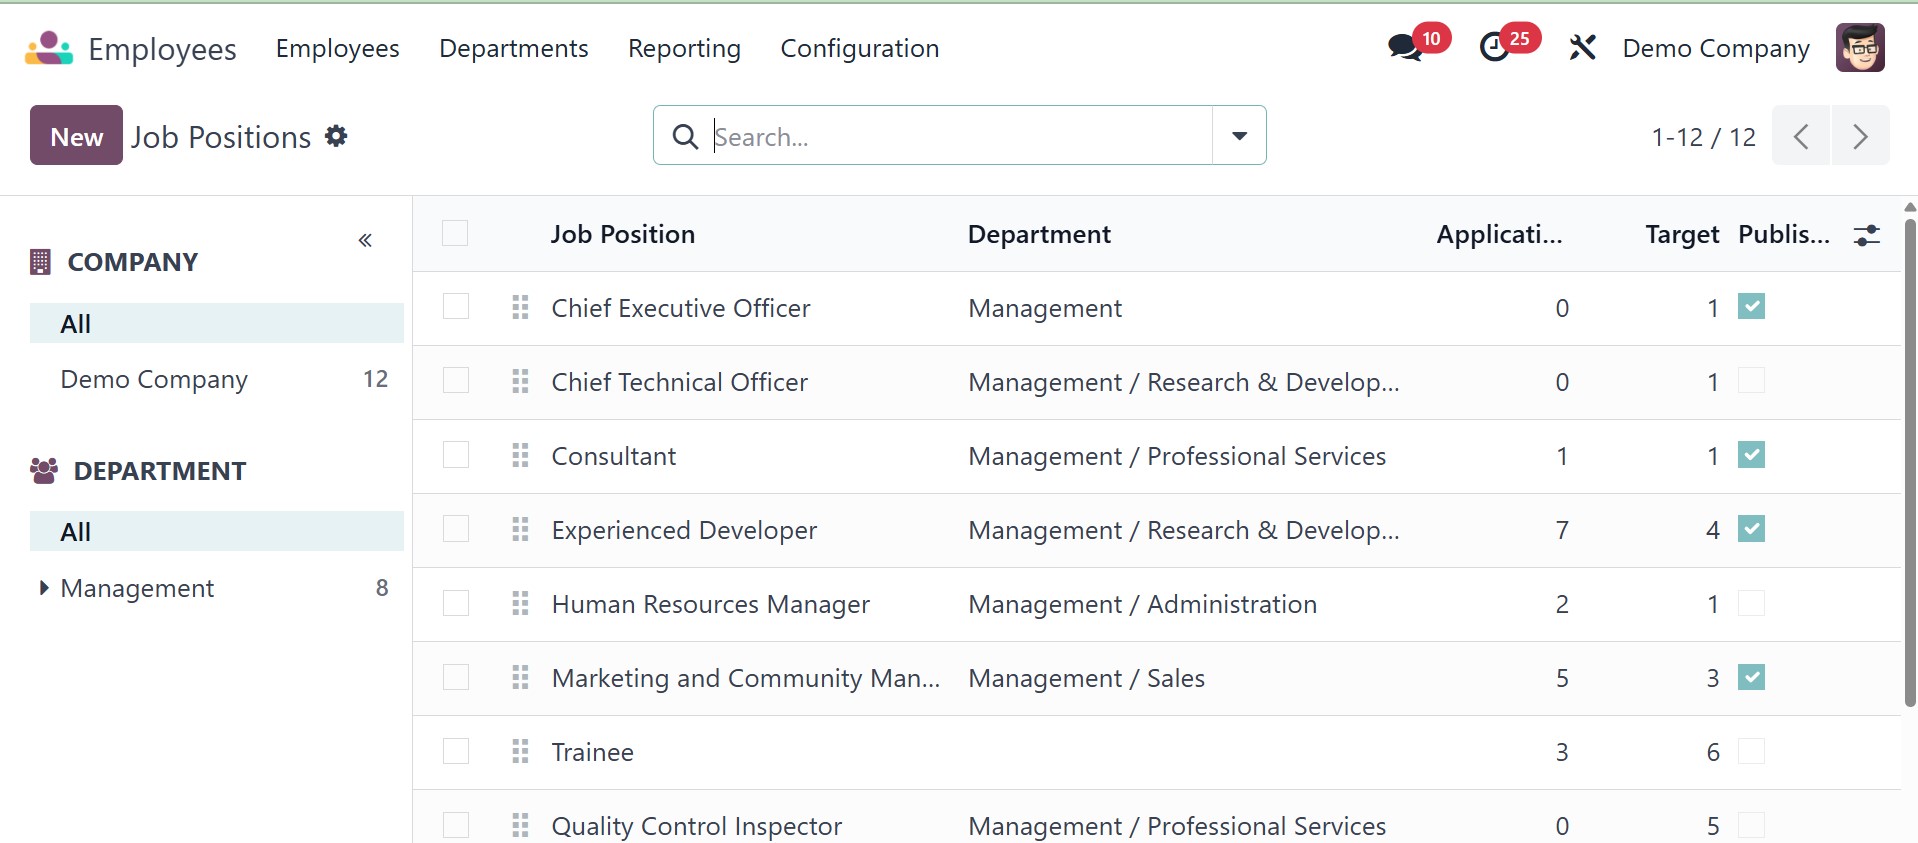
You may get the list of pre-configured employment positions here. Click the New button to create new job roles.
A new form view will appear in Odoo18, as seen above, where you may alter the details of the new job position.
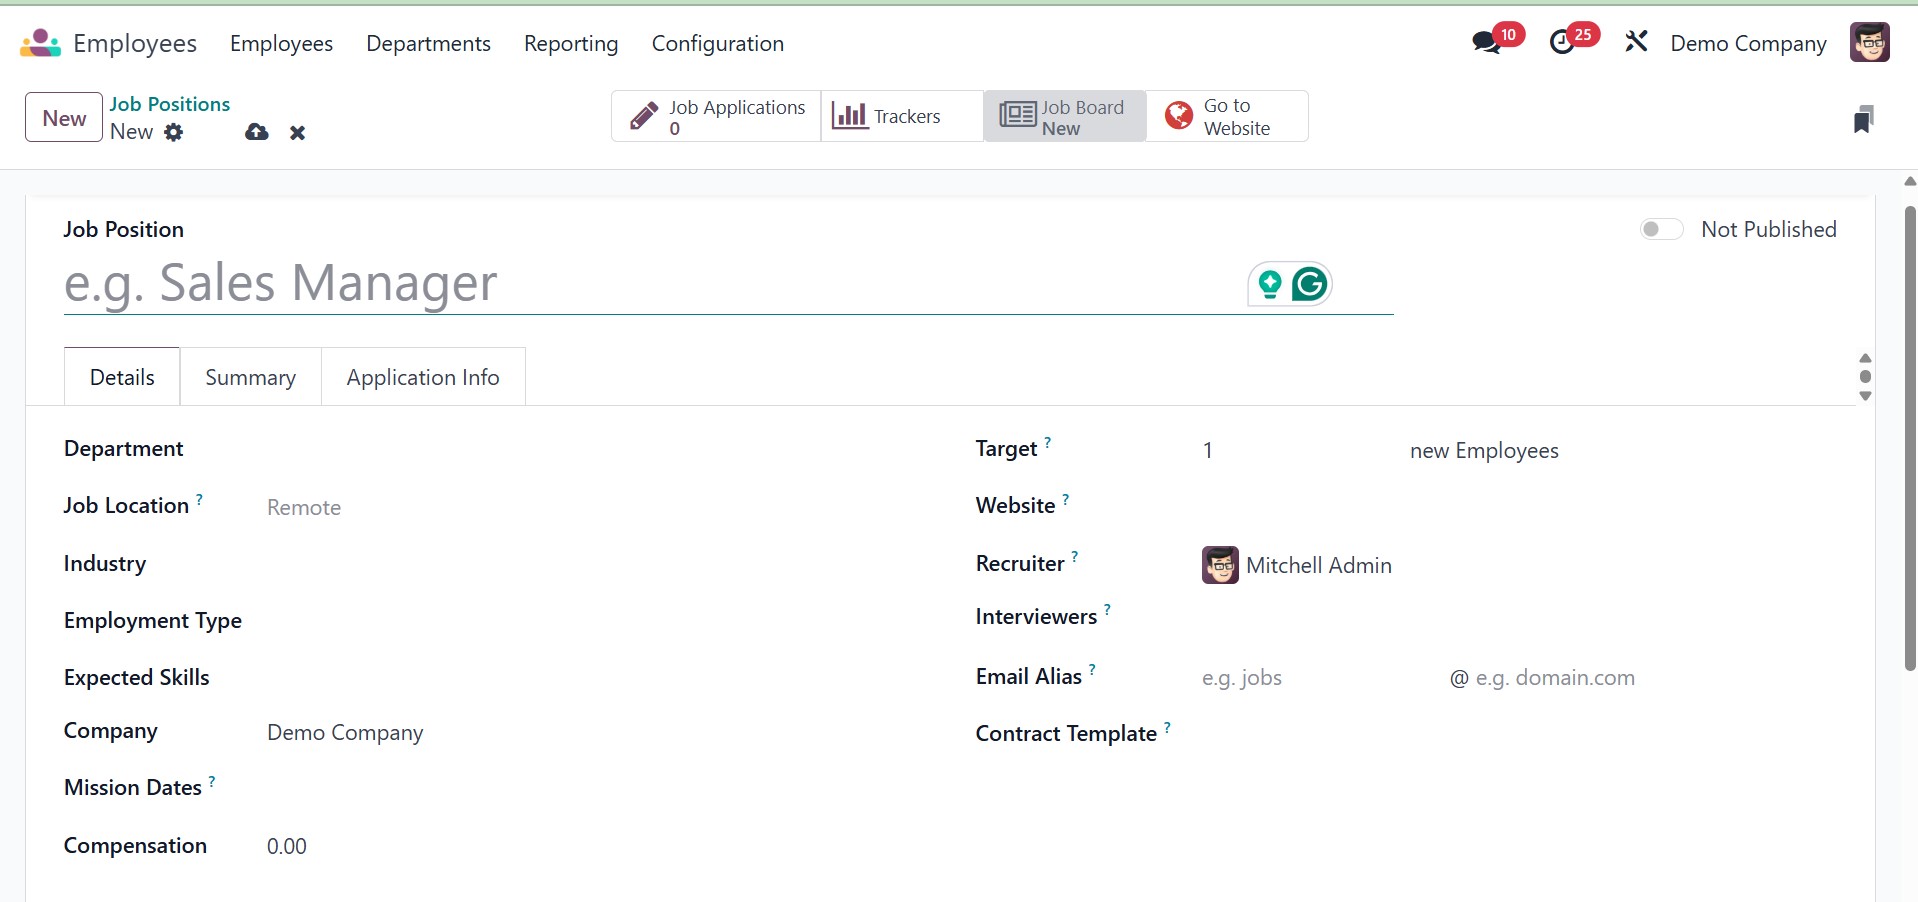
Under the details, you can add the job location, industry, employment type, expected skills, company, mission date, target, website, recruiter, interviewers, email alias, contract template, and compensation, respectively.
You can include a job-related description that will show up on the application in the job summary box.
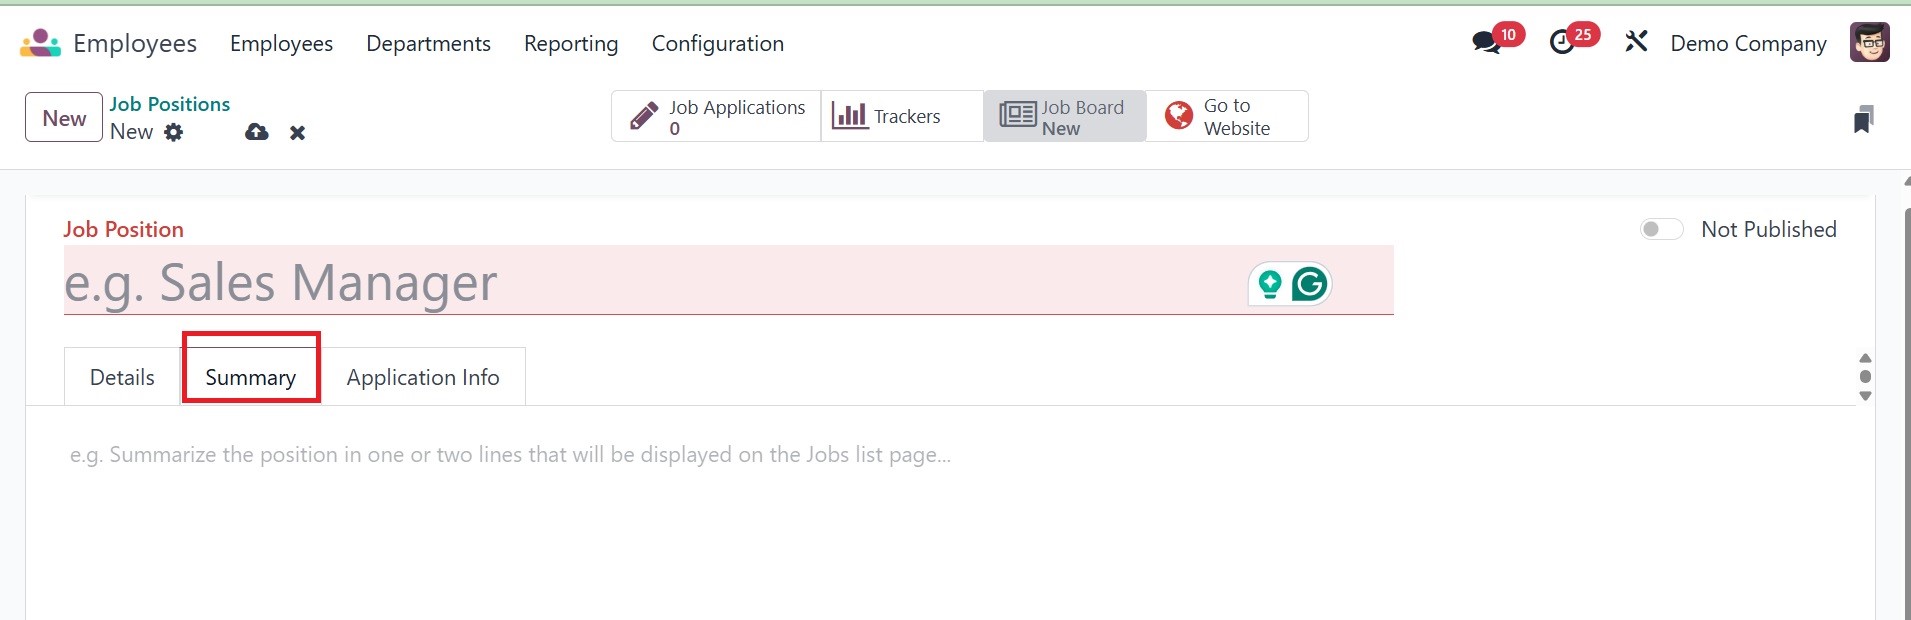
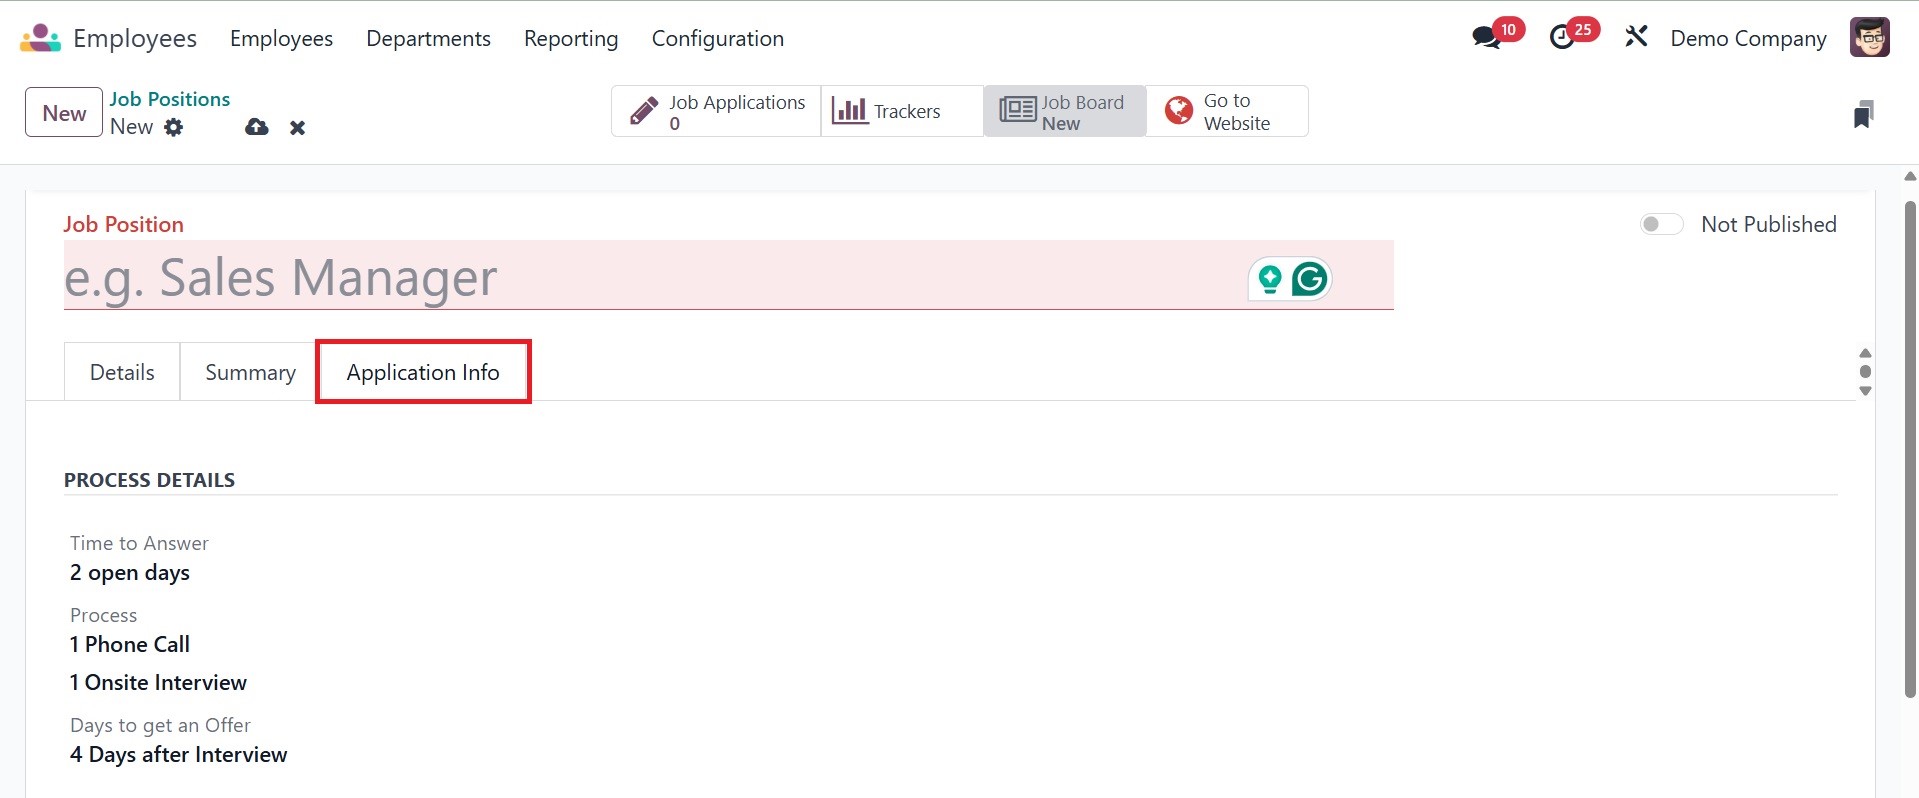
The Process Details area can be used to specify any additional information that will be displayed on the job submission page. It contains information on the Process, Days to Get an Offer, and Time to Answer.
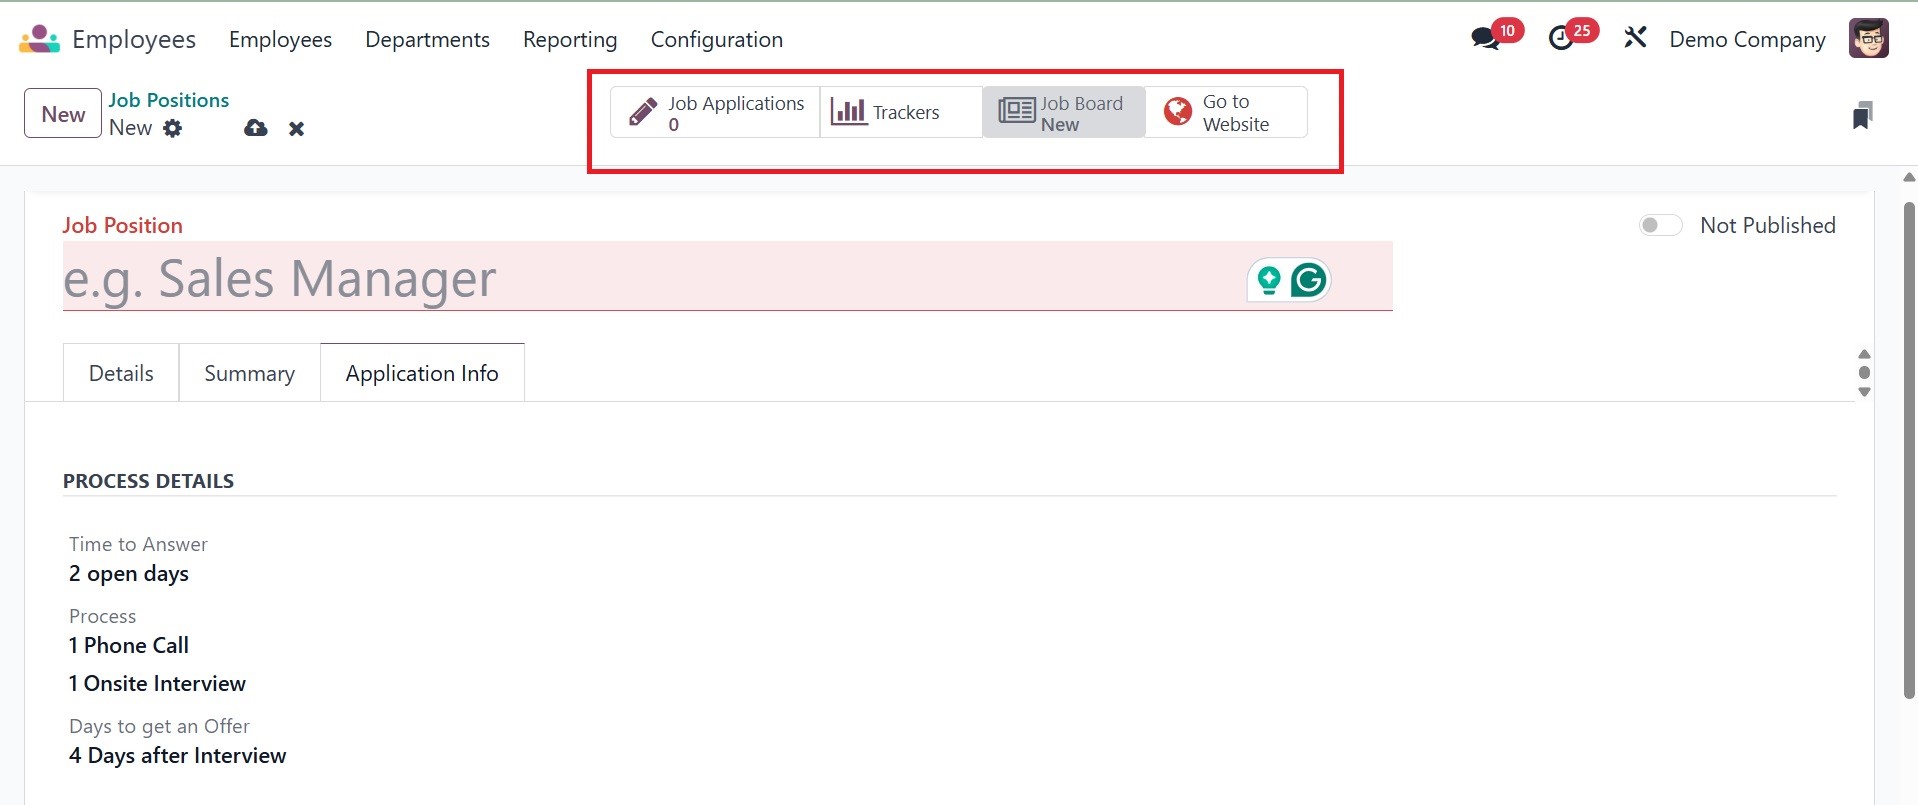
Every application for this particular job opportunity that has been received from various sources can be managed using the Job Applications smart button. Clicking the Documents button will display the documents related to this job opportunity. The Trackers will show multiple job sources.
3.8 Employment Types
A firm might have a wide variety of personnel. While some may be interns, others may be full-time staff members. Use the Employment Types option from the Configuration menu to set up the various employee types in your business.
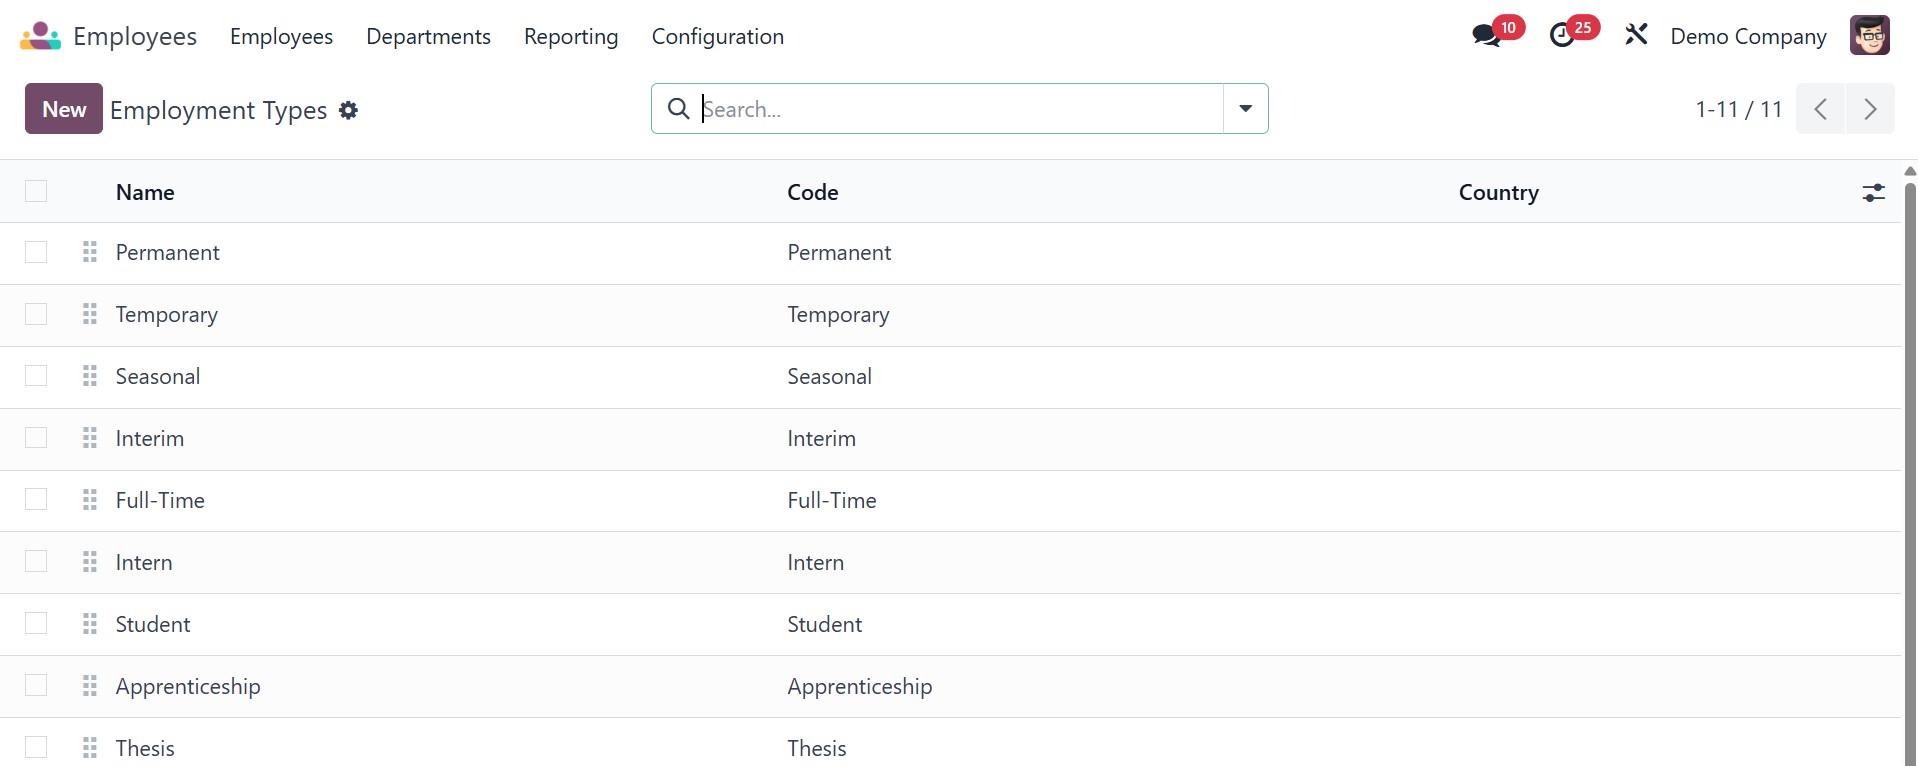
Using the New button, you may create Employment Types rapidly. The Employment Type must be indicated in the box provided before you click the Save button.
3.9 Contract Template
All the contract templates created will be available under this option.
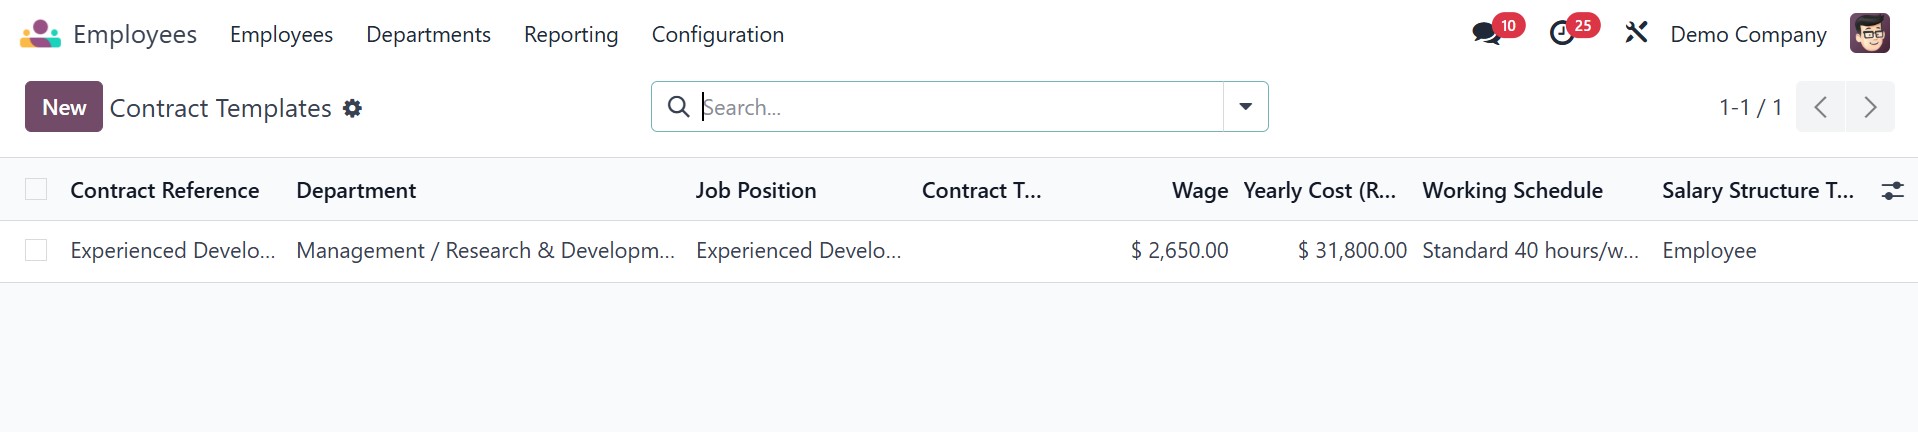
Let's have a look at how to create a new contract template. The Contract Templates preview includes the Contract Reference, Department, Job Position, Working Schedule, Salary Structure Type, Status, and Company data. Click the New button to create a new form that looks precisely like the one below.
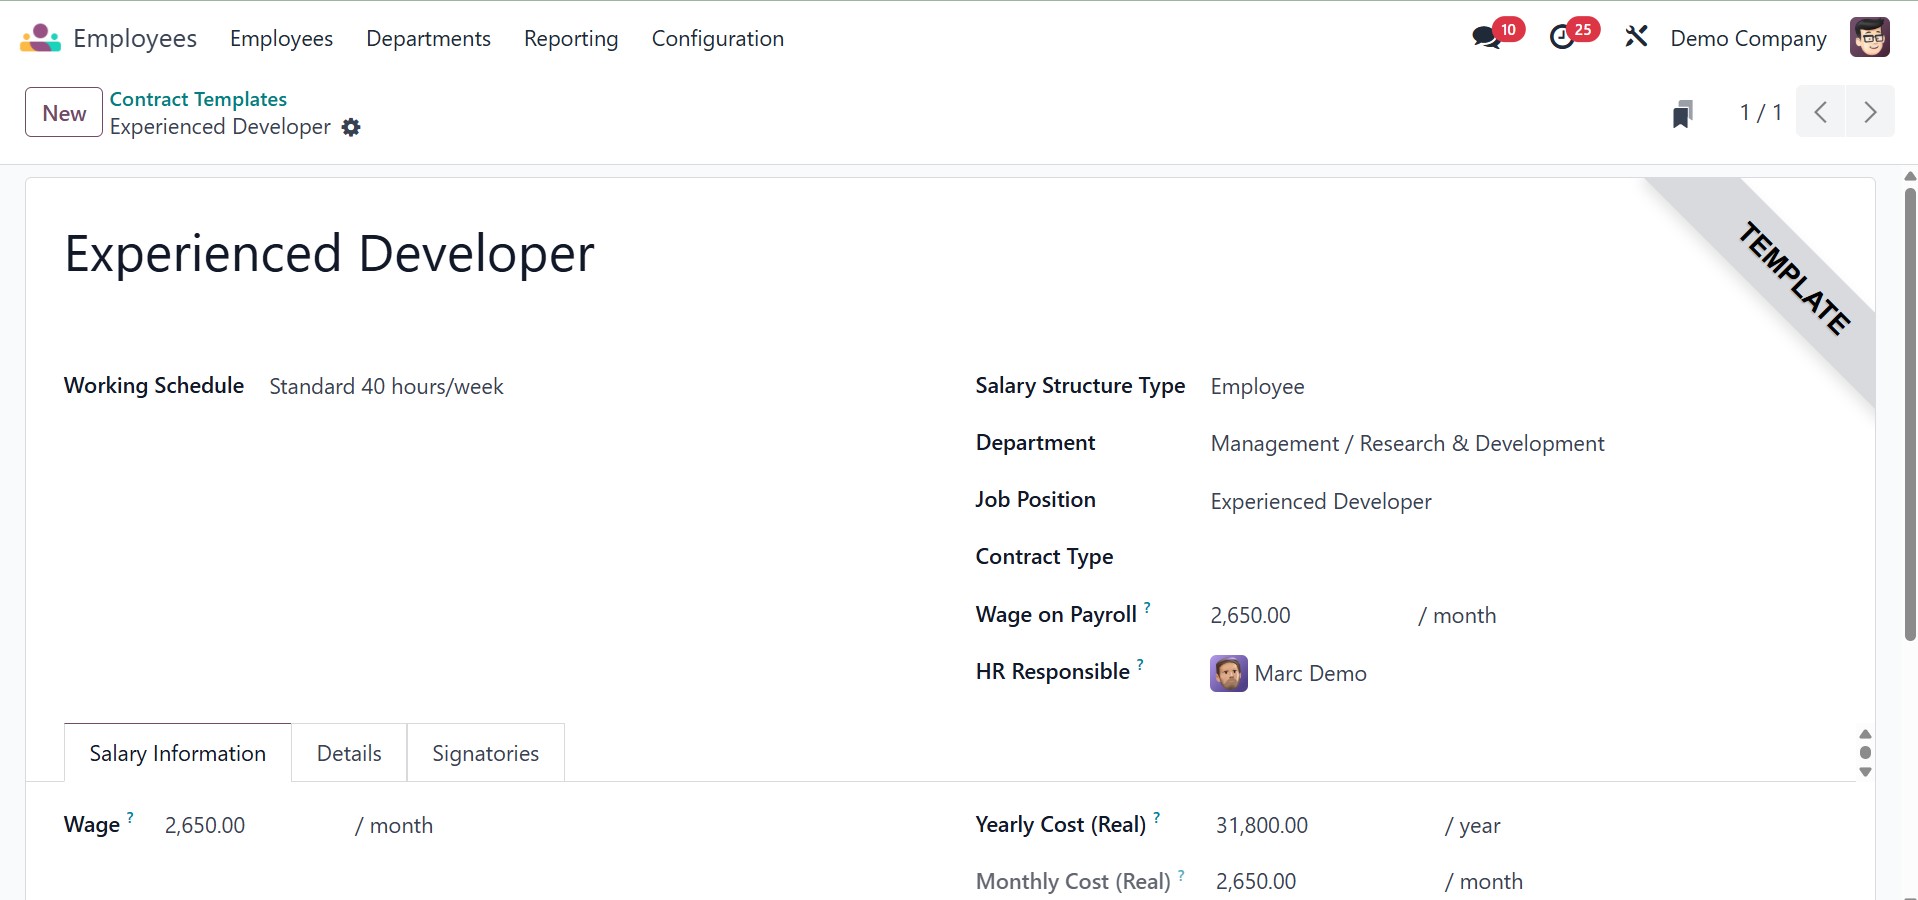
Selecting the Working Schedule, Attendance, or Planning as the Work Entry Source will specify the source for the creation of work entries; if you select the appropriate option, the work entry will be created from the employee's working schedule, attendance, or planning. You can then enter the Contract Reference in the space provided here, choose the type of salary structure for the contract, and enter the employee's working schedule in the appropriate field. You can then use the external link provided below to modify the working schedule to suit your needs.
In order to accept a contract offer, the candidate must automatically sign the New Contract Document Template, therefore make sure to include this information. By default, if an employee wants to modify their contract, they must sign the Contract Change Document Template.
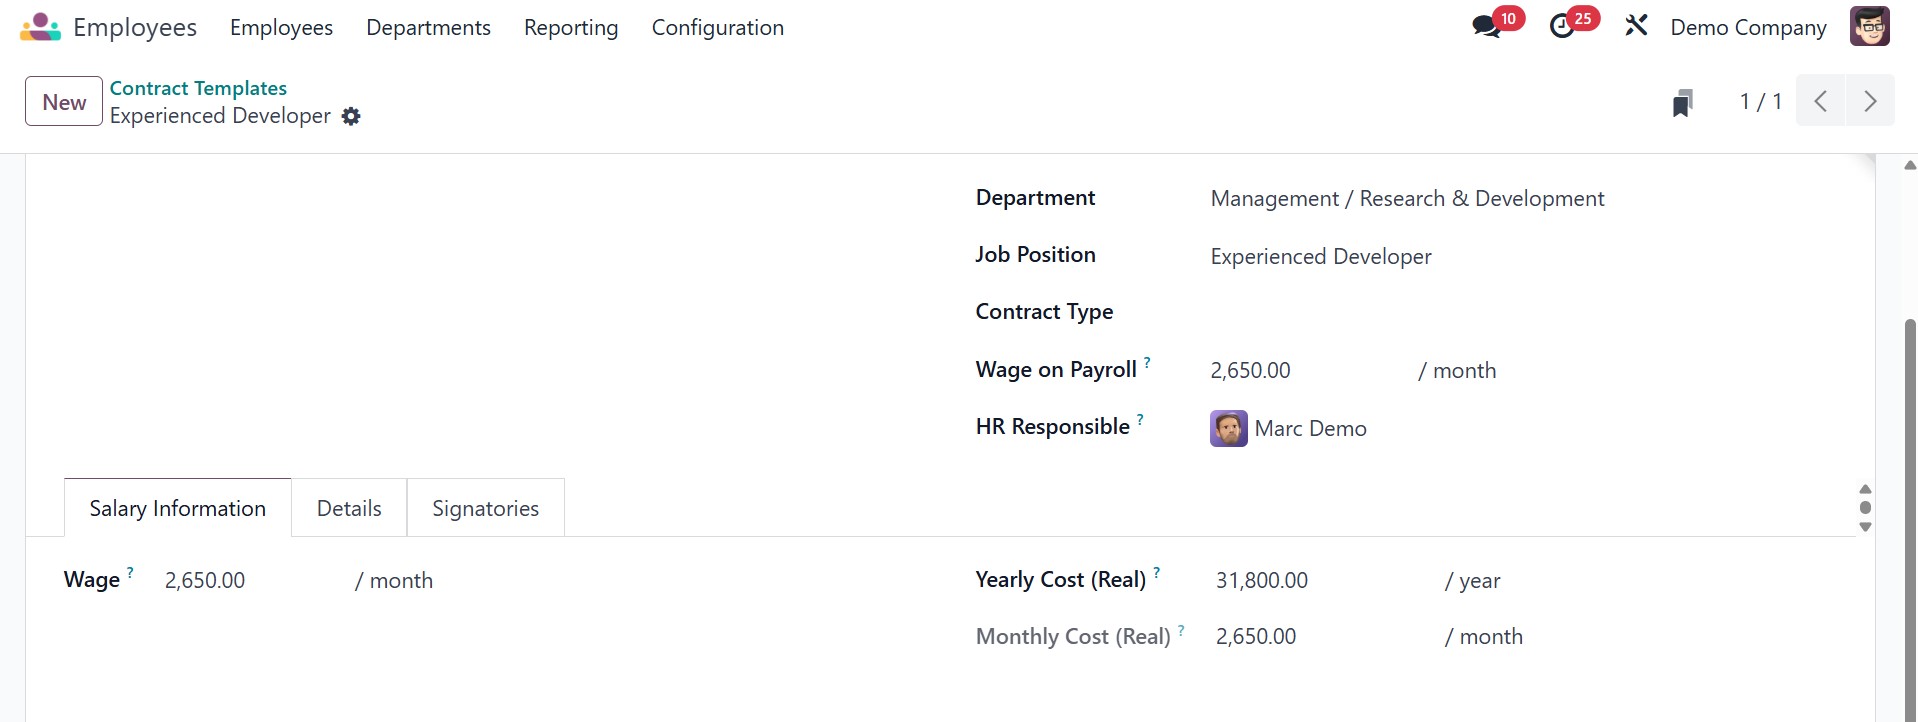
Under the Salary Information tab, you can submit the following information: Wage Type, Wage (the employee's monthly gross salary), Yearly Cost (the total real annual cost of the employee to the employer), and Monthly Cost (the total real monthly cost of the employee to the employer). When fiscal voluntarism is triggered, the withholding tax rate will increase on its own. There will be a separate entry for the Fiscal Voluntary Rate.
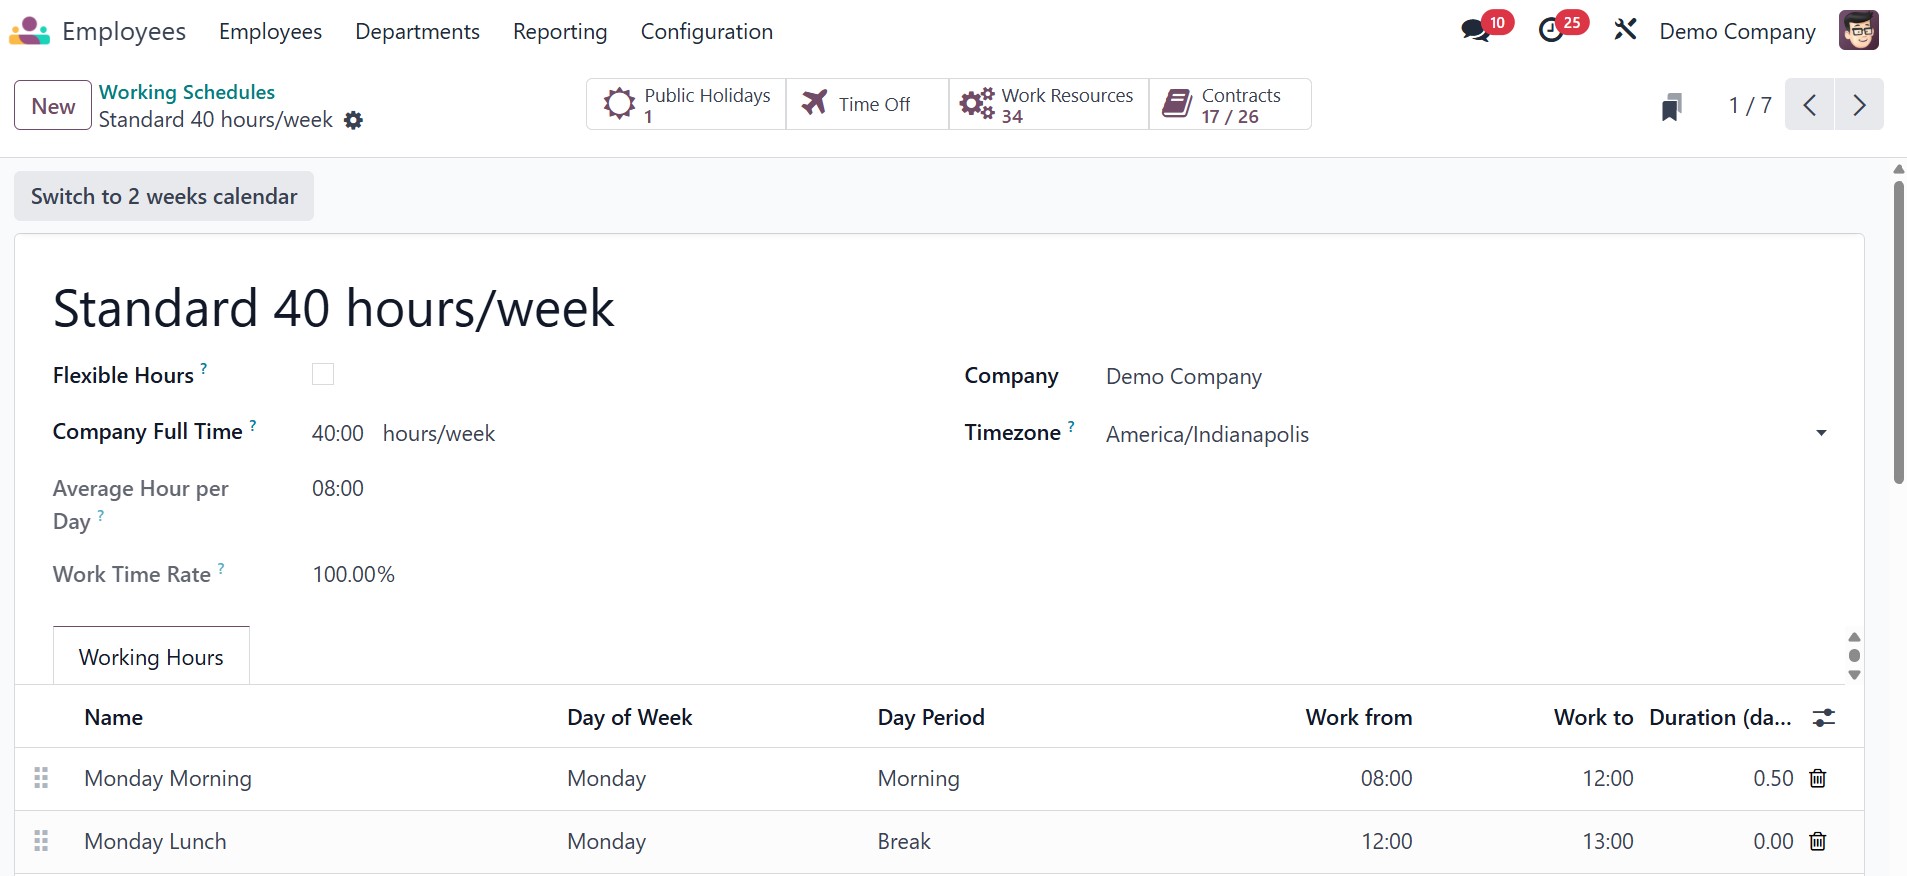
3.10 Working Schedule
Employee work schedules are created through the Configuration menu, so choose the Working Schedule option from the Configuration menu. The list contains the Working Time, Work Time Rate, Company name, and the number of contracts that use this; you can then add a new working schedule by clicking the New button.
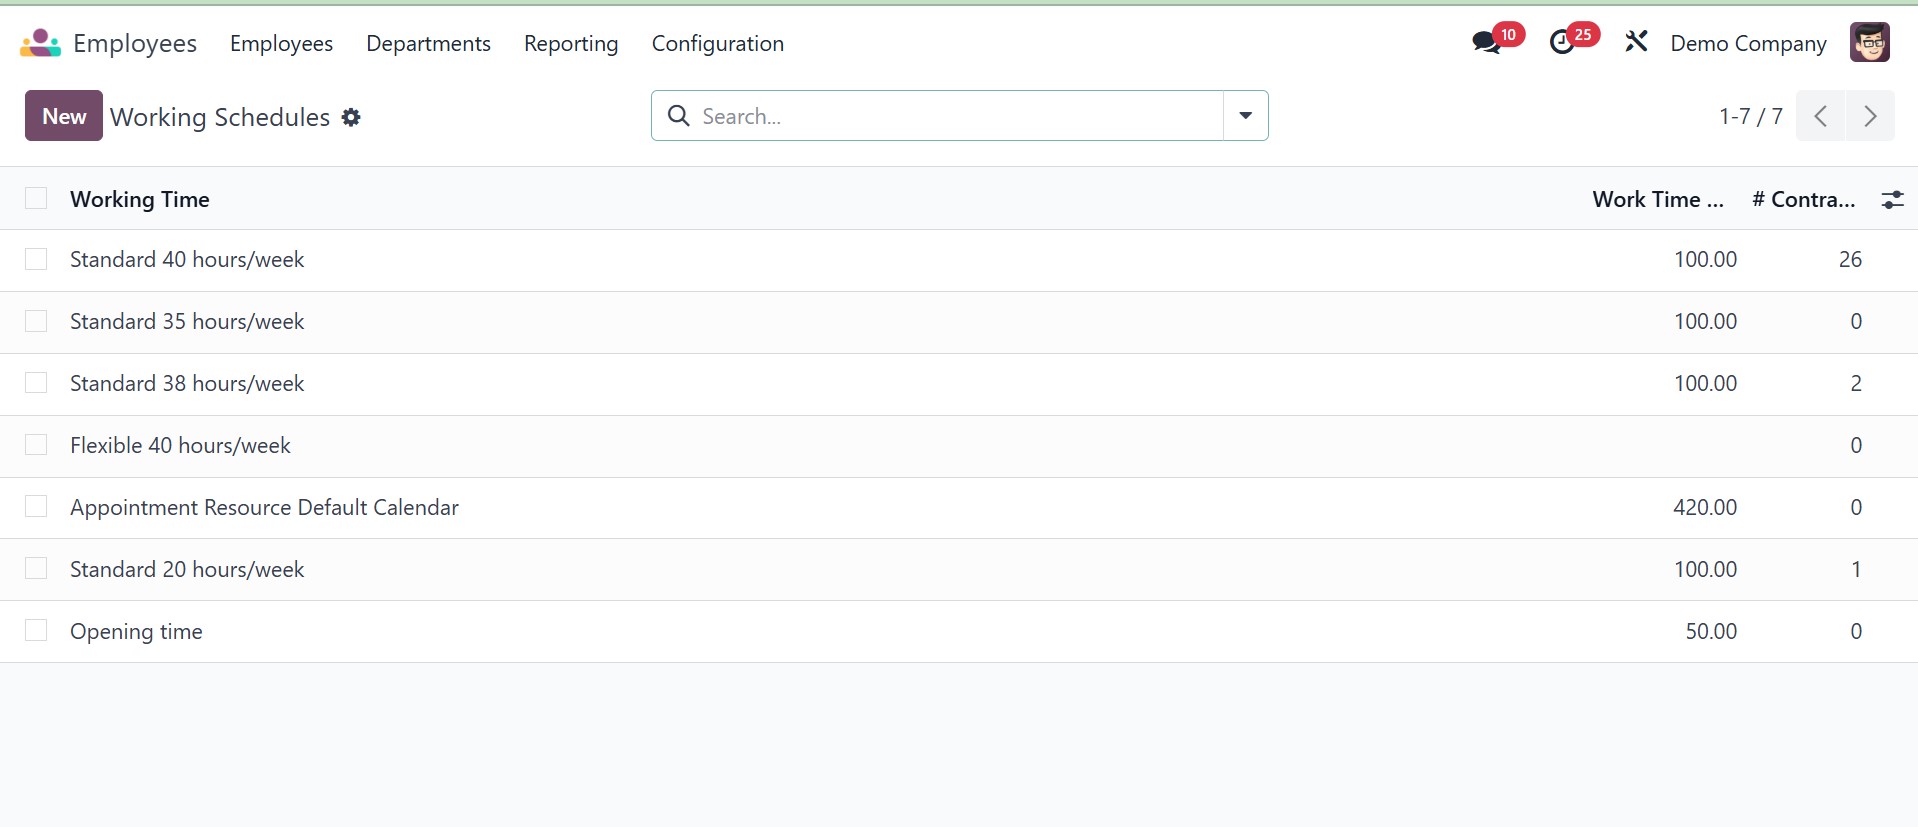
The company name should be mentioned first, followed by the schedule name, the time zone, and the average working hours for the day. Company Full Time is the number of hours required to work on a company schedule to be considered full-time; the Work Time Rate must be between 0 and 100 when calculated in relation to a full-time work schedule. Finally, the Working Hours within the tab should be mentioned.
3.11 Badges
Next, under the configuration, you have the Badges option, as in the image below.
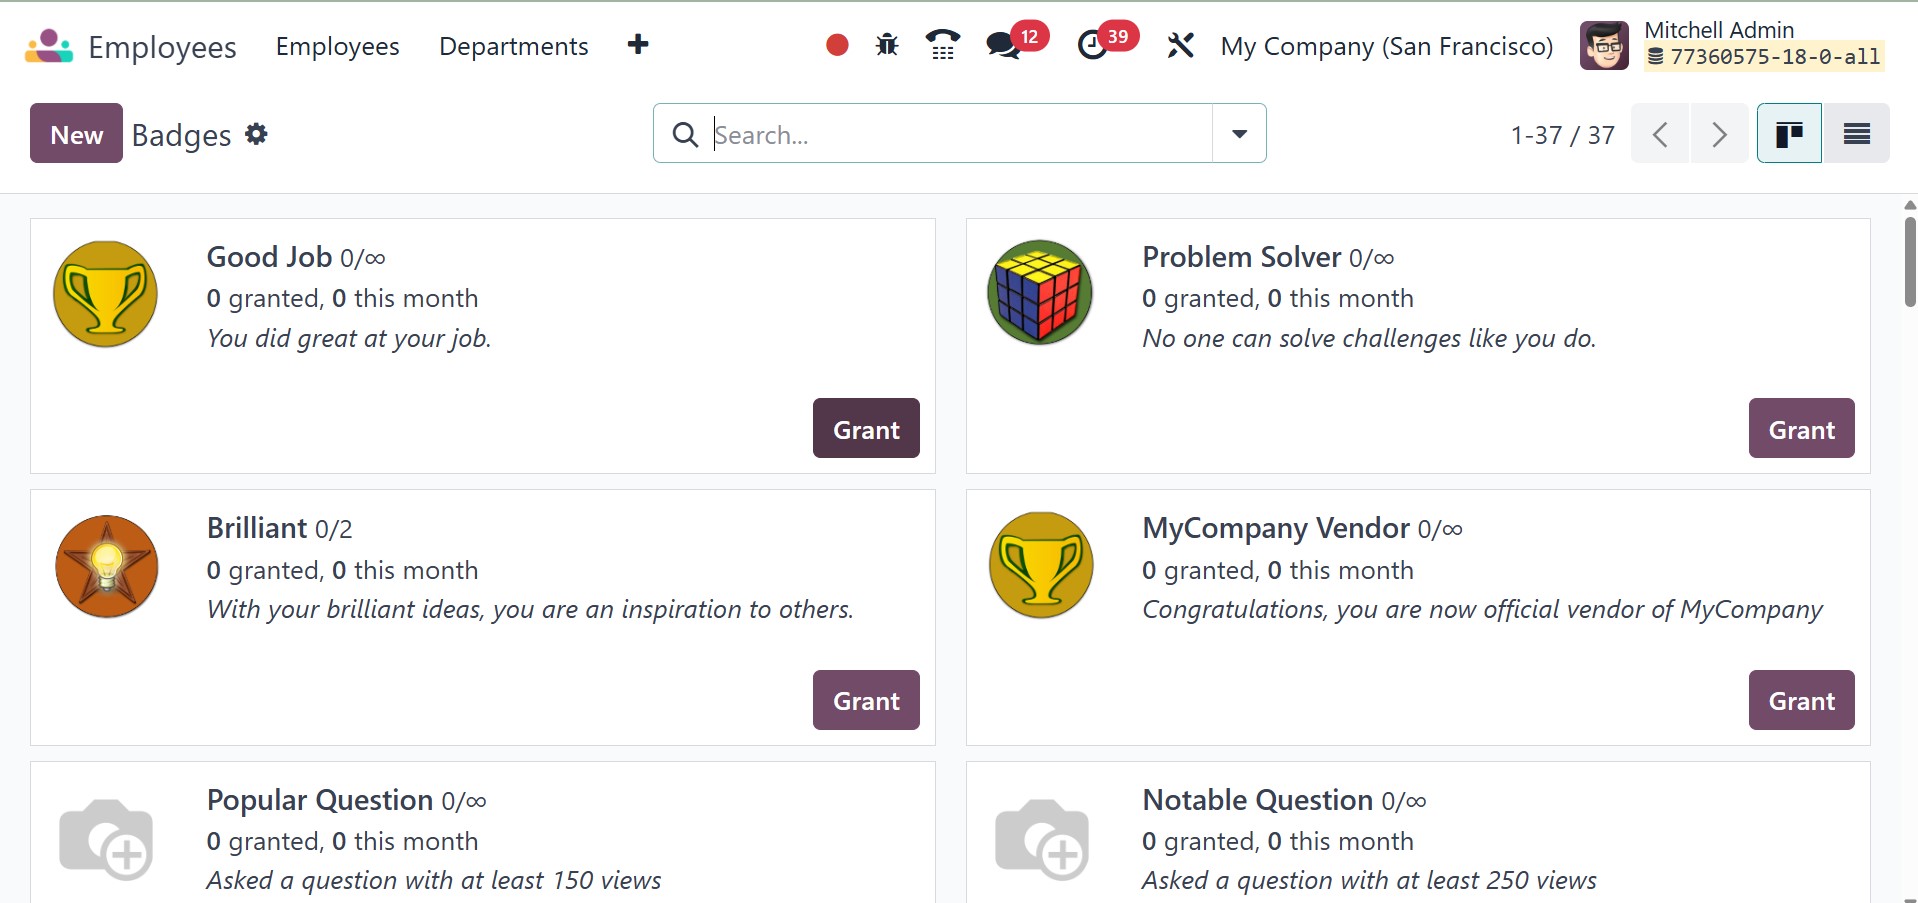
The Gamification system includes the Badges option in the Employee Module Configuration of Odoo. It enables companies to design, oversee, and award badges to staff members according to their performance, accomplishments, and training development.
On selecting the NEW option, you have the creation page, as in the image below.
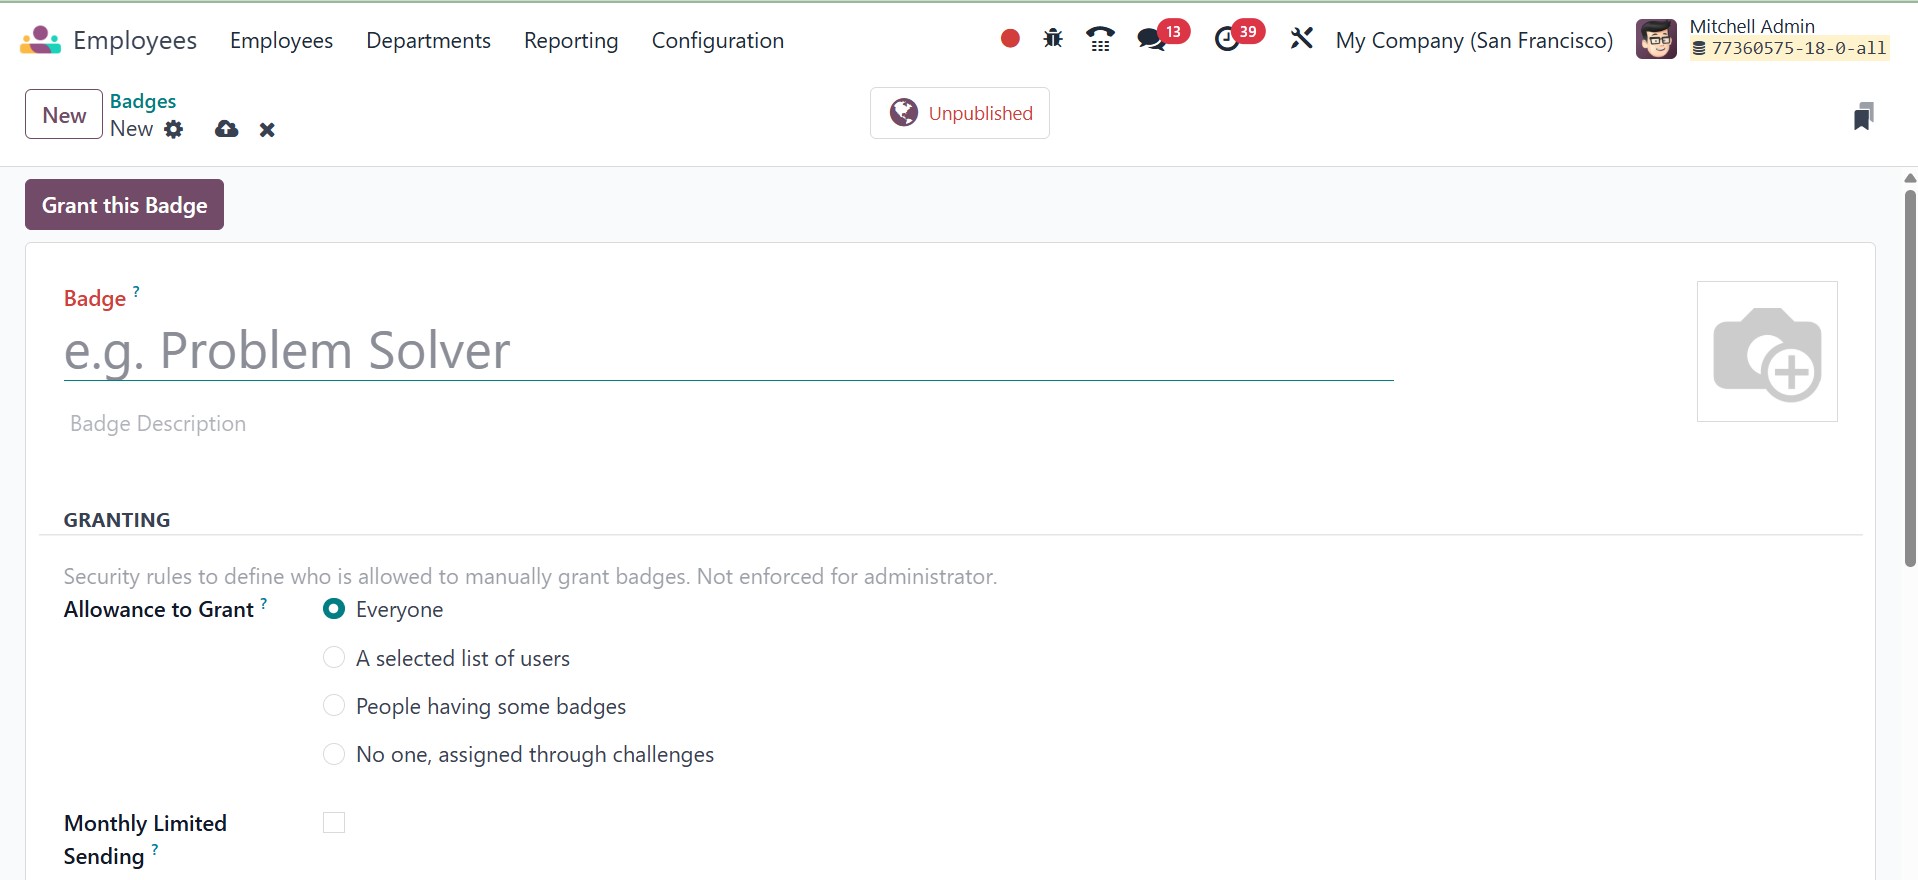
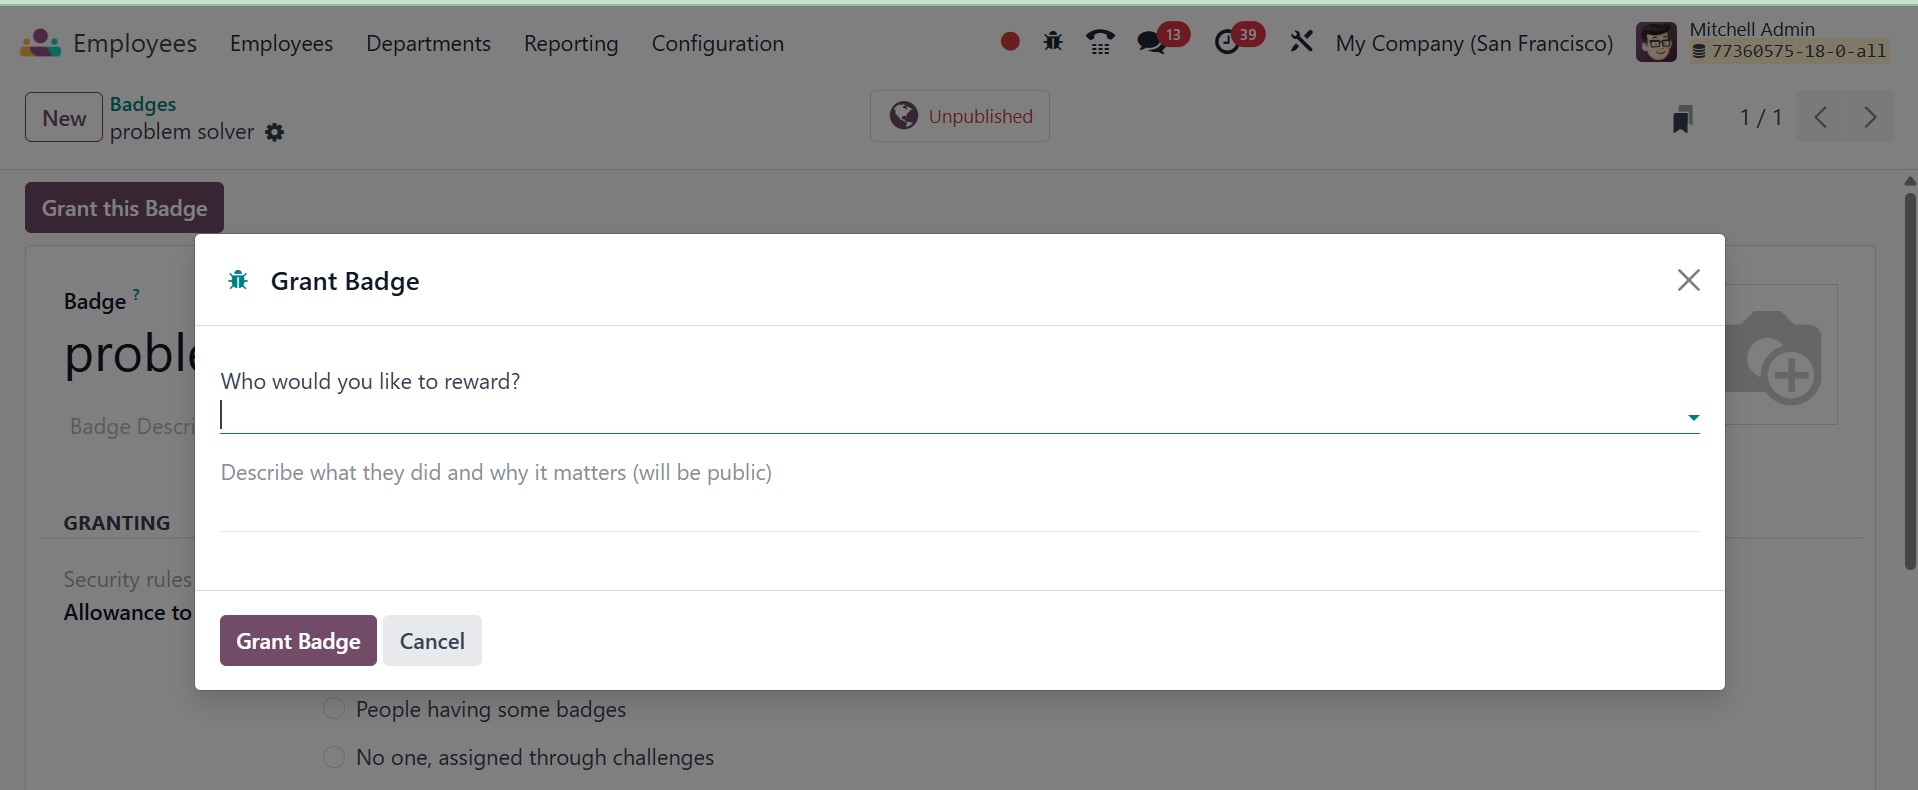
There, the administrator can grant a badge to an eligible employee by clicking on the Grant Badge button. This will give a pop-up, as shown below.
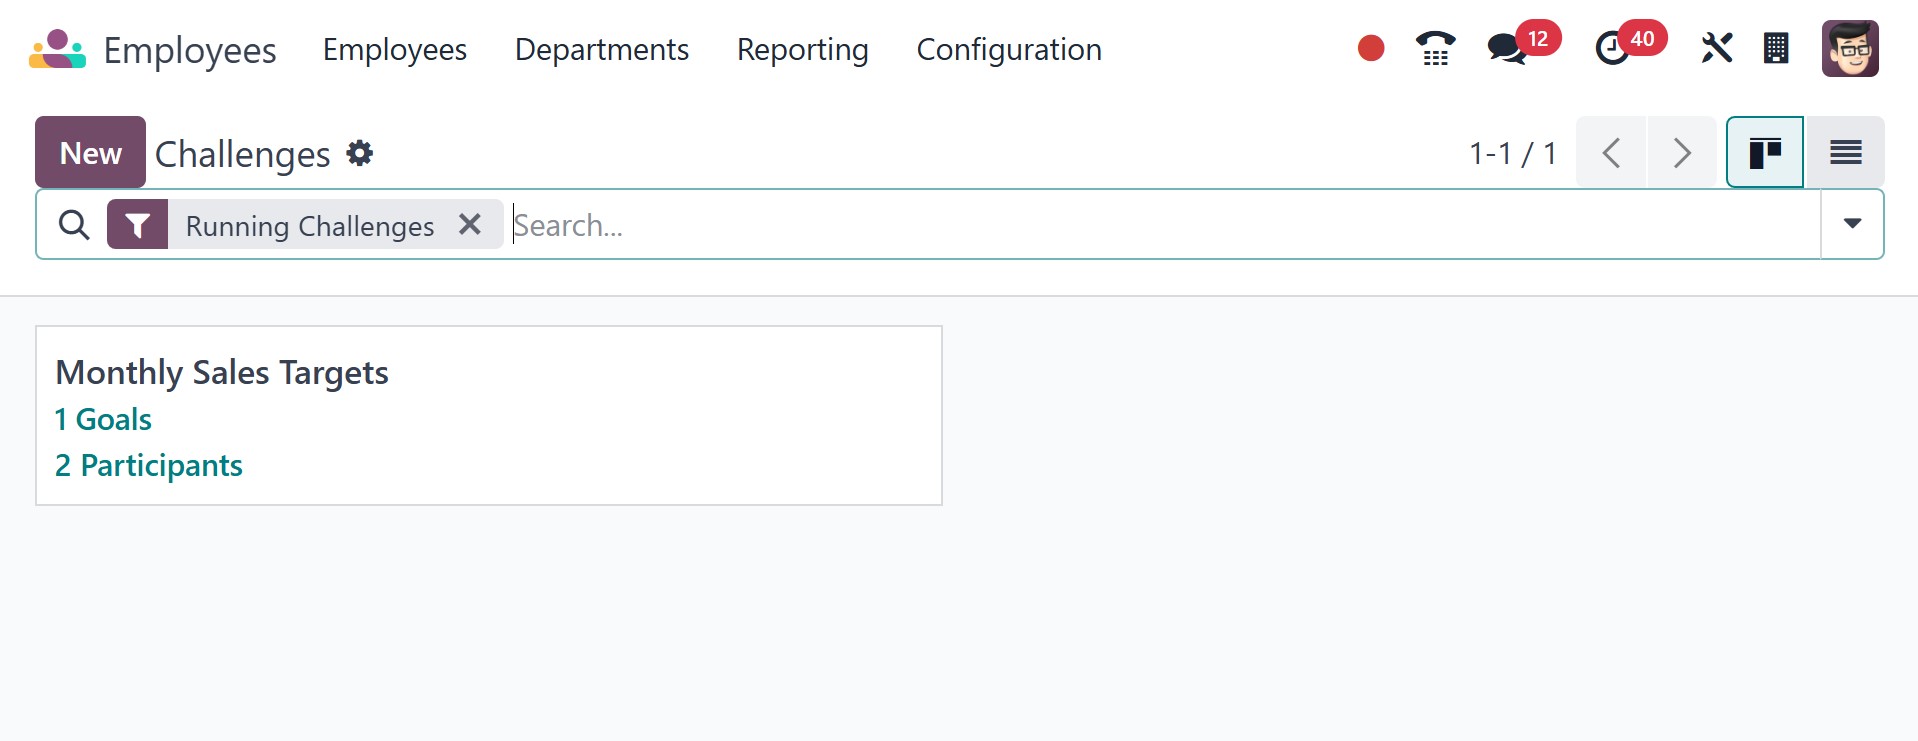
3.12 Challenges
The employee module includes the Challenges option in the Odoo Employee Configuration menu. It enables companies to set performance-based goals for staff members, monitor their development, and give them badges, points, or ranks as rewards. This feature is intended to increase engagement, inspire workers, and increase output. The page will be, as in the image below.
On selecting the NEW option, you will be directed to the creation page.
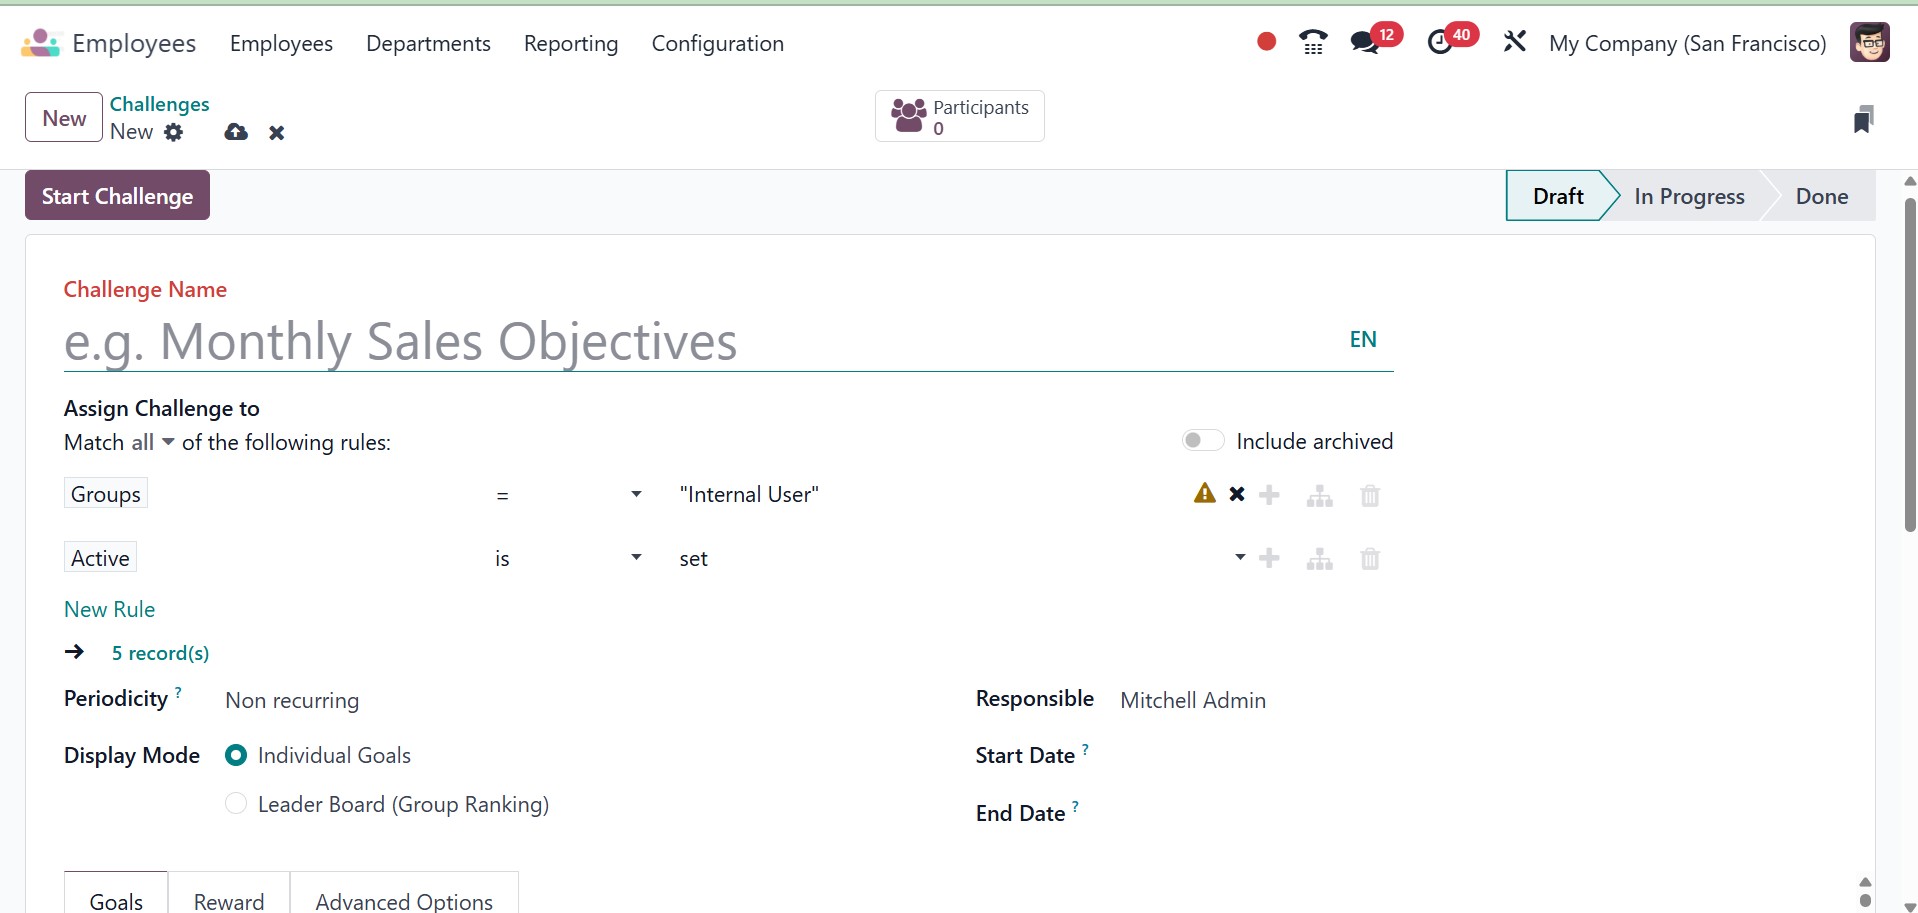
You will see a designated space to enter the Challenge Name here. You can configure users to allow Odoo to assign challenges to the records that match by using the Add Filter option. The Periodicity parameter allows you to specify the time frame for automatic challenge assignment. Daily, weekly, monthly, or annual are all possible. If you would like not to repeat the challenge, you may also set it to Non-Recurring. Leader Boards or Individual Goals can be selected as the Display Mode. The Responsible column allows you to specify which employee is in responsible of handling this challenge. The Start and End date fields can be used to add the challenge's duration.
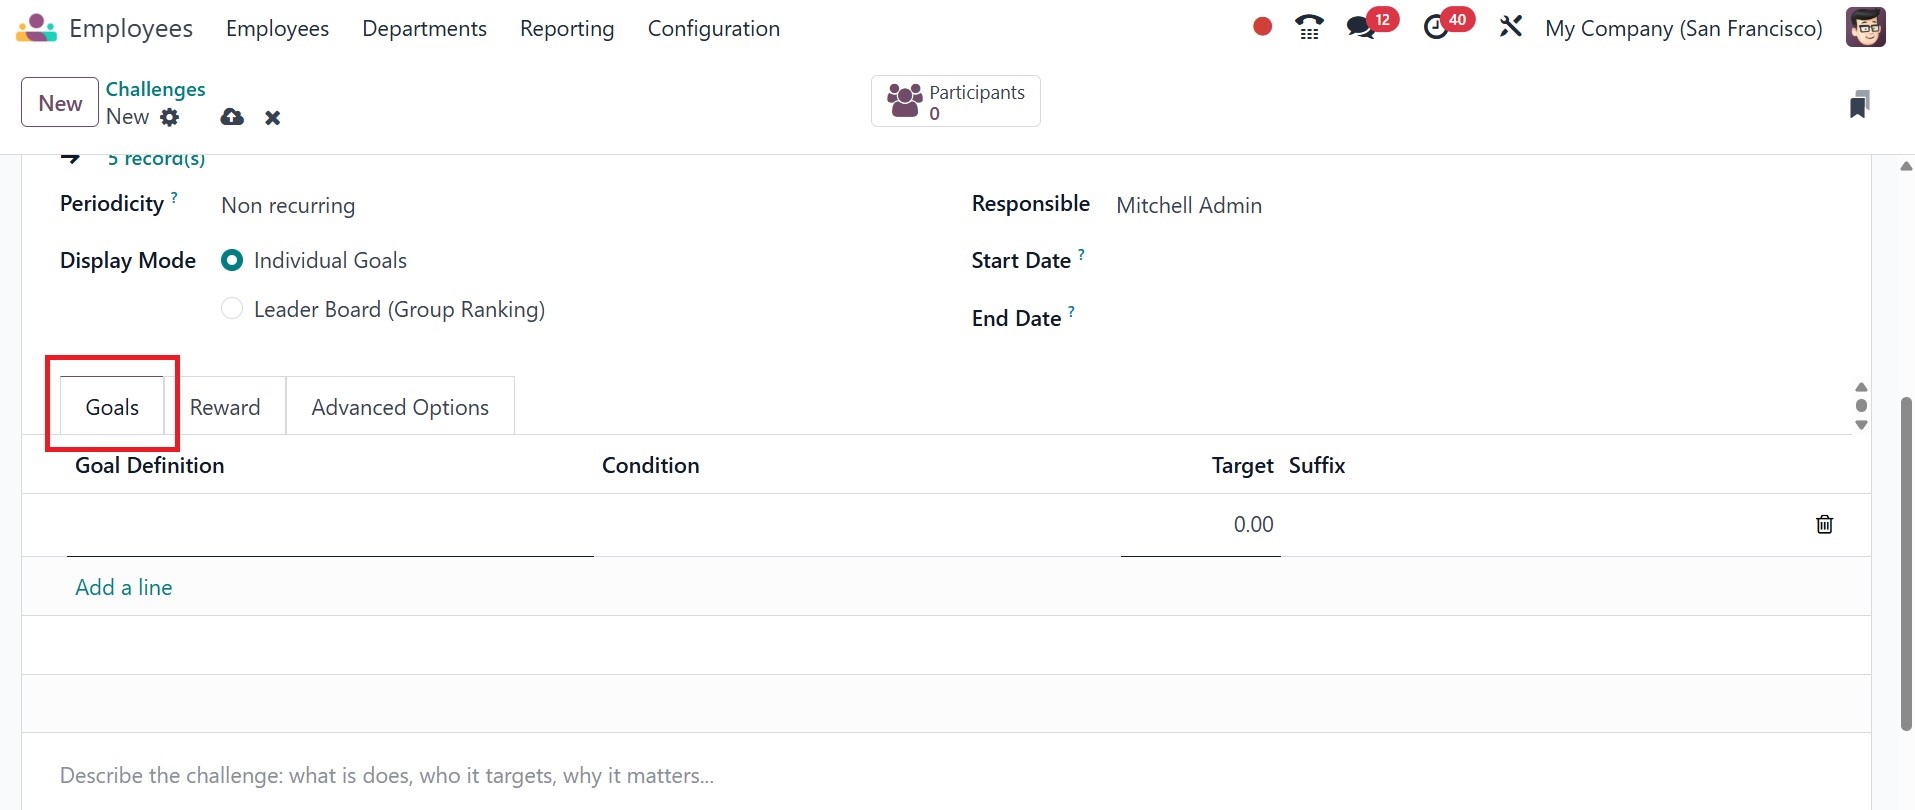
The Add a Line button on the Goals tab allows you to describe the challenge. It will assist a user in comprehending the challenge's requirements. Goal Definition, Condition, Target, and Suffix are all included.
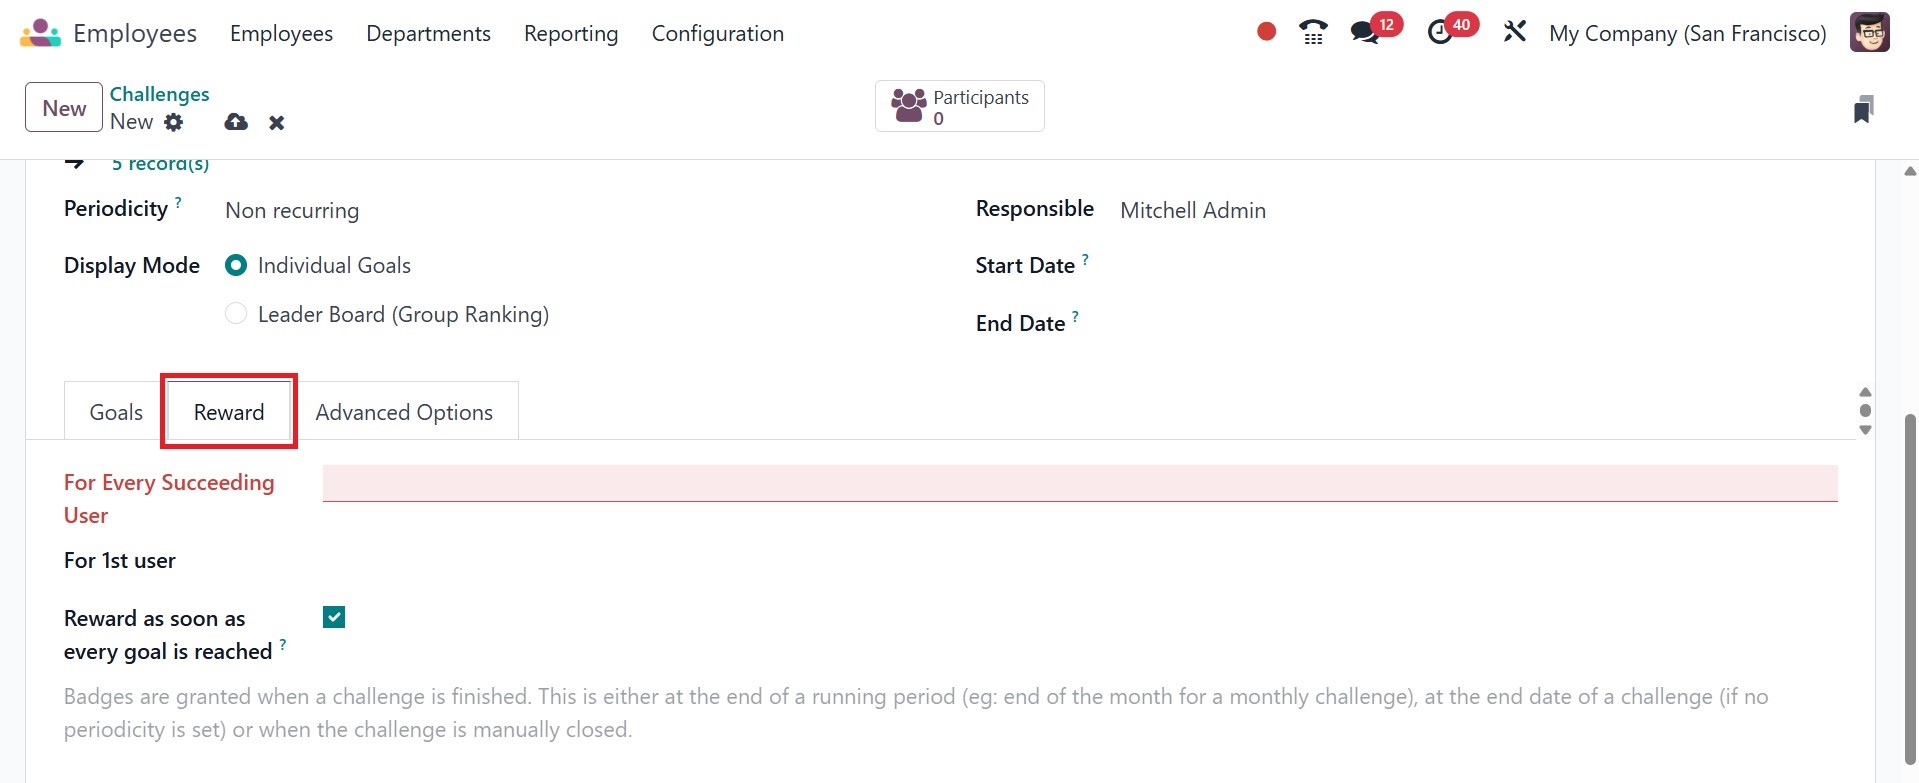
You may add the challenges' rewards under the Reward tab. Rewards can be specified for the first user and for each subsequent user. You can activate the reward as soon as each goal is accomplished if you want to give the worker a reward when the goal is finished.
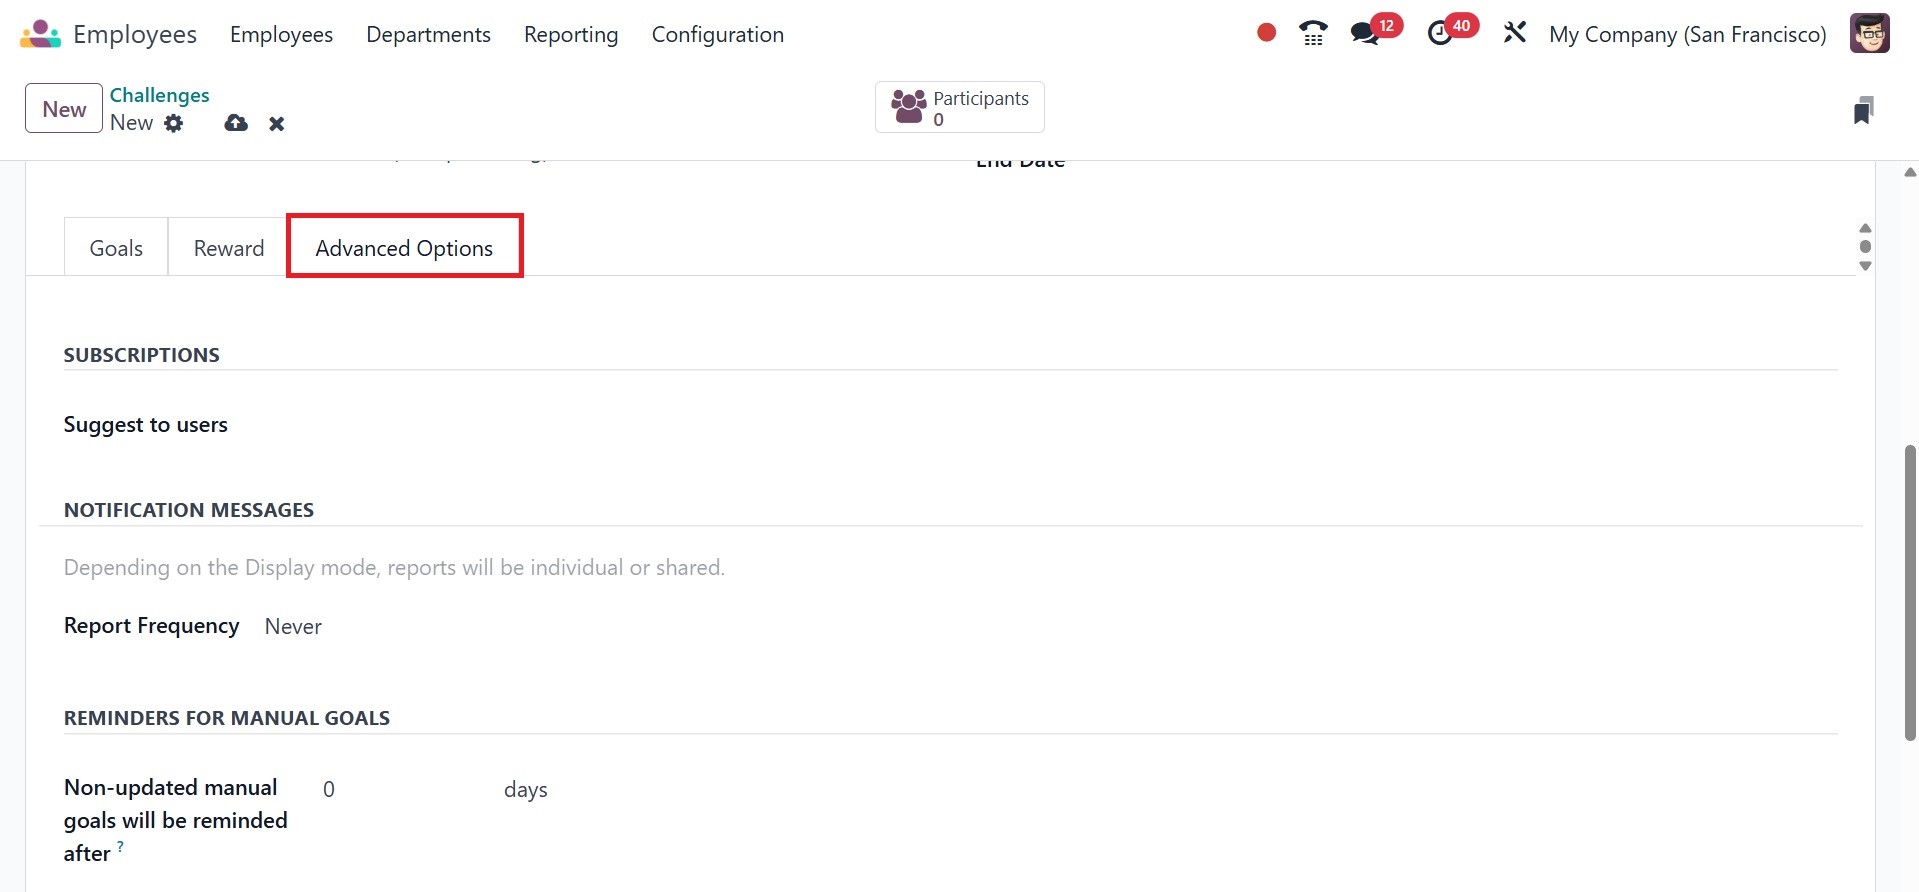
You can invite people by entering their IDs in the Suggest to people section under the Advanced Options tab. To alert the staff, place a notification message in the designated area. You can also configure the Report Frequency in addition to this. In the relevant field, set reminders for the manual goals. Lastly, use menus to specify the challenge's visibility. You may begin using this challenge by clicking the Start Challenge button after you've finished configuring it.
3.13 Goals History
You can choose the Goal History option from the Configuration menu to look at the employees' performance. The employees' goal history will be shown in this window.
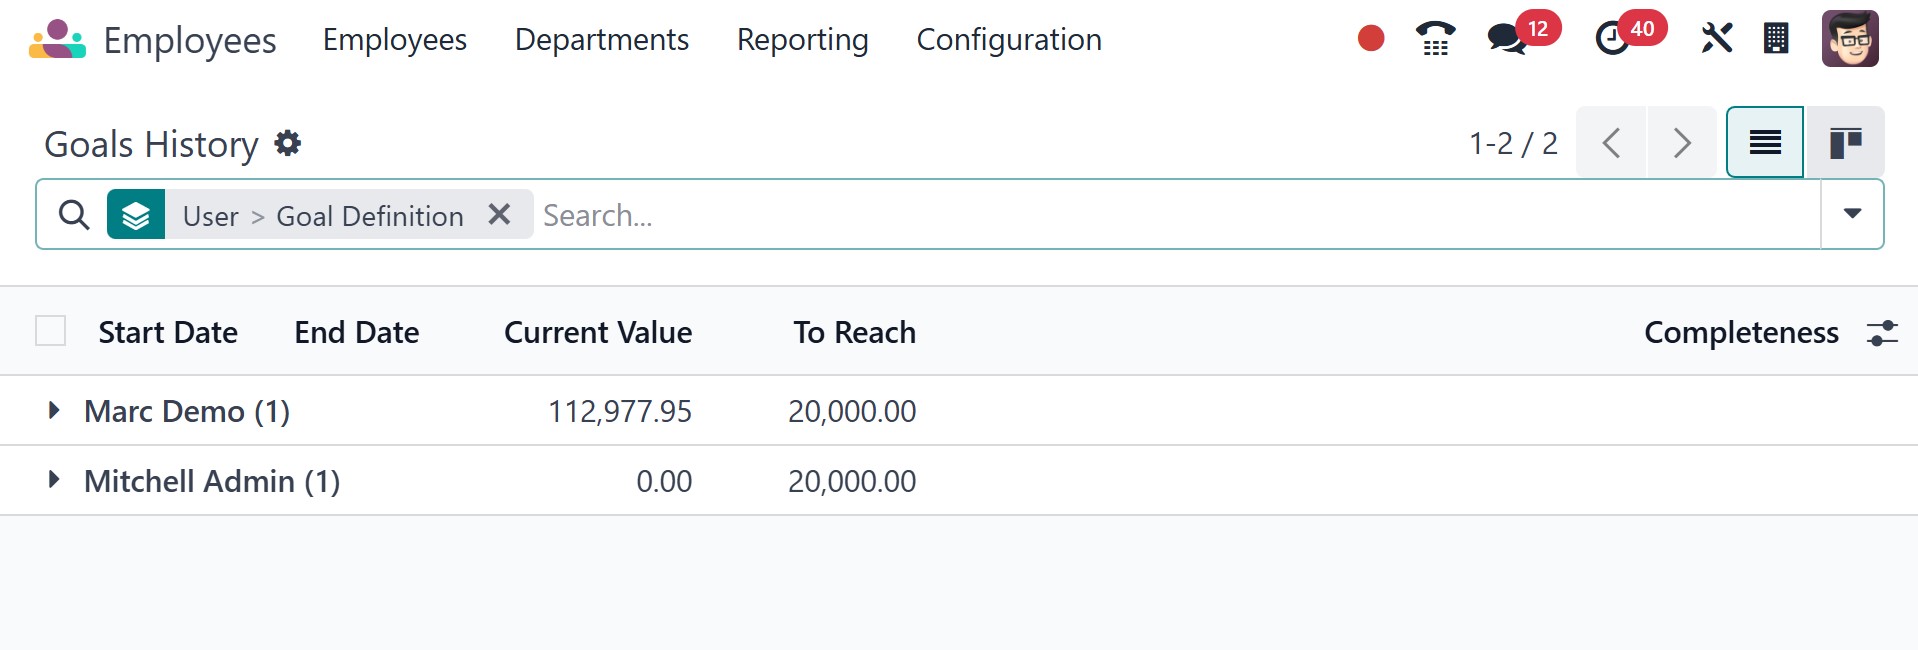
This platform allows you to examine each employee's performance level. Dates of Start and End, Current Value, To Reach, and Completeness are displayed. Employee motivation will be maintained by displaying goal history.
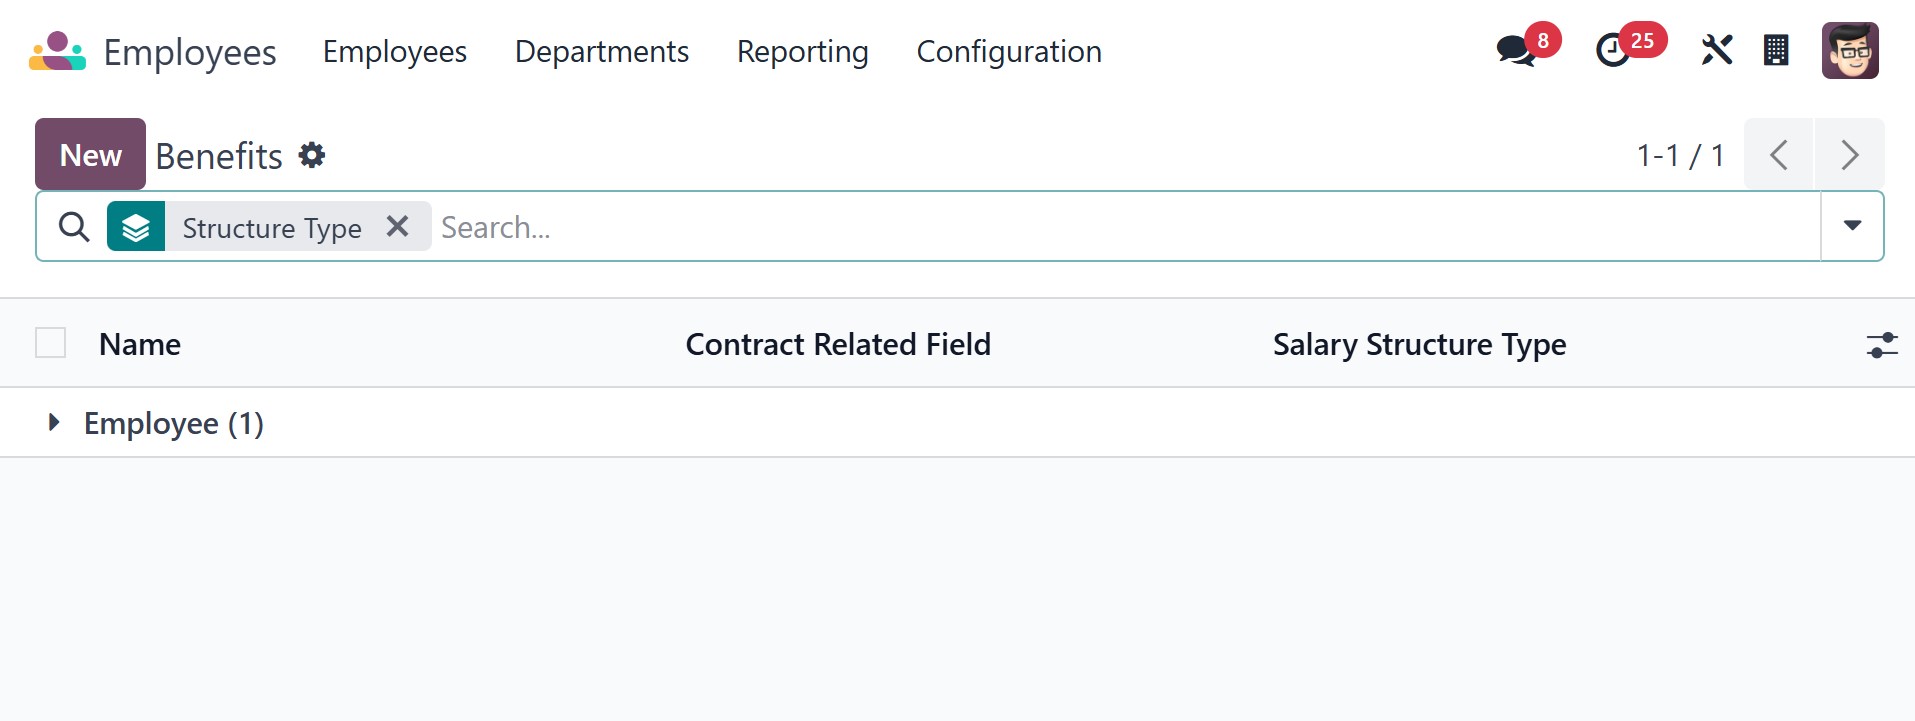
3.14 Benefits
Under the benefits option, you will have the pre configured benefits for the employee, as in the image below.
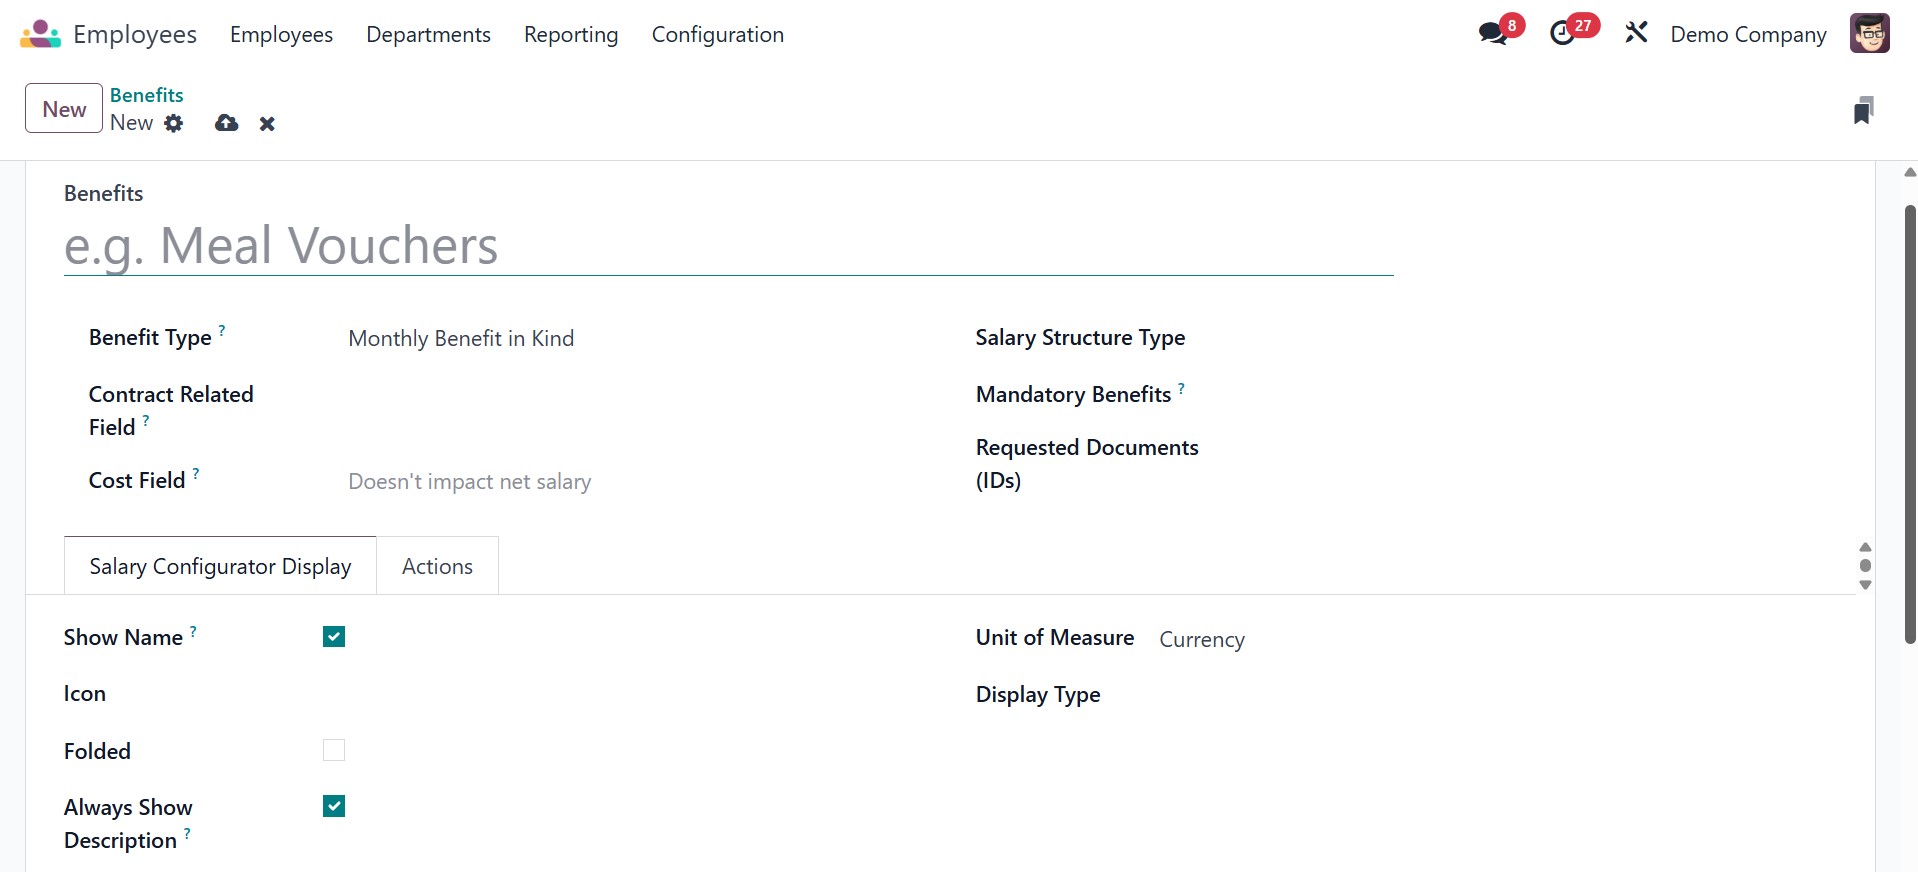
The new option can be used for creating a new one.
On the new page, you can add the benefits name, type, contract related field, cost field, salary structure type, mandatory benefits, and requested documents. Under the salary configurator display, you can activate the show name, icon, flooded, always show description, units of measure, and display type, respectively. Below that, you can add the description as well.
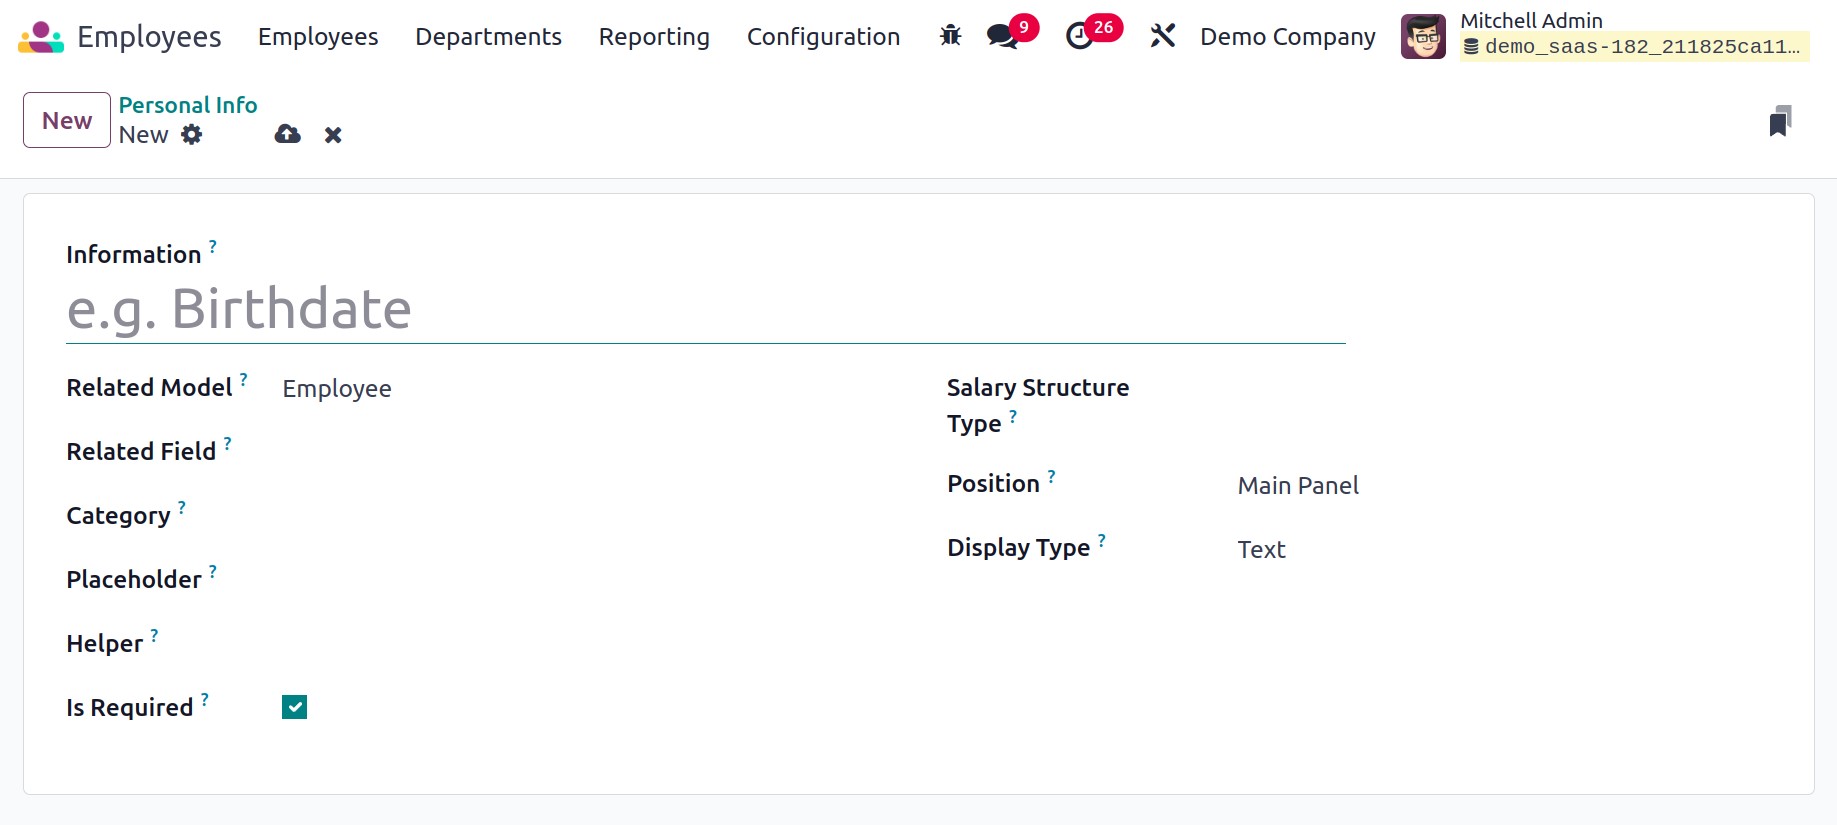
3.15 Personal Info
The option allows you to configure personal information about your employee into the salary slips.
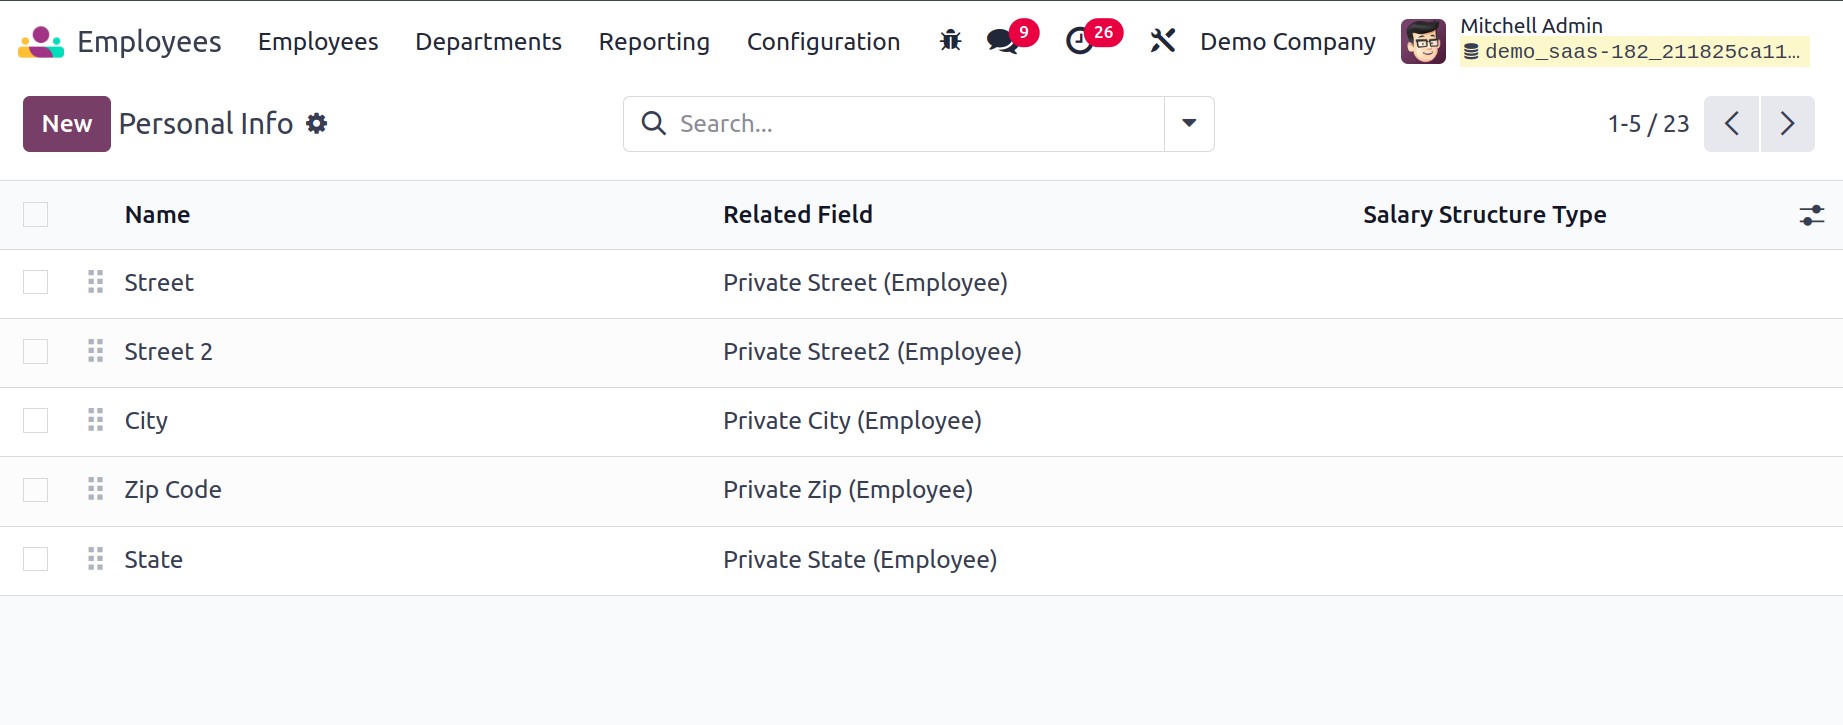
Using the New option, you can add the name, related field, category, placeholder, helper, position, display type, and salary structure type, respectively.
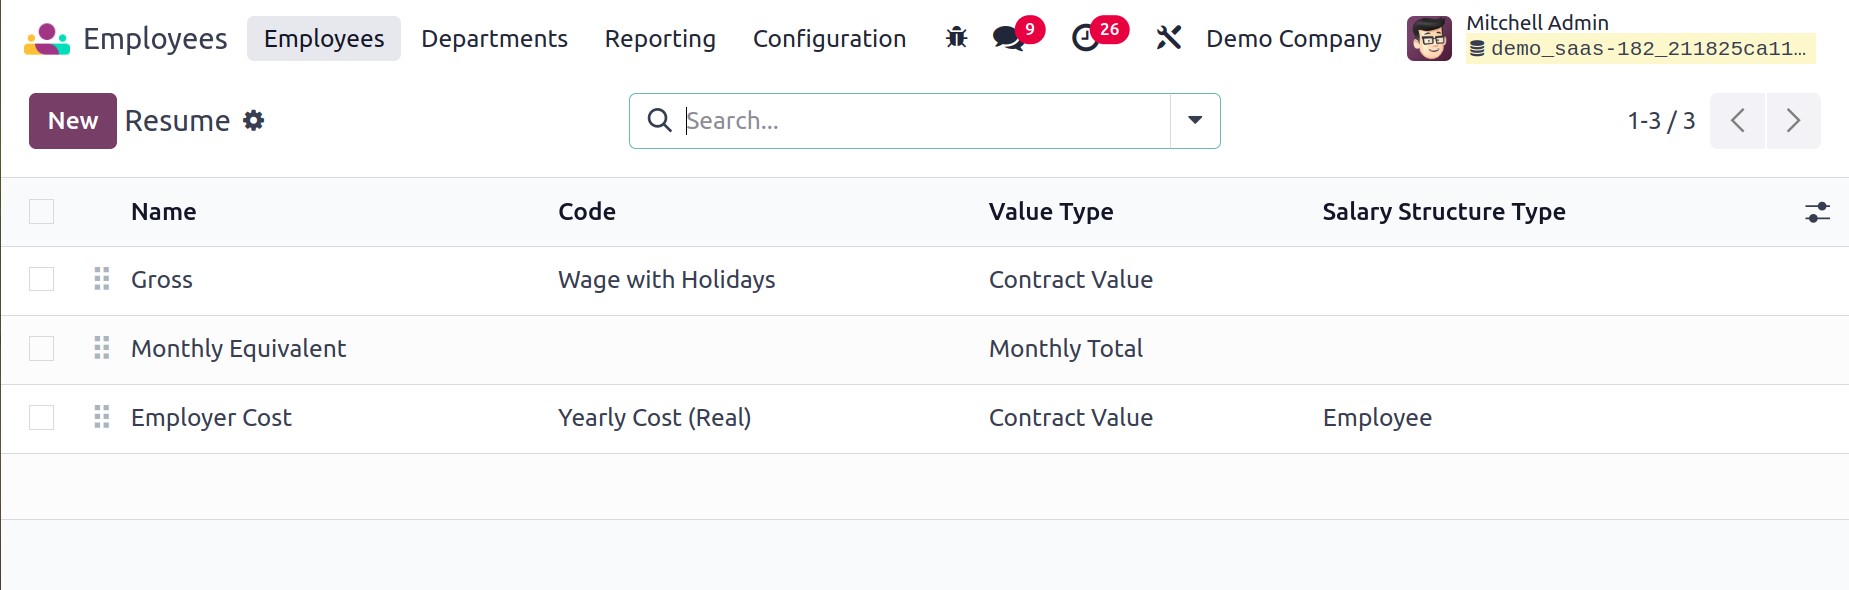
3.16 Resume
Organizations can maintain and monitor employee qualifications, job experience, and skills within their HR system by using the Resume option in the Odoo Employee module.
On selecting the new option, you can create a new one, as in the image below.
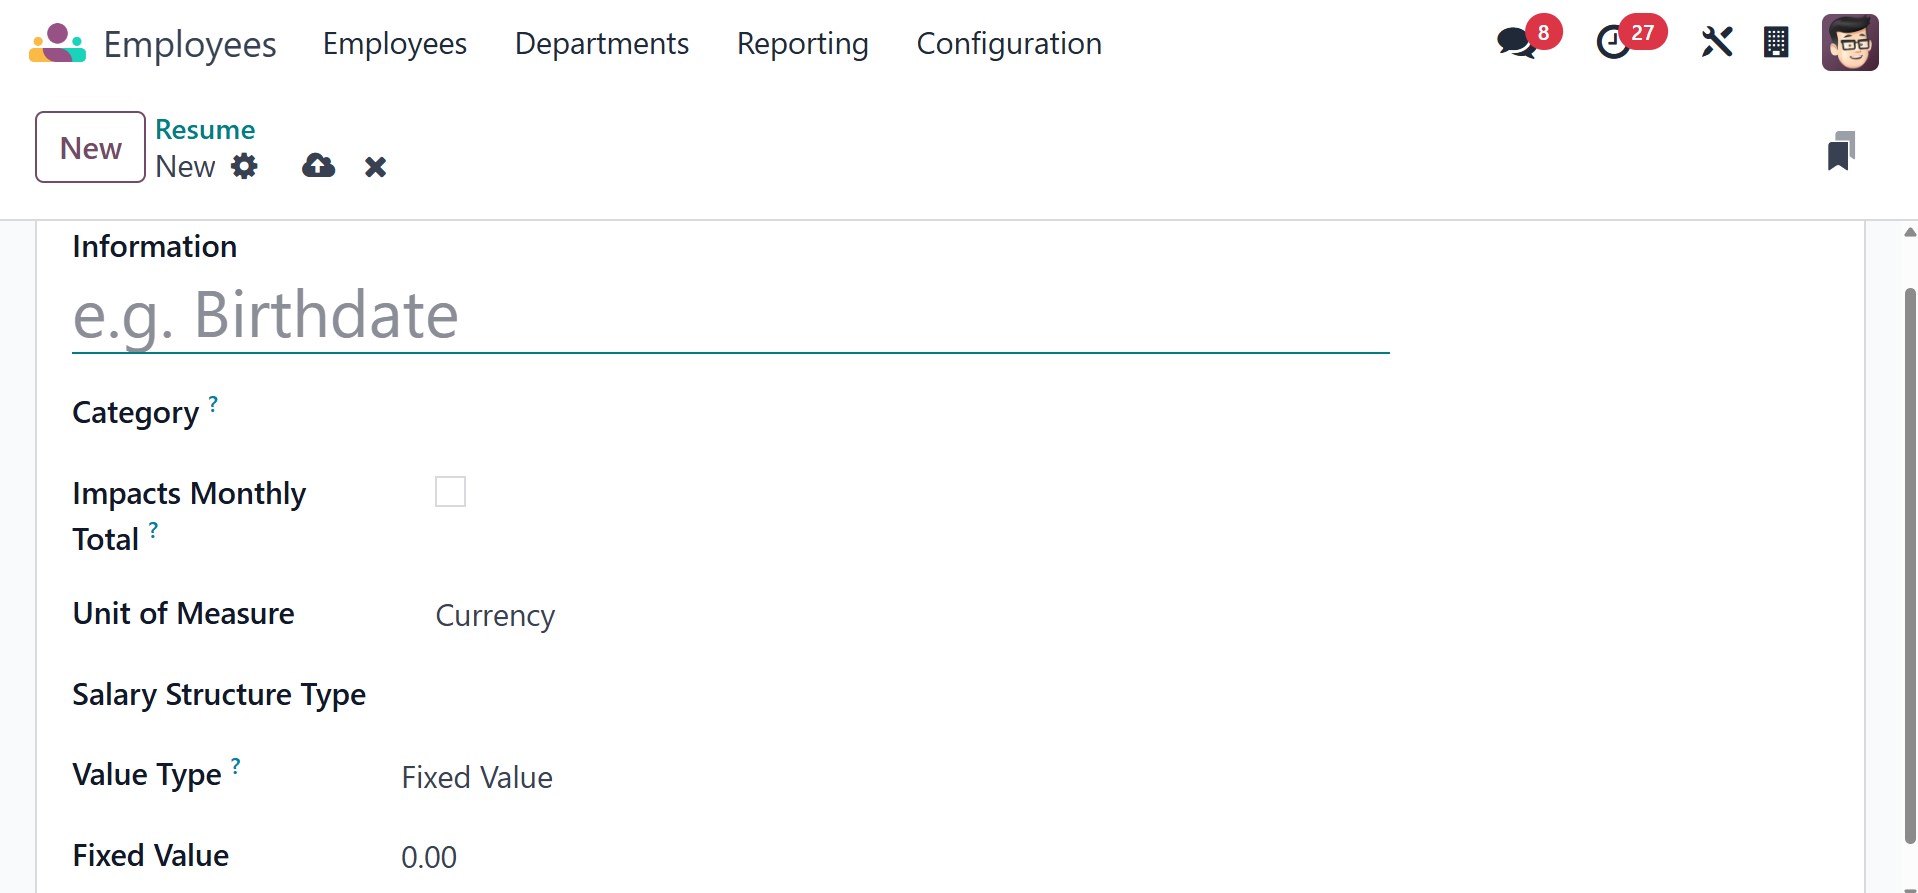
There, you can provide the information, category, impacts monthly total option to activate, units of measure, salary structure type, value type, and fixed value, respectively.
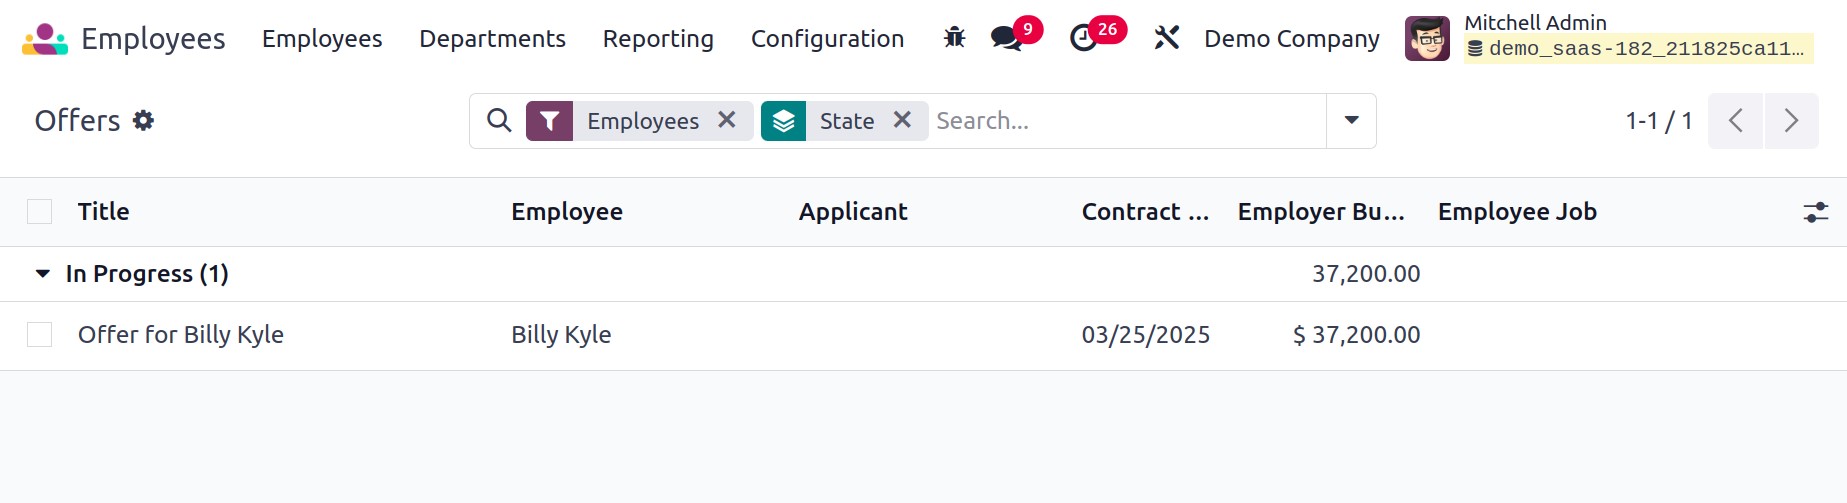
3.17 Offers
Offers option in the Odoo Employee module is primarily related to the Recruitment process. It allows HR managers to manage job offers extended to candidates during the hiring process. This feature helps track the details of employment offers, including salary, benefits, job position, and contract terms.
3.18 Settings
Under the settings option, you have the options like, employee, work organization, employee update right, salary configurator, and extra time off allocation.
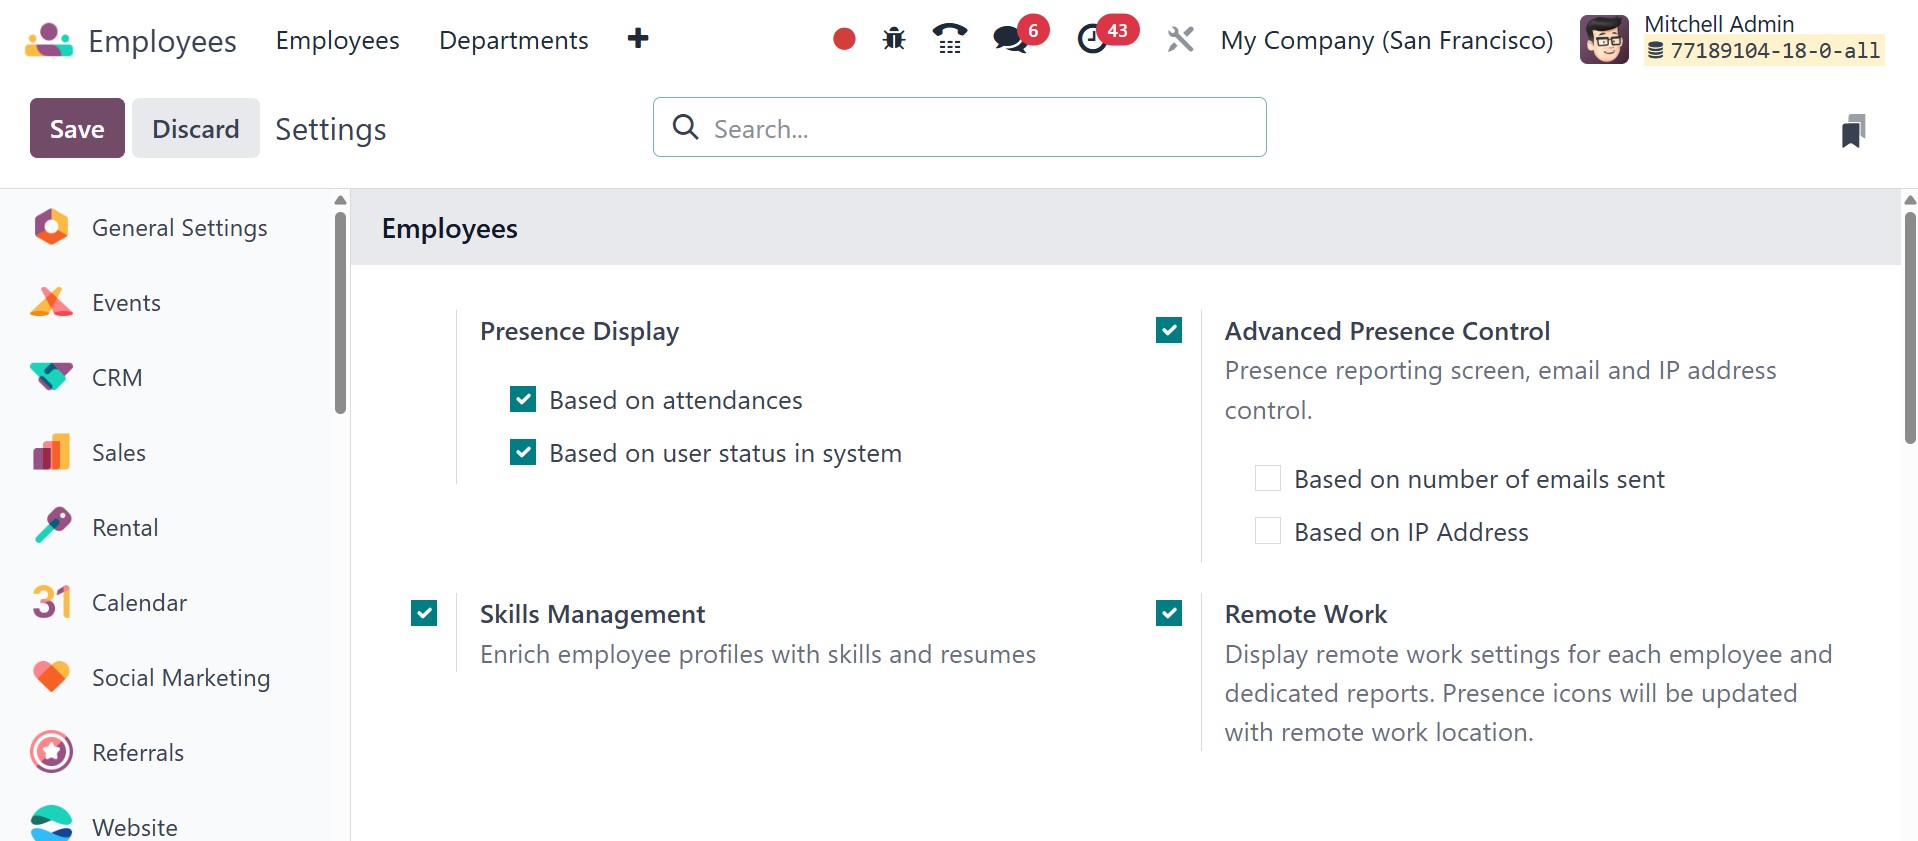
Under the employee, you have the presence display, which can be activated based on attendance or based on user status in the system. Under the advanced presence control option, attendance will be marked based on the number of emails sent or based on the IP address. Now, below that, there is skills management, which enriches employee profiles with skills and resumes. The remote work option displays the remote work settings for each employee and dedicated reports. The presence icons will be updated with the remote work location.
Now, under the work organization, you have company working hours, which set the default company schedule to manage employee working time, as in the image below.
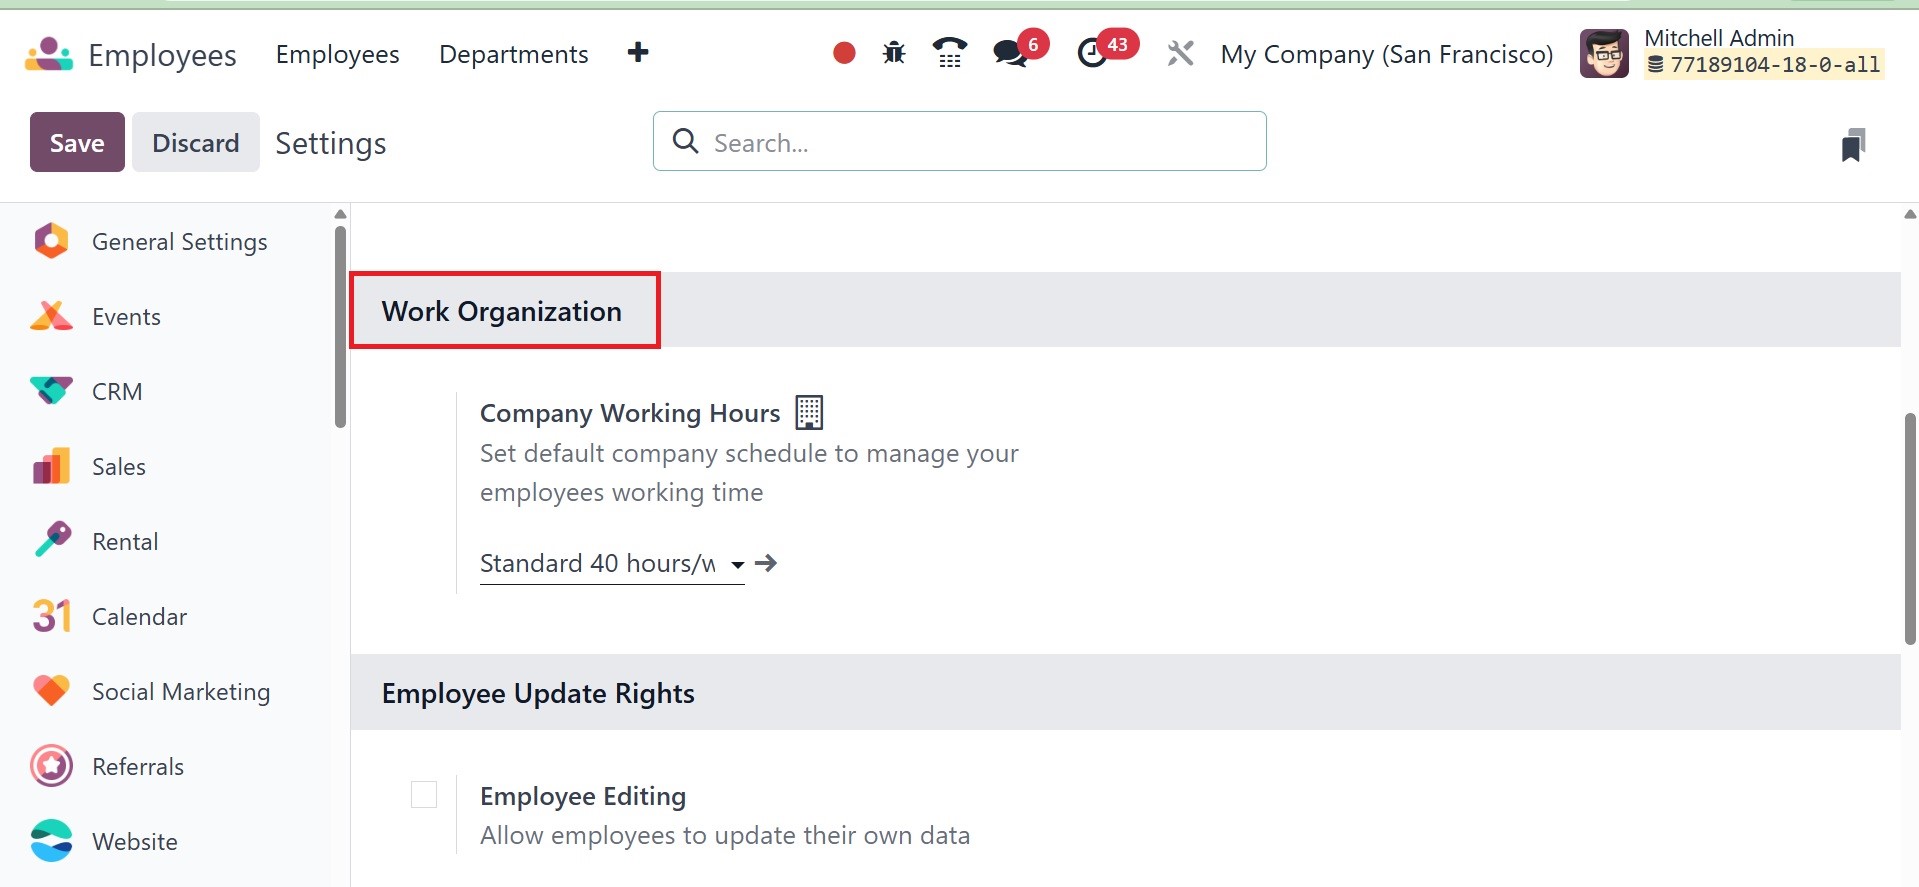
Next option under the settings is, employee update rights, as in the image below.
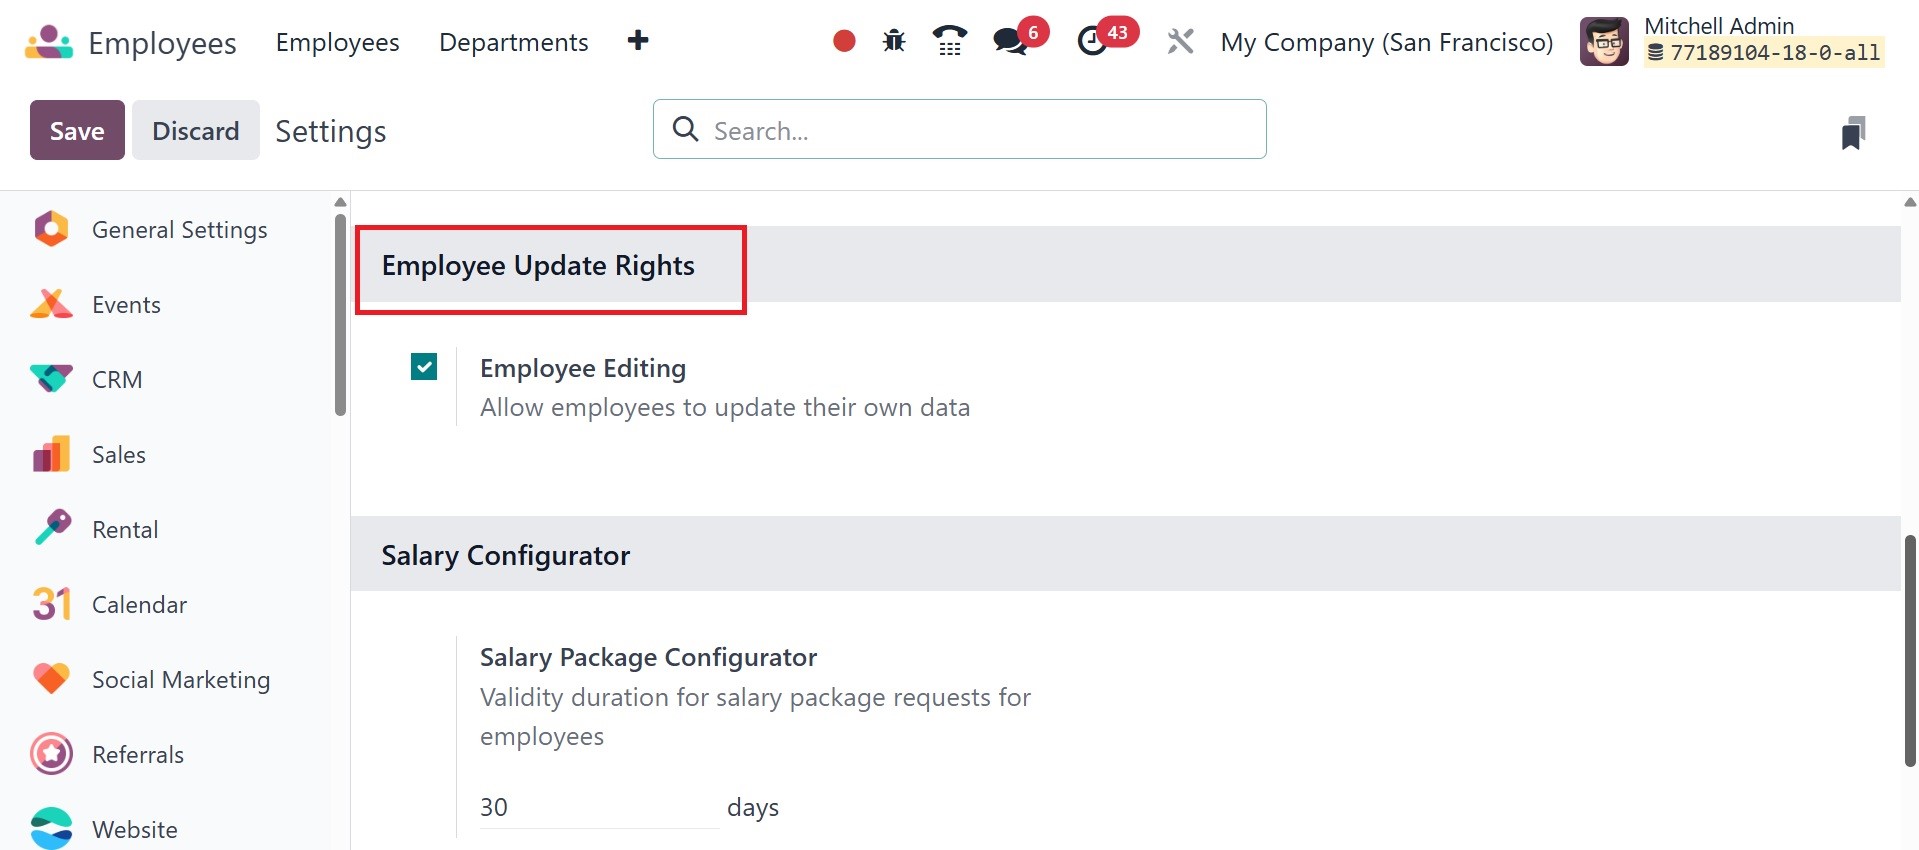
There, you can activate the employee editing option, which allows employees to update their own data.
Now, next to that, there is salary configurator, as in the image below.
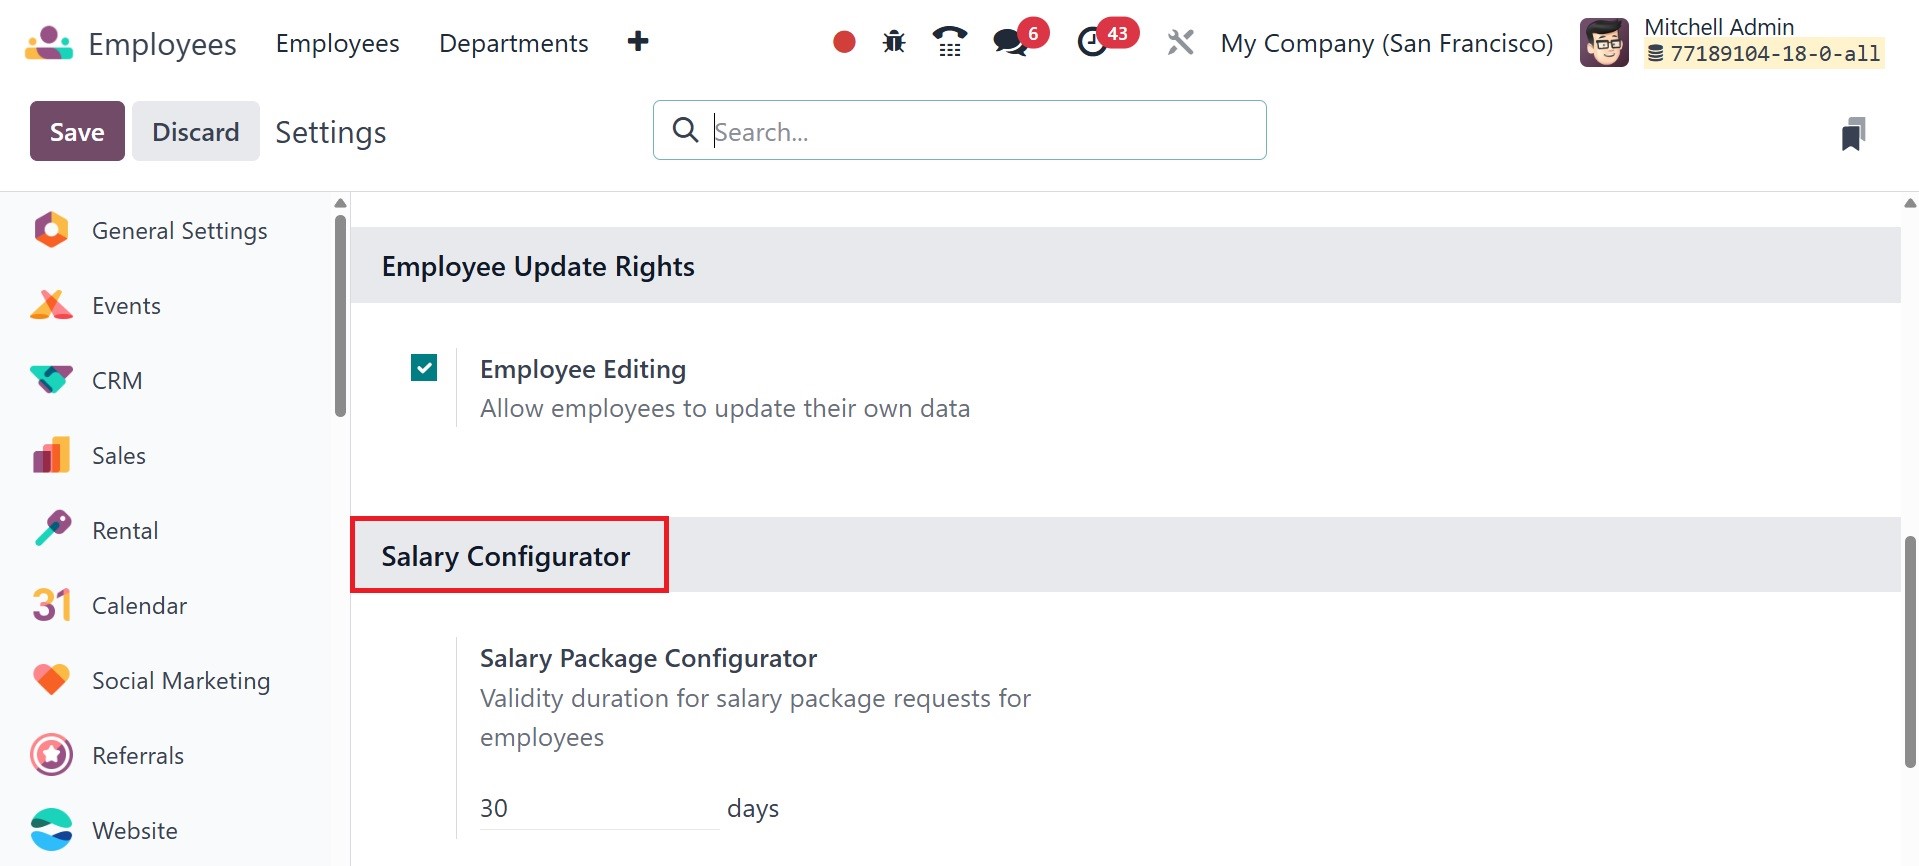
Here, you have the salary package configurator, which shows the validity duration for salary package requests for employees.
Lastly, there is extra time off allocation, as in the image below.
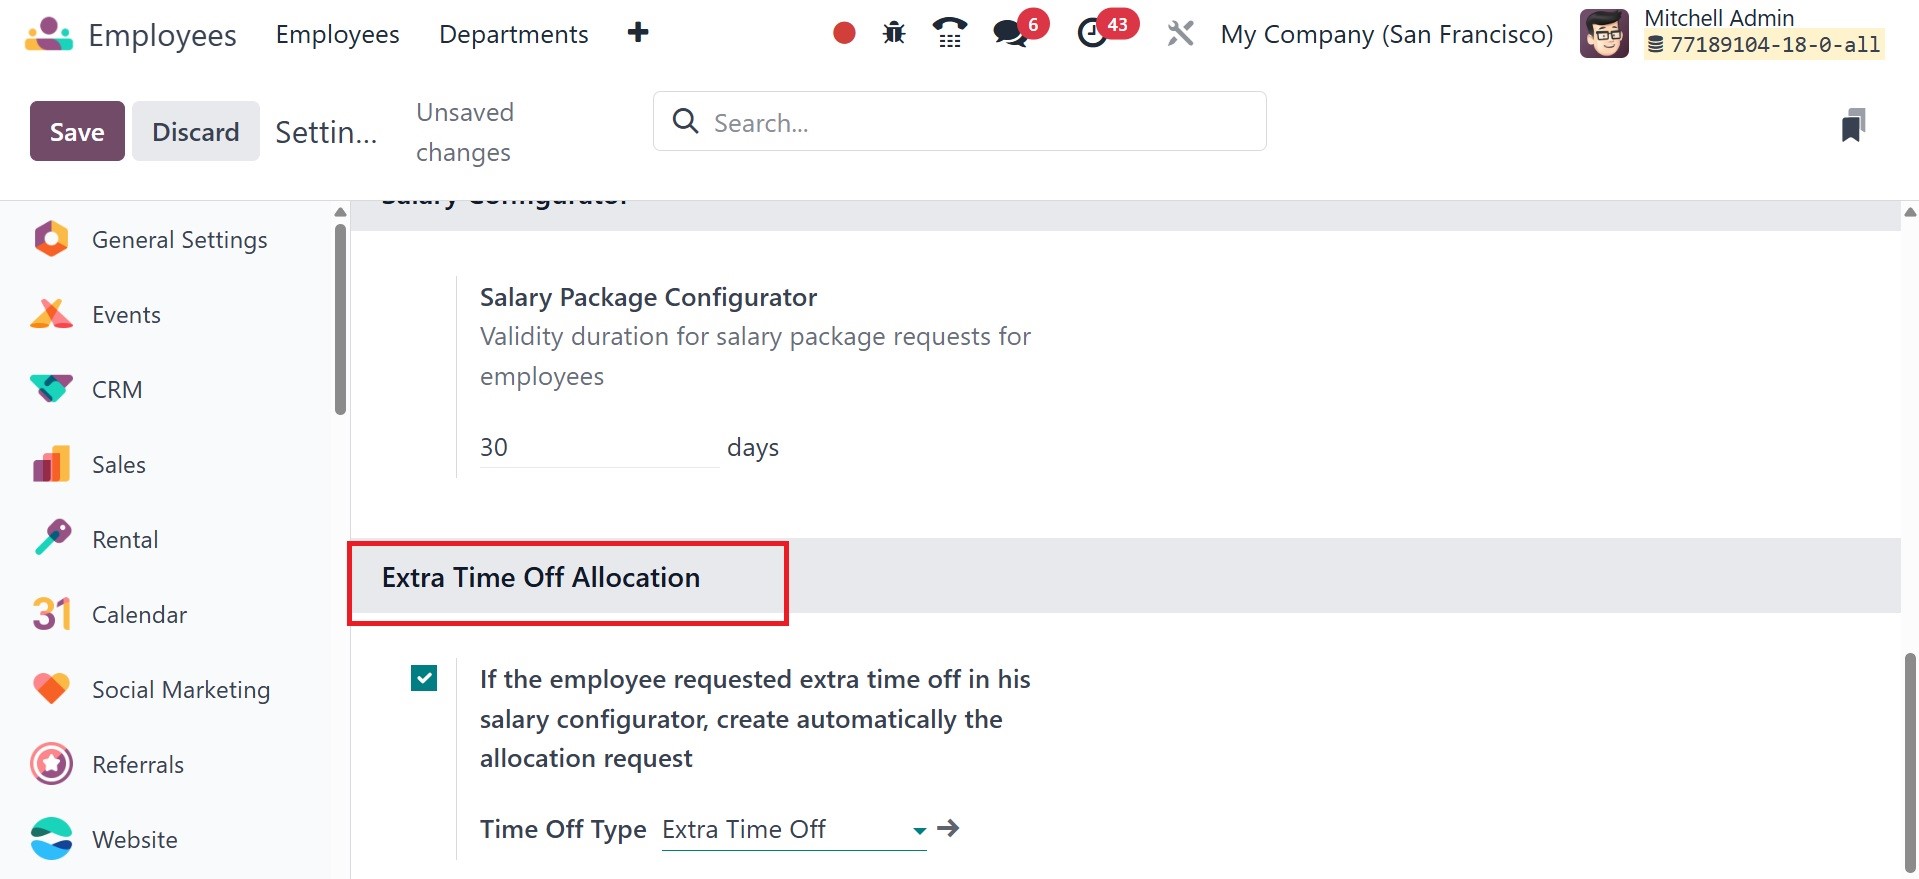
Here, there is an option to activate which is if the employee requested extra time off in his salary configurator, create automatically the allocation request. There, you can add the time off type from the provided list.