1. Employee
Personal details, employment
details, a contract, a
resume, and numerous other
things can be included in an
employee profile that is
created with the Employee
module. While you are
creating an employee profile
in the module, you can use
the profile window to view
documents, timesheets,
contracts, equipment, work
entries, and payslips
associated with the employee
as well as plan or schedule
activities with the said
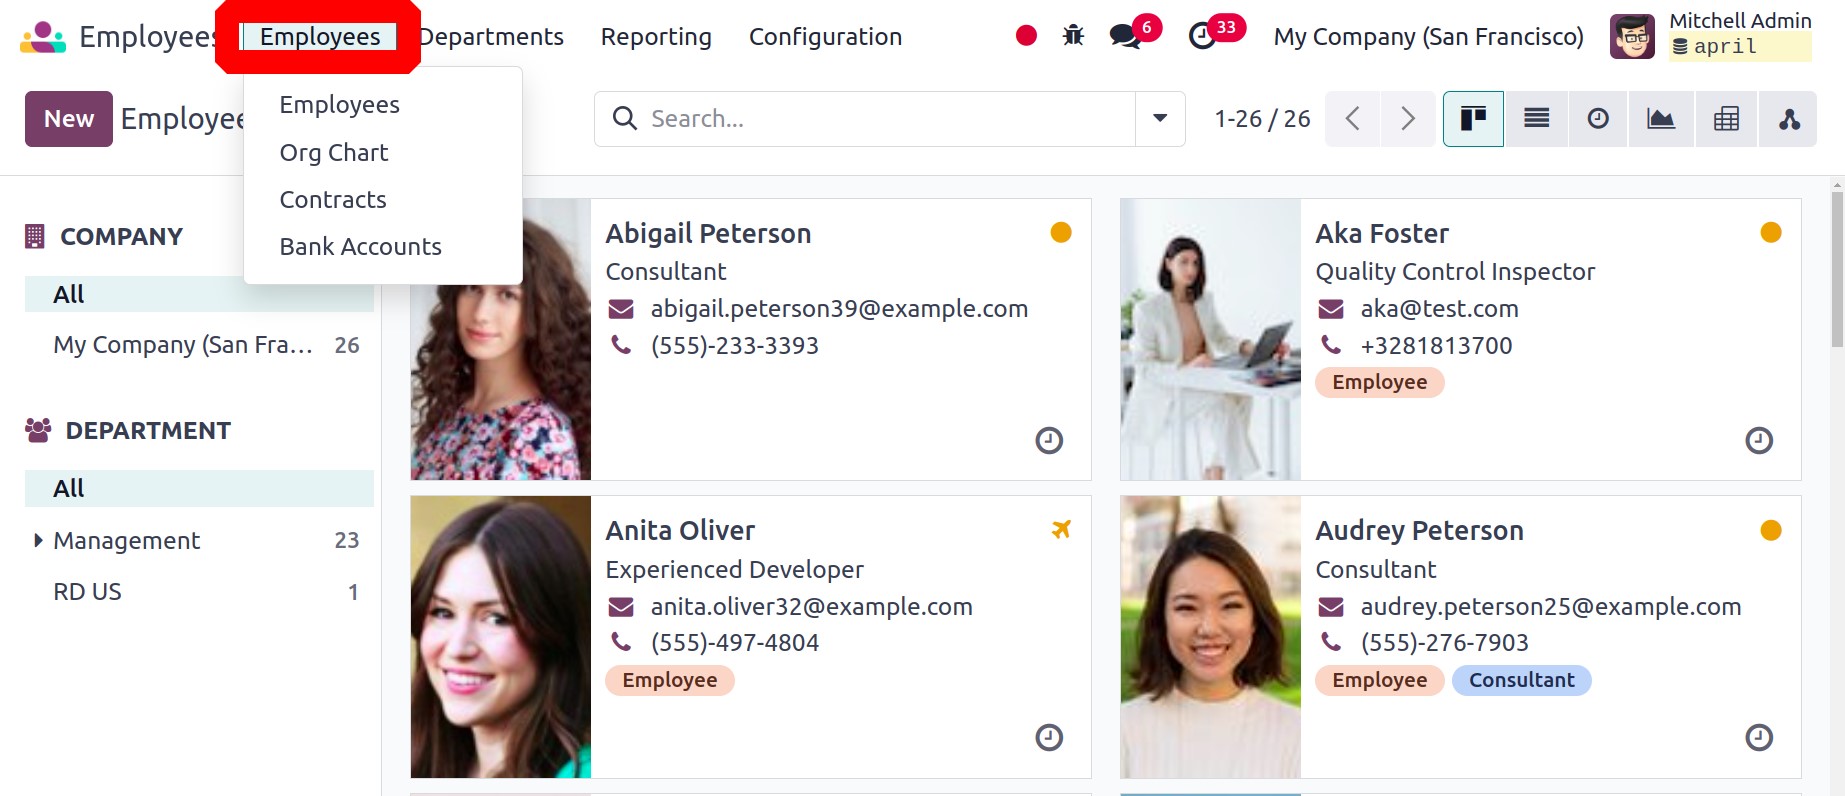
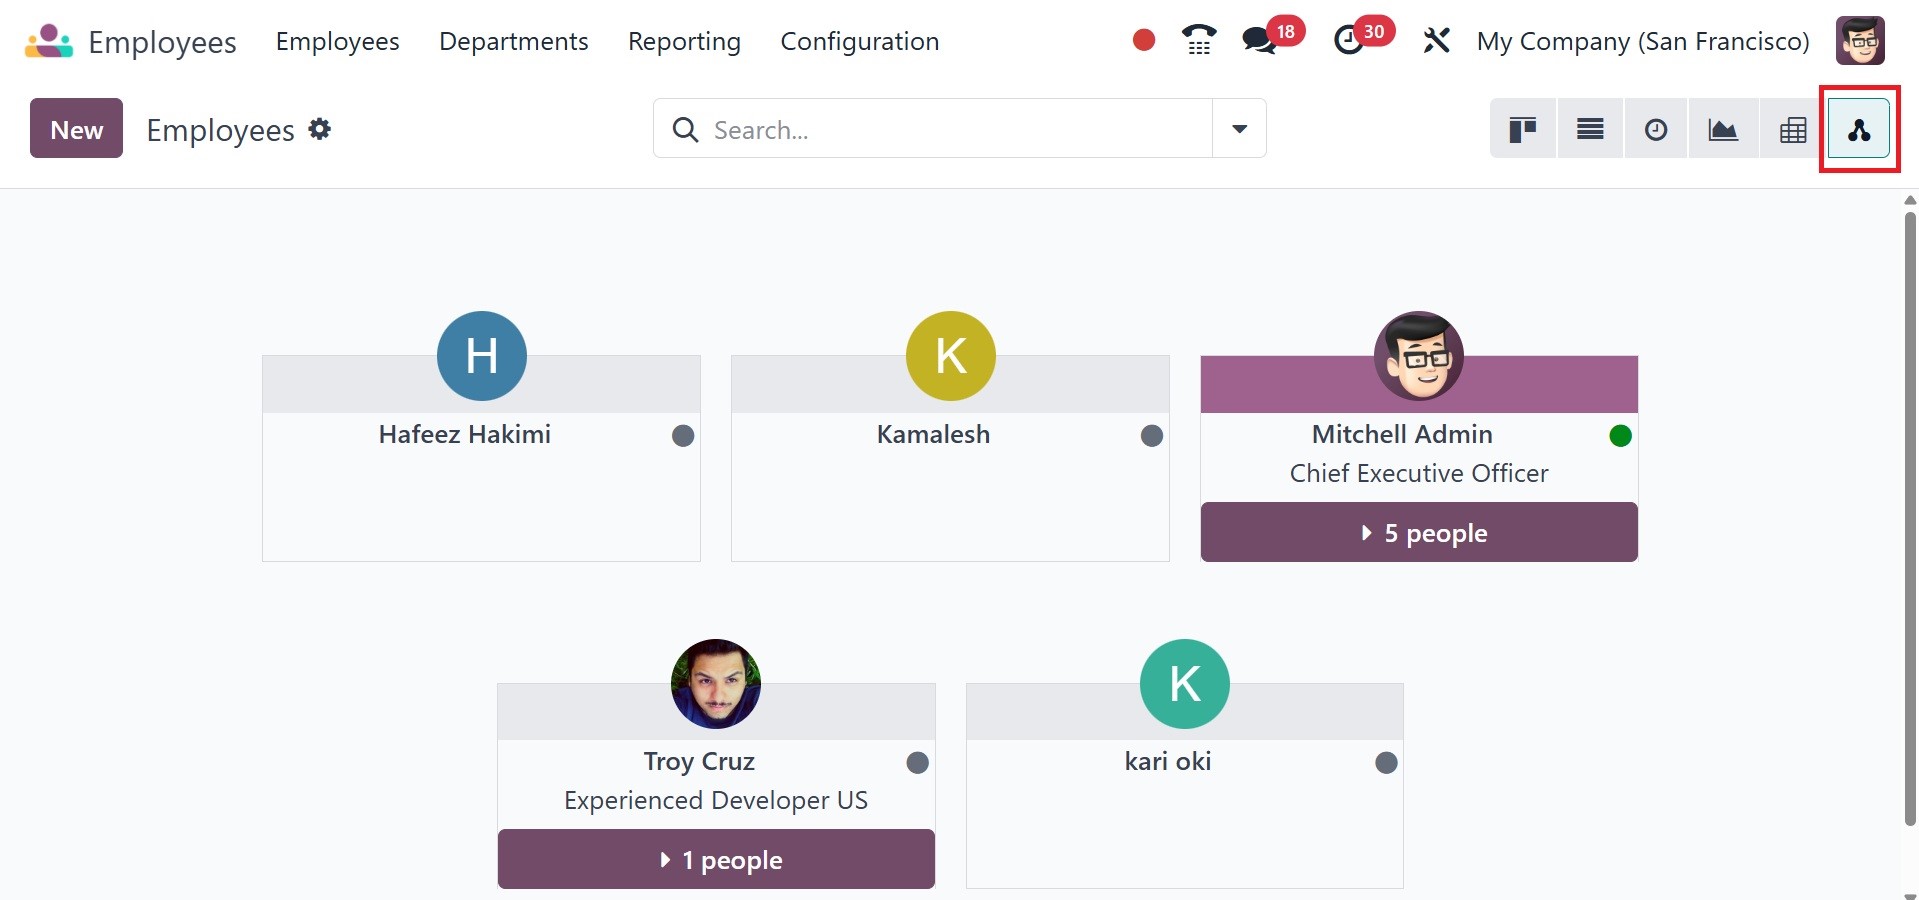
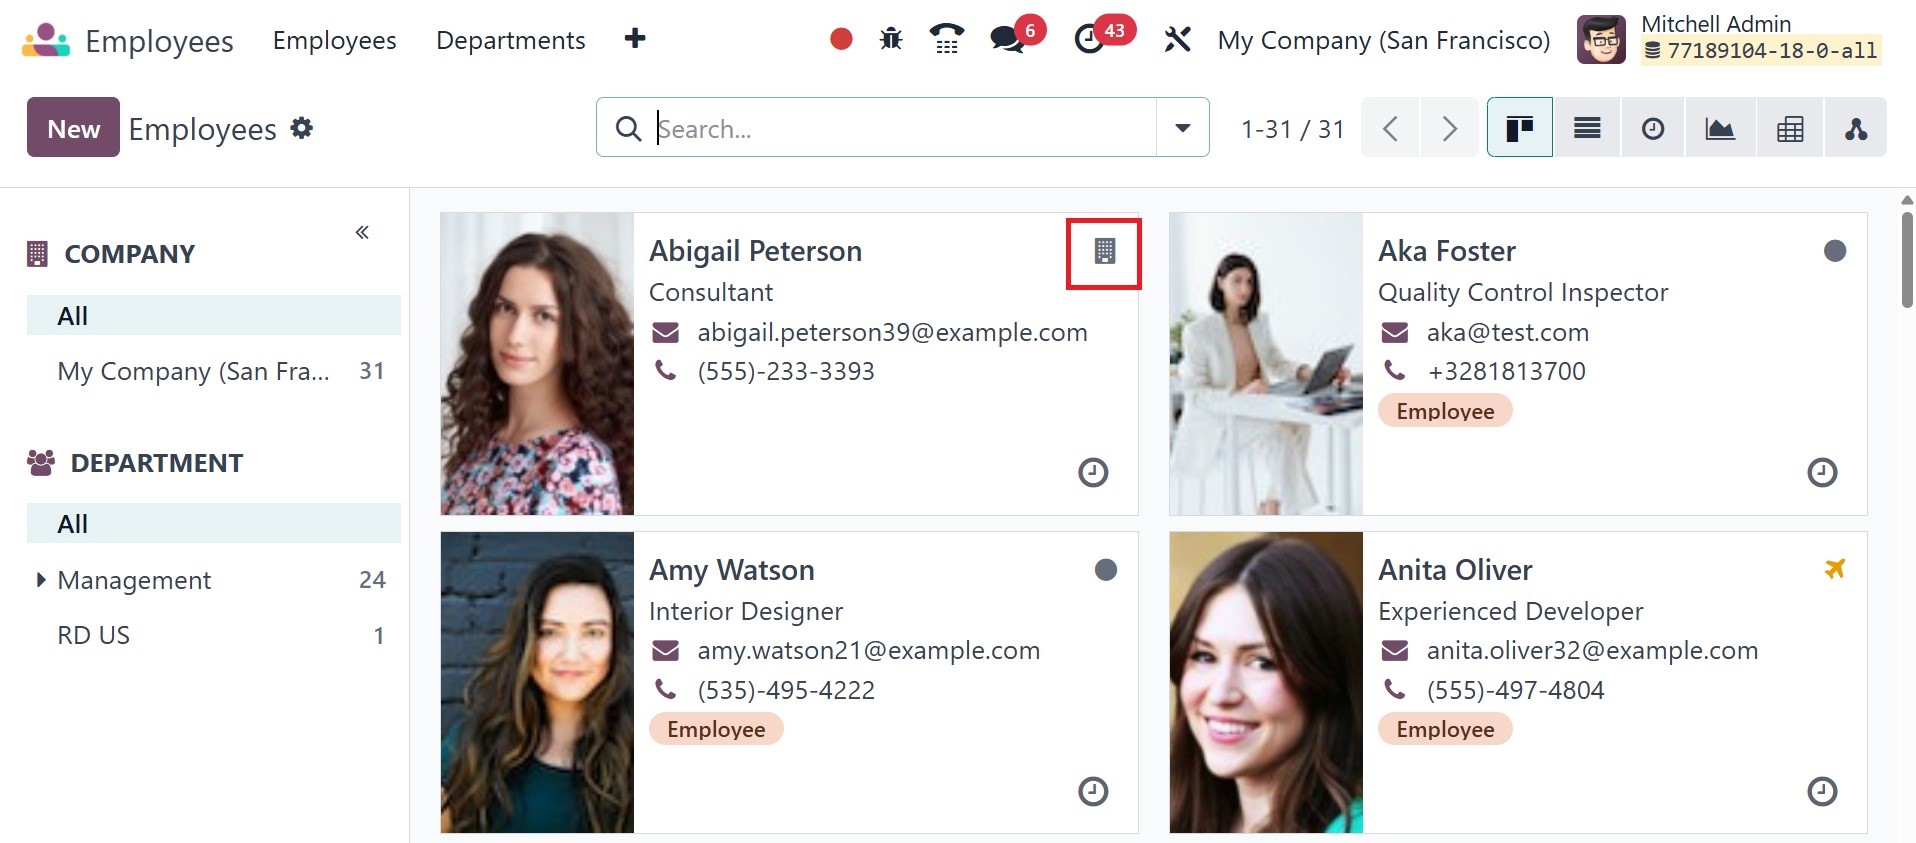
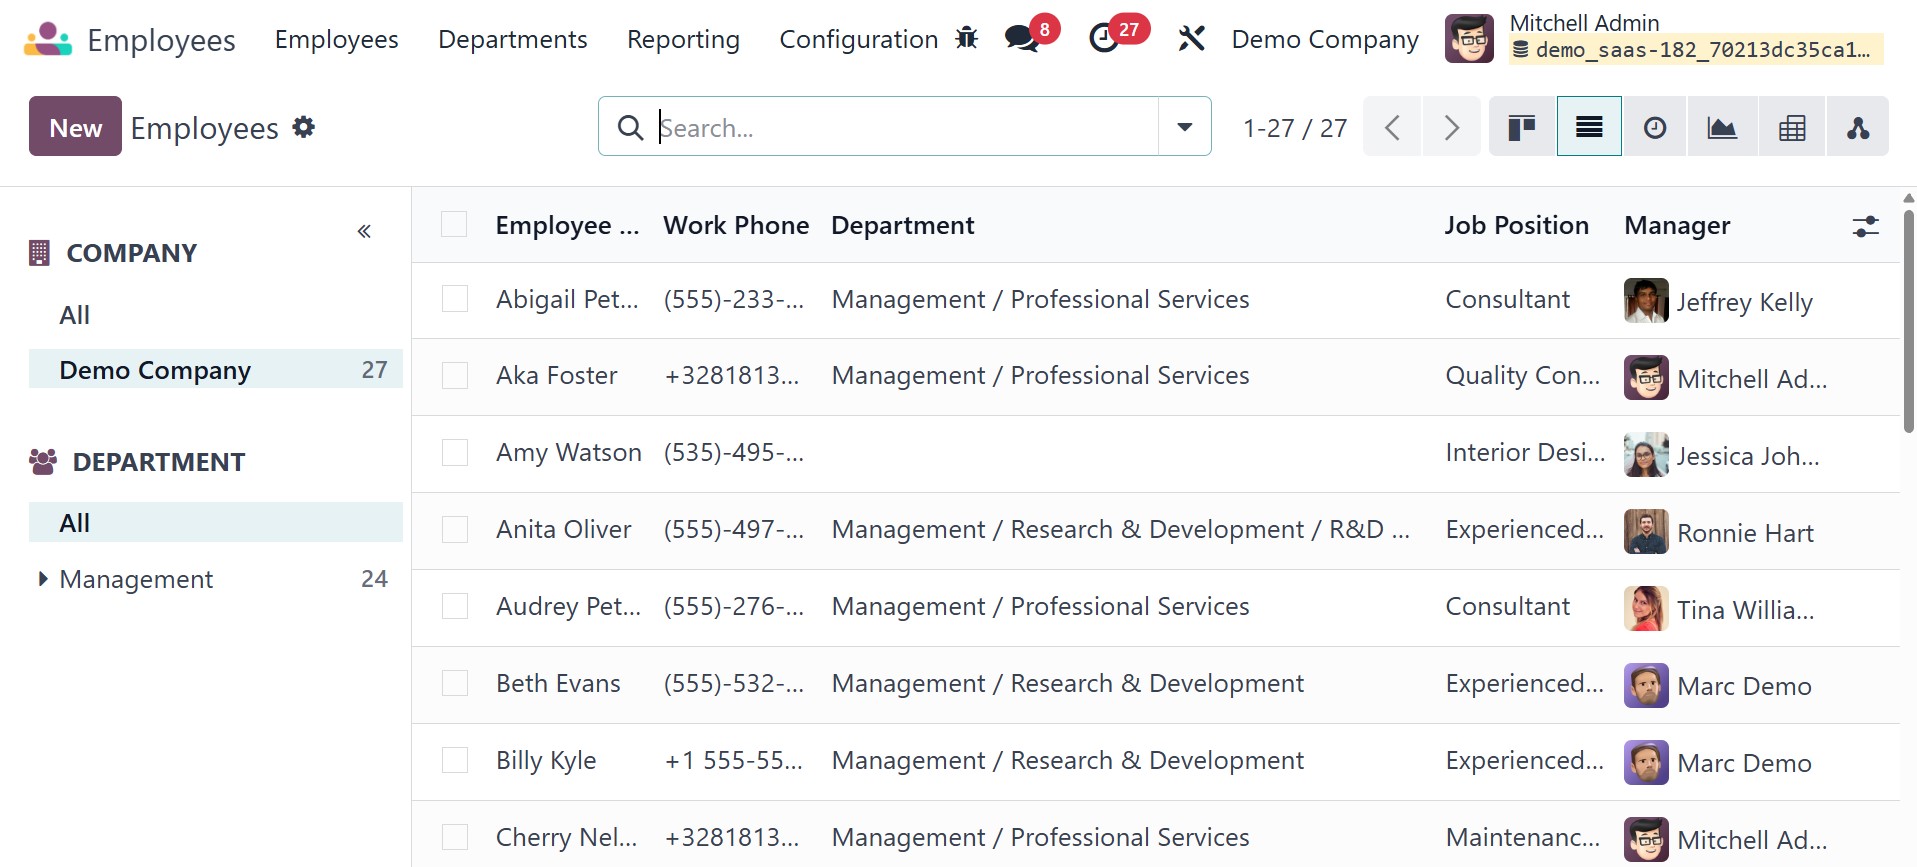
person. You can view a Kanban
representation of the saved
employee profiles in the
system when you open the
module for the first time.
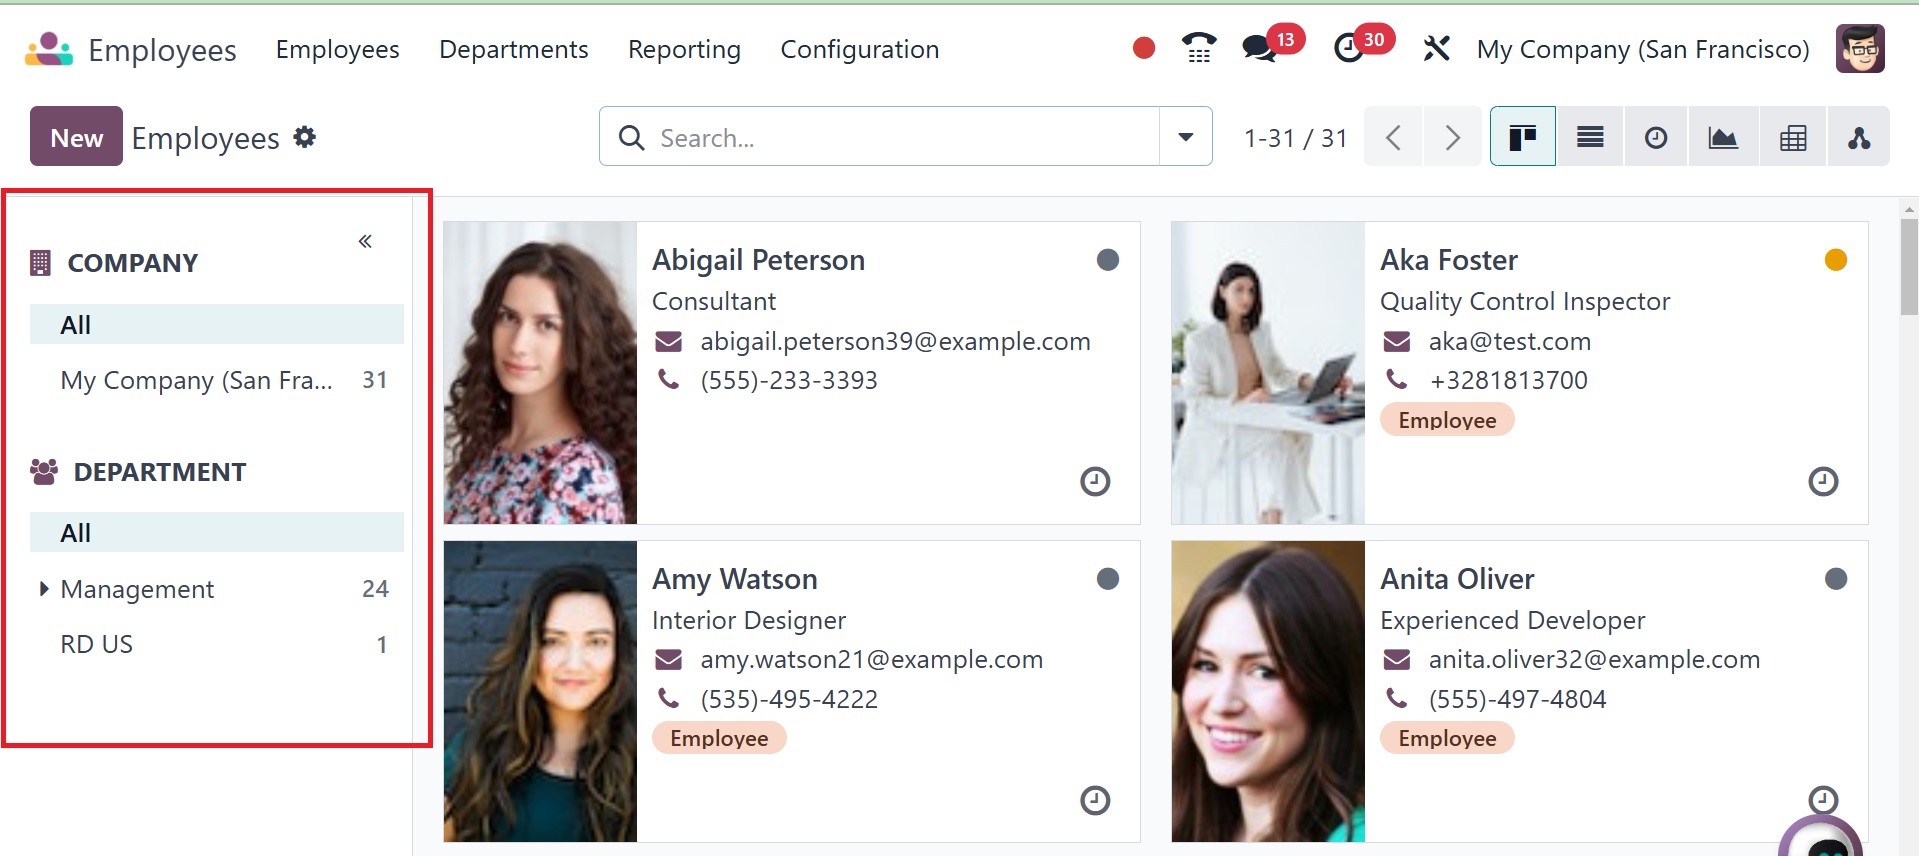
If you are in a multi-company
setup, you can simply group
the employees of each company
using the panel on the left
side of the screen. You can
also see employees by their
Departments. Every employee
profile will display some
basic details pertaining to
the respective employee,
including name, job title,
contact details, and photo.
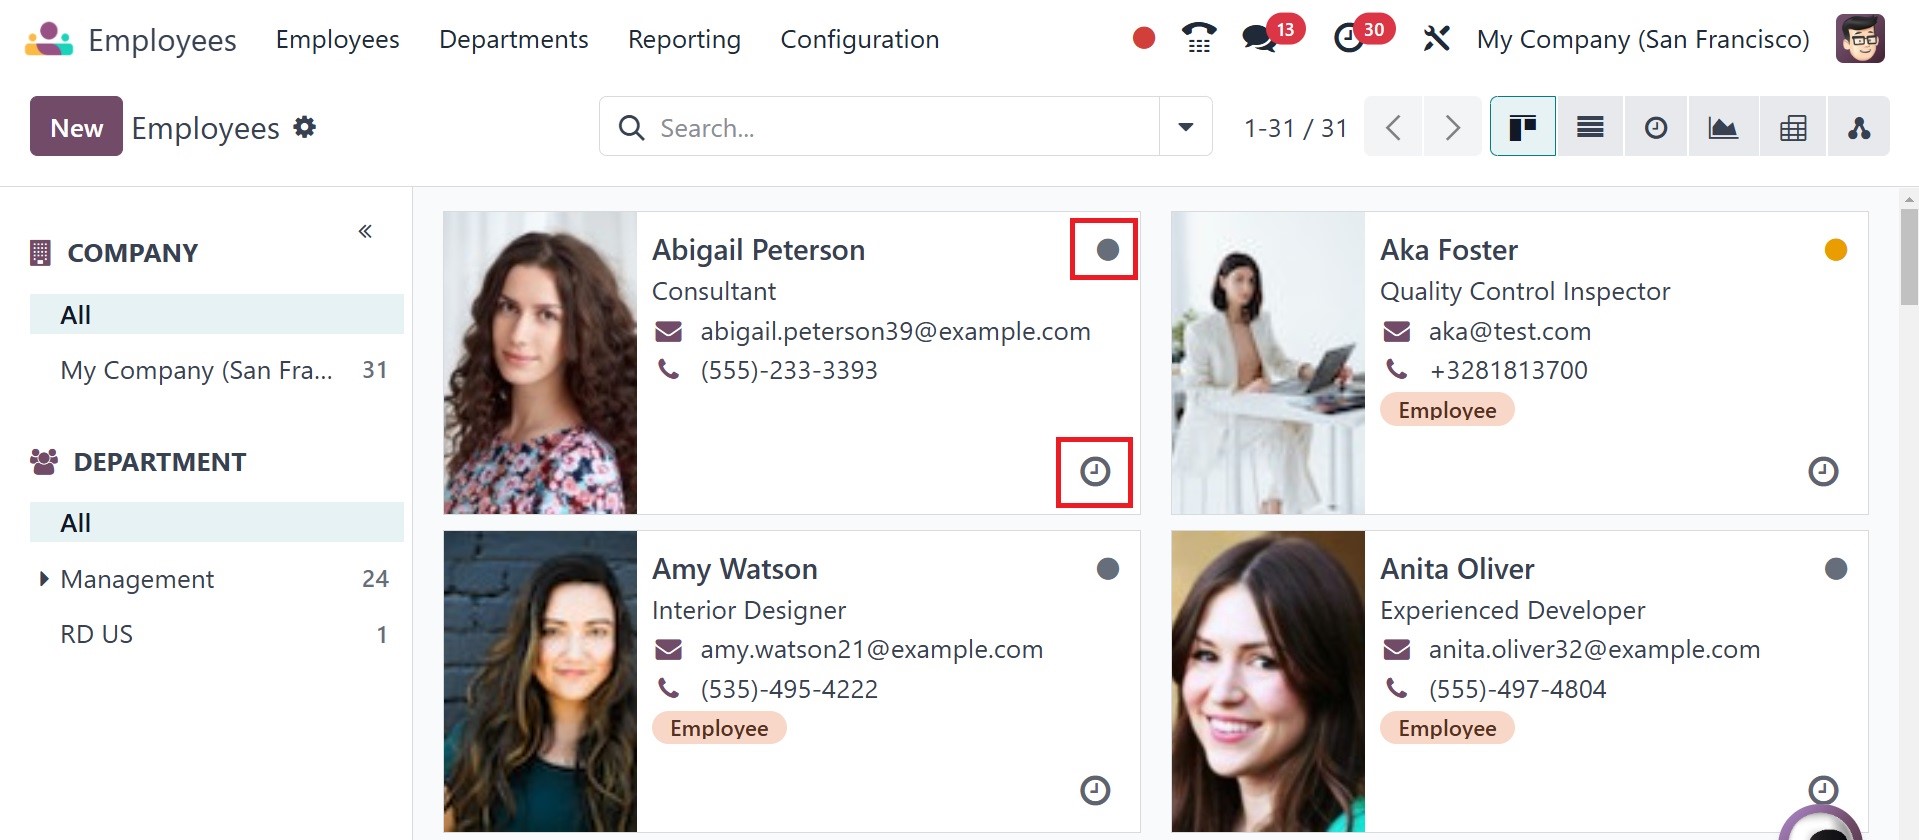
Moreover, as can be observed
in the picture above, there
is an icon of a building or a
house on the profile's top,
indicating whether the
individual works from home,
the office, or elsewhere.
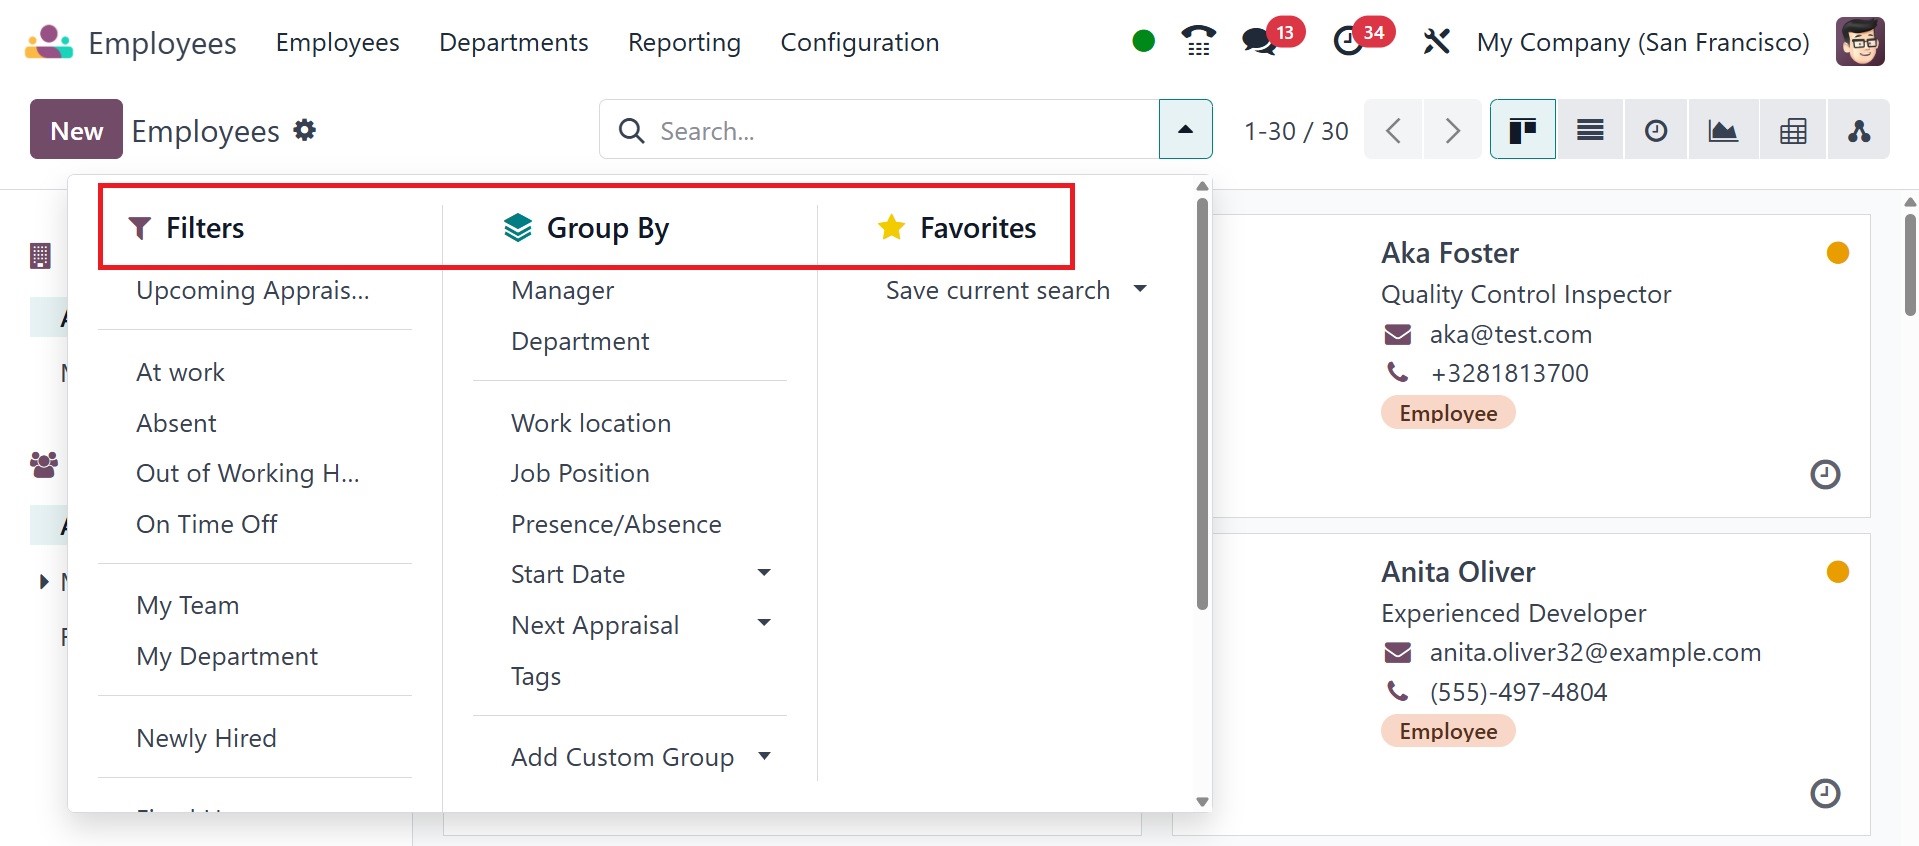
As default filters, you will be
able to view Newly Hired,
Absent Today, Unread
Messages, Contract Warning,
My Team, My Department, Fixed
Hours, Flexible Hours, and
Archived. For grouping
employees by their manager,
presence, department, job,
skills, and tags,
In the list view of the
employees, your name, work
phone number, work email,
first contract, activities,
next activities, company,
department, job position, and
manager are all visible. By
selecting the New button, you
can now make a new
profile.Before that, you have
got another view for the
employees list, which will
be, as in the image below.
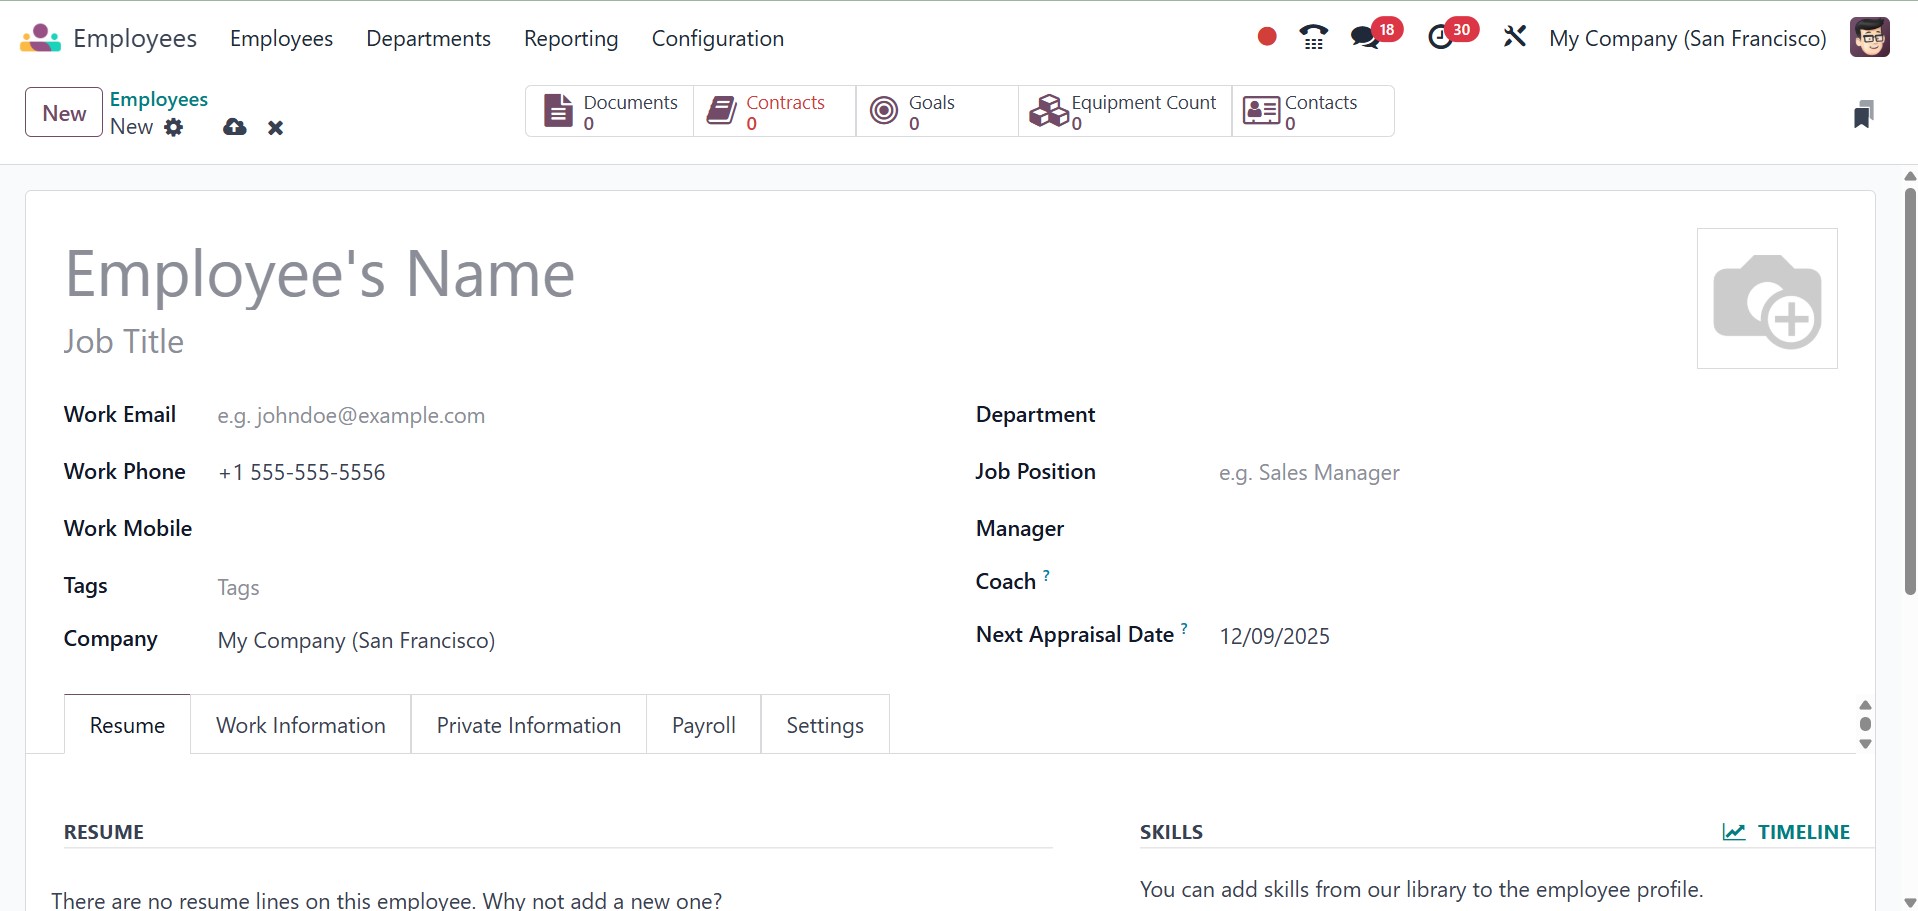
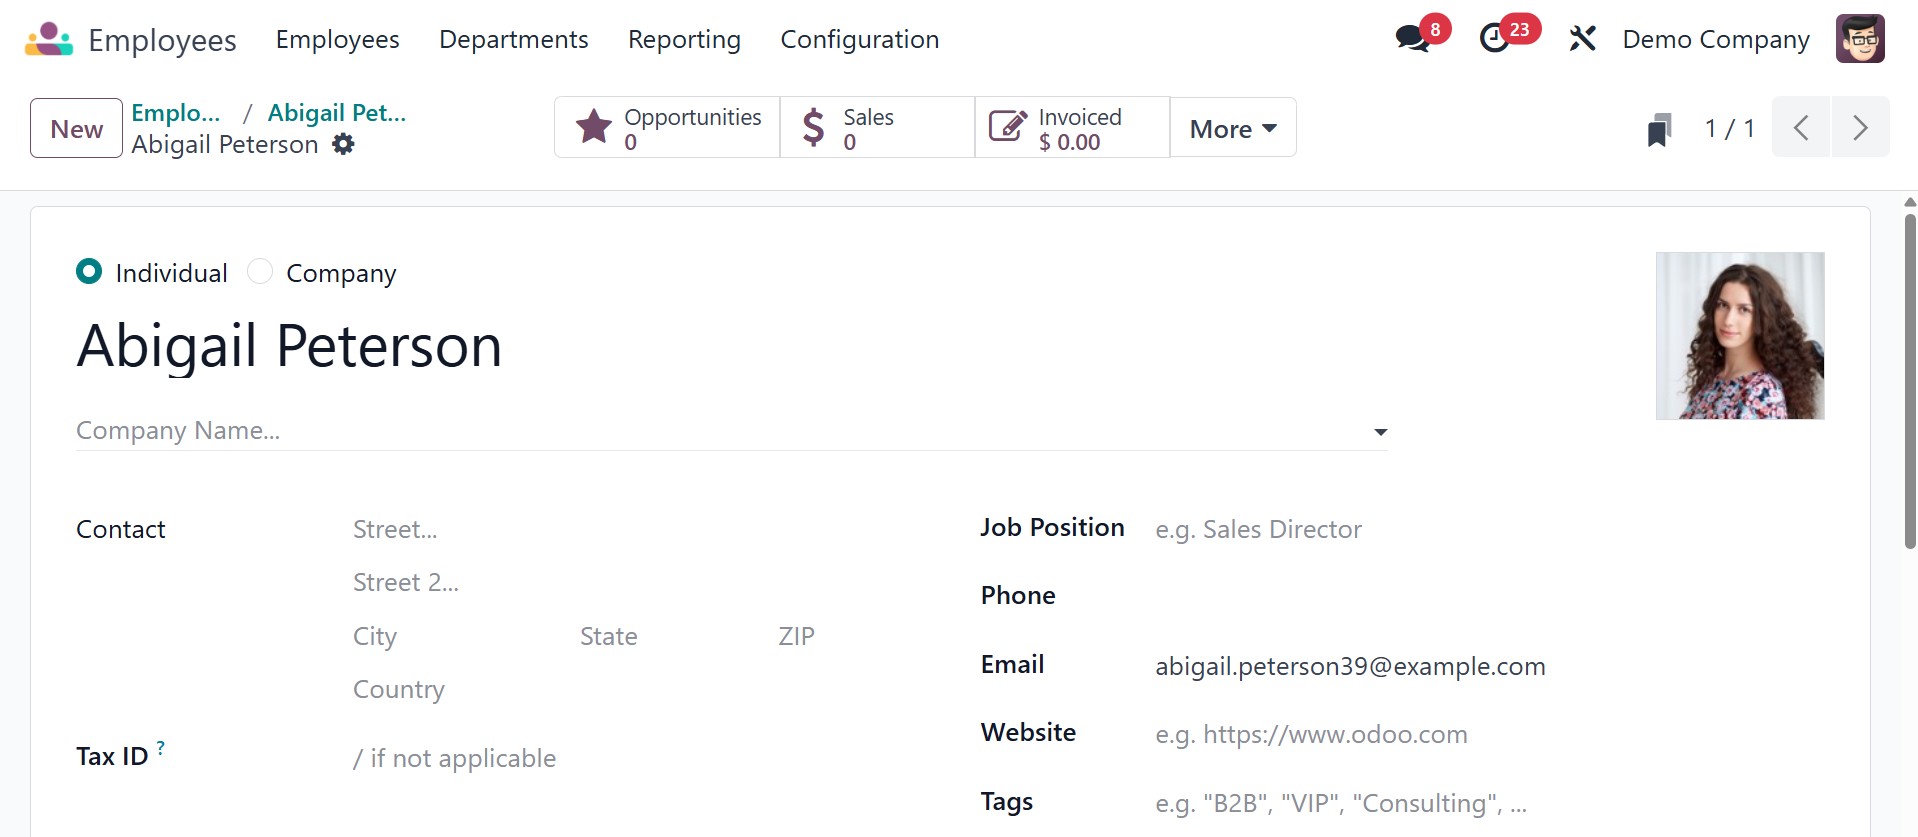
There will be a new view form in
which you can edit the
information of the employee.
Enter the name and position
of the employee within the
company in the appropriate
boxes.
The new structure view that is
provided by Odoo 18 keeps it
easy for users to understand
the staff structure. Managers
need only drag and drop in
order to change the
hierarchy.
Also, you can assign the
appropriate tags to the
employee. You will be
presented with specific
fields where you will input
the employee's company,
department, manager, and
coach, as well as work
mobile, work phone, and work
email. There will be a field
where you can upload an
employee's photo.
Let's upload the abilities and
resume to the employee
profile to update it. For
this, you will see the Resume
tab below.
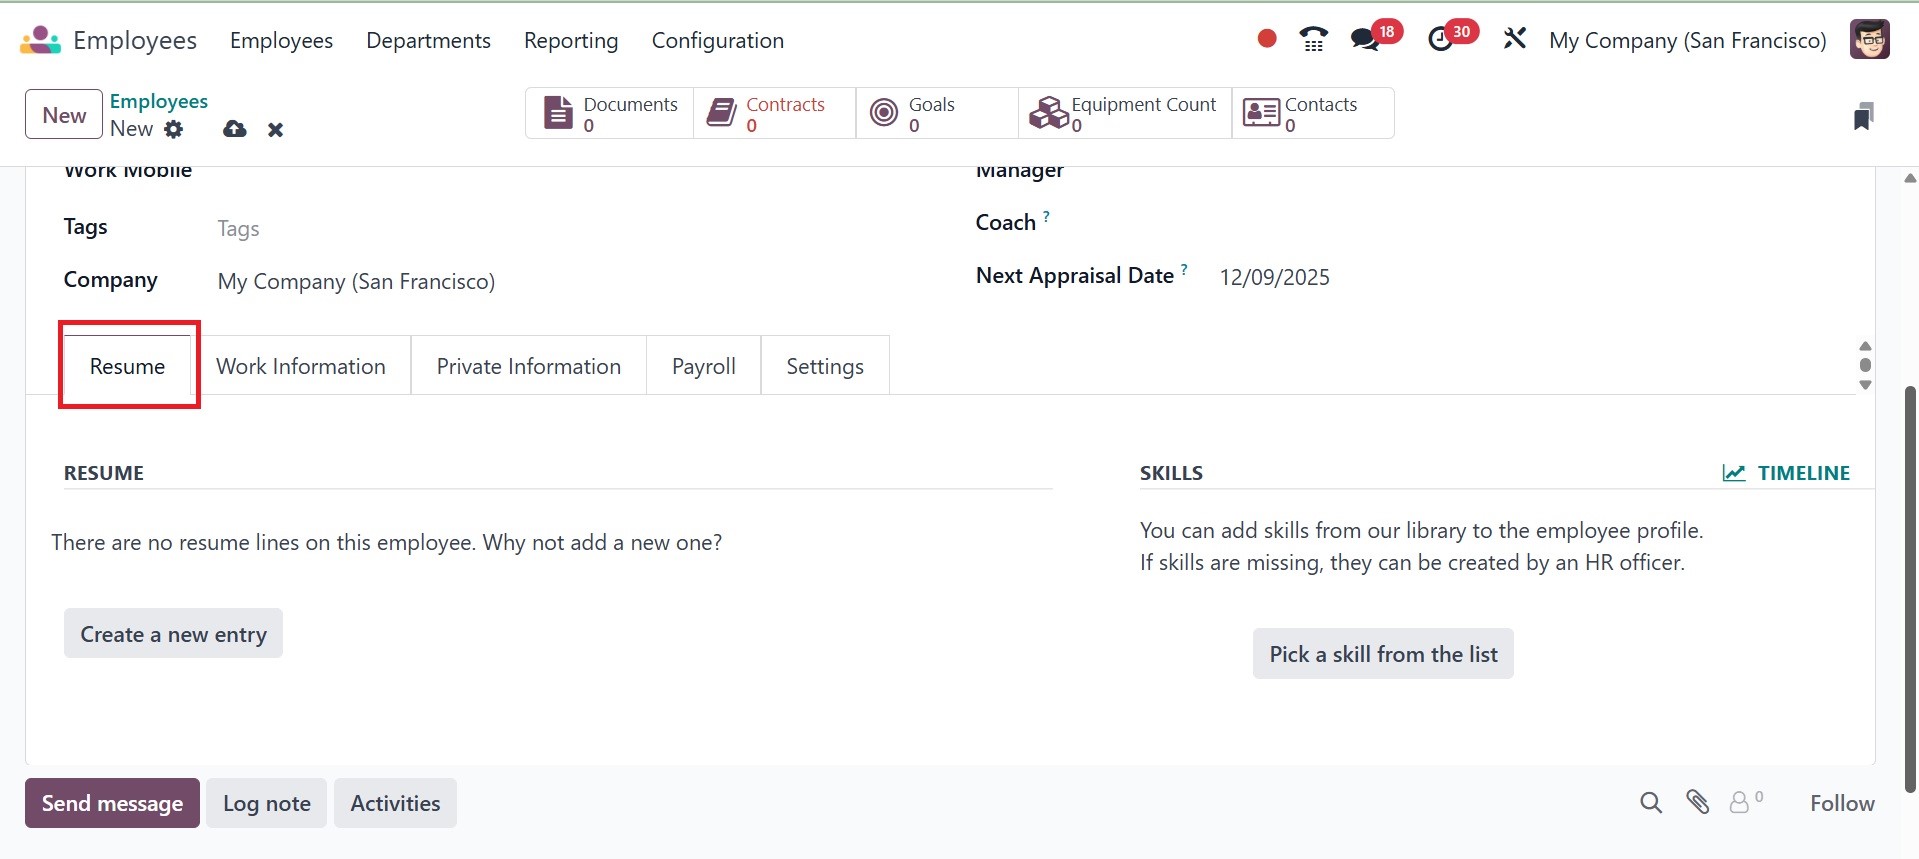
If you wish to include resume
lines in your profile, click
on Create a New Entry. Under
Resume, you can enter details
regarding your education,
work experiences, internal
certifications, training
history, and other
qualifications. A pop-up will
appear as soon as you click
this button, as shown below.
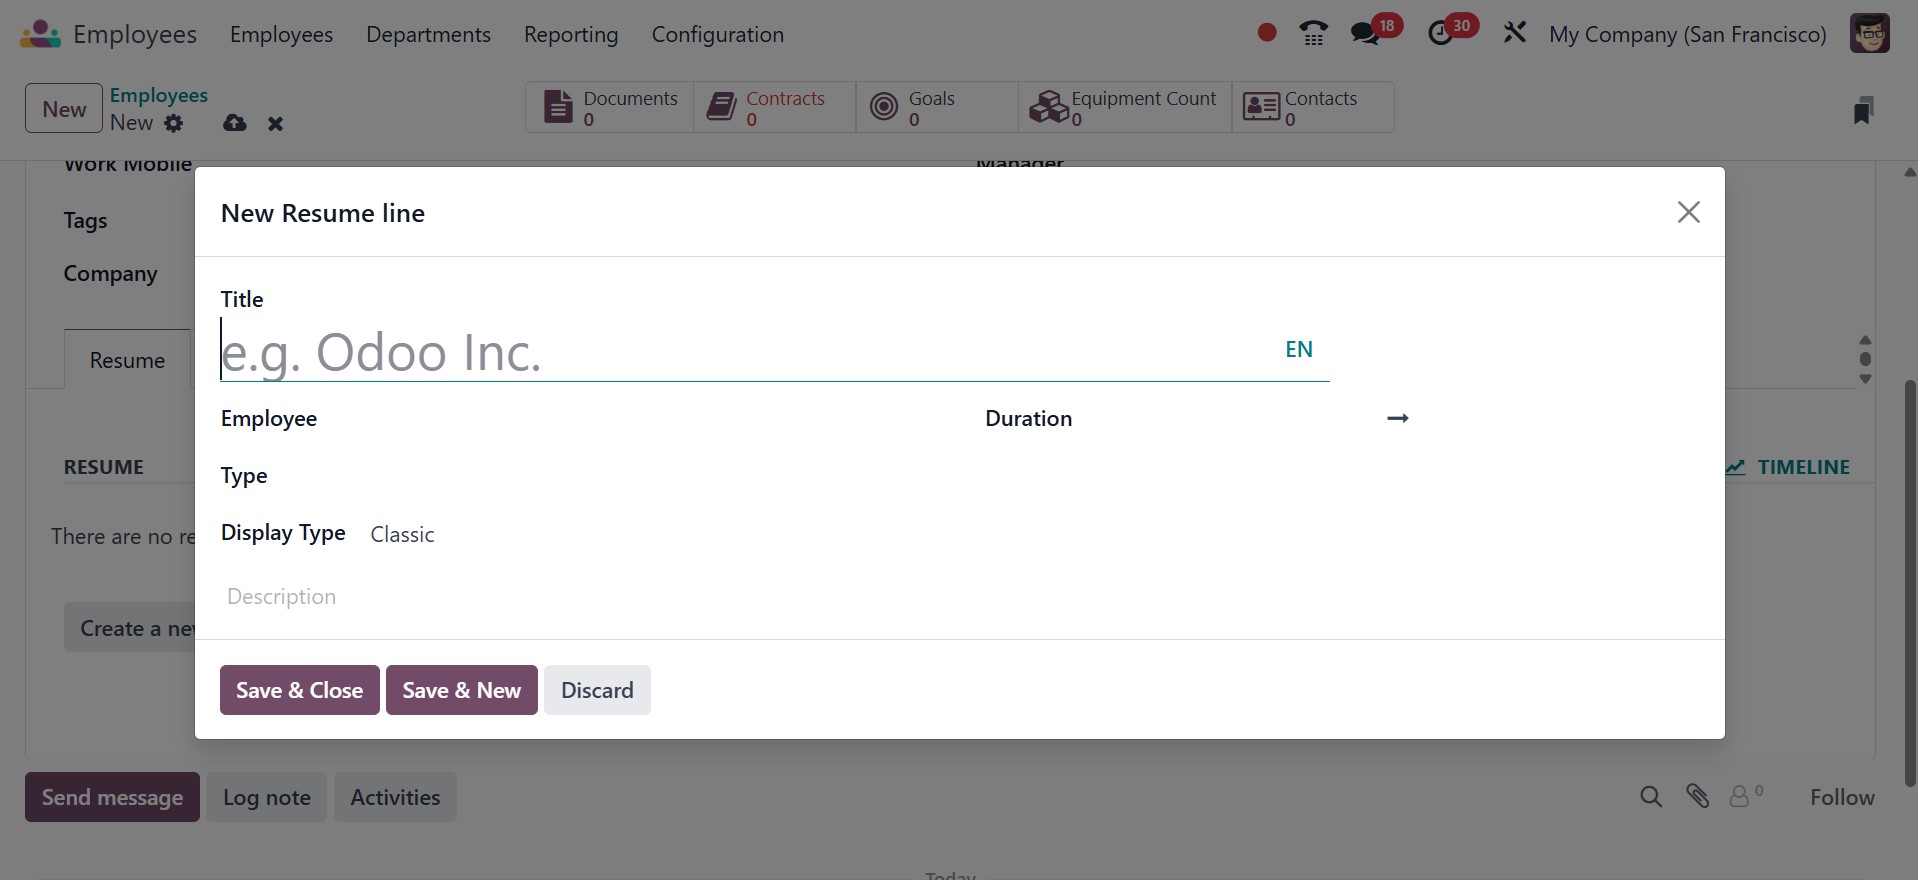
Insert a Title and select Type
from the dropdown.
Experience, education,
internal certification, or
internal training are all
good choices. You can also
create a new Resume Line Type
with the use of the module's
Configuration menu. You can
select Classic,
Certification, or Course as
the Display Type after you
reference the Type. Enter the
time span in the Date Start
and Date End fields. You can
enter more information
regarding this resume line in
the description field.
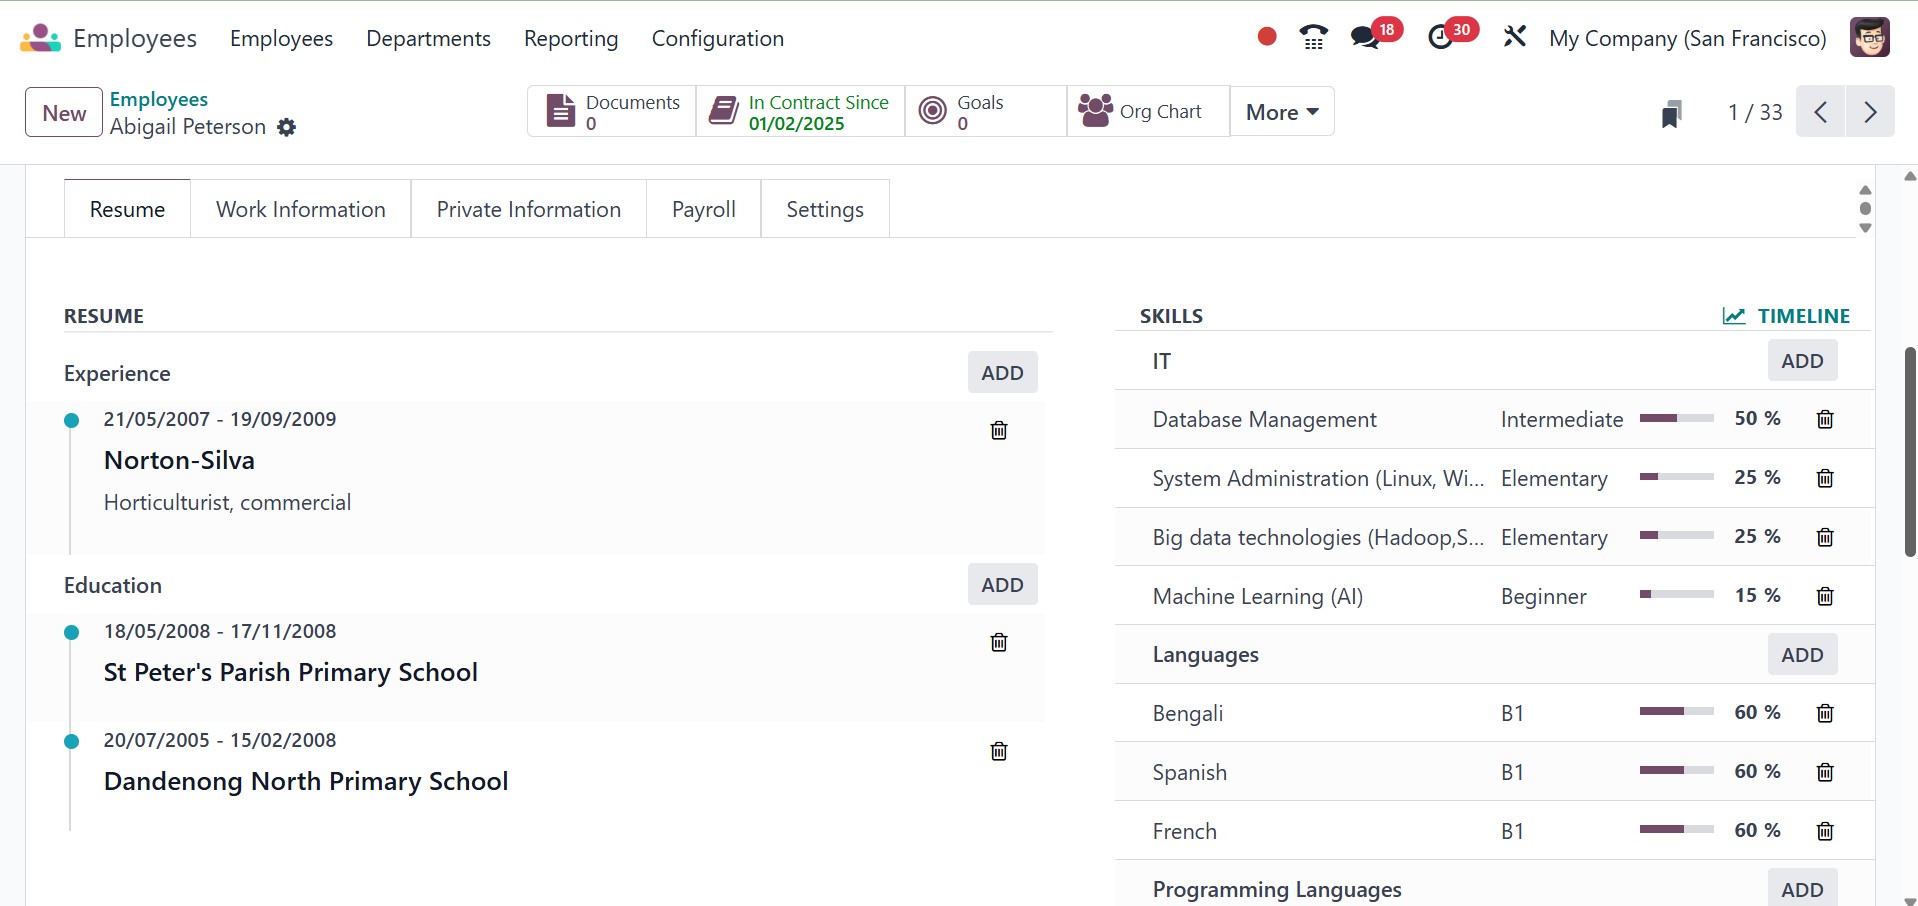
This is what it looks like after
you insert resume lines. You
can insert additional resume
lines to this tab using the
Add button. To insert the
employee's skills, click the
Create New Entry button on
the talents field.
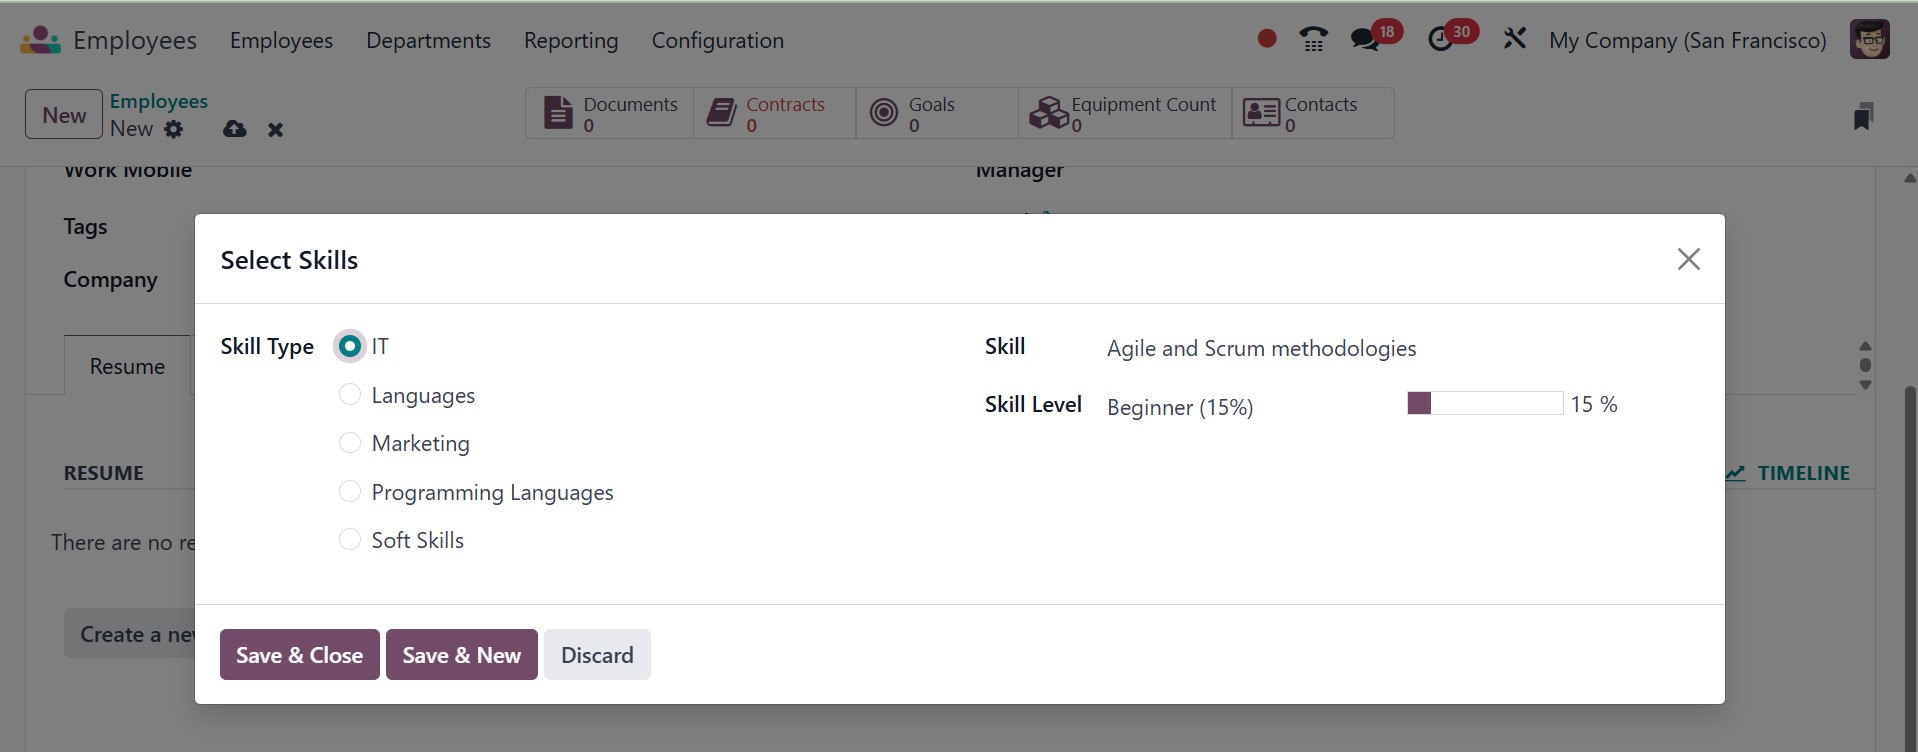
A pop-up window will appear where
you may select the employee's
skill type and designate a
particular talent. In the
Skill Level field, note the
employee's level of
expertise.
You can add new abilities by
using the Add button on the
Resume tab. The Work
Information tab contains
fields for critical job
information pertaining to
employees.

In the Location area, include the
work address and location.
The Approvers section can
contain the people who
approved this employee's
timesheet, expenses, and
vacation time.
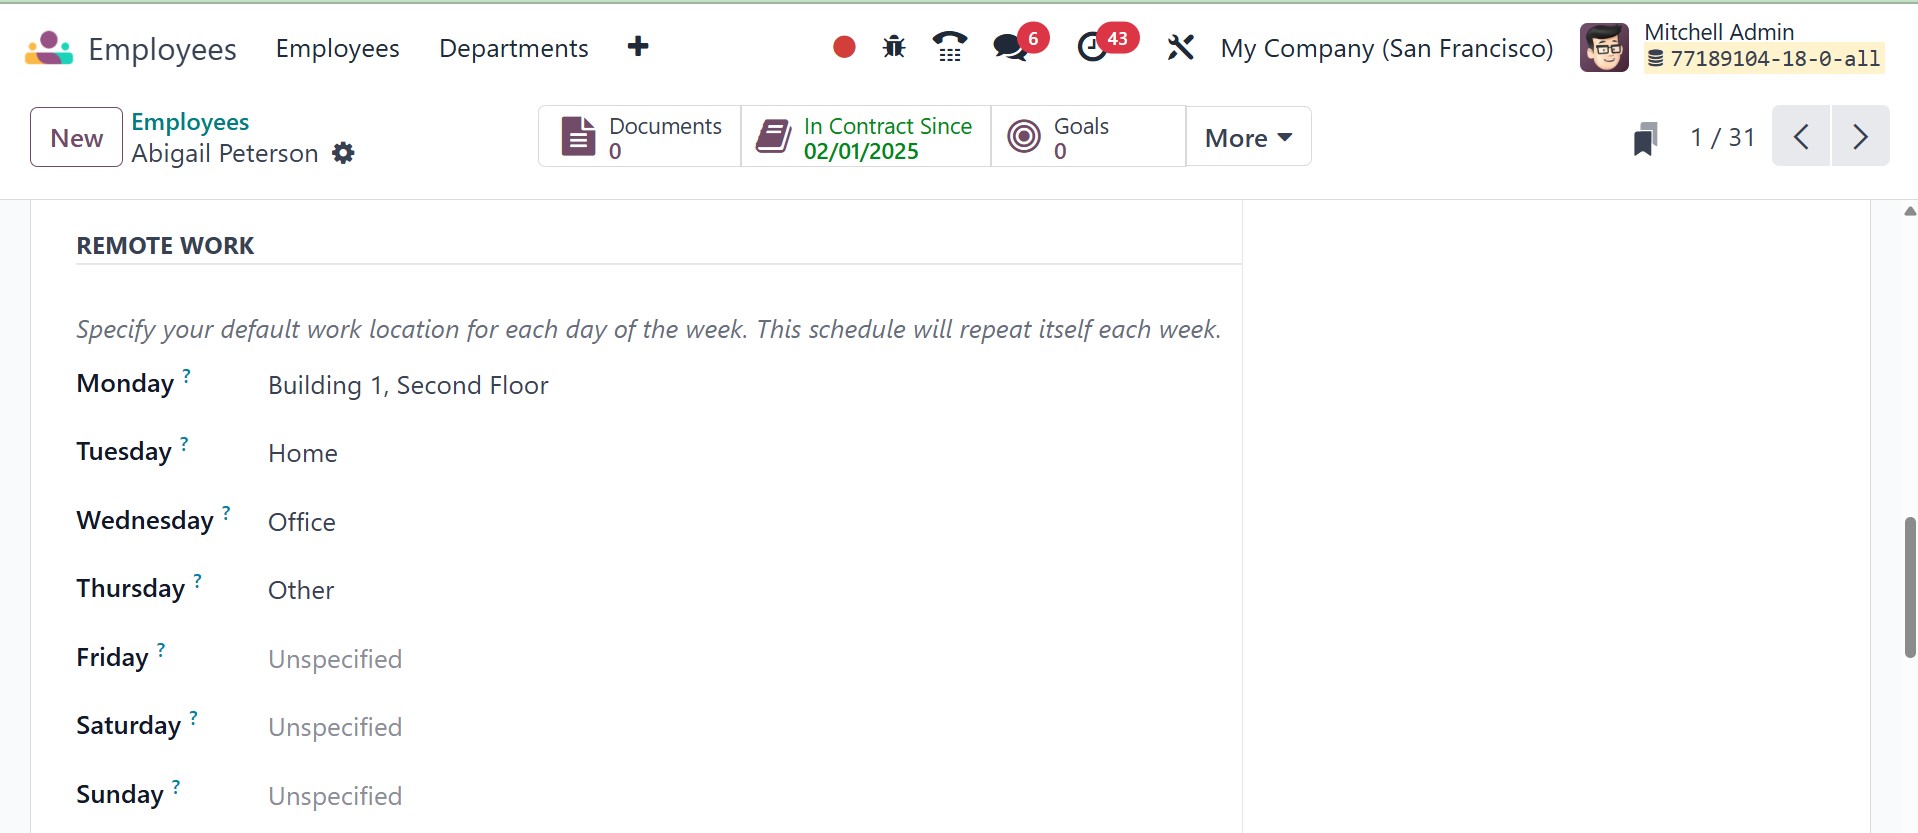
The REMOTE WORK section,
introduced in Odoo 18,
specifies the work location
of each employee for each day
of the week. This is updated
automatically on a weekly
basis. Users can then easily
determine the daily work
location of the employee. The
employee's profile on the
dashboard will show the
corresponding icon in the top
right corner depending on the
choice made here. As in the
screenshot below, you can see
the work allotted is from the
office.
The SCHEDULE section will contain
information regarding the
employee's work schedule. You
can activate the Flexible
Hours field if the employee
is allowed to work flexible
hours. Otherwise, you need to
specify the employee's weekly
working hours. Use the
Timezone to indicate the time
zone the resources will be
working in. Indicate the
position the worker is
qualified for. Only the
templates for these types of
positions will be available
to view when scheduling a
shift for this employee.
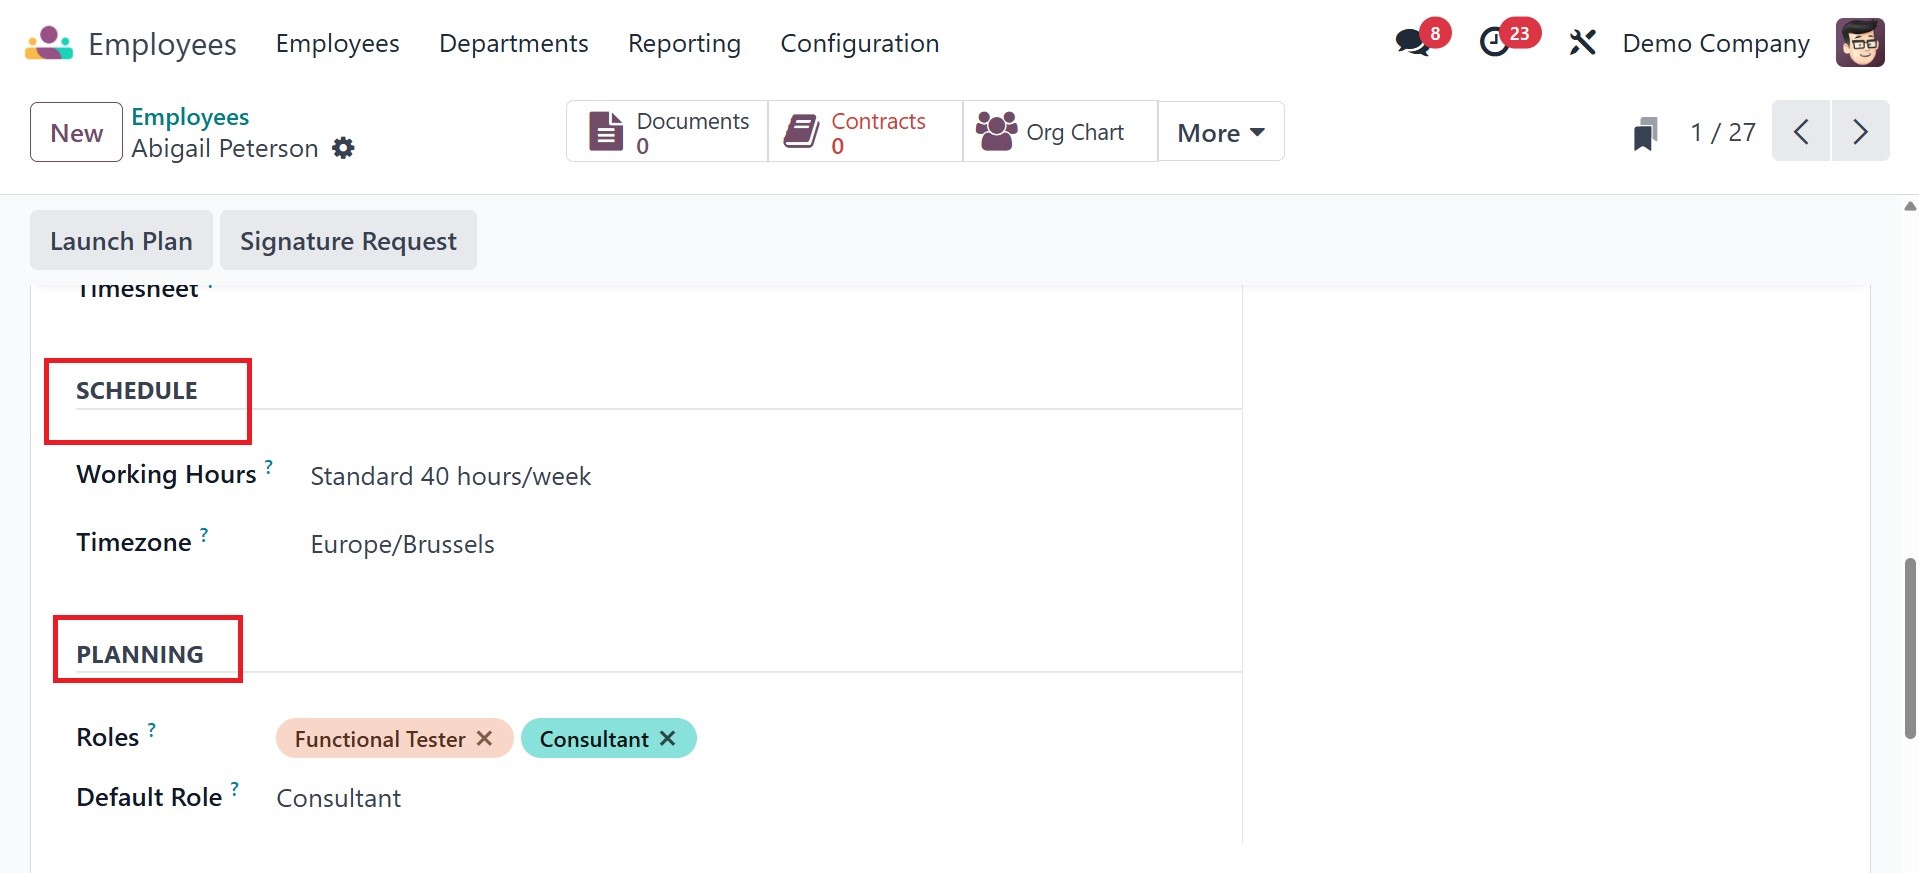
Users can designate the role that
will be selected
automatically when creating a
shift for a certain employee
by using the Default Planning
Role feature.
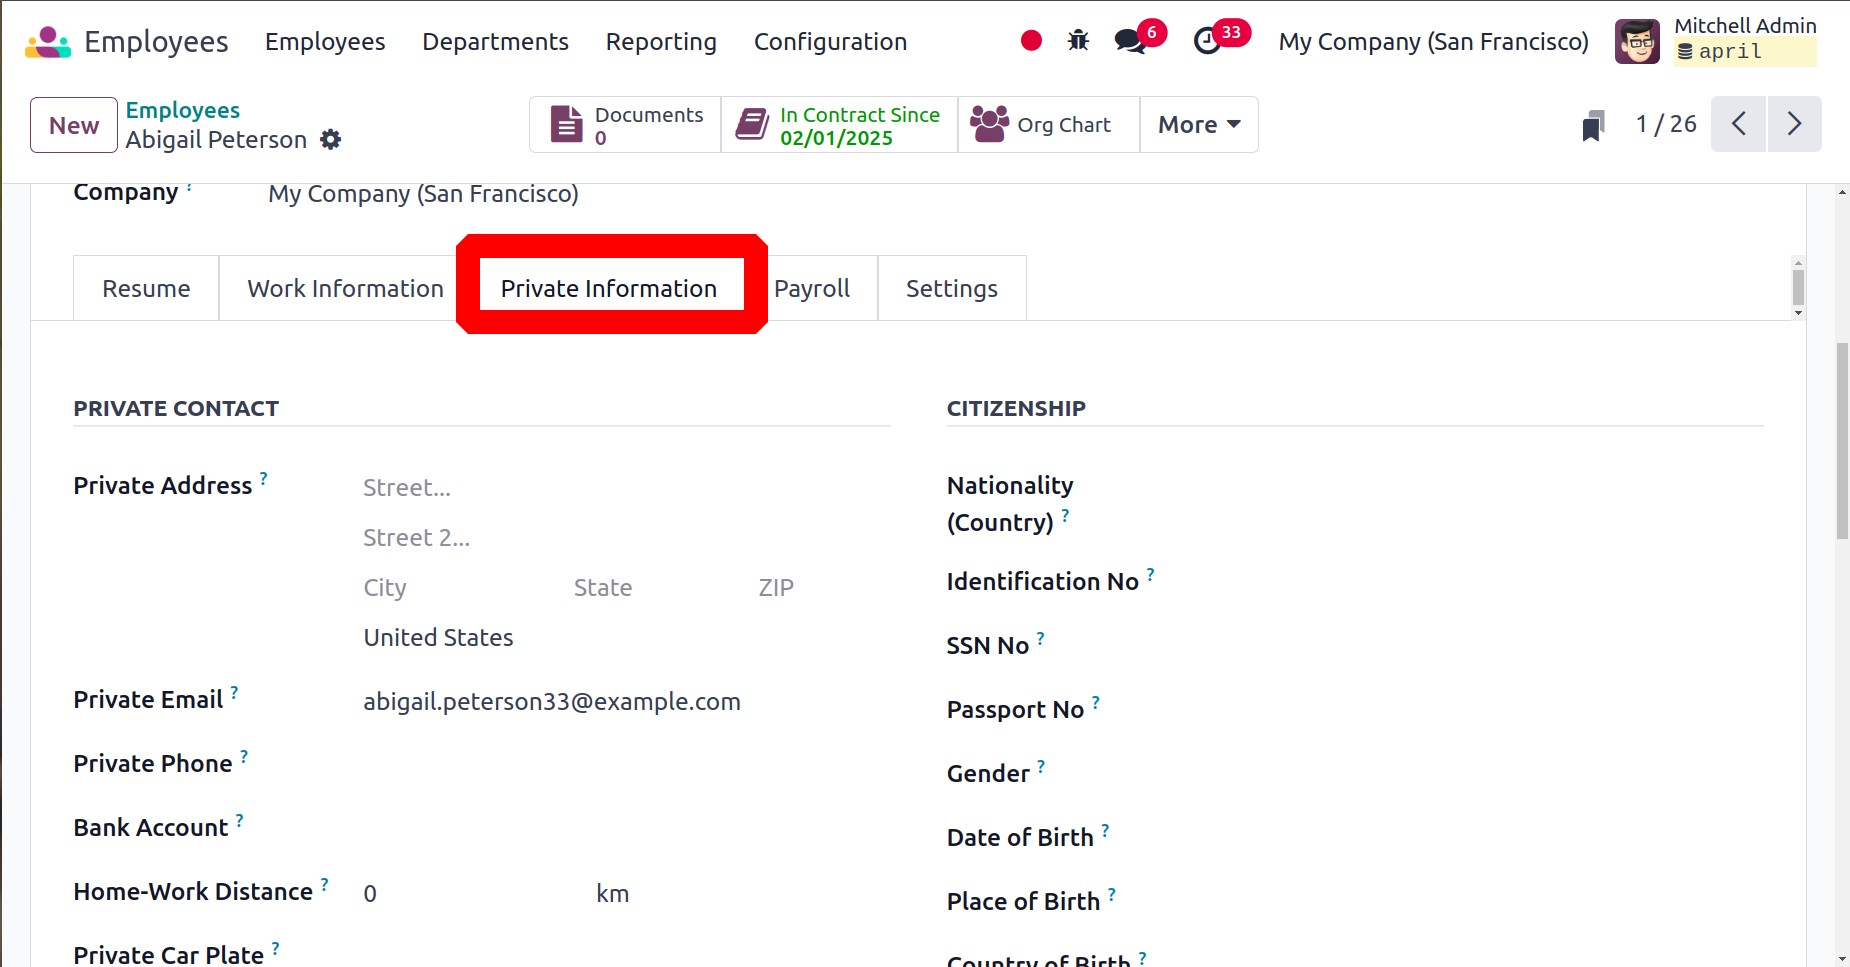
Under the "Private Contact"
section, include the worker's
private address, email, phone
number, language, and commute
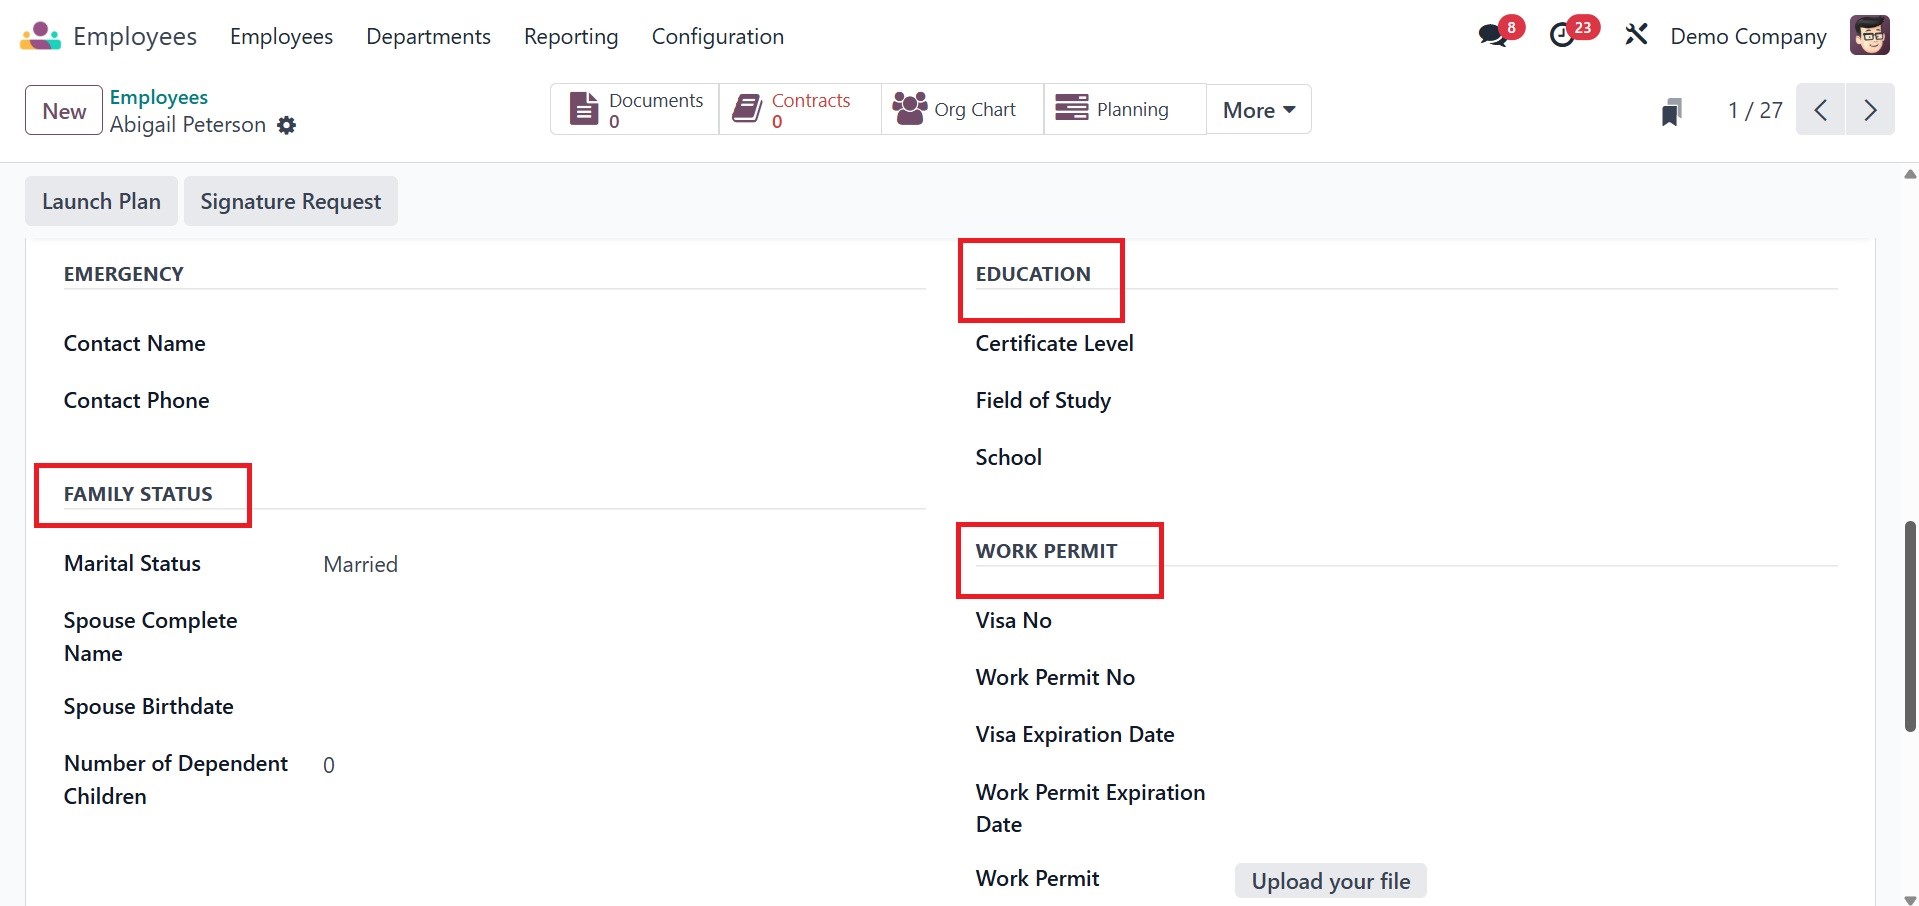
time. An employee can add
their marital status, the
number of dependent children,
the emergency contact's name,
and their phone number under
"Family Status."
Under the Education area, you can
include details about the
School, Field of Study, and
Certificate Level. The Visa
No, Work Permit No, Visa
Expire Date, and Work Permit
Expiration Date can be added
in the appropriate fields. A
designated field will be
provided for you to upload
the worker's work permit.
Citizenship information
include nationality, ID
number, passport number,
gender, date of birth, place
of birth, and country of
birth.
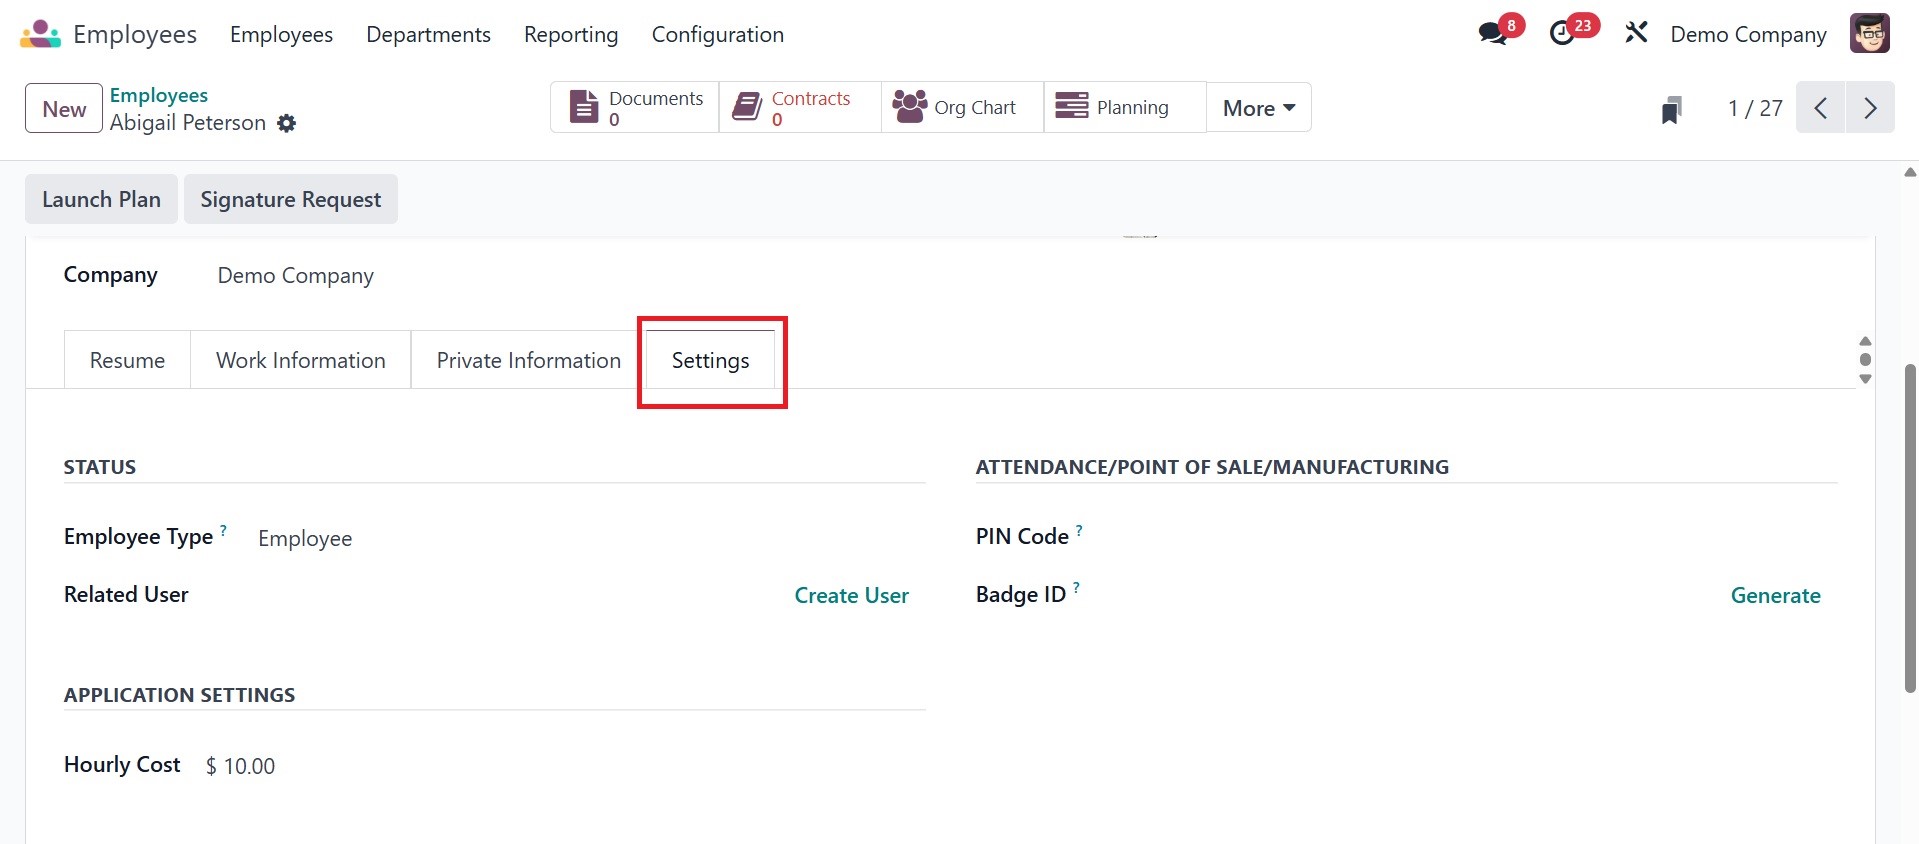
Under the settings tab, you have
the options like, status,
application settings, and
attendance/point of
sale/manufacturing. Under the
status, you have the employee
type and related user. Below
attendance/point of
sale/manufacturing, you can
add the pin code and badge
ID. and under application
settings, hourly cost can be
added. Settings tab
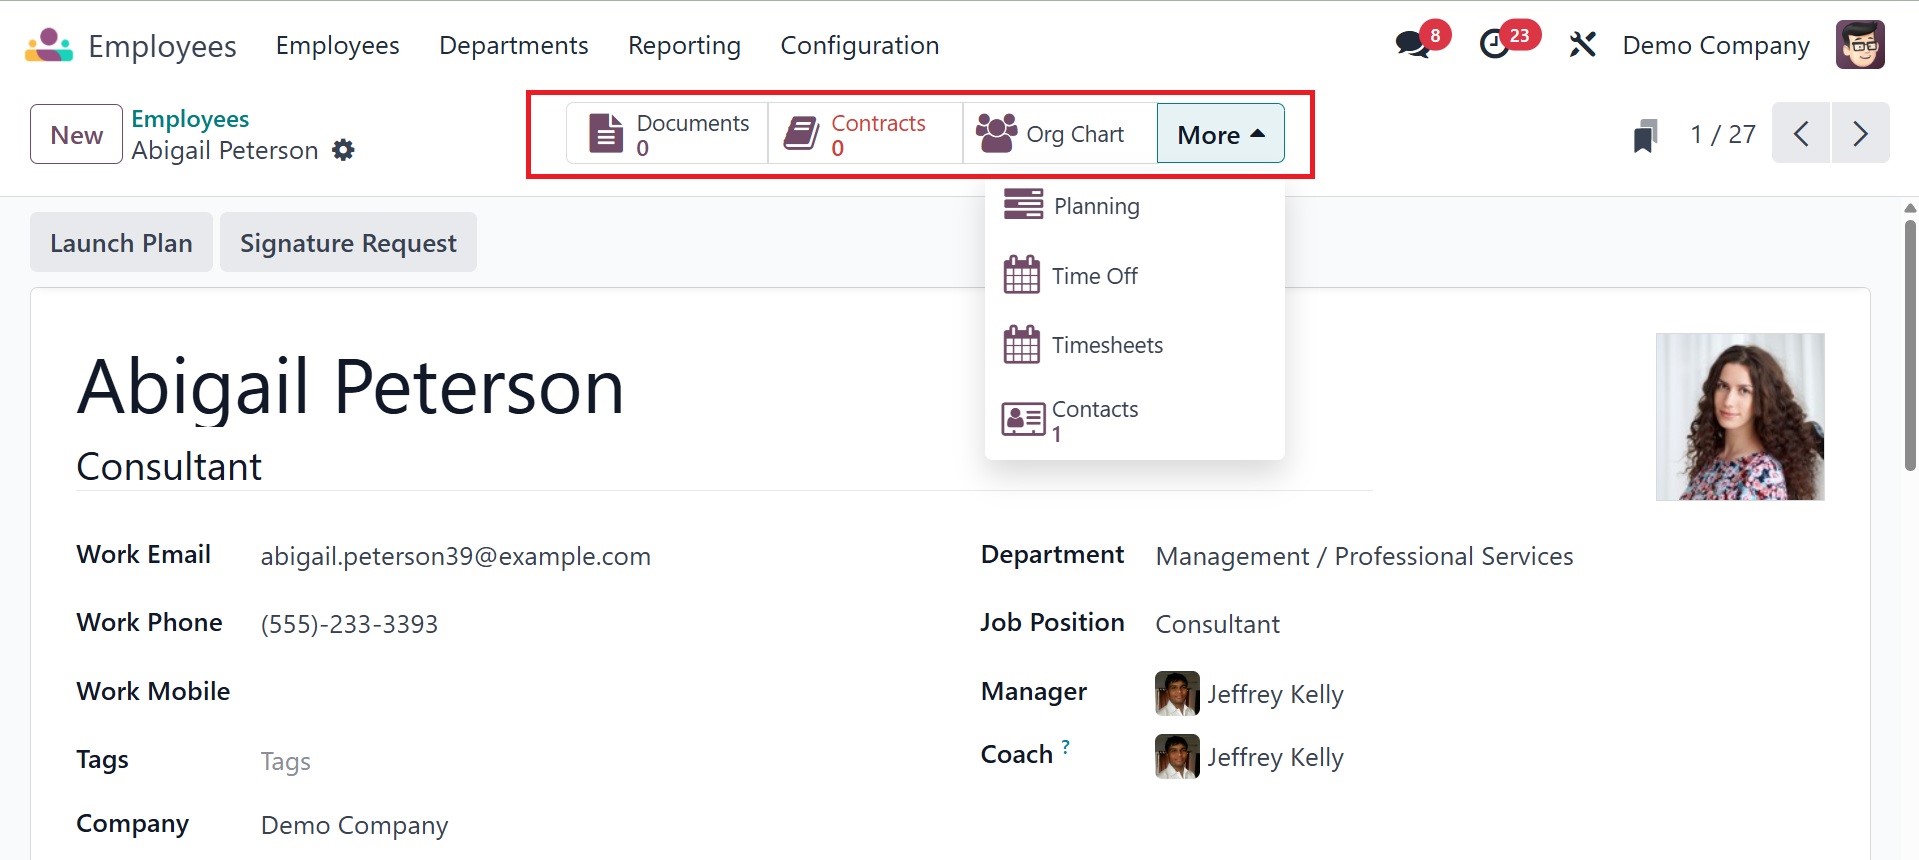
Once you have completed setting
up the employee profile, you
will have access to several
smart buttons on the form
view to monitor the
employee's related
activities. Clicking the
Document button will display
the documents related to the
employee. You can use the
contracts, org chart,
planning, time off,
timesheets, and contacts
smart buttons accordingly.
Clicking the Contract Smart
button will display the
employee's current contract.
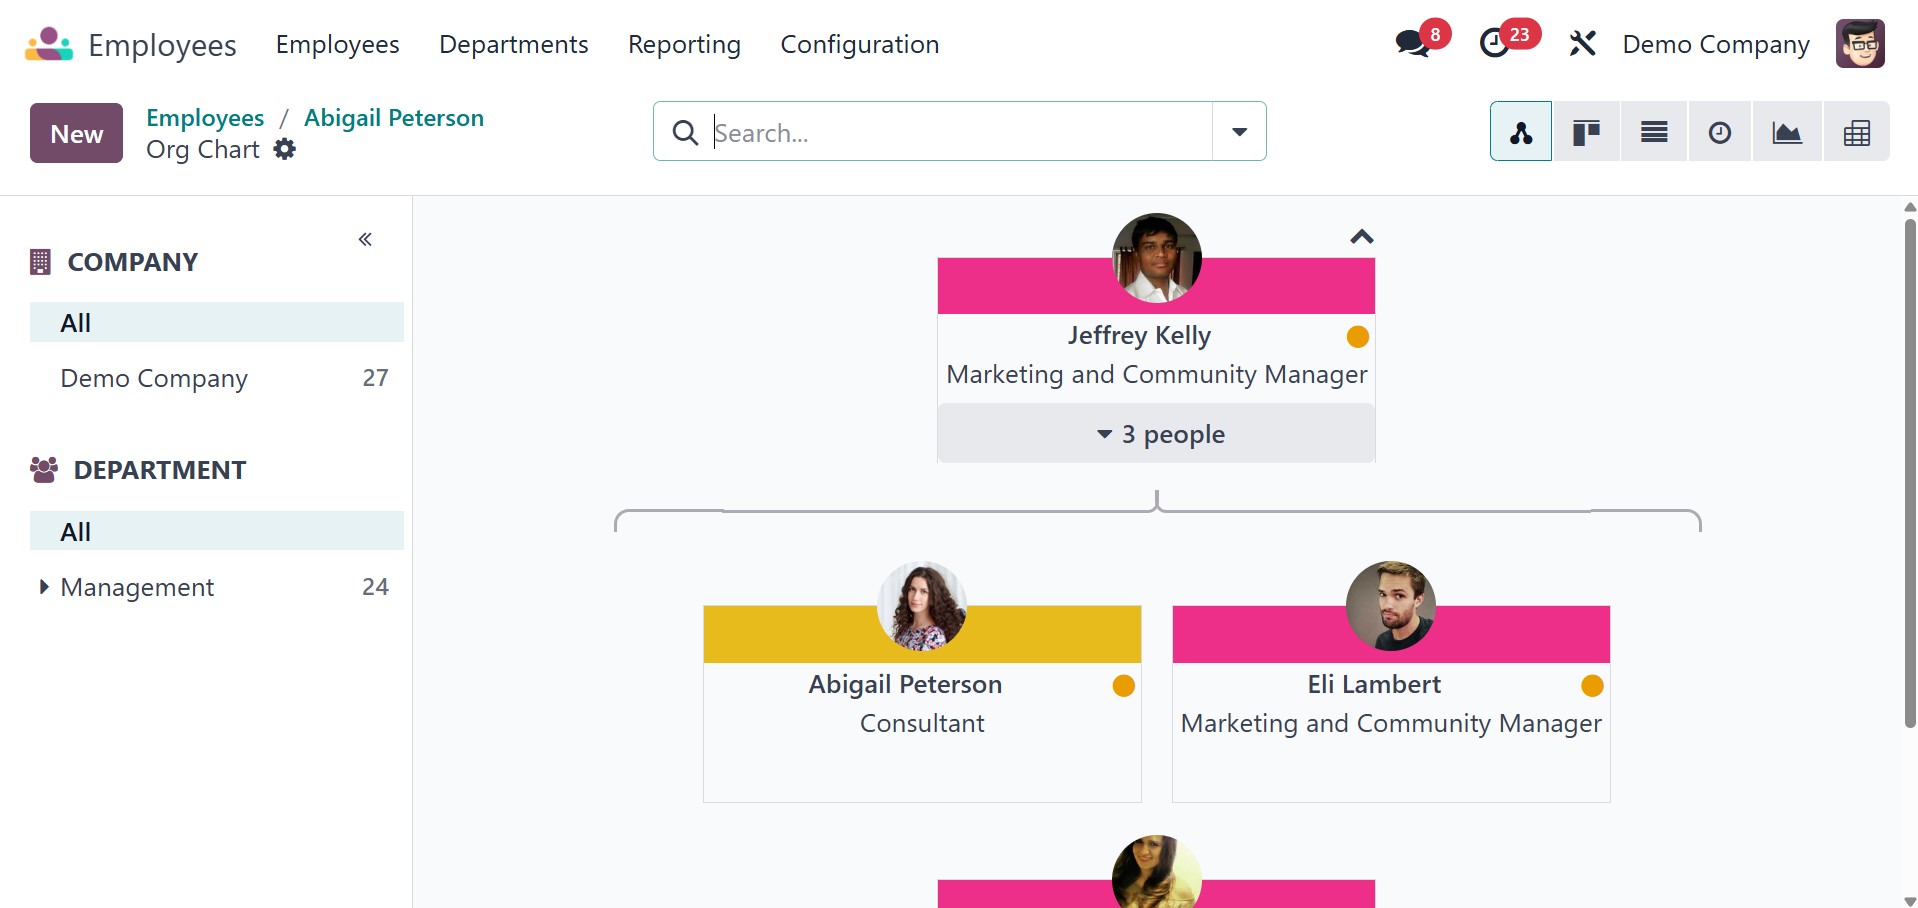
The Org chart contains the
employee's hierarchical view.
The numerous tasks this employee
has scheduled can be viewed
by clicking the Planning
smart button. The Gantt view,
as can be seen below, will
provide specifics of the
planned actions. You can plan
new tasks with this employee
from this window.

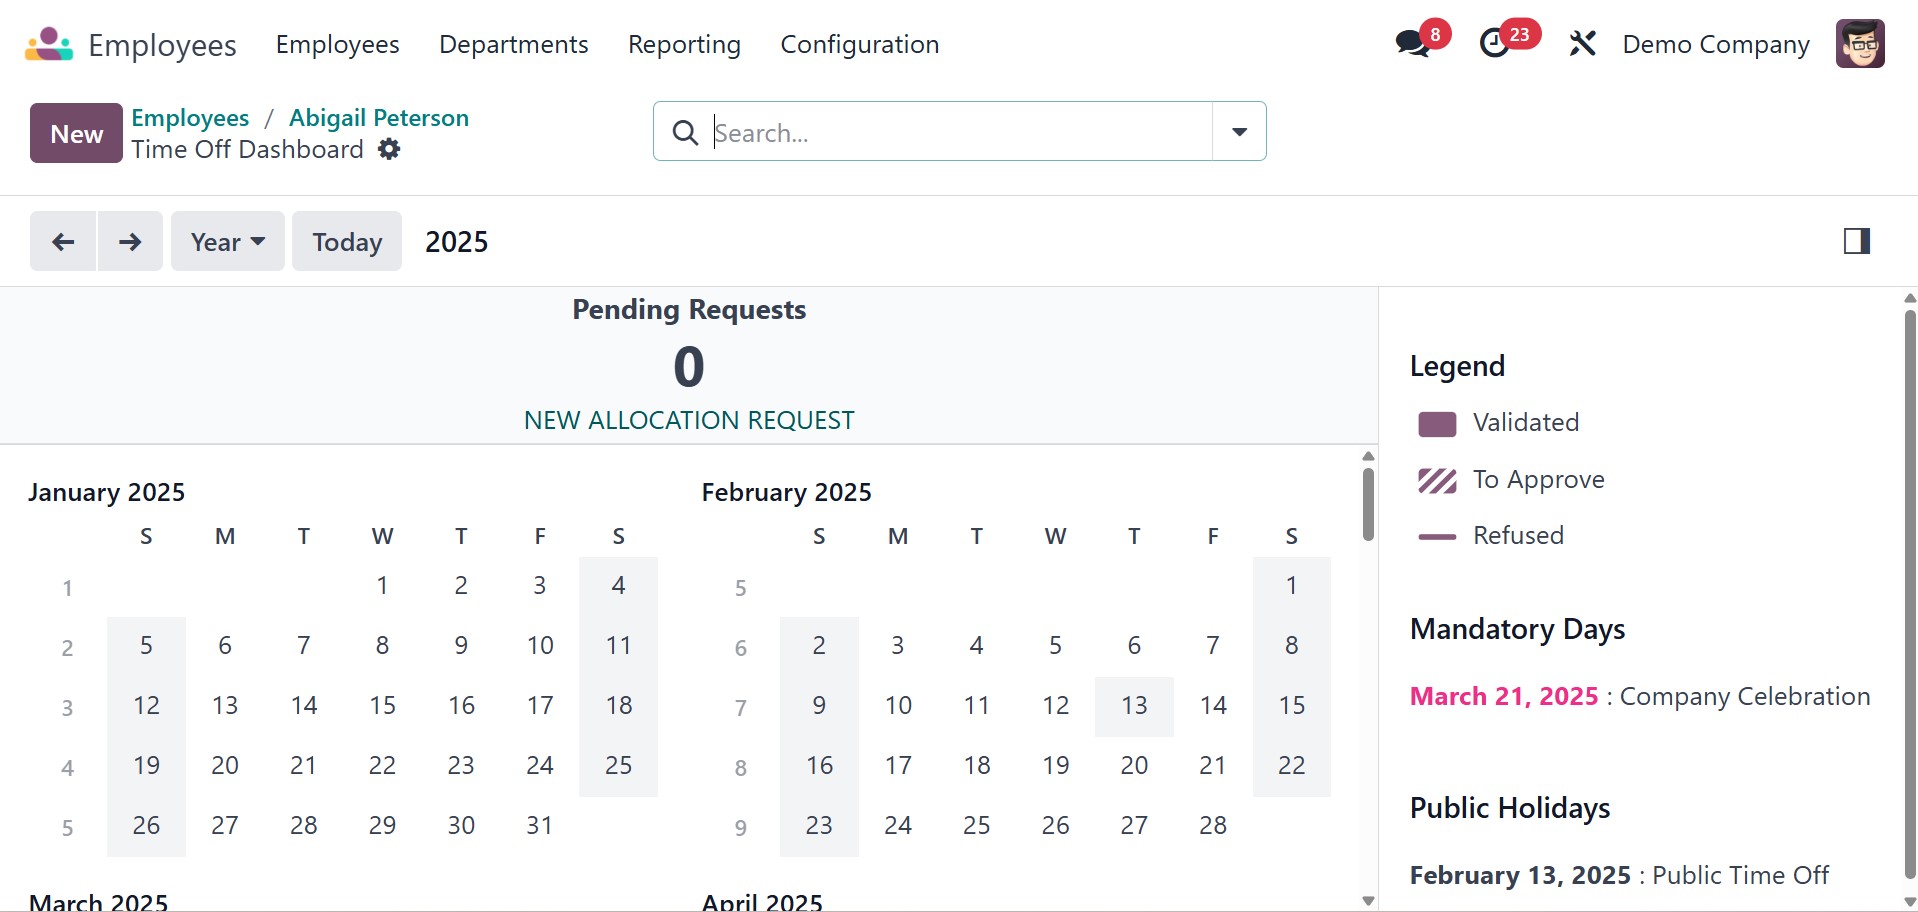
The employee's monthly and yearly
time off can be viewed by
selecting the Time Off
option.
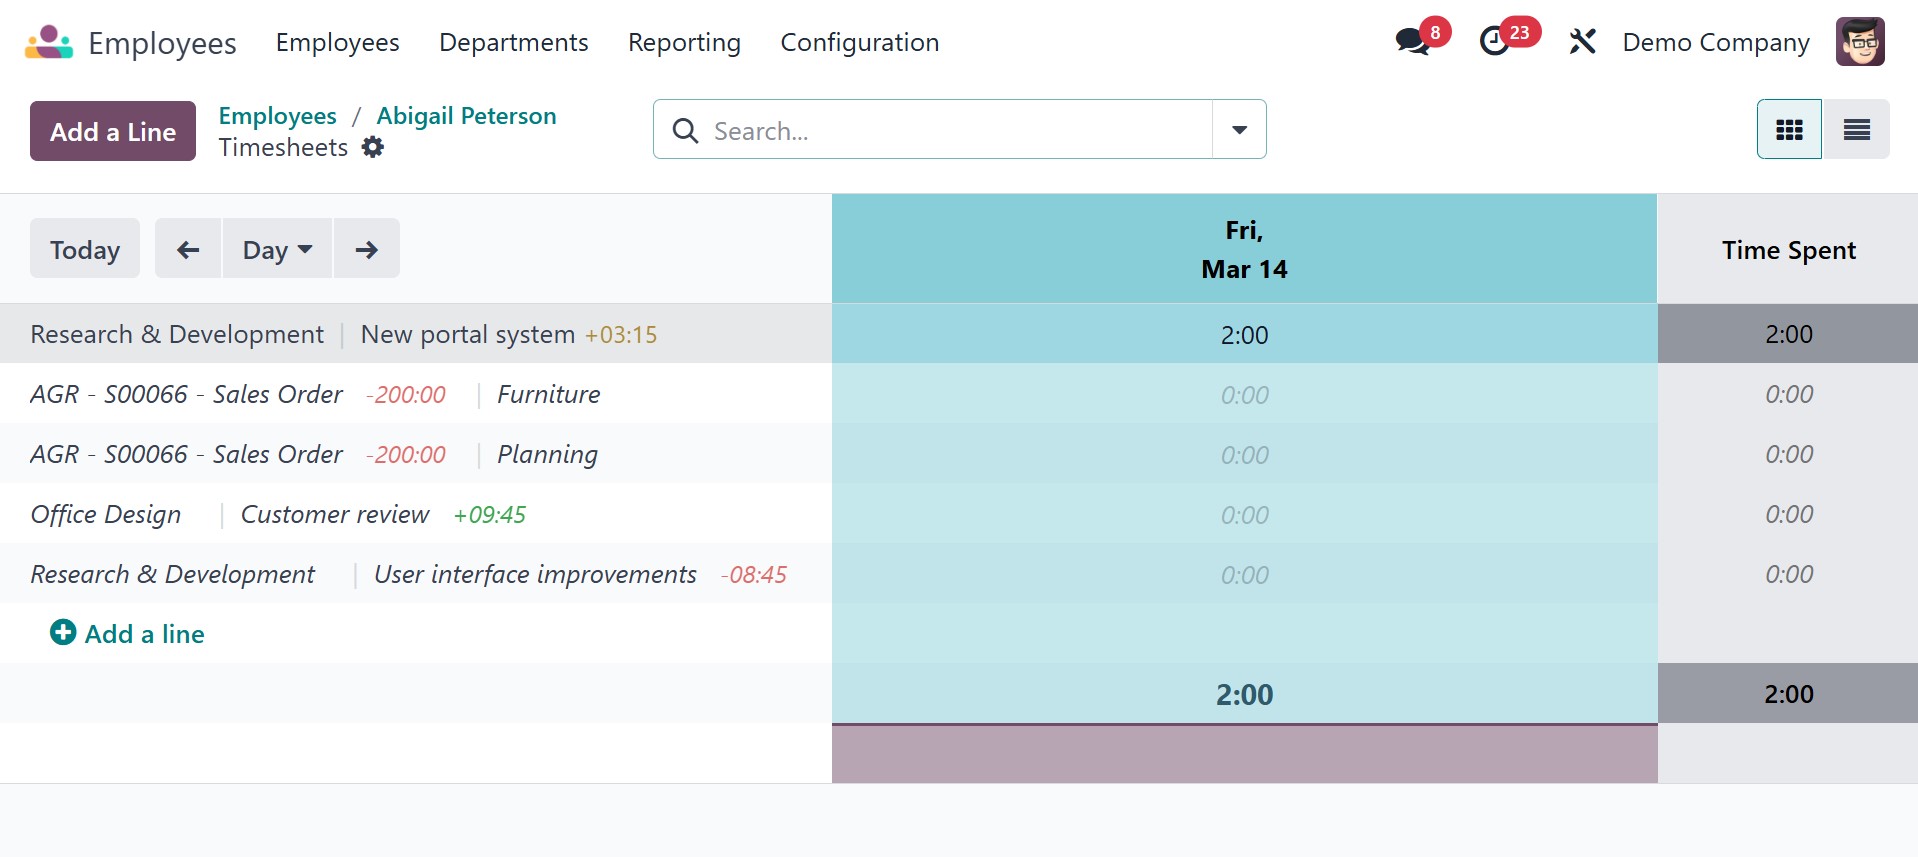
Clicking the Timesheets button
will bring up the employee's
timesheet. The employee's
recorded time spent on each
task will be shown.
The list view shows the
Reference, Employee, Batch
Name, Company, Basic Wage,
Next Wage, and Status.
The employee profiles of people
connected to the current
employee will be seen when
you click the "Contacts"
option.
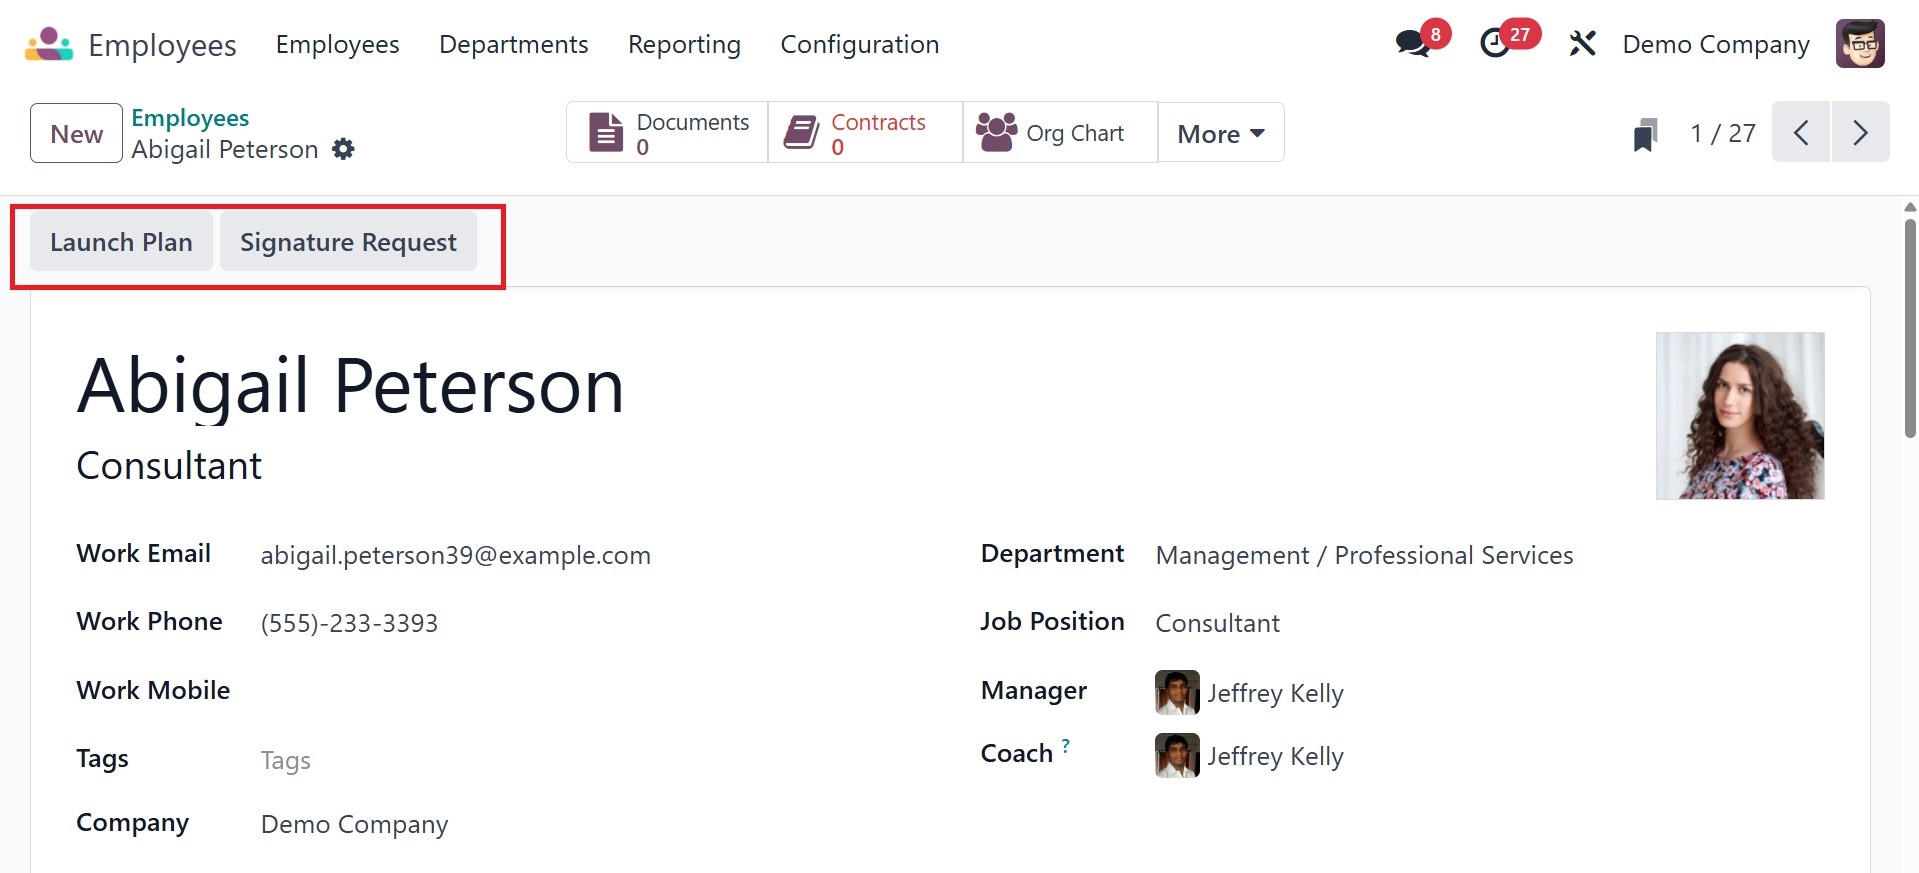
You can begin the employee's
onboarding and offboarding
programs by clicking the
Launch Plan button. Use the
Signature Request button to
submit a request for a
signature on particular
documents.
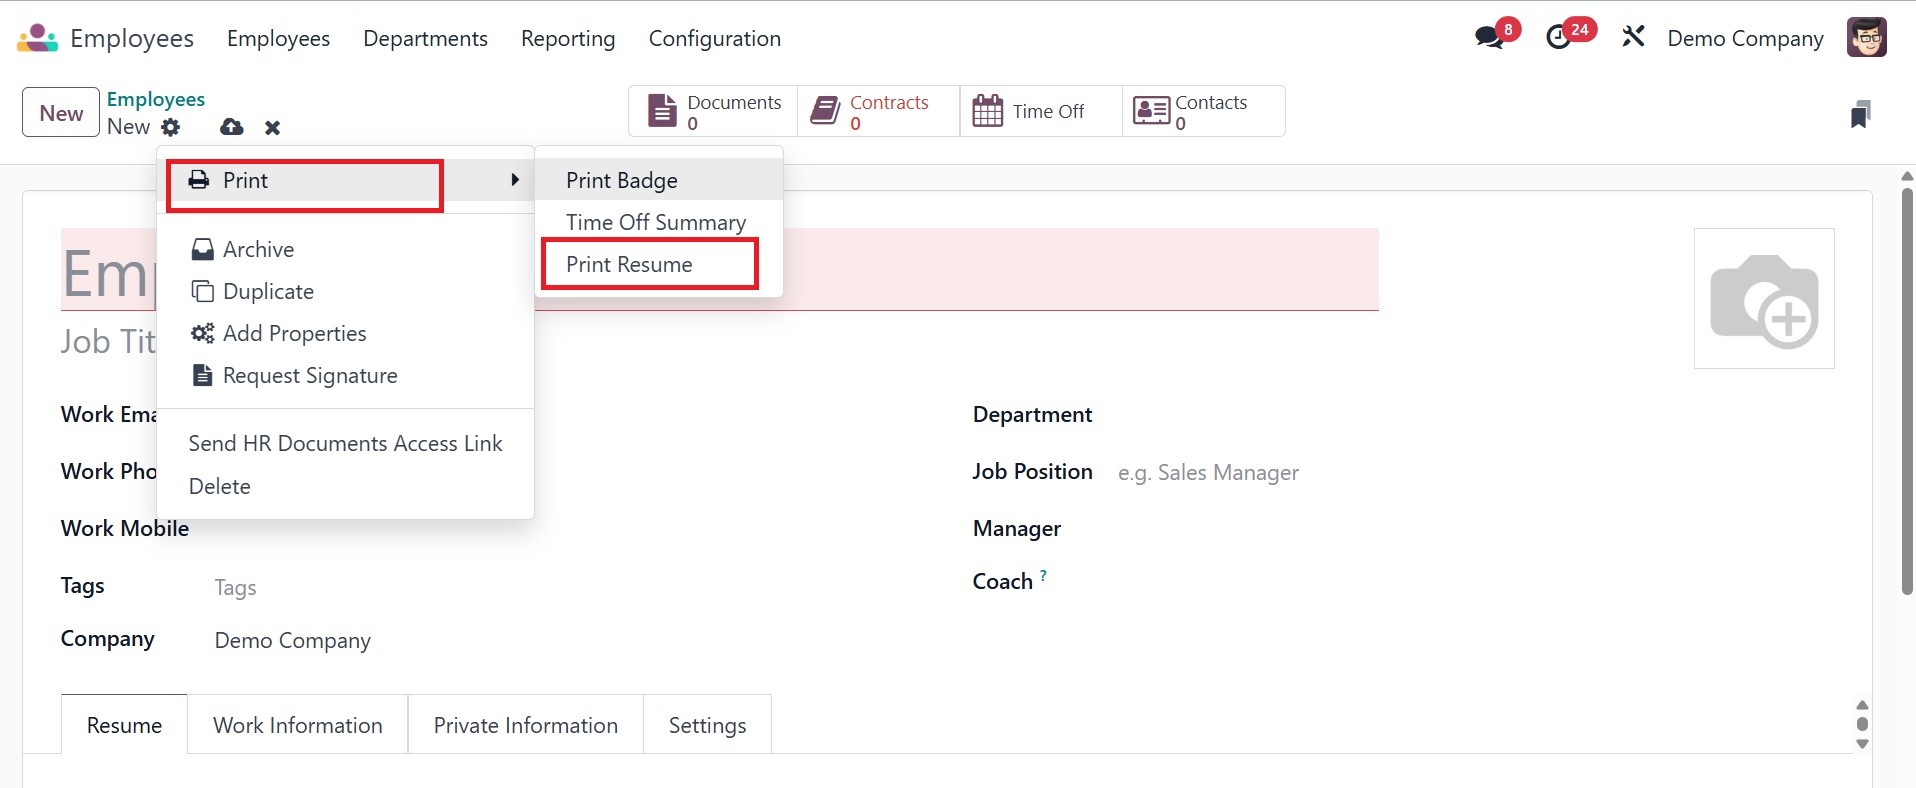
The Action button has a Print
Resume option. This makes it
easy for the user to print
the employee resume.
1.1 Org Chart
The employee organizational chart
is now accessible to users
through the Employees menu.
To do that, click the Org
Chart.
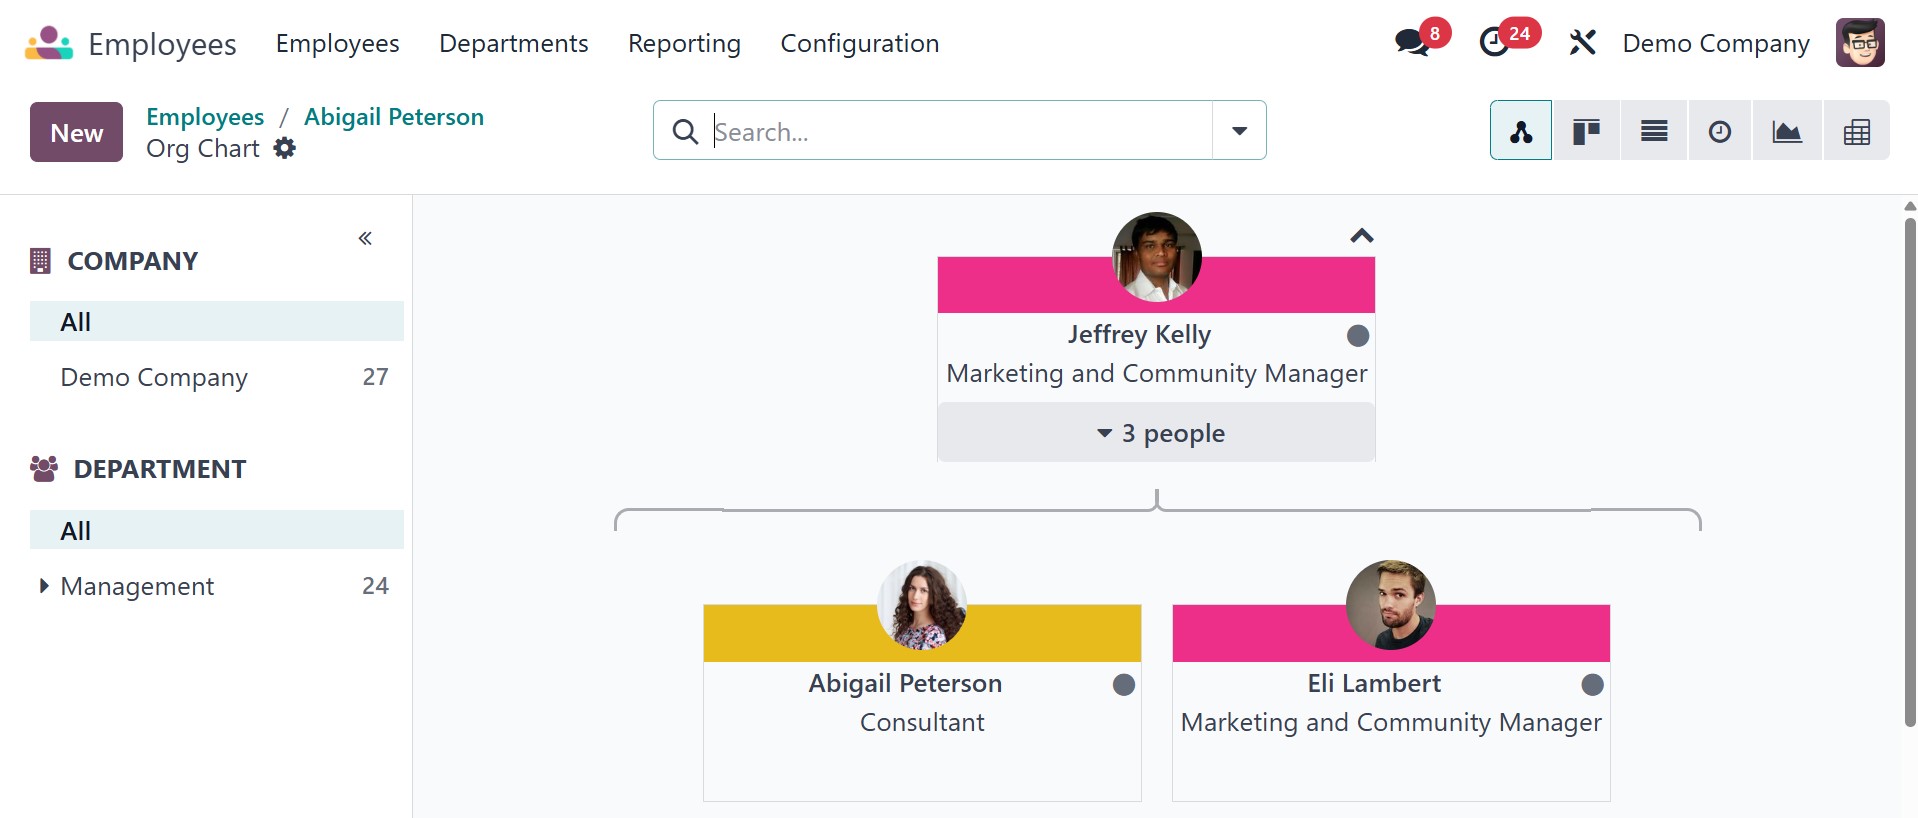
The number of workers who report
to each individual will be
displayed, and when you
select "three people," the
specifics of the subordinates
who report to the boss will
be revealed. Simply drag the
employee and drop them under
the new manager if you wish
to switch their manager.
1.2 Contract
From the Odoo18 Employees module,
select the All Contract menu
option to see the contracts
created for each employee in
the company. Here is the
Kanban view platform for all
contracts.
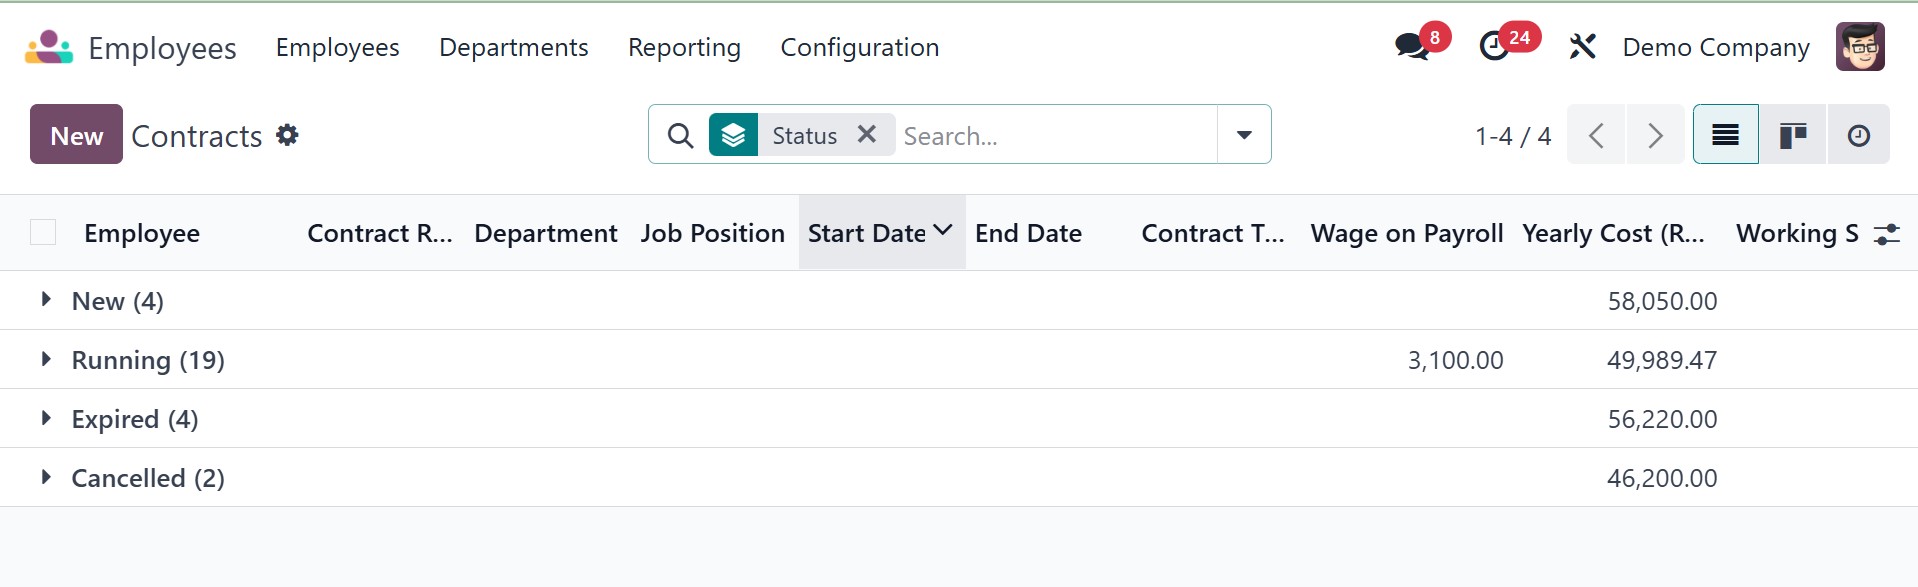
There are four stages for the
contracts: New, Running,
Expired, and Canceled. Click
the + icon to add a new
contract under a specific
stage. The name, title, and
pay of the relevant employee
will be listed in each
contract.
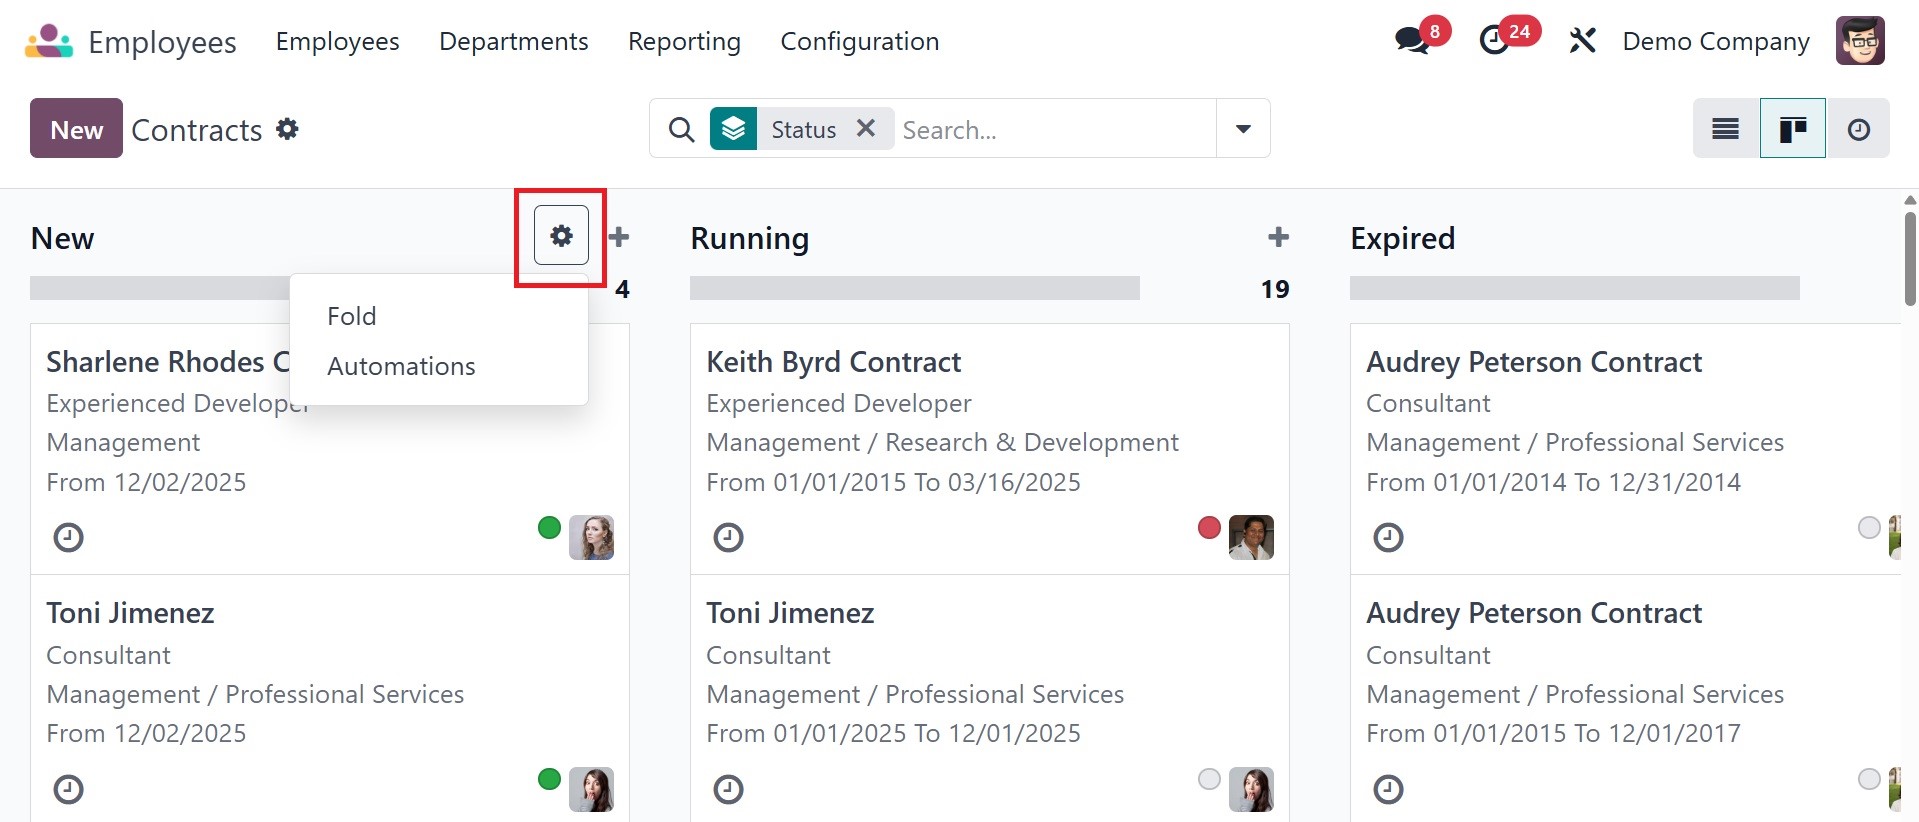
The total number of contracts for
each stage is displayed in
the upper right corner. Three
small vertical dots on each
contract indicate whether it
should be edited or deleted.
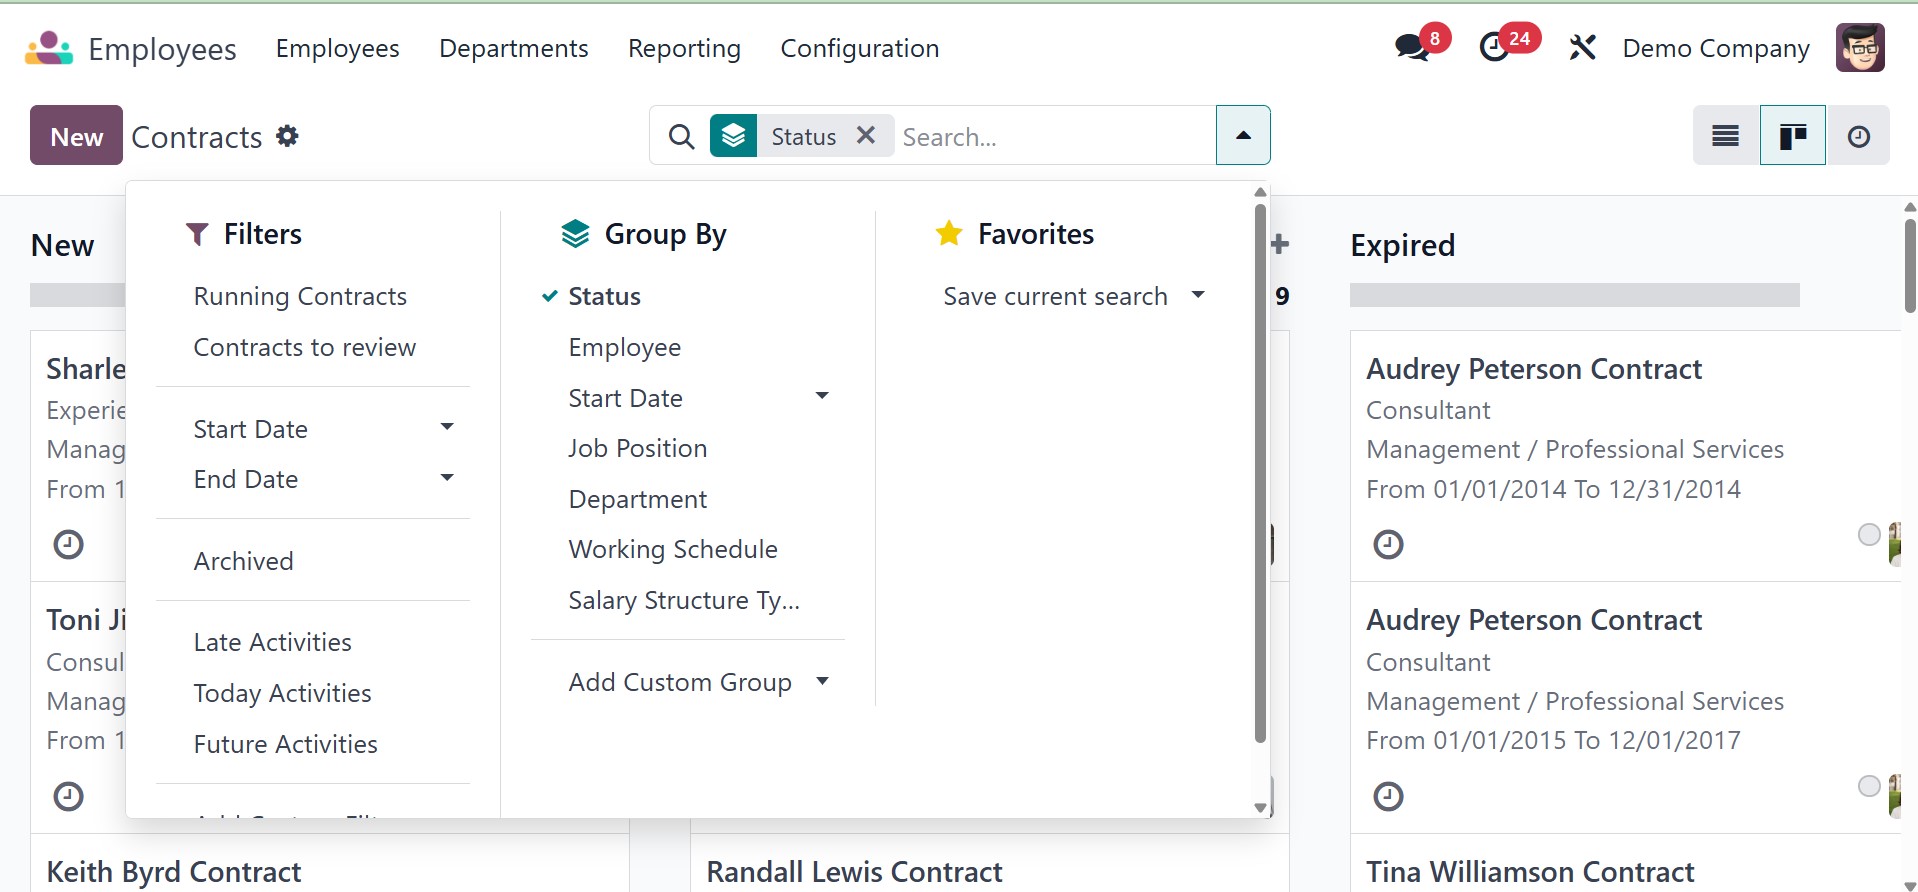
Running contract, contract to
review, start date, end date,
archived, late activities,
today activities, and future
activities are available
under the filters. Under the
group by, you have status,
employee, start date, job
position, department, working
schedule, salary structure
type, and add custom group,
respectively. Click the New
button now to establish a new
contract.
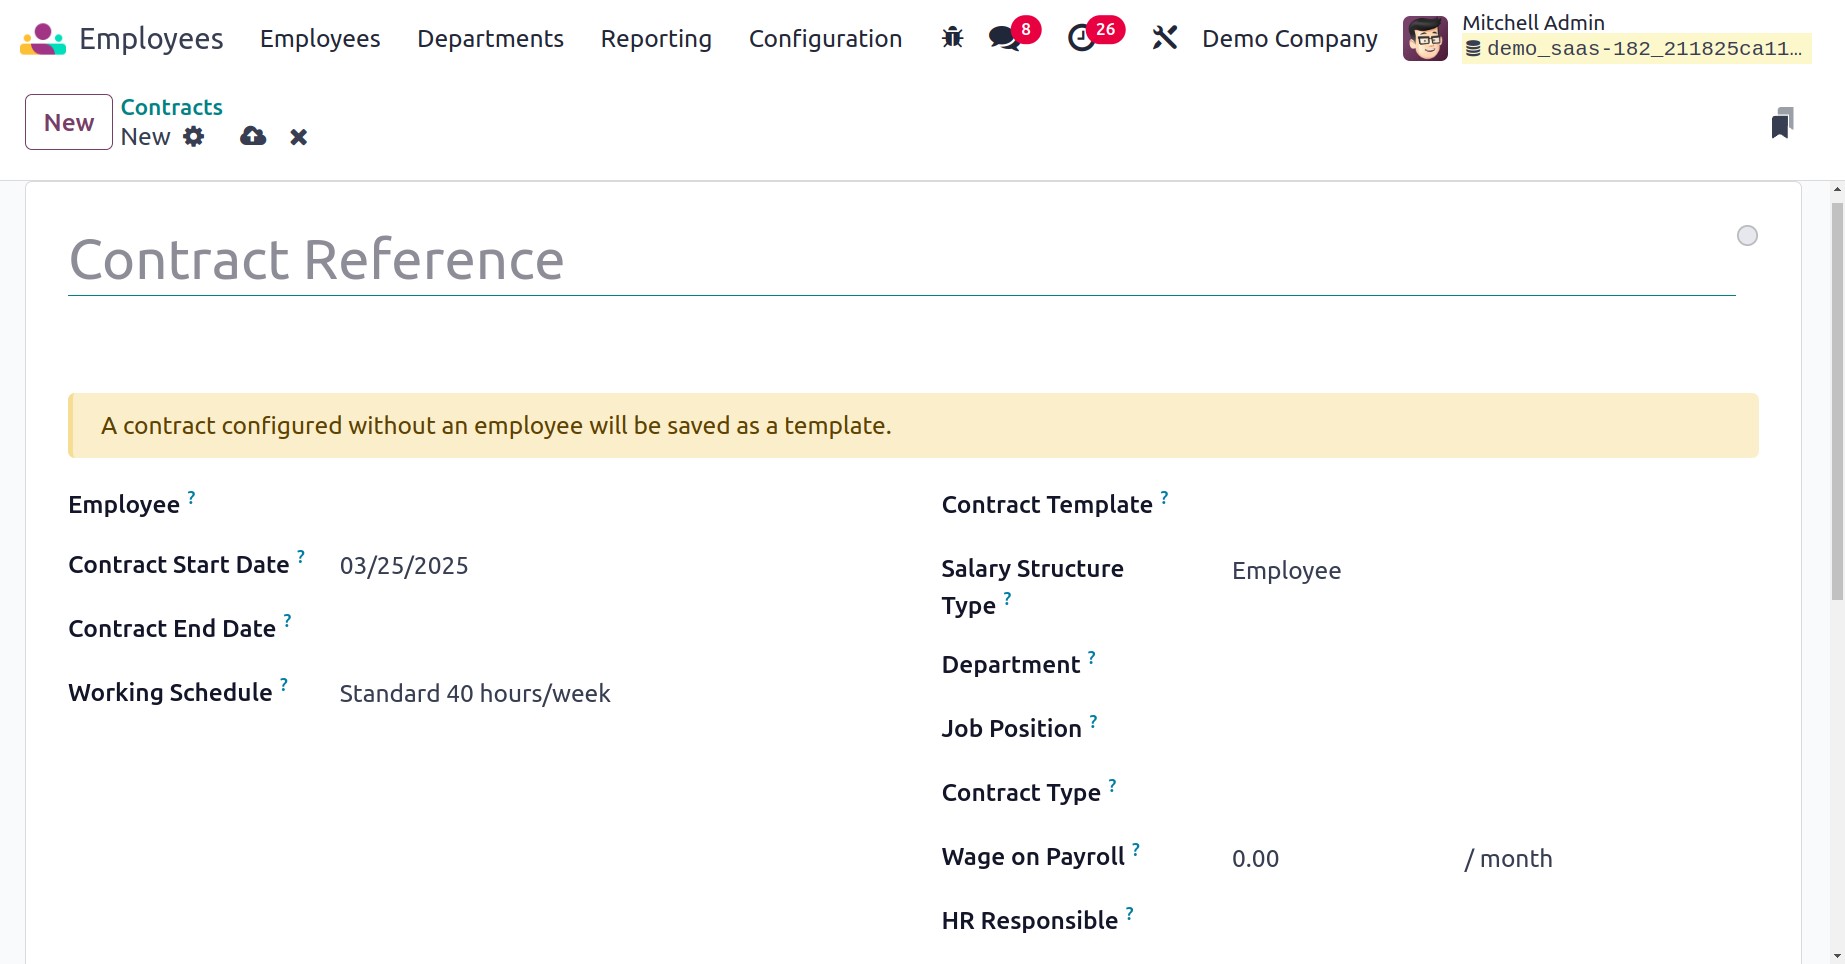
As a reference, you can provide a
title in the contract.
Contract Start Date, Contract
End Date, Salary Structure
Type, Working Schedule,
Department, Wage on Payroll,
Job Position, Contract Type,
and HR Responsible should all
be included in the
corresponding fields. The
work entry source will
specify the source from which
work entries will be
generated. Work entries can
be created using planning,
attendance records, or
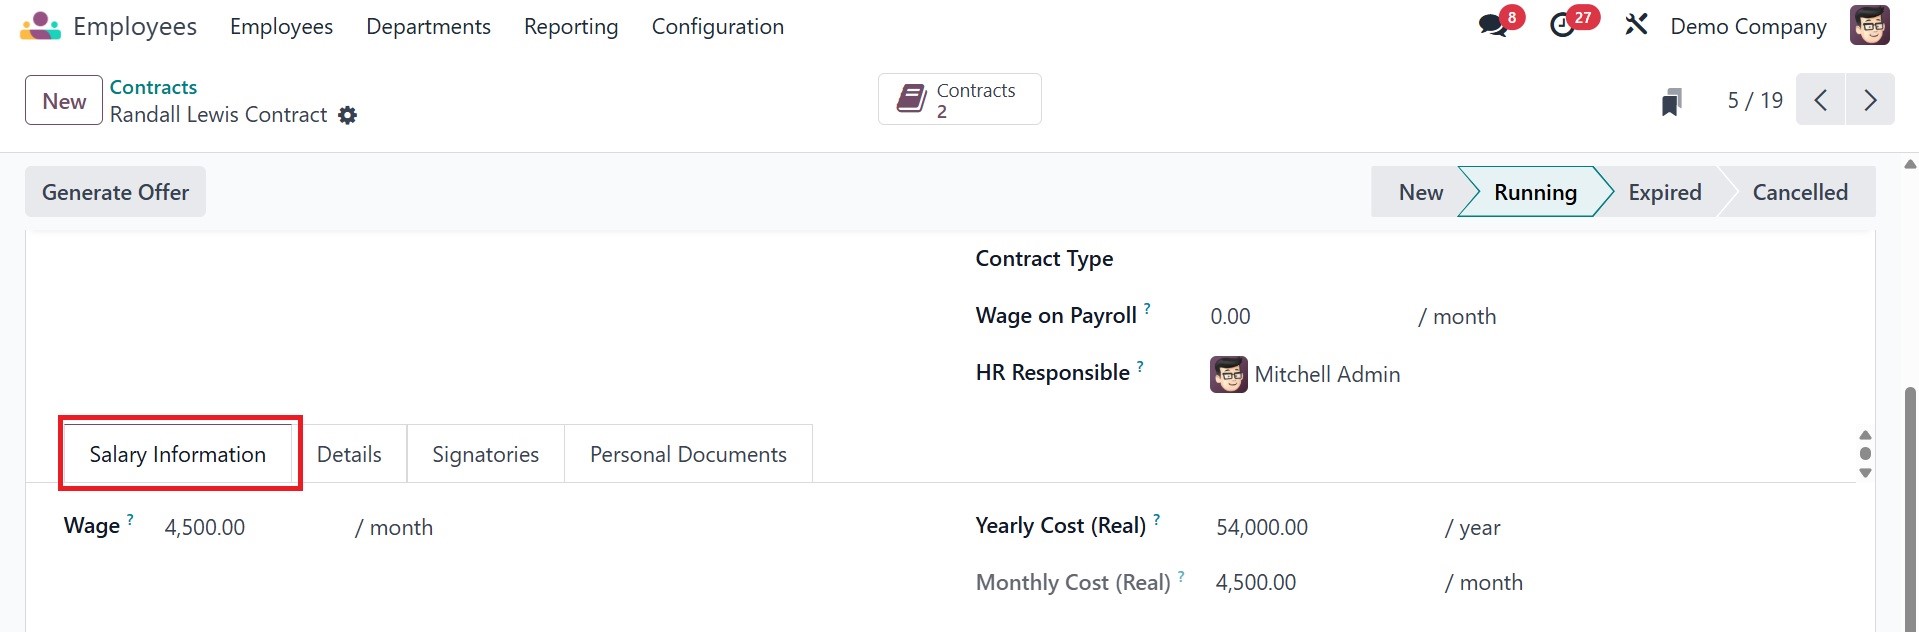
working schedules. There, you
have the salary information
tab, under which you can add
the wage, yearly cost, and
monthly cost, respectively.
The next tab is details, as in
the image below.
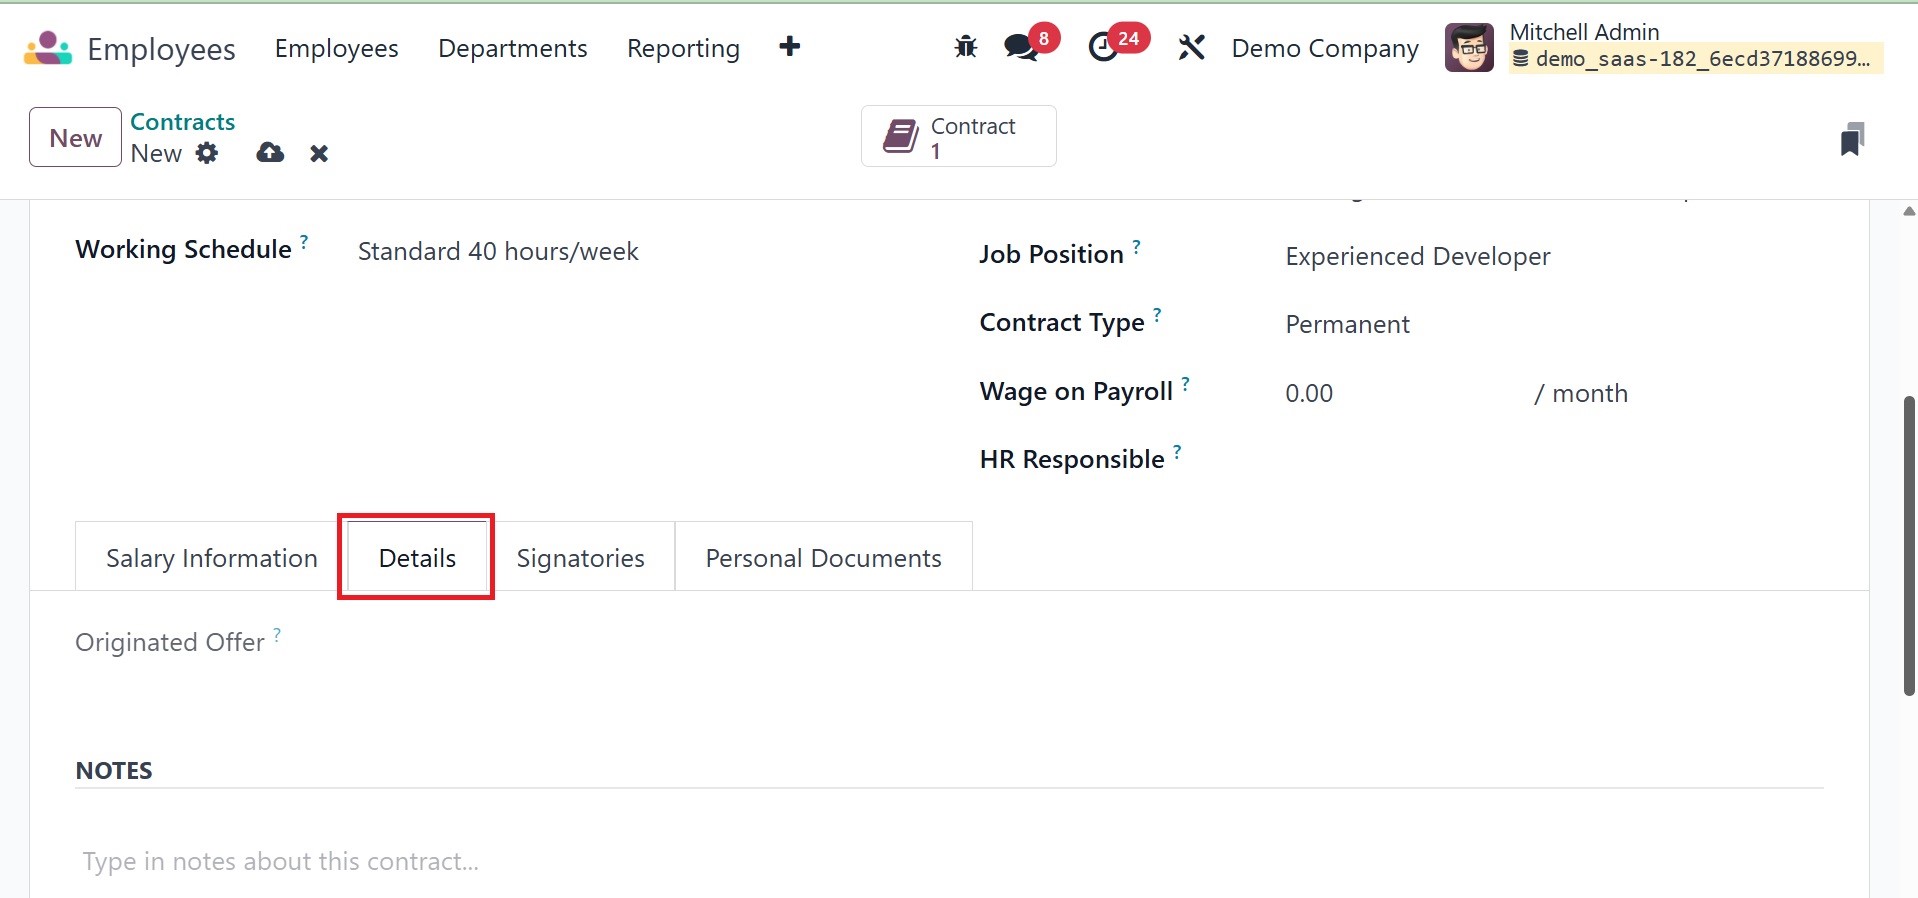
Here, you can add the notes
regarding the contracts. The
next tab is signatories. The
employee module manages the
"signatories" or signature
request capability for
employee contracts, enabling
you to send them for
electronic signatures and
monitor their progress.
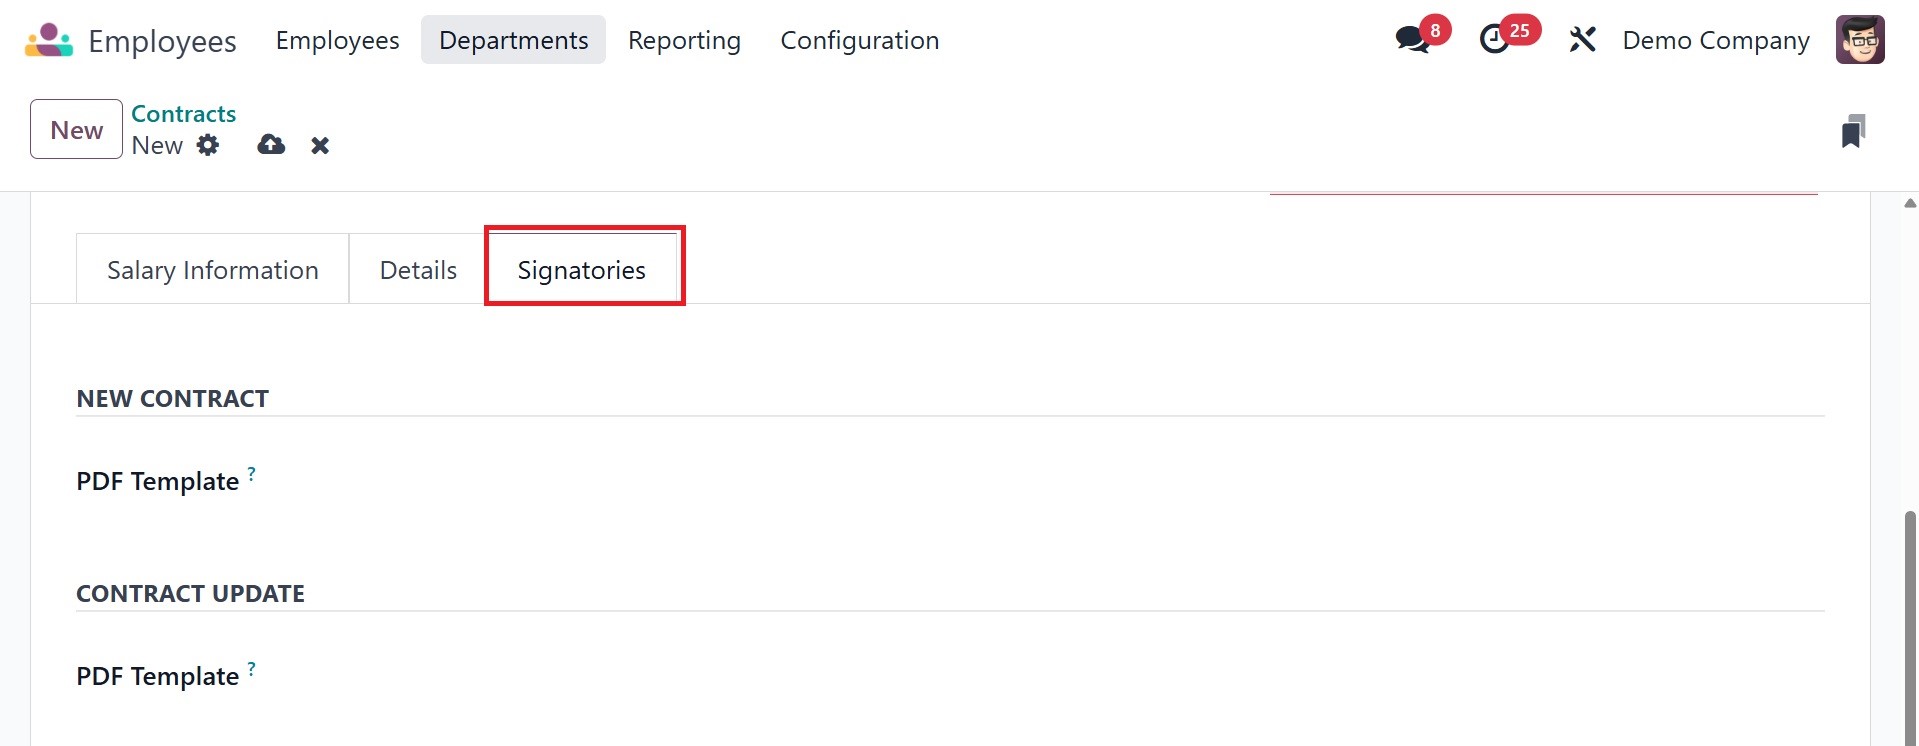
There, you have the NEW CONTRACT
option to add the PDF
template and CONTRACT UPDATE
as well.
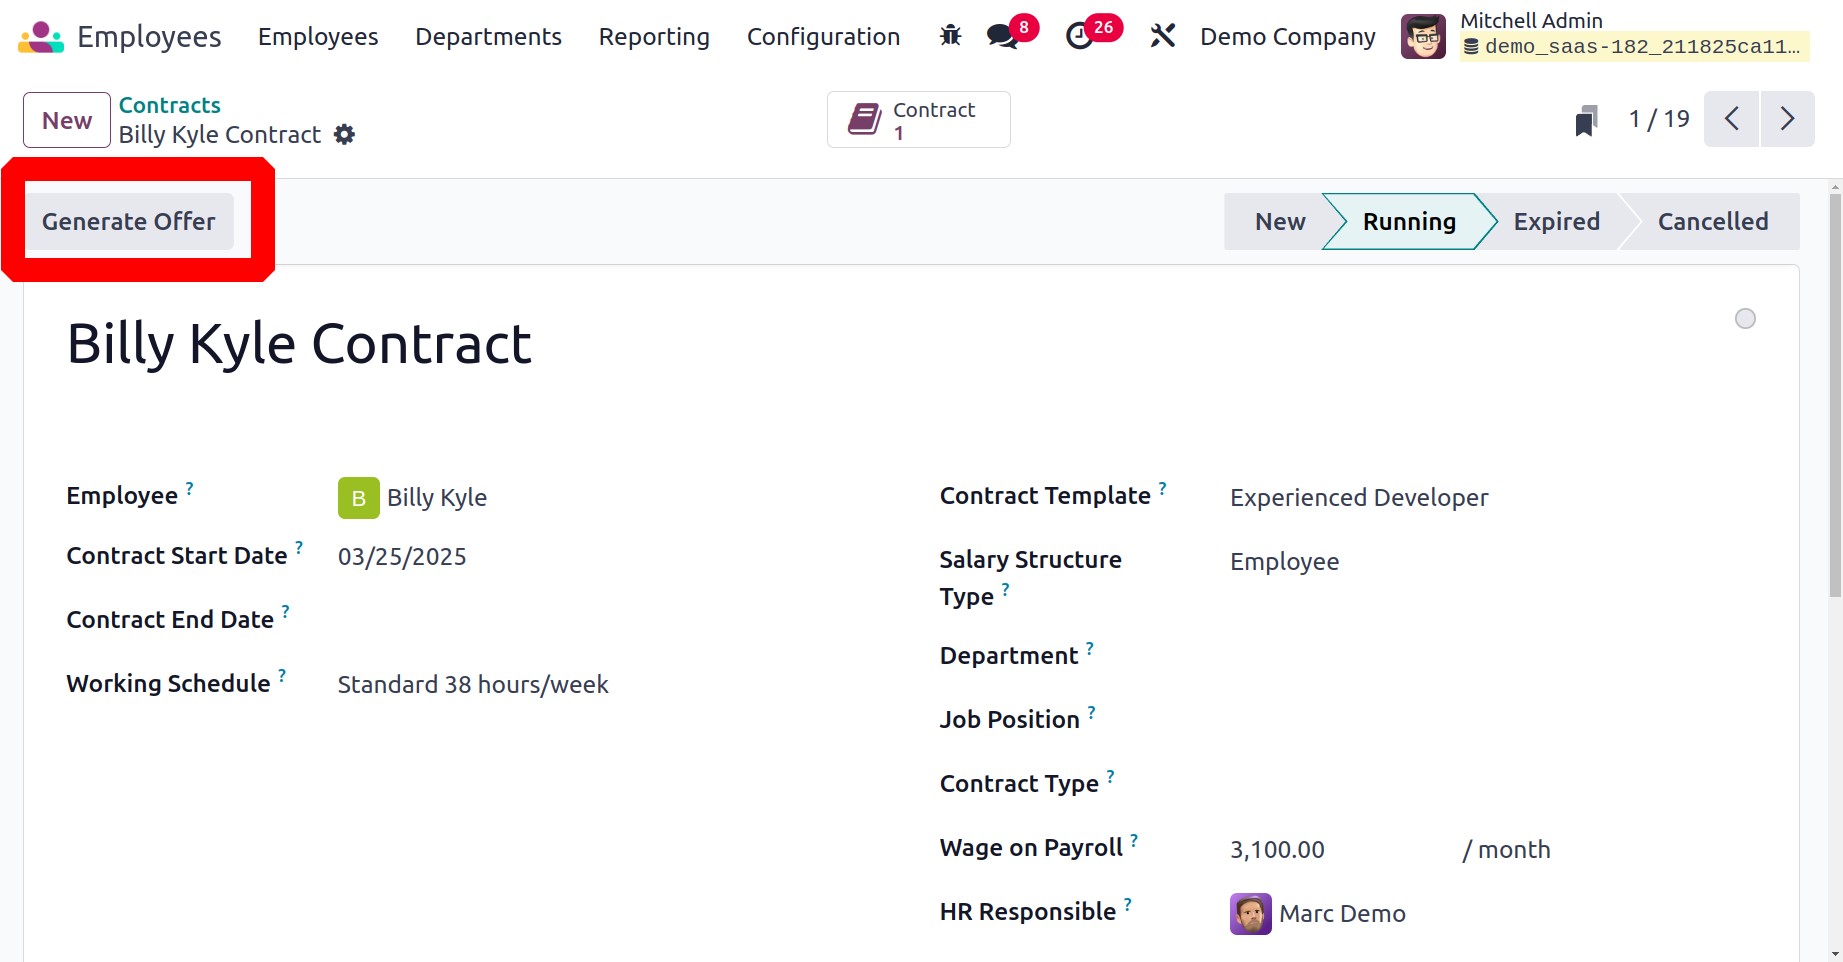
Once you have completed creating
the employee contract, you
can choose the Generate Offer
option, as illustrated in the
above image, to produce an
offer that will be delivered
to the relevant employee.
A pop-up window like the one
below will show up when you
click on this button.

For example, the offer's
template, job title,
employment position,
department, contract type,
contract start date, Link
expiration date, and annual
cost can all be found here.
The default employee's
company car is represented by
the "Default Vehicle." The
Offer Link will be displayed
in the pop-up window. The
Send By Email button allows
you to send a message to the
relevant staff member.
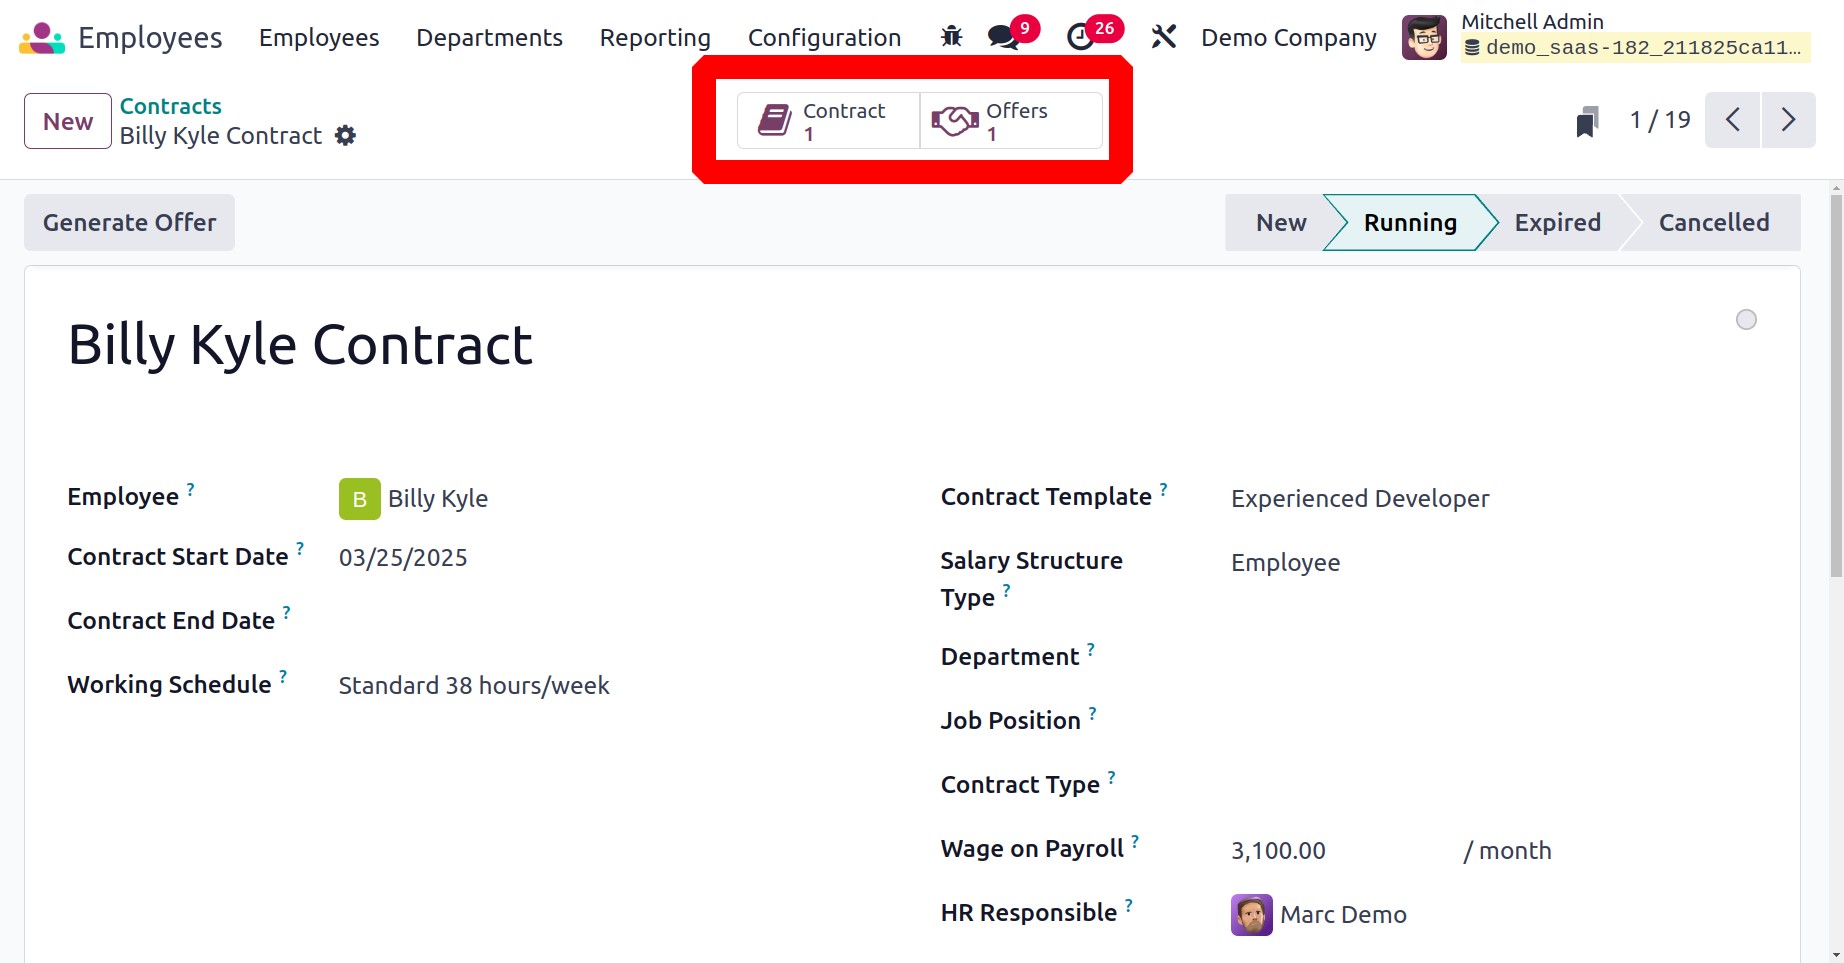
The offer will then appear on the
Offers smart tab.
1.3 Bank Account
Businesses can save and manage
employees' bank account
information for payroll
processing and reimbursements
by using the Bank Account
option in Odoo's Employee
Module. It guarantees the
safe and effective handling
of wage payments and other
financial activities. The
page of the bank account will
be as in the screenshot
below.

You can create a new one using
the NEW option, and the page
will be, as in the image
below.
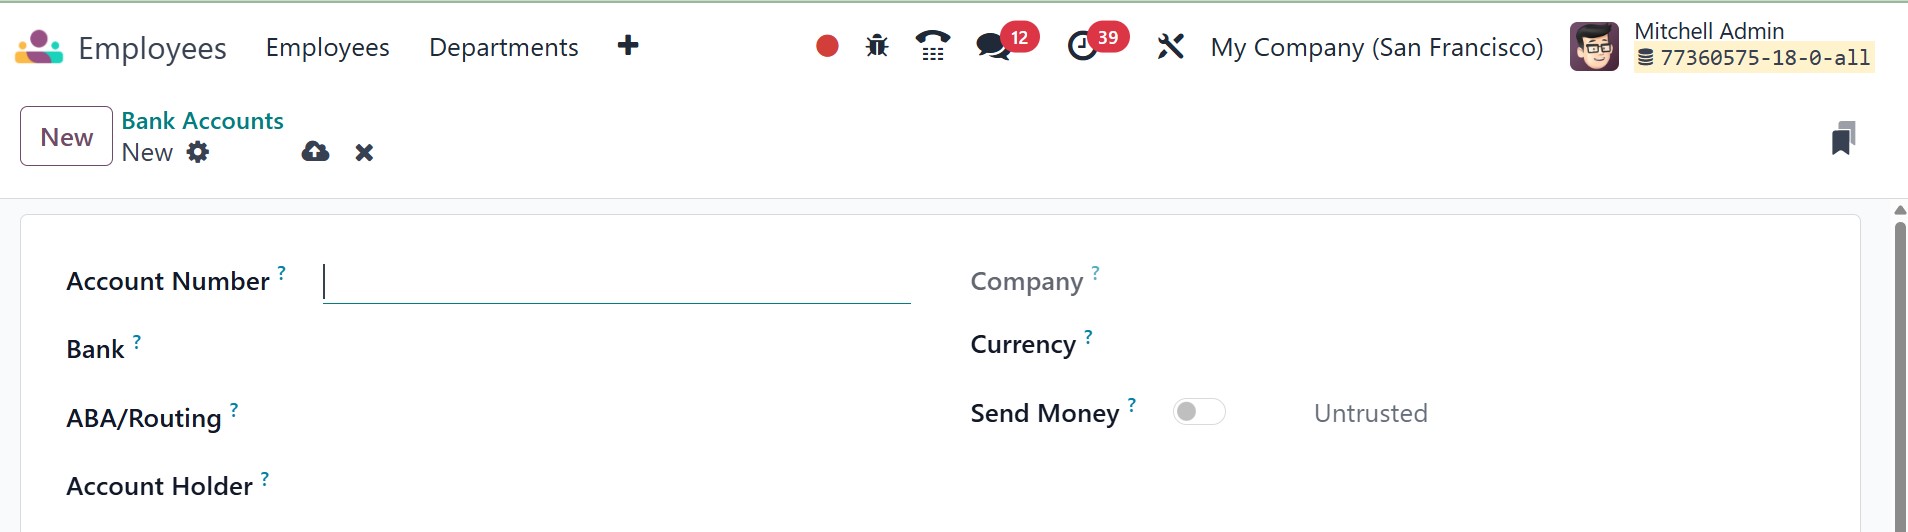
Here, you can add the account
number, bank, ABA/routing,
account holder, currency, and
send money option to
activate. Send money is
activated if it is trusted to
send money. Phishing is a
frequent activity that
involves sending phoney
invoices using a bogus
account number. Verify the
new bank account number at
all times for your own
protection, ideally by
calling the provider, as
phishing typically occurs
when their emails are
compromised. Sending money
can be enabled after
verification.