1. My Expenses Management
1.1 My Expenses
After choosing the My Expenses option from the My Expenses menu, you
can view the dashboard for the expense module. Users can view the
history of previously reported expenses on the My Expenses page.
Information concerning expenses, such as the date of the expense,
the employee, the company, the status, the description, the
activity, and more, may be found in the List view. At the top of the
window, you can see the reimbursement amount, validation costs, and
reportable expenses. A user can clearly see the situation of the
spending after seeing the report.
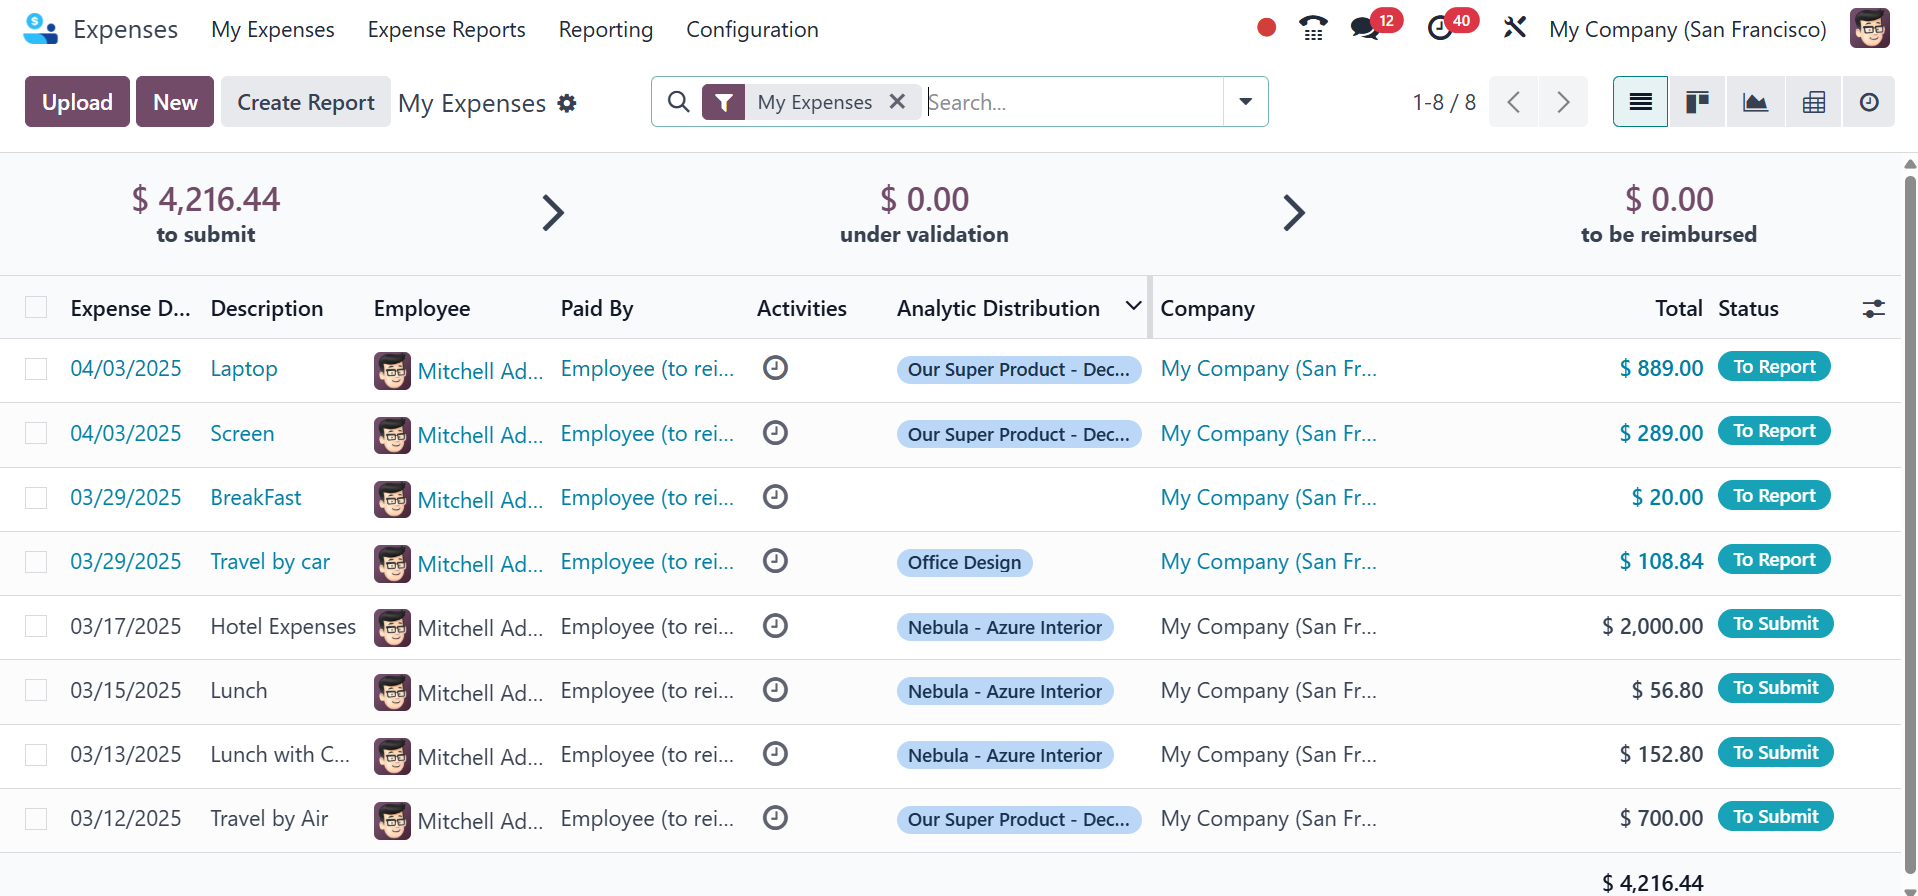
The onboarding panel assists administrators or HR managers in
correctly configuring the Odoo Expenses module. It typically shows
up at the dashboard's top. The onboarding panel typically shows
status counters like:
- To Submit
- Under Validation
- To Reimburse
These represent different stages in the expense report workflow,
helping finance/HR teams see where things stand at a glance. The
onboarding panel of the expense module will be as on the image
below.
To Submit:
What it displays: Expenses the employee has logged but has not yet
filed. Its origin is the creation of draft expense records that are
left out of an official expense report. Expense reports must be
prepared by staff members and submitted for approval, usually
accessible to managers and staff.
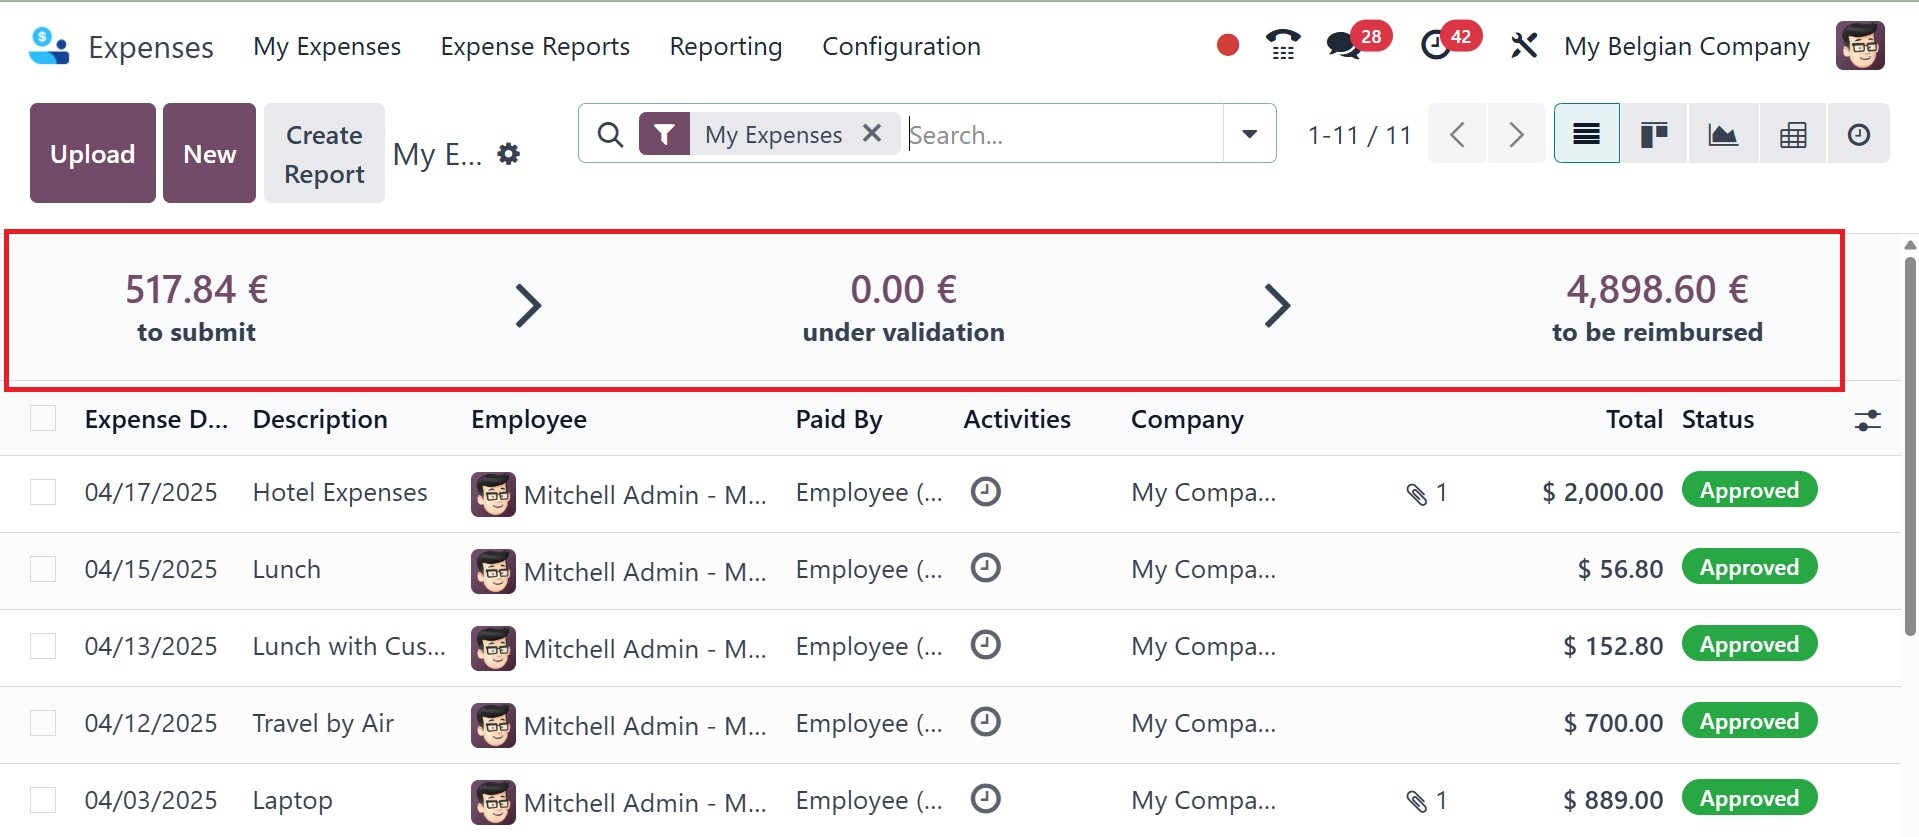
Under Validation:
It displays submitted expense reports that are pending approval. A
report goes through the approval pipeline when an employee submits
it. It needs to be verified (approved) or rejected by managers or
accounting personnel. When managers and accountants notice this,
they typically act.
To Reimburse:
It displays approved expense reports that have not yet been paid or
refunded. Following verification, the expense report is ready for
accounting to complete. The accountant must process the payment
either manually or using an accounting module.
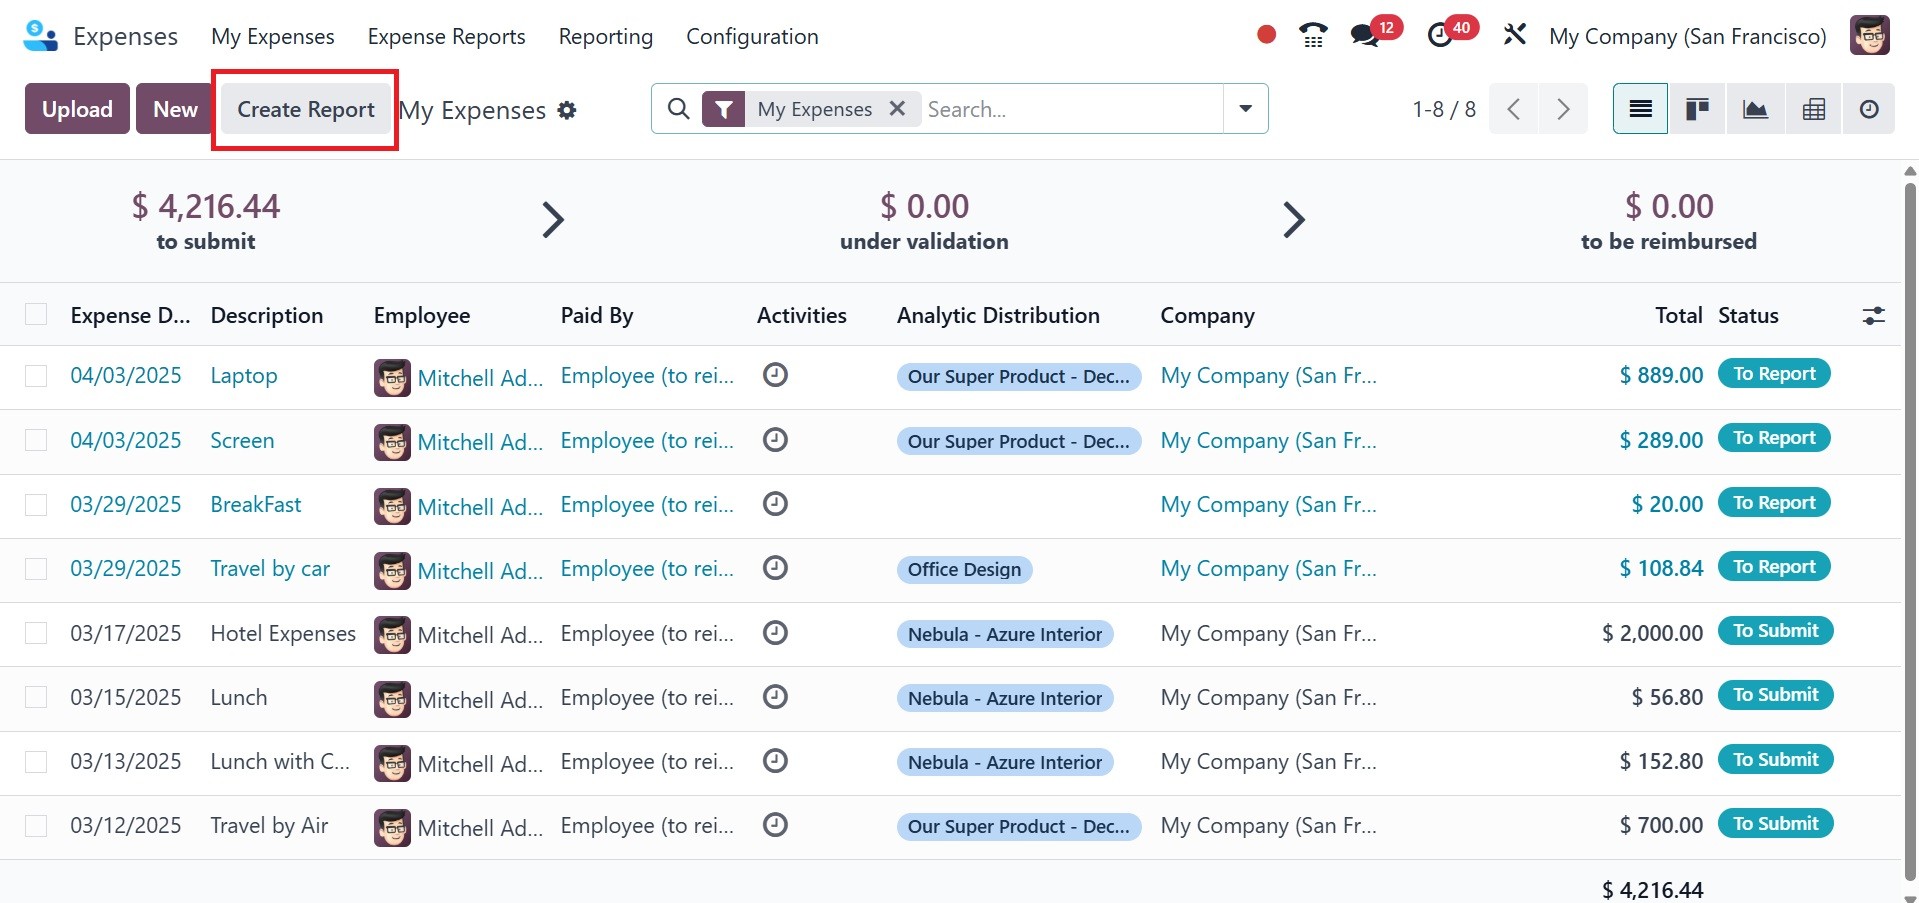
The Upload icon allows you to upload an expense report from your
system. You can also make a new report once you click the Create
Report button. To add a new expense, select the NEW symbol in the My
Expenses pane.
After providing details about your spending in the Description part
of the new window, choose the relevant Category. Numerous spending
categories, including Communication, Gifts, Travel and
Accommodation, Others, etc., are available to users. The Total field
allows users to input the total cost of a specific expense. You can
choose the name of a certain employee in the Employee option.
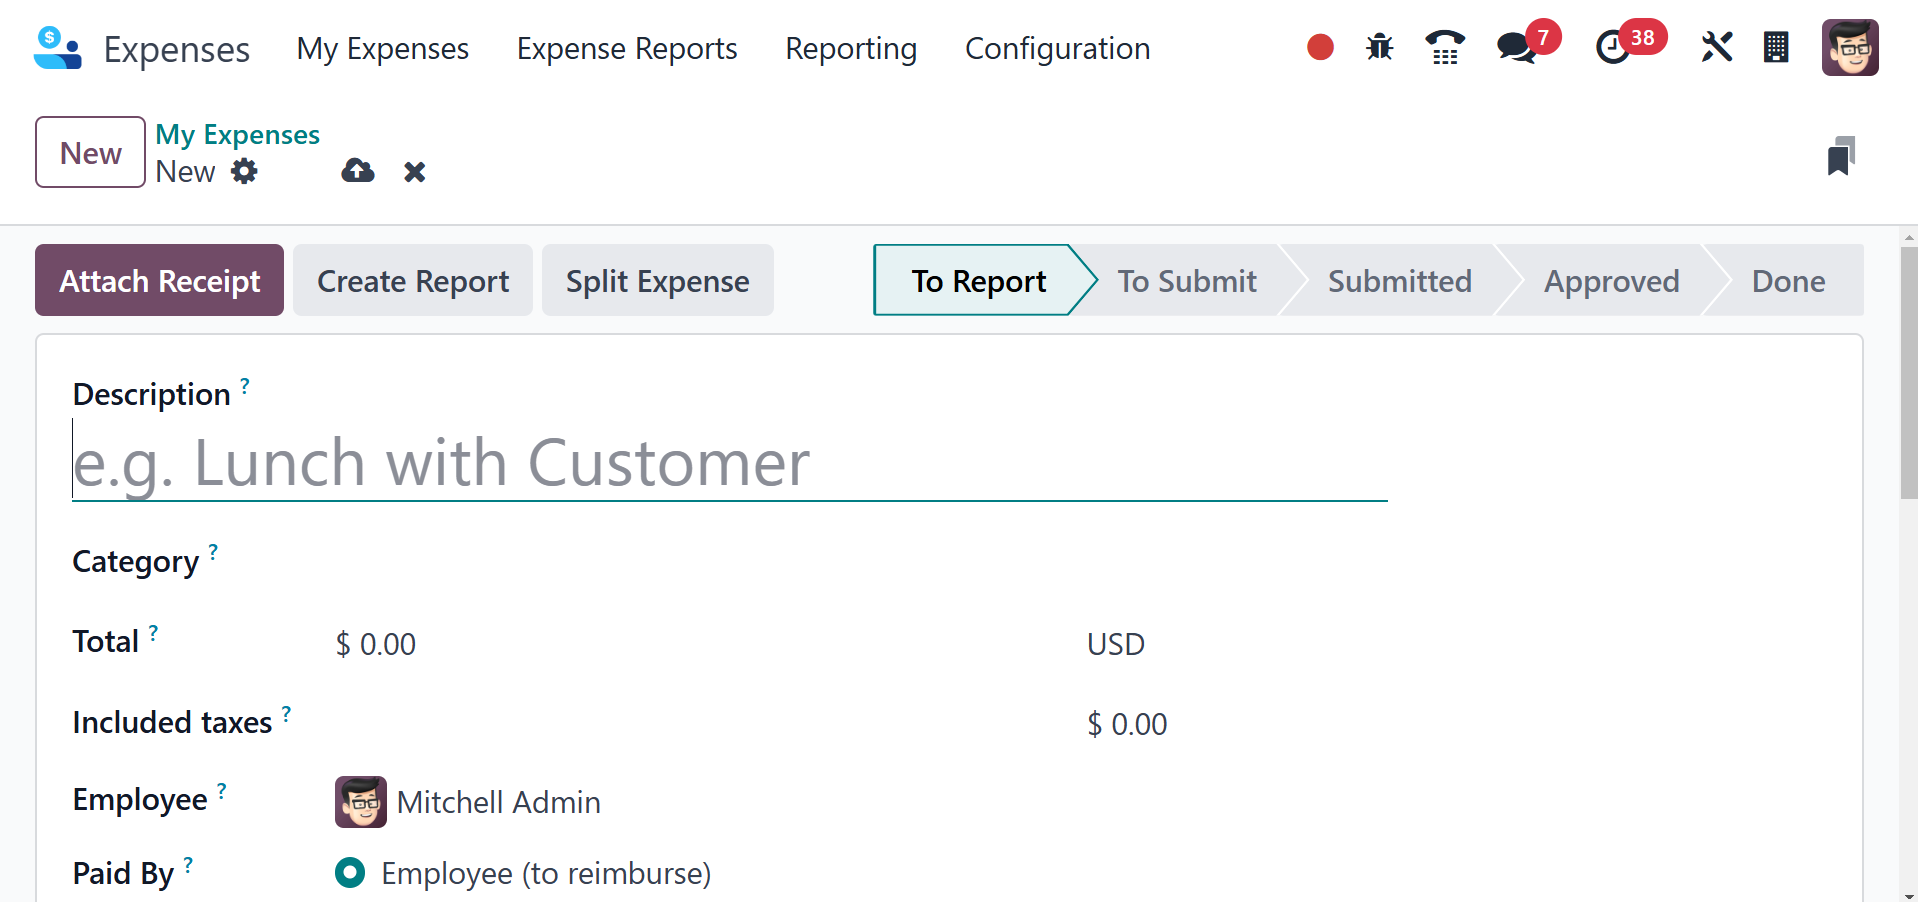
In the Paid By area, you can also select who should cover the cost.
Both the employer and the employee may choose to pay. If the
employee receives payment, the company will reimburse them for any
costs they may have incurred. The Bill Reference and Expense Date,
which indicates the date your item was billed, can also be added.
The Account option allows you to choose the projected expense
account. We may also decide on the name of the company and the
category that clients will be invoiced under.
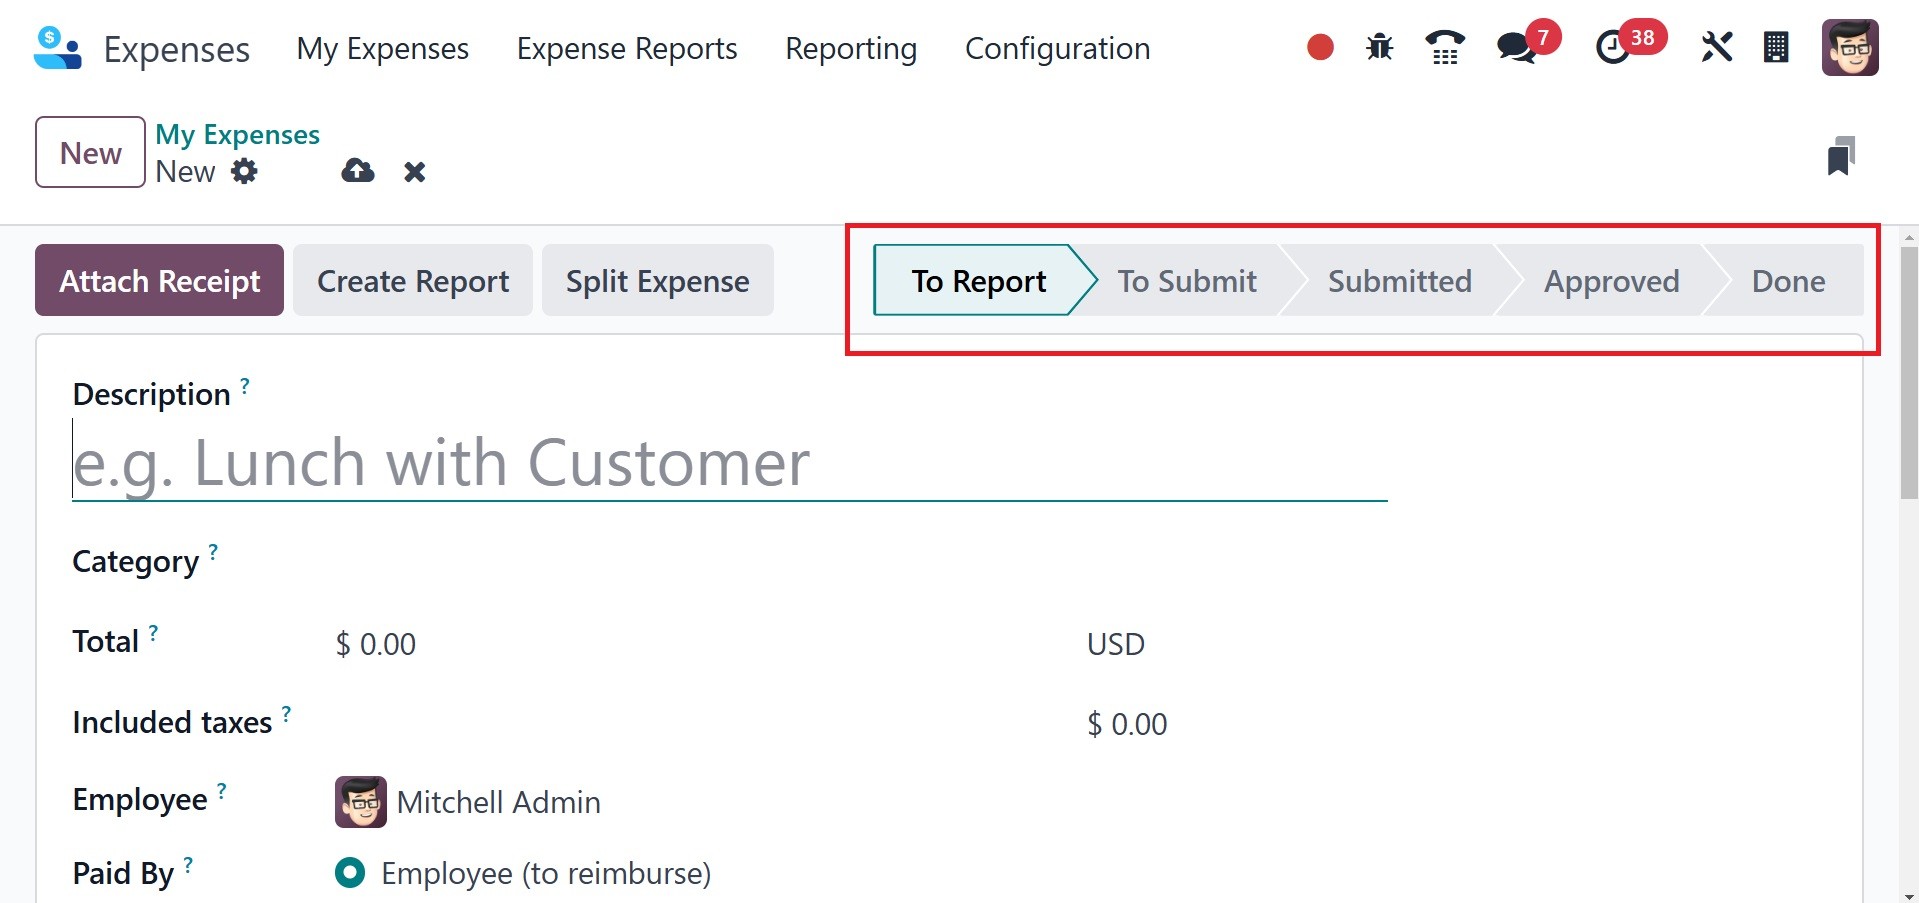
Every piece of data is automatically saved by Odoo 18. You may also
choose to classify the expenditure as Approved, Refused, Submitted,
Done, To Report, or To Submit.
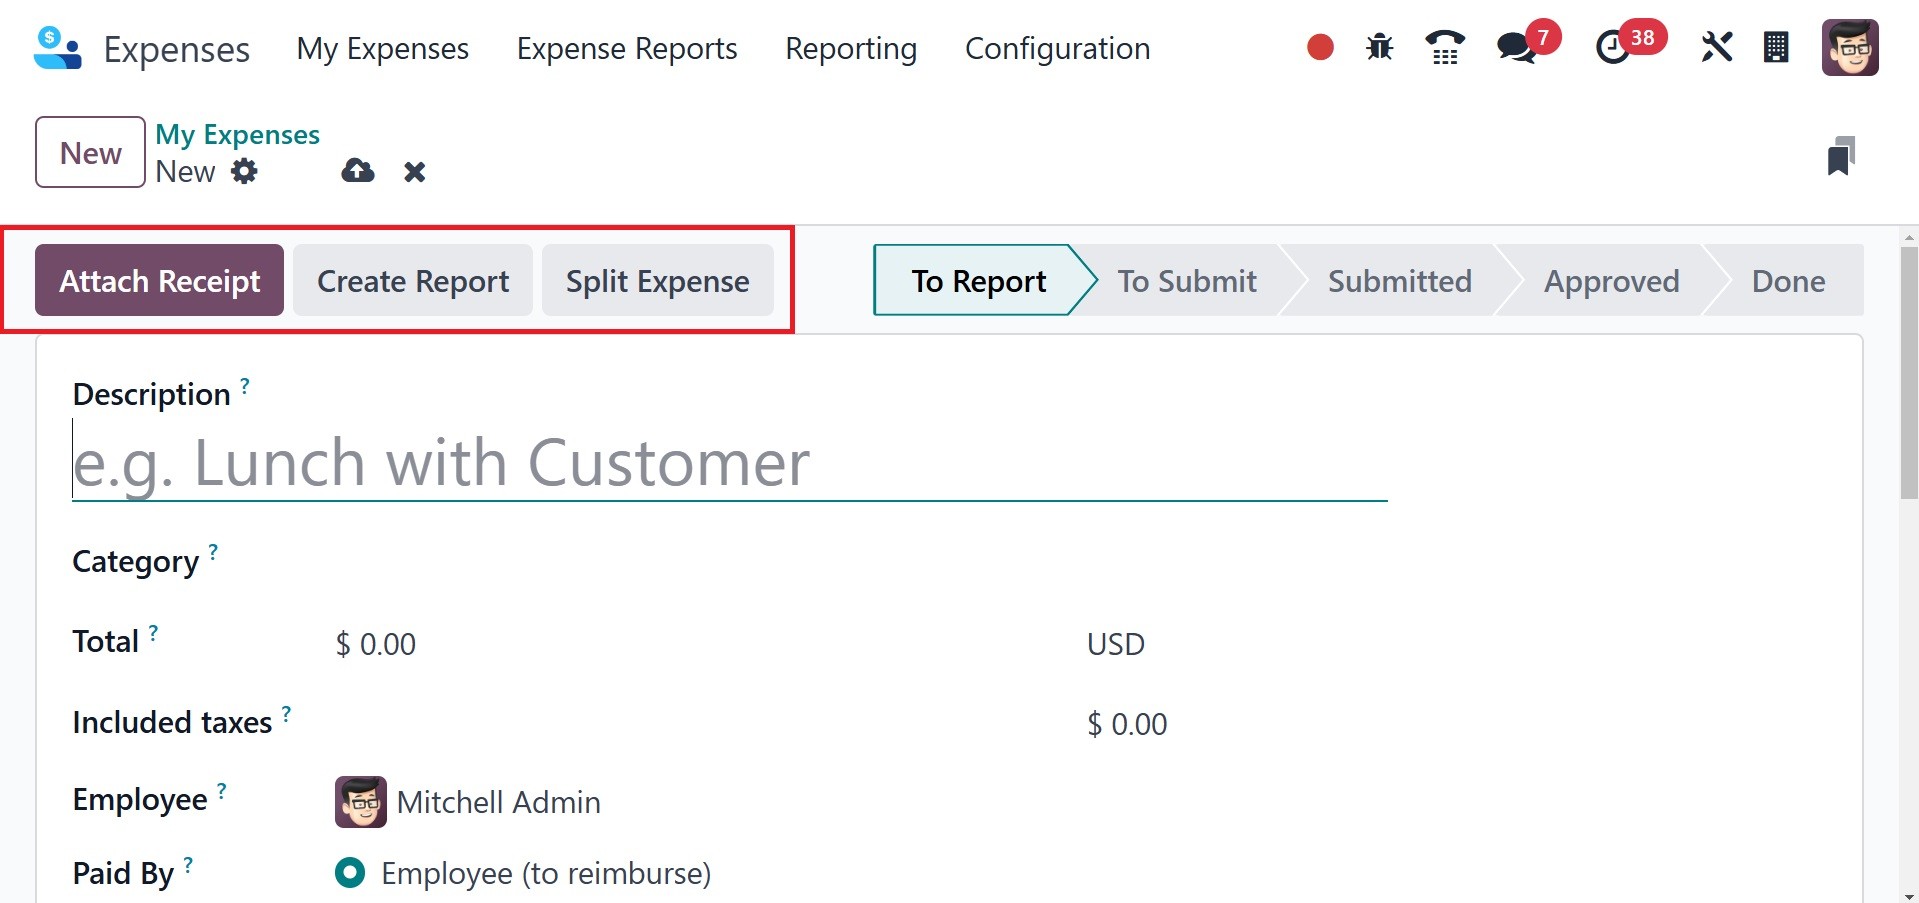
To upload any cost receipt, click the Attach Receipt icon. You can
divide the expense after using the Split Expense button. An expense
report can be rapidly defined by selecting the Create Report icon in
the My Expenses window.
1.2 My Reports
The user can view all of the reports that are currently accessible by
selecting the My Reports option, which is located beneath the My
Expenses item. Every detail of reports on topics like Employee,
Activities, Payment Status, Expense Report, Company, and more are
visible to the user. Choosing the SCAN symbol will allow you to
quickly upload report data to Odoo 18. It's simple to create a new
report after selecting the NEW symbol.
