Regardless of the circumstances,
prioritizing your customers
is essential for the
effective management of your
business. The Field Service
module in Odoo 18 allows you
to provide in-person customer
service efficiently.
Implementing Enterprise
Resource Planning (ERP)
software simplifies and
organizes on-site work
management. Odoo 18
distinguishes itself from
other software by supporting
all processes related to
fieldwork. The system
monitors every stage of a
registered field service.
Customers often require
professional assistance when
implementing or installing
products or services
purchased from a business. In
such cases, you can record
service details within the
Field Service module,
ensuring that the entire
process is tracked.
Additionally, this module
enables you to generate
quotations for field services
and create invoices based on
completed activities or the
number of hours worked.
Upon launching the Field Service
module, the "My Tasks" window
will appear, as illustrated
in the screenshot below.
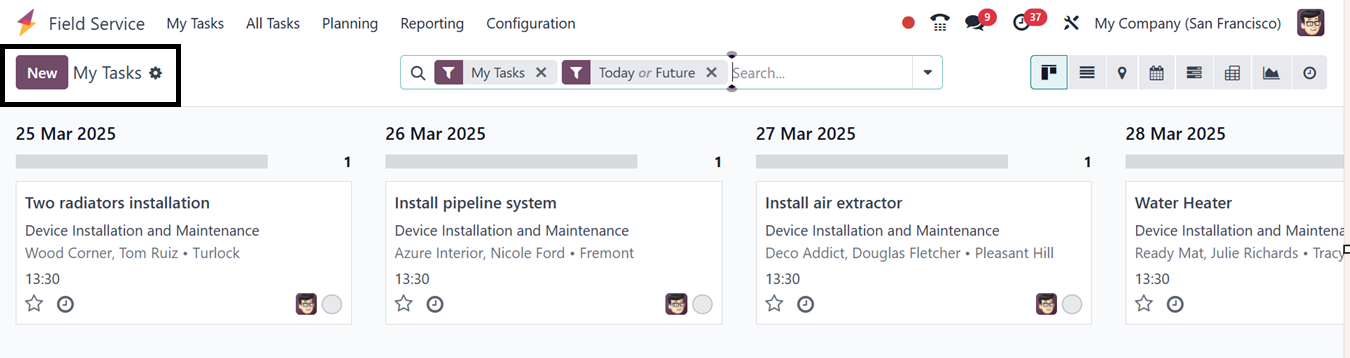
Your assigned tasks will be
displayed in this window in a
Kanban view, allowing for
task management based on
planned dates. This window
provides filters such as My
Tasks, Followed, Unassigned,
Favorite Projects,
Timesheets, Last Stage
Update, Open Tasks, Closed
Tasks, Closed On, and
Archived. Tasks can be
grouped by predefined
categories, including
Assignees, Stage, Project,
Worksheet Template,
Milestone, Customer, Company,
Creation Date, Assignment
Date, and Last Stage Update.
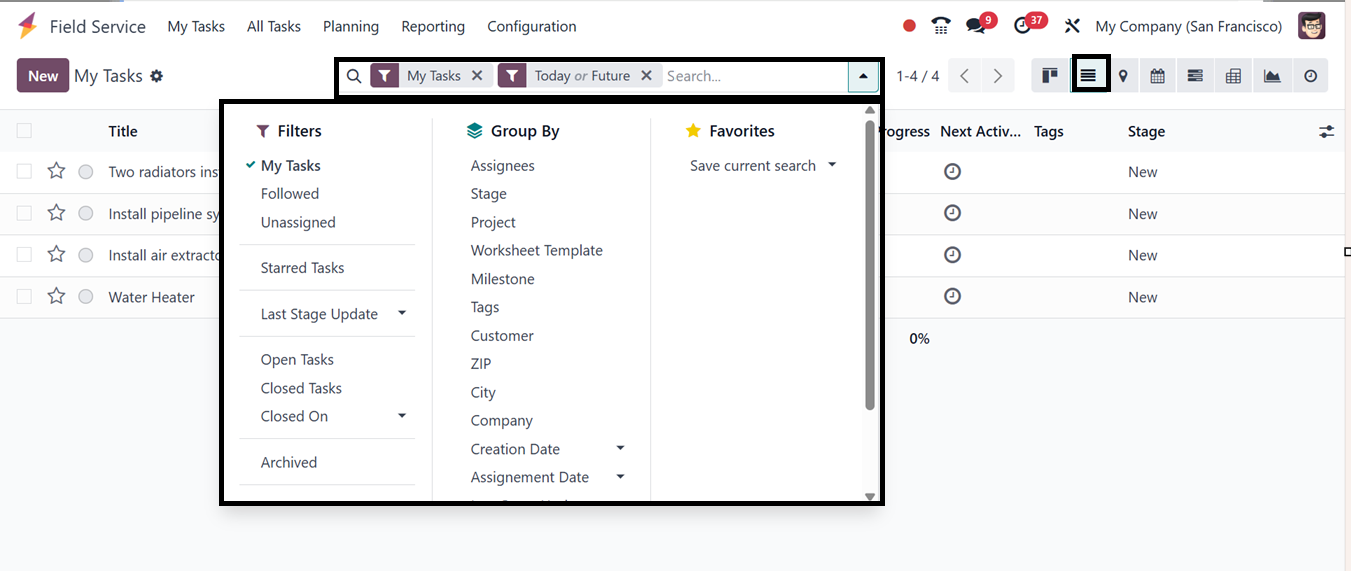
The platform offers various
views, including Kanban,
List, Map, Calendar, Gantt,
Pivot, Graph, and Activity
views. Task details such as
name, customer, assigned
employees, tags, and
scheduled dates will be
visible. To prioritize tasks,
use the star icon.
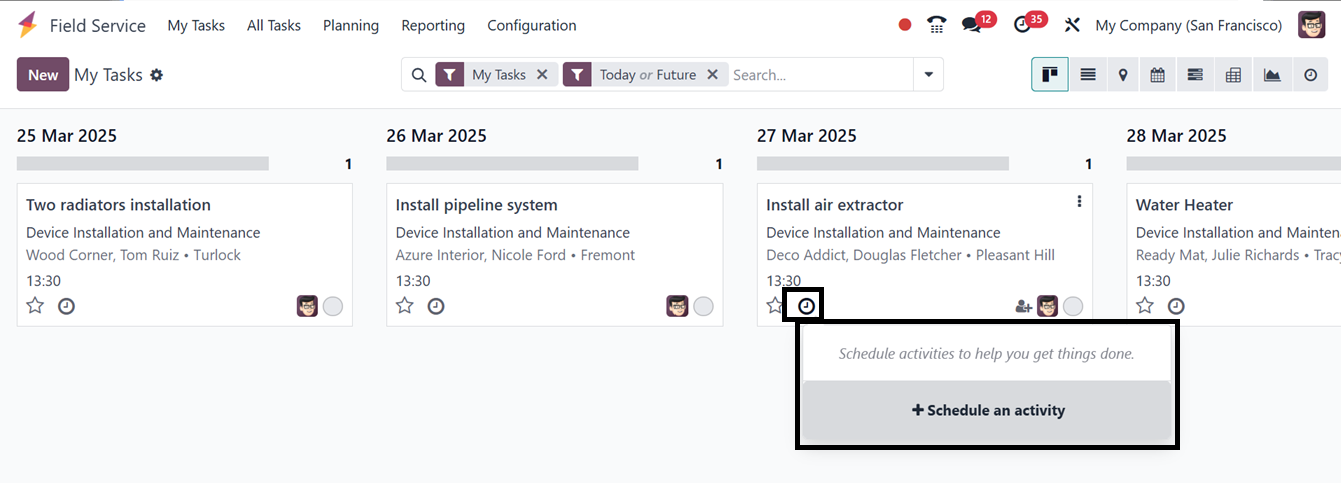
The clock icon on each task
allows scheduling of new
activities. This window
facilitates direct personnel
assignments, providing space
to add new employees to
tasks, as shown in the
screenshot below.
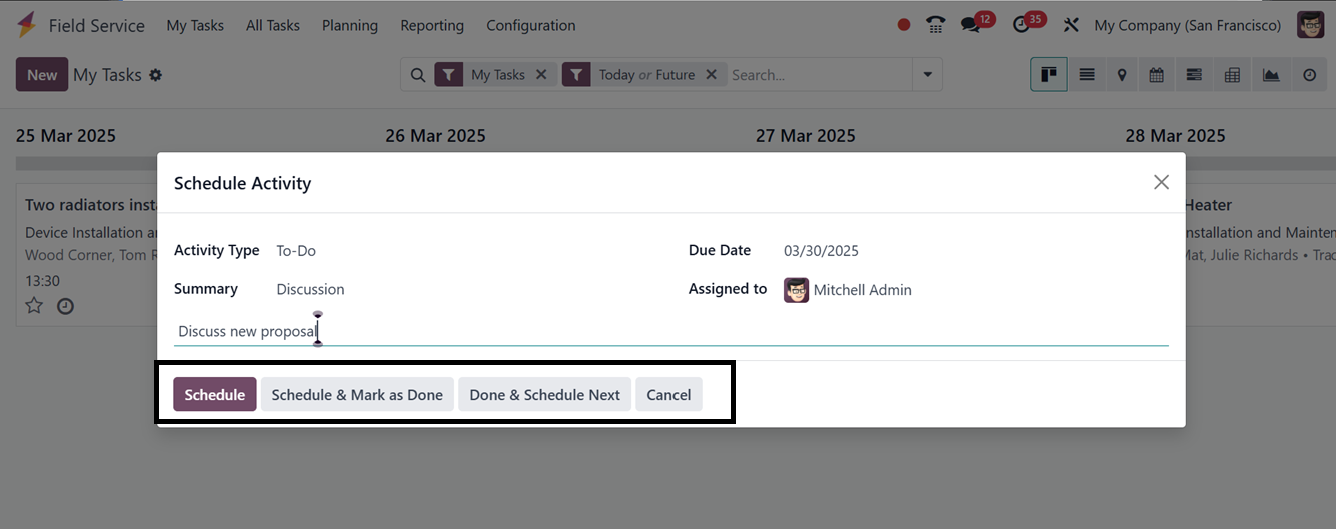
After providing the details, you
can immediately schedule the
activity using the ‘Schedule’
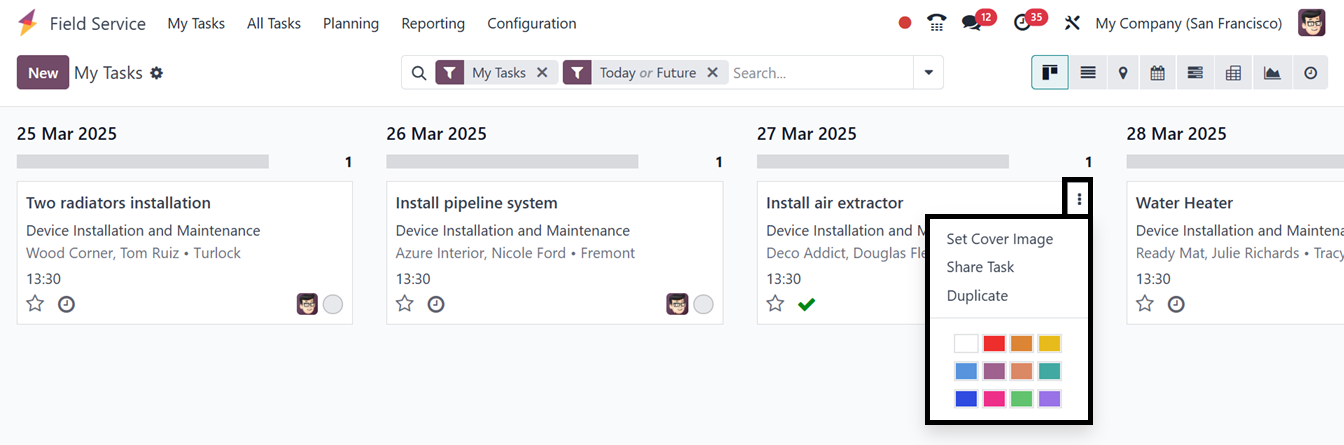
button or Options such as
"Set Cover Image," "Share
Task," and "Duplicate" are
accessible via the three
vertical dots in the
upper-right corner of each
task.
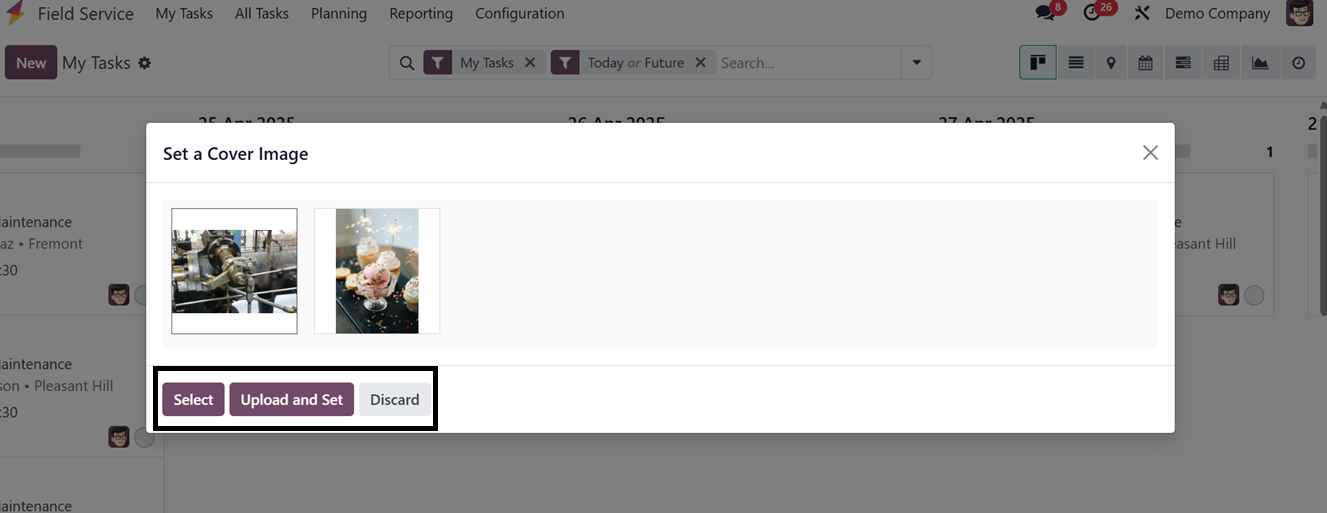
To set a cover image for a task,
click the ‘Set Cover Image’
button located in the task’s
kanban menu. A pop-up window
will appear, allowing you to
select the ‘Upload and Set’
option to upload an image
file directly from your
device storage, as depicted
in the screenshot below.
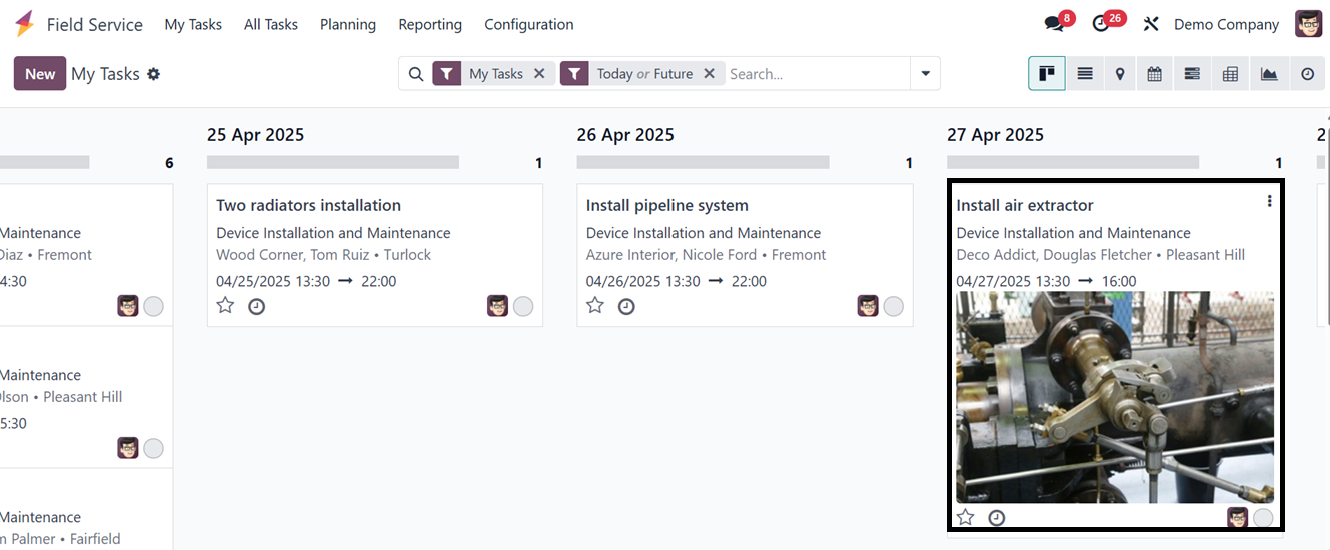
After choosing the image, you can
see the cover image inside
the kanban view of the task
as depicted in the image
below.
If you want to change the cover
image, click on the ‘Set
Cover Image’ button again and
choose the ‘Remove Cover
Image’ button or choose
another image.
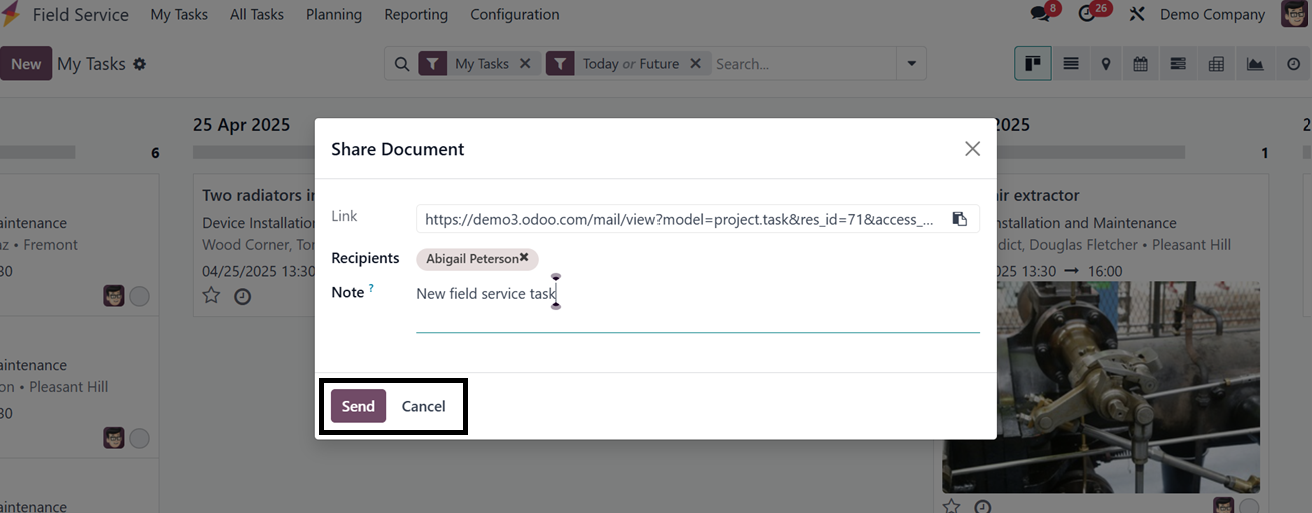
The ‘Share Task’ button in the
kanban view allows you to
share task details with an
employee or the assigned
responsible person. When you
click the button, a pop-up
window will appear, providing
a document sharing link along
with options to select the
Recipients and add or edit
Notes, as shown in the
screenshot below.
The task details document will be
sent via email with a link,
facilitating efficient task
monitoring and enhancing
transparency.
The ‘Duplicate’ button allows you
to create a copy of the task,
generating a new task with
the same details, as
illustrated in the screenshot
below.

1.1 Adding a New Task
To create a new task, click the
"New" button, which will open
the form view, as depicted in
the screenshot below.
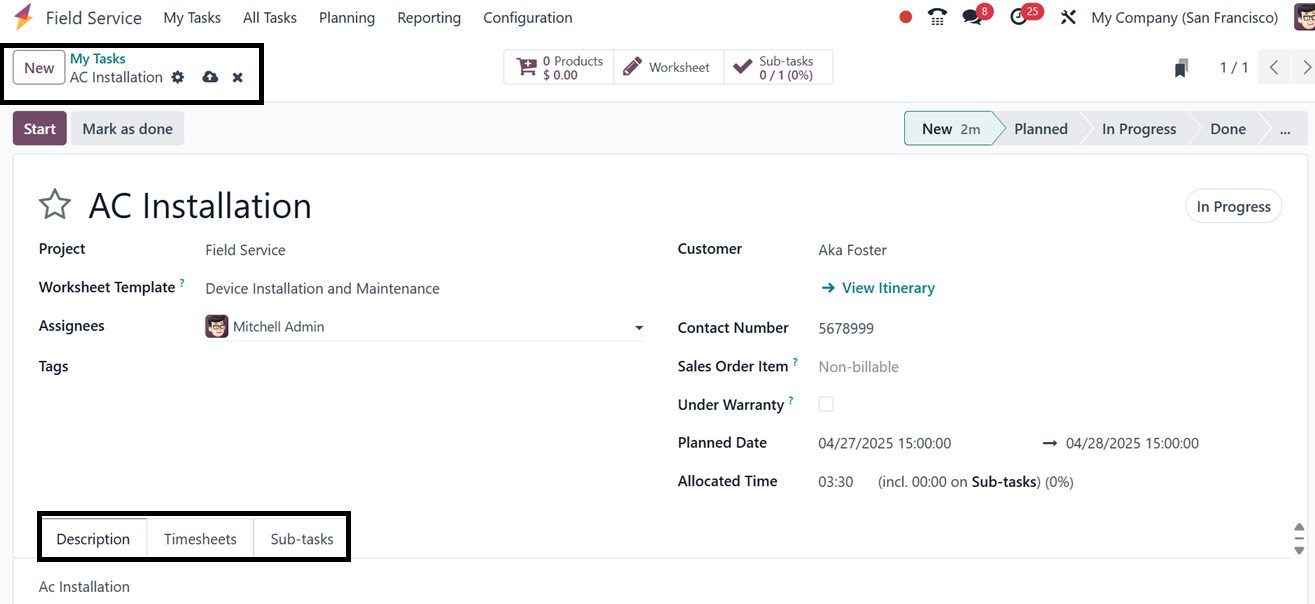
Enter the task name in the
designated field. Tasks can
be organized under specific
projects created for this
service in Odoo 18. The
‘Project’ can be selected
from a drop-down menu.
Additionally, a suitable
worksheet template for the
activity can be chosen.
Employees can be assigned
under the "Assignees"
section. Tags relevant to the
task can be added, and
customer details can be
entered in the "Customer" and
‘Contact Number’ fields. The
‘Sales Order Item’ section
allows selection of a sales
order to invoice the task. To
indicate that the work is
covered under warranty and
will be offered as a free
service, next enable the
'Under Warranty' option. The
allocated time for the task
can be specified in the
"Allocated Time" section, and
the scheduled date in the
"Planned Date" column.
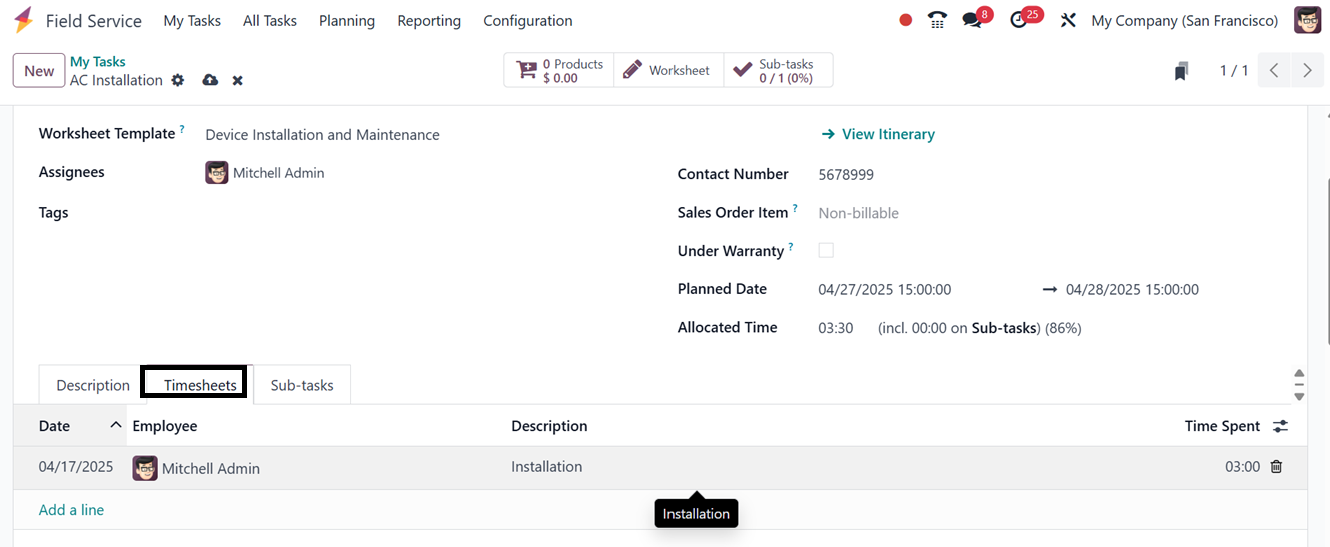
Then, additional task details can
be recorded under the
"Description" tab. The
"Timesheet" tab enables
tracking of time spent on
tasks. Clicking "Add a line"
allows entry of Date,
Employee, Description, and
Hours Spent, as illustrated
in the screenshot below.
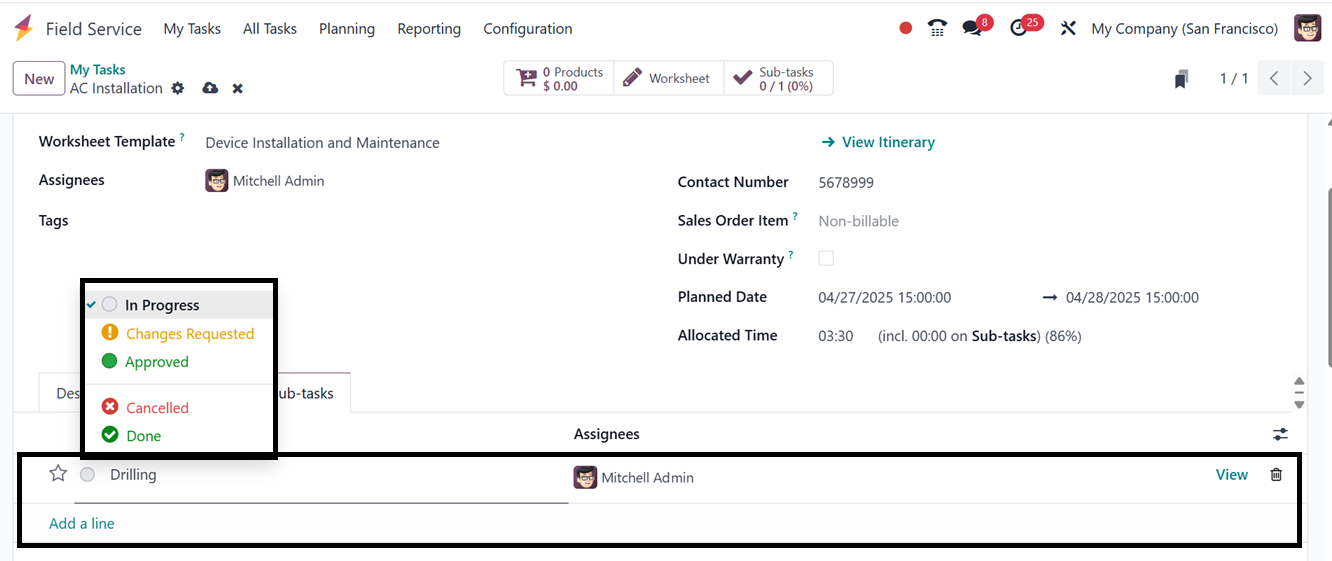
Tasks can be divided into
sub-tasks under the
"Sub-tasks" section for
systematic monitoring.
Employees can also be
assigned to these subtasks
from this section.
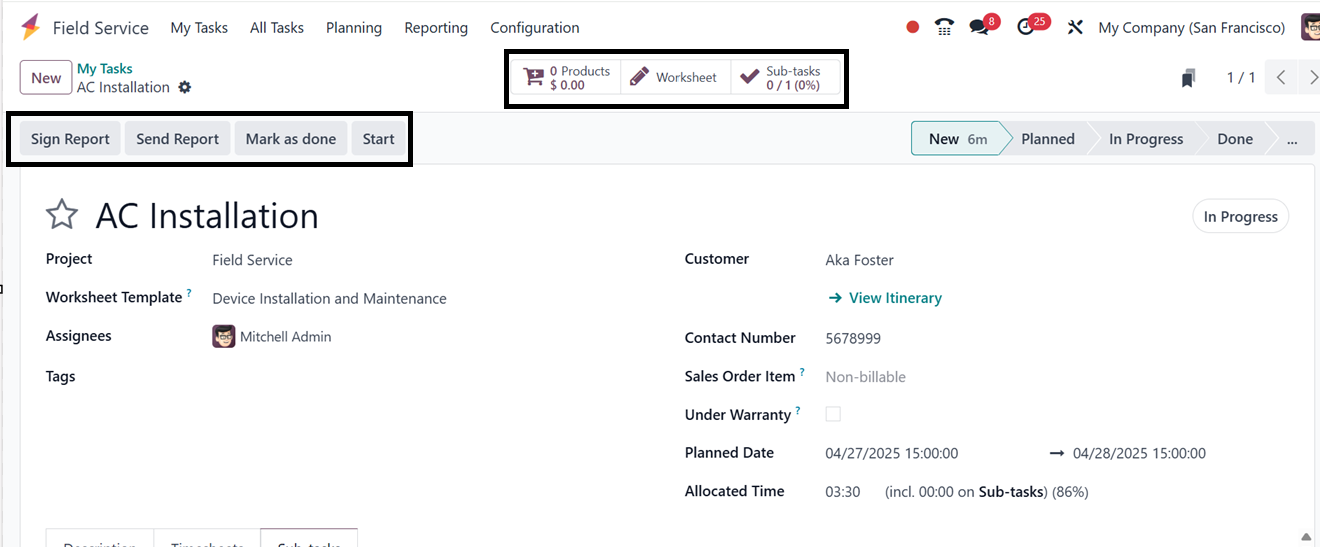
The form view includes smart
buttons labeled "Products,”
"Worksheet," and “Sub-tasks”
providing insights into
associated worksheets and
goods. Once configured,
clicking on the "Start"
button will automatically
track time spent on the task.
Pressing "Stop" upon task
completion prompts a
confirmation window to verify
the recorded time.
1.2 Creating a Worksheet for
a Field Visit
Odoo 18's Field Service module
allows the addition of
worksheets to field visit
tasks, capturing detailed
information, checklists, and
service-specific forms. Tasks
within a project are linked
to the worksheet, allowing
technicians to complete tasks
during or after visits using
the ‘Worksheet’ Smart button.
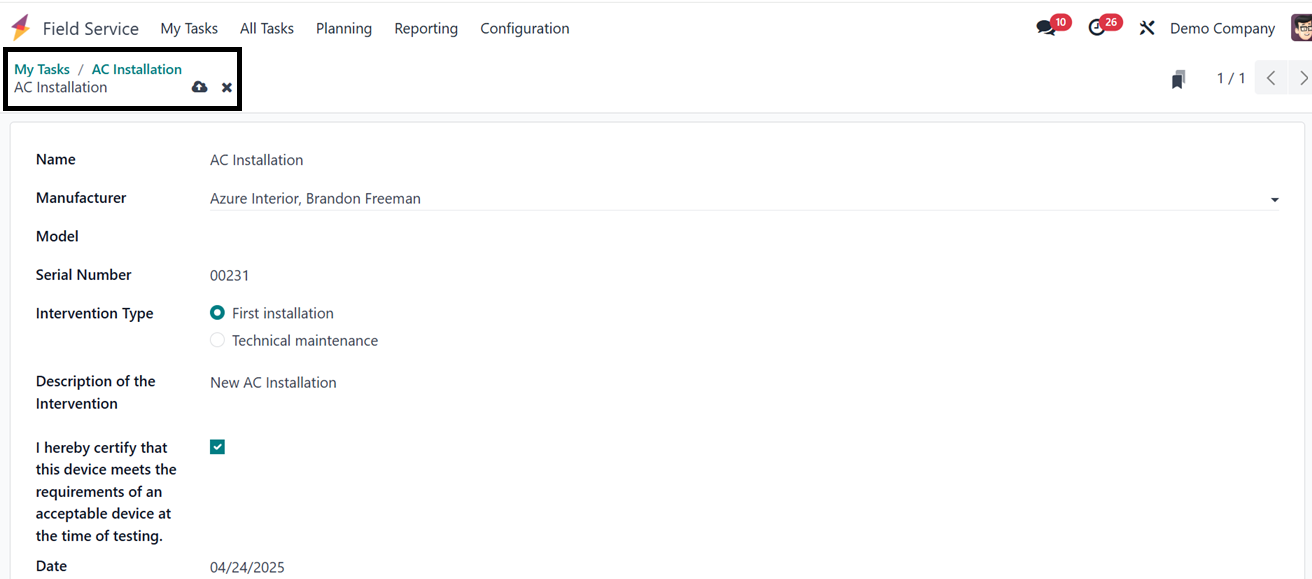
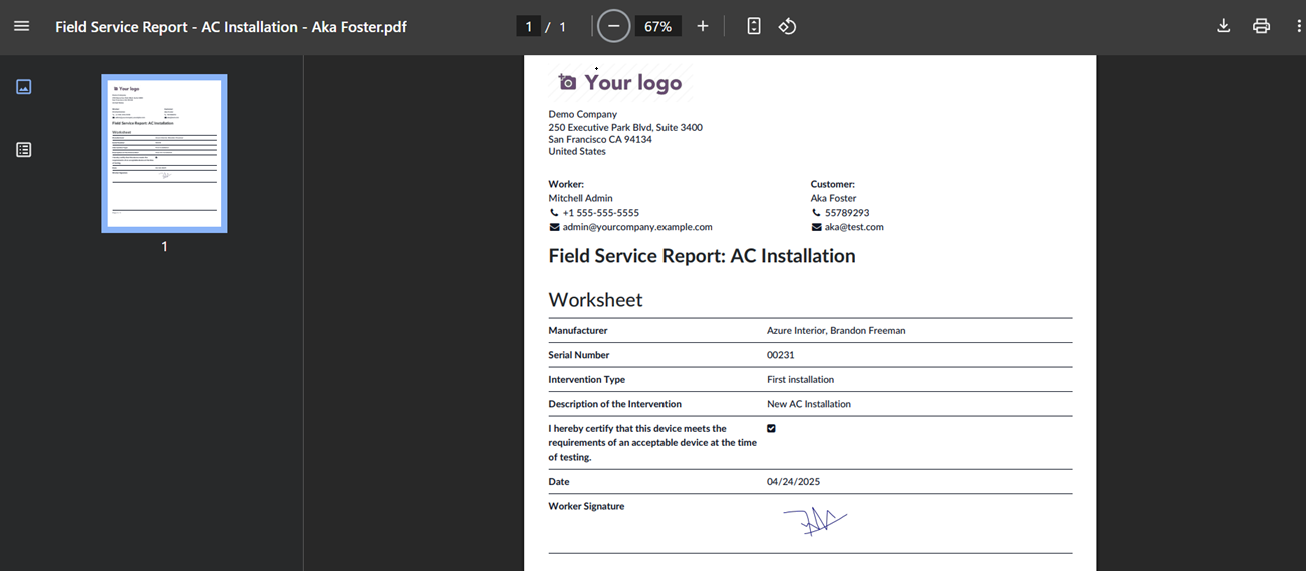
The ‘Worksheet” smart button will
open the worksheet of this
particular task where, you ca
add the required details
including the Task Name,
Manufacturer of the device,
Model, Serial Number,
Intervention Type,
Description about the
intervention, Date and a
certification assurance about
the product or service with
an employee signature, as
depicted in the screenshot
below.
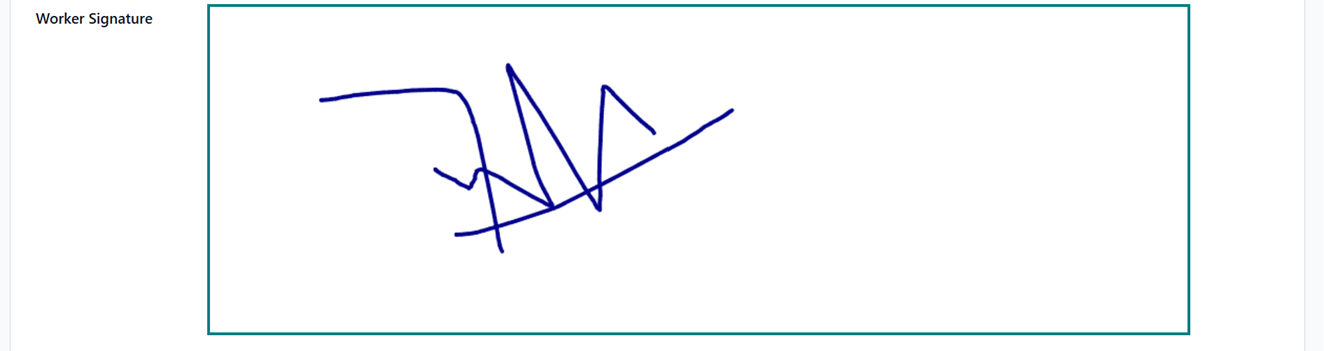
By clicking on the signature
column, you can upload or
draw your signature inside
the displayed window, as
illustrated below.
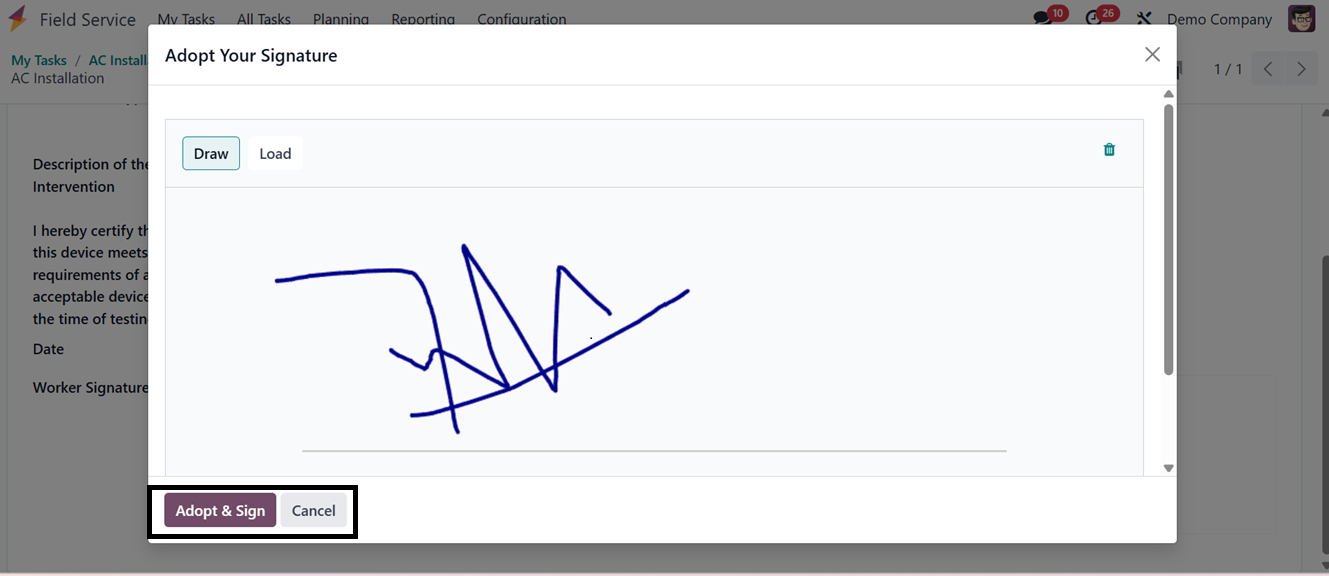
After clicking the ‘Adopt & Sign’
button, the employee sign
will be added to the
worksheet document.
After completing the task, you
can print this worksheet
document by selecting the
‘Field Service Report’ option
from the ‘Print’ button
located within the ‘Action’
menu at the top of the field
service configuration page.
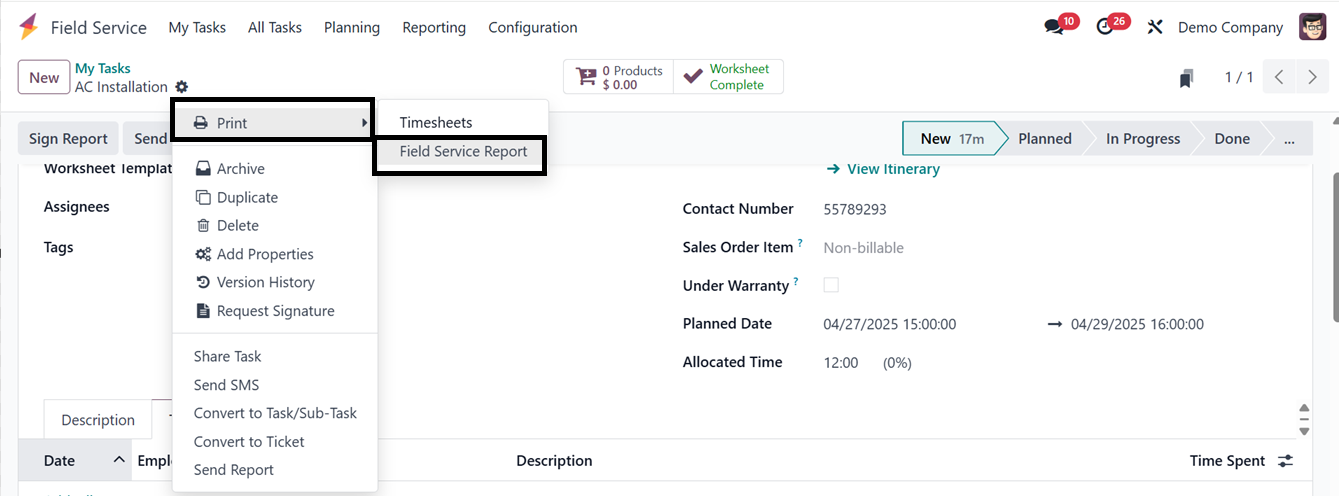
The worksheet document will be
downloaded into your system
and it can be printed using
an external device, as
depicted in the screenshot
below.
After confirming the time, the
"Timesheet" tab will maintain
a record of the task. To
start tracking project time,
click on the “Start” button
after completing the
configuration, so that Odoo
will automatically start
tracking time. Once the task
is completed, use the “Stop”
button to confirm the
recorded time, which will
appear in a pop-up window.
Clicking "Mark as Done" will
finalize the task, making an
invoice generation button
available.
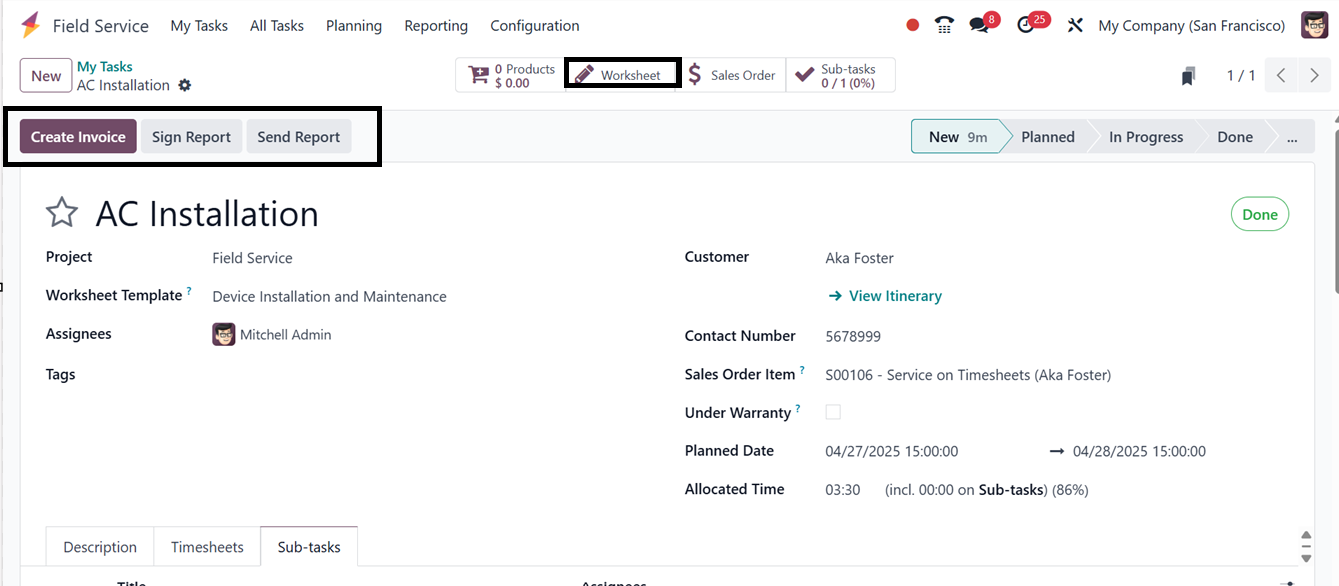
A "Send Report" button enables
sending the worksheet report
to the relevant customer via
an auto-generated email with
attachments. Clicking "Sign
Report" grants access to the
customer portal, where users
can digitally sign documents.
Clicking on the ‘Create Invoice’
button will open a pop-up
window, where you can choose
the invoice type, whether it
is a Regular Invoice, Down
Payment(percentage), and Down
Payment(fixed amount) with
Timesheets Period, as
illustrated in the screenshot
below.
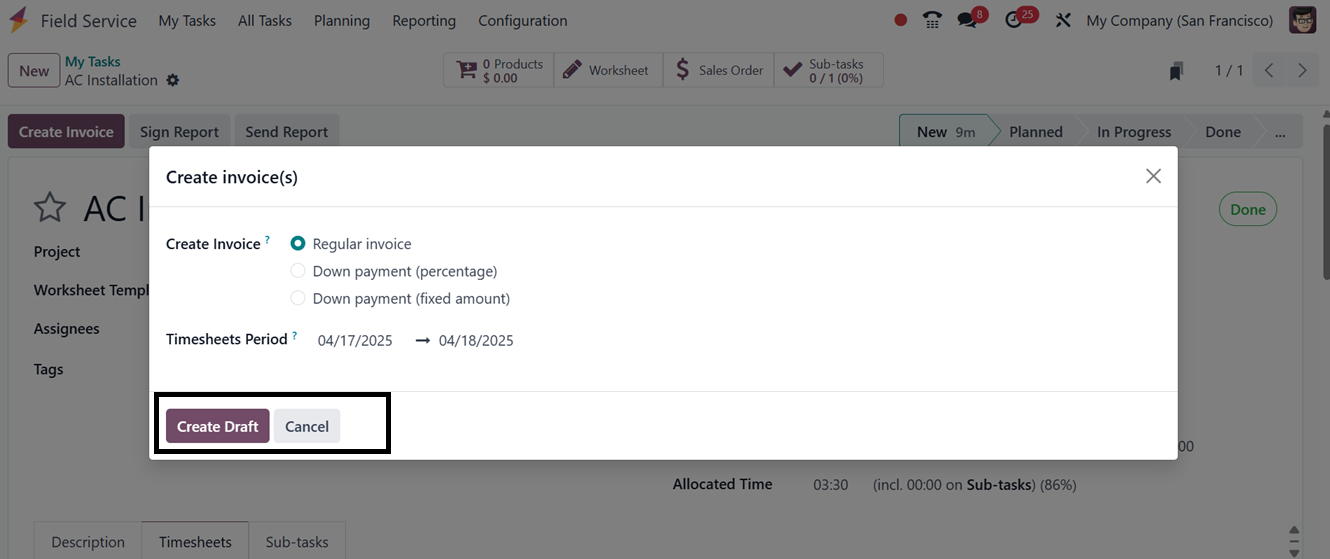
The ‘Create Draft’ button will
create the invoice with the
Invoice details, including
Invoice Lines, Journal Items,
and other basic invoice
details.

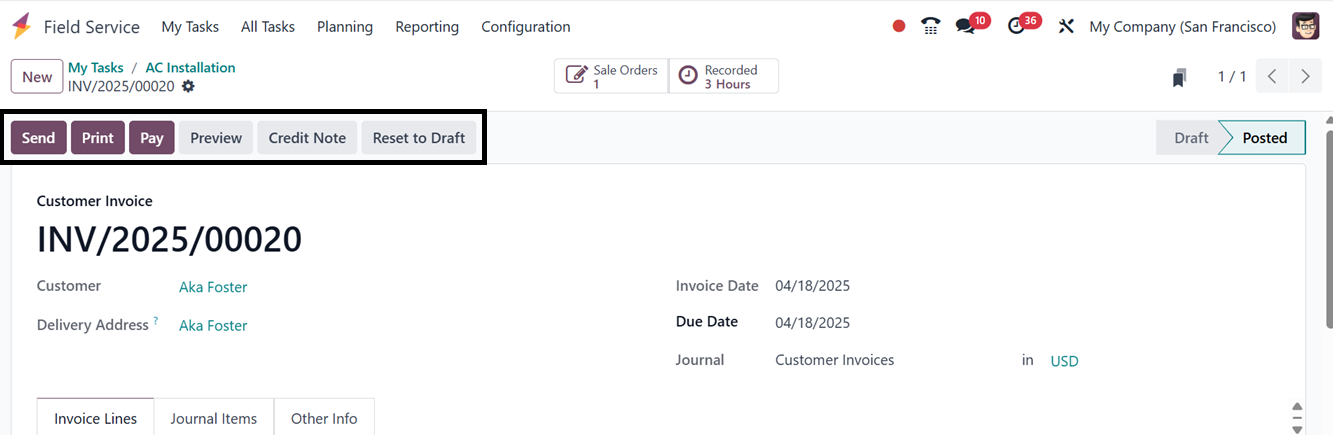
After editing and confirming the
invoice, you can send, print,
complete the payment, check
invoice print preview, make
credit notes and reset to
draft using the Send, Print,
Pay, Preview, Credit Note and
Reset to Draft buttons,as
illustrated in the screenshot
below.
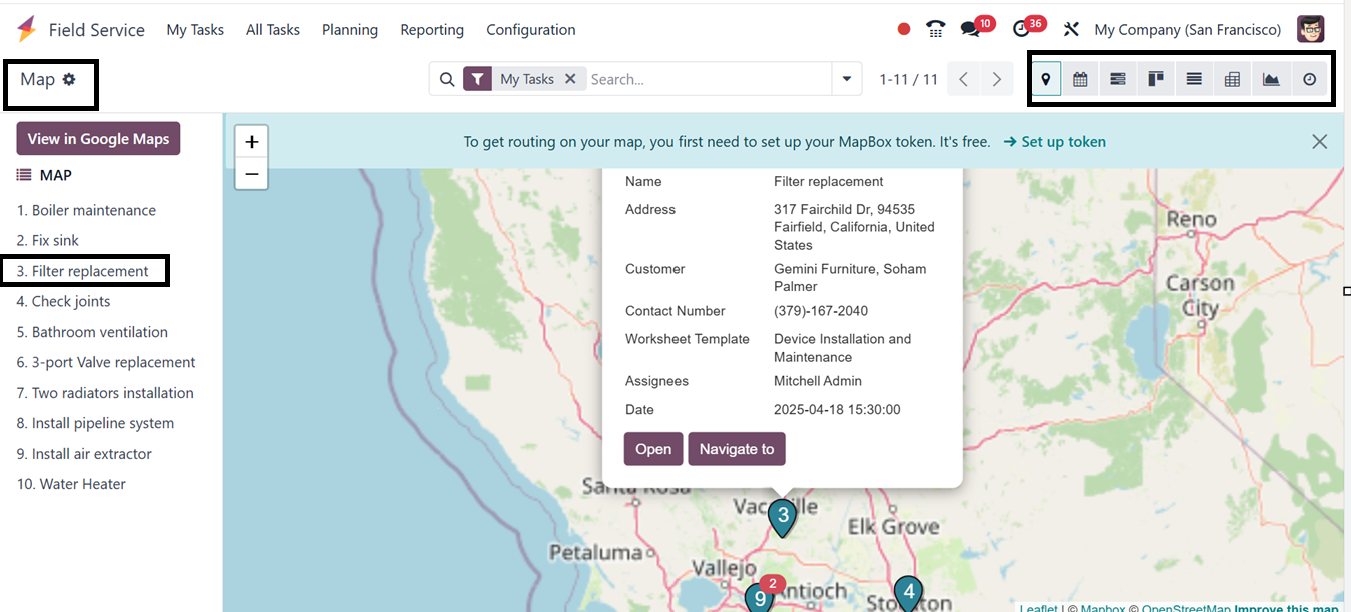
1.3 Viewing Tasks on a Map
The Field Service module in Odoo
18 (Enterprise) has a Map
view that enables you to
visually monitor and manage
jobs according to their
location. Use the map symbol
in the upper-right corner to
get to the Map view. On the
map, tasks with valid client
addresses will show up as
pins. You may click on any
pin to see more information
about the job, as depicted in
the screenshot below.
The customer's address determines
the task locations, so make
sure it has all relevant
information (street, city,
zip code, and country) and
that geolocation is enabled,
usually using Google Maps or
a comparable tool. Tasks
won't show up on the map if
their geolocation information
is invalid.
Clicking on the ‘Open’ button
from the task card in the map
area will open the task
configuration form of the
particular task. Clicking on
the ‘Navigate to’ button will
open the Google map services
for easy navigation so that
the field service employees
can easily locate the
customer address.
Using the ‘+’ and ‘-’ icons, you
can zoom in and zoom out the
map view. Apart from the map
view, users can also utilize
the calendar, Gantt, pivot,
list, Kanban, and graphical
view of the tasks using the
respective icons provided at
the top right corner of the
window.