1. Station
A station is simply the workspace of an office. As a result, one can examine each
created workstation directly from the dashboard. To add a new one, click the New
button.
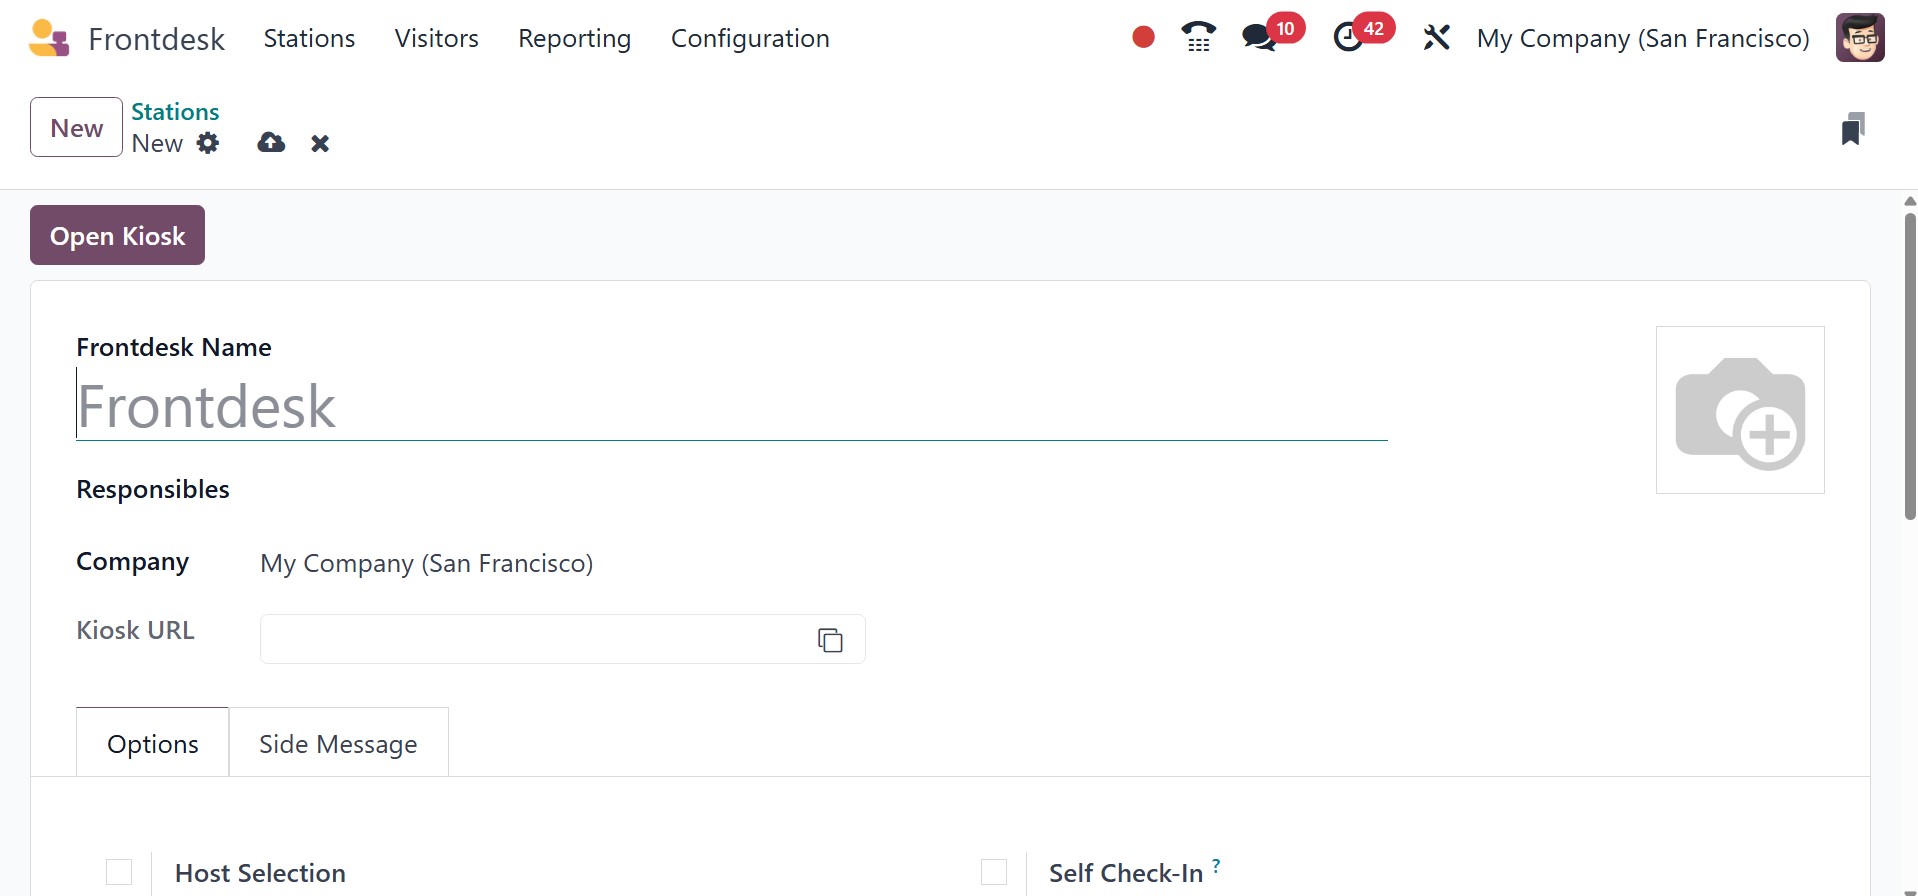
First, provide the name of the front desk. The users with responsibilities are the
ones who get visitor notifications. After that, you can enter the company's name.
The Kiosk URL is then also displayed in the form view. Then, the Options menu facilitates
the addition of additional configurations.
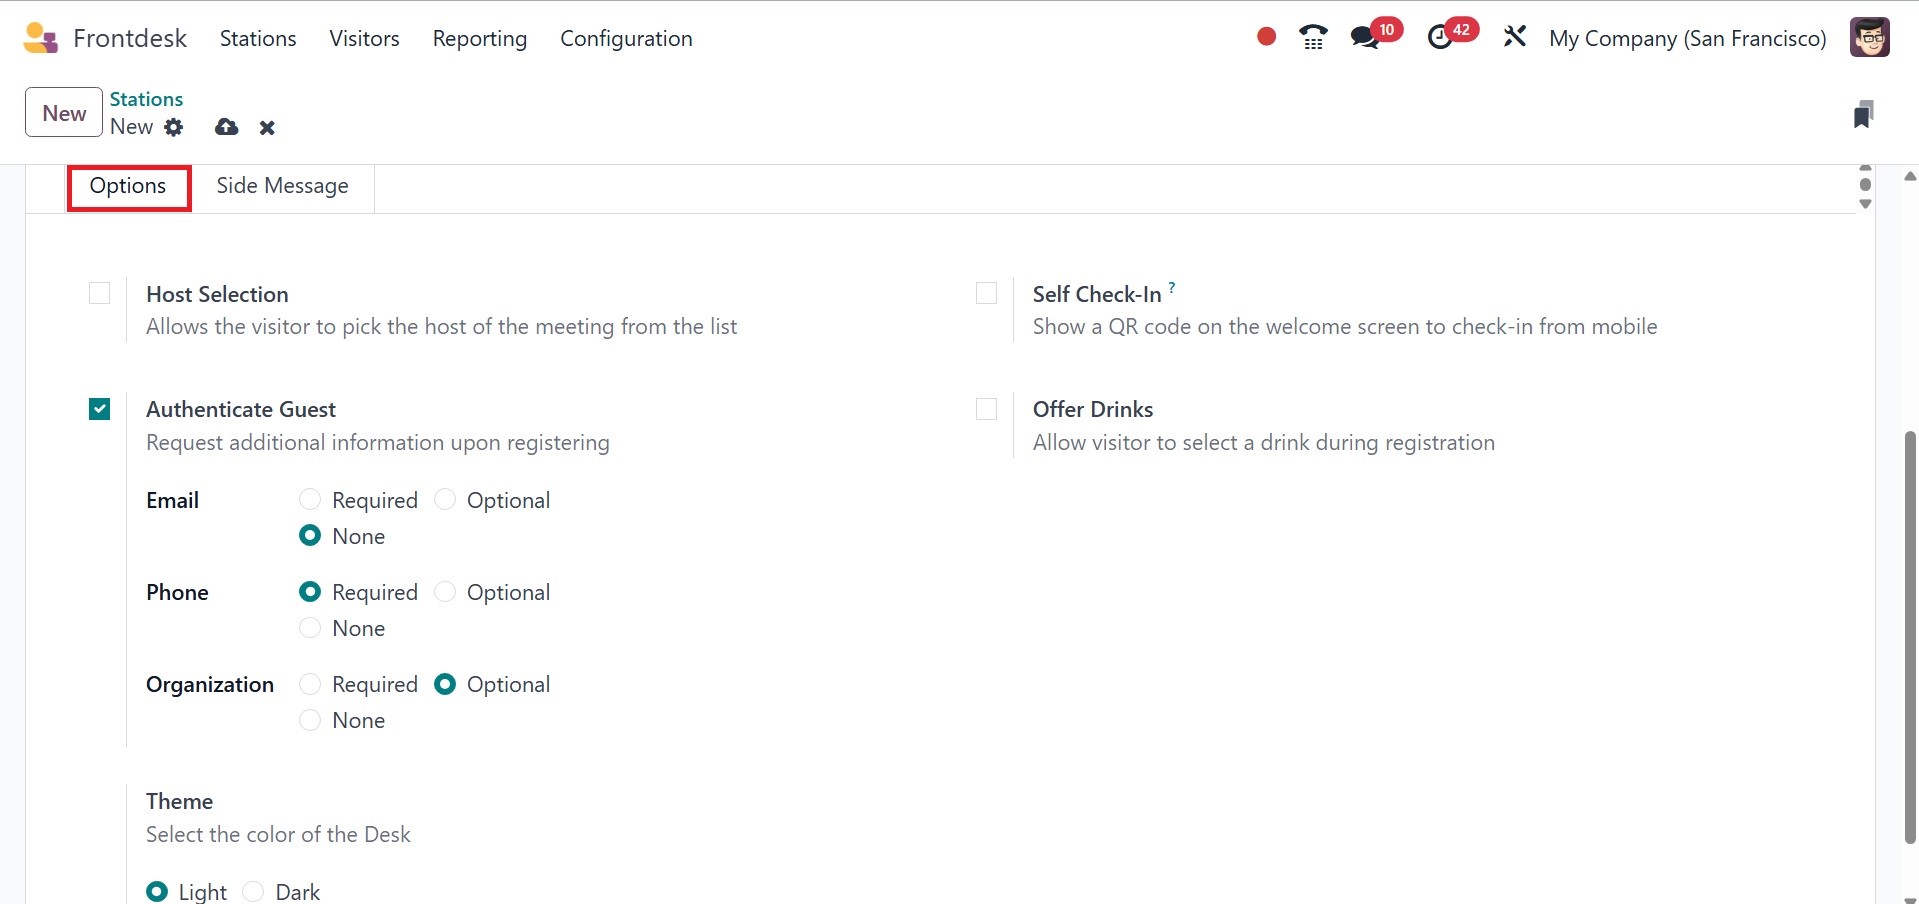
Through host selection, the visitor will be able to choose the meeting's host from
the list. Verify that when guests sign up, they will be asked for more information.
The Notify by Email and Notify by SMS features assist in informing the host via
email and SMS when guests arrive. Self Check-In offers a QR Code on the welcome
screen for mobile device check-in. Offer Drinks enables you to serve snacks or beverages
to guests and allows them to select their preferred beverage upon registering. A
chat window will open on the user's computer when a guest comes if they have enabled
"Notify by discuss." The color of the desk can be either light or dark, depending
on the theme.
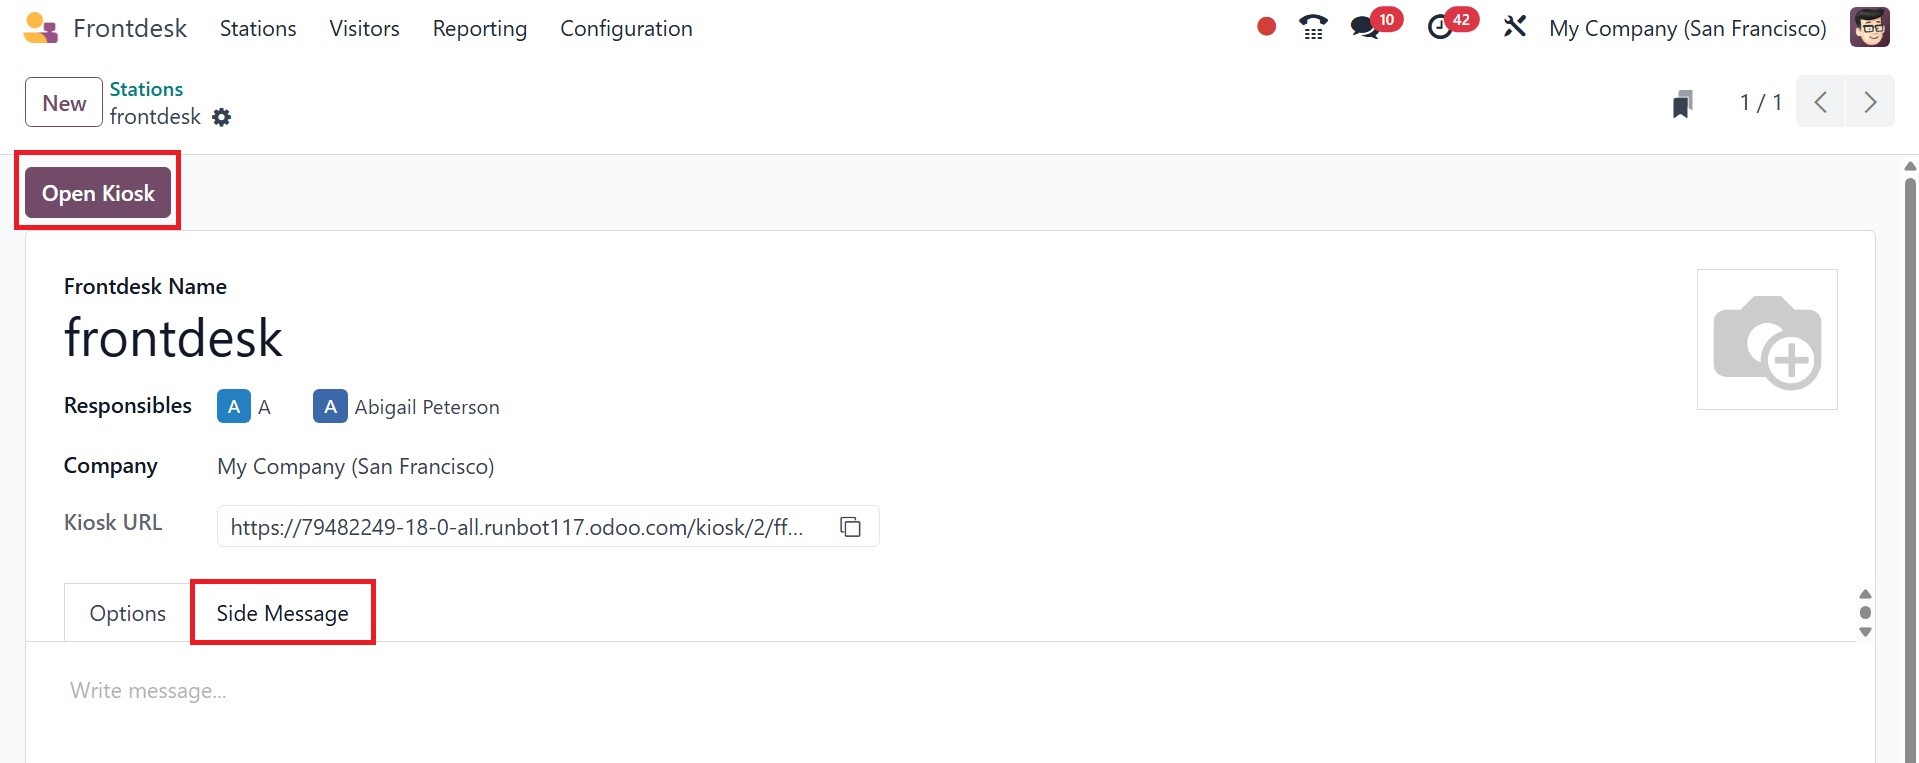
The following tab, Side Message, facilitates adding any messages. Click the Open
Kiosk symbol in the upper left corner after the configuration is complete.
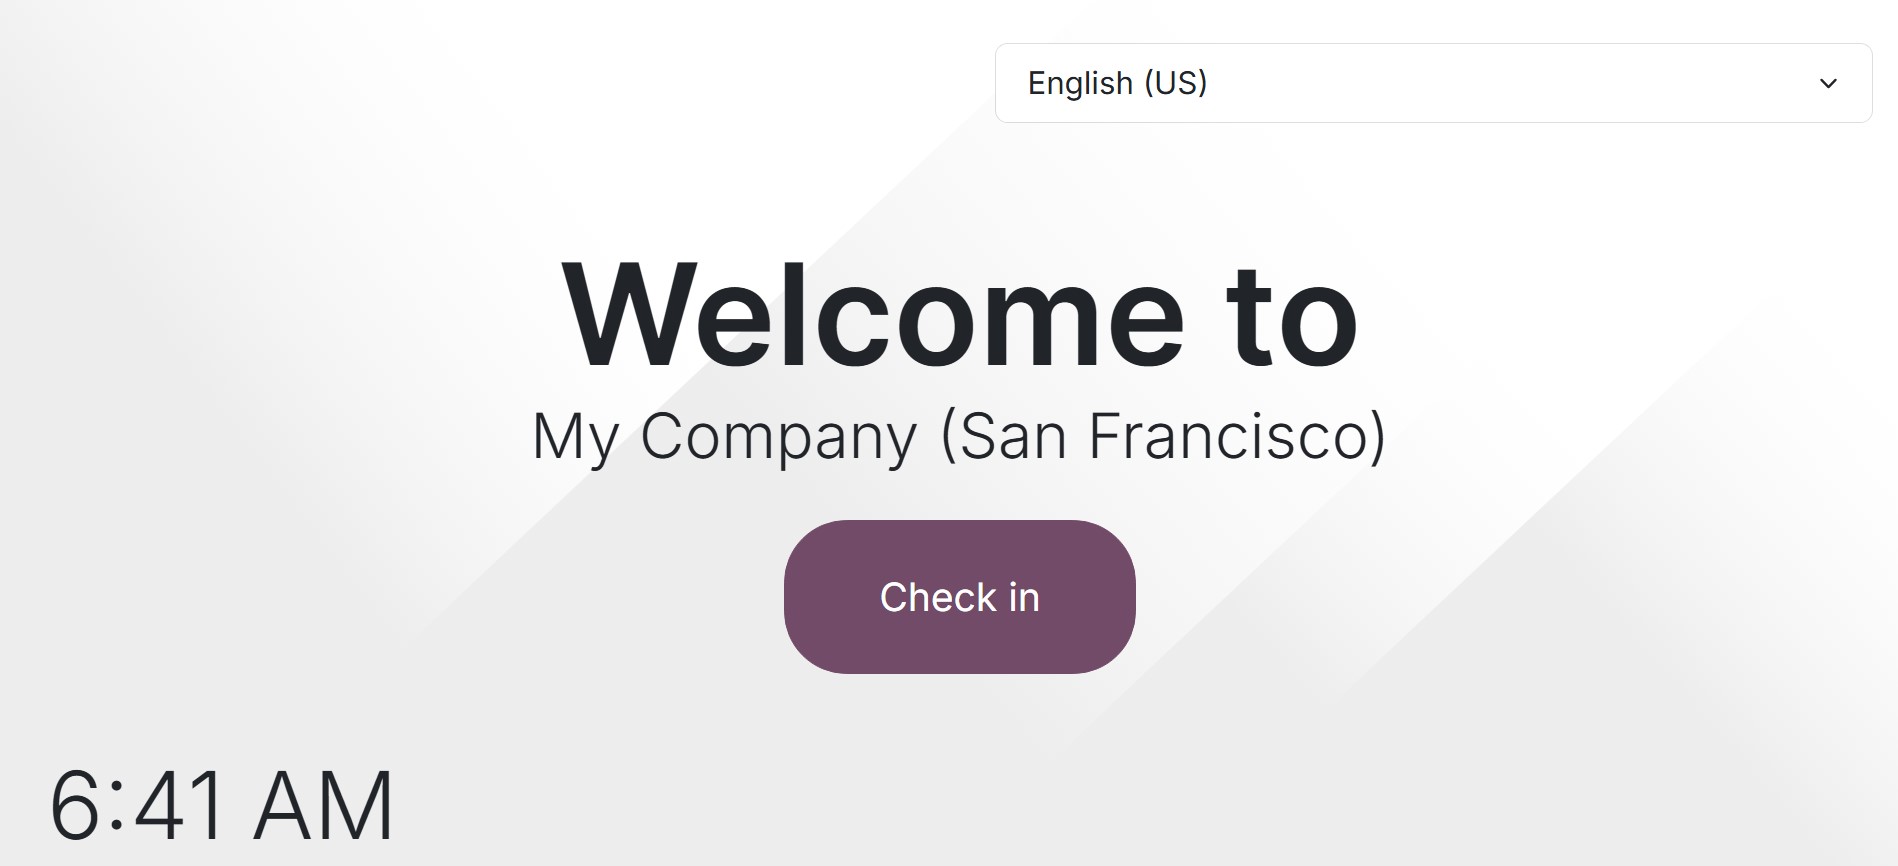
The screen displays a welcome message. Guests can either click the Check In button
or scan the QR code to check in.
There is a language selection option at the top of the screen. We will be able to
choose between languages if Odoo has multiple languages enabled. So that visitors
can add details by selecting the relevant language.
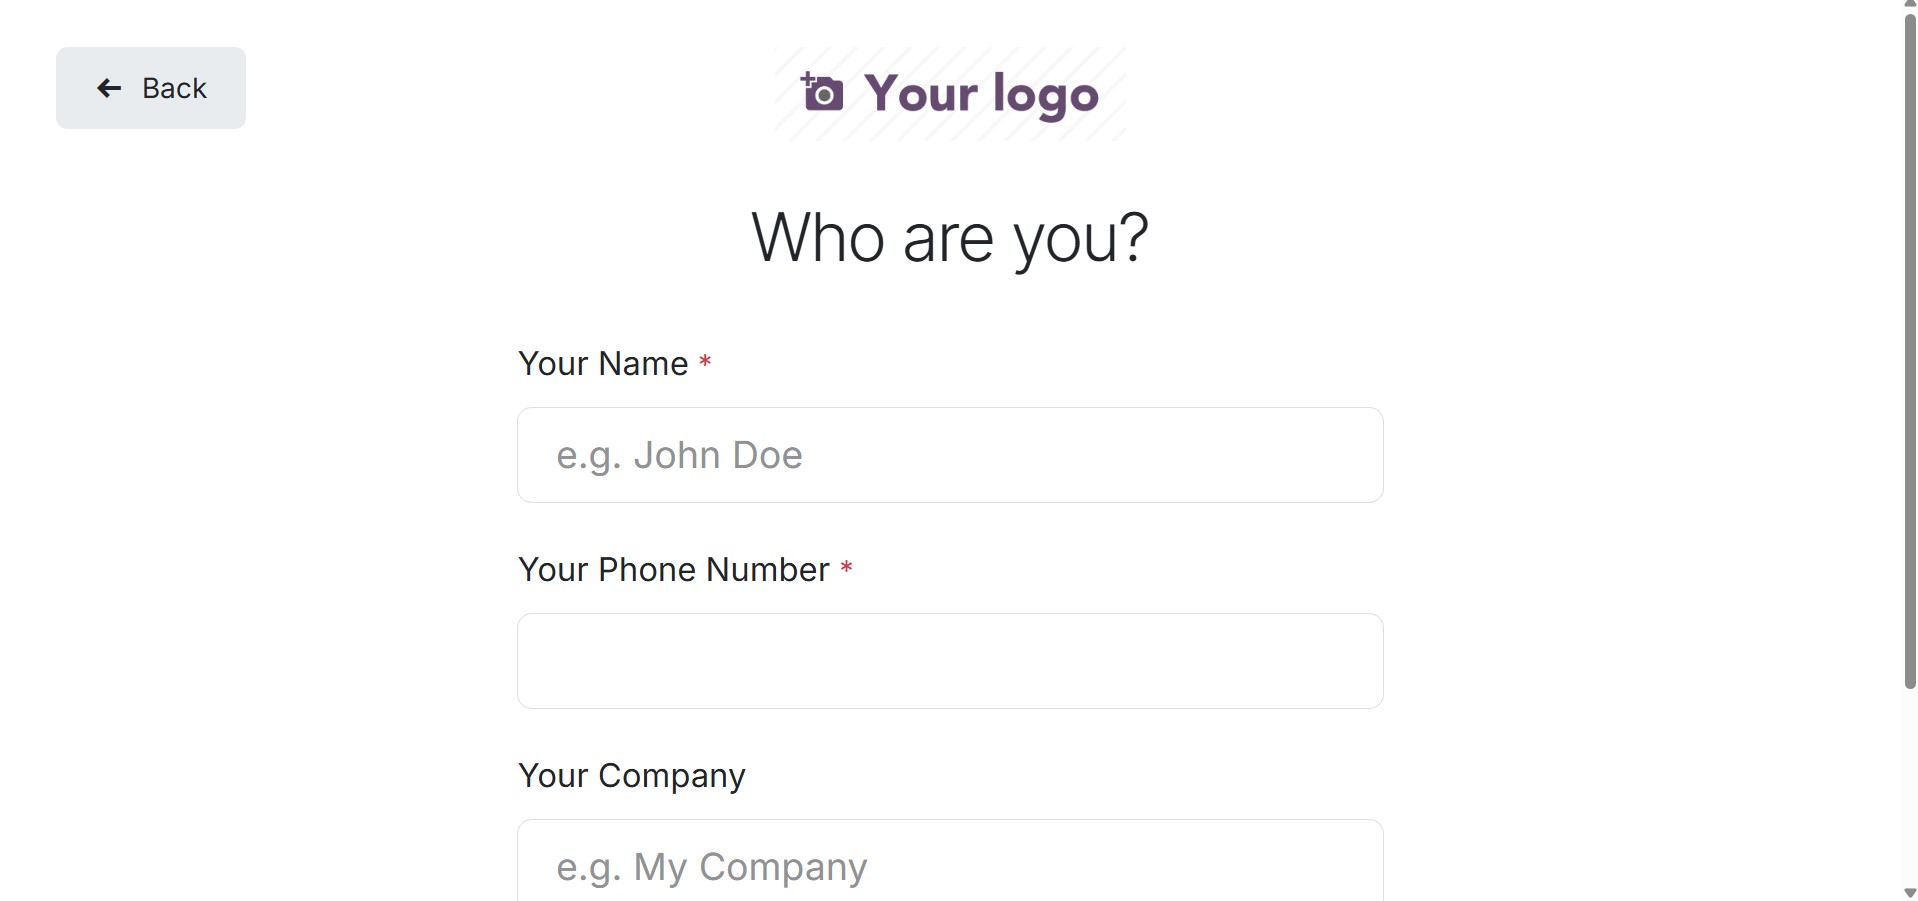
Visitors are asked to enter their personal details, such as name, phone number,
and company name, on the next page. Press the "Check In" button after that.
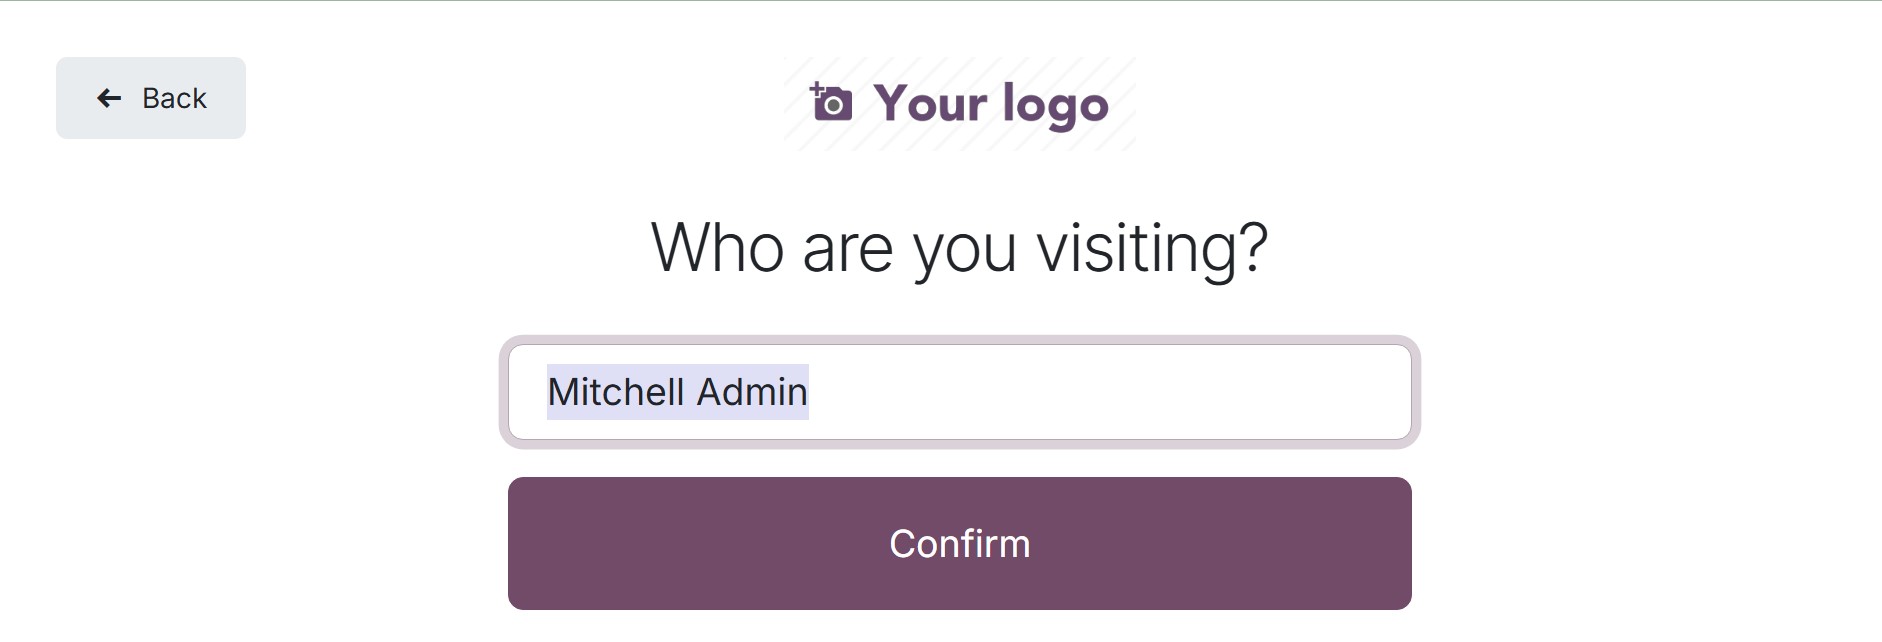
Next, determine which employee or user the visitor wants to view. Click the Confirm
button after choosing the employee from the list.
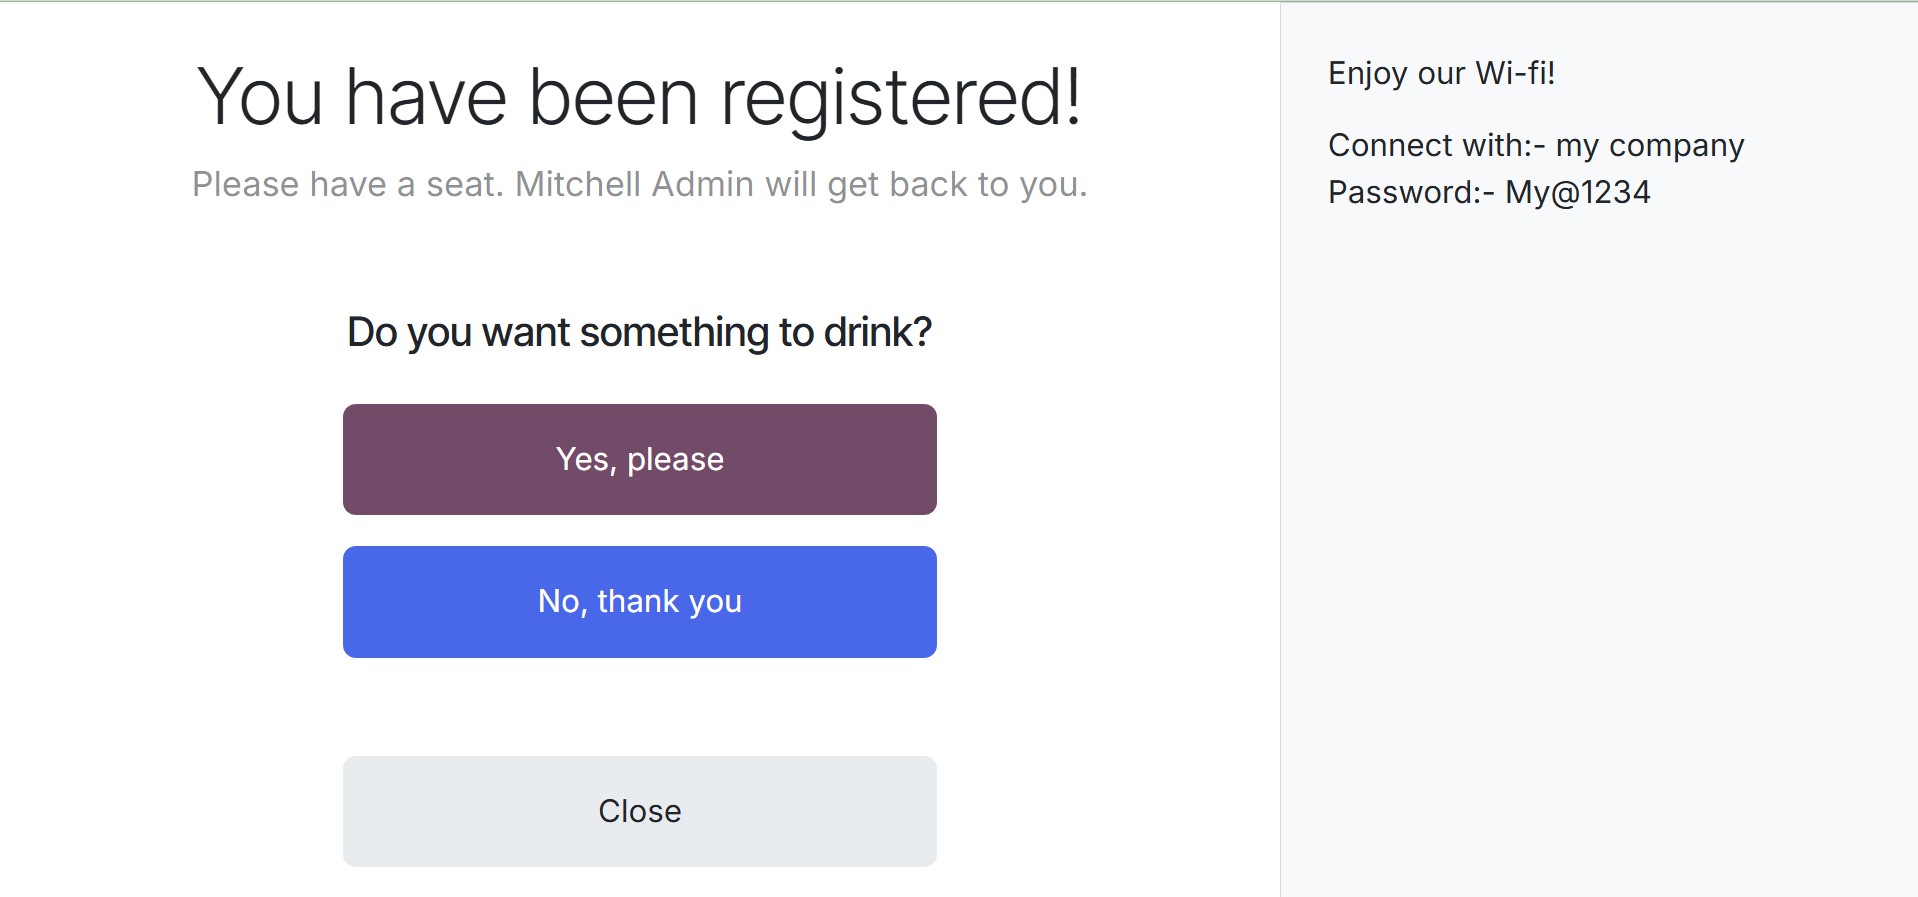
After that, the establishment serves some refreshments or snacks to the guests.
If they want that, click the "Yes, please" button. As an alternative, customers
can reject the offer by clicking the "No, thank you" button.
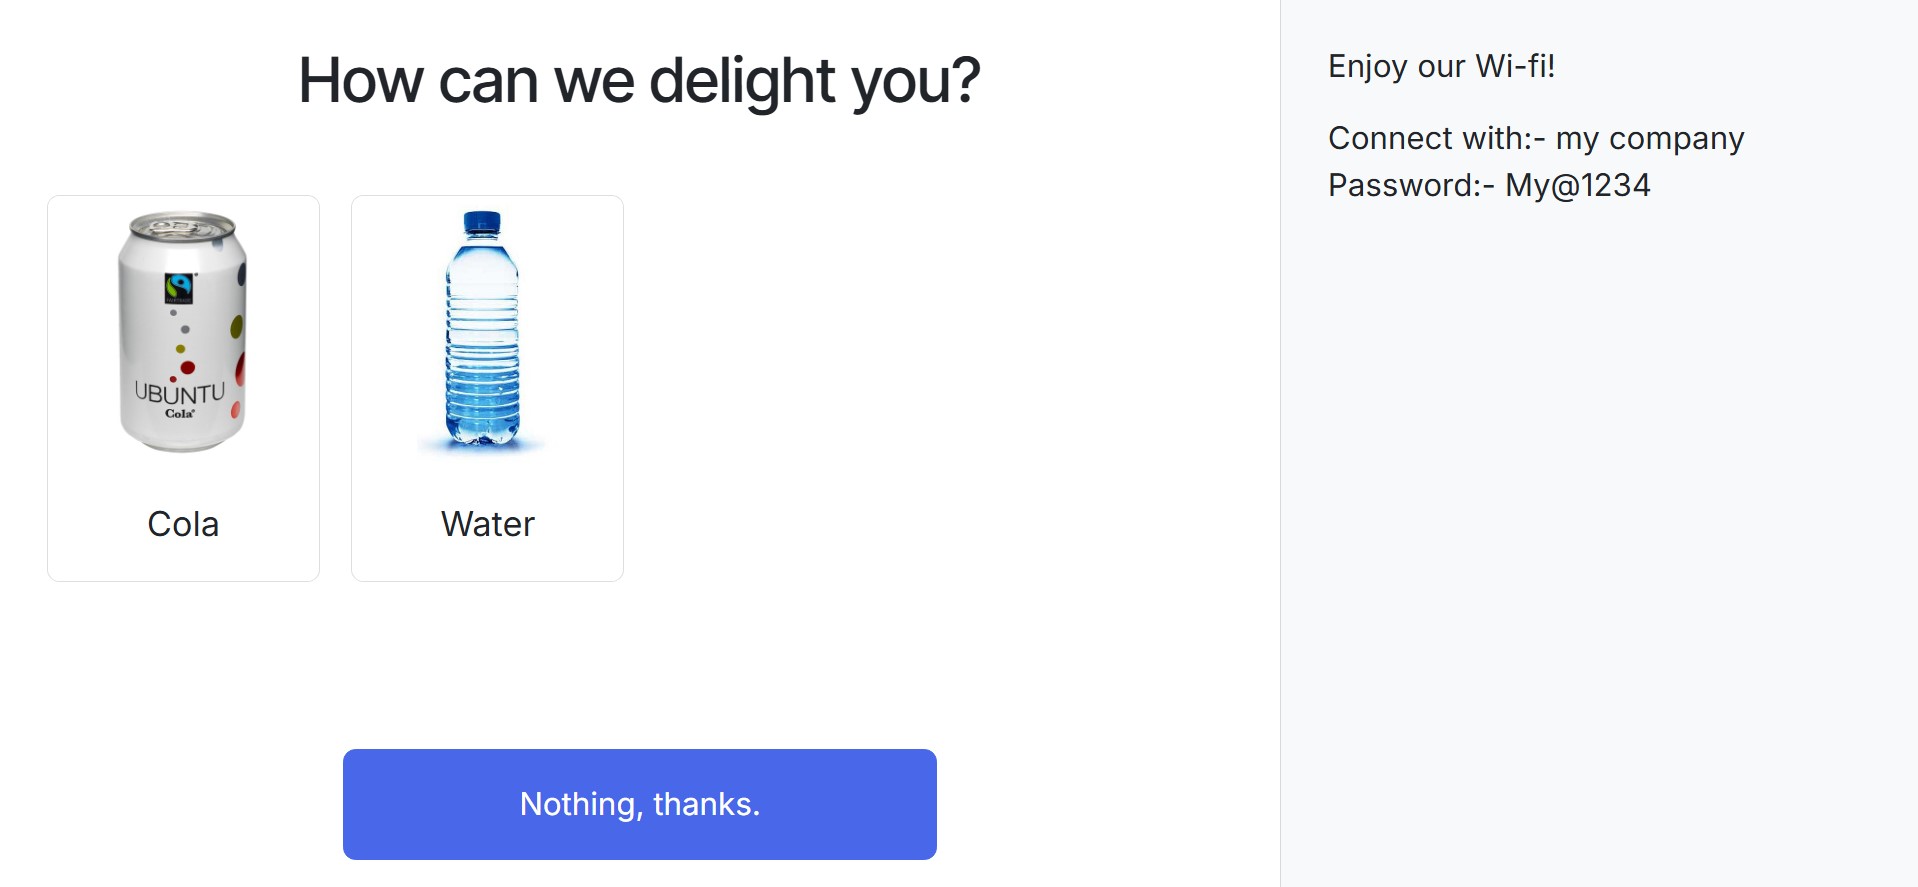
If guests would want to make a selection, the list is presented on the very next
page.
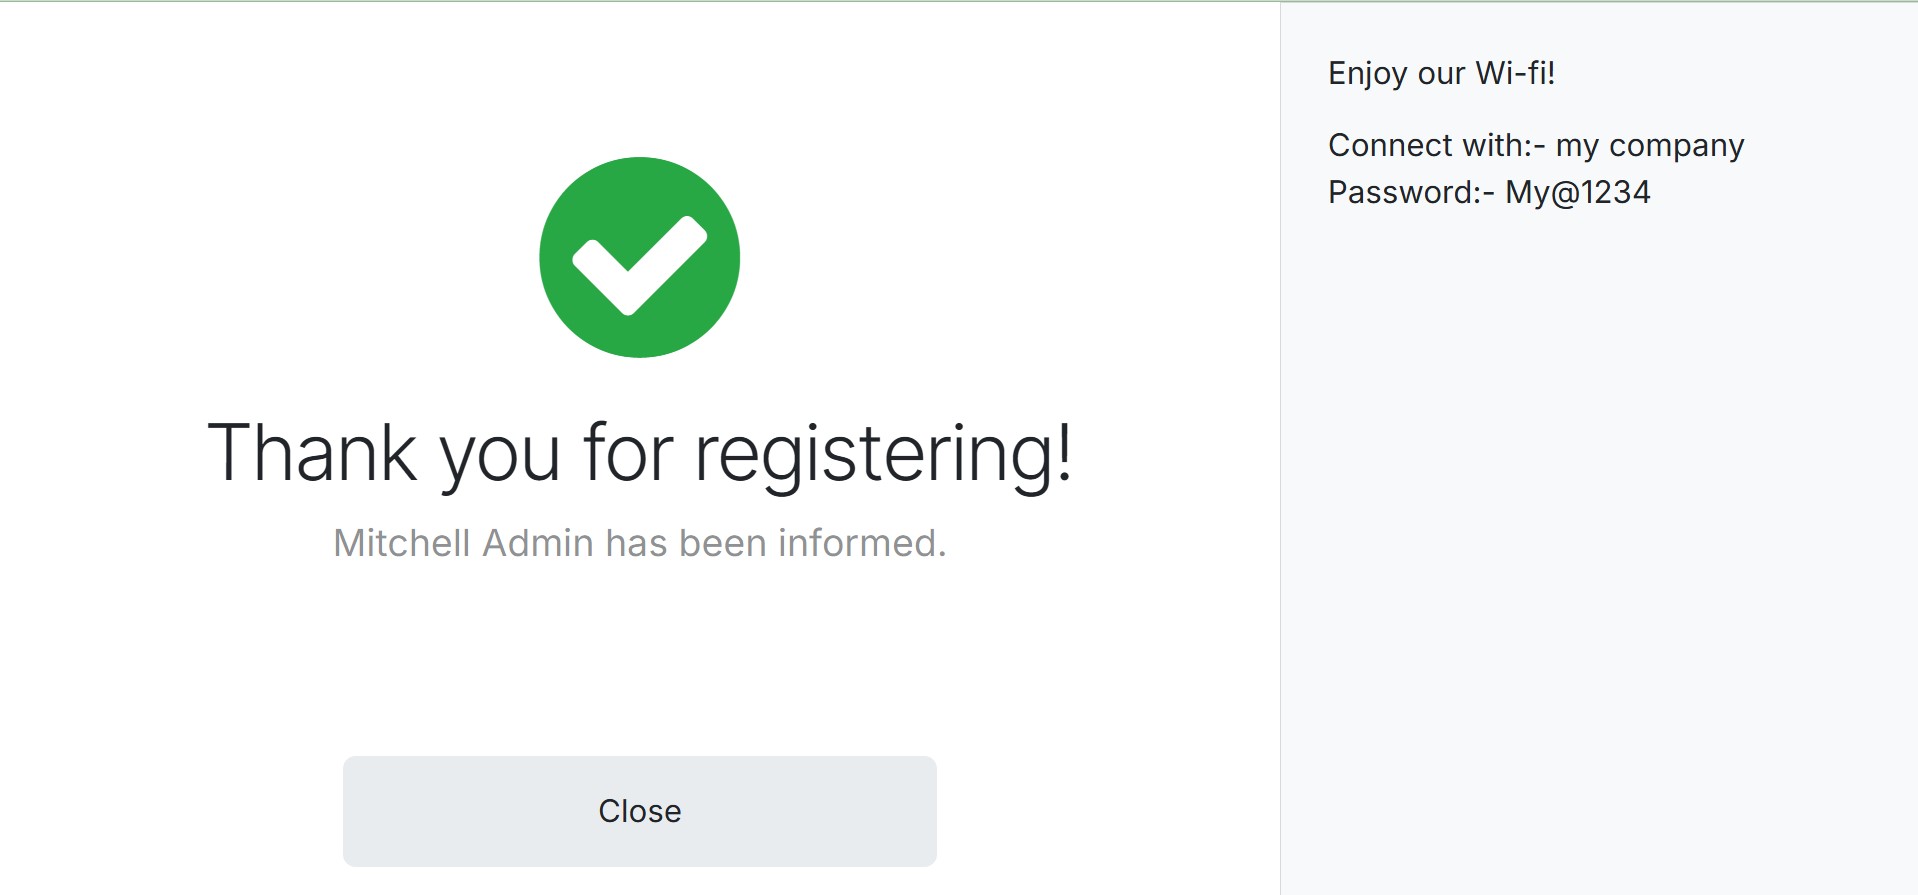
We've finished the signup process. as soon as the visitor sees the confirmation
notice below.
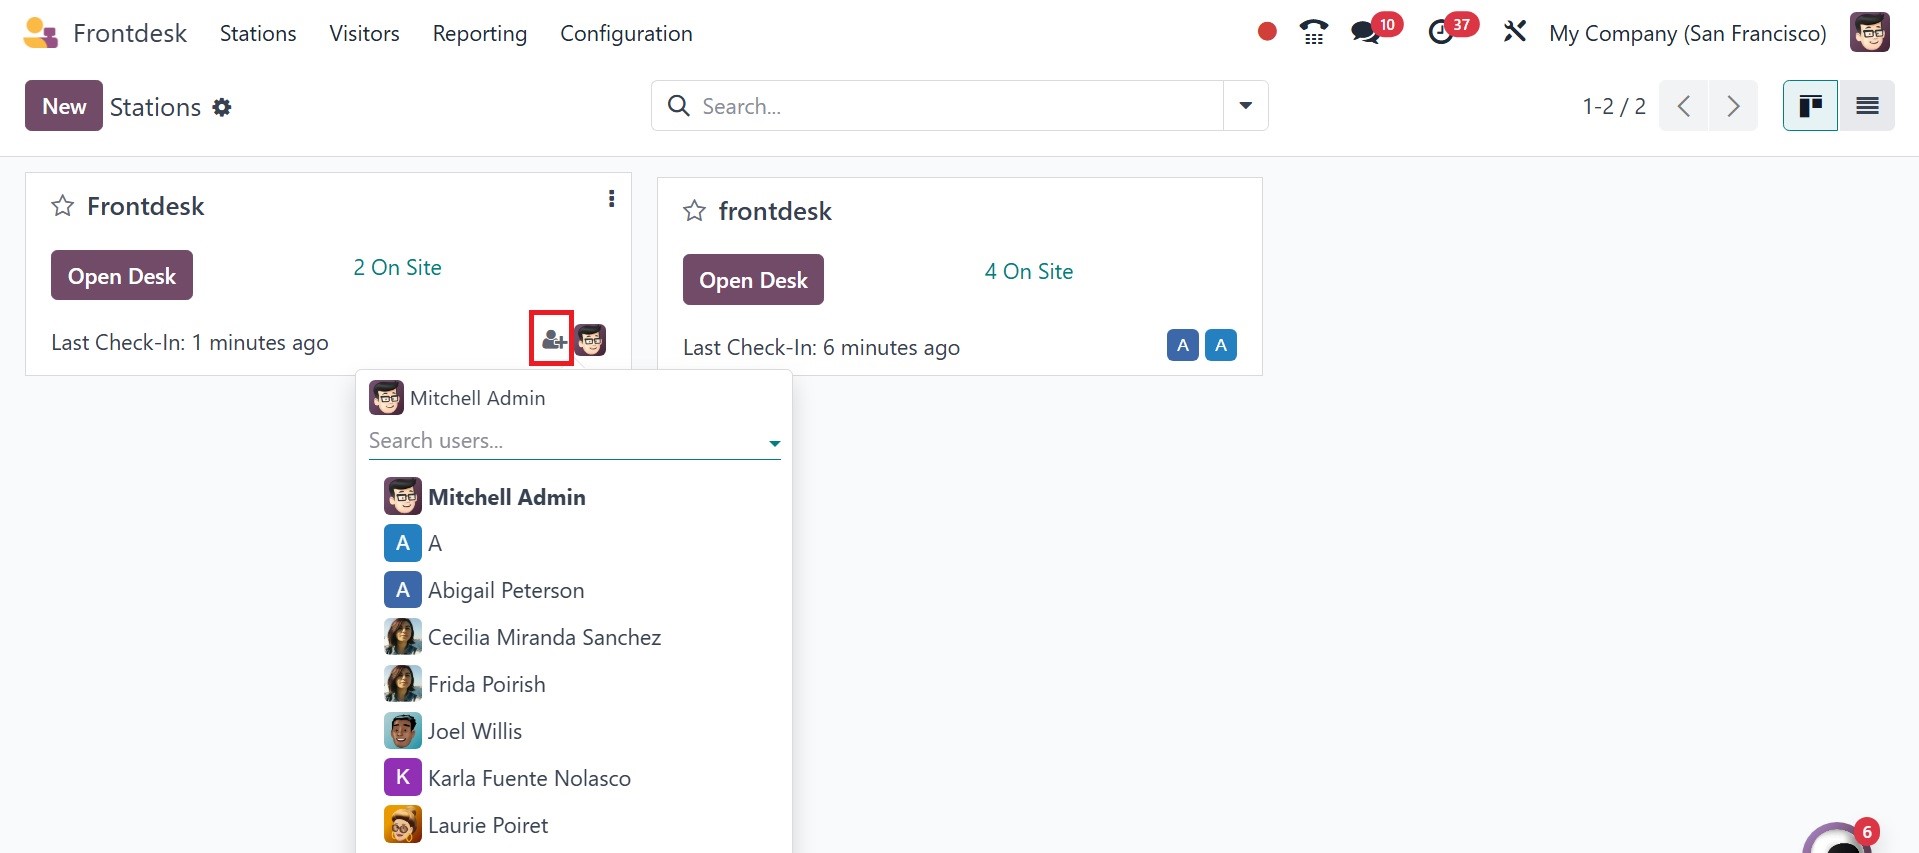
The dashboard then displays the station's current status. When was the last check-in,
how many people are waiting, how many drinks may be provided, etc. A responsible
person can be added from the dashboard.
When you select the three dots, you will see the option to install the PWA, as in
the image below.
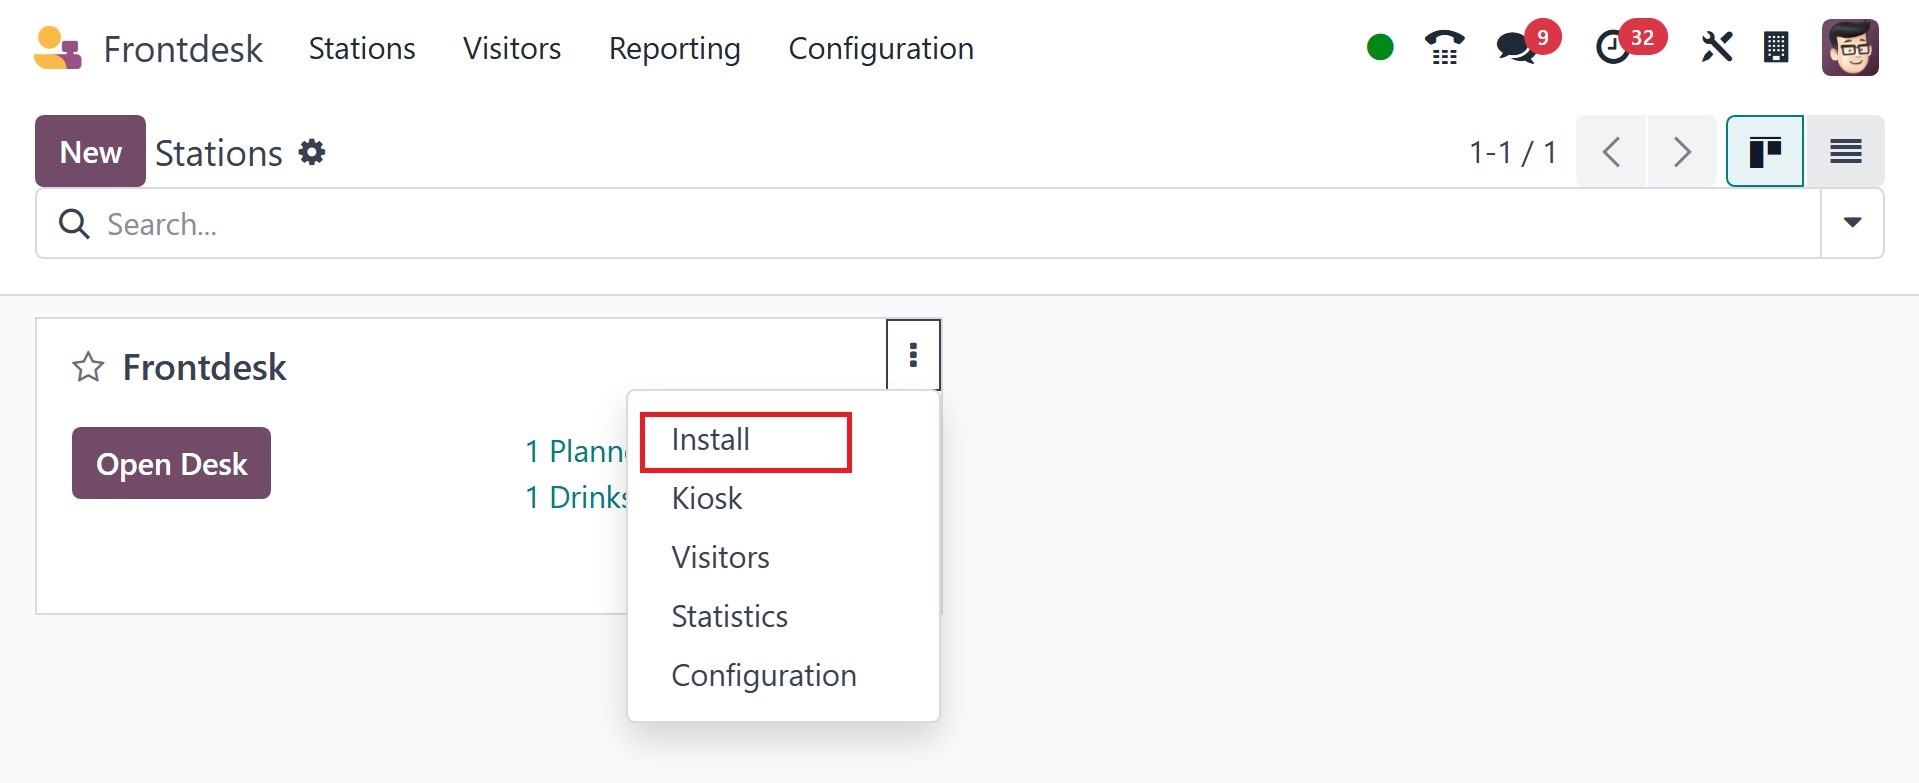
The install option helps you define and enable the "Install" option for a Progressive
Web App (PWA) of the Odoo 18 Frontdesk module. Adding the web application to the
user's desktop or home screen so that it functions like a native app is sometimes
referred to as the "Install" option.