3.
Configuration
Under the configuration, you have the
following options: helpdesk team, stages,
SLA policies, tags, canned responses, and
activity types.
3.1 Stages
Using phases helps you better understand how
each help desk ticket progresses. You can
create several stages to organize tickets
based on their development. This will also
make it easier for your teammates to look
at the stage and see the status of the
ticket. To add new stages for the helpdesk
tickets, select the Stages option from the
Configuration menu.
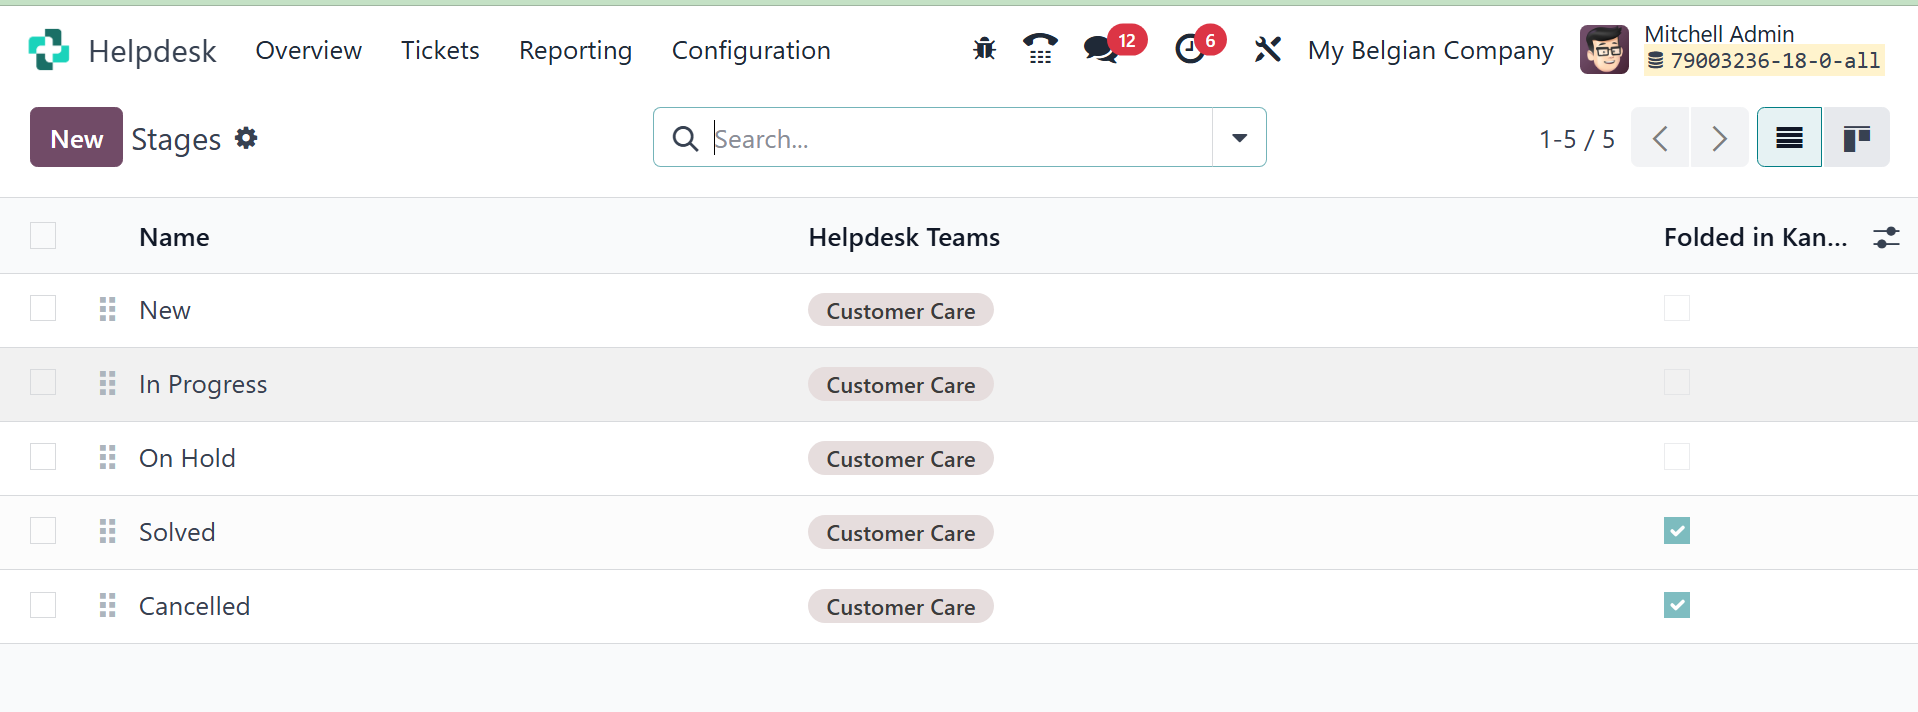
Below are the names and teams of each stage
created in this module.
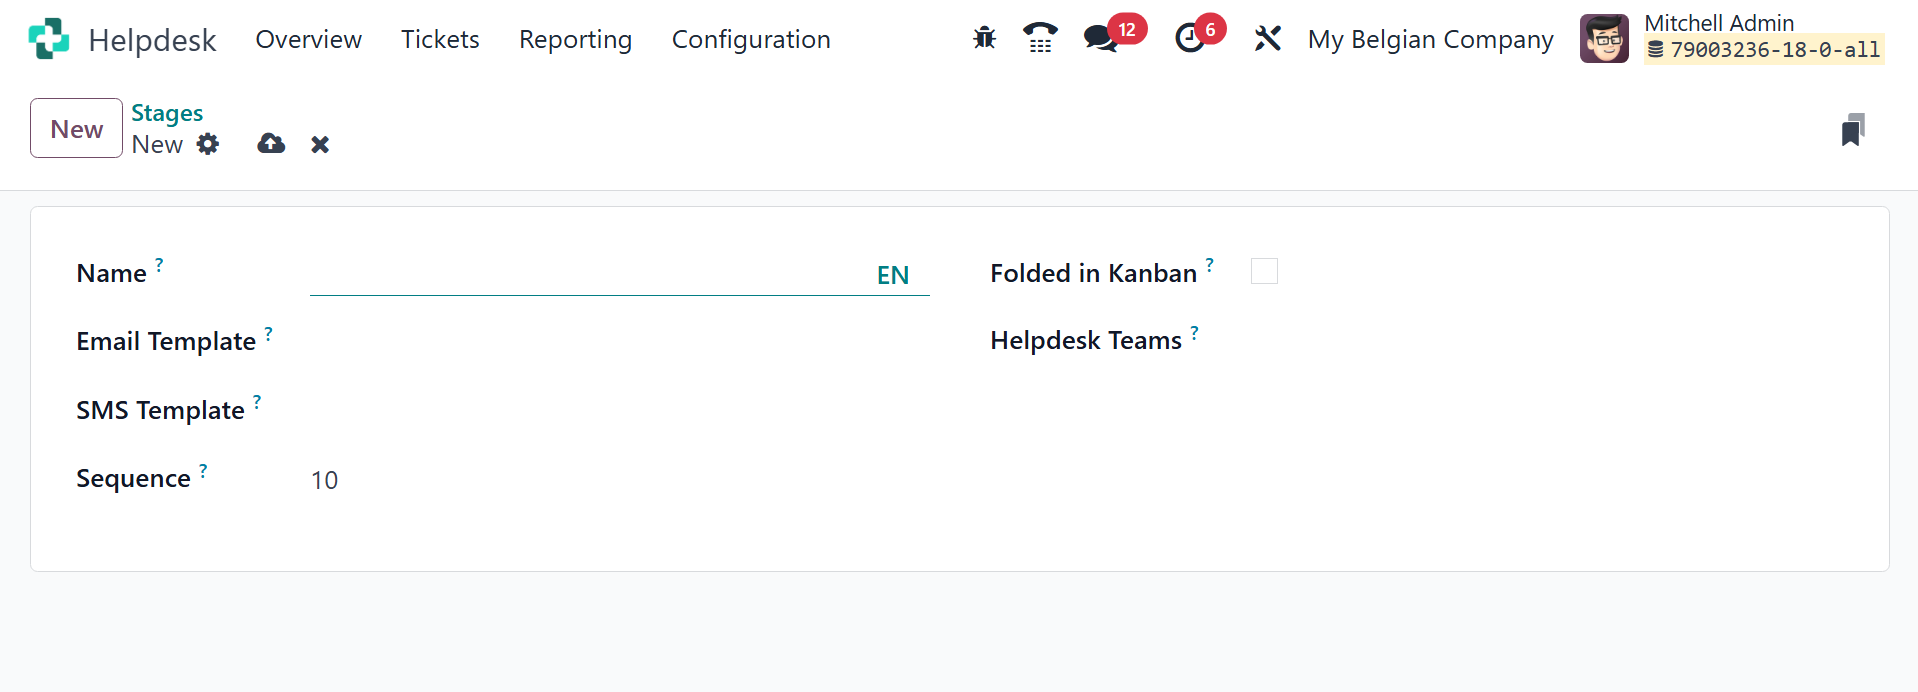
Choosing the New button will open a new form
view where you may create a stage, as
demonstrated in the example above. The
stage's name can be entered in the
designated field. Add the relevant Email
and SMS Templates to the relevant areas
when a new ticket reaches this step so
that the relevant customer will receive
it. In the Teams box, you may list the
names of the helpdesk teams who will be
able to see this stage. Add a description
to this new stage in the Stage Description
section to assist your teammates in
grasping its purpose. You can use this
step to arrange the tickets in a
systematic manner after entering all the
data. You can also view the option of
folding in Kanban. Stages can be
configured to be folded in the Kanban view
of a ticket's page. The names of the
folded stages are still visible, but the
tickets on the stage are hidden from view.
To fold a stage, tick the Folded in Kanban
checkbox on the Stages form. Tickets that
reach a folded stage are considered
closed.
3.2 SLA
Policies
The Odoo 18 Helpdesk module's SLA Policies
can be used to outline the terms and
conditions that apply to both the client
and the service provider. Setting
deadlines and other guidelines is
essential before starting any work on
addressing your clients' complaints,
regardless of the service you provide. It
will be simpler for both sides to agree on
terms for the helpdesk service if SLA
principles are followed. SLA Policies on
tickets will be used to specify the target
time to fix the problem. The Configuration
menu of the module contains the SLA
Policies option.
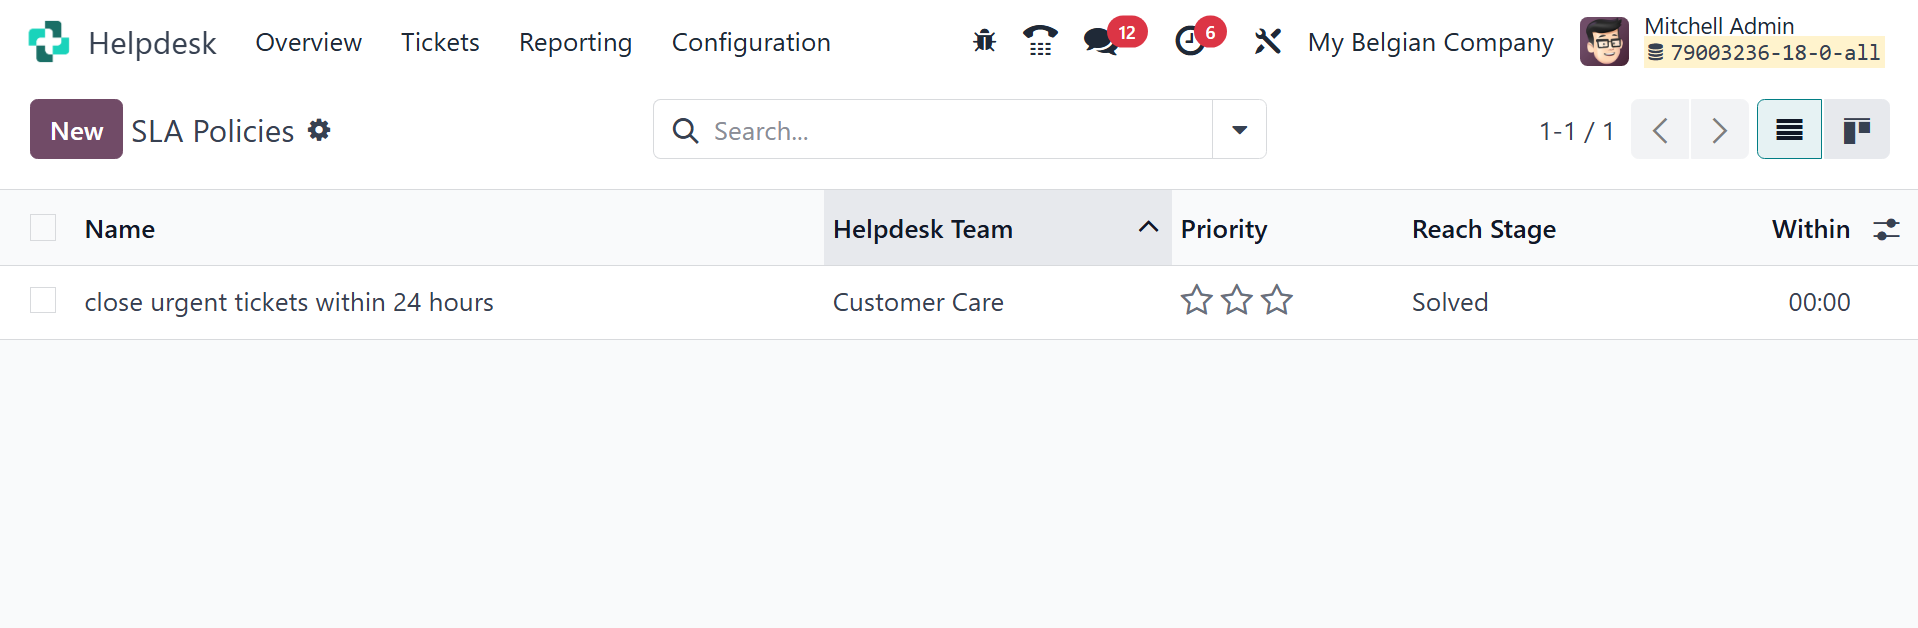
This list view displays the SLA Policy data,
including Name, Team, Priority, Types, In,
and Reach Stage. Click the New button to
begin a new one.
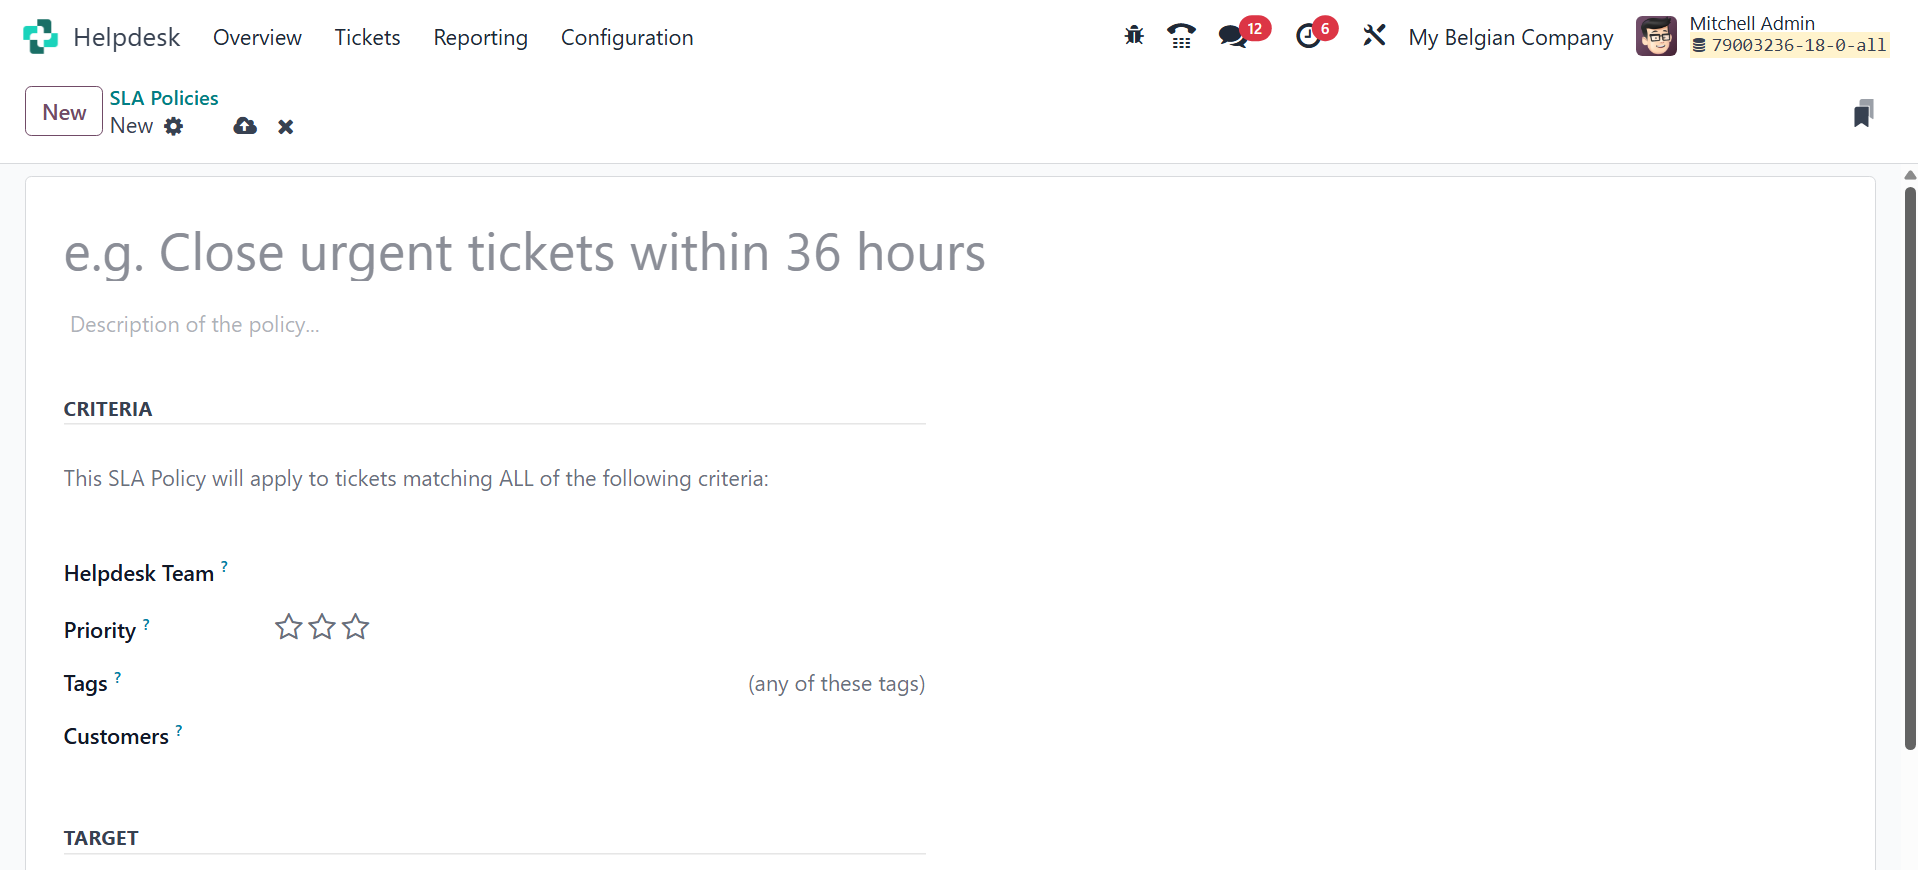
The description of the policy can be entered
in the designated field. There will be
more space for you to explain the policy.
Under the Criteria tab, you may designate
the name of the Team that is allowed to
use this policy. In the relevant areas,
you can select which Priority, Types,
Tags, Customers, and Sales Order Items are
covered by this SLA Policy. Under the
Target tab, you can set the Reach Stage as
the minimum stage that a ticket must reach
in order to be covered by this policy. The
"within" field may include the minimum
number of working hours required to reach
the target stage in order to adhere to
this policy.
Add a stage to the Excluding Stages column to
remove the time spent on that stage from
the SLA calculation. This is how SLA
Policies are made in the Odoo 18 Helpdesk
platform.
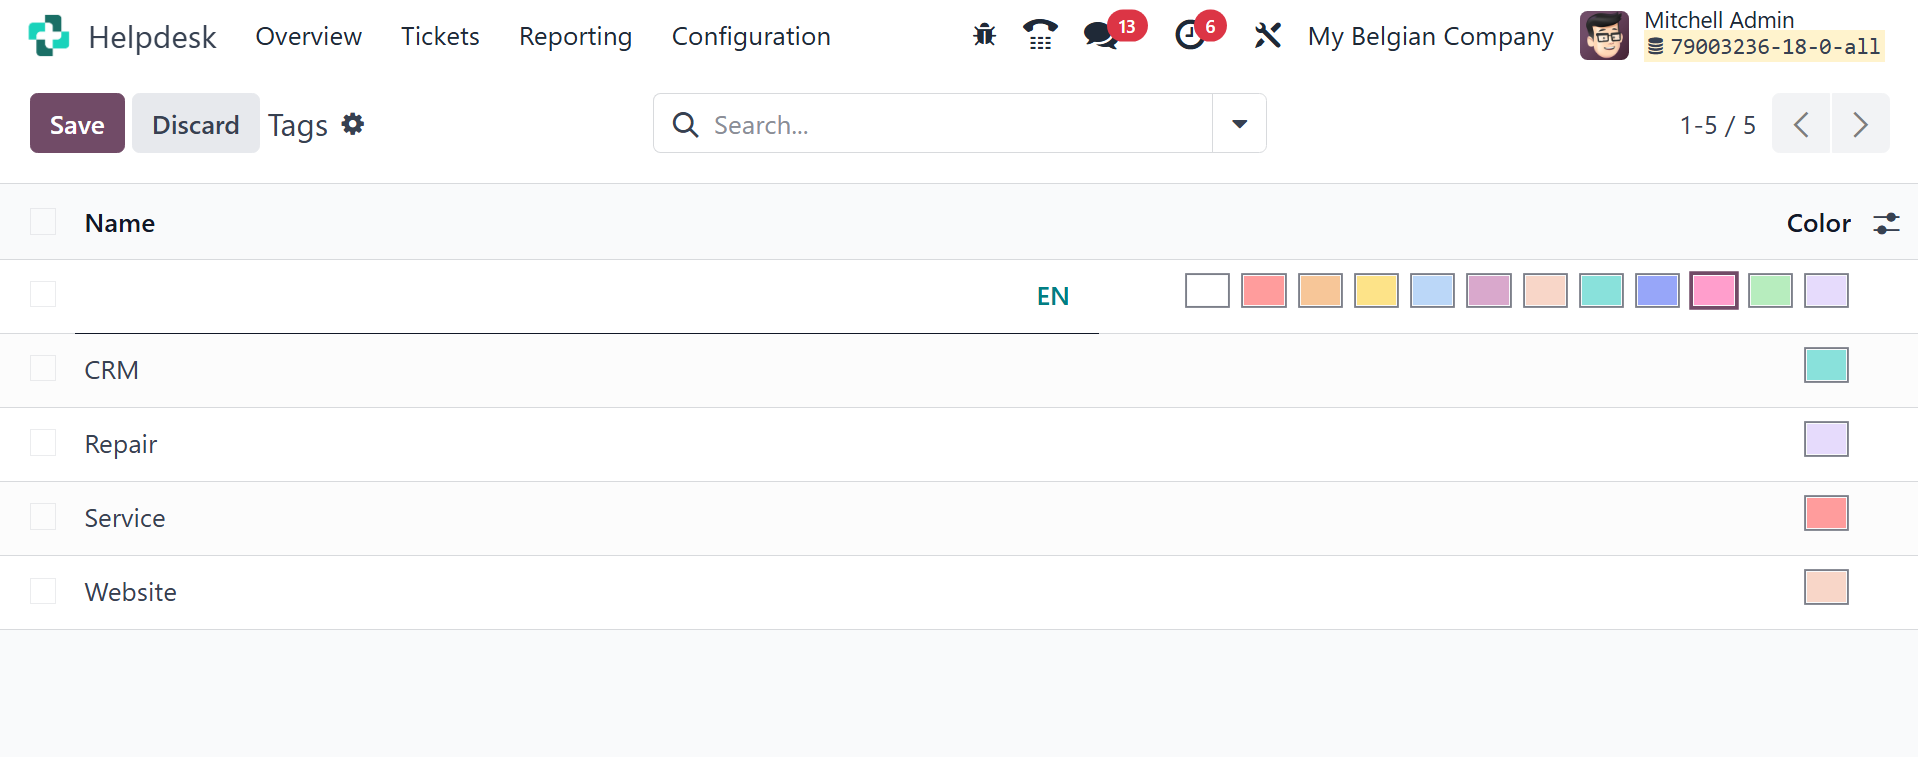
3.3 Tags
The Odoo Helpdesk module allows you to
generate distinct tags for different
procedures. Help desk personnel will find
these tags helpful in organizing tickets.
The Help Desk module makes it simple to
configure tags. The Configuration menu
contains the Tags option. This option will
provide you with a list of tags that have
previously been generated on this
platform.
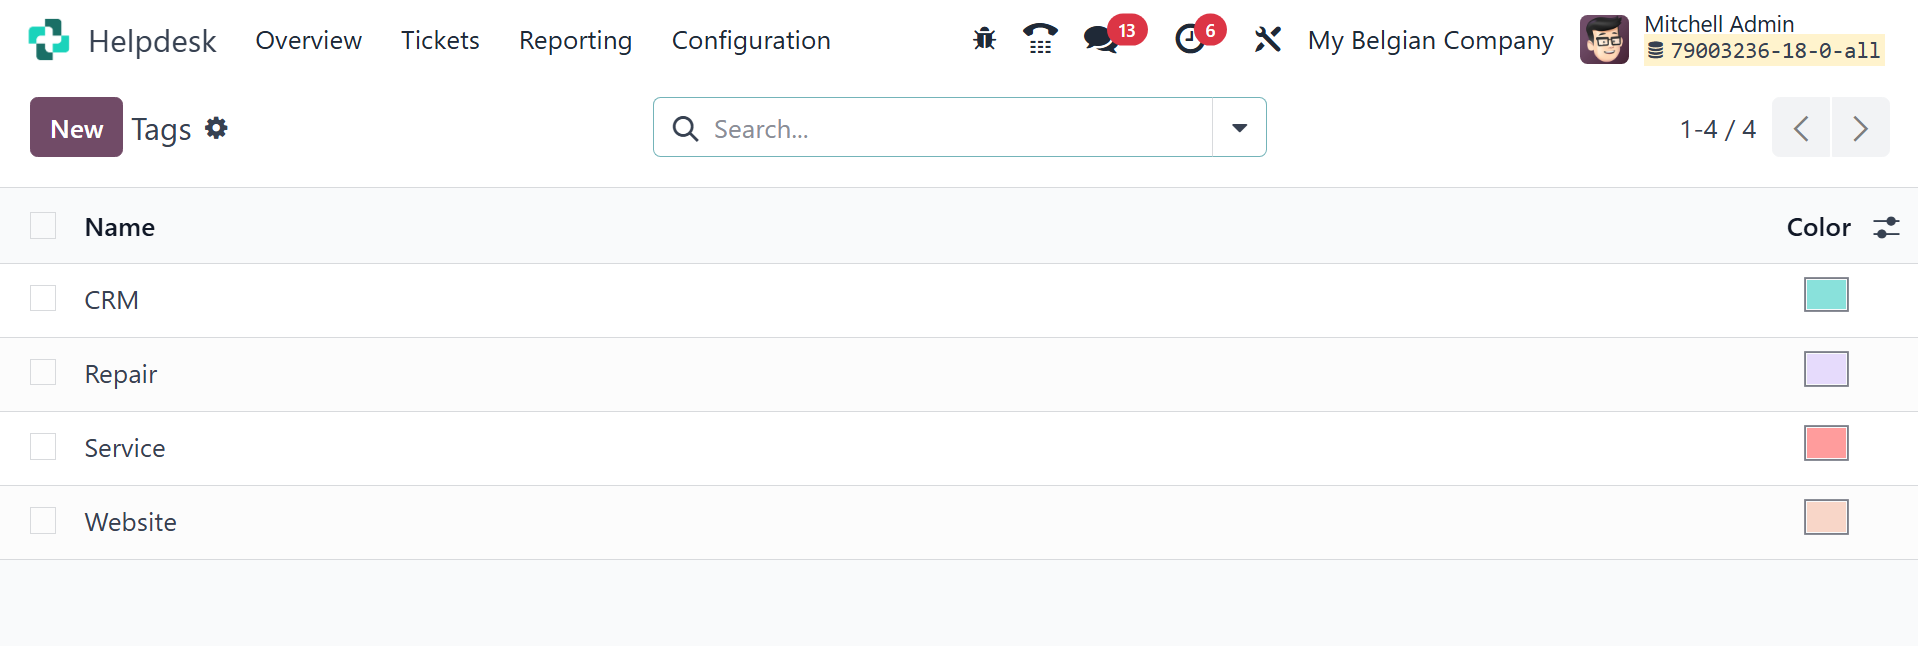
You can click the New button to make a new
tag. The current list will be topped with
a new line. You can choose a color for the
tag from the available options and
indicate the tag's name.
3.4 Canned
Responses
You can use Odoo 18 to generate pre-written
answers to send to your clients. Answer
frequently asked questions and queries
from your customers by using these
pre-written answers. Choose the
Configuration option in the Helpdesk
module to generate such Canned Responses.
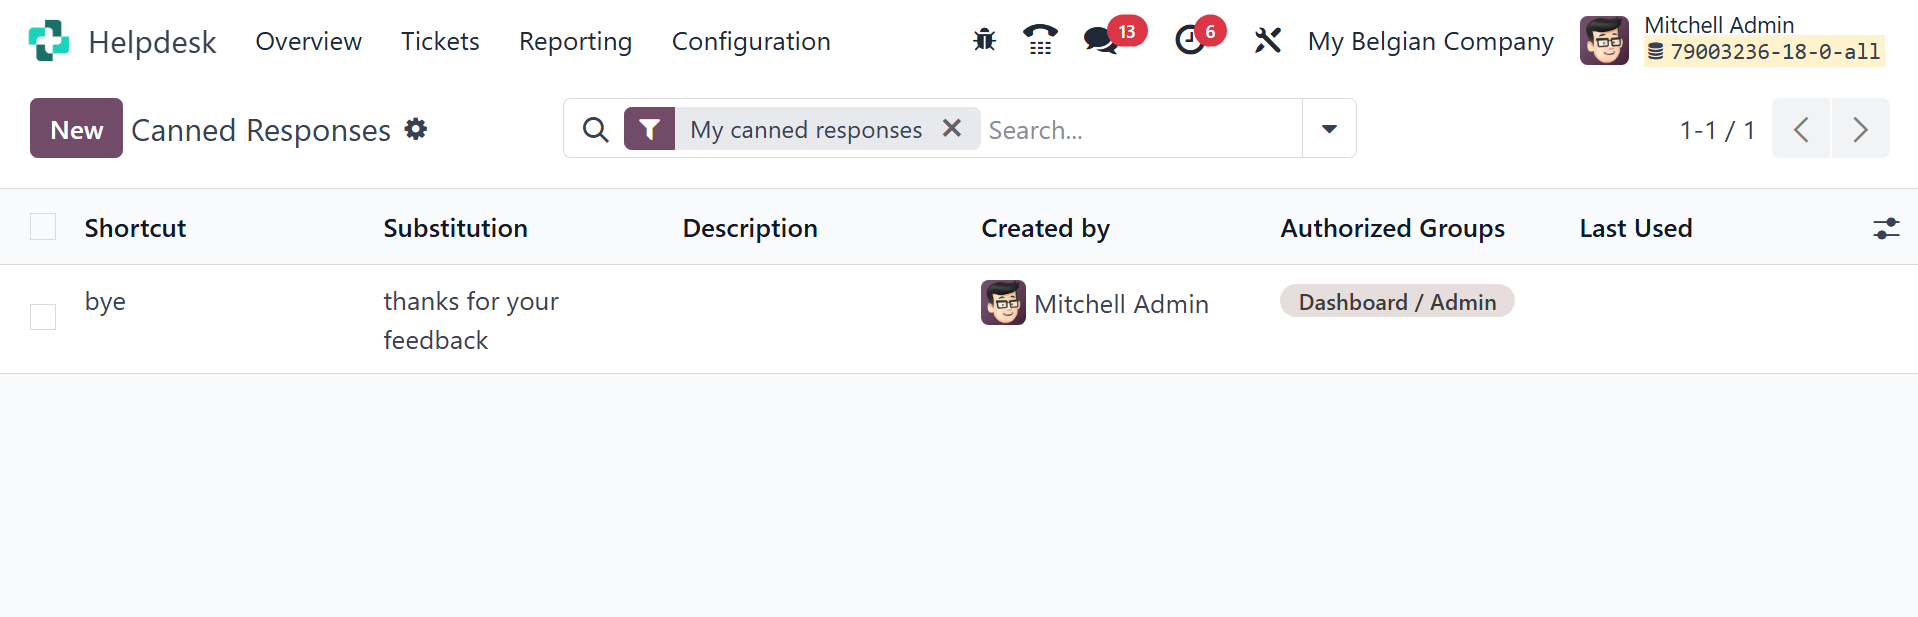
Here, you may see the description, created
by, approved groups, shortcut,
substitution, and last used of several
premade responses. Clicking the New button
will open a new line where you can enter a
new Canned Response. Click the Save button
to save the updated version to your
computer. To view the list of pre-written
responses, type ":" into the chat box.
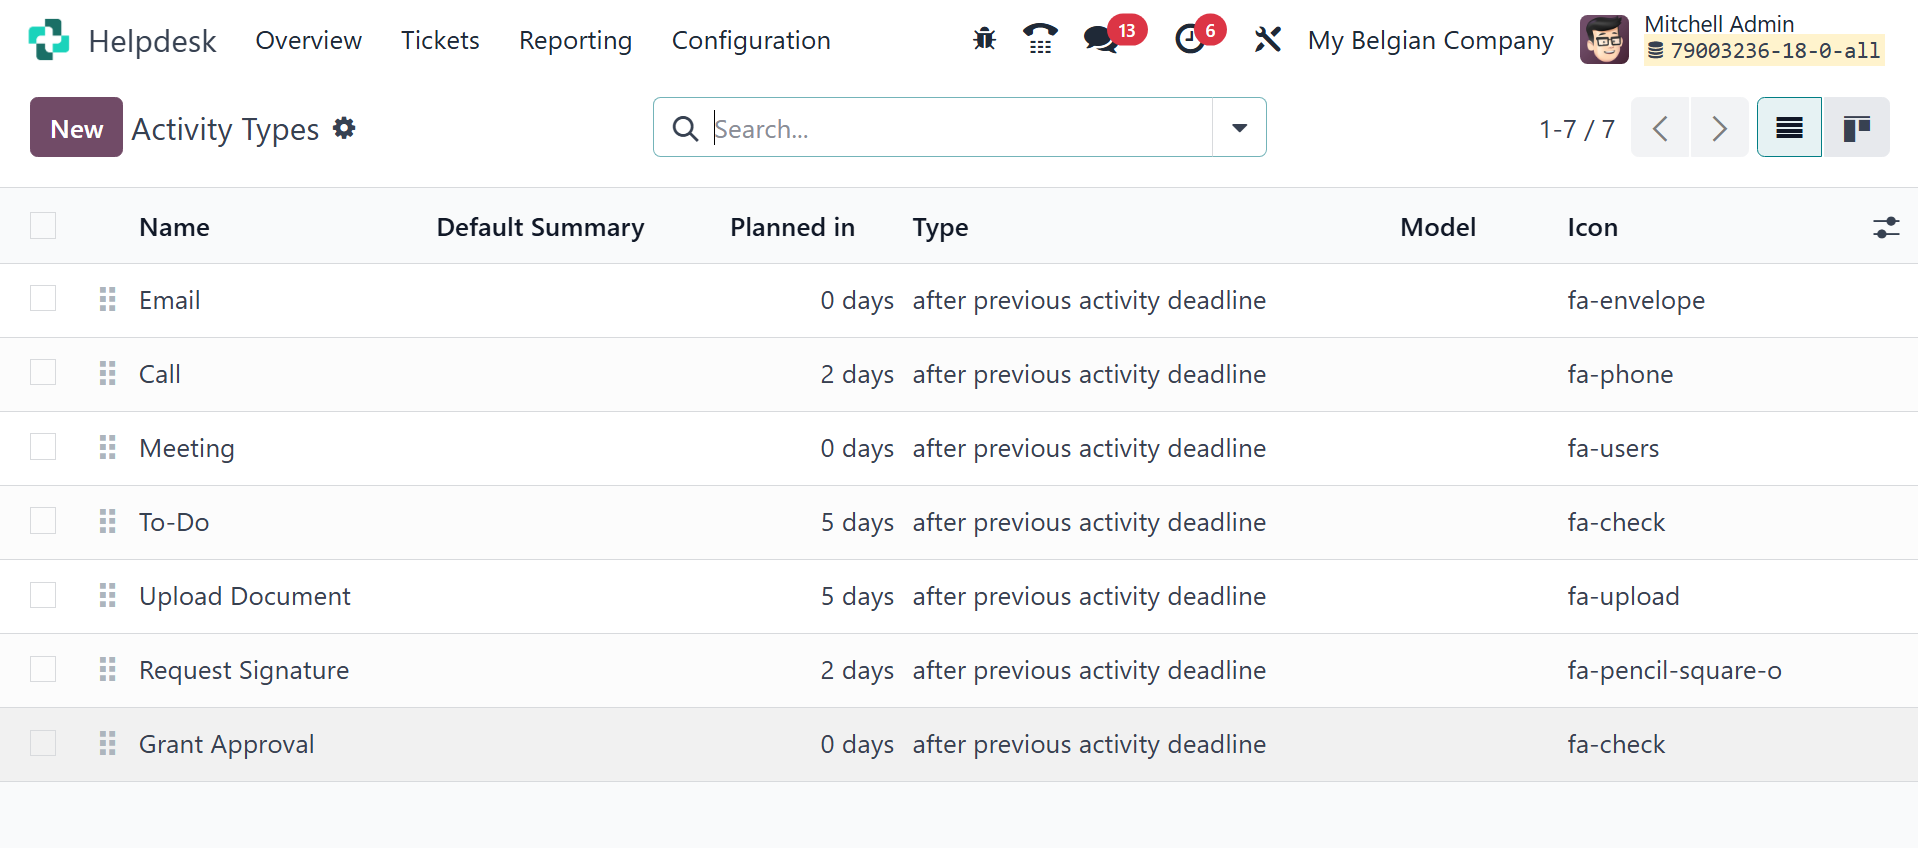
3.5 Activity
Types
Activity types are used by the Odoo Helpdesk
module to arrange follow-up tasks related
to particular tickets or records. These
customizable activity categories can be
used to manage a variety of tasks,
including making to-do lists, sending
emails, and scheduling phone calls. For
every activity type, the module enables
the definition of the action, default
user, model, summary, icon, and additional
information.
3.6 Helpdesk
team
A helpdesk team in the Odoo Helpdesk module
is a collection of users from the company
who are in charge of managing support
tickets pertaining to a certain topic or
kind of problem. Teams are set up to
handle ticket workflows, assign tickets to
the right people, and monitor performance.
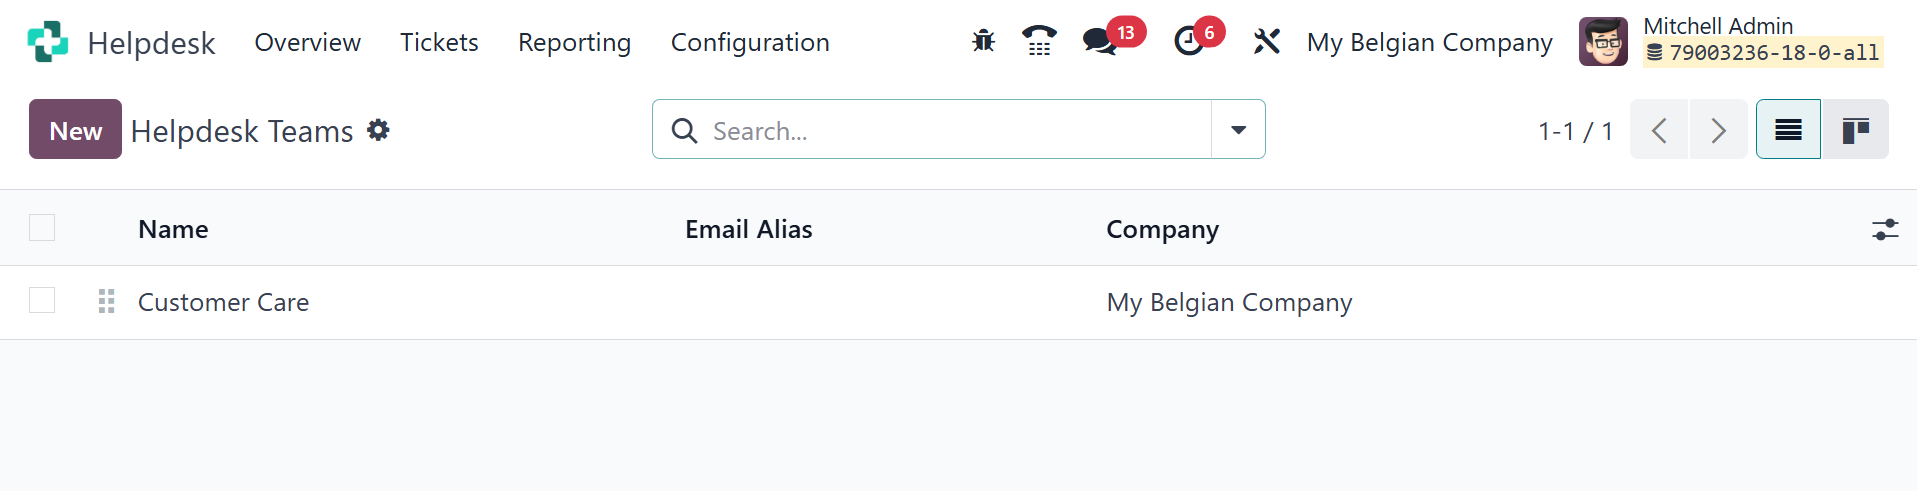
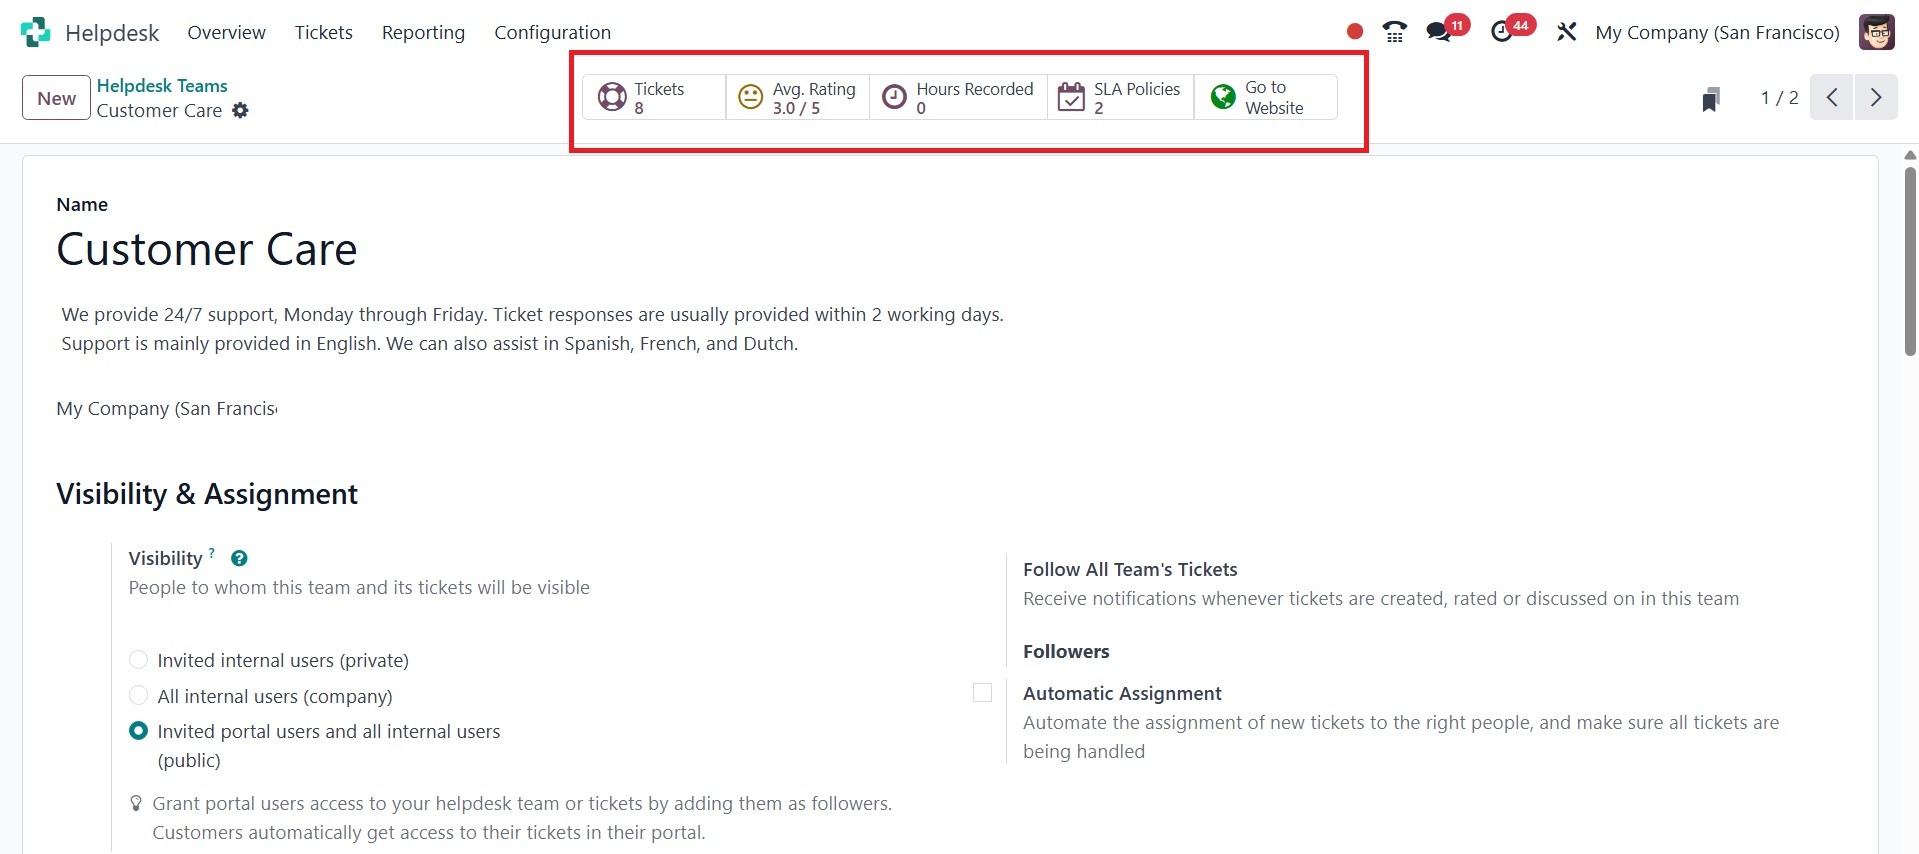
There, you have a helpdesk named ‘customer
care’, under which you have options like
visibility and assignment, channels, help
center, track and bill time, performance,
self-service, and after-sales, as in the
image below.
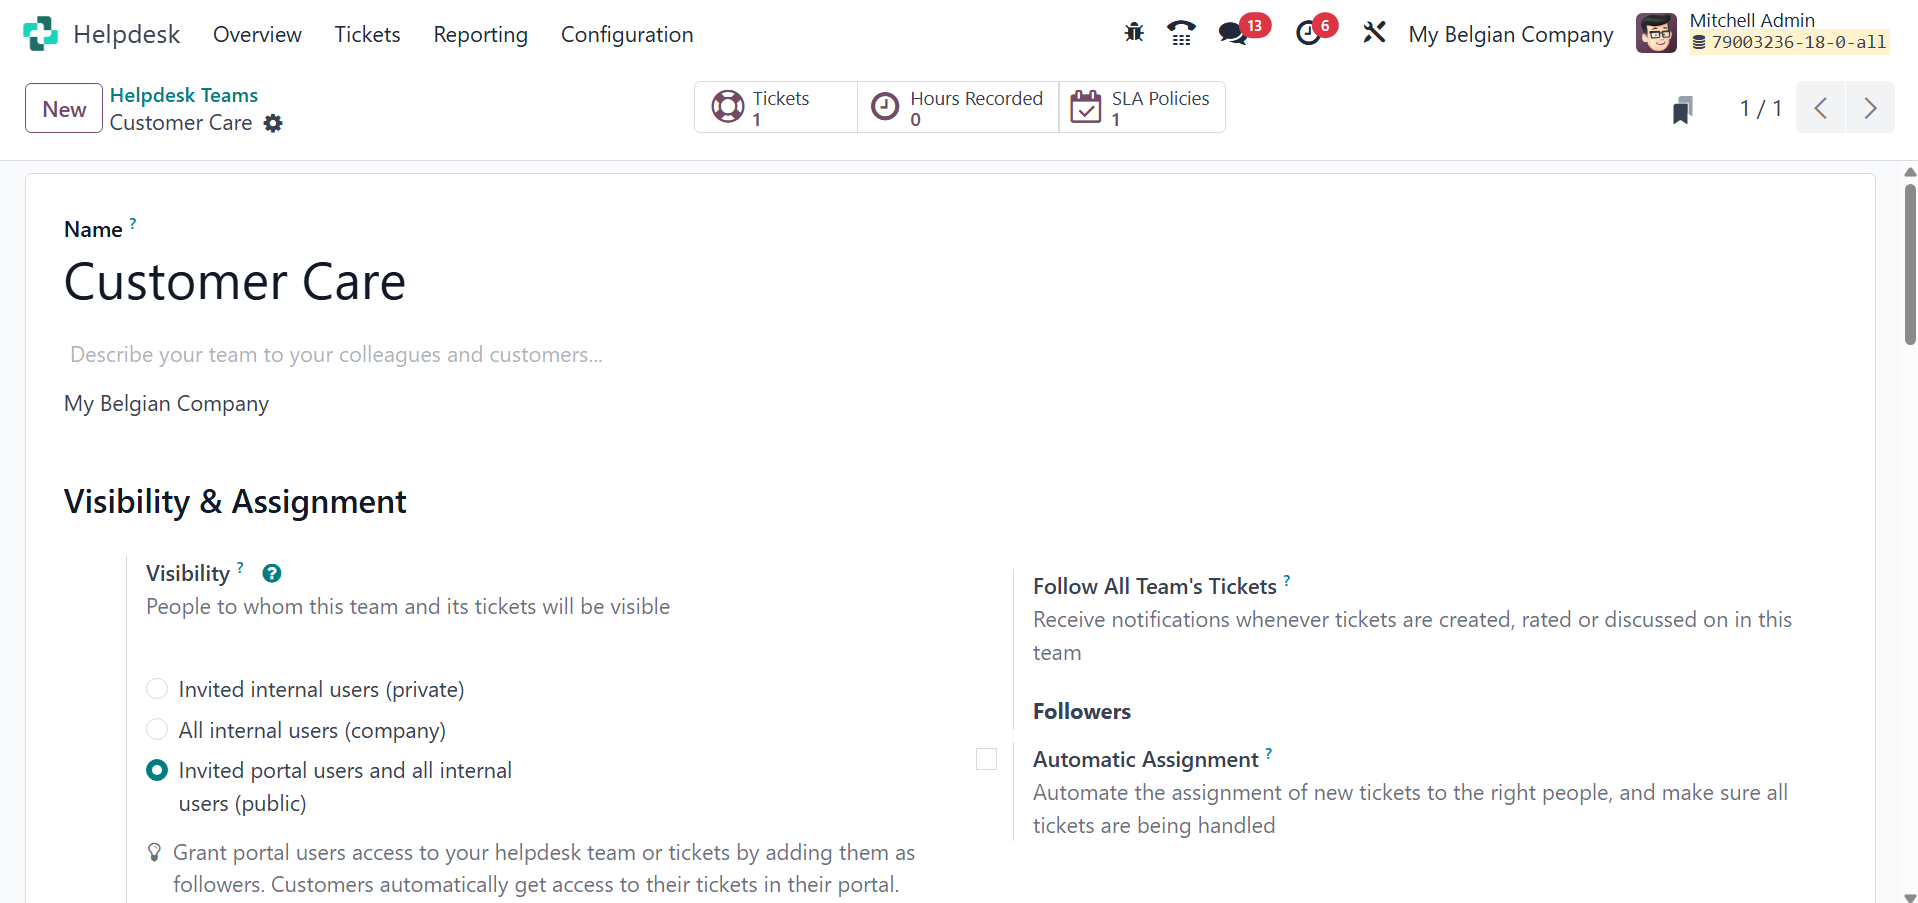
The description of the helpdesk team can be
added in the given area.
- The visibility option helps people to
see who this team and its tickets
will be visible to. There, you can
view two options like
a. Invited internal users
(private)
b. All internal users (company)
c. Invited portal users and all
internal users (public)
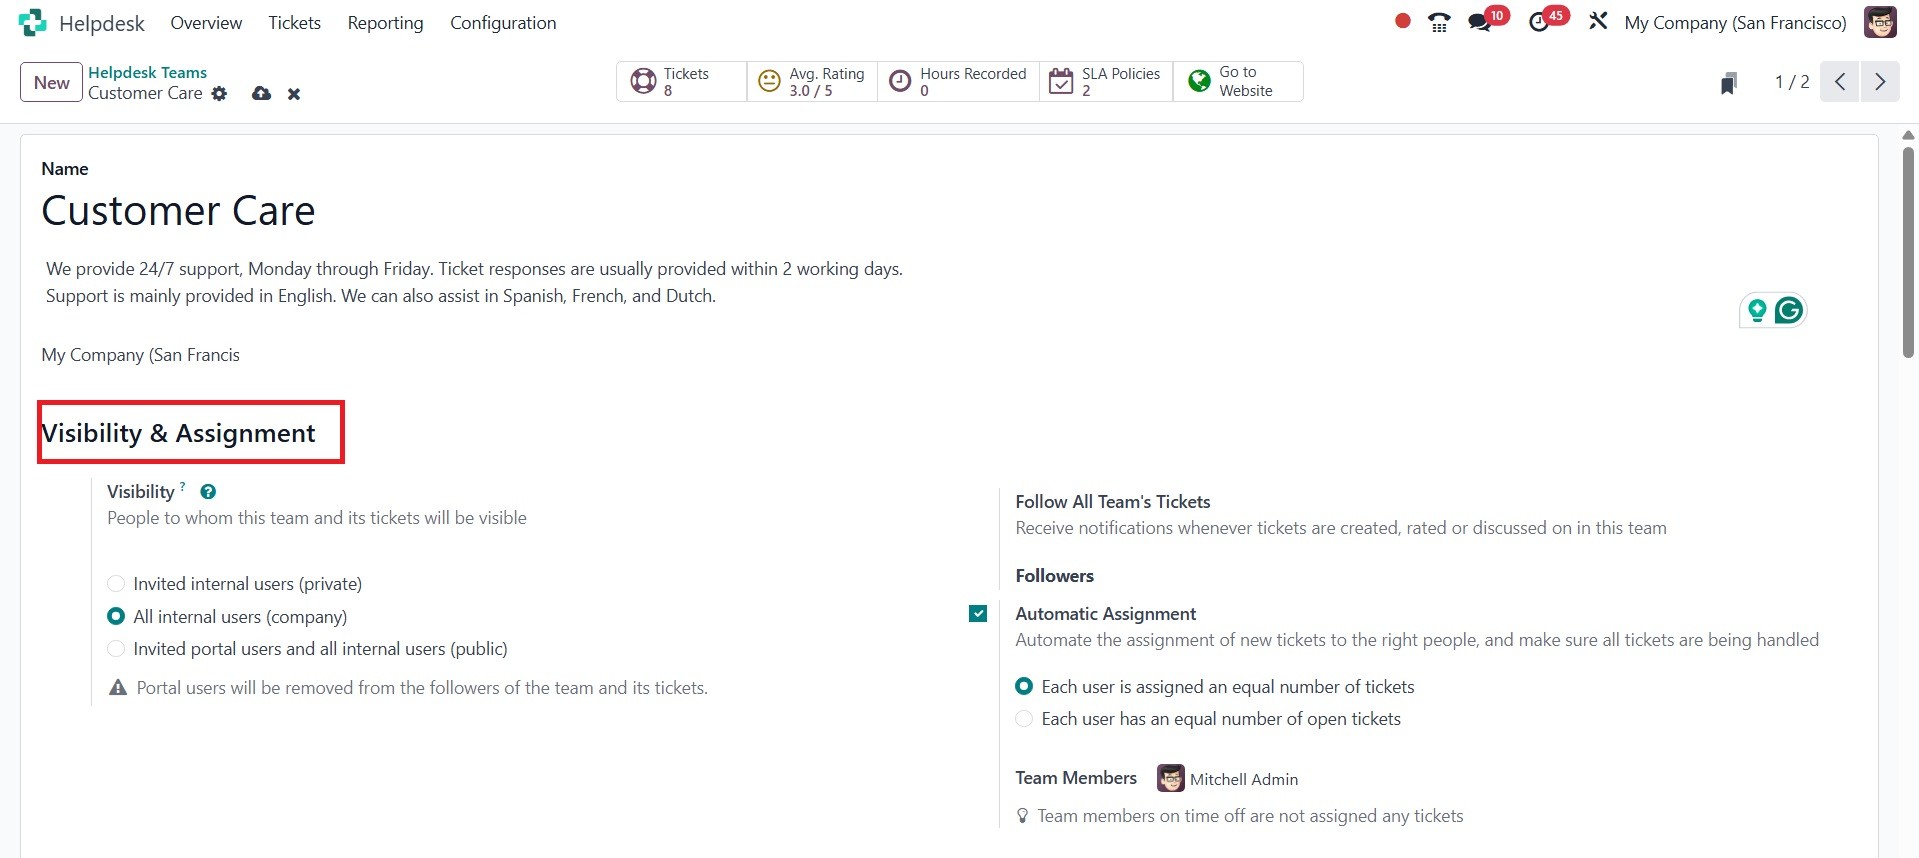
Grant employees access to your
helpdesk team or tickets by
adding them as followers.
Employees automatically get
access to the tickets they are
assigned to.
- The Follow All Team's Tickets option
helps you receive notifications
whenever tickets are created, rated,
or discussed within this team.
- Automatic Assignment, here you have
the option to automate the
assignment of new tickets to the
right people, and make sure all
tickets are being handled. Here, you
have two options like:
a. Each user is assigned an equal
number of tickets
b. Each user has an equal number
of open tickets
c. Dispatch tickets based on tags
Then the next option here is channels, which
has the option of email alias, and creates
tickets by sending an email to an alias.
Here, you can add the email in the
provided space.
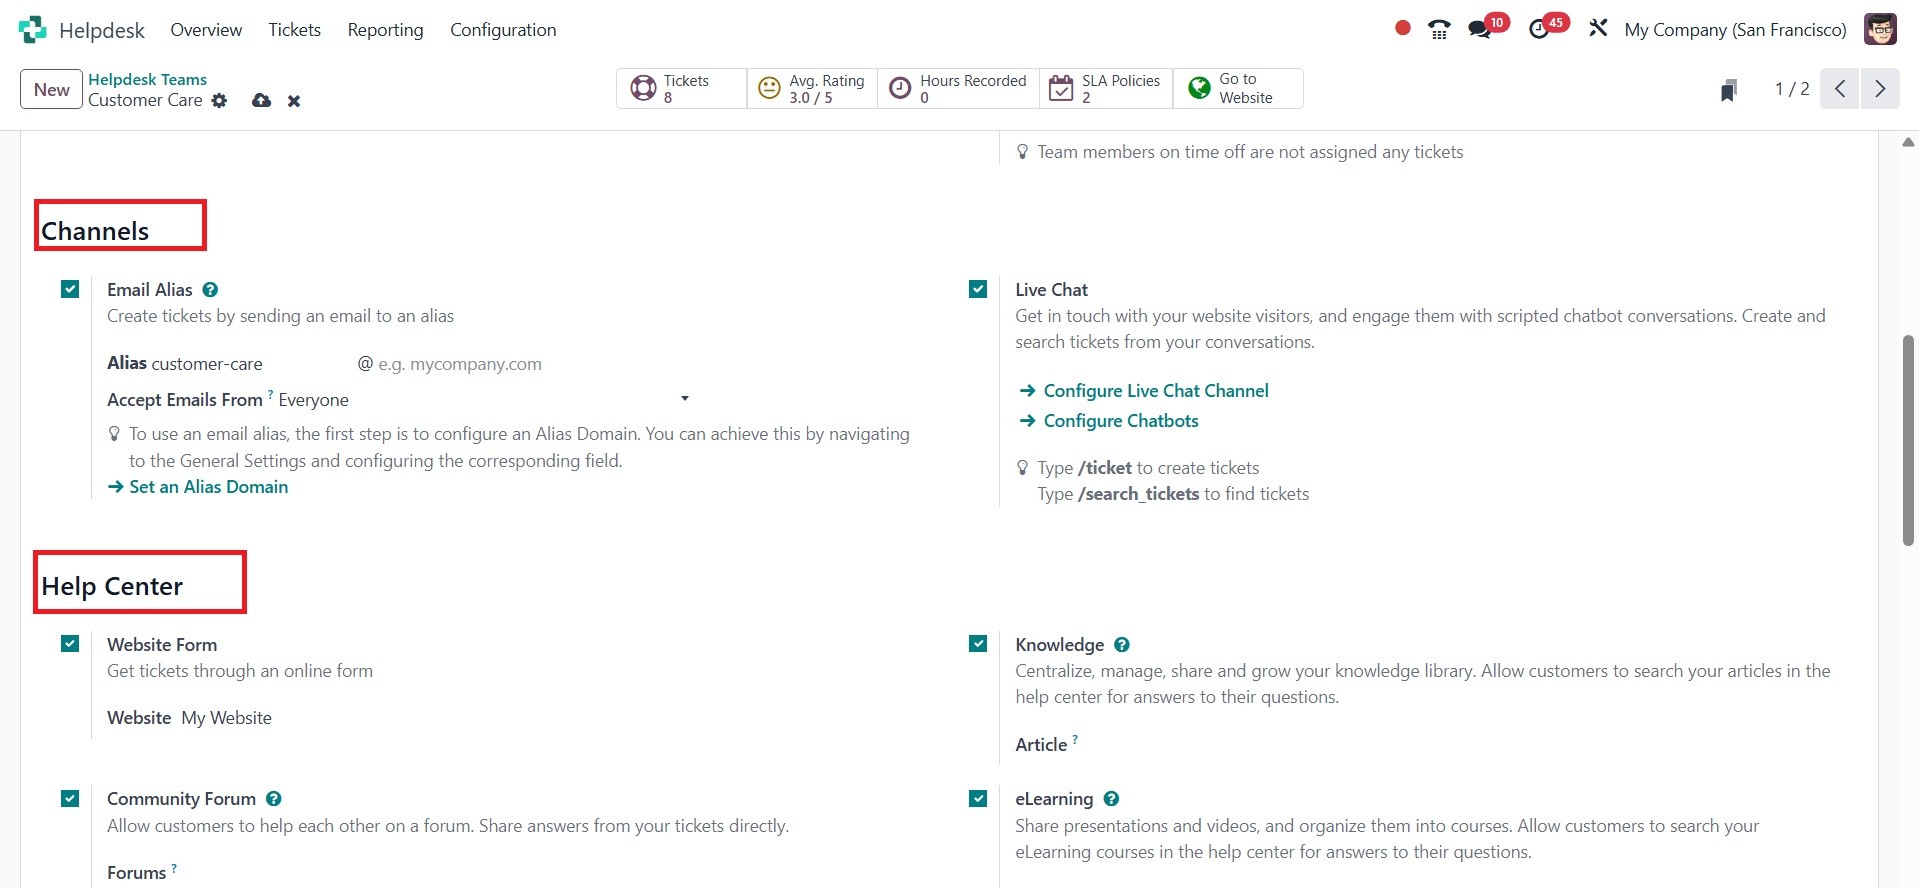
Next to that, you have the live chat option,
which helps you to get in touch with your
website visitors and engage them with
scripted chatbot conversations. Create and
search tickets from your conversations.
Here, you can configure live chat channels
and chatbots as well.
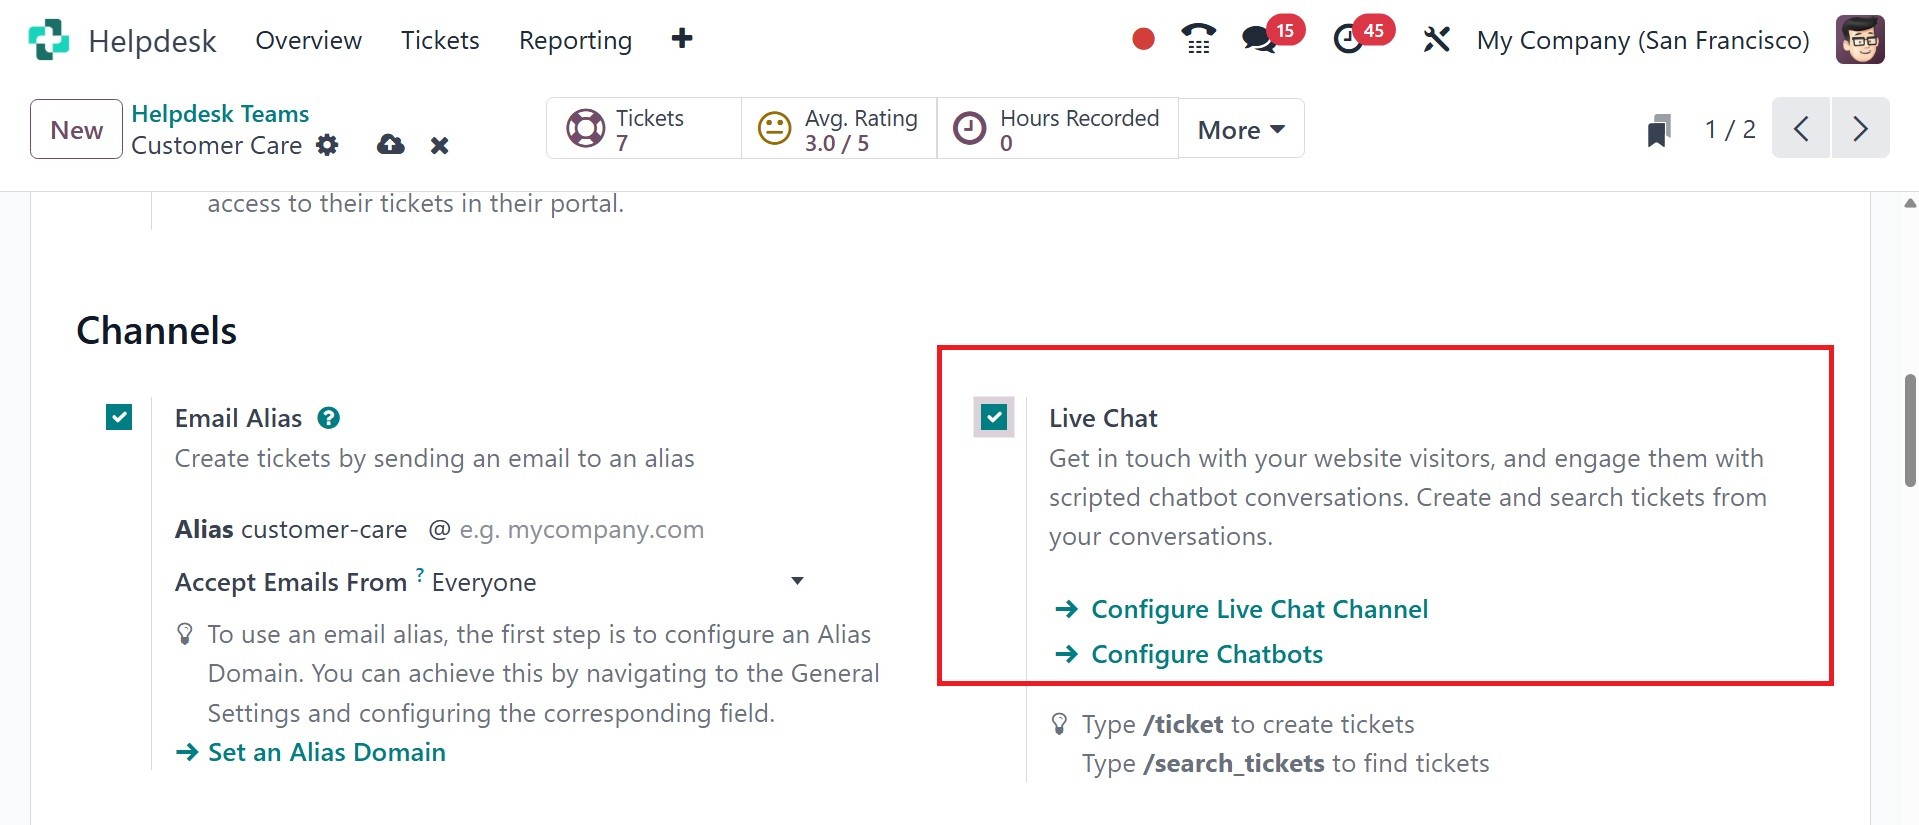
After the Live Chat setting is enabled on a
Helpdesk team, a new Live Chat channel is
created. Click on Configure Live Chat
Channel to update the channel’s settings.
On the channel’s settings page, Channel Name
can be edited, though, Odoo names the
channel to match the Helpdesk team name,
by default. On the channel form, navigate
through the tabs to complete the setup.
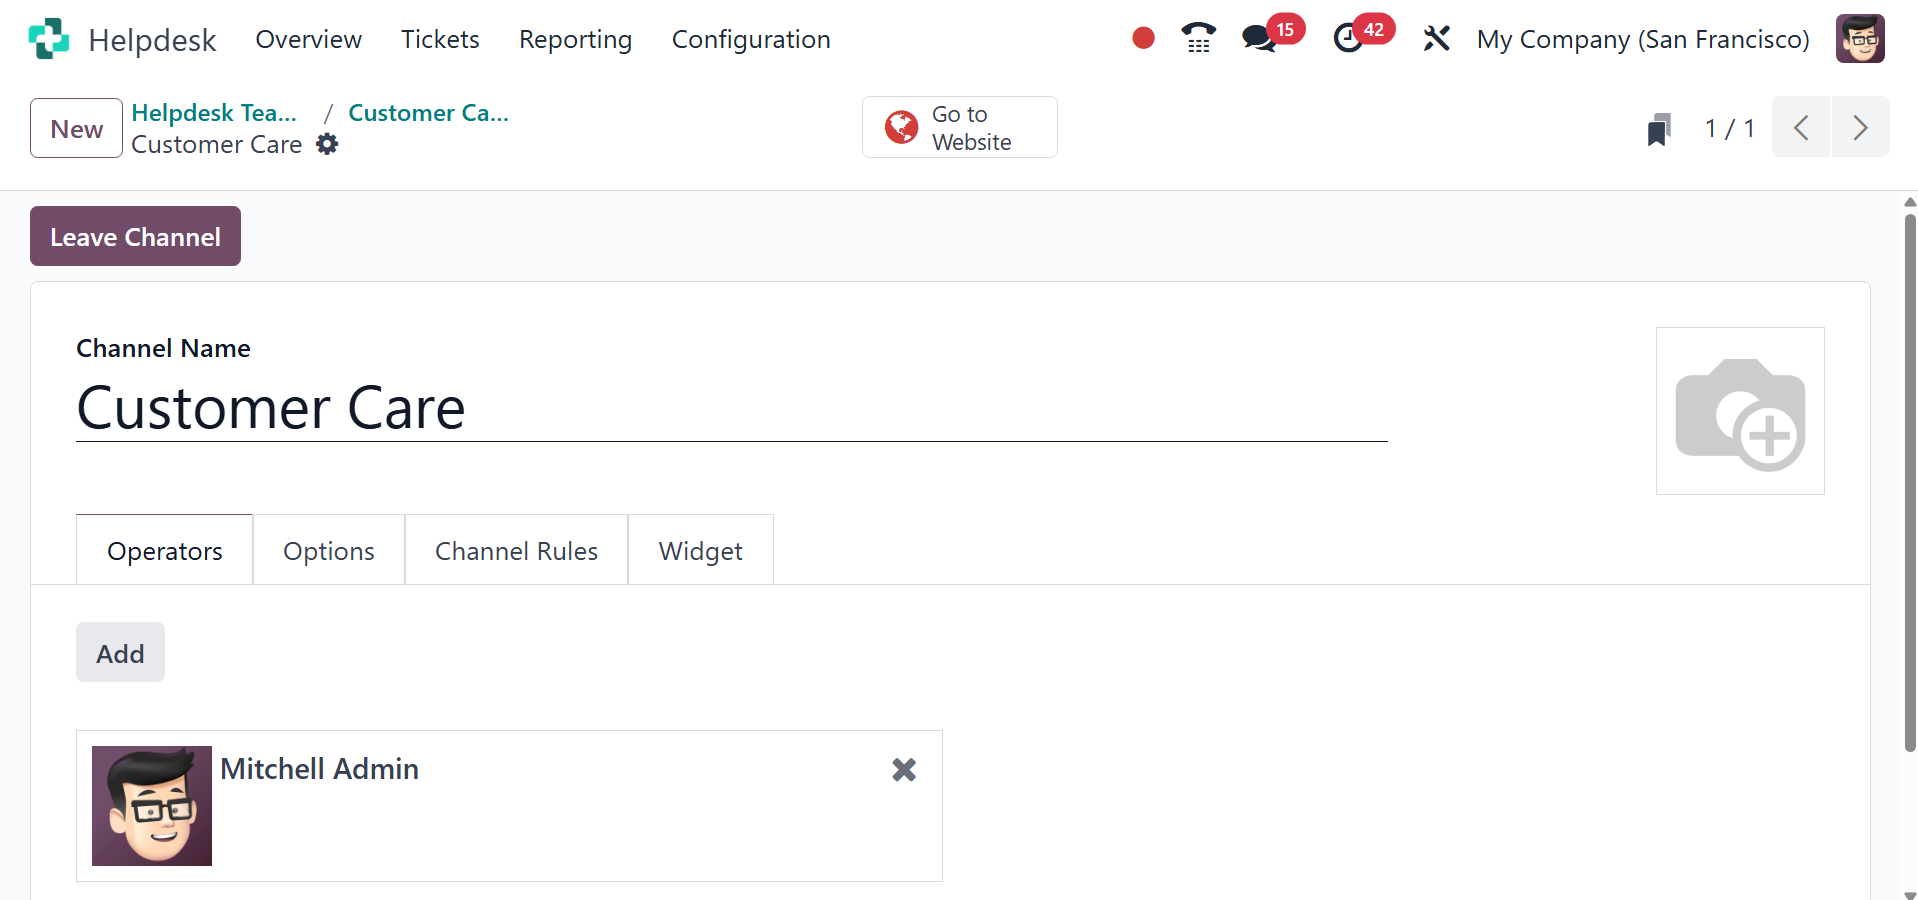
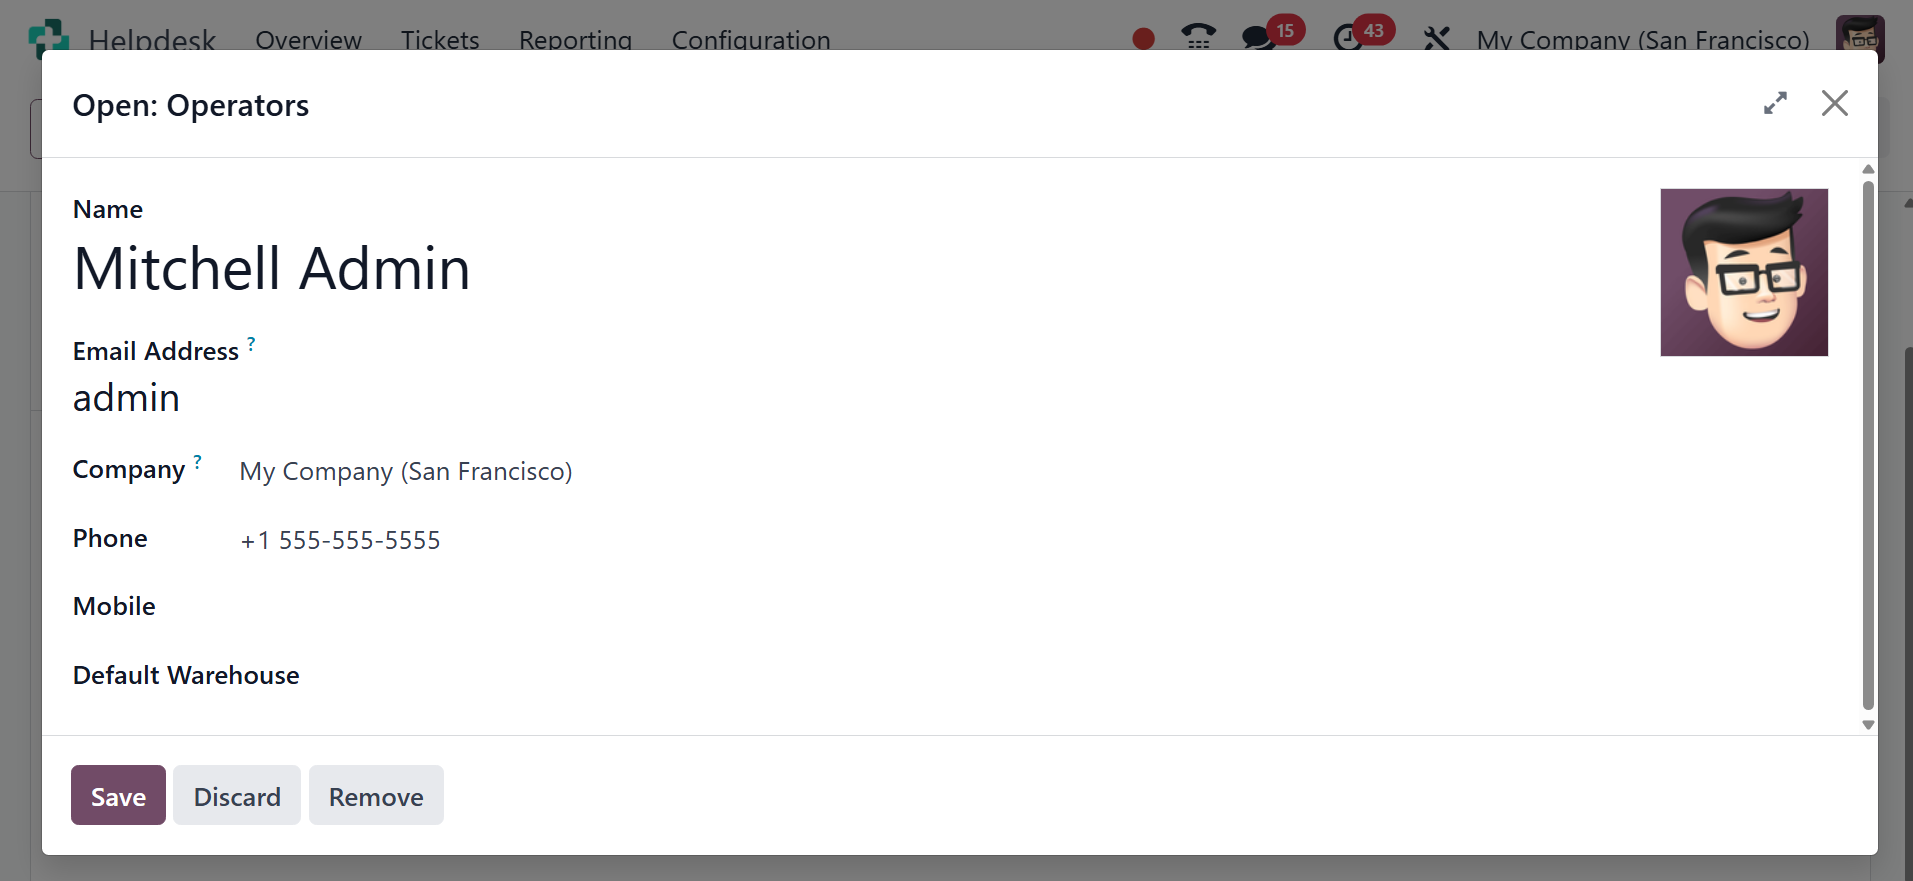
Operators are users who take on the role of
agents and reply to consumer requests via
live chat. By default, the person who
started the live chat channel is included.
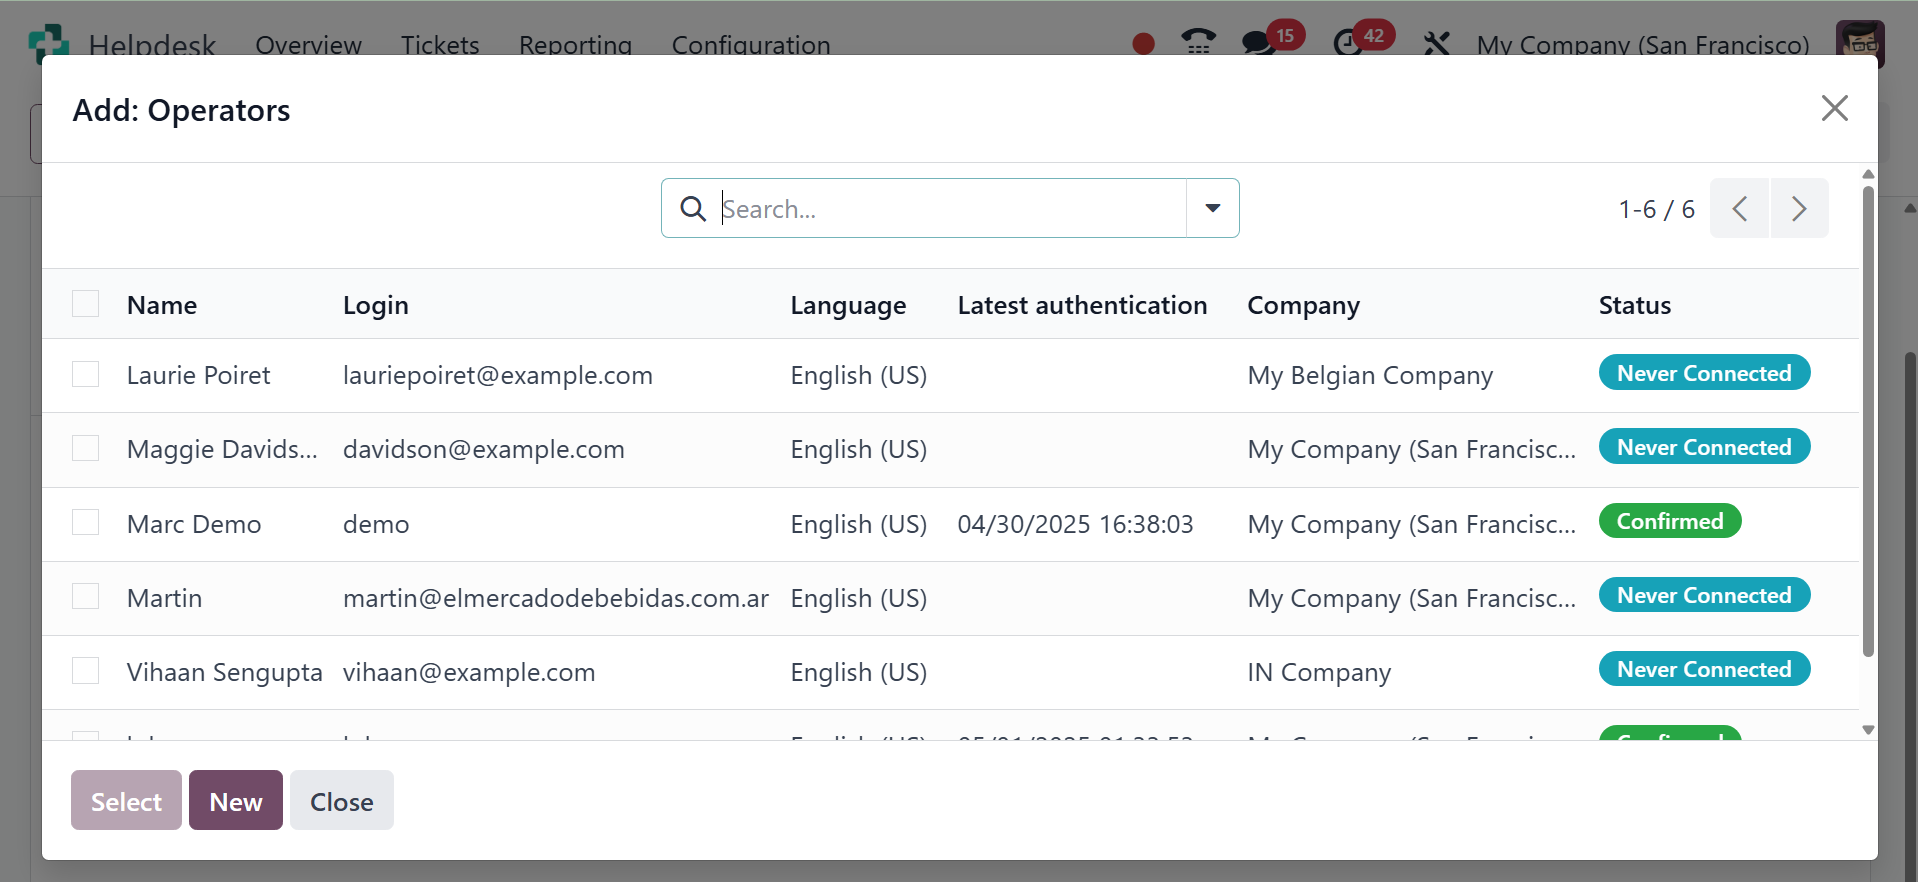
Click on the Operators tab and select Add
to add more users. On the resulting Add:
Operators pop-up window, choose the
checkbox next to the users to be added. If
new operators are required, click New to
create them.
Click Save & Close (or Save & additional for
adding numerous additional operators) once
the desired addition is finished.
Furthermore, existing operators can be
changed or eliminated by selecting their
corresponding boxes in the Operators tab,
then modifying their form values on the
resulting pop-up form, or by selecting one
of the buttons at the bottom of the form,
such Remove.
The Options tab contains the visual and text
settings for the live chat window.
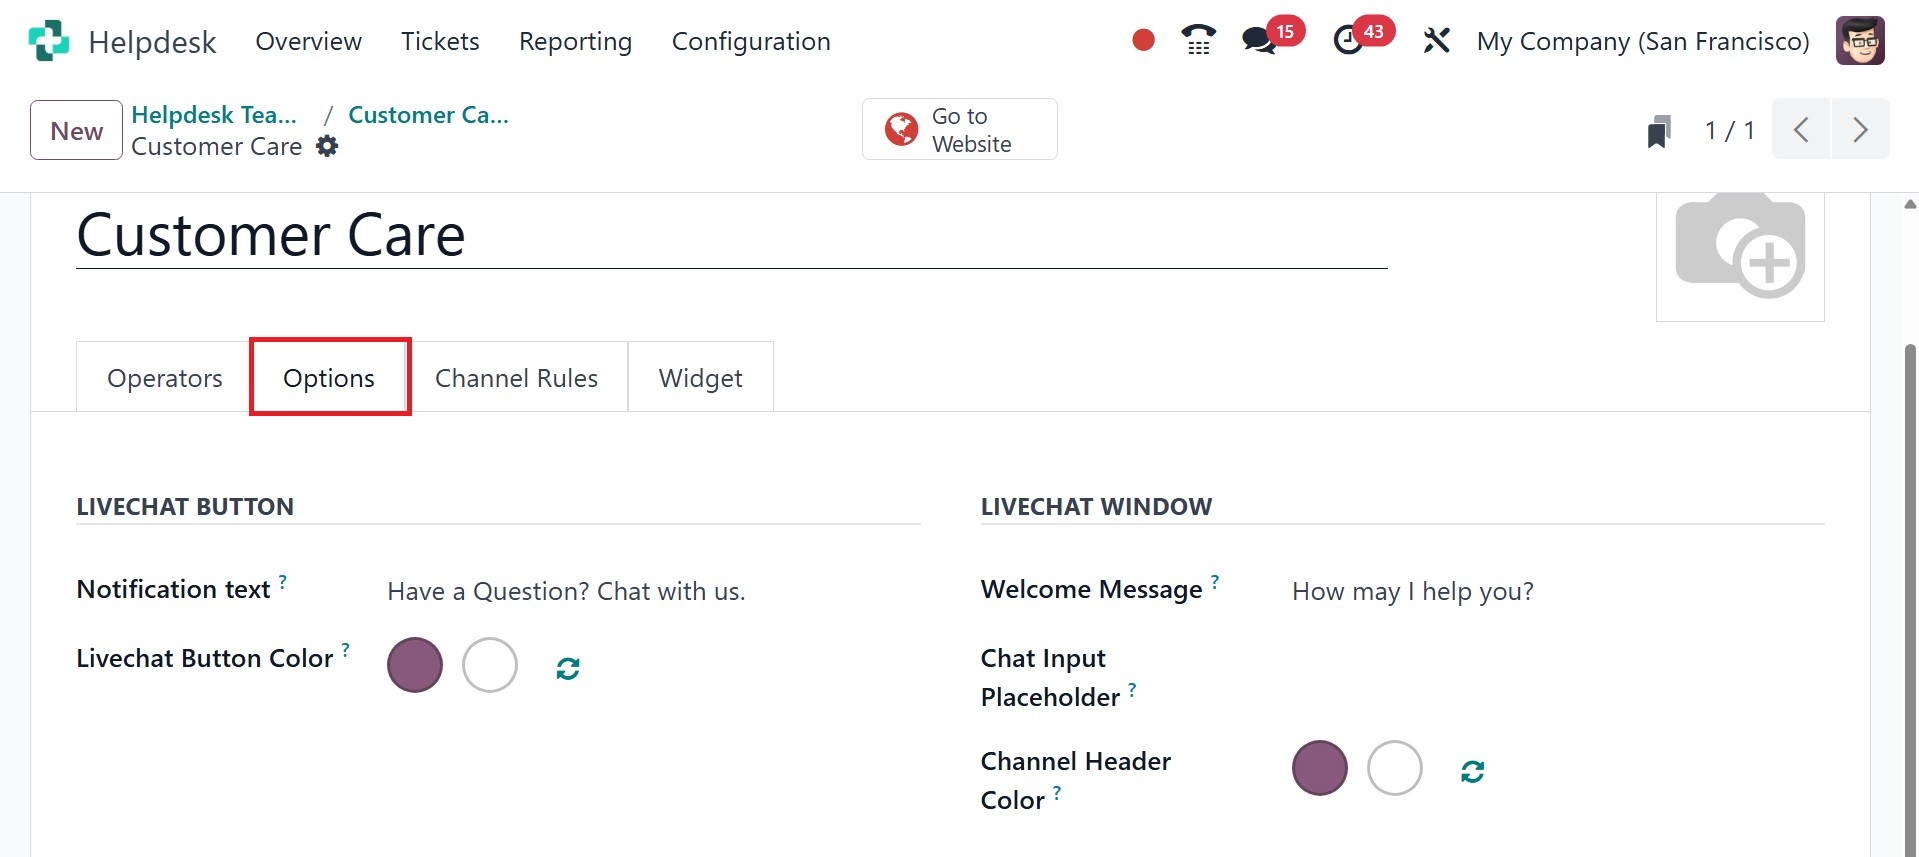
- Notification Text: This field updates
the greeting displayed in the text
bubble when the live chat button
appears on the website.
- Livechat Button Color: This field
alters the color of the live chat
button as it appears on the website.
To change the color, click on a
color bubble to open the color
selection window, then click and
drag the circle along the color
gradient. Click out of the selection
window once complete.
Then, you have the livechat window, where,
you can add the welcome message, chat
input placeholder, and channel header
color.
The Channel Rules tab determines when the
live chat window opens on the website by
logic of when a URL Regex action is
triggered.
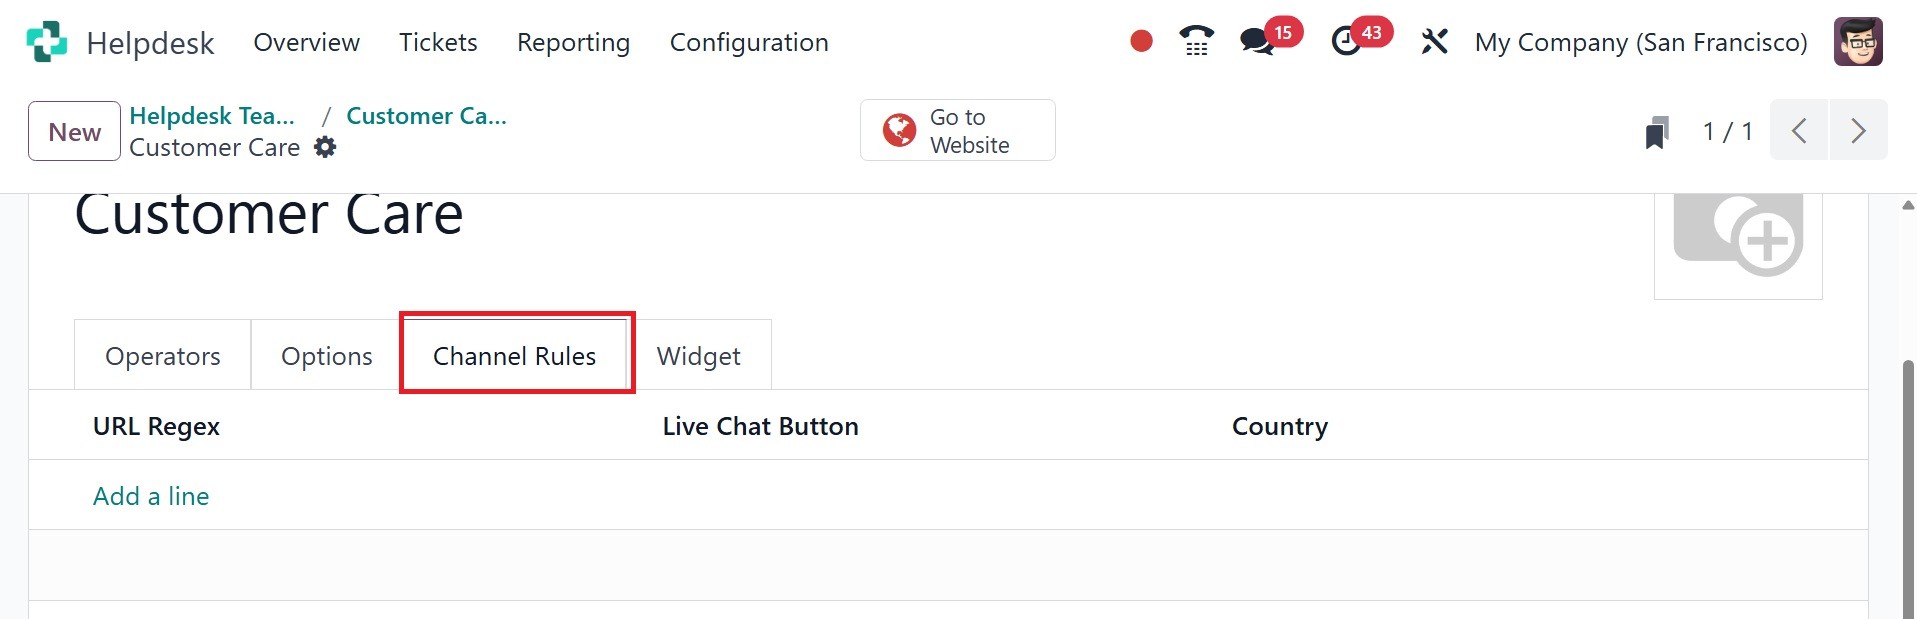
Edit existing rules by selecting them from
the Channel Rules tab, or create a new
rule by clicking Add a line. Then, proceed
to configure the details for how the rule
should apply on the pop-up form that
appears. Add the URLs for the pages where
the channel should appear in the URL Regex
field. Only the path from the root domain
is needed, not the full URL.
If this channel should only be available to
users in specific countries, add those
countries to the Country field. If this
field is left blank, the channel is
available to all site visitors. On
selecting the Add a line option, you get
the image below.

The Widget tab on the live chat channel form
offers a website widget that can be added
to third-party websites. Additionally, a
URL is available that can provide instant
access to a live chat window.
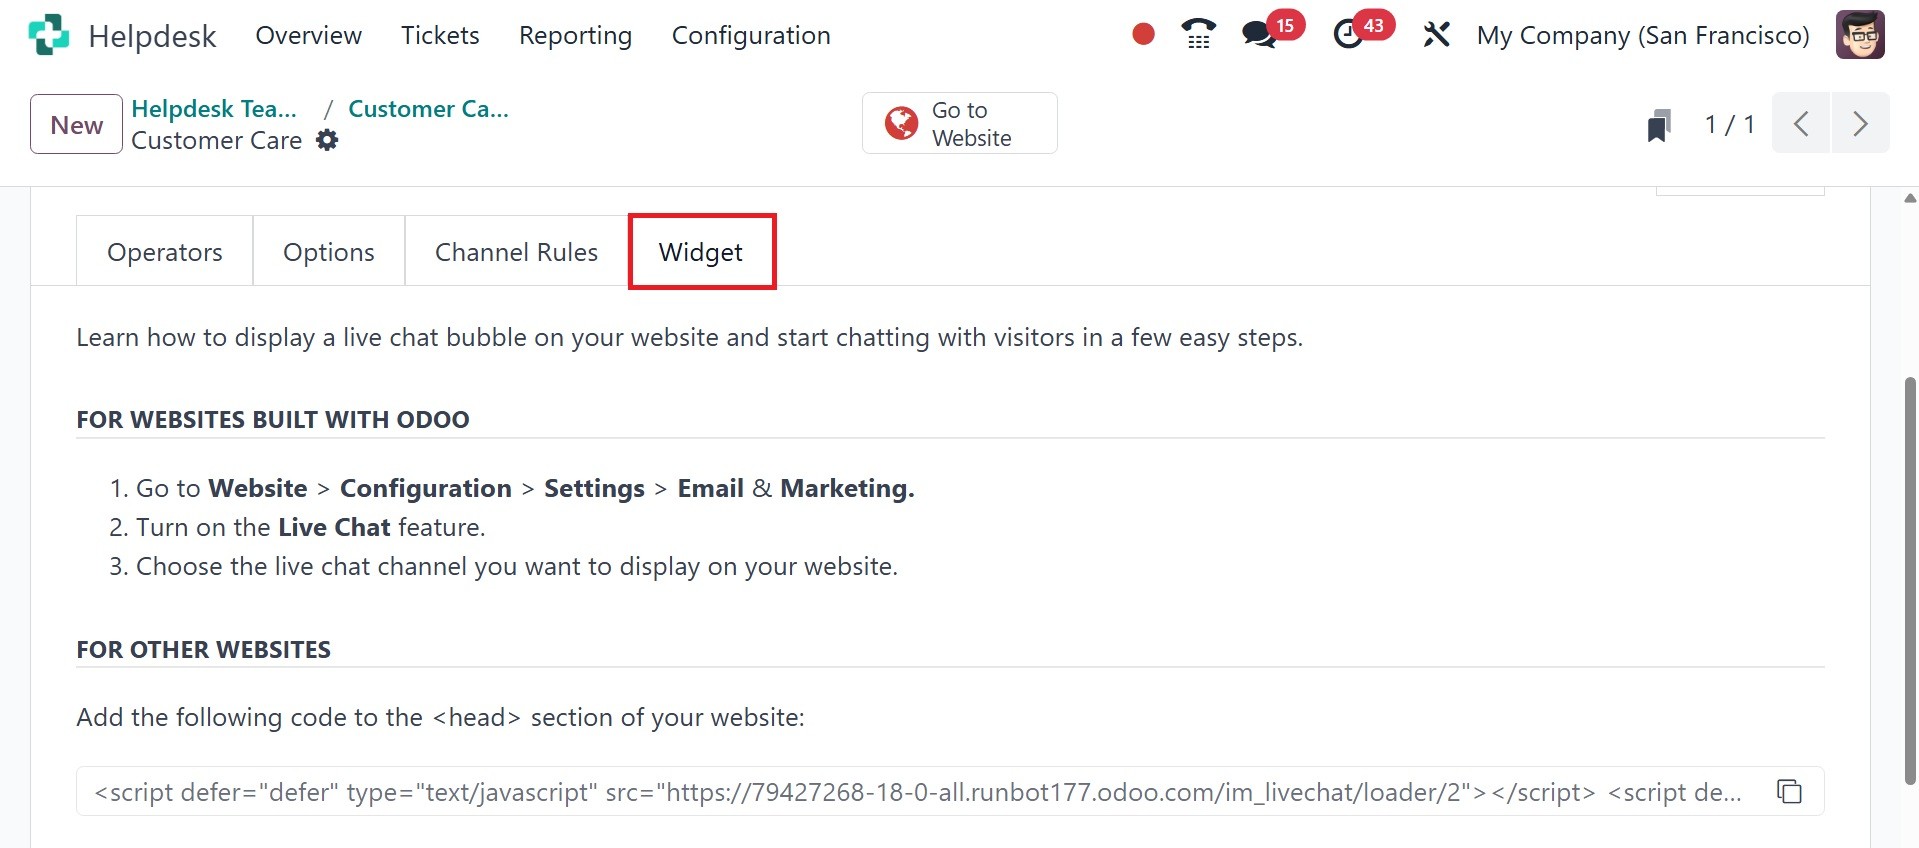
Operators who have joined a live chat channel
are able to communicate with site visitors
in real-time.
Now, you can also make use of the configure
chatbot option, as in the image below.

If a chatbot is added to a live chat channel,
a new Chatbots smart button appears on the
channel settings form. Click here to
create and update the chatbot script.
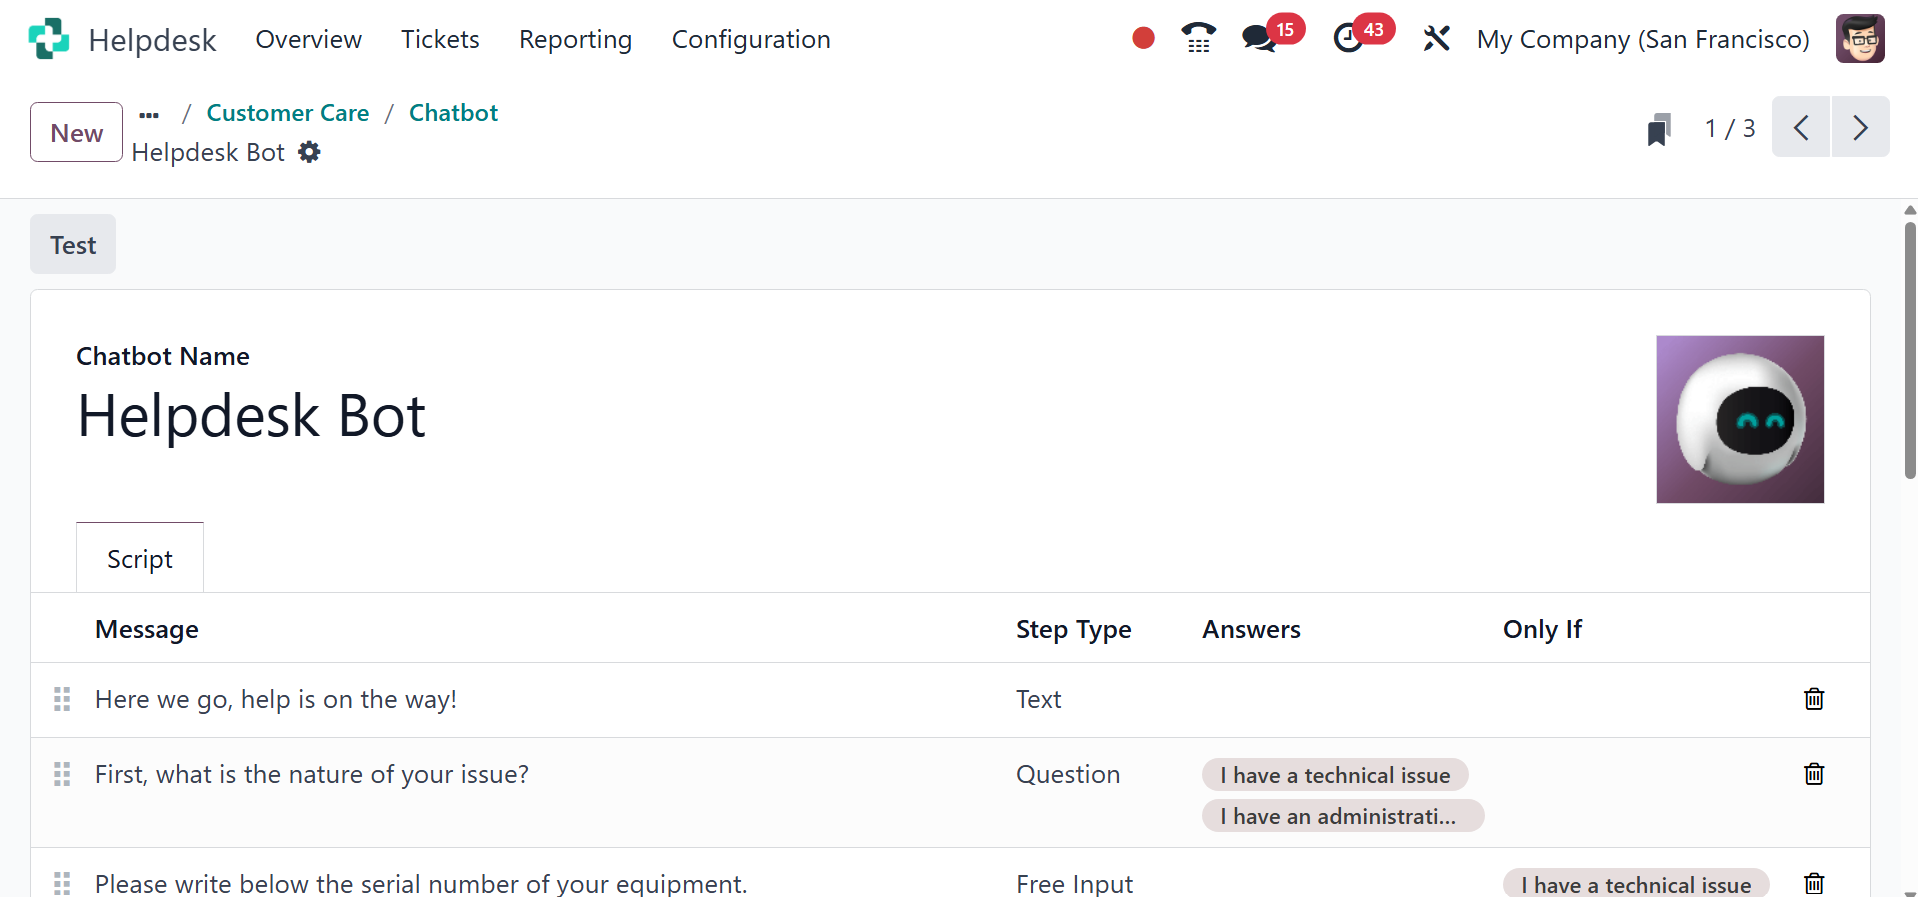
Each line in the script contains a Message,
Step Type, Answers, and conditional Only
If logic that applies when certain
pre-filled answers are chosen.
To create more steps in the script, click Add
a line, and fill out the script steps
form, according to the desired logic.
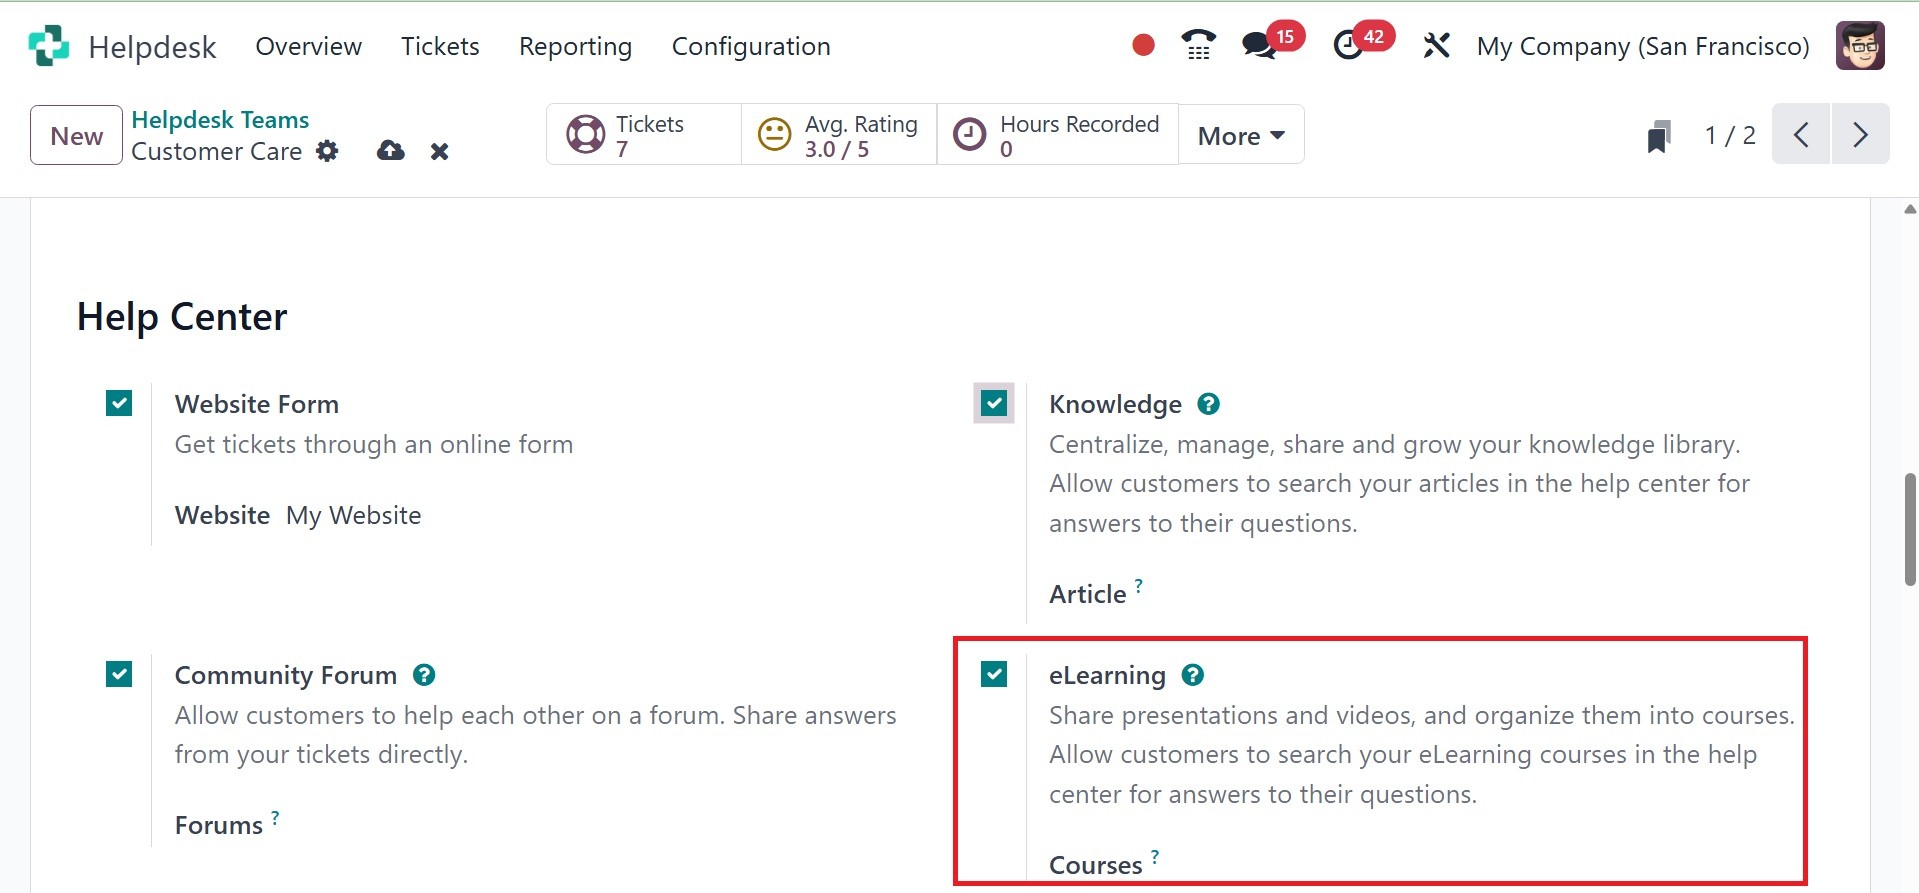
Below that, you have the help center option,
where there is a website form, knowledge,
community forum, and e-learning option, as
in the screenshot above.
The website form helps you get tickets
through an online form field.
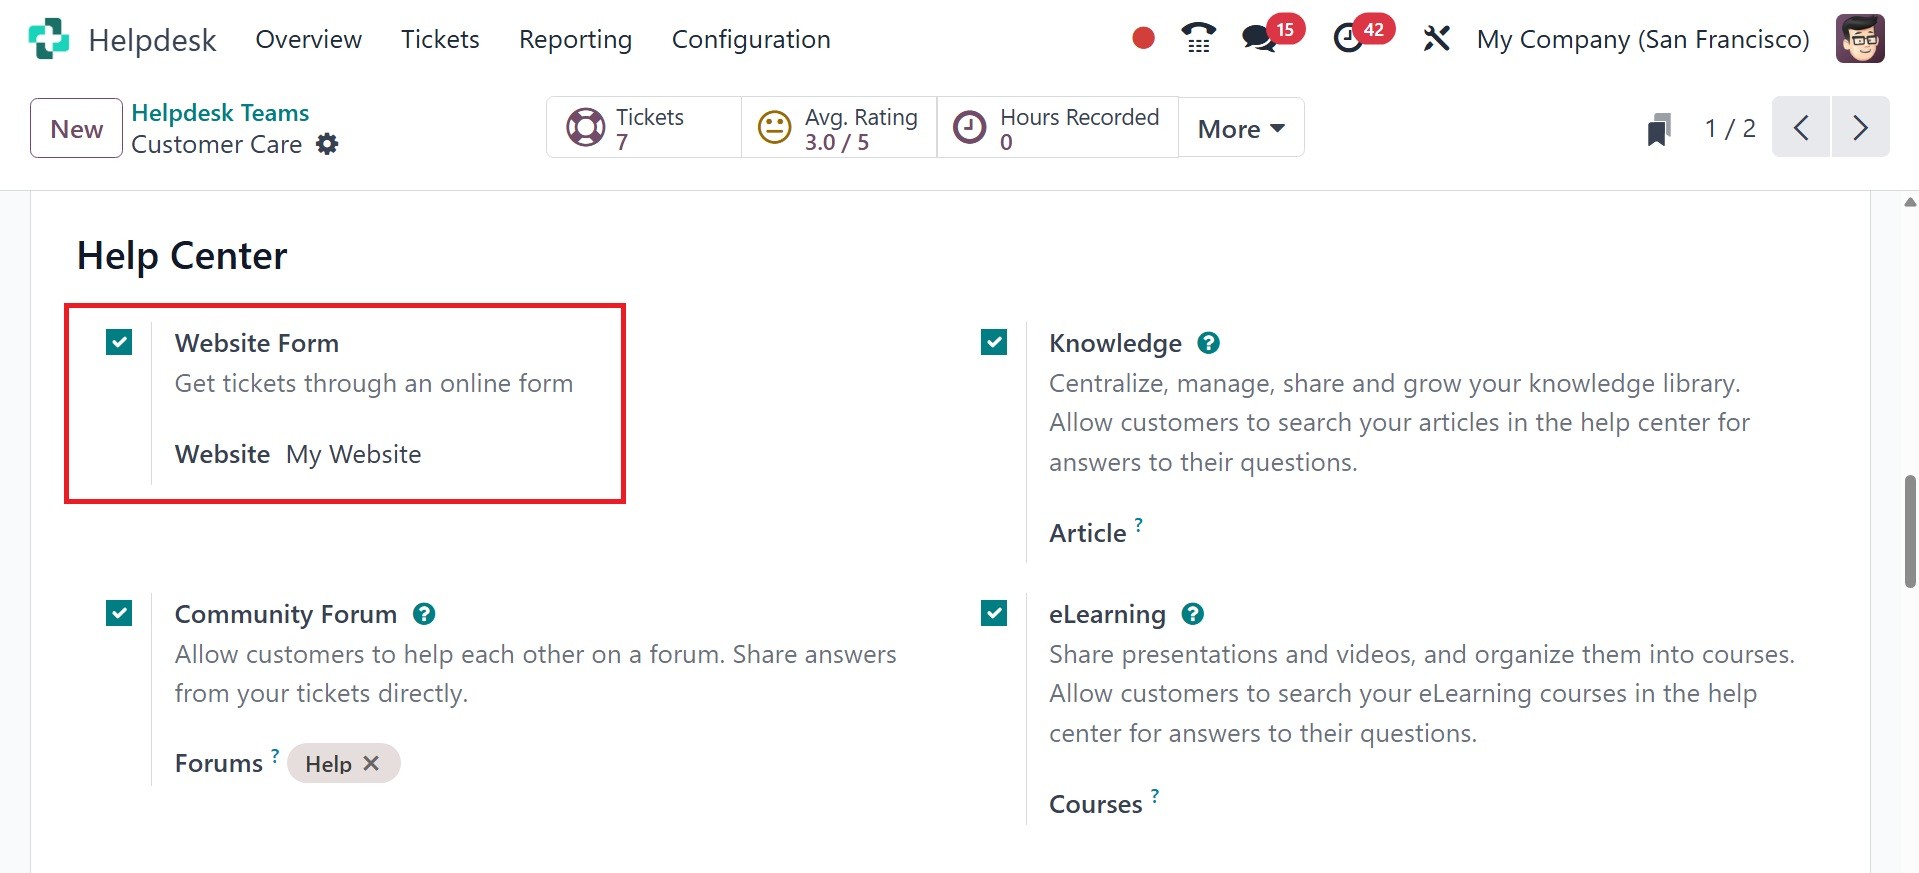
You must enable the "Website Form" option for
a particular Helpdesk team in order to
collect tickets from a website form within
Odoo's Helpdesk module. This will produce
an editable form on your website that,
once submitted, opens a new Odoo ticket.
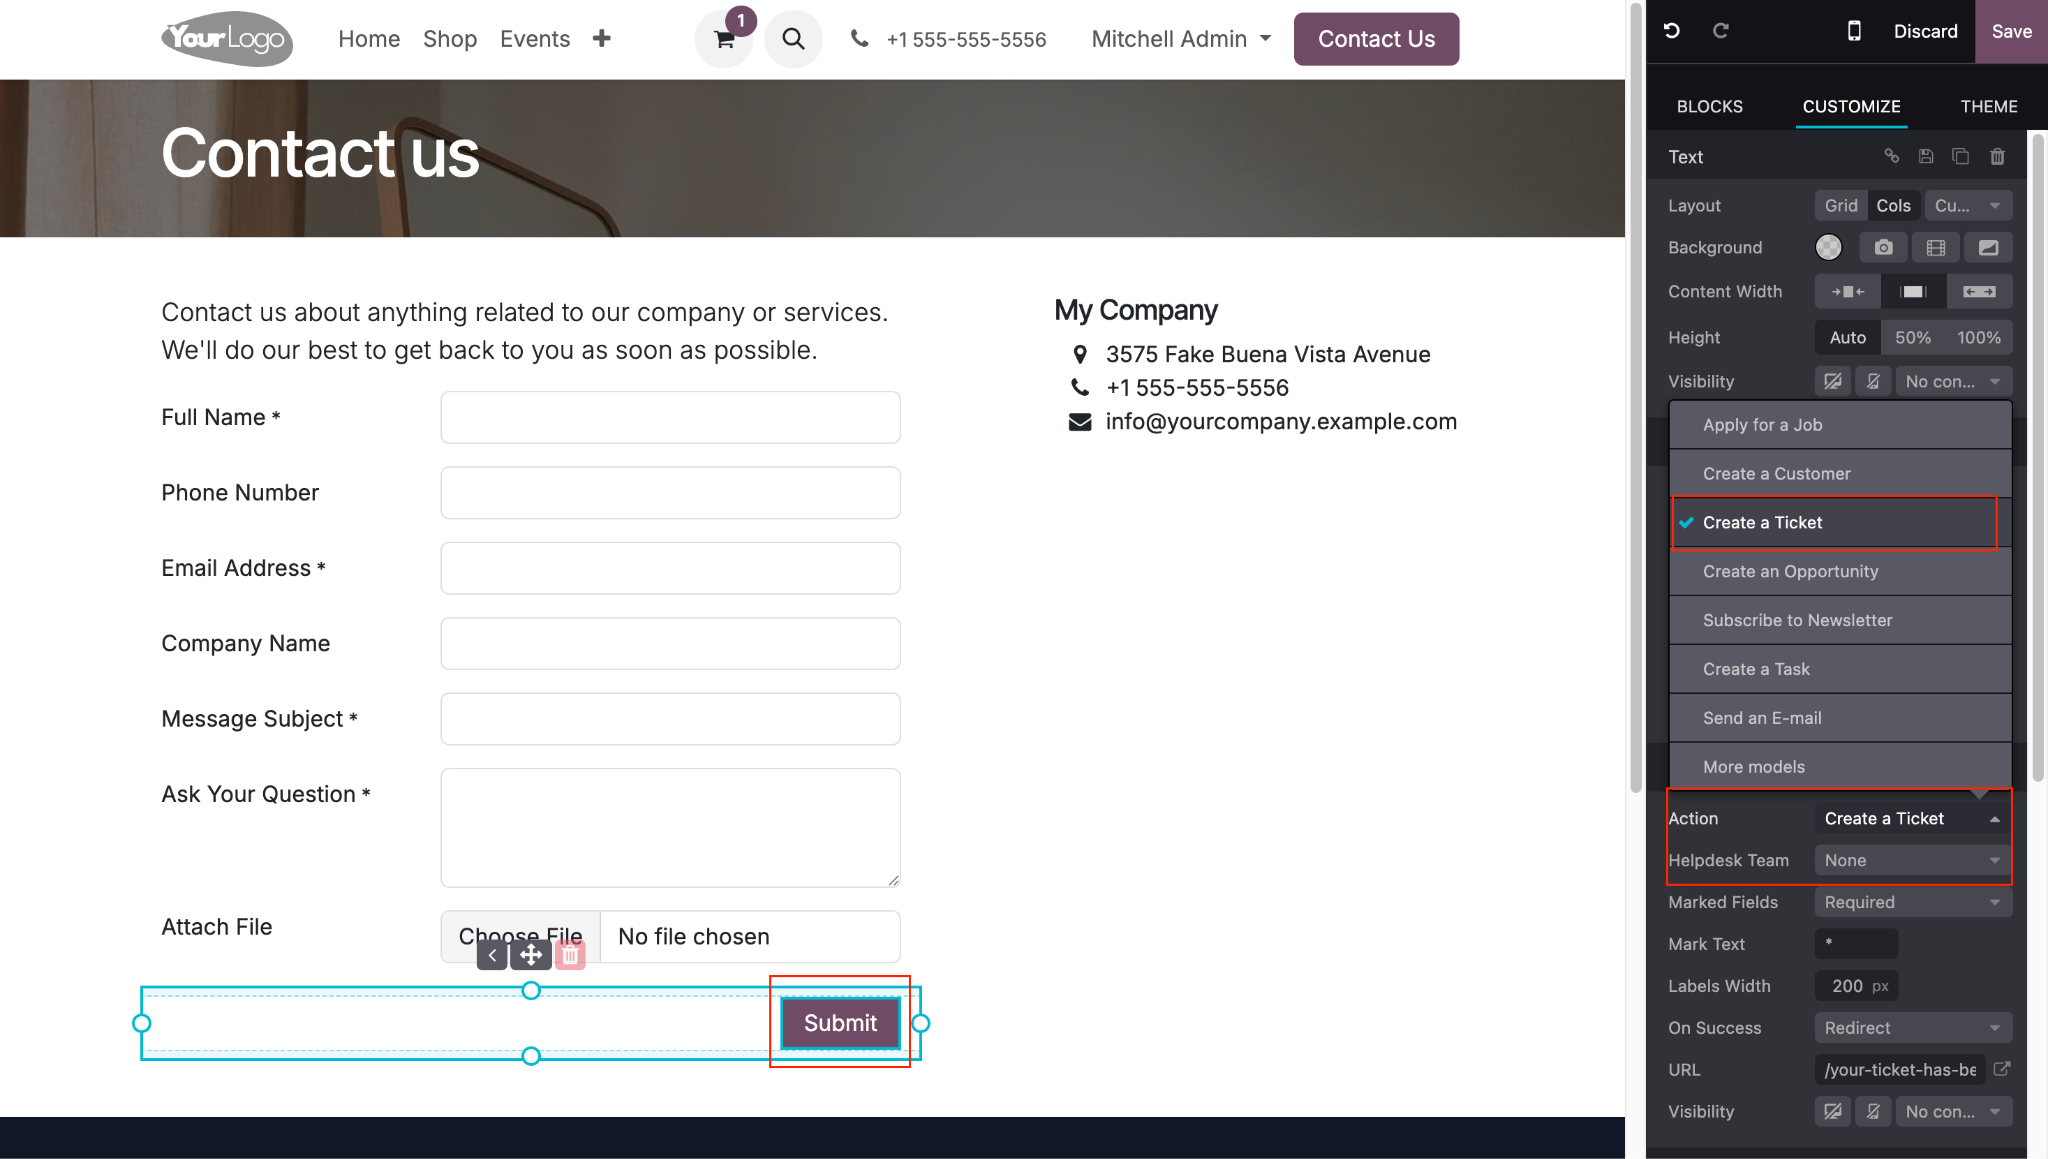
Once activated, the automatically generated
form can be seen and edited by clicking
the "Go to Website" smart button. Modify
the form fields as necessary, perhaps by
adding custom fields for particular data
you wish to gather.
The knowledge option helps you to centralize,
manage, share, and grow your knowledge
library. Allow customers to search your
articles in the help center for answers to
their questions.
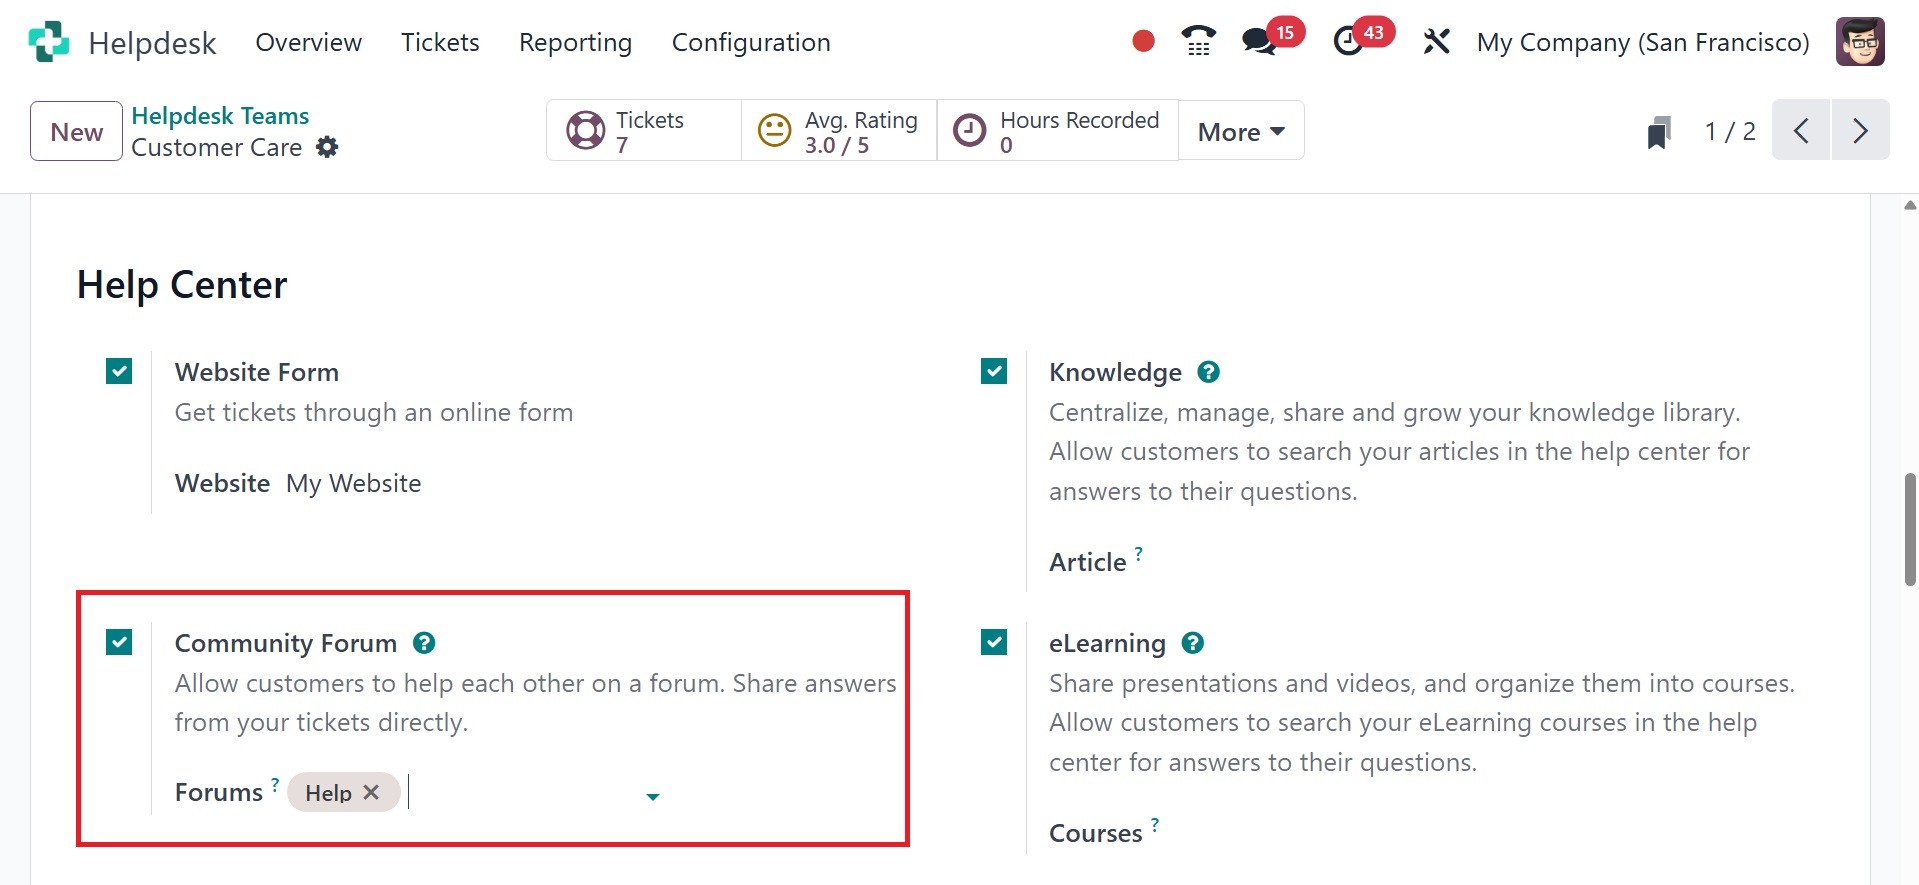
The community forum option helps you to allow
customers to help each other on a forum.
Share answers from your tickets directly.
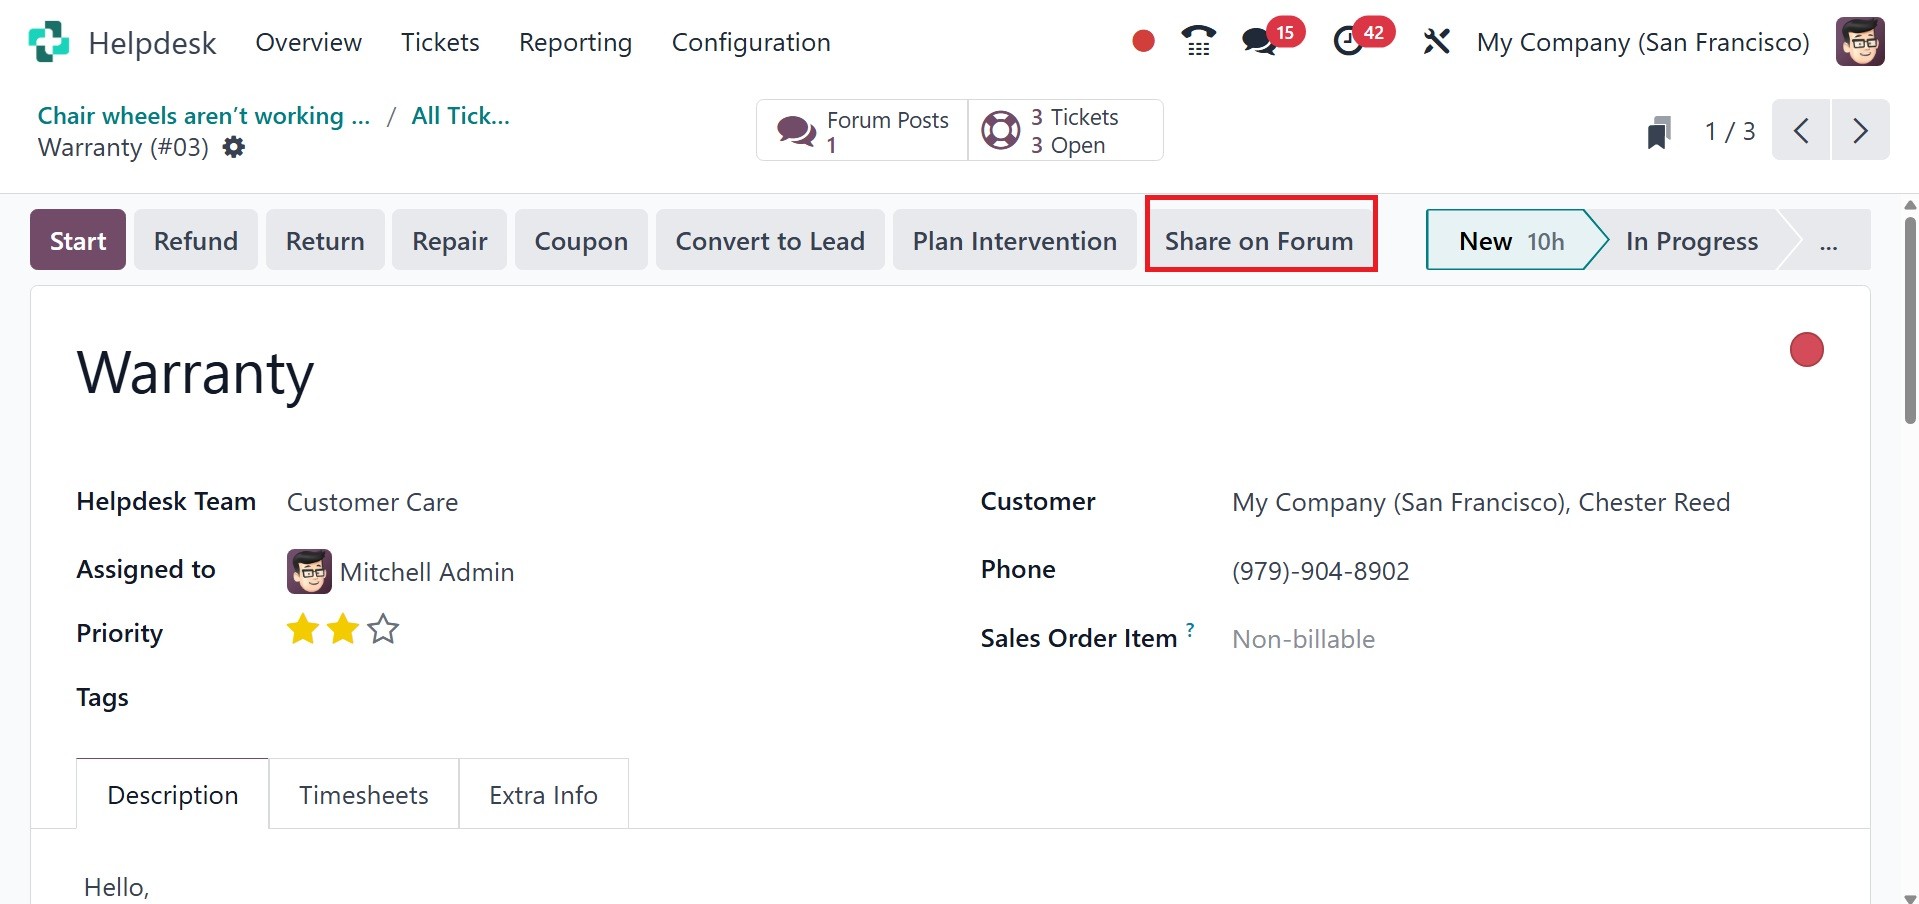
To generate a helpdesk ticket from the forum,
firstly, you have to activate this option,
then choose which forum you want to give
access to.
And the e-learning option shares
presentations and videos, and organizes
them into courses. Allow customers to
search your eLearning courses in the help
center for answers to their questions.
When a user creates a forum post, they click
on the three dots and then on View Ticket.
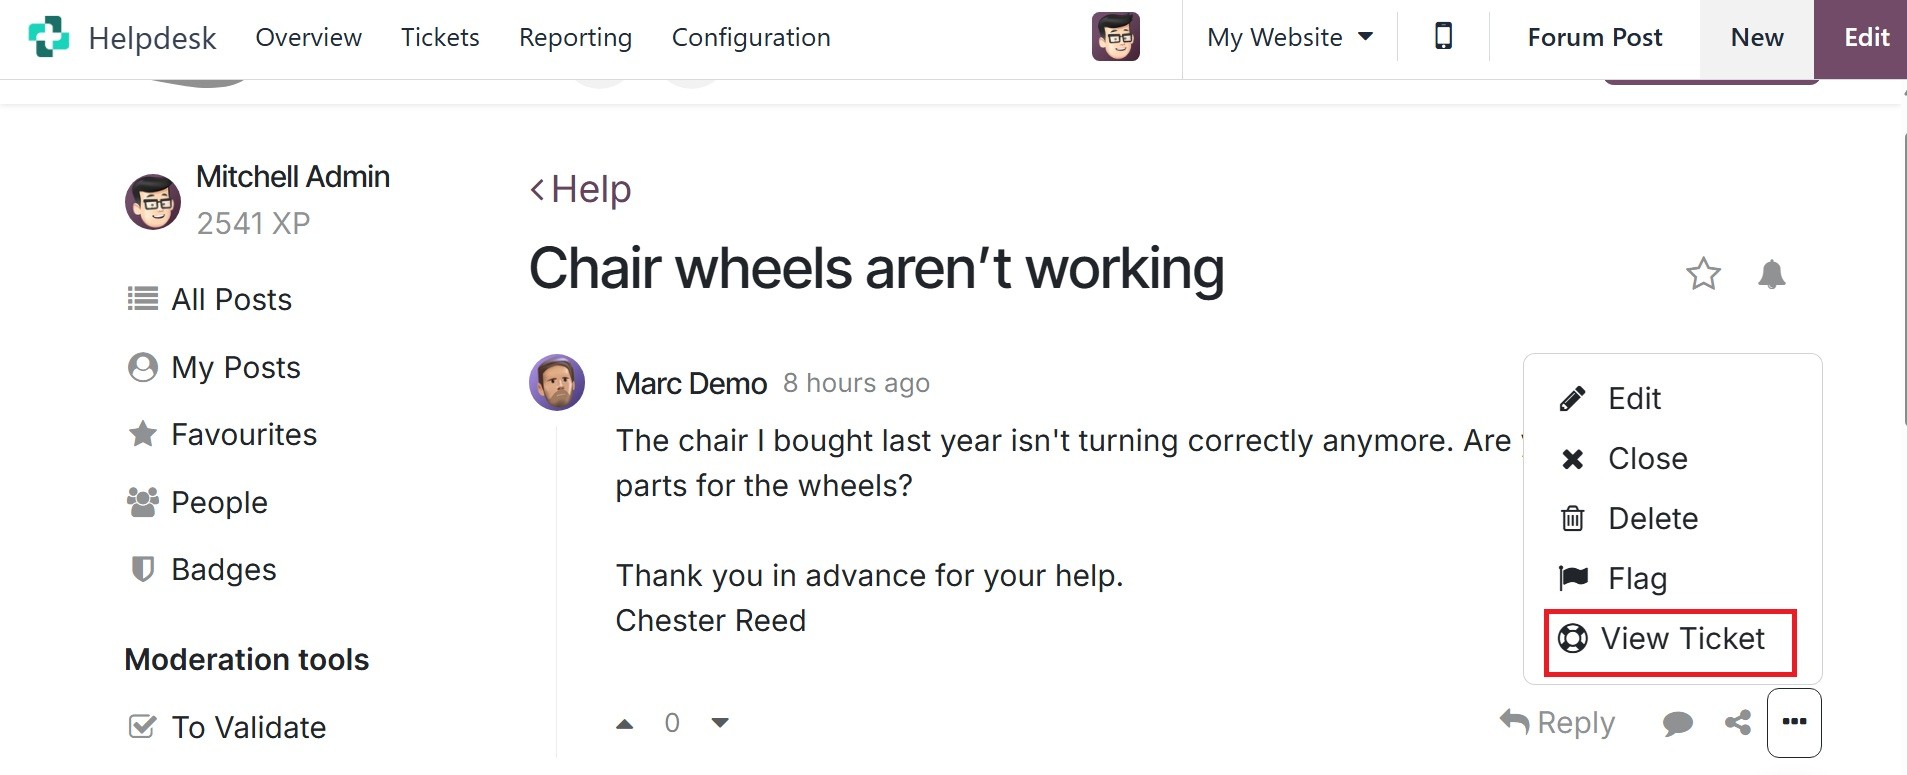
Also, you can navigate to the forum post by
clicking on the forum post from the
chatter of the helpdesk ticket. You can
share on the forum using the icon marked
below.
Now, you have the ‘Track & Bill Time’ option,
as in the image below.
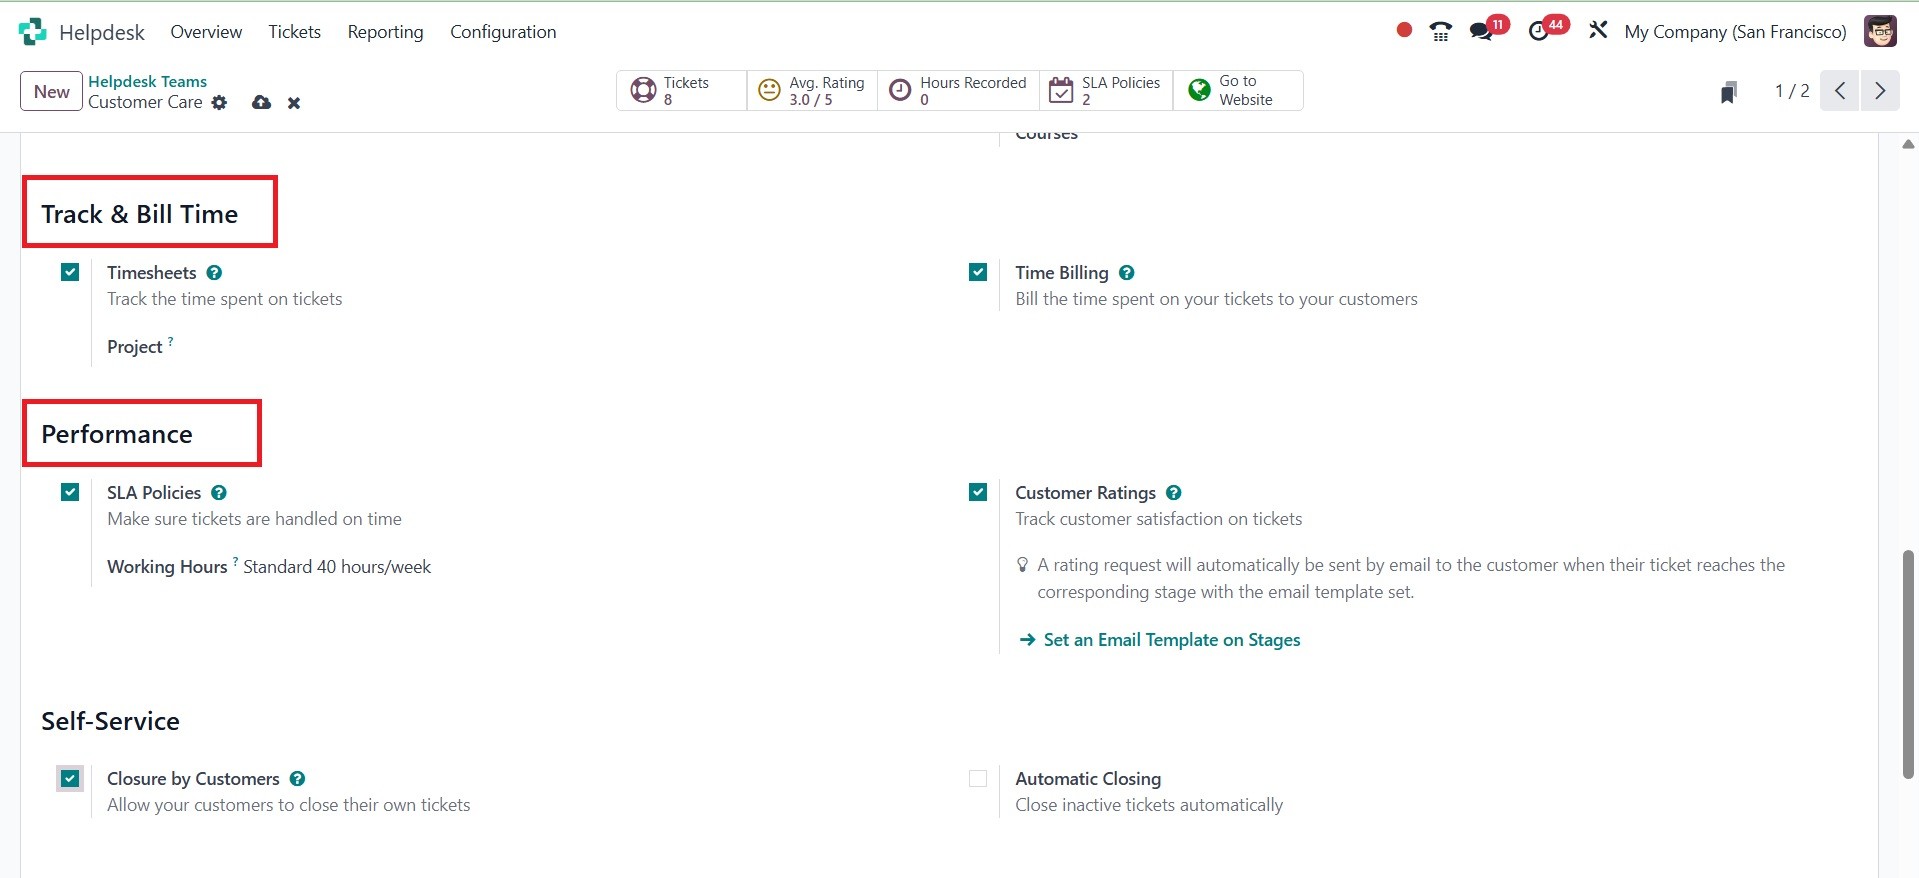
There is a ‘timesheet’ and ‘time billing’
feature. Timesheet helps to track the time
spent on tickets, and time billing helps
to bill the time spent on your tickets to
your customers. Now, under the performance
option, there are ‘SLA policies’ and
‘Customer Ratings’ to activate. SLA policy
makes sure tickets are handled on time,
and the customer rating helps track
customer satisfaction with tickets. Below
that, there is self self-service option,
as in the image below.
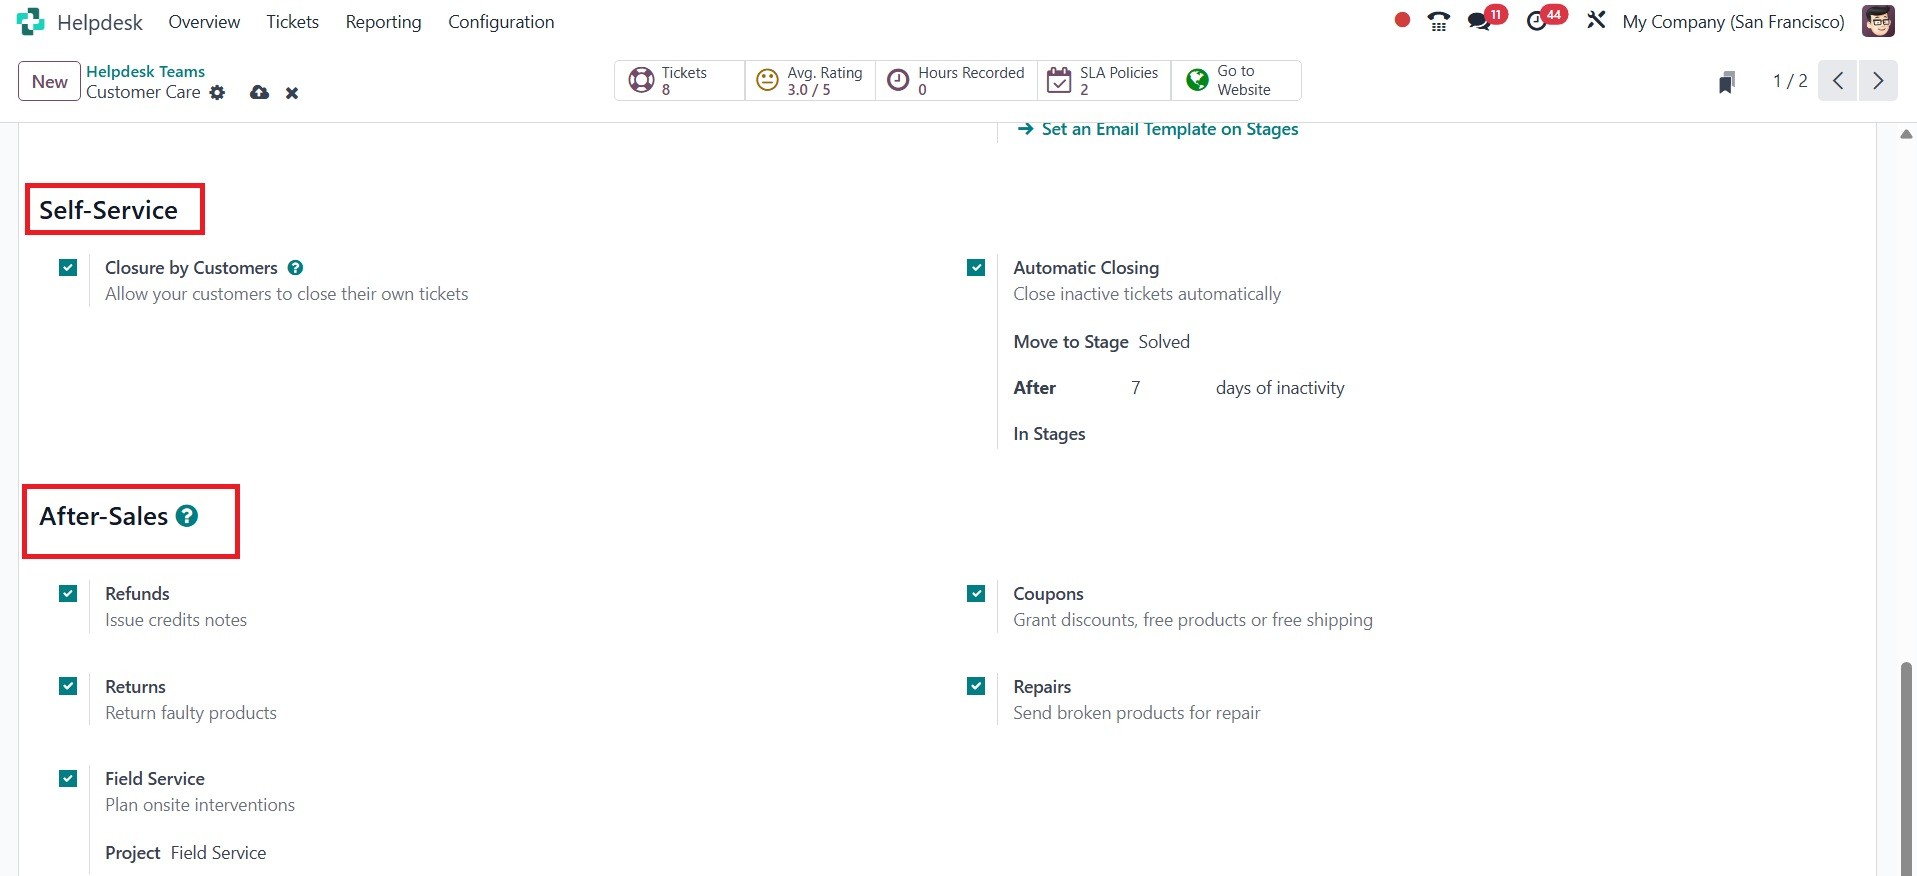
Under self-service, you have the ‘closure by
customer’ option, which allows customers
to close their own tickets from the
customer portal. ‘Automatic closing’
option closes inactive tickets
automatically. Under the after-sales
option, you have refunds, returns, field
service, coupons, and repairs.
Here, you can have smart tabs for tickets,
average rating, hours received, and SLA
policies, and go to the website, as in the
image below. In a helpdesk system, tickets
track customer requests, average rating
measures user satisfaction, hours recorded
indicate the total time spent on tickets,
and SLA policies define service level
agreements for response and resolution
times.