2. Tickets
Customers can ask inquiries or
report issues in Odoo 18 in a
number of ways. The Helpdesk
module makes it simple for
you to assist your clients.
Customers can reach a
company's help desk staff via
live chat, messaging, the
Contact Us page, forums,
websites, emails, and phone
calls, among other methods.
When a customer asks for
assistance from your company,
you may manually create a
ticket in the Helpdesk module
to record the issue. In Odoo
18, the creation of help desk
tickets can be automated. The
Tickets menu in the Helpdesk
module of Odoo 18 will be
used to manage each of these
tickets.
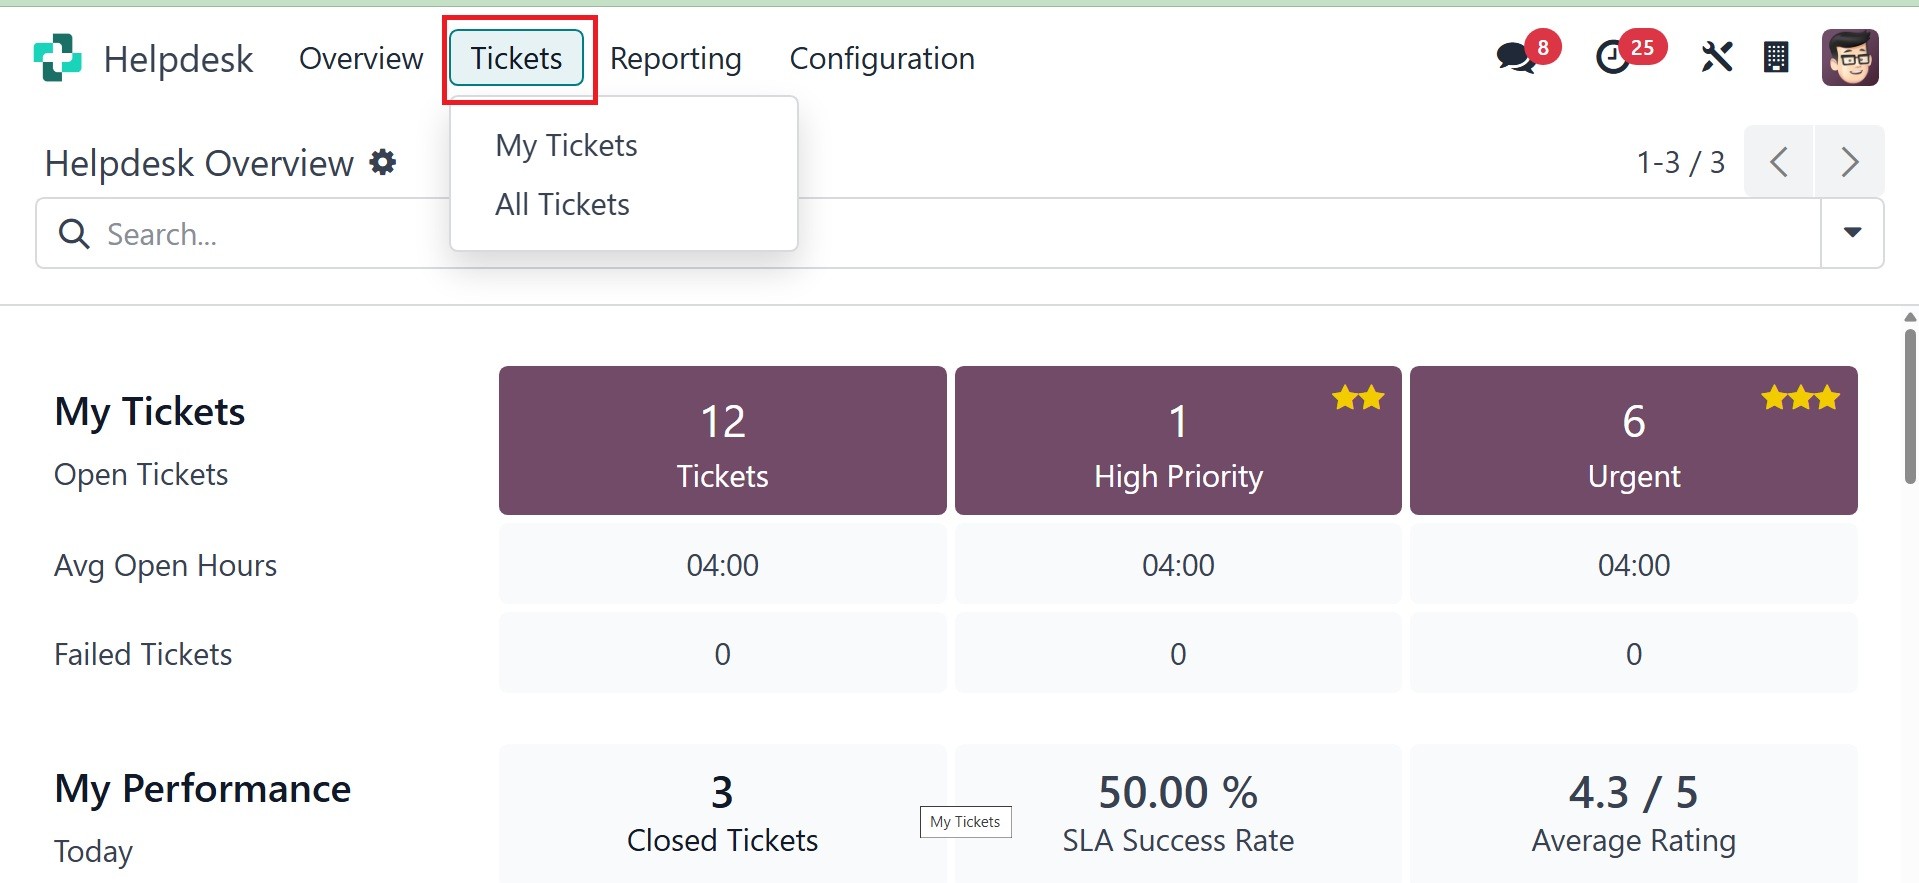
You can see the My Tickets and
All Tickets options under the
Tickets menu.
2.1 My tickets
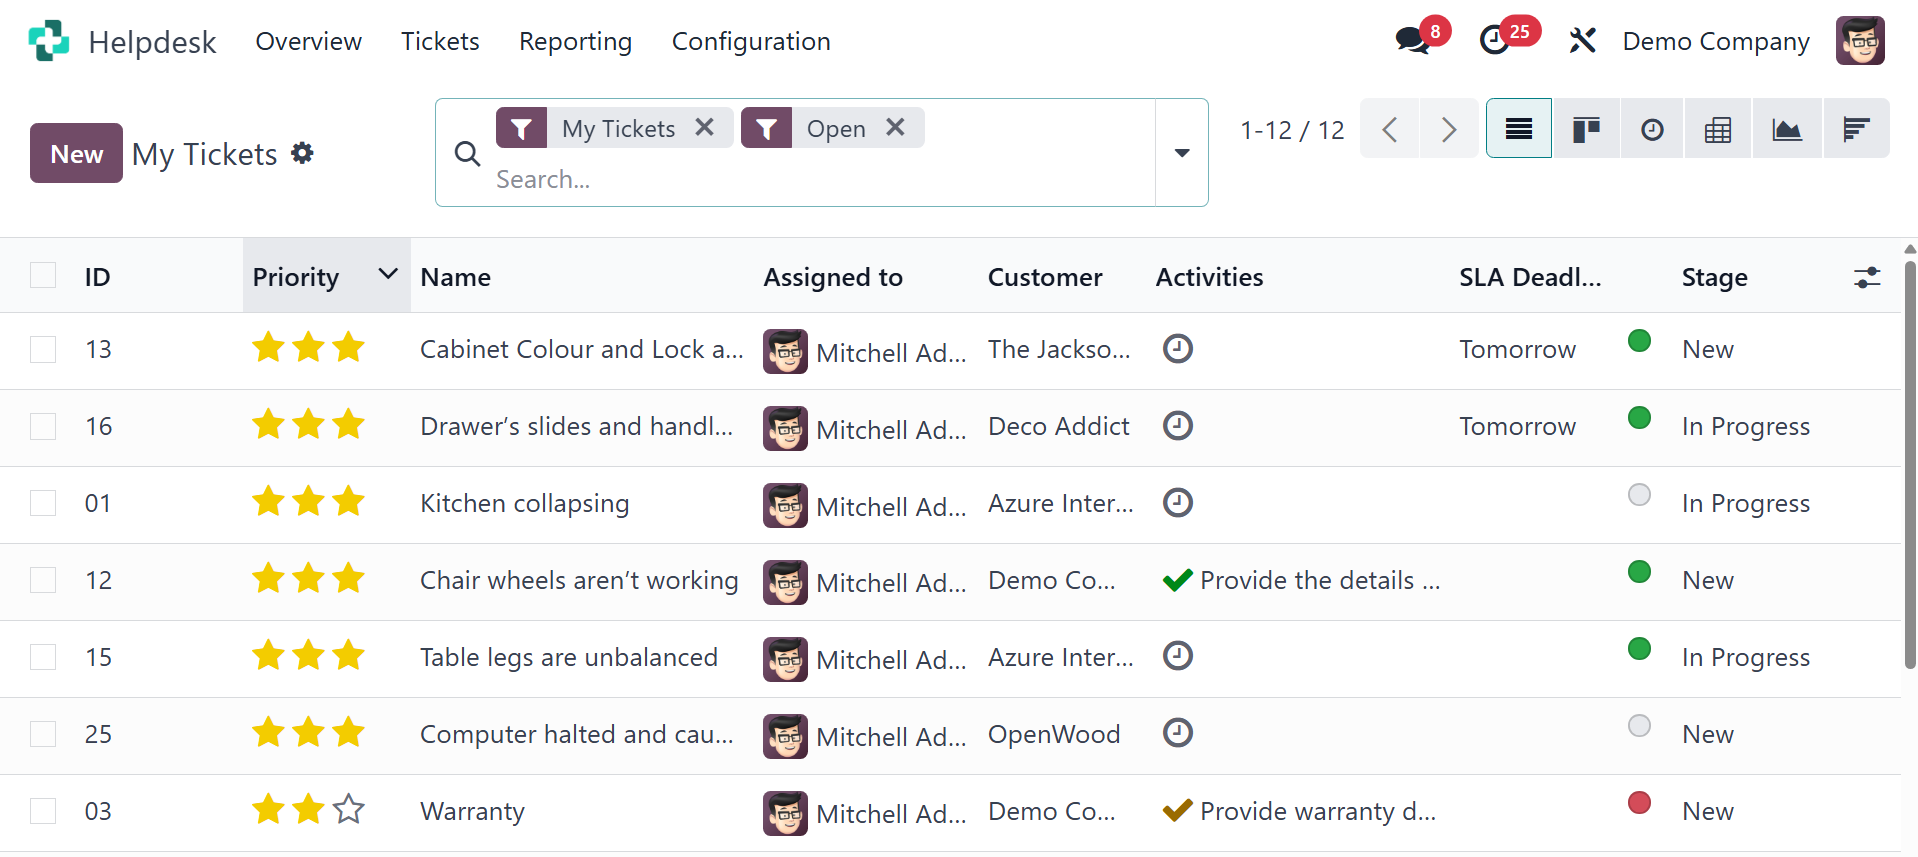
The My Tickets platform will show
you a list of all the tickets
that have been issued to you.
Here, you have options like
ID, priority, name, assigned
to, customer, activities, SLA
deadlines, and stages,
respectively. The page can be
viewed in list, kanban,
activity, pivot, graphical,
and cohort views. The list
view will be, as in the image
below.
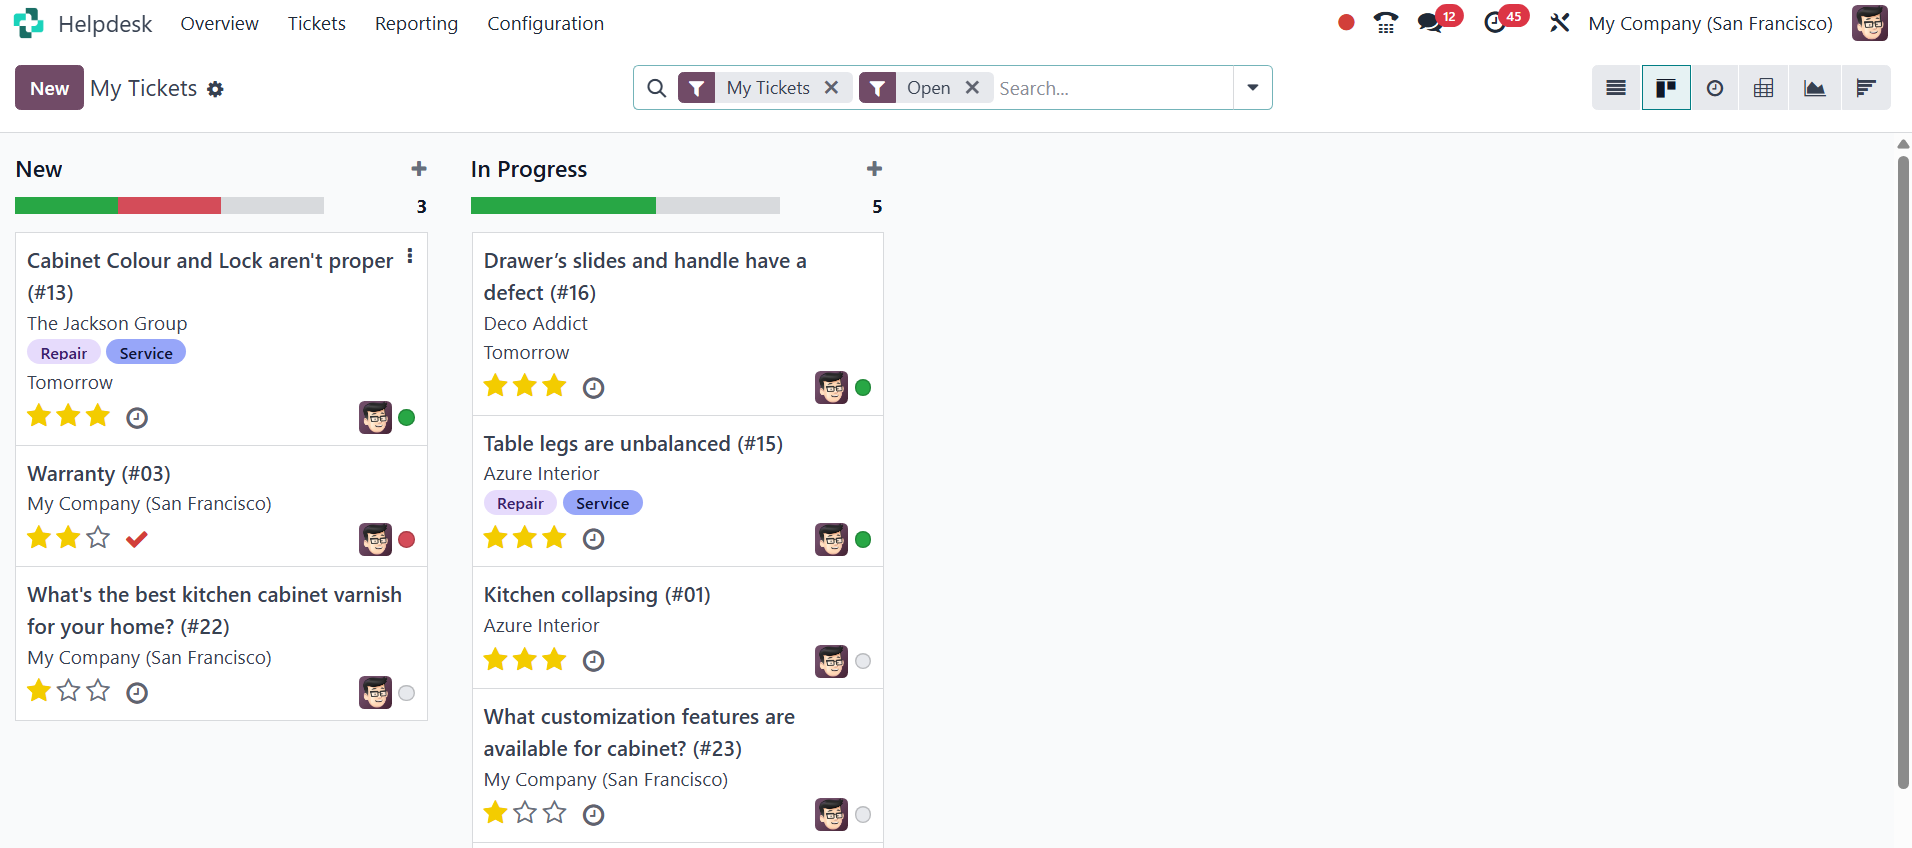
The kanban view will be, as in
the image below.
The next view is activity, as
shown in the image below.
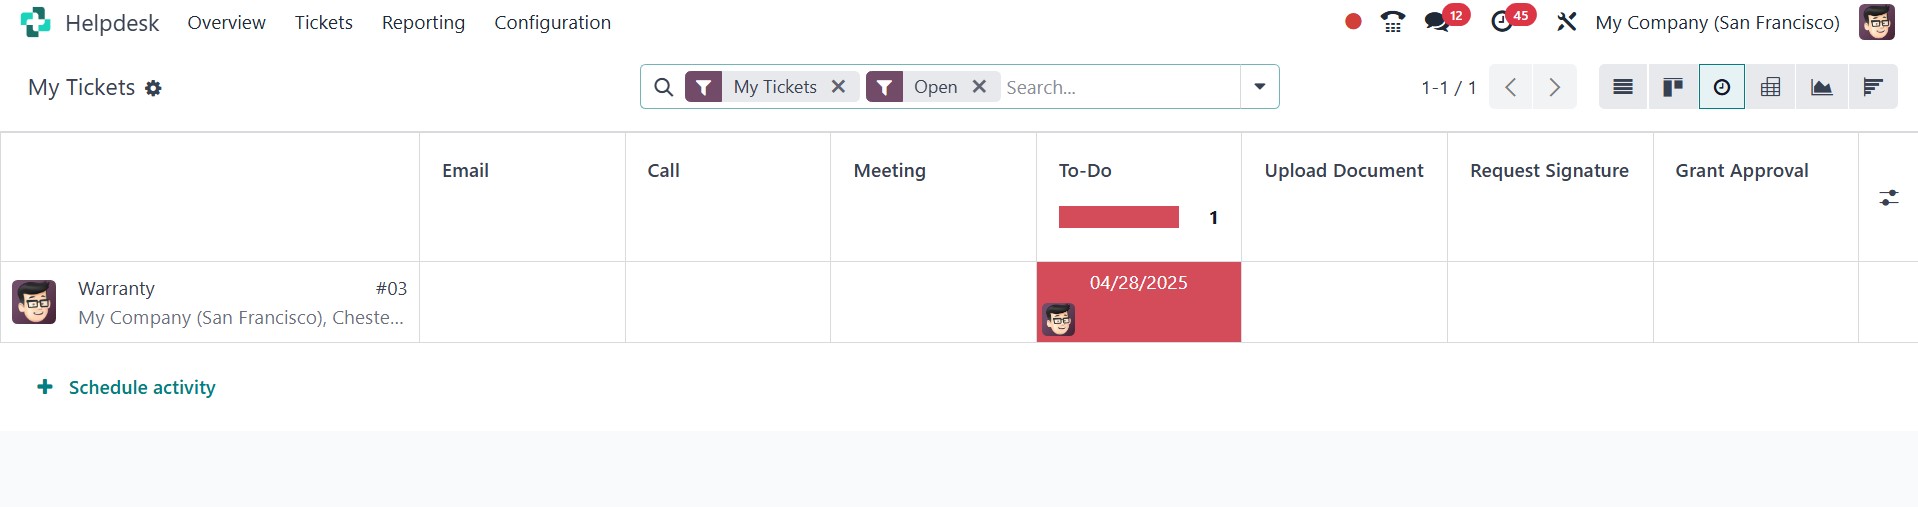
The ‘schedule activity’ option
helps you create a new
activity. Now, the next
option is pivot view.
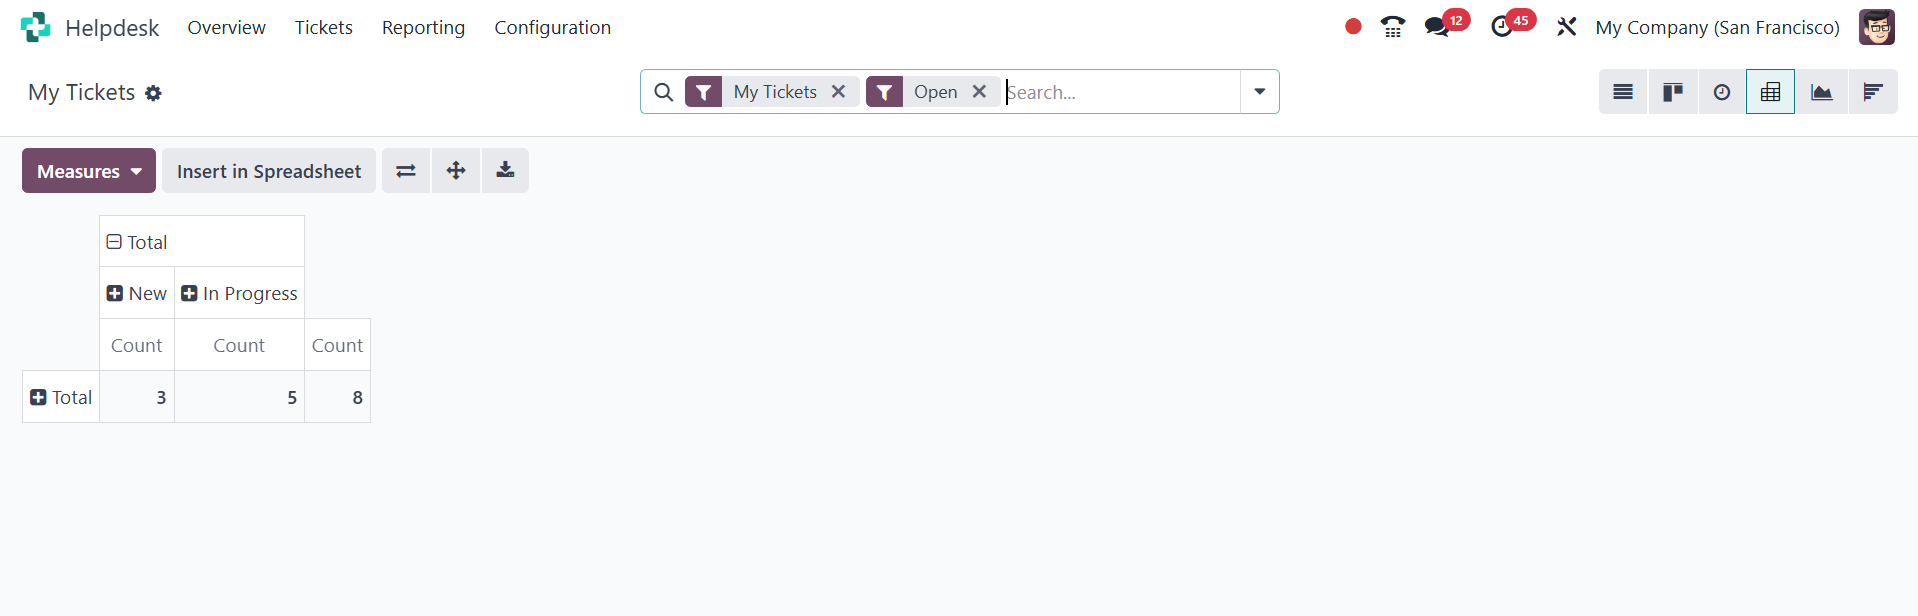
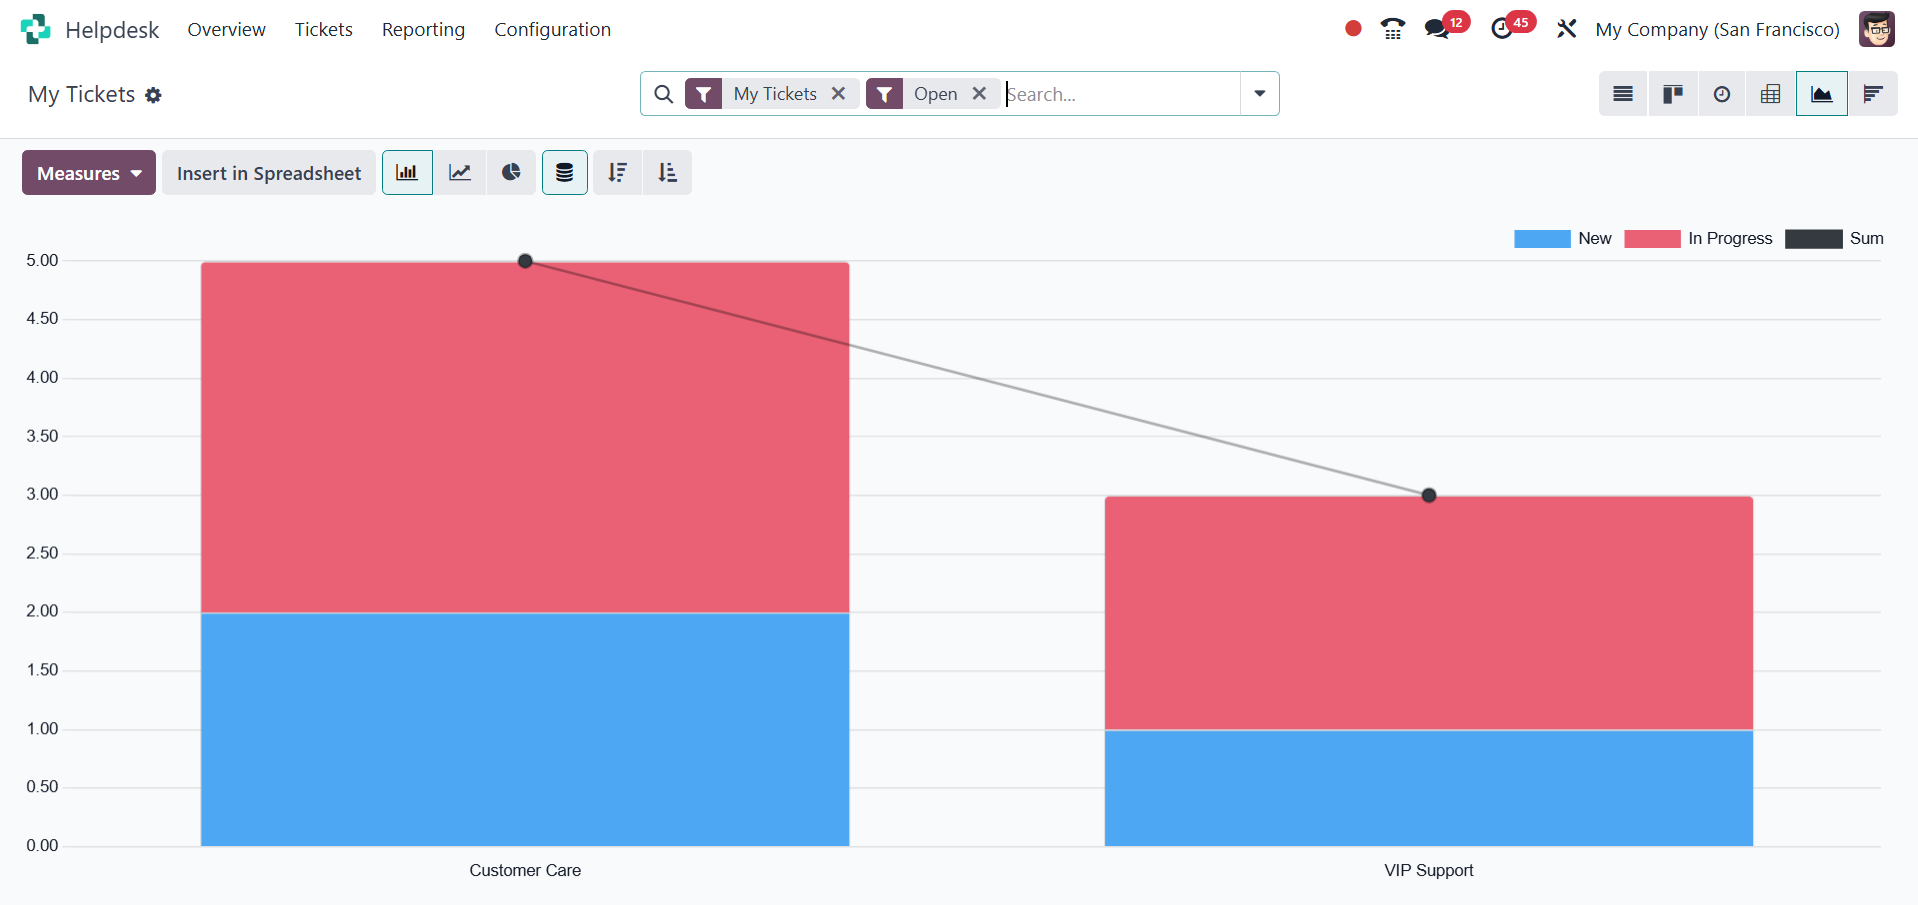
The next type is the graphical
view, as in the image below.
And the final type of view is the
cohort view.

Here, you can view the creation
date, count, and close date,
respectively.
2.2 All tickets
The All Tickets platform will
allow you to keep track of
all the tickets issued by
your company's help desk
staff.
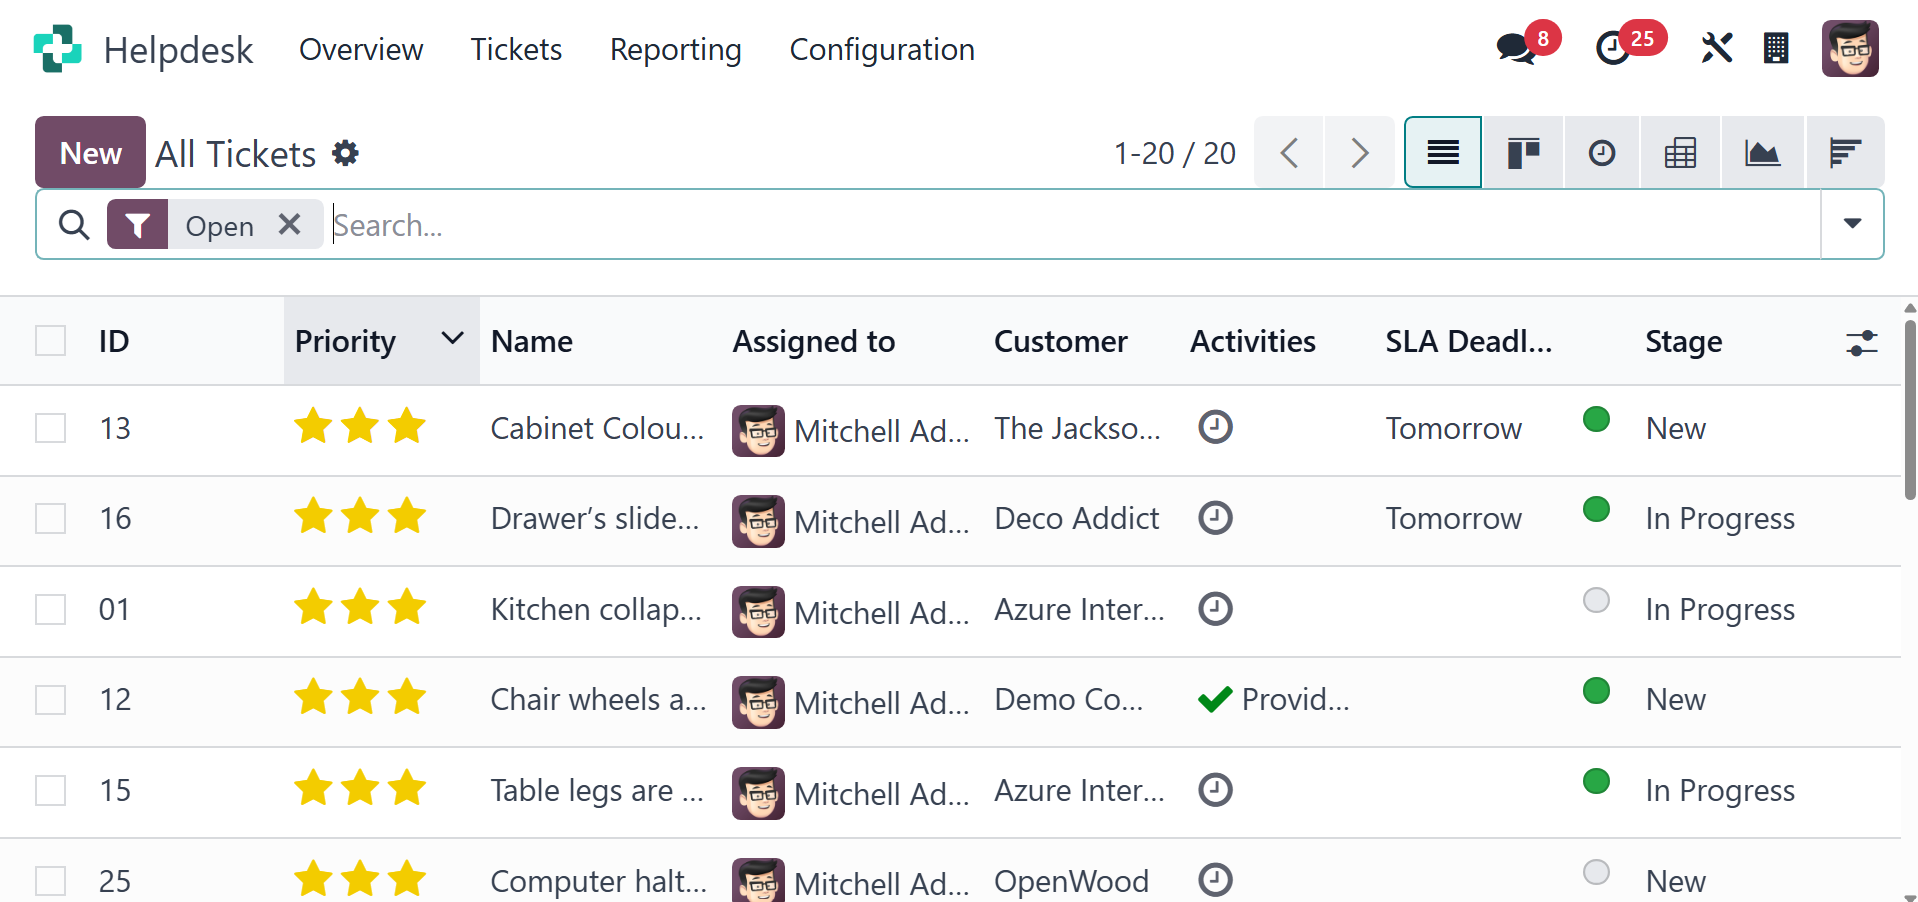
The tickets in the list view are
depicted in the above image.
In addition to the list view,
you can also use the Kanban,
Activity, Pivot, Graph, and
Cohort views, depending on
your needs. The list preview
includes ID, Priority, Name,
Team, Assigned to, Customer,
Company, Activities, SLA
Deadline, and Stage. To
extend the view, click the
menu icon in the top right
corner of the list view, and
then choose new fields from
the list that appears.

ID, priority, helpdesk team,
assigned to, customer,
company, activities, my
deadline, SLAs, SLA deadline,
creation date, sale order
item, Last Updated On, Type,
Tags, stage, Rating, and
Kanban State are among the
items from this list that can
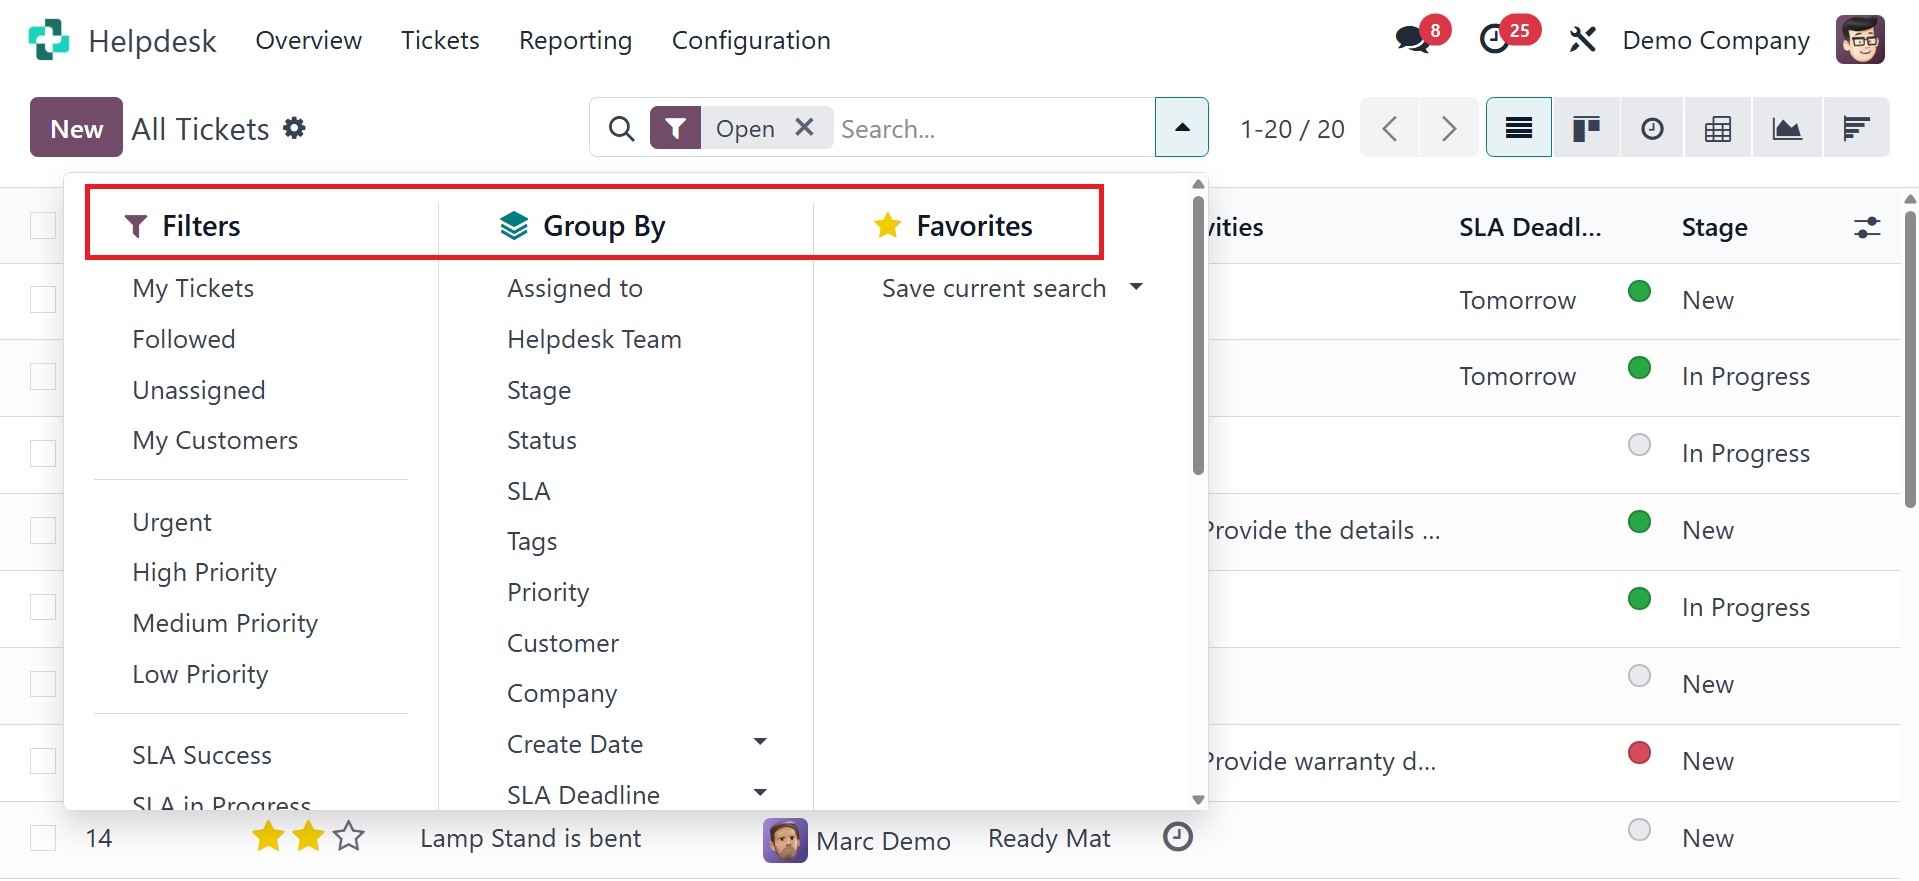
be activated. This platform
offers the following default
filters: My Tickets, My
Team's Tickets, SLA Success,
SLA in Progress, SLA Failed,
High Priority, Medium
Priority, Low Priority,
Unassigned, Urgent, and
Followed Satisfied, Okay,
Dissatisfied, No Rating,
Creation Date, Archived,
Open, Closed, Closed in the
Last 7 Days, Closed in the
Last 30 Days, and Overtime
tickets. Use the Custom
Filter option to build custom
filters for tickets. Assigned
to, Team, Stage, Type,
Priority, Status, Customer,
Company, Analytic Account,
and Creation Date are the
default grouping options.
To manually create a new ticket,
click the New button. This
will direct you to a new form
where you can specify the
issue the customer has
reported, as shown in the
screenshot.
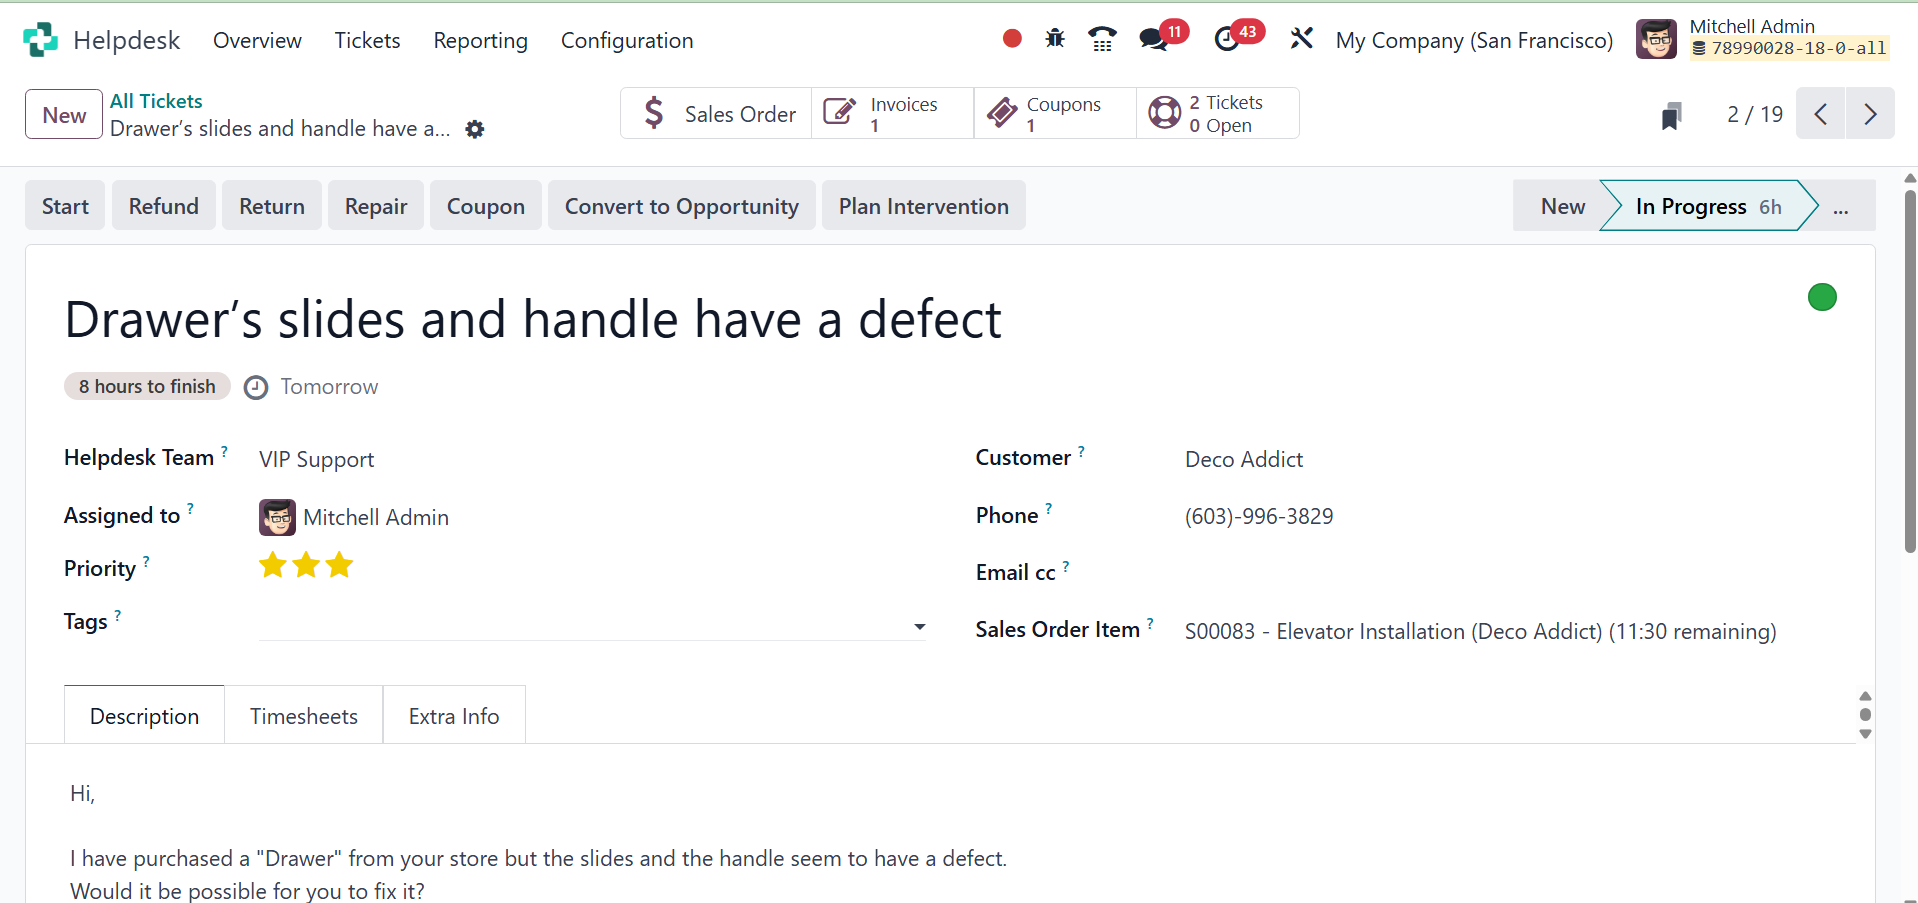
In the space provided, type the
ticket's title. Depending on
the Helpdesk Team you
selected for this ticket, the
pertinent SLA Policies and
SLA Deadline are applied to
the ticket. The ticket can be
assigned to an employee by
entering the user in the
designated field. Depending
on the priority of the
ticket, you can assign stars
in the Priority section.
Information about the Type,
Tags, and Company can be
entered in the appropriate
boxes. The drop-down option
allows you to select the
customer's name. The Email
and Phone sections will be
immediately filled up using
the provided information as
soon as you select the client
name.
If the ticket is being filed for
support for a specific item
that was purchased, you can
provide the appropriate sales
order in the "Sales Order
Items" section. When you wish
to document the financial
details of this ticket's
operation, bring up the
Analytical Account. If the
ticket is about one of the
company's goods, you can
indicate it in the Product
area. You can also provide
the product's serial number
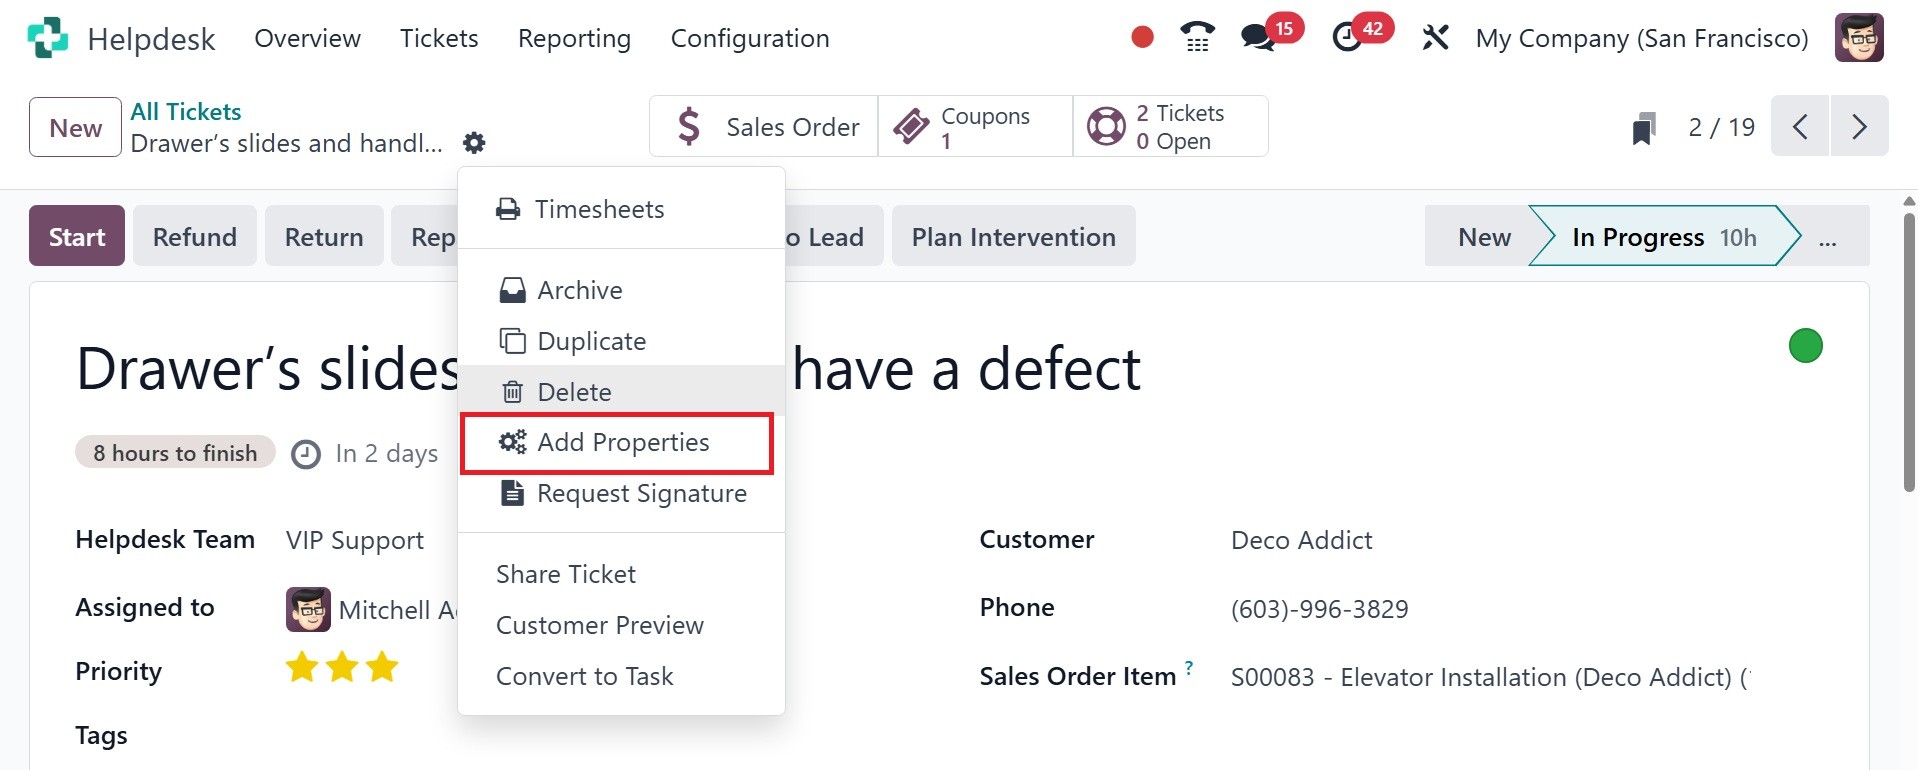
or lot. The ‘Add Properties’
button may now be used to add
any customizable fields to
the form display.
In the Description section, you
can include any information
related to the ticket, as
well as the issue the
customer has encountered.
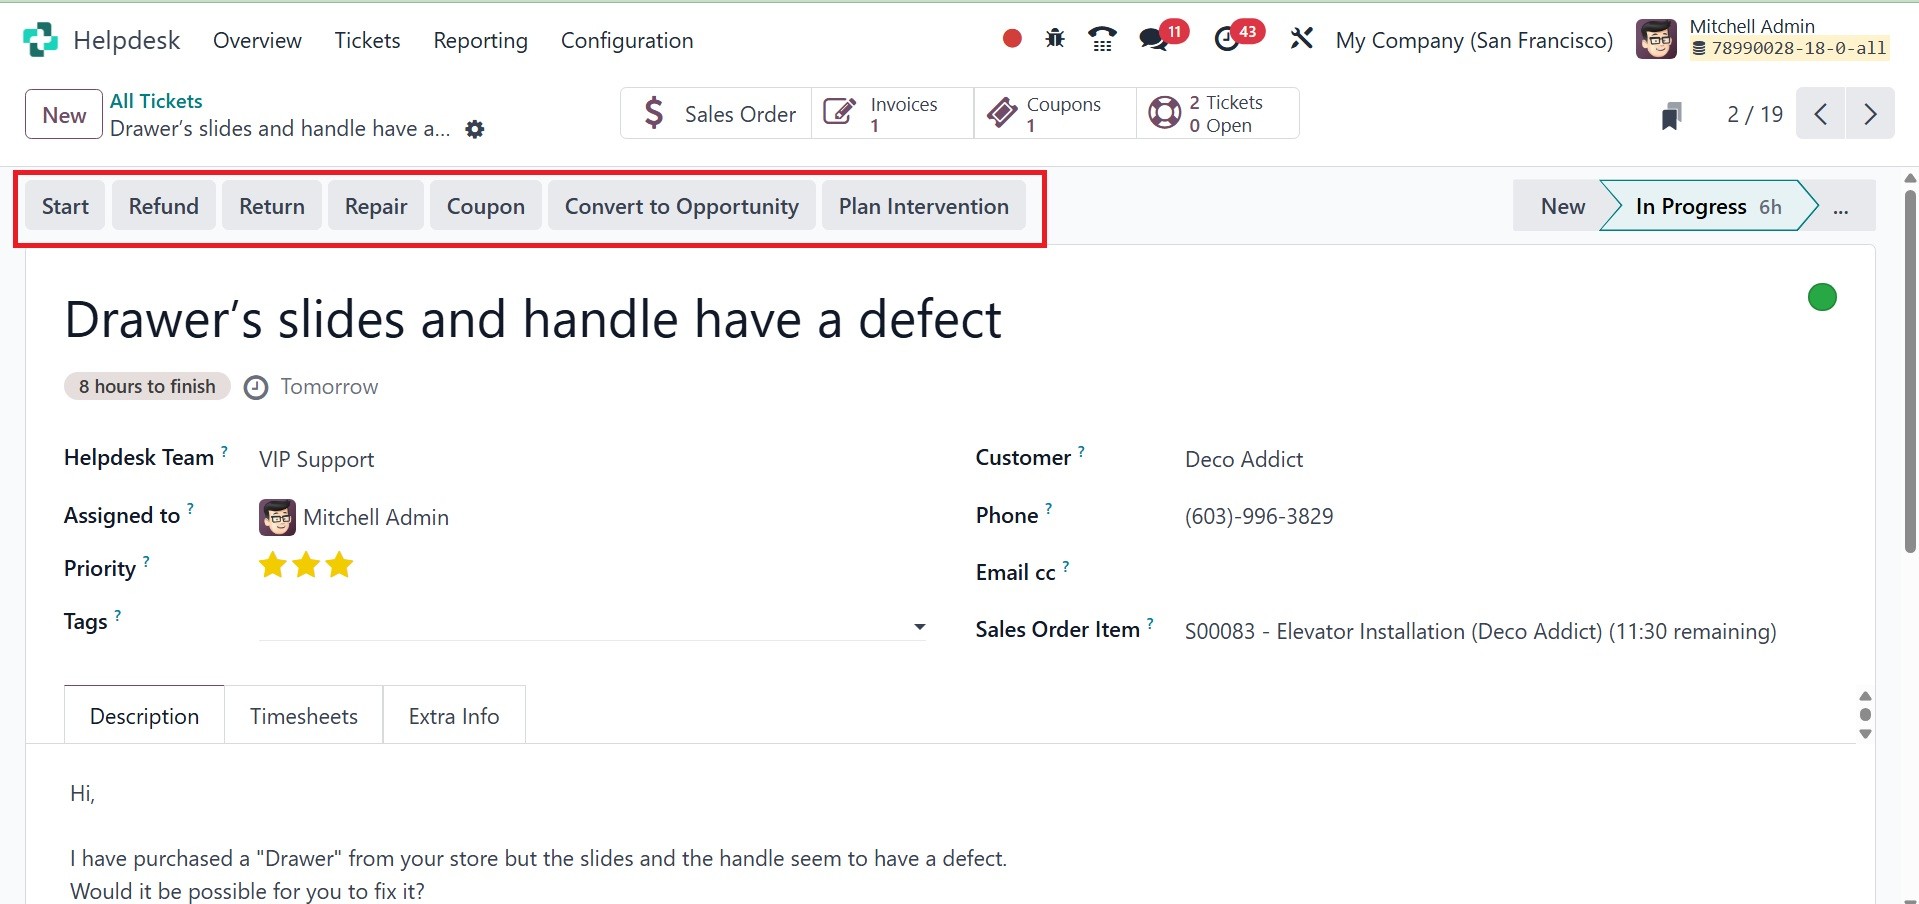
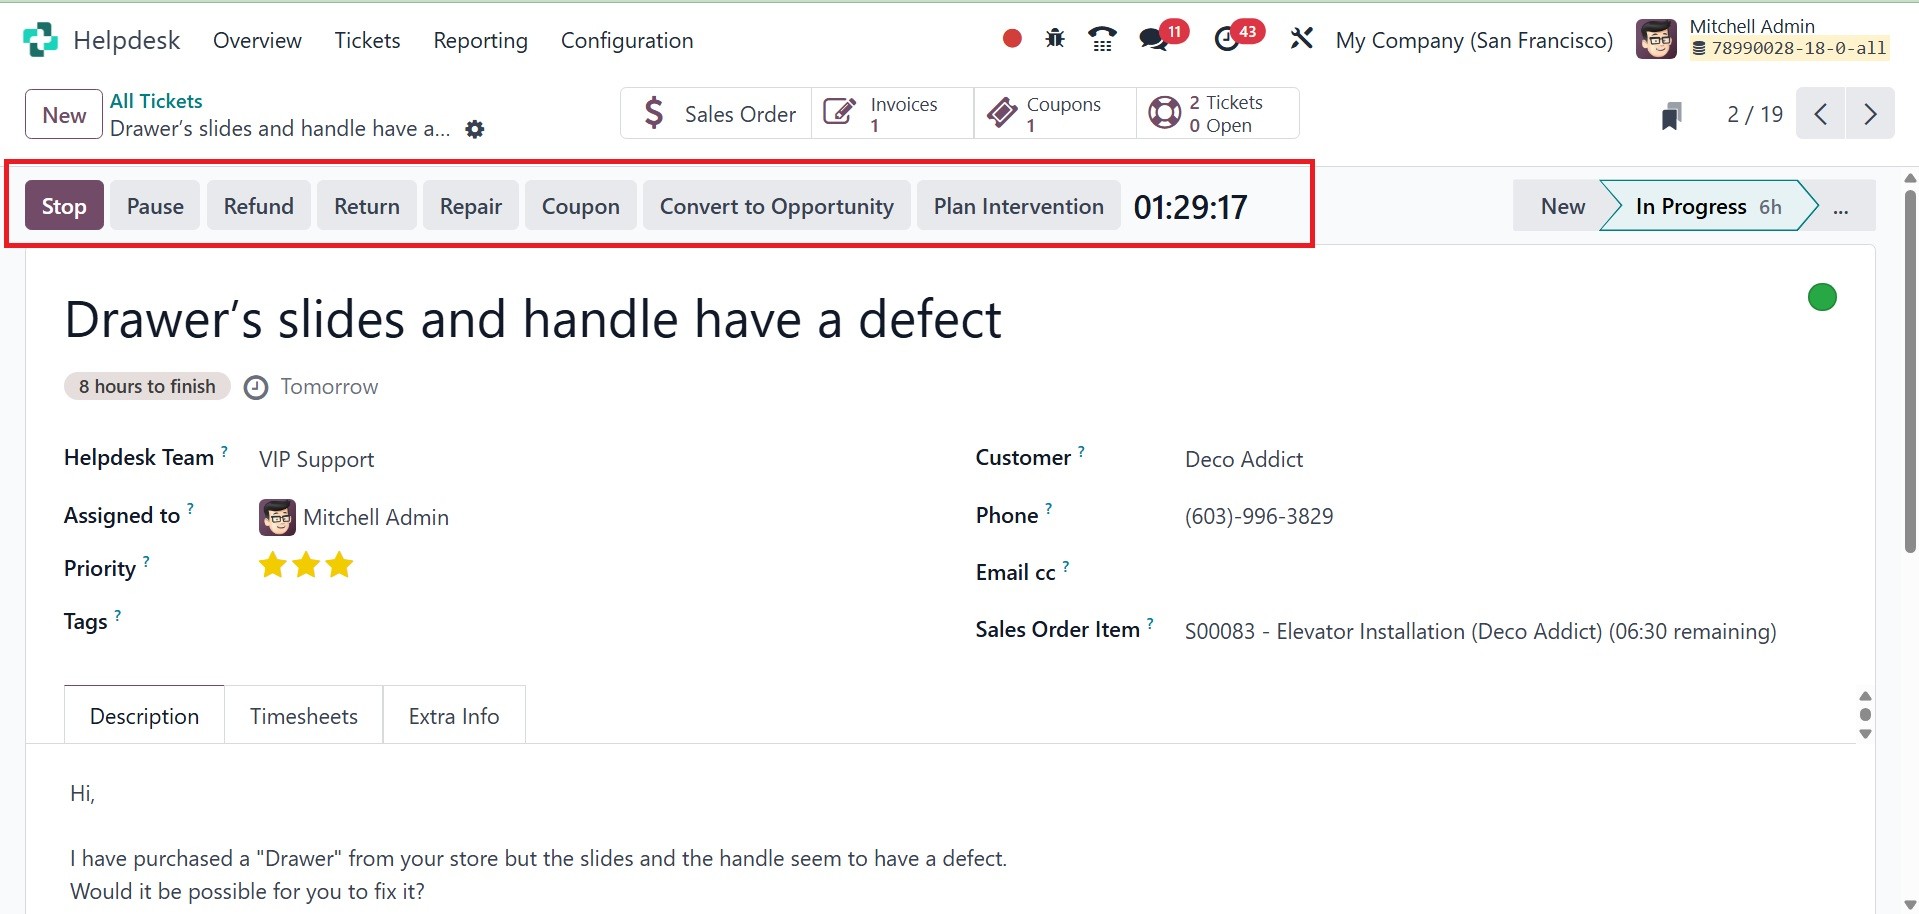
By clicking the Start button, you
can see how much time the
helpdesk staff has worked on
this case. Every time a
member of this team clicks
the Start button, the user
can begin working on the
problem. Odoo18 will start
recording the time, as shown
below.
When the task is complete, you
can use the Stop button to
stop the timer. Odoo18 will
display a pop-up window to
verify the time it has
recorded.
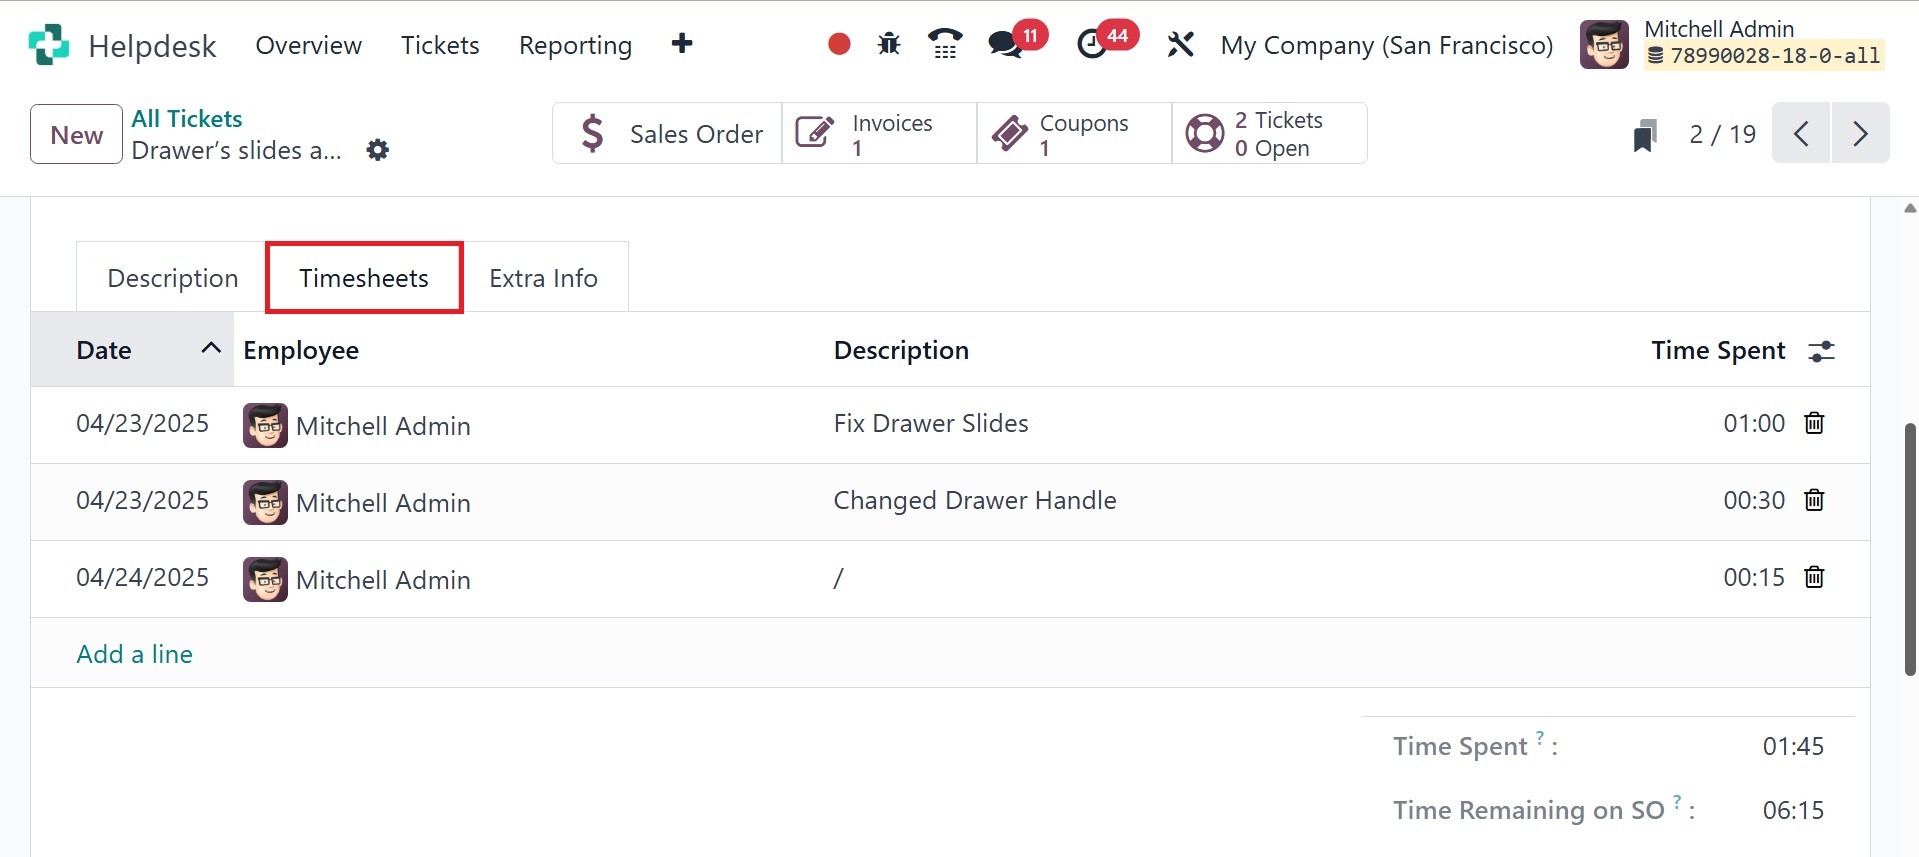
Once you've checked the time, you
can describe the activity
using the spare space. Use
the Save button to enter time
into a timesheet. On the
Timesheet tab, you can see
the verified time.
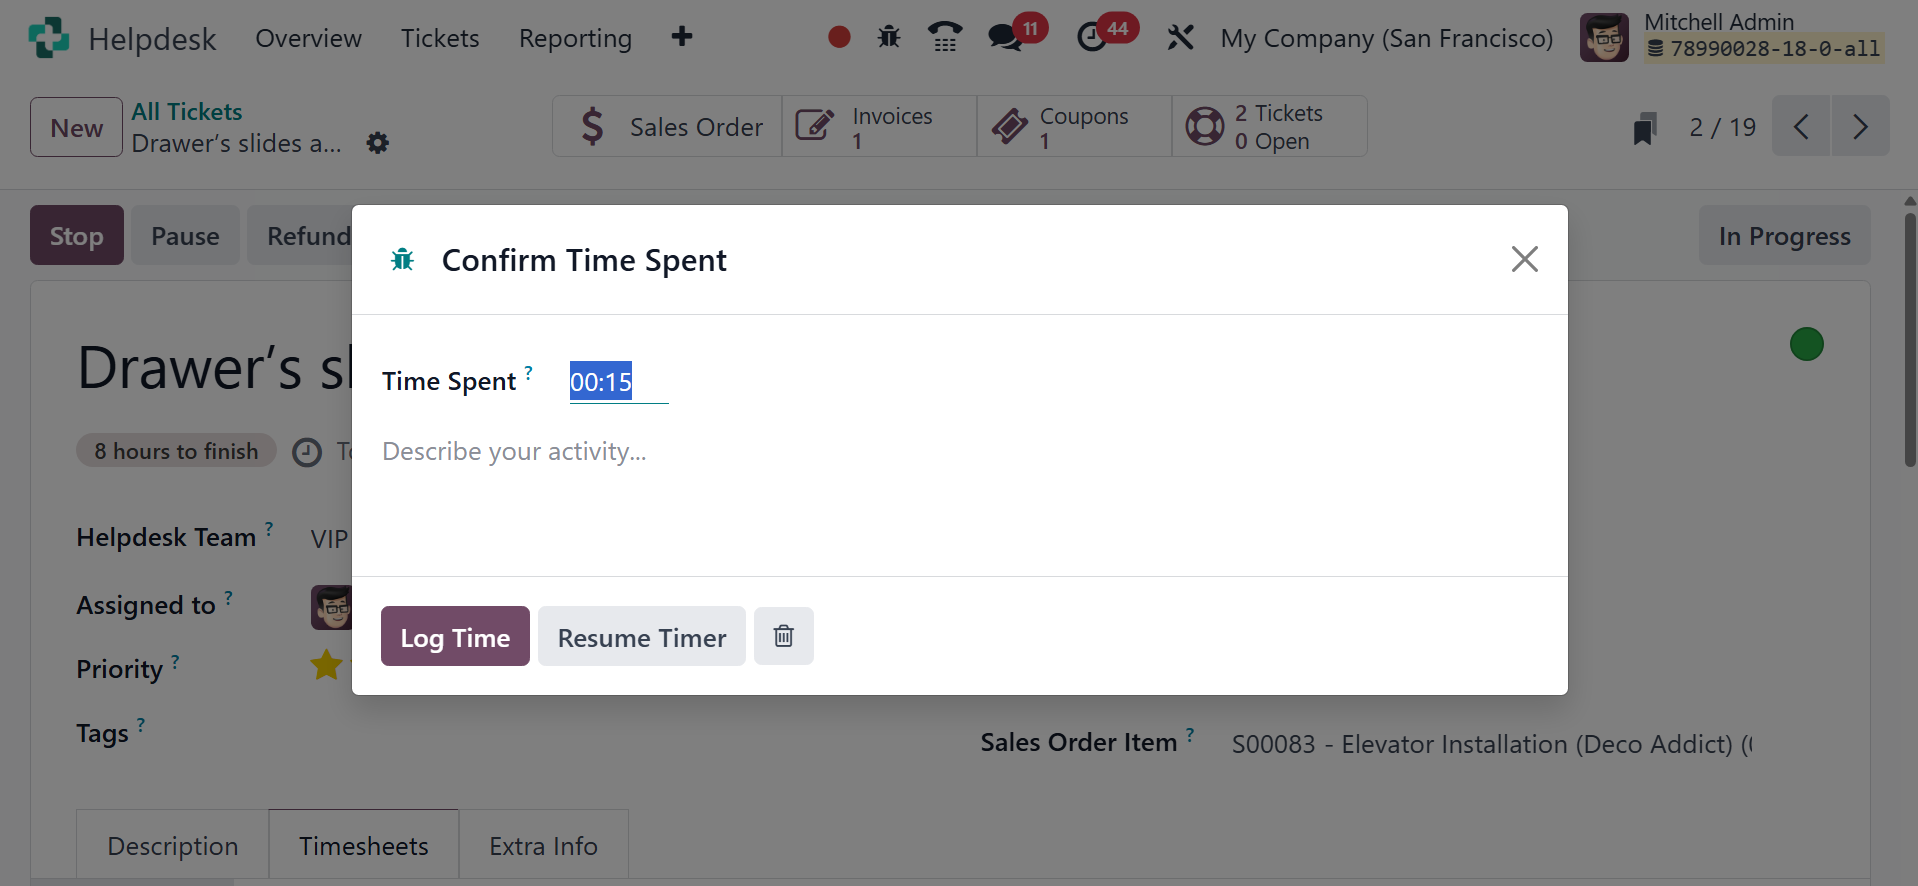
It will show the Date, Employee,
Description, and Hours Spent.
Businesses usually give clients
refunds in certain
situations, subject to
certain limitations and
rules. You can give a
customer a refund by using
the ‘Refund’ button on the
Ticket form screen. The
details of the refund can be
described in the pop-up box
that displays after you click
the Refund button.
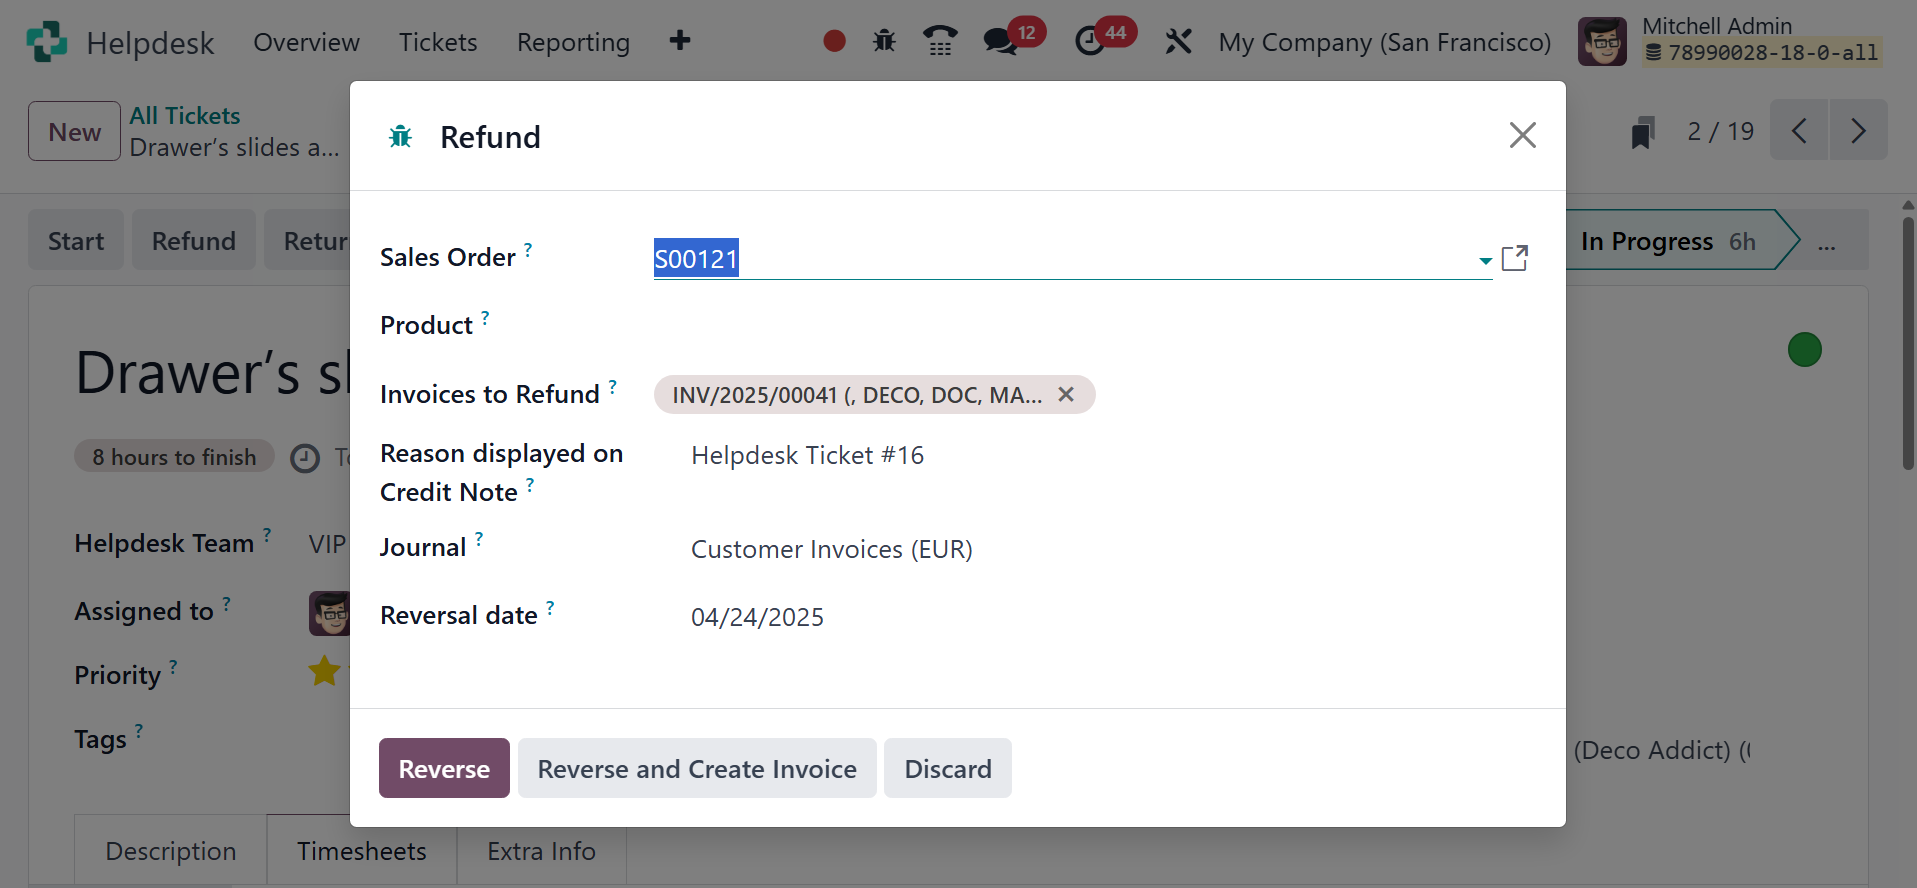
The fields for Sales Order,
Invoices to Refund, Reason,
Reversal Date, and Journal
can be filled out here.
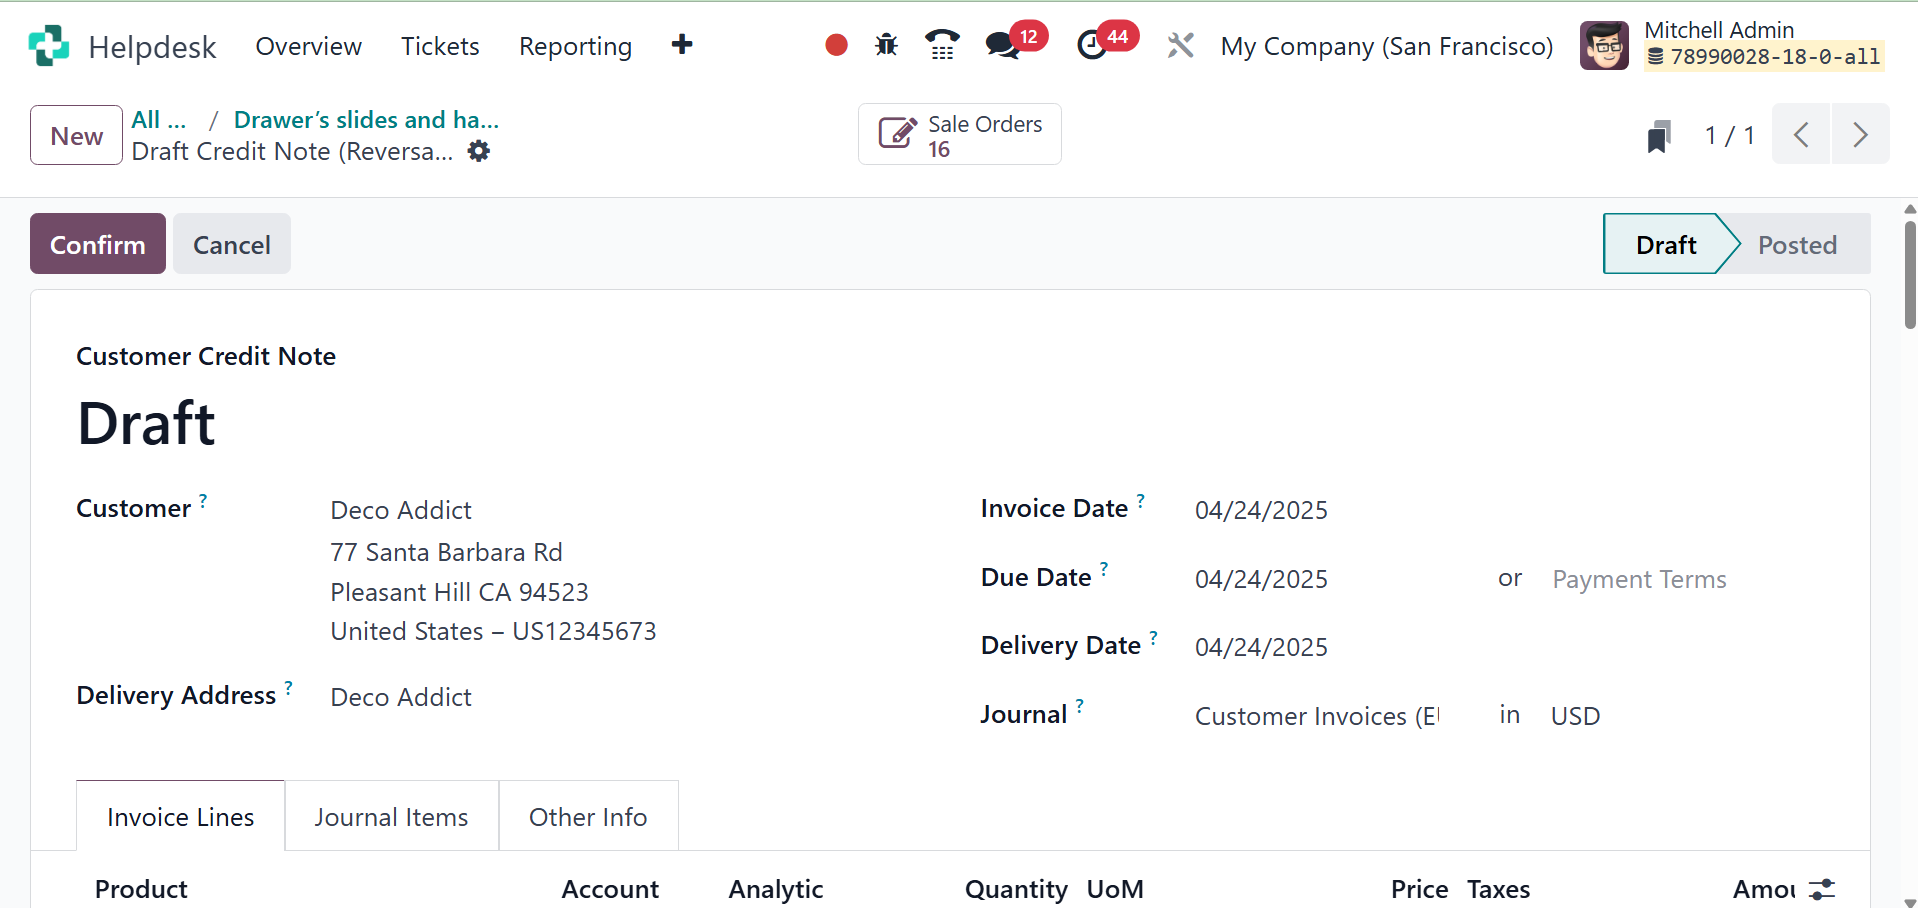
Clicking the Reverse option
will reverse the invoice and
create a customer credit
note.
If a customer wishes to return a
product they purchased from
your company, use the
‘Return’ button on the ticket
to document the return.
Pressing the Return button
opens a pop-up window.
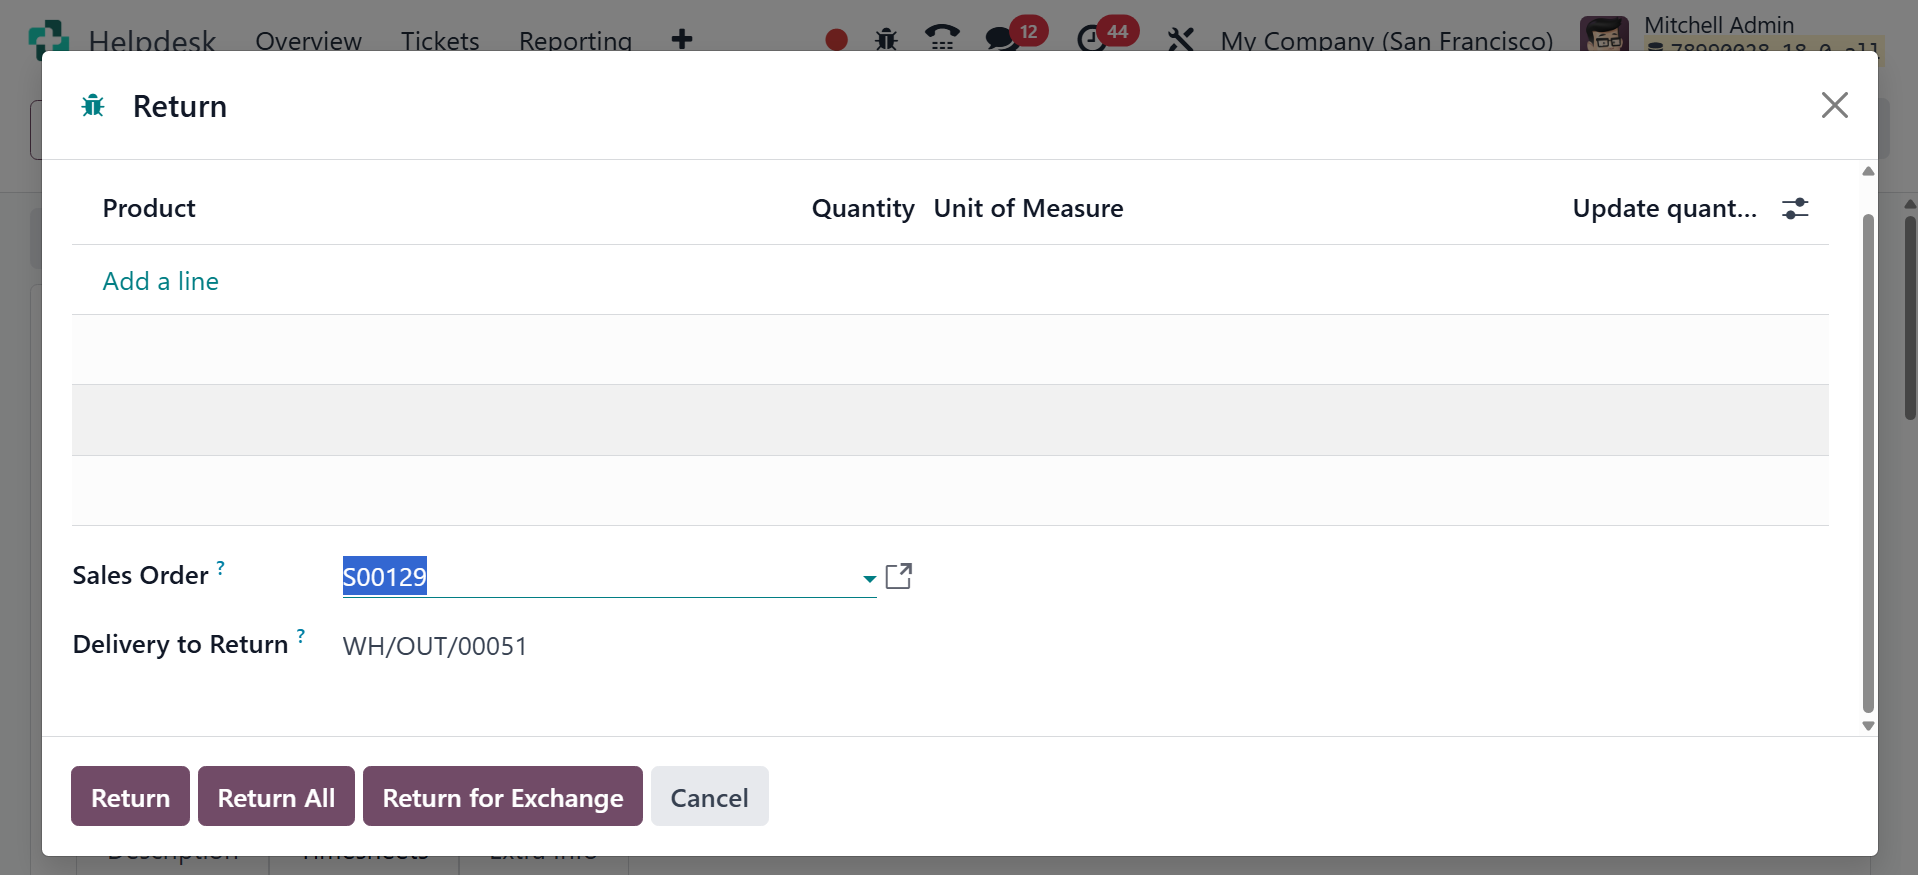
A return order will now be sent
to you, as shown in the image
below.
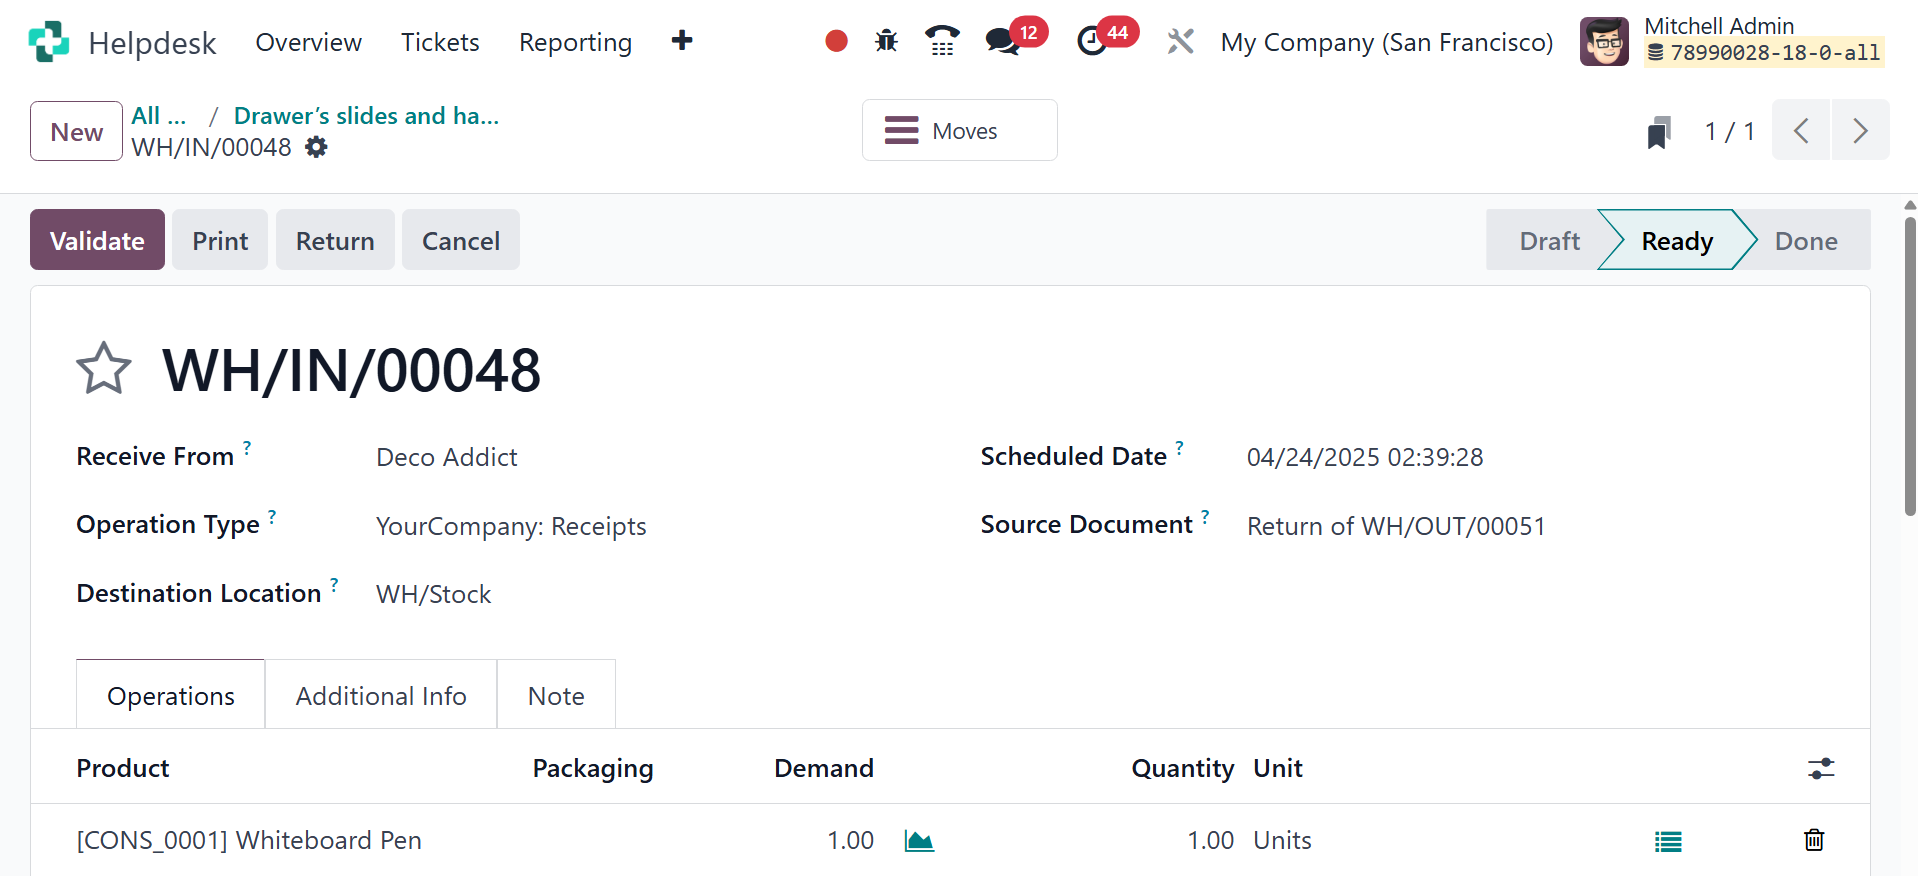
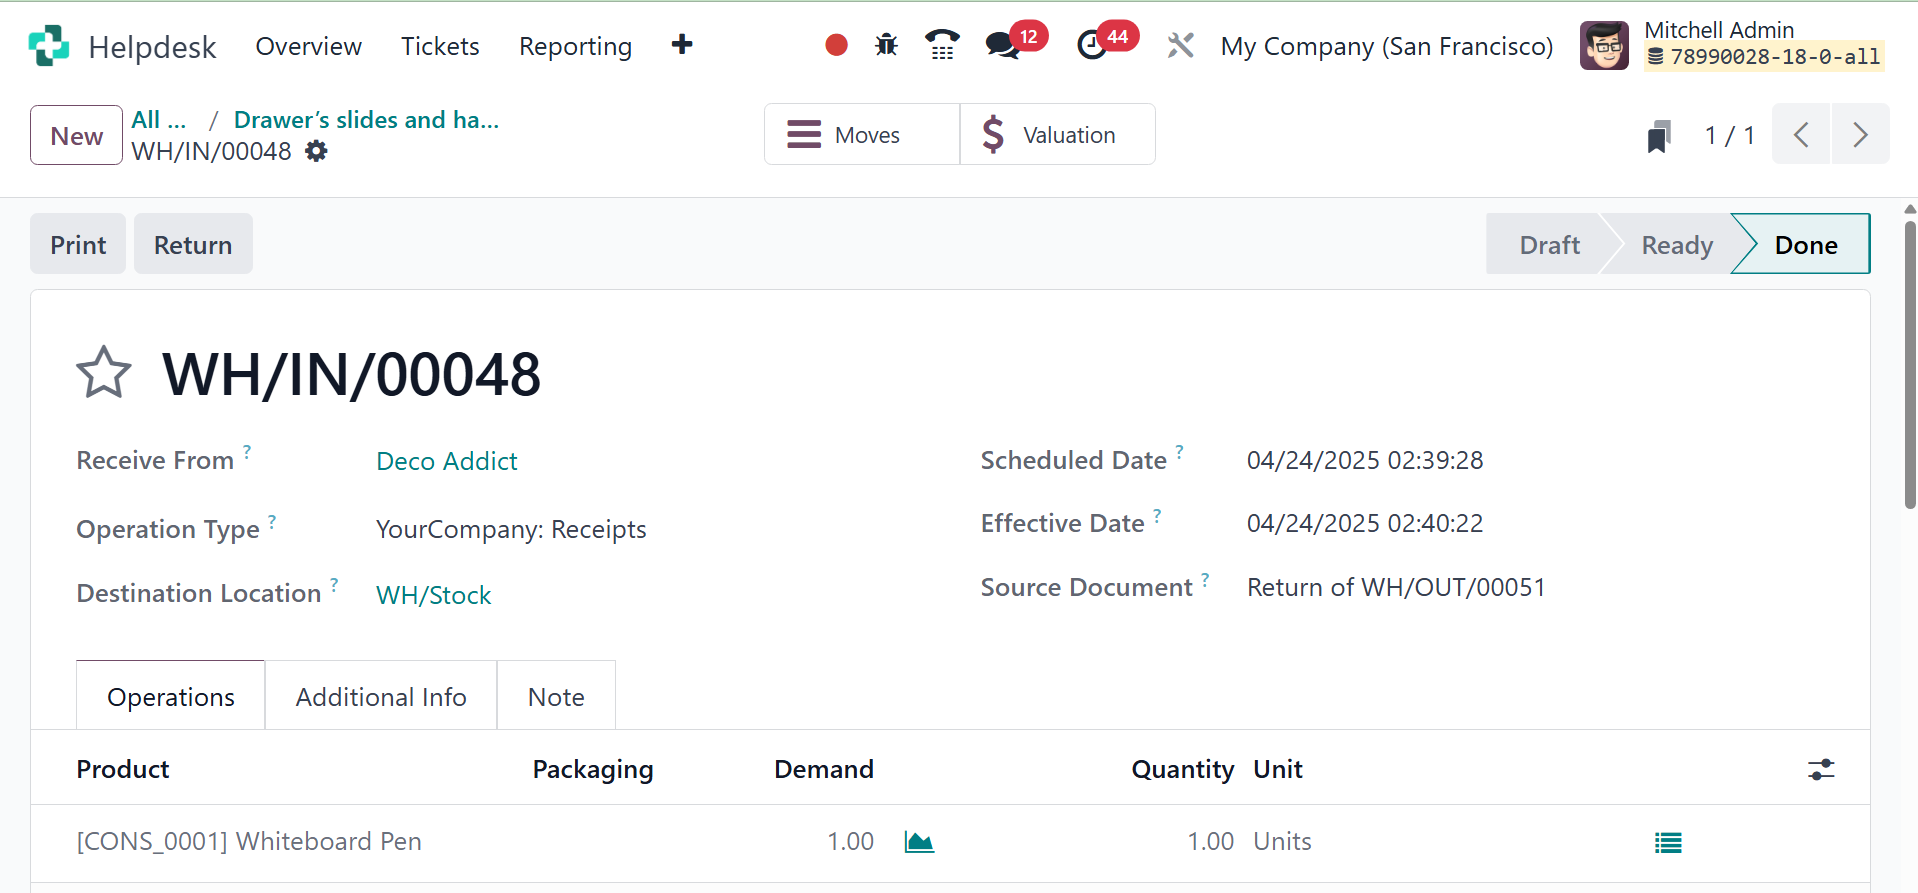
You can verify the return by
clicking the Validate button
once you've checked the data
in this window.
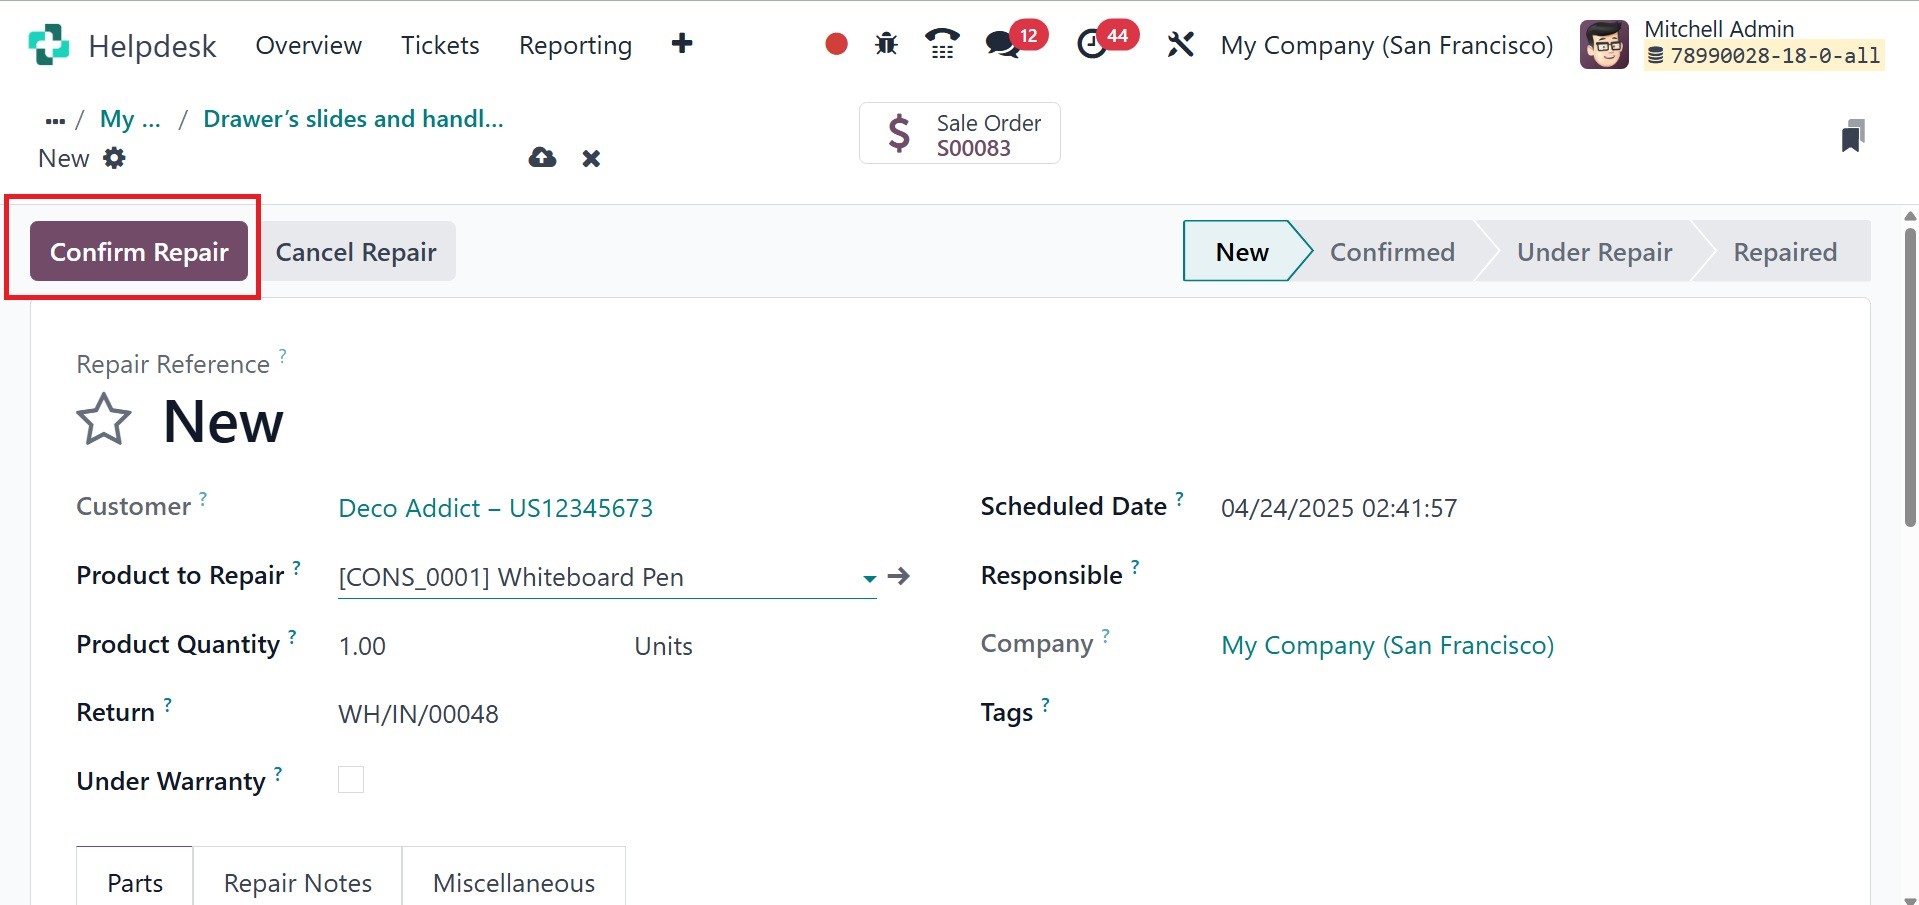
If the customer wishes to have
the product fixed because it
is damaged, you can use the
Repair button to create a
repair order. The product
will generate a repair order
as a result. After looking
over the repair order, you
can click the Confirm Repair
button.
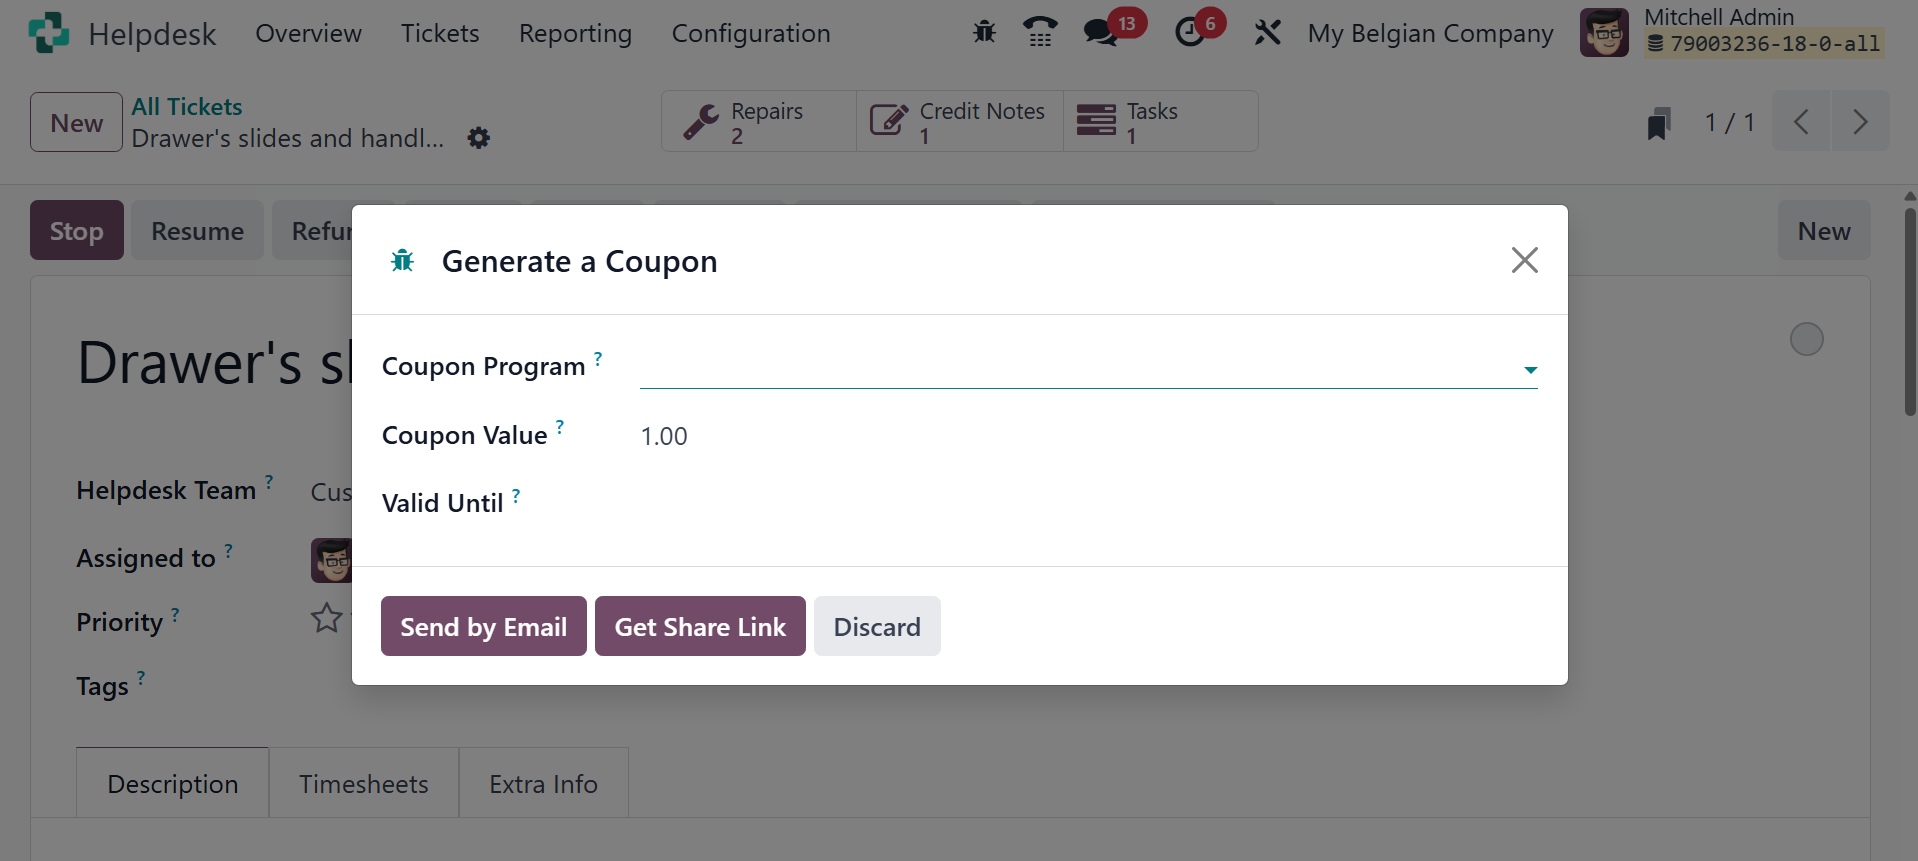
You can give coupons and presents
to your customers. The
‘Coupons’ button allows you
to deliver coupons to the
right customer. Clicking the
coupon button will bring up a
pop-up window like the one
below.

Here, you may mention the coupon
program you plan to offer
your customers.
You can generate a Field Service
straight from a helpdesk
request by selecting the
"Plan Intervention" option in
the Odoo Helpdesk module.
When a ticket calls for a
technician to physically
visit the location or
intervene, this function is
quite helpful.
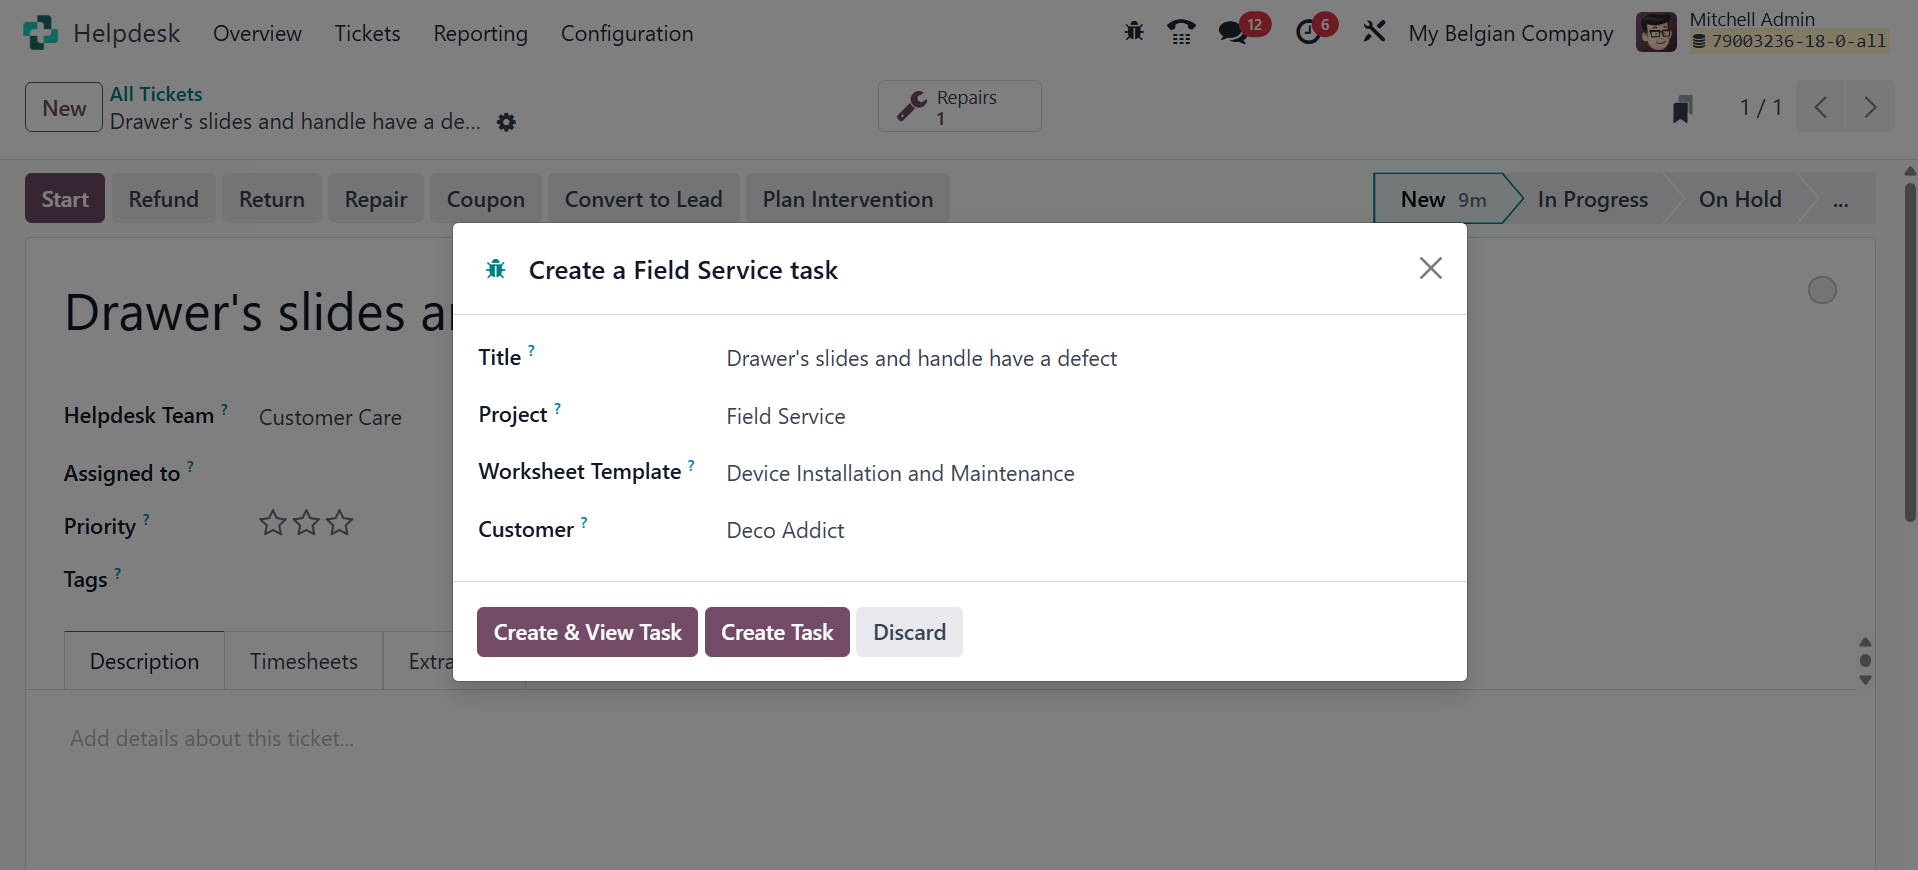
You may find information about
the Title, Project, Worksheet
Template, and Customers here.
When the work is finished,
you can close the ticket and
handle the task from the
Field Service module.
The "Convert to Lead" option
allows you to transform a
helpdesk ticket into a lead
within the CRM module. This
feature is particularly
useful when a support
interaction reveals a
potential sales opportunity.
On selecting the option, you
will get the given pop-up
window.
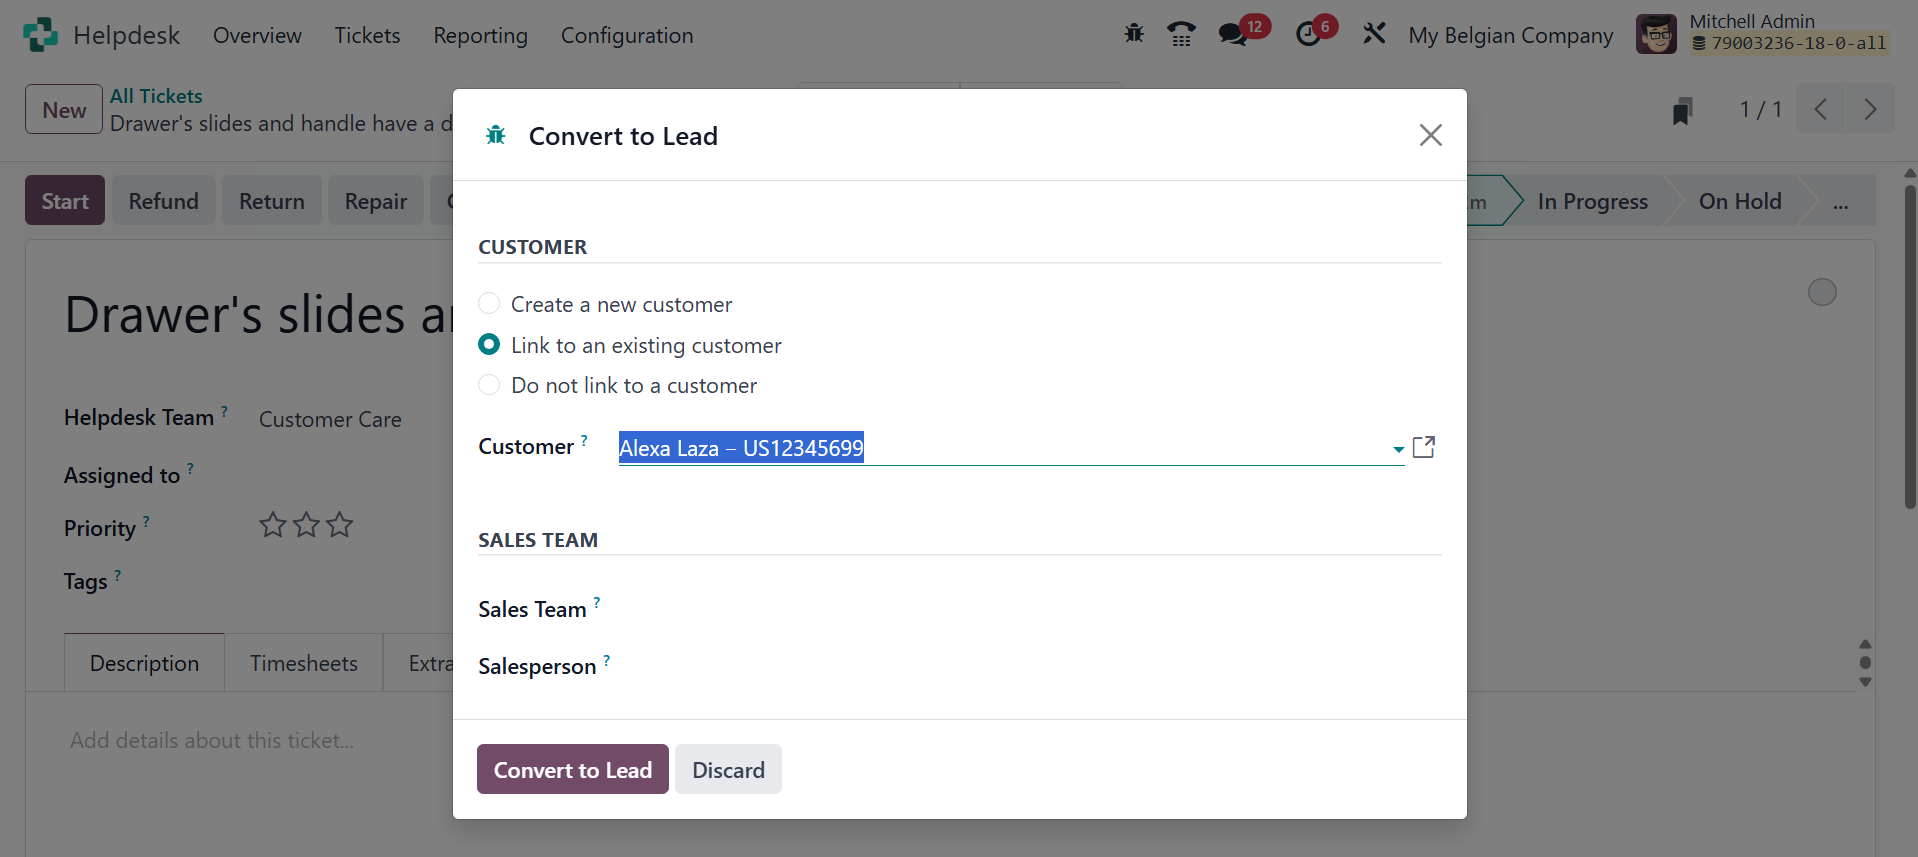
You will be prompted to enter
details about the lead in a
pop-up window, such as:
Customer: You have the option of
linking to an existing
customer, creating a new one,
or not linking to any
customers at all.
Sales Team: Designate a certain
sales team to handle the
lead.
Salesperson: Designate a specific
salesperson to handle the
lead.
Click "Convert to Lead" to create
the lead in the CRM module
after you've entered all the
required information. The
"Convert to Lead" tool
essentially closes the gap
between sales and customer
service, allowing your team
to actively follow up on
possible leads that are
produced via helpdesk
conversations.