5. Configurations
The ‘Configuration’ menu in the Live Chat module provides access to
the configuration and management of various Canned Responses and
Chatbots features, allowing users to customize their Live Chat
settings.
5.1 Canned Responses
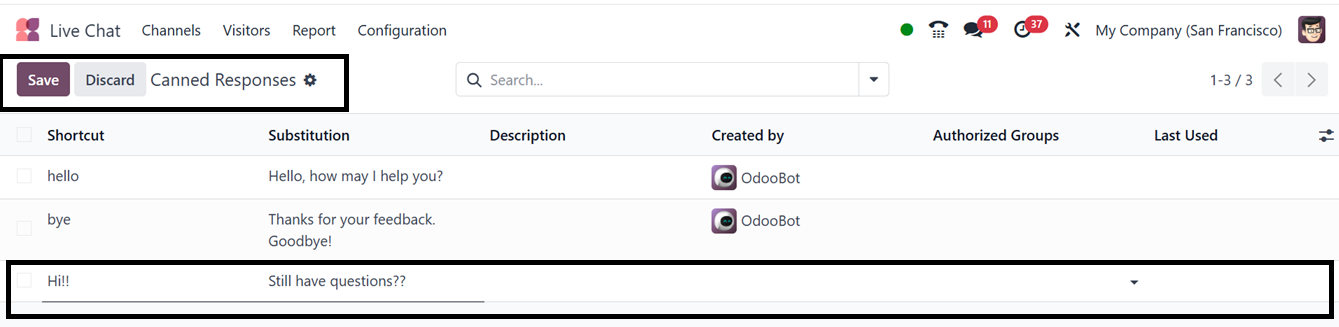
The ‘Canned Responses’ feature allows businesses to create
pre-configured responses to frequently asked questions. This
functionality significantly reduces response time and optimizes
efficiency. The Canned Responses dashboard will show all the
available responses with their shortcut, Substitution, Description,
Authorized Groups, and Last Used details in a list view, as shown
below.

For creating a new response, click on the ‘New’ button and start
filling out the required fields, including the Shortcut,
Substitution Text, Created By user name, and other details, as
illustrated in the screenshot below.
After saving the details, you can utilize them in the live chat
channels.
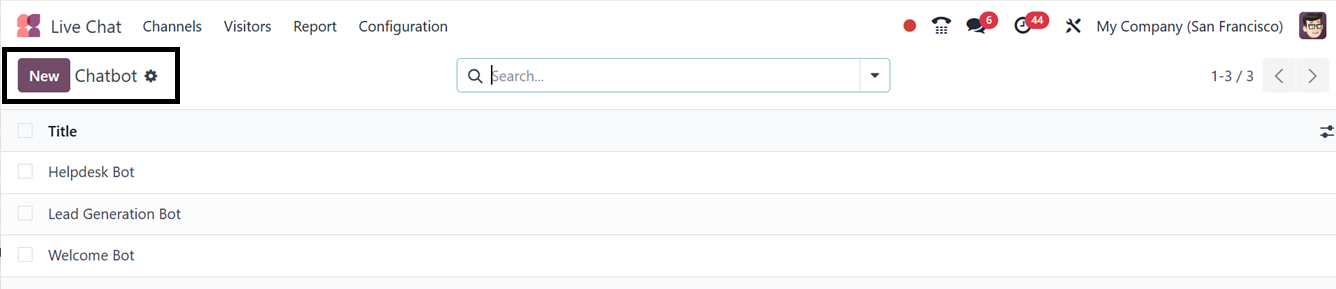
5.2 Chatbot
Businesses can enhance customer engagement through the integration of
Chatbots within the Live Chat module. The ‘Chatbot’ configuration
functionality allows for automated responses and efficient handling
of common inquiries. Chatbots can be configured under the
Configuration menu, with the dashboard of all the available
chatbots.
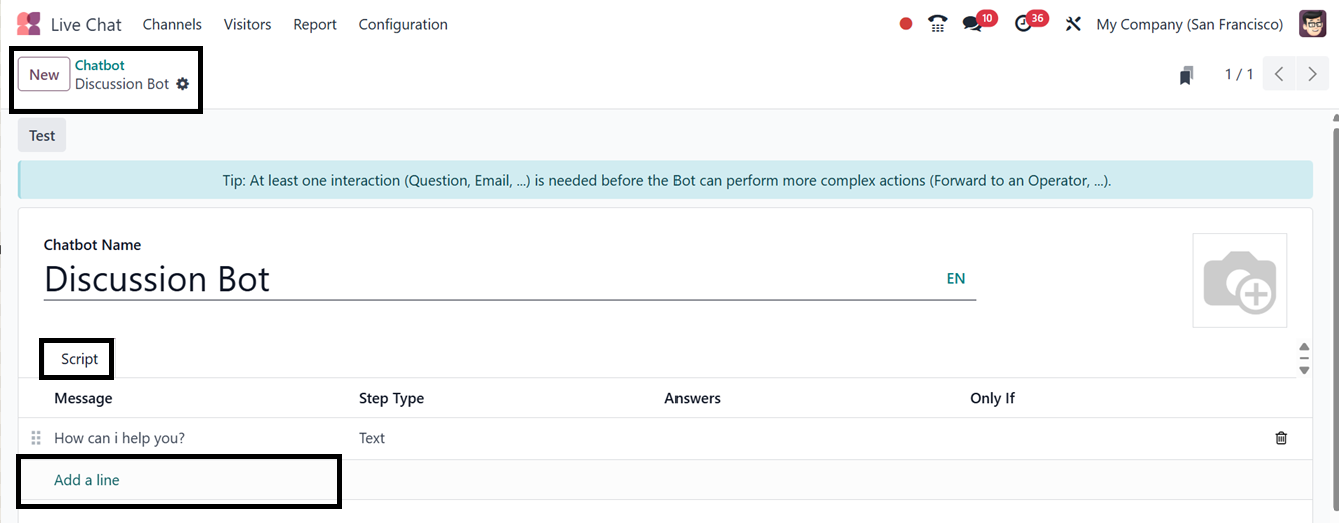
To create a new Chatbot, click on the ‘New’ button and enter the
‘Chatbot Name’ in the designated field. Then, define the automated
scripts and responses in the ‘Script’ tab by clicking on the ‘Add a
line’ button, as illustrated in the screenshot below.
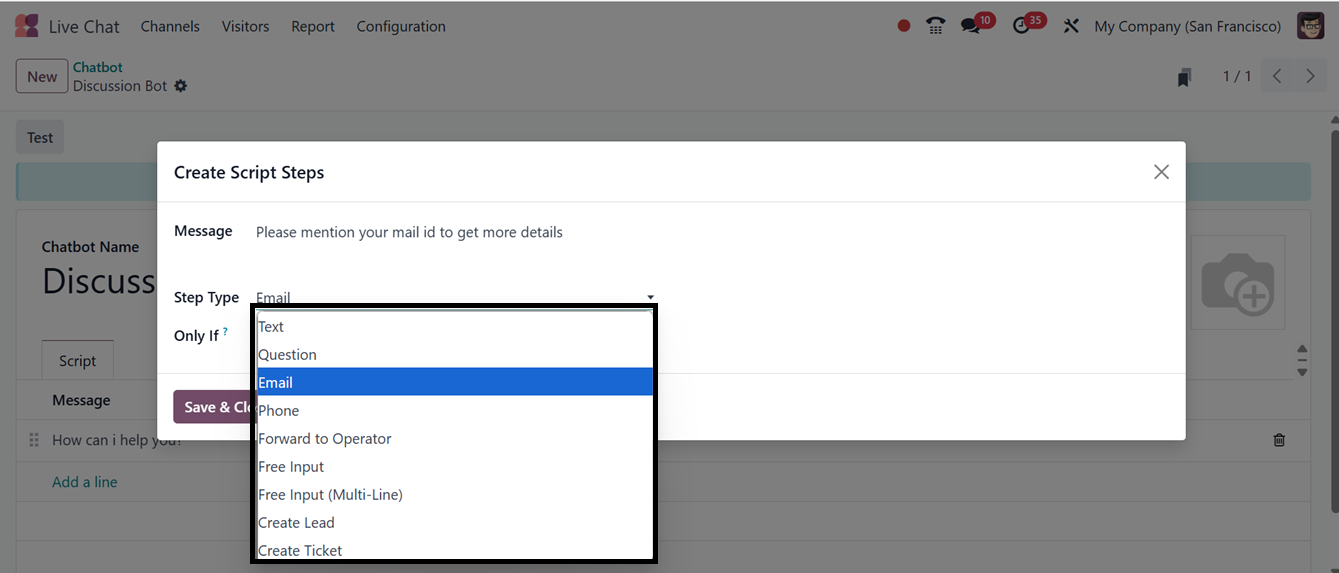
A pop-up box asking you to enter the Message or Question and the Step
Type will show up when you click the "Add a line" button to insert
chatbot scripts. You may include several scripted messages with
different step kinds, including Text, Question, Email, Phone, Create
Lead, Create Ticket, and more, depending on the objective of the
live chat channel or the purpose of your chatbot. The chatbot is
guided by these steps when deciding how each message should fit into
the conversation flow.
Then, activate or deactivate the ‘Only If’ option to show or hide the
steps only if all the answers are selected. Once set up, the chatbot
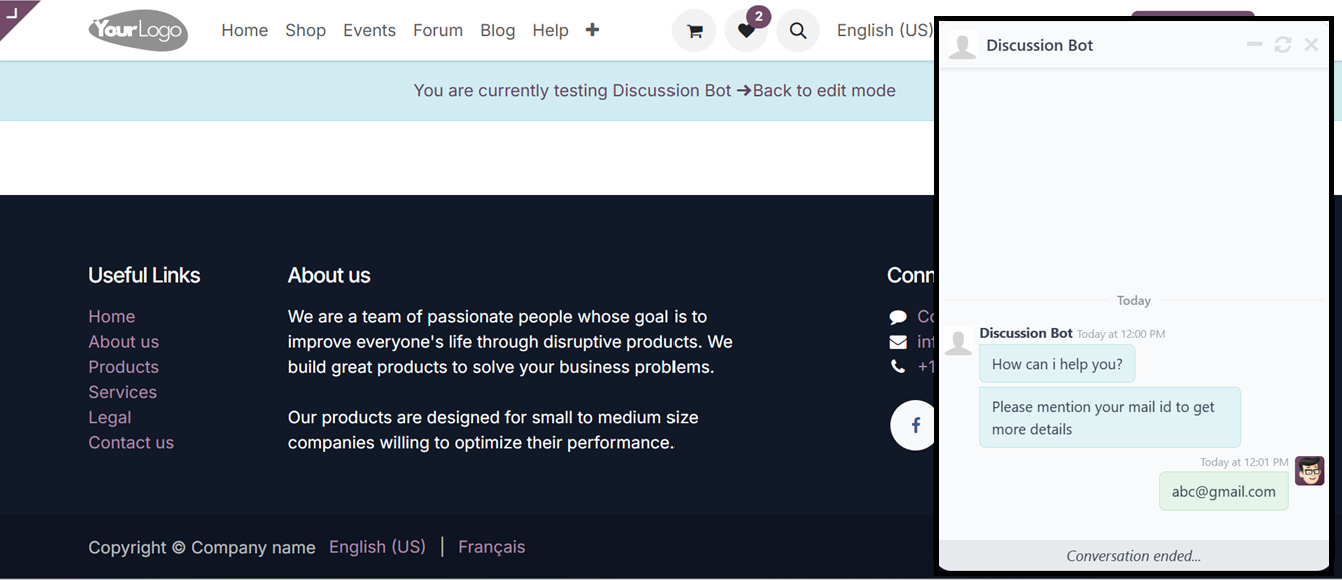
can be tested to ensure optimal performance using the ‘Test’ button.
The ‘Test’ button will take you to the web interface of a channel, so
you can start a chat with the newly created chatbot ‘Discussion
Bot’, as illustrated in the screenshot below.
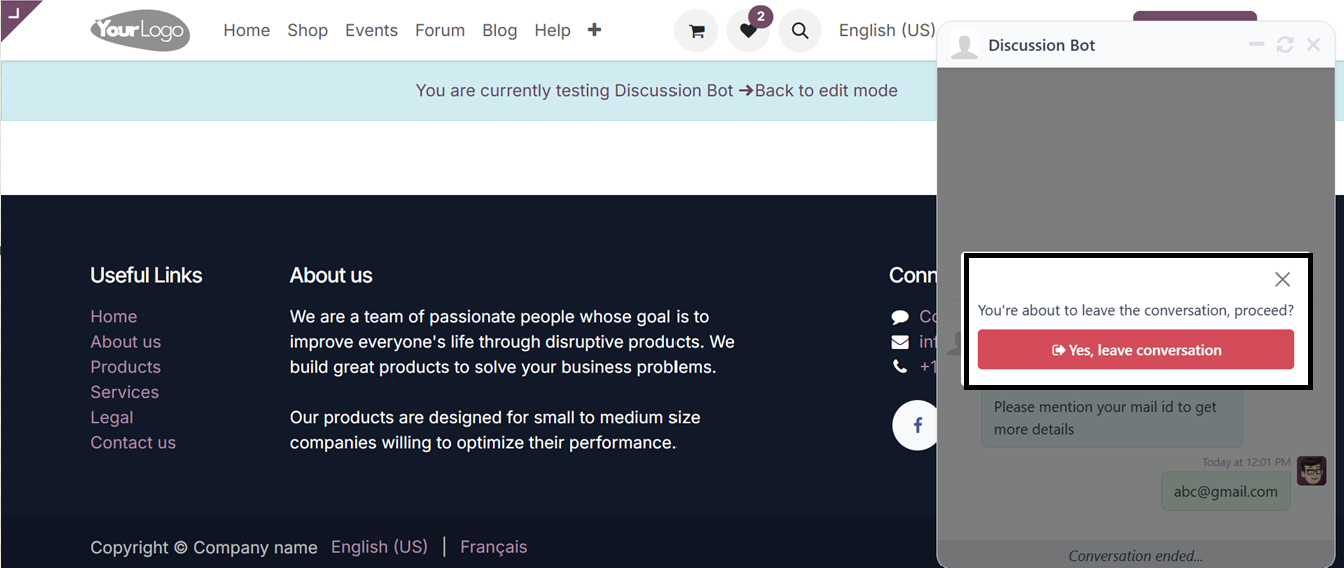
Click the close icon at the top of the chatbot window to terminate
the conversation session. A confirmation pop-up asking if you wish
to end the discussion will show up. Click the "Yes, leave
conversation" button to confirm.
After confirming the exit, the bot will ask for a rating. So, you can
choose the emojis from happy, ok, and sad to mention the ratings, as
illustrated below.
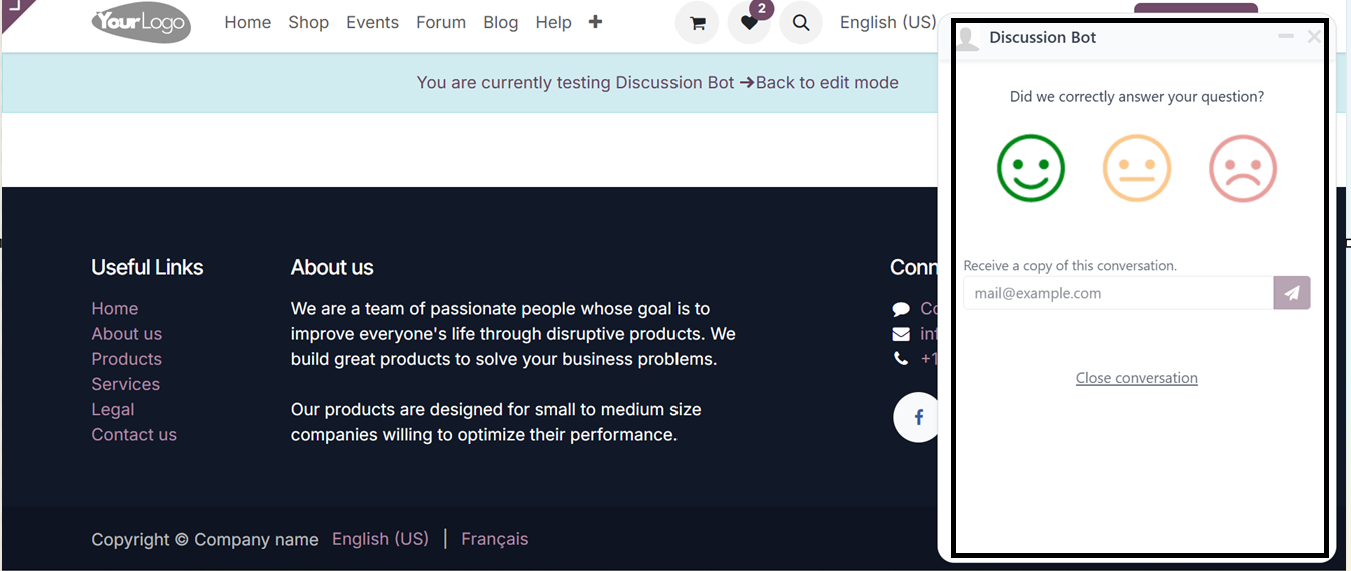
After choosing the rating, you can text a response for the question
regarding the chatbot conversation and send the response using the
‘Send’ button.

To wrap up the interaction, click the ‘Close Conversation’ button.
Once the chat is closed, any customer feedback or ratings will be
automatically updated in the Customer Ratings dashboard for
analysis. Additionally, all activities related to the channel and
chatbot will be logged in the Reporting sections for further review.
The Live Chat module in Odoo 18 ERP serves as an invaluable tool for
real-time customer engagement. It not only facilitates seamless
communication but also improves customer service, lead generation,
and overall business efficiency. Through features like chatbot
integration, canned responses, and detailed reporting, businesses
can optimize their customer interaction strategies and deliver a
superior service experience.