4. Configuration Menu
The Configuration Menu in the Odoo Maintenance module includes
several key options to customize and optimize maintenance
operations. Users can access the Settings, Maintenance Teams,
Equipment Categories, and Worksheet Templates options.
4.1 Settings
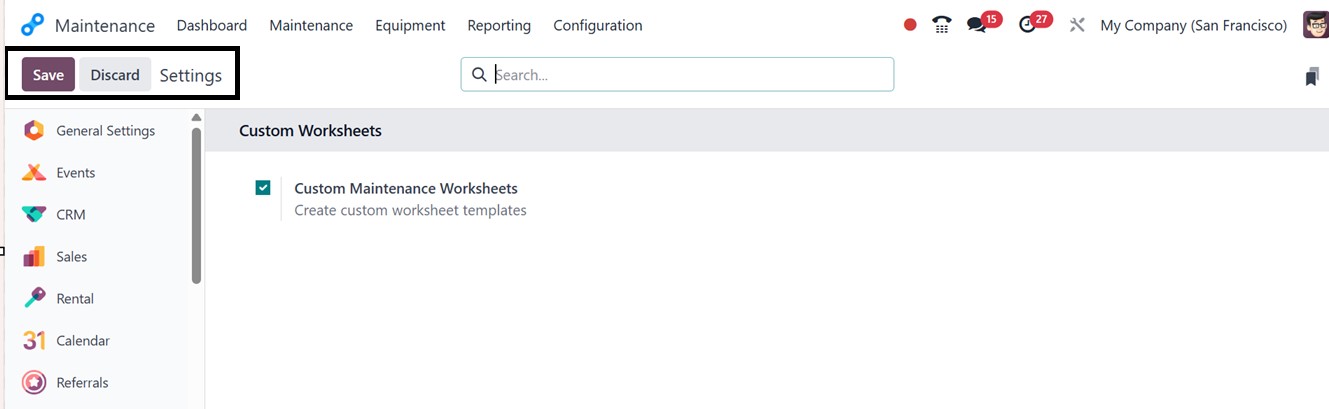
Using the ‘Settings’ window, you can enable or disable the ‘Custom
Maintenance Worksheets’ feature to give or restrict access to create
customized worksheets for different maintenance requests, as shown
in the screenshot below.
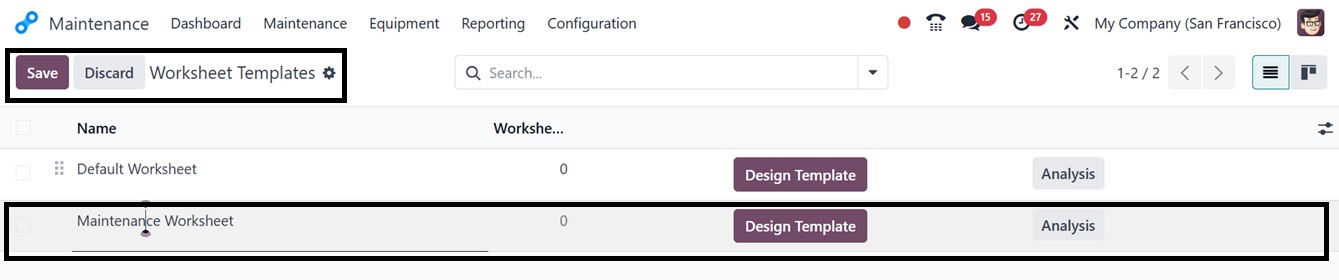
Once the feature is enabled, a ‘Worksheet Template’ option becomes
available under the ‘Configuration’ menu. This section displays a
dashboard listing all existing worksheet templates, along with
options to create and customize new ones. The dashboard also shows
details such as the Template Name and the Available Worksheets. To
create a new template, simply click the ‘New’ button and enter the
desired name in the designated field, as demonstrated in the
screenshot below.
To alter the worksheet layout and form fields to your specifications,
click on the "Design Template" button once the template has been
saved. This will start the Odoo Studio-powered editing interface,
which offers a variety of customisation options and settings, as
seen in the picture below.
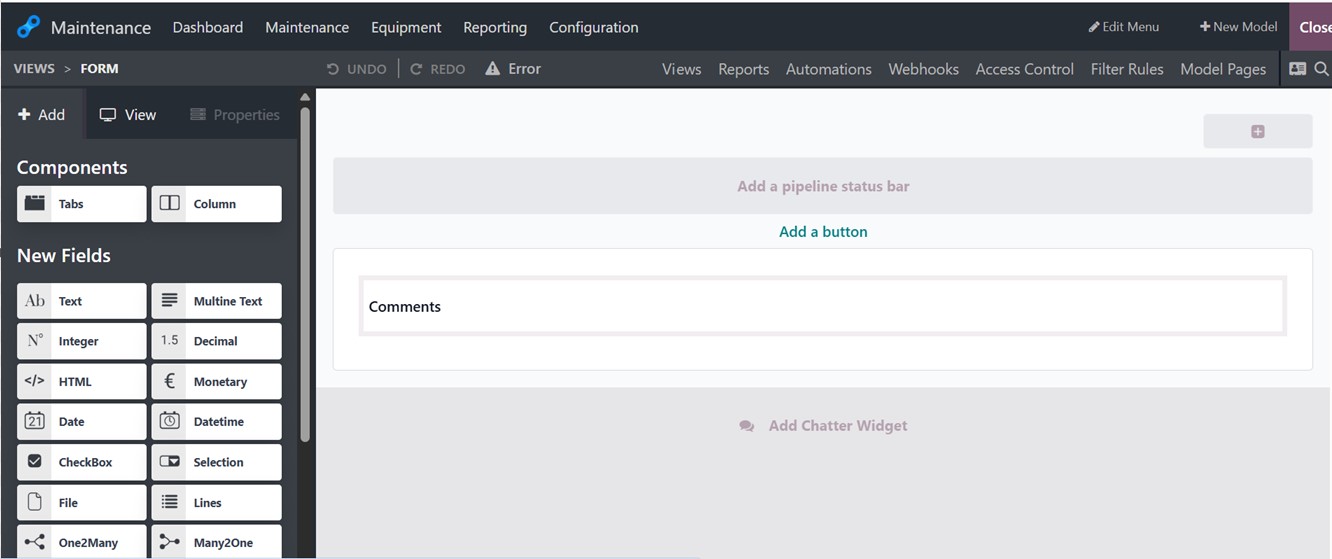
The Components and New Fields sections offer user-friendly
drag-and-drop capabilities for customizing a worksheet by adding the
required fields, columns, and any features. Here, I have added only
one column for demonstration purposes, but you can add as many
columns, fields, or buttons as necessary to suit your unique
requirements.
4. 2 Maintenance Teams
In the Odoo 18 Maintenance module, users can designate maintenance
teams to oversee and manage maintenance orders. When creating a
maintenance request, the system prompts the user to specify the
responsible maintenance team for ensuring accountability.
To create a new maintenance team, users can navigate to the
Configuration menu and select the ‘Maintenance Teams’ option. Here,
you can manage and add new teams by specifying the Team Name, Team
Members, and Company details, as depicted in the screenshot below.

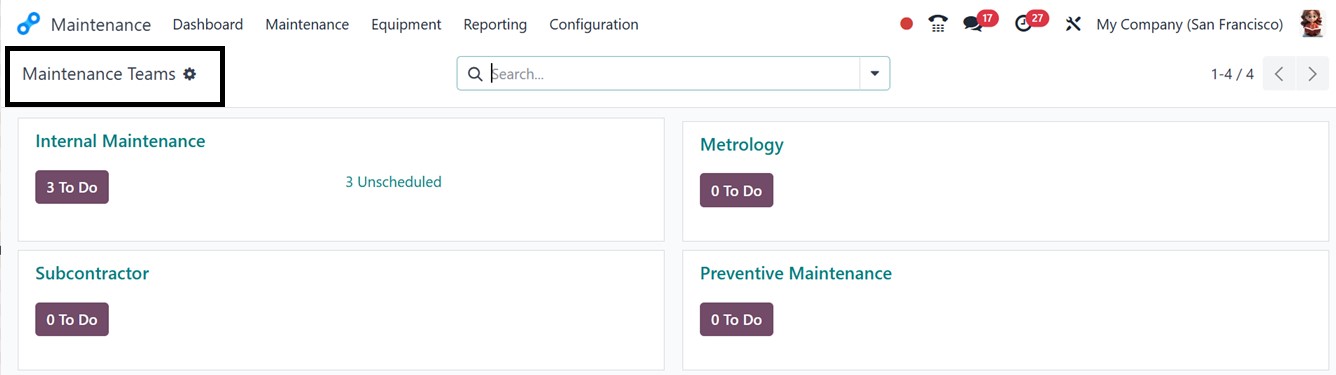
After creating the team, the default dashboard window of the
Maintenance module provides an overview of all maintenance teams in
the organization, with each team panel displaying the number of
pending requests, as shown in the screenshot below.
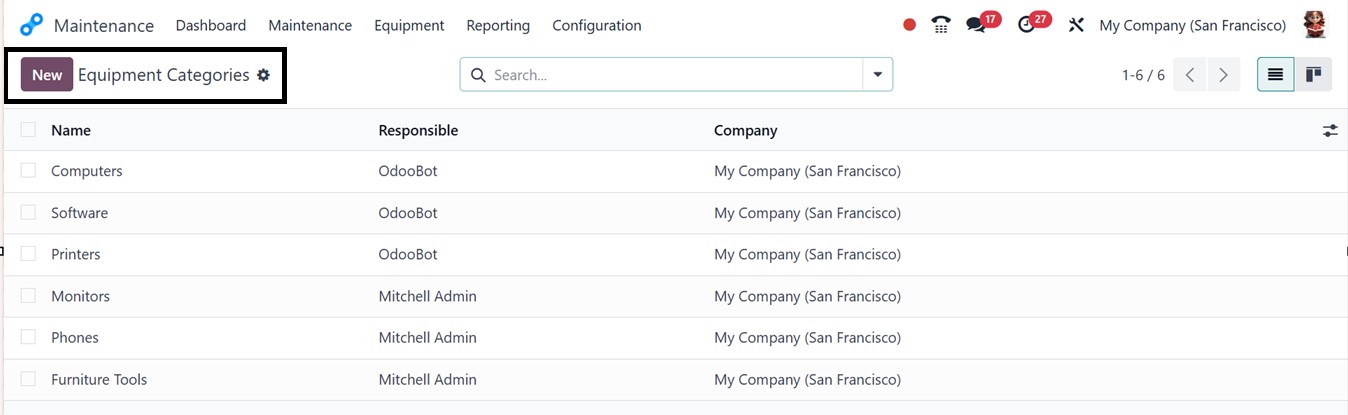
4.3 Equipment Categories
To streamline asset management, users can classify equipment into
categories by navigating to the Equipment Categories option in the
Configuration menu. This section displays a predefined list of
categories along with details such as the Name, the Responsible
Person, and the Company.
To create a new category, users simply click on the ‘New’ button and
enter relevant details such as the Category Name and the Responsible
Employee. Then, edit the Company and Email Alias. Additional remarks
or notes regarding the category can be added in the Comments field.
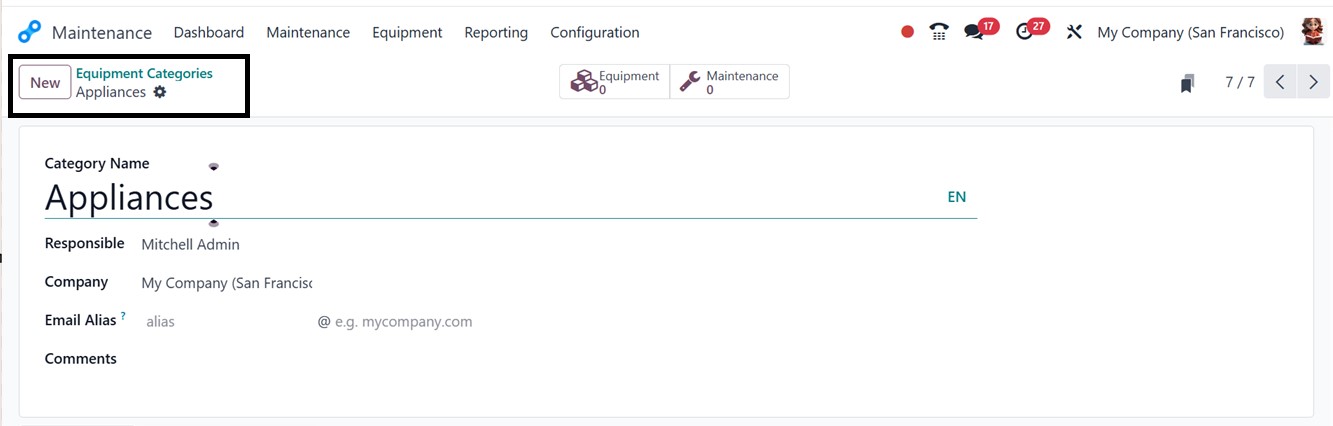
After configuring and saving all the category details, the
‘Equipment’ smart button provides insights into assets assigned to a
specific category, while the ‘Maintenance’ smart button displays
related maintenance requests. By effectively categorizing equipment,
organizations can improve maintenance tracking and ensure that each
asset receives proper attention.