2. Operations Menu
Manufacturing a product involves
sourcing quality raw
materials, setting up
workstations, monitoring
product flow, and conducting
quality checks. In Odoo, a
Manufacturing Order (MO)
is created to initiate
production with a specific
product configuration. Two
primary ways to create MOs
are focusing on different
stages or customizing the
work center and configuring
operations for specific
products. These activities
are crucial for ensuring the
final product's quality. Upon
accessing the manufacturing
module, users are greeted by
a dashboard that showcases
existing production orders,
as shown below.
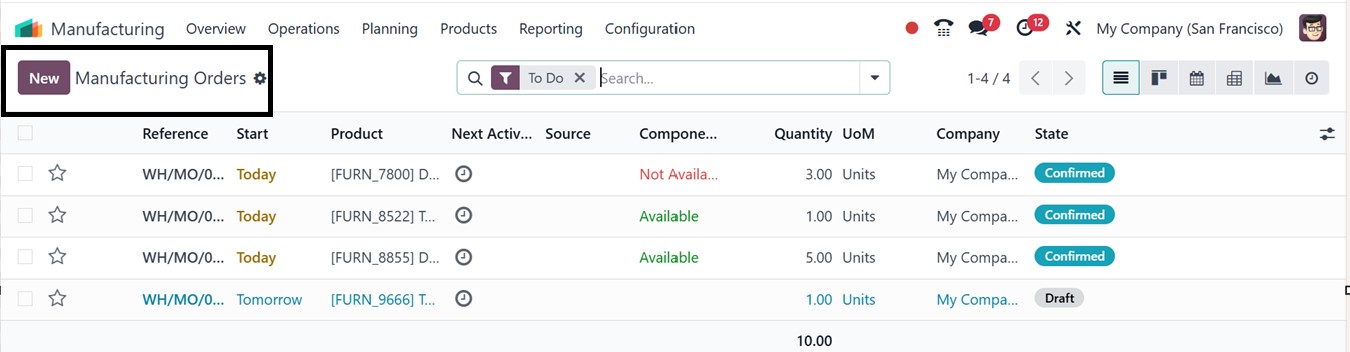
The page displays pre-configured
details, such as Reference
number, Start date, Product,
Next Activity, Source,
availability of components,
Quantity, unit of measure
(UoM), Company, and Status of
each manufacturing order. The
module also provides
different views, including
Kanban, List, Calendar,
Activity, and Pivot, allowing
users to choose a view that
best suits their needs. This
versatility enables effective
reporting and analysis.
The Group By and Filters options
inside the search bar further
enhance functionality. Users
can filter manufacturing
orders by their status (e.g.,
draft, confirmed, in
progress, or completed) or by
product type, scheduling
date, material availability,
and other options
3.1 Manufacturing Ordersr
To create a new manufacturing
order, navigate to the
manufacturing module and
select the "New" option. The
creation page in Odoo 18
requires users to input key
details essential for
manufacturing operations.
These include the Product
Name, which specifies the
item to be produced, and the
Bill of Materials (BoM),
detailing the components and
their required quantities.
Users must also define the Number
of units to be manufactured,
the Scheduled Date for
production, and the
Responsible User, identifying
the person overseeing the
process. Additionally, the
Company Name must be entered
to associate the production
order with the correct
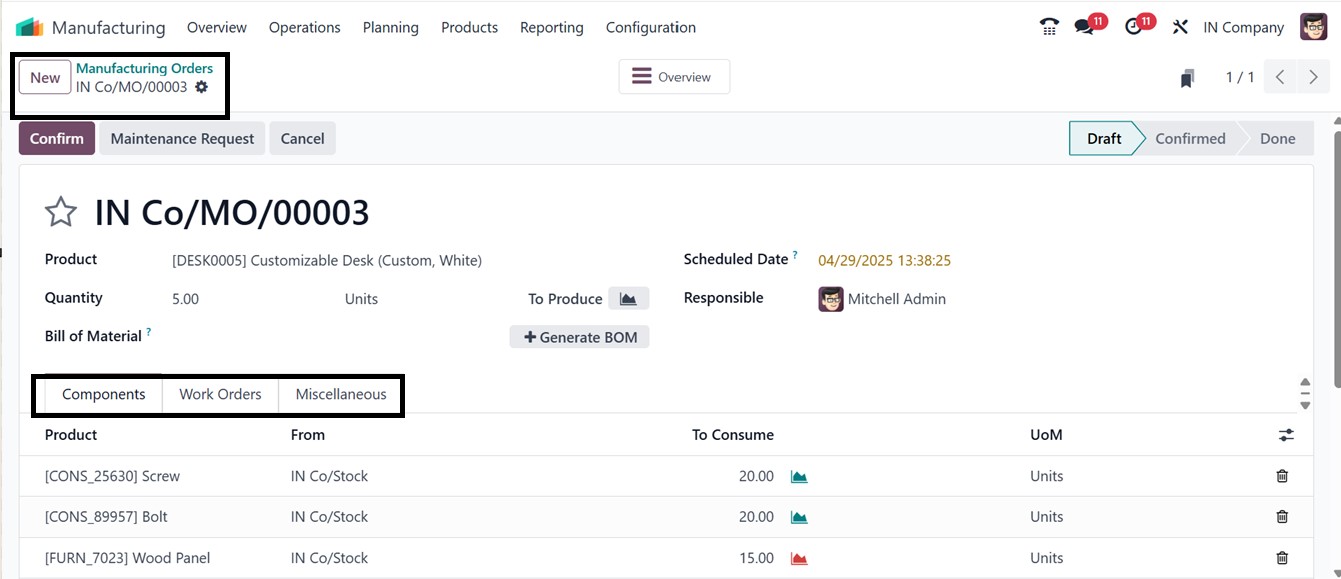
entity. Beyond these basic
details, users can further
refine the production process
by utilizing additional tabs
such as Components to manage
material requirements, Work
Orders to detail specific
tasks, and Miscellaneous for
other relevant configurations
or notes.
The Components tab allows the
addition of raw materials
using the "Add a Line"
option. Here, we can mention
the component products,
Consumption quantities, and
unit of measure (UoM), as
illustrated in the above
screenshot.
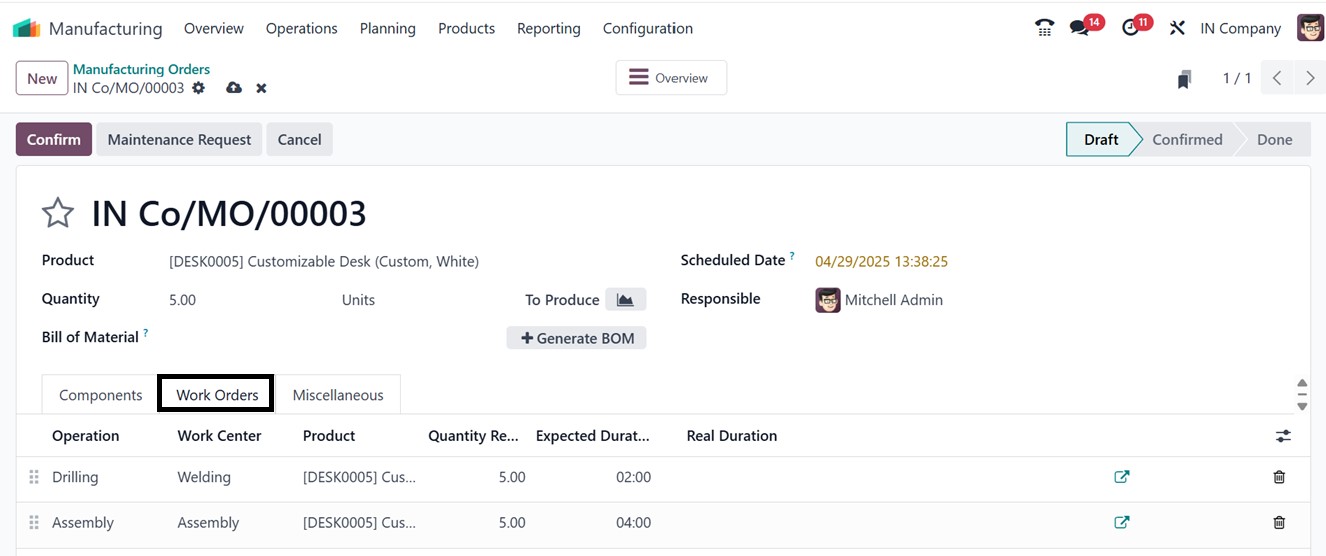
Under the Work Order tab option,
you may add the operation,
work center, product name,
quantity scheduled to start,
estimated duration, and real
duration. The tasks involved
in the manufacturing process
will determine how the
real-time is automatically
modified. After all the
information is finalized, we
can provide other details
about the work order in the
Miscellaneous tab.
The Miscellaneous tab provides
options to enter additional
details, including Sources,
or specify Operation Types,
Projects, and the Company.

After filling in all the form
data, save the work order
details and proceed with the
work order using the ‘Confirm
’ button. This action will
trigger a new manufacturing
order creation, and we can
see some important buttons
and smart button options for
further operations, as shown
below.
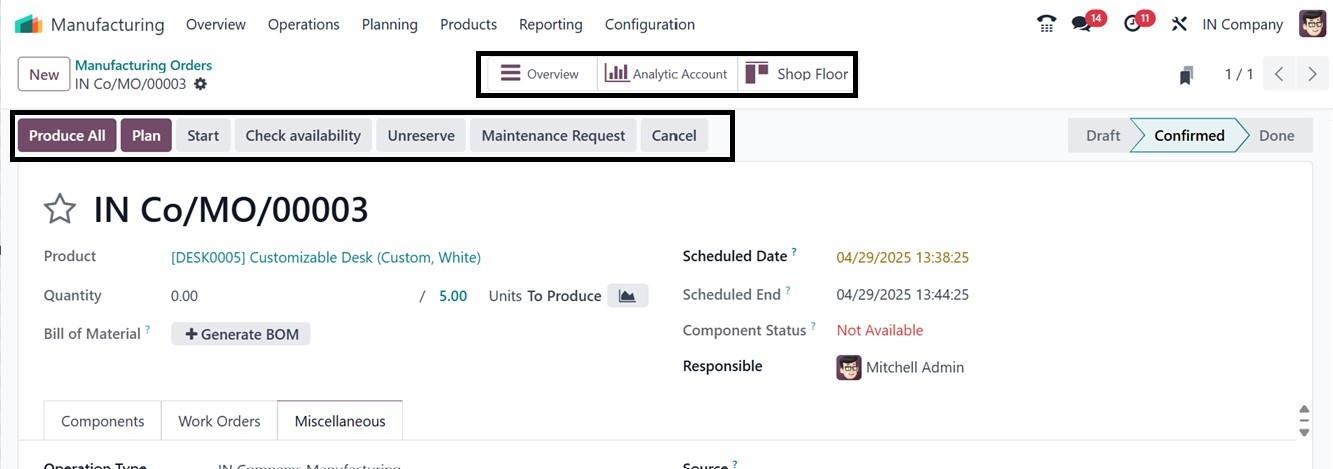
We can see the availability of
the mentioned components in
the ‘Component Status’ field.
The ‘Produce All’ button can
be used to create the
manufacturer order
immediately, or we can
postpone the order by using
the ‘Plan’ button. The
‘Start’ button can be used
for start the manufacturing
process with the timesheet
recording facility. You can
also check the product
availability using the ‘Check
Availability’ button. Using
the ‘Unreserve’ and ‘Cancel’
buttons, you can unreserve
the product and its
components and cancel the
entire manufacturing order.
Finally, the ‘Maintenance
Requests’ button will help
you to send a manufacturing
request to that particular
work center or the associated
users.
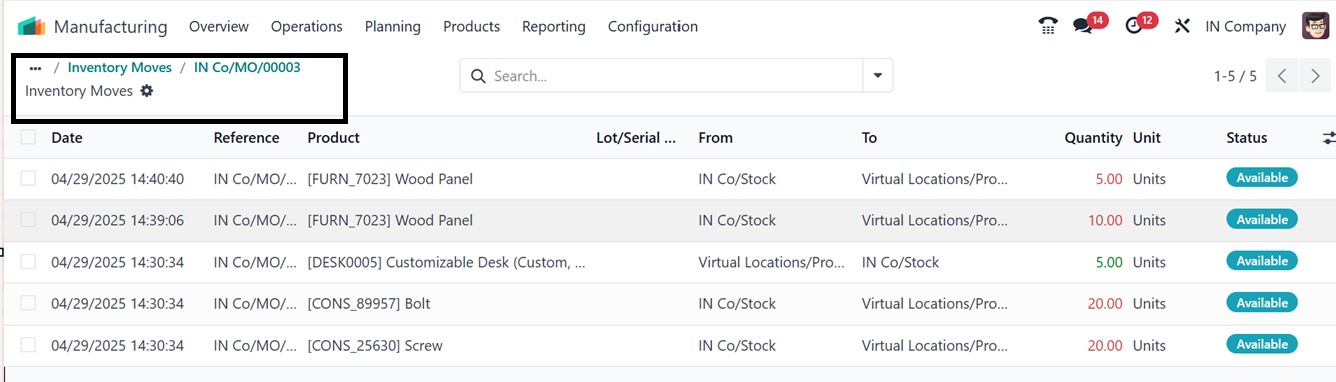
A dashboard displaying all
inventory movement
information, including the
time and location of a
component or product transfer
between sites, will appear
when you click the "Product
Moves" smart button. To
guarantee stock availability,
a few components were
repositioned in this example.
Clicking the "Check
Availability" button will
initiate this operation.
The Overview smart button will
display a complete overview
of the manufacturing process,
including the components,
operations involved in this
process, Status of the actual
product and operations,
Quantity, Reserved
Quantities, Manufacturing
Order Costs (MO Costs), Real
Cost, and other details as
illustrated in the screenshot
below.
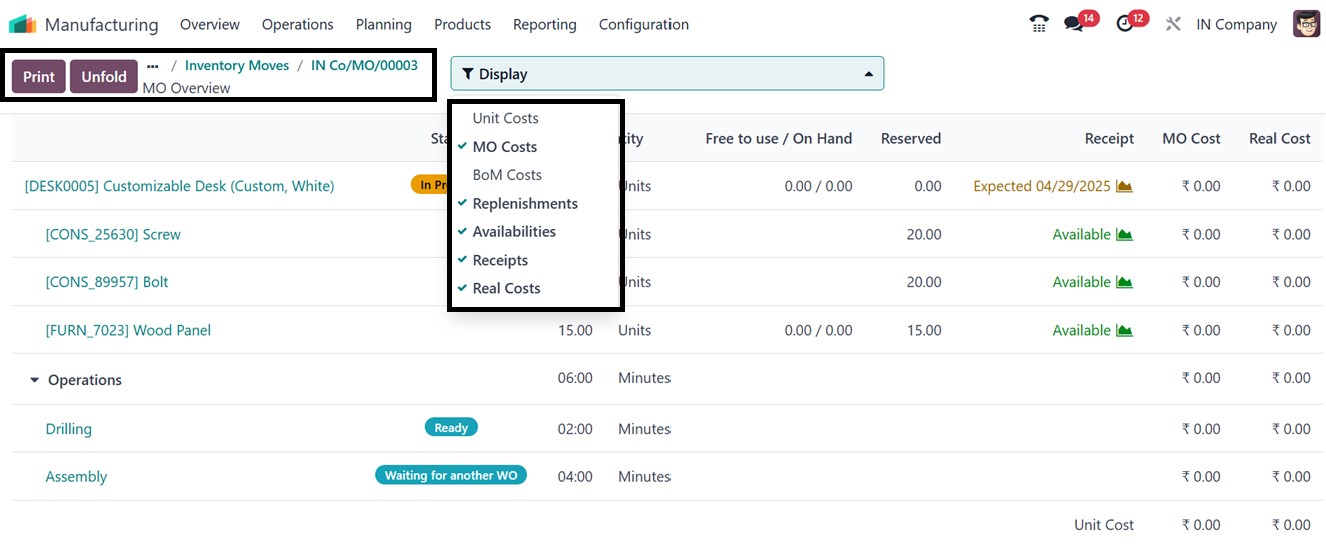
Using the filter feature, you can
view various aspects of the
manufacturing process such as
Unit Costs, Manufacturing
Order Costs, BoM Costs,
Replenishments, etc.
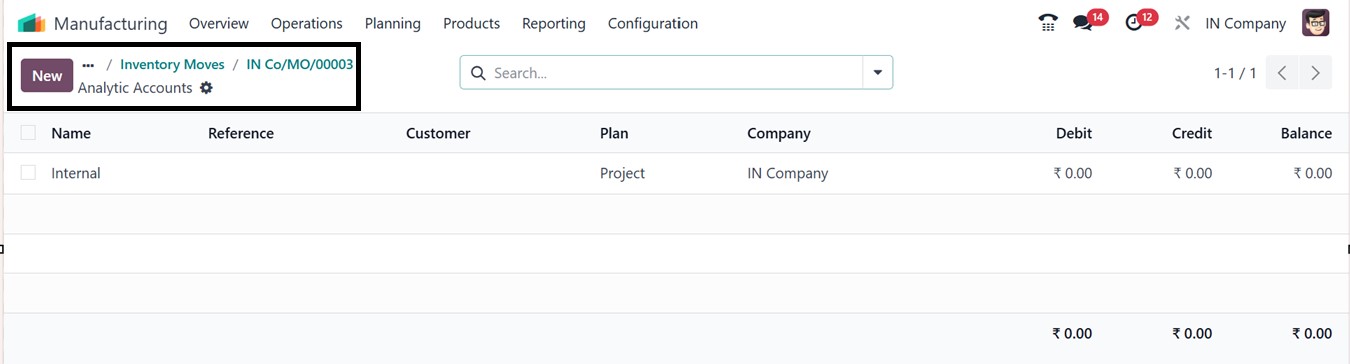
The "Analytic Account" smart
button in the manufacturing
order view connects to the
analytic account linked to
that particular order. A
deeper financial
understanding of the
manufacturing process is
provided by the tracking and
recording of debit, credit,
balance, and project-related
cost analysis using this
account.
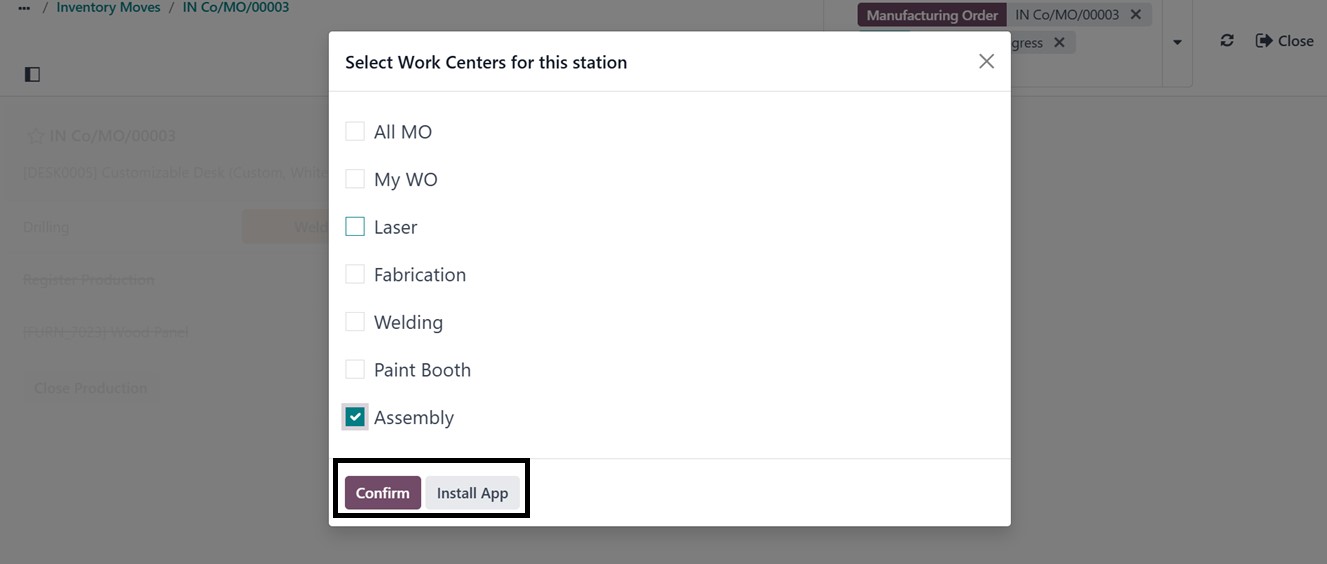
The ‘Shop Floor’ tab will show
the work order tablet view of
the manufacturing order. So,
you have to choose the work
center for this station and
confirm it
The ‘Action’ button placed at the
top left corner of the form
view can be used to Print,
Delete, and Duplicate the
form data. Users can also
utilize the ‘Request
Signature’ option to sign the
work order documents.
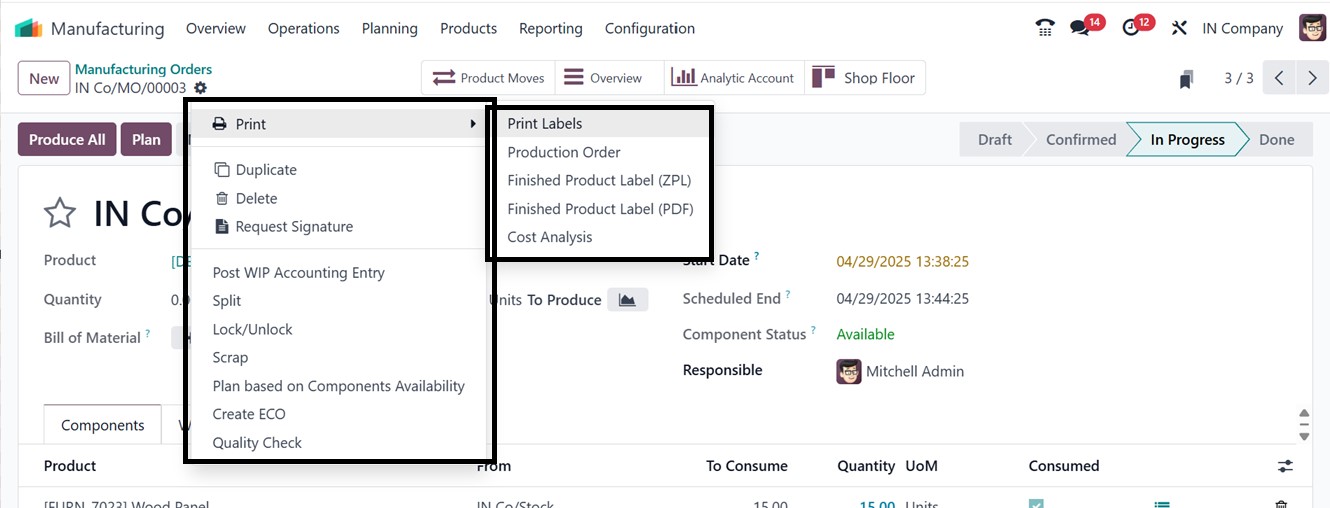
You can also create Split orders,
lock and unlock work orders,
Mark scrap orders, Plan
orders based on component
availability, create ECO
orders, and Quality check the
produced products using the
respective icons placed under
the ‘Action ’ menu.
Using the Print button, we can
print the data for future
analysis or for a better
understanding of the
procedures. The display
filter allows you to
include/exclude MO Cost, Real
Cost, BOM Cost, Unit Cost,
etc, to the MO Overview.
Finally, you can schedule the
manufacturing order using the
‘Plan’ button or immediately
start the process using the
‘Produce All’ button. The
Security Lead Time feature,
available under the
Configuration menu, helps
schedule production ahead of
time to prevent delays. It
enables manufacturers to
input safety days to ensure
on-time production and
mitigate potential
disruptions.
After producing the manufacturing
order, odoo will display an
‘Unbuild’ button to unbuild
the product if any mistakes
or quality issues arise.
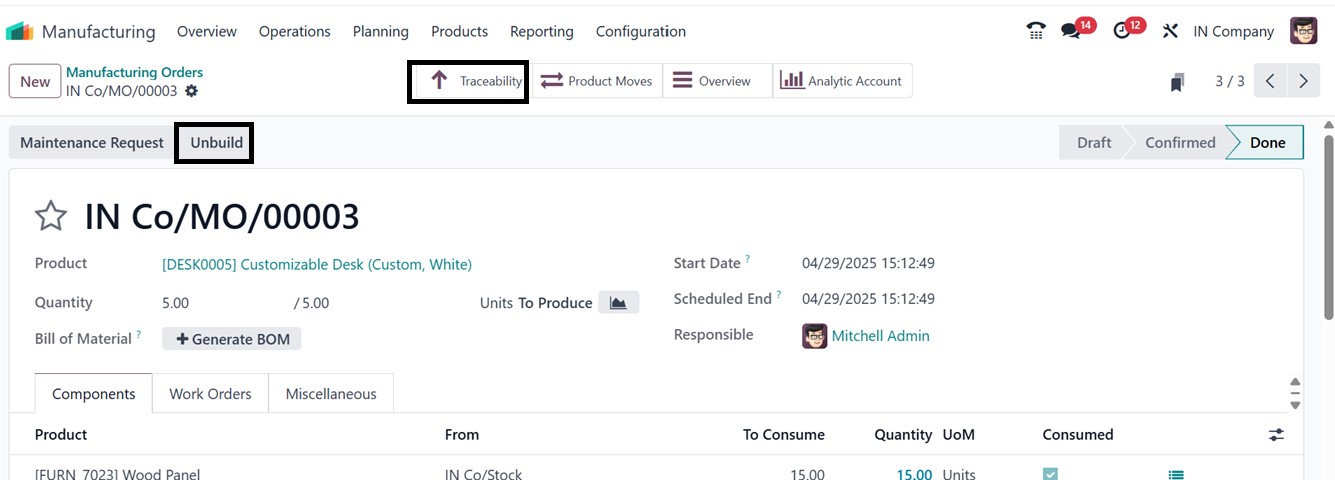
By selecting the "Traceability"
smart button, you can see the
product traceability report.
As seen in the picture below,
this report includes detailed
information on every product
that was part of the
manufacturing order.

3.2 By-Products and Work
Orders
Demanding by-products from a
manufacturing order will be
helpful for the efficient use
of components and for
reducing scrap items.
Monitoring quantities,
confirming production
outcomes, and ensuring
precise inventory updates are
possible for both primary and
secondary goods created
during the manufacturing
process.
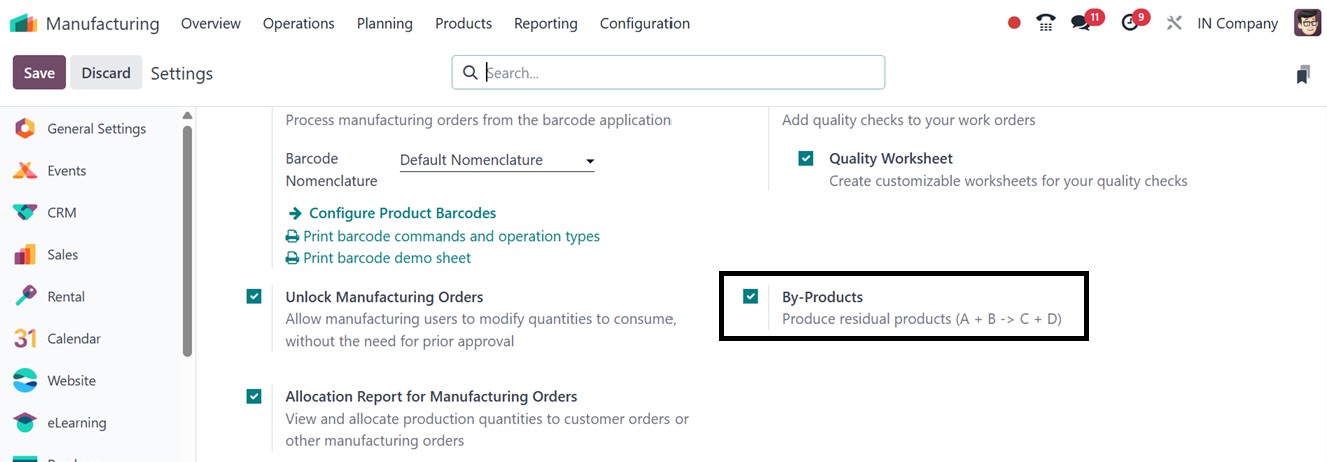
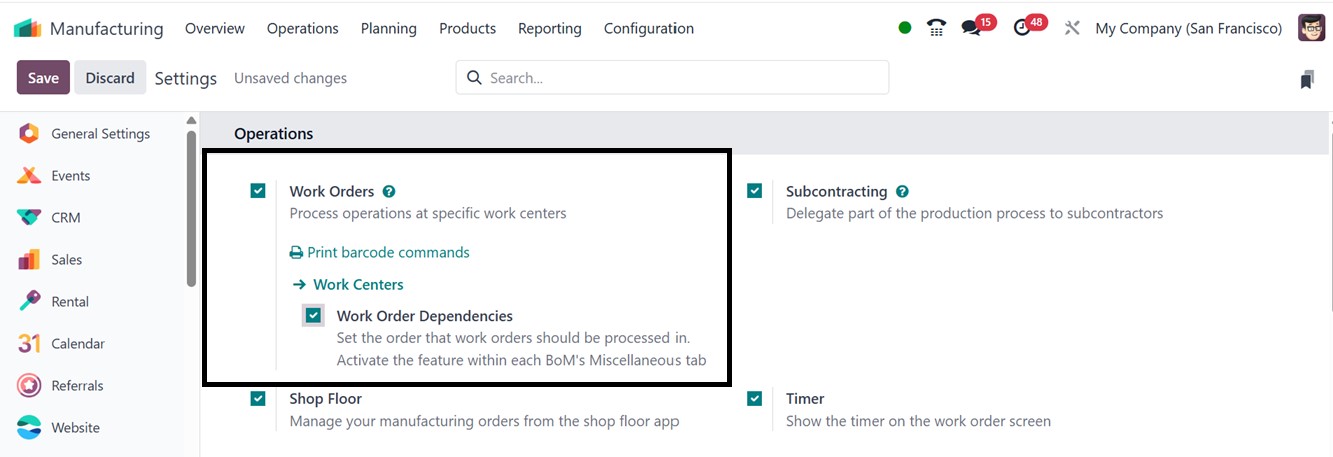
If required, users can activate
the By-Products feature in
the settings menu. This
enables the option to specify
any by-products produced
during manufacturing
alongside the main product.
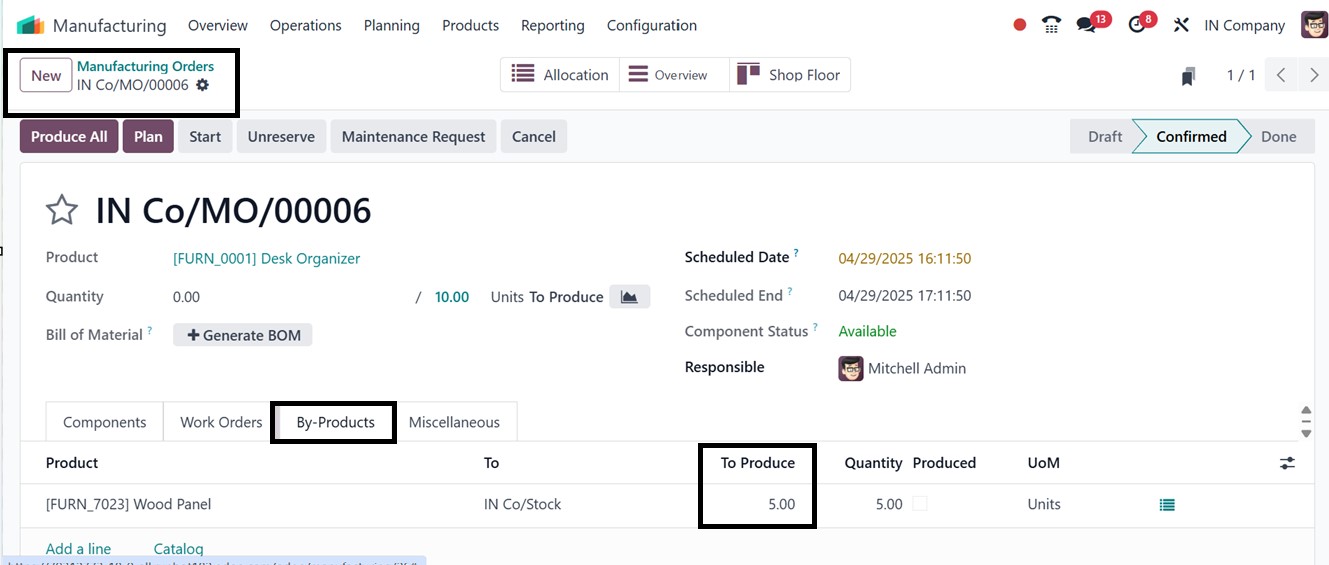
Activating this feature will open
an extra tab option in the
manufacturing Order
configuration form named the
‘By-Products’ tab. Users can
add by-products by selecting
"Add a Line" and providing
necessary details, such as
product name, UoM, and serial
number.
Once the manufacturing order is
created and saved, users have
the option to confirm it.
Upon confirmation, proceed
with the production process
using the ‘Produce All’
button.
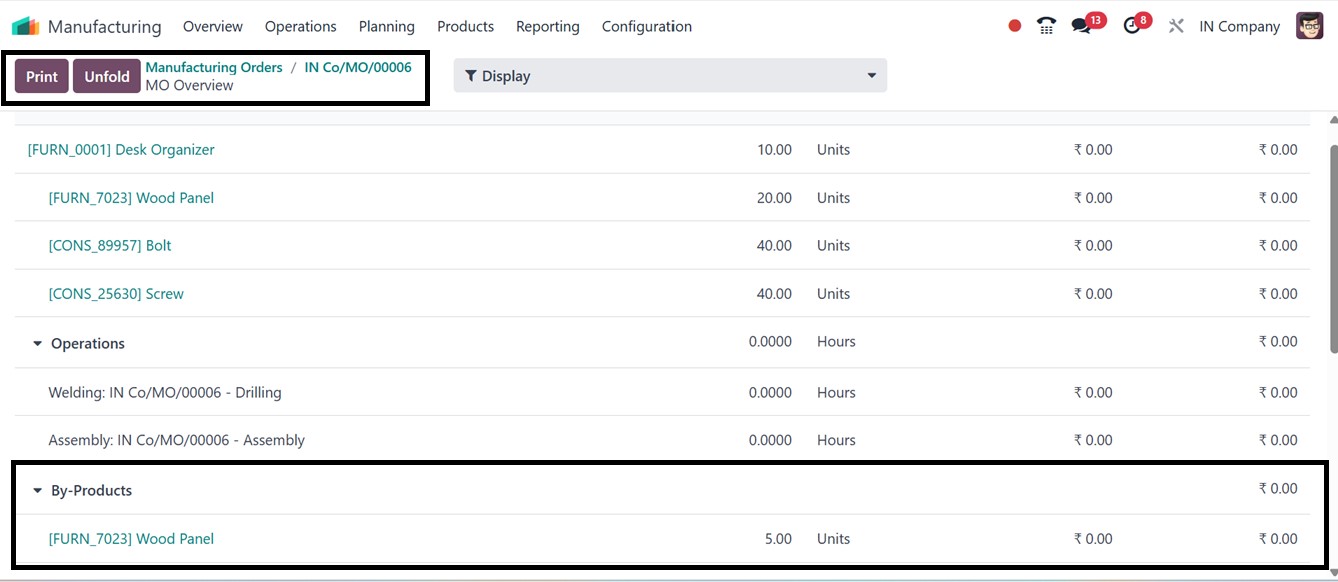
The "Overview" button allows you
to evaluate by-products
produced after finished items
are produced. This section
summarizes the production
order, including secondary
outputs or by-products
specified in the bill of
materials (BoM), as depicted
in the screenshot below.
3.3 Work Orders
The management and organization
of work orders are crucial
for effectively coordinating
all activities related to
product production. When work
orders are initiated, options
are available from the main
menu of the manufacturing
module. If you enable the
Work Orders feature in the
settings menu, the average
work order details will be
displayed on a separate page.
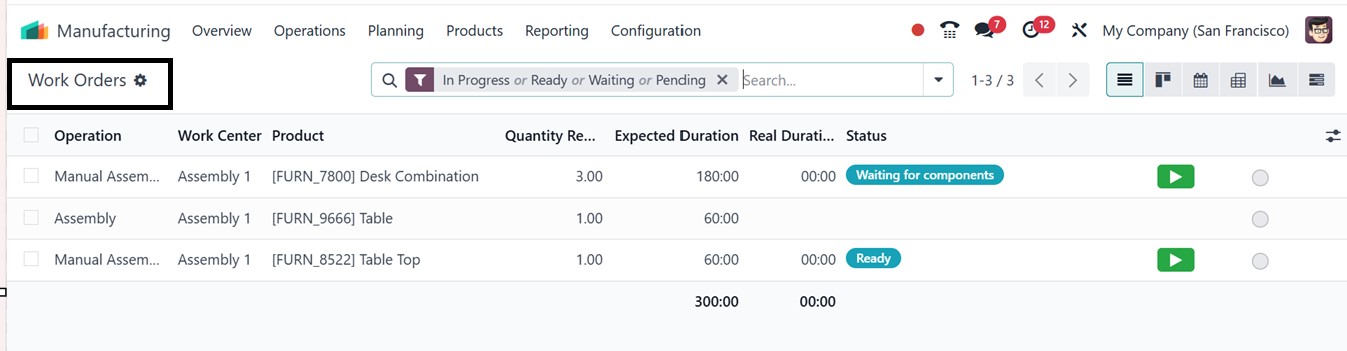
If work orders have already been
created, they will be listed
on the ‘Work Orders’
dashboard window with
information including the
Operation, Work Order,
Product, Quantity Remaining,
Expected and Real Durations,
and the current status of
each work order, as depicted
in the screenshot below.
The Pivot, Graph, and Kanban
viewing choices on this page
let you select the format
that best suits your
analytical and workflow
needs. You may start the
process by clicking the Start
button next to any work
orders that are still
waiting. Clicking on any work
order entry will open its
work order form for better
understanding, as depicted in
the screenshot below.
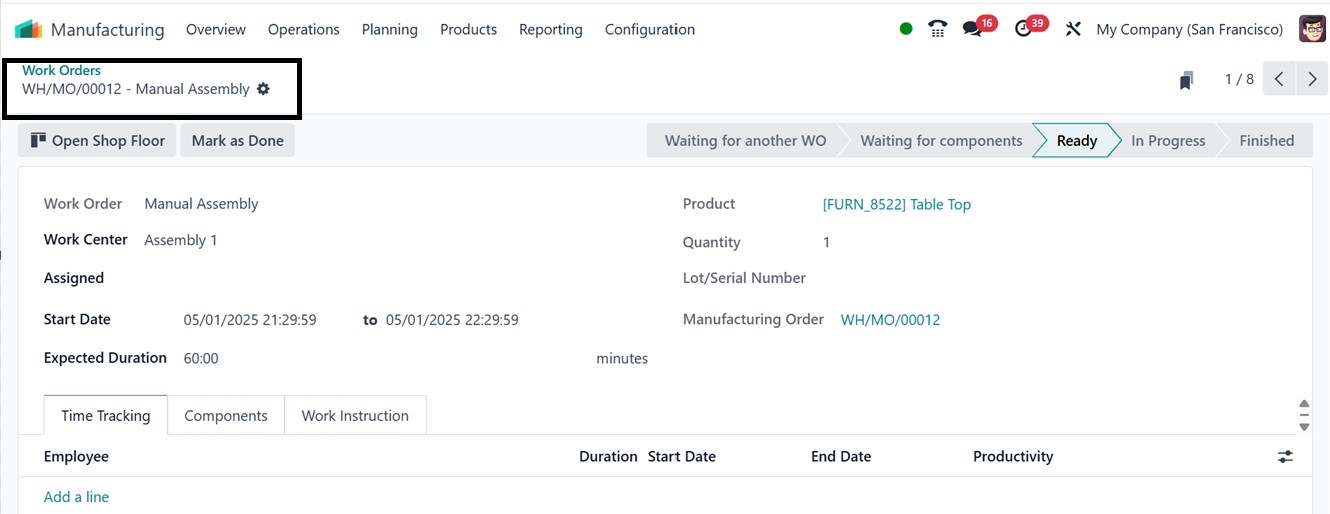
This feature is essential for
effectively overseeing and
managing the different phases
of the production process. If
required, you can edit any
changes to the work order
from this configuration form.
3.4 Unbuild Orders
The unbuild method in Odoo
enables the disassembly of a
completed product into its
individual components, making
it easier to manage and track
these processes. The
manufacturing module in Odoo
provides a list of all
created and unbuilt orders in
its ‘Unbuild Orders’ window
from the ‘Operations’ menu.
If any unbuilt orders have
already been established in
your manufacturing
application database, they
will appear on this window
with their Reference Id,
Product, Bill of Materials,
Manufacturing Order,
Lot/Serial Numbers, Unit of
Measure, Source Location and
other details in a dashboard
list view, as shown below.

The list can be filtered or
organized using the "Group
by," "Favorites," and
"Filter" features. To create
a new unbuild order, click
the "New" button. The
screenshot below shows the
unbuilt order creation page.
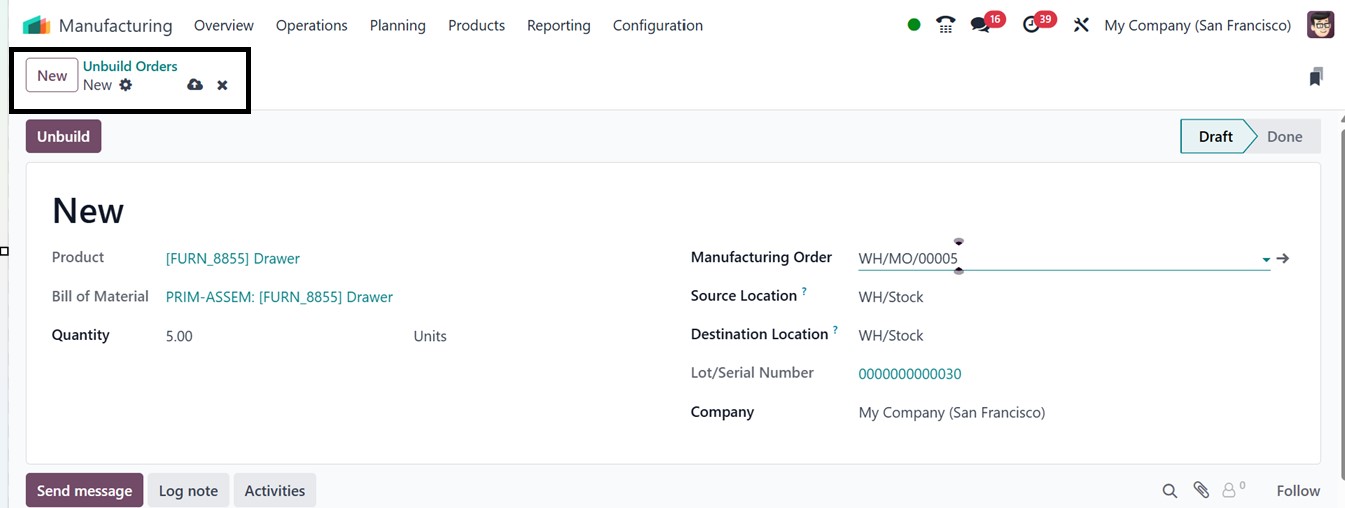
You can enter information such as
the Product name, Bill of
Materials, Quantity,
Manufacturing Order,
Lot/serial number, Source
Location, Destination
Location and Company name on
the form field. Then, click
on the "Save" icon when all
the data has been provided.
After saving, click the
"Unbuild" button to finish
the unbuild order draft. If
required, you may use the
action menu's Delete and
Duplicate options from the
‘Actions’ button of the form
to remove or duplicate the
unbuilt order.
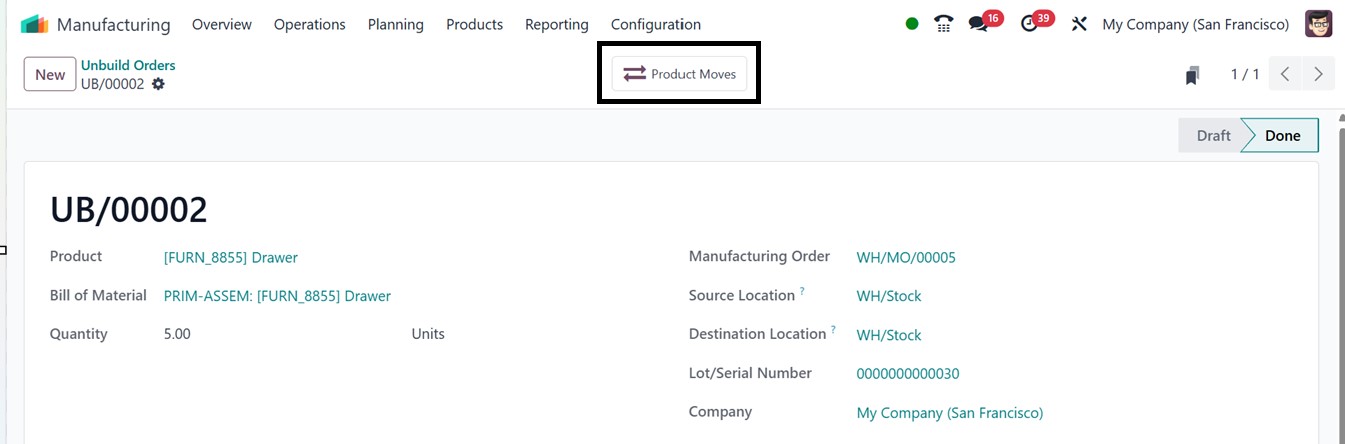
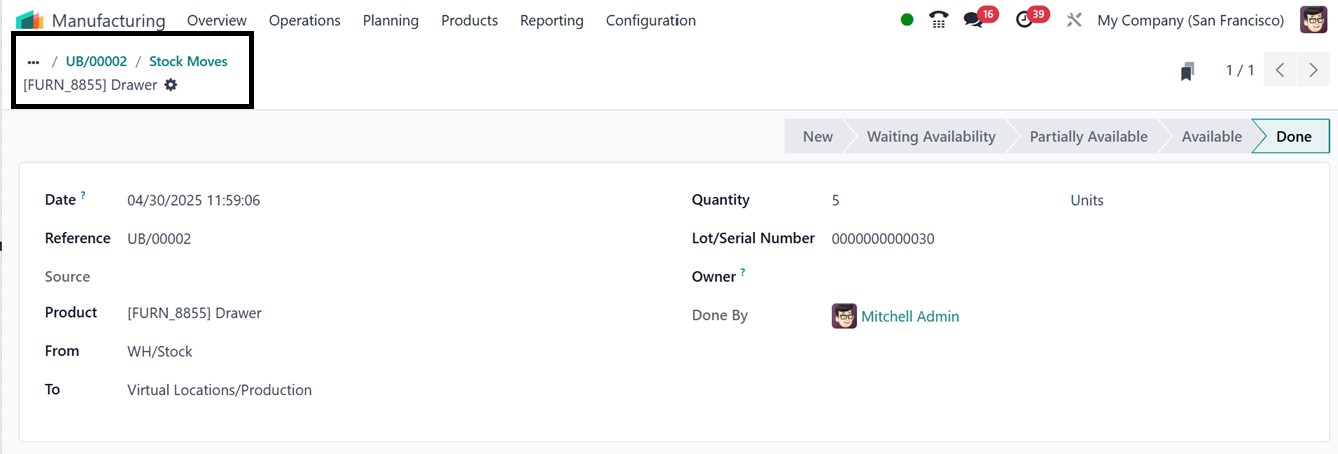
The "Product Moves" smart button
offers comprehensive details
on how products are moved
from their starting point to
their final destination. To
see this information, just
click on the dashboard's
product move entry, as shown
below.
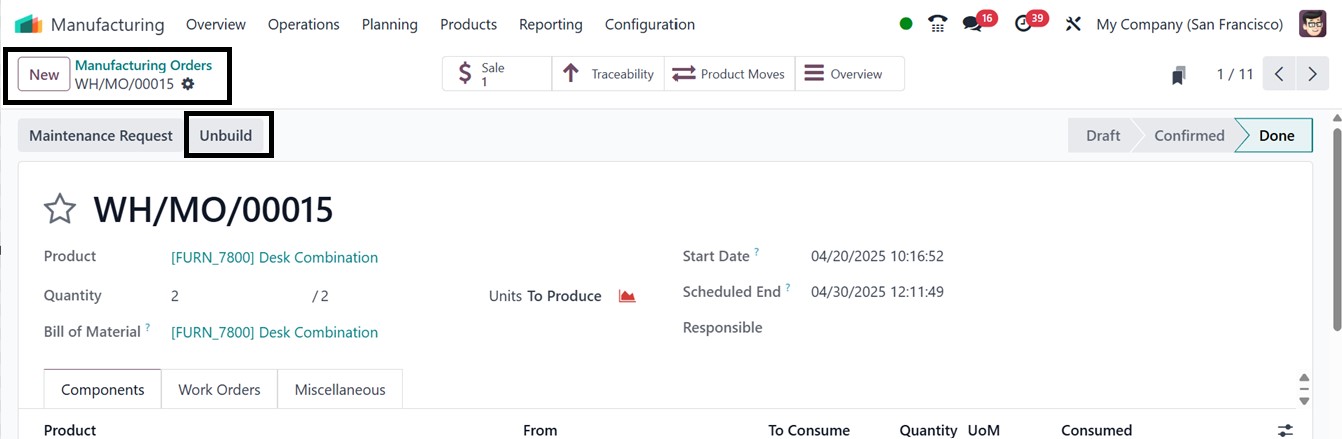
You can utilize the unbuild
capability even after a
normal manufacturing order is
finished. If the finished
product is flawed or damaged
after all manufacturing
processes have been
completed, you can quickly
undo the process by selecting
the "Unbuild" button on the
manufacturing order form, as
seen below, As a result, the
system is able to deconstruct
the final product and
appropriately return the
parts to stock.
3.5 Scrap Orders
The ‘Scrap orders are an
essential part of the
production process for
handling discarded or damaged
product components. Removing
scrap items is a crucial step
that ensures defective parts
are properly managed after
the production process is
verified.
You can choose the "Scrap"
option from the Operations
menu. This will take you to
the scrap orders dashboard.
You will also have access to
a list of previously
completed scrap orders if
they are available, as shown
in the screenshot below.

From the dashboard, open a new
Scrap Order creation form. In
this section, you can specify
the name of the Product and
the Quantity to be scrapped.
Afterward, provide the
Lot/Serial Numbers, Replenish
Quantities, Scrap Reasons,
Source Location,
ScrapLocation, and Source
Document details for future
reference and better scrap
management.
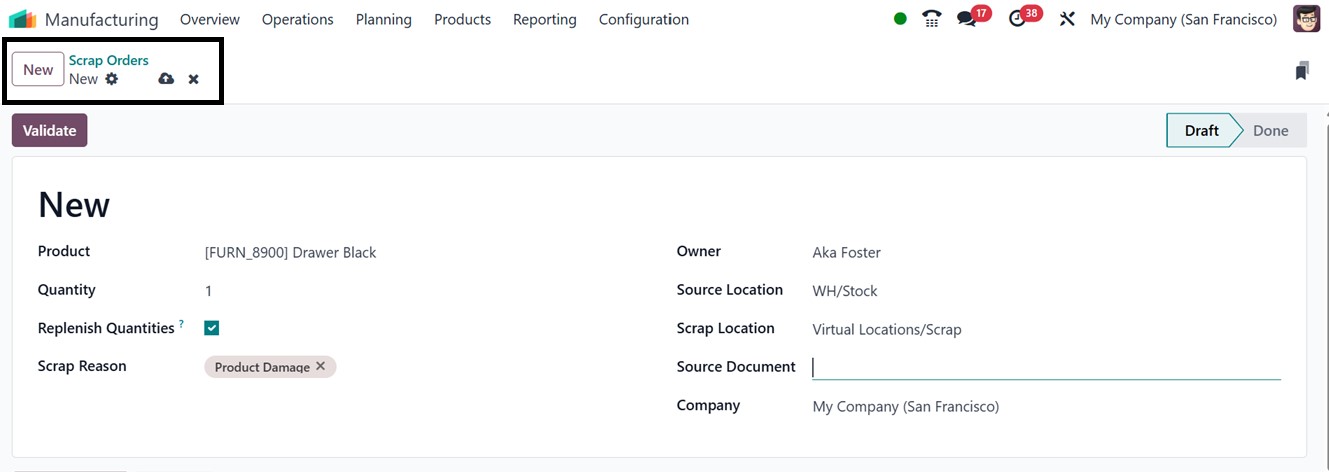
Finally, select the "Validate”
option to confirm the scrap
order. Upon validation, this
order will be displayed in
the Scrap menu dashboard.
After confirming the Scrap
order, you can check the
product movement history
details from the “Product
Moves” smart button.