2. Contract
Users can handle employee
contracts and salary
attachments in the Odoo 18
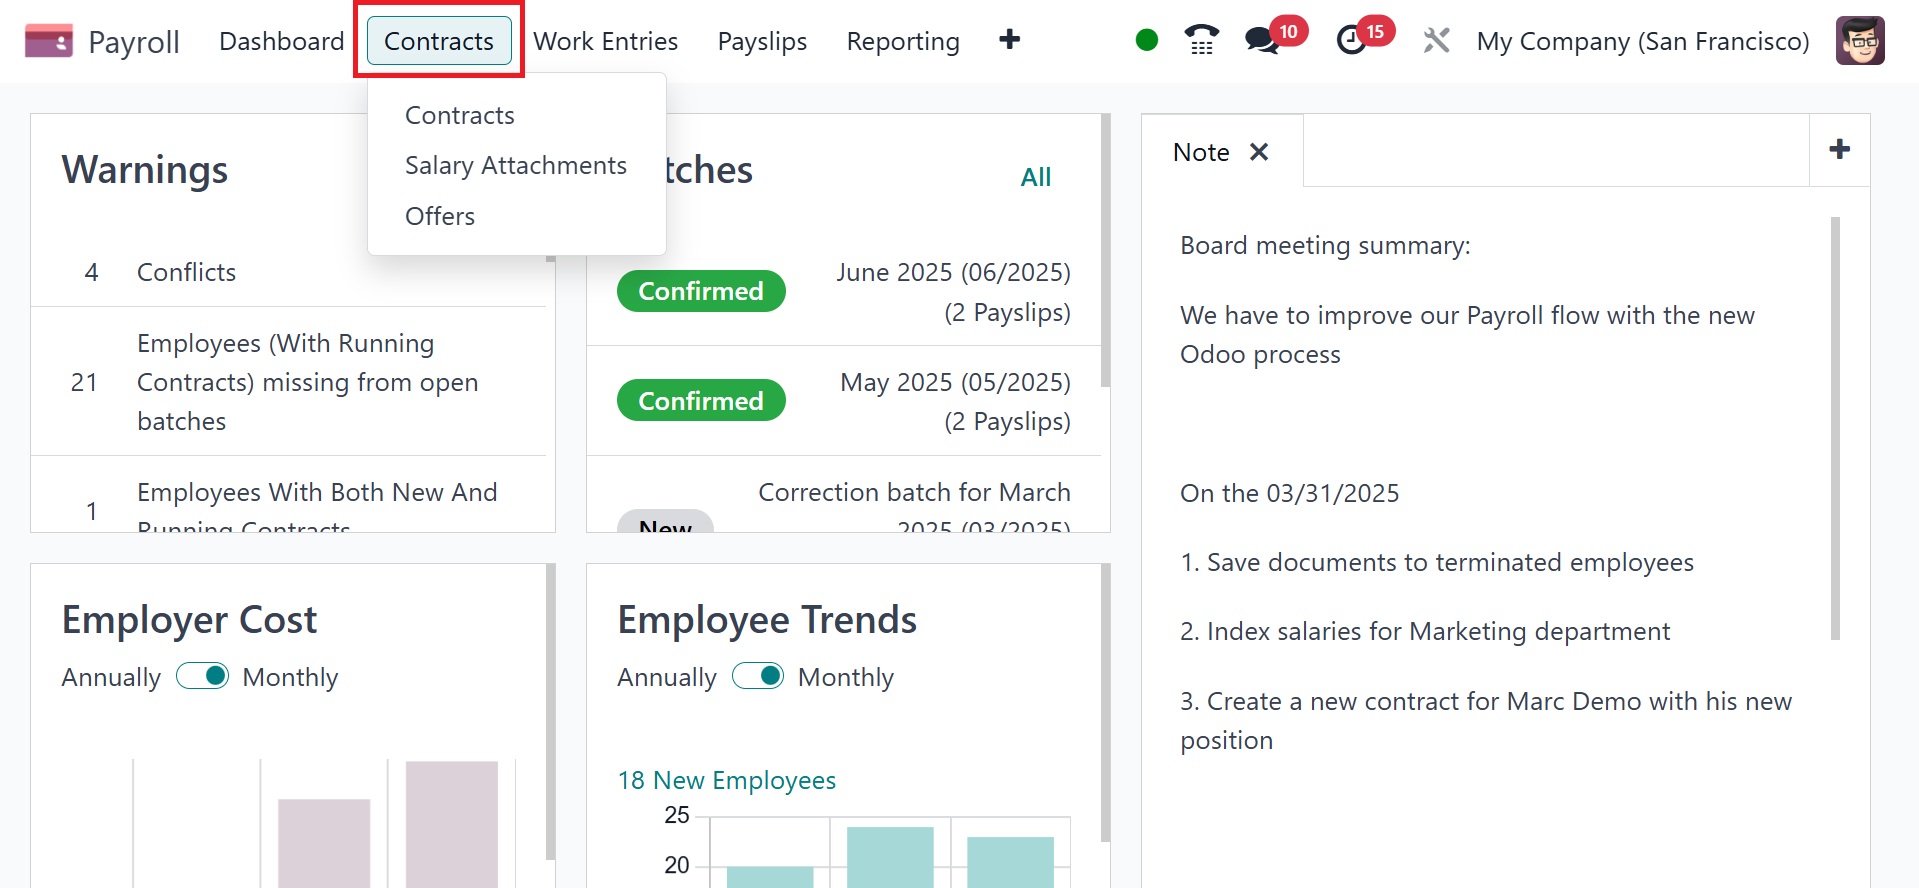
Payroll module's Contracts
menu. Contracts, Salary
Attachments, and Offers are
the three choices that appear
when you choose the Contracts
menu. Let's look at each of
these options separately.
2.1 Contract
You can construct and maintain
employee contracts, including
their specifics such as start
and end dates, pay scales,
working hours, and any
relevant comments, by
selecting the "Contracts"
option. Managing wage
attachments and offers is
another aspect of it. Users
can manage the salary
attachments and employee
contract data within the
Contracts menu of the Odoo 18
Payroll module.
Users can also create a new
employment contract by
clicking the New symbol under
the Contracts. On the open
page, you can select your
employee and type the name of
the contact. The user is
immediately presented with
details about the person's
department, job title, and
contract type after selecting
the employee.
Enter the start date of the
contract in the Contract
Start Date box and the end
date in the Contract End Date
field. After choosing the
sort of salary structure, you
may choose the employees'
work schedule in terms of
hours per week. It is then
possible to describe the
source of work entry in the
contract. Three distinct
sources of work entry include
attendance, working schedule,
and planning. Working entries
are made in accordance with
regular working hours when
the Working Schedule option
is used. If the Planning
option is selected, working
entries will be generated
depending on employee
planning.
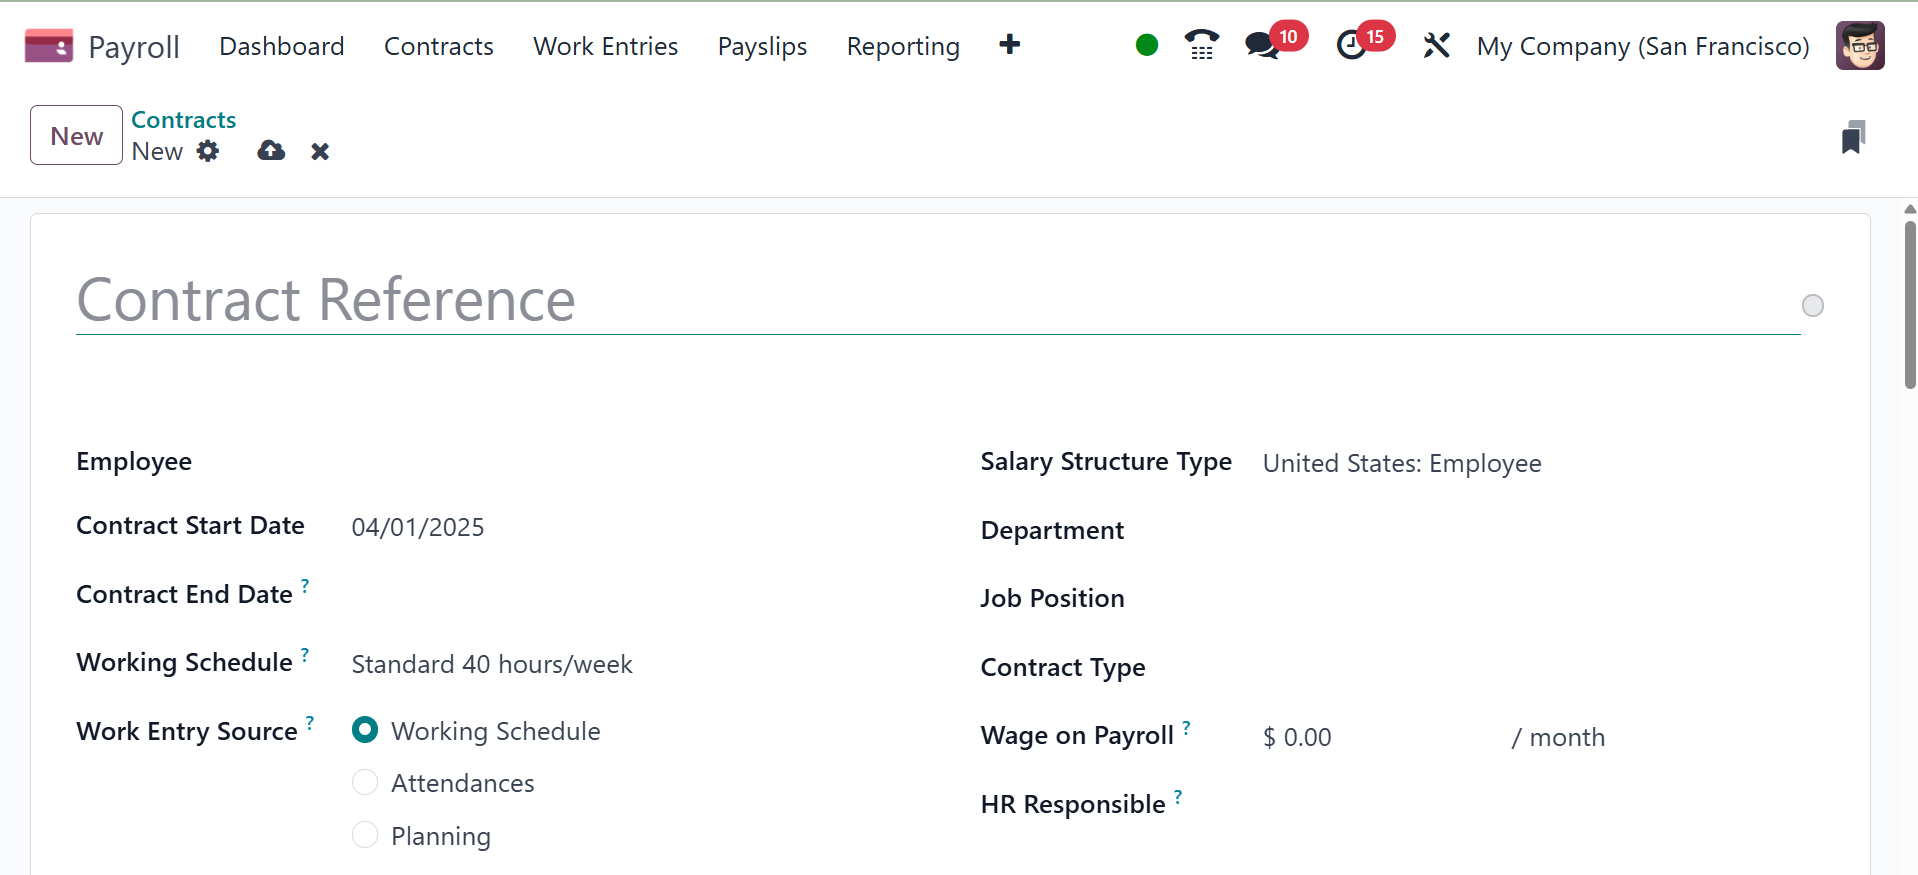
Each employee may have a
different salary structure
type. Add the department, job
position, contract type, and
HR responsible as well. The
wage from the contract can
then be entered in the Wage
on Payroll box.
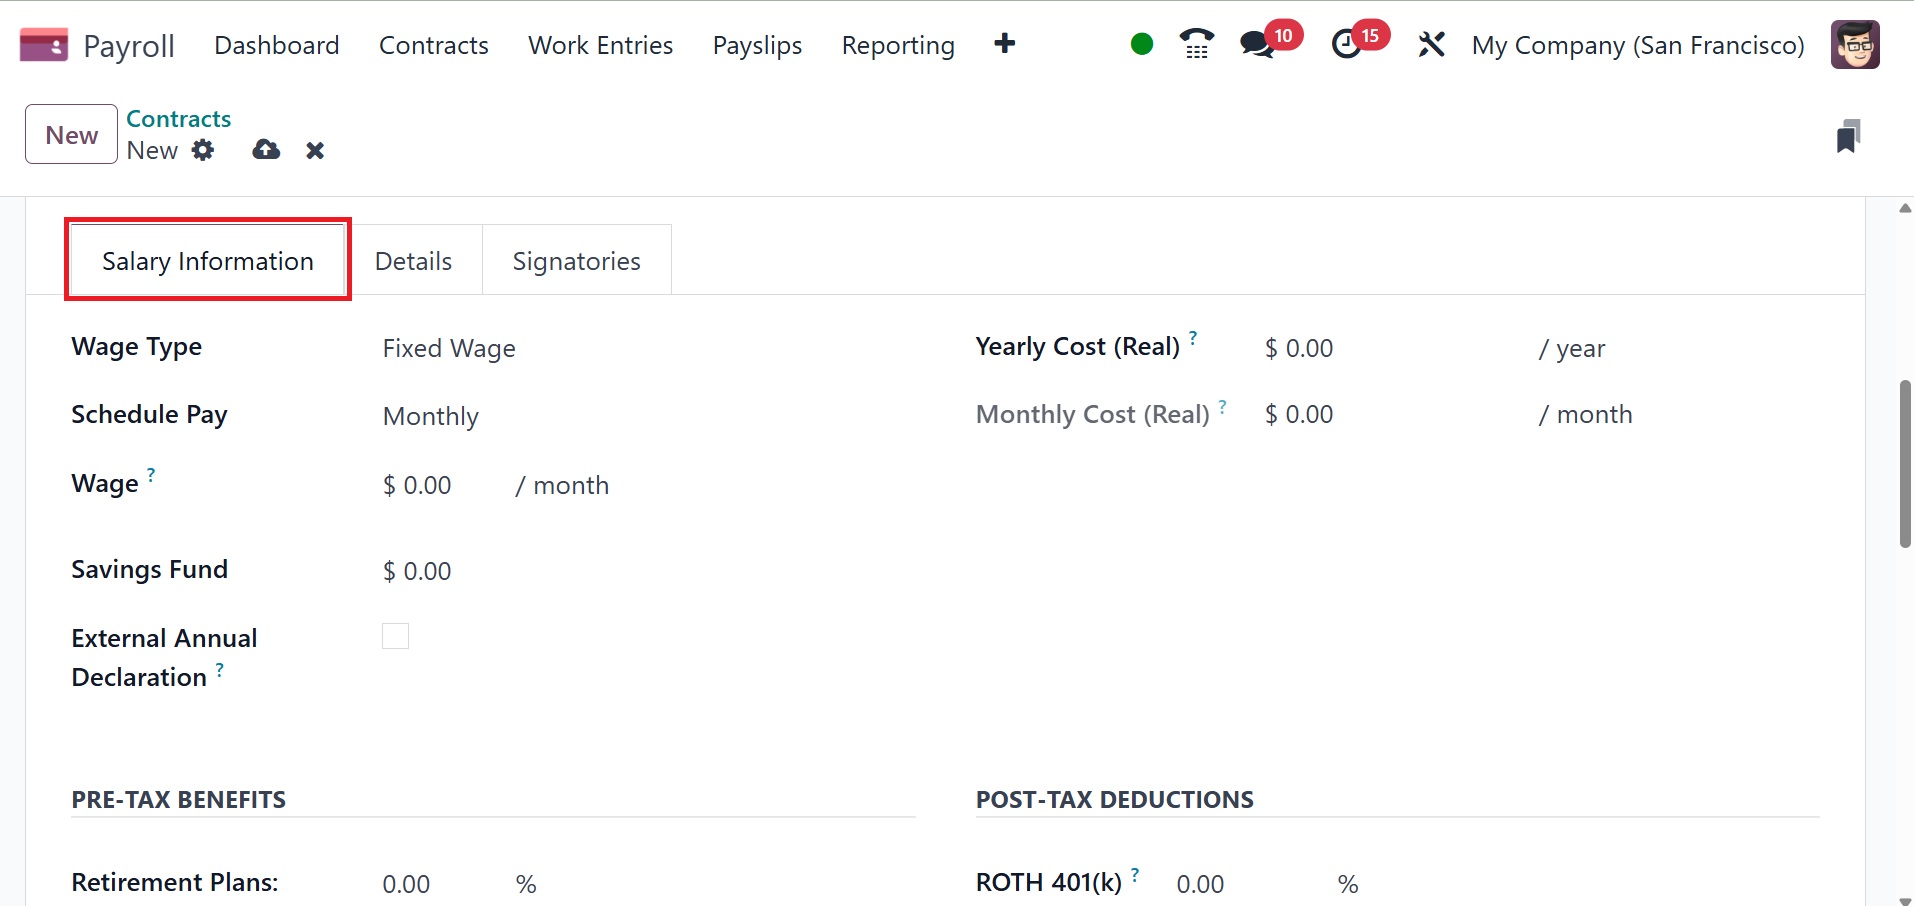
In the Wage part of the Salary
Information, the user can
input their base pay for the
month. Furthermore, the
Yearly Cost (Real) option
automatically enters an
employer's total cost for the
entire year. Additionally,
mention the Wage Type and
Schedule Pay. You can define
an employee's pay by
specifying their wage type
and scheduled pay frequency.
Wage type determines how an
employee is paid (fixed or
hourly), while schedule pay
defines the payment
frequency. Wage type can be
either "Monthly Fixed Wage"
or "Hourly Wage", and the
scheduled pay options include
monthly, quarterly,
semi-annually, annually,
weekly, bi-weekly, or
bi-monthly. Then, provide the
savings fund and external
annual declaration. Below the
pre-tax benefits, and
retirement plans, retirement
plan matching amount, and
retirement plan matching
yearly cap can be added.
Under the post-tax deduction,
add the ROTH 401(K), which is
retirement saving plan
provided to American
employees from US companies.
It can be a percentage of
fixed amount in payslip.
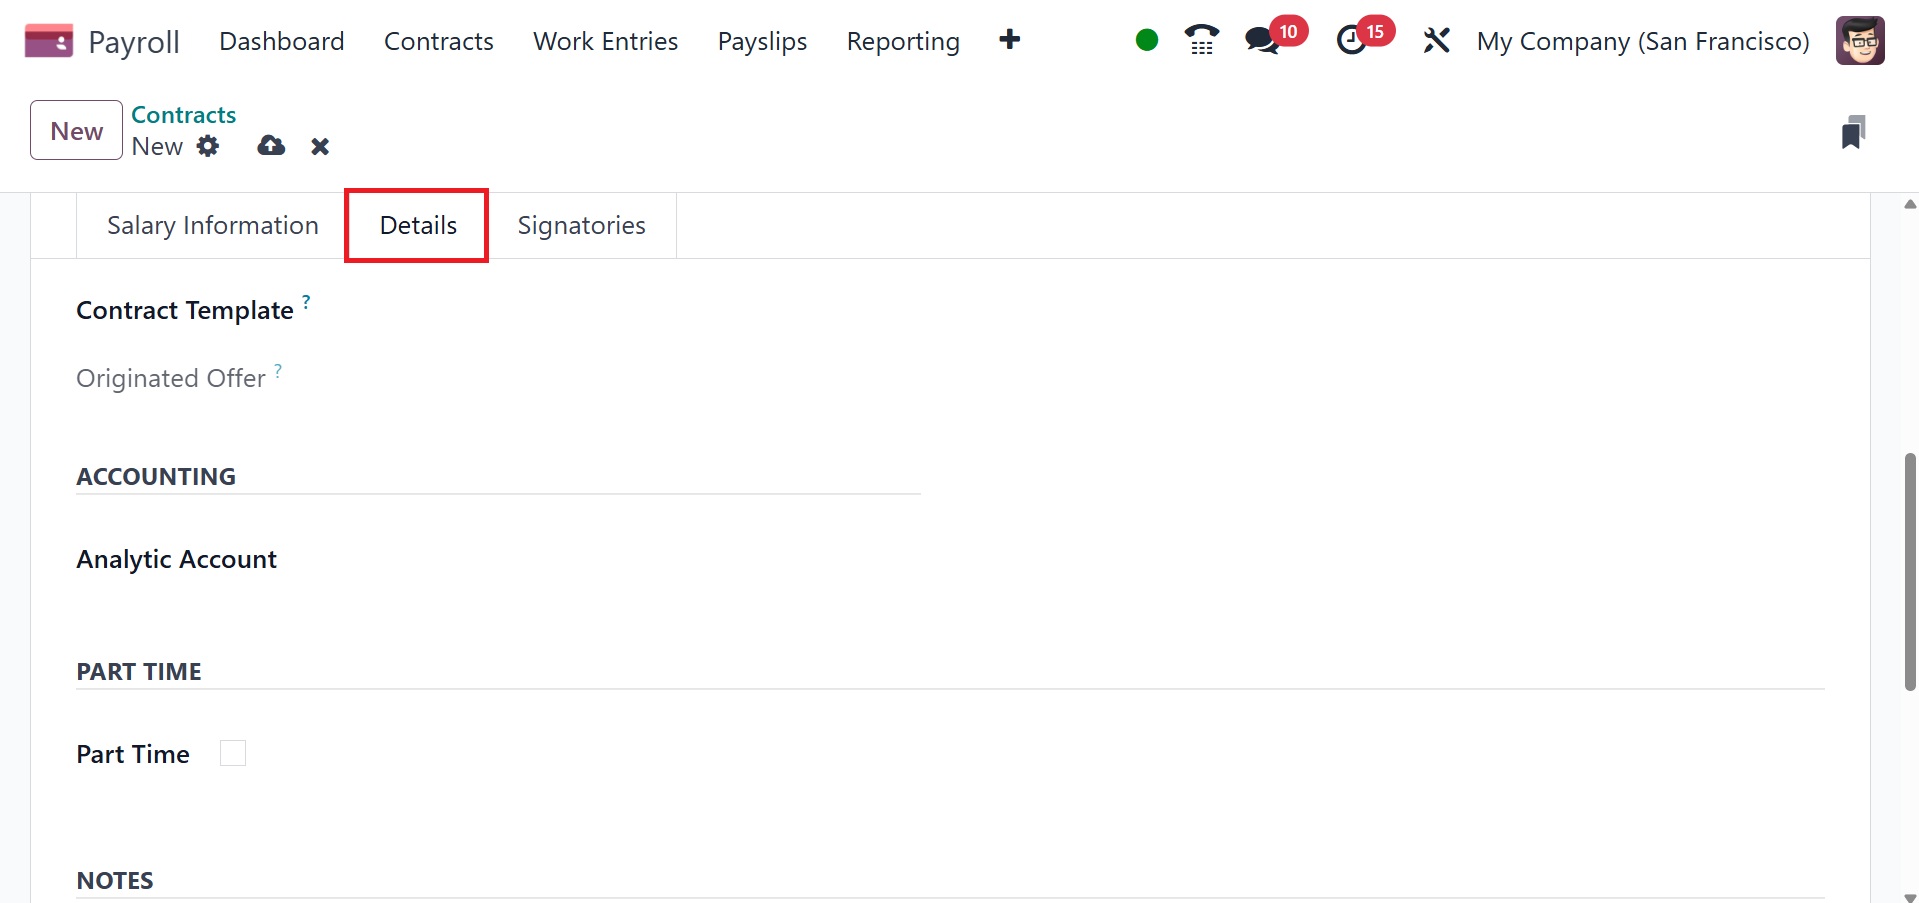
Include the Contract Template. It
is possible to add the
Analytic Account field
beneath the ACCOUNTING
section. The New Contract
Document Template field can
then be used to specify the
default contract that must be
signed in order to accept a
contract offer. The part-time
option can be activated under
the PART TIME section. The
default document template for
employees can be specified by
users in the Contract Update
Document Template field. In
HR Responsible, you may later
define responsible HR. Save
the contract after that.
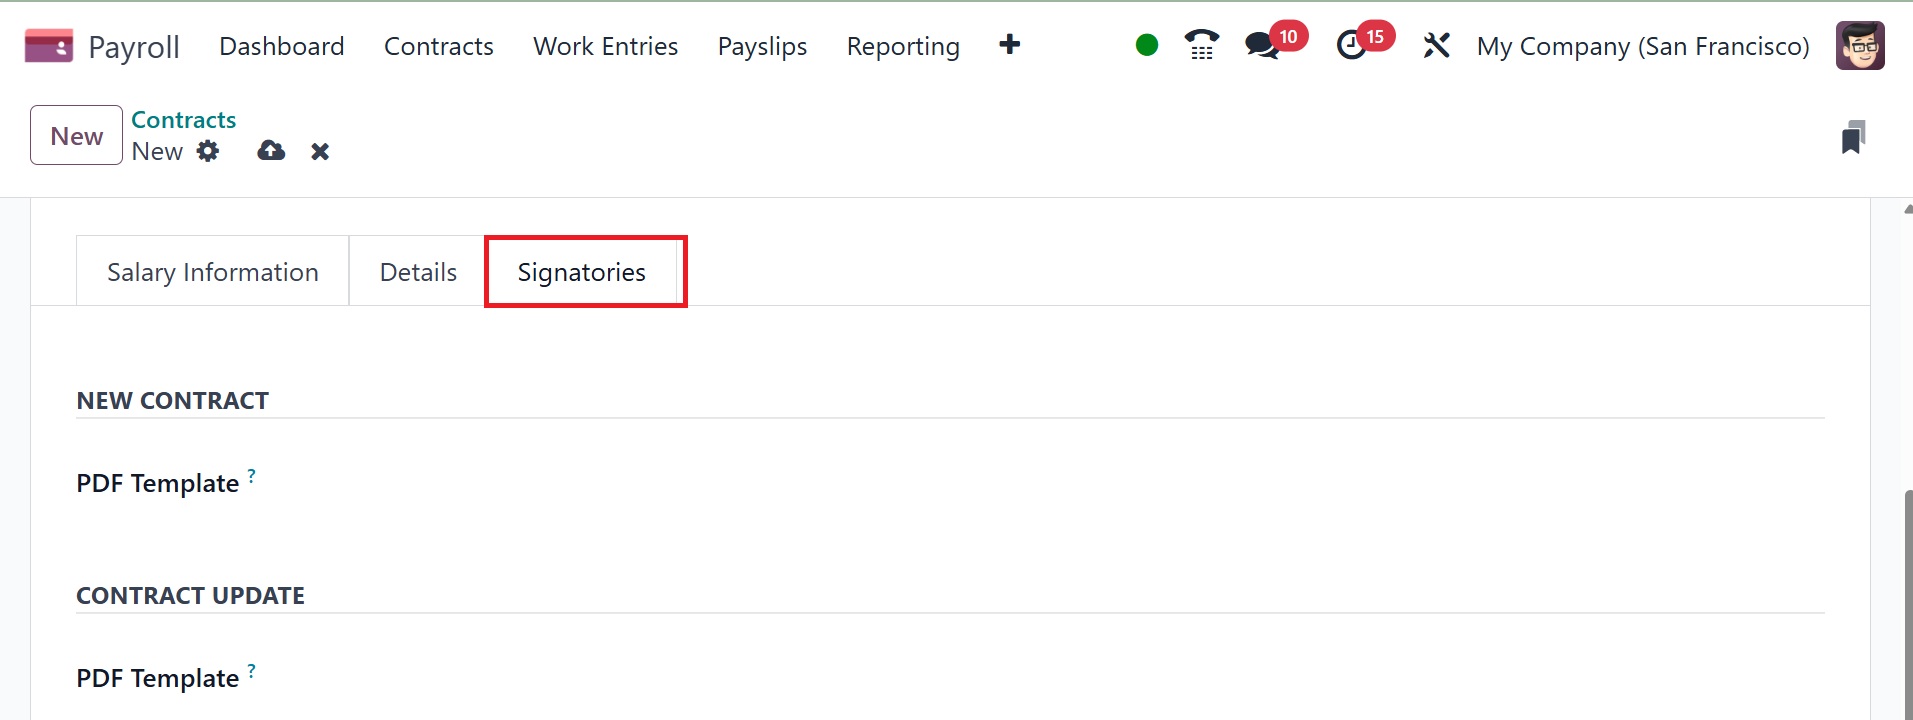
Now, under the Signatories, you
can add the PDF template in
NEW CONTRACT, PDF template
under the CONTRACT TEMPLATE.
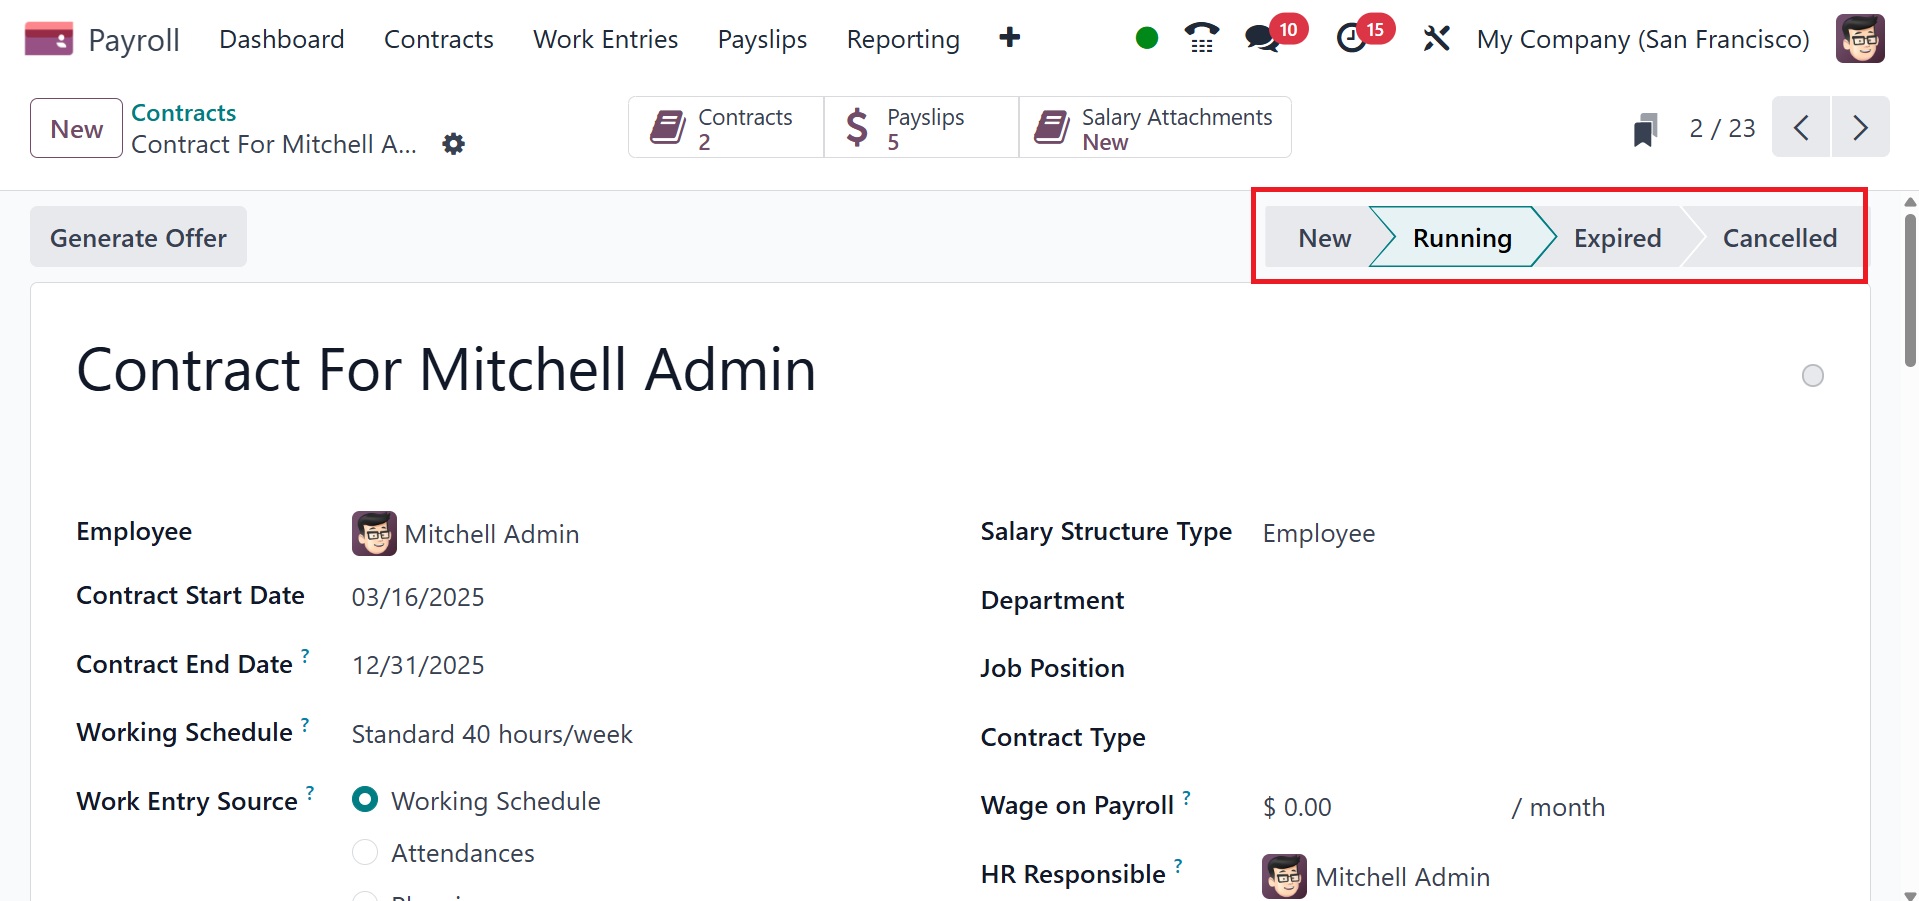
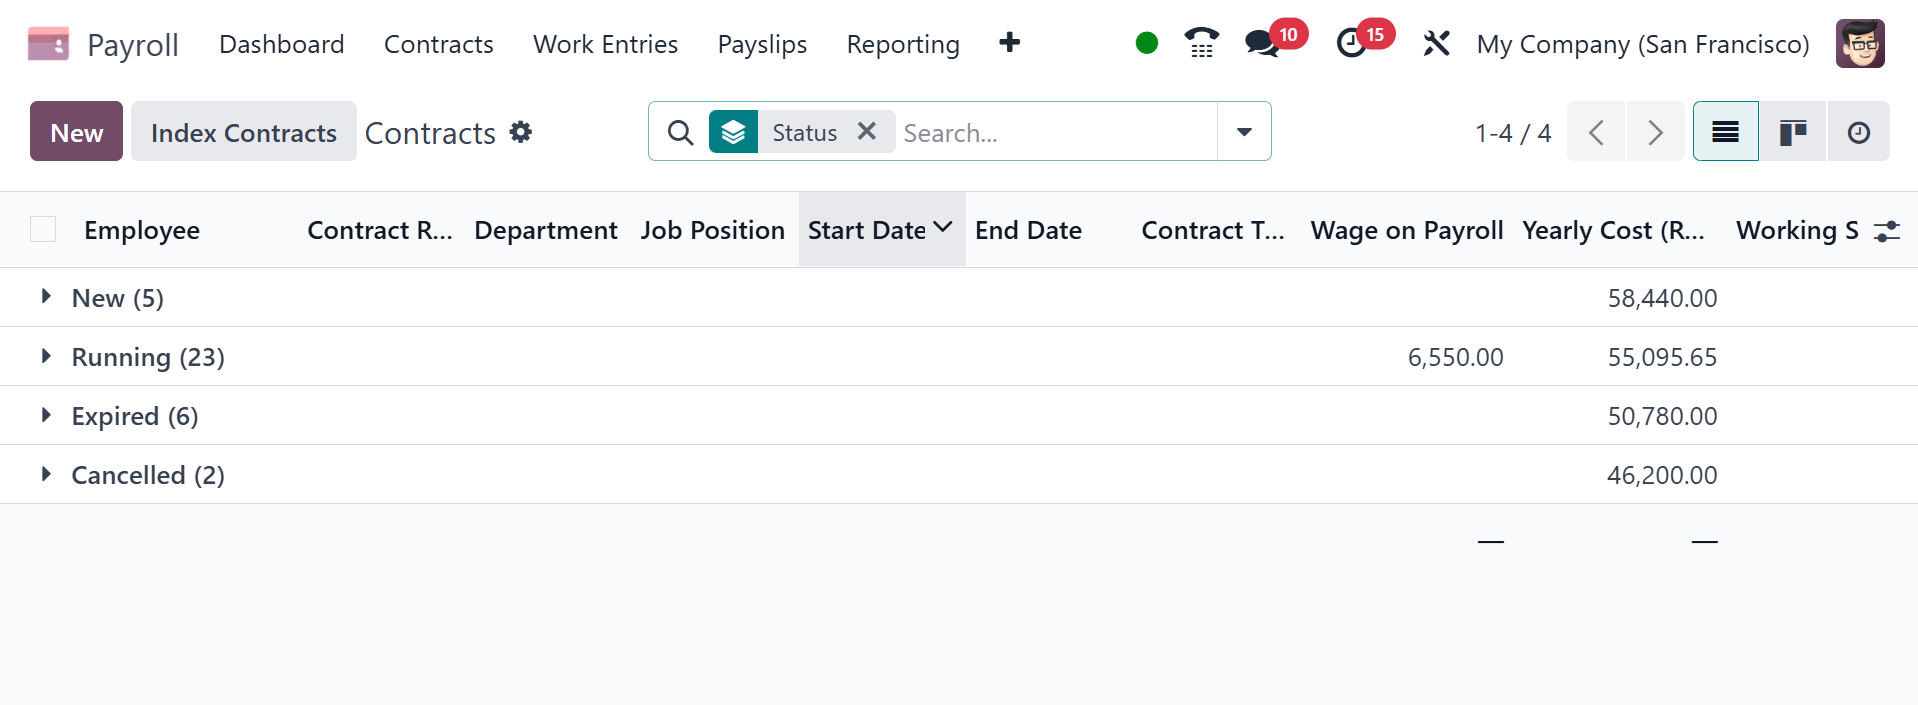
Every detail is instantly saved
via Odoo 18 Payroll. Offers
to the employee can be
created by the user. The
state of the contract can
also be adjusted to New,
Running, Expired, or
Cancelled. Every active
employee in a company must
have a running contract.
2.2 Salary Attachment
Parts of earnings that are taken
straight from a payslip for a
specific purpose, whether
mandatory or optional, are
known as salary attachments.
Generally, they are seen as
deductions when they are
voluntary. All of these are
commonly referred to as
salary attachments in Odoo.
Keep in mind that salary
attachments can also be used
to deduct from regular
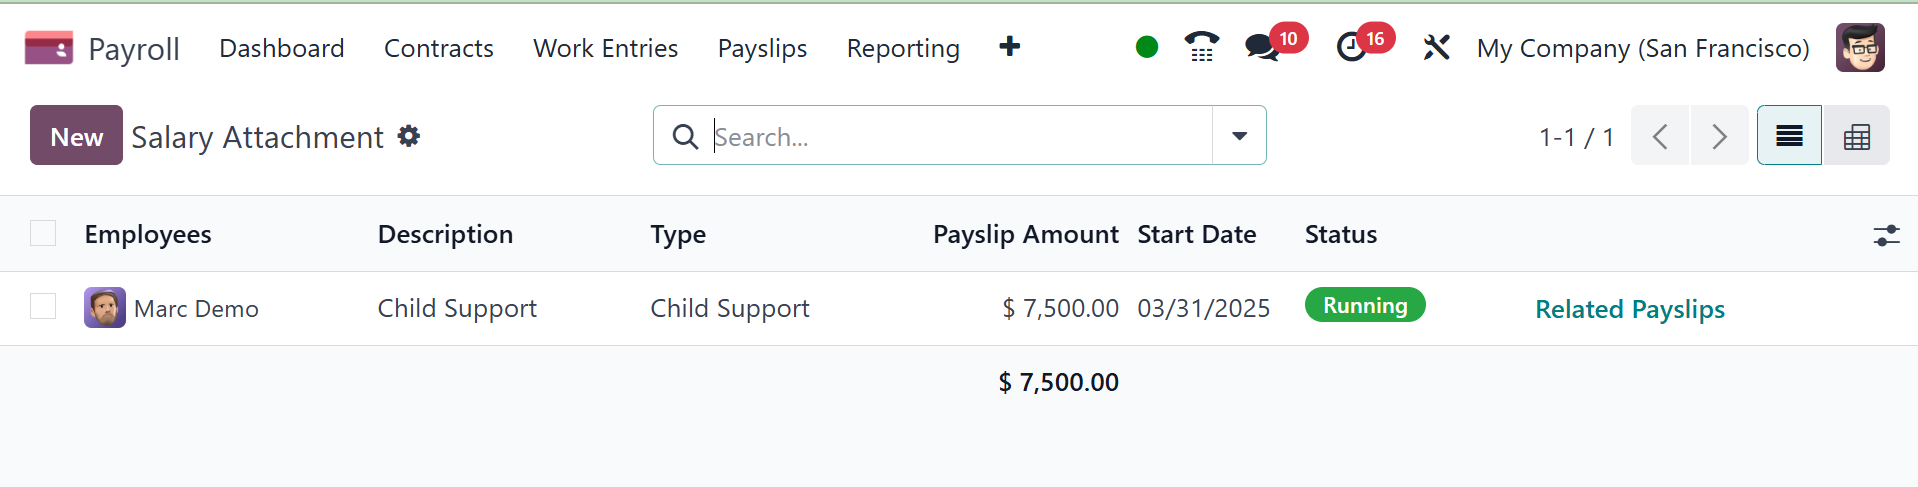
payments. We can obtain a
list of each employee's pay
attachments by choosing the
Salary Attachments menu from
the Contracts tab.
Information about each salary
attachment, such as the
Employee, Type, Status,
Description, Start Date, and
more, is available. By
choosing the New button in
Odoo 18 Payroll, we can
establish a new salary
attachment.
In the Description section of the
window that opens, the user
can select the employee's
name and enter information
about the salary attachment.
For the Type of Salary
Attachment, users can choose
between Child Support,
Assignment of Salary, and
other choices.
In the Odoo Payroll module, the
salary attachment feature
allows you to define and
manage deductions from an
employee's salary for various
reasons, such as child
support, loan repayments, or
other legal obligations. A
blank Salary Attachment Types
form loads when you select
the New button to create a
new kind of salary
attachment. In the relevant
field, type the new salary
attachment type's name. Next,
input the code that is used
to calculate pay stubs
according to the salary
guidelines. Finally, if this
salary attachment never
expires, check the No End
Date box.
The Salary Attachment Types form
additionally has a Country
column if the database
contains many companies with
locations in different
nations. Choose the nation to
which the attachment
pertains, or leave it empty
if it is universal.
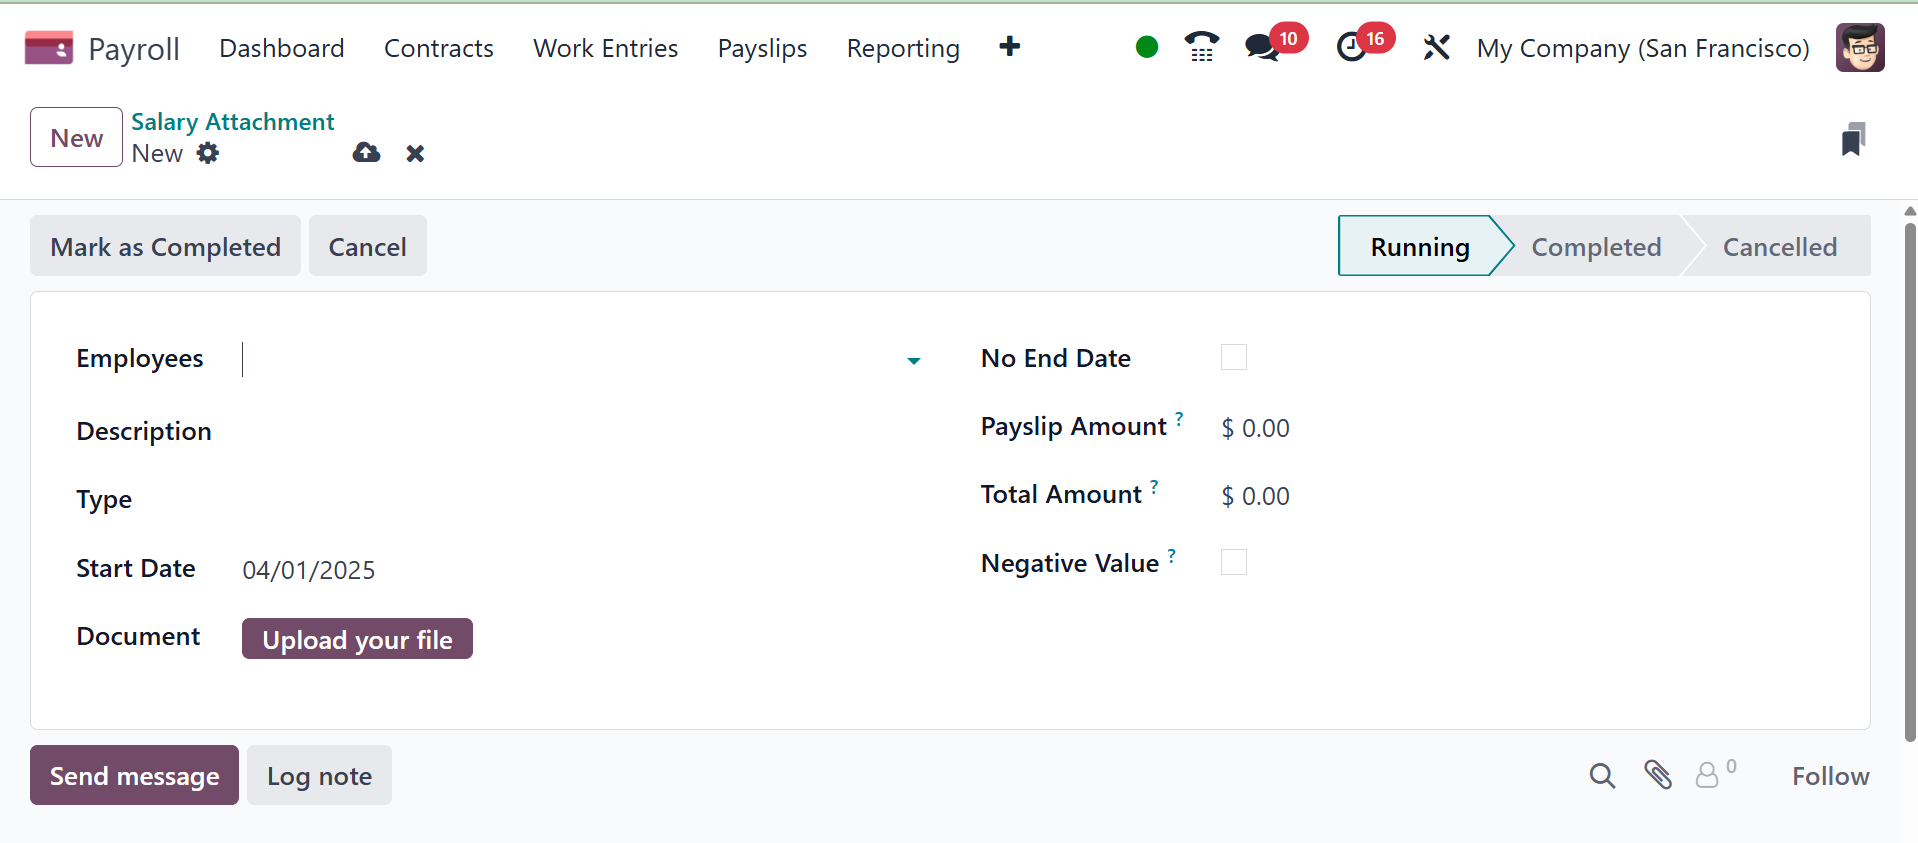
To create a new salary
attachment, click the New
button in the top-left
corner, and a blank Salary
Attachment form loads. Enter
the following information on
the form:
- Employees:
Using the
drop-down menu, select
the desired employees.
Multiple employees can
be listed in this
field.
- Description:
Enter a short
description of the
salary attachment.
- Type: Using
the drop-down menu,
select the specific
salary attachment
type.
- Start Date:
Using the
calendar selector,
select the date the
salary attachment goes
into effect.
- Estimated End Date:
This field is
not modifiable and
only appears after the
Monthly Amount field
is populated. This
field is the estimated
date when the salary
attachment will be
completed. Today’s
date populates the
field by default.
Then, when the Total
Amount field is
populated, this date
is updated.
- Document:
If any documentation
is needed, such as a
court order, click the
Upload your file
button, and a file
explorer window loads.
Select the desired
document to attach to
the record. Only one
document can be
attached to a salary
attachment.
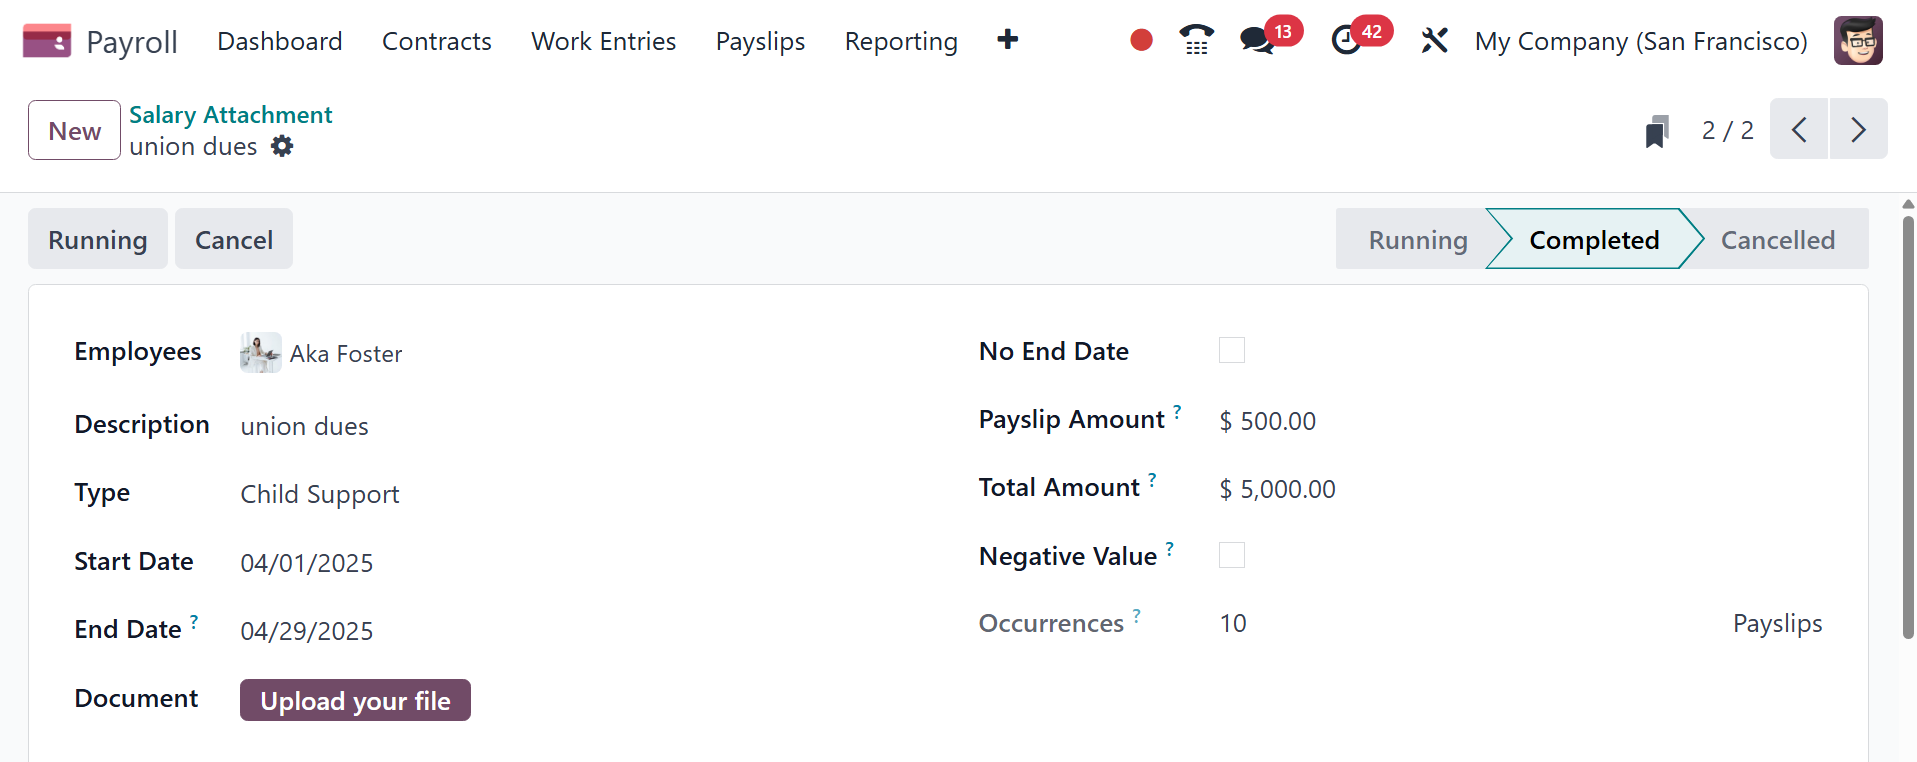
There are three possible statuses
for salary attachments:
Cancelled, Completed, or
Running. Every salary
attachment shows up in the
configuration sequence. A pay
attachment has the status
"Running" when it is created.
The status immediately
changes to Completed and the
employee no longer has the
money deducted from
subsequent paychecks after
the salary attachment is
complete (the total amount
provided on the salary
attachment form has been paid
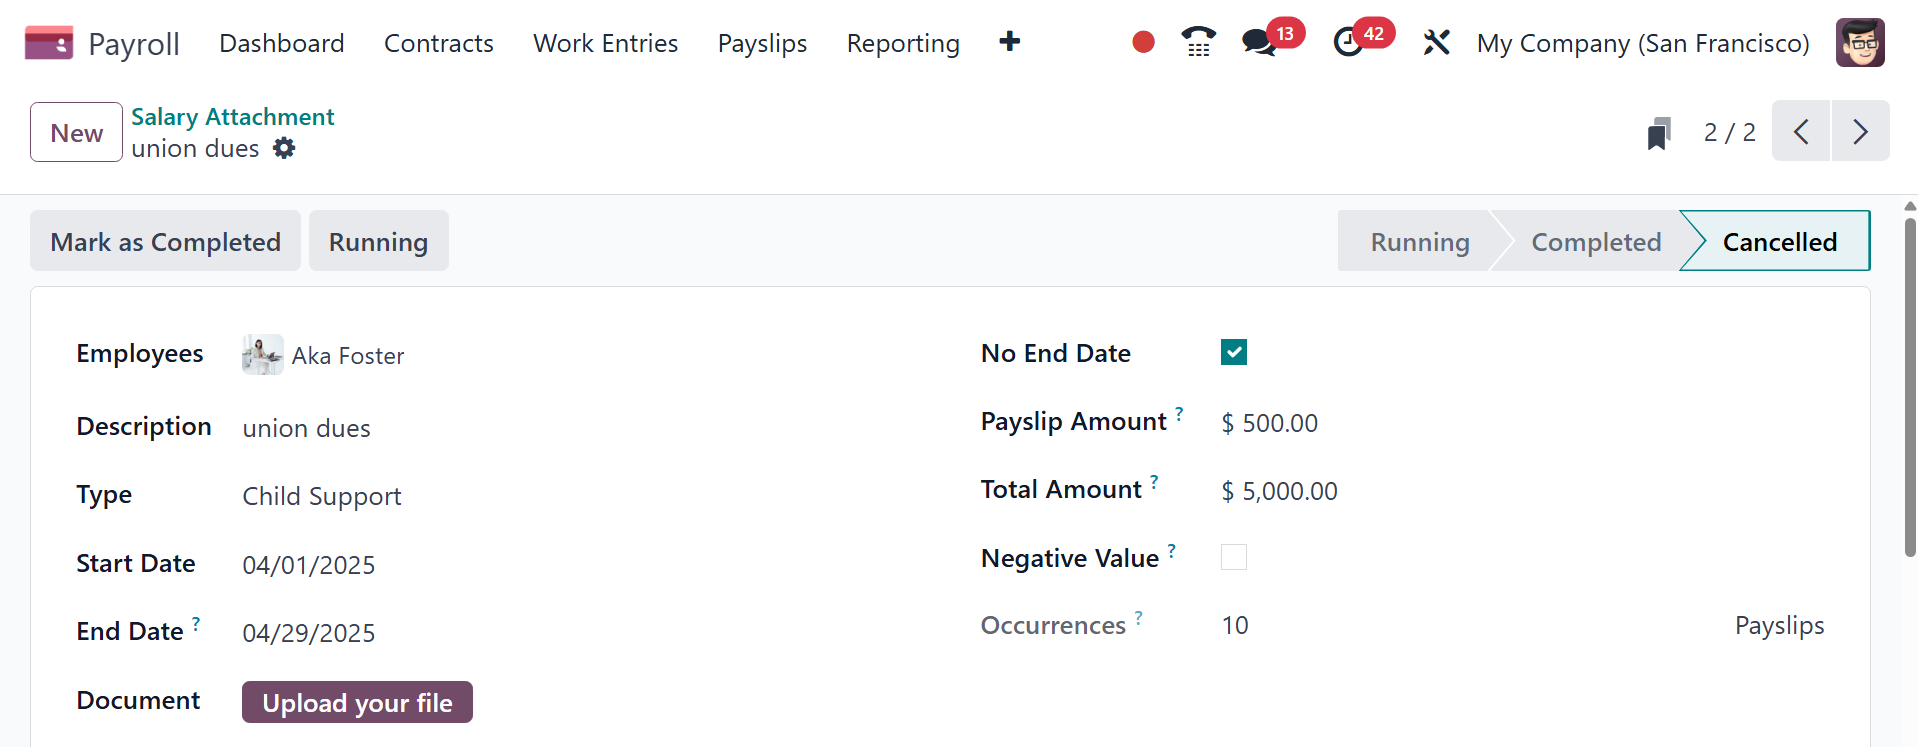
in full). It is always
possible to cancel any salary
attachment. Click on each
individual attachment record
from the main Salary
Attachment dashboard to
access the record and cancel
it.
Click the Cancel button on the
Salary Attachment record to
end the salary attachment and
prevent the specified amount
from being deducted from
subsequent paychecks. And it
will show in the cancelled
state.
2.3 Offers
Offers made for employees are
also included in payroll. It
is similar to what is
mentioned in the Recruitment
module. Employed Budget,
Title, State, and Offer
Validity Date are shown in
the list view.
