4. Payslip
The entire payroll application for a business is efficiently managed
by the Odoo18 system. Once employee paystubs have been specified,
you can draft a contract that includes a wage structure.
Odoo 18 allows you to export a payslip as a PDF if one was generated.
In Odoo 18, journal entries on accounts can also be explained.
Batches, payments, and all paystubs are easy to manage.
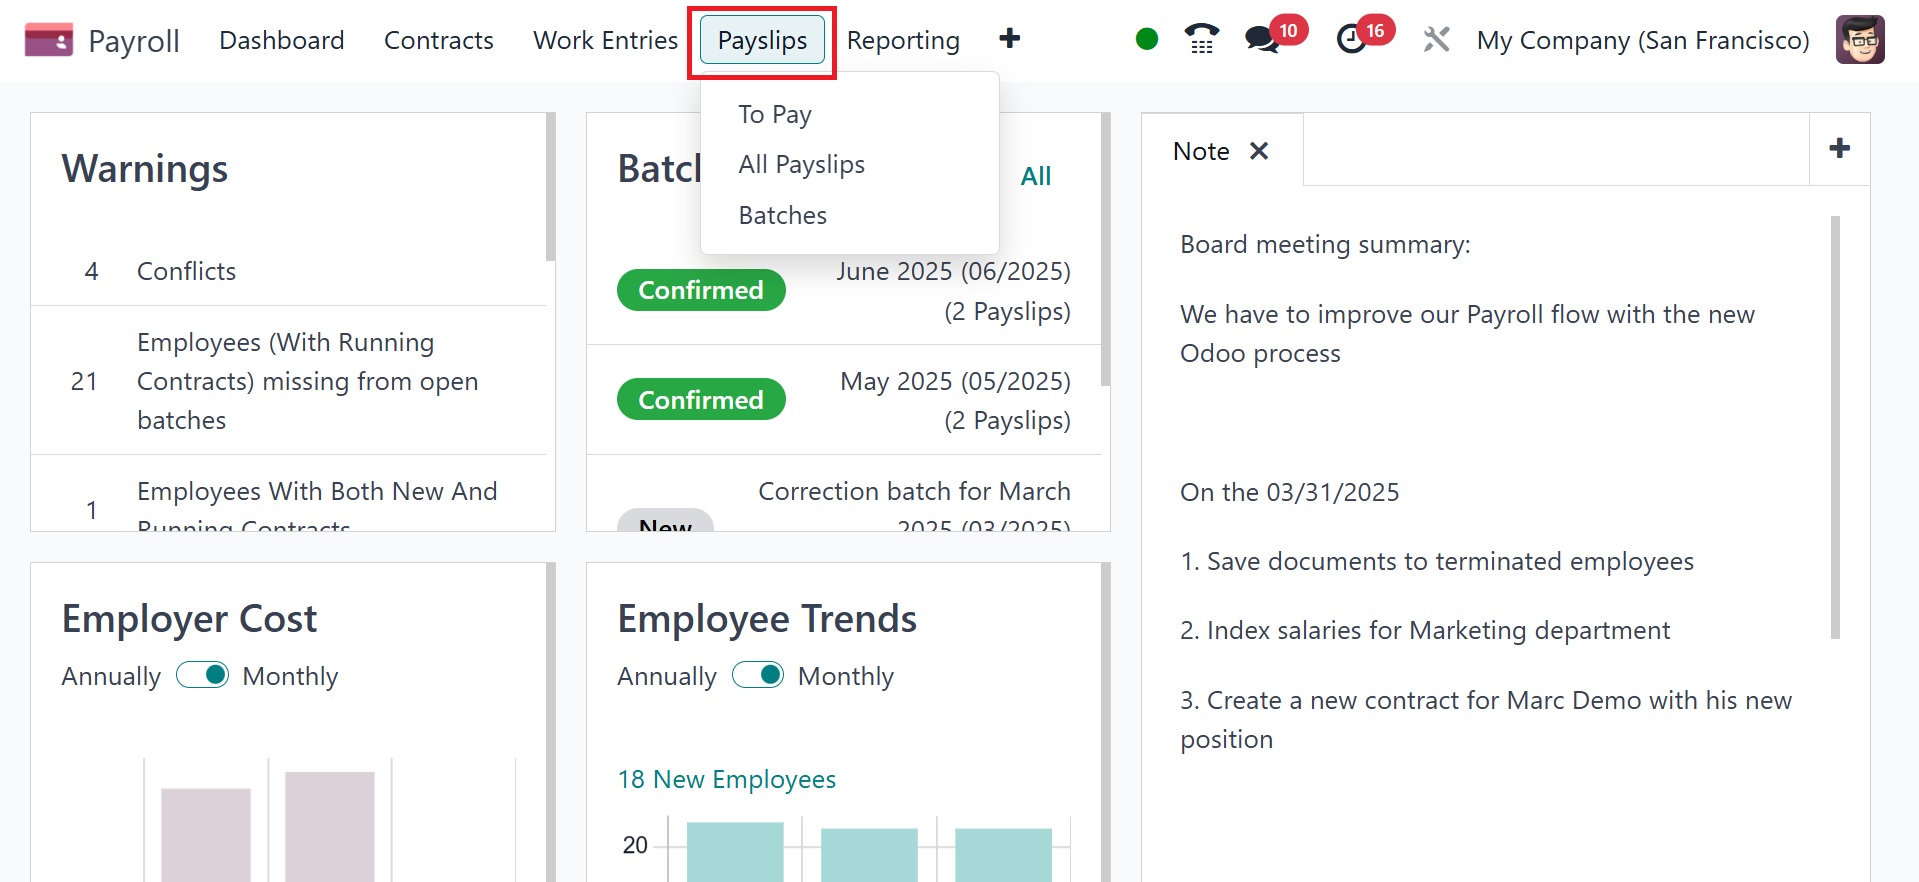
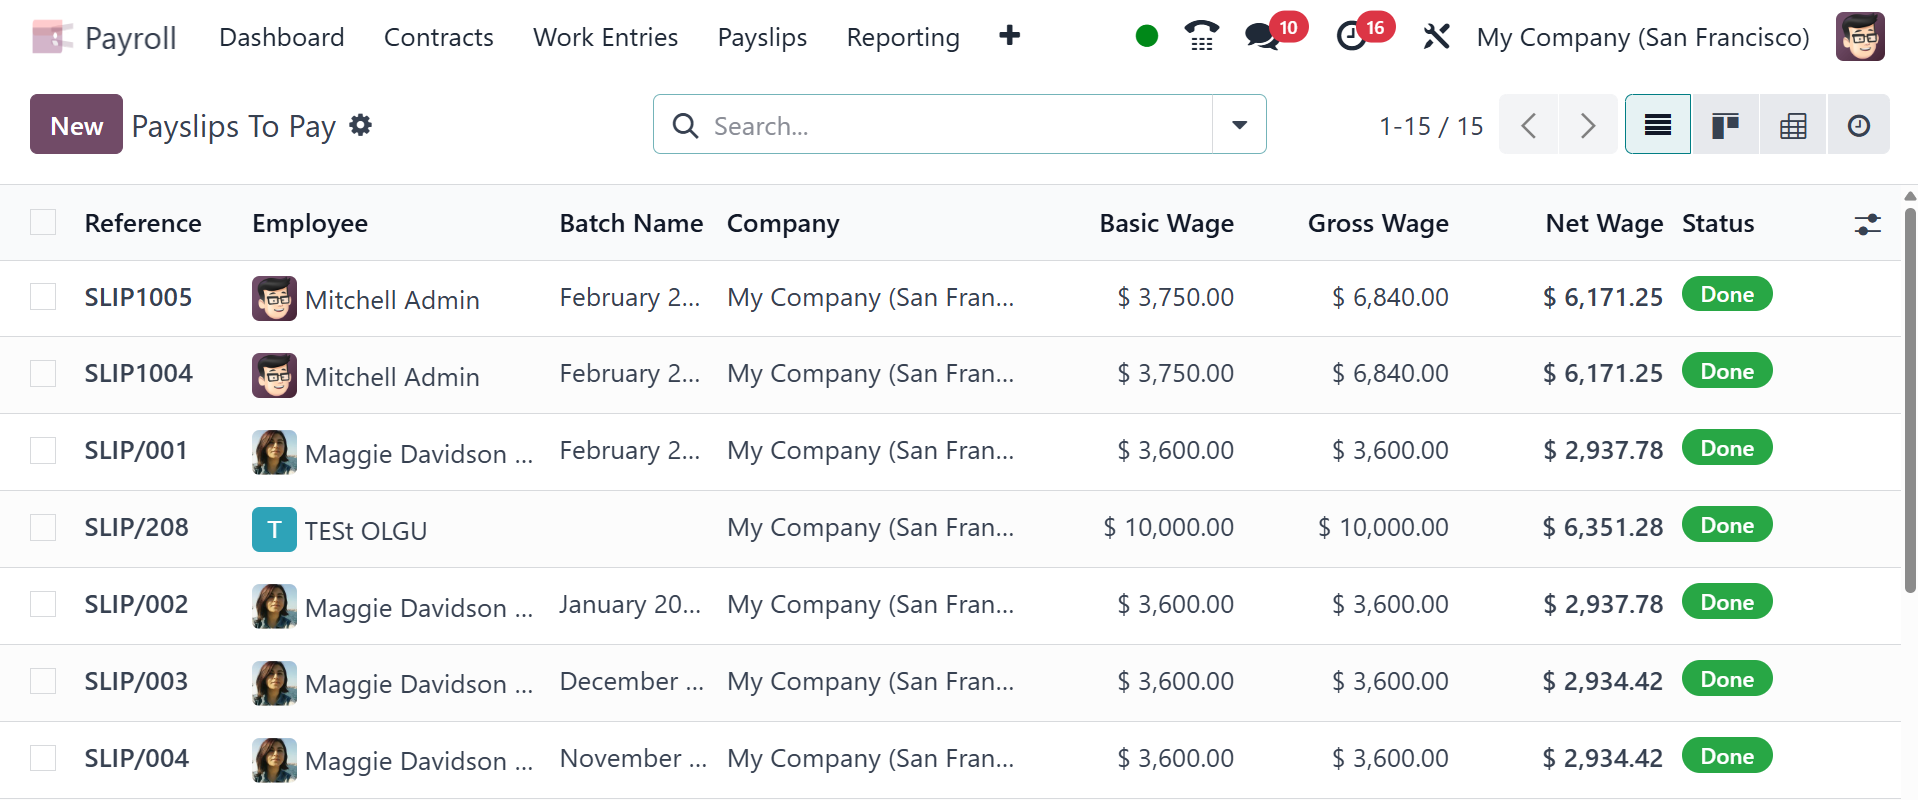
4.1 To Pay
By selecting the To Pay menu in Payslips, we can get a list of all
created paystubs that need to be paid. Every payslip's information,
such as Reference, Batch Name, Basic Wage, Status, and more, is
accessible to the user. You can create a new payslip for payment
after selecting the New option.
Users can input the employee name needed to create paystubs in the
Payslips to Pay window. The Period section can then be used to
insert the start and end dates of the employee payslip.
Additionally, you can select the Contract and Batch for payslip
payment. Users can define the rules that apply to a payslip in the
Structure section.
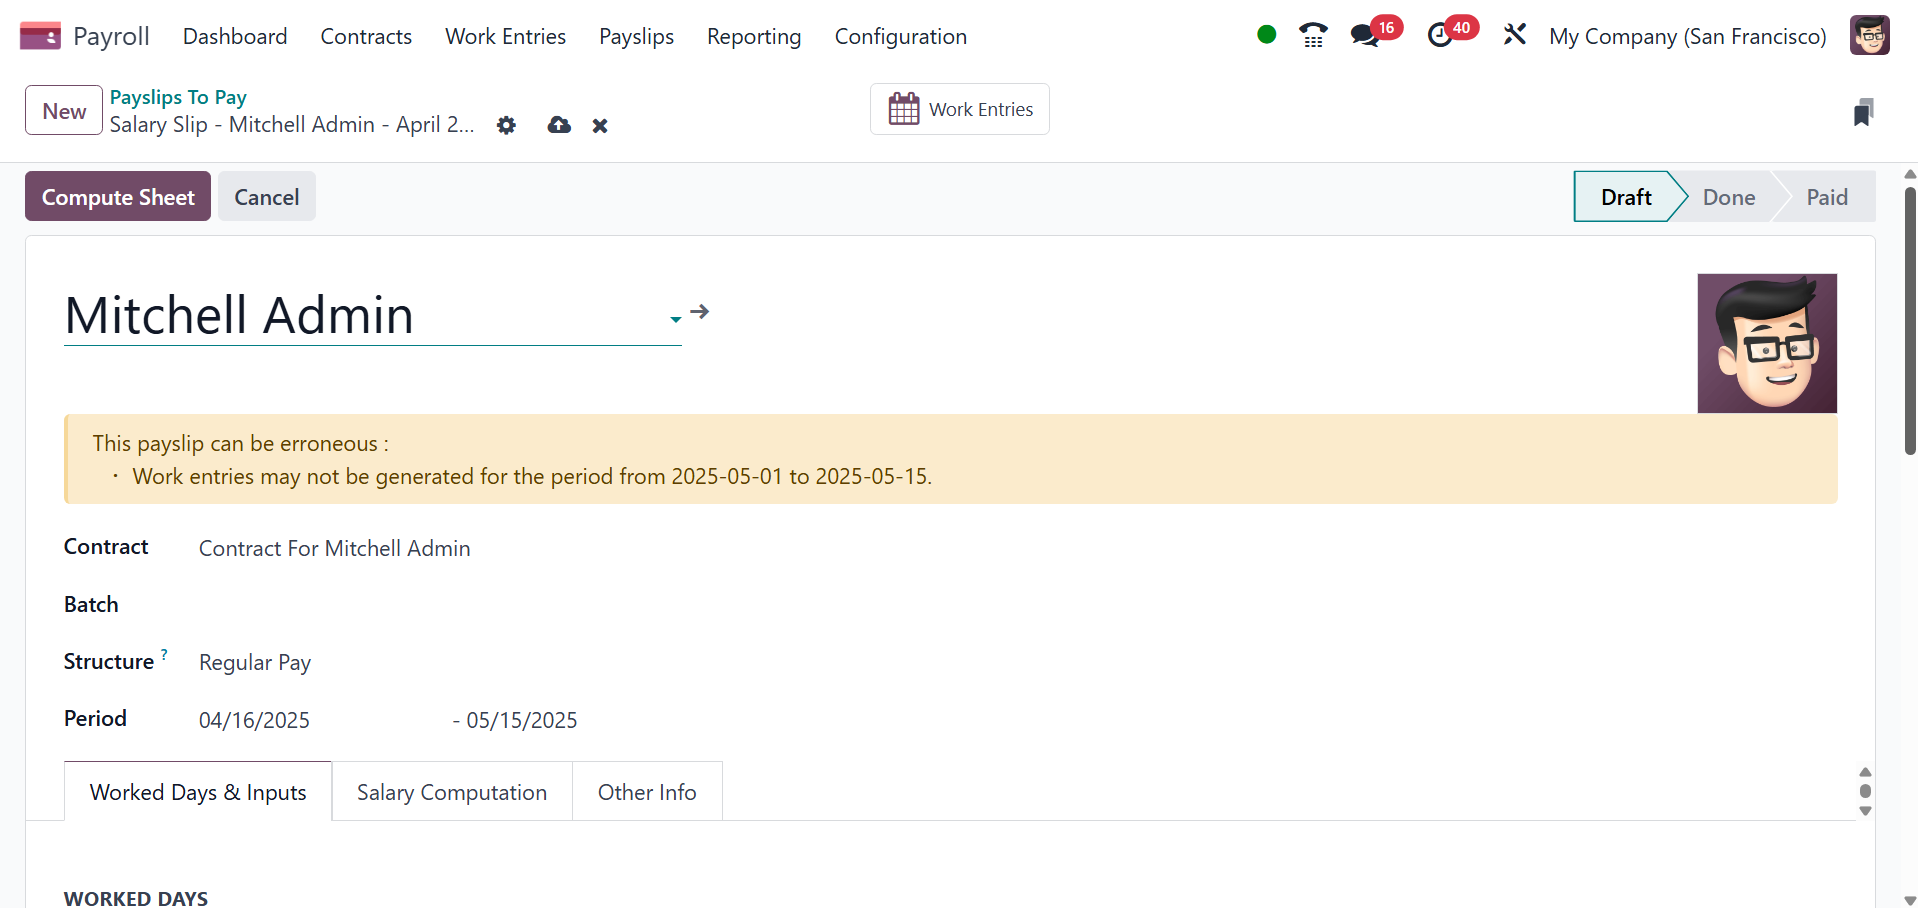
The Payslips to Pay window displays three tabs: Worked Days & Inputs,
Other Info, and Salary Computation.
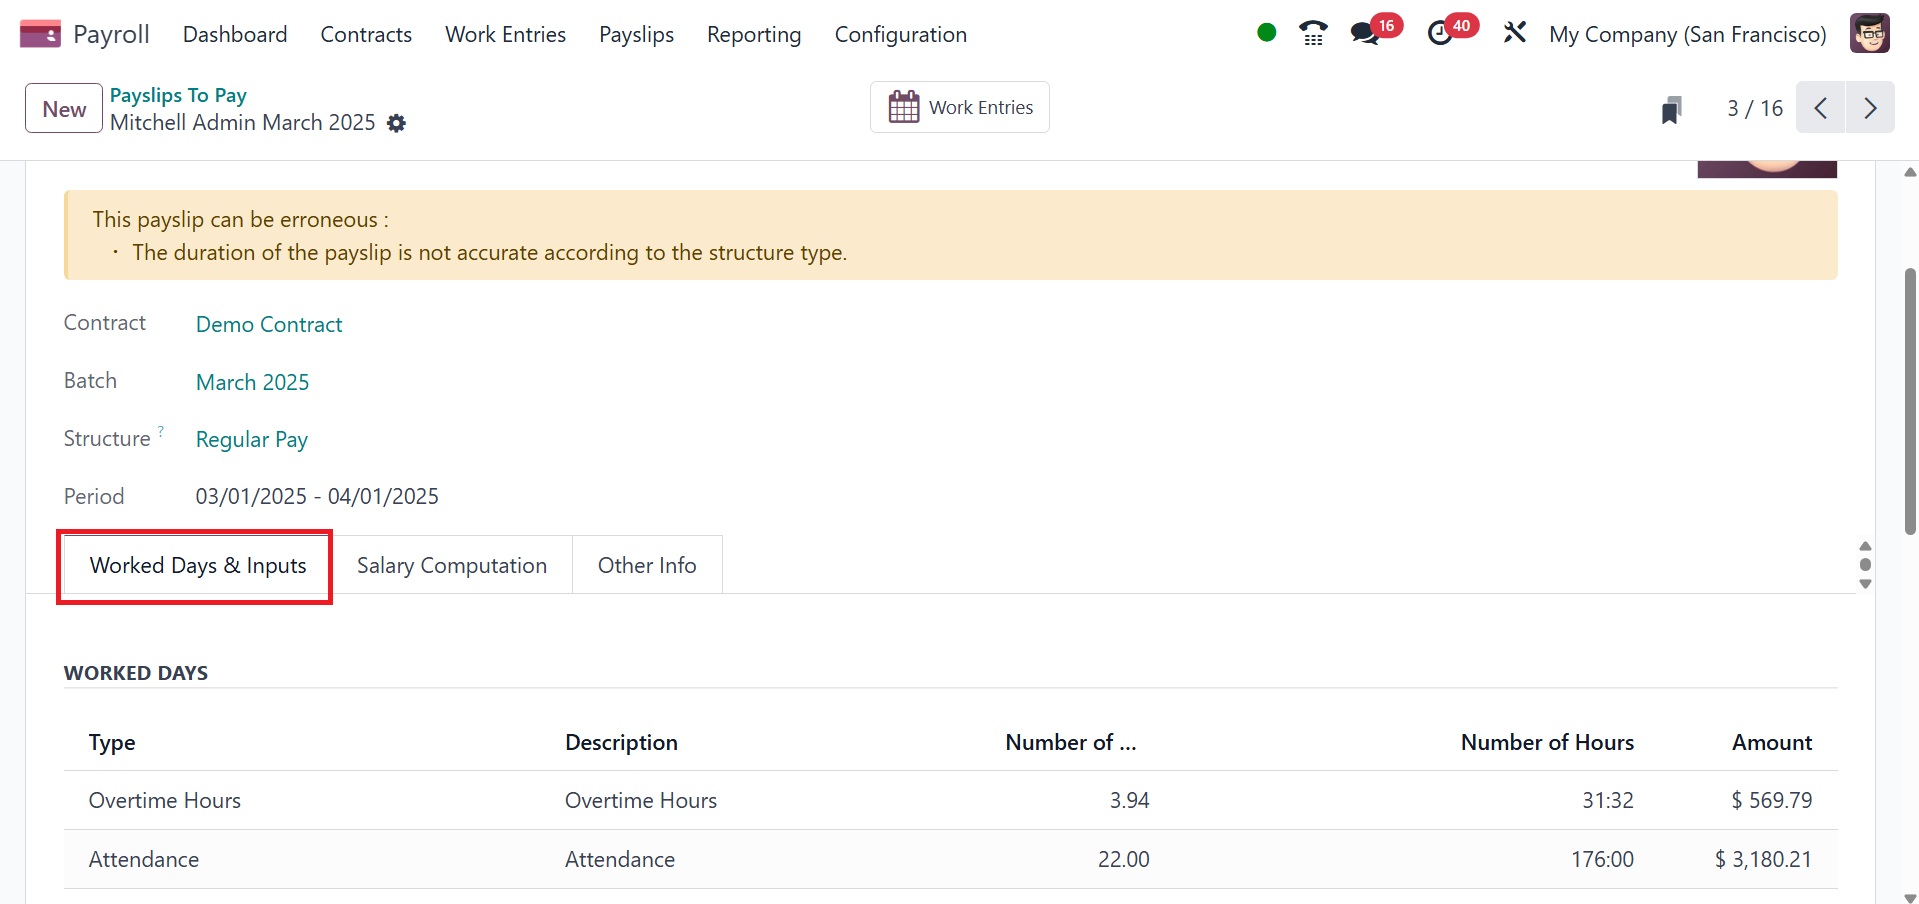
Under the Worked Days & Inputs tab, we might deal with WORKED DAYS
and OTHER INPUTS. Under the WORKED DAYS section, we can alter the
Type, Amount, Description, Number of Days, and other settings. In
contrast, the OTHER INPUTS section allows you to define the input
type and any required descriptions. Here, you can see the number of
worked days, worked hours, and the amount.
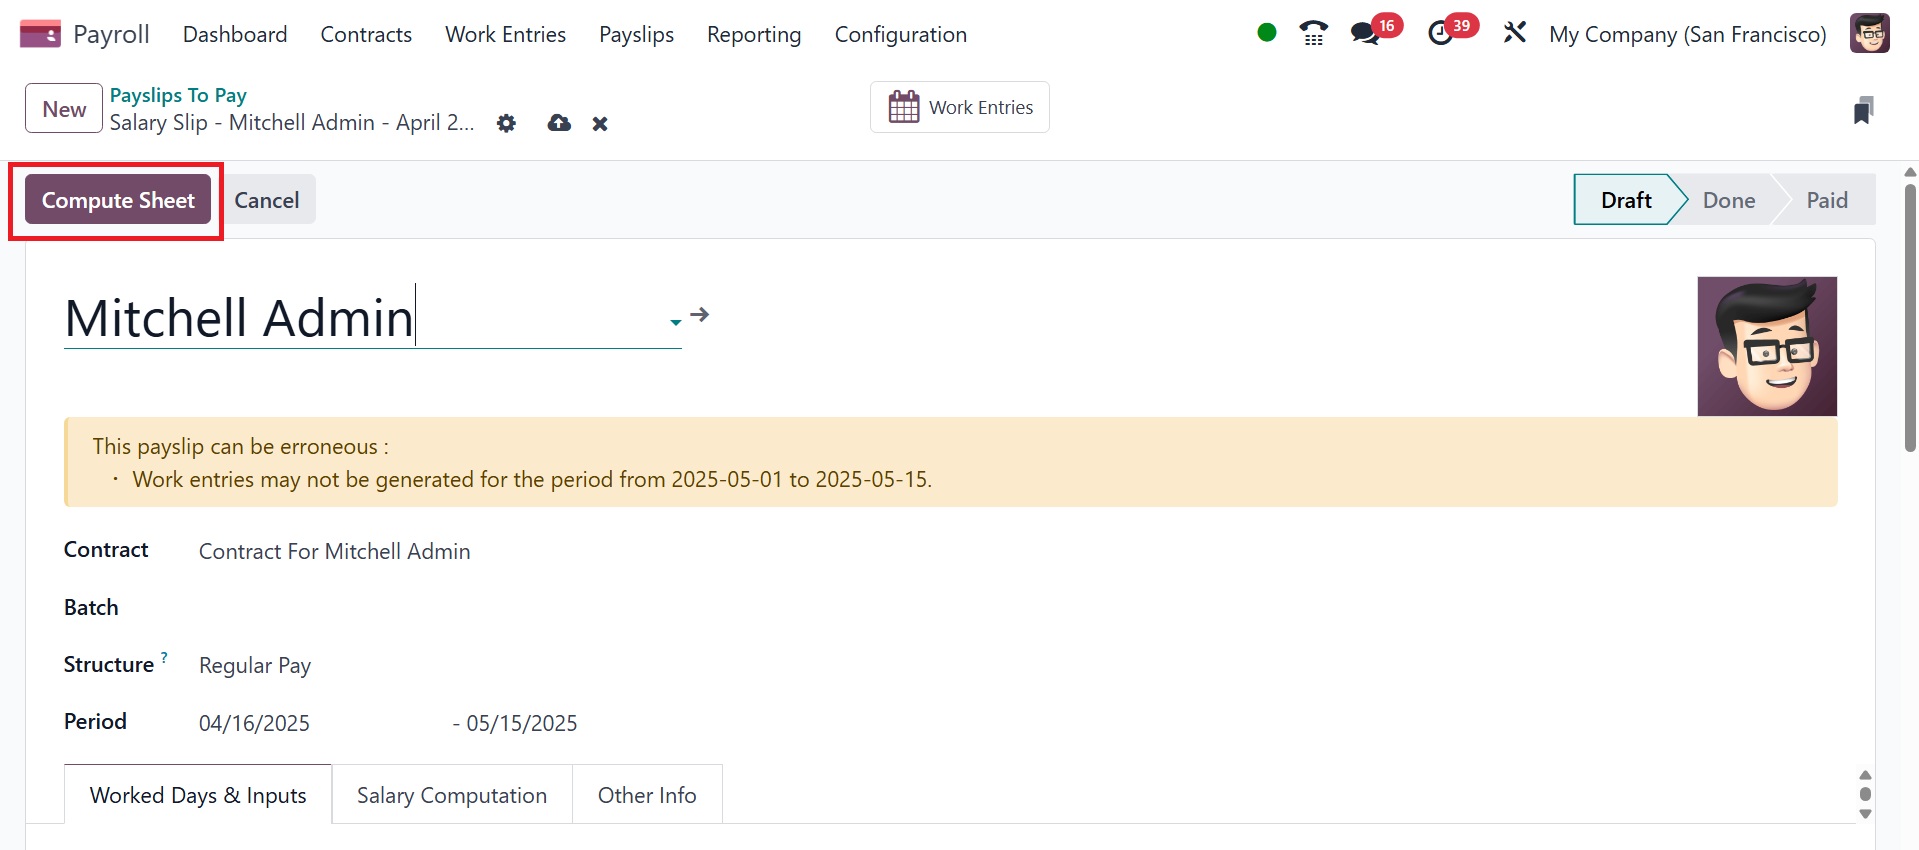
Click the Compute Sheet button once the employee, contract, and
pertinent structure have been chosen. Data pertaining to employee
salary computation is then shown beneath the Salary Computation
field.
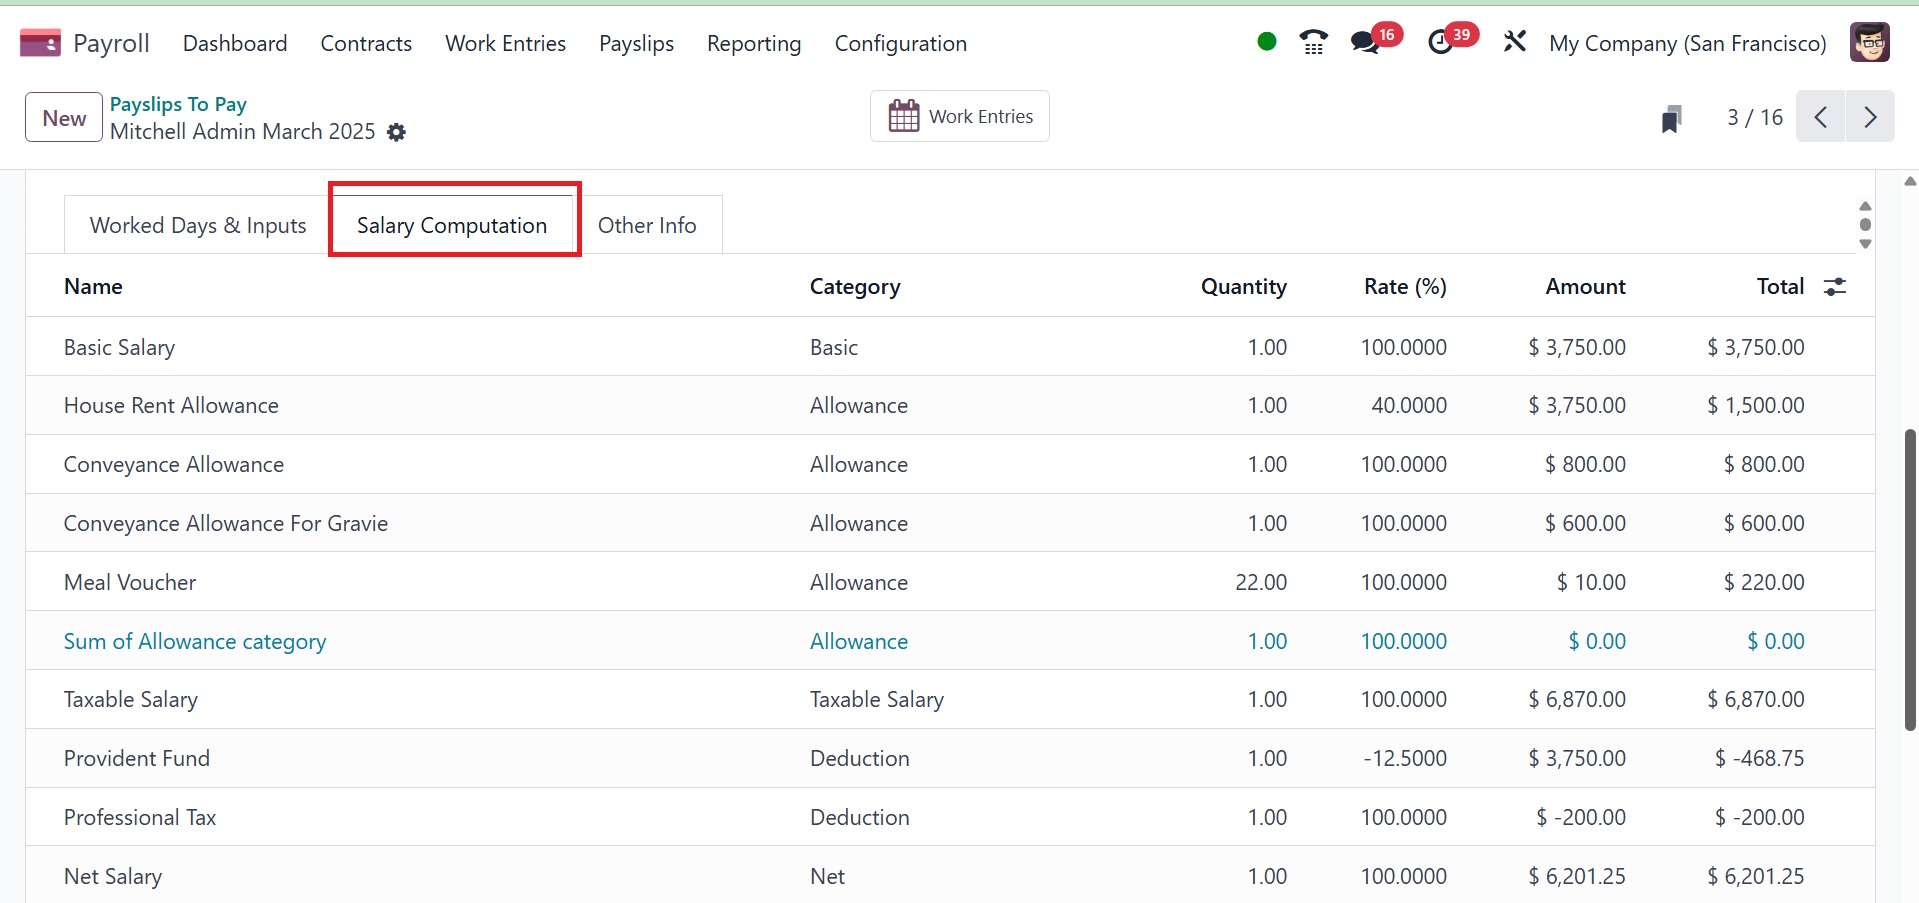
We may list the salary computation that occurs in pay stubs in
compliance with the compensation rule and structure set by employees
by selecting the Salary Computation tab. Name, Quantity, Amount, and
other details are included on the Salary Computation tab.
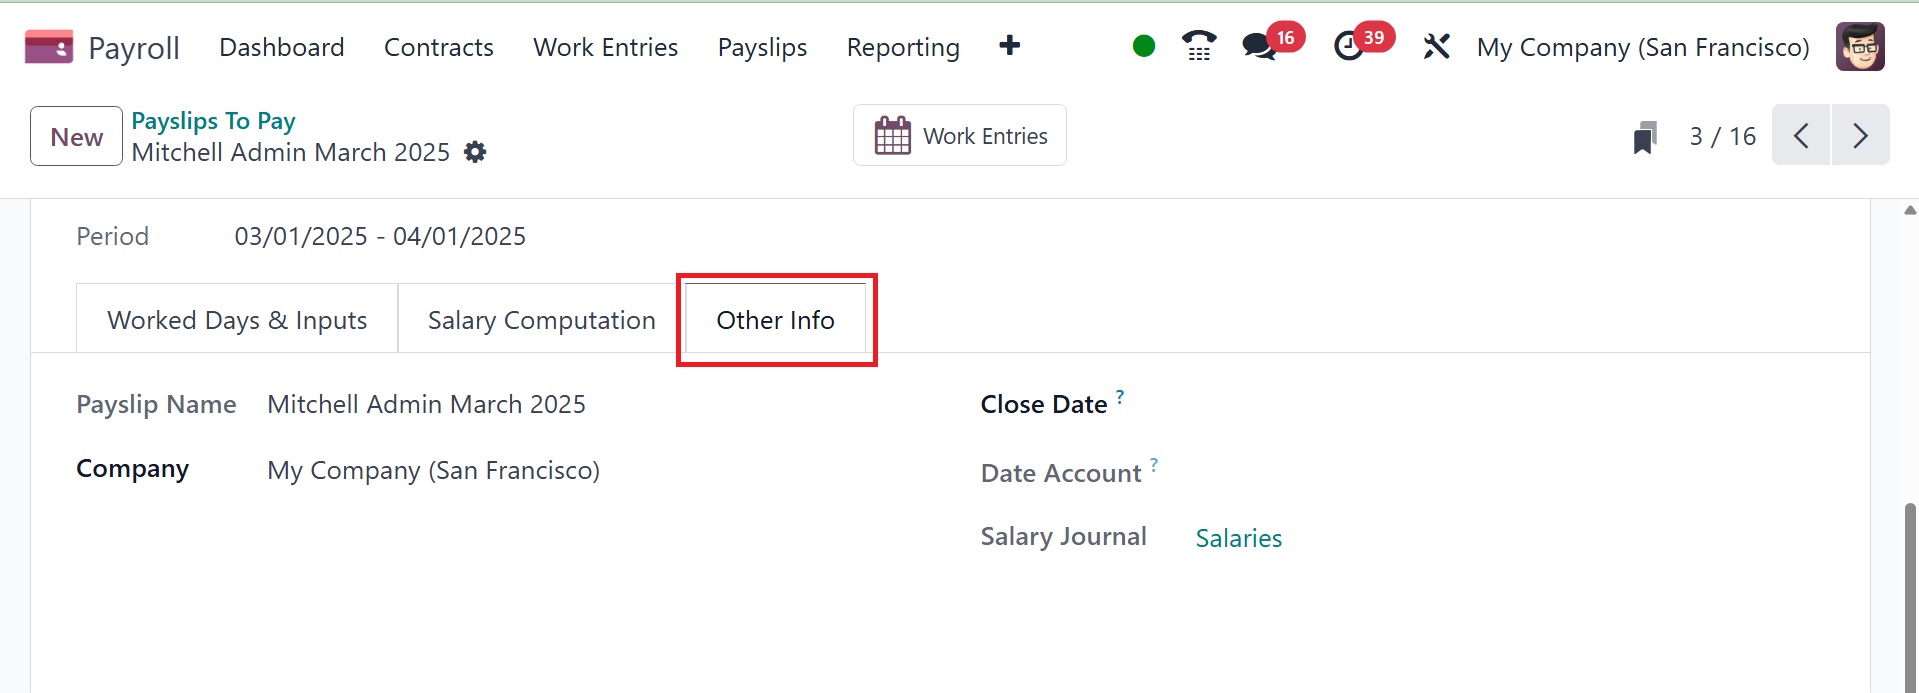
Users can describe the company, payslip name, and other details about
payslips to pay under the Other Info tab. To record the duration of
the payslip validation date, leave the Date Account column empty.
The day the consumer receives their money is known as the "close
date."
The Work Entries smart button also gives us access to all work
entries related to payslips that an employee is required to pay.
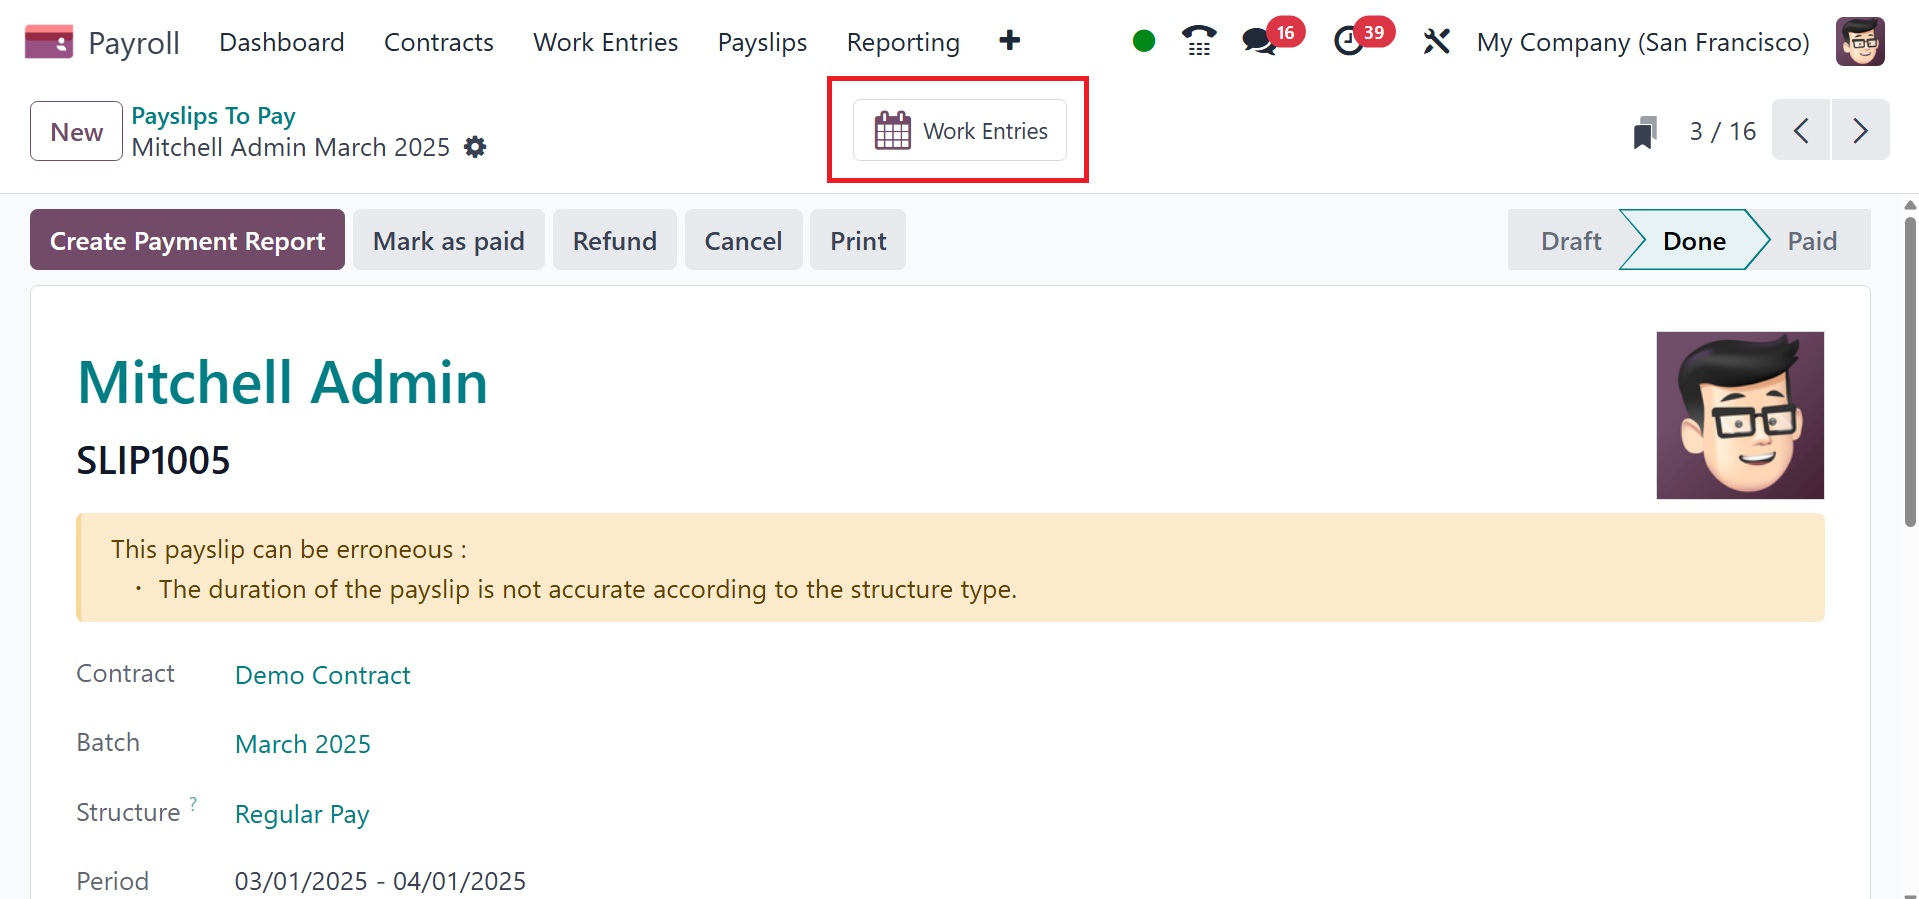
Then the payslip stage changes to Done. However, with Odoo 18, the
manual payment option is now accepted.
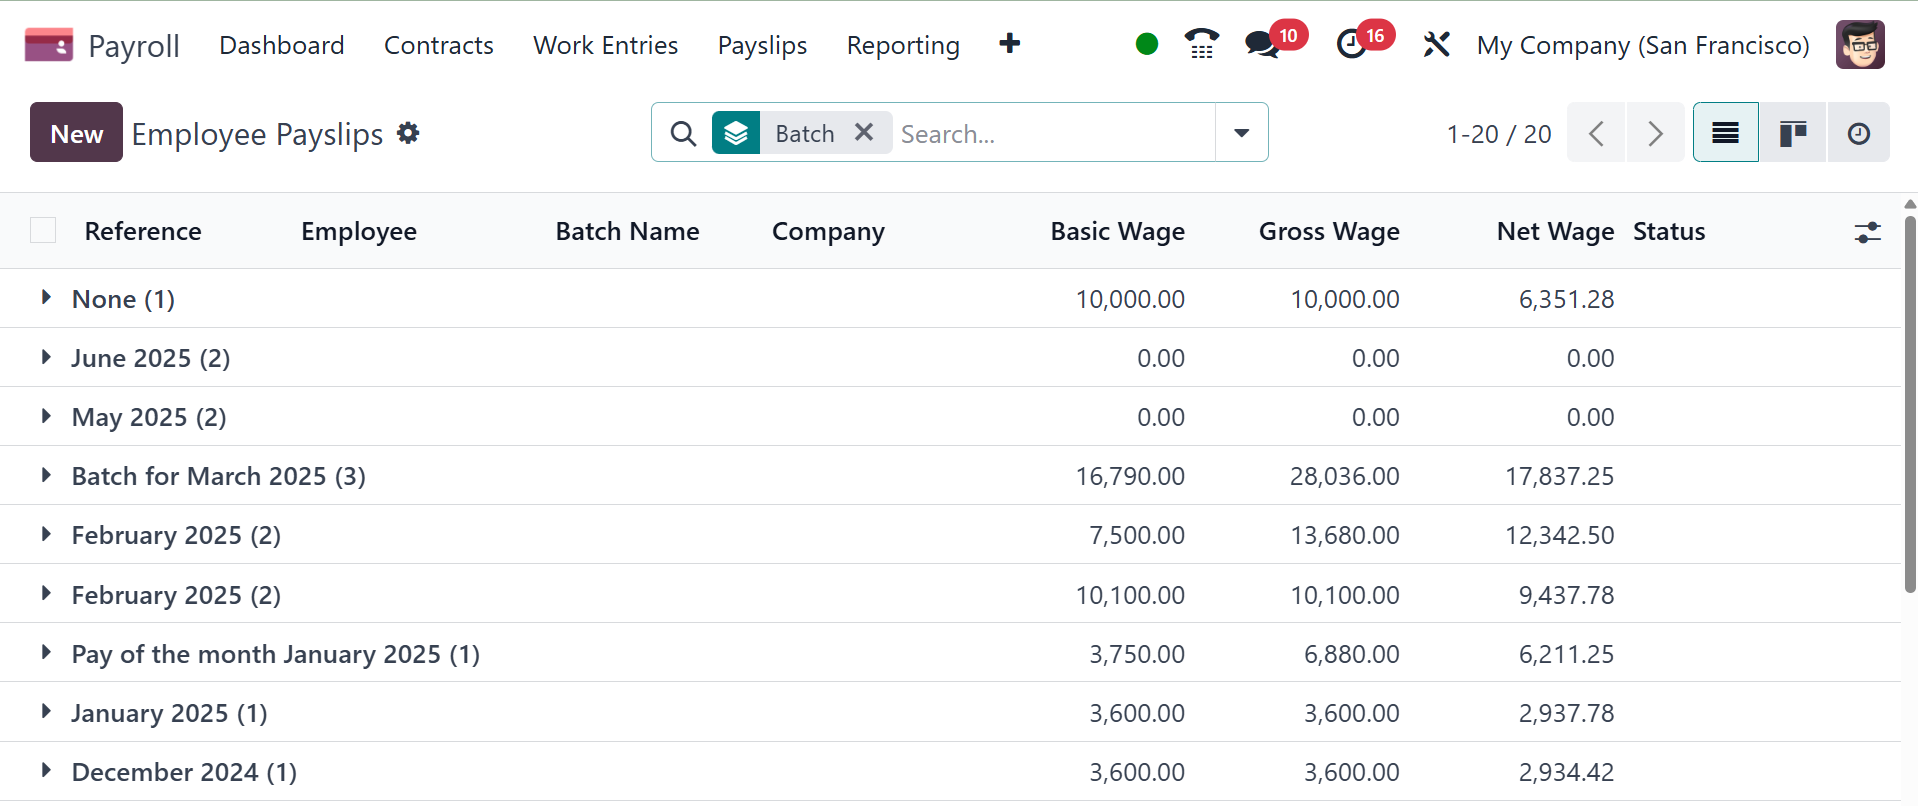
4.2 All Payslips
Data on payslips generated for all employees can be accessed by
selecting the All Payslips menu from the Payslips tab. The List view
displays information about employee payslips, including Reference,
Batch Name, Basic wage, status, and more. By selecting the New icon,
we can quickly define new pay stubs for employees. You can also
create a new payslip using the NEW option.
The new page will be, as in the image below.
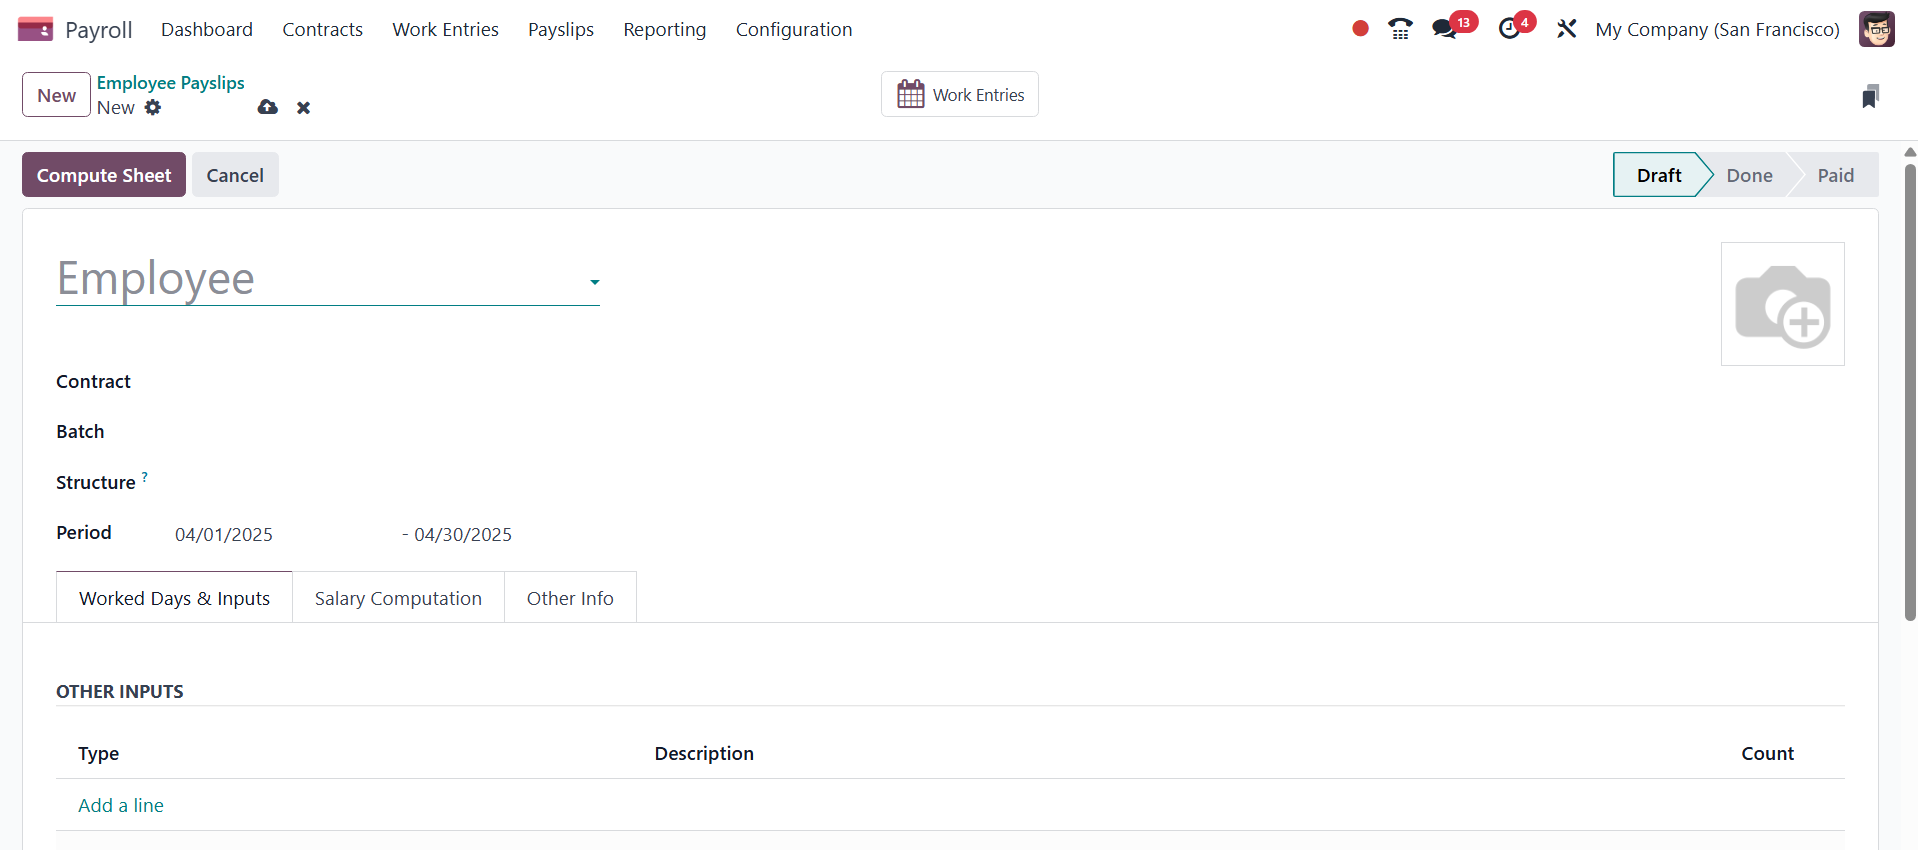
Here, provide the the employee, contract, batch, structure, and
period. Under the worked days and input, add other inputs using the
add a line option.
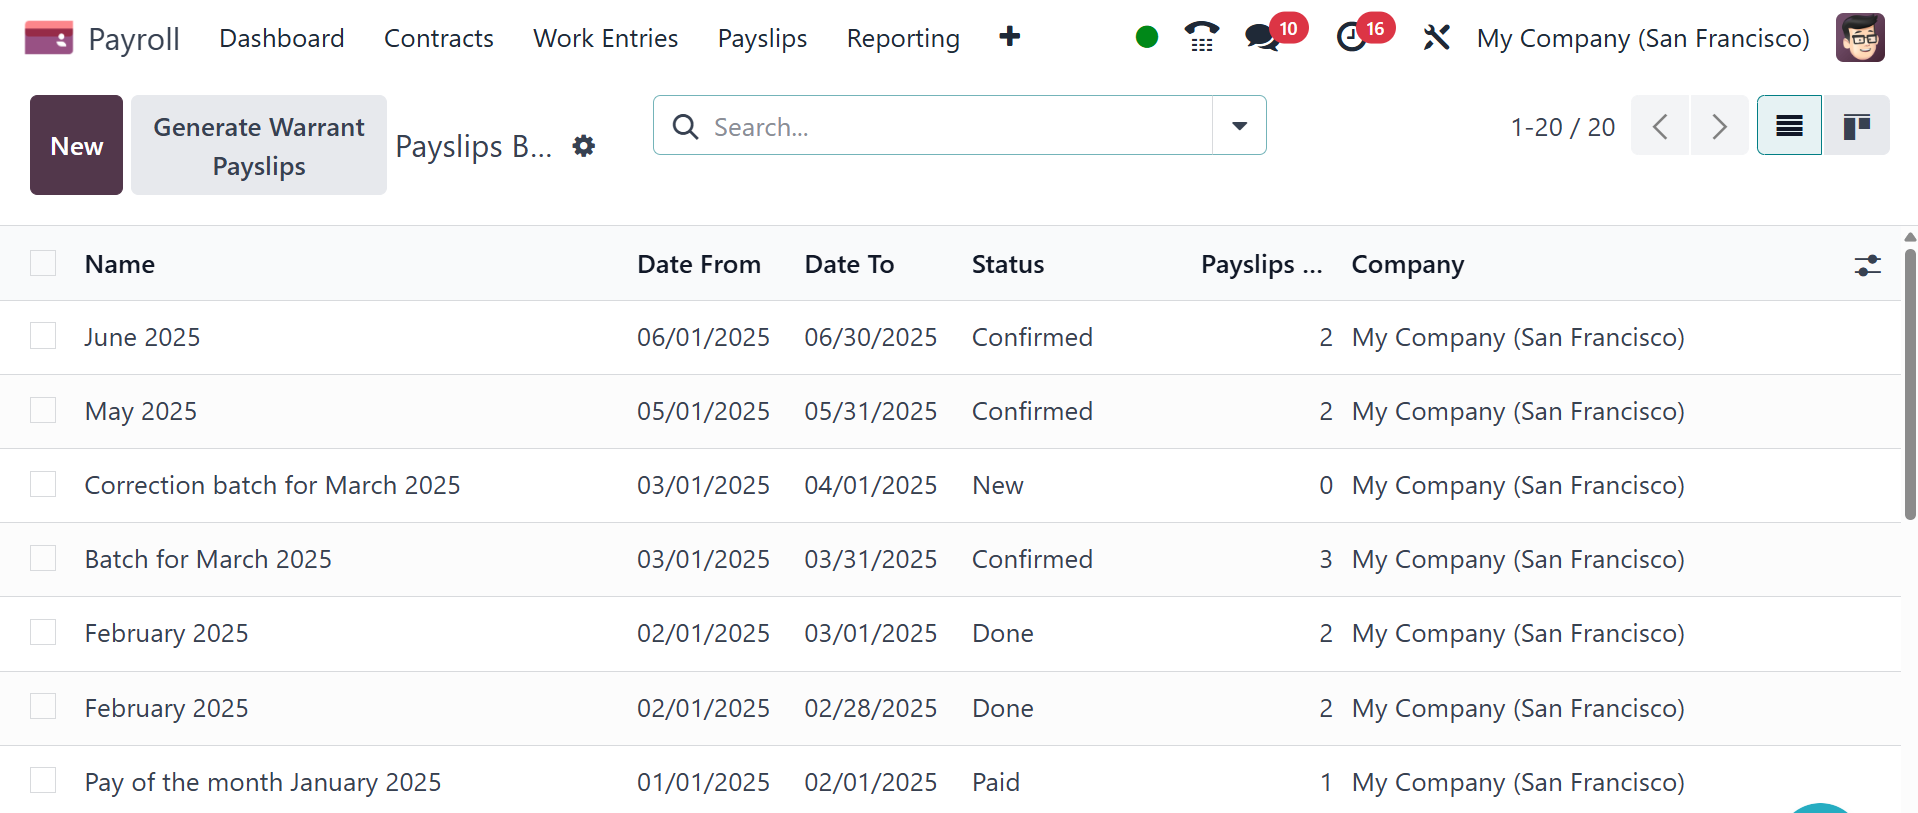
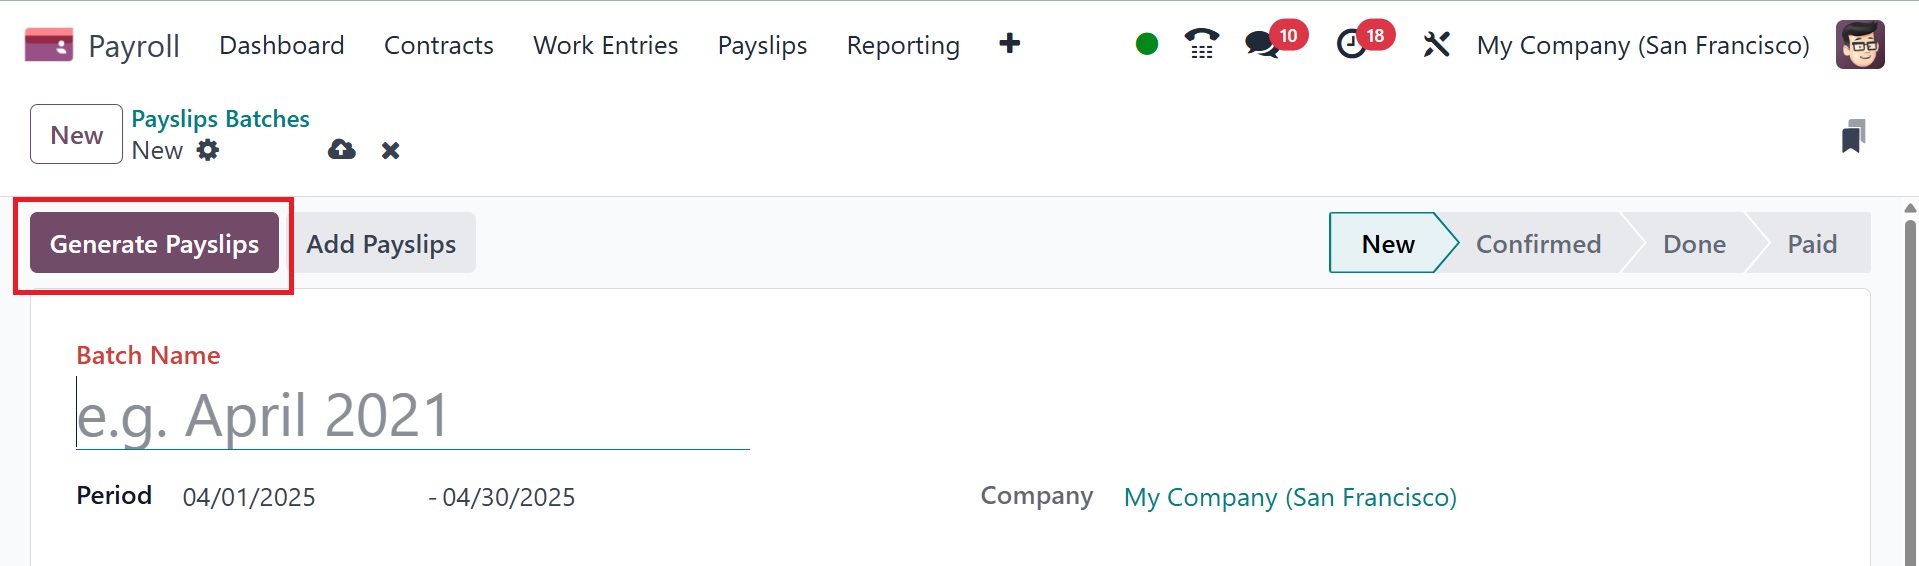
4.3 Batches
The Payslips tab's Batches menu can be used to create payslips for
employee batches. Data concerning each batch is defined in the
Payslip Batches pane. Among other things, this information contains
Name, Date To, Company, Date From, and Status. Selecting New will
allow us to provide a fresh set of payslip data.
In the new screen's Period area, mention the batch name and time for
your particular batch. Users can input a batch's start and end dates
in the Period option. Additionally, all information is immediately
recorded if you type in the name of the company.
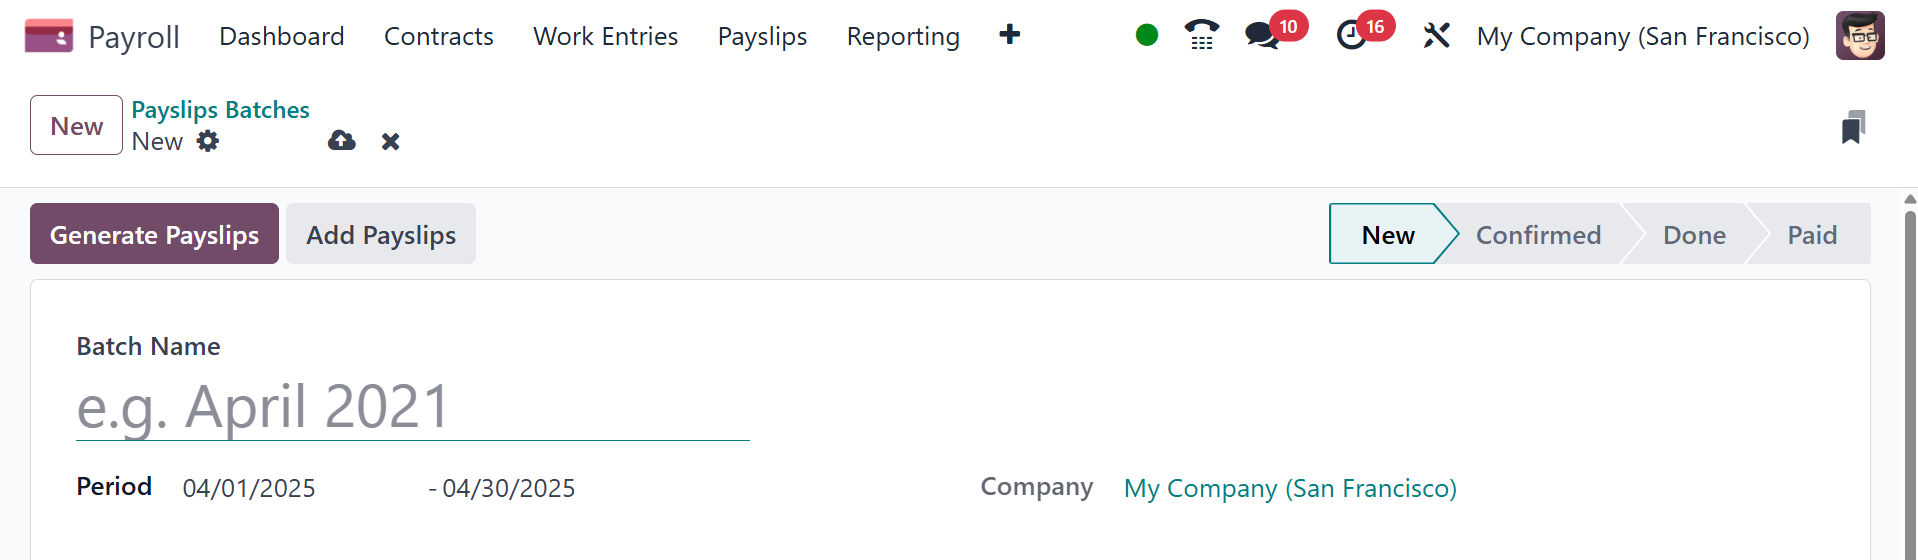
Depending on what comes next, the payslip batch might be placed at
each stage. Once the required data has been entered, you can select
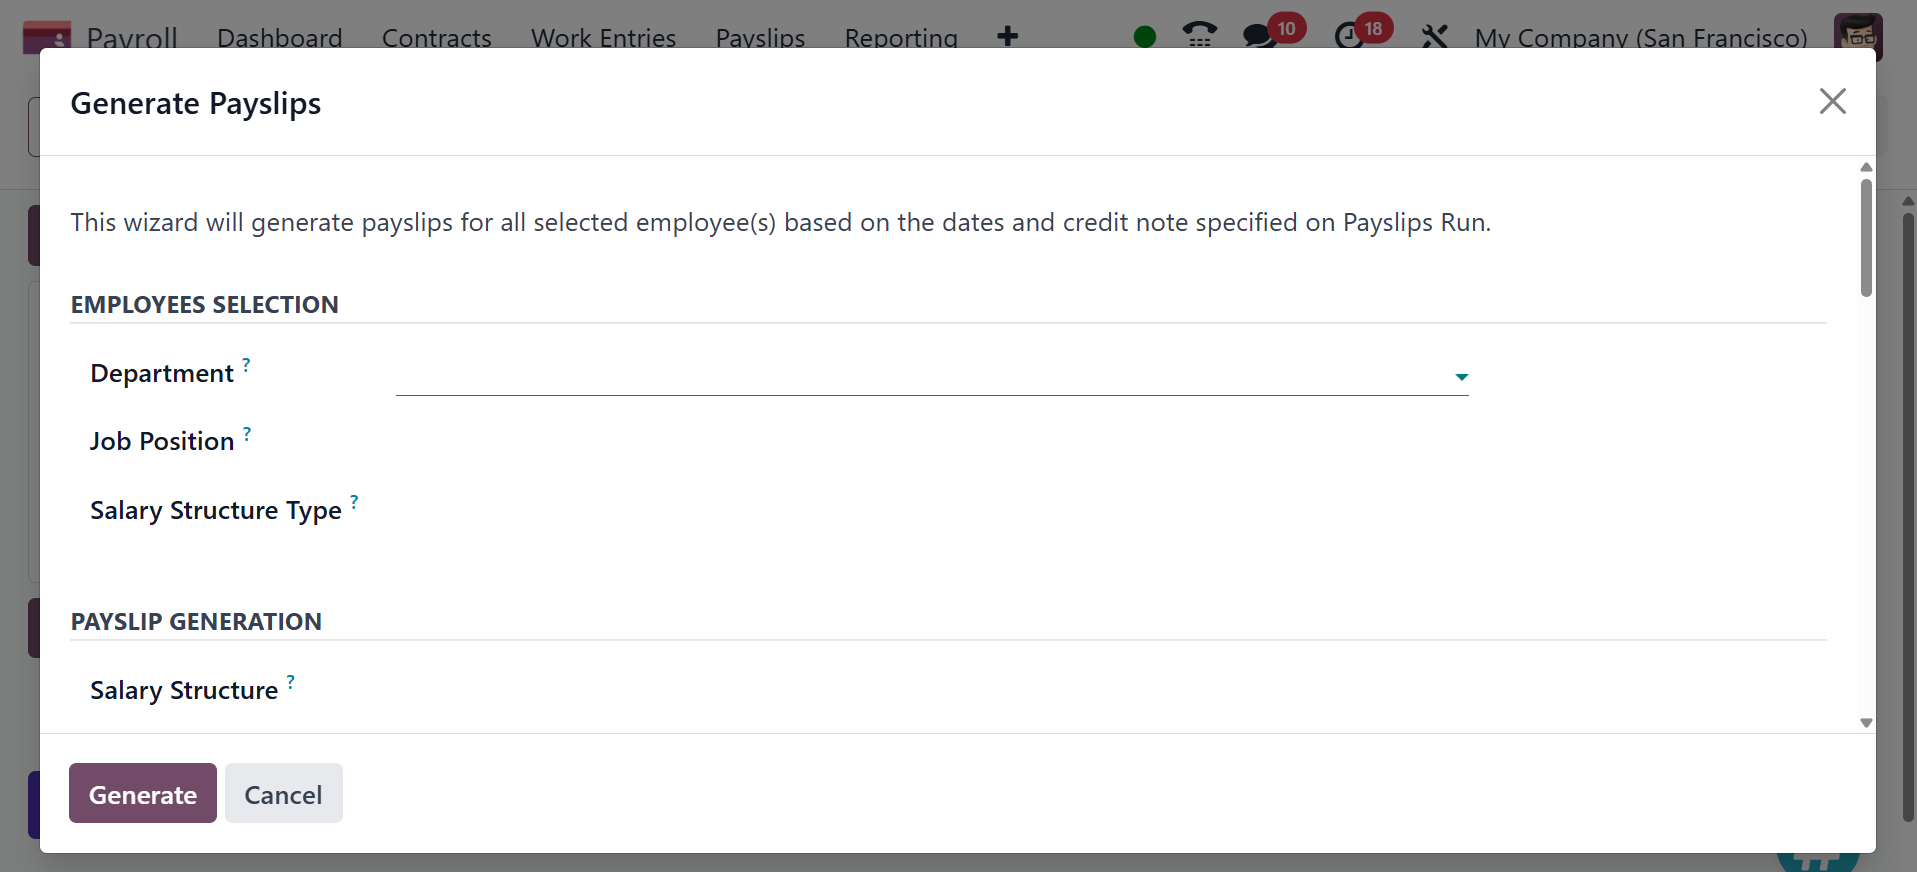
several employees by selecting Generate Payslips.
Under the SALARY STRUCTURE section of the Generate Payslips window,
the user can add a specific structure, such as Worker Pay, Regular
Pay, and more. A regular payslip is produced based on employee setup
if the field is left empty. Similarly, when choosing employees
within the DEPARTMENT section, you can designate a certain
department.
We can enter an employee's name after selecting the Add a line option
under the EMPLOYEES tab. Once each piece of data has been entered,
select the Generate symbol.
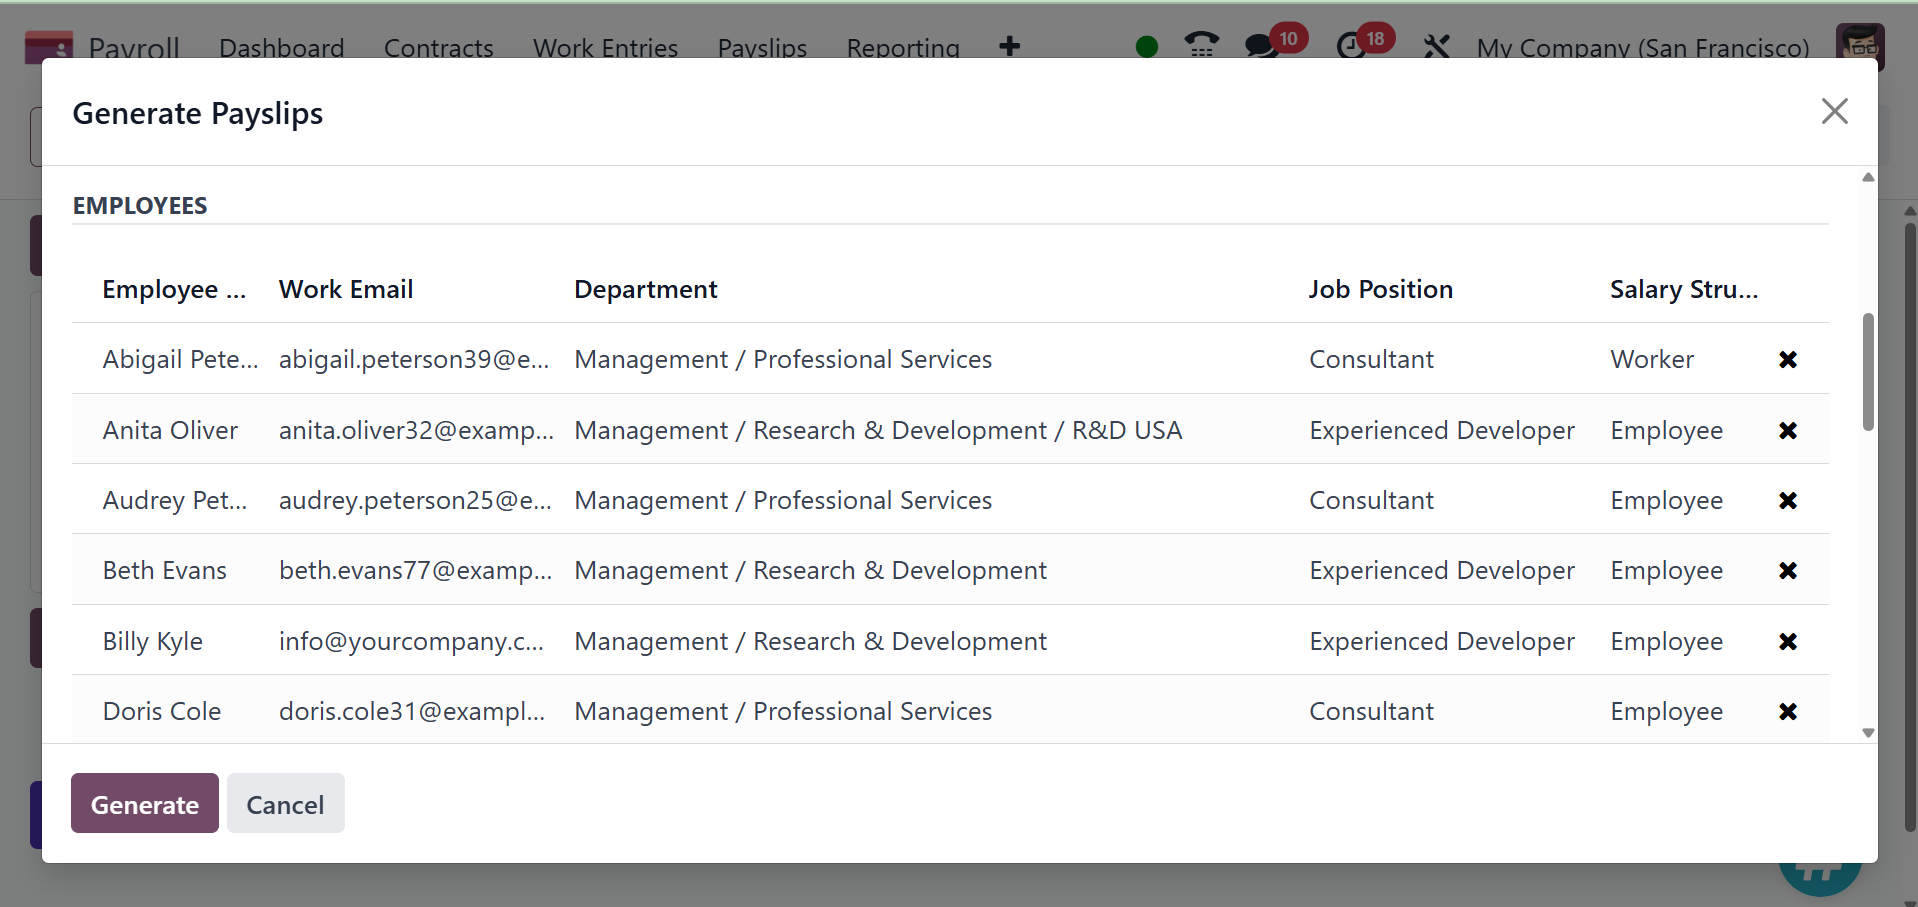
Consequently, it is easy to create employee's payslip based on
batches.