1. Scheduling
Selecting the Planning module
from the module's main
dashboard will lead you to
the scheduling platform. You
may easily arrange your
activities around the
available dates because this
platform is designed to seem
like a calendar.
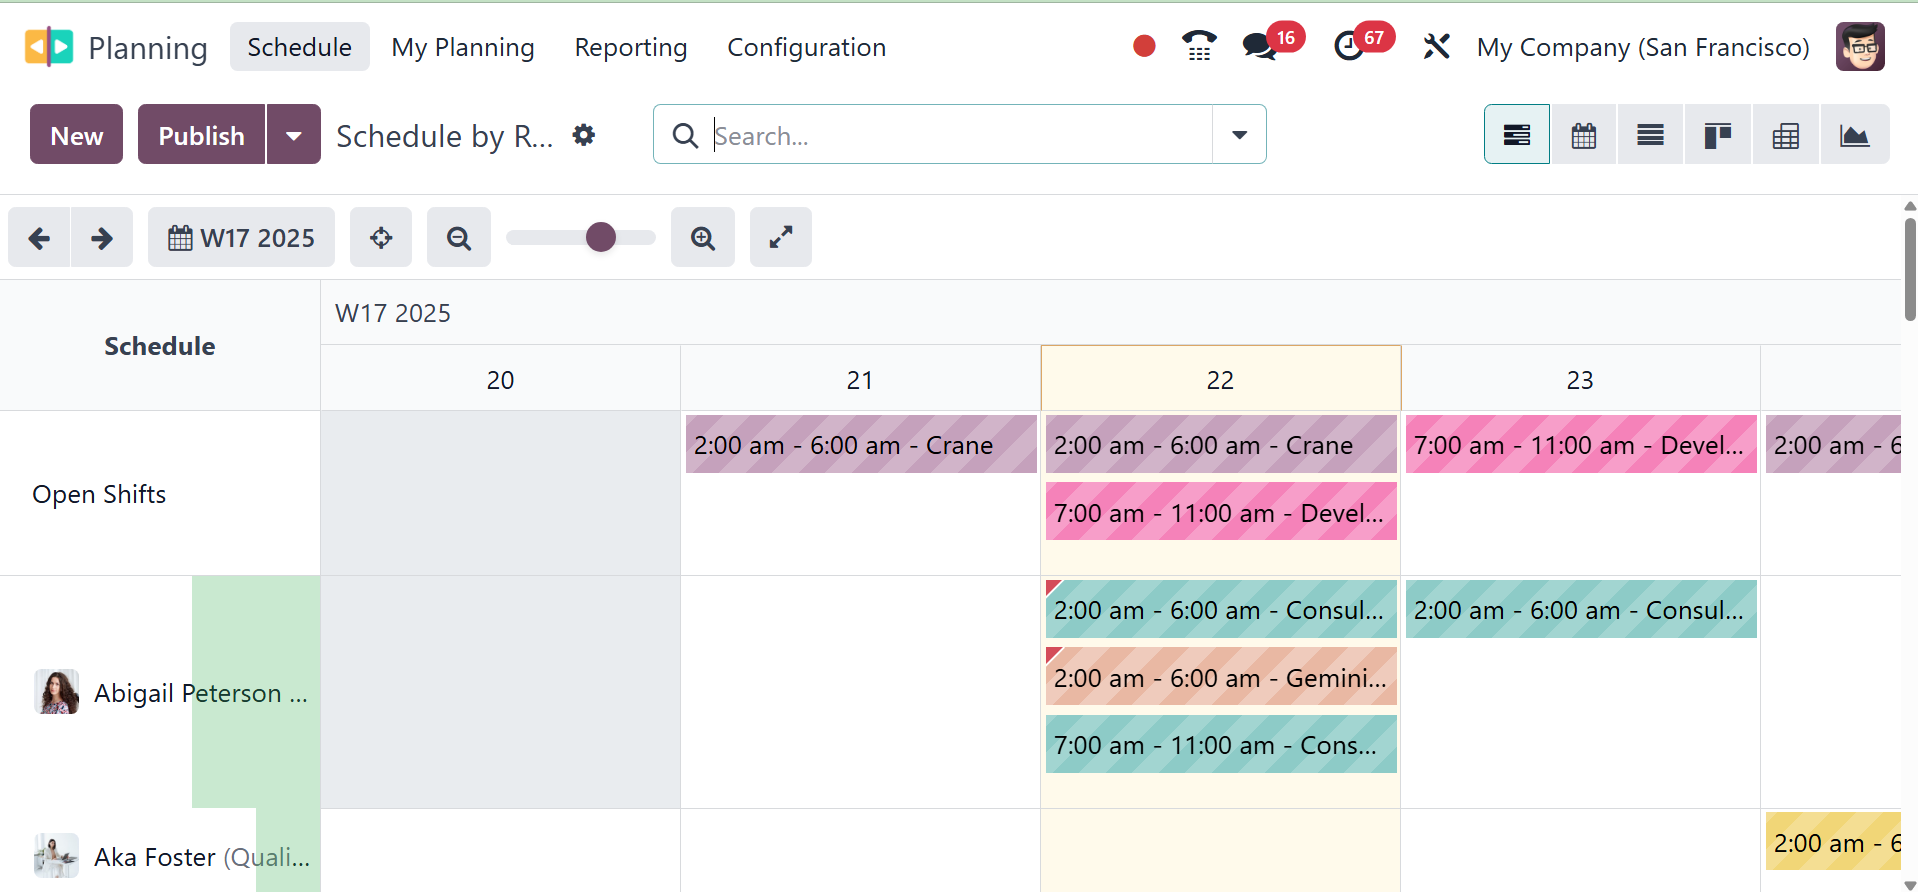
Resources, roles, projects, and
sales orders can all be used
to plan activities. The
screenshot shows the schedule
by resource. Plans can be
seen by month, year, week, or
day. Depending on your
requirements, you can select
a convenient viewpoint. You
may view the schedule for
each resource person here.
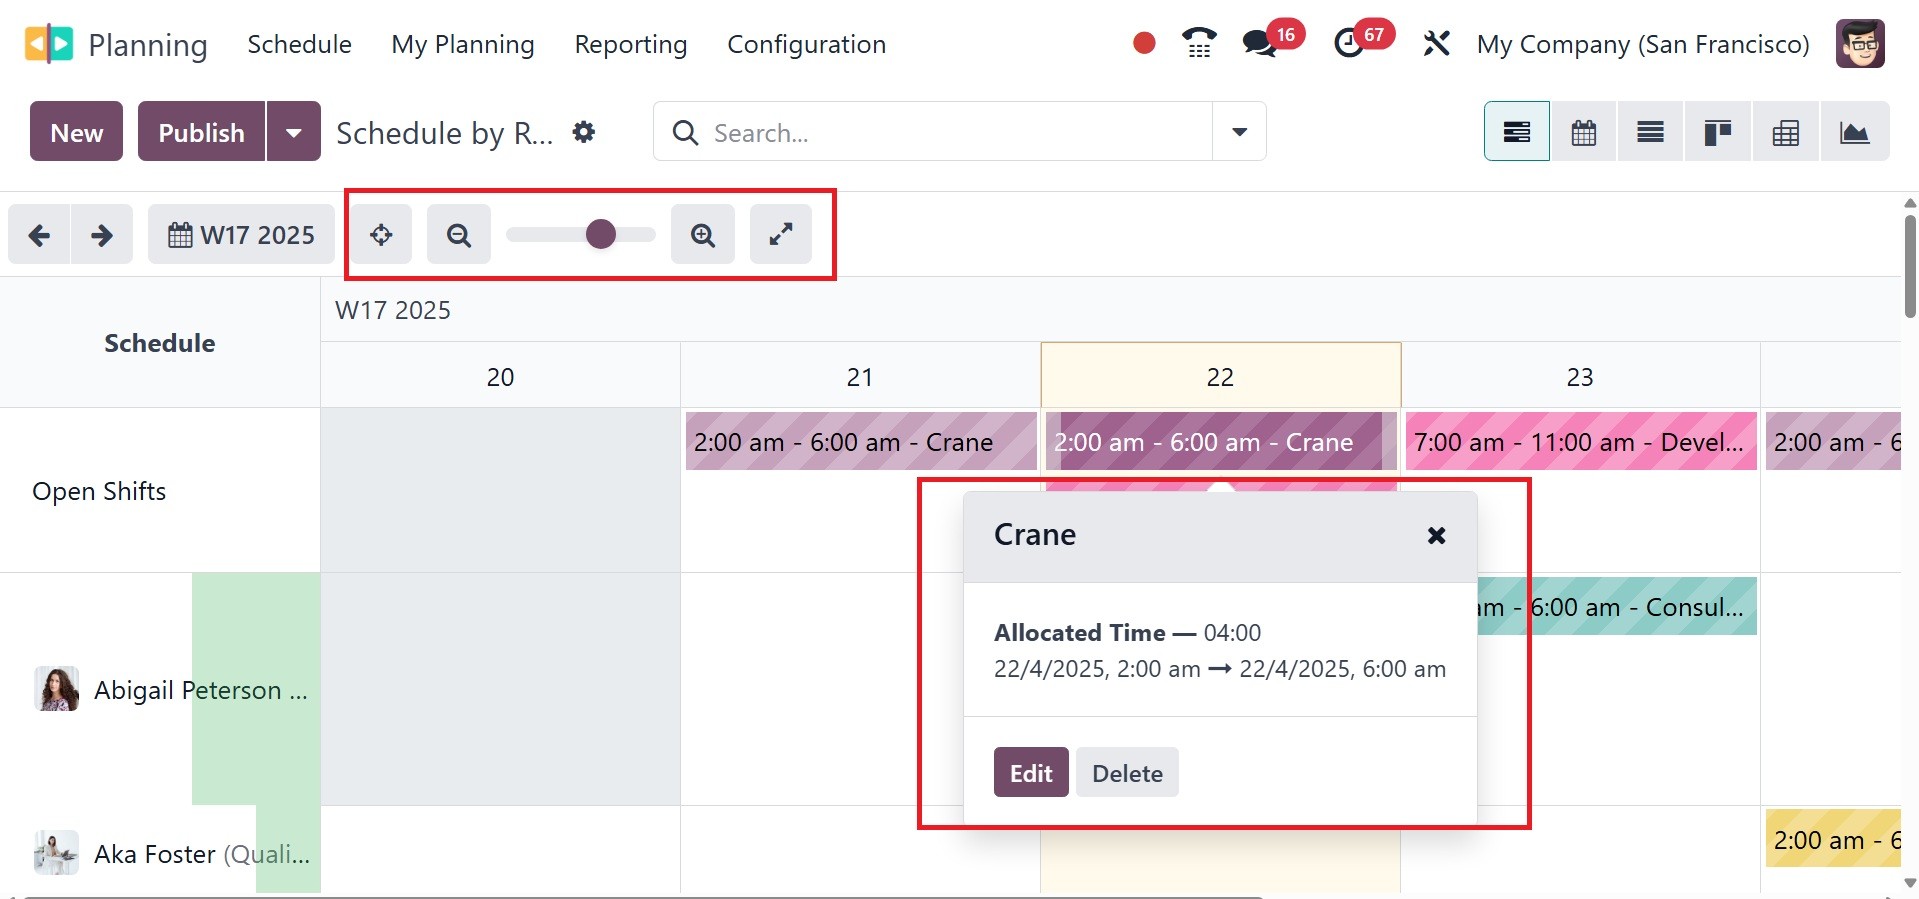
A preview of the schedule can be
viewed by hovering the cursor
over a particular timetable.
The preview will show the
details of the timetable, as
shown in the screenshot
above. A tiny red label will
show up on the schedule if an
employee is booked for
multiple shifts at once.
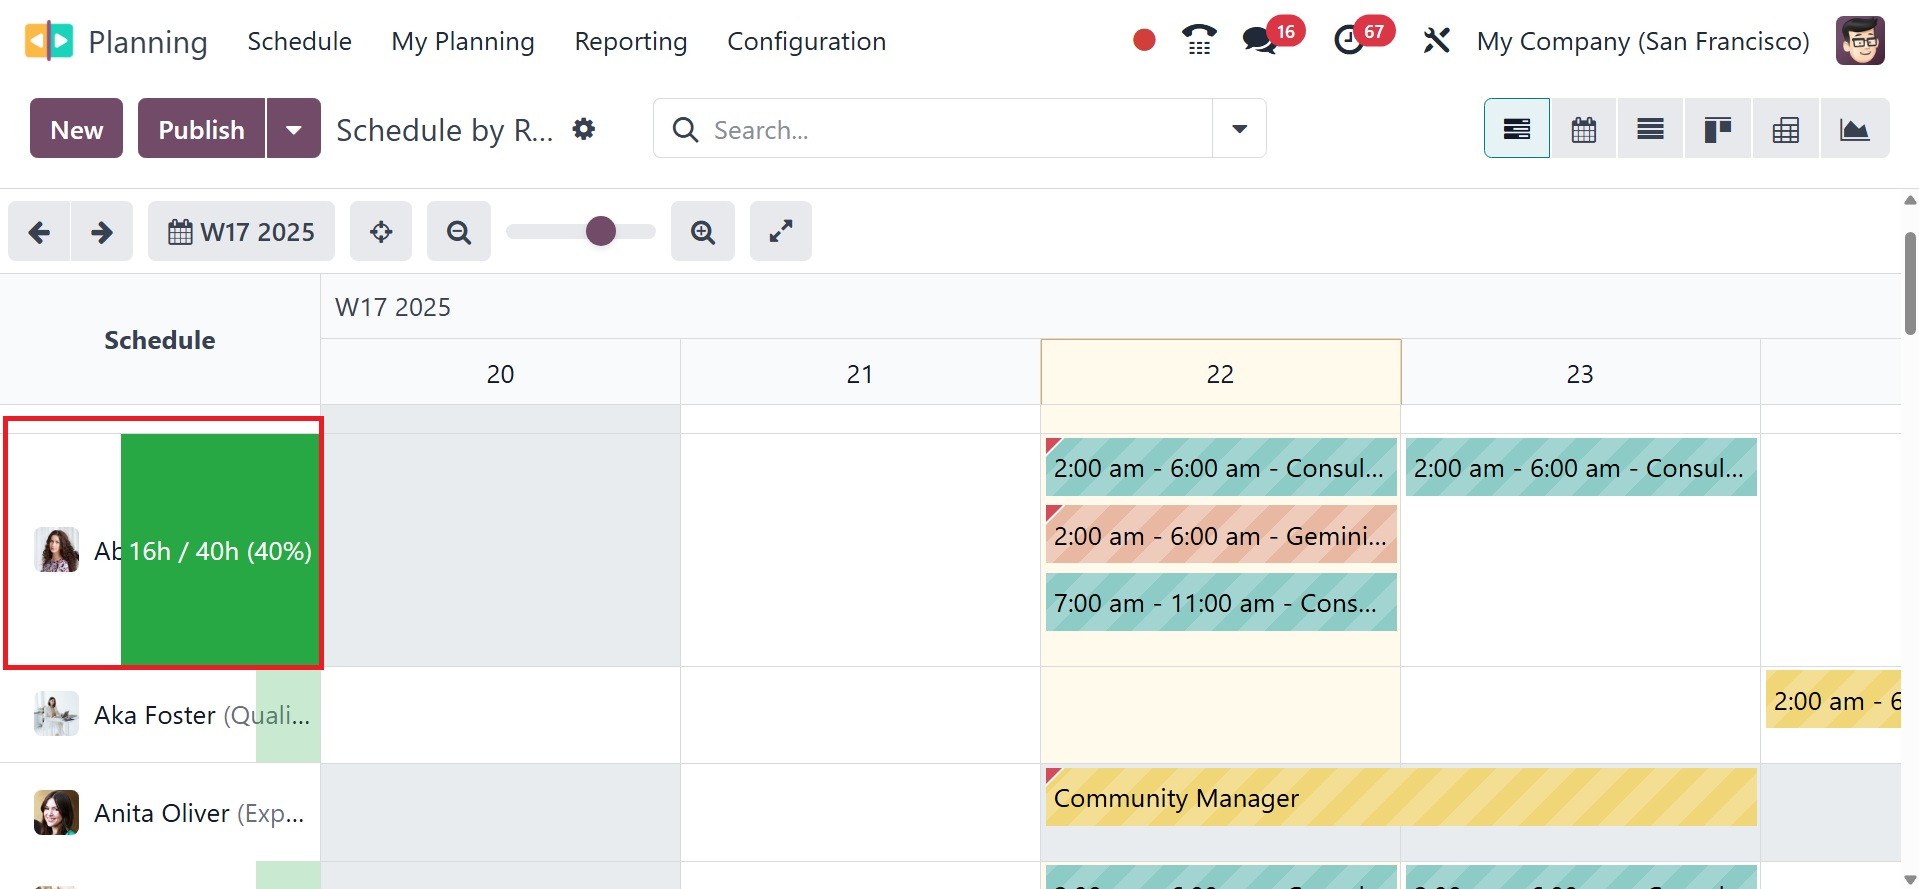
Next to the resource person's
field, you can see the total
number of hours the employee
worked during the selected
day, week, month, or year.
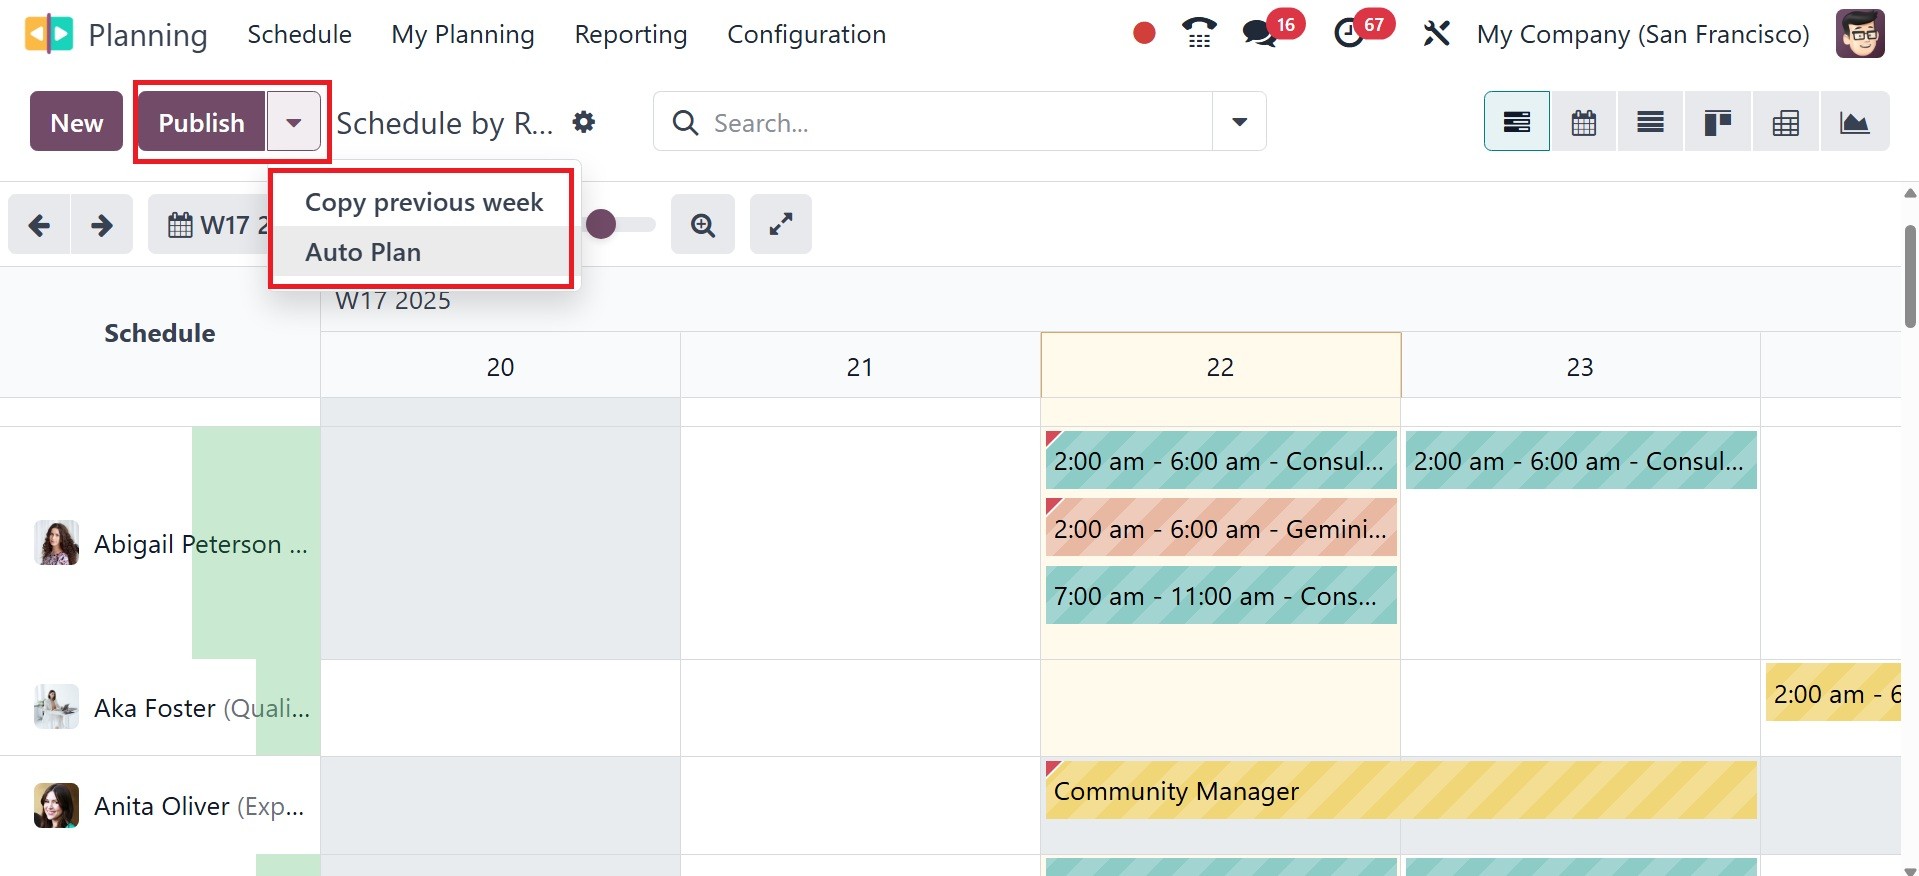
By selecting the Plan Orders
button, unassigned sales
orders can be allocated to
available staff members. To
replicate the shift from the
prior week, use the Copy
Previous Week option.
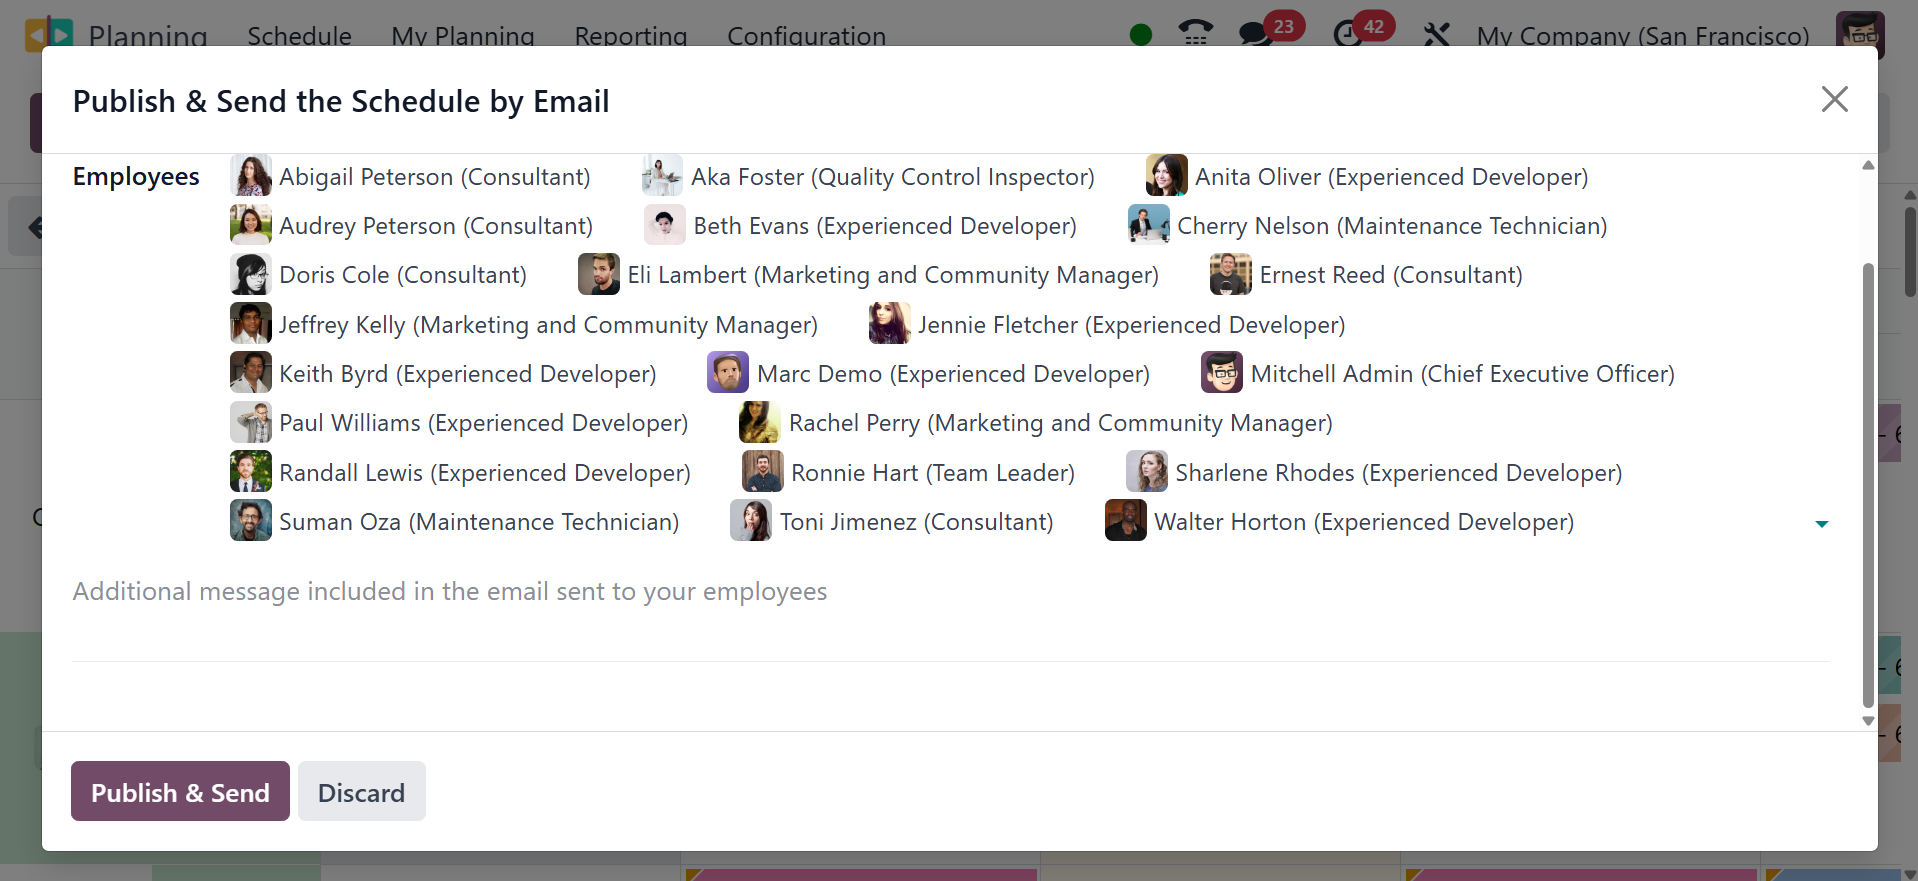
When you click the Publish
button, a pop-up window
appears. The resources
provided in this area can be
emailed with planning
requests. The data are
provided in different visual
elements. That is, the
schedules' shifts make use of
the following graphic
components:
Full color: planned and published
shifts.
Shifts that are planned but not
yet publicized are
represented by diagonal
stripes. Employees with
grayed-out backgrounds are
those who are taking time
off.
Progress bar: shifts that are
currently in progress and
have timesheets associated
with them, means the hours
planned vs the actual working
hour of the employee as per
standard working hour
Grayed-out shift: previously
existing shifts are
momentarily grayed out when
they are copied, but the
copied shifts are displayed
in full color. When the page
is refreshed again or the
filter is removed, the color
returns to full color or
diagonal stripes.
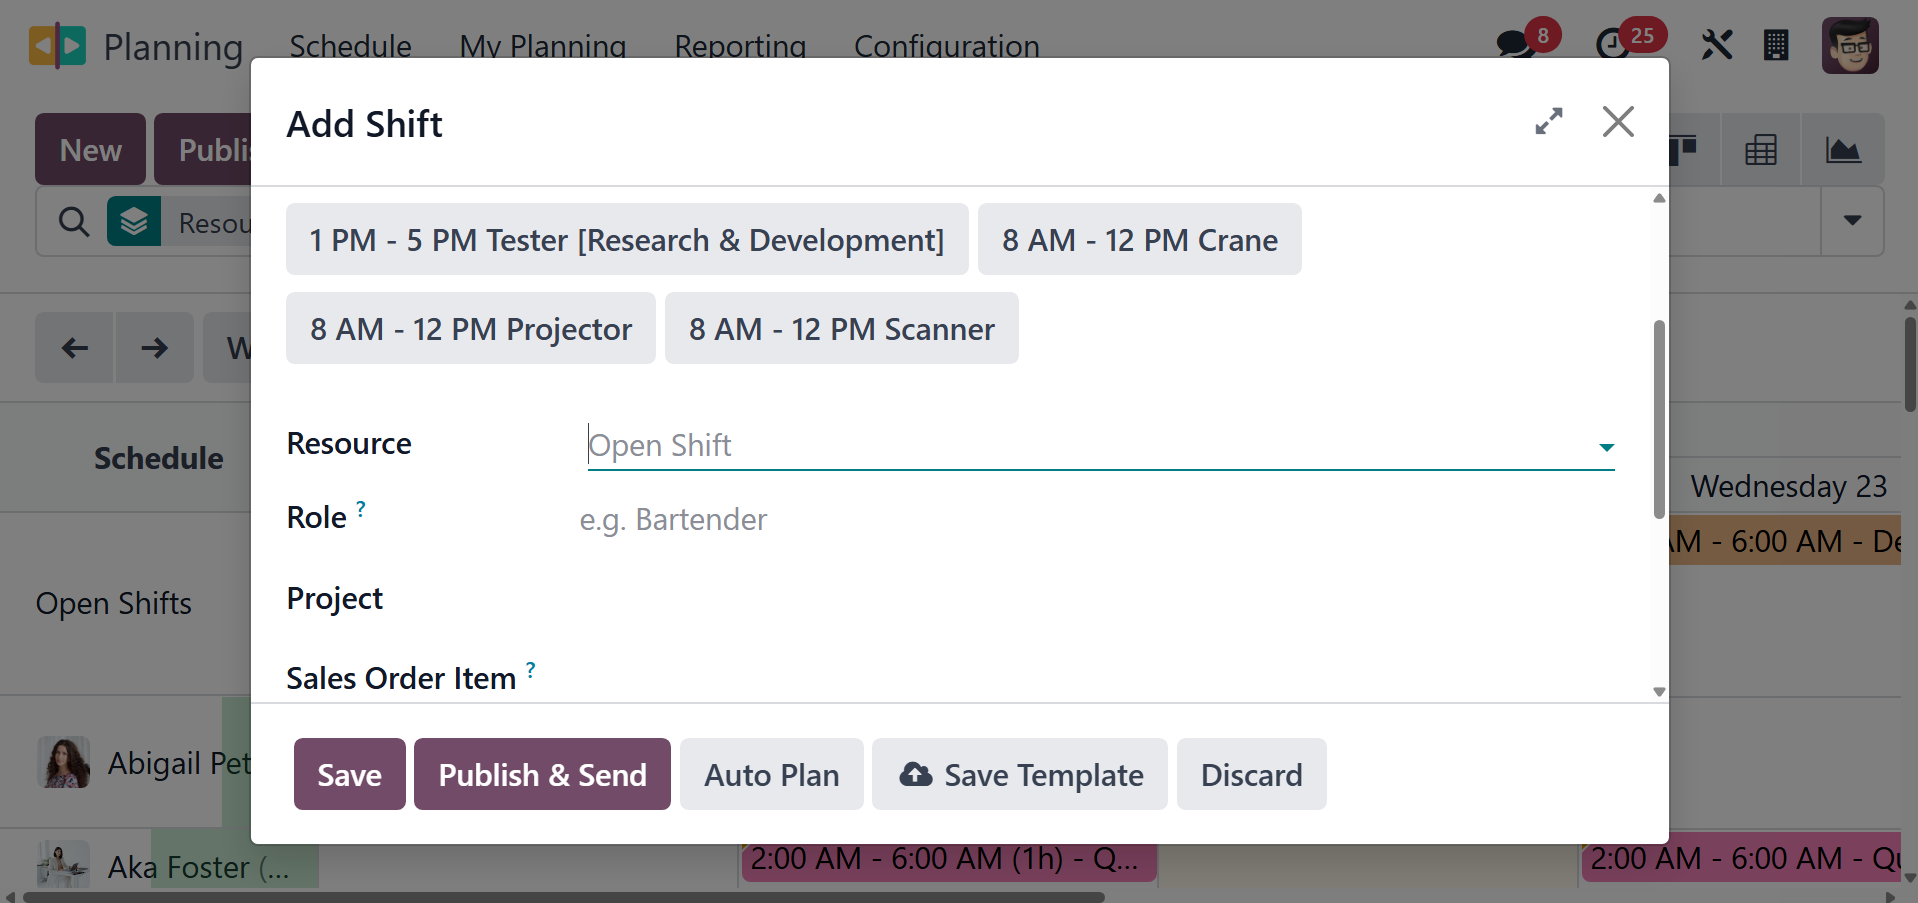
Click the New button to start a
new activity. The + symbol
that appears on the screen
when the pointer is past a
particular date can also be
used. This will cause a
pop-up window to appear, as
shown below.
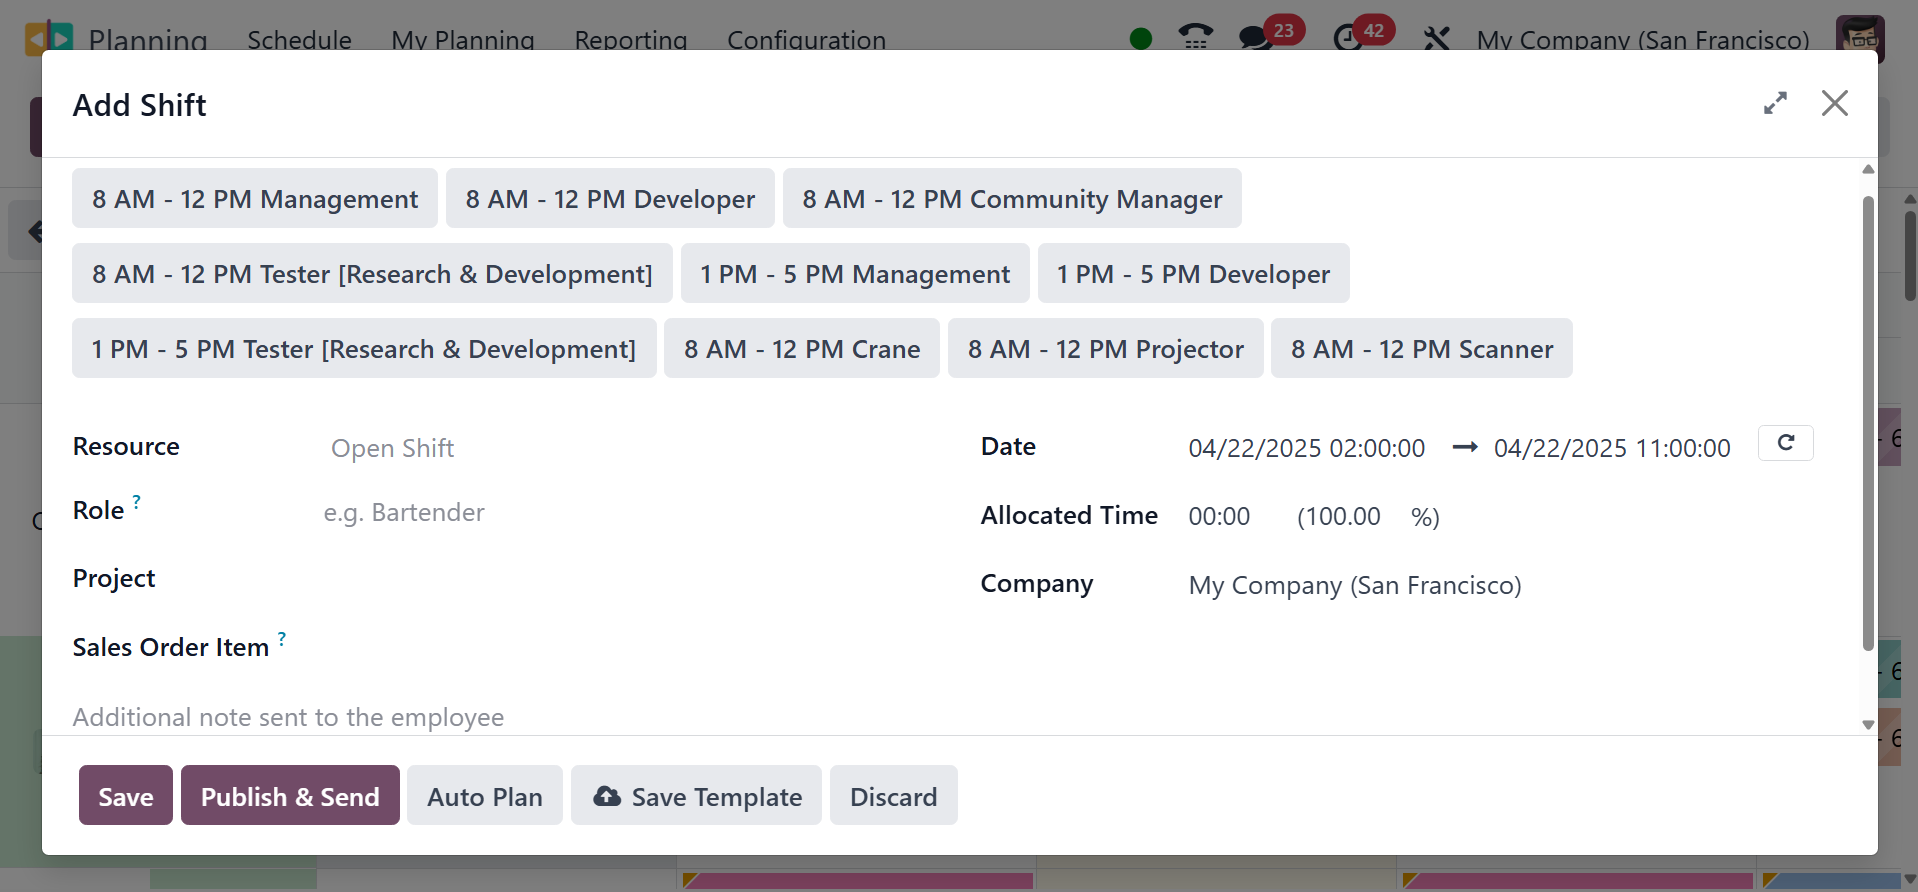
The resources' and roles' names
will be presented in the
window. If not, you can
provide the resource and role
in the appropriate fields.
The resource person can be
selected from the provided
drop-down menu. It is
necessary to provide the
project and sales order item
for which this activity is
being planned from the
drop-down menu provided along
with the fields. Add the
date, allocated time, and
name of the company. To
repeat the schedule, you can
activate the Repeat field.
Shift changes only impact the
current shift; they don't
impact the other shifts that
make up the repeat. Removing
a repeating shift is no
different. To stop this from
happening again, you can
disable the repeat option. To
store the shift as a
template, select the Save
Template option. The Date,
Allotted Time, and Company
fields will be accessible.
The employee will receive an
email with the schedule
details and any other notes
you enter in the designated
spot. To save the shift, you
can finish the required steps
by clicking the Save and
Publish & Send buttons,
respectively.
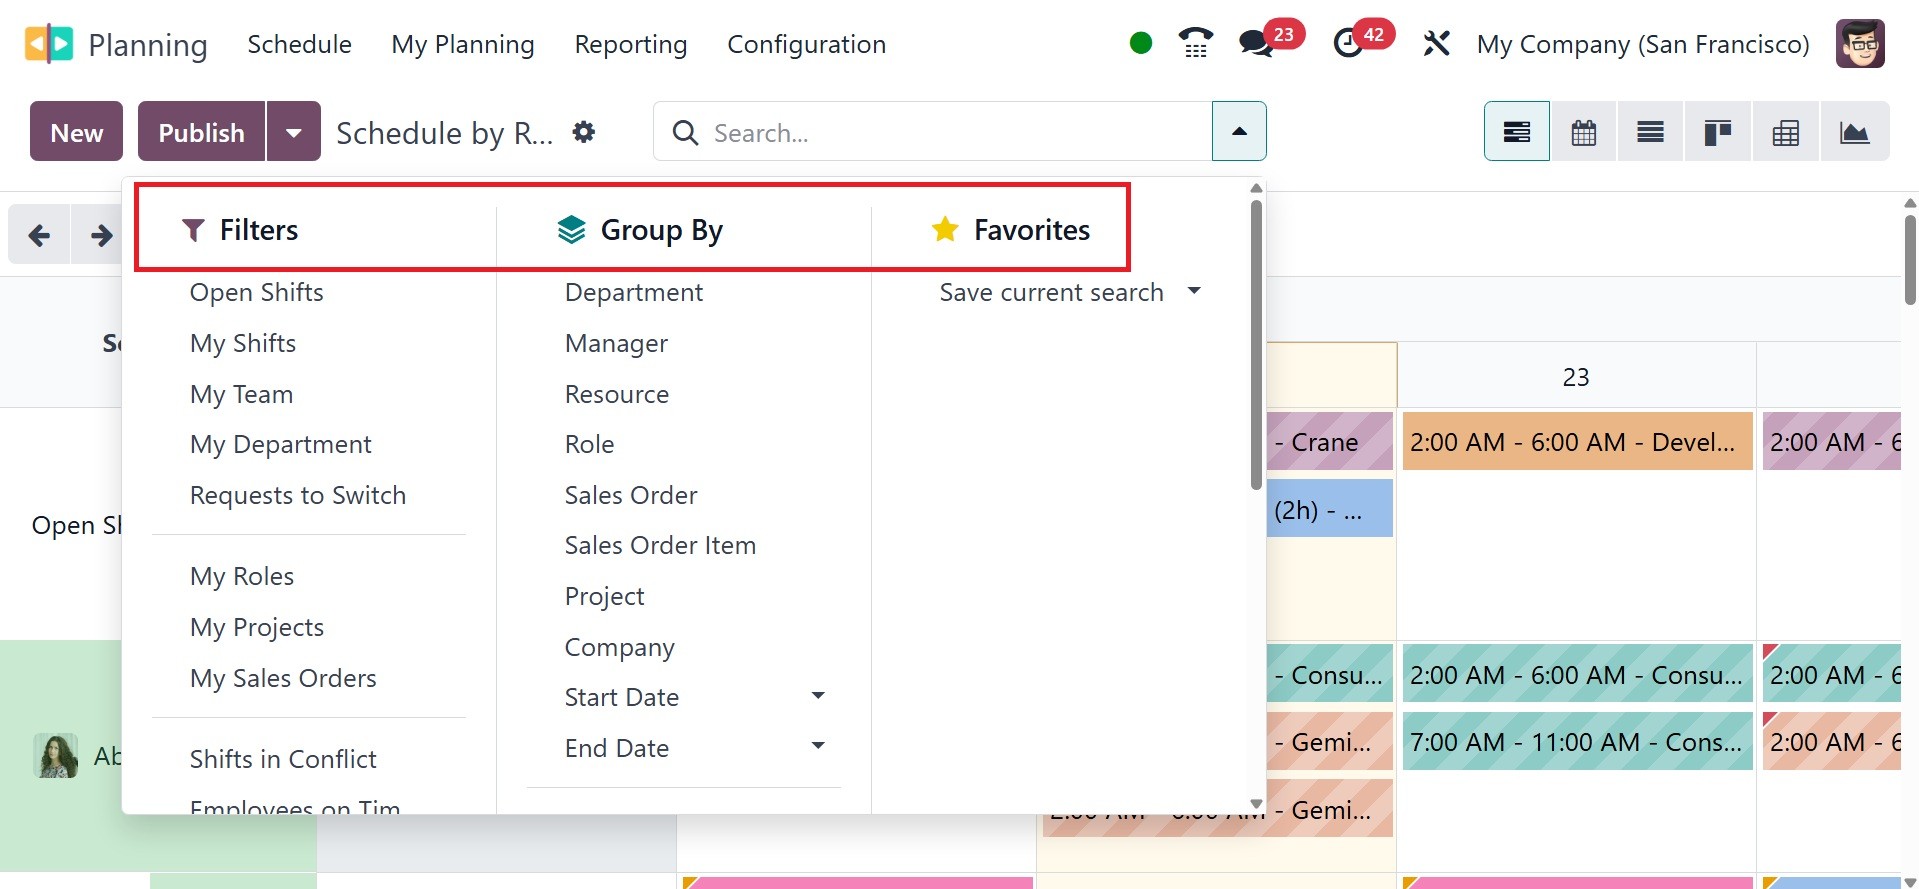
Open shifts, my shifts, my team,
my department, request to
switch, my role, my project,
and my sales orders, shifts
in conflict, and Employees on
Time. You can use the
following default criteria on
this platform. The Group By
option contains the following
options: Department, Manager,
Resource, Role, Sales Order,
Sales Order Item, Project,
Company, Start Date, and End
Date. Under the favourites,
you have the save the current
search as well.
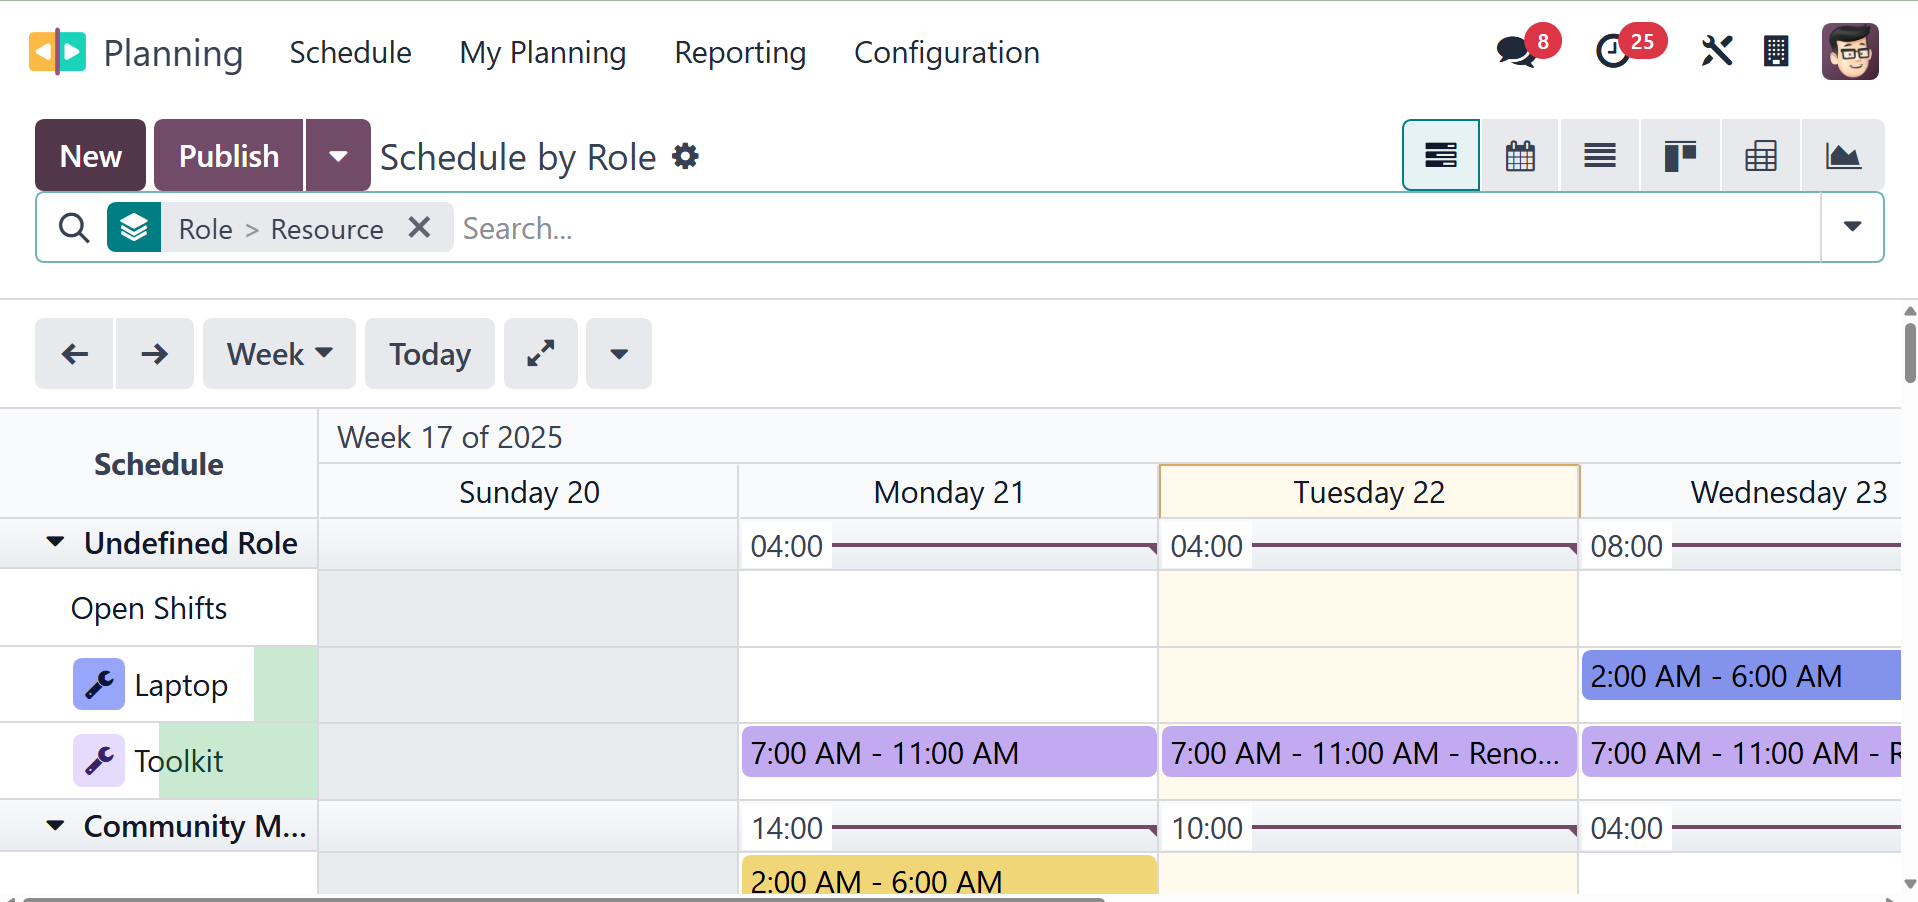
Under the schedule option, you
have the options like by
resource, by role, by
project, and by sales order,
respectively.

The schedule by resource will be,
as in the image below.
By choosing accountable
resources, roles, projects,
sales order items, dates,
business names, and repeat
frequencies, users can
generate resource-based
calendars.
By clicking the "New" button,
users can establish a new
"Resource Planning".
Select the appropriate "Role" and
"Resource" columns. Decide on
the schedule's beginning and
ending dates. In the "Repeat"
area, enter the frequency.
For later usage, save the
schedule template. The
"Publish & Send" button makes
it easier to receive timely
notifications regarding the
schedule of the designated
employee, as in the image
below.
Schedule By Role: By allowing
users to organize schedules
according to roles within the
company, this component makes
it easier to categorize
schedules by department.
The "Schedule By Role" menu lets
users arrange plans based on
roles like Community Manager,
Consultant, Developer, etc,
to assist responsible
employees in effectively
managing the schedules for
their departments. Users can
make a new schedule by role
by clicking the "New" button.
The settings and buttons
don't change.
Schedule By Project: This feature
enables users to organize
schedules according to
projects, which facilitates
more efficient scheduling and
project management.
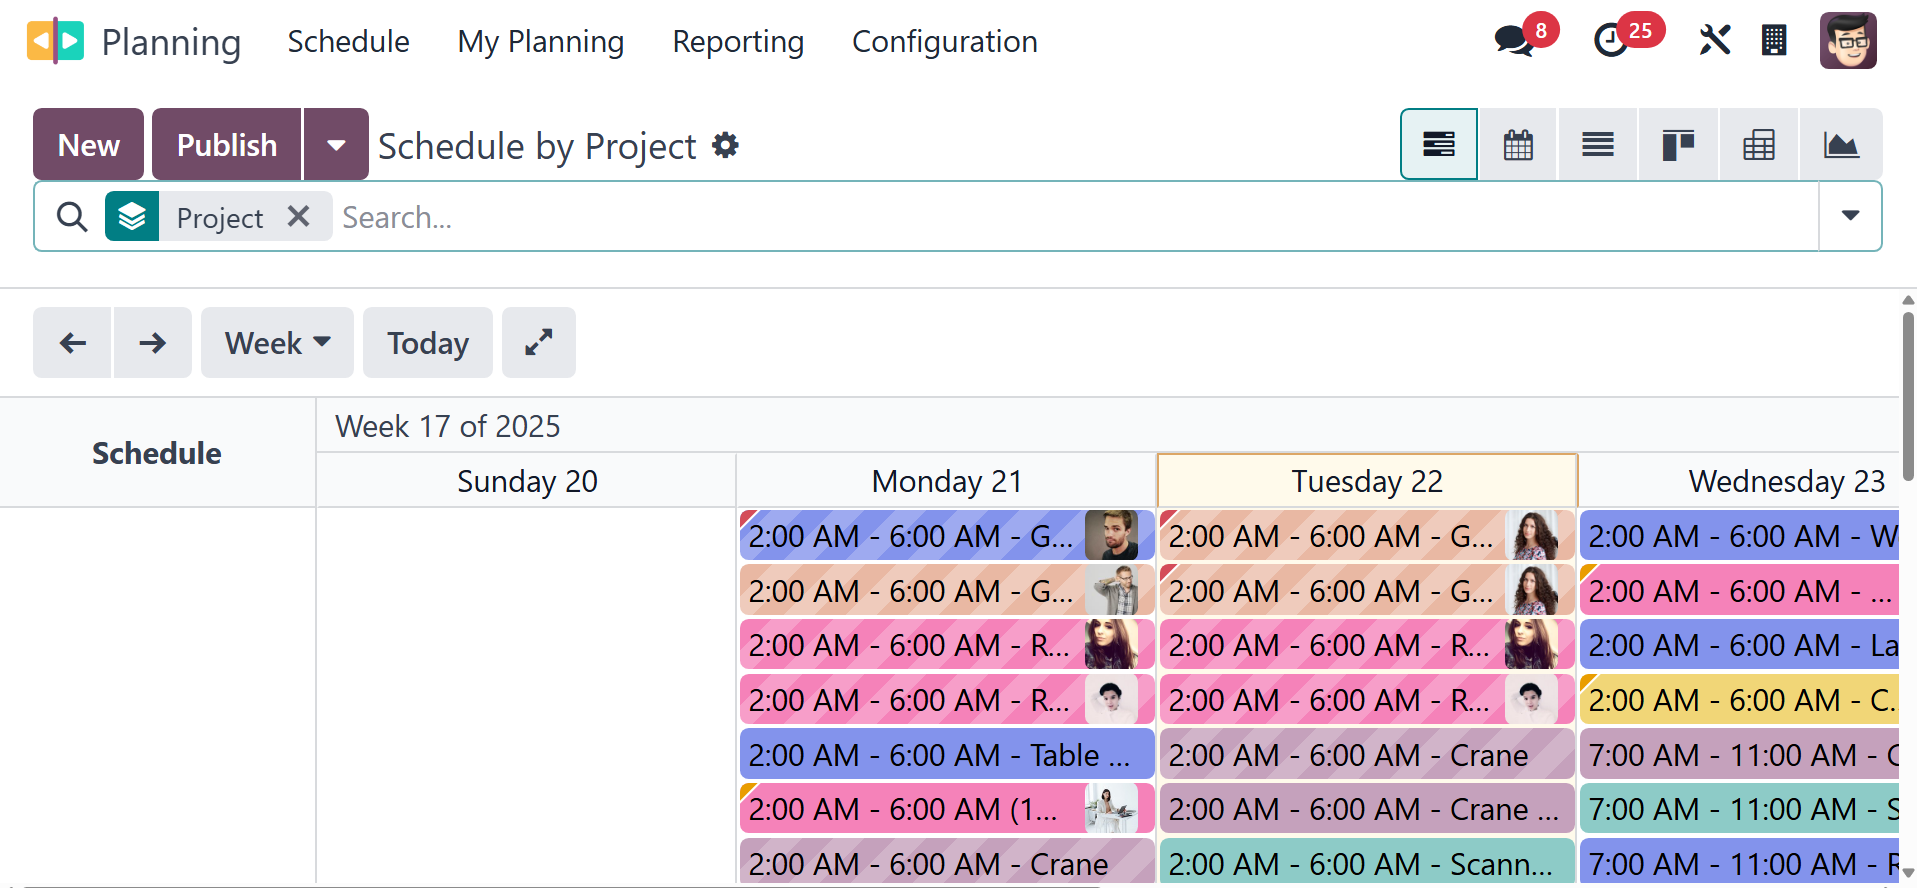
The "Schedule By Project" menu
feature makes it simpler to
arrange timetables based on
projects. The project-based
scheduling dashboard is
accessible to users through
the "Schedule By Project"
pane. Making a new project
schedule is not a
particularly challenging
task.
Schedule By Sales Order: This
feature makes it easier to
arrange timetables according
to different sales orders.

Lastly, the "Schedule By Sales
Order" option allows users to
make plans based on various
sales orders. All of the
previously created schedules
based on different sales
orders will be shown on the
"Schedule By Sales Order"
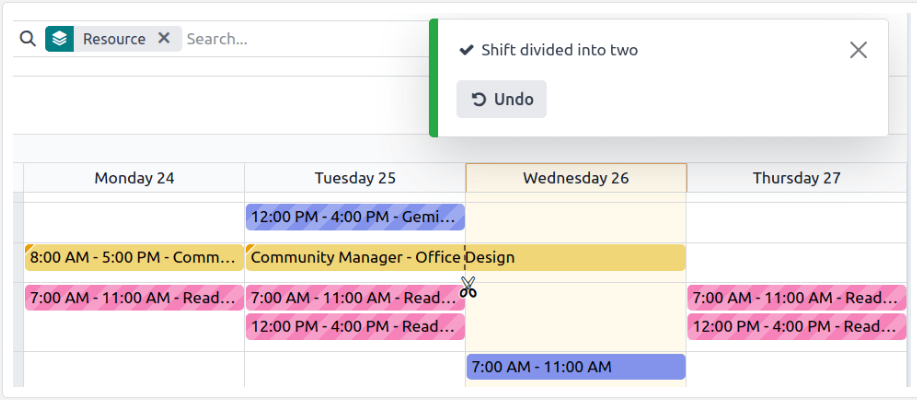
tab. The split shifts tool
allows to easily split a long
shift into segments. To do
so, hover the mouse over the
desired shift and click the
scissors icon.
Simple yet elegant schedule
management is made possible
by these features, which
enable users to effectively
manage their schedules
through the user-friendly
Odoo interface.