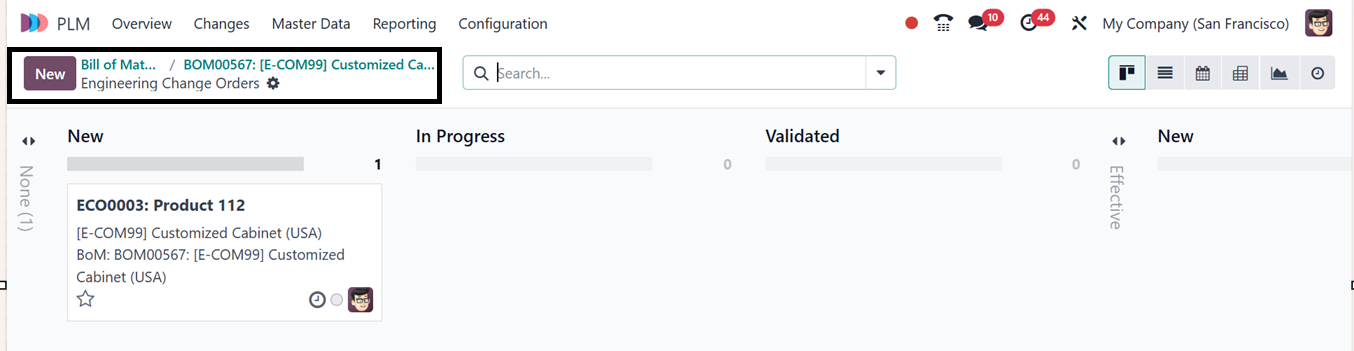
2. Changes Menu
An Engineering Change Order (ECO) outlines proposed modifications or
new designs for an existing product. The Odoo 18 PLM module
simplifies the creation and management of these orders. Users can
manage ECOs through the "Changes" menu, which provides a Kanban view
of existing orders arranged according to predefined stages, as
illustrated in the screenshot below.
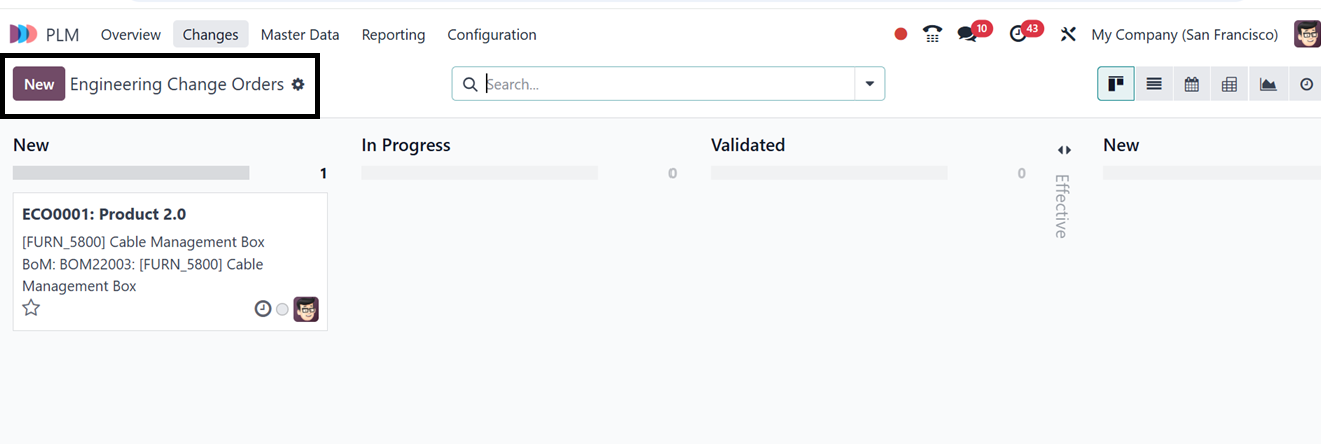
There is also a platform for creating and controlling ECO phases in
the Configuration menu. So that you can create more ECO stages as
per the requirement. The list view of ECOs displays key details such
as Reference, Bill of Materials (BoM), Responsible Person, Stage,
Effective Date, and Company.
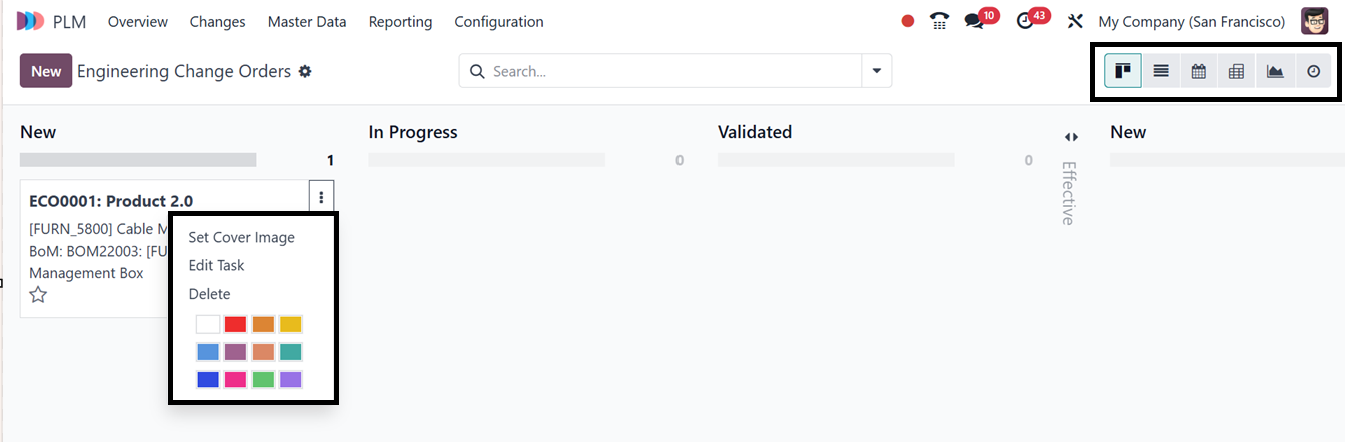
The three dotted vertical menu items placed on an ECO order card can
be used to set a cover image for the task, edit the task, and delete
it. Using the color icons, you can highlight the task according to
the priority. This Kanban view is also converted into List,
Calendar, Activity, Graphical as well as Pivot view using the
respective icons provided at the top right corner of the screen.
The search bar filter options allow you to Filter, Group, and mark
data as Favorites, making it easier to manage a large number of
tasks on the dashboard.
To create a new Engineering Change Order (ECO), begin by clicking the
New button. In the designated field, enter a detailed description of
the proposed modifications to clearly define the purpose of the ECO.
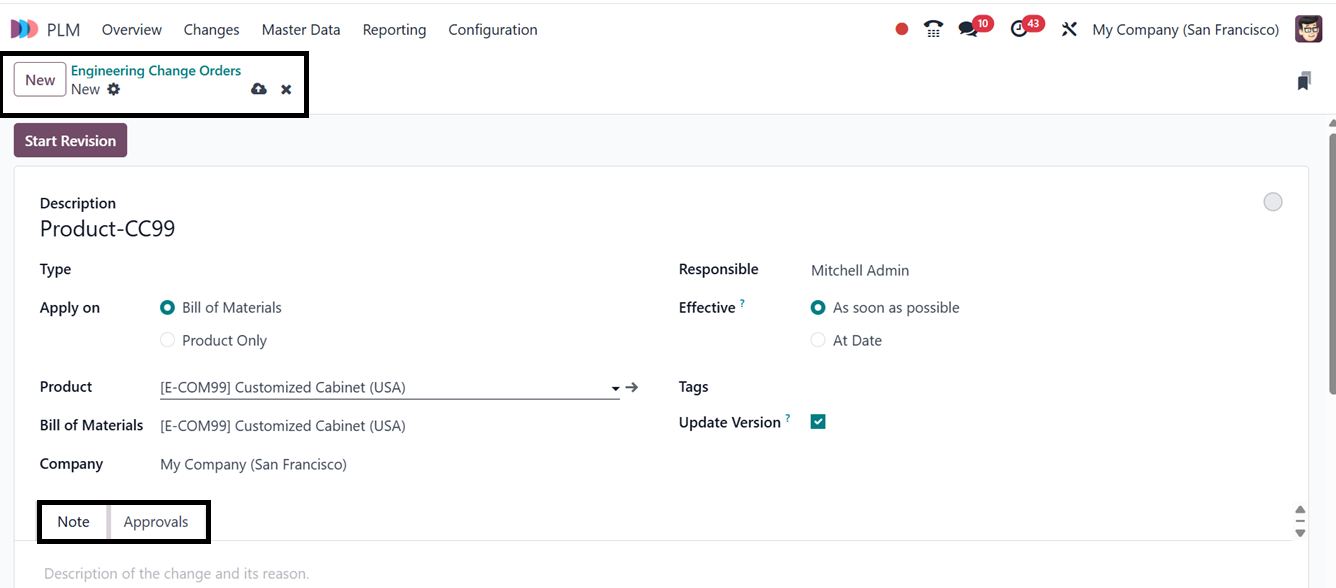
Next, select the appropriate ECO Type from the available dropdown
menu to categorize the change correctly. Determine whether the
changes apply to a specific Product Only or a Bill of Materials
(BoM) and fill in the relevant Product and BoM details accordingly.
Assign a Responsible person who will oversee the ECO process and
ensure proper execution. Set an Effective Date to schedule when the
modifications will be implemented. Then, add relevant Tags to
enhance organization and streamline tracking within the system.
Finally, disable the Update Versions option to keep the product/BOM
version unchanged after the ECO is applied.
The ‘Note’ tab can be used to edit any notes regarding the order,
and the ‘Approval’ tab contains the record of approvals from the
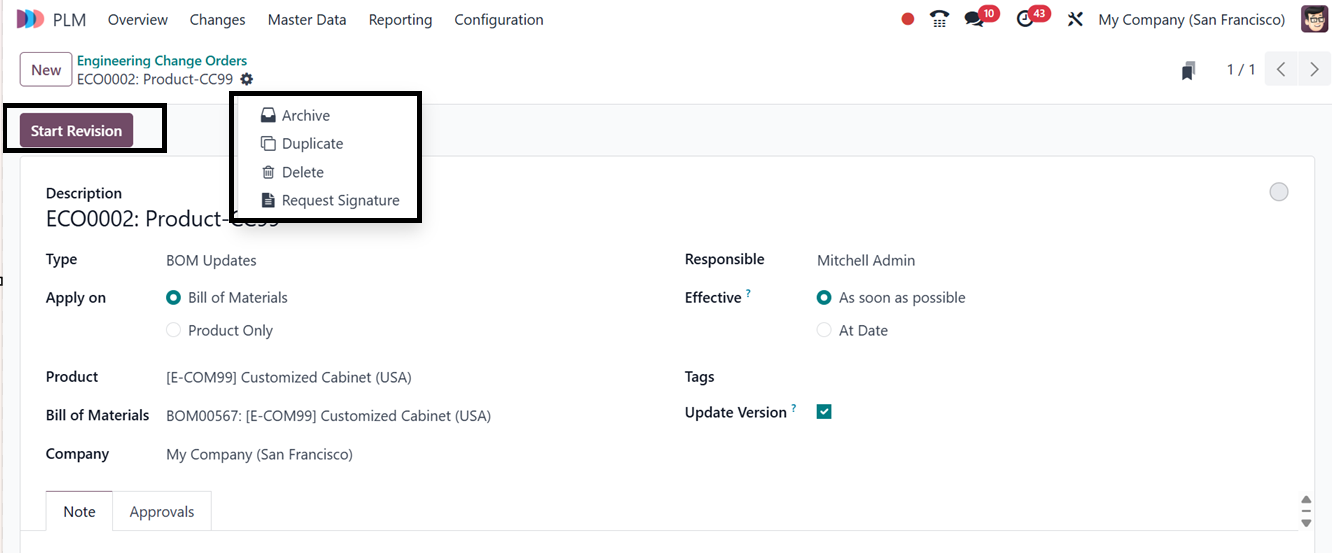
responsible users or the team. After saving the data, you can
utilize the ‘Action’ menu placed on the form to Archive, Duplicate,
Delete, and Request Signature from the responsible person.
Clicking on the ‘Request Signature’ button will open a pop-up window
that can be used to send a signature request to the authorized user.
So, you have to choose the request Template, Customer, Validity, and
a Reminder, as illustrated in the screenshot below.
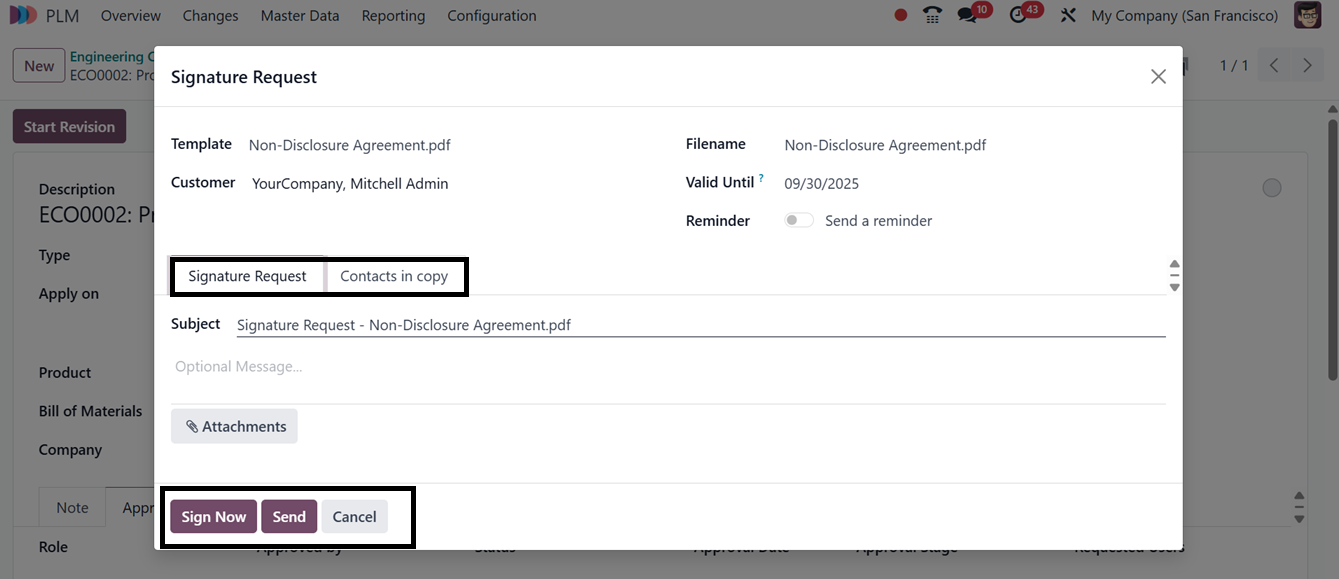
In the ‘Signature Request’ tab, you can edit the Subject as well as
an optional message about the request or document. You can also
attach any supporting documents or files in this tab area using the
‘Attachments’ link.
The ‘Contacts in Copy’ tab lets you include additional contacts or
users responsible for a task, ensuring better transparency and
accountability in each operation. Finally, send the request.
Clicking the Start Revision button initiates the revision process.
Once the required approvals are obtained, users can update the ECO’s
stage. The Document smart button displays associated files, while
the Revision option contains all the details about the ECO
modifications, Operation Performance, Schedules and BoM Overview,
Components, By-products, etc.

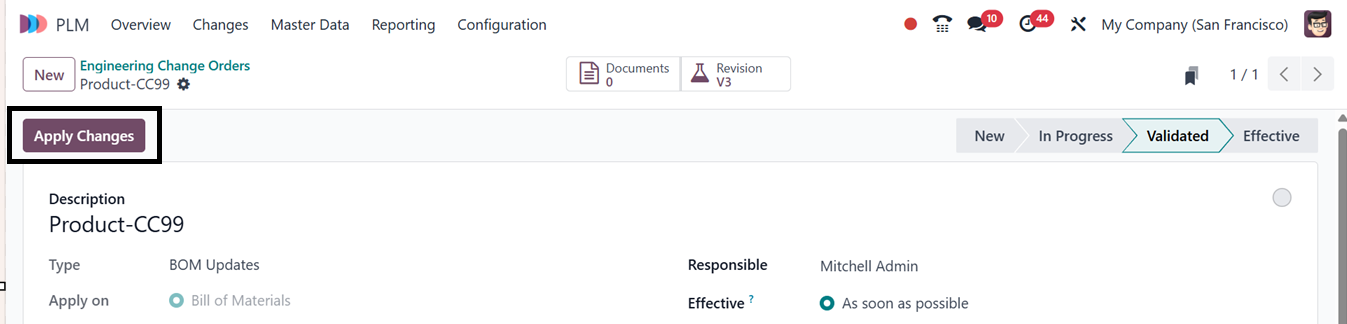
Once the relevant official has given their clearance, you can modify
the phases in accordance with the ECO's development. The Document
smart button will provide access to files pertaining to ECO. The
‘Apply Changes’ option will show up after the ECO has reached the
Validated stage, enabling you to make the recommended changes to the
product.
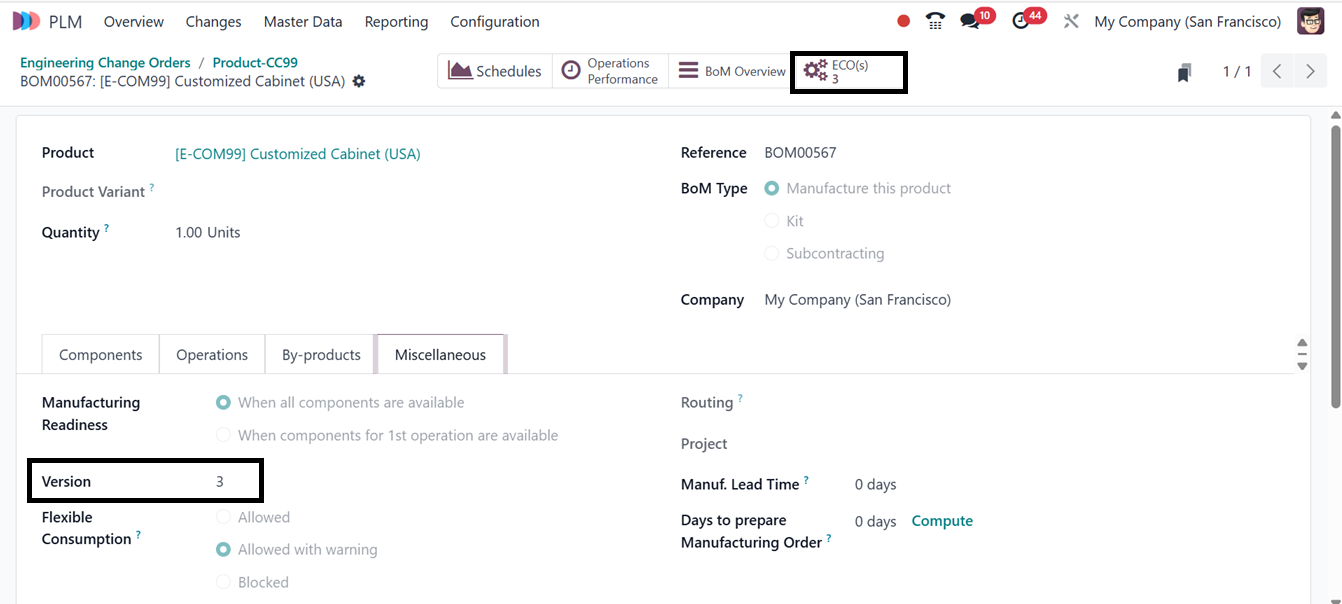
Once created, apply the necessary adjustments and modifications to
align with the required changes. After implementing the updates,
navigate to the Miscellaneous tab, where the revised Bill of
Materials (BoM) version will be displayed, reflecting the latest
modifications made to the product structure.
2.1 Creating ECO Orders for an
Existing BOM
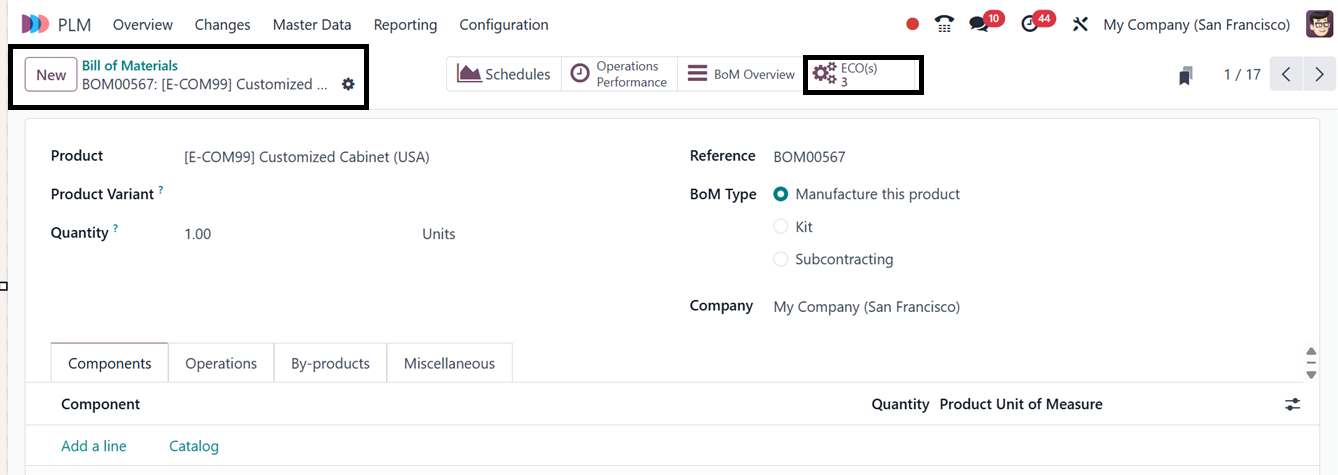
You can create Engineering Change Orders (ECOs) for an existing Bill
of Materials (BoM) from the ‘Bill of Materials’ window of the
‘Master Data’ menu of the PLM Module.
Then, choose the required product and use the ECO smart button
located in the BoM form view of a product to initiate an ECO for the
selected BoM, as illustrated in the screenshot below.
Inside the ECO(s) smart button, you can see the previous ECO orders
carried out for this particular product as a dashboard, as depicted
in the screenshot below.
Simply select the "New" option and follow the instructions we covered
in the last section to make a brand-new order.
2.2 Generating ECOs from the
Manufacturing Module
Users can also generate ECOs within the Manufacturing module. This is
facilitated by an advanced menu bar in the work order’s Shop floor
view.
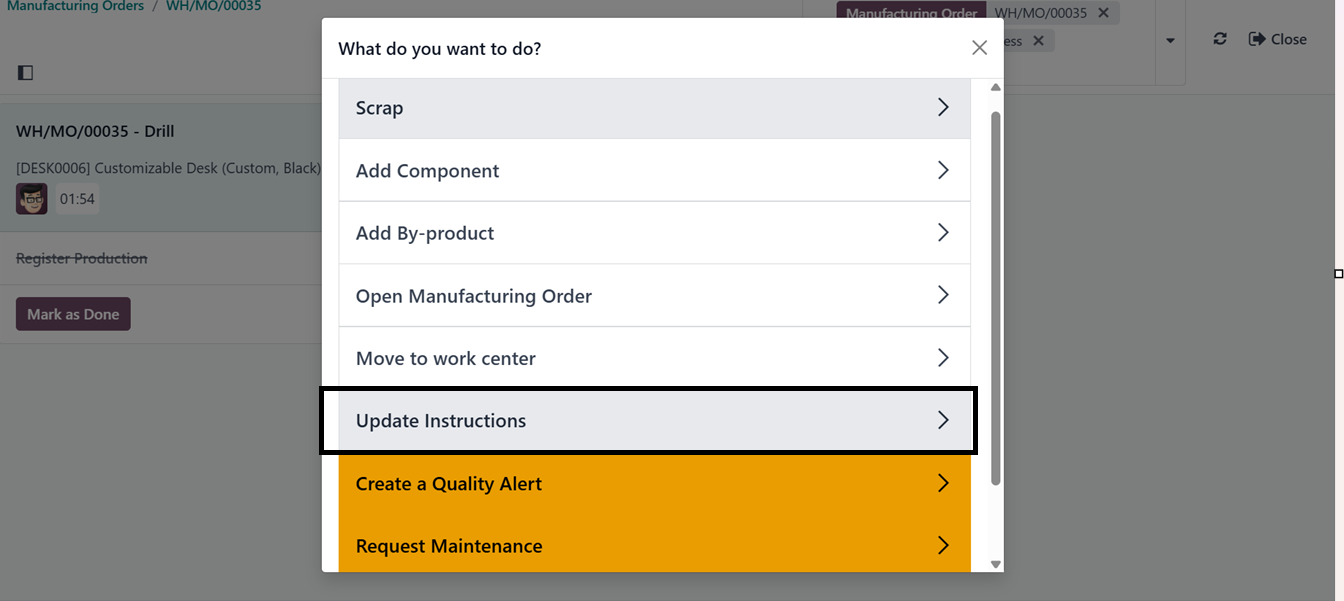
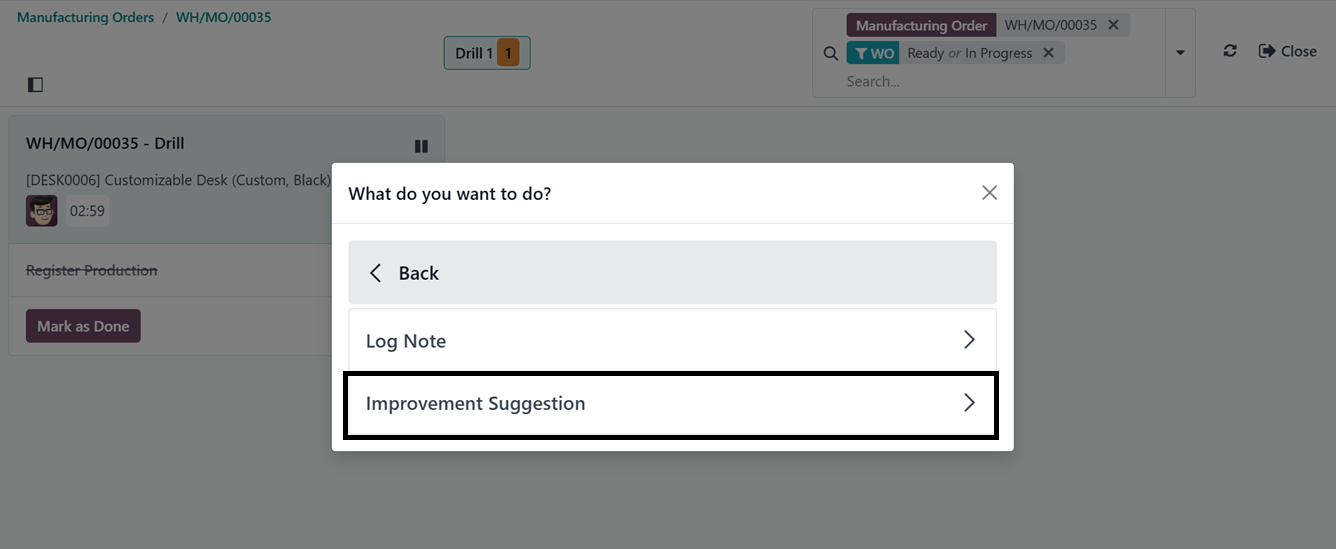
By selecting the ‘Update Instructions’ option, you will get a pop-up
window asking what to do next. Here, you can log messages to the
work order team using the Log Note feature or go with the
Improvement Suggestion button to proceed.
Then, you will get an ‘Add a Step option, users can introduce new
workflow steps using this feature.
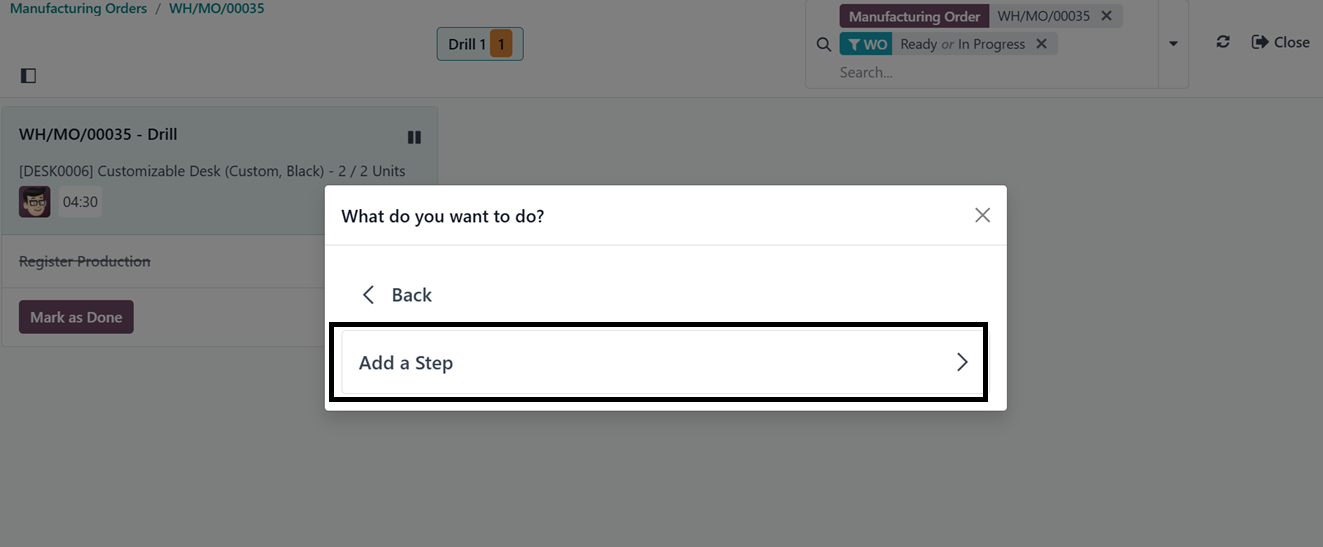
The ‘Add a Step’ button will open another pop-up with the options to
mention the Test Type, Title, Instruction along with the Upload file
facility.
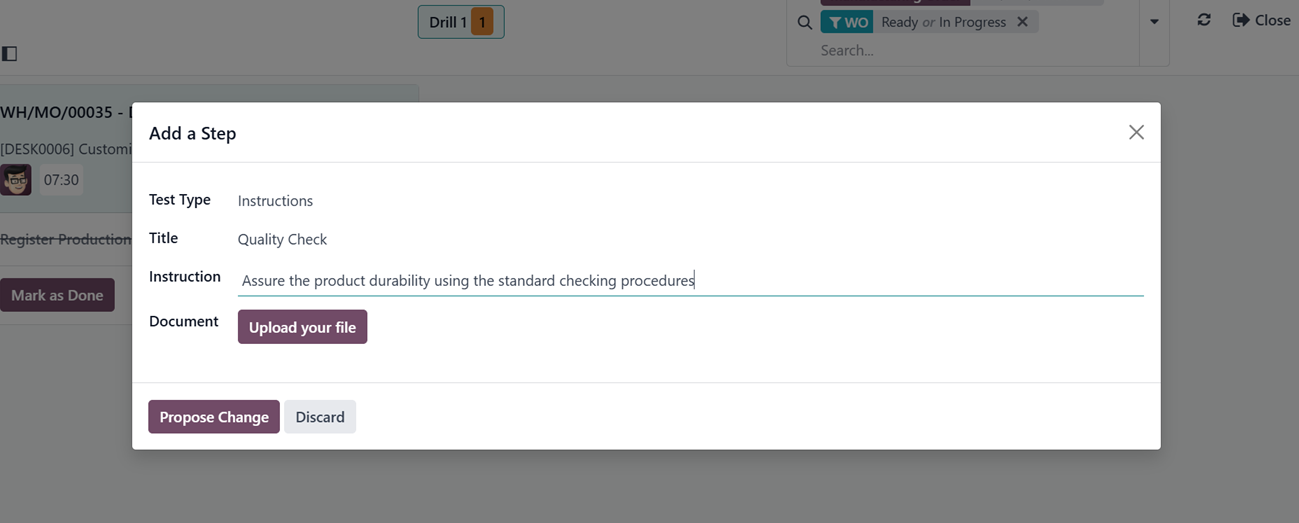
Clicking the Proposed Change button automatically creates a new ECO
in the PLM module.
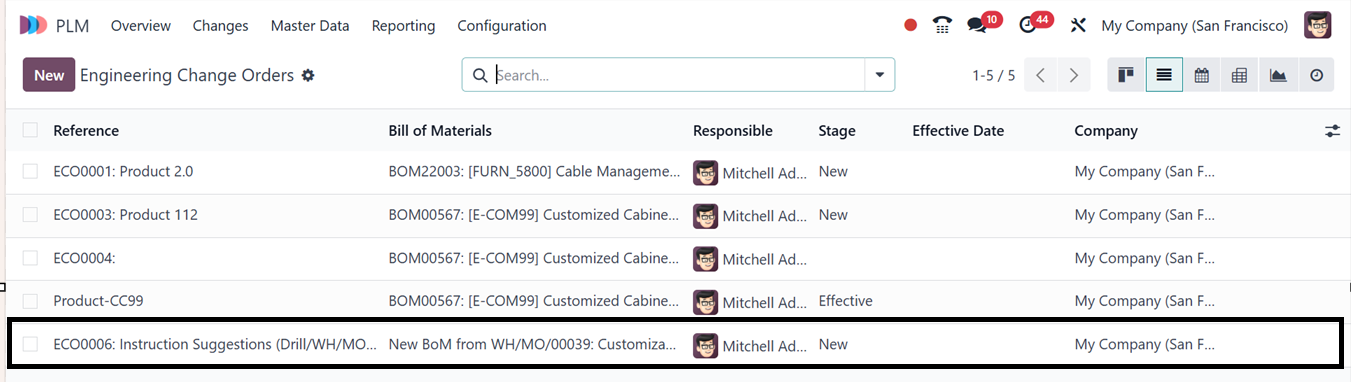
Once the order is approved, the responsible employee can review and
implement the necessary adjustments.