6. Configuring a new Point of
Sales Shop
You can modify the parameters of any Point of Sale (PoS) by selecting
the "Settings" option under the Configuration menu. To adjust a
specific PoS shop or restaurant, choose it from the "Point of Sale"
field. If you want to create a new shop, click the "+New Shop"
button.
Inside the displayed window, edit the shop name in the ‘Point of
Sale’ editing field and activate the ‘Is a Bar/Restaurant’ button,
if it is a restaurant session. Here, we are going to configure a
normal point of sale shop session.

After saving the point of sale session details, save the shop using
the ‘Save’ icon of the point of sale’s Settings window. This will
enable all the settings options related to a shop in the
configuration settings window as shown in the screenshot below.
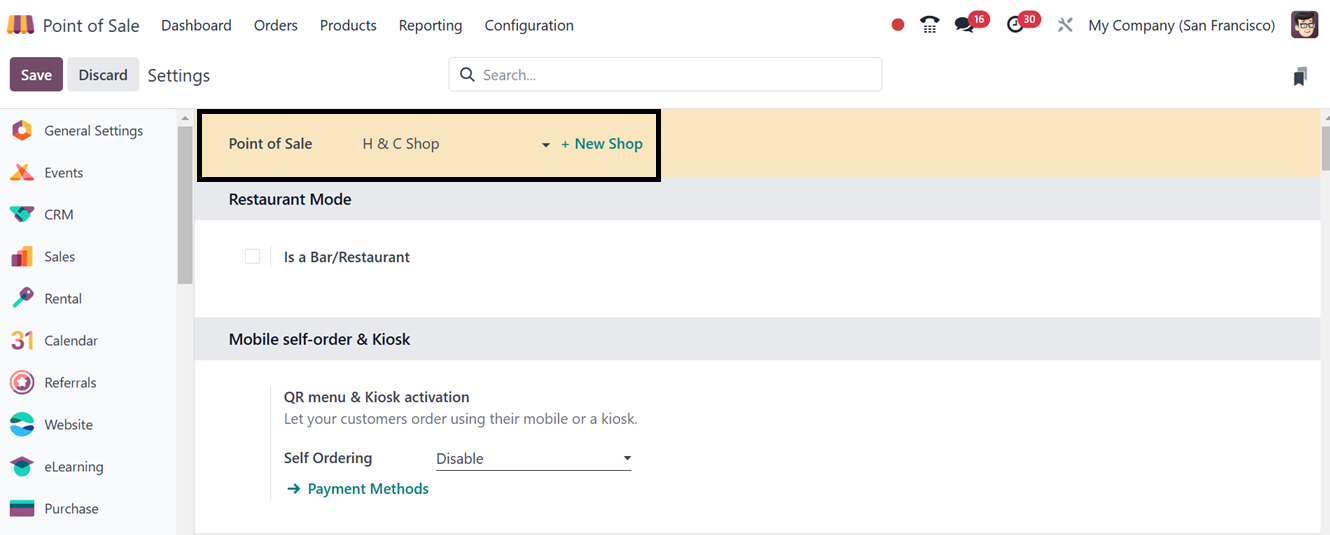
Odoo's Point of Sale module features Mobile Self-Order & Kiosk
settings, allowing businesses to configure self-service options for
customers. This is beneficial in restaurants and retail stores. The
kiosk mode transforms a device into a self-service terminal,
simplifying navigation and ordering. Mobile self-ordering allows
customers to access the ordering system through a QR code, providing
a convenient and contactless ordering experience.
After configuring all the shop settings, you can see the new shop
session is added in the Point of Sale dashboard as shown below.
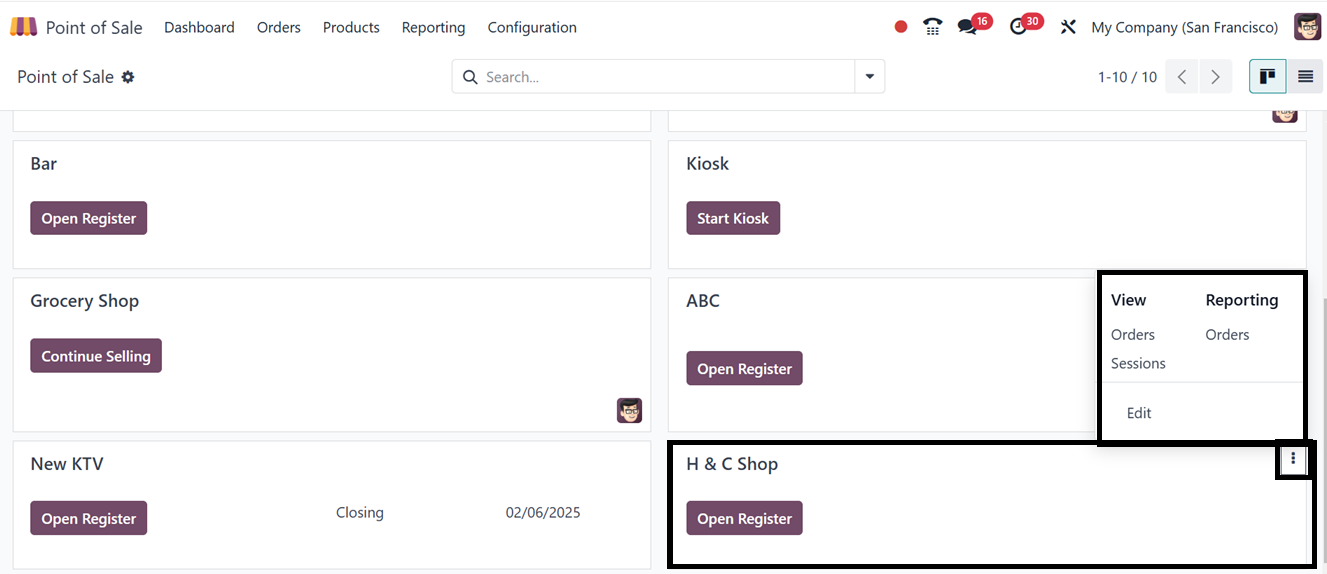
From the three dotted menu of the point of sale’s kanban view, you
can edit or manage the required settings using the ‘Edit’ button.
The ‘Orders,’ and ‘Sessions’ in the ‘View’ section can be used to
manage all the orders and sessions of this particular shop session.
The ‘Orders’ in the ‘Reporting’ area can be used to analyze all the
orders to get a quick overview of your product sales.
The ‘Open Register’ button in a Point of Sale acts as a starting
point of a sales session. Clicking on this button starts a new
session, expediting the sales process and giving cashiers the
ability to efficiently monitor transactions. In the displayed
Opening control window,you have to provide an ‘Opening cash’ and
‘Opening note’ according to the shop’s cash register.
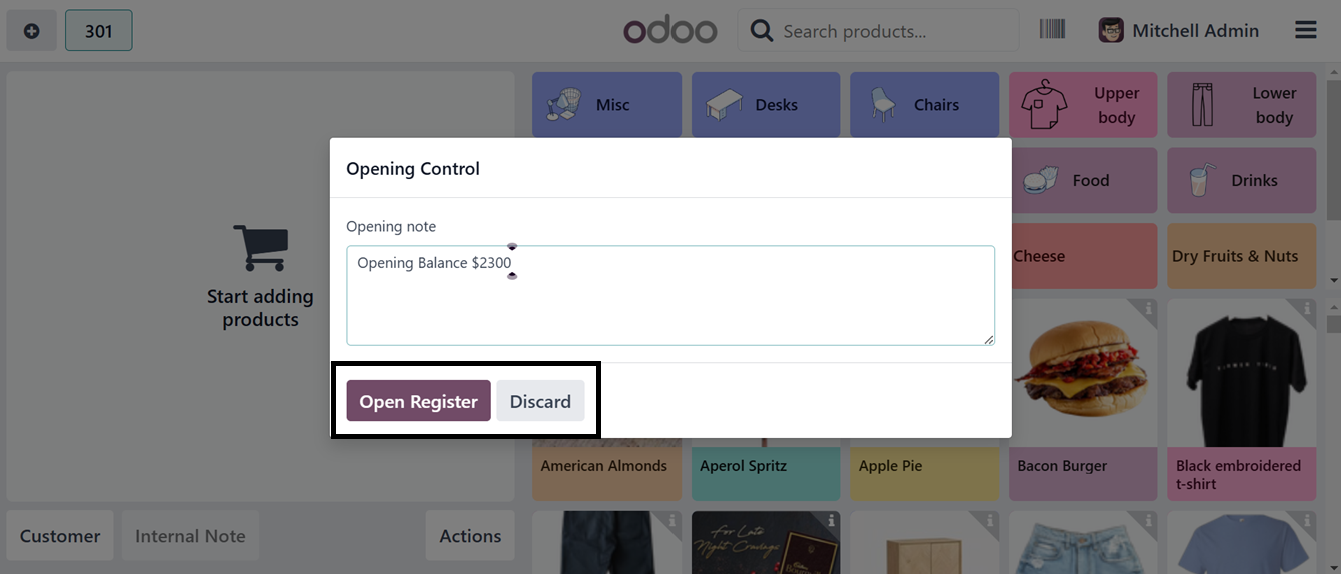
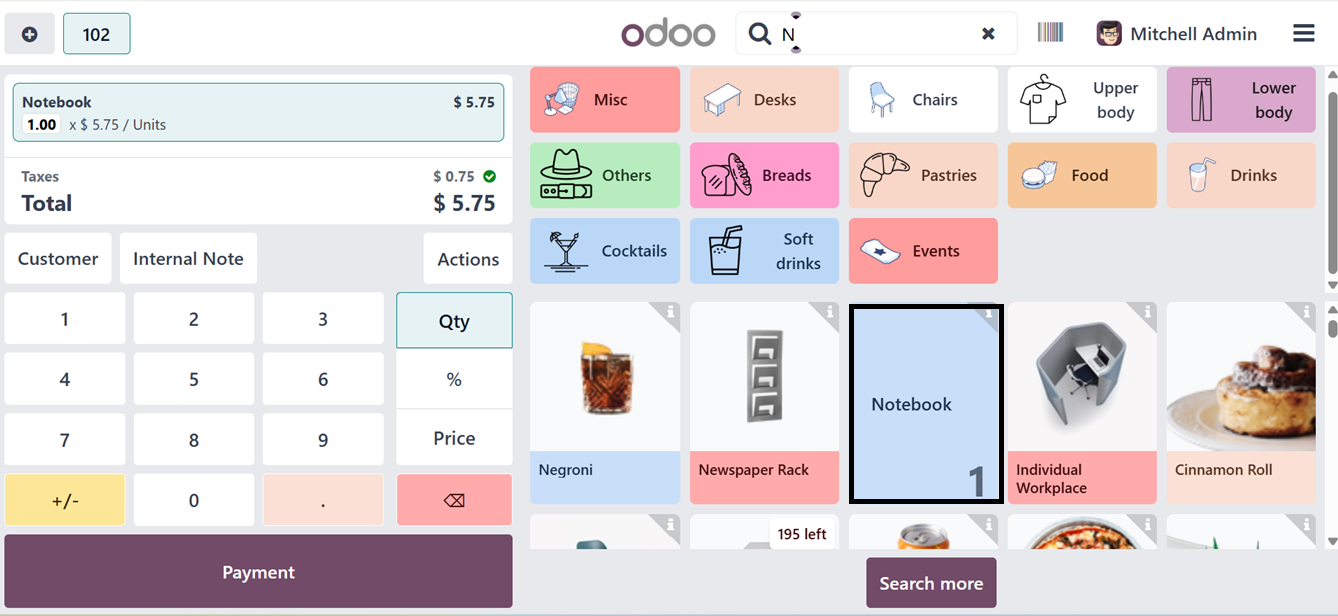
Click on the ‘Open Register’ button to proceed. This will lead you to
the point of sale terminal as illustrated in the screenshot below.
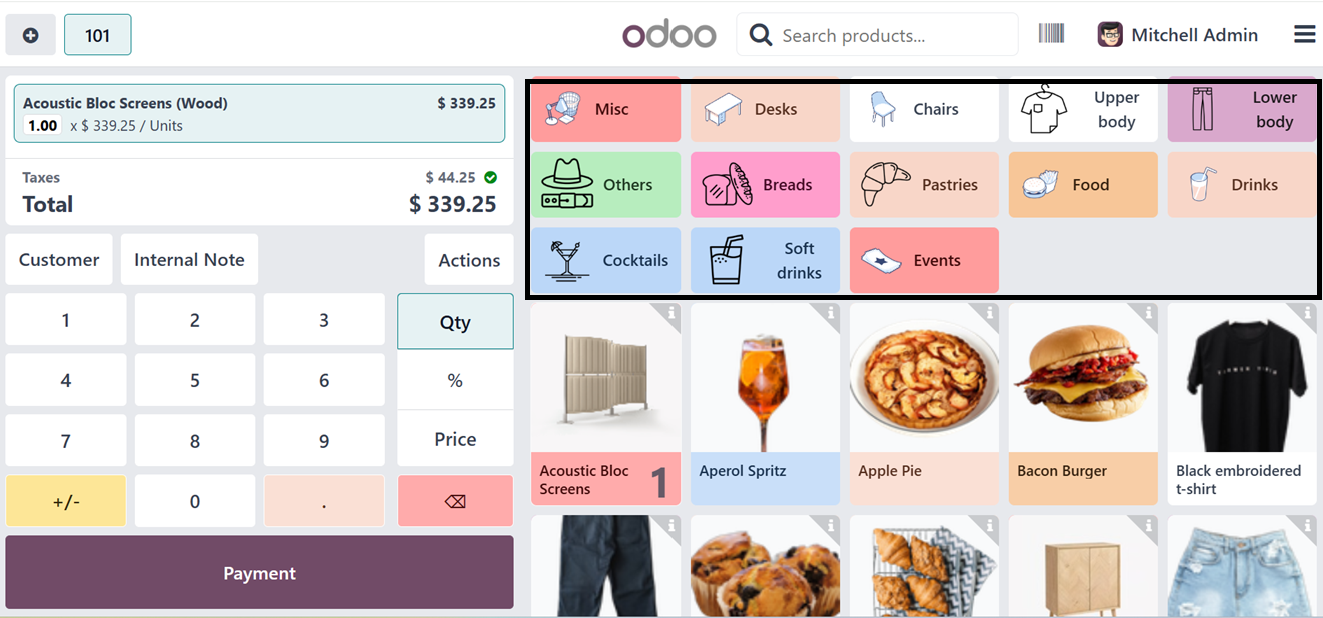
You can see the various product categories from the top part of the
window. To restrict and customize relevant product categories for
this shop, you can activate the ‘Restrict Categories’ option from
the Configuration Settings window.
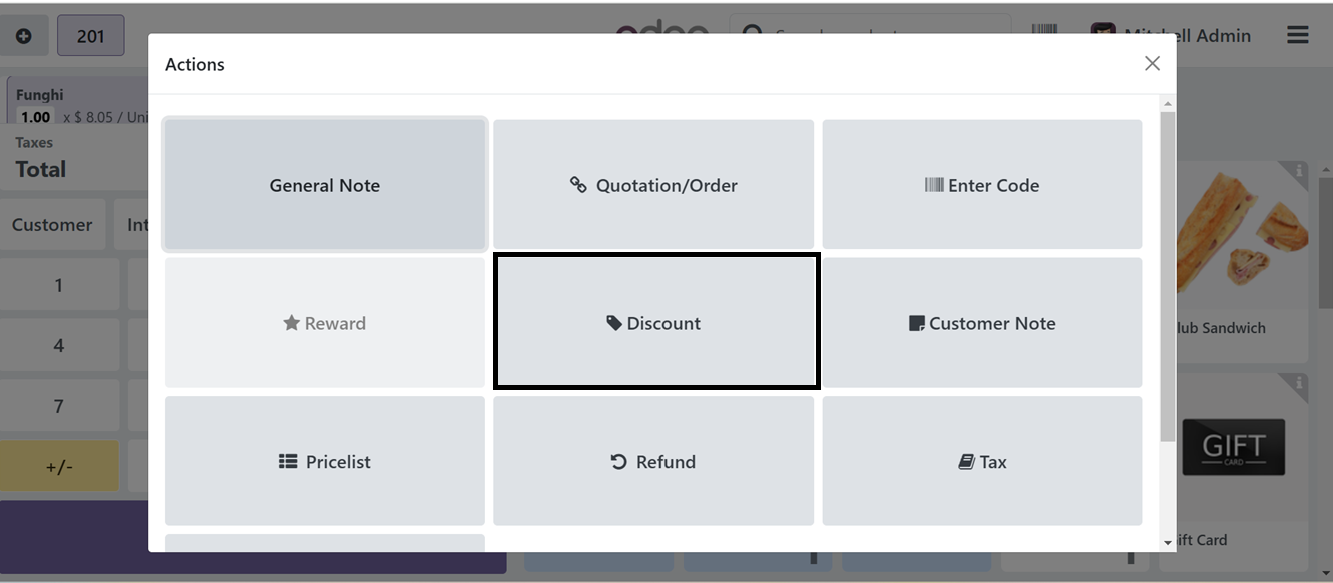
Select desired products from the catalog and add them to your cart.
You can utilize the ‘Action’ button to edit your order and perform
various actions including Applying Coupon codes, Rewards, Discount,
Edit Orders, General Notes, Taxes, Customer Note, Choosing
Pricelists, Refunds etc.
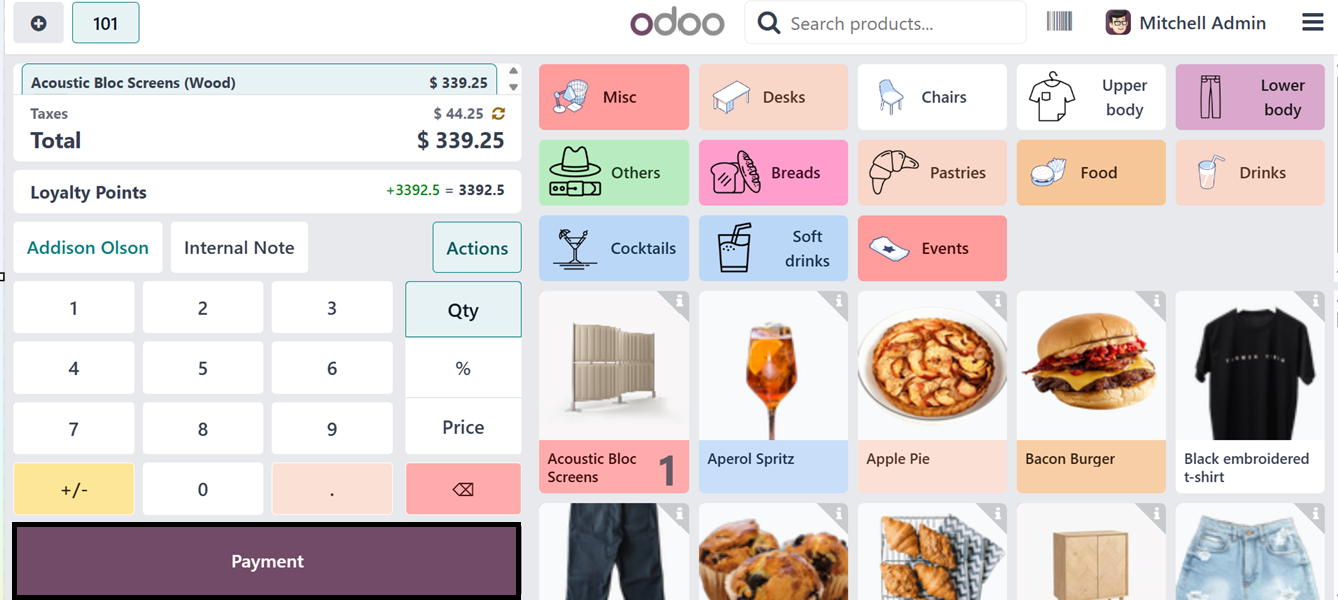
To proceed with the next product order procedures, simply click on
the 'Customer' button from the point of sale terminal. You can add
any notes or messages regarding the order by clicking on the
‘Internal Note’ button. Clicking on the ‘Customer’ button will open
the available customer address list that has been previously saved
in your Point of Sale customer database.
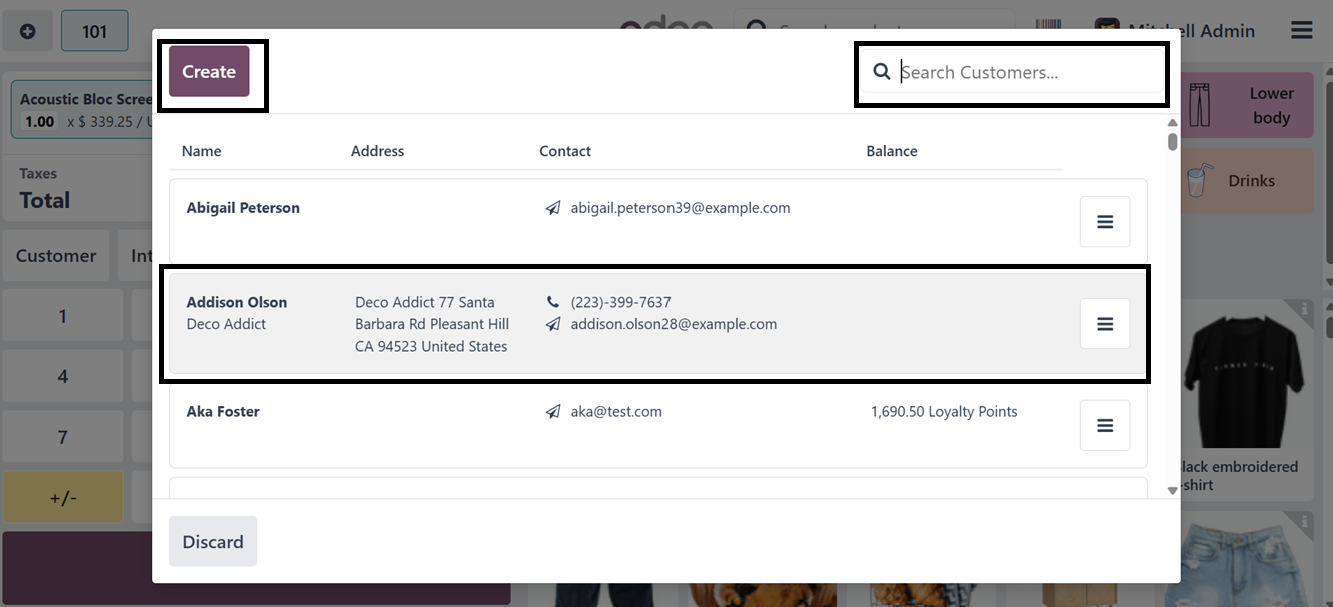
Just click on the relevant customer address to continue the ordering
process. You can search for customer details using the search bar.
Then, if it is a new customer, you can also quickly create a new
customer data using the ‘Create’ button. The selected customer name
will be added to the new order and then, you can click on the
‘Payment’ button to proceed.
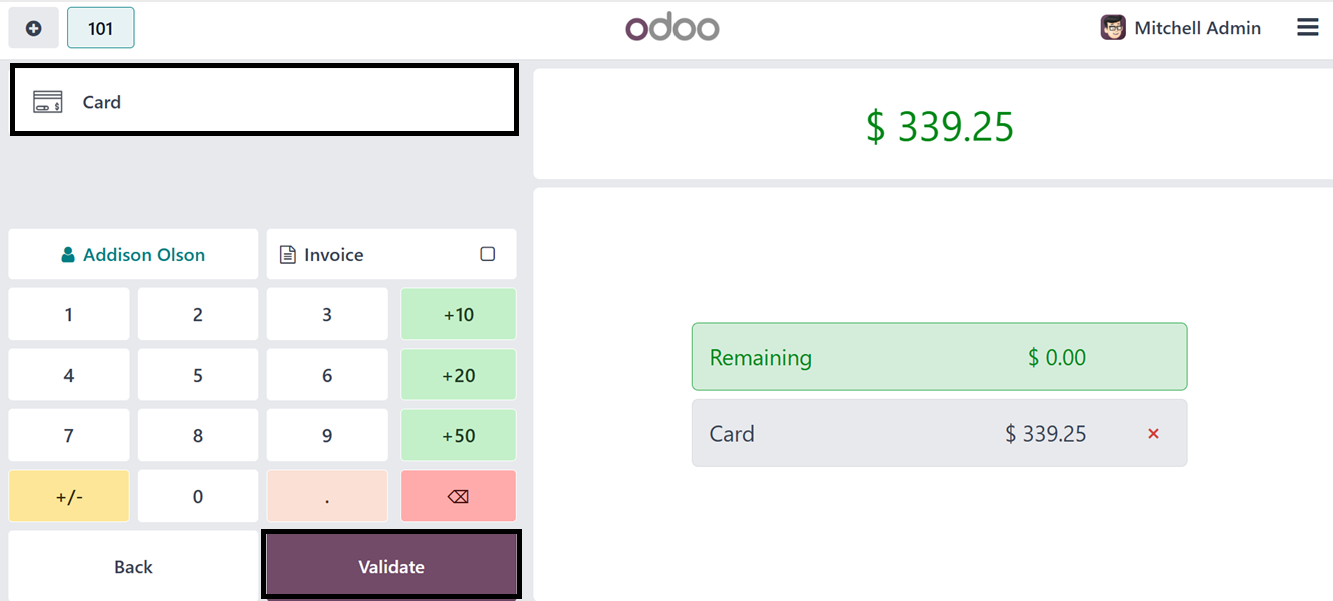
The ‘Payment’ button will open a payment interface, where you have to
choose an appropriate Payment Method. You can see the available
payment methods from the upper left side of the screen. Choose the
payment method and validate the payment using the ‘Validate’ button.
Validating the payment will complete the payment process and you can
see the payment success window with a payment receipt.
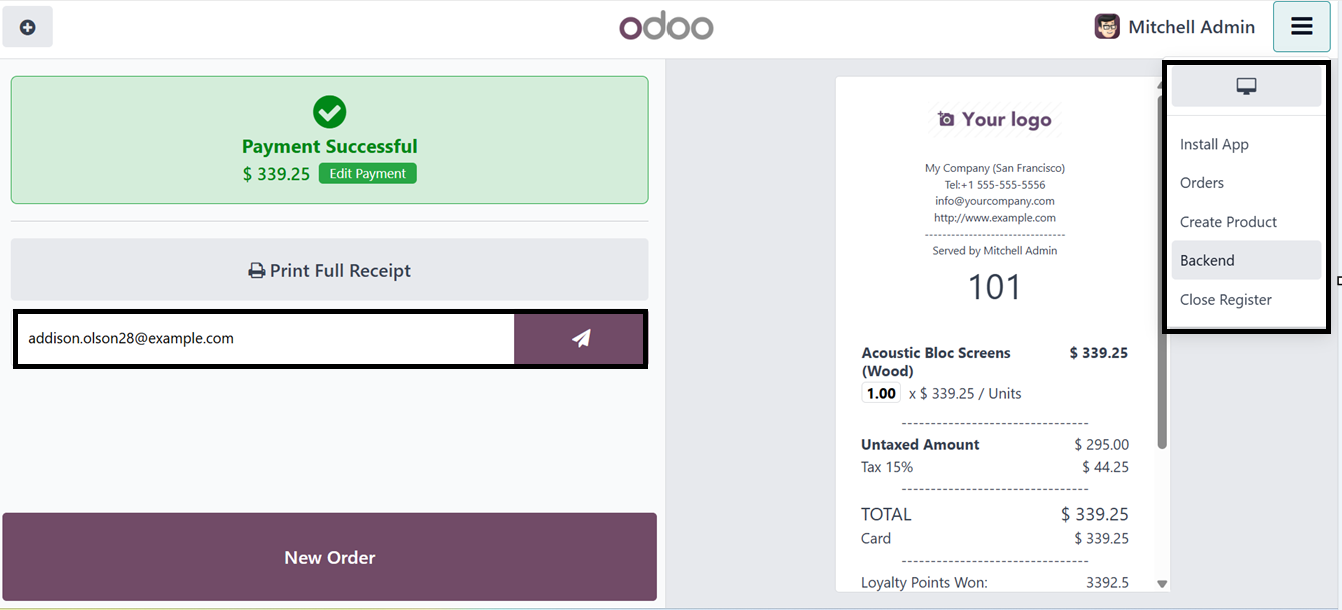
Here, you have the option to’Print Full Receipt,’ send the payment
receipt to the customer mail id and start a ‘New Order.’ Then, you
can Install the point of sale shop application as PWA using the
‘Install App’ option.
The small menu icon provided at the top right corner of the point of
sale terminal will help you to go to the orders history, check the
Cash In/Out details, Create new sales products, Go to the Odoo
application backend and Close the cash register using the designated
menu options available.
7.1 Product Creation from PoS
Interface
To create a product directly from the Point of Sale interface, just
click on the ‘Create Product’ button from the PoS Terminal menu.
This will open a new product configuration form as a pop-up window
as shown below.

In the displayed window, input the Product Name, Barcode, Sales
Price, and applicable Sales Taxes. You may also add an image by
selecting the 'Edit' image button. To monitor product availability
based on quantity, enable the 'Track Inventory' option. Specify the
'Website Category' to which the product belongs on the Point of Sale
website, and select the appropriate 'POS Category' for the product
within the Point of Sale sales terminal.
After saving the new product details, it will create the new product
database and added to the product catalog of the point of sale
session as shown in the screenshot below.
7.2 Cash In/Out
The ‘Cash In/Out’ feature in the Odoo Point of Sale module enables
businesses to manage cash transactions outside sales. This feature
enables recording cash in, such as starting balances or deposits,
and out, for payouts, refunds, or transfers. It also maintains a
detailed audit trail to ensure accountability and transparency in
cash management to ensure accurate tracking, accountability,
transparency, and efficient cash operations management.
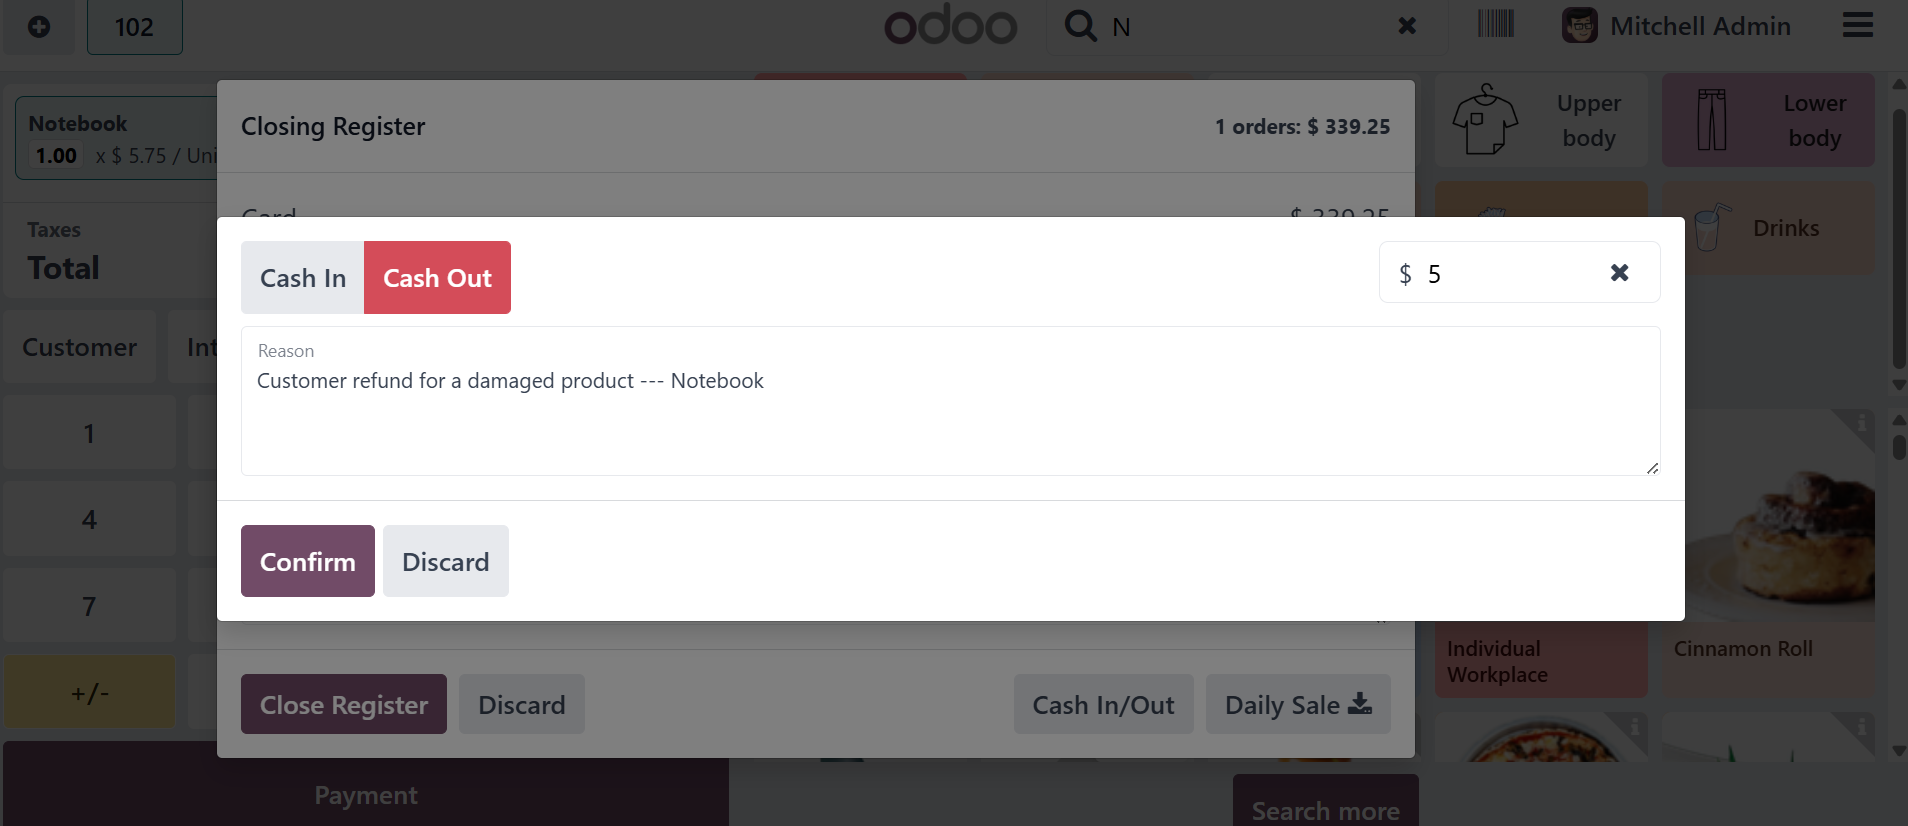
To record cash transactions, click on the ‘Cash In/Out’ button and
select the appropriate transaction type, either Cash In or Cash Out,
by toggling the button. Then, enter the reason and amount in the
fields provided at the upper right corner of the pop-up window, as
shown in the screenshot below.
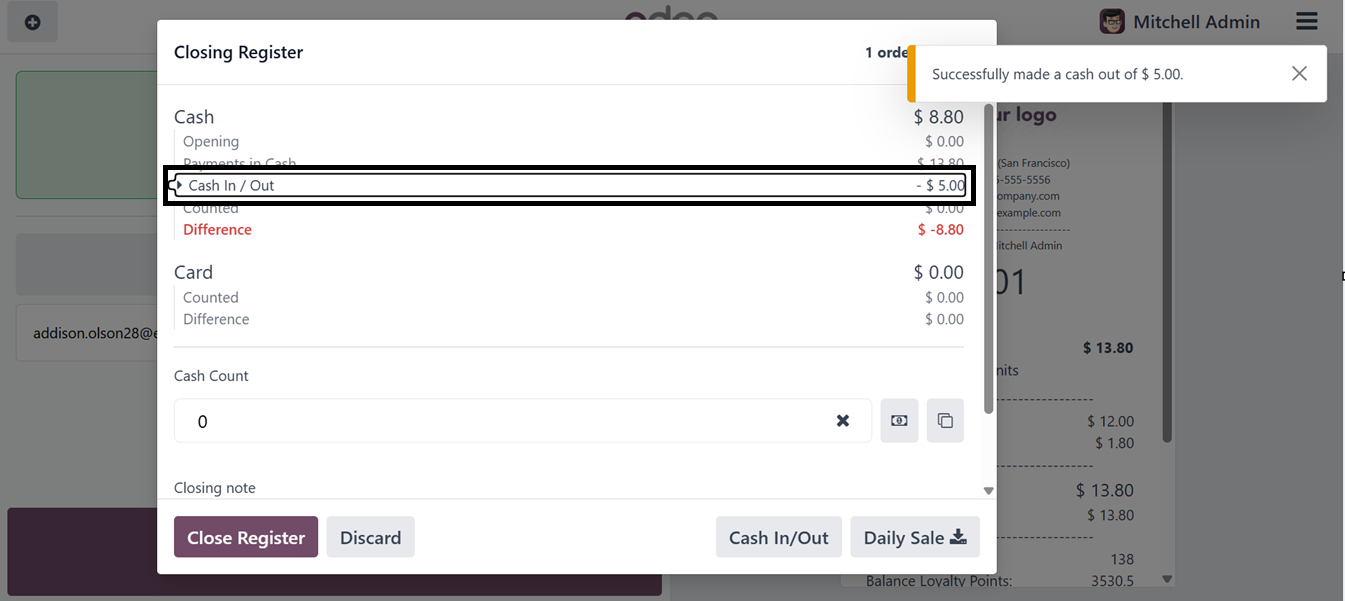
After confirming the details by clicking the ‘Confirm’ button, you
will receive a notification regarding the transaction. The new ‘Cash
Out’ transaction data will be recorded in the daily cash register of
the Point of Sale session. This record can be accessed when closing
the cash register at the end of the shop session, as depicted in the
screenshot below.
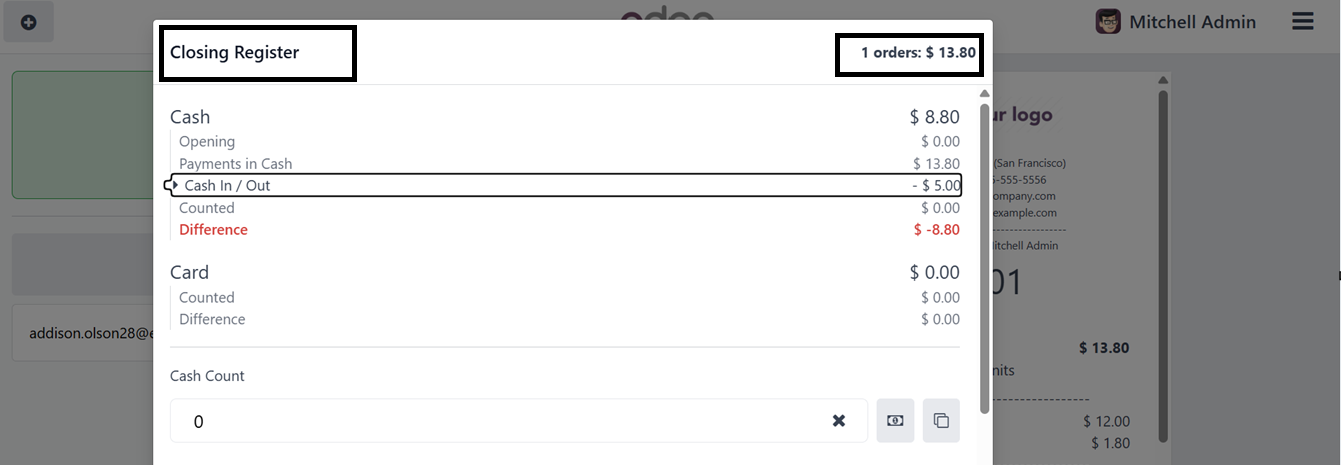
7.3 Closing a Cash Register
After completing all the sales orders of a day, you can close the
shop session and cash register using the ‘Close Register’ button.
This will generate the Closing Register with all the details of
point of sale orders including the total number of orders, Total
amount for the day, Payments in Cash, Card and all the available
payment methods and Cash Count, Opening note. Then you can also edit
a Closing note, as illustrated in the screenshot below.
Clicking on the ‘Daily Sale’ button will download the sales report
for this particular day. Then, click on the ‘Close Register’ button
to close the sales session. This will open another dialogue box
containing the Payments Difference notification.
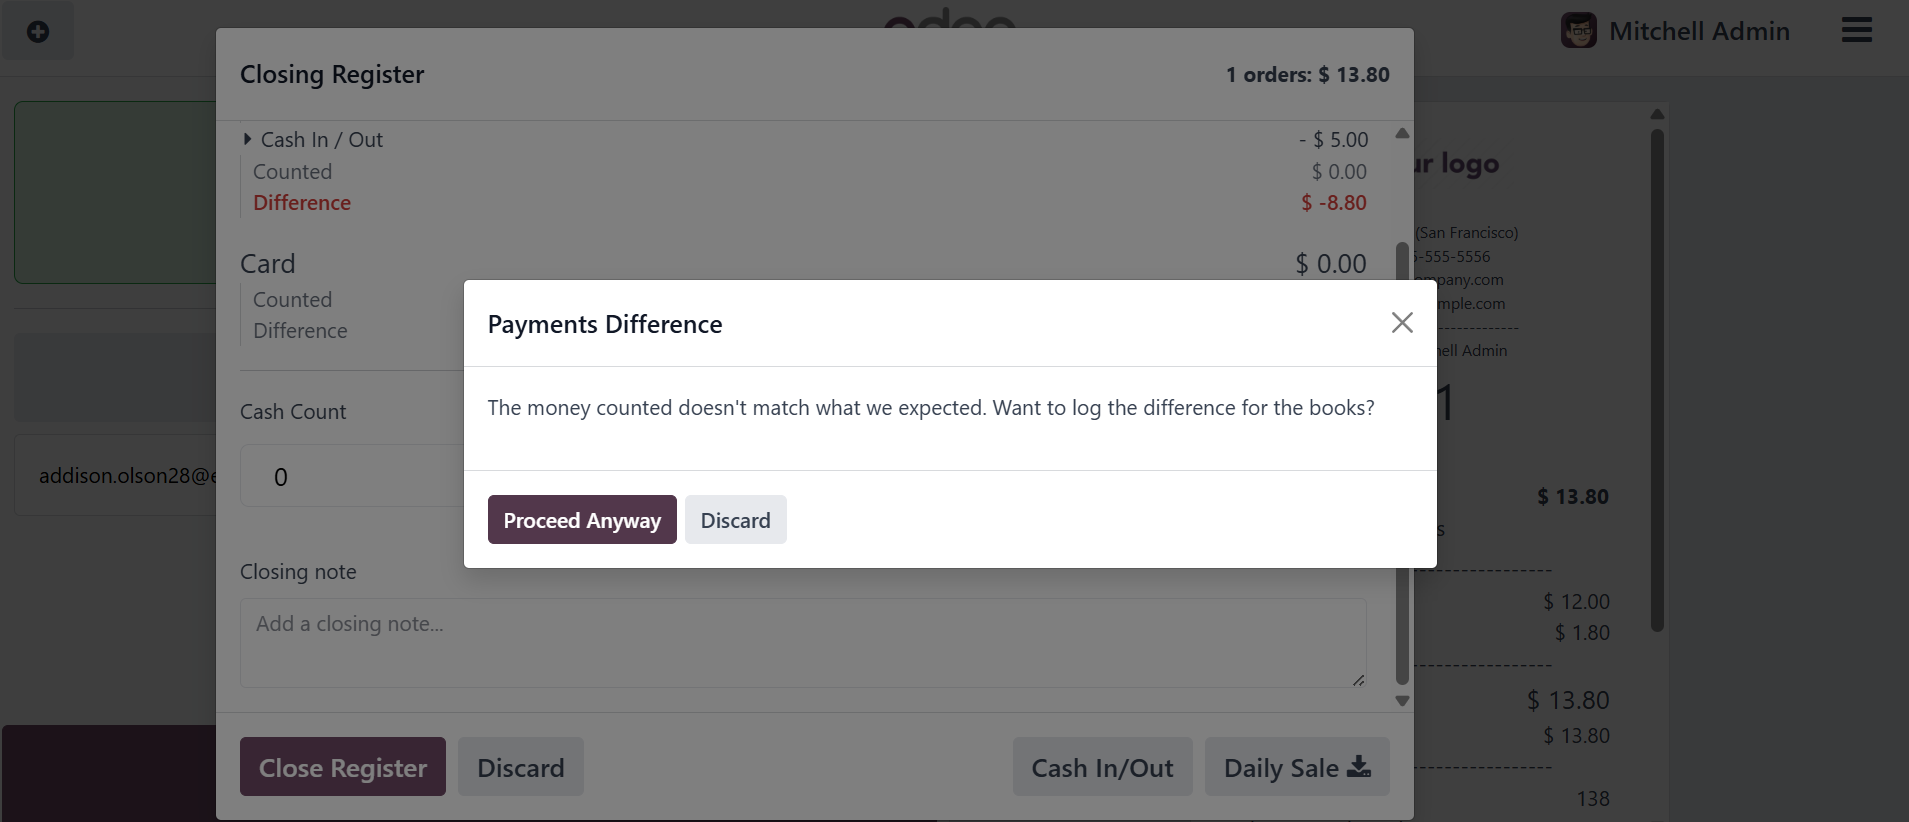
Then, proceed to close the register by clicking the 'Proceed Anyway'
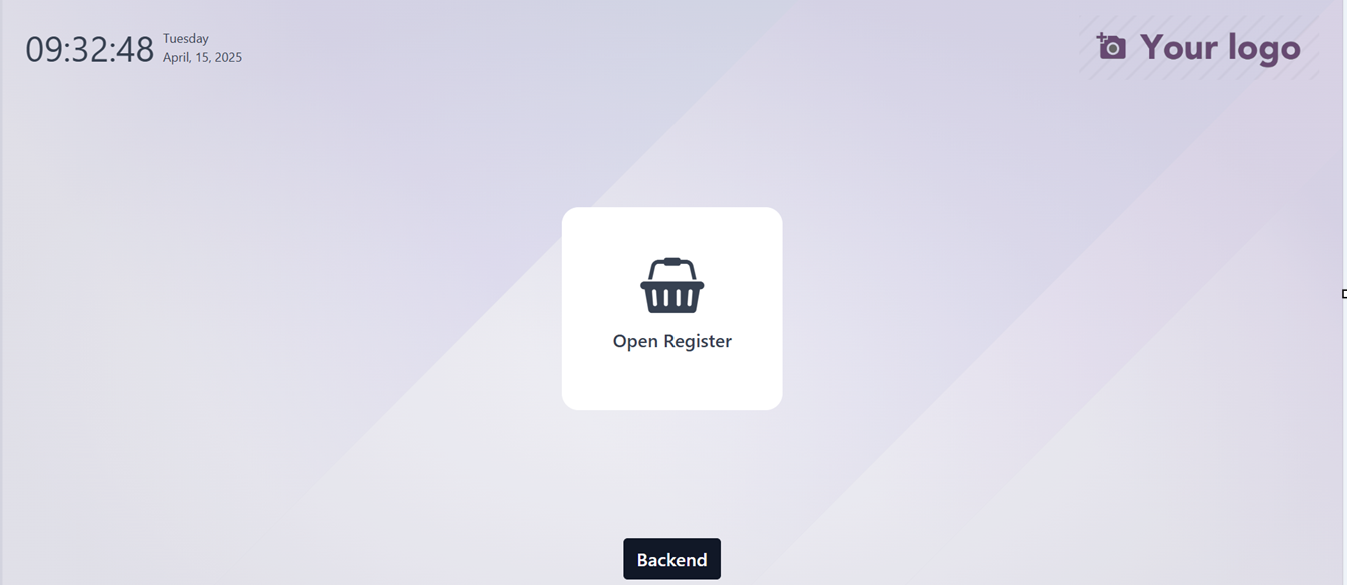
button. Finally, the session will be closed, and you will return to
the Point of Sale opening terminal, where you can either open a new
cash register or navigate to the Odoo backend using the 'Backend'
button.
Similar to a typical store experience, the Odoo point of sale
application makes order administration, cash movement tracking, and
payment processing smooth. Configuring payment methods, turning on
sophisticated features, or connecting with other Odoo modules for
improved functionality are examples of customization choices.
Let's now examine how the Odoo Point of Sale module functions during
a restaurant shop session. This includes tools made especially for
effectively managing restaurant workflows.