7. Restaurant Management
Through the integration of table service, culinary processes,
inventory control, and customer interaction capabilities, the Odoo
18 Point of Sale (PoS) Module provides a complete solution for
restaurant and bar administration. Features like kitchen displays,
real-time communication, inventory automation, and CRM connection
increase operational efficiency, improve customer satisfaction, and
increase profitability.
You must first develop a flexible product menu that facilitates
ingredient monitoring, personalization, and smooth kitchen
coordination before opening a new restaurant or bar. The Products
menu may be used for this arrangement, which enables simple
classification and inventory-linked automated purchases.
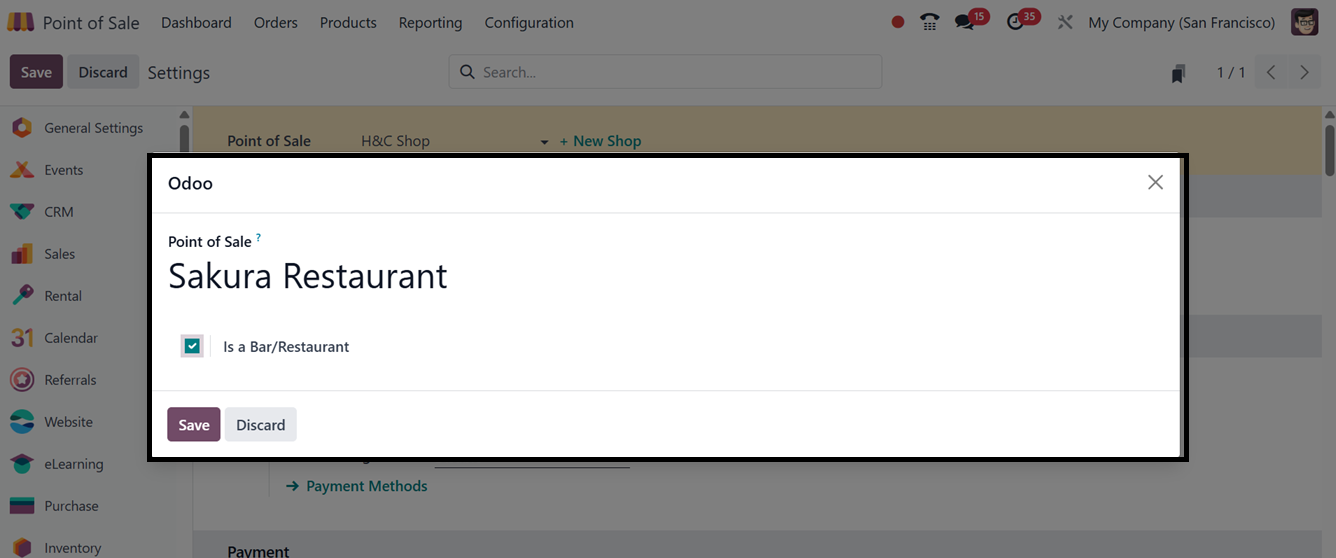
To create a new restaurant, navigate to the Settings tab under the
Configuration menu in the PoS module. From there, either select an
existing session or click +New Shop to create a new one. In the
pop-up window, enter the restaurant name, enable the Is a
Bar/Restaurant option, and save the setup using the Save button, as
shown in the screenshot below.
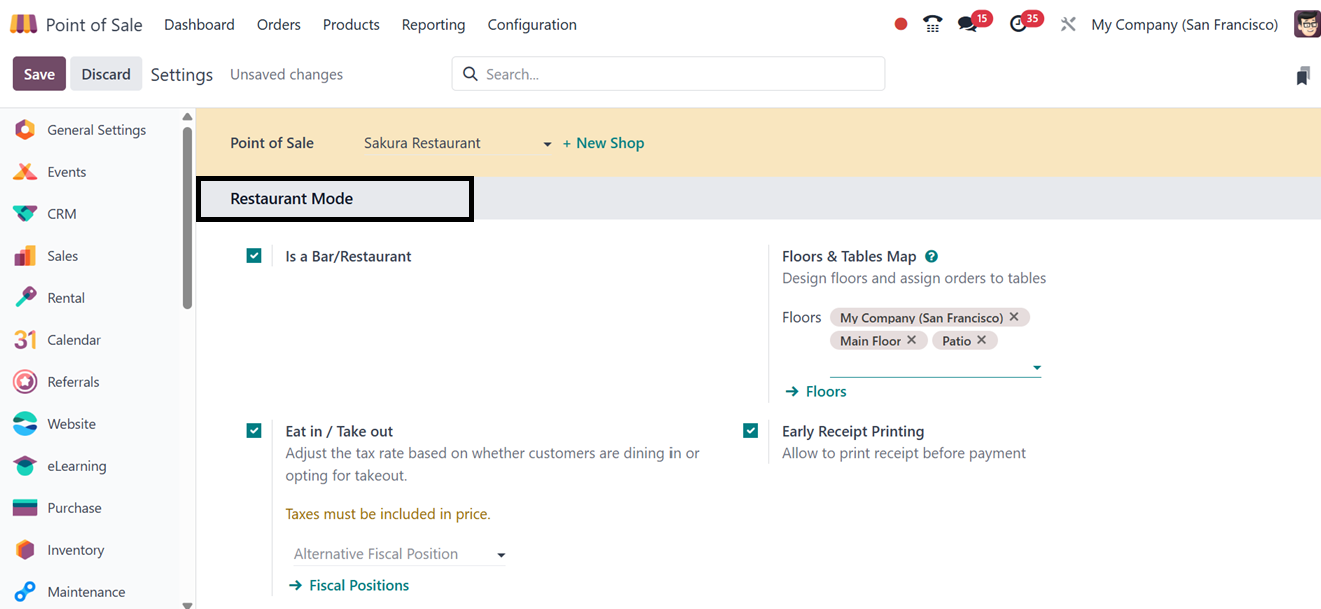
After saving the restaurant, the restaurant-specific options will be
presented in the settings window, along with the regular Point of
Sale settings. To launch a new restaurant configuration, you may
specify crucial restaurant features accessible under the 'Restaurant
Mode' and 'Mobile Self-Order & Kiosk' settings pages. As covered in
a previous part of this book, the remaining configuration options
are identical to those described in the Point of Sale settings.
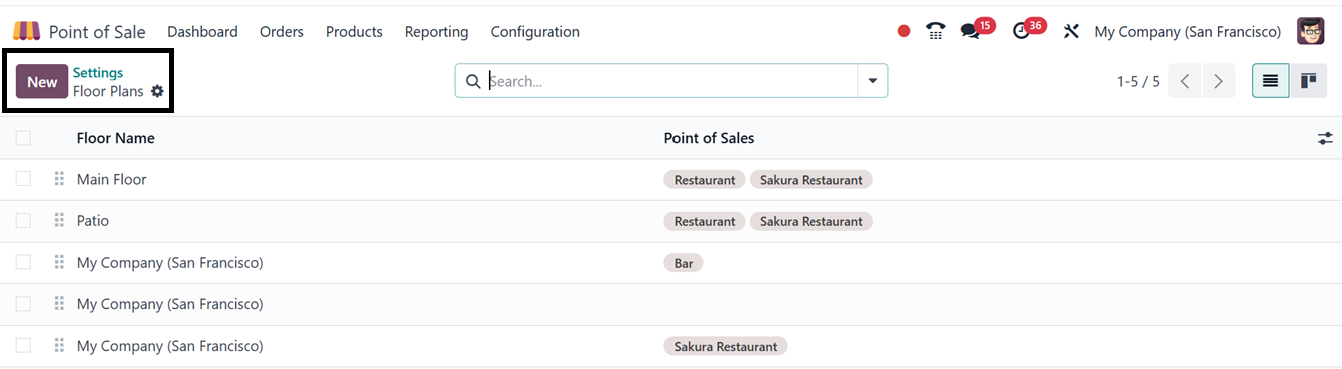
8.1 Floors & Tables Map Settings
The Floor Plans feature in the Configuration menu lets users set up
several floor plans. Clicking the ‘New’ button option allows you to
build a new floor plan. The screen shows a list of current layouts
with floor titles and points of sale.
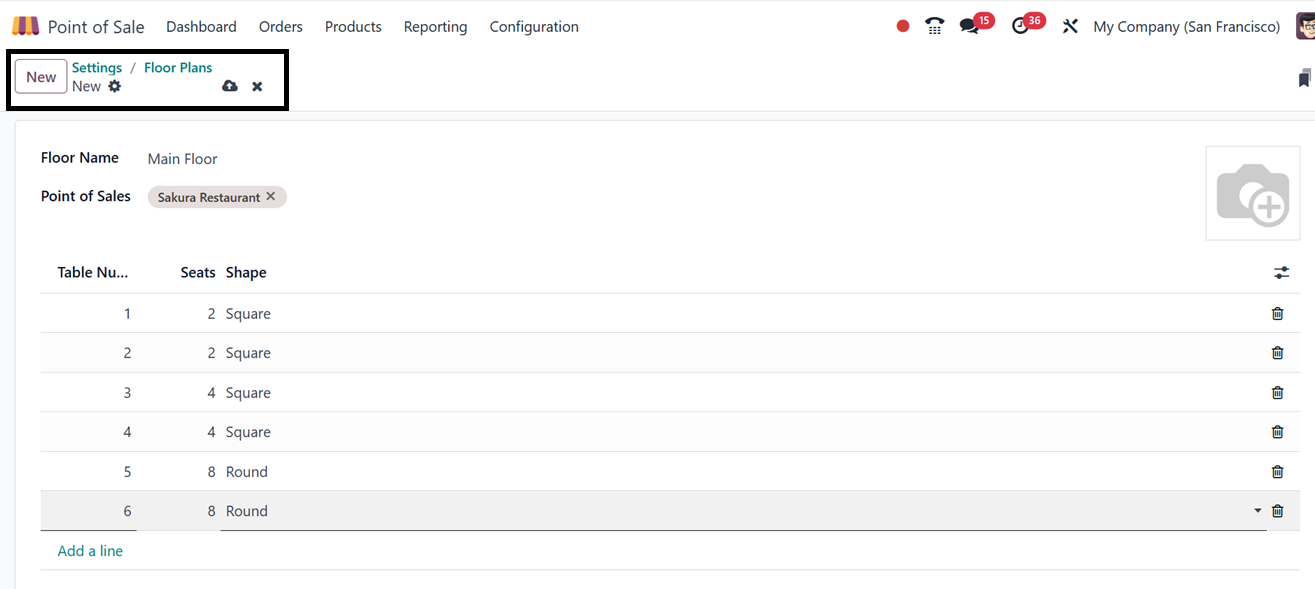
On the floor plan creation page, enter the Point of Sale and floor
plan name in the Floor Name field. You can then add tables by
clicking Add a line, assigning table numbers and seating
configurations as needed. Once the layout is complete, click Save to
store the floor plan.
This customized floor plan will now be available within your PoS
session, allowing you to select tables during order placement, as
shown in the screenshot.
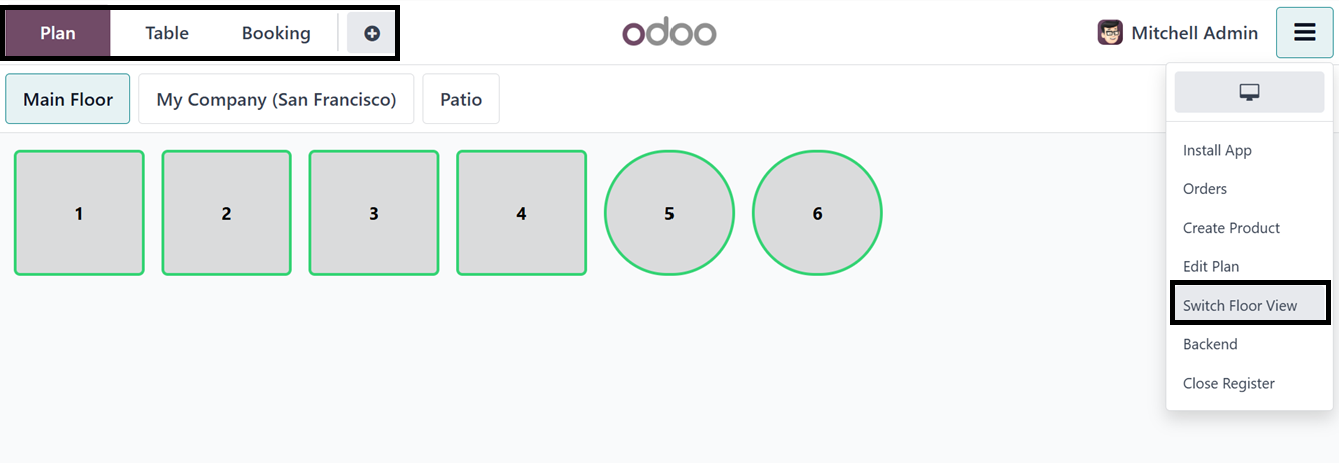
You can easily switch between different floor layouts using the
Switch Floor View button in the PoS terminal.
8.2 Eat-in or Take-out
The Eat-in or Take-out option in Odoo 18’s Point of Sale module helps
distinguish between dine-in and takeaway orders. It allows staff to
set order types, apply different pricing rules, and streamline
service operations. This distinction also enhances reporting
accuracy and supports tailored customer experiences.
Additionally, fiscal positions can be configured based on the order
type, enabling businesses to apply different tax rates for dine-in
and take-out transactions according to their policies. To explore
this feature, start a restaurant PoS session, create a new order,
and click the Action button to select between Eat-in or Take-out, as
shown in the screenshot.
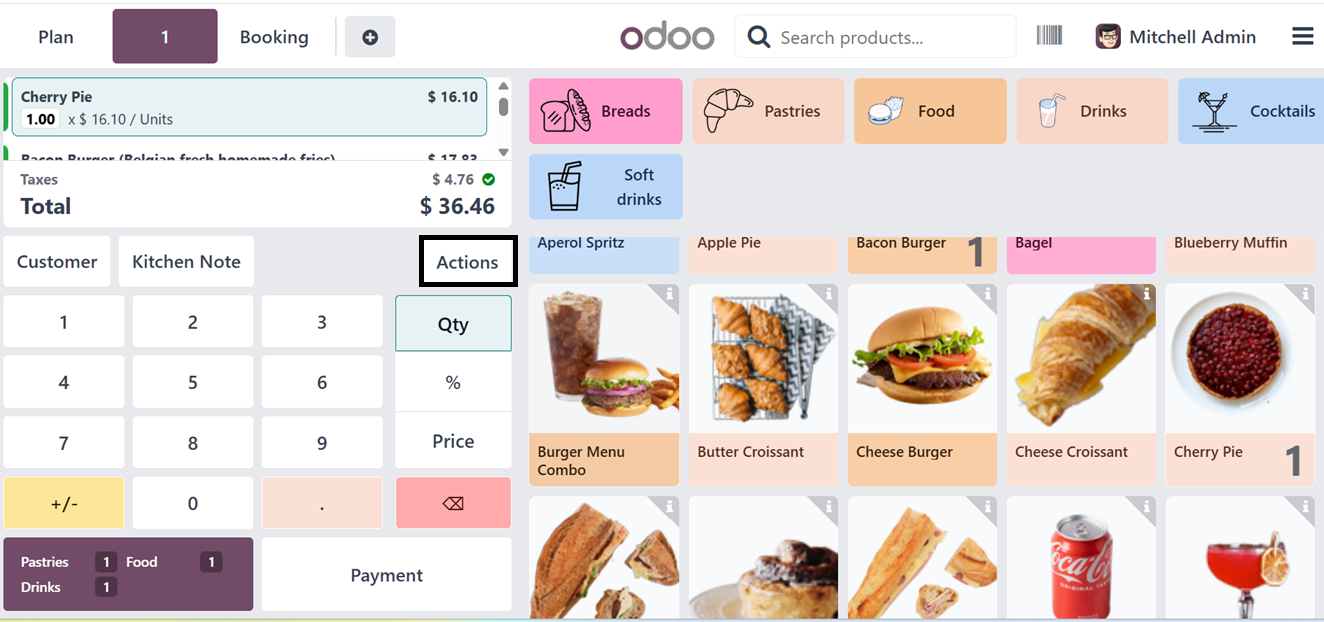
In the Point of Sale interface, several action buttons are available,
such as Split, Transfer/Merge, Pricelist, Refund, and Cancel Order,
as displayed in the screenshot below.
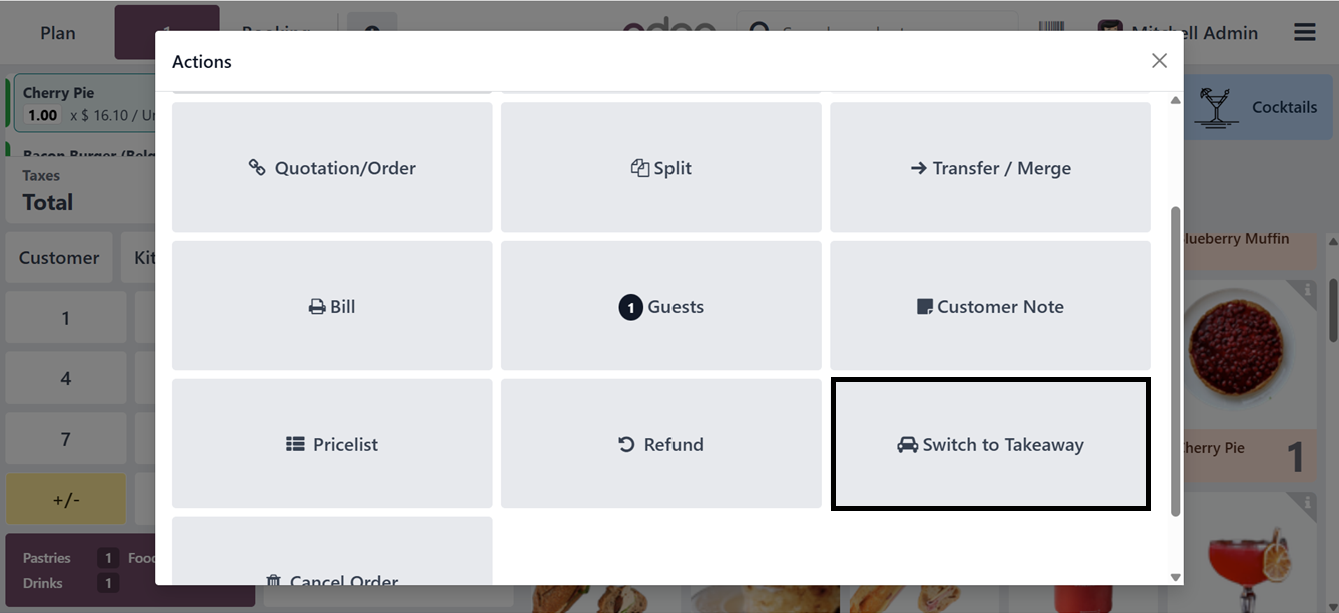
Selecting the Switch to Takeaway option will categorize the current
order as a takeout. Once this is done, you can continue with the
usual process of finalizing the order and selecting the appropriate
payment method.
The Early Receipt Printing feature in Odoo’s PoS settings enables
printing the receipt before the payment is completed. This helps
improve the customer experience, supports faster service, and
enhances transaction accuracy.
8.3 Allow Bill Splitting
The Allow Bill Splitting feature in Odoo's PoS module is especially
beneficial for restaurants and bars. It allows the total bill to be
divided into separate payments, making it easier to handle group
orders or customers who wish to pay individually. Bills can be split
by items or by customer groups, which streamlines the cashier’s
workflow and offers greater flexibility in handling payments.
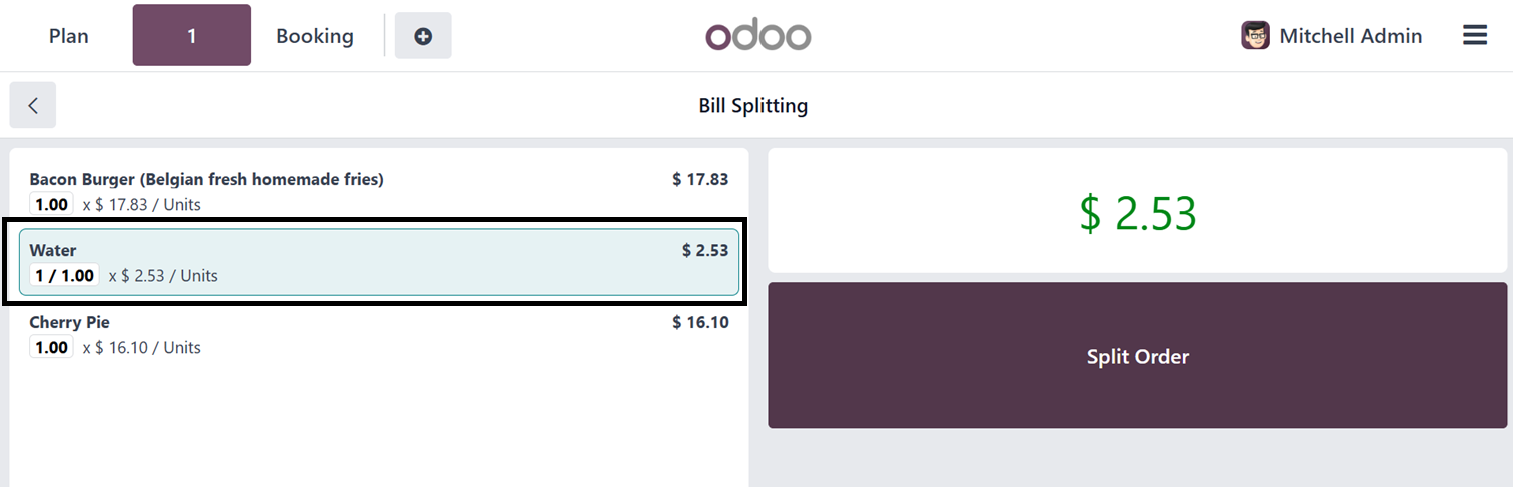
Once this feature is activated, you can test it by launching a new
Restaurant PoS session, selecting products, and clicking the Action
button. This will reveal the Split option. When selected, a new
window opens, allowing you to divide the bill based on selected
products or customers by using the Split Order button. In this case,
a specific product was selected before applying the split.
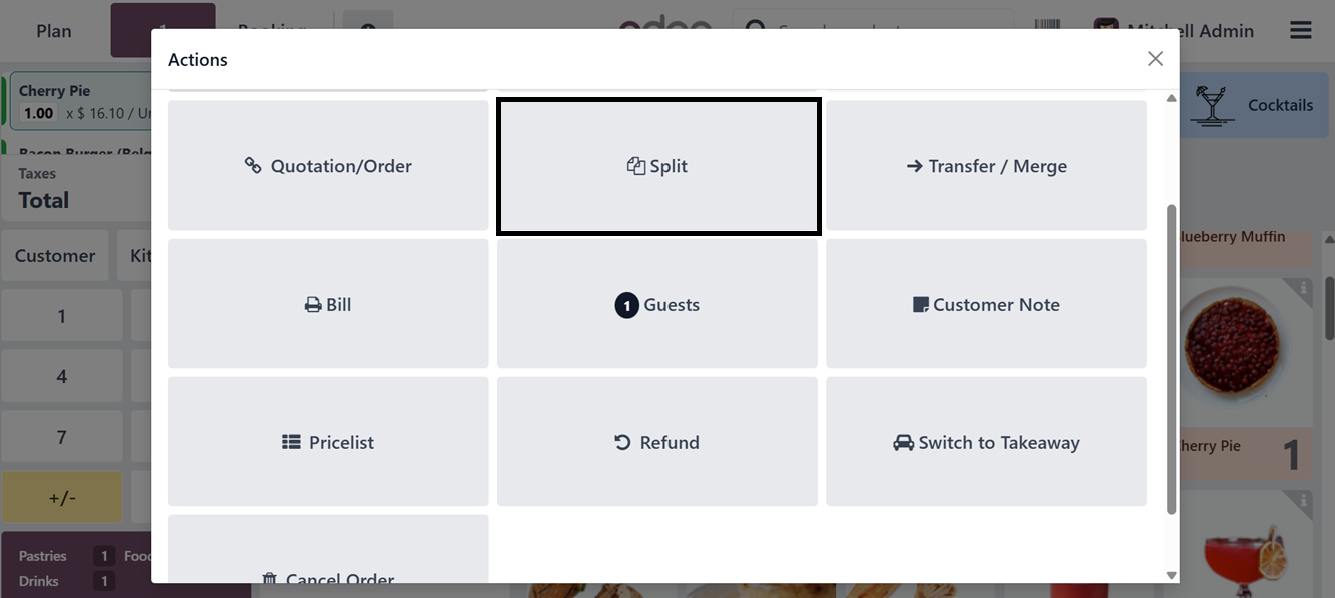
The ‘Split’ button will open another window, where you can split the
order amounts based on products or customers using the ‘Split Order’
button. So, here, I have chosen a product and chosen the ‘Split
Order’ button.
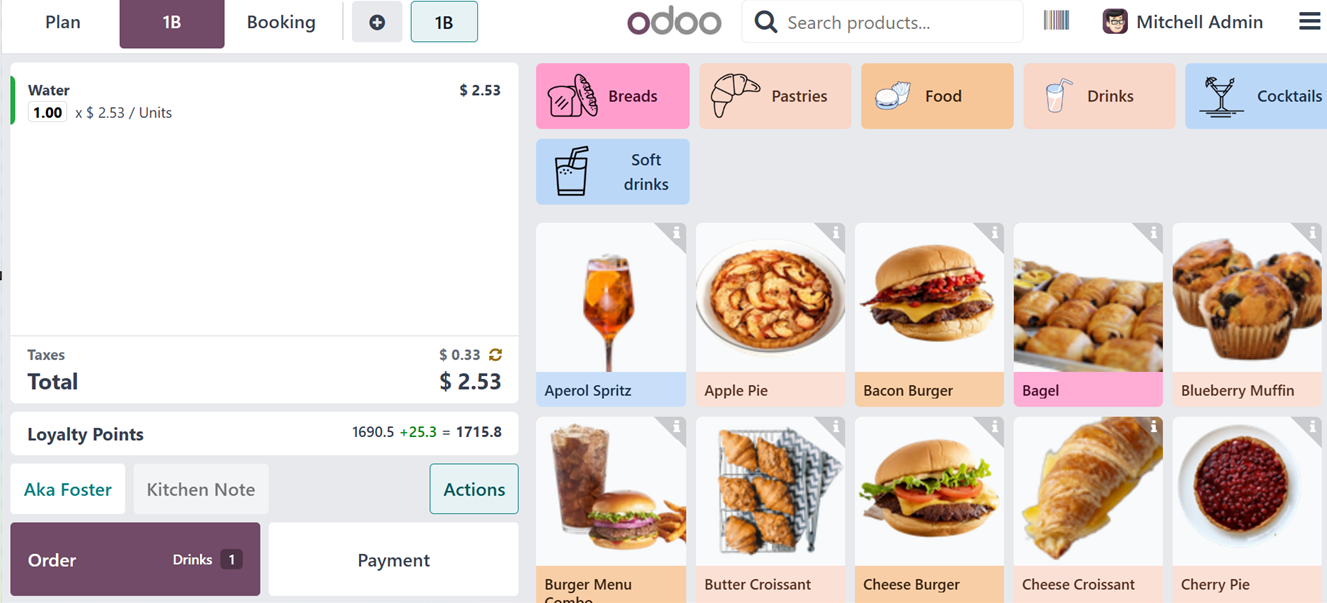
Then, we can assign the bill of this particular product to a customer
as usual by selecting the ‘Order’ button.
The order will then be assigned to the specified customer, and the
payment process will proceed accordingly. Upon validation, the
payment for the selected product will be recorded as received from
the customer, and the bill will be generated, as demonstrated in the
illustration below.
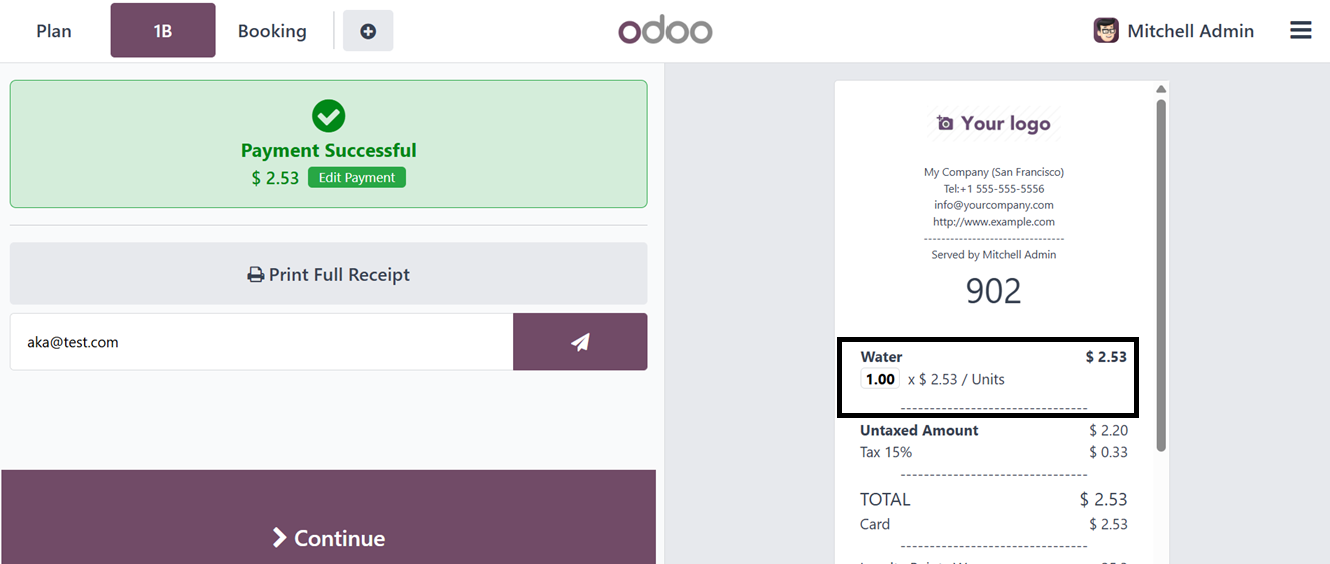
Once the payment is completed, you may proceed with the order by
selecting the 'Continue' button. The payment can be further split
and processed as per the customer's requirements until the full
order amount is settled.