9. Restaurant
Session Management
To initiate a restaurant point of
sale session, follow these
basic settings, then
customize other
configurations like Sales,
Taxes, Accounting, Payment,
and Pricing as per your
requirements. Now, open the
restaurant session from the
Point of Sale dashboard.

You can start the process by
clicking on the ‘Open
Register’ button and this
will take you to the opening
control panel, where you can
edit the Opening cash for the
current day and a Opening
note as illustrated in the
screenshot below.

After proceeding with the ‘Open
Register’ button, you will be
directed to the restaurant
session and it will display
the floor plans as shown
below.
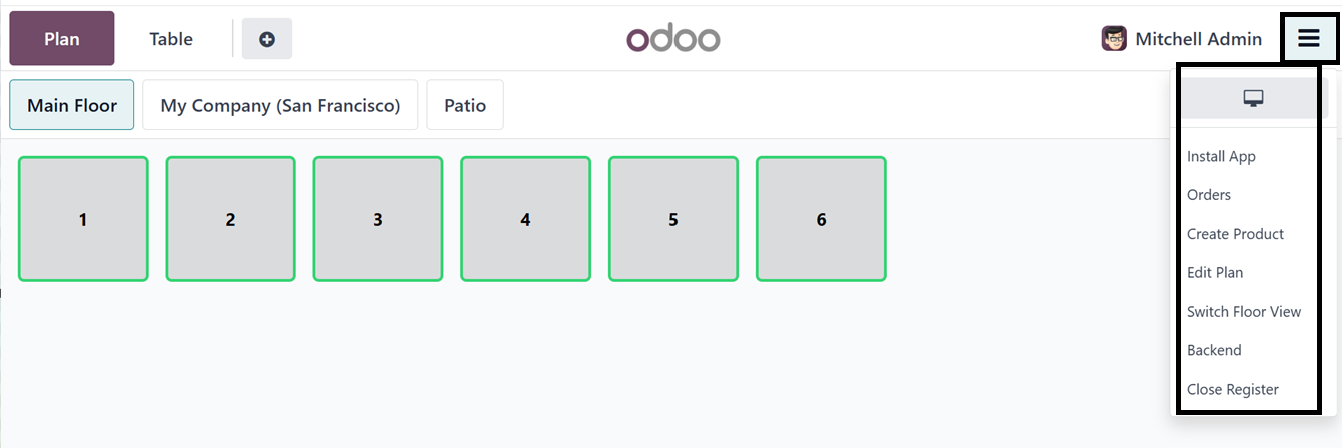
From the above screenshot, you
can see the two floors and
the available seats and
tables. The menu icon
provided at the right side of
the window can be used to
Edit the floor plan, Switch
floor view, Close Register,
go to Backend, Create
Product, Go to Orders Session
etc.
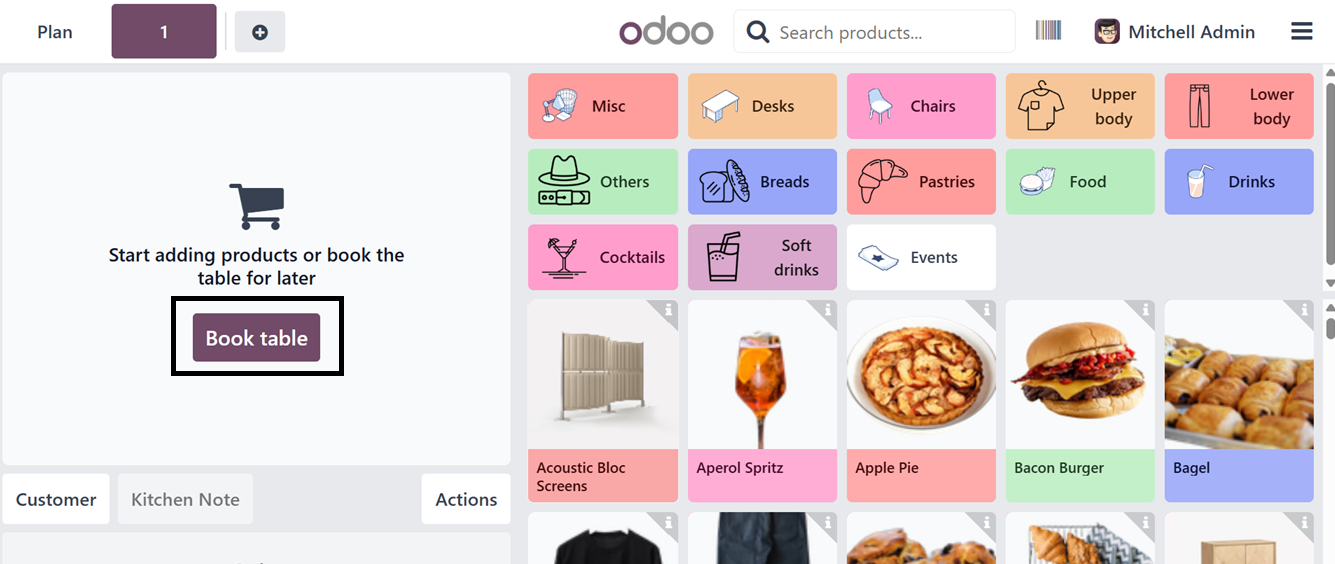
From the available floors and
tables, choose the tables.
Clicking on a table will take
you to the restaurant session
with all the products and
product categories. Where,
you have to book a table
using the ‘Book table’
button.
Then, choose the button from the
Floor and Tables window.
Here, you can see the table
arrangement of a floor as
shown in the screenshot
below.
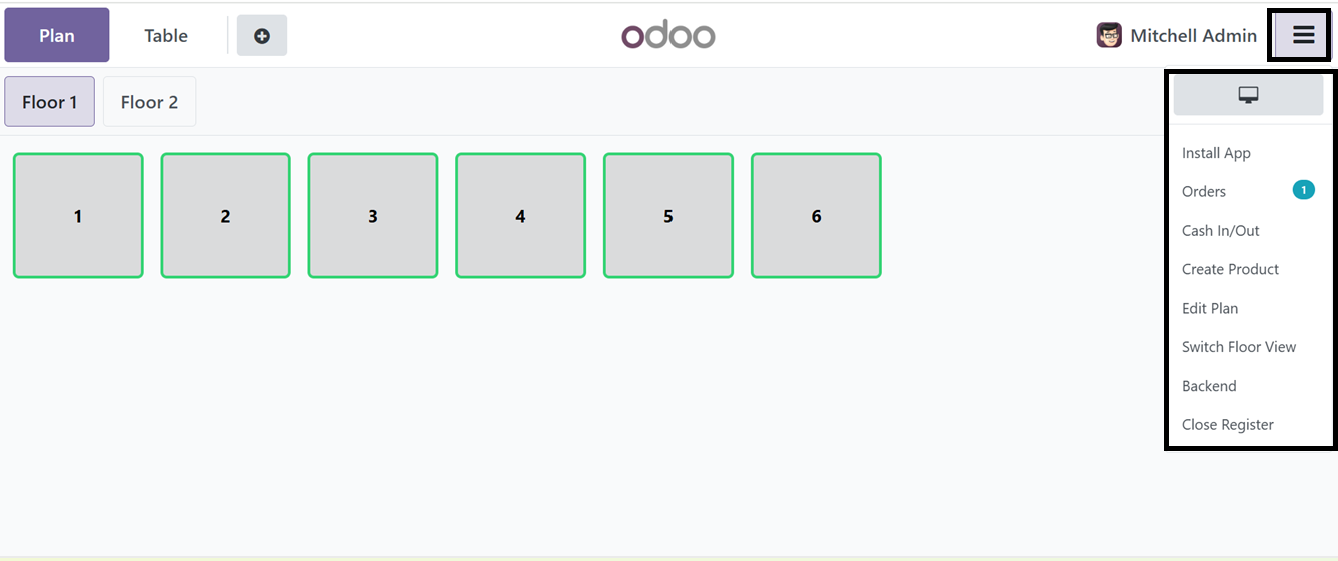
After reserving a table, select
your desired products and
continue with the order
placement and payment
process. Using the point of
sale terminal menu to install
the Restaurant application,
check the order history,
mention the Cash In/Out
transactions, Create new
sales product, edit plan,
switch the table view into a
floor view, go to the Point
of sale backend and close the
cash register using the
Install App, Orders, Cash
In/Out, Create Product, Edit
Plan, Switch Floor View,
Backend and Close Register
button options as depicted in
the above screenshot.
10.11 Editing Floor Plans
The 'Edit Plan' option in the
Odoo 18's Point of Sale
module lets users alter their
virtual floor plan to fit
their actual layout within
the Point of Sale interface,
improving service
effectiveness, maximizing
seating capacity, and
guaranteeing optimal table
configurations.
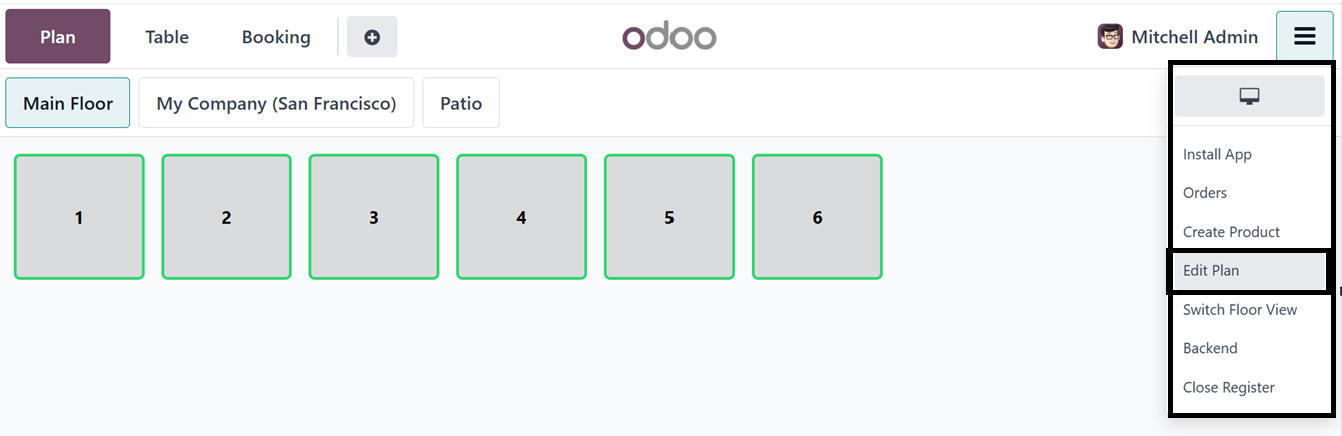
Clicking on this option from the
point of sale terminal menu
will display some editing
options as shown below.
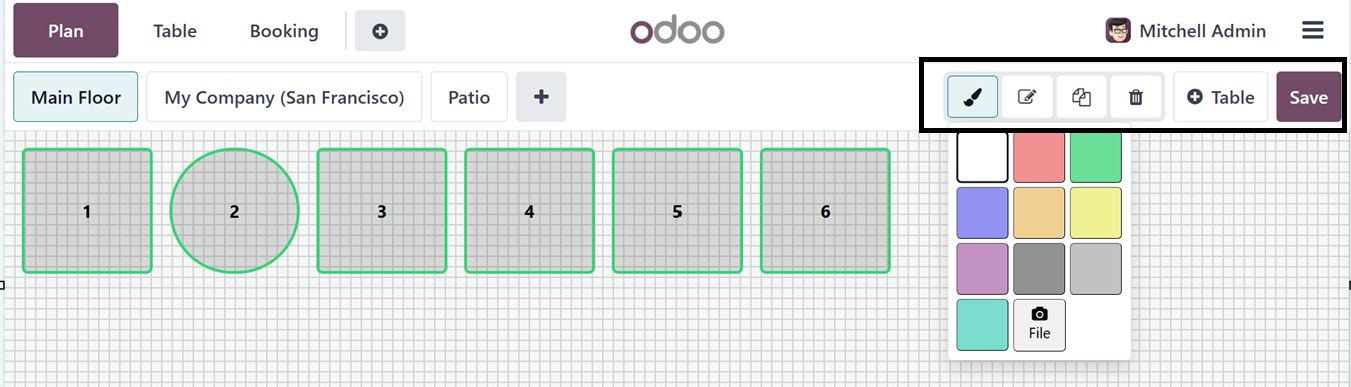
You can customize the floor
background color and table
colors using the 'Color'
icon. In this instance, the
floor color has been
modified, and a specific
table has been selected and
recolored accordingly.
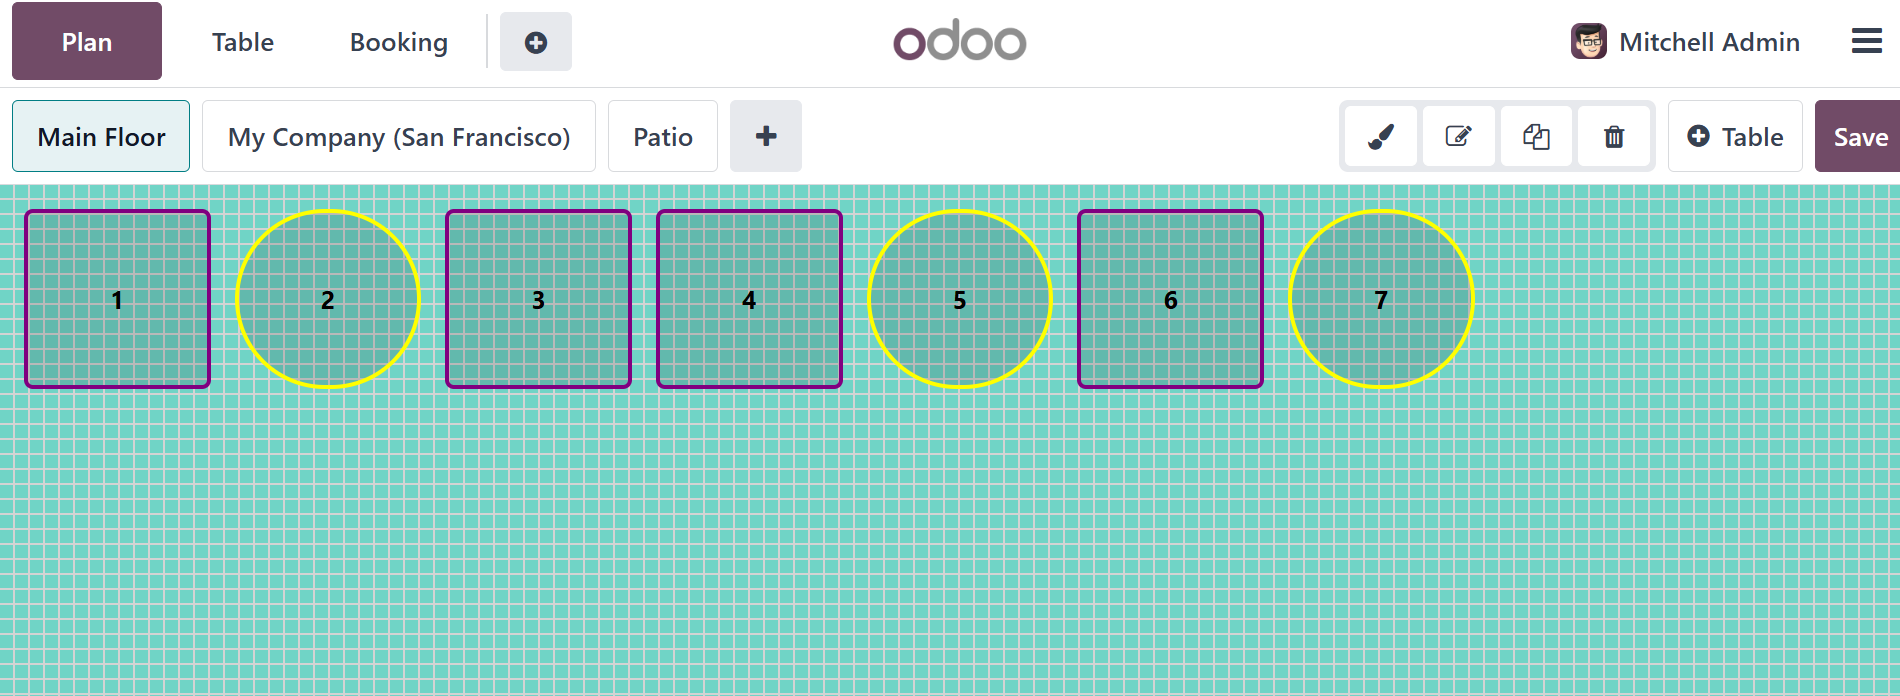
After selecting a table, you can
edit the table specifics
including modifying the Seat
capacity, Changing the table
shape, Coloring the table,
Renaming the table name,
Copying the exact table and
Delete tables using the
Seatings, Shape, Color,
Rename, Clone and Delete
icons provided at the upper
right corner of the window
respectively. Adding new
tables is also quickly done
through the ‘+Table’ button.
Once the Floor and Table Plan
has been edited, save the
plan using the ‘Save’ button.
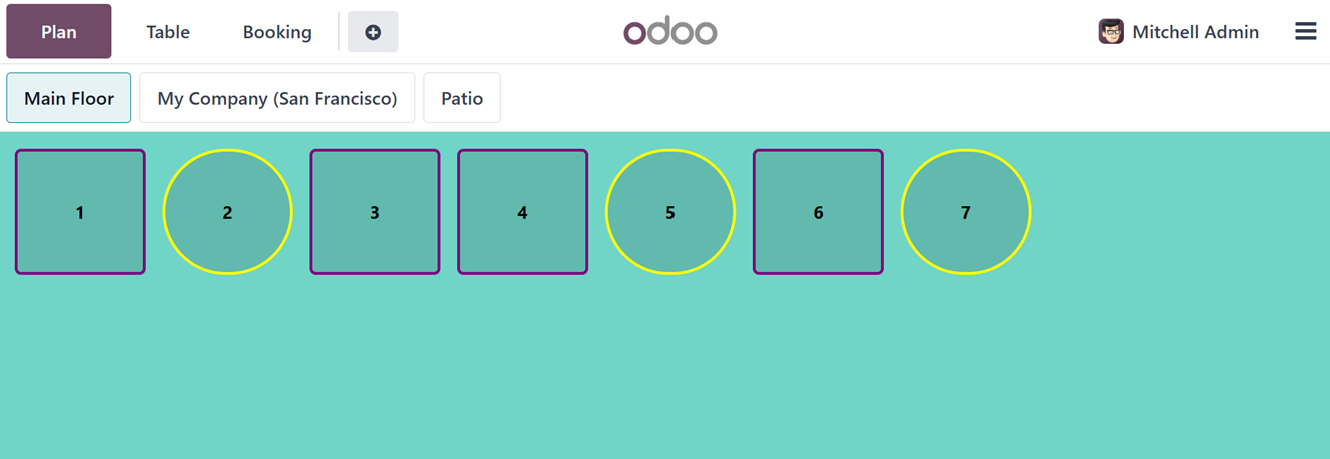
After saving the plan, you can
see the final floor and table
arrangement plan as
illustrated in the above
screenshot and proceed with
the sales process. This
feature can be utilized at
any time based on operational
requirements.
Then, choose the products from
the catalog as per the
requirement. This will
display the detailed options
at the left side of the
screen.
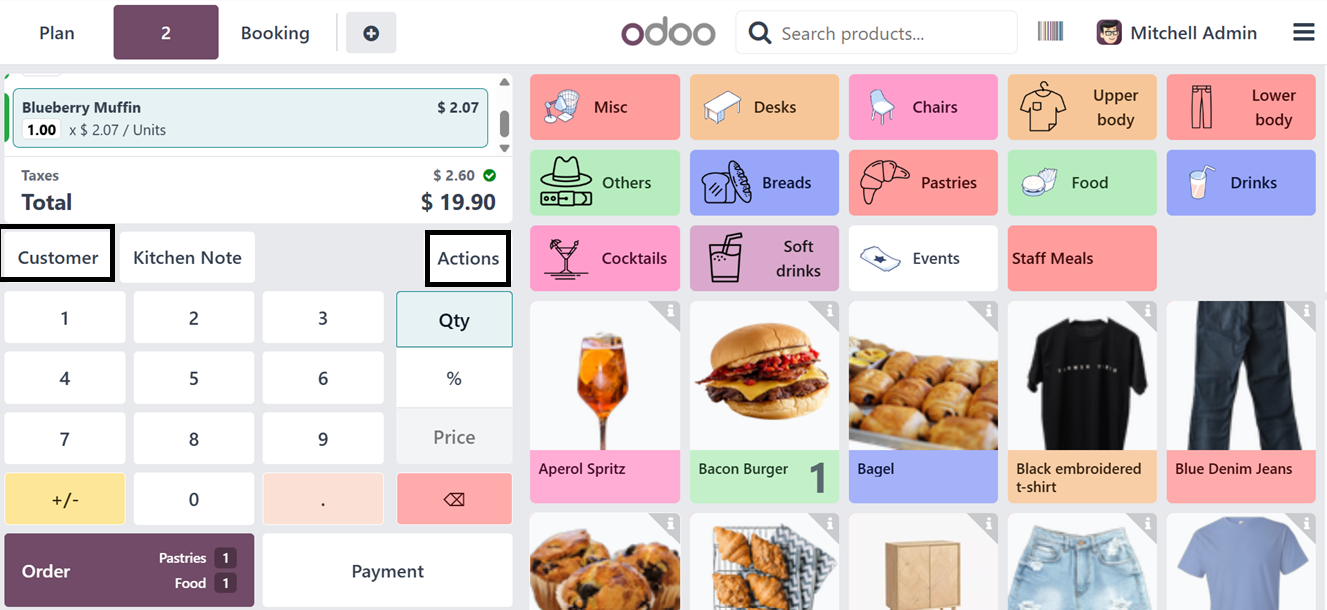
Here, you can see the total bill
amount with the tax rates
under the ‘Total’ section.
Then, provide the customer
name using the ‘Customer’
button. This will display the
list of previous customers.
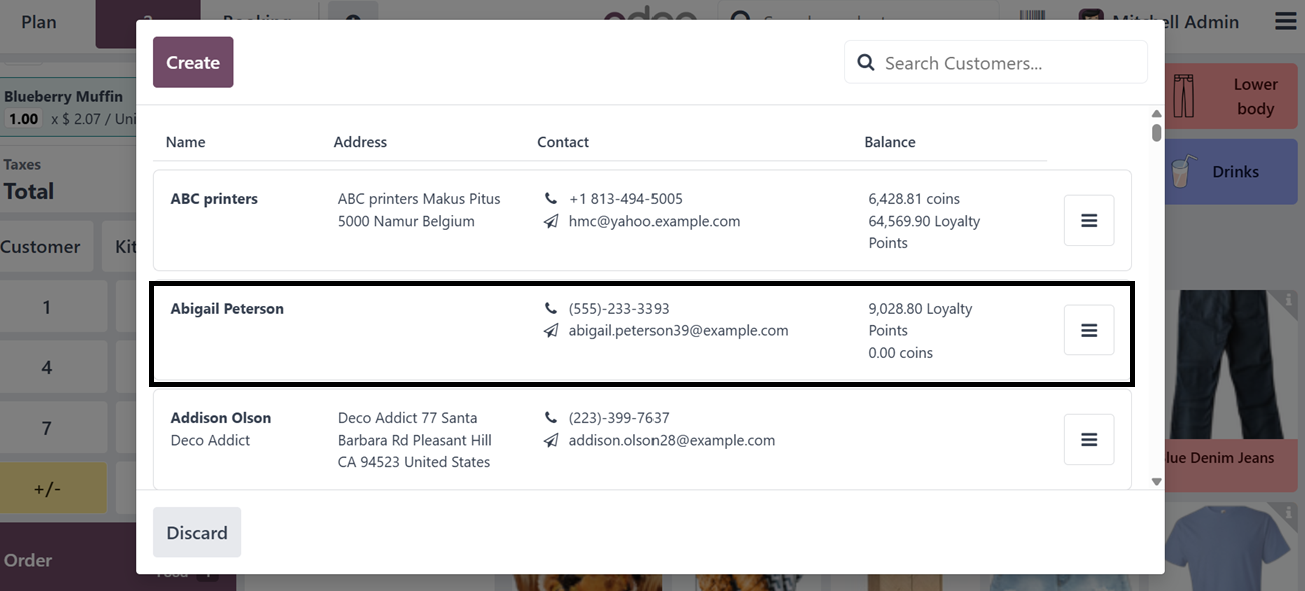
After choosing a customer name it
will display inside the sales
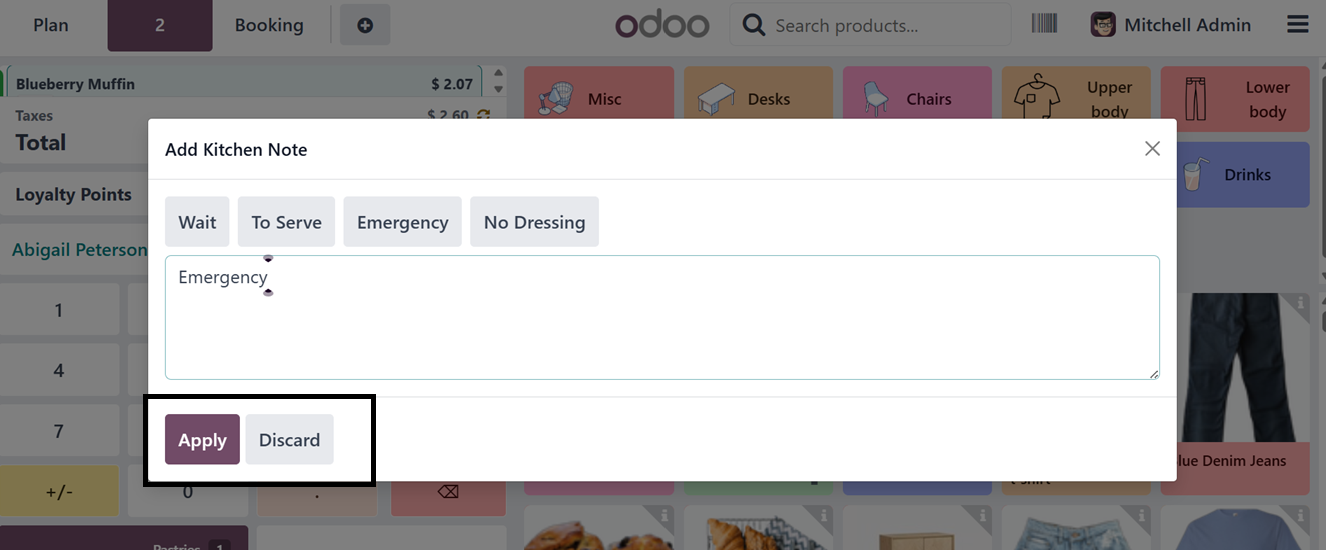
session window. Then you can
add any notes to the kitchen
members using the ‘Kitchen
Note’ button. This will
trigger another pop-up where
you can edit the message or
notes regarding the dishes or
orders.
It is also possible to choose
from the available kitchen
notes for a quick process.
So, we can choose an
‘Emergency’ note, as shown
below.
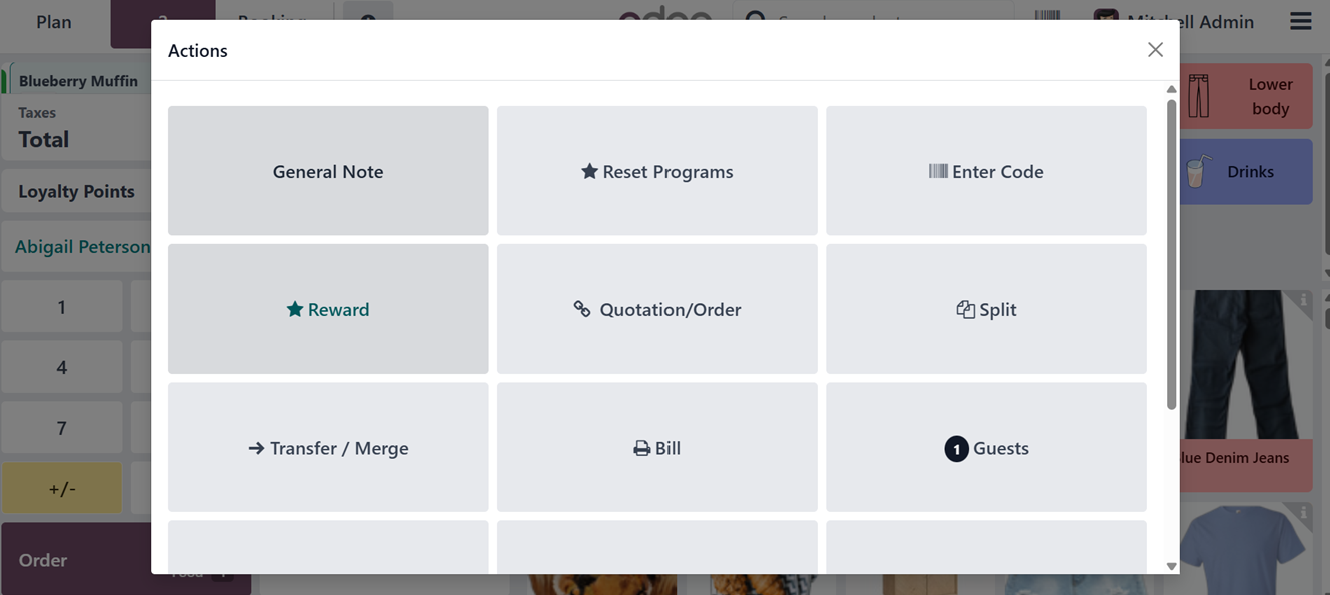
After applying the note using the
‘Apply’ button, you can
utilize the ‘Action’ button
of the main window to perform
certain actions including
adding General Note,
Quotation/Order, Split Bills,
Enter Promotion/Discount
Codes, Check Rewards,
Transfer/ Merge Orders,
Customer Note, Pricelists,
Refund, Switch to Takeaway
Order and Cancel Orders using
the irrespective button
options as shown in the
screenshot given below.
After selecting the products and
adding any coupons or editing
actions, you can confirm the
order using the ‘Order’
button from the sales window.
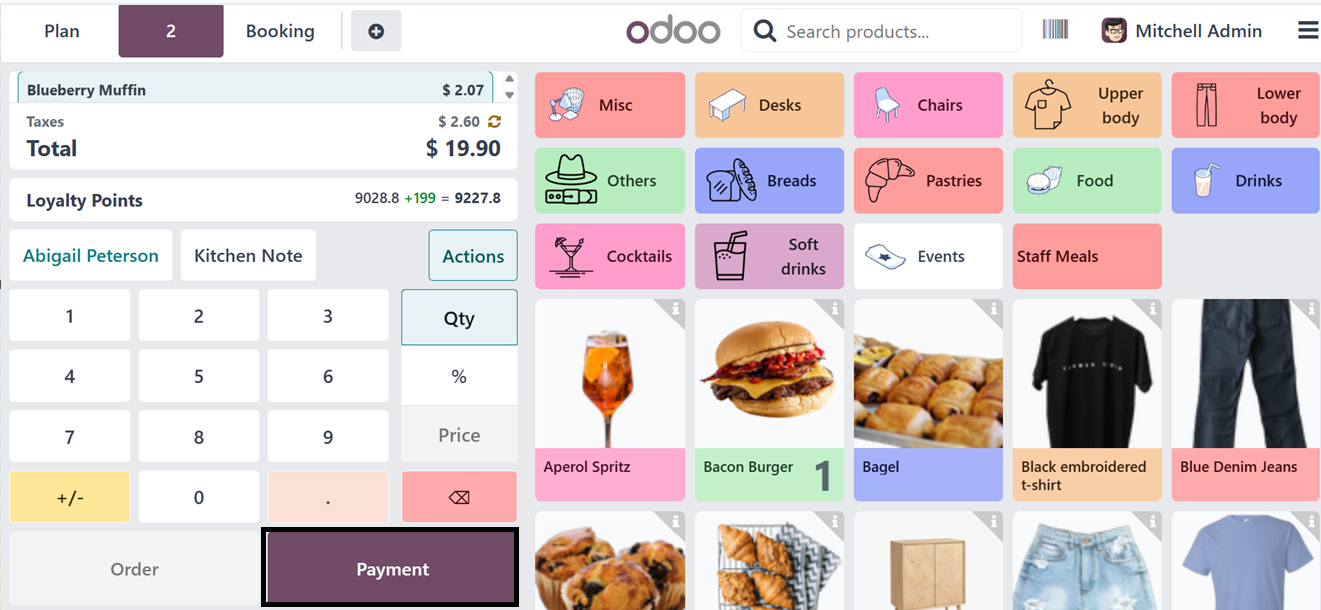
This action will complete the
order process and after
getting the products, you can
make payments using the
‘Payment’ button. Immediately
after pressing the ‘Payment’
button, you will be taken to
a payment window where you
have to select the payment
method from the available
options.
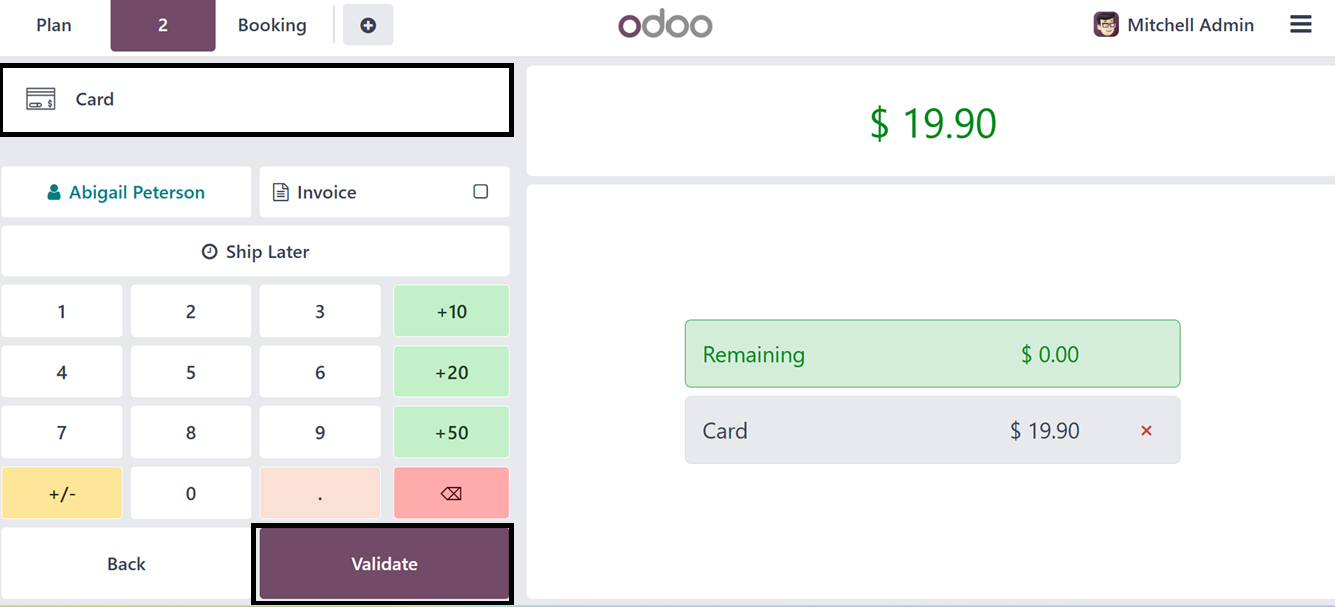
In this scenario, we have
selected the ‘Cash’ payment
method and it will be
displayed on the screen. Then
you can add a tip to the
payment using the ‘+amount’
buttons. Here, you can choose
from the +10,+20 and +50 tip
amounts. Finally, validate
the payment using the
‘Validate’ button.
After validating the payment, you
can see the payment
completion window with an
invoice receipt preview as
shown in the screenshot
below.
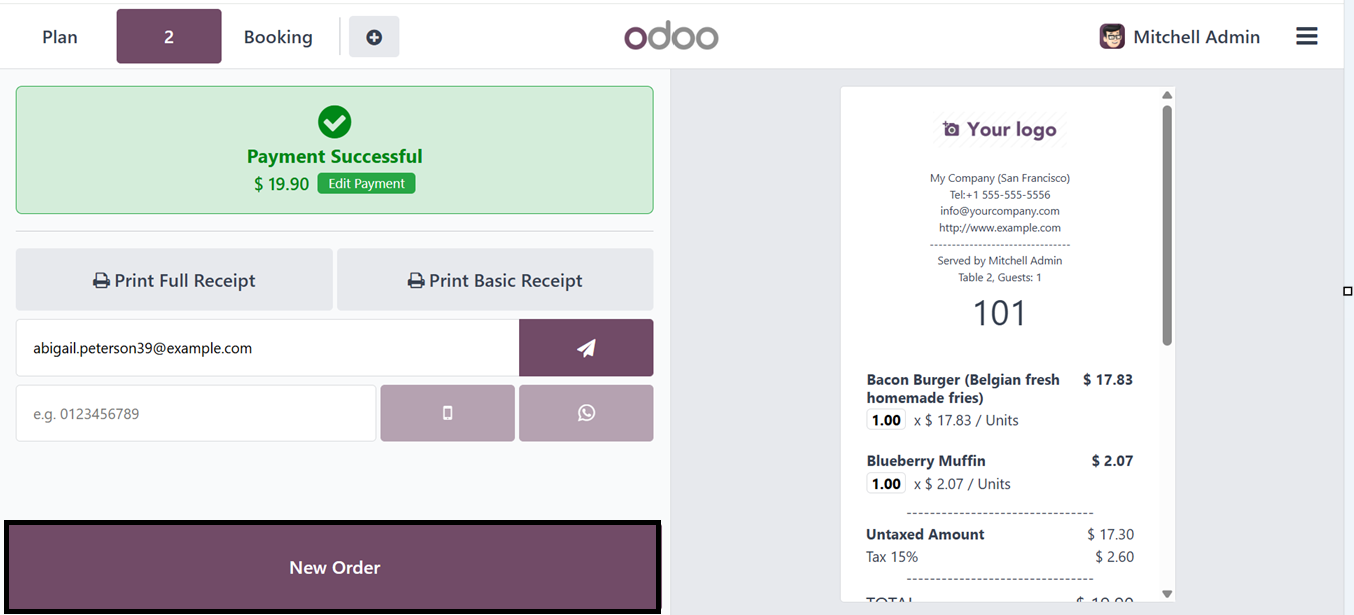
The "Print Basic Receipt" or
"Print Full Receipt" buttons
can be used to print the
bill, depending on the
quantity and amount of detail
needed. Another option is to
use the send icon next to the
email box to send the receipt
straight to the customer's
email.
You may also use the
corresponding icons in Odoo
to send receipts via WhatsApp
or SMS for further
convenience. This guarantees
that clients will immediately
receive digital copies of
their invoices. Finally,
utilize the "New Order"
button to begin a new
transaction after finishing
an existing one. Just
complete the day's sales by
selecting the "Close
Register" option from the
terminal menu to end the
session.
For retail and hospitality
enterprises, Odoo 18's Point
of Sale (POS) and Restaurant
Module offers a cohesive and
powerful solution. Multiple
payment methods, real-time
inventory management,
customer loyalty features,
and offline functionality are
all supported by the
point-of-sale system.
Specialized capabilities like
tipping, order routing, floor
and table management, and
meal course control are added
by the Restaurant module.
When combined, these modules
help organizations remain
competitive in a fast-paced
market, increase service
quality, and streamline
processes.