1. Project management
Odoo18 will direct you to the
project module's main
dashboard if you select the
project module. Below is the
Kanban view of the project
dashboard.
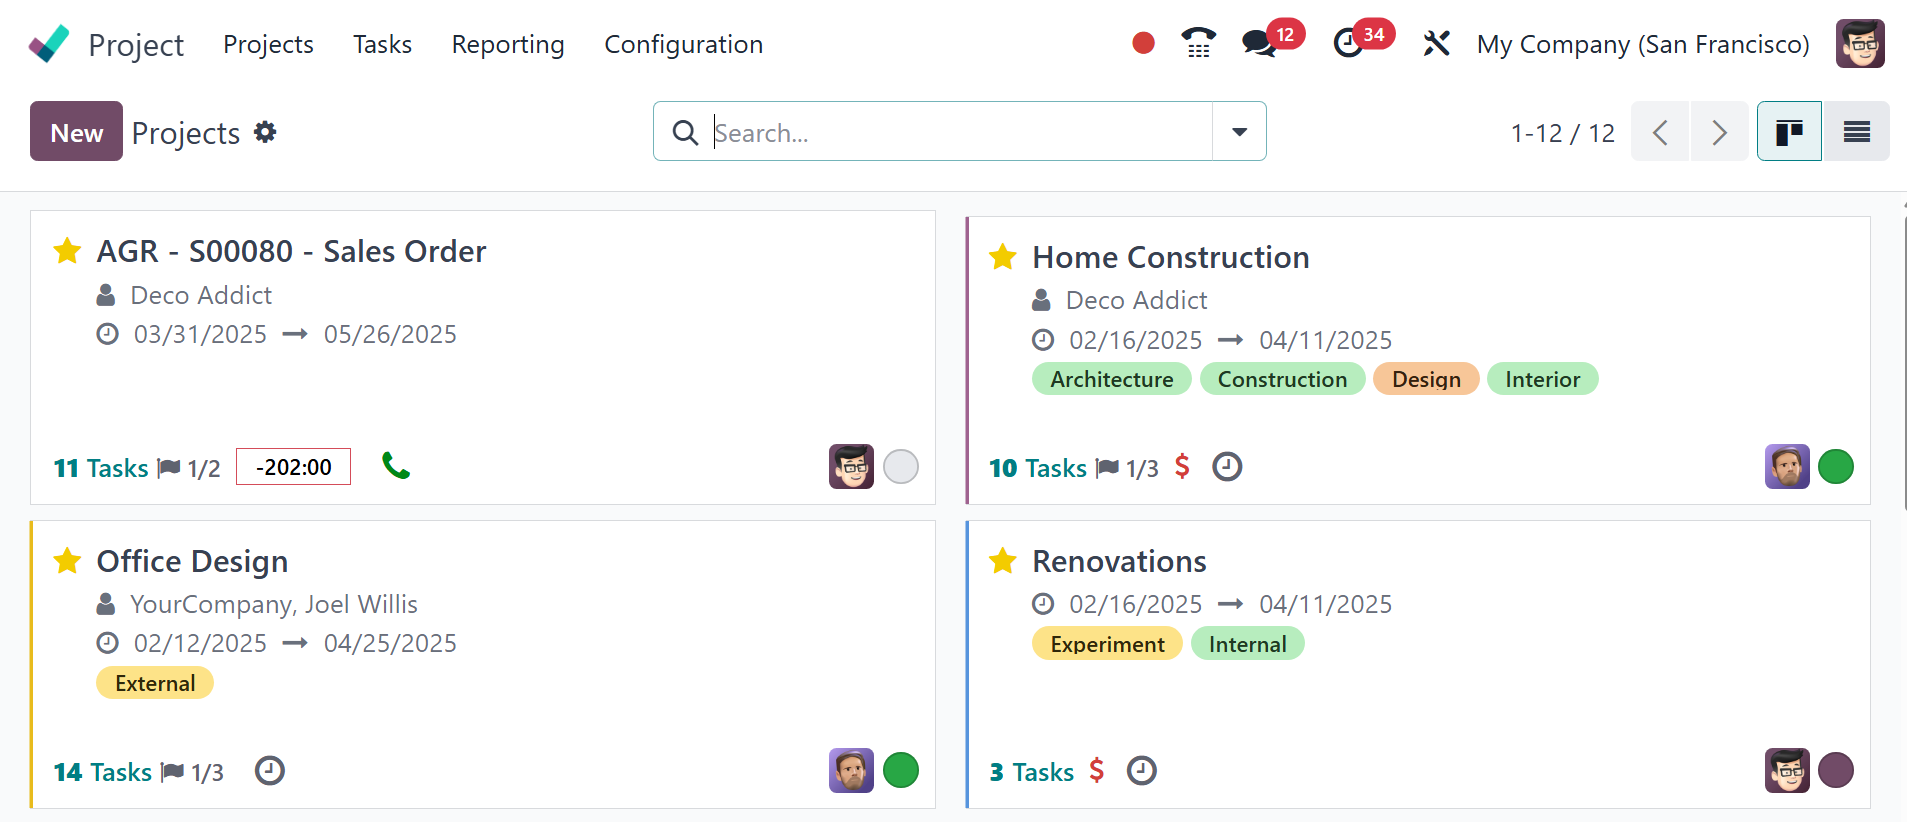
The projects that are already
established are visible from
the Kanban view. The due
date, partner, customer
rating, number of tasks,
milestones, and amount of
hours required are all listed
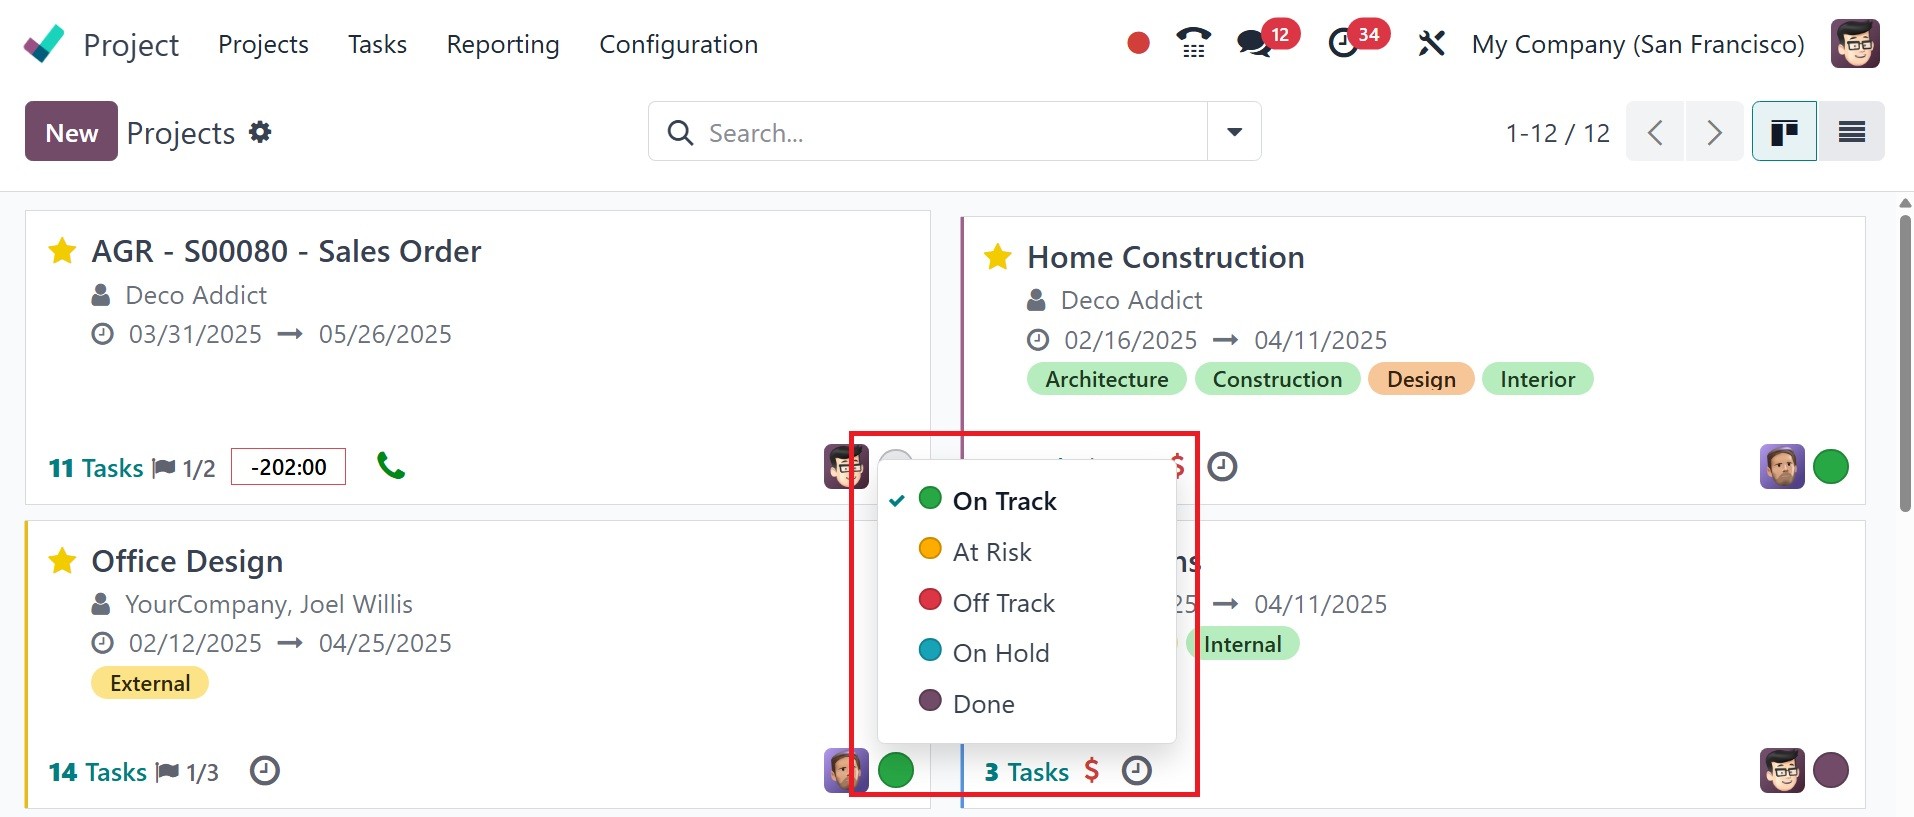
in each project. The status
of each project is shown in a
range of colors, each of
which represents a distinct
meaning, including At Risk,
Off Track, On Hold, Off
Track, and Done. Use the star
symbol to add the project to
your list of favorites.
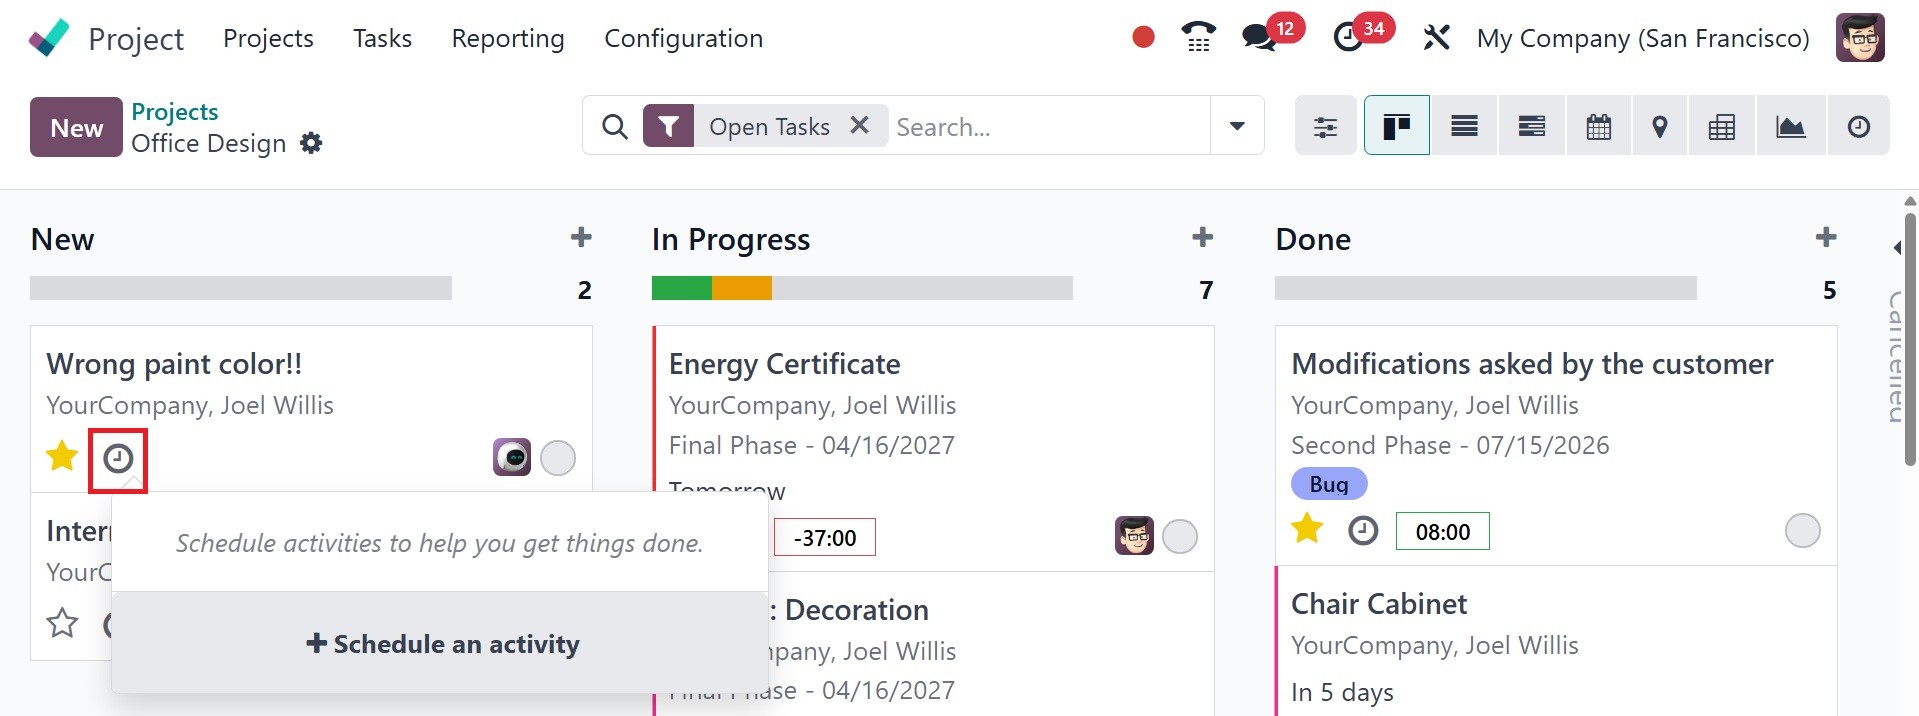
Clicking on the small clock
indicator will bring up a
pop-up window to schedule
activities to help you get
things done. Using the
schedule an activity, you can
easily schedule one. The
colored bubbles help to track
project status.
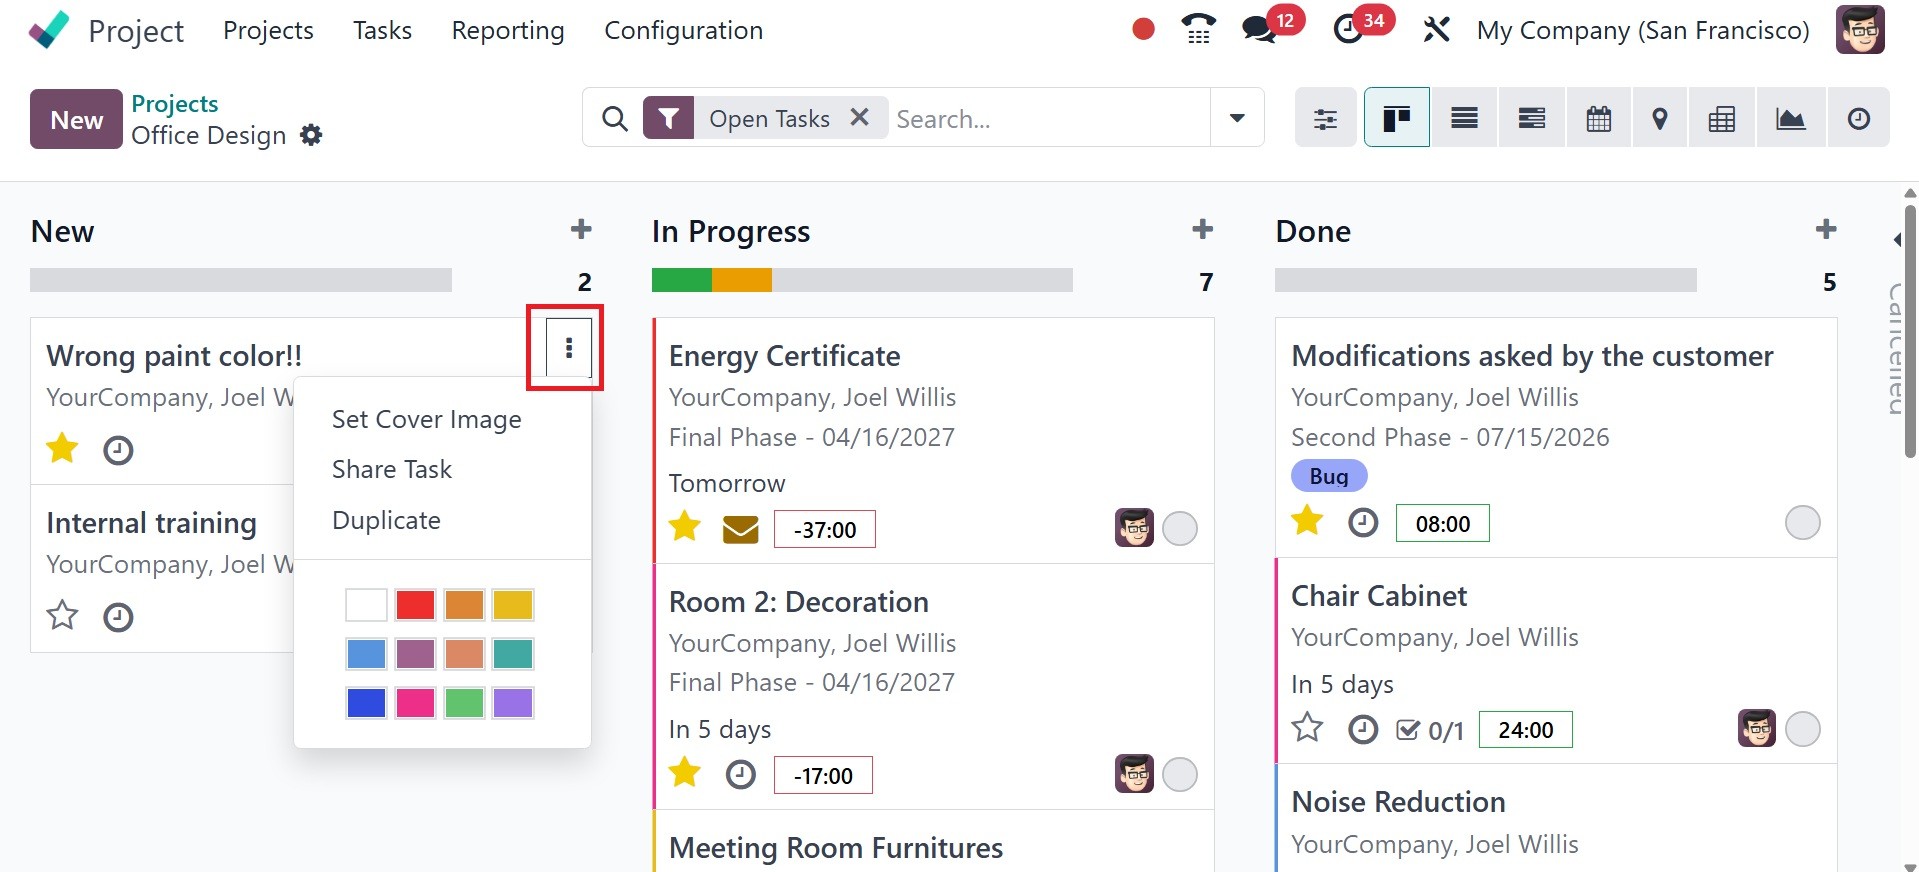
There is a small three-dot menu
in the top right corner of
each task that allows you to
view the set cover image,
share the task, and duplicate
it.
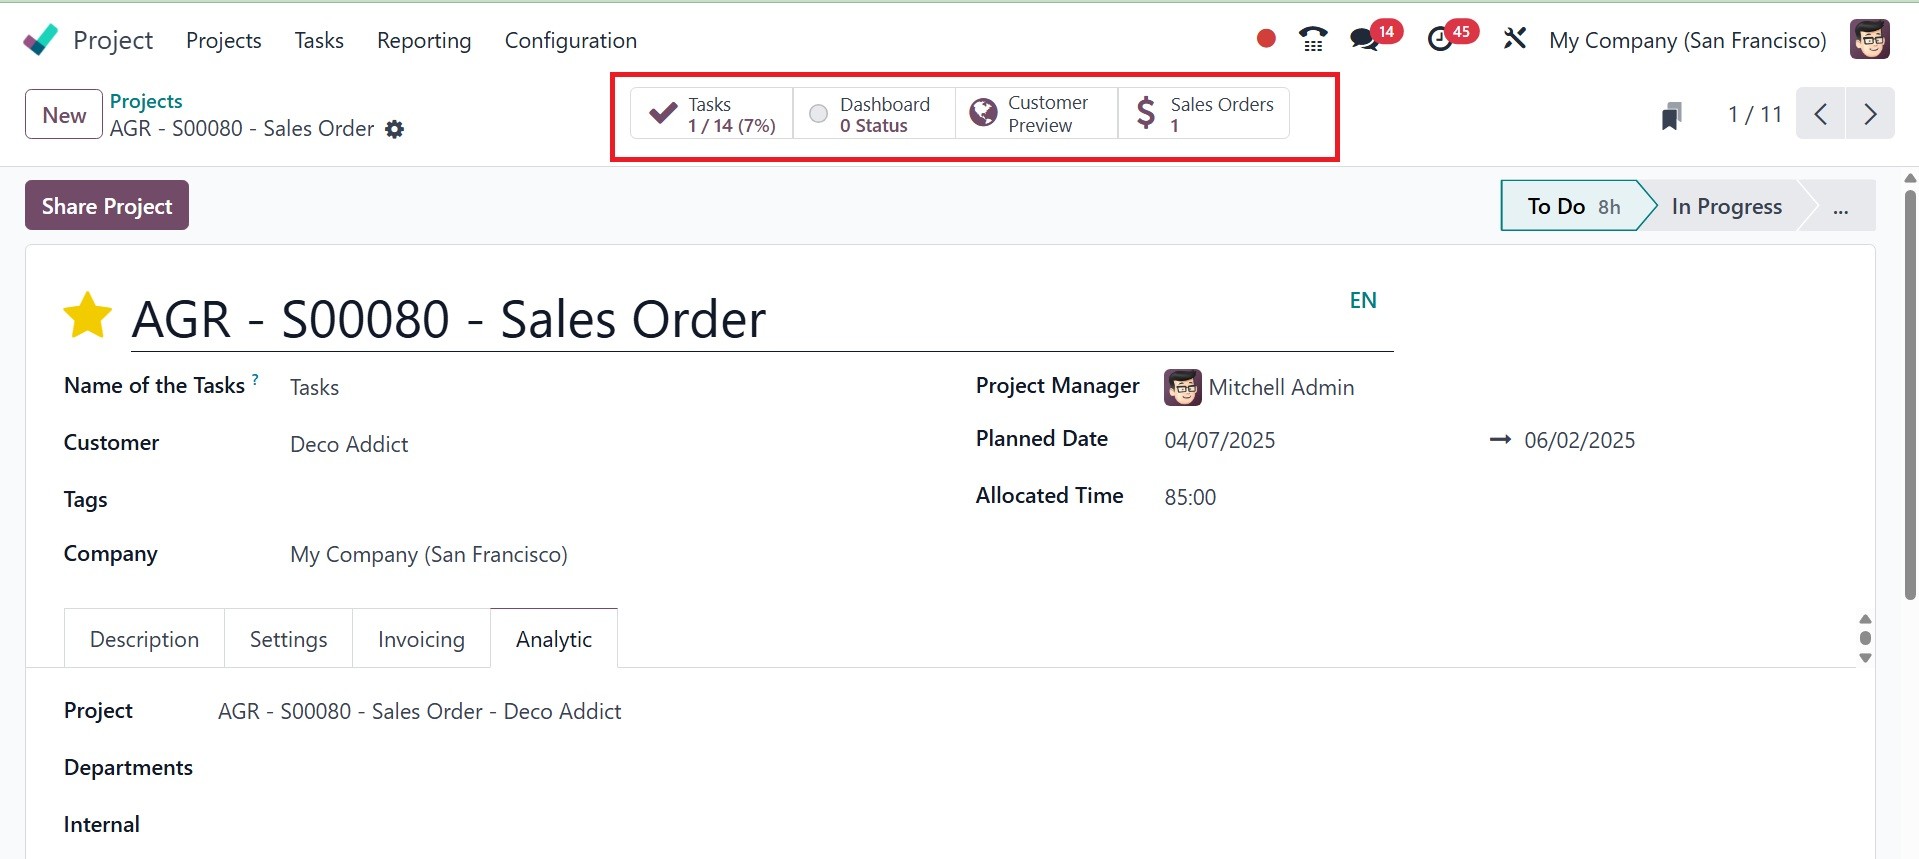
The following smart buttons are
displayed on the top left of
the project dashboard of the
project module, as in the
screenshot below.
There, you have the options like,
- Tasks: the number of
completed (i.e., Done
or Canceled tasks) and
all tasks, in format
completed/all, as well
as the entire
project’s completion
percentage estimation.
- Milestone: This section
is only visible if
milestones have been
created for this
project
- Timesheets: the number of
hours or days
(depending on the
Timesheets app
configuration) linked
to the project. This
includes all
timesheets, whether or
not they have been
validated.
- Documents: number of
documents in the
project’s workspace.
- Burndown Chart: Click the
smart button to access
a report on the status
of the project’s tasks
over time.
- Sales orders: Allows you
to view and manage the
sales orders
associated with a
project. This feature
is particularly useful
for tracking billable
tasks and generating
invoices for customer
work.
- Timesheets and Planning:
Click the smart button
to access a report on
the project’s
timesheets and shifts.
- Additional fields, such
as customer ratings,
Sales Orders, Sales
Order Items, Purchase
Orders, and more,
represent the number
of records linked to
the project.
- Task Analysis: helps to
analyse tasks. Task
analysis can also be
used to create a
burndown chart for a
specific project by
using the reporting
option.
- Share project: When you
share your
projects/tasks, you
allow external users
to be on the same page
as you. It avoids
misunderstandings,
simplifies
communication, and
allows you to become a
more coordinated
company as you get the
right information to
the right people.
- Duplicate: helps to
duplicate the task
- Settings: The settings
can be used to manage
visibility, edit
details, and configure
various aspects of the
project or task.
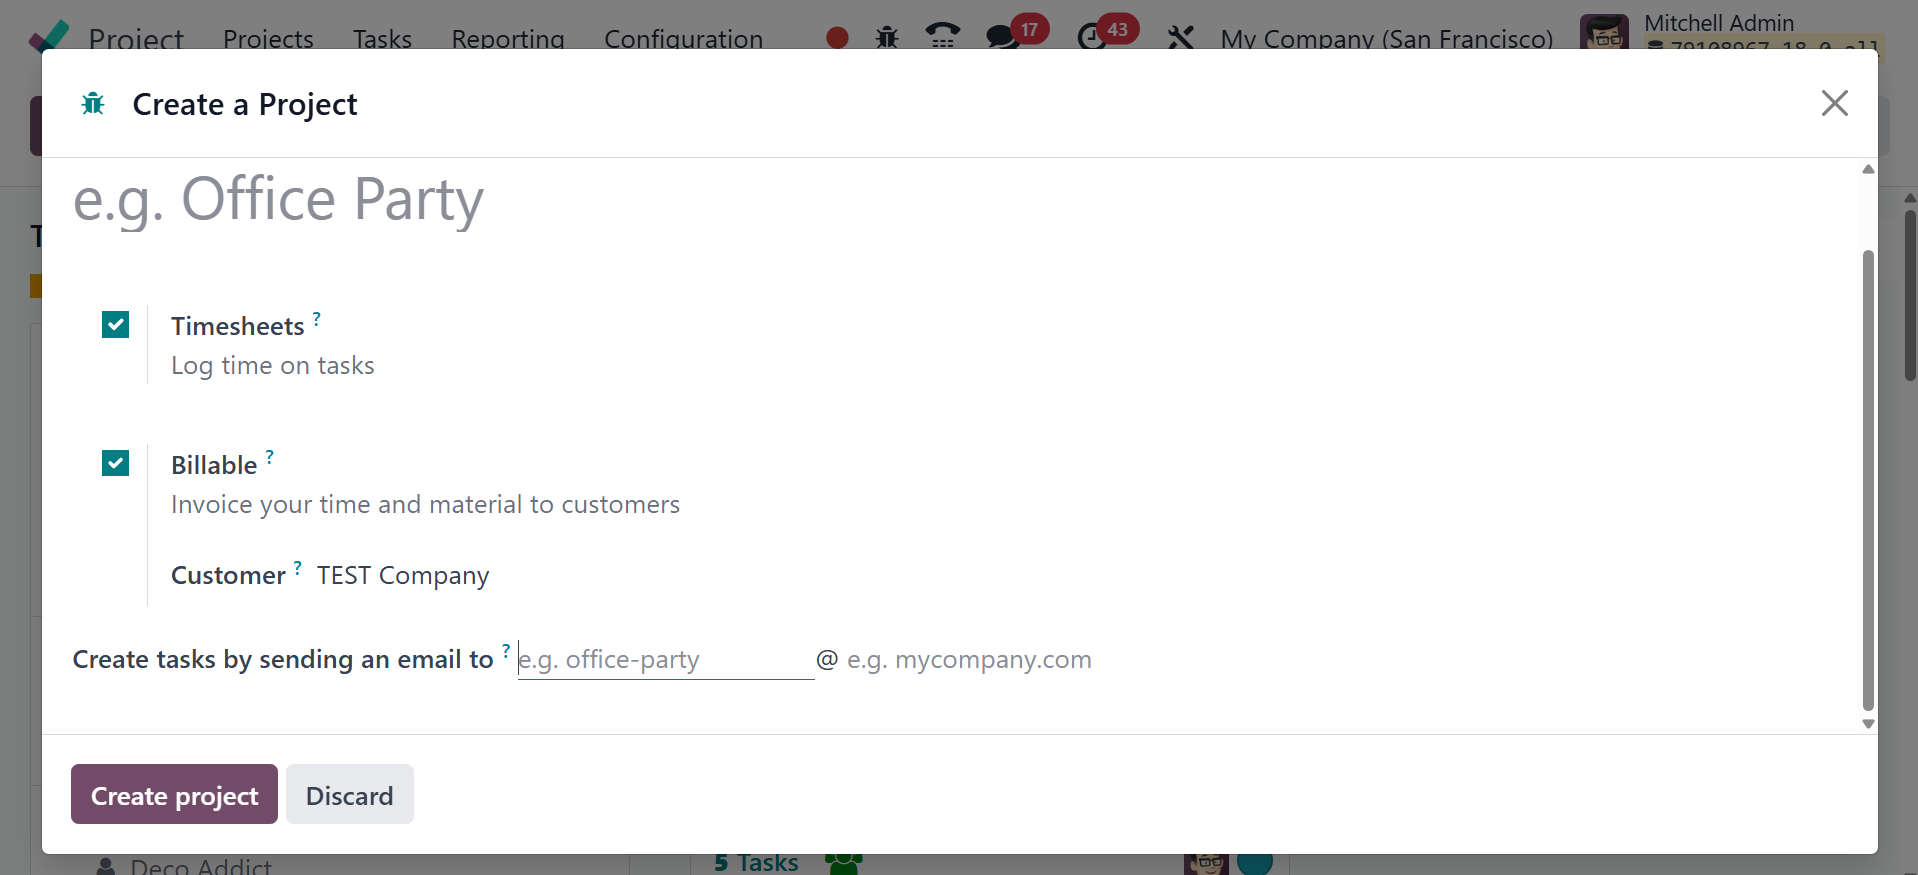
You can begin a new project by
clicking the New button,
which will cause a pop-up to
appear as seen below.
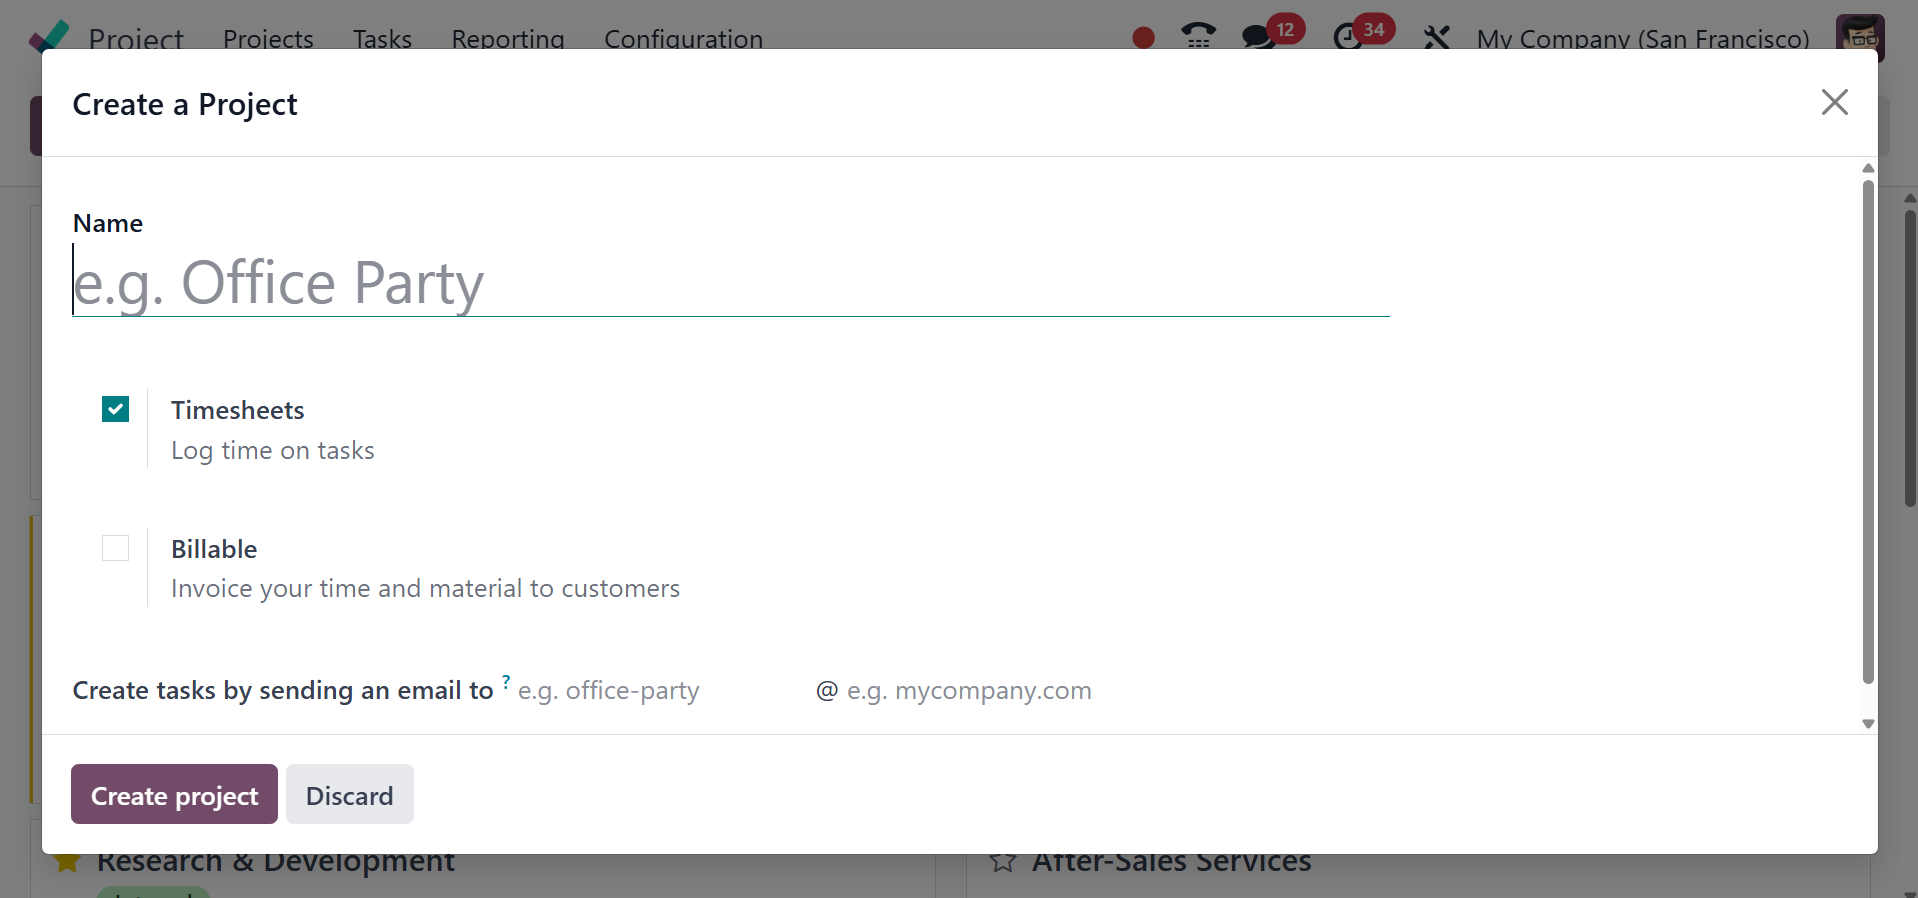
In the corresponding field, type
the name of the project.
Enable the Billable field if
you wish to send clients
invoices for this project.
You can monitor the amount of
time spent on tasks within
this project by activating
the Timesheets box. The
"Create tasks by sending an
email to" field defines the
email alias that, when used
as the recipient of an email,
will trigger the creation of
a new task within the
project. By setting this
field, you can streamline
task creation by simply
sending an email instead of
manually creating tasks
within the Odoo interface.
Finally, you may start a new
project by selecting the
Create Project option, which
will create a new window for
you to add tasks to.
You can also have the details of
the project in the top bar
for easy access to the
project’s record, as in the
image below. There, you have
the task, timesheet,
planning, documents, sales
order, invoices, purchase
orders, vendor bills, and so
on.
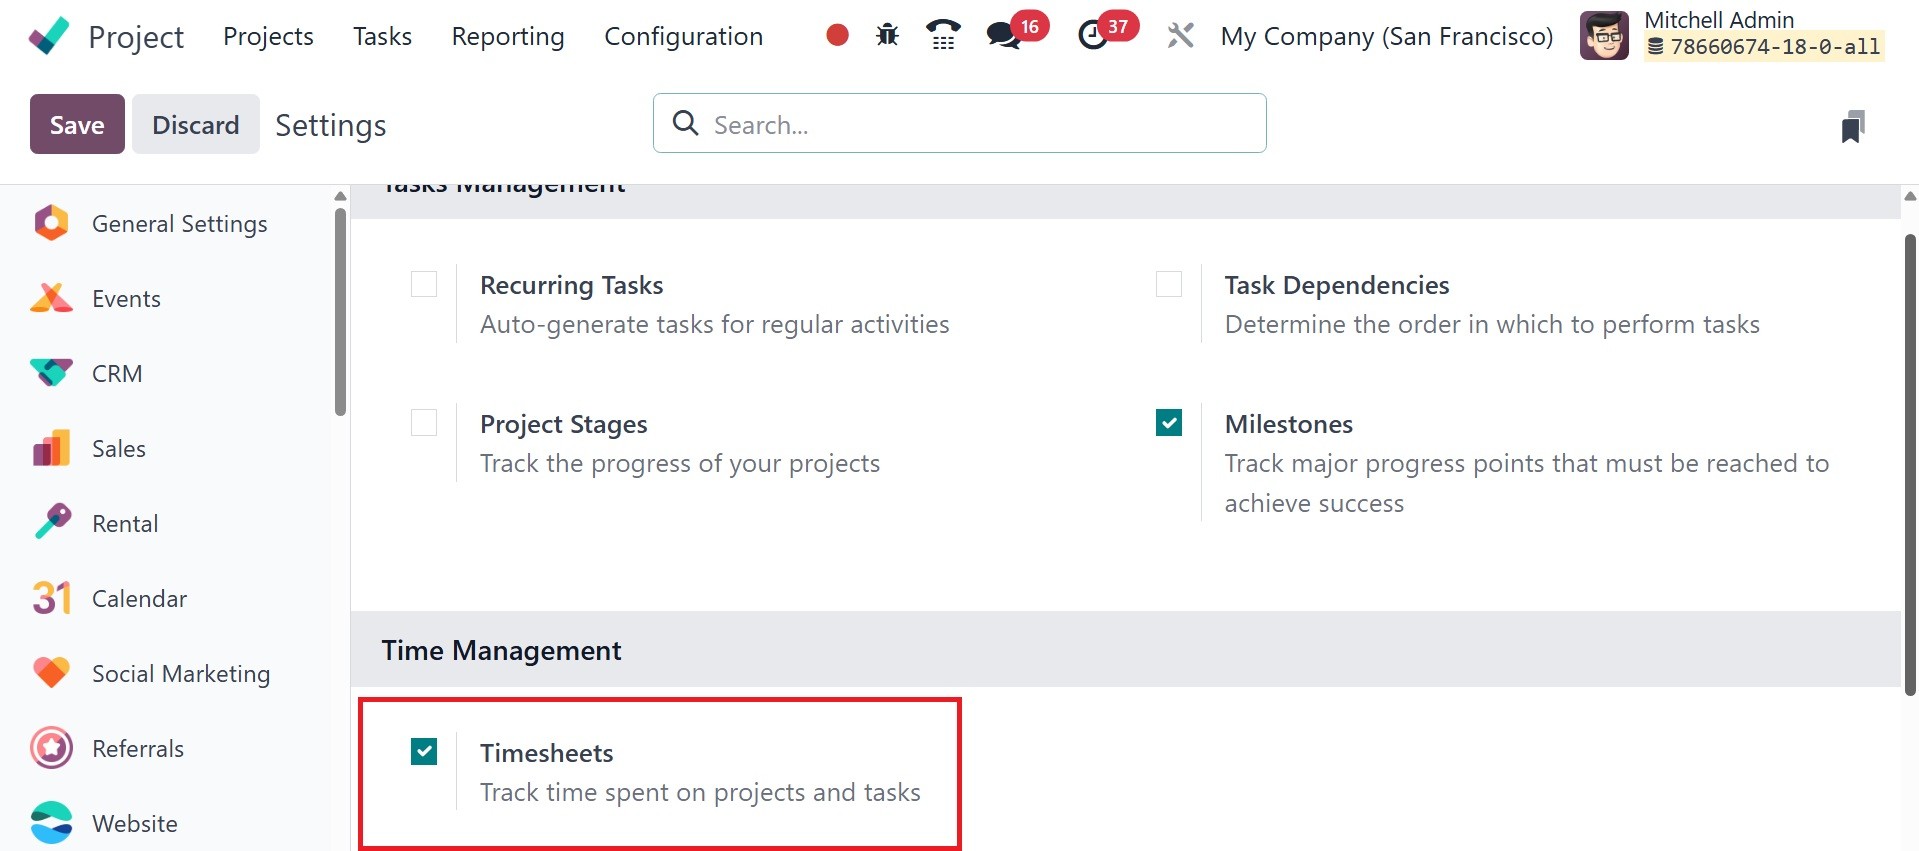
Before completing the tasks for
the project, you can set up
phases for them. To
accomplish this, click the
Add button after inputting
the stage name in the
relevant field. In a similar
way, you can construct new
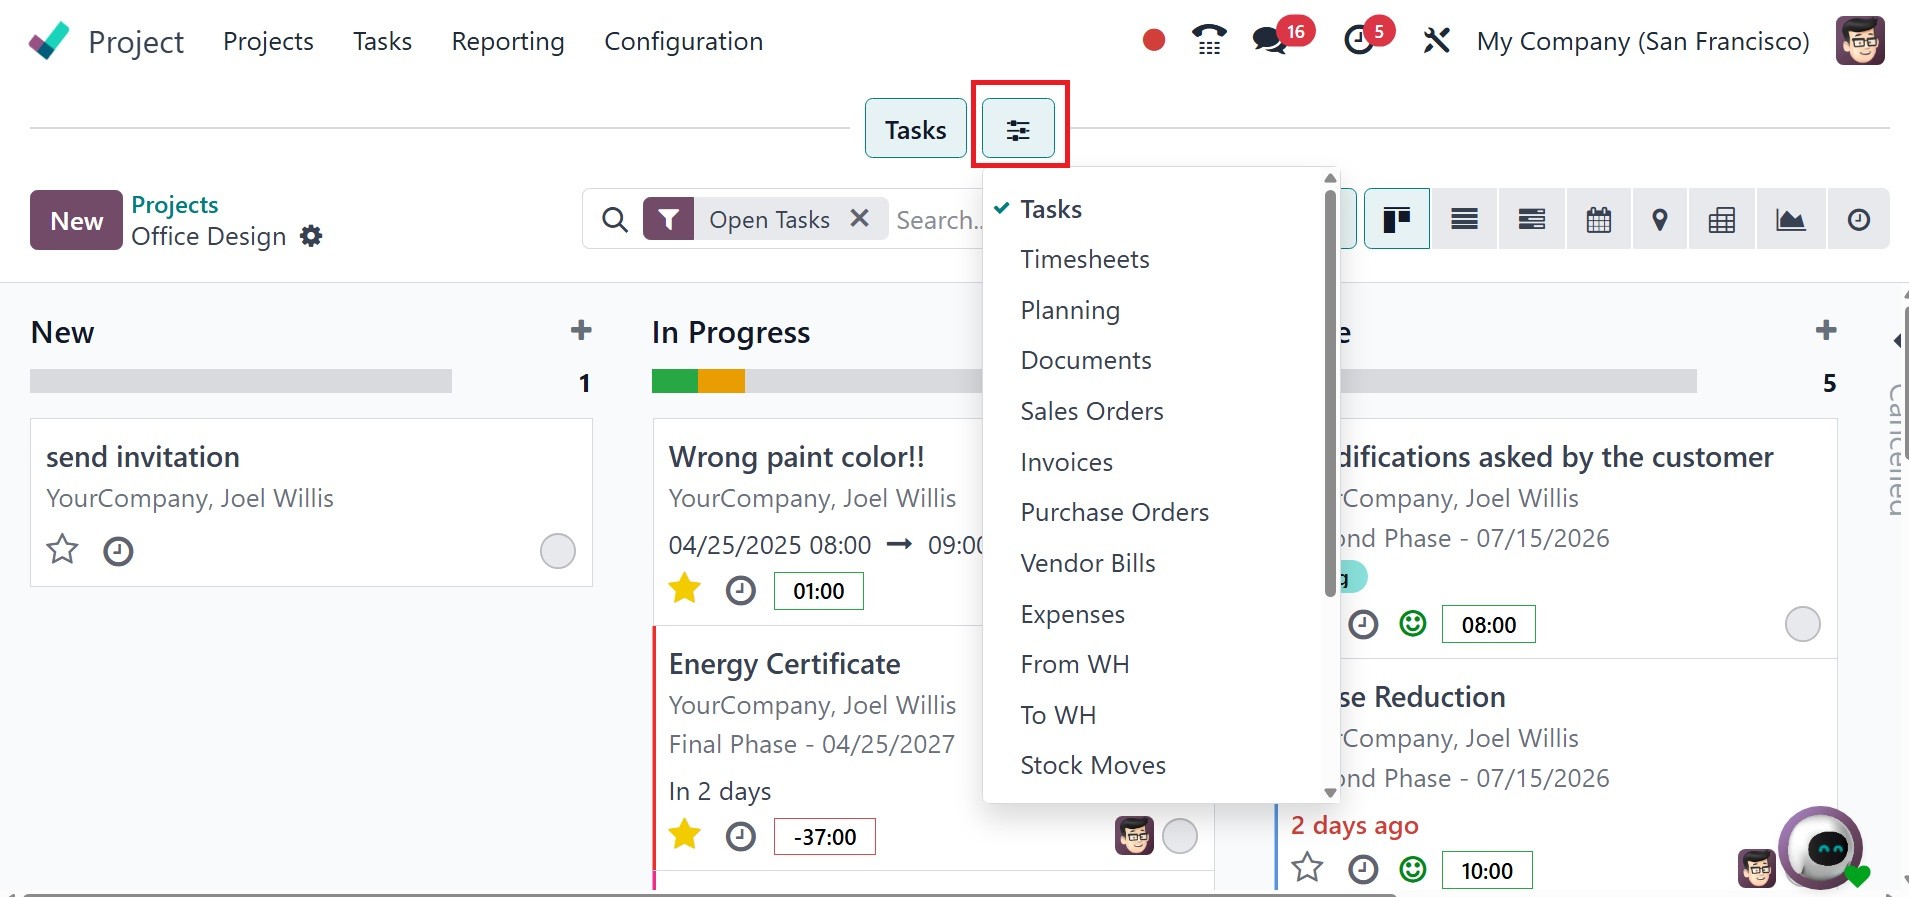
task stages.
The small settings icon next to
the stage title contains
options for Fold, Edit Stage,
Delete, Automation, Archive
All, and Unarchive All.
- Fold: to hide the task
stage and all of the
tasks in this stage
from the Kanban view.
- Edit: to edit the task
stages.
- Automations: to create
custom rules that
trigger automatic
actions (e.g.,
creating activities,
adding followers, or
sending webhook
notifications). Note
that this will
activate Studio in
your database, which
may impact your
pricing plan.
- Delete: to delete this
stage.
- Archive/Unarchive all: to
archive or unarchive
all of the tasks in
this stage.
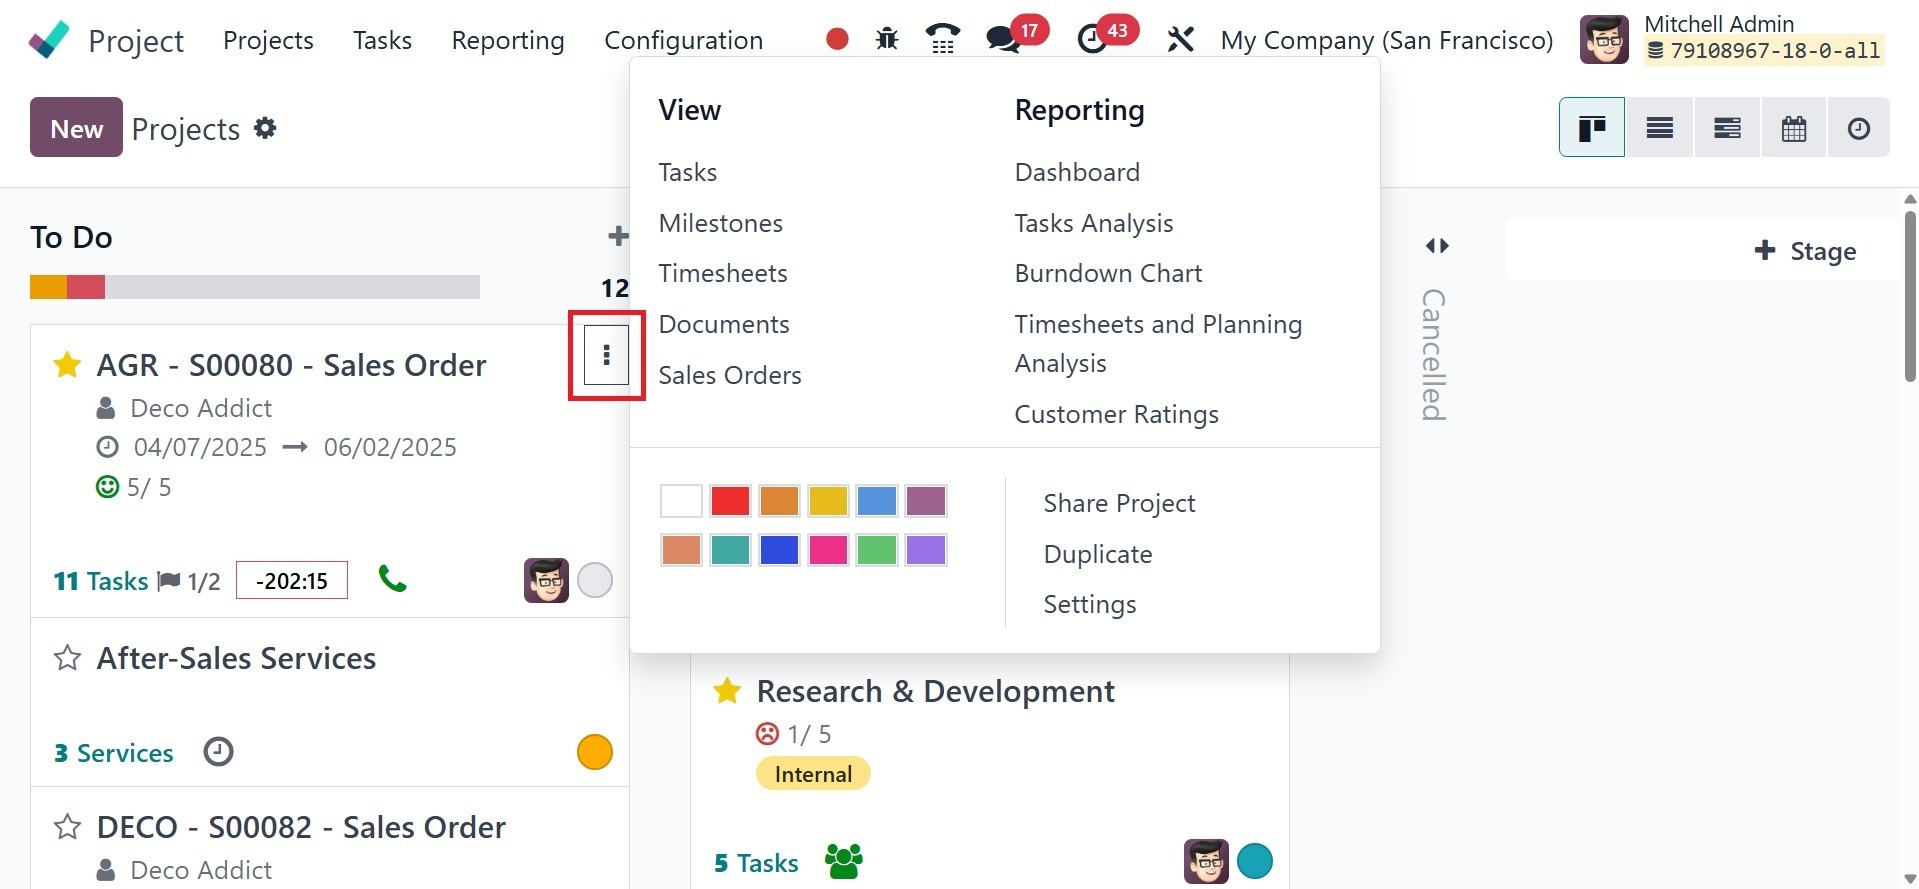
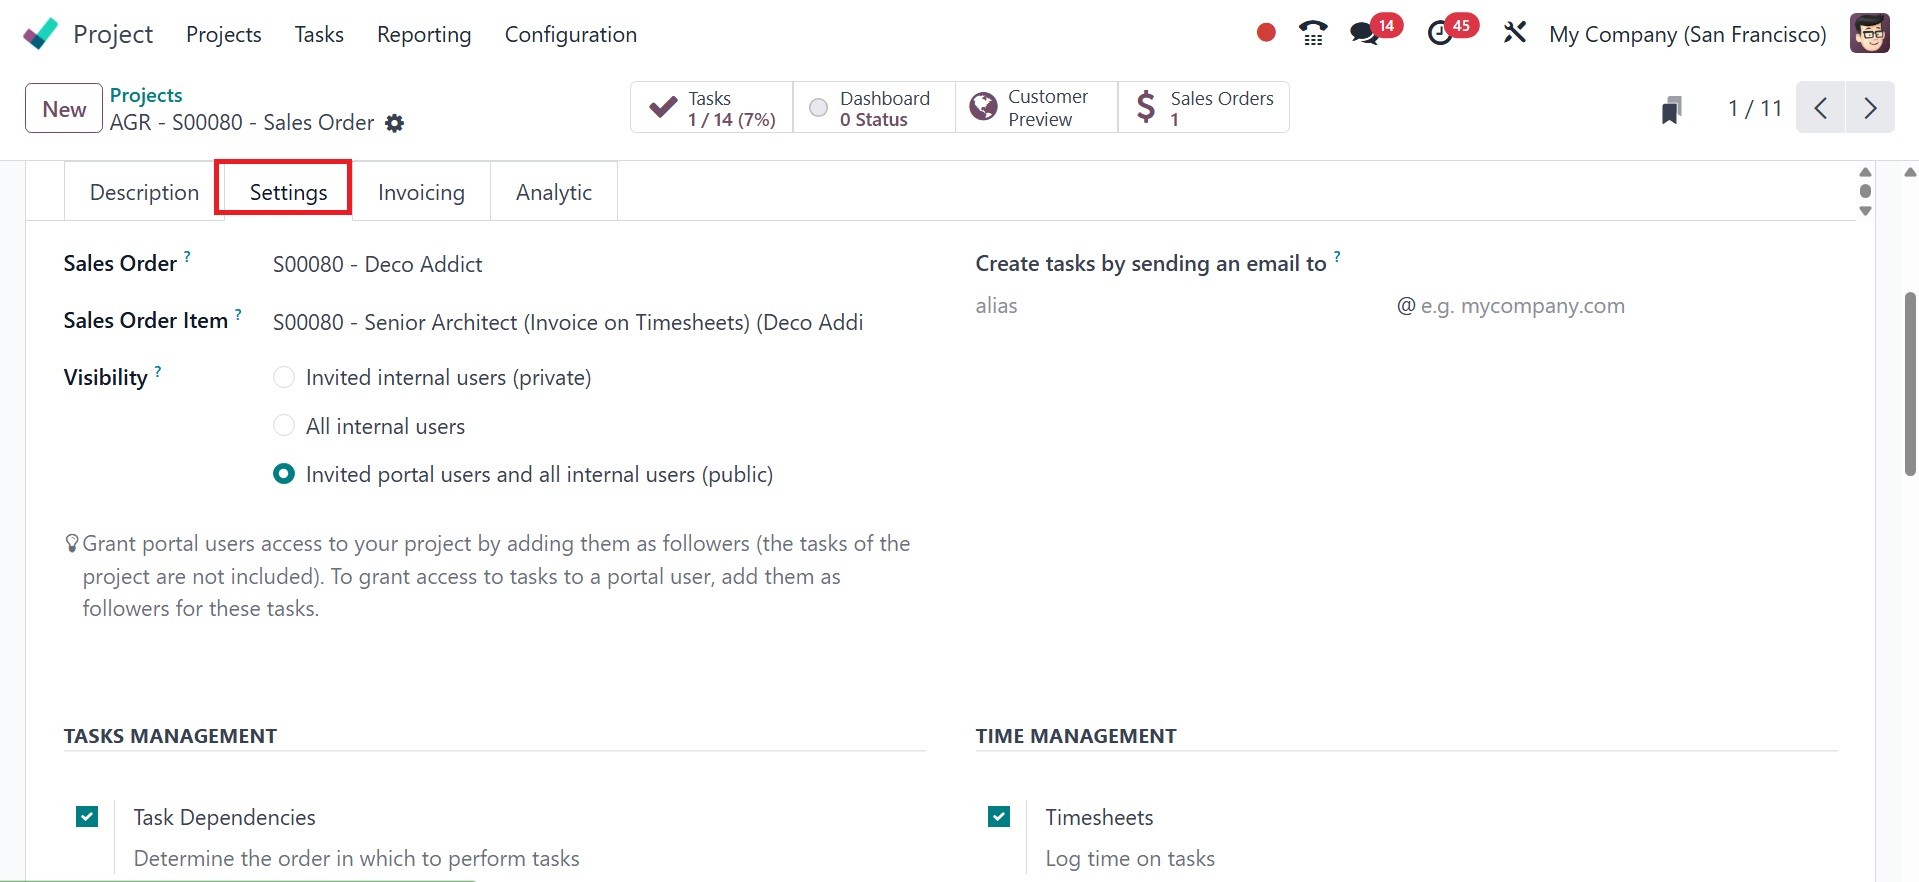
Now, on the project page, you can
have a three-dot icon in the
upper right corner. When it
is clicked, you will be able
to find the settings, click
on that to get the detailed
view of the project, as in
the image below.
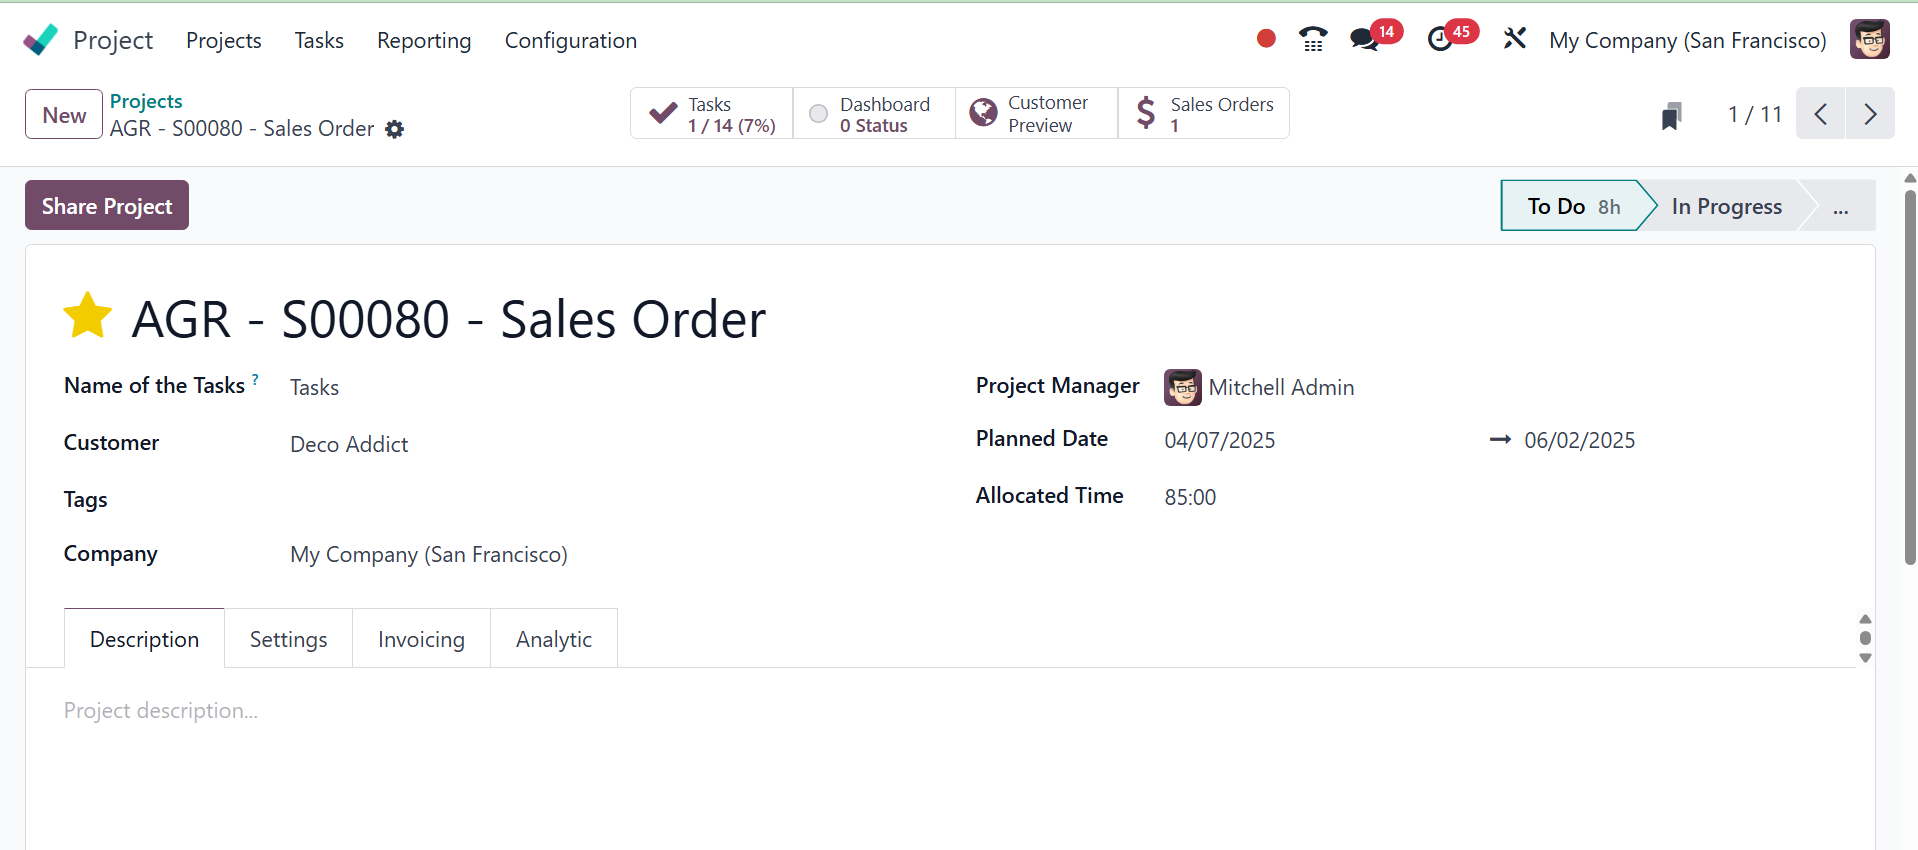
There, the page provides the
details, like the name of the
task, customer, tags,
company, project manager,
planned date, and allocated
time, respectively. You are
provided with the
description, settings,
invoicing, and analytic
options. Under the
description, you can add the
description of the project.
Under the settings option,
there are options like sales
order, sale order item,
visibility, create tasks by
sending an email to, task
management, time management,
sales and invoicing,
documents and analytics, and
field service, respectively.
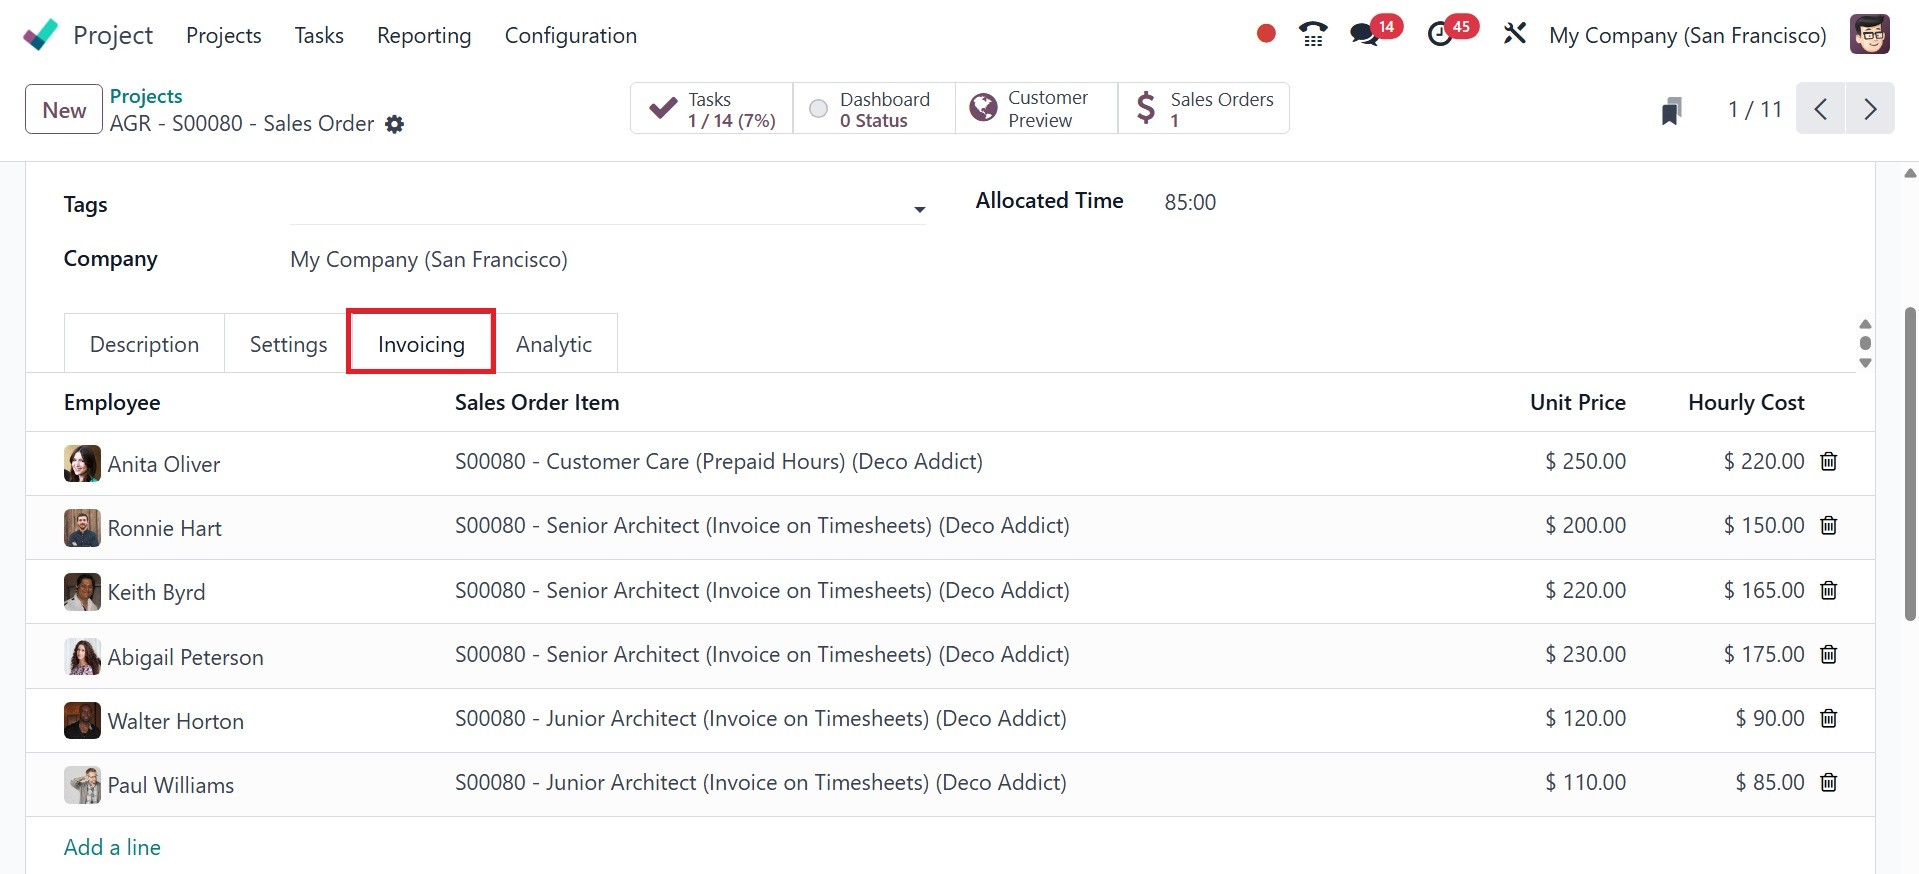
Now, under the invoicing option,
you have the details of the
employee, sale order item,
unit price, and hourly cost,
as in the image below.
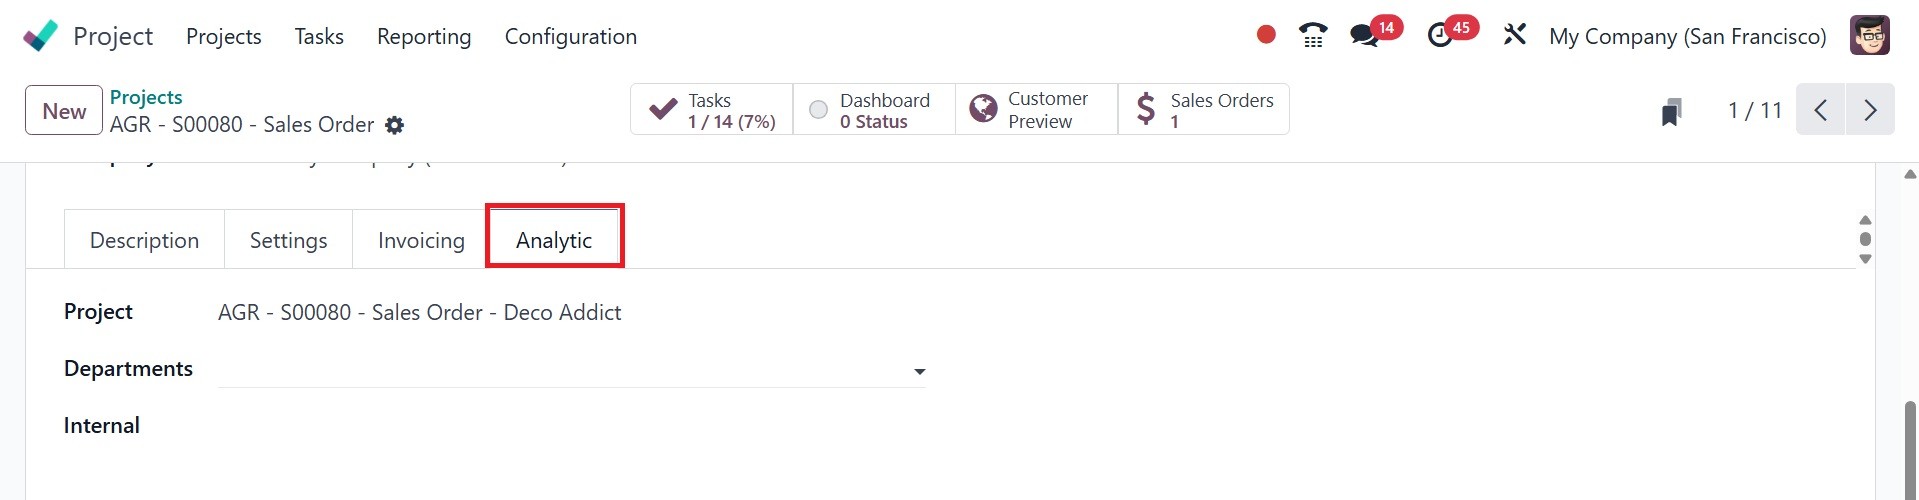
And the analytic option provides
the space to add the
projects, department, and
internal.
Now, there you can view different
smart tabs, such as task,
dashboard, customer preview,
and sale order.
1. Tasks: Within a project, this
tab serves as a central
location for handling
individual tasks. Task
details, assignees,
deadlines, and other
pertinent data can be
created, viewed, and updated
by users.
2. Dashboard: This tab provides a
high-level summary of the
status, progress, and
important metrics of the
project. It gives a brief
overview of the project's
status by visualizing project
data using graphs, charts,
and other widgets.
3. Customer Preview: This page
allows users to see the task
or project on the website or
customer portal just as the
customer would.
Administrators can review
reports, worksheets, and
timesheets from the viewpoint
of the client, which is
particularly helpful for
field service jobs.
4. The Sale Orders enables users
to associate a task or
project with a particular
sales order. They can
generate tasks from sales
orders, monitor the status of
associated sales orders, and
generate invoices based on
project activities thanks to
it.
By offering a centralized and
user-friendly method of
seeing, managing, and
interacting with various
project components within
Odoo, these smart tabs
simplify project management.
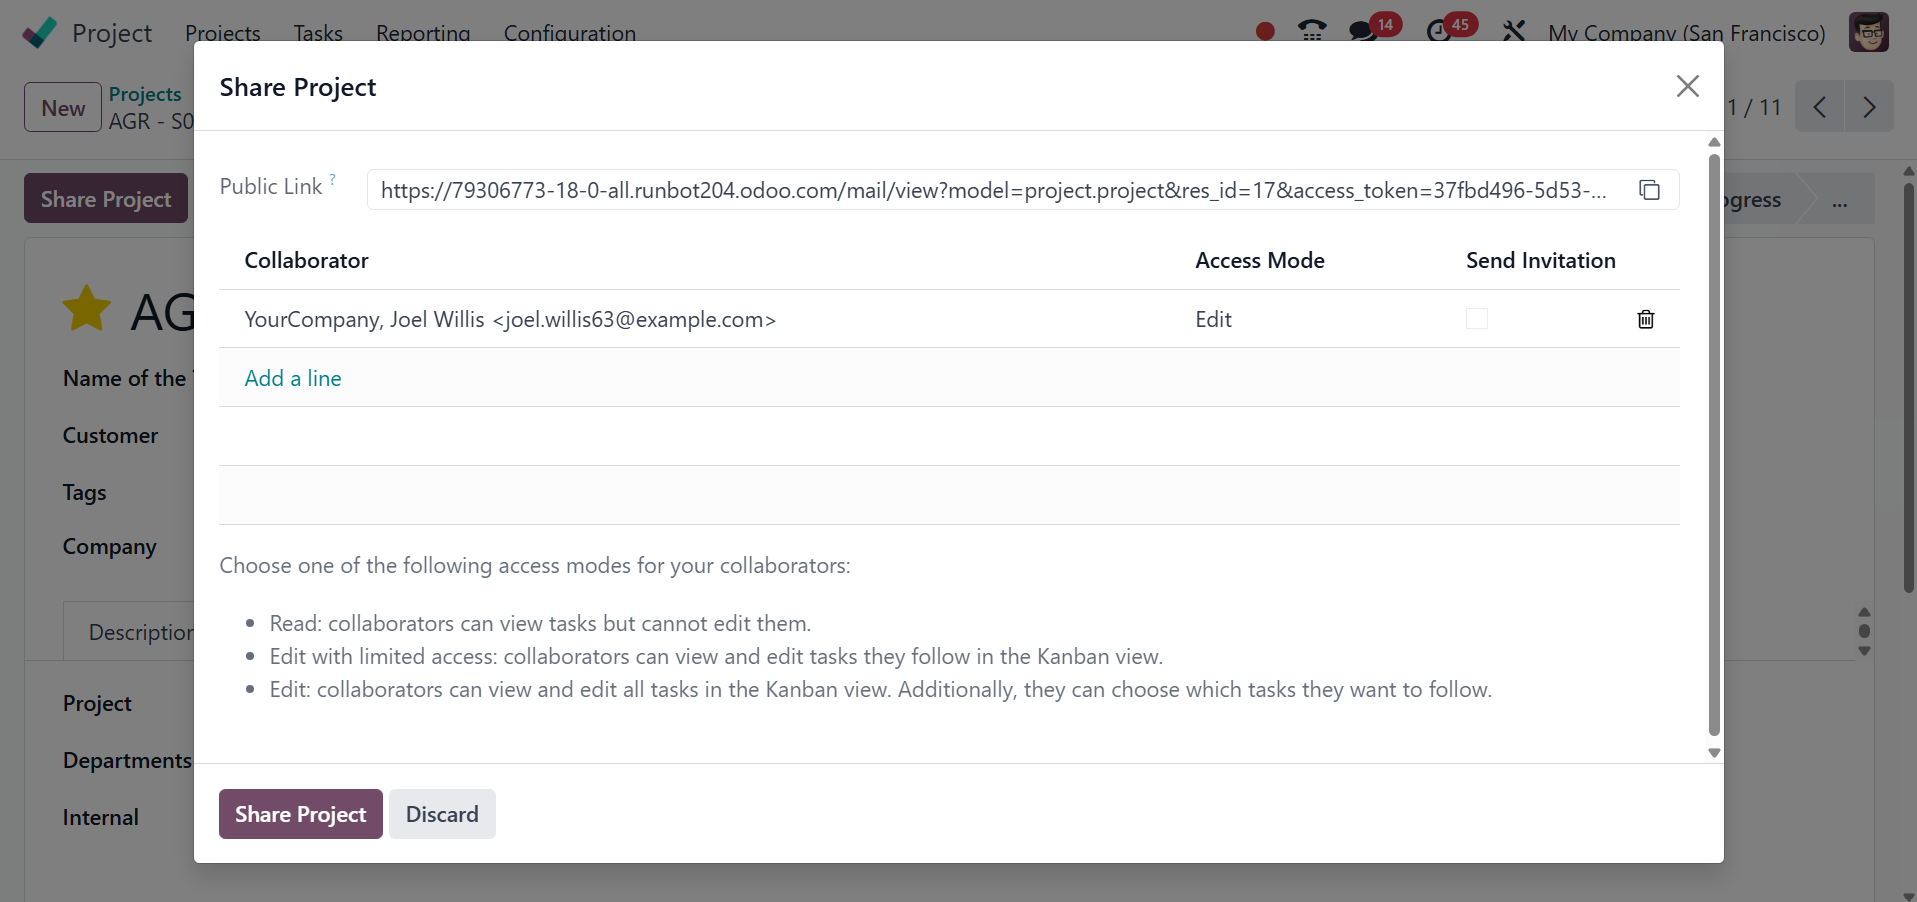
The share project icon provided
on the page helps you to
share the project, and on
selecting the icon, you will
get the page, as in the image
below.
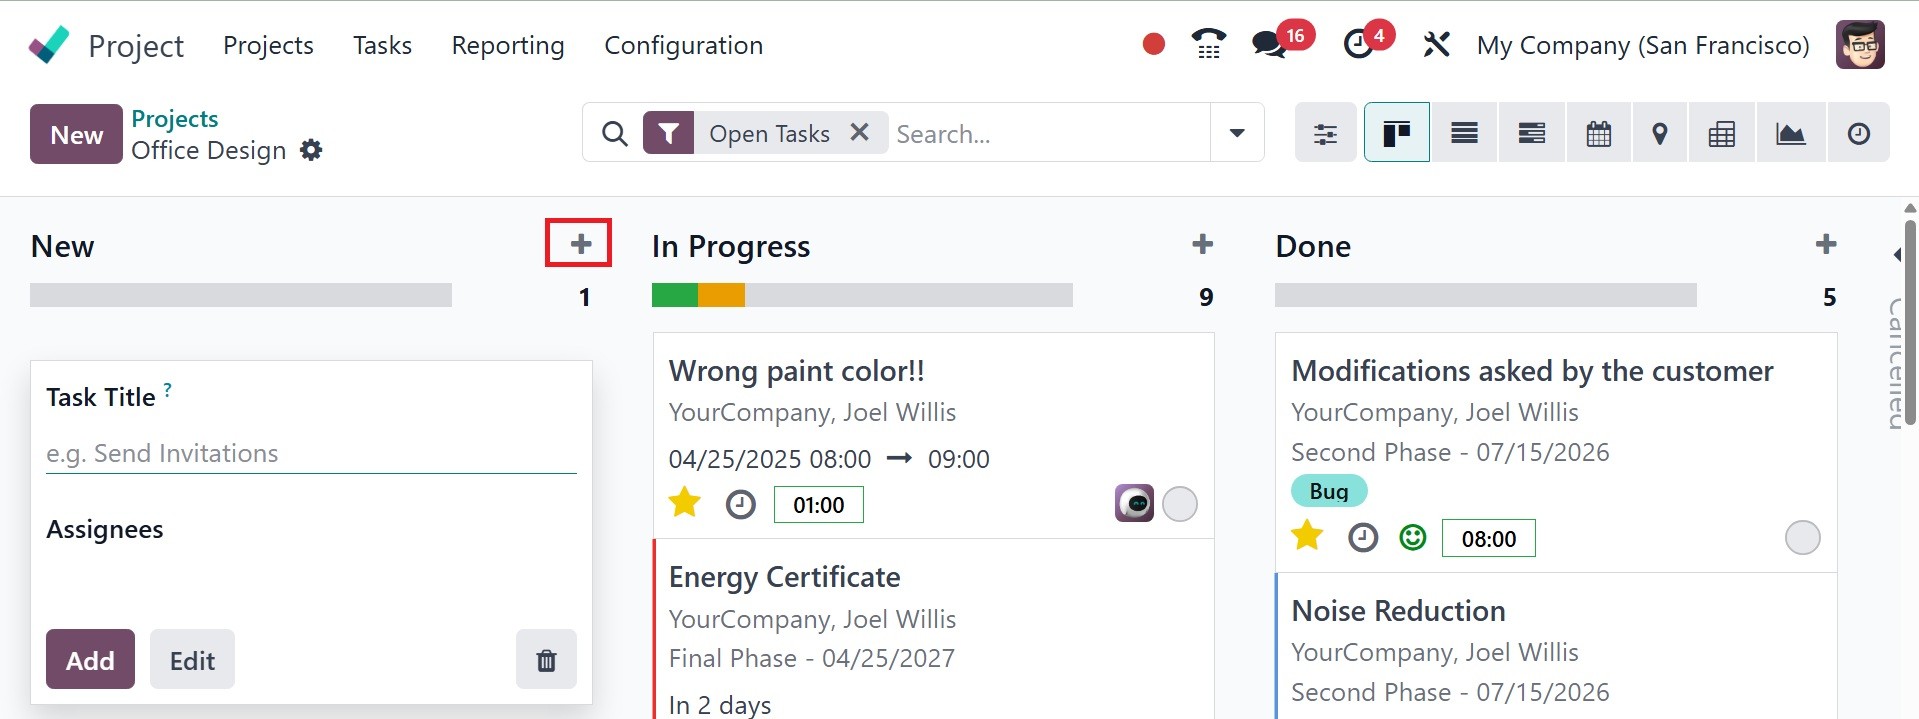
Now, as in the image below, you
can make use of the + icon to
quickly add new tasks to a
certain stage.
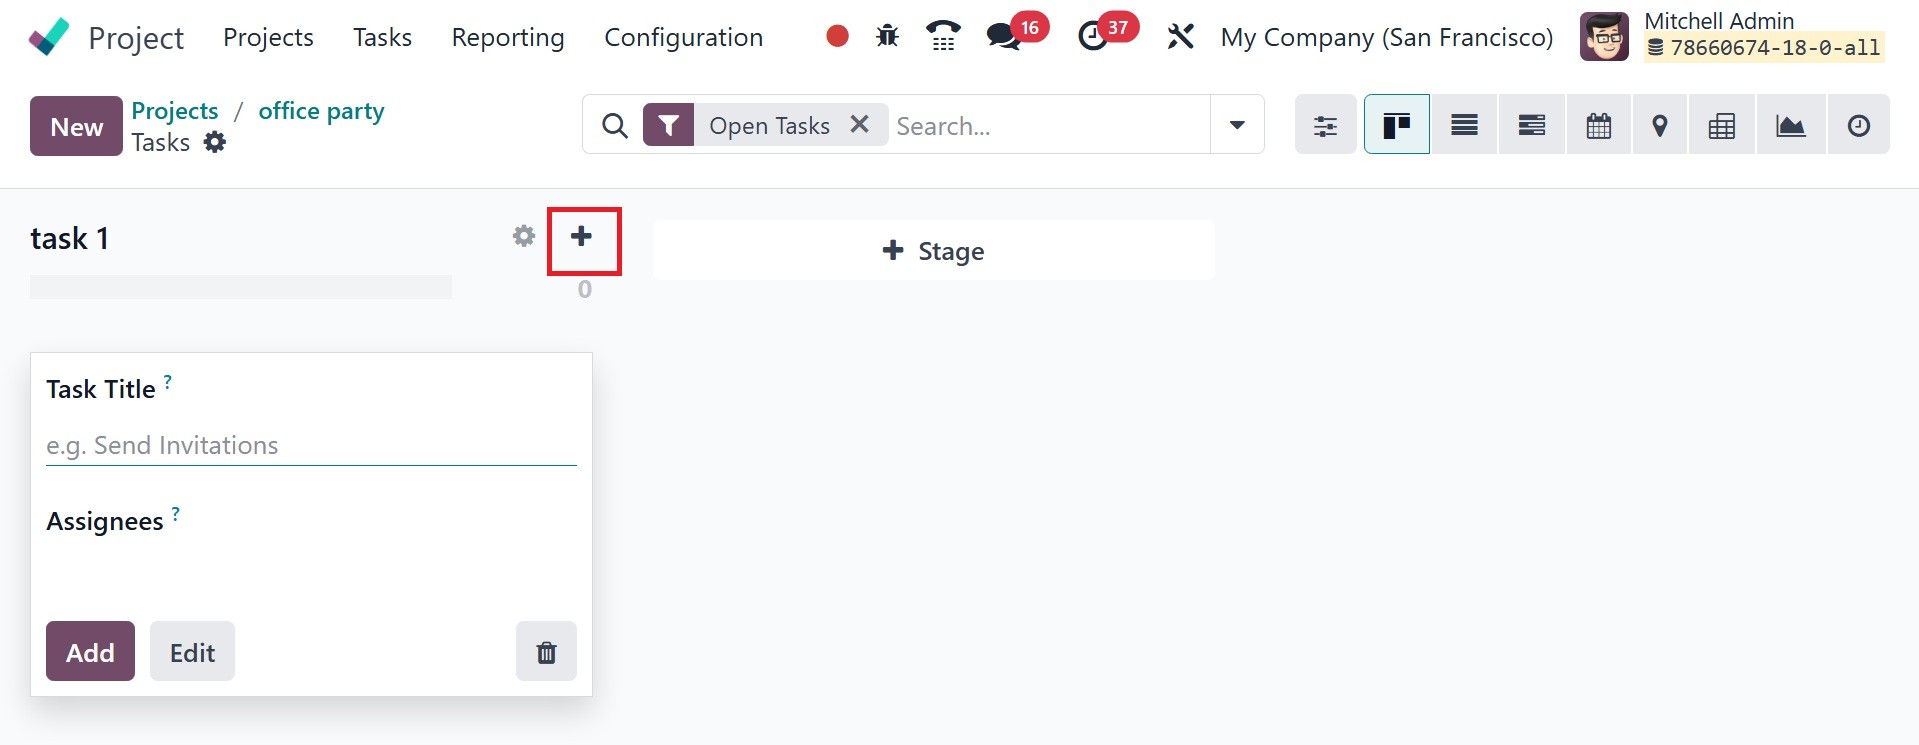
The task title and assignees must
be entered in the appropriate
fields. To add more details,
you can click the Edit
button.
The names of the assignments,
projects, and assignees can
be found here. When a
milestone is reached, you can
automatically deliver your
services by attaching it to a
sales order item and
mentioning it in the
designated section. Must
include the customer's name
on the invoice for the time
spent on the project, which
will be available only if the
Billable option has been
enabled.
According to the time shown on
the stage, the assignment was
added to the new stage one
minute ago.
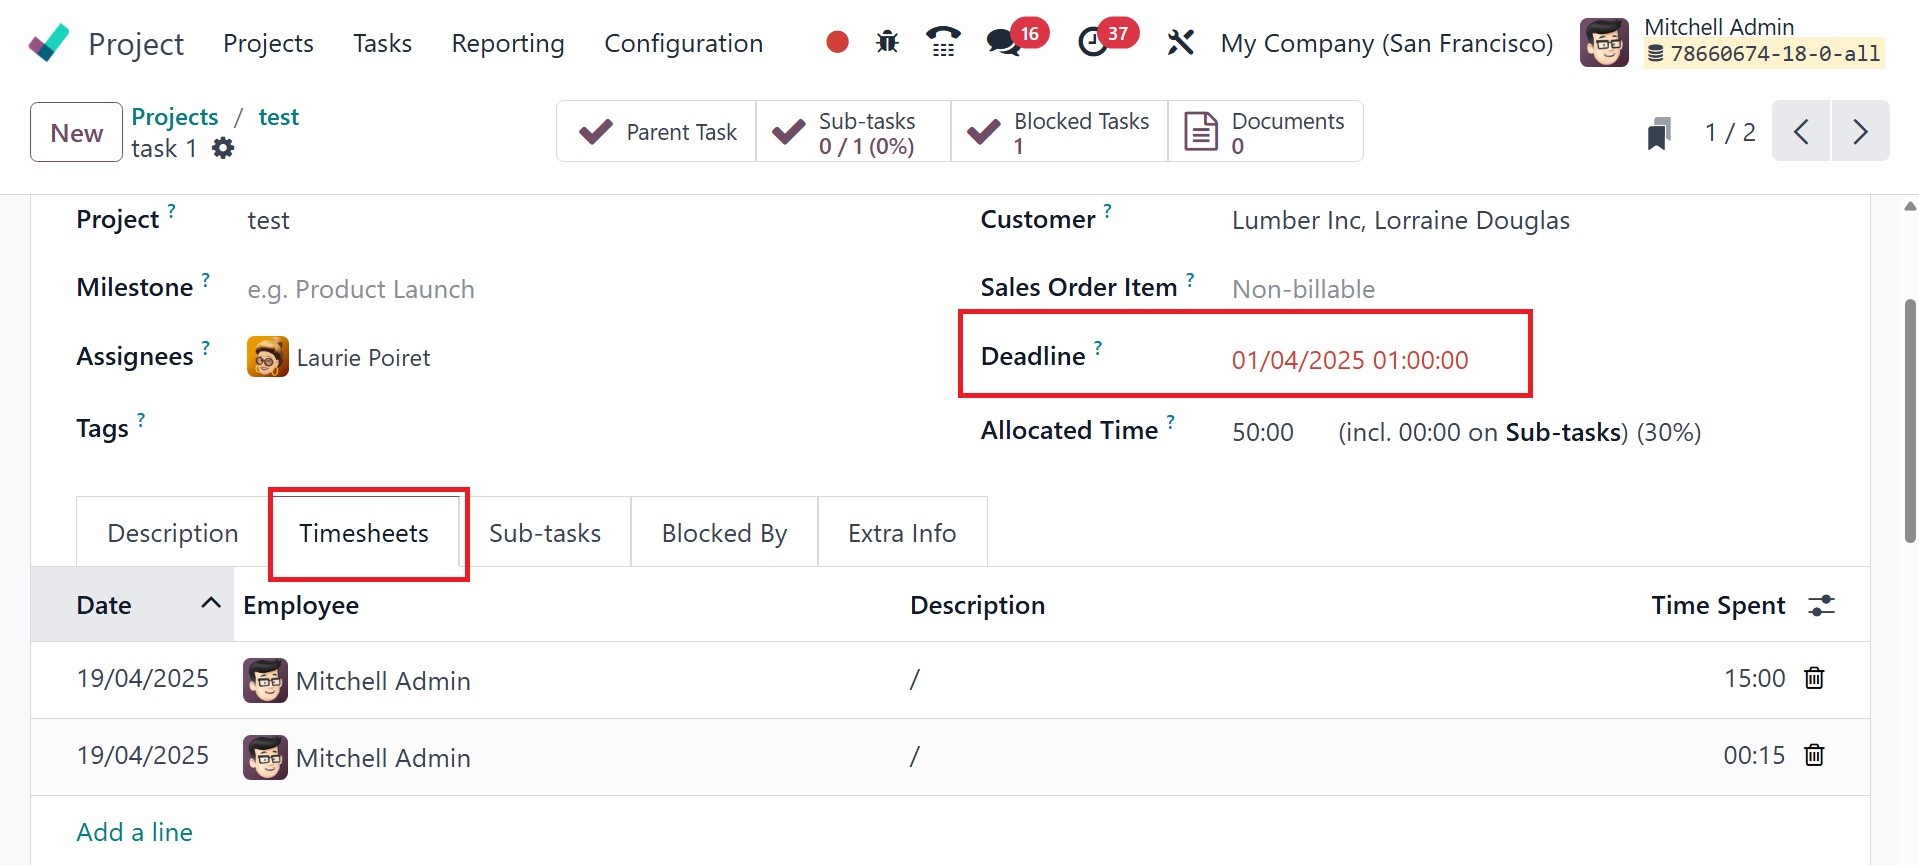
Give the project a due date. You
can now enter the start and
end dates in the Deadline
field in Odoo 18. Below that,
you can add the allocated
time as well. Next, include
the relevant tags. Under the
Description tab, you can
include a detailed
description of the work. If
you want to track how much
time you spend on a project
or job, you may turn on the
Timesheet option from the
module's Settings menu.
The Timesheet tab will show up in
the task's form view
automatically when this
option is chosen.
The desired hours can be
specified in the Allocated
Hours column. The employees'
time worked can be manually
recorded by using the Add a
Line button. Based on the
total number of hours spent
on the work, you may see its
progress under this tab.
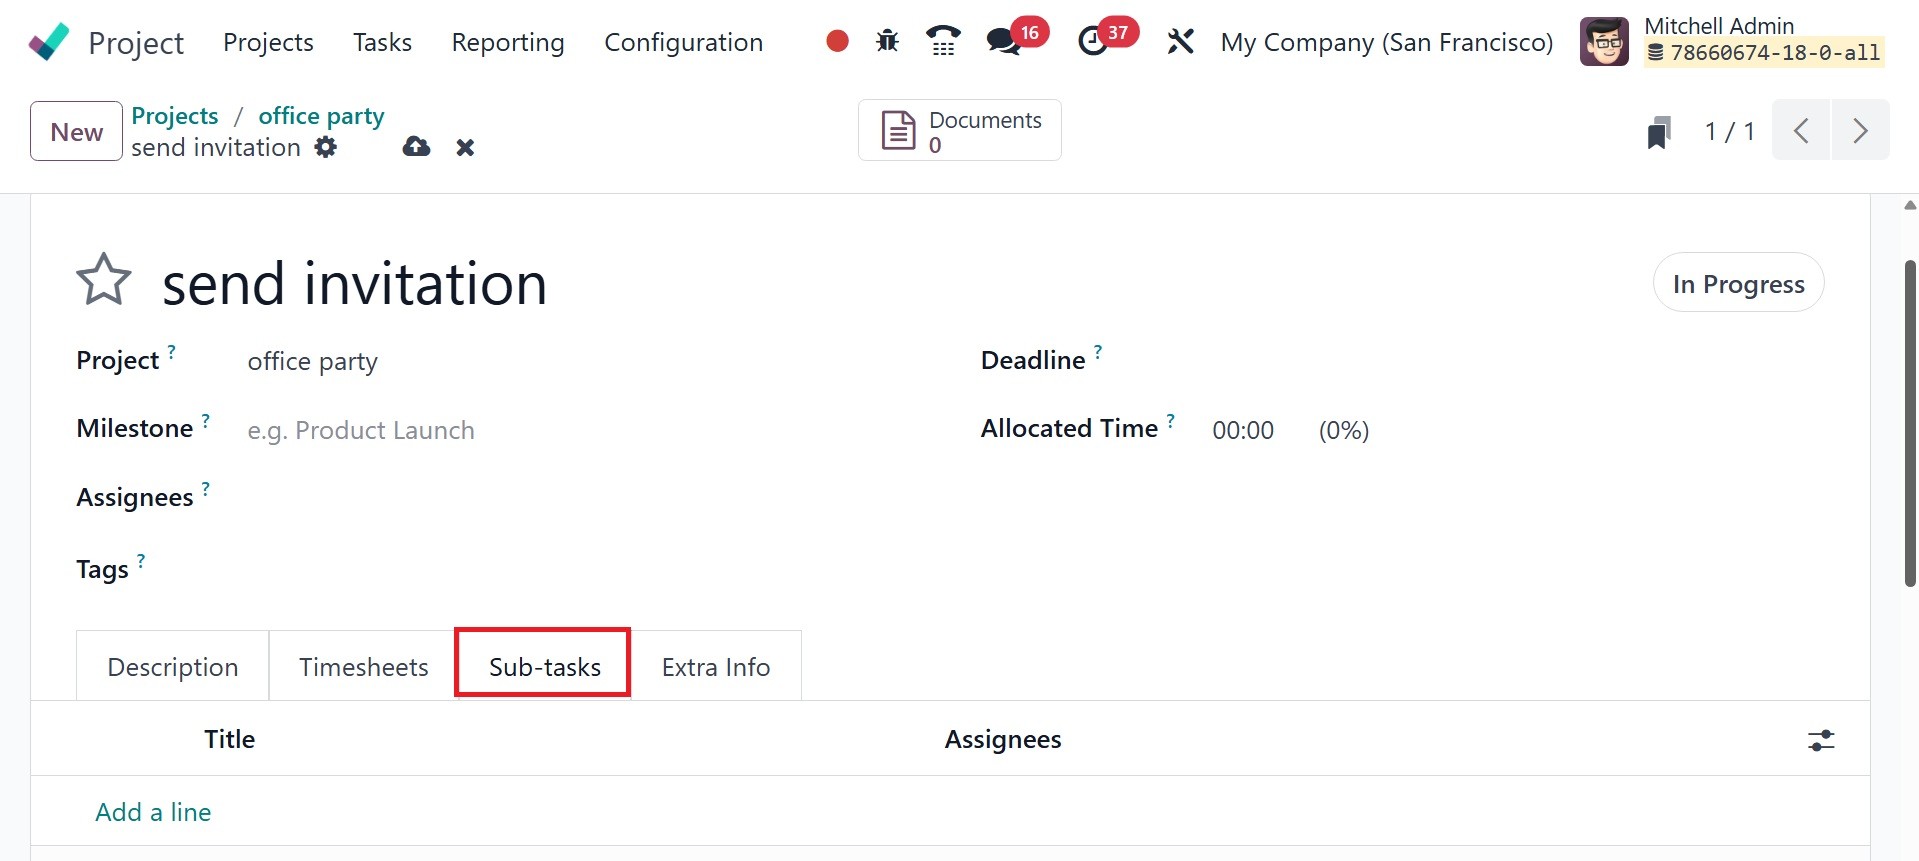
You may make the project operate
more smoothly by breaking up
your work into smaller
milestones. The Add a Line
button beneath the Sub-Tasks
tab allows you to add them
one at a time. This subtask
can be created from the
Kanban card as well.
Details include the Title,
Assignees, Deadline, and
Stage. After creating the
sub-task, click the View Task
button in this tab to see it
in detail.
For certain projects, a range of
tasks may need to be
accomplished. In these
situations, it is important
to describe the order of the
tasks. The Settings menu
contains the Task
Dependencies feature.
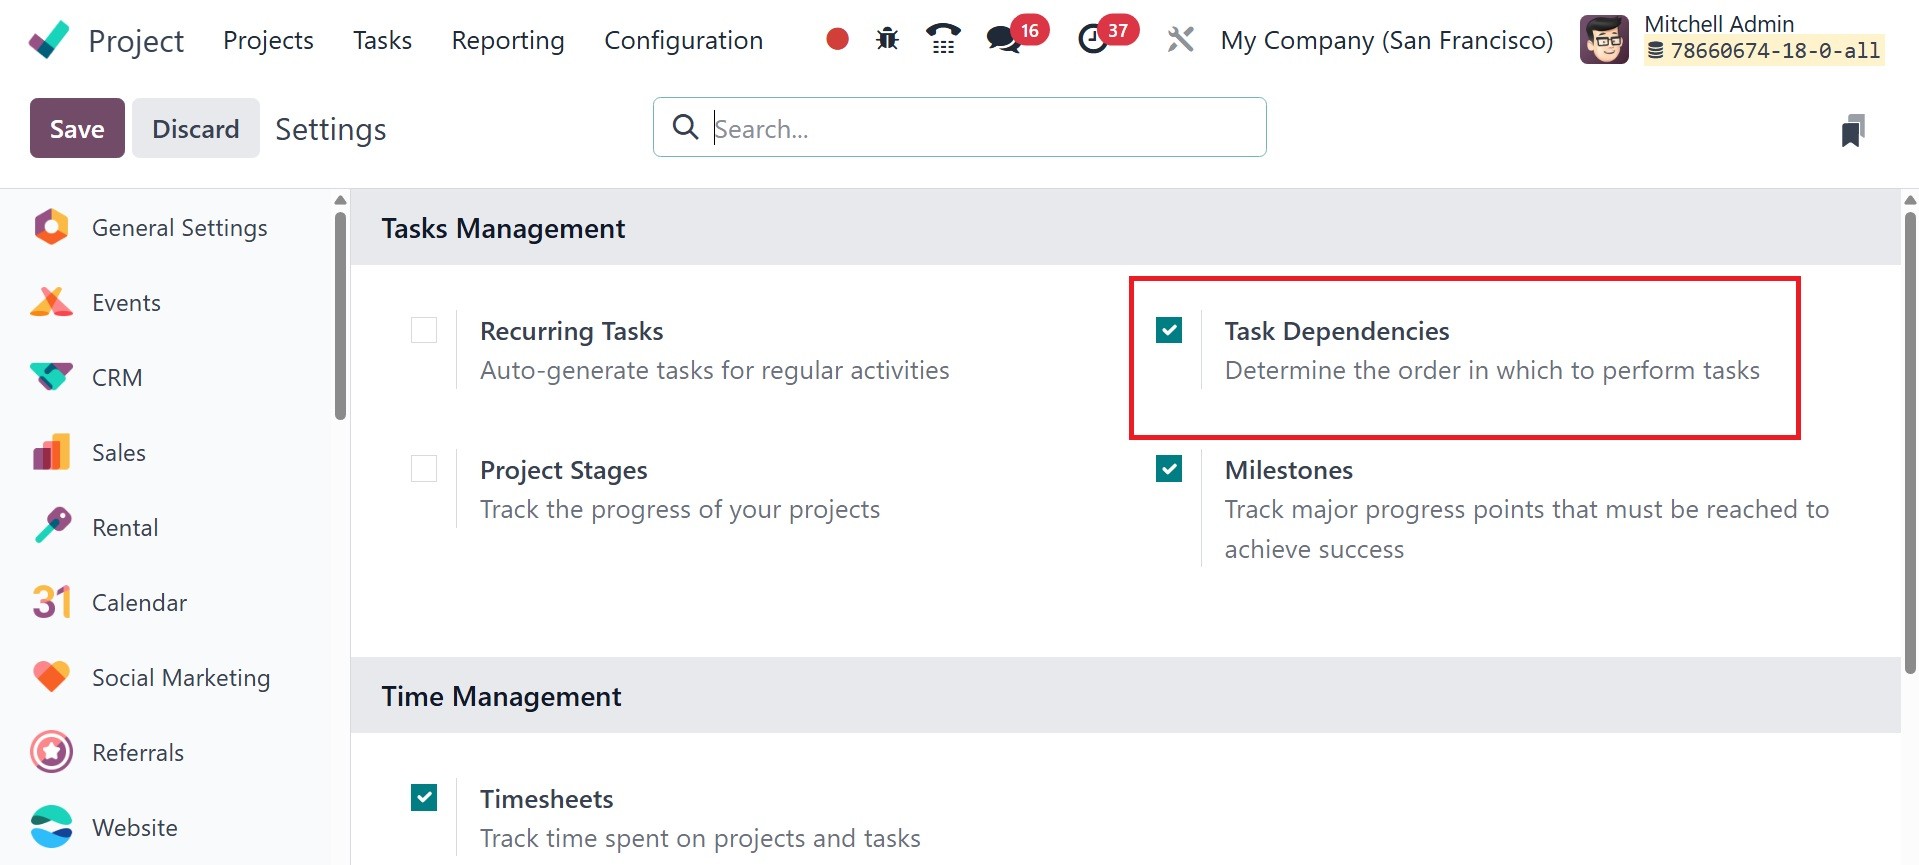
This feature will dictate the
sequence in which the tasks
should be finished. This
feature will add a new tab
called Blocked By to the
task's form view.
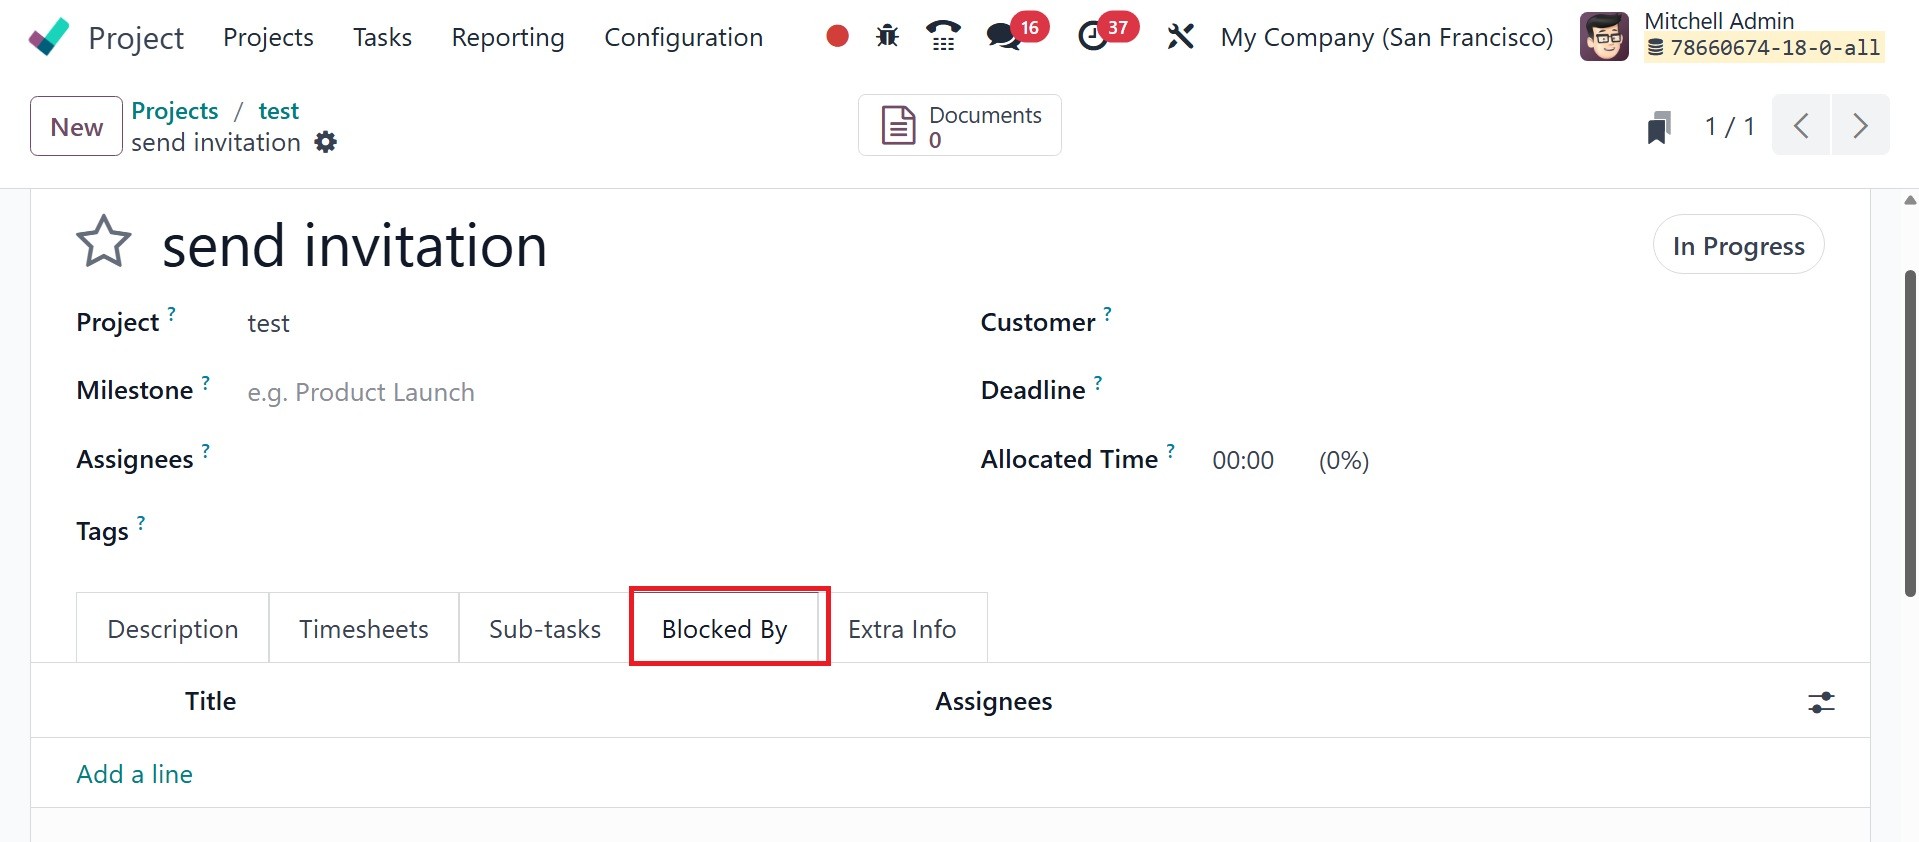
If you want to do this task
before the other, you can use
the Add a Line button to
prevent it from happening.
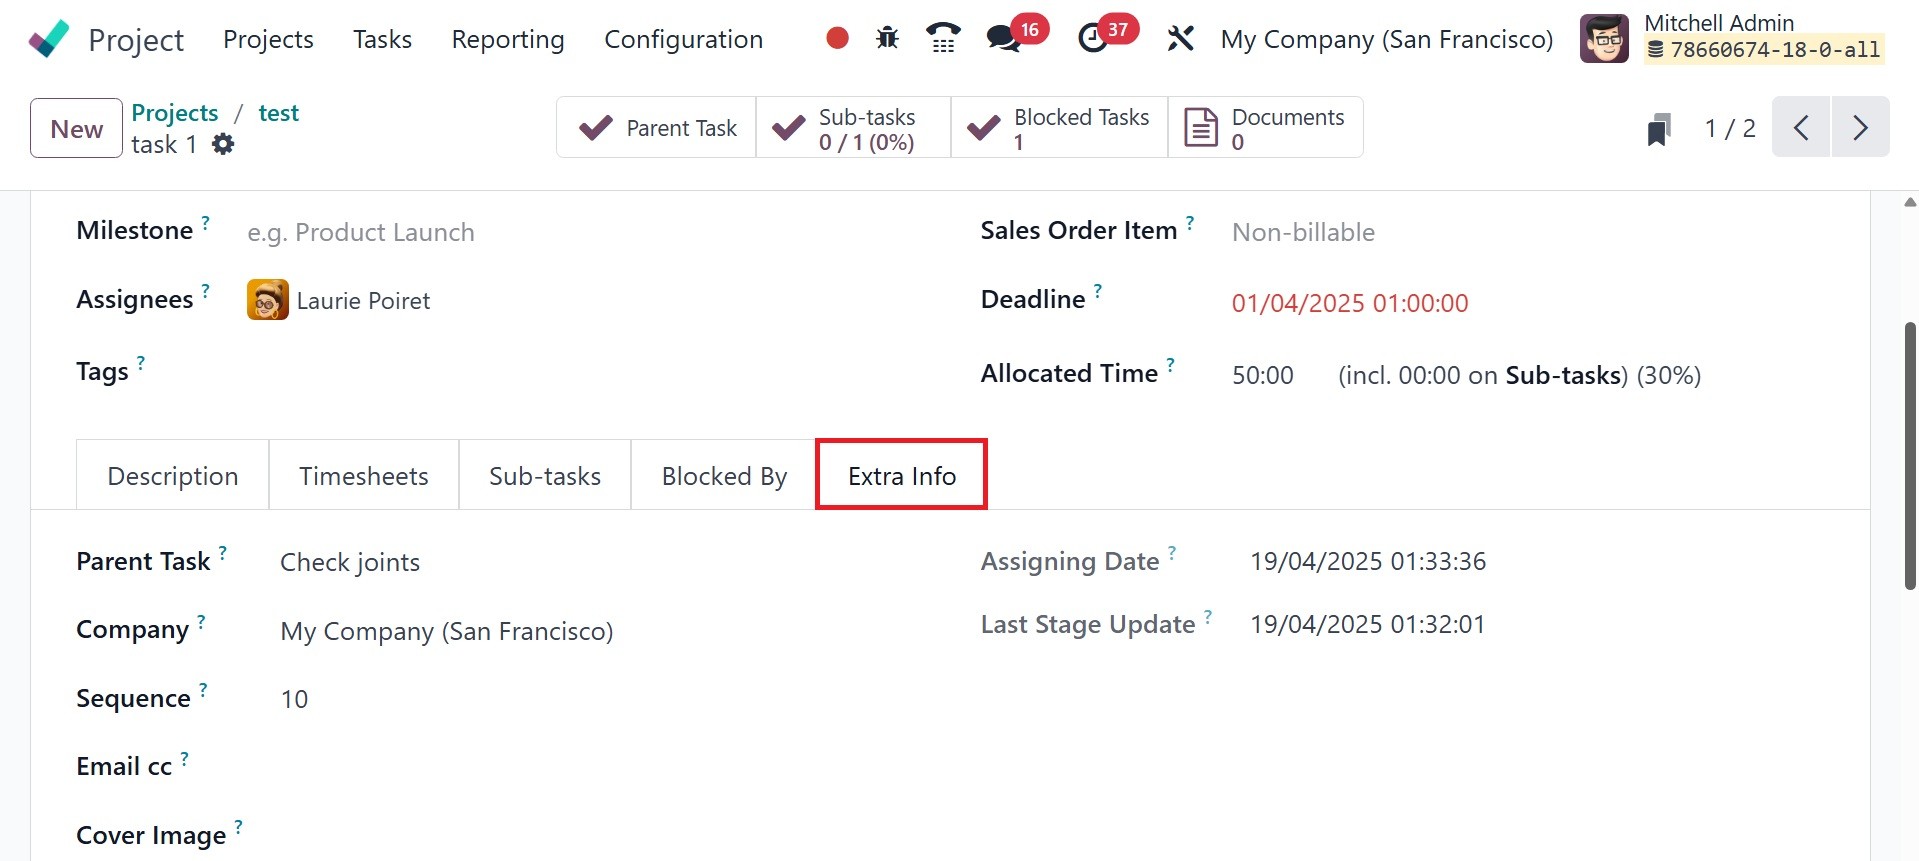
The Parent Task, Analytic
Account, Company, Sequence,
Email cc, and Cover Image can
all be mentioned in the Extra
Info tab. The corresponding
fields will contain the
Assigning Date and Last Stage
Update. This is how a new
project gets tasks added to
it.
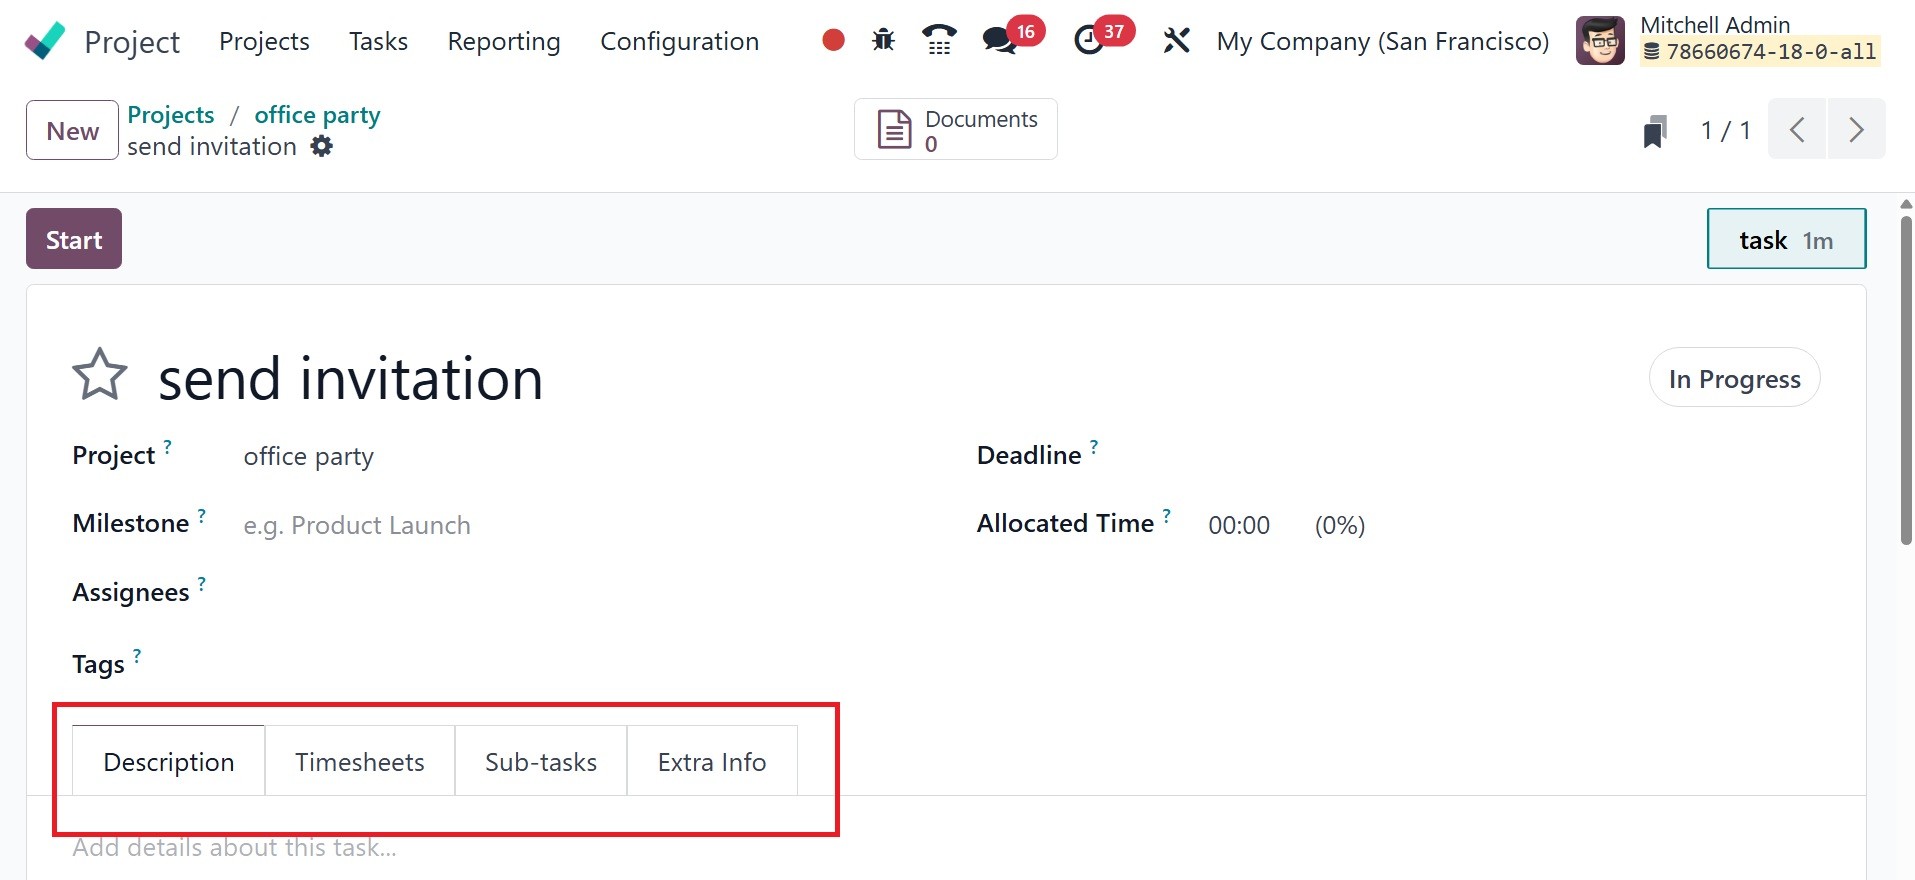
As seen in the figure below, once
the task's configuration is
finished, you will have
access to a number of smart
buttons on the window.
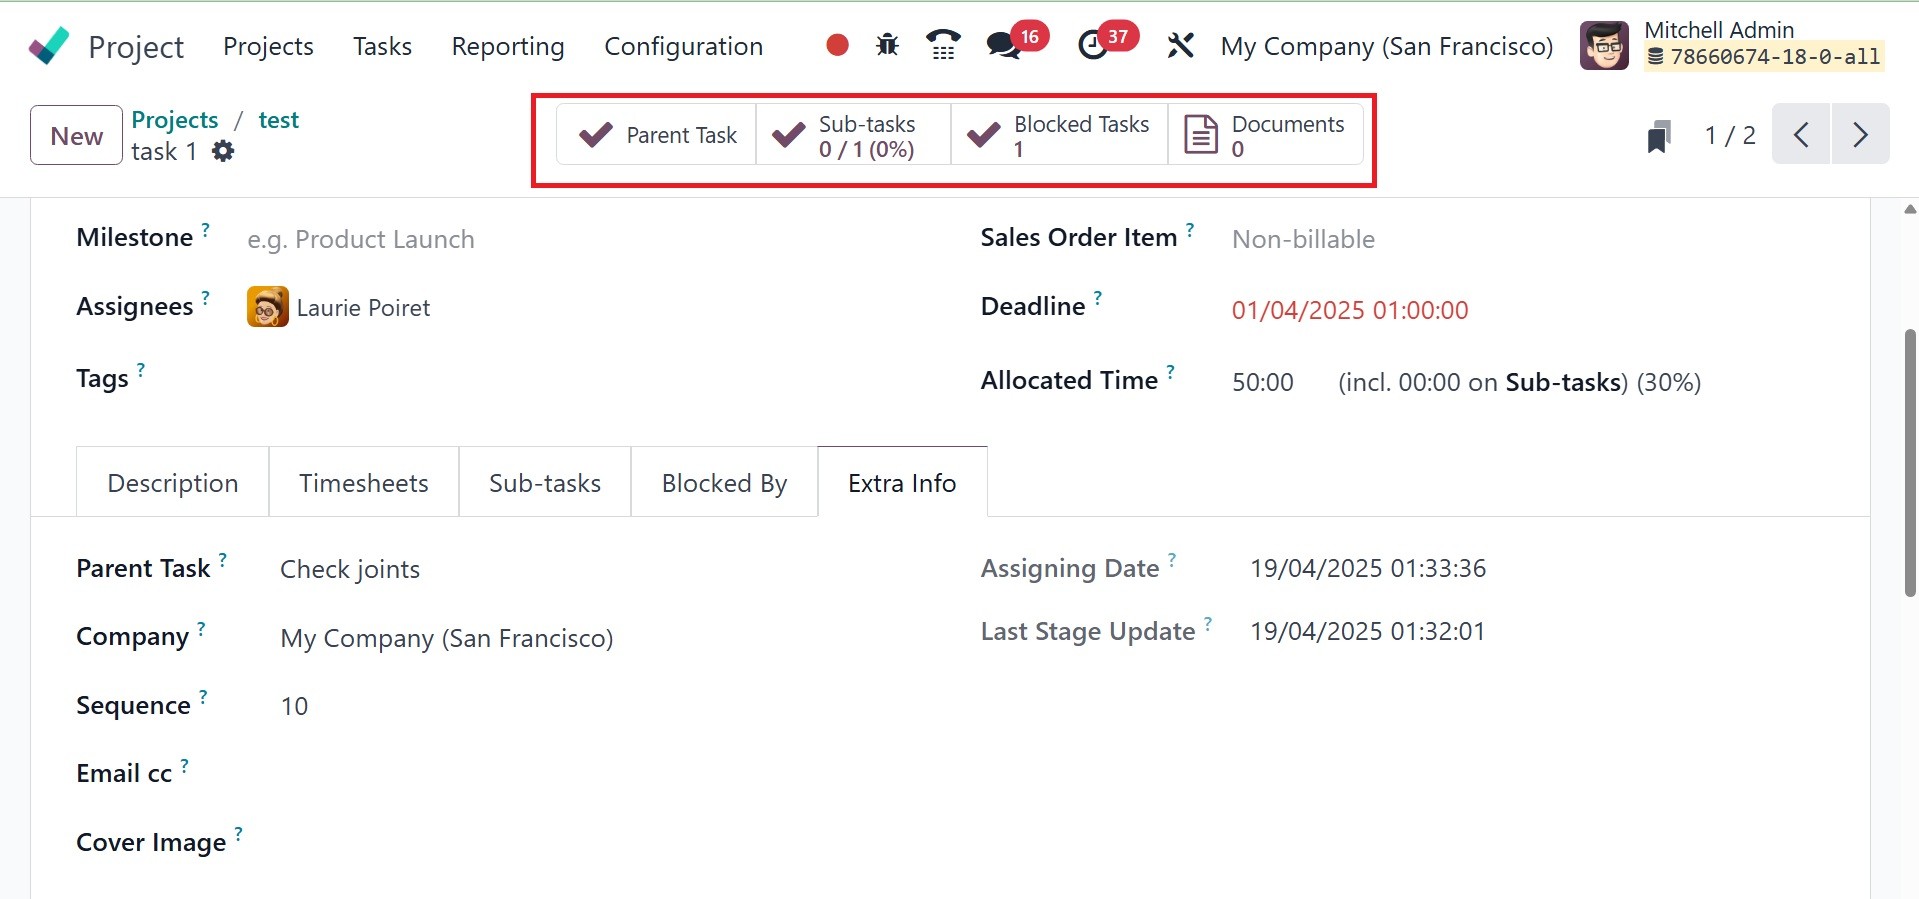
These buttons will show the
current task's documents,
blocked tasks, parent tasks,
and subtasks. You may track
how much time you spend on
this particular task by using
the Start button, which is
located here. Odoo18 will
start recording the time when
you click this button.
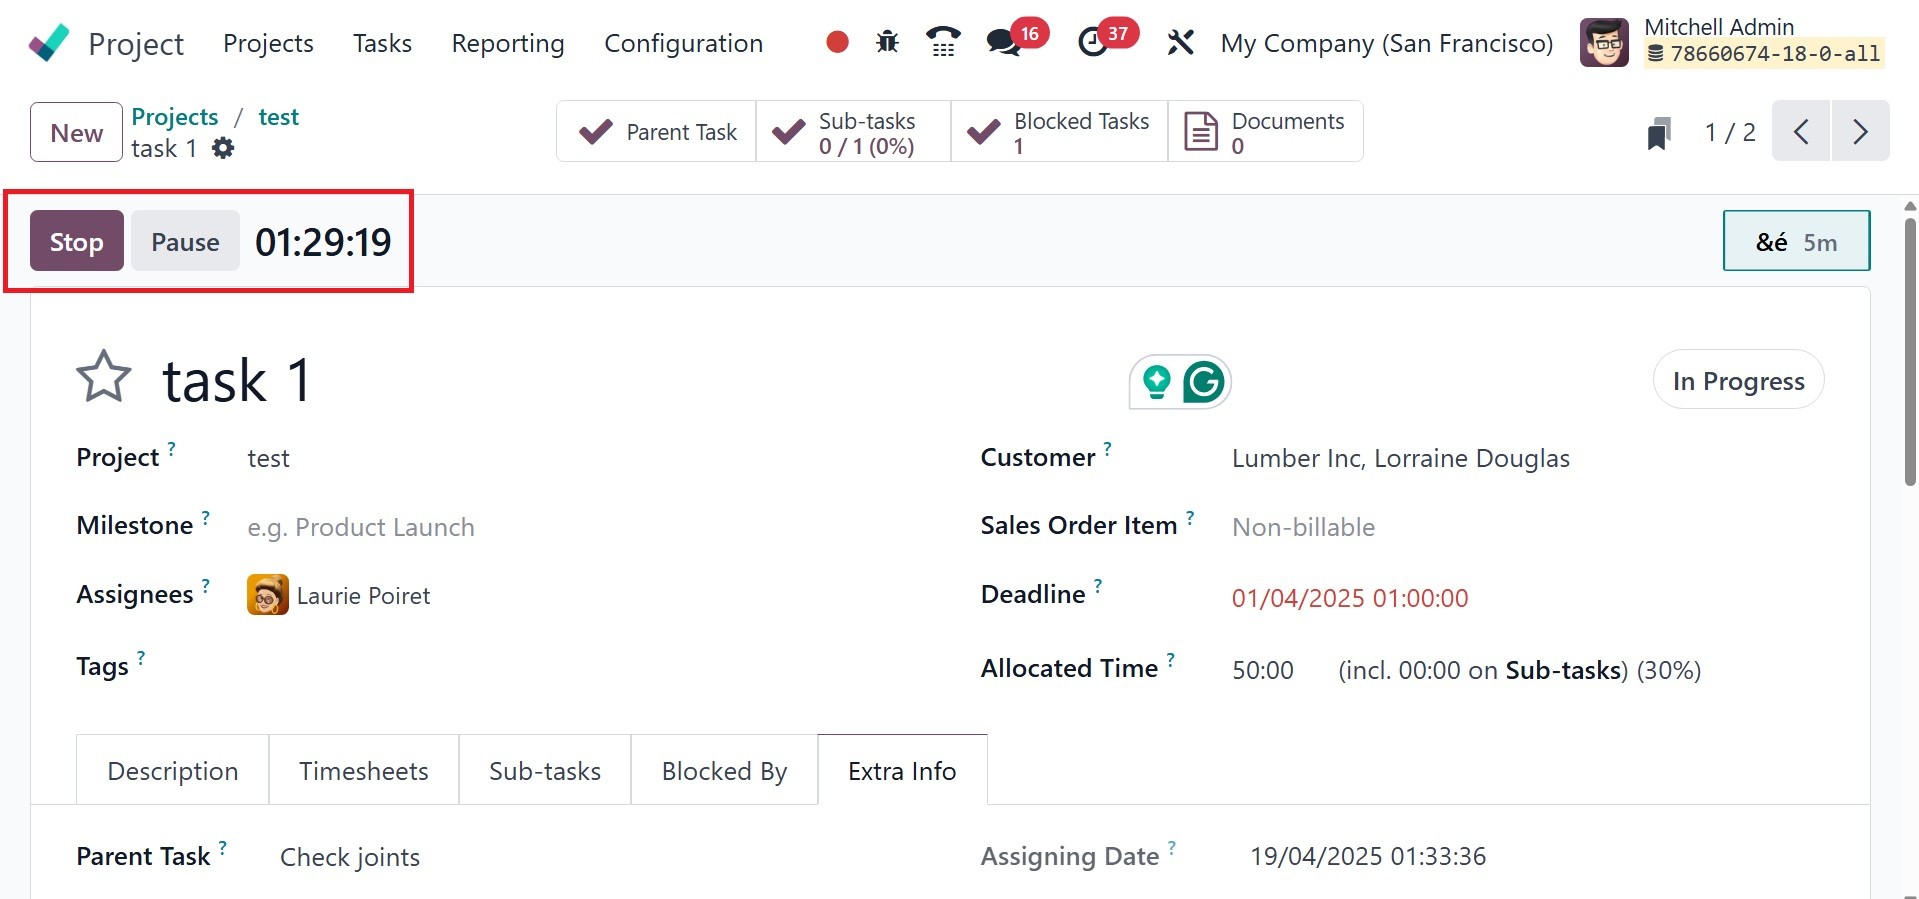
To perform the necessary actions,
the Pause and Stop buttons
are available. After
completing the task, you can
click the Stop button. A
pop-up window will show up to
verify the recorded time.
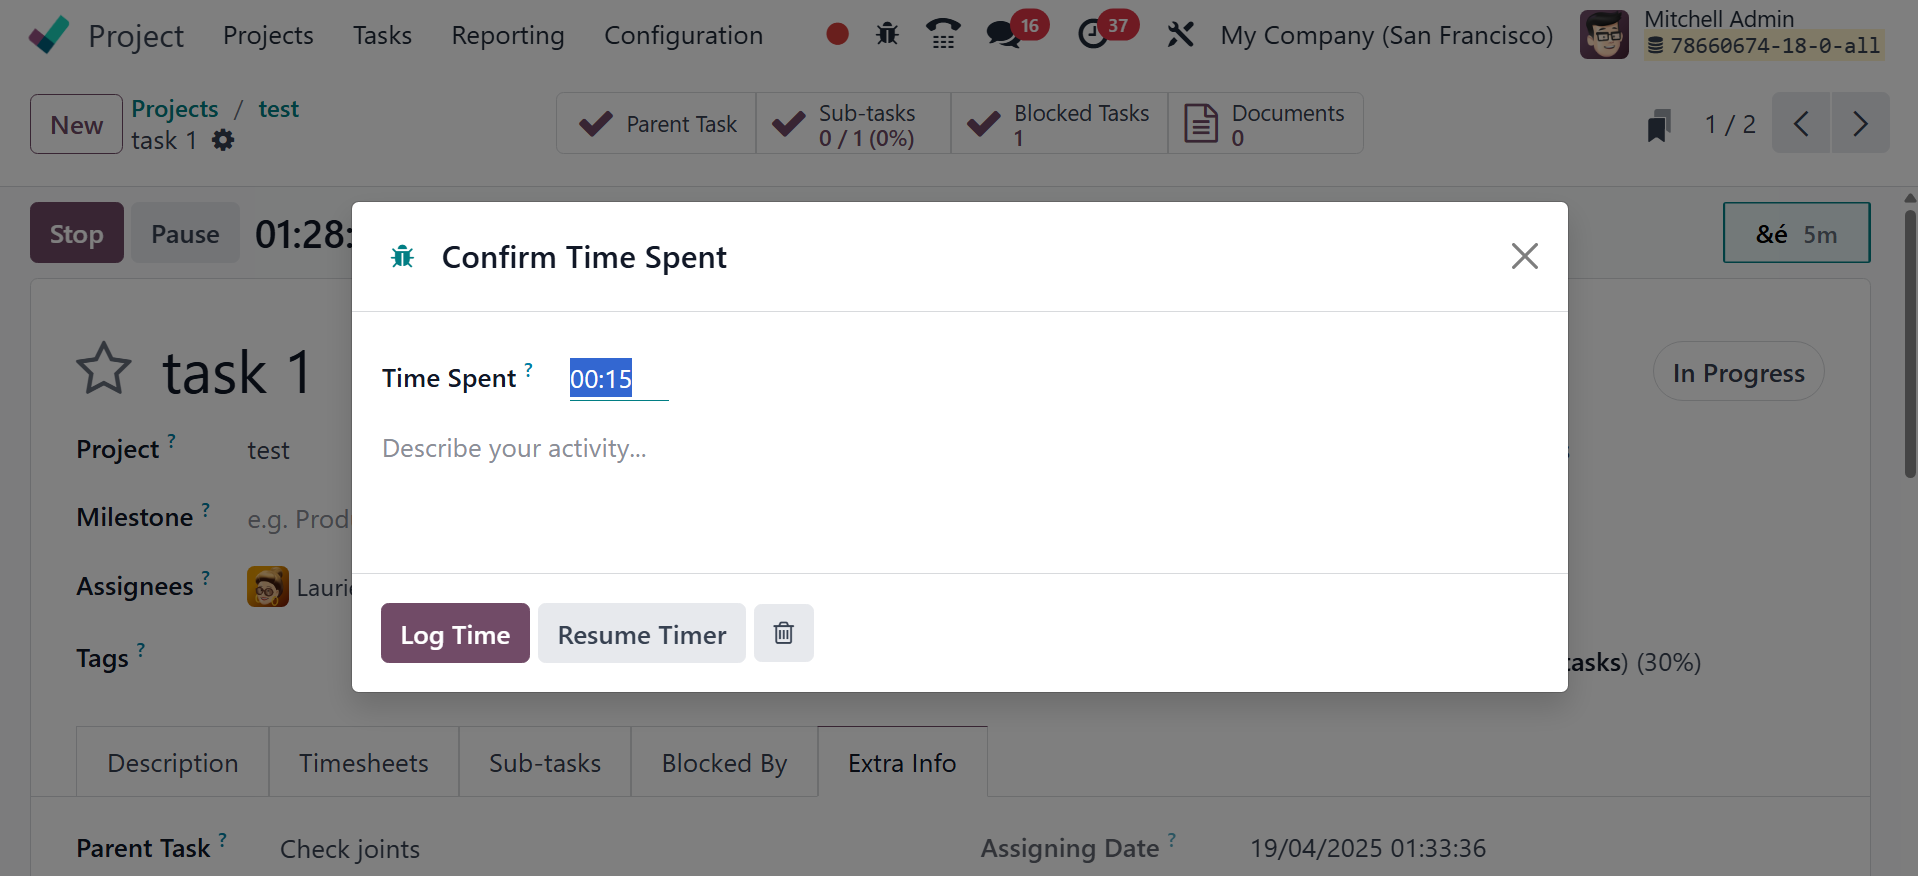
Hours spent will be shown in the
pop-up window, and you can
describe your activities in
the spaces provided. Then
click the "Save" button.
The Timesheets tab in the form
view now displays the time
that was monitored. You can
see the task's progress and
remaining hours on this page.