1. Rental Orders
All of the duties required for
rental operations are handled
by the Rental module. In
addition to searching for
rental-eligible products, the
rental module provides
facilities for handling
rental orders, generating
rental estimates, and
preparing invoices and
payments. The example below
shows how the page for the
rental module will appear.
You'll find out more about the
rental products that have
already been manufactured and
the person who oversees them.
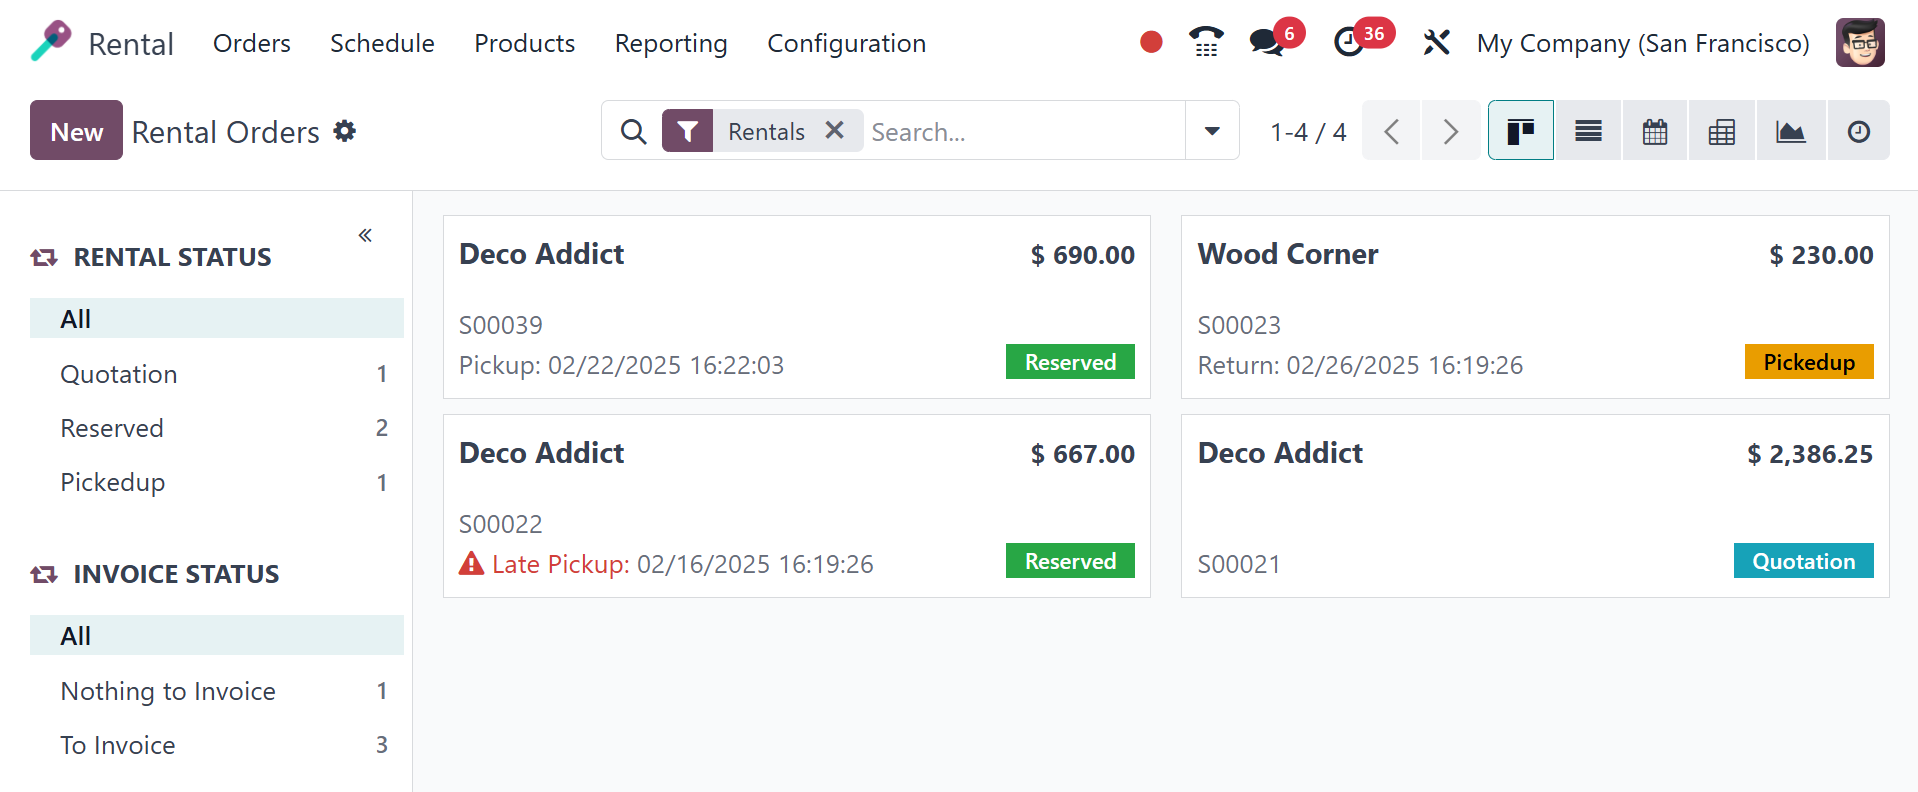
On the left side of the
screen, the rental and
invoice statuses are shown in
the Kanban view of the page.
There are numerous rental
statuses, such as Quotation,
Confirmation, and Pickedup.
There are additional views of the
page, including Kanban, List,
Pivot, Calendar, Activity,
and Graph. You can place a
new rental order by simply
selecting the New icon.
Selecting the New option to
make a new rental will bring
up the screen below.
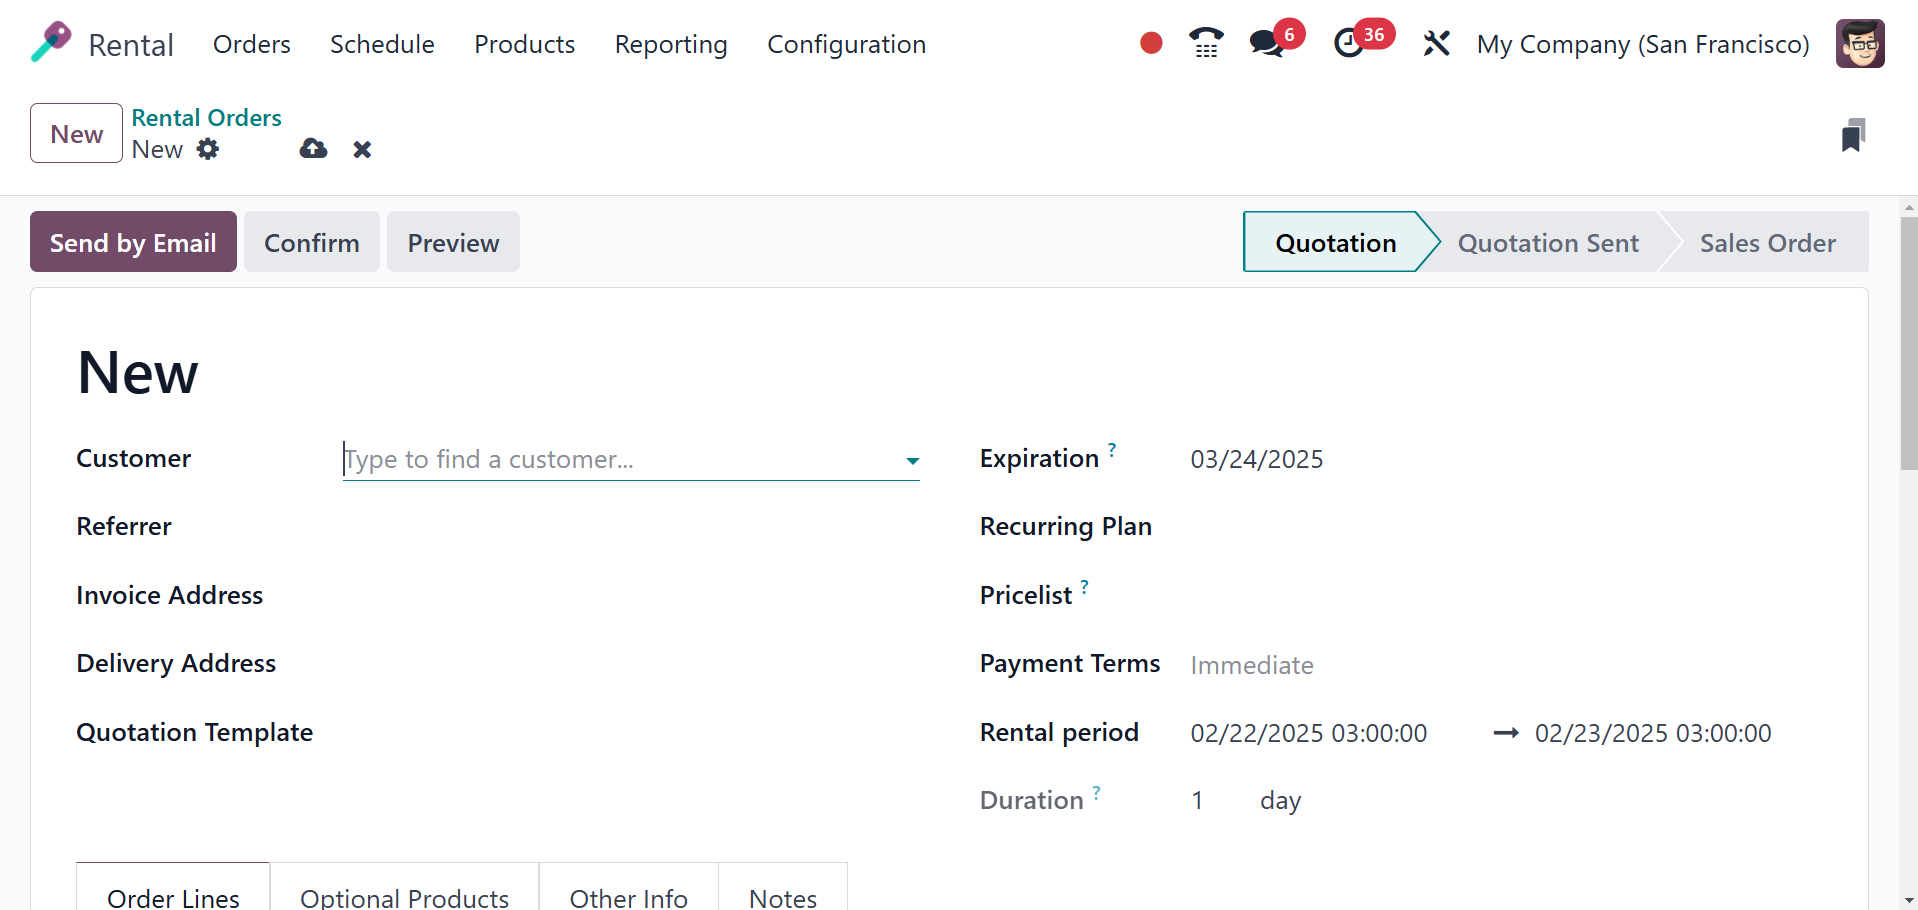
On the creation page, there is a
space for you to enter the
customer's name, the source
of the referral, the invoice
address, the delivery
address, the expiration date,
the recurring date, the price
list, and the terms of
payment. Businesses can
specify the beginning and
ending dates of a rental with
the Rental Period and
Duration options,
guaranteeing appropriate
scheduling, pricing, and
availability monitoring.
The start and end times of the
rental are specified by the
rental period. Businesses can
charge clients according to
time-based pricing (hourly,
daily, weekly, or monthly) by
using the Duration field.
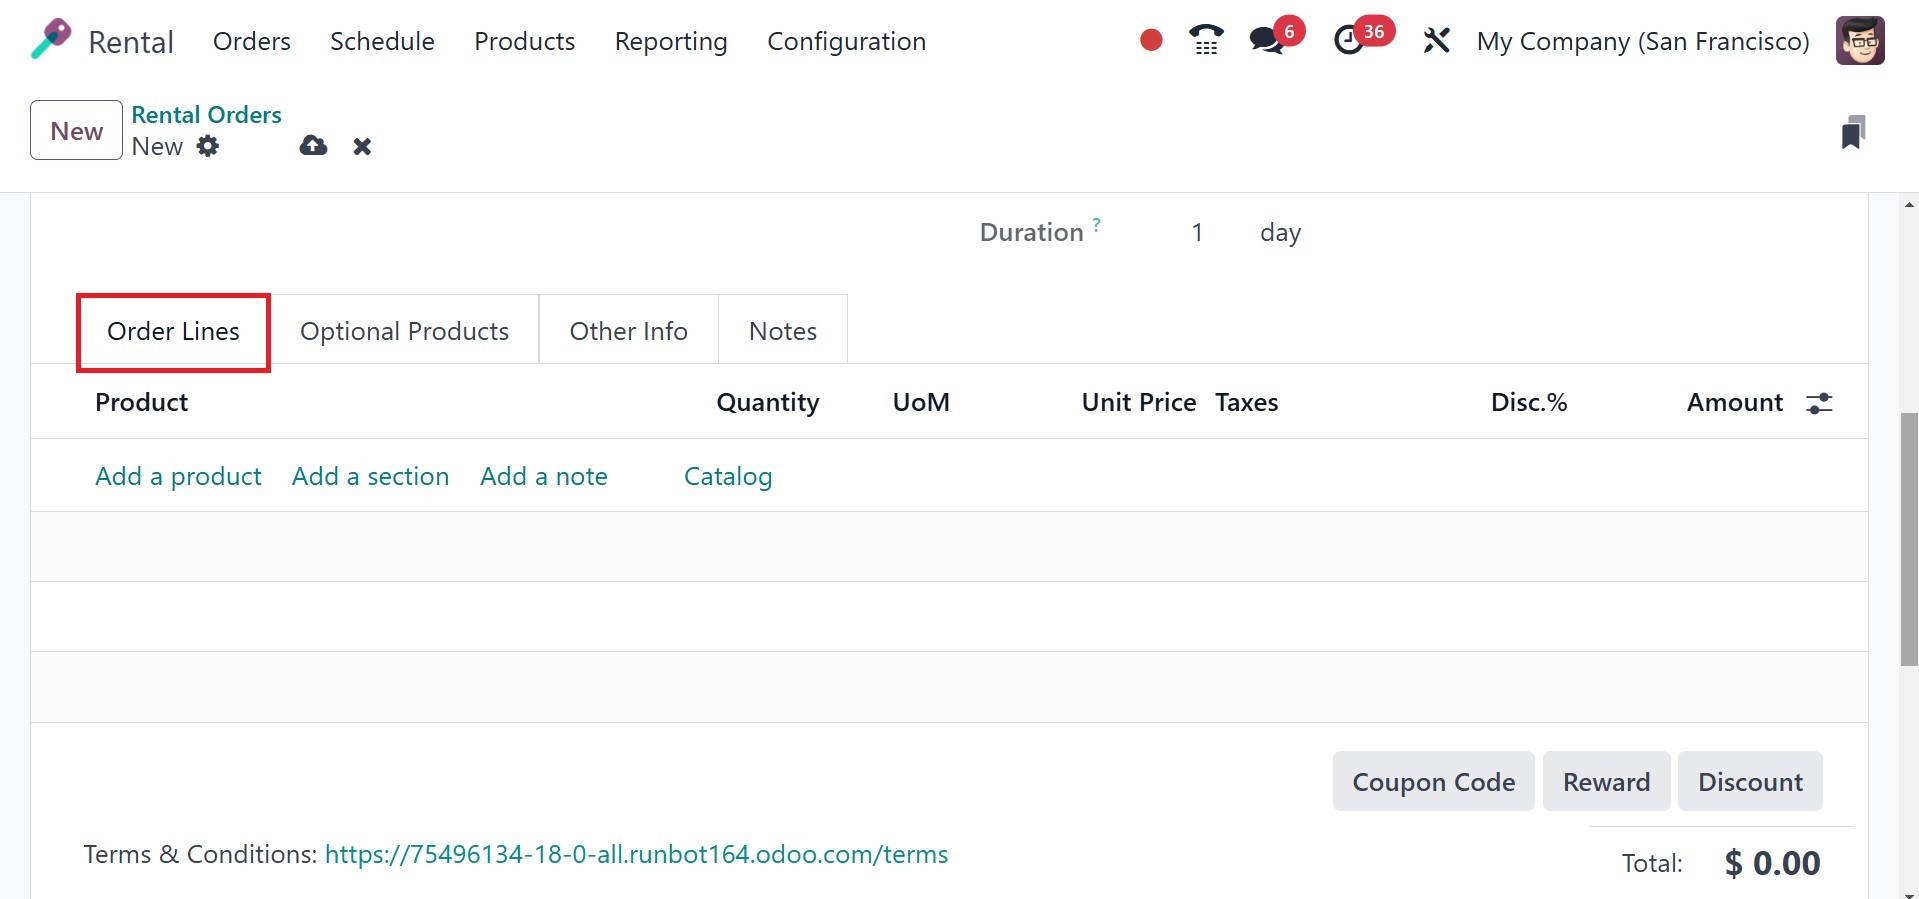
The Quotation template is now
available in Odoo 18 Rental
Orders. Order lines, Optional
Products, Other Info, and
Notes are among the tabs that
you can complete. The Order
Lines option will display a
list of products, together
with a description, quantity,
unit price, taxes, the amount
of the discount, and the
subtotal. By choosing the Add
a line option, you can easily
add a new product to the list
that is presented. Now, when
you choose a specific item
from the list supplied, a new
window like the one below.
After adding the extra item to
the list, you will receive
the entire amount of rent.
The sales order's procedures
are the same as the remaining
ones.
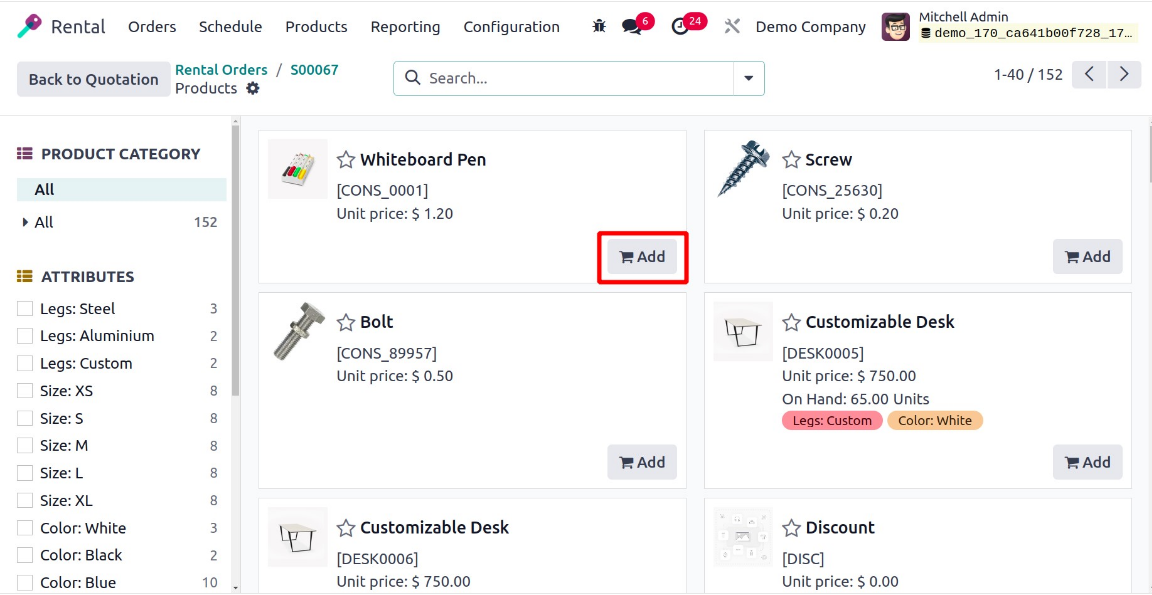
The Orderline's Catalog option
will take you to the Product
Catalog page. To make it
easier for consumers to
select items, users have got
categories for each product
category and attribute.
Under the Optional Products
option, you have choices for
Product, Description,
Quantity, Unit Pricing,
Discount, and many more.
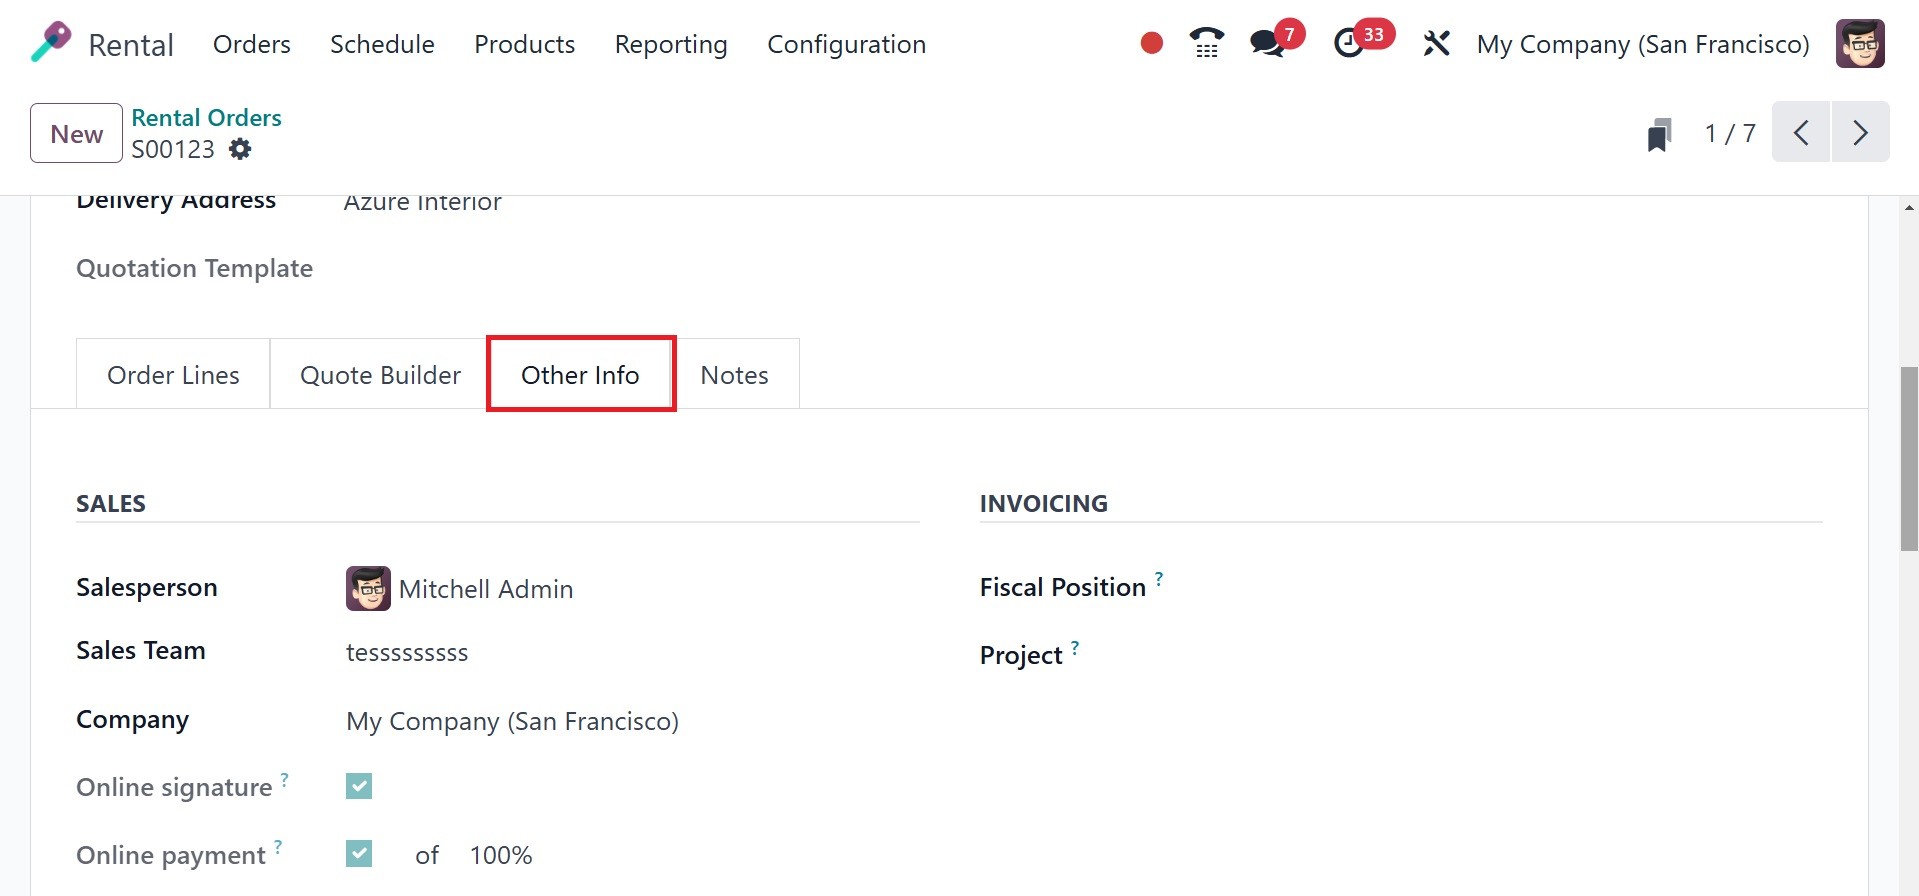
The next tab is Other Info, which
includes options for
tracking, deliveries,
invoicing and payment, and
sales. The SALES part
contains the following
details: Customer Reference,
related Tags, Salesperson,
Sales Team, Company name, and
online payment and signature
confirmations.
The INVOICING section is where
you can enter the Fiscal
Position and Project which
support the administration of
analytical accounting and tax
regulations. Based on the
location of the client, tax
exemptions, or particular
fiscal policies, the Fiscal
Position establishes the tax
regulations that apply to a
rental order. To manage
rental expenses, income, and
resource allocations for
particular company
operations, the Project field
associates the rental order
with an Odoo Project. Under
the DELIVERY option, you can
now choose the Delivery Date
and Shipping Policy.
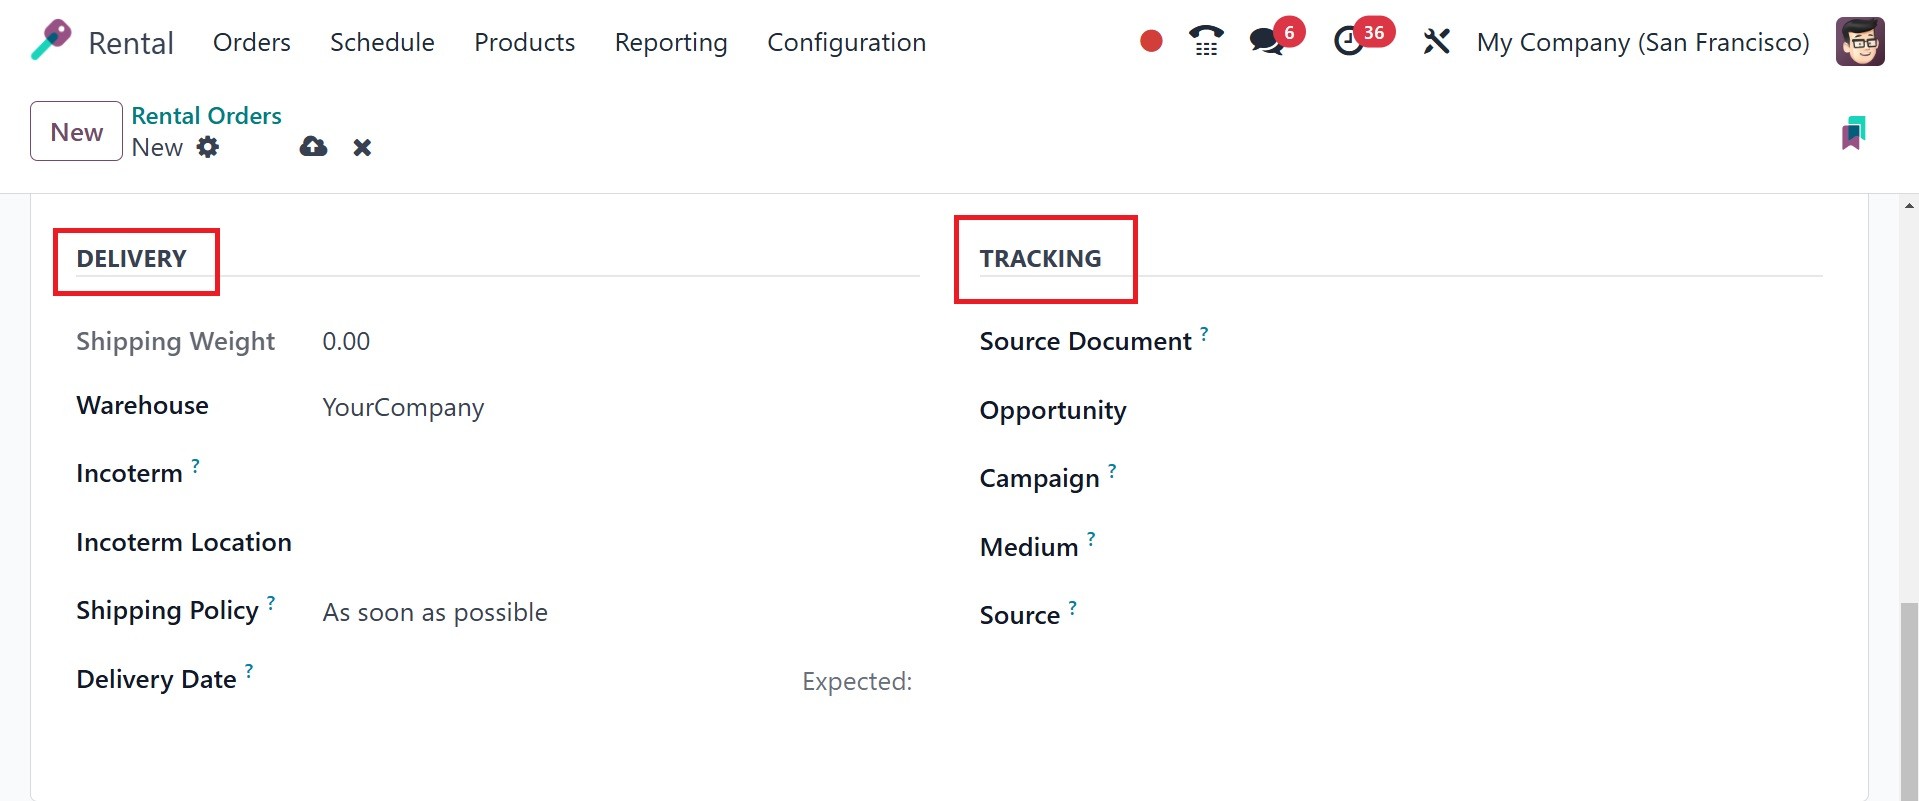
The TRACKING option is the last
one, and it allows us to
define the source, medium,
campaign, and source
document, accordingly.
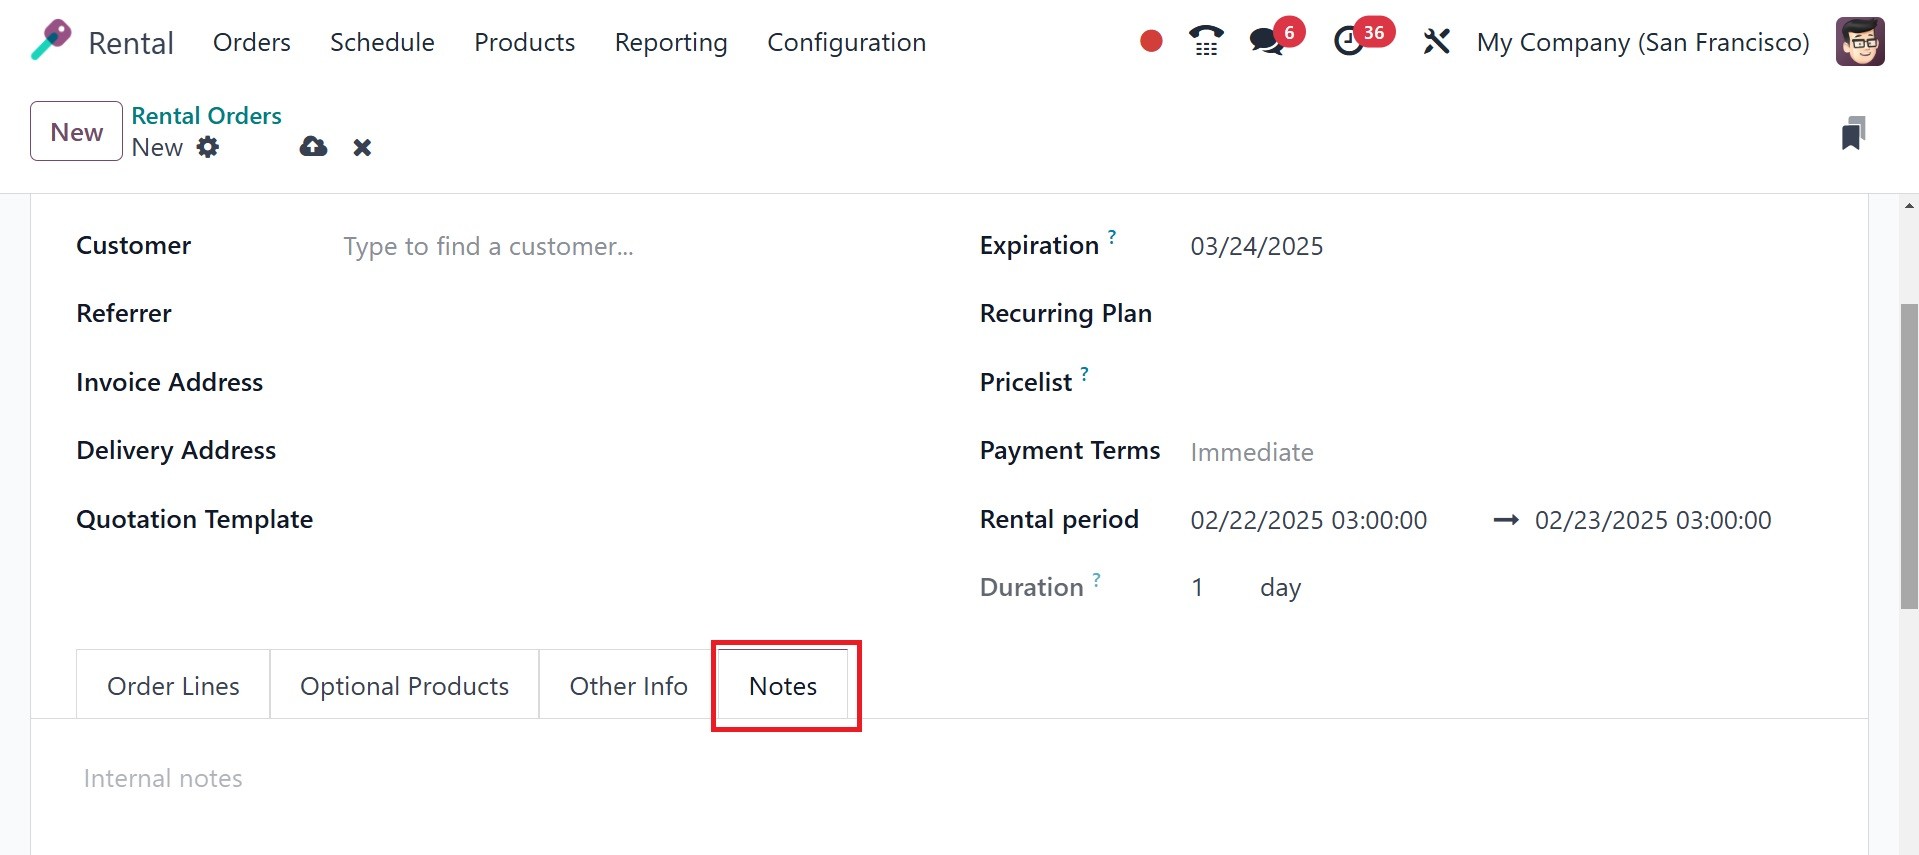
Under the Notes tab, users can
add some internal comments
regarding the rental items.
Once all the necessary data has
been entered, you can reach
the save icon. After that, as
seen below, the generated
quotation order can be
emailed using the Send by
Email option.
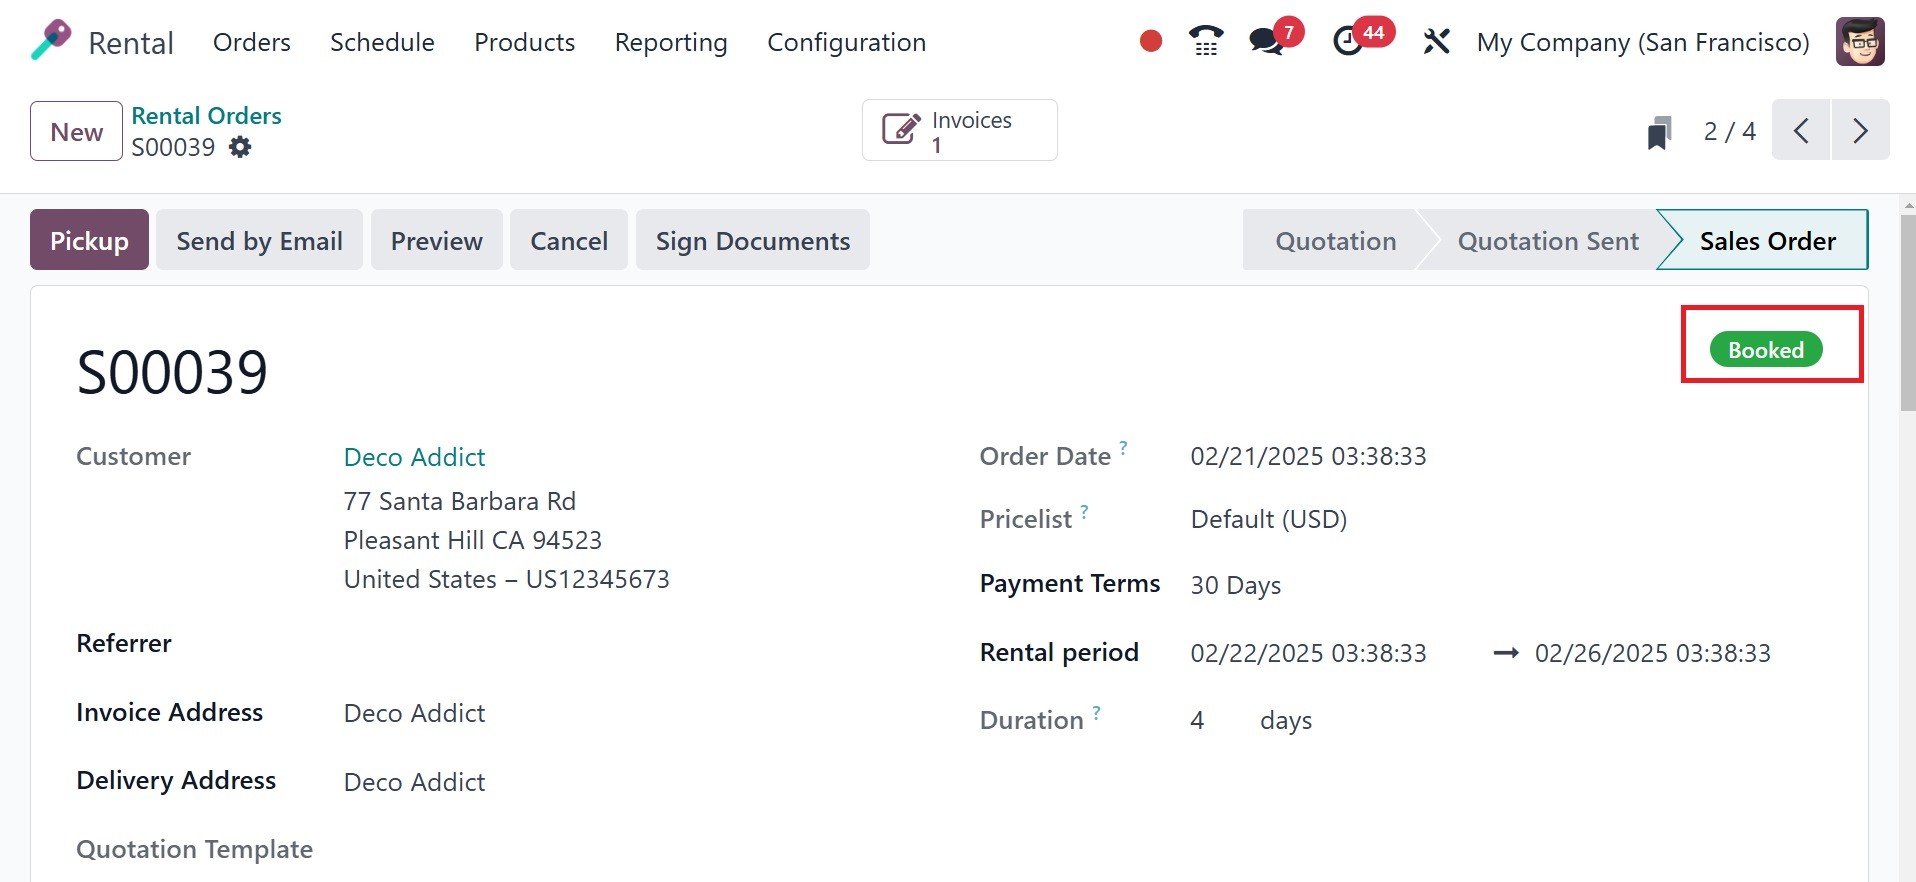
Once you have a specific
customer's confirmation, you
can easily access the Confirm
option, as shown in the image
above. Once the rental item
has been confirmed, you will
see the page as seen in the
screenshot below. When a
rental order is verified but
the rental period has not yet
begun, it is said to be in
the "Booked" status. By doing
this, companies can better
handle reservations and
prevent duplicate bookings.
Here, you can see the status
marked as booked.
Two delivery transfers were
created in the Delivery smart
tab once the delivery was
confirmed. One is in the
Waiting stage, and the other
is waiting for another
operation, as we can see
below.
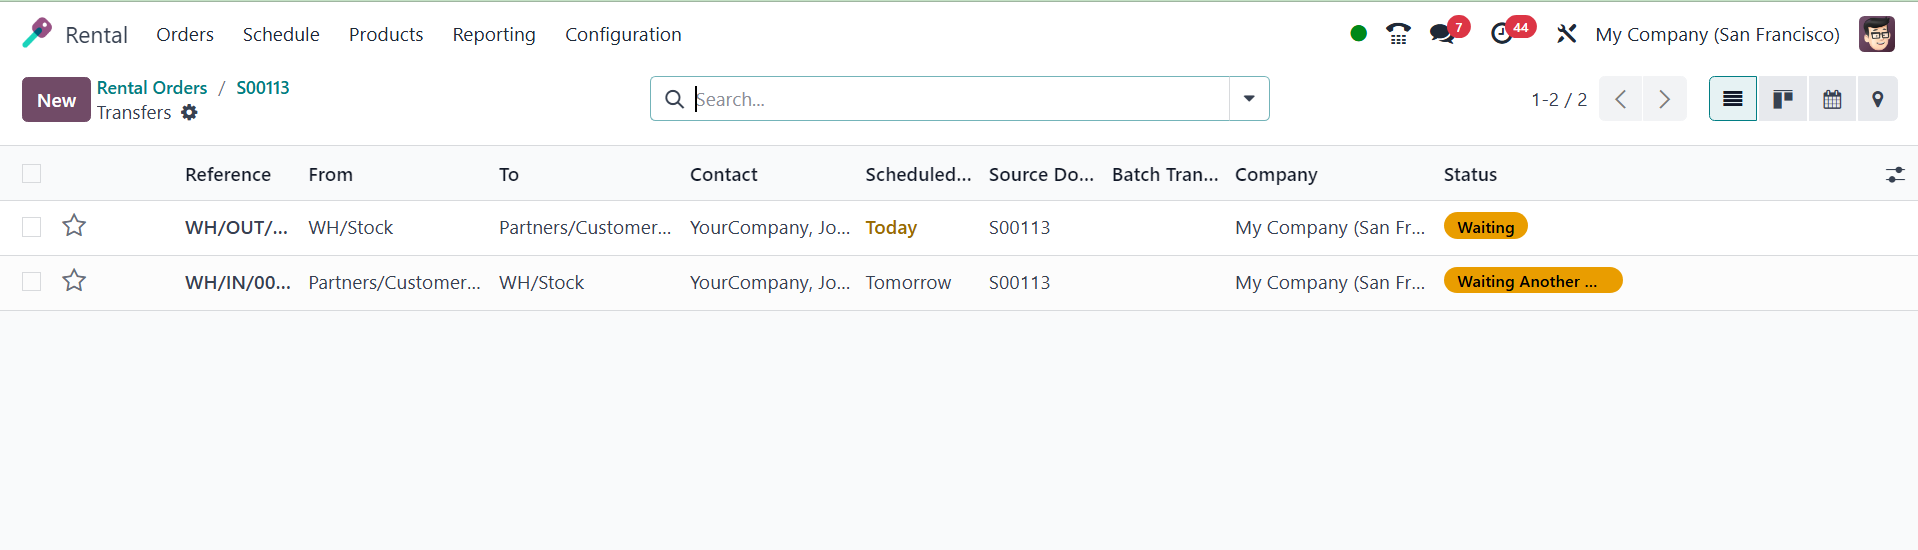
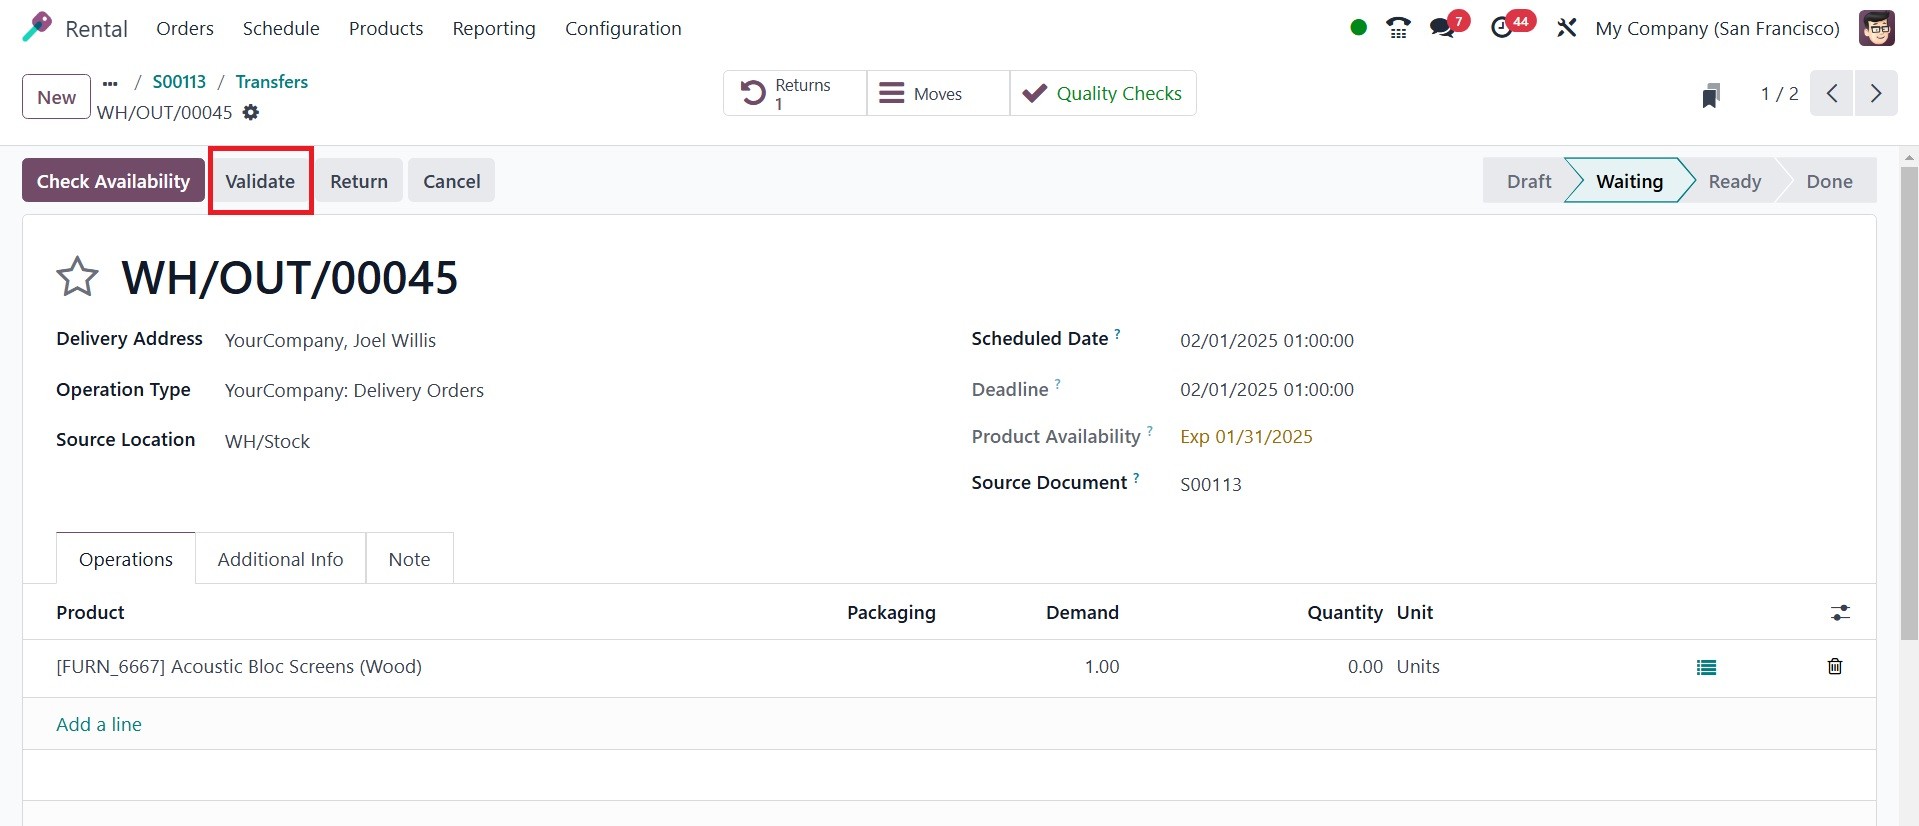
A delivery to the customer is the
first. To finish the order,
confirm the delivery.
The second transfer moved to the
Ready stage when the delivery
was finished. The merchandise
will be picked up from the
customer on the scheduled
day, which is tomorrow.

After that, the status will be
modified to Picked-up,
signifying that the
particular order has been
delivered to the designated
client.
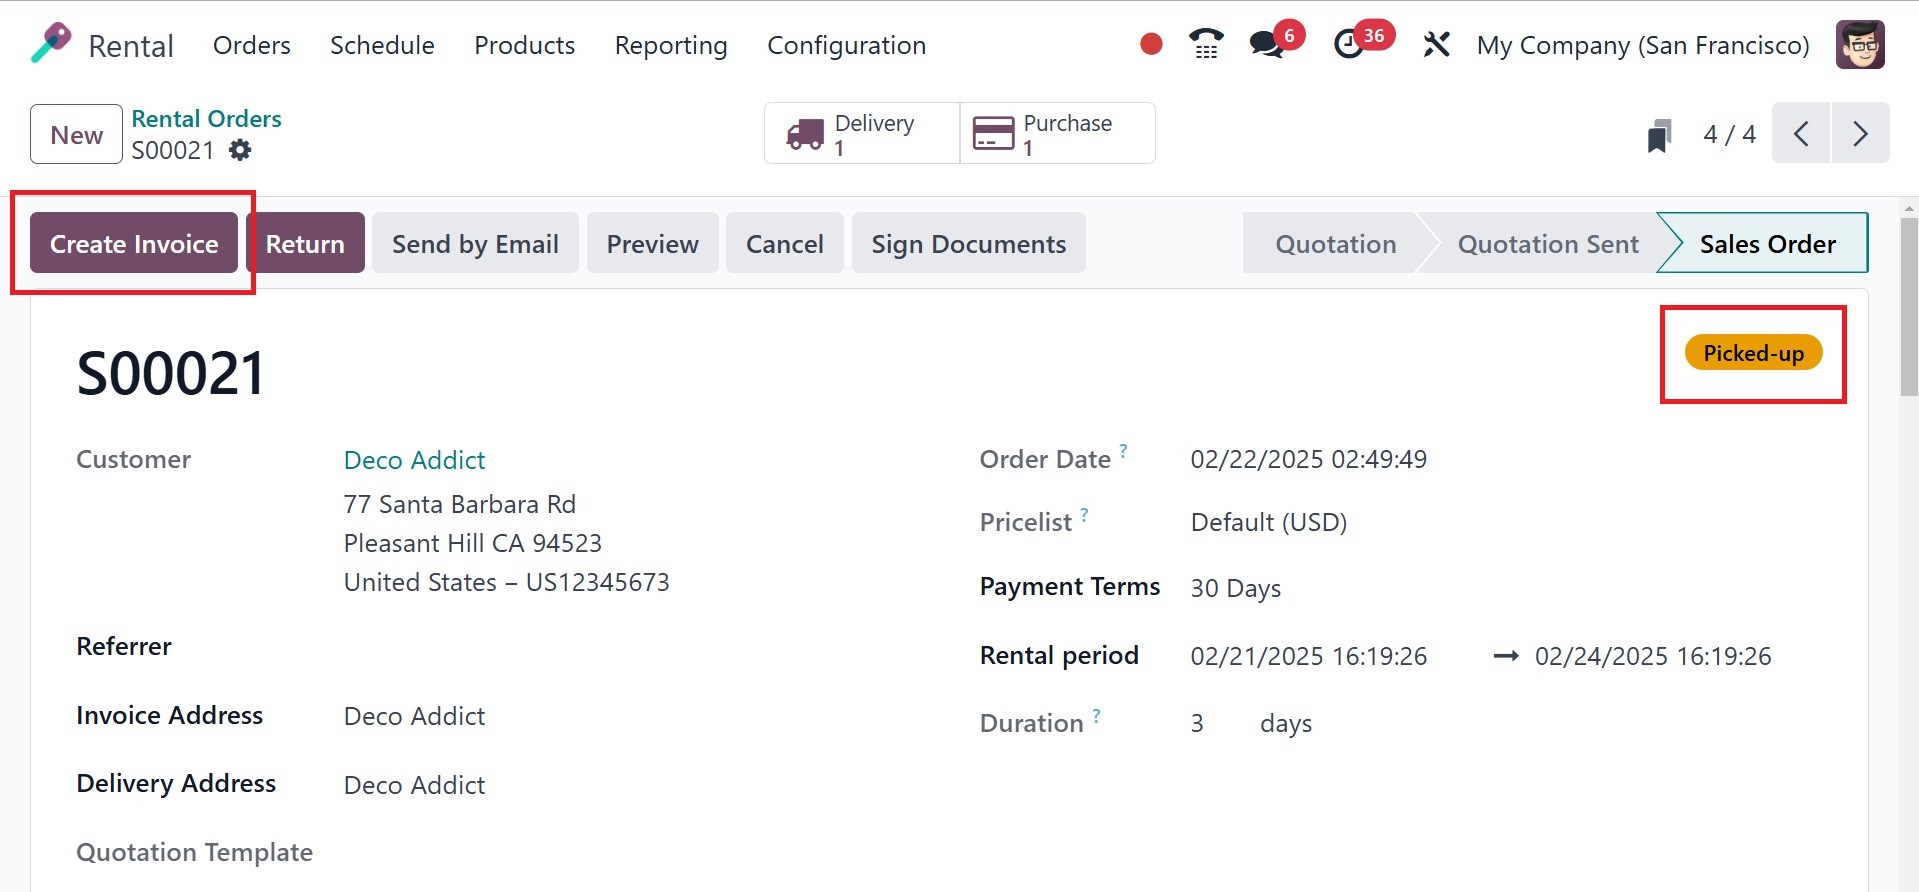
The confirmed status is now shown
on the right side of the
page, as seen in the above
image. Customers can use the
Create Invoice option to
generate invoices for a
particular product. These
produced invoices can then be
used to easily register the
payment.
You can return the rented item by
selecting the Return option
once the rental term has
ended. This will result in
the status being "Returned."

When you go back to the main page
of the rental module, you'll
see the Orders menu with the
ToDo option, as seen below.
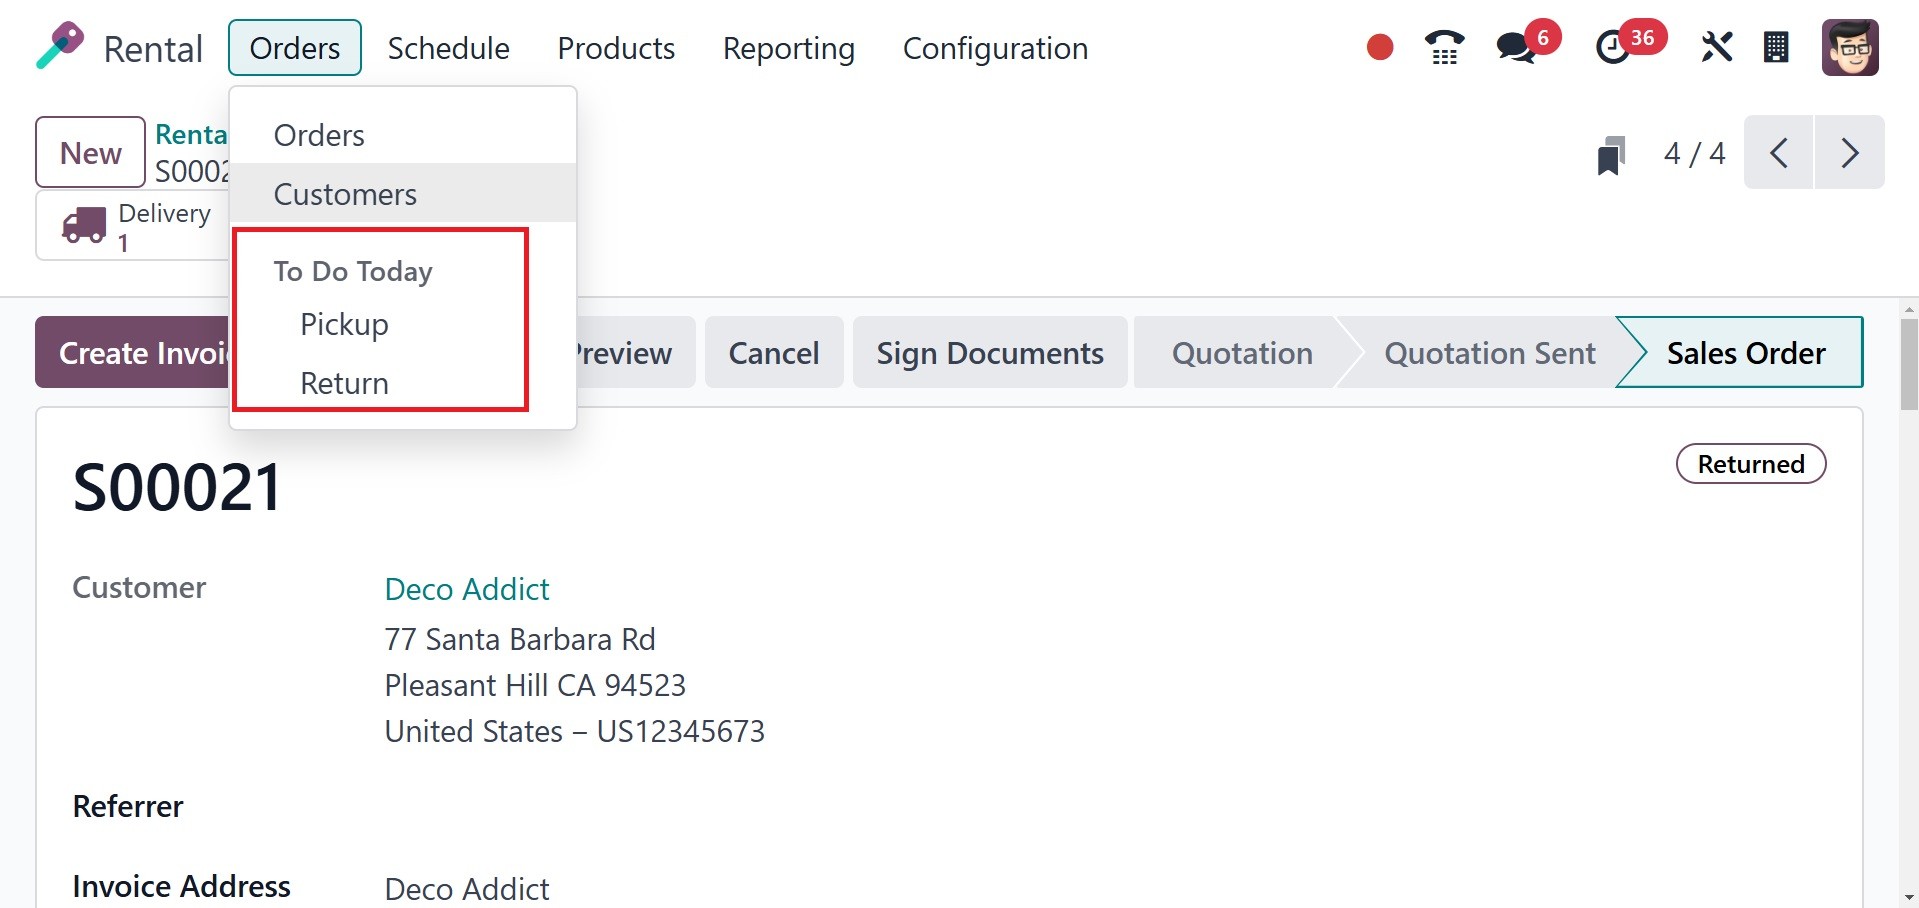
Return and Pickup are two of the
sub-options under the ToDo
Today option under the orders
menu. The pickup page
provides details on the
product that has to be picked
up, and the return option
shows things that have been
returned after the rental
period.
Under the ToDo Today menu, you
have the Pickup and Return
options, as in the image
above. Pickup lists all
rental orders where products
are scheduled to be picked up
today. Return lists rental
orders where products are due
for return today.
Under the Orders menu, you have
an option of Customers, which
directs you to the customer
info page with lists of
customers, as in the
screenshot below.
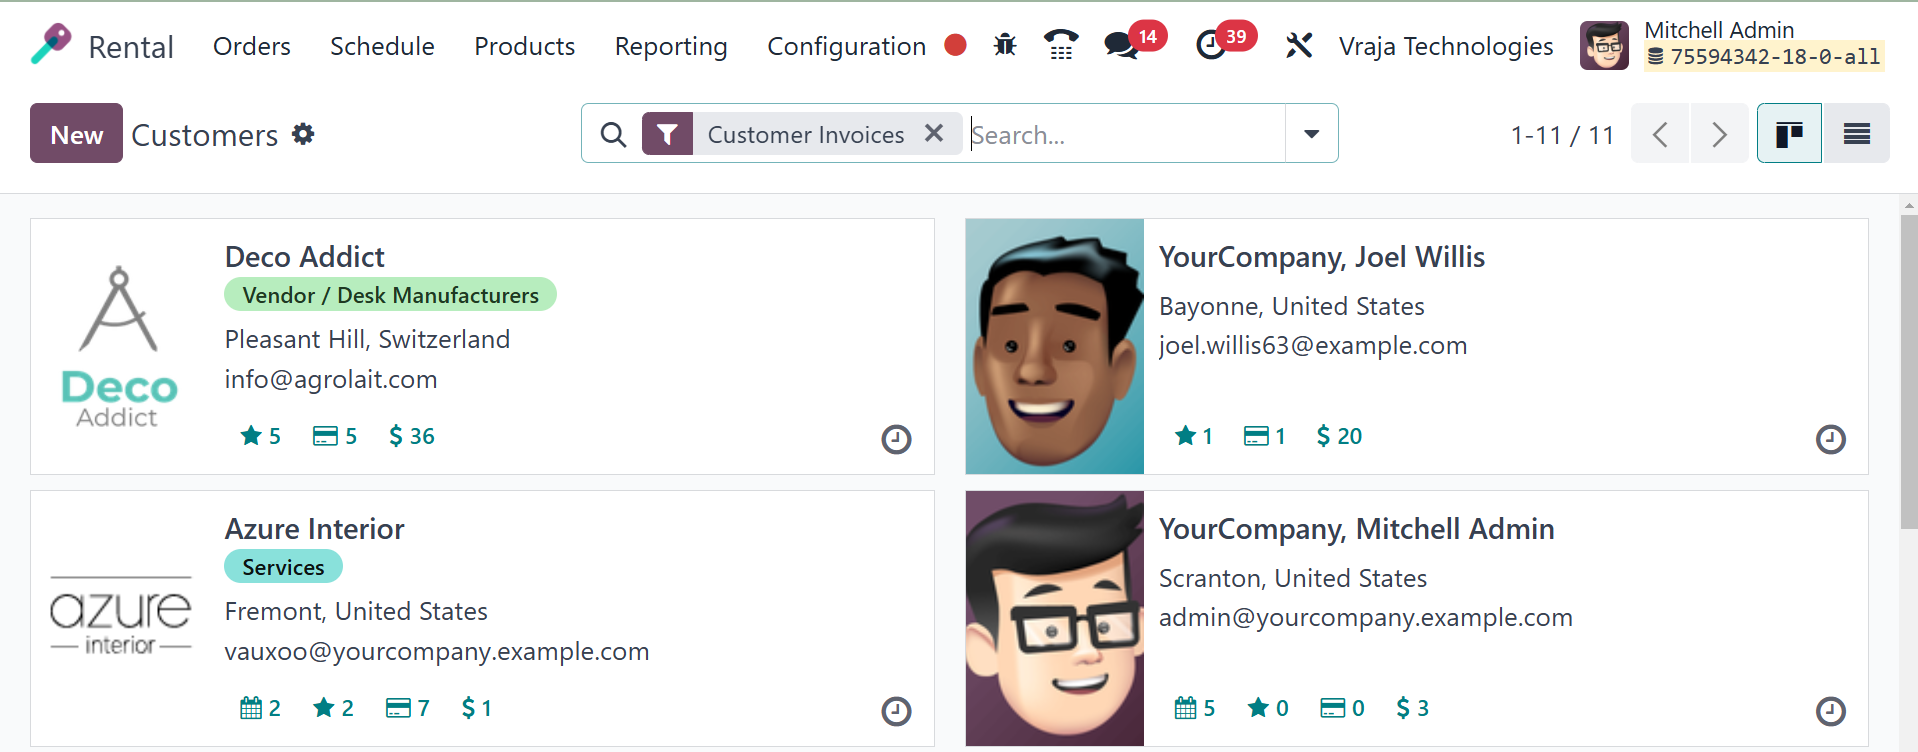
In order to manage rental orders,
track transactions, and
guarantee seamless
operations, customer
information is essential.