1. Overview Menus
The “Overview” menu in the Repair module of Odoo 18 functions as a
central dashboard that provides a thorough overview of all repair
procedures, statuses, and activities. The ability to effectively
monitor current repair jobs and evaluate workloads in real time is
very helpful for managers and service teams.
In the ‘Repair Overview’ window, you can see all the available repair
order categories in a Kaban tile view, as depicted in the screenshot
below.
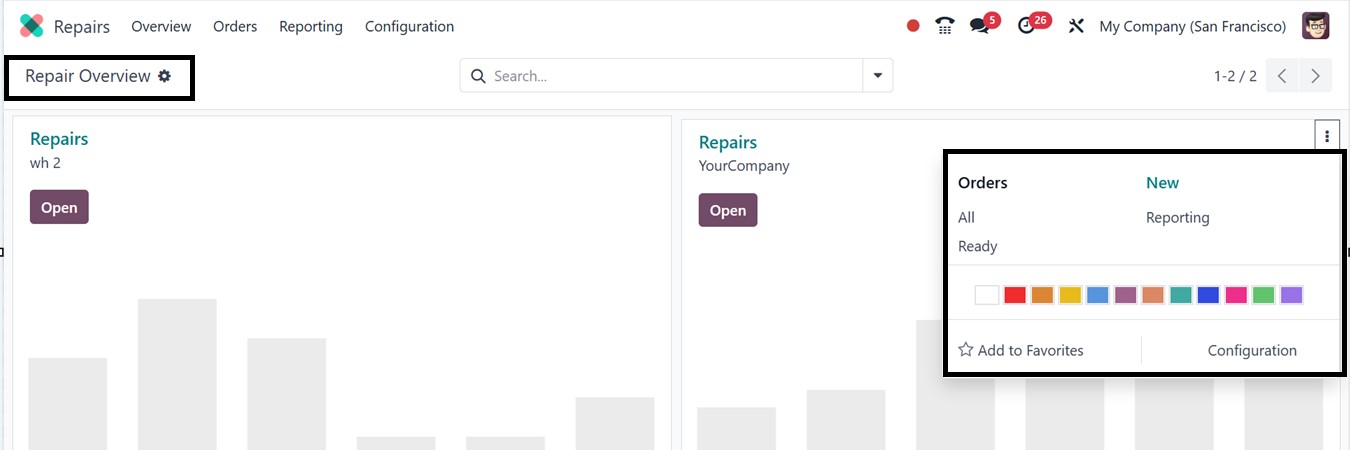
From the kanban card, you can utilize the vertical menu to check and
manage the All Orders, Ready Orders, Reporting, and Configurations.
The ‘Add to Favorites’ button can be used to mark the important
repair orders
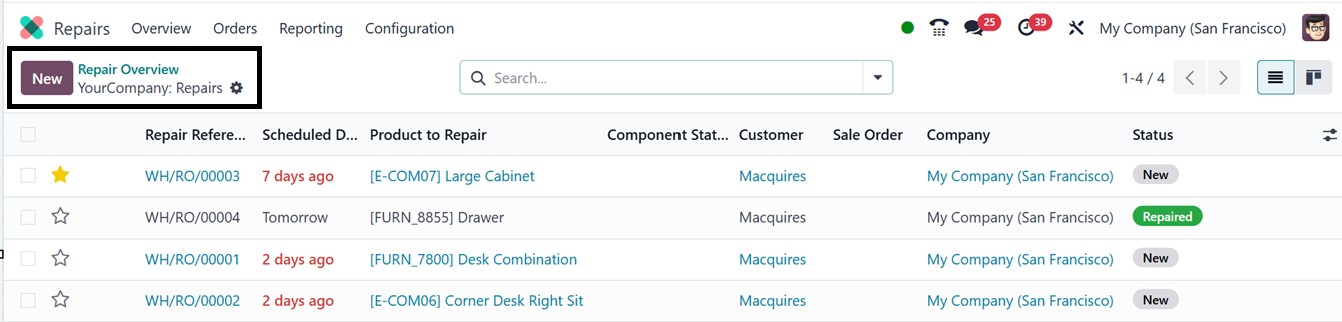
Opening any of the repair categories, the Repair orders are arranged
in a list view, you'll find details such as Repair Reference,
Scheduled Date, Product to Repair, Customer, Delivery Address,
Warranty Expiration, Sale Order, Company, and Status. The status of
each repair order is visually represented using various color codes.
Additionally, a star icon is available for each entry, allowing you
to mark the significance of the repair request
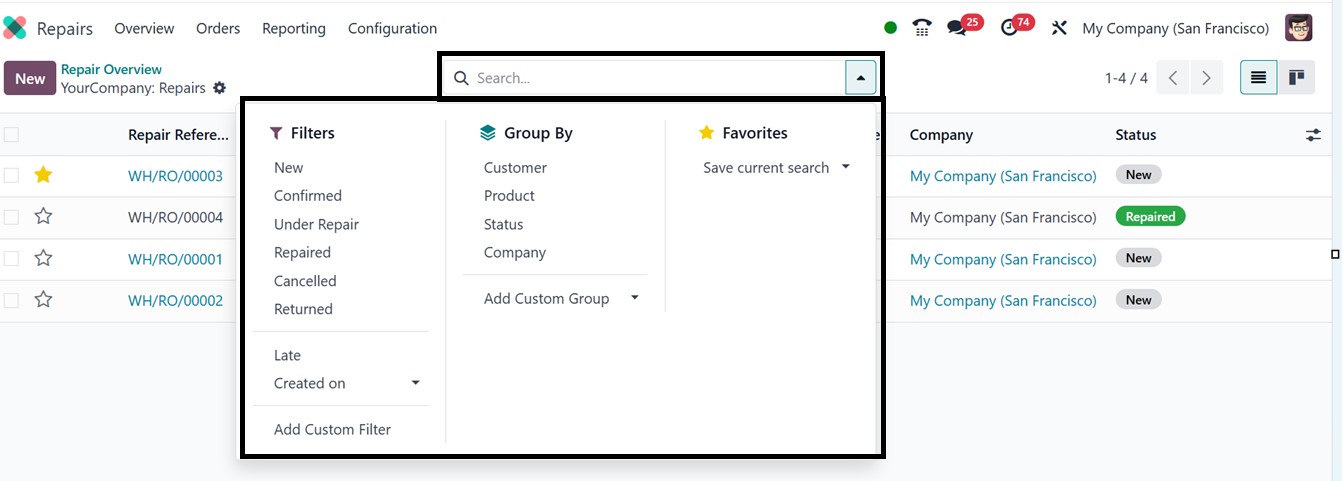
Users may refine repair orders by status, assigned technician,
warranty coverage, product, or client using a search bar filter.
Furthermore, clever indicators draw attention to crucial data,
including warranty tags, past-due chores, and maintenance
priorities. The dashboard is a useful tool for managing service
operations and balancing workloads since it allows real-time
tracking of the quantity of repair orders at each step.
By default, the system includes filters such as New, Confirmed, Under
Repair, Repaired, Cancelled, Returned, Late, Created on and Add
Custom Filter options. If these are not sufficient, custom filters
can be created using the Add Custom Filter tool. The Group By
function helps categorize repair orders based on Customer, Product,
Status, and Company. Any existing repair order can be accessed and
edited by simply clicking on it. You can also crete customized group
data using the ‘Add Custom Group’ option.
To initiate a new repair request, click the New button, which opens a
form view, as depicted in the screenshot below.
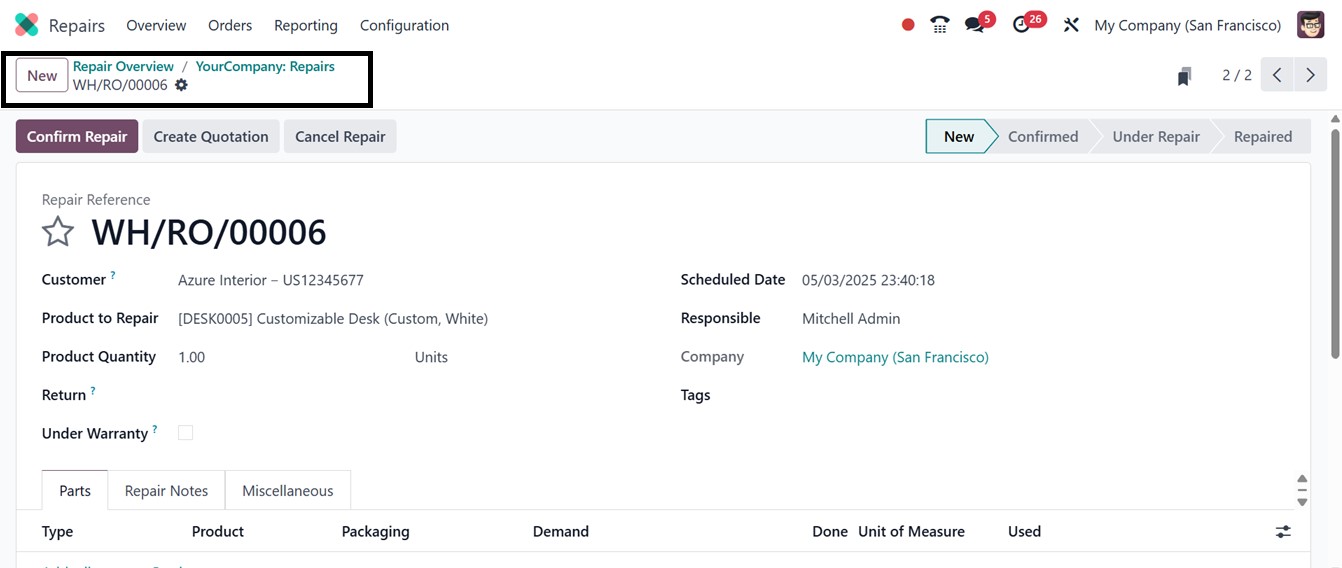
In the form, the Customer section is where the client's name is
entered. The Product to Repair field lets you specify the item that
needs fixing, and the Product Quantity field is used to indicate the
number of items. The customer’s contact details and delivery address
can be provided in their respective fields. The Return Order
checkbox can be used if the repair is for a returned product. The
Scheduled Date field allows you to plan when the repair should
occur. Assign a technician in the Responsible field to handle the
repair process. If the Under Warranty option is checked, the items
from this repair order will be treated as invoiced at zero cost. You
can also enter Tags and select the Company name. The star icon next
to the Repair Reference can be used to prioritize the task.
The Parts tab is used to define the specific components involved in
the repair. You can list the items that were either added or
replaced to fix the product. Use the Add a Line button to input part
details. The Type can be set to Add, Remove, or the newly available
Recycle option.
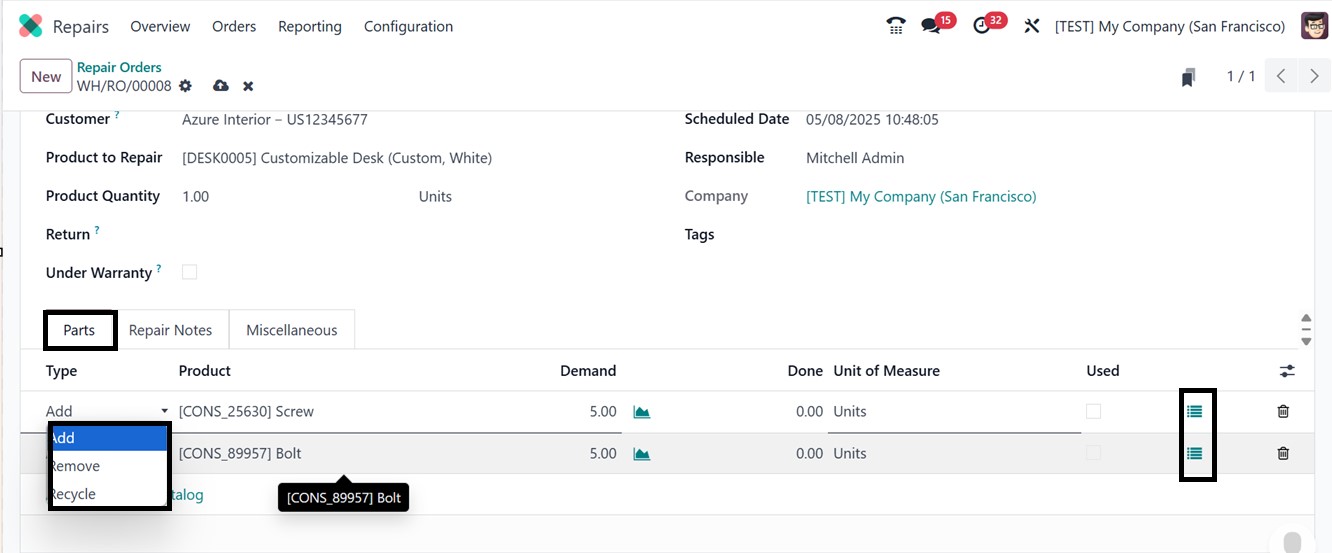
By choosing the ‘Add’ option from the ‘Parts’ tab, the part is listed
as a component meant to be used during the repair and is included in
the Repair Order (RO). Unused parts can be saved for later use, as
the user can verify whether the part was utilized or not while
performing the repair.
When you select the ‘Remove’ option, the part is shown as one that
has to be removed from the product in order to be repaired. After
that, the technician can say if the part was indeed taken out.
By choosing the ‘Recycle’ option, the part is designated as recycled
and will be stored for future use or repurposed at the warehouse.
You can also fill in fields such as Product, Demand Quantity, and
others. Any notes or descriptions regarding the repair order or the
product can be edited under the Repair Notes tab, as illustrated in
the screenshot below.
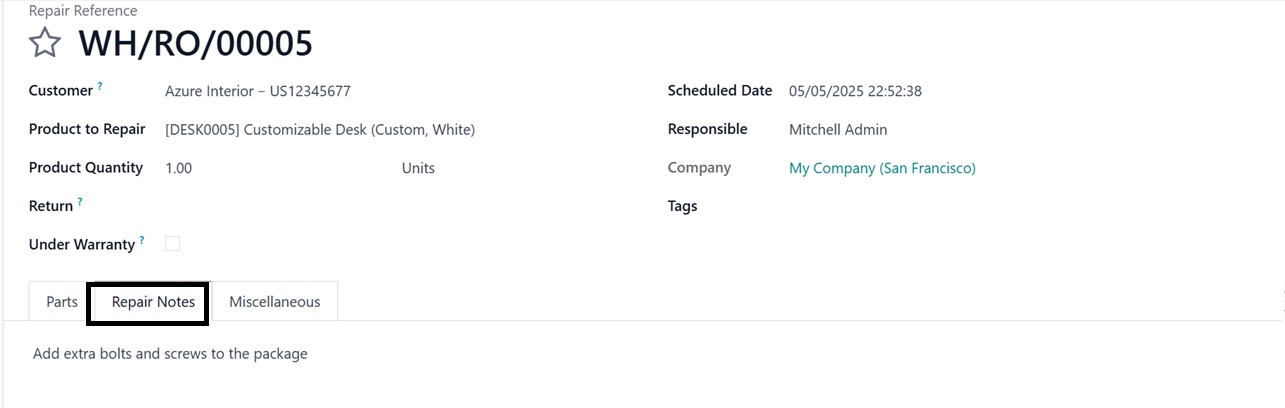
For internal documentation, a designated section is available to add
repair notes. The Miscellaneous tab allows you to define the
Operation Type. This Operation Type determines the stock operation
type associated with the repair process. This controls how the
system manages inventory movements associated with the repair,
including returning the repaired goods to the client or bringing in
and taking out components.
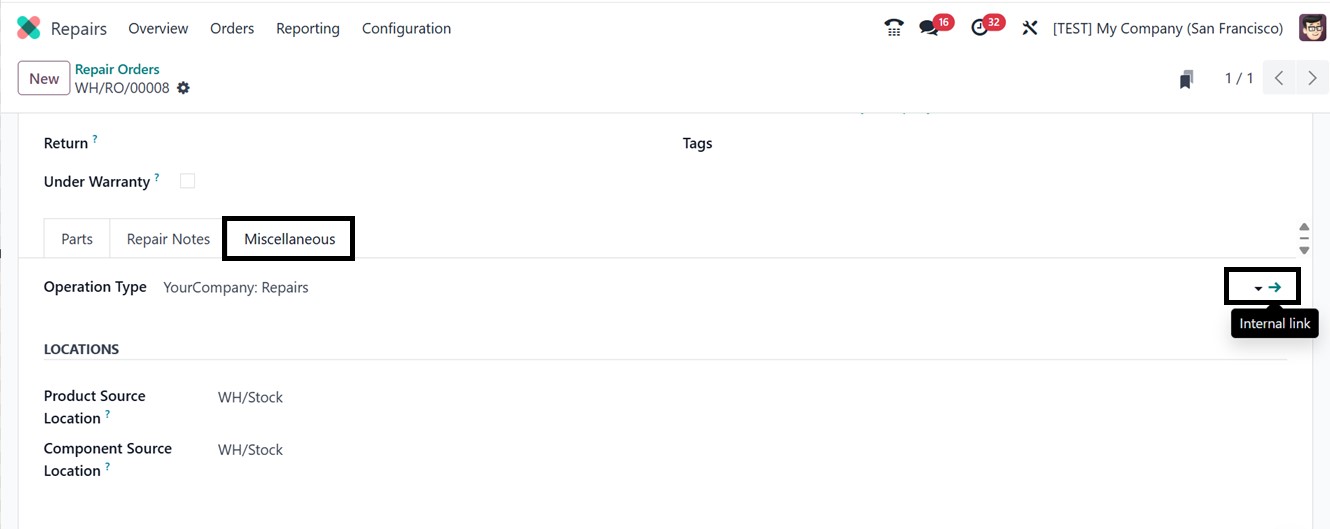
Selecting the right operation type guarantees that the repair process
accurately reflects stock adjustments and connects with your
warehousing operations. So, click on the interlink provided in the
Operation Type field to check the Type of Operation, Sequence,
Warehouse, Barcode, Reservation Methods, and Locations of this
operation type as depicted in the screenshot below.
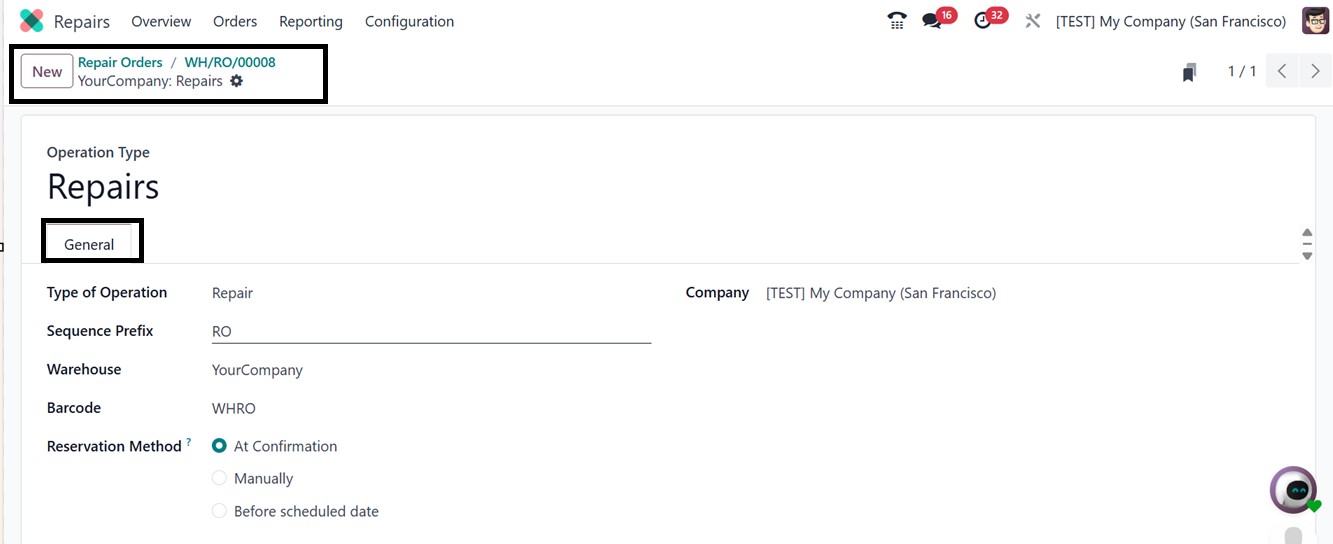
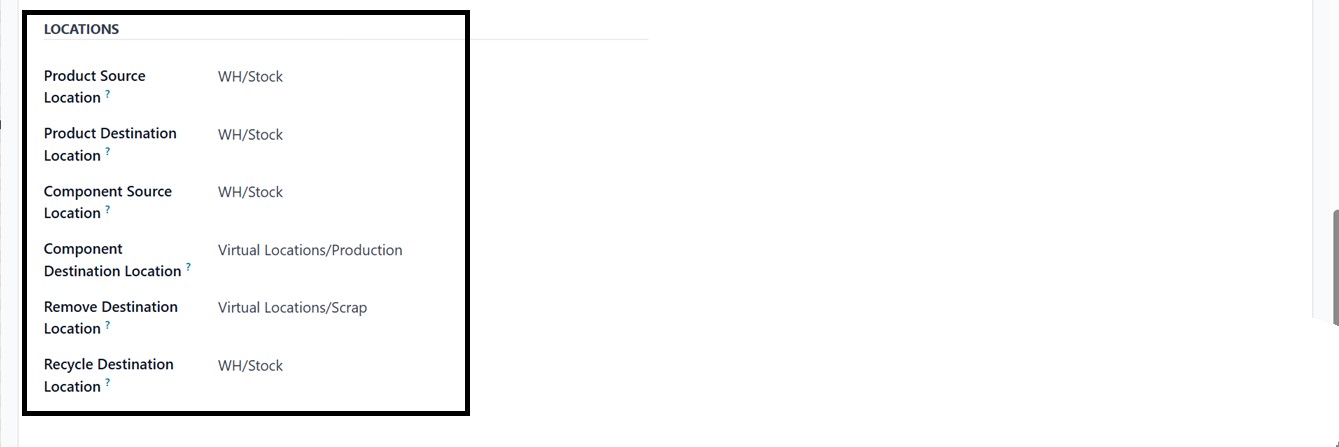
The ‘Reservation Method’ option defines how the product is
transferred. When adding, deleting, or recycling parts during the
repair process, you can see where the product and its components are
relocated from the Component Destination Location, Remove
Destination Location, and Recycle Destination Location fields of the
"LOCATIONS" area. According to the chosen Operation Type parameters,
this also contains information like the Product Source Location,
Product Destination Location, and Component Source Location.
Once all the required fields have been completed, the repair order
form will be ready for further actions. To start and validate the
repair, click the Start Repair button. If you wish to prepare a
quotation based on this repair, use the Create Quotation button. If
you want to unreserve the order, click on the Unreserve button.
Finally, to cancel the repair order process, select the Cancel
Repair option. At this stage, we proceed by confirming the order.
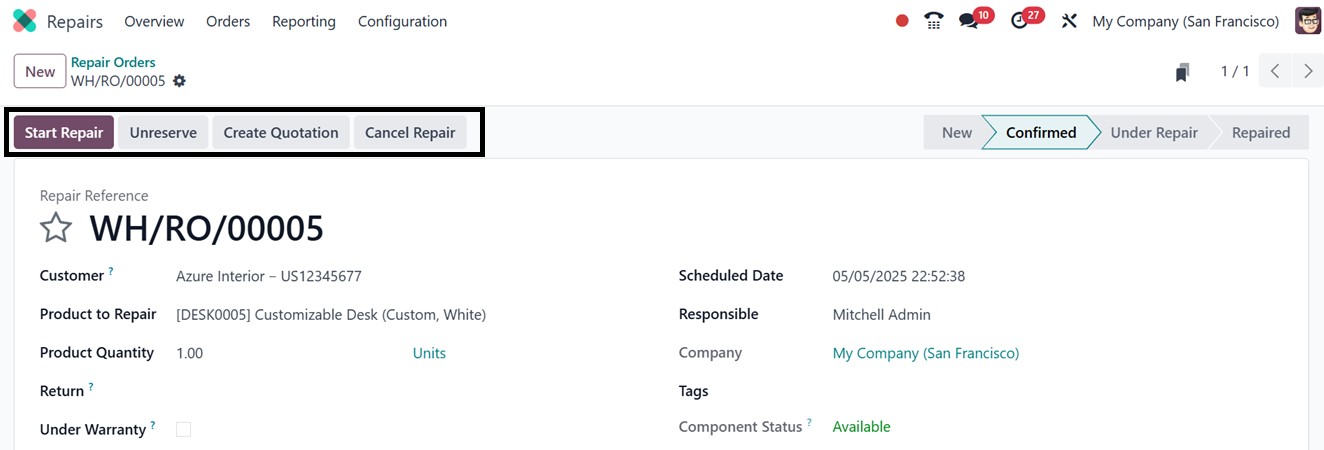
After confirmation, the order status will change to Confirmed, as
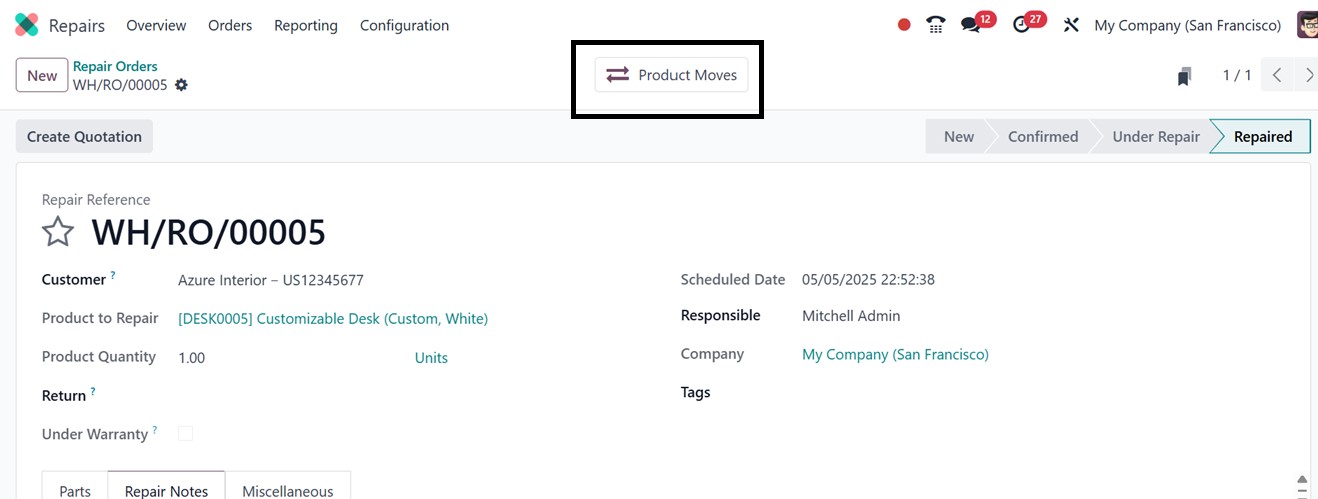
shown in the interface. Clicking Start Repair begins the repair
operation. While the repair is ongoing, the status will reflect as
Under Repair in the pipeline stages area. Once the process is
finished, click on the End Repair button to complete the procedure.

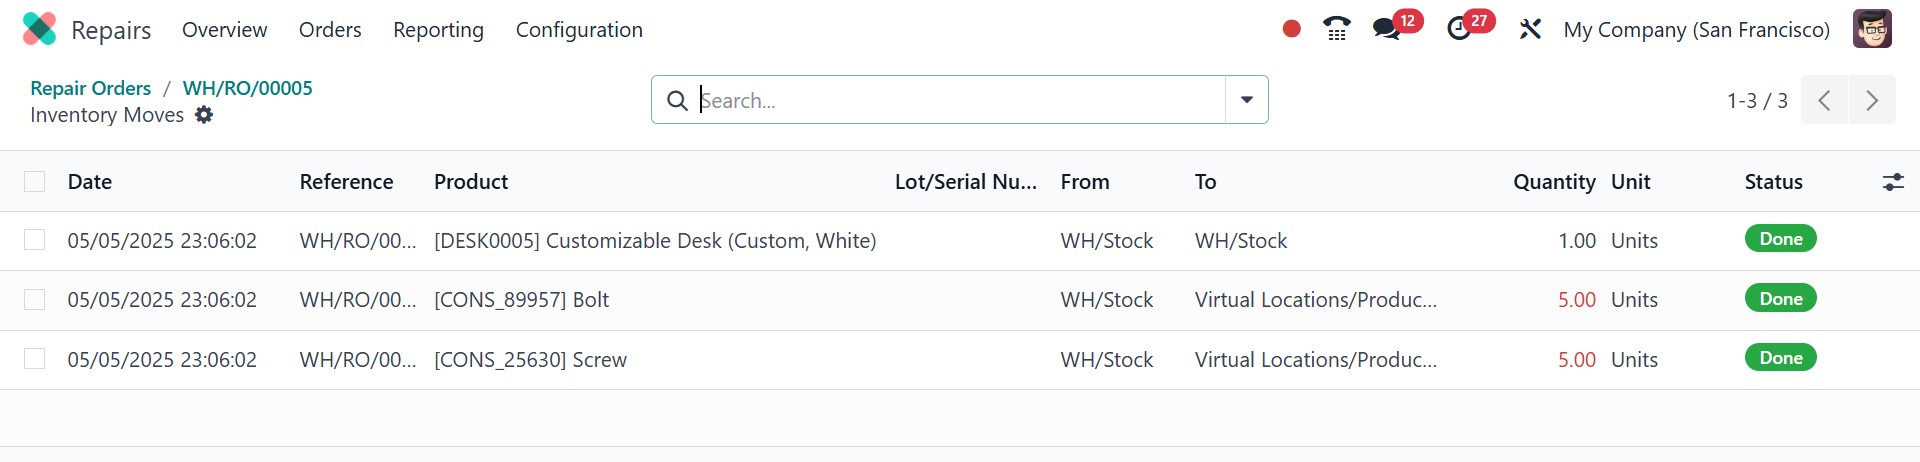
A smart tab labeled Product Moves displays the movements of the
product following the repair.
The Product Moves dashboard will show detailed information such as
Date, Reference, Product, Lot/Serial Number, From, To, Quantity,
Unit, and Status. This provides a full record of the product’s
logistics after servicing.
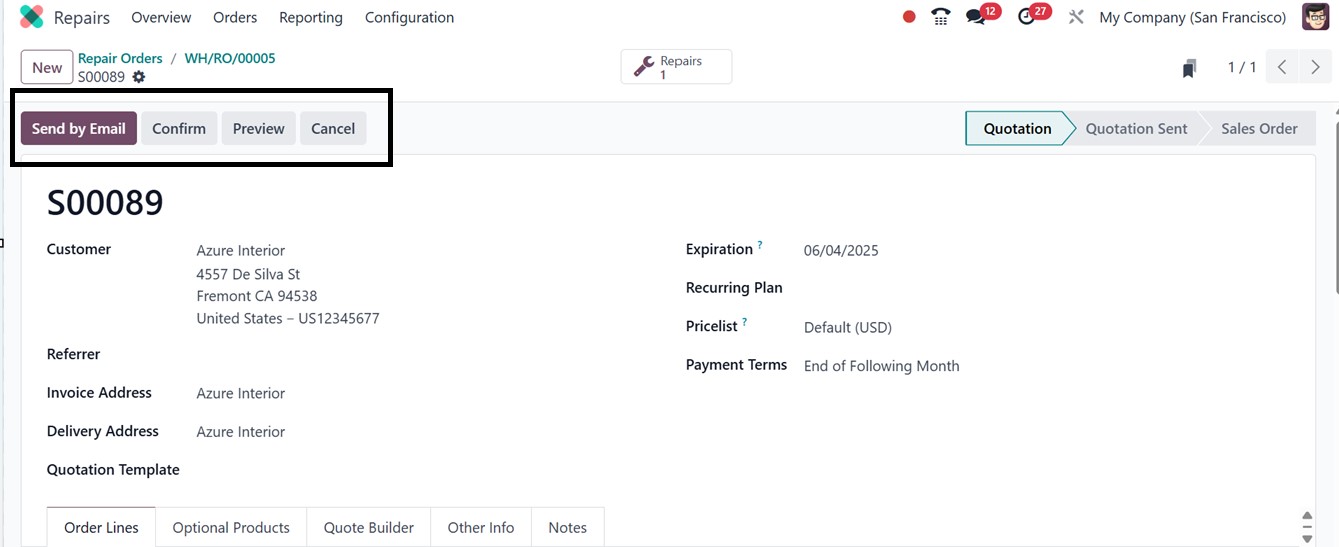
After completing the repair, you can create a new quotation by
selecting the Create Quotation option. This action will immediately
convert the order into a new quotation, and you can see the
quotation form with all the details, as depicted in the screenshot
below.
Following the creation and confirmation of the quotation, users can
proceed to generate an invoice by clicking on the Create Invoice
button from the menu. After the creation of the invoice, a Sales
Orders smart button will appear on-screen, giving access to all the
related Sales Orders for the repair.