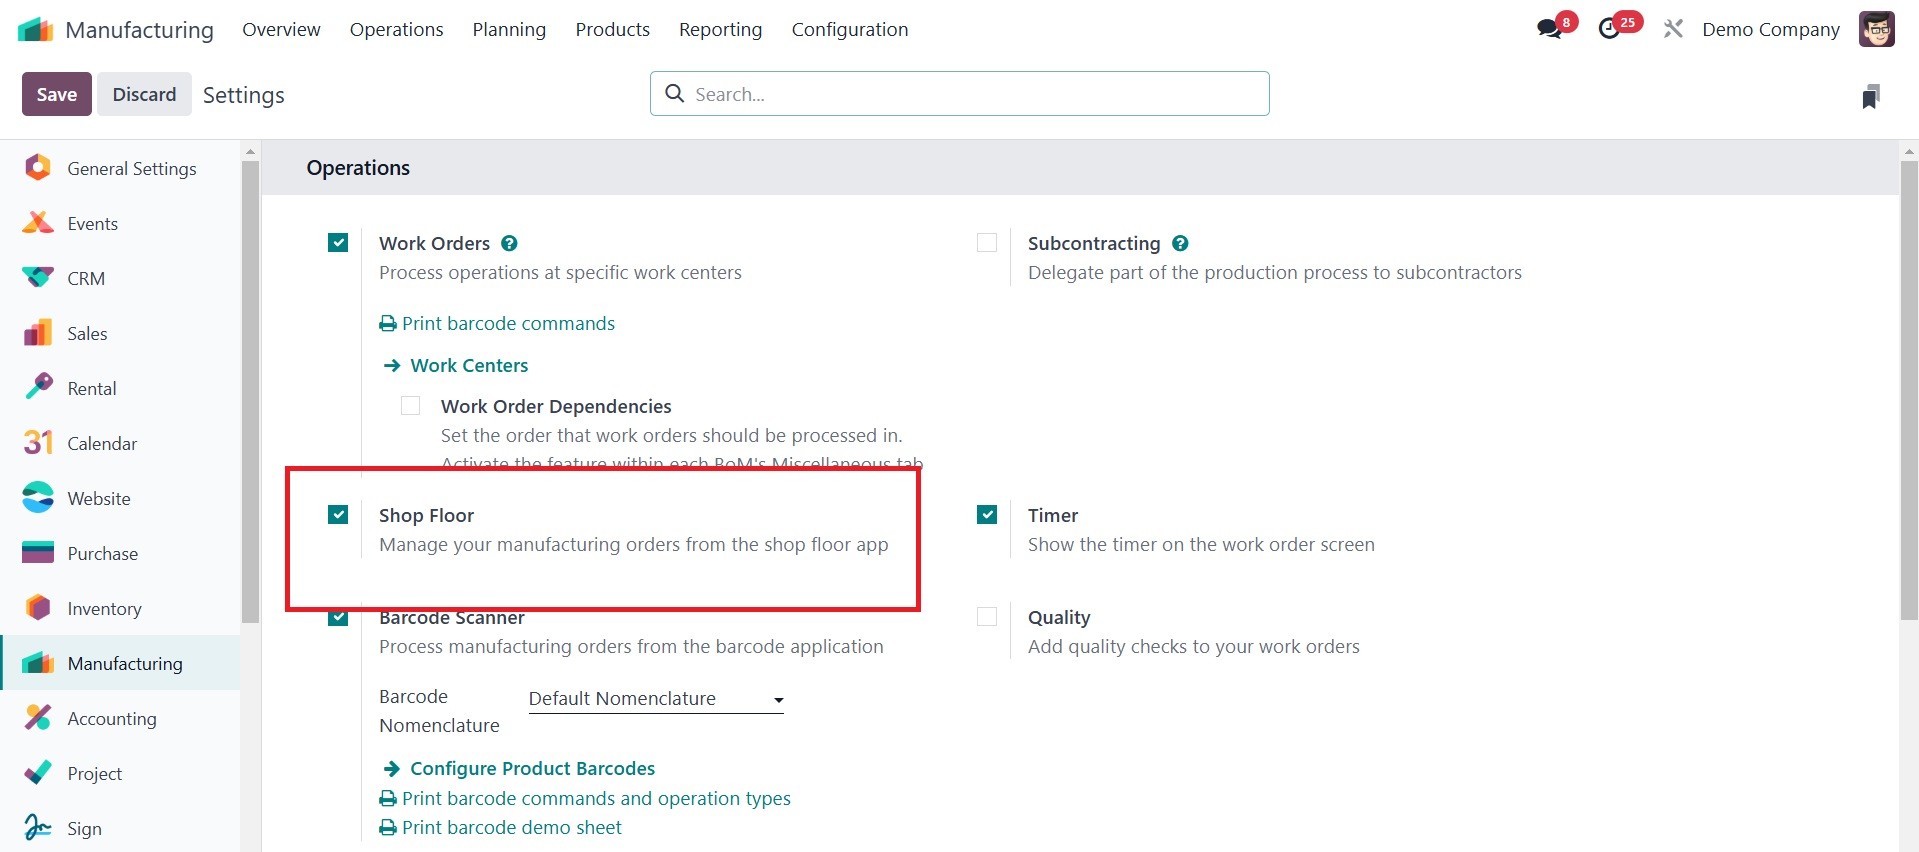
1. Shop Floor
As mentioned before, "Shop Floor"
is a submodule of
manufacturing. Therefore,
"Shop Floor" must be enabled
in the manufacturing module's
Configuration > Settings
before you can access the
app.
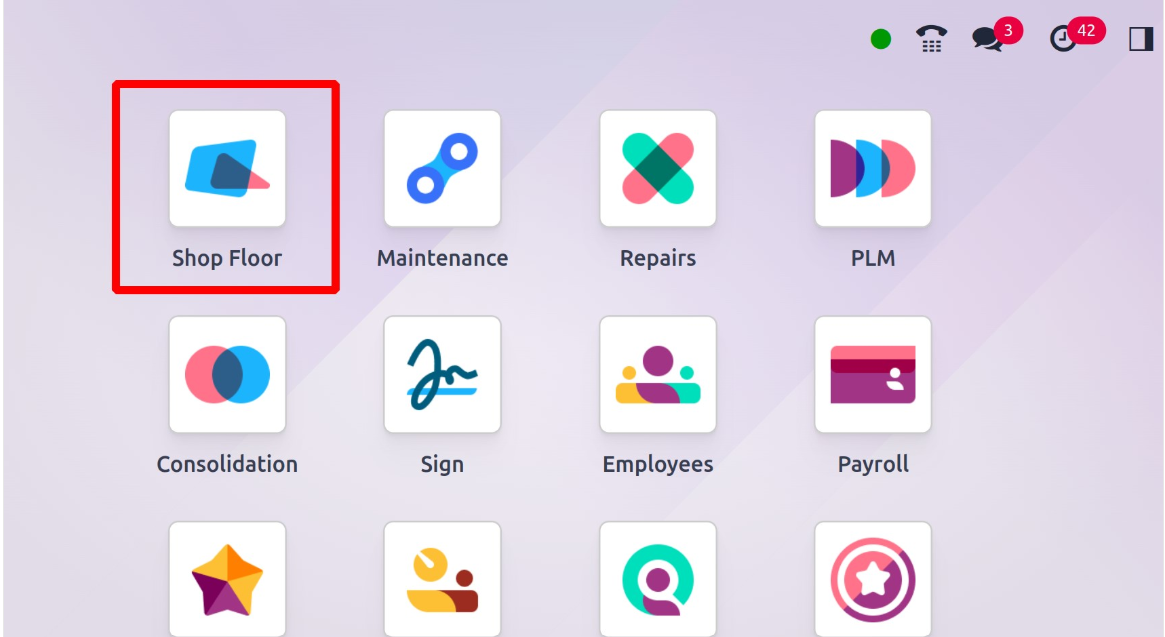
After saving the modified
configuration, the user will
be able to use the Shop Floor
app as seen below. The user
can then easily manage the
manufacturing orders from the
shop floor app.
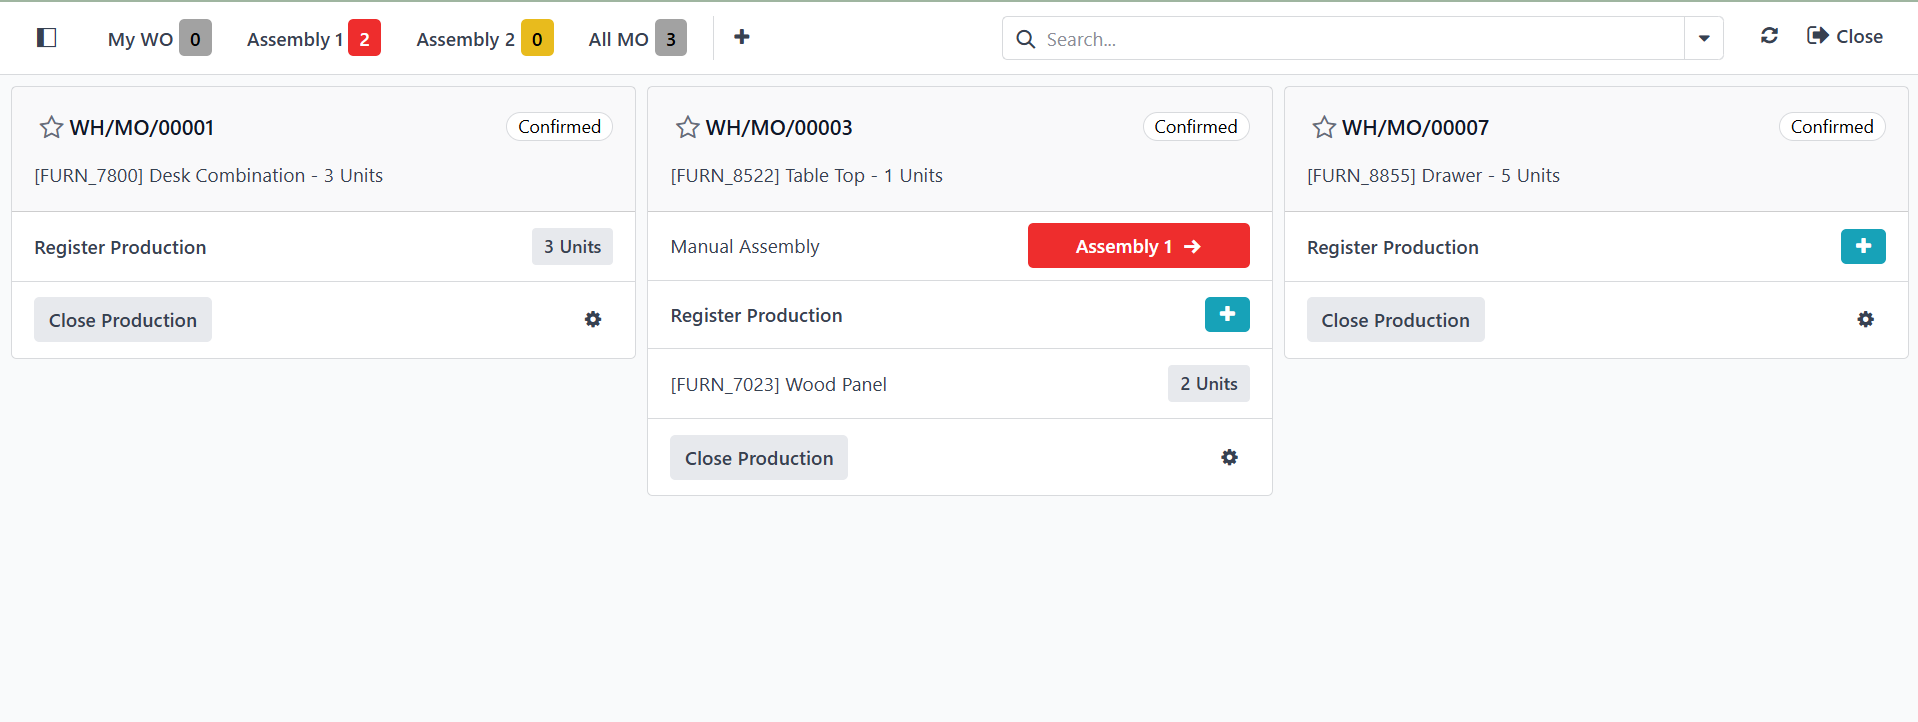
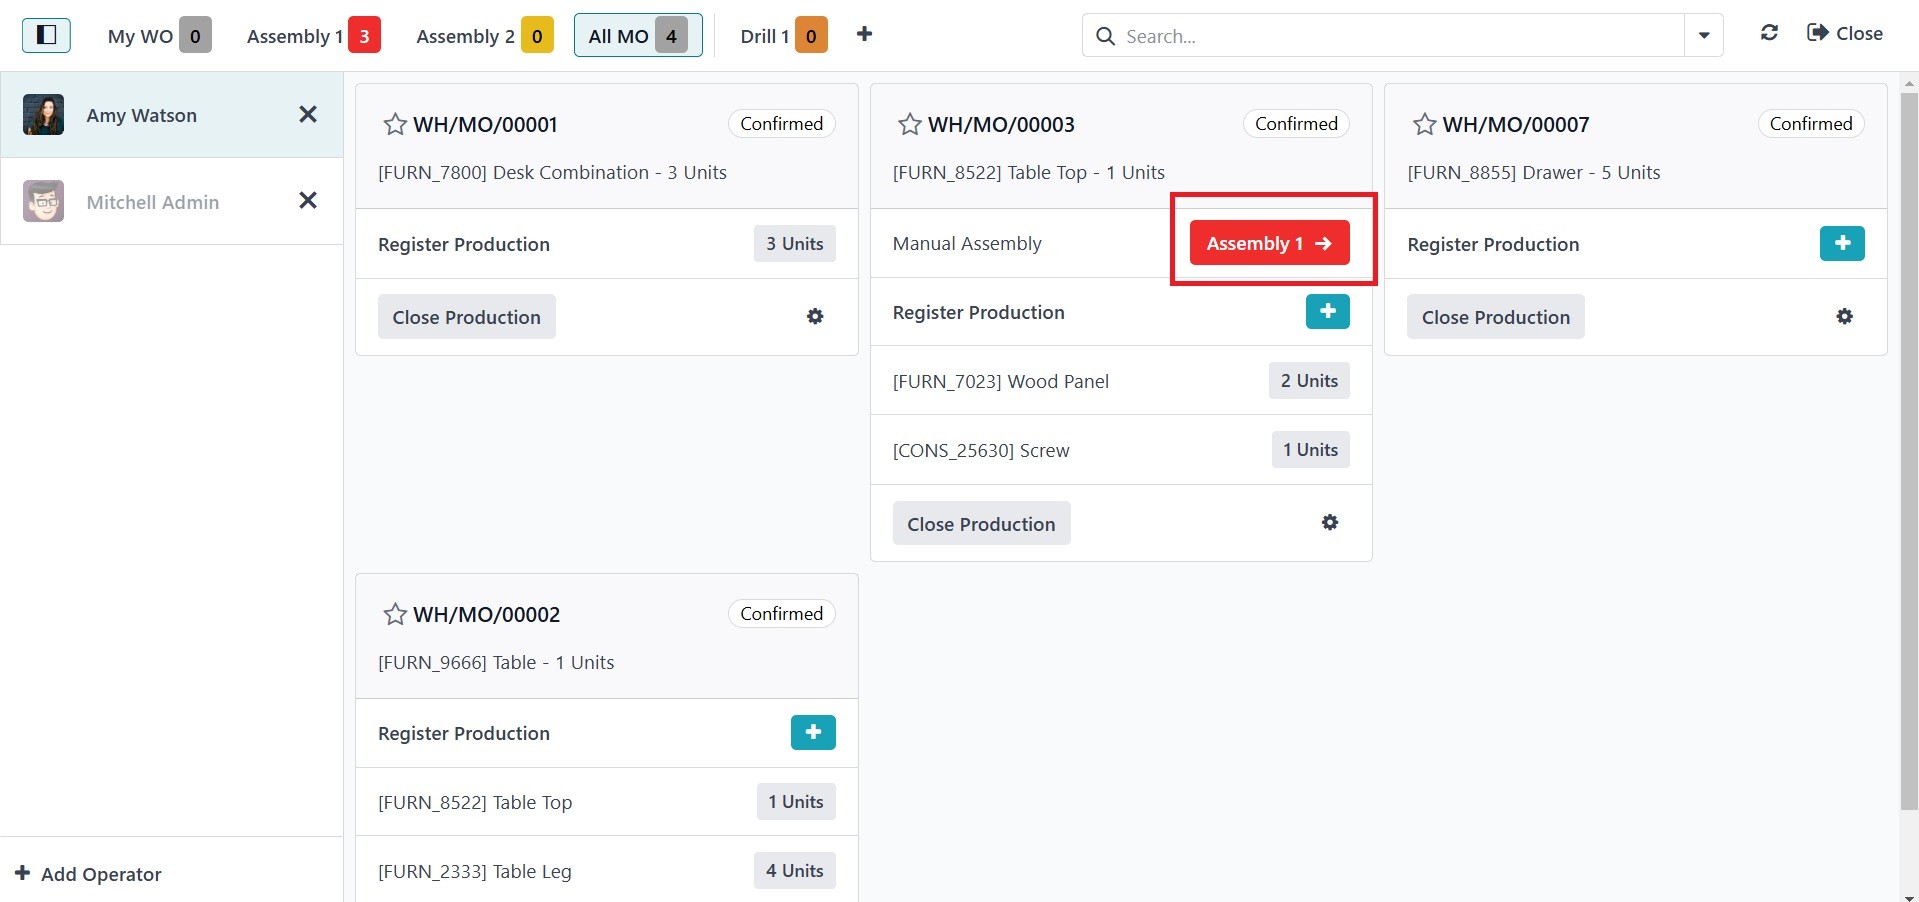
An overview similar to the one
below appears when the shop
floor app launches. From the
overview, users may see
manufacturing orders. There
are three orders for
manufacturing.
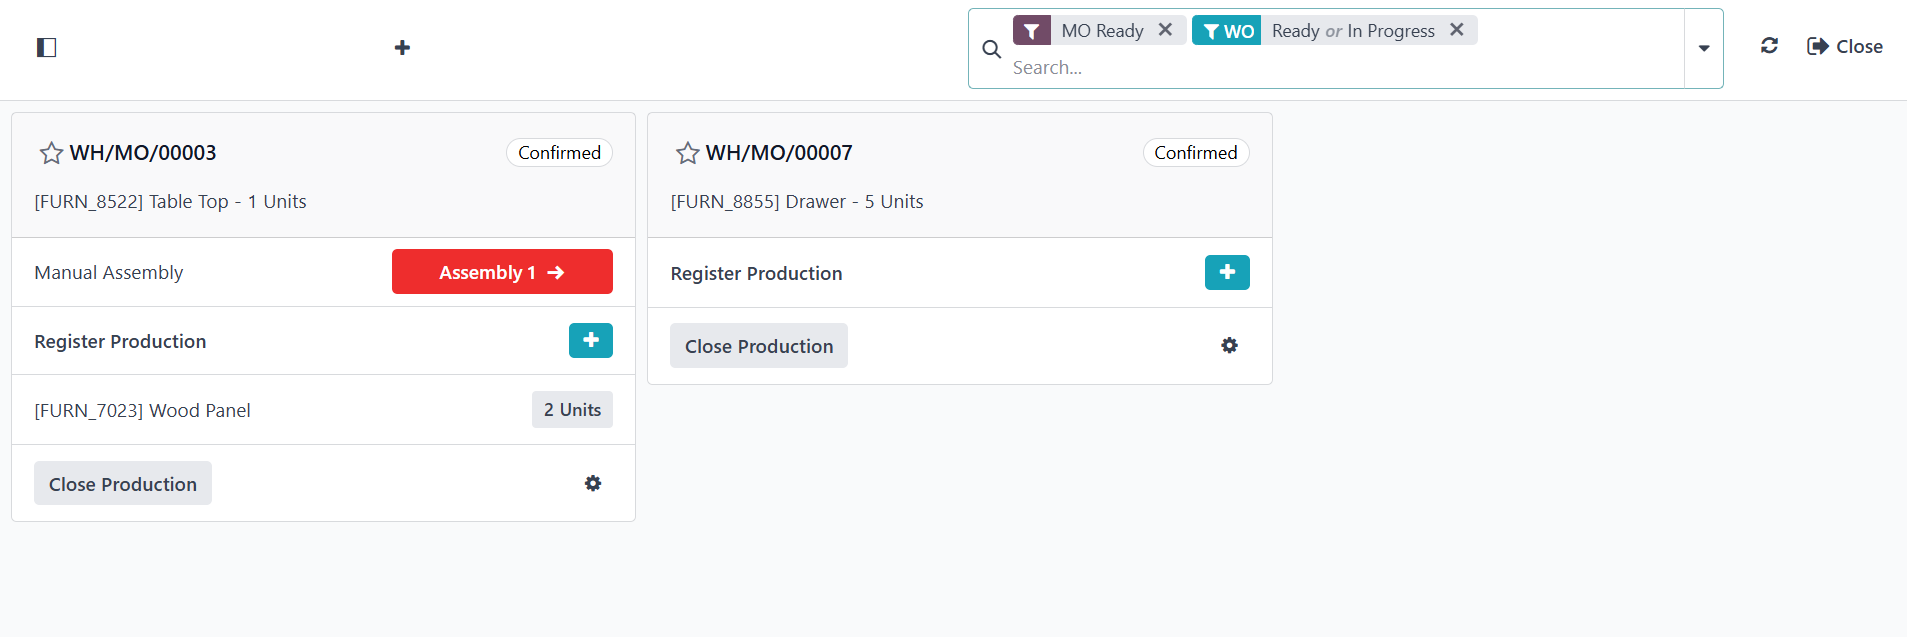
The top left corner of the screen
contains All MO, which shows
all manufacturing orders that
have been created. The work
orders allocated to the
logged-in user are displayed
when they click the My WO
button.
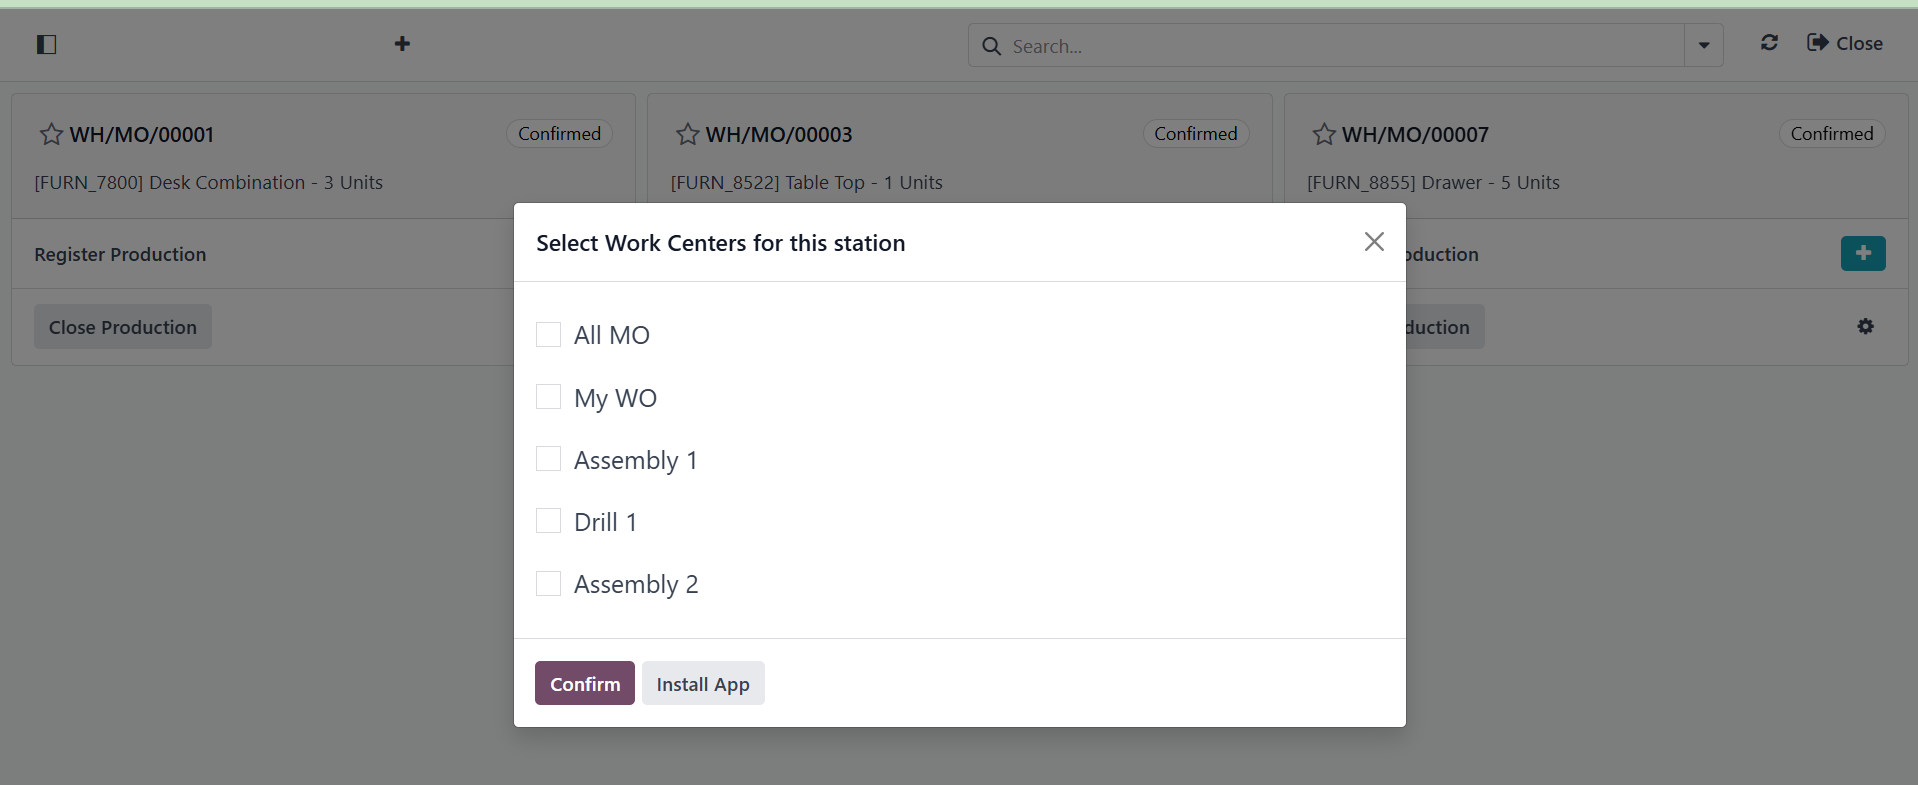
By selecting the Add option,
users can add work centers to
this shop floor. From the
popup, the user can select
the work center. Click the
Confirm button after choosing
the work centers, as in the
image above.
As shown in the screenshot below,
the user may then utilize
this dashboard to access the
selected Work centers.
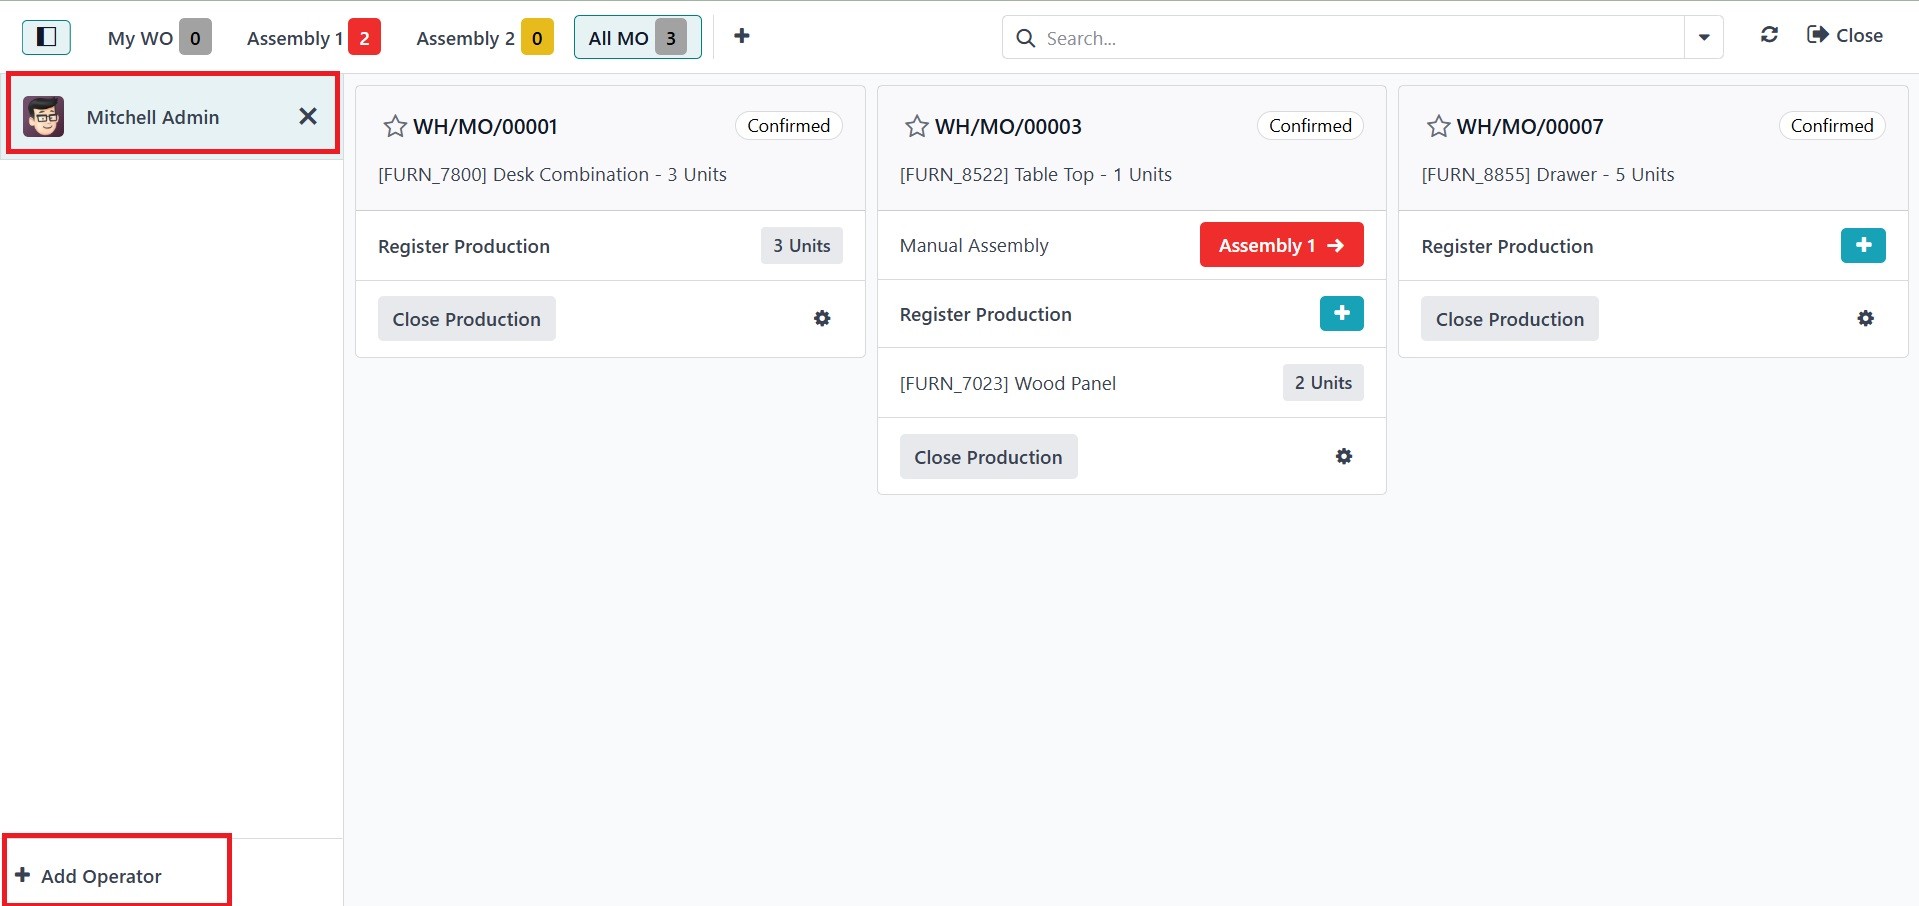
The user who logs in is visible,
as can be seen here. The +
Add Operator button can then
be used to add a new
operator.
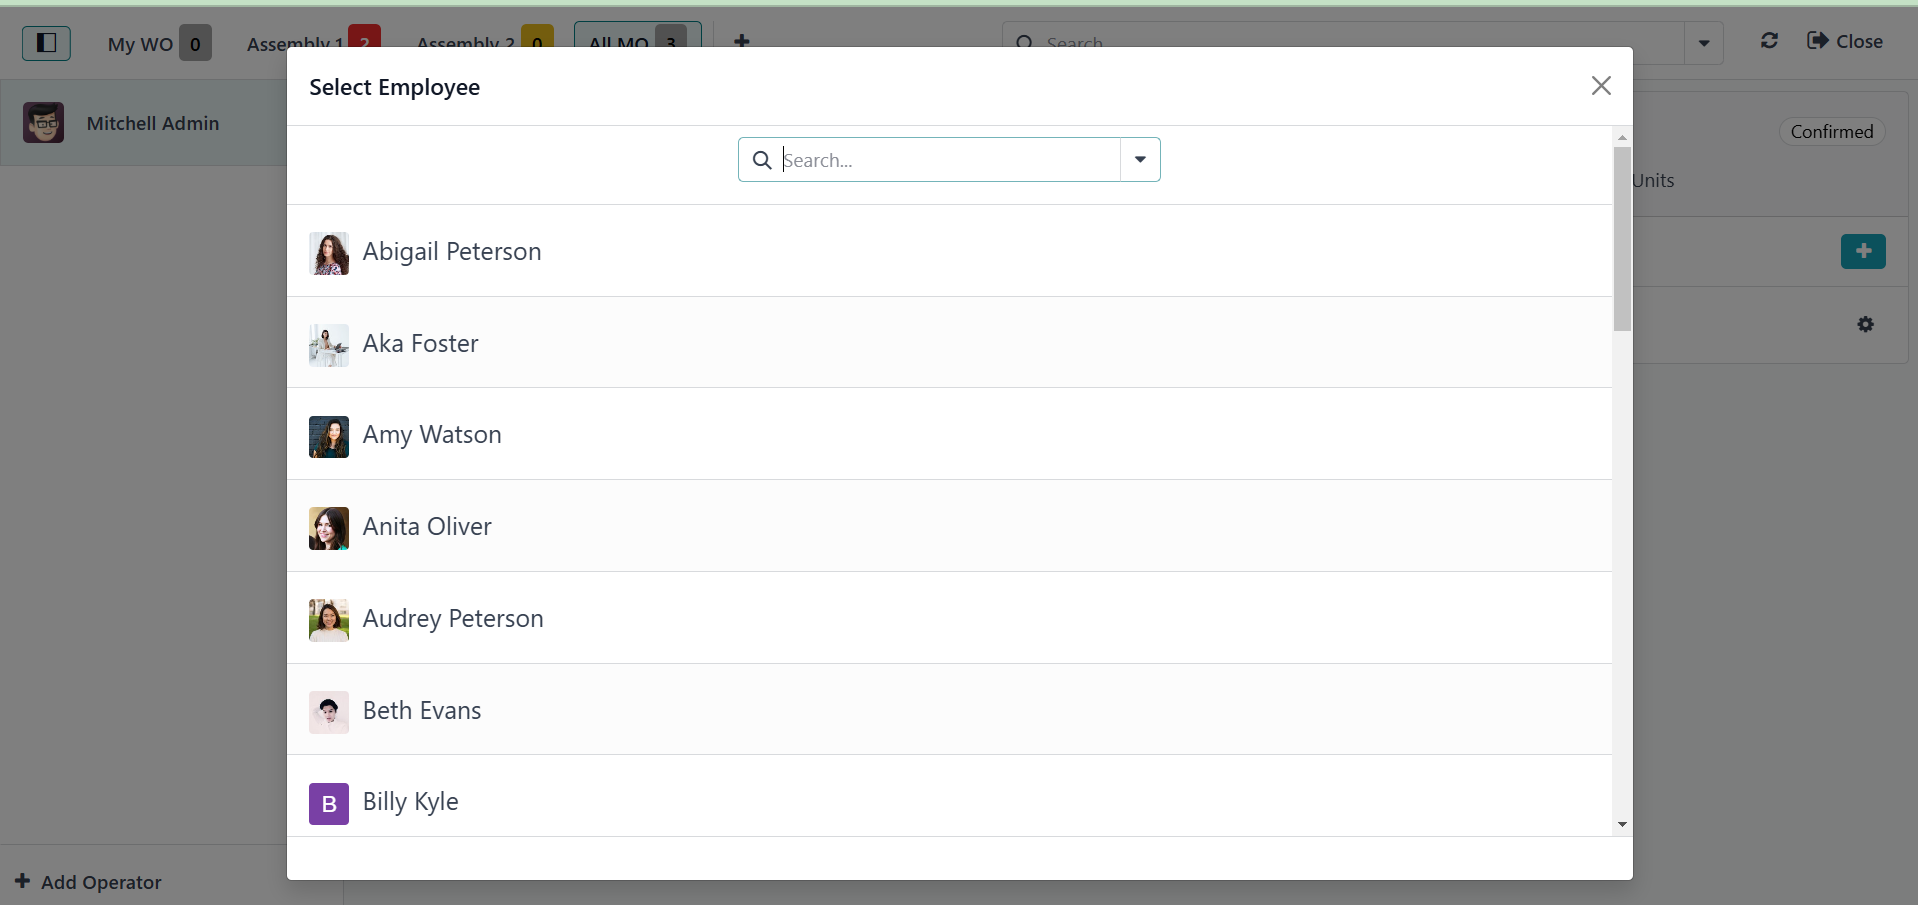
Simply select the employee from
the list.
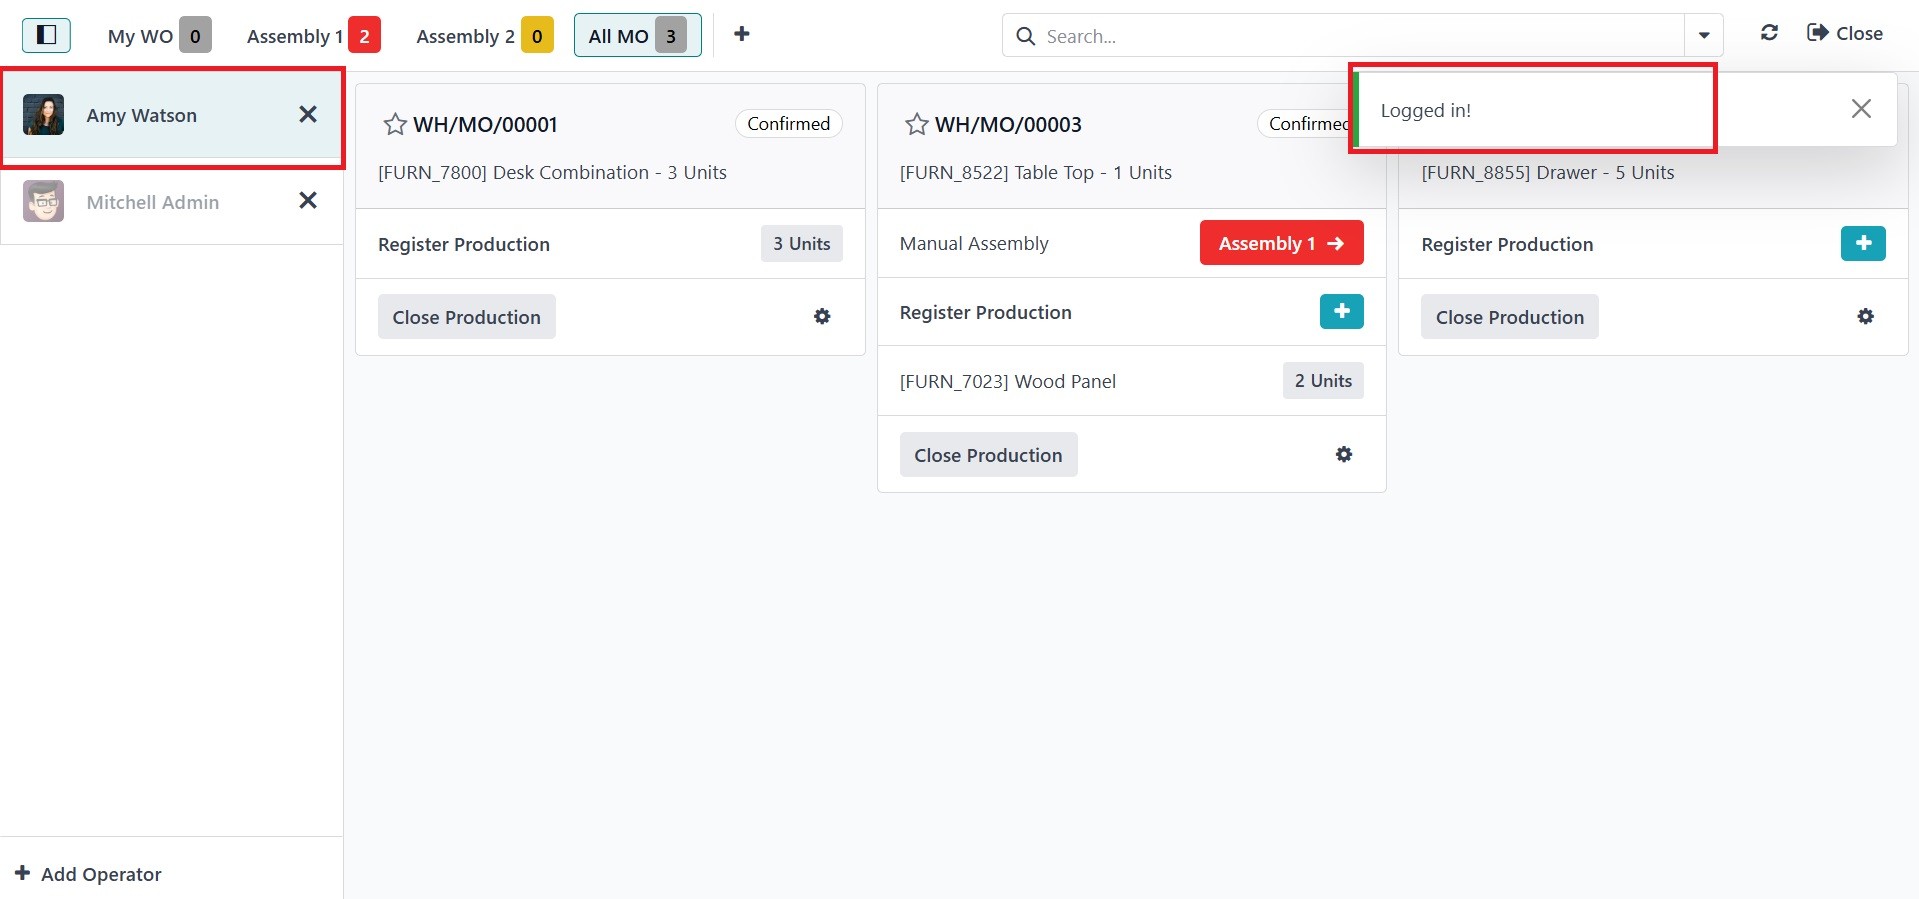
The selected employee will
therefore seem to be logged
in. The user can log in using
the credential user name and
password, which is added in
Employee module.
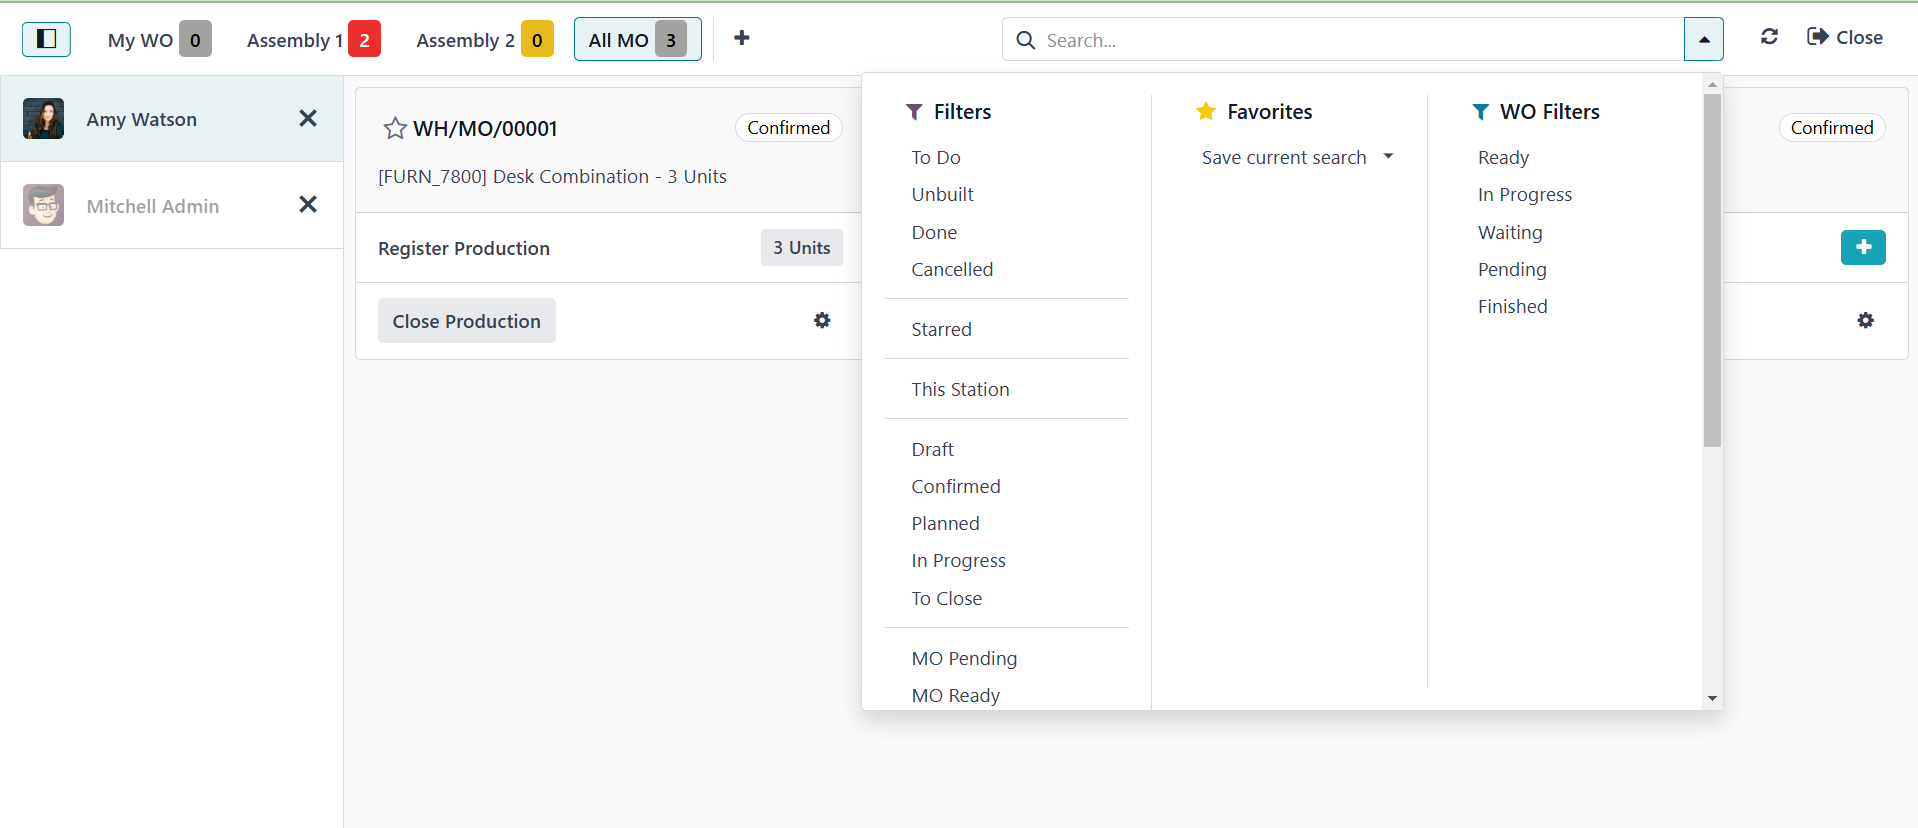
The search is provided as
indicated below, and the
details can be filtered or
favorited.
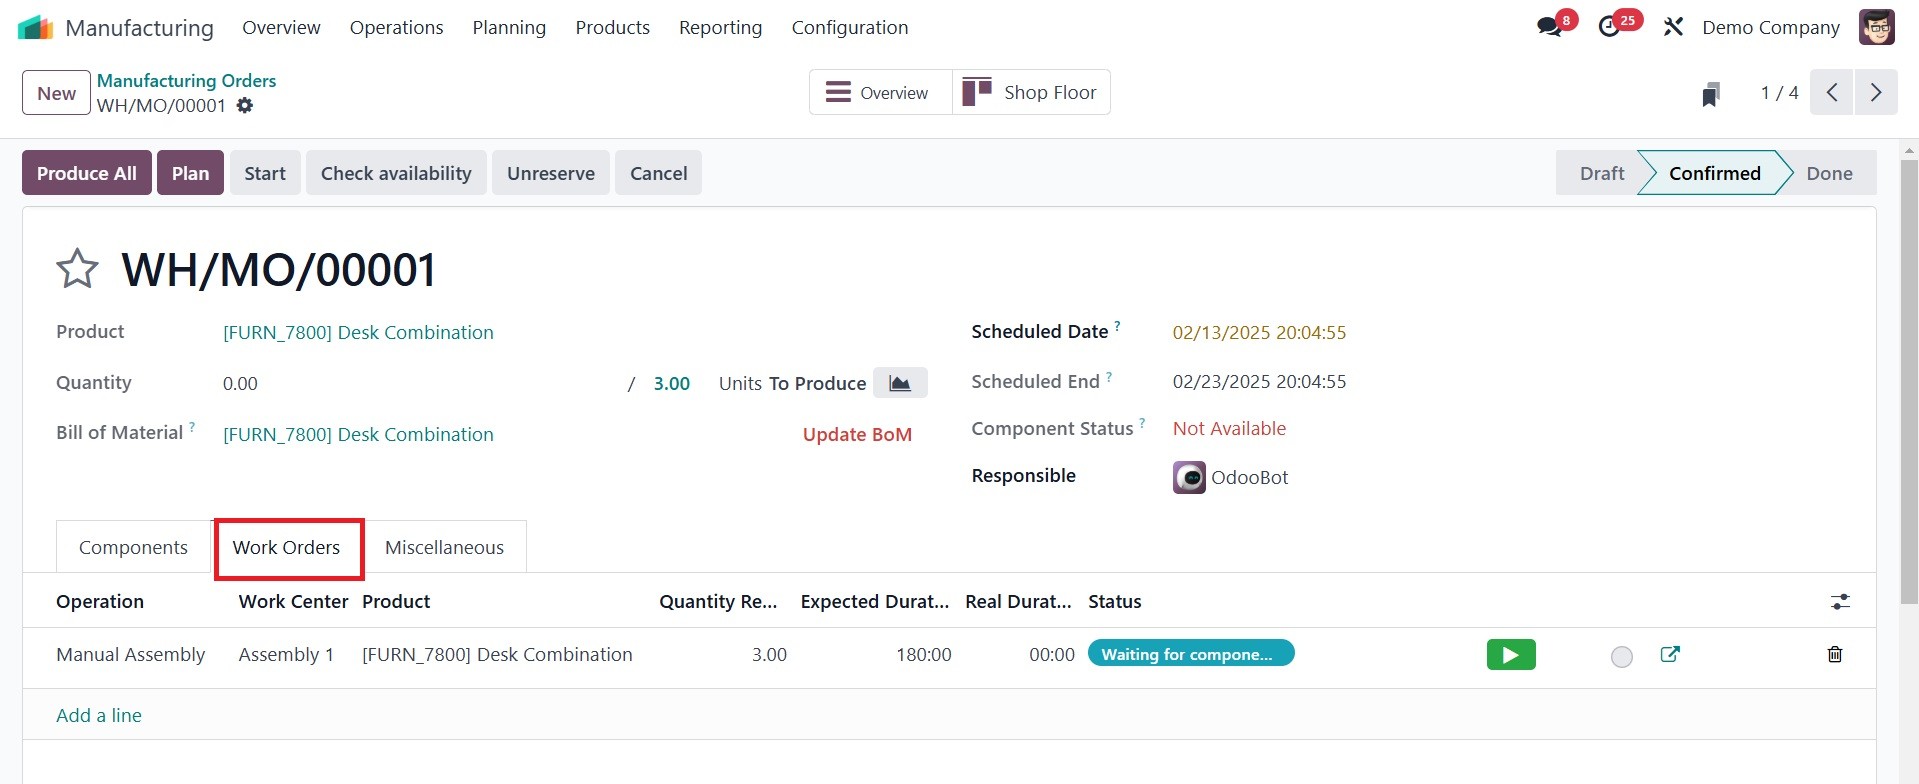
We have received a verified
production order. Two
additional processes have
been added: Polishing is done
in the Drill Station work
center, and Manual Assembly
is done from Assembly Line 1.
The worker in charge of the
first operation is Mitchell
Admin.
The dashboard view is similar, as
seen below. The employee's
assigned work orders are
shown as one, and the work
centers that show the
quantity of work orders are
shown in the upper section.
Two procedures are involved
in a single production order.
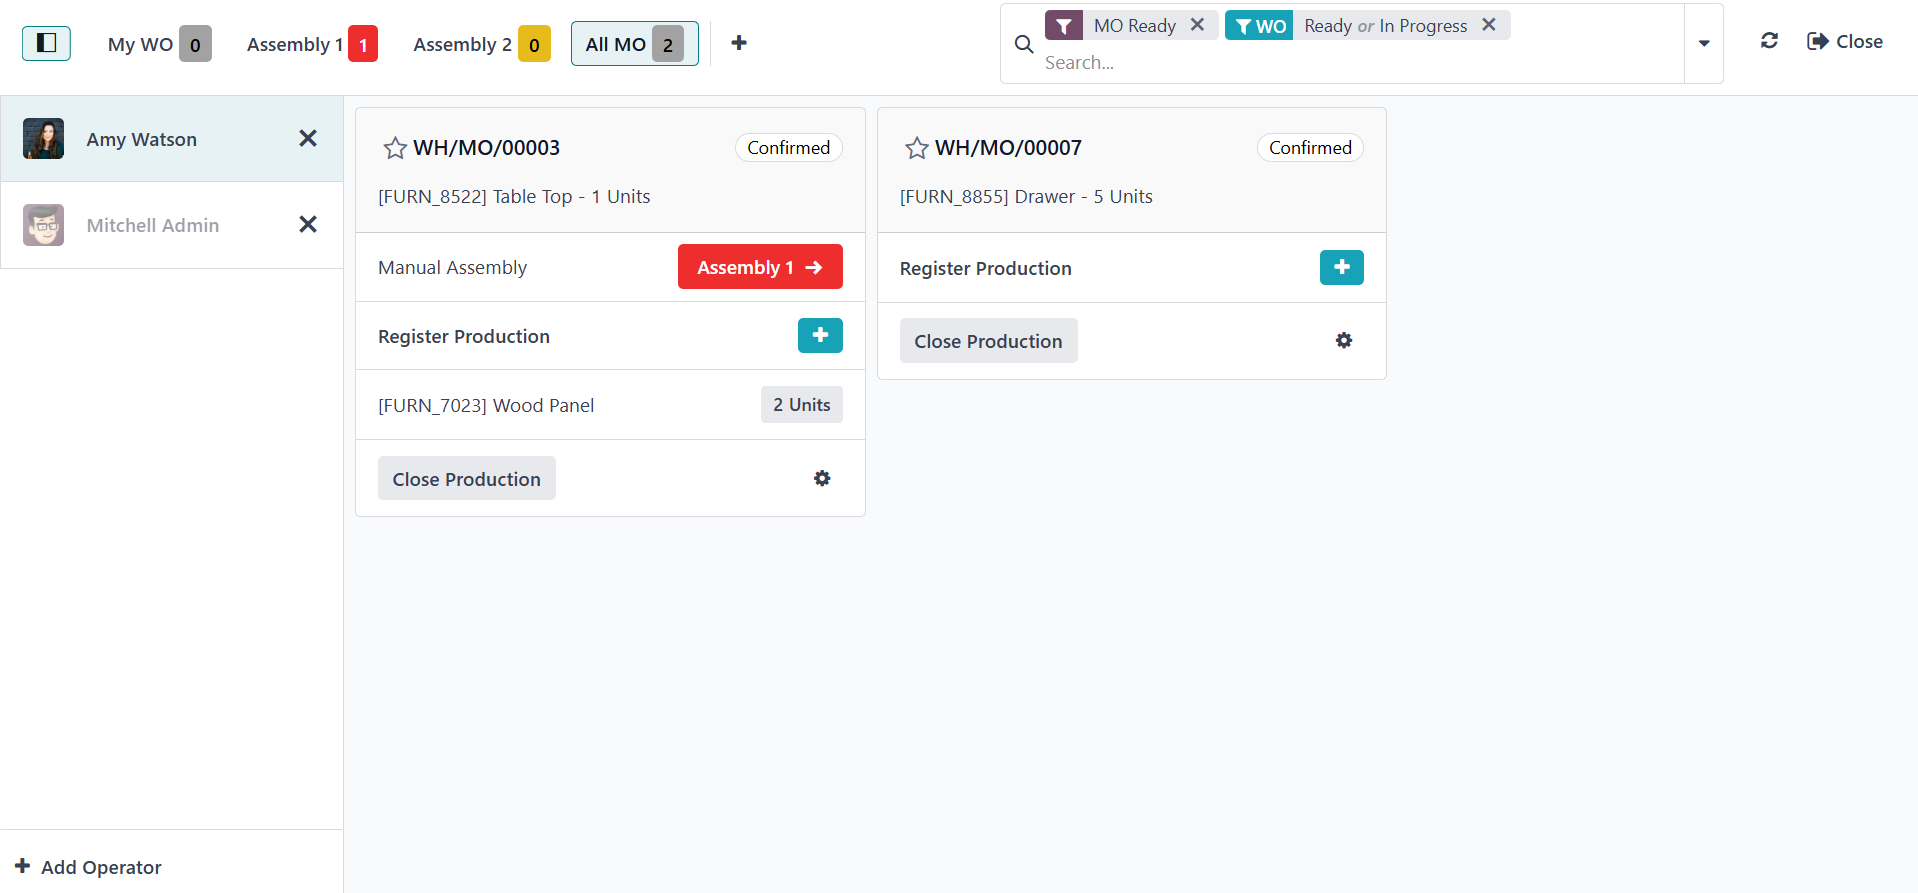
The operations and work centers
are visible there. Then, as
seen below, you can click the
settings icon to add more
configuration.
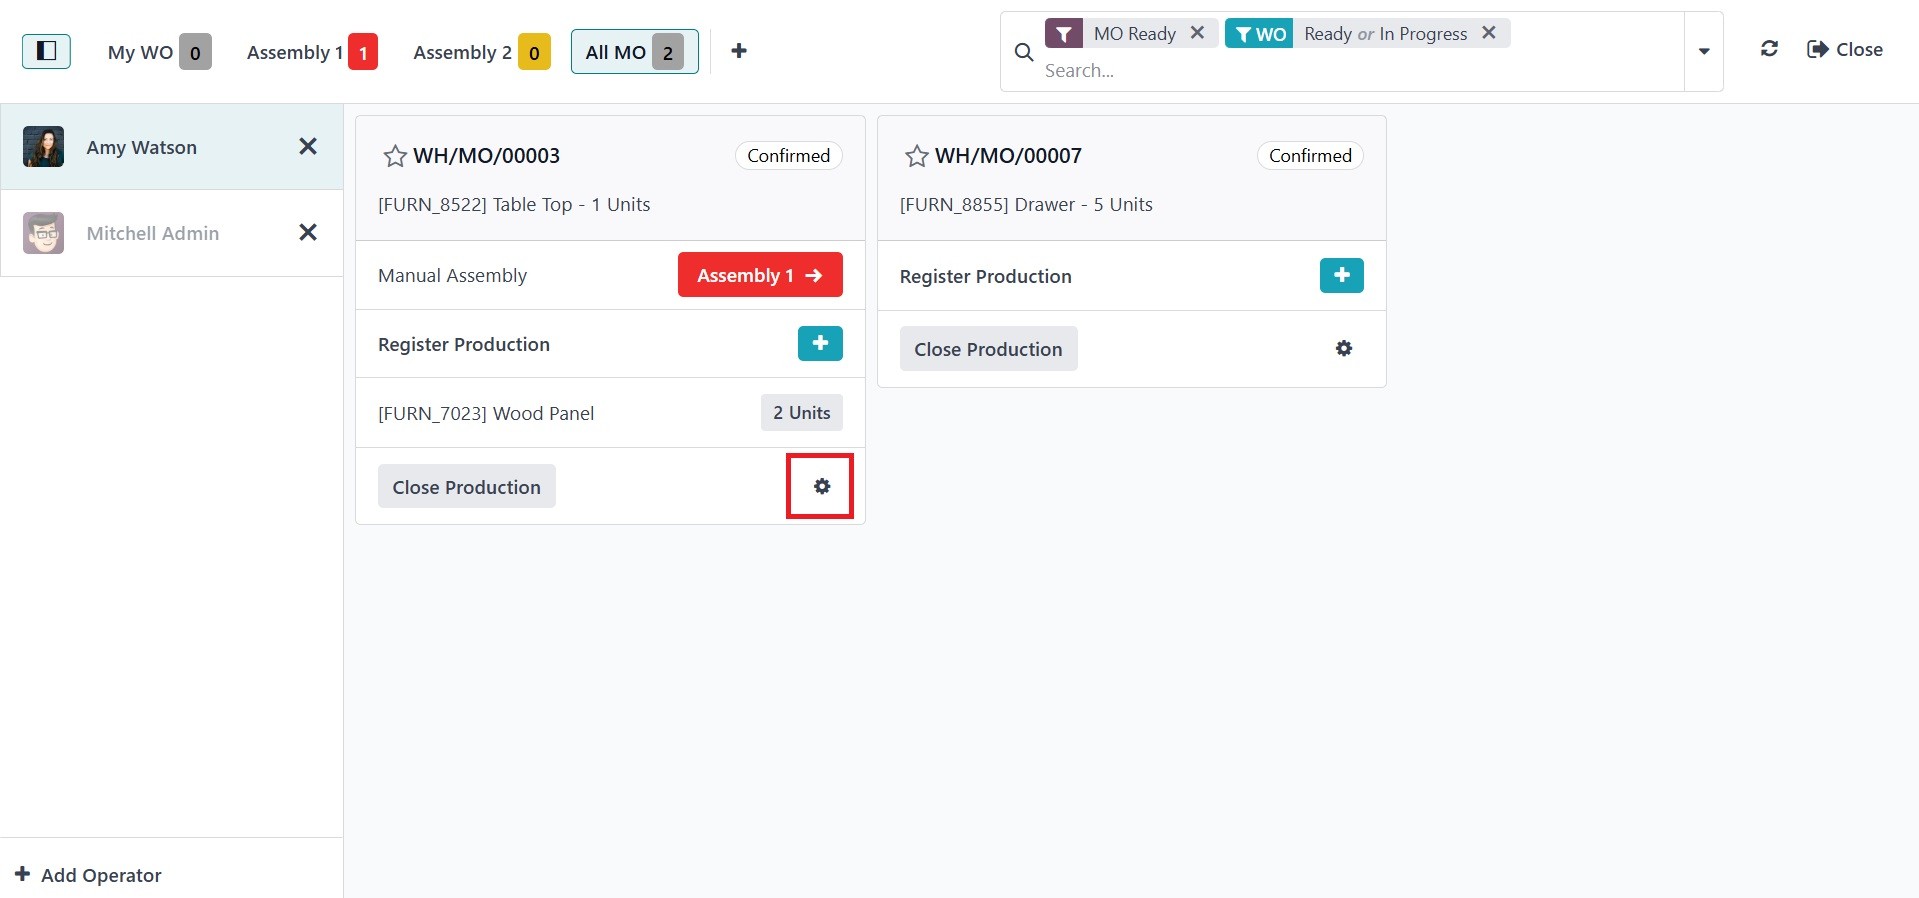
The user can add new work orders,
scrap old goods, add new
components, and possibly
access the manufacturing
order's backend by clicking,
which will open a new window.
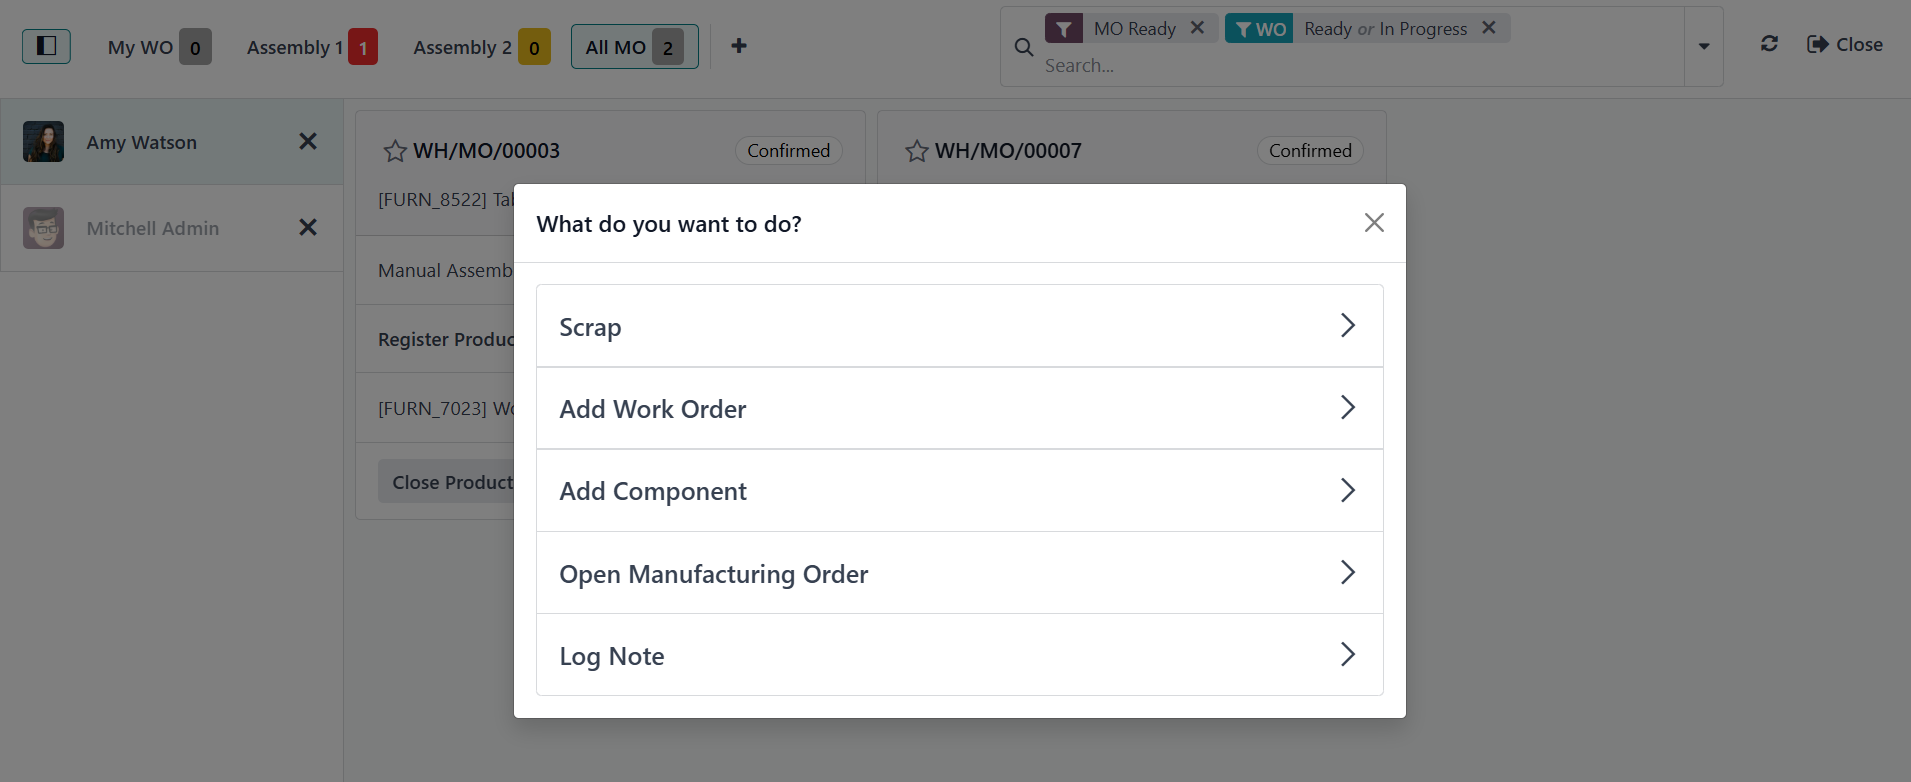
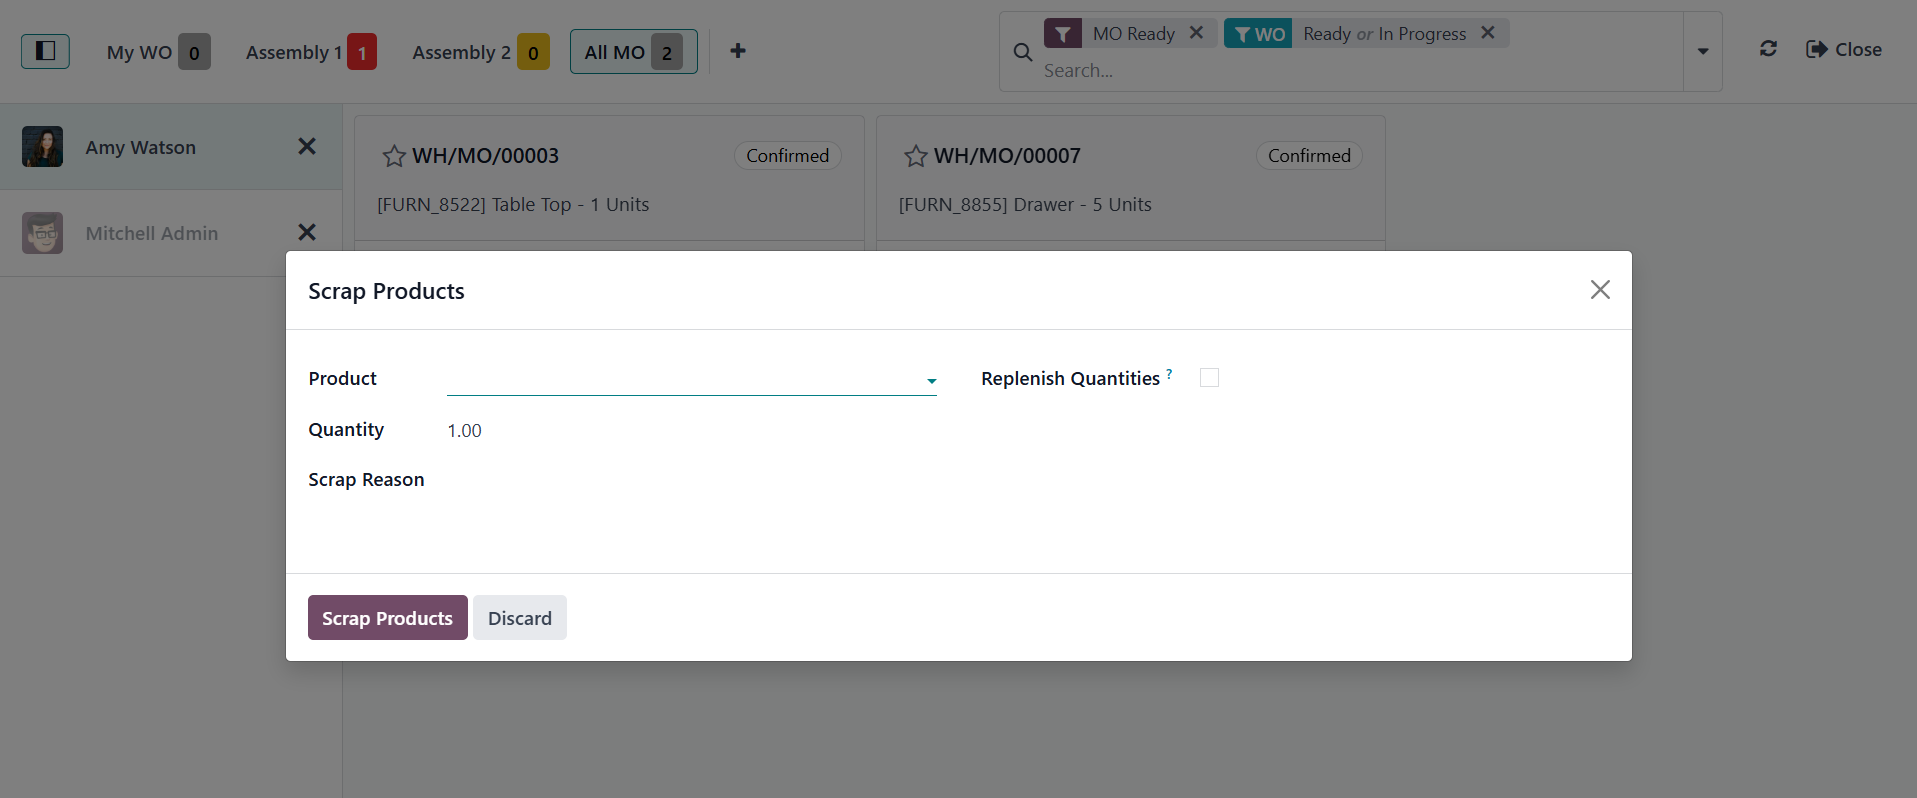
Clicking on the Scrap will open
the Scrap order box. The user
may then create a scrap order
directly from there without
having to go to the
production module.
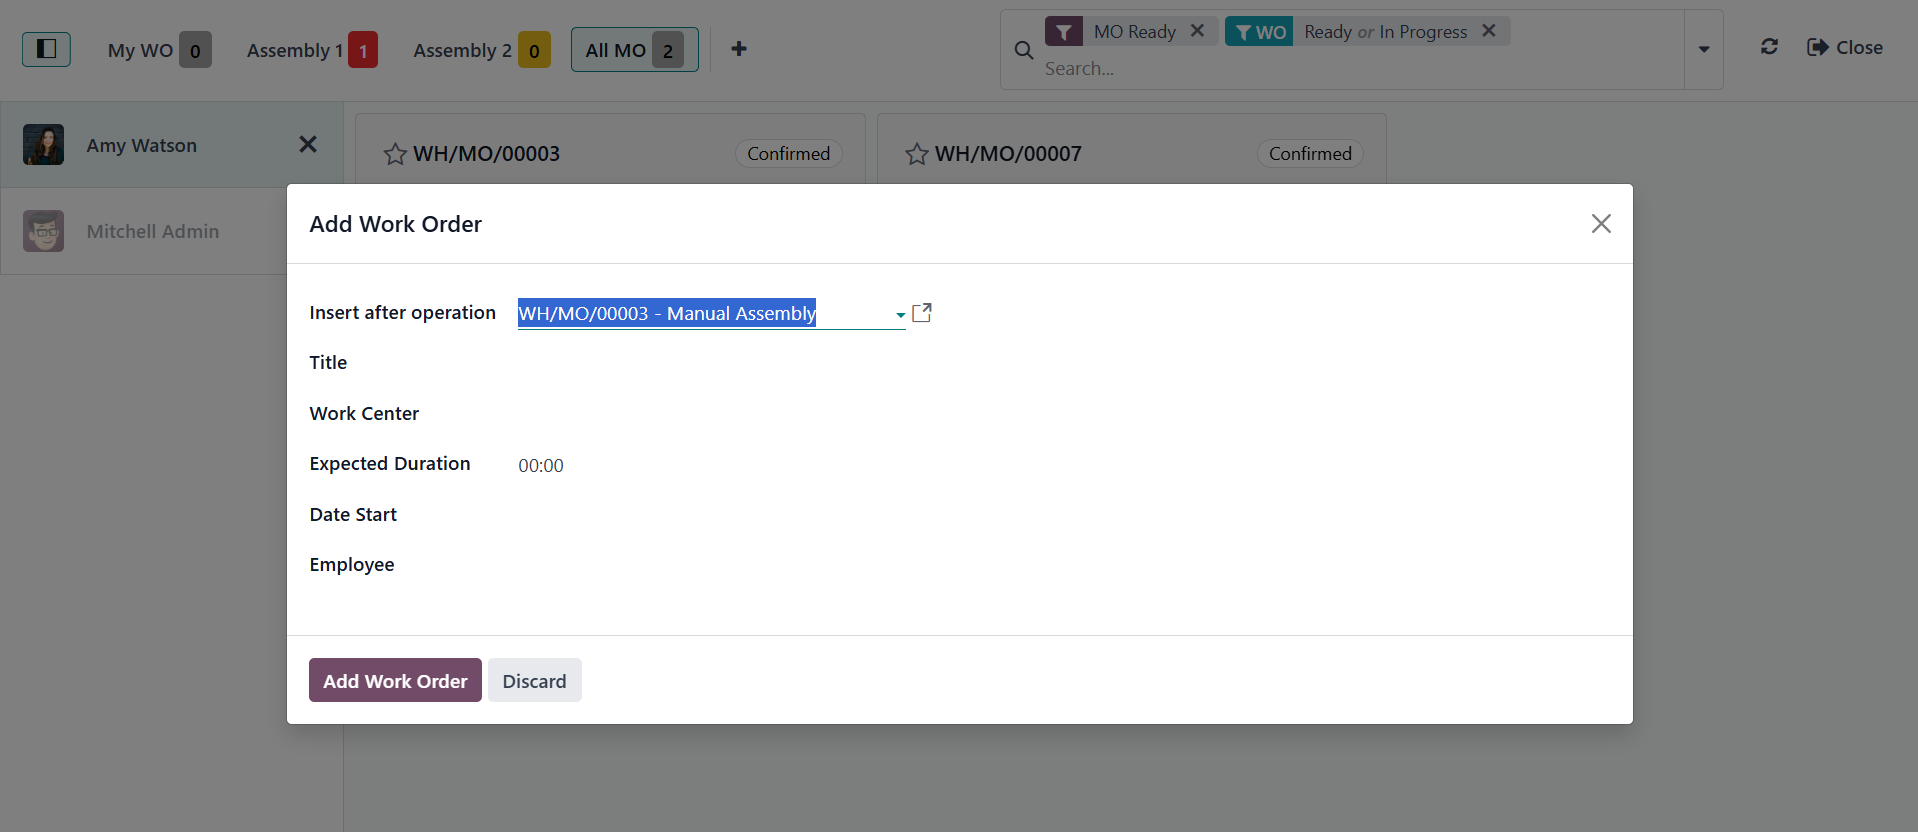
Clicking the Add Work Order
button will open a popup
window where you may add
further operations. It is
important to include the
operation's name, work
center, expected duration,
start date, and designated
employee. Next, choose the
option to Add Work Order.
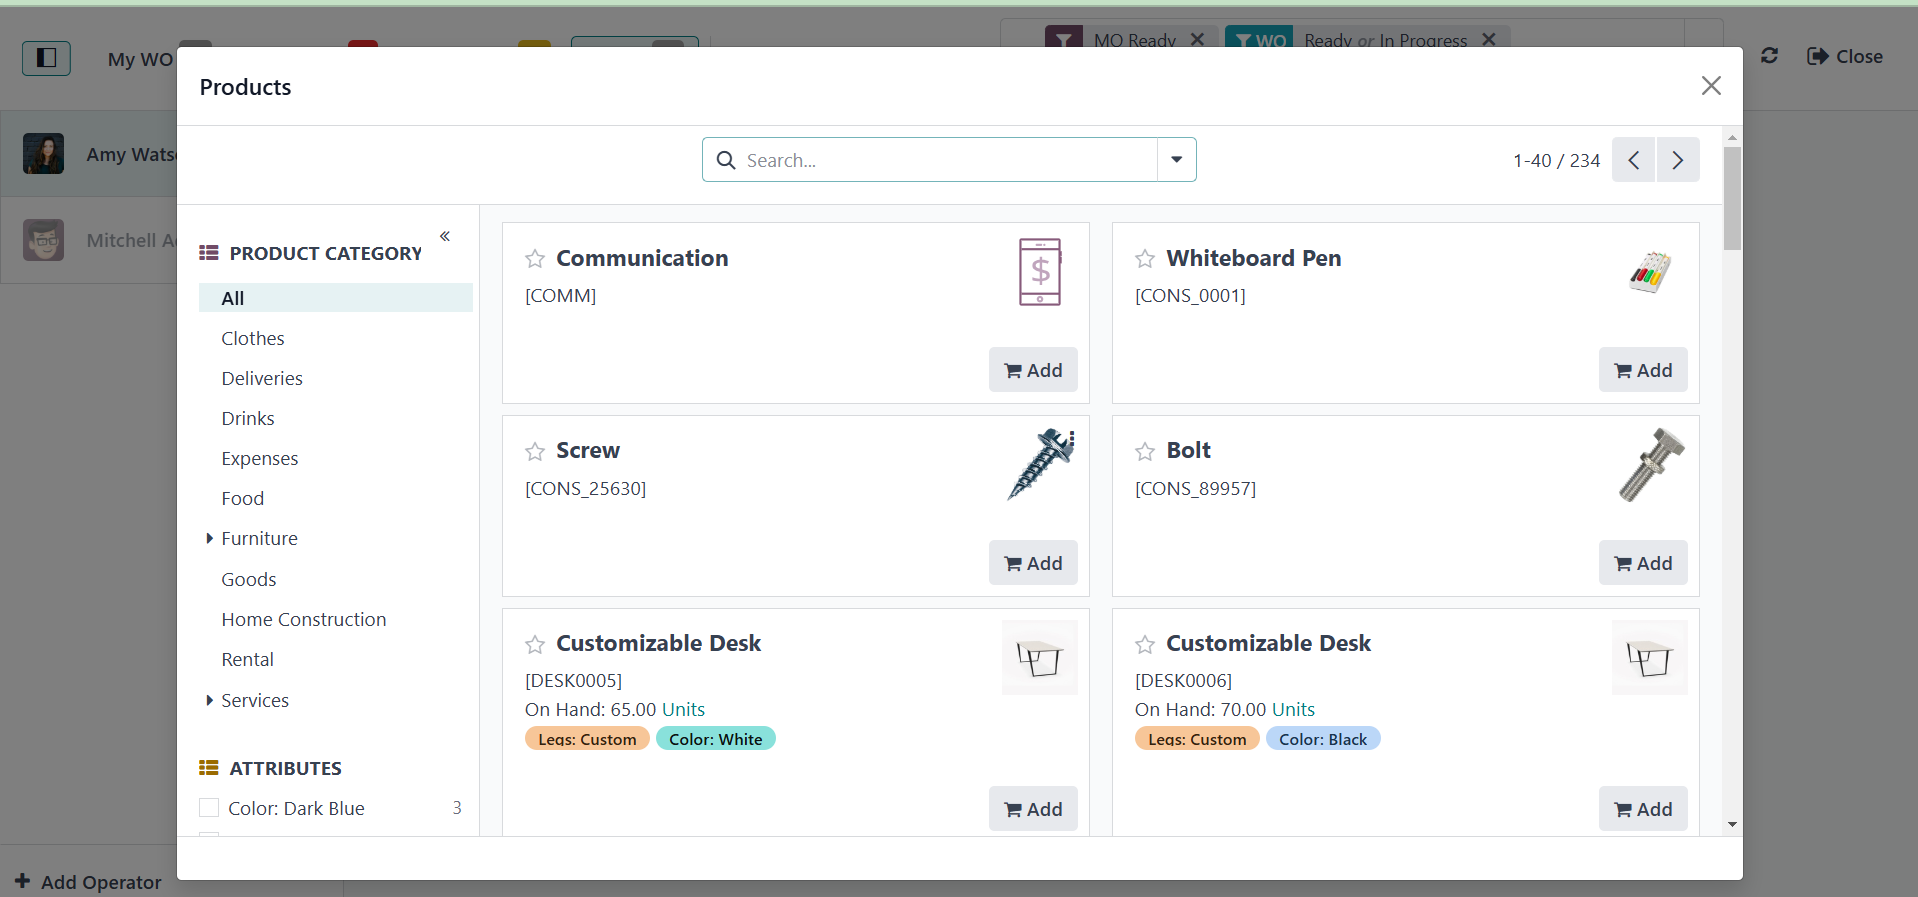
New components can be added in
quantity using the Add
Component button.
The Open backend MO will open
the manufacturing order.
Click on the first work
center.
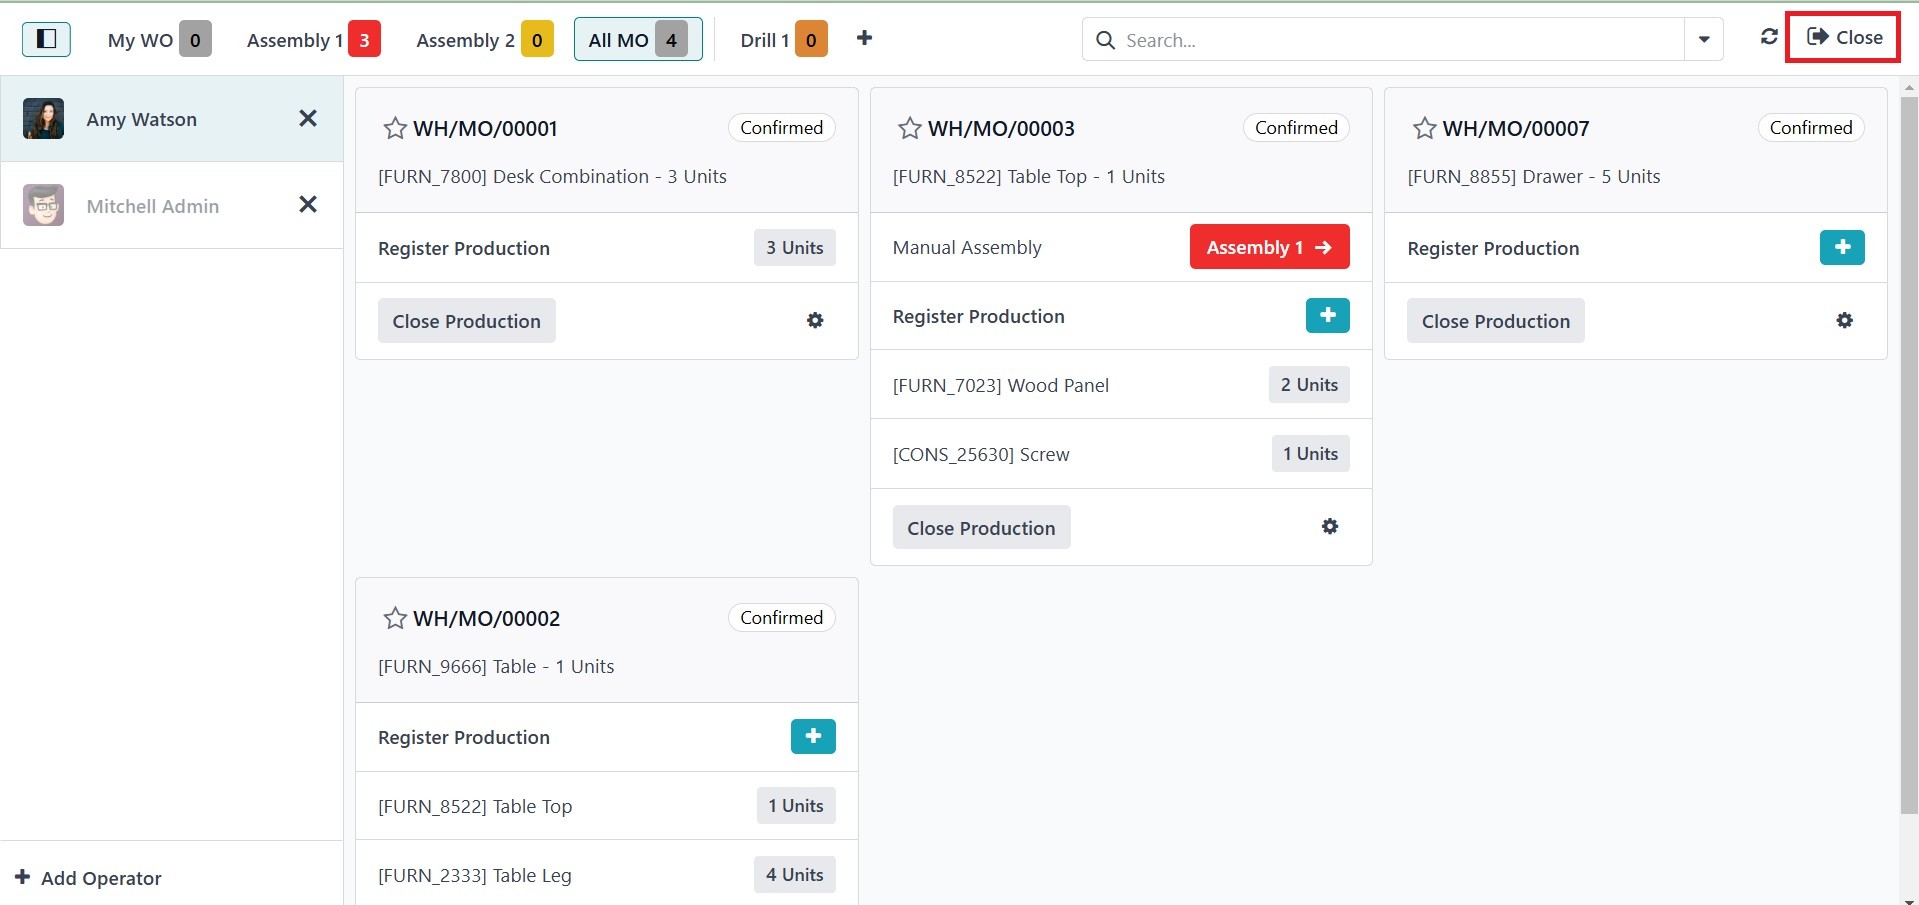
After that, you can finish the
manufacturing order by
clicking the Close Production
button.
So that the operator may now
easily manage the production
process by using the Shop
Floor Management System in
Odoo 18.