The Sign module of the Odoo18 ERP
platform is designed for
electronic document delivery,
approval, and signature. The
module features drag-and-drop
fields that are easy to use,
making it quick and simple to
upload your PDF file.
Without paper and a pen, the
module functions as a
powerful tool to sign
documents more rapidly.
Getting documents signed as
quickly as feasible will lead
to increased productivity and
simpler document signing
procedures.
Using drag-and-drop preset blocks
to build up contacts, the
Odoo18 Sign module gives you
a state-of-the-art way to
submit, sign, and approve
documents. It will also help
follow the status of each
document and make it easy to
submit requests for
signatures.
The system also facilitates the
creation of reports,
including audit reports, for
all parties at any time or
location. According to the US
ESIGN Act, EU Regulation
910/2014, and eIDAS, any
signatures created with the
Odoo Sign module will be
accepted as legitimate
electronic signatures. It
also confirms that electronic
signatures are required in
almost every country.
Bid farewell to unforeseen costs
associated with postage,
printing, copying, faxing,
scanning, and shredding.
There are no more worries
about important documents
vanishing because the sign
module makes sure everything
is available online, at any
time, and from any location.
Additionally, you will be able to
save more and more time
because you won't have to
wait hours, days, or even
weeks for everyone to sign.
You can use the Odoo 18 Sign
module to finish it with just
a few clicks. In the same way
that it will help you reduce
errors and hazards associated
with document signing.
To access the Odoo18 Sign module,
you should first install the
module from the Odoo18
applications. Clicking the
Sign module menu icon will
then open the module.
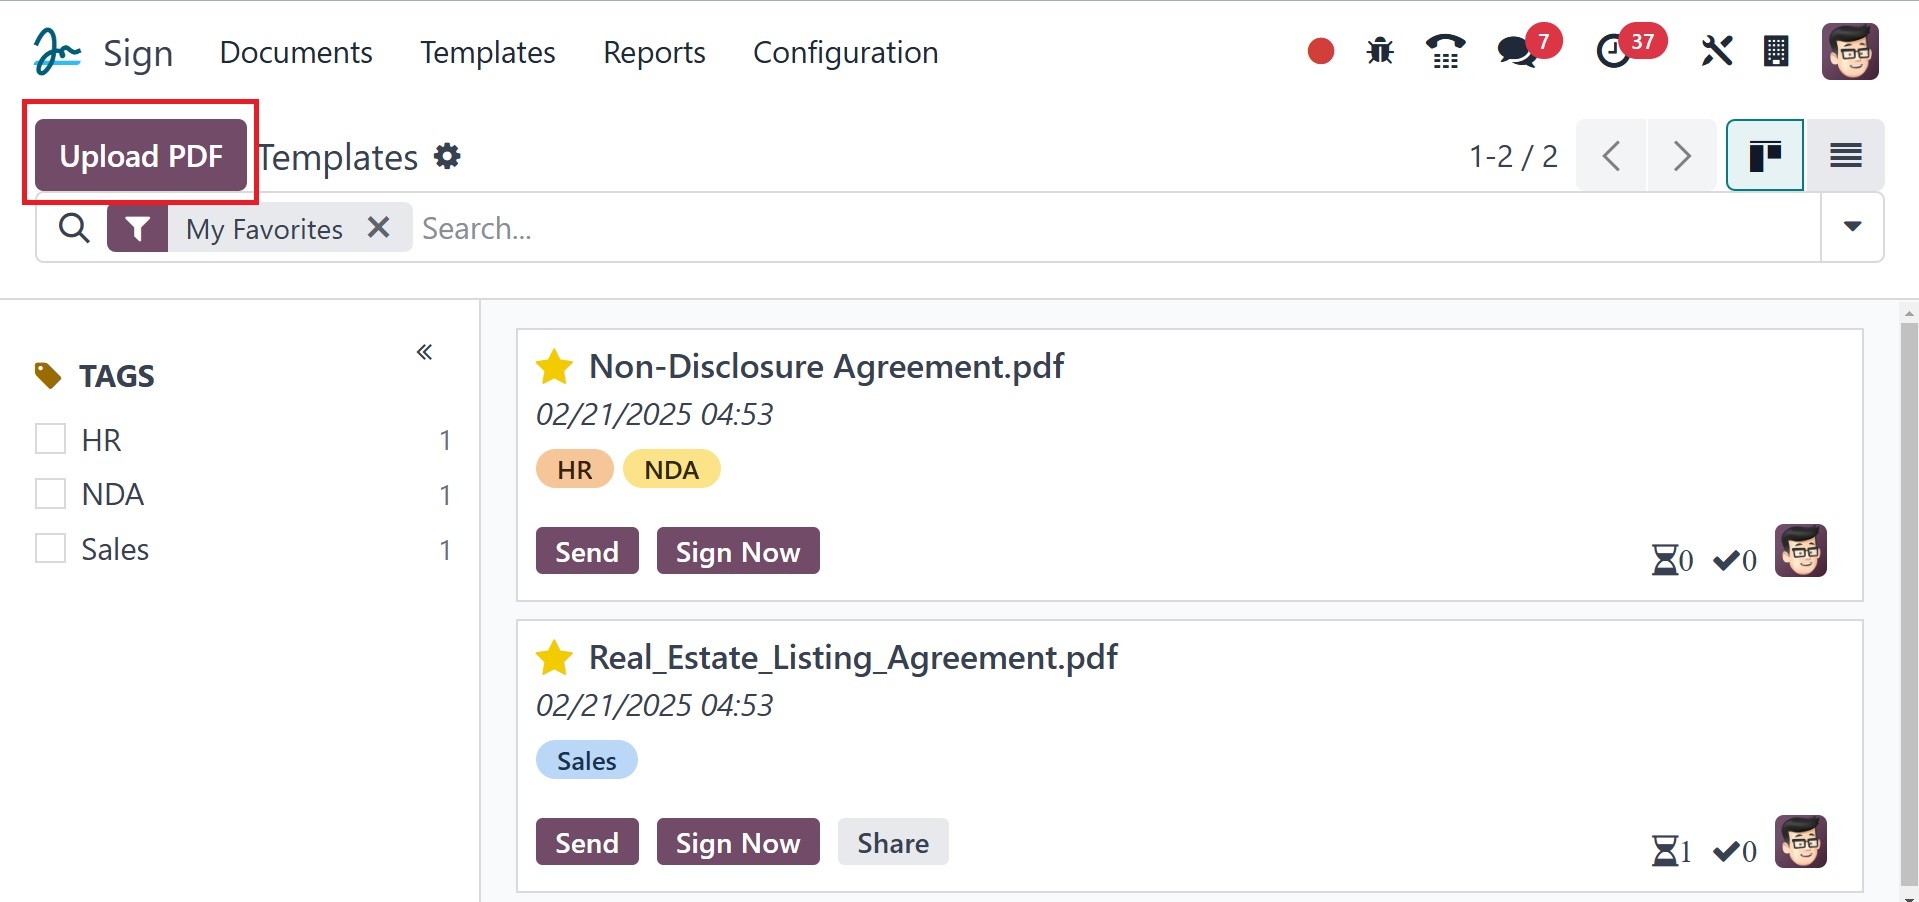
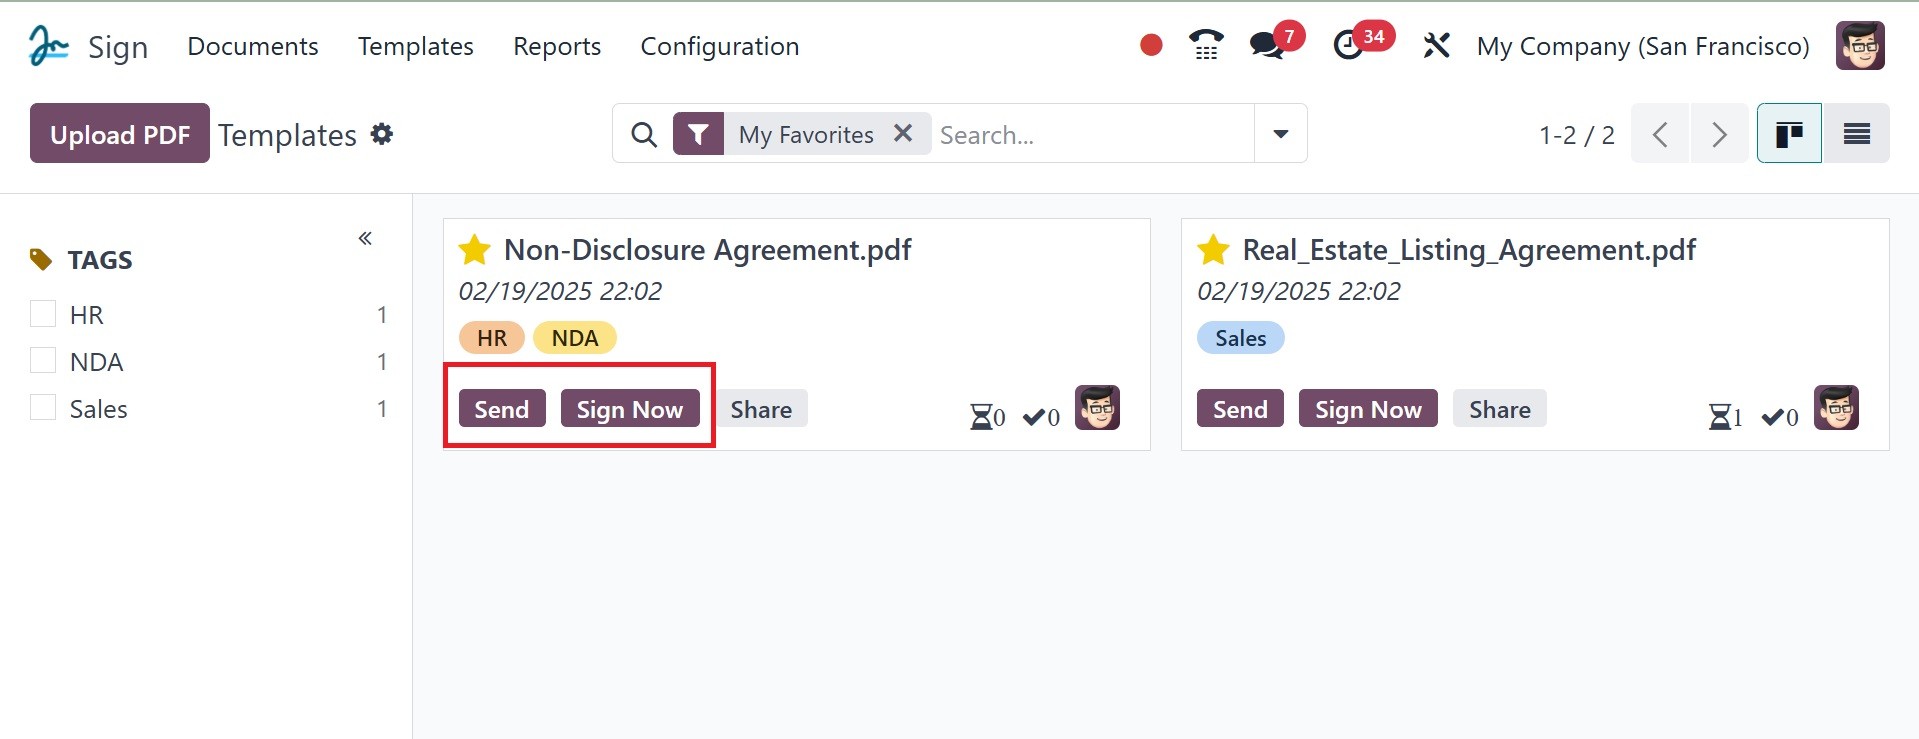
In the home dashboard window of
the module, you may view a
preview of the templates that
have already been created in
the platform. A screenshot of
the dashboard window can be
found below.
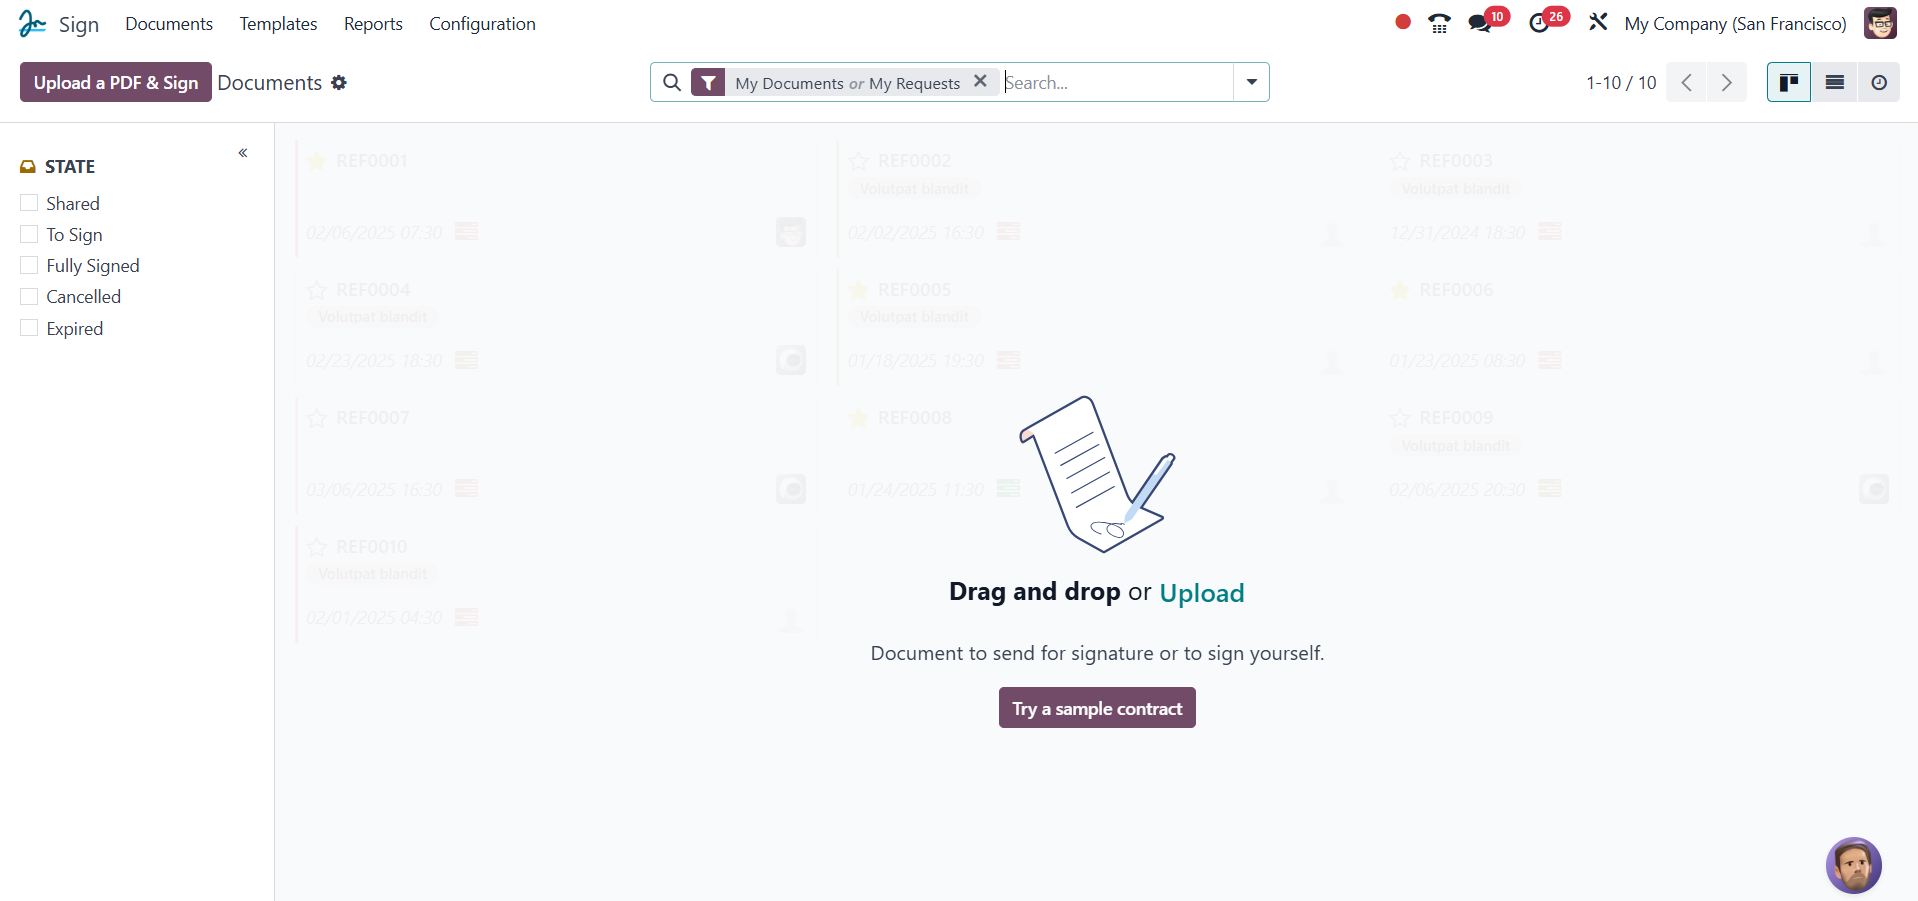
The image above shows the Kanban
view of the dashboard panel
for the module's templates.
You can also access this
module from List View by
selecting the List View menu
icon. As seen in the
screenshot, all of the
templates you have created on
the platform will be visible
on the right side of the
interface. The templates will
all be arranged in separate
card-like layouts, which is a
more effective way to
represent data and
facilitates information
interpretation. Along with
details regarding the PDF's
name, date, defined tags,
SEND, SIGN NOW, and SHARE
buttons, there is also a
brief explanation of the
pertinent template.
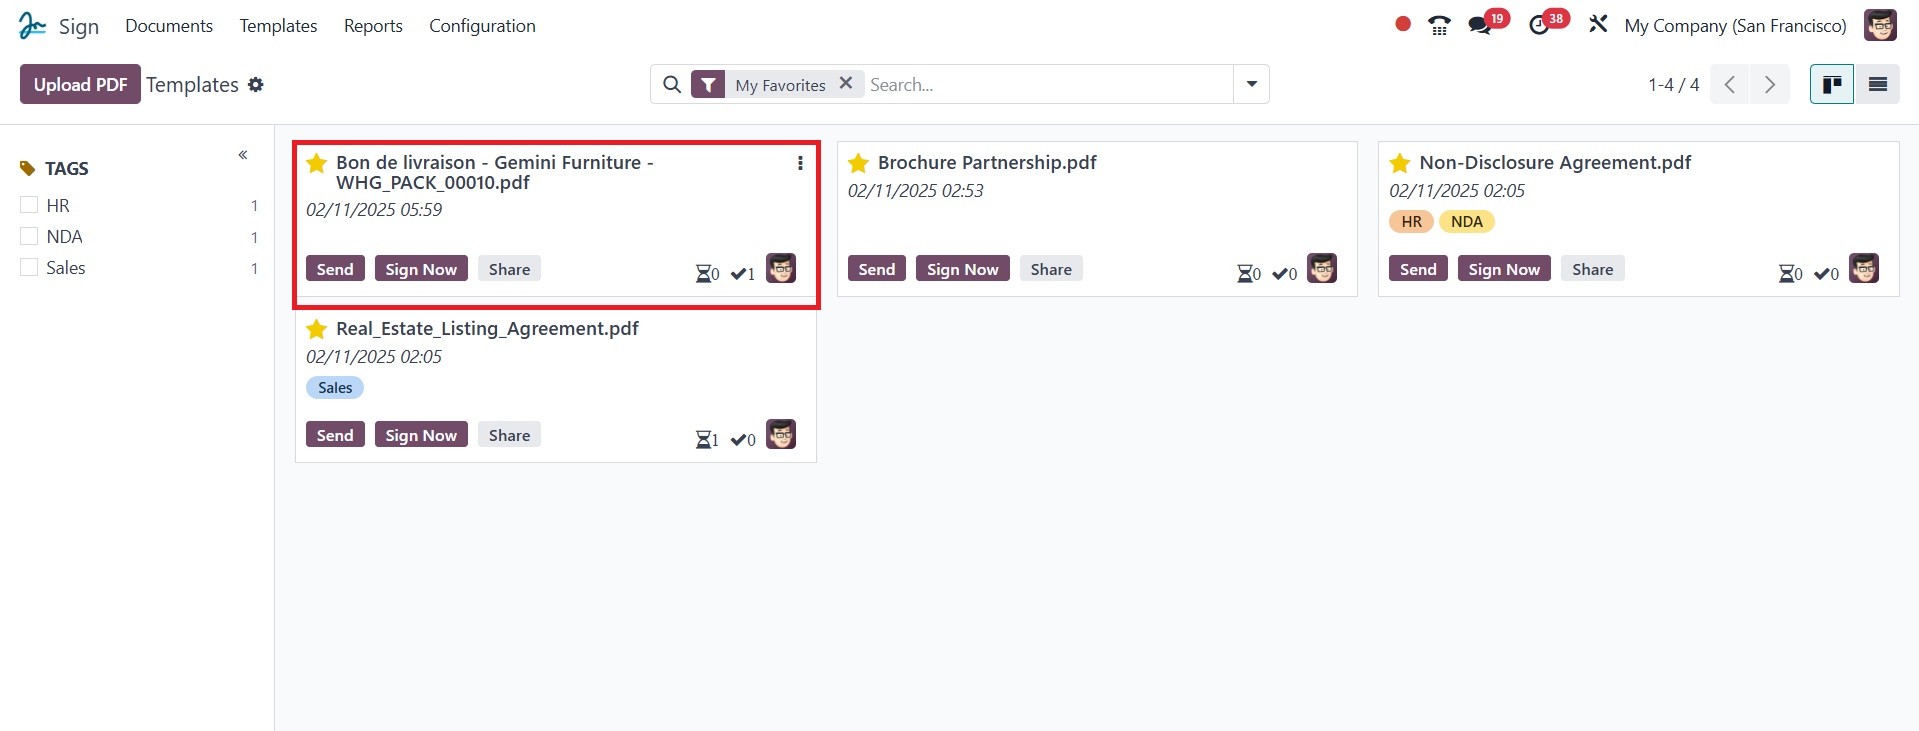
Each Template record has icons on
the bottom right that allow
you to view the number of
papers being worked on for
that template, the number of
documents signed for that
template, and the picture of
the person in charge.
There will also be several
convenient options for each
record's drop-down menu
triggers. The dropdown menu
can be accessed by clicking
on the three accessible dots
located in the upper right
corner of each record, as
seen in the image below.
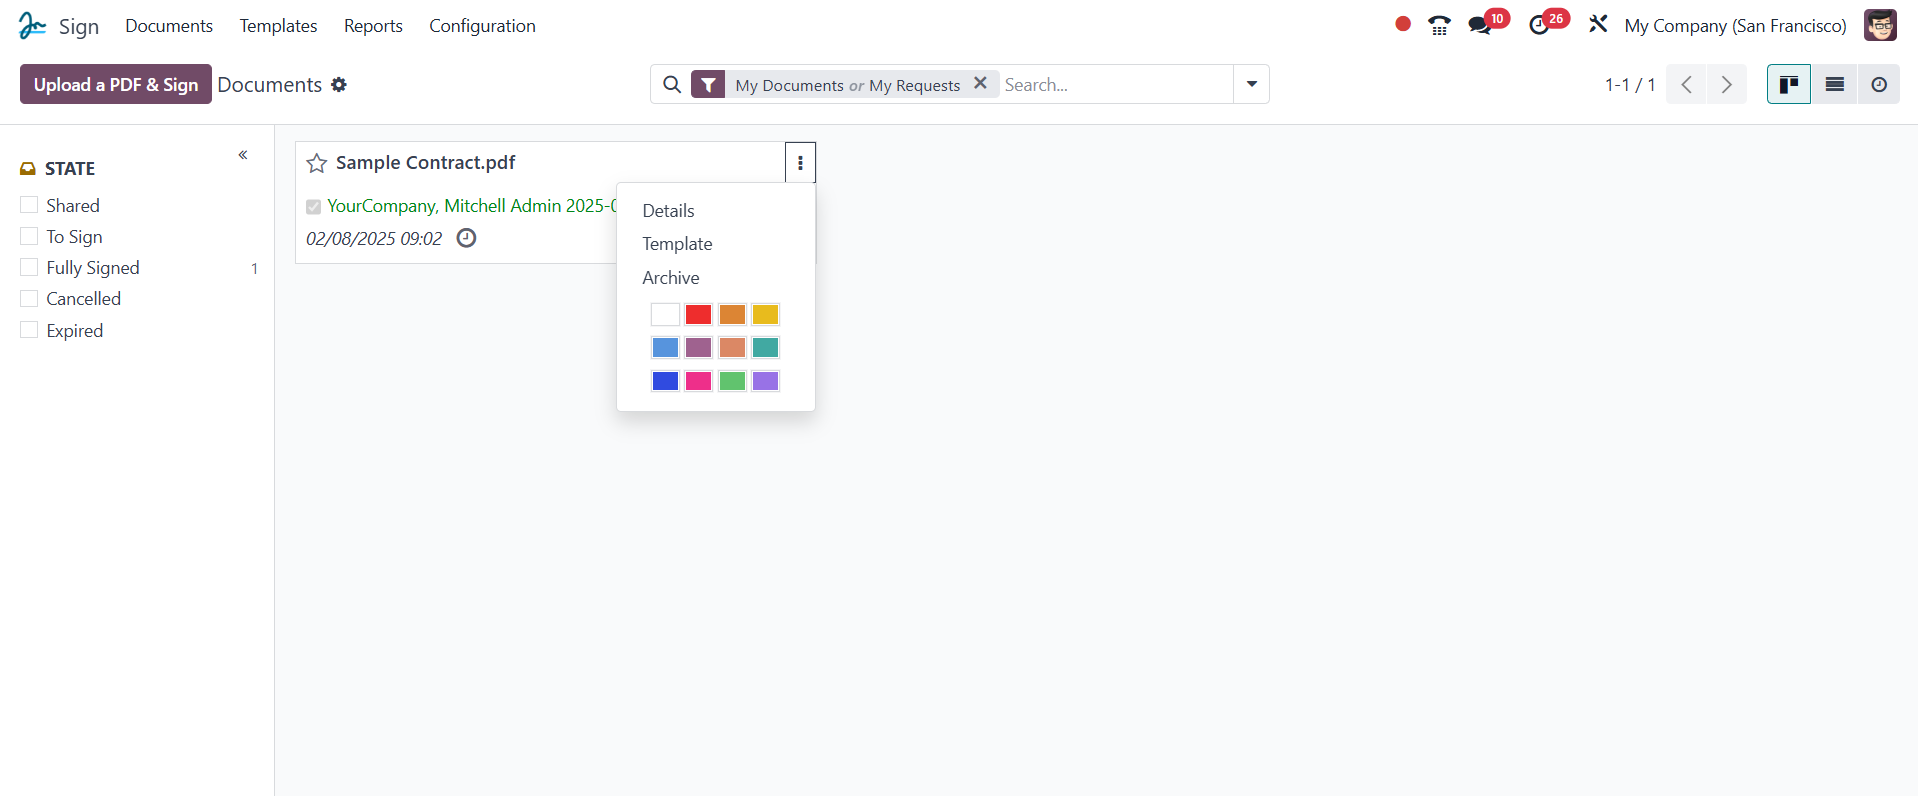
The drop-down menu offers choices
such as Delete, Archive,
Signed Documents, Modify
Templates, and Use Layout.
Additionally, you can label
your template with a unique
color to help people
recognize it right away using
the several colors available
in the dropdown menu.
The data in the Templates window
is grouped and organized on
the left side of the window
according to the defined
tags. This is a great option,
especially if you need to
manage a large amount of
data.

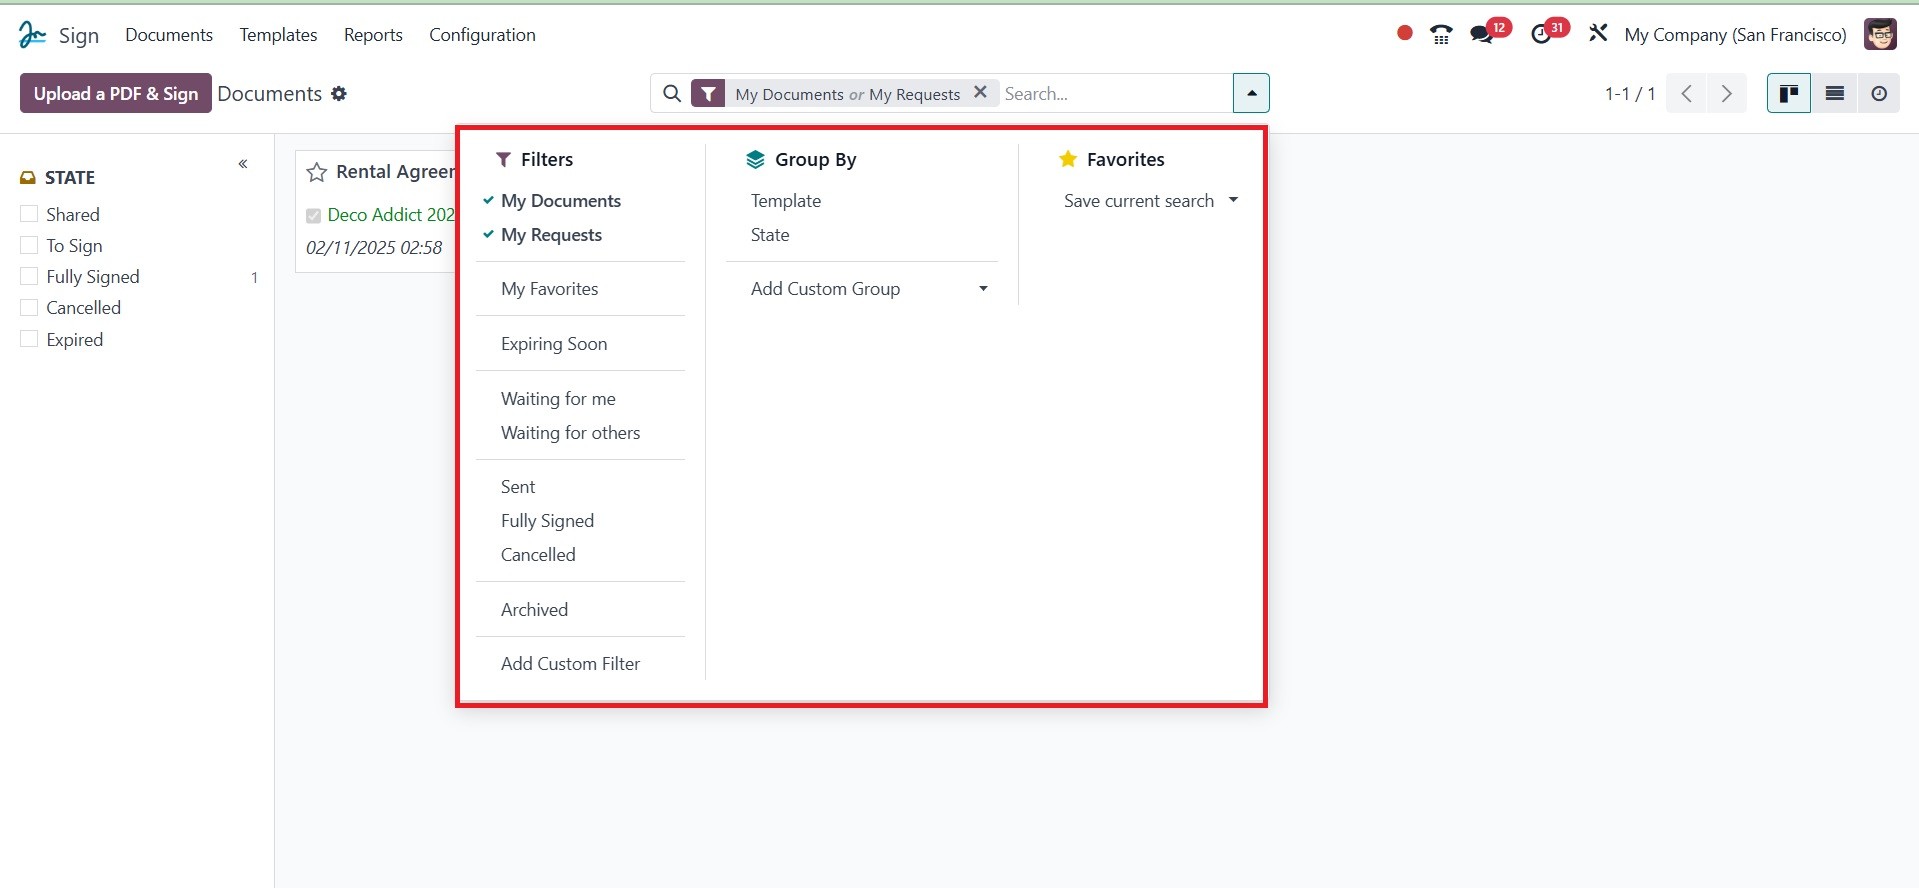
The various pre-filled and
adjustable string features
are located under the
Filters, Group By, Favorite,
and Search tabs, which are
also viewable and selectable
from the top of the window.
The default pre-added filters
under the Filters menu are My
Documents and My Requests.
At this stage, we can inspect the
List view of the window. For
this, we could click on the
List view menu icon located
at the upper right corner of
the window.
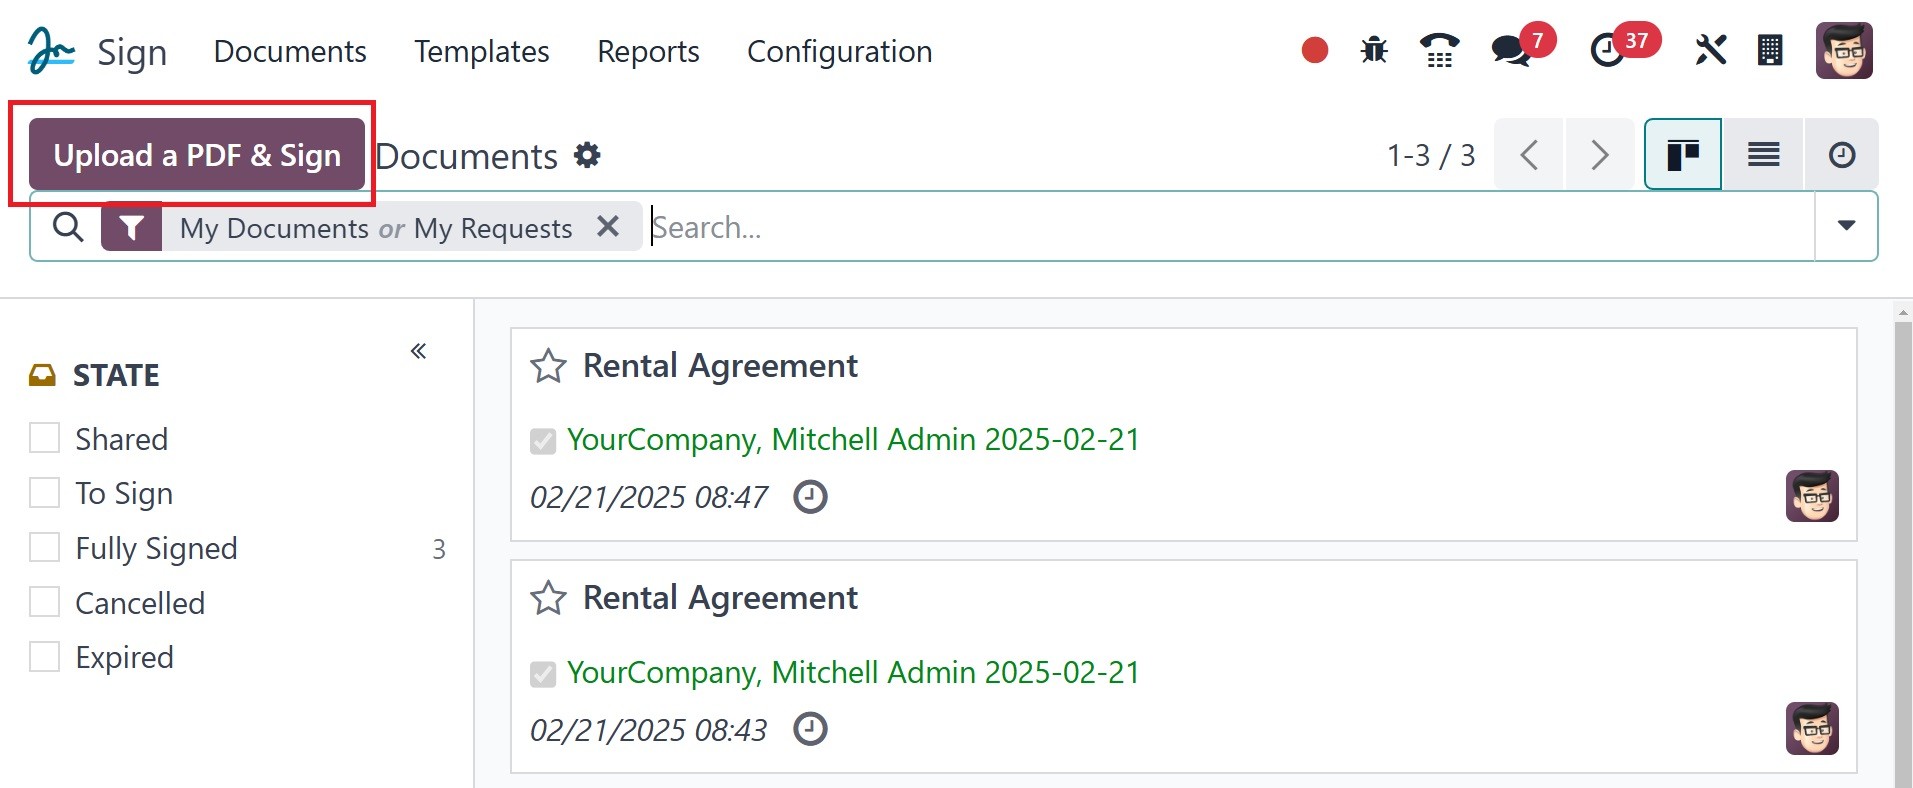
You can now use the Upload a PDF
and Sign button to upload a
PDF from your computer for
signing. Subsequently, if you
want to add a digital
signature to the document,
you would need to click the
button and select the PDF
file from your computer to
sign.
With the selection of UPLOAD A
PDF in Odoo18, it is also
possible to update a PDF
template.
You shall have the opportunity to
select the desired PDF from
the system after clicking it.
Once the PDF has been
published to the system of
Odoo 18, successfully, you
will see the preview of the
newly uploaded PDF, and you
can view that as given in the
below image.
Click on the preview to view the
PDF in its full size on the
Odoo18 system.
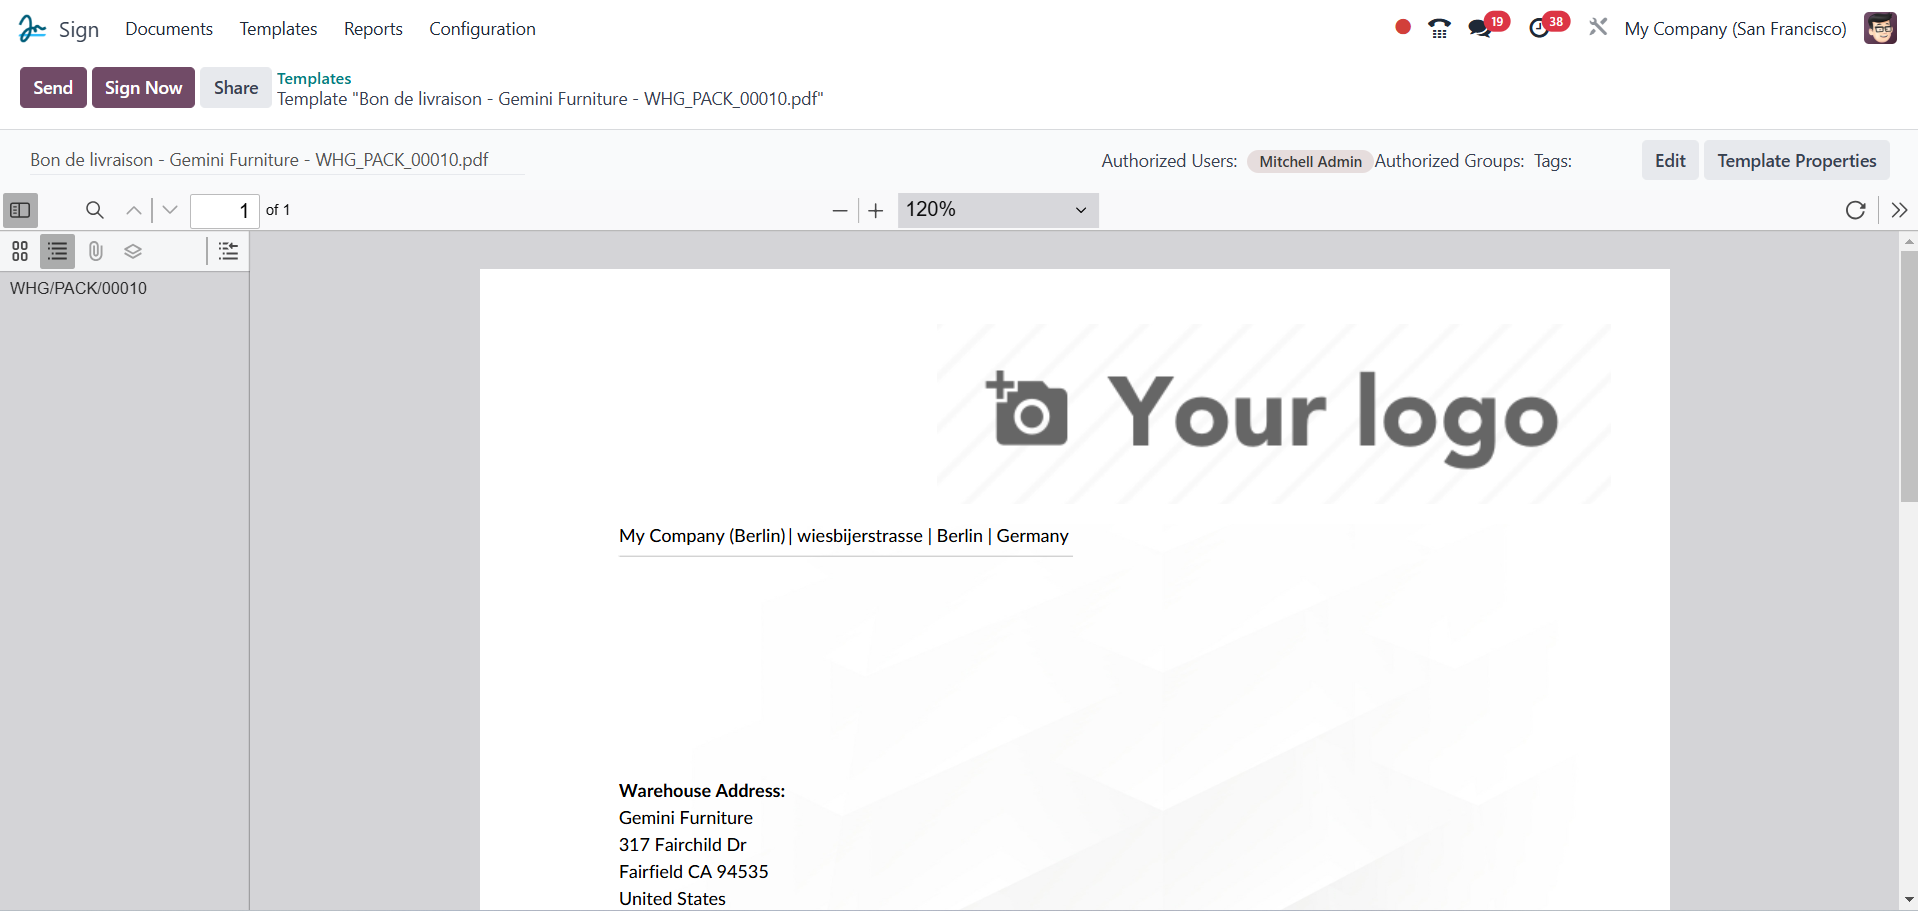
The pdf view is seen in the
following image in detail.
You can see several
alternatives here. There are
several fields on the left
side of the window, which are
highlighted in the
illustration below.
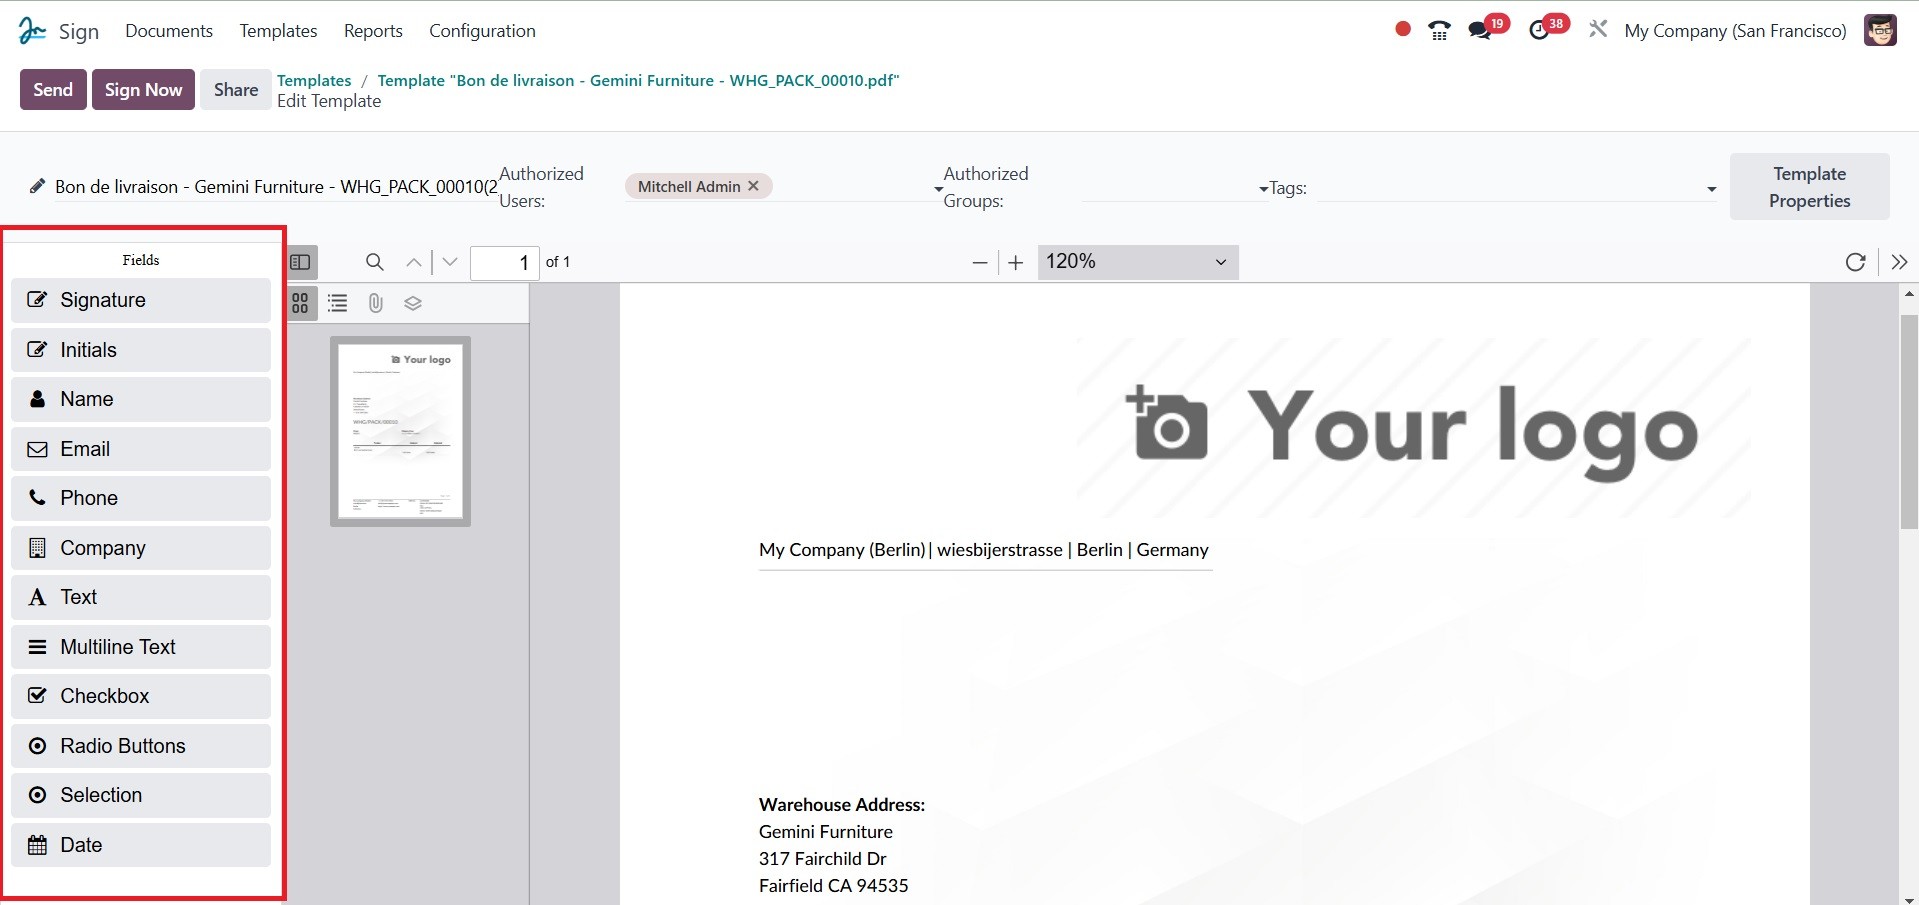
There are several available
fields, and these include the
following: signature,
initials, name, e-mail,
phone, company, text,
multi-line text, checkbox,
selection, and date. You
would be able to drag and
drop each of them into your
PDF to add this information
to those fields. In case
you'd like to input a
signature in the pdf file,
you will drag the field for
signature on the left hand
side and insert it in that
area. For filling up the rest
of the details and for
verification, you may select
the fields from the pdf. That
is, you can click on the
field if you want to insert a
signature on the pdf. Then,
as shown below, a pop-up will
appear:.
You can now choose the person
whose signature you need in
the provided box by simply
clicking on the field. The
pop-up will present you with
a list of persons available:
Customers, Companies,
Employees, Human Resources,
and Responsible. You may
choose the right persons from
the list. You may tick the
dropdown if the field to be
filled must come from the
chosen person. You may make
use of the validate option to
validate the information.
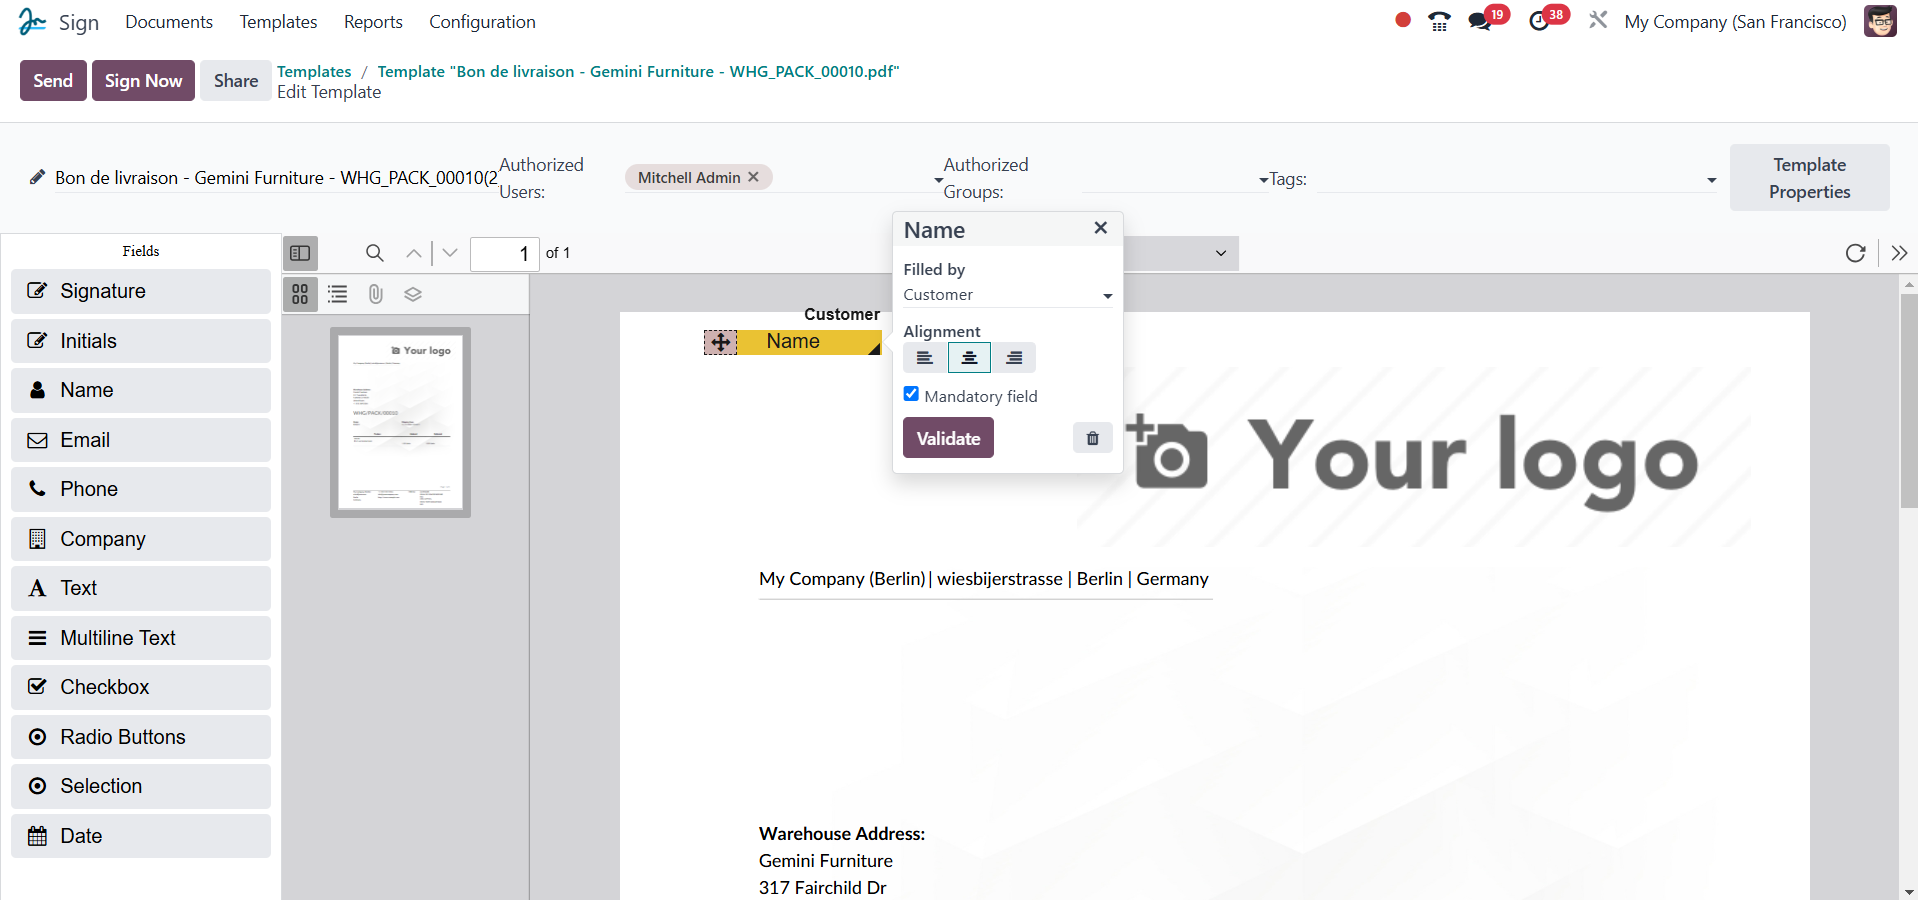
You can also assign tags to the
Tag field to make it easier
to identify the document
template. You can first add
the name field by dragging
the Name field onto the
document.
By clicking on the +icon, the
Name field (along with all
the other fields), of course,
can be resized and moved to
almost any position, just
like a row. Along the same
lines, it can display a row
to indicate who the person is
who must sign the paper. In
other words, it will be the
assigned person's task to
fill out the field. More
responsible individuals can
be set up, and the Roles menu
can assist you in doing so.
The Configuration tab gives
you access to the Roles menu,
which will be discussed in
greater detail below. To view
the pop-up, simply click on
them.
You can also indicate whether or
not the field is to be
mandatorily filled. You then
click the VALIDATE button to
check it. You can drag and
drop the Signature field into
the document, following the
same procedure. The Date and
all other primary fields are
available for your use in
your documents. You can then
save the document by hitting
the SAVE button once you have
input all the details
required to fill up all the
mandatory fields. The PDF
template is already saved in
your computer.
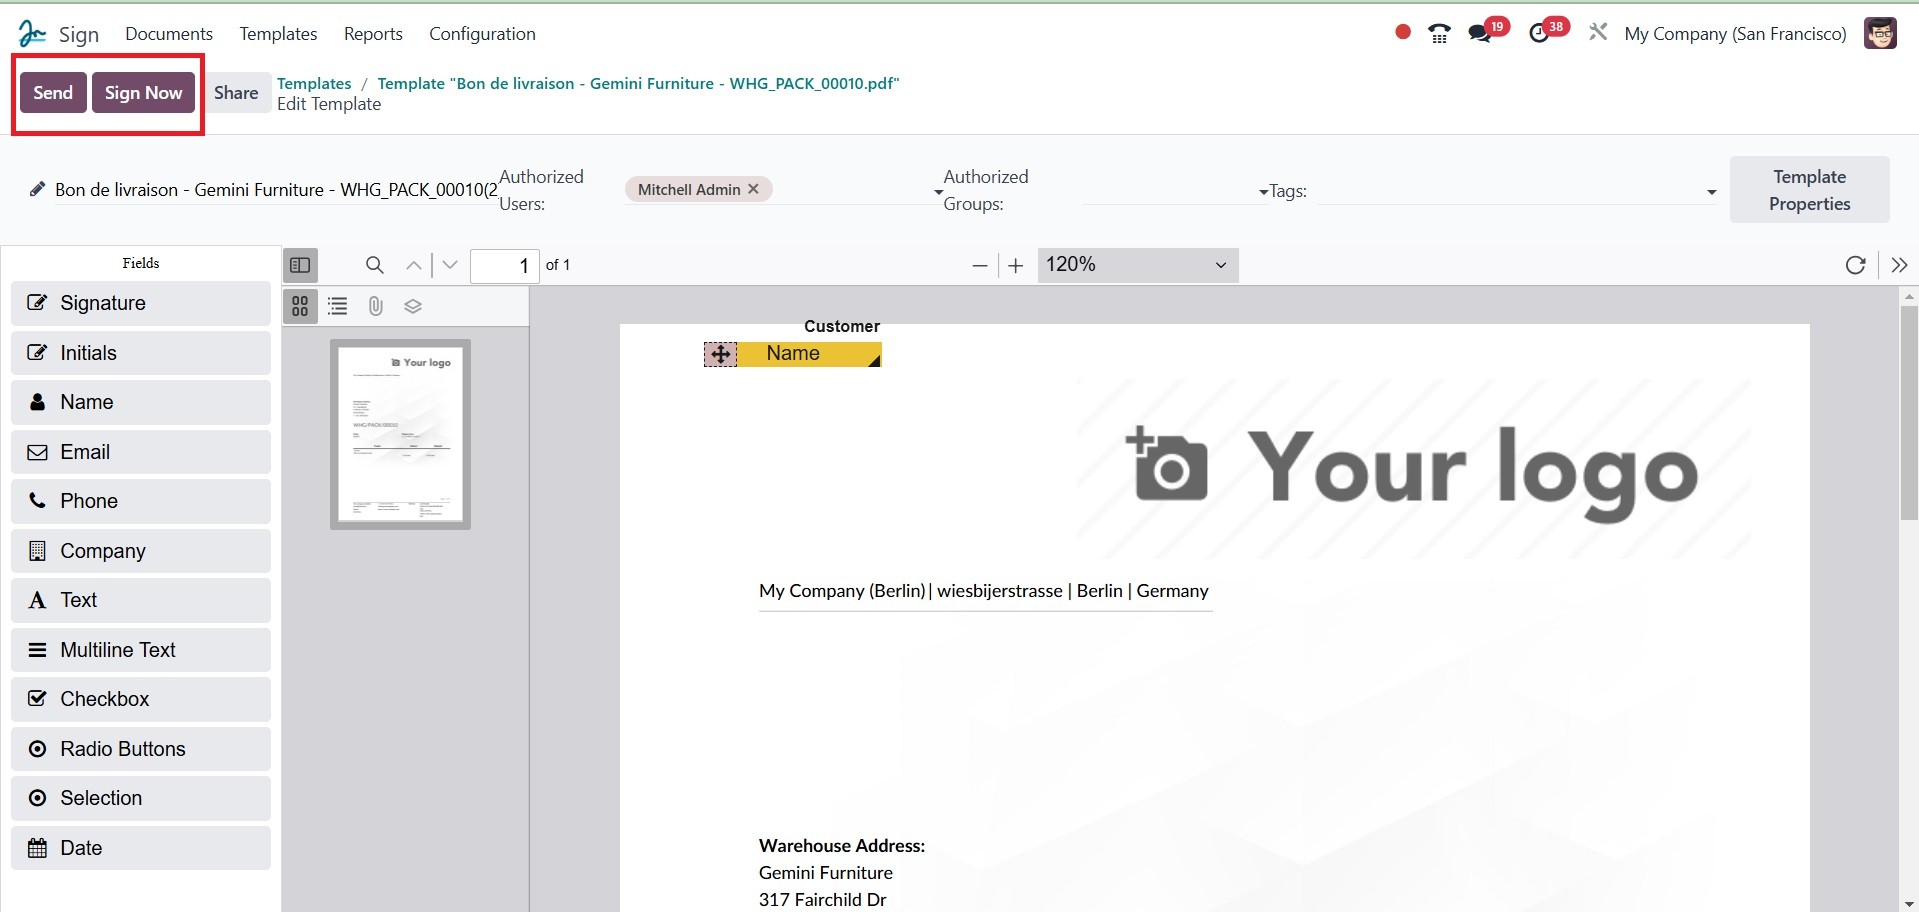
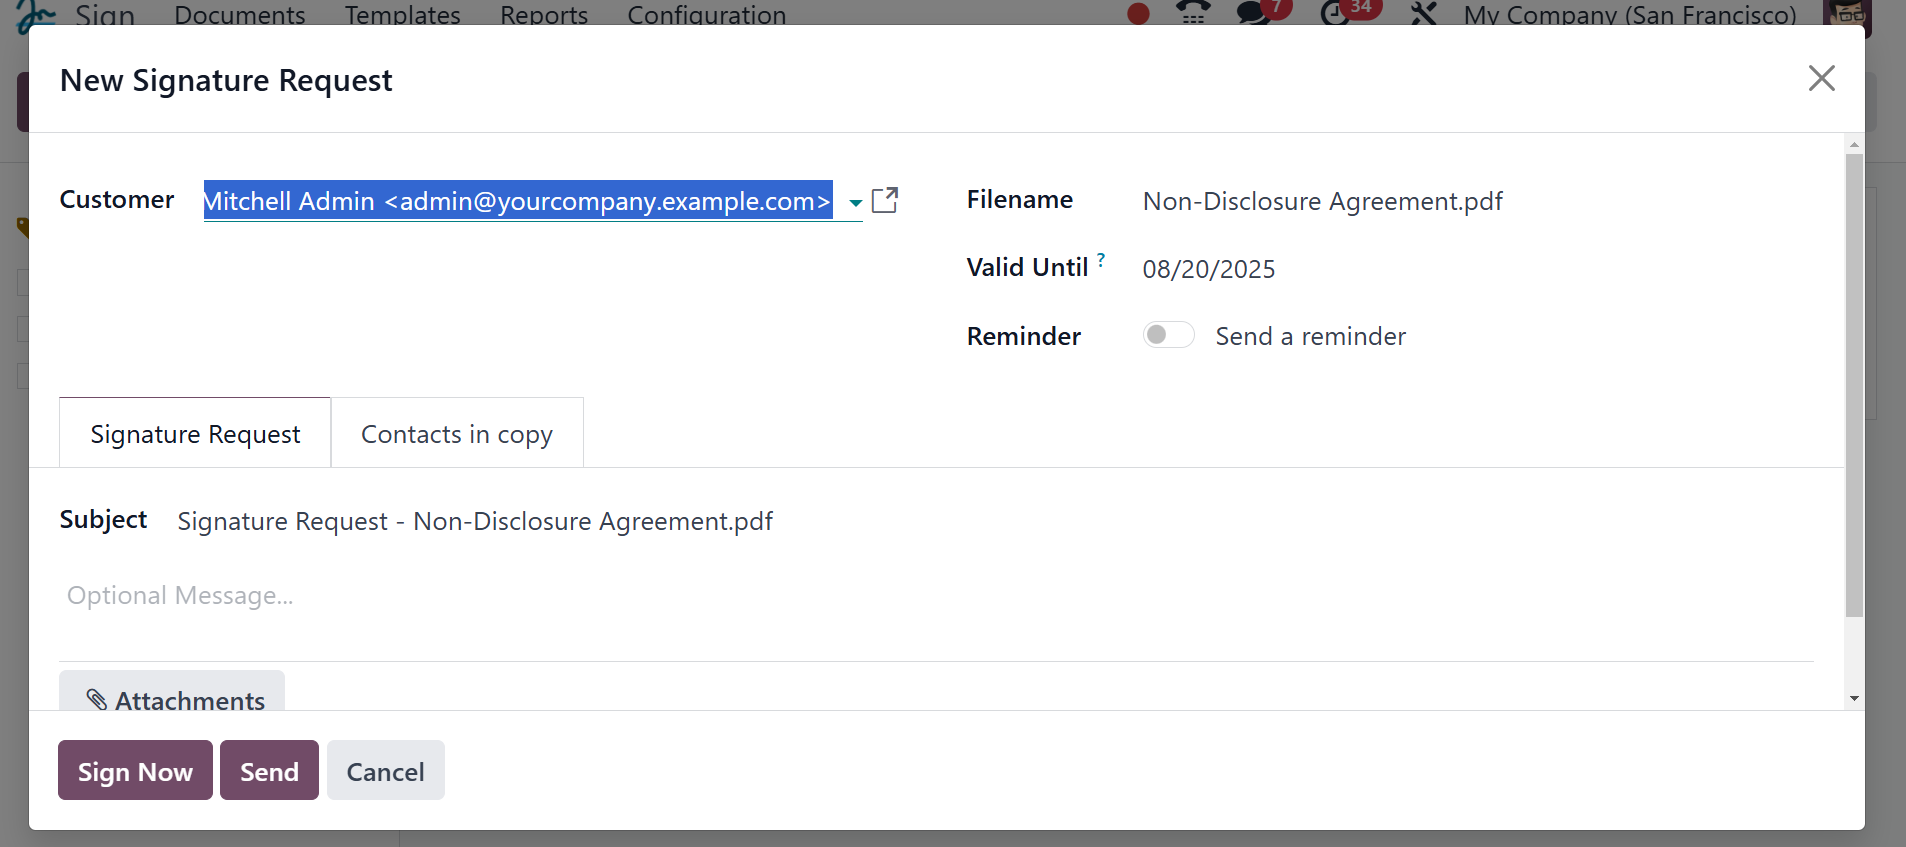
The Send and Sign Now buttons are
available when you view the
upper right corner of the
window. You can send the
paper to the related person
by clicking the Send button.
As seen in the screenshot above,
clicking the SEND button will
cause a new pop-up window to
open.
You can sign the document by
clicking the Sign Now button,
as in the image above.
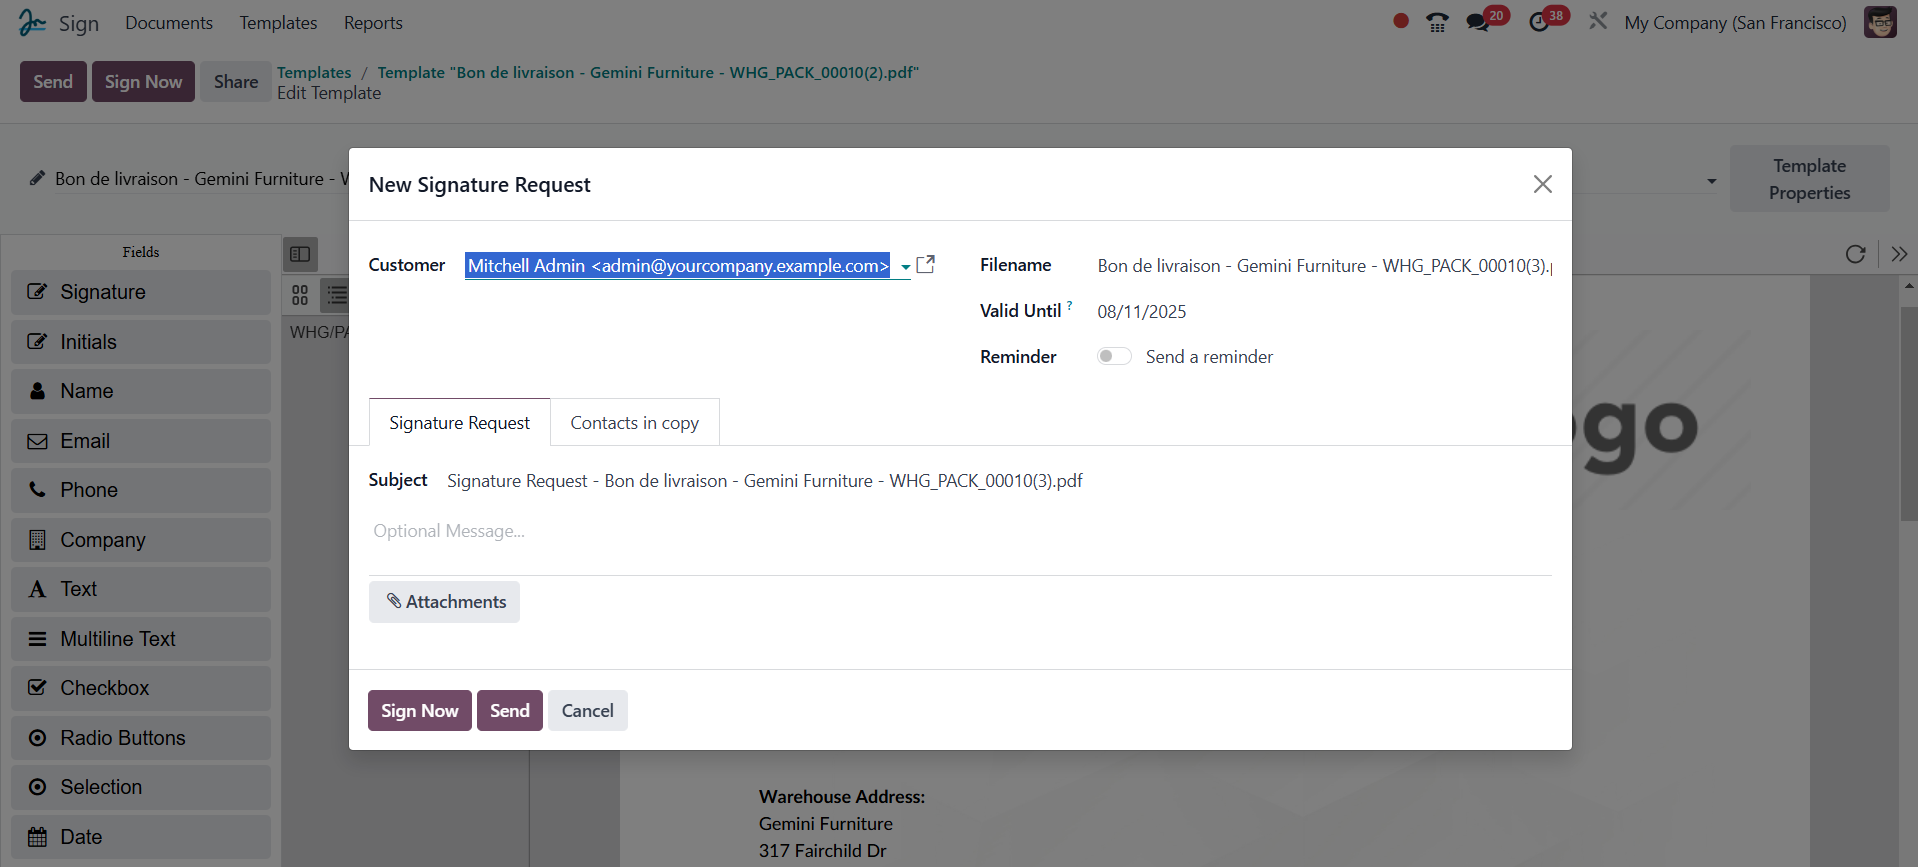
In the Customer box of this
opened pop-up window, you can
type the names of the
pertinent people to whom the
document will be sent by
email. The Filename fields
will be automatically filled
in with the name of the
document. Valid Until and
Reminder dates are included
in the option. On the
Signature Request page, you
may add a message that will
be emailed to the signers of
the document. Add people to
the Copy contact list; after
the document is accepted or
rejected, the contacts in
Copy will receive an email.
Once the information has been
entered, you can choose SEND.
In order for the system to
notify you that the document
is prepared for signature and
that the sender's information
is also drawn, you will now
need to illustrate it.
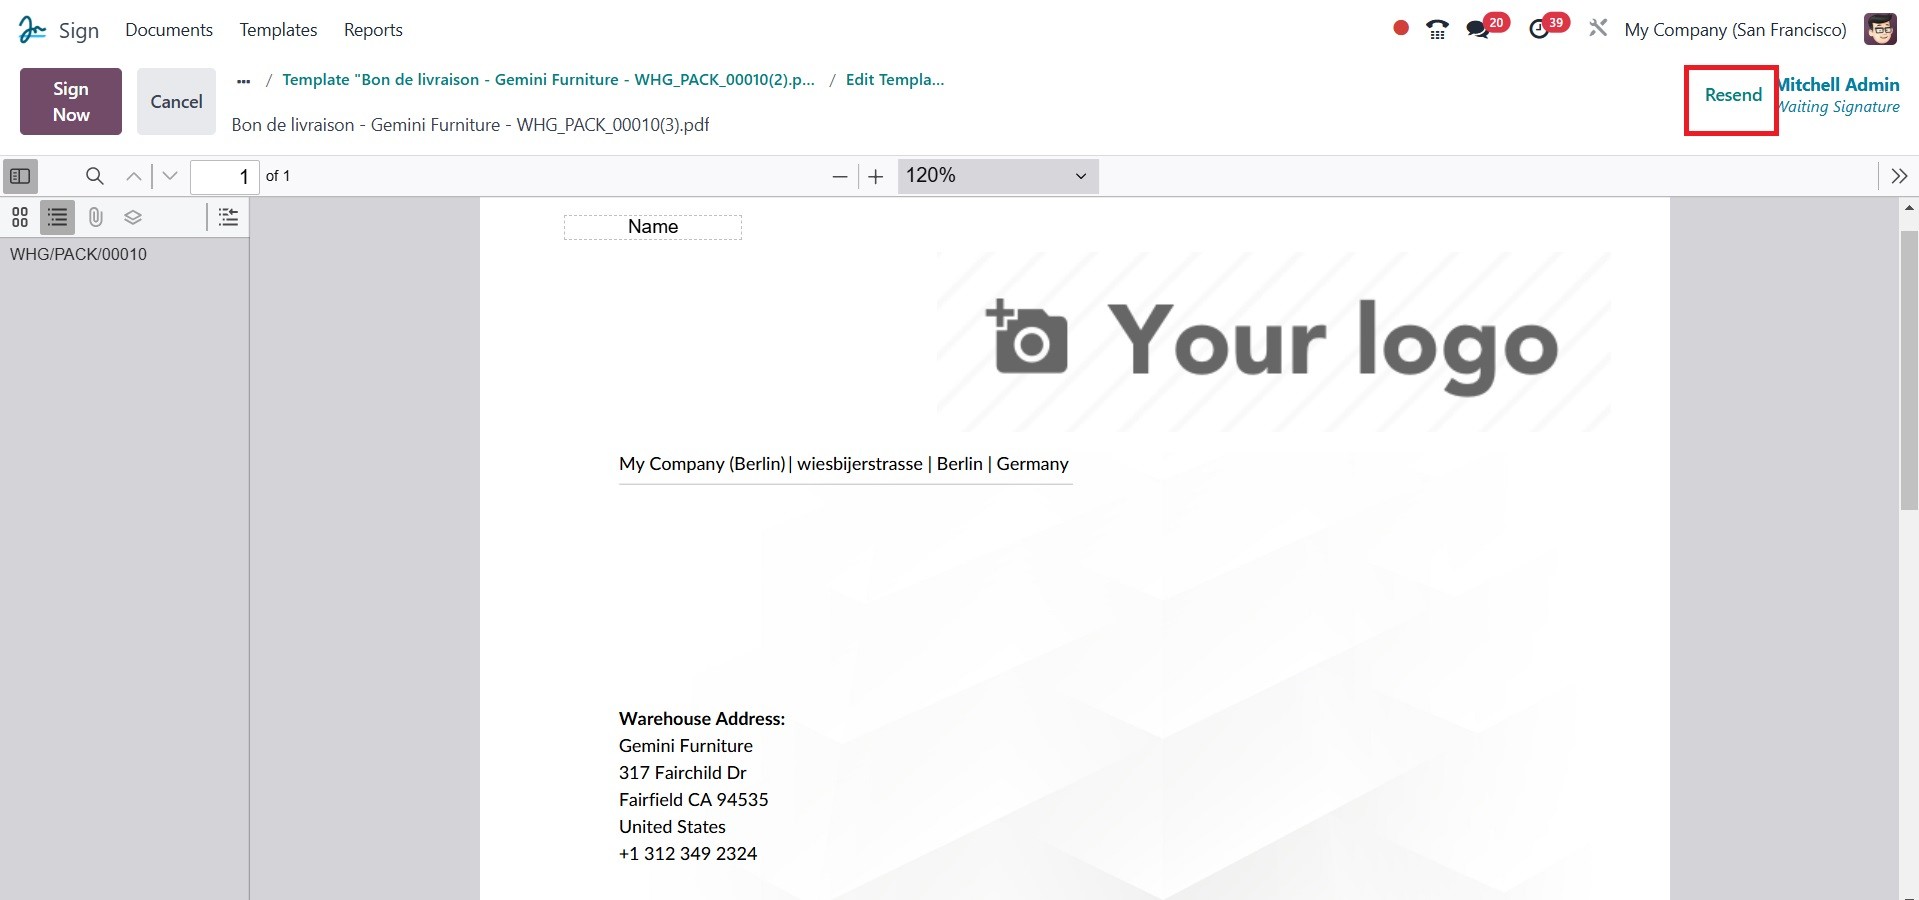
By clicking the Resend button in
the upper right corner, you
can send the invitation
again.
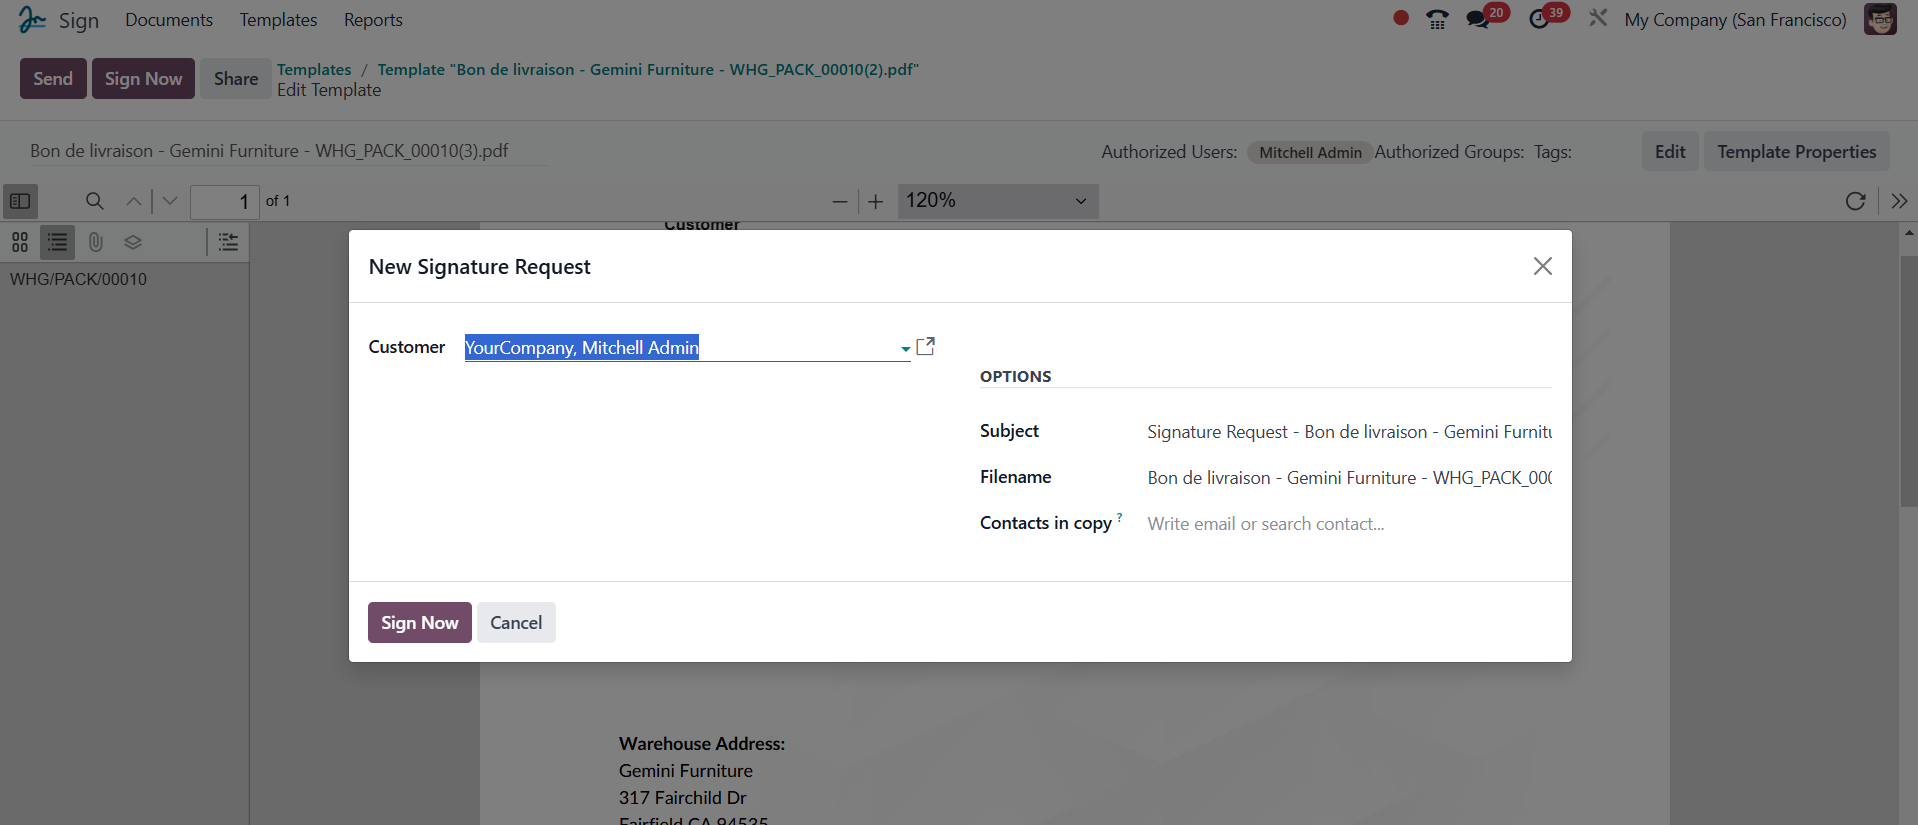
The Customer, Subject, and File
name are automatically
assigned when the SIGN NOW
button is clicked, and a
Signature Request pop-up box
will also show up.

The recipients of the signed
document's email address or
other contact details can be
entered in the Customer
section. The file name can
also be included in the
designated space.
After that, you can click the
SIGN NOW option. I'm ready to
sign the contract here.
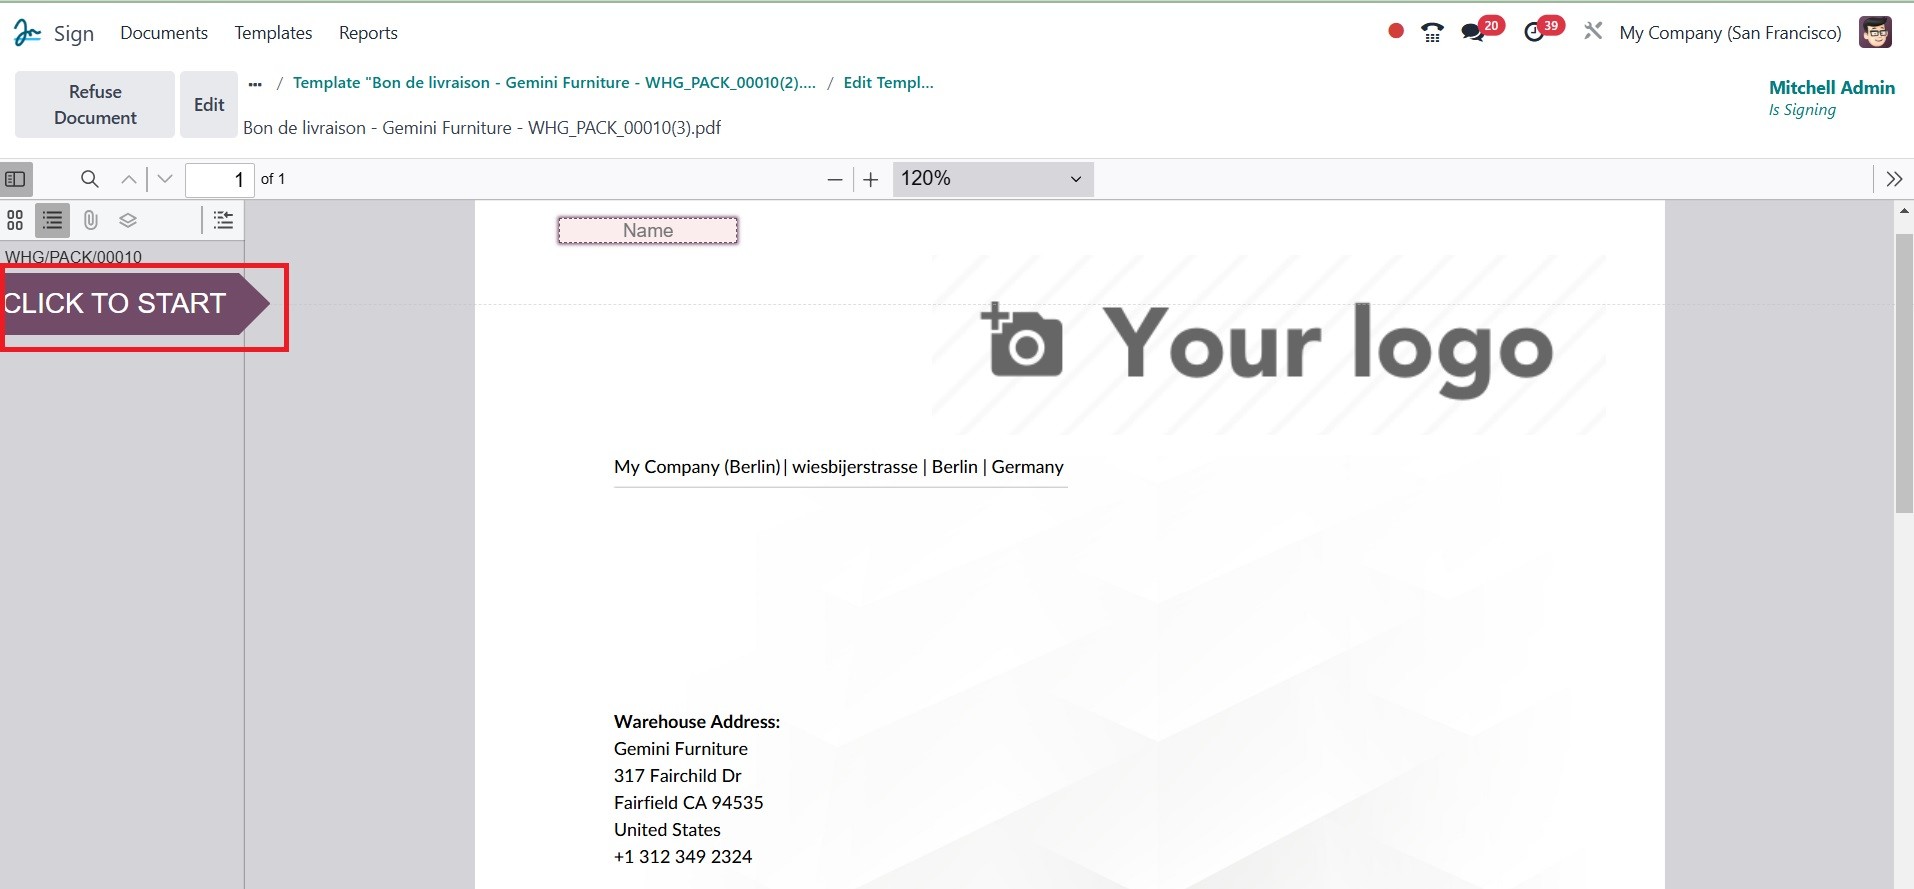
Click the CLICK TO START button
below to fill in each
mandatory field. Odoo detects
every field and reveals the
next one without missing a
single step.
You will be taken from the
beginning of the document to
its end in the exact model.
You will go to the next
filling area after completing
the first column. The system
will display a pop-up window
in the Signature box for you
to mark it. Below is a
picture of the pop-up window.
You will be taken from the
beginning of the document to
the end in the exact model.
You will proceed to the next
filling area once you
complete the first column.
The system will display a
pop-up window in the
Signature box for you to mark
it. Below is an image of the
pop-up window. Your signature
will be embedded in this
window. You can begin with
the Full Name form by typing
in your full name. From
there, you can select the
option to sign. Odoo18
provides a wide range of
signature options so that you
may personalize your
signature any way you like.
This is the draw option. Upon
selecting this option, the
client will be able to use
the mouse pointer, digital
pen, or other devices to sign
the document.
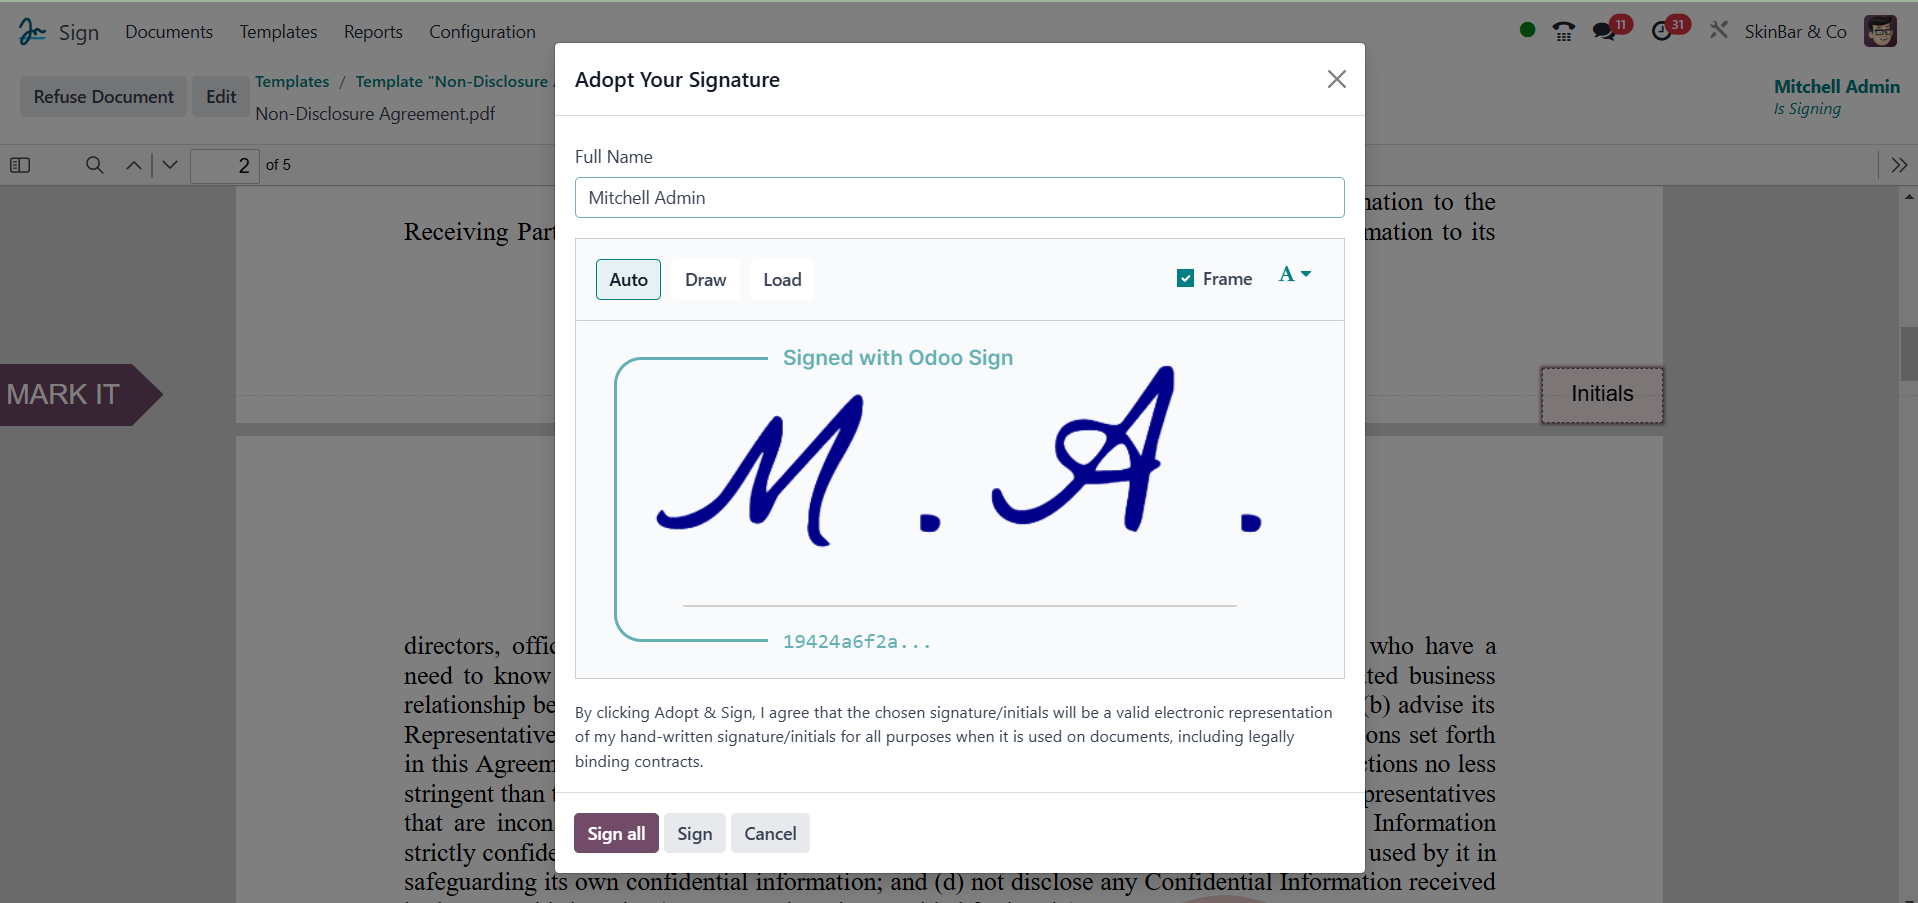
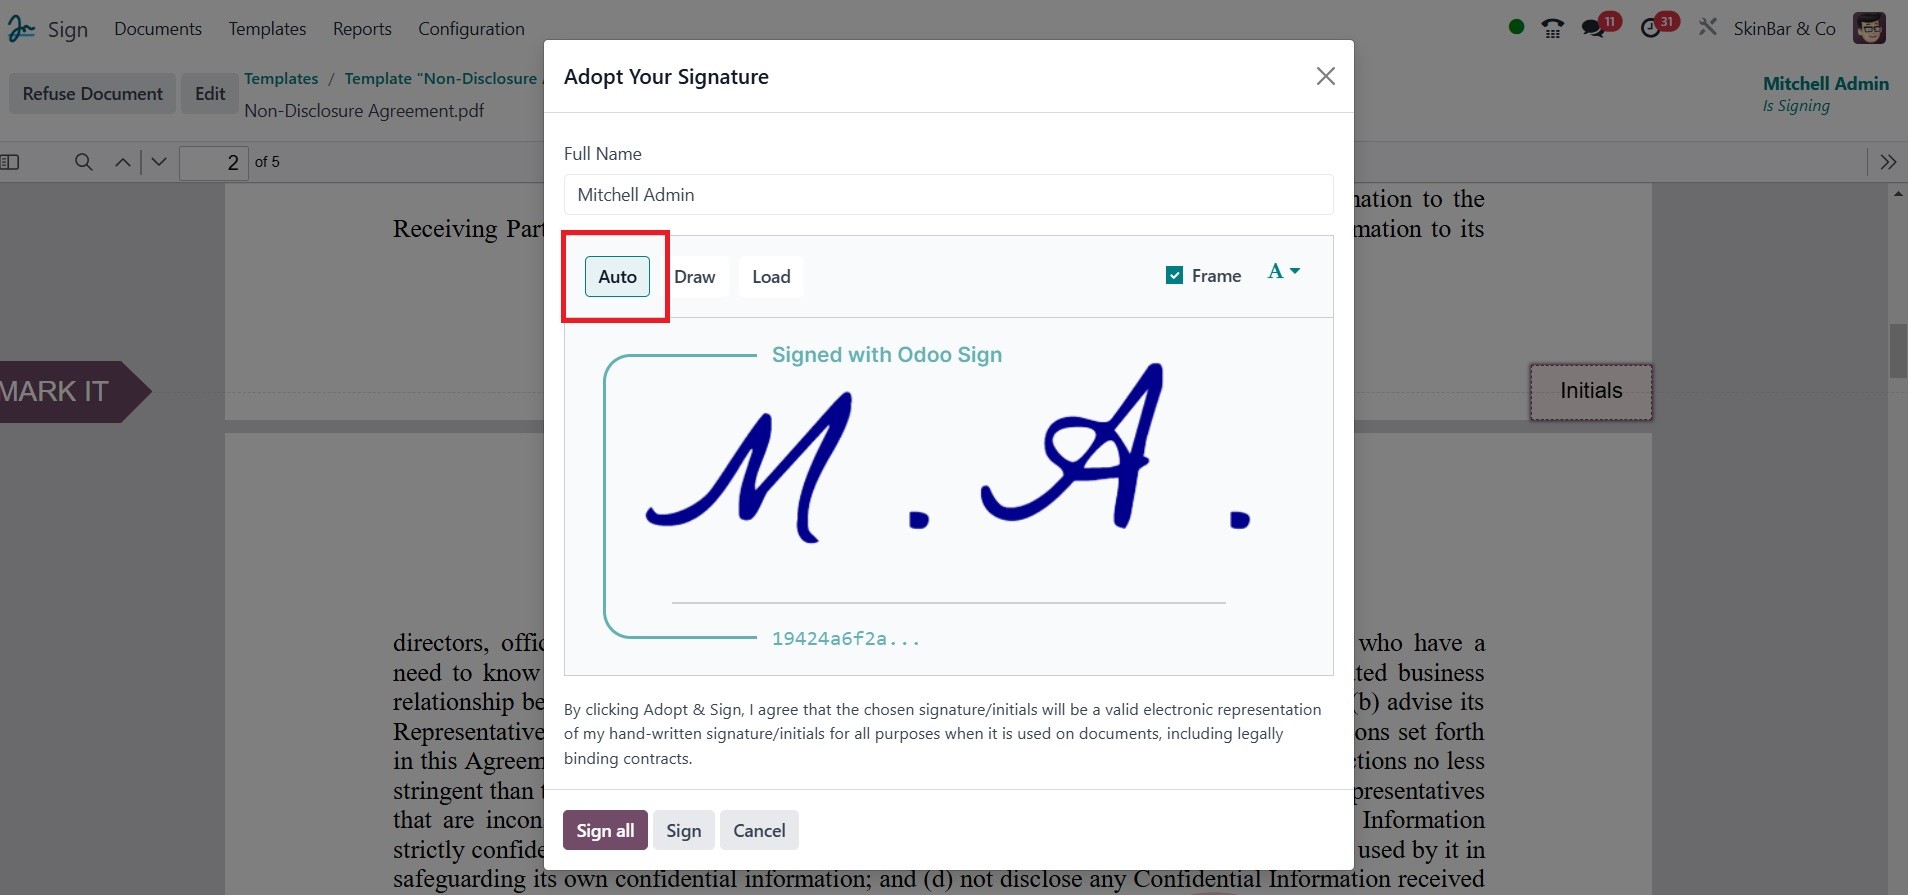
The next option is Auto. The
buyer can choose from a
variety of signature styles
in this case, thanks to the
system.
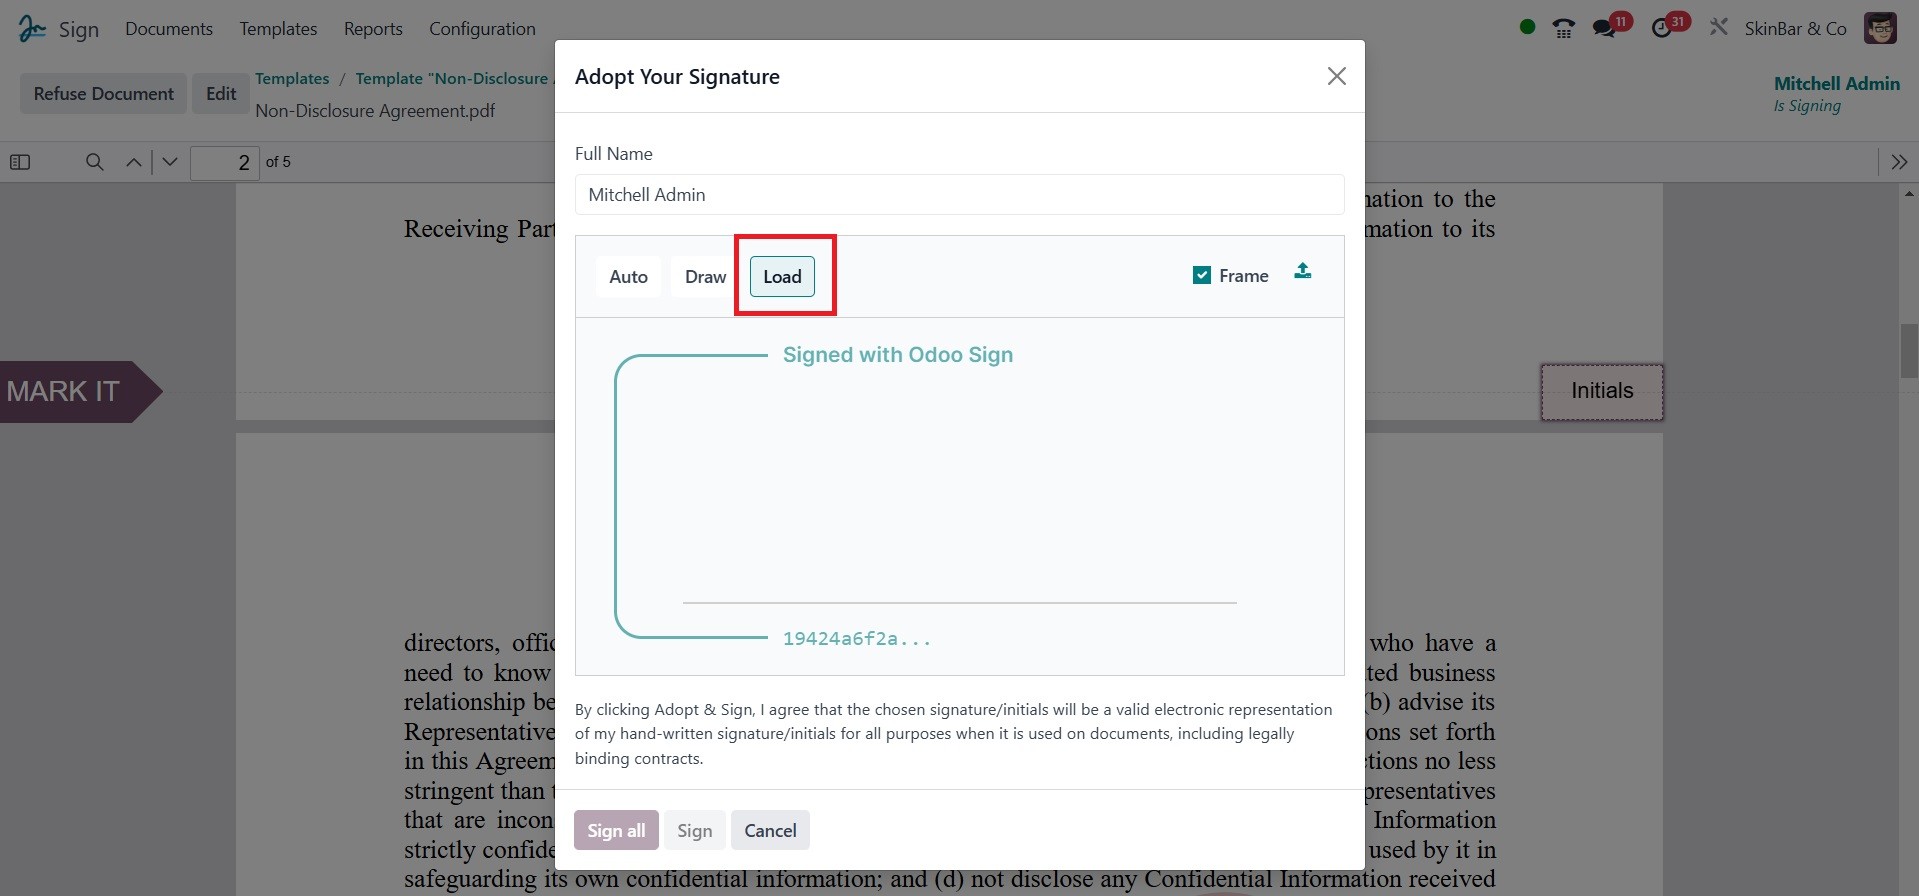
By using the Load option, the
client can import their
signature from their system.
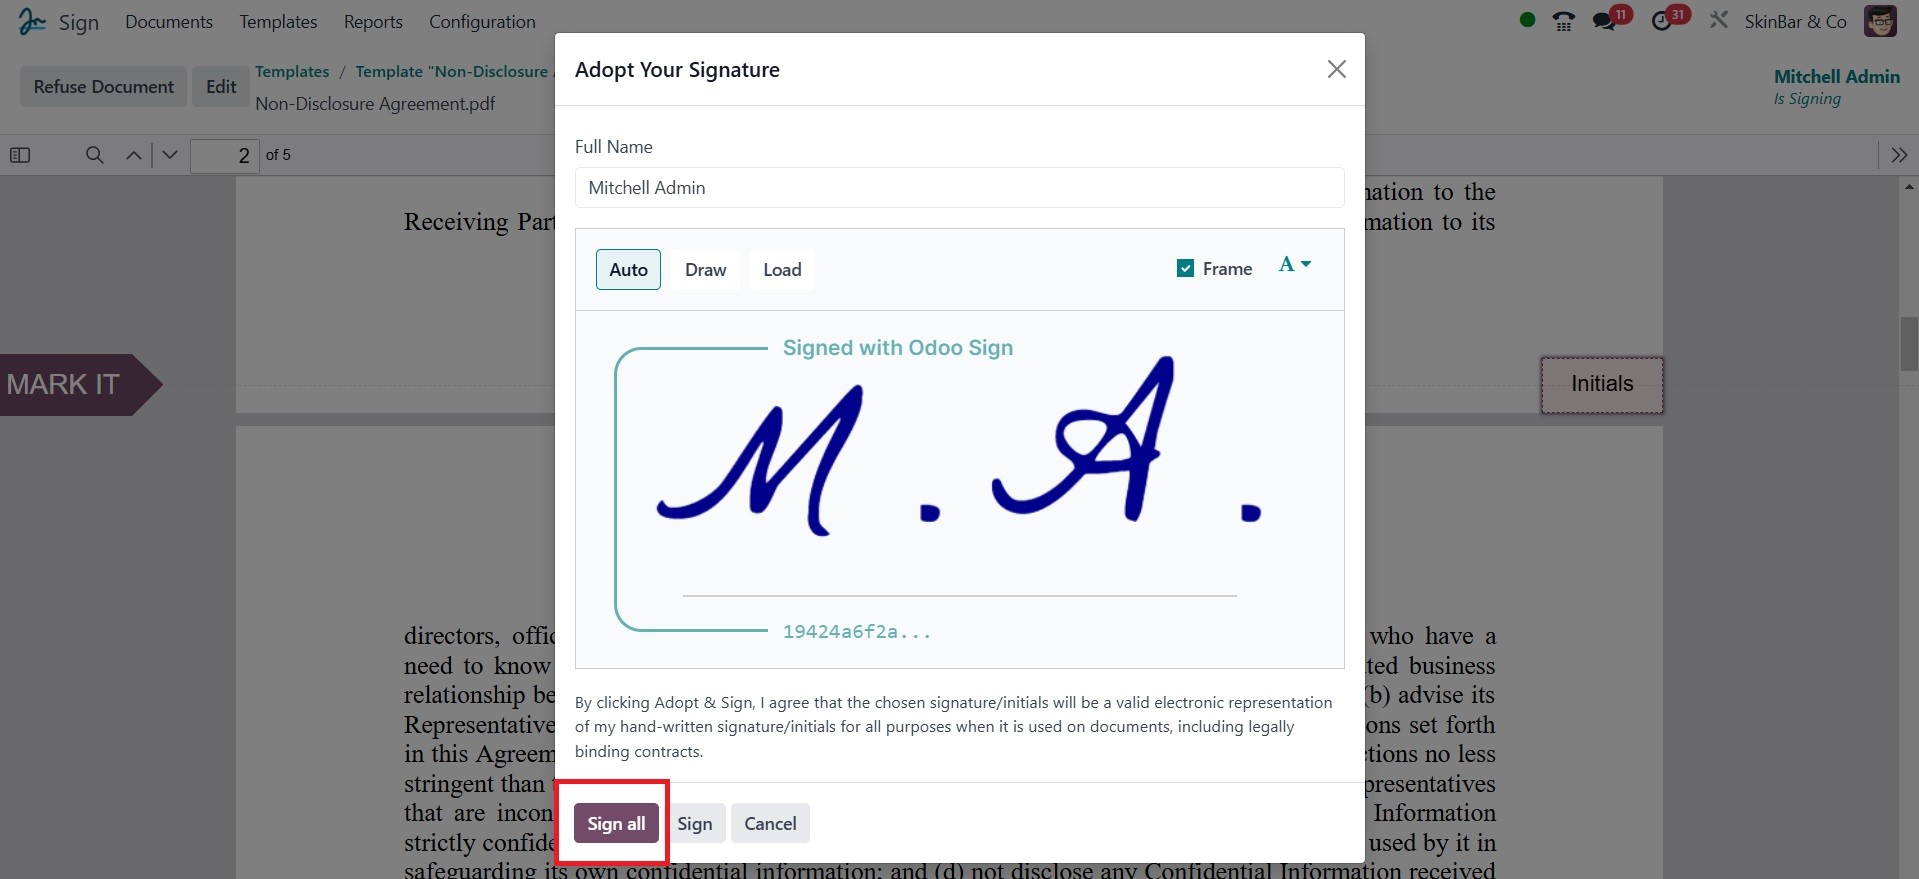
As can be seen in the screenshot
above, the system will also
show a declaration notice.
The client can click the Sign
All button after selecting
their preferred method. The
user acknowledges that their
electronic signature will be
verified as a legitimate and
legally binding document by
clicking this button.
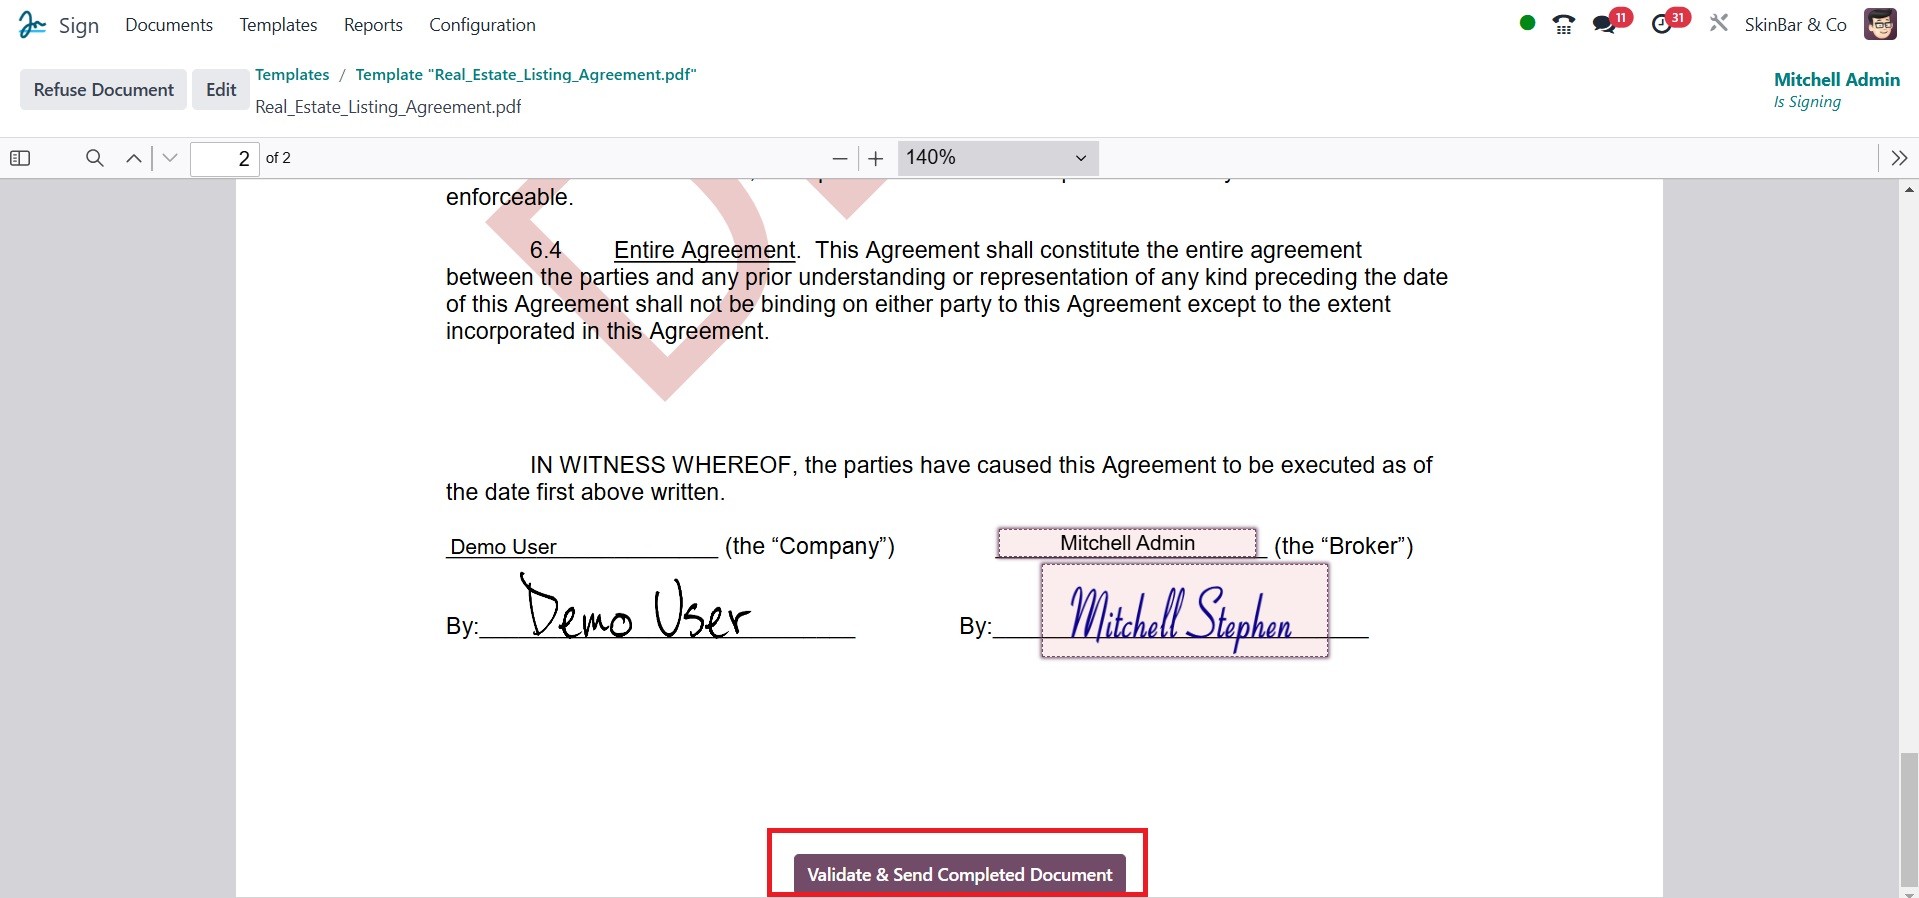
Click the "Validate and Send
Completed Document" button at
the bottom of the page once
you have filled out every
field in the document.
A pop-up window will then show
you that the signature has
been saved and that the
client will receive an email
with a copy of the signed
document. If the pop-up
indicates that there are
further documents that need
to be signed, you can access
the Sign Next Document,
DownloadDocument, and Close
buttons in addition to
details on those documents.
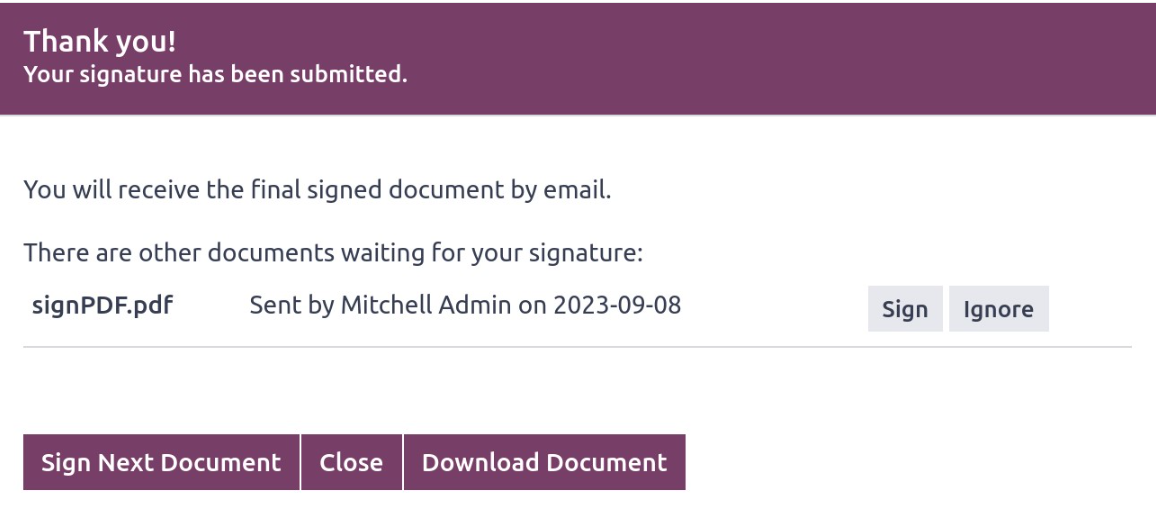
The signed paper can be
downloaded by clicking the
DOWNLOAD paper button.
It will be beneficial to view the
Documents tab on the module.