3. How can Pipelines be added
Using the pipeline-based features of the Odoo 18 platform, you may
categorize the entries based on the phases of operations they are
now in. Custom definition of these Stages is possible with the
Odoo18 platform; however, the Stage options need to be enabled and
set up before they can be described. Once the model of the apps
created using Odoo18 Studio has been described, the Pipeline Stages
option must be enabled.
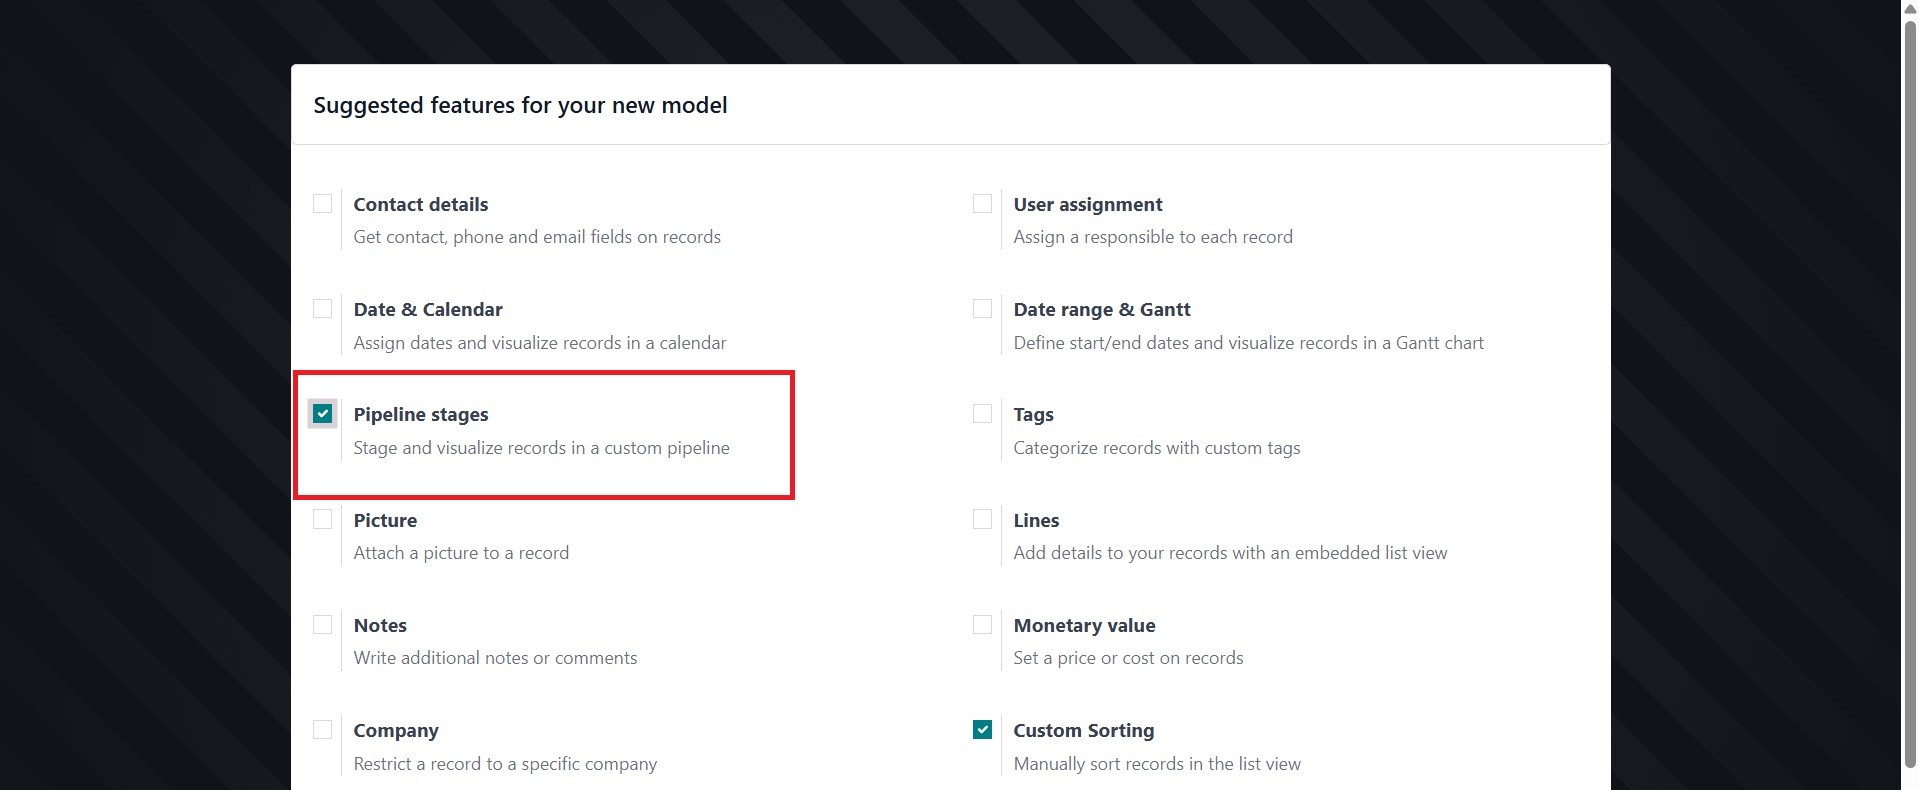
The specified default stages will be displayed when you select the
Form view for the configurations and enable the Pipeline Stages
option. Selecting it will bring up the Configuration choices window
seen in the screenshot below. The Read-Only, Required, and Invisible
settings can be enabled here. Furthermore, the Label, HelpTooltip,
Domain, Context, and Limit Visibility to Groups choices can be
chosen. You can also choose to hide the relevant Field from
visibility.

In Odoo Studio, you add stage names for a pipeline by using the
"+Stage" button within the "My Pipelines" window. This button will
open a text field where you can enter the new stage name, and then
click the "Add" button to add it to the pipeline. You can also edit,
automate, and delete stages using the settings icon next to each
stage's title.
Here, firstly activate the pipeline stages option during the
configuration, as in the image below.
Different stages are identified by the pipelines. In applications
pertaining to sales, it is highly helpful. You may also create a lot
of phases as pipelines in the form view of an application using the
Odoo 18 Studio platform. When starting the Application Model
features, we must enable the "Pipeline Stages" option in order to
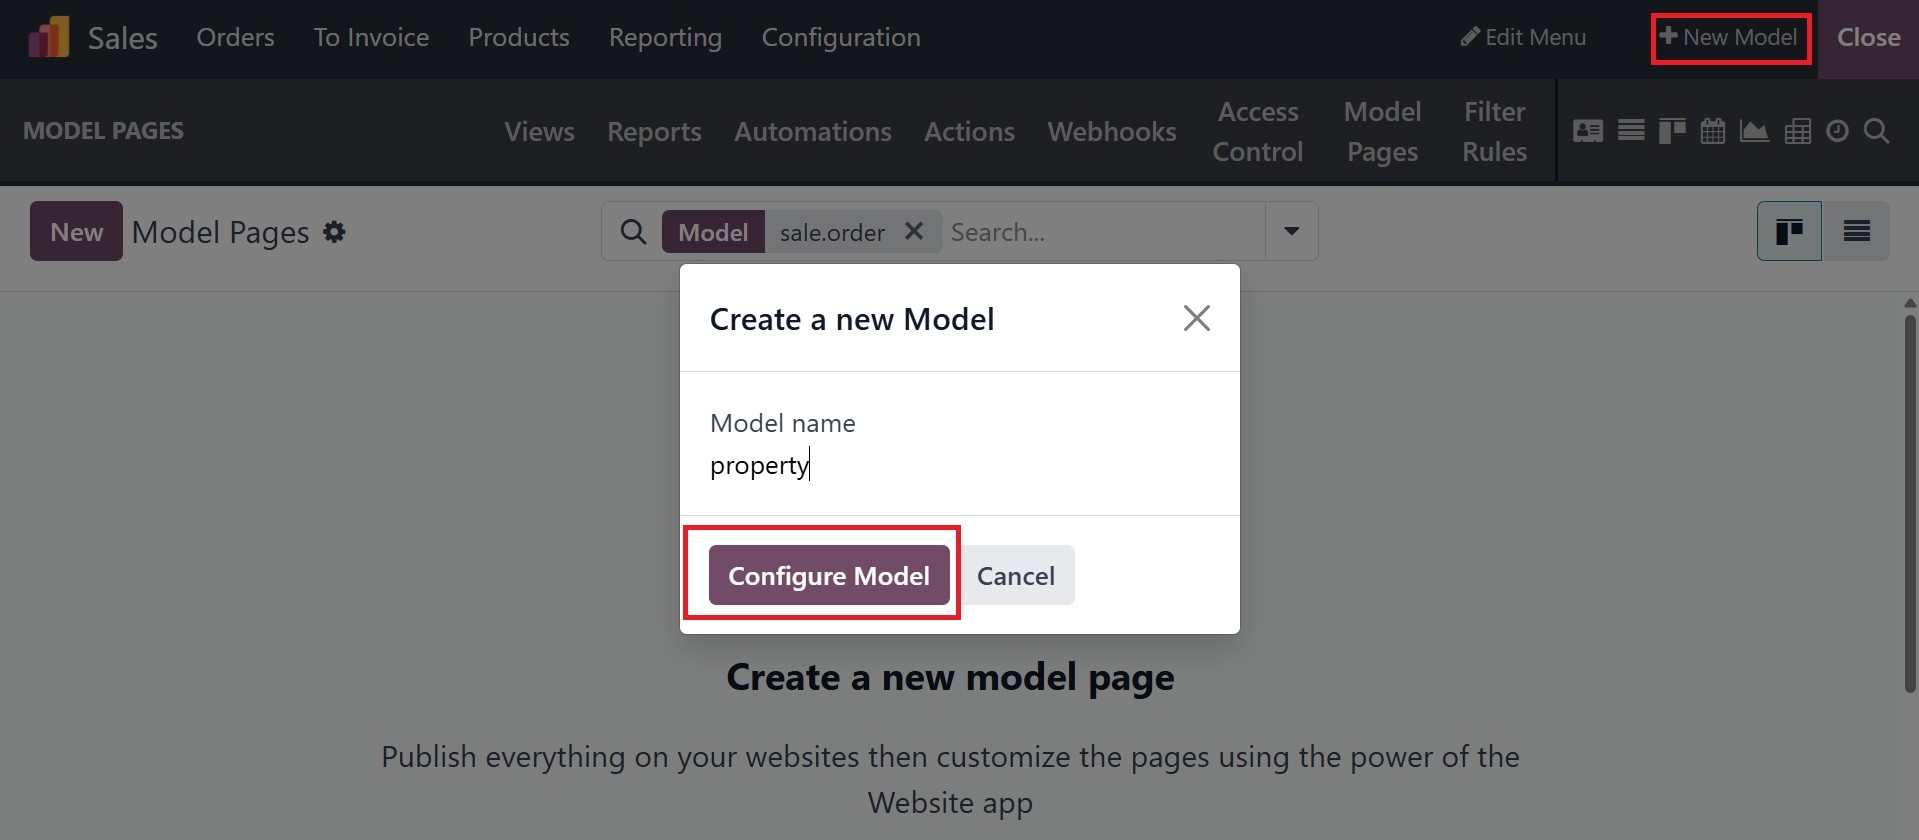
establish Pipelines. By selecting the "+New Model" option at the top
of the form, you can see how to create a new Model and configure its
Pipeline settings. Click the "Configure Model" button after entering
the model name.
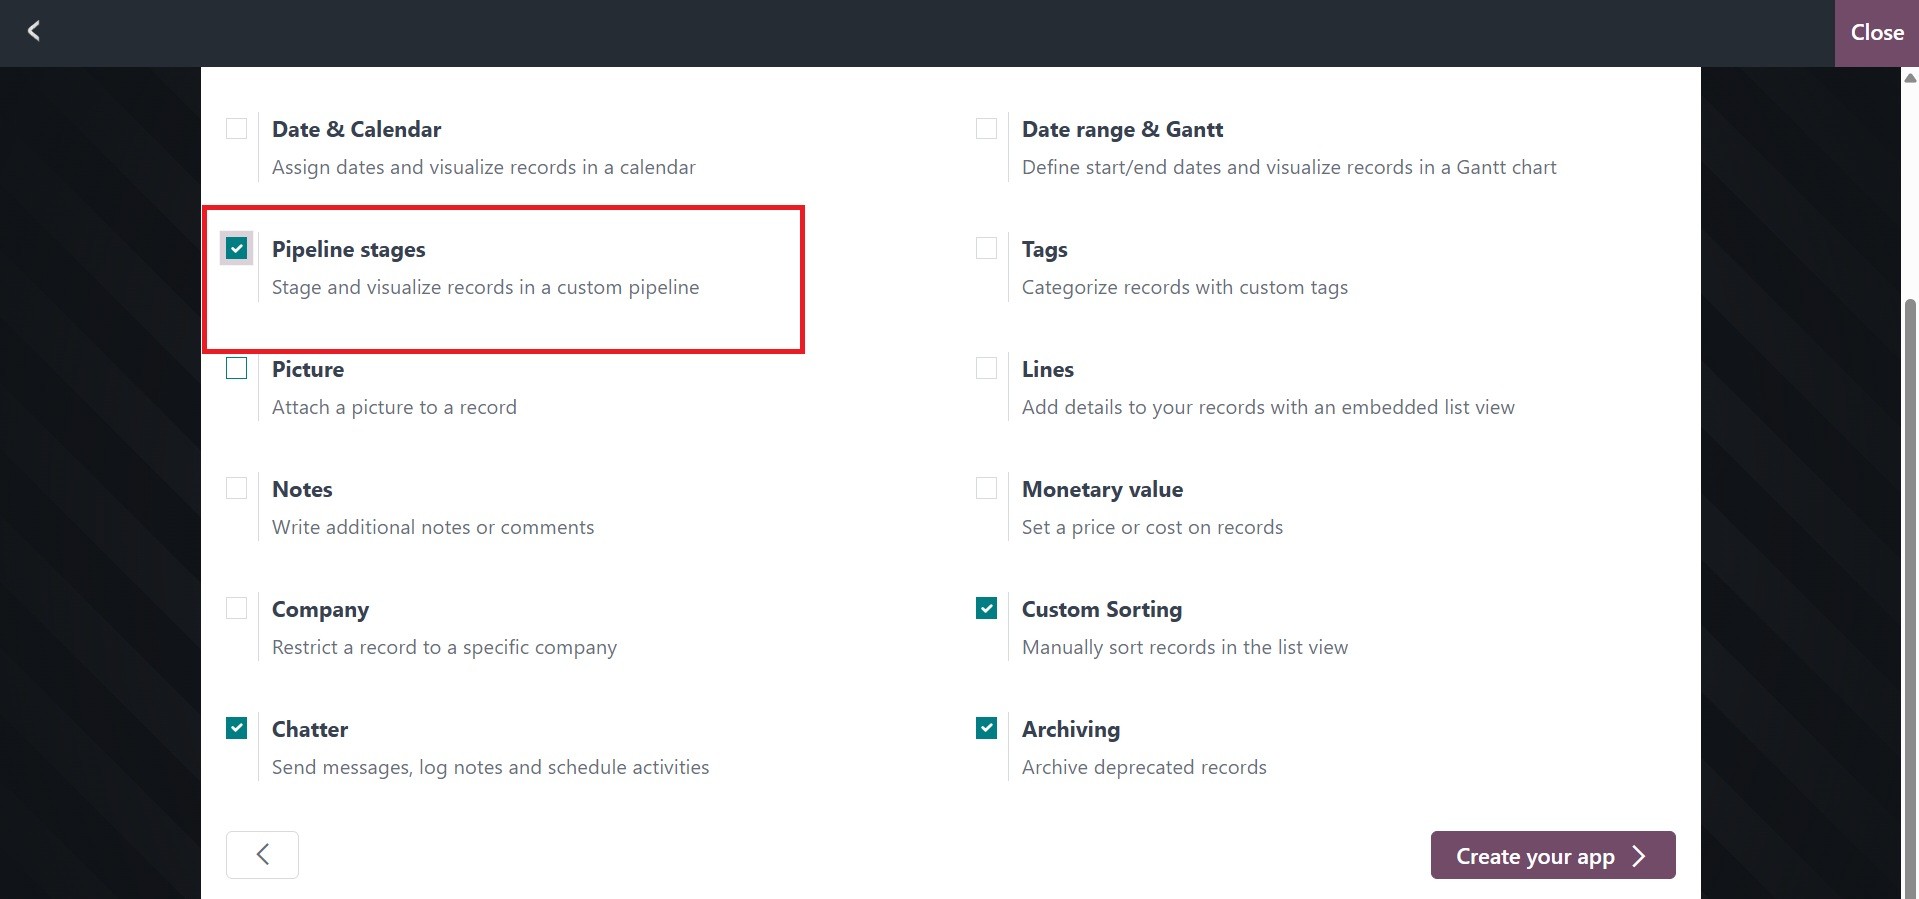
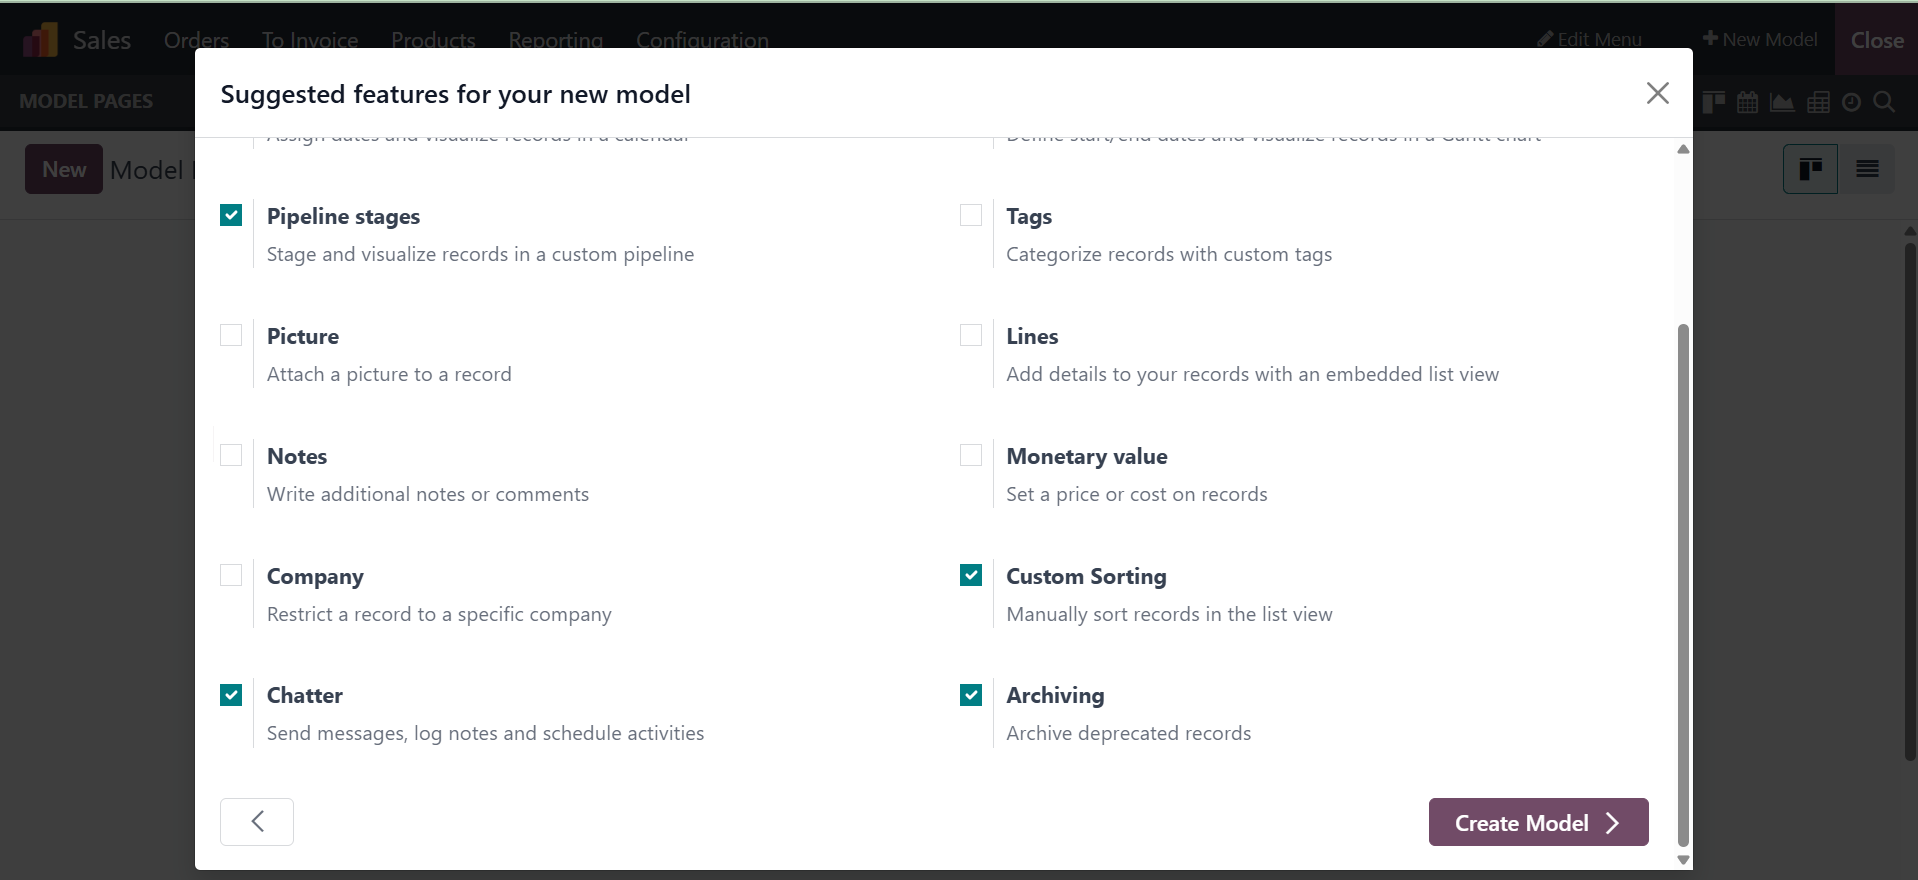
Pressing the "Create Model" button will enable the "Pipeline Stages"
option from the Model's feature list.
As seen below, you may monitor and control different Pipeline stages
from the form view's top right corner.
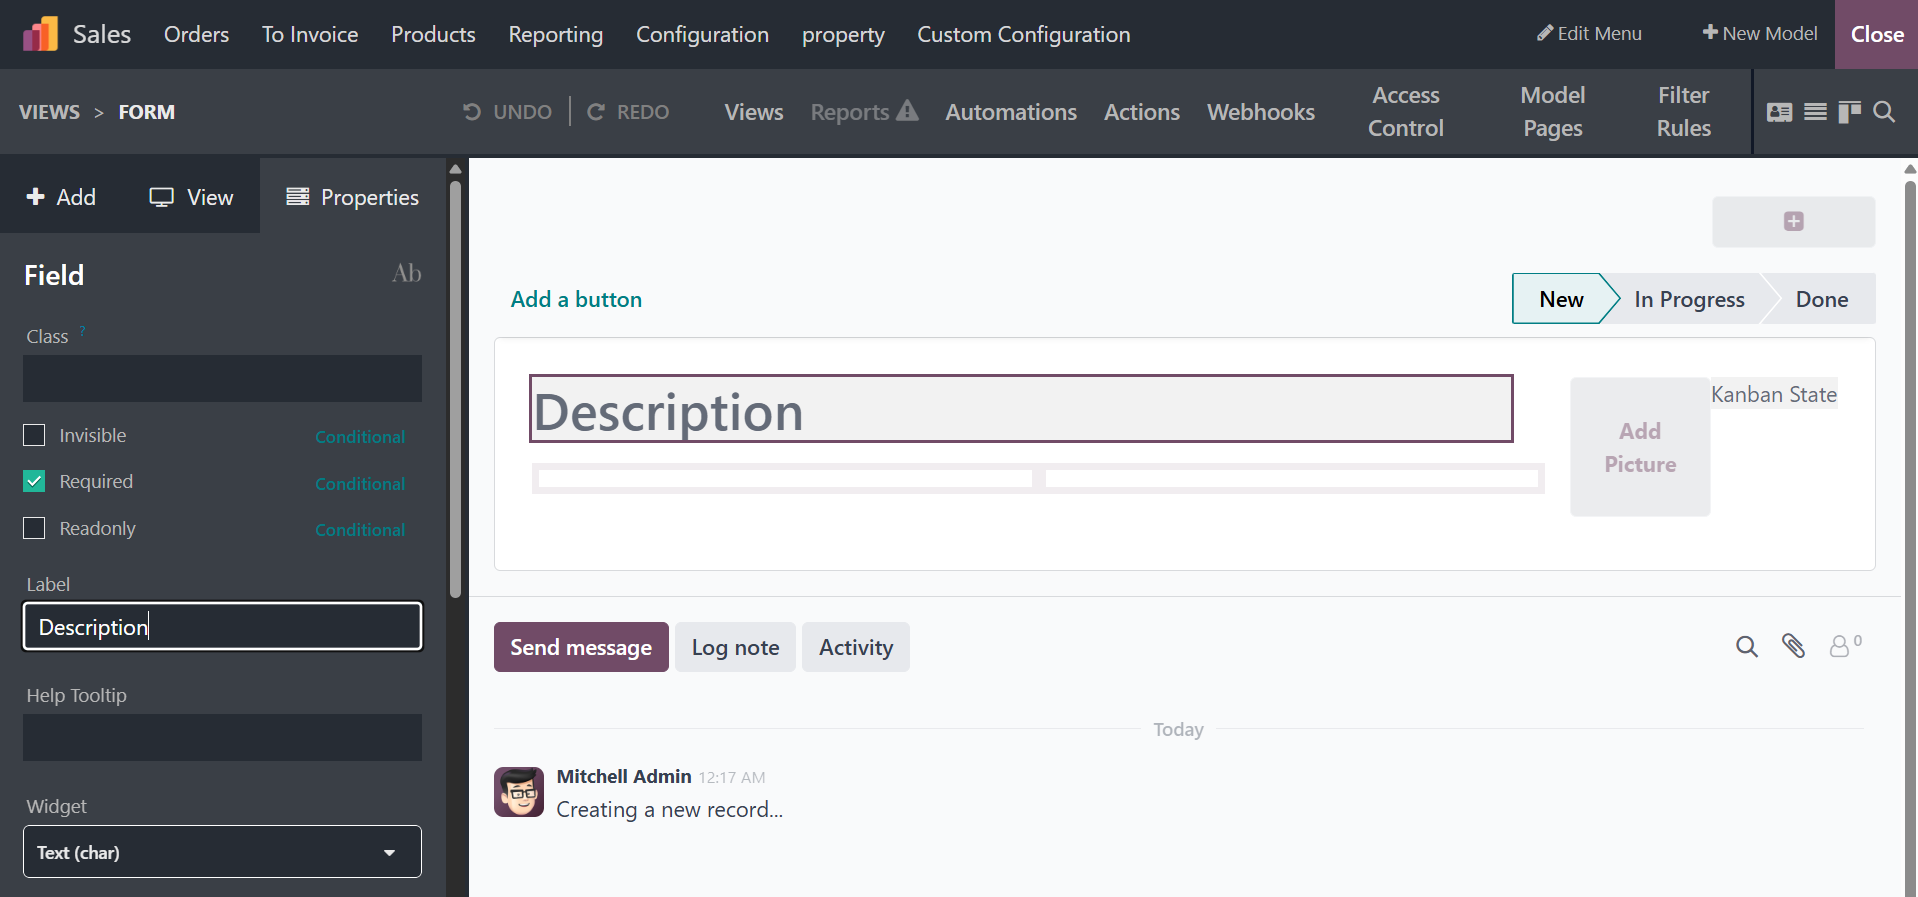
To enter studio edit mode, click on any of the Stages options and
navigate to the left side of the screen. The technical Label name
for the Pipeline Stage appears when you select the properties tab.
If you haven't added the Pipeline settings, you can see it inside
the form view, as shown below.

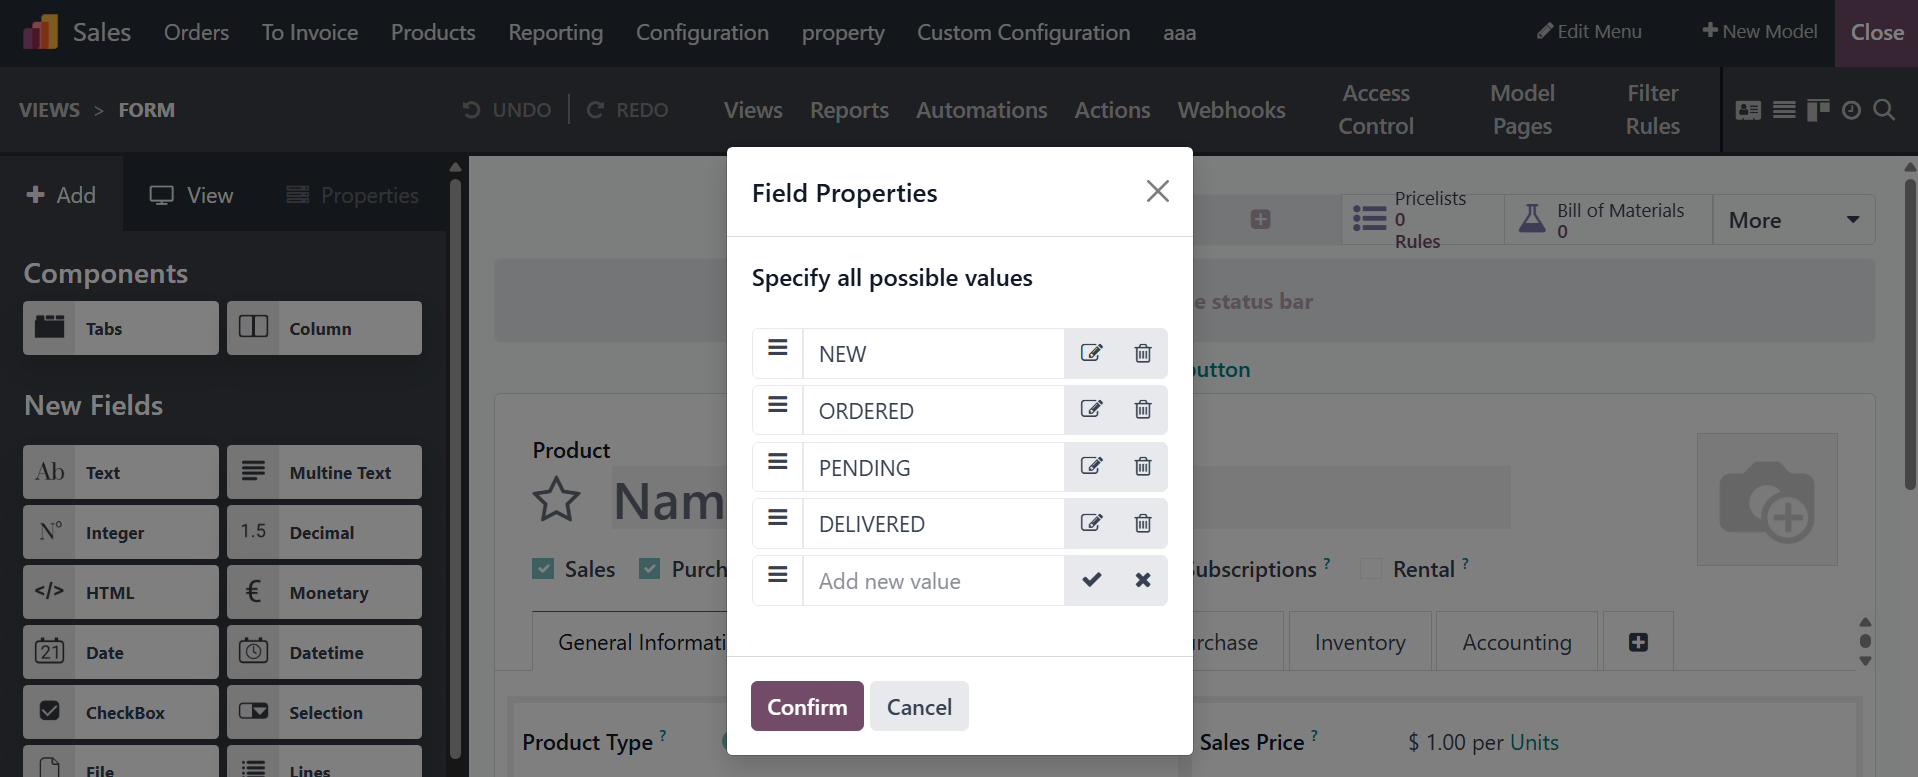
To add new Pipeline Stages, click the "Add a pipeline status bar"
button. You can modify the Pipeline Stages in the "Field Properties"
window that appears when you click the button, which will launch a
tiny pop-up window.
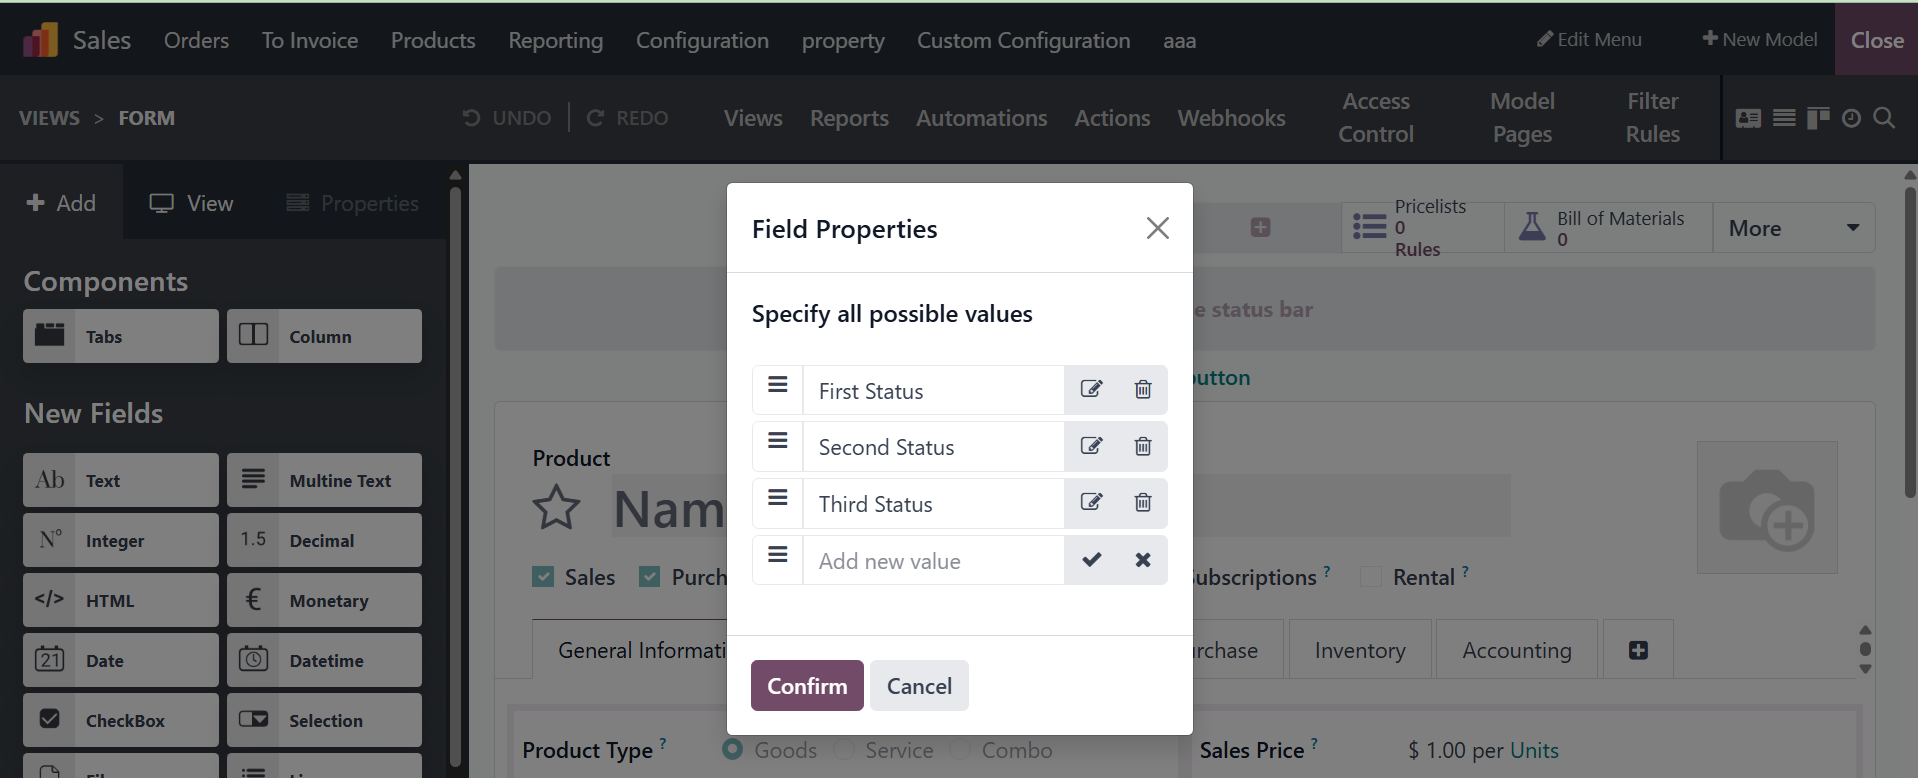
To add the Pipeline stages to your form view after altering them,
click the "Confirm" button.
As seen below, you may monitor and control different Pipeline stages
from the form view's top right corner.
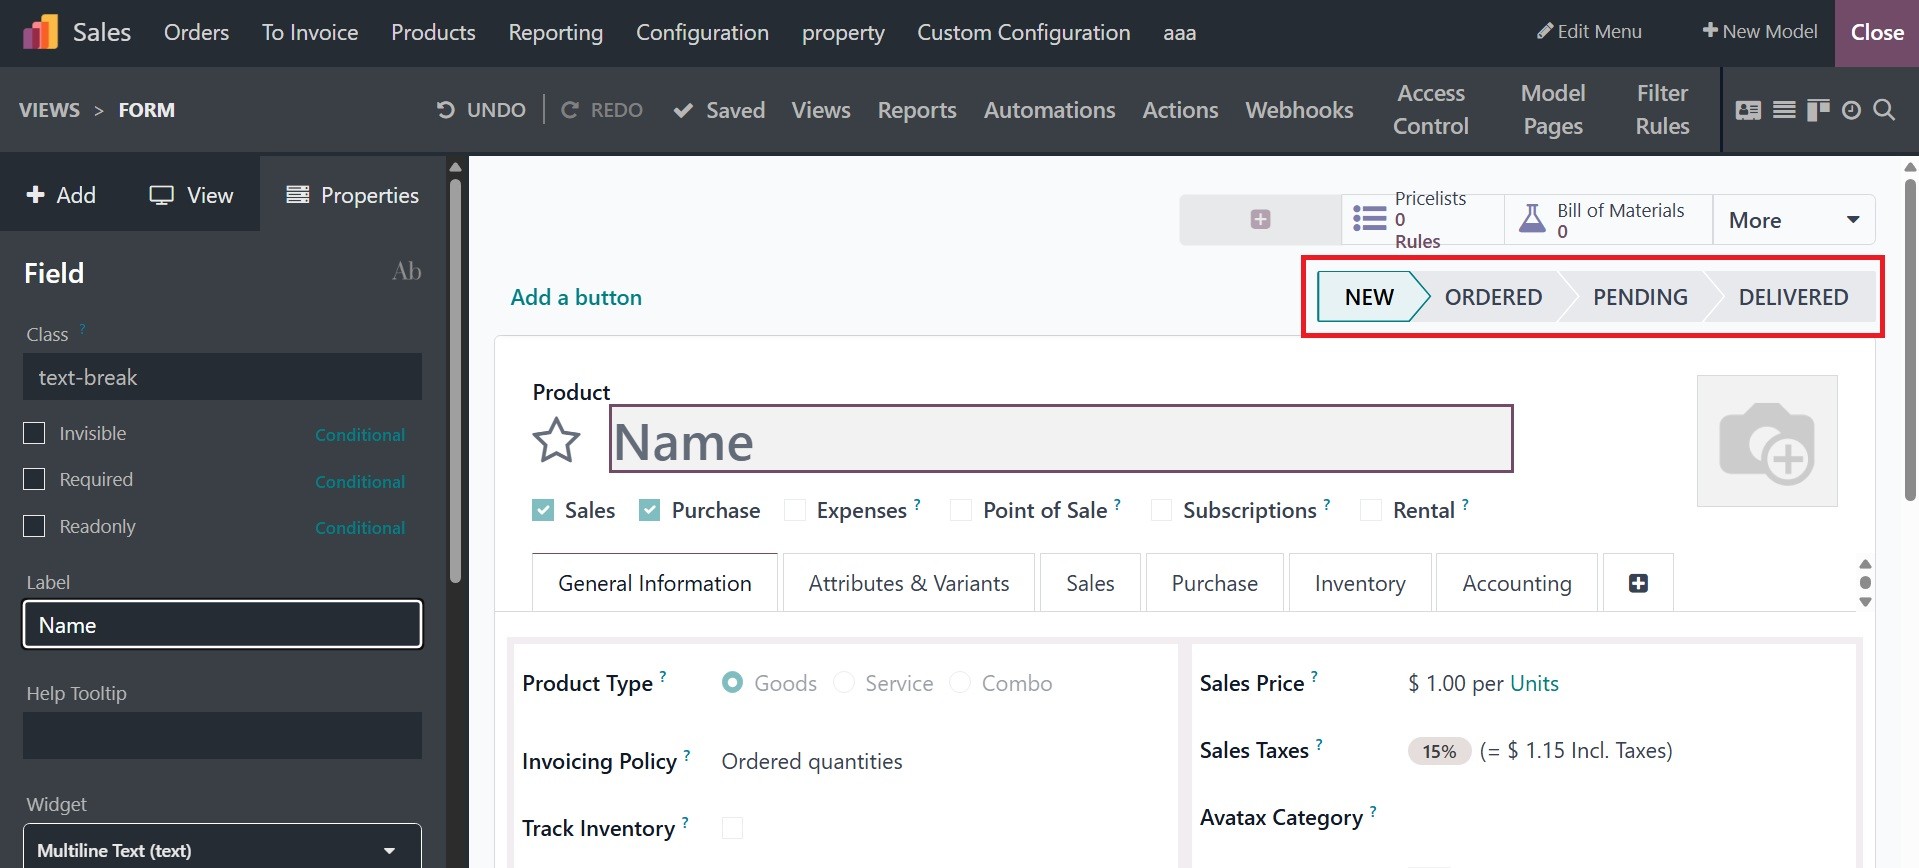
To enter studio edit mode, click on any of the Stages options and
navigate to the left side of the screen. The technical Label name
for the Pipeline Stage appears when you select the properties tab.
Then, based on your application's needs, you can modify settings
using this editing area.
After stages have been configured, you have the option to define them
straight from the Odoo18 platform instead of using the Studio
configuration box. Furthermore, the pipeline's stages can be
precisely adjusted to meet the needs, and the menu will display the
designated pipeline states.