7. Menus for Configuration in Odoo
18 Studio
Most businesses want a variable and adjustable operation tool to help
them design the operation and control of the apps according to their
demands. In order to offer a superior solution for businesses of any
size and operating style, the Odoo18 Studio was developed with the
goal of maximum customization. The setup specifics for the majority
of the operations will be defined with the aid of the studio
module's own menus. With the help of the Fields and the particular
menus, you will be able to specify and produce exceptional
operational applications. Let's go on to gaining a thorough
understanding of the distinctive menus.
Odoo 18 offers considerably more sophisticated capabilities and
customization choices, expanding the possibilities for creating
unique pages. Examine the inheritance method to preserve a unified
visual identity throughout the website and dive into using QWeb
templates to create complex and dynamic pages.
When creating custom pages in Odoo 18, following best practices is
still crucial. To guarantee the scalability and maintainability of
your online presence, use elements with meaningful and unambiguous
names, keep your code structure tidy, and carefully adhere to Odoo's
coding rules.
To create a new menu, you can go for the edit menu option, as in the
image below.
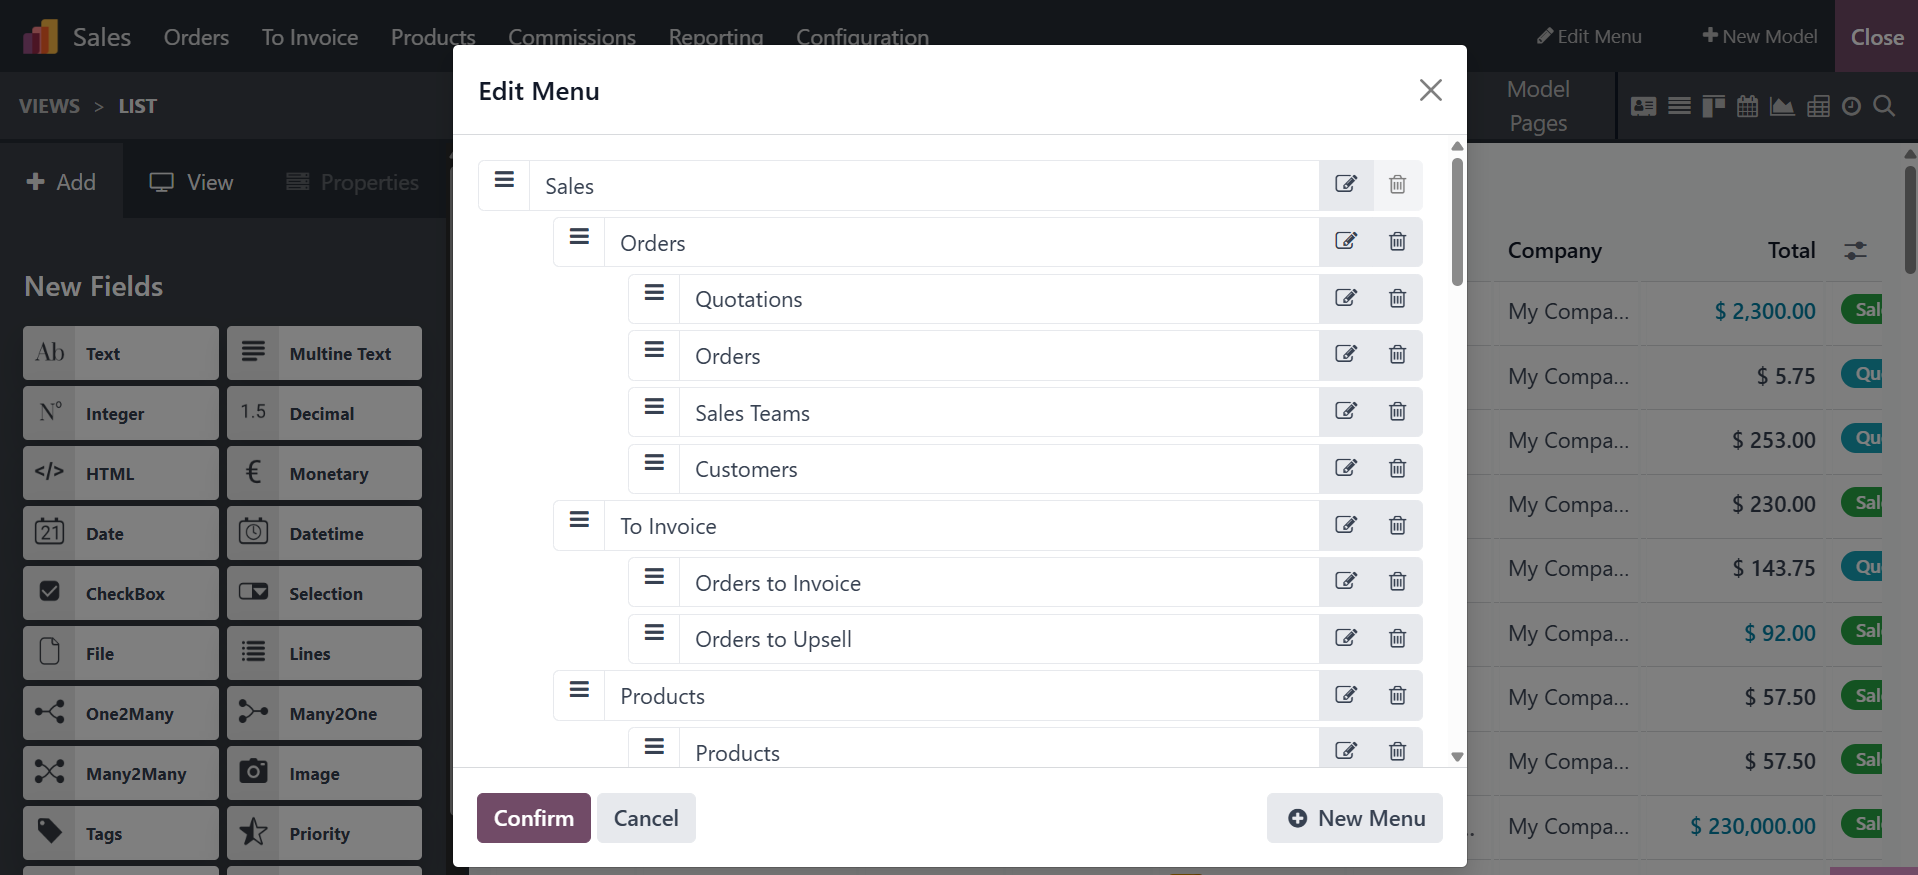
We can see the menu customization window in the same window, and here
we can see all the menus and sub-menus. In the first step, we can
drag and drop the menu and change its position as needed. There is
also an option to delete using the red delete icon. Click on it to
delete the menu.
To add a new menu, just click the "New Menu" button in the lower
right corner, as shown in the image below. Modifications can also be
made by adding new menus.
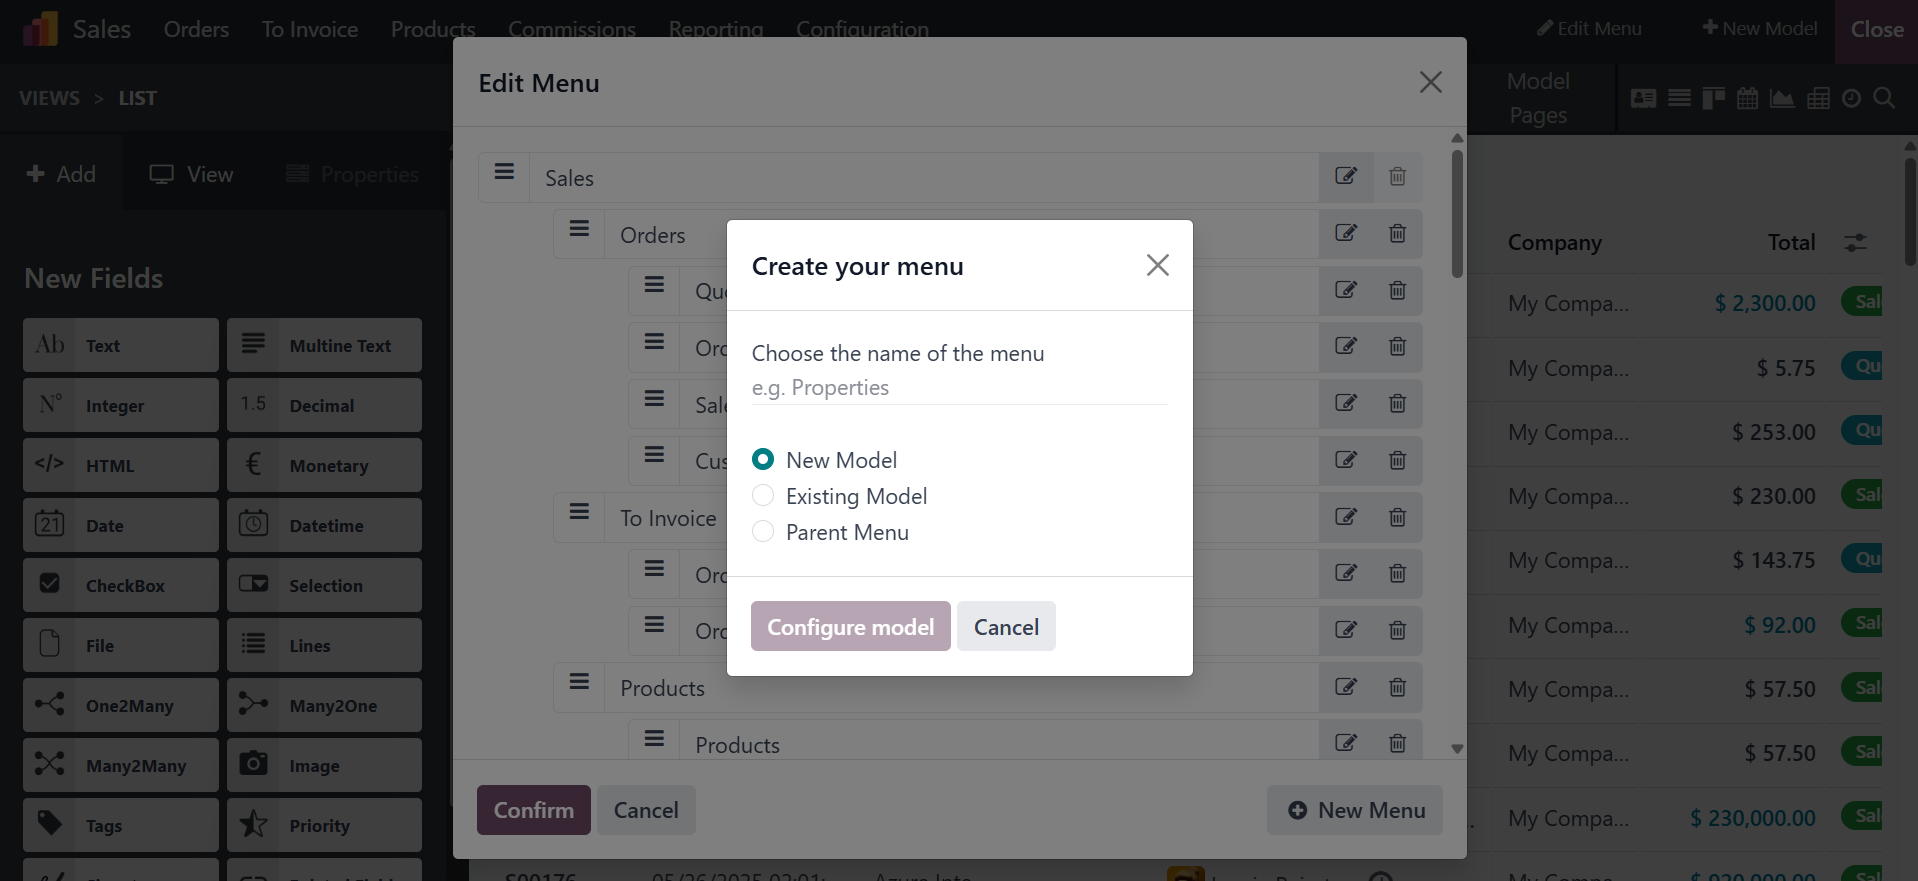
If it is a base menu means leave blank for parent menu and change the
sequence for order. If it is a submenu means choose the parent menu.