8. Setting views to your model
The Odoo18 Studio Module Views menu may be used to generate several
views for the apps menu. By default, the special Views will help
attract more attention and offer information from the different
menus, both of which will be quite beneficial. Views such as Form,
Search, and Activity View can be used to define the menu views.
Aspects of the Form View include the Form's title, buttons for
adjusting the form according to operational needs, and a Print
button that, in the event that paper format data is needed, will
print the Form View from the window right away. Additionally,
several Action components, such as Delete, Archive, Unarchive, Mark,
and Unmark, can be included based on the circumstances. To
facilitate switching between the many-from menus, navigational
features like a breadcrumb trail can also be added.
Odoo18 Studio may be used to add the different Filtering elements
under the Search view, where the required entries can be sorted
using these tools. The user has total control over how to use the
Filter tool thanks to the ability to specify the customization
features for the Filter options. It is possible to add the Chatter
element to the Activity View so that people can discuss it when
arranging different events.
This will ensure that everyone there has a chance to discuss it
before the appointed time. Additionally, a number of record views,
such as list, kanban, and map views, can be configured.
New Fields of operation can be easily added to the List View to
ensure that the required instructions are displayed in the List. The
Contact Field, Priority Field, and many more functions are included.
As needed, the numerous detailed fields can also be made invisible,
altered, or eliminated. The ability to remove certain operational
aspects from the Kanban View, such as the Create and Edit buttons,
will be useful in granting external people access to the portal
while preventing the creation, modification, and removal of new and
current items. Additionally, a specific Pipeline Status indicator
can be added to the screen, giving a clear understanding of the
operational phases. The elements like the Name and Address can be
set to disappear in the Map View. Additionally, you may add
Additional Fields that will help with the view and enable the
Routing option, which will make it easier to interpret the address
and go to the appropriate locations.
Additionally, Timeline Views such as Calendar, Cohort, and Gantt
Views can be defined. The Calendar View is where you may set the
configuration options, such as the Start Date Field and the Stop
Date Field. The Delay Field, Color, All Day configuration, and
Default Display mode are among the administrative features that can
be set up. The Cohort View allows for customization of both the
Start Date Field and the Stop Date Field. It is also possible to set
the Timeline, Interval, Mode, and Measure Field.
Additionally, several Reporting Views such as the Dashboard, Graph,
and Pivot can be used to locate specific reports. In addition to
Type, Sorting, First Dimension, Second Dimension, and Measure, the
Graph View can have a new dimension added as it is being created.
Depending on the circumstance, the Pivot View can activate features
like Measures, the Display count, Column grouping, Row
grouping-First level, and Row grouping-Second level.
All of the Views configuration options provided by the Odoo18 Studio
module will be used to create the various application menus, which
will clarify the data being described.
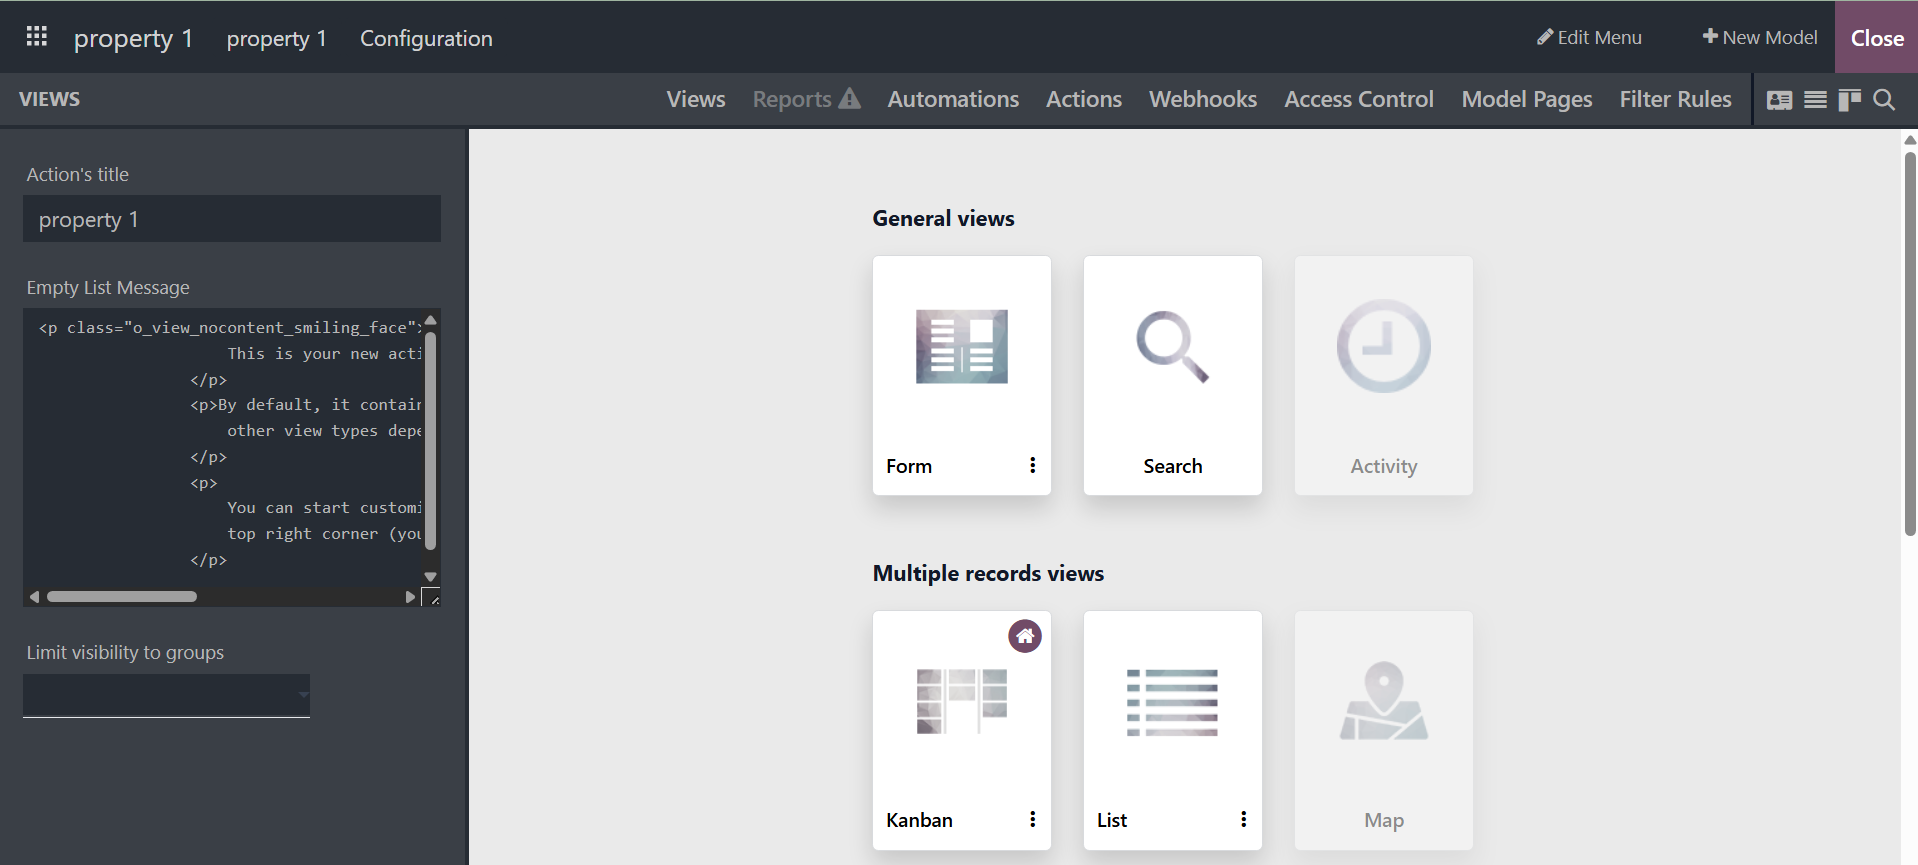
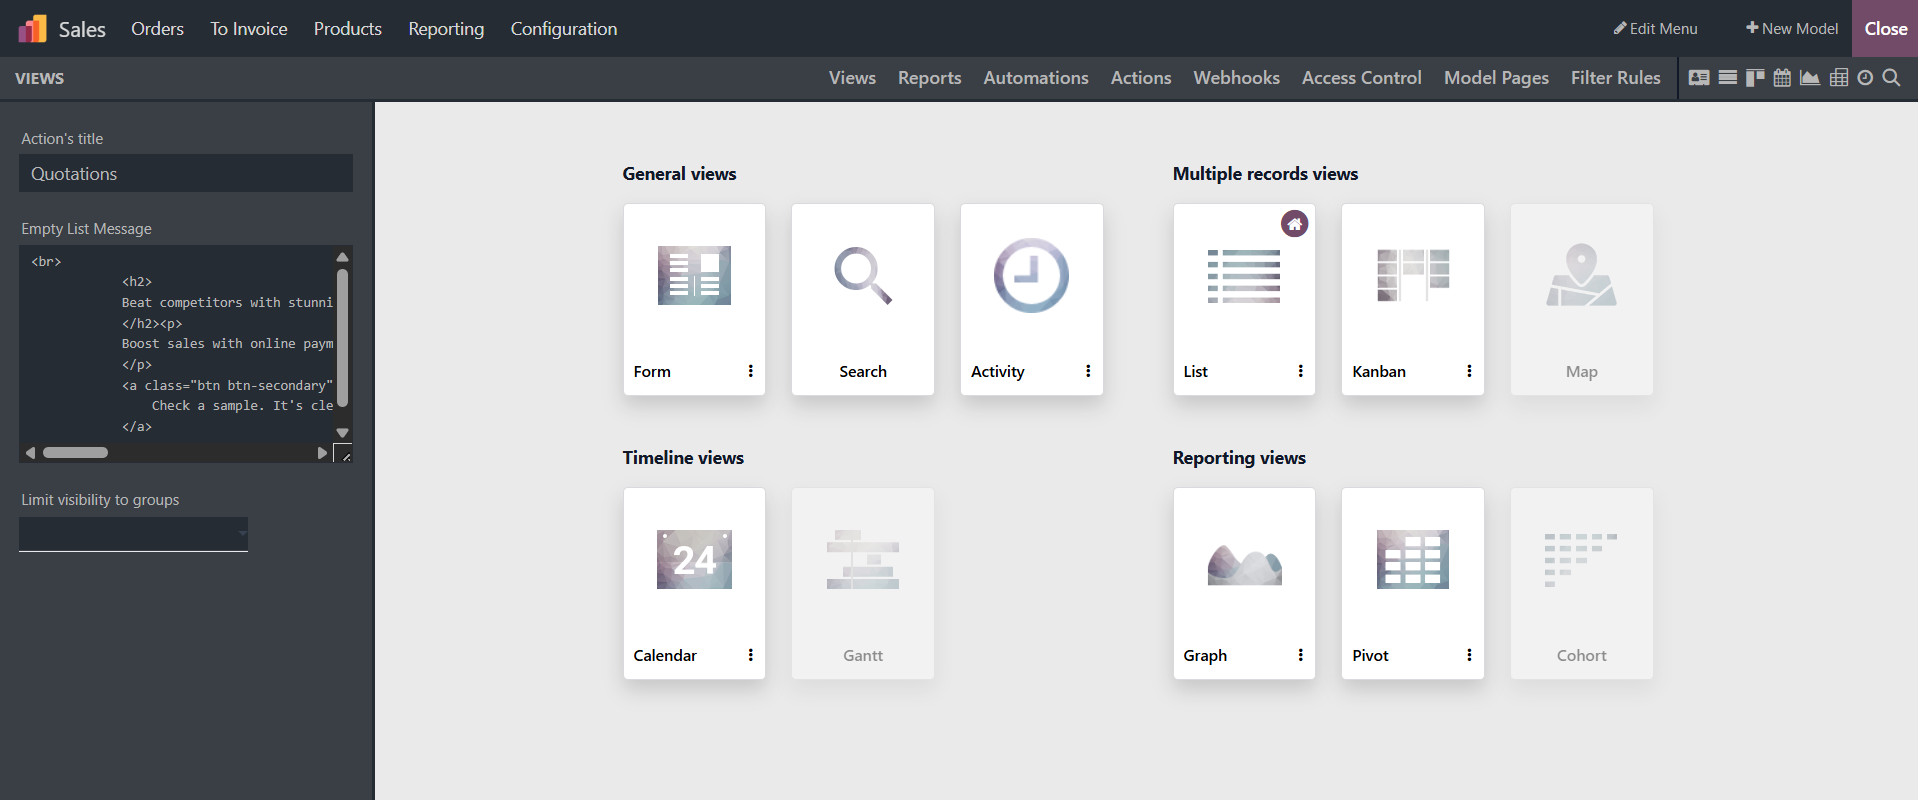
You are provided with different views, as in the image below. The
Odoo Studio Module Views menu makes it possible to create a variety
of Views for applications, boosting their usability and aesthetic
appeal. Views from the General Views, Multiple Record Views,
Timeline Views, and Reporting View categories are included in this
menu.
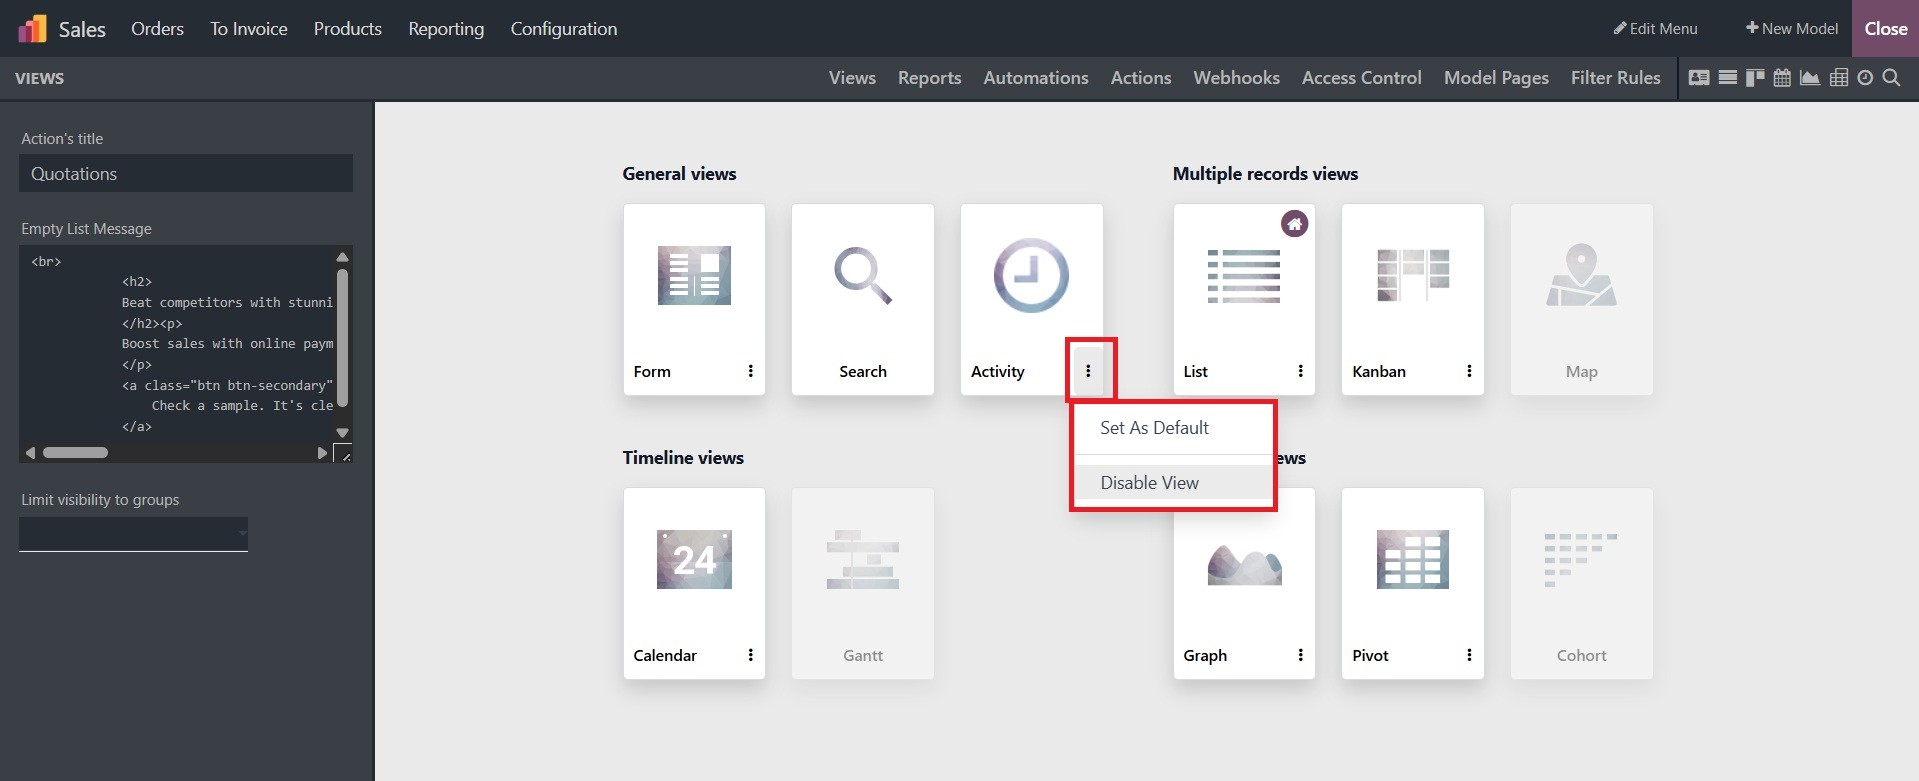
Odoo also helps you to set or change a view as the default view for a
specific application. To change the default view of a model, you can
go to the “Views” menu and select the “Set as Default” option from
the three dots available on each view.
Form, Search, and Activity Views serve as the menus' General views.
The “Form” View is the main part of an application platform that
helps to configure various functions.
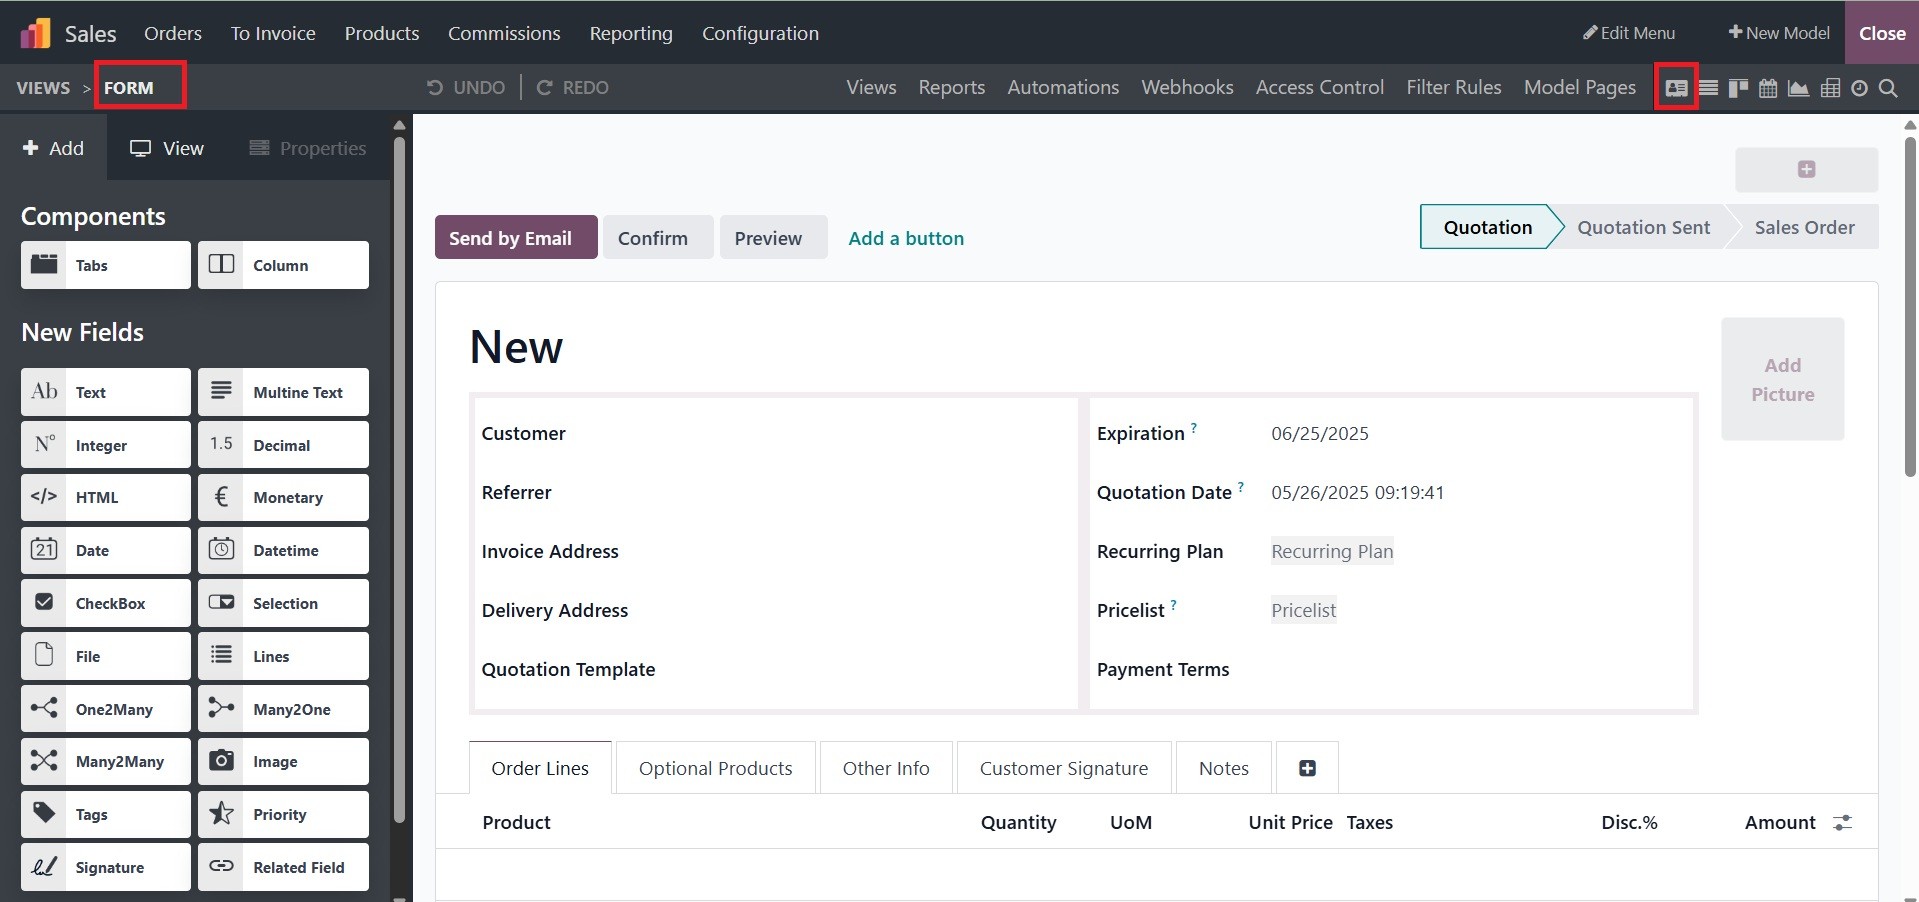
The Form's title and button settings are among the elements you can
see according to your operational needs. The many form editing
components and tools are located on the left side of the page. The
status buttons labeled NEW, IN PROGRESS, and DONE are visible on the
right side.
In the Odoo Studio, the different Filtering components can be
displayed and placed under the “Search” view, where these tools can
be used to organize the essential elements. The user has total
control over how to utilize the Filter tool, thanks to the
customization capabilities that allow for the usage of the Filter
options to be specified.
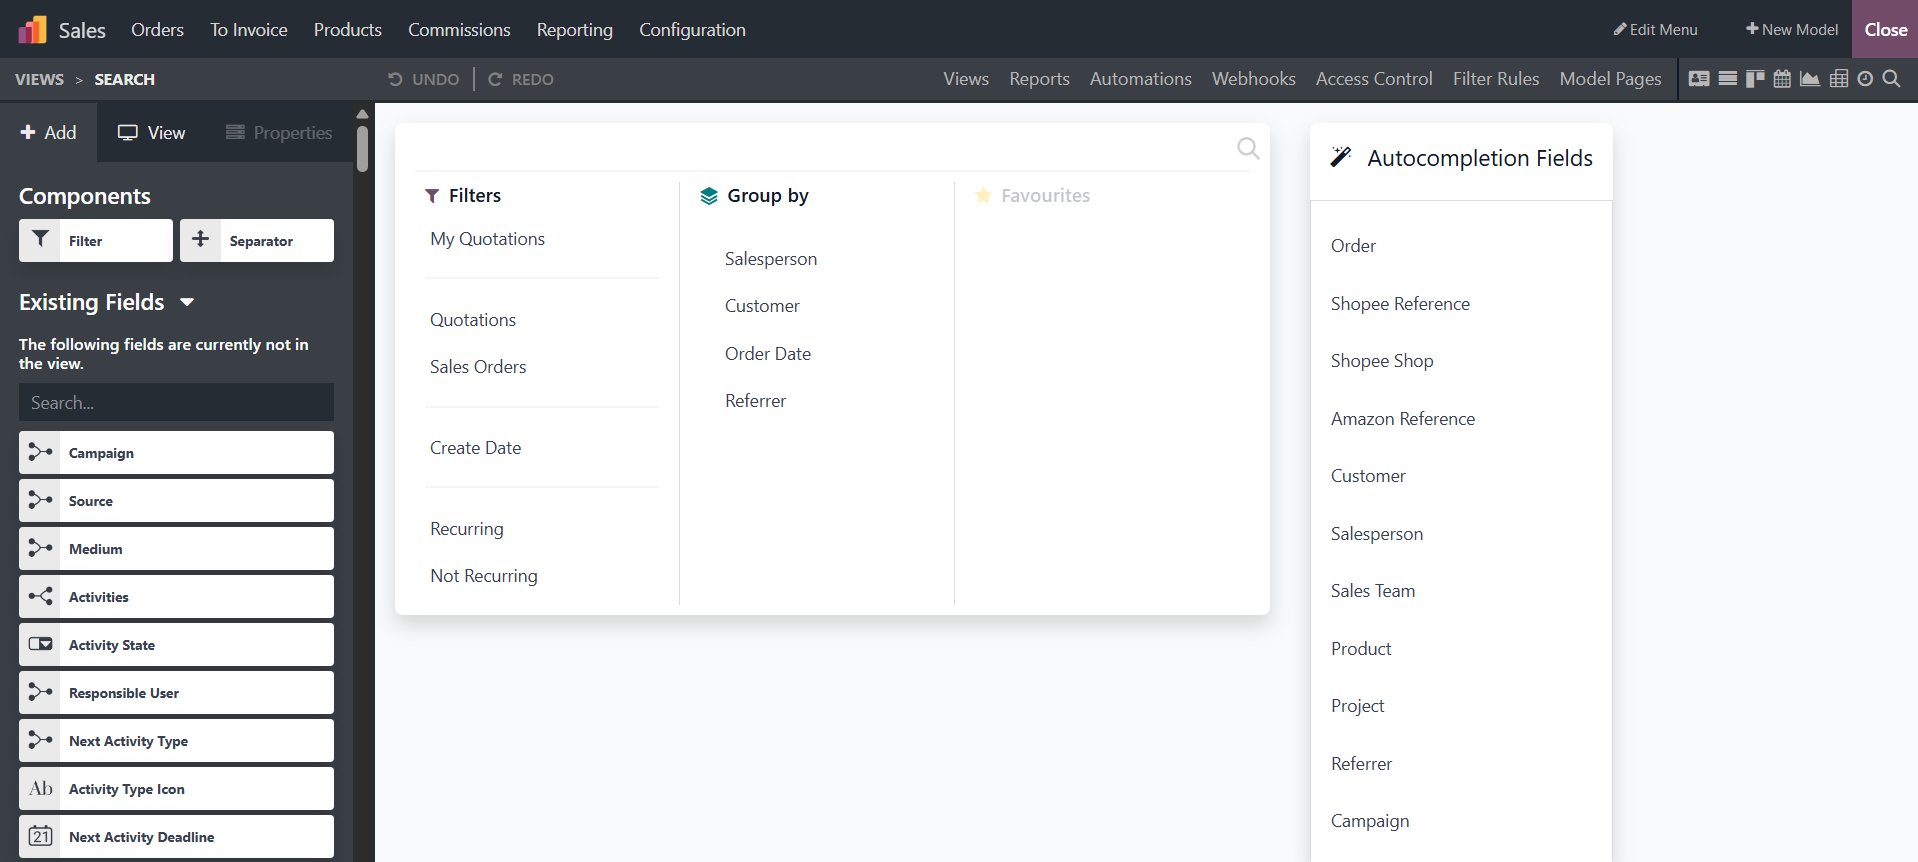
There is a clickable link in each "Filter" and "Group by" option box
that lets you alter it to your liking. The editing column on the
left has choices that you can change or remove. You can add or
remove more fields from the "Auto Completion Fields" section, which
also specifies which fields are automatically filled in when users
submit specific data on the form.
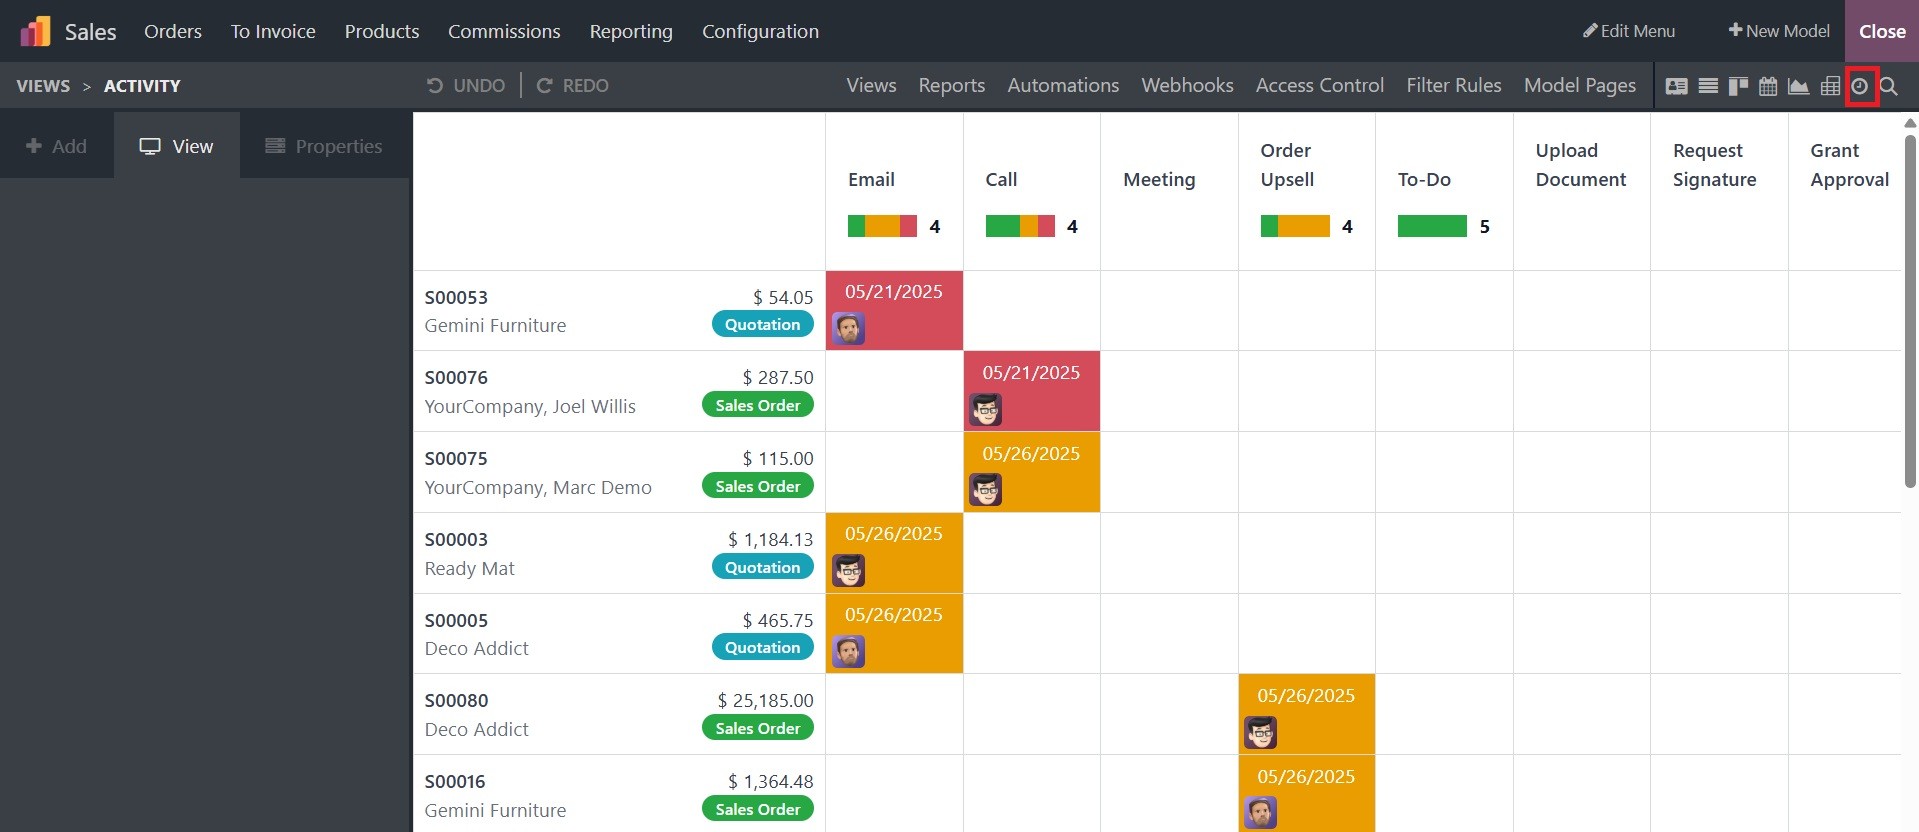
Users can plan activities using the Chatter element in the "Activity"
View, which lets participants talk before the allotted time. This
ensures a space where everyone can engage in productive discussions.
The "+ Schedule Activity" option allows you to schedule calls,
emails, meetings, to-do lists, and more.
As seen here, you may create numerous Kanban views from the "Multiple
Record Views" component.
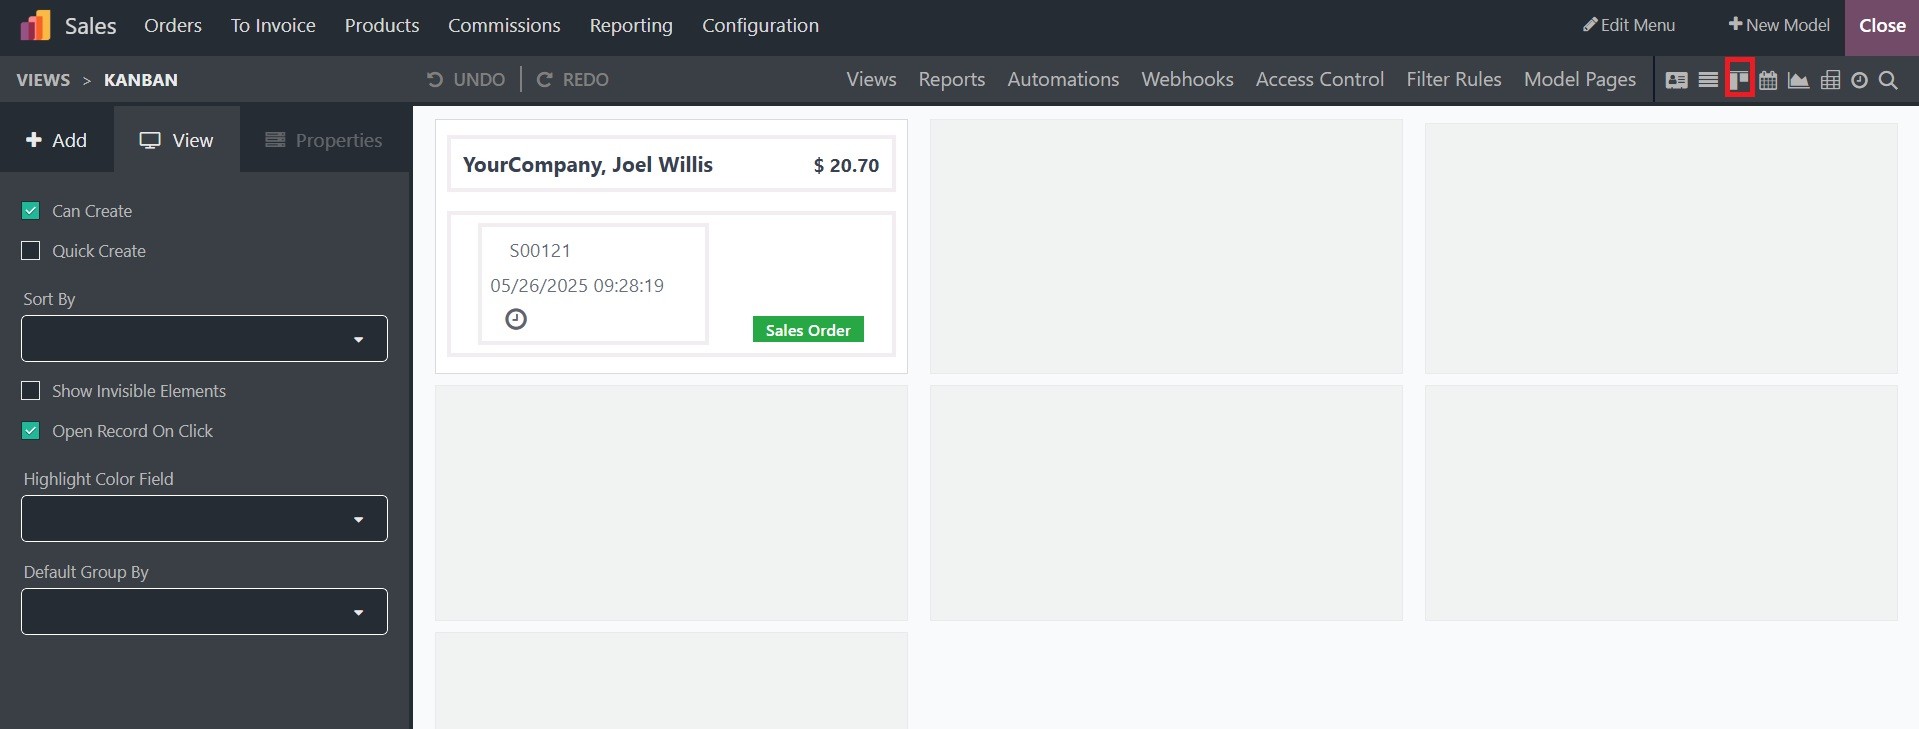
We can edit the options required for the Kanban display by clicking
on the sample template and adding the required fields and components
as per the specification. Here, some of the kanban details are
given; you can Edit, Delete, Replace, or Customize them using the
editing section provided on the left side.
Your application's "List" view is editable. To give the required
directions, you can modify operational fields in the List View, such
as Priority Filed and Contact Field. Depending on the user's needs,
these fields can be hidden, changed, or eliminated.
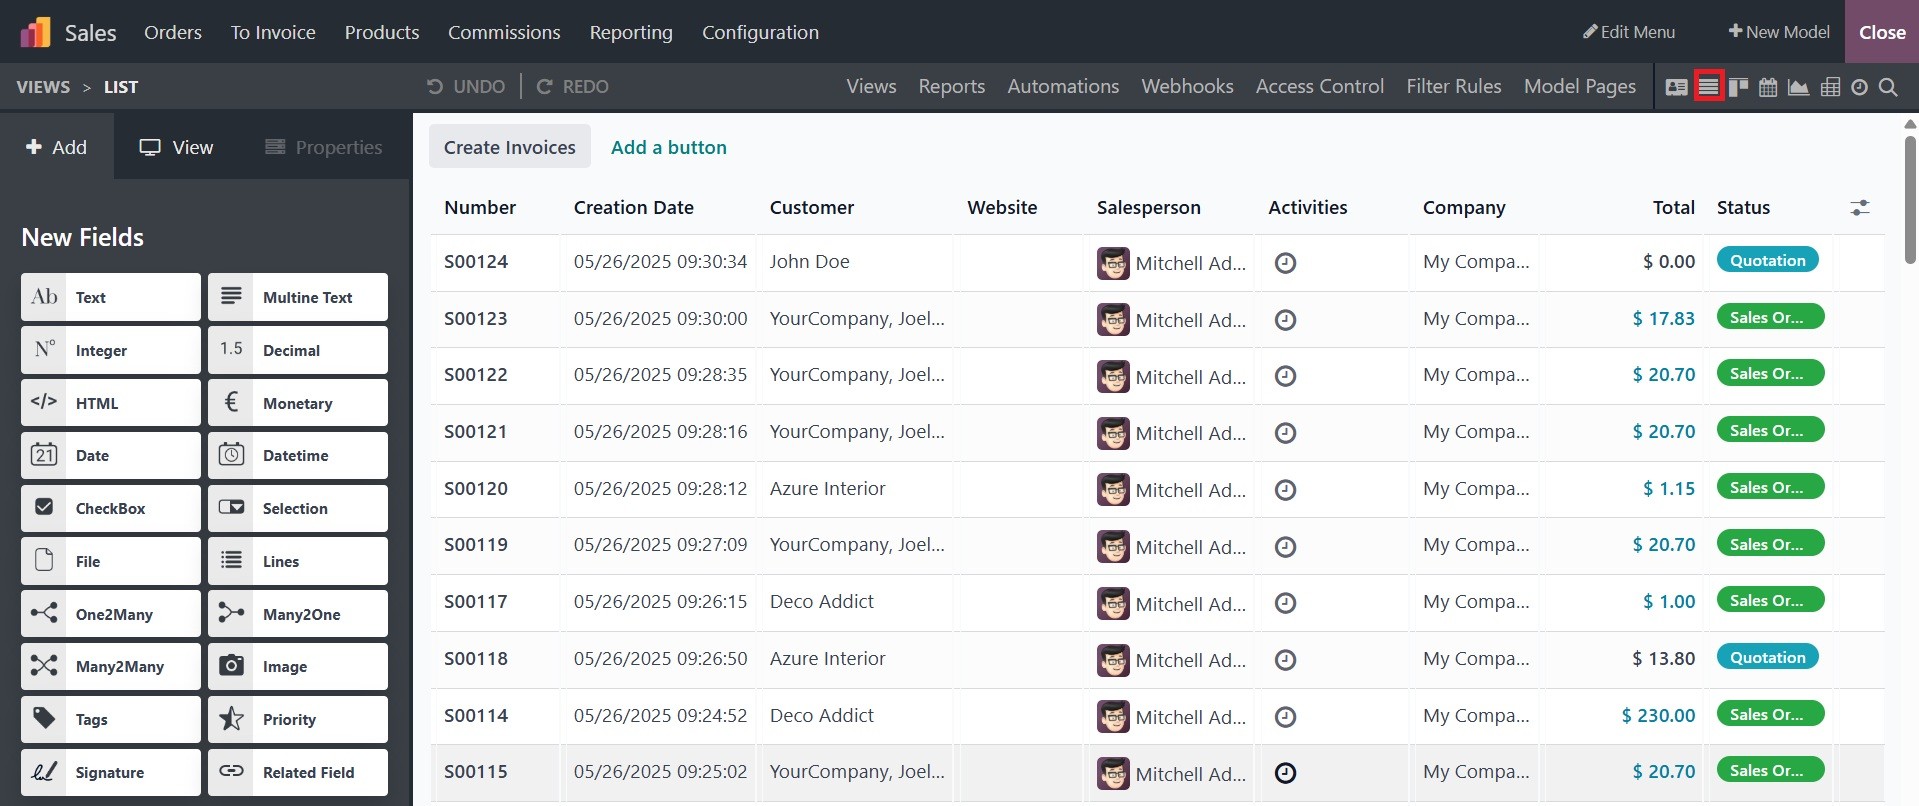
The List view is a useful tool for viewing and editing large records
at the same time. To create and edit records right away, select New
Record at the top or New Record at the bottom under Editable.
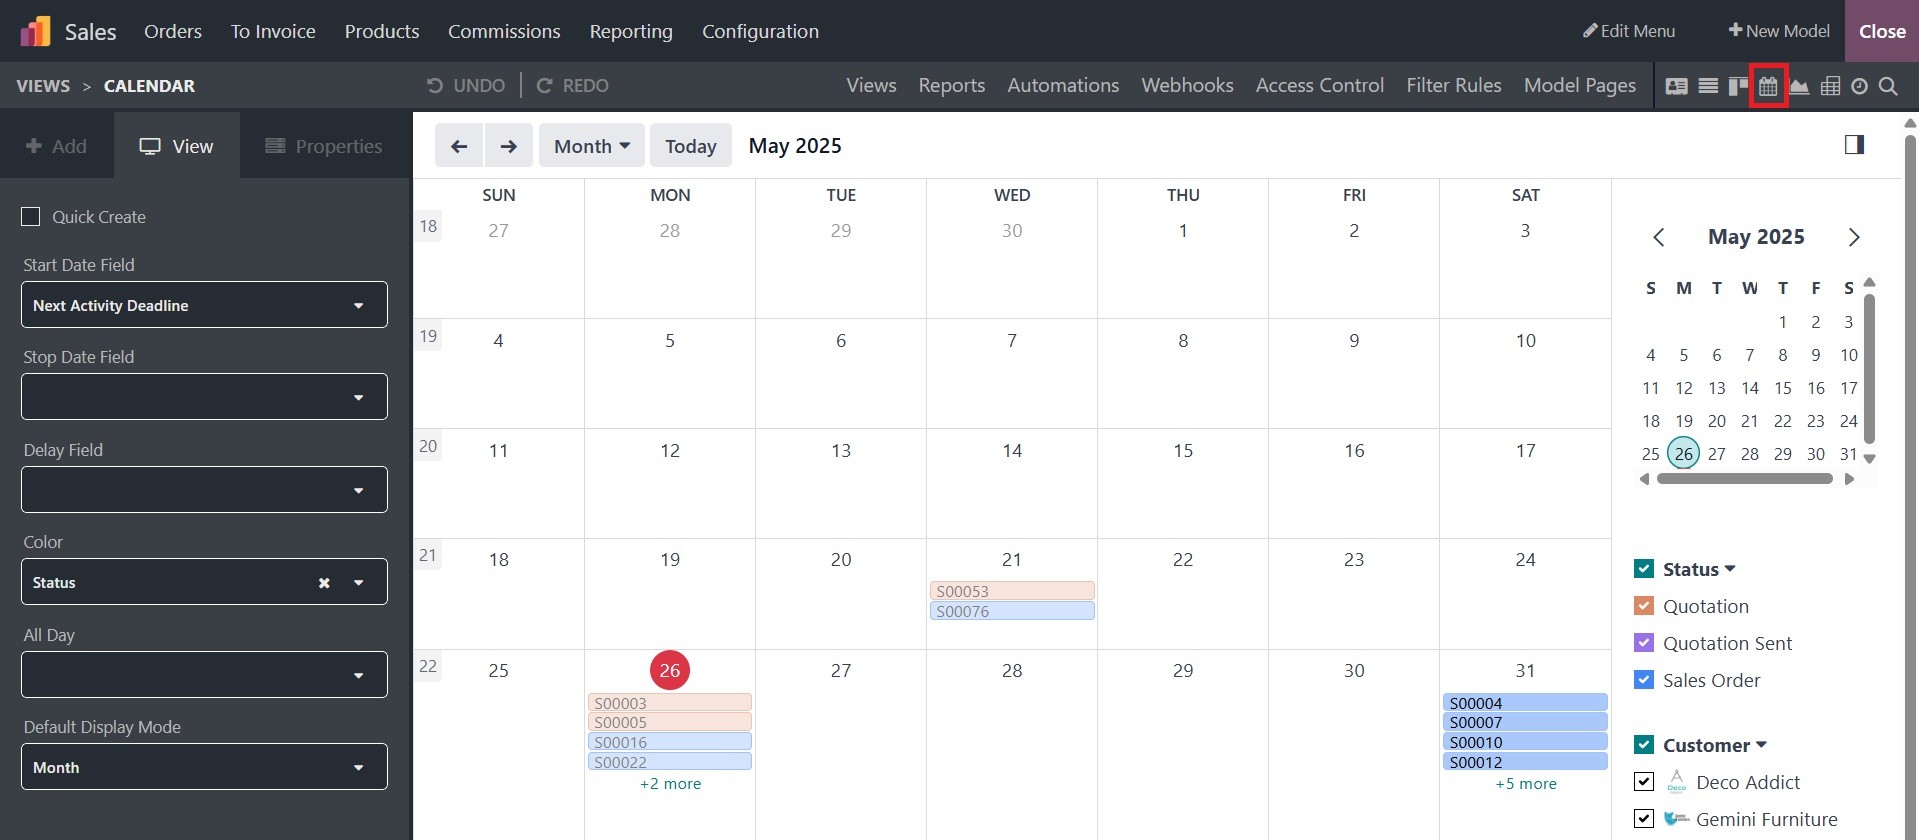
In the "Timeline views" area, you can set up Calendar, Cohort, and
Gantt views.
The "Calendar View" allows you to configure several configuration
choices, including the Start Date Field and Stop Date Field. As seen
in the screenshot below, the editing section allows you to change
the administrative features of the Delay Field, Color, All Day
setup, and Default Display mode.
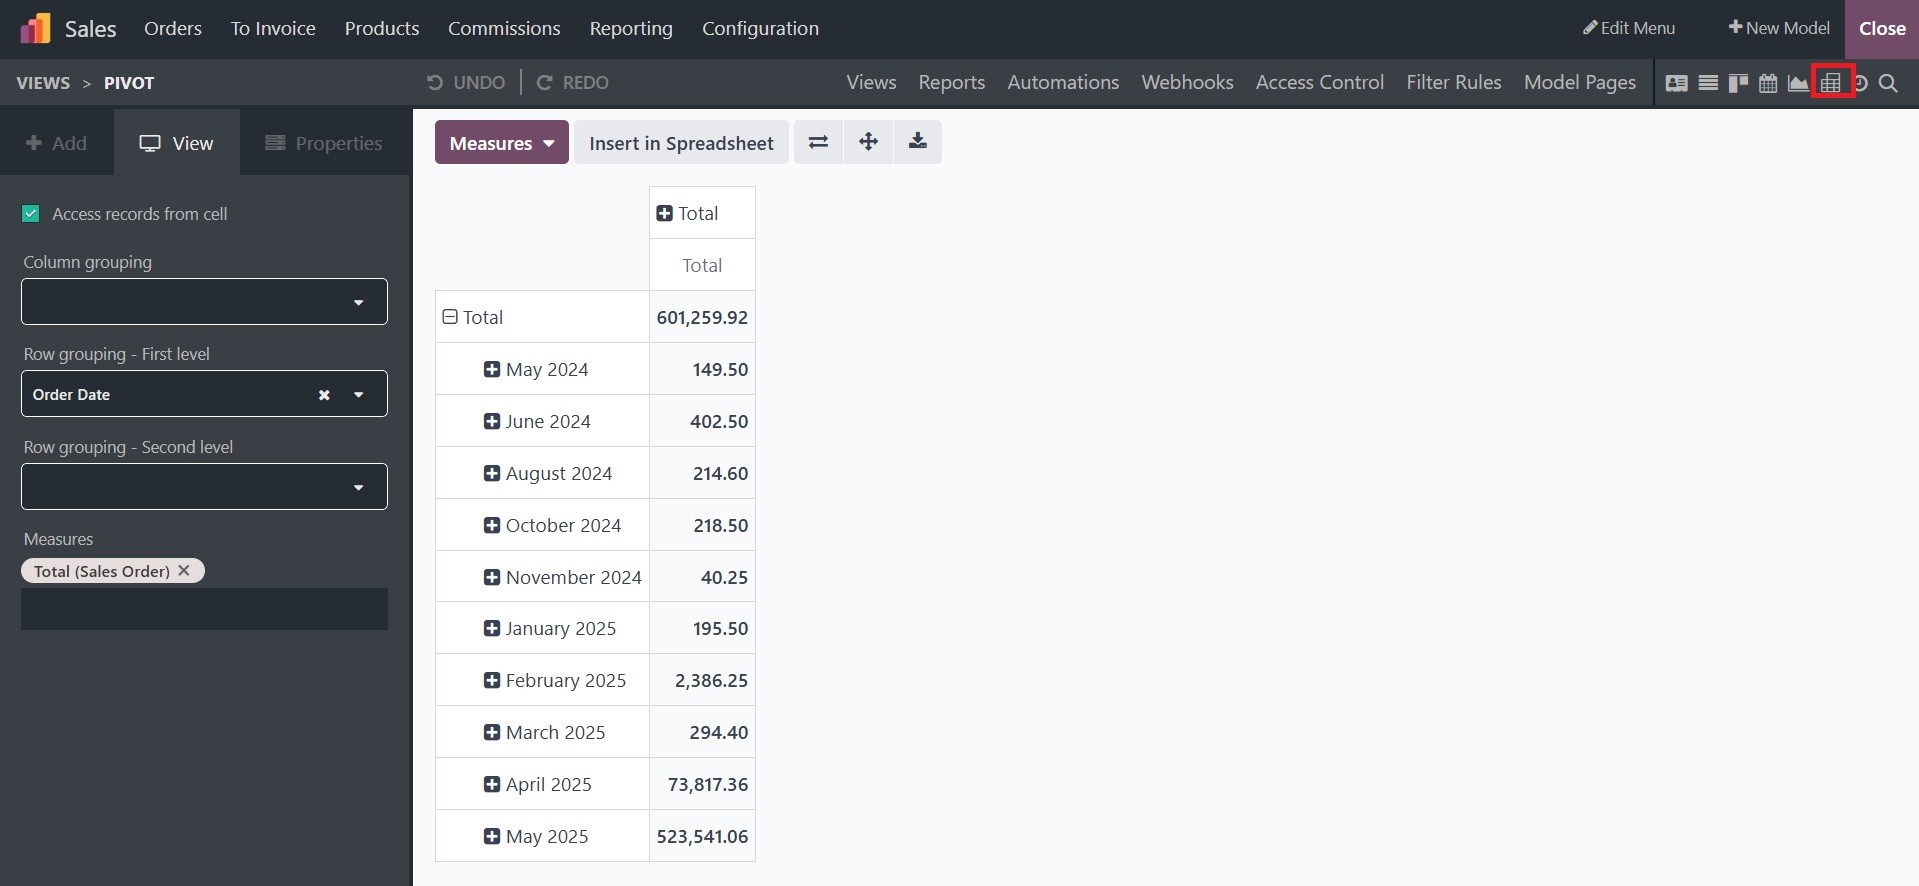
Users can get the data records from a pivot table by enabling the
“Access records from cell” option. Aspects like Column grouping, Row
grouping - First level, Row grouping - Second level, Measures, and
the Display count can be activated under the Pivot View depending on
the situation.
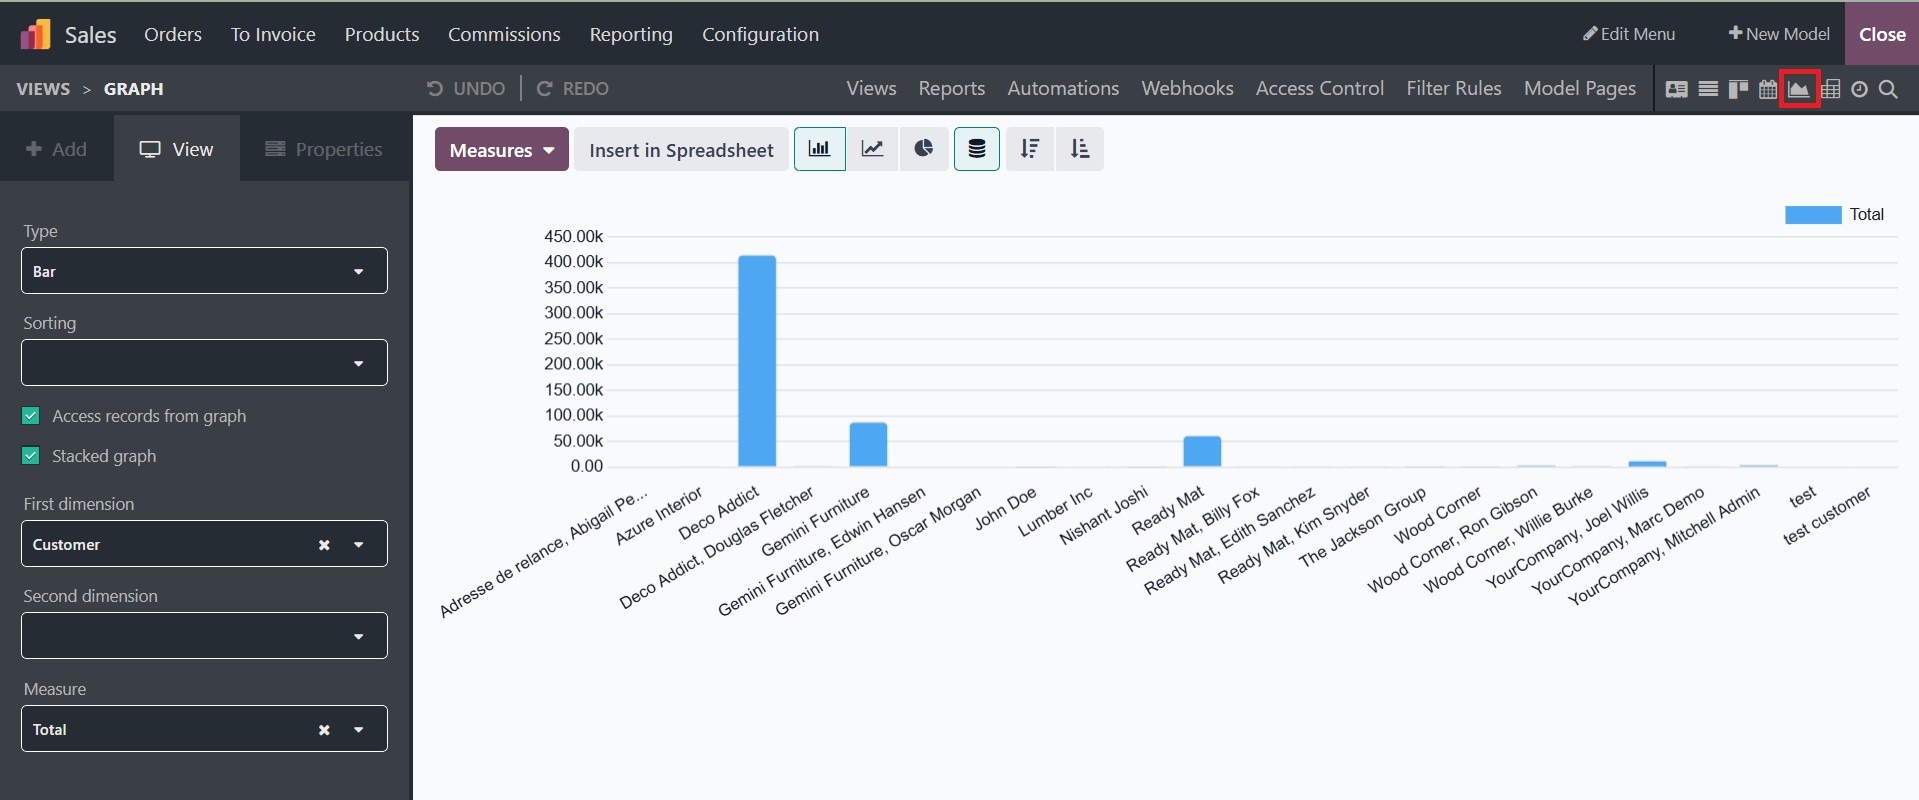
In the Graph view, data is displayed using bar, line, or pie charts.
The "Graph" view includes First and Second Dimensions, Measures,
Graph kinds, and Sorting options. Users have the option to add
additional dimensions throughout the creation process.
To change the chart's format, choose from options like Bar, Line, or
Pie in the "Type" column. Choose a default data type for the Measure
in the "Measure" column, as well as a default data category for the
"First dimension" and "Second dimensions."