1. Studio
management
The Enterprise edition of Odoo 18
already comes with the Odoo18
Studio module, which gives
you the freedom to create
original apps according to
functional requirements. It
will be feasible to design a
range of capabilities in
compliance with the
platform's functional
requirements thanks to the
Studio module's simple
drag-and-drop framework.
Using the Odoo Studio module,
you can also create a wide
range of apps based on the
functional and operational
requirements of the company.
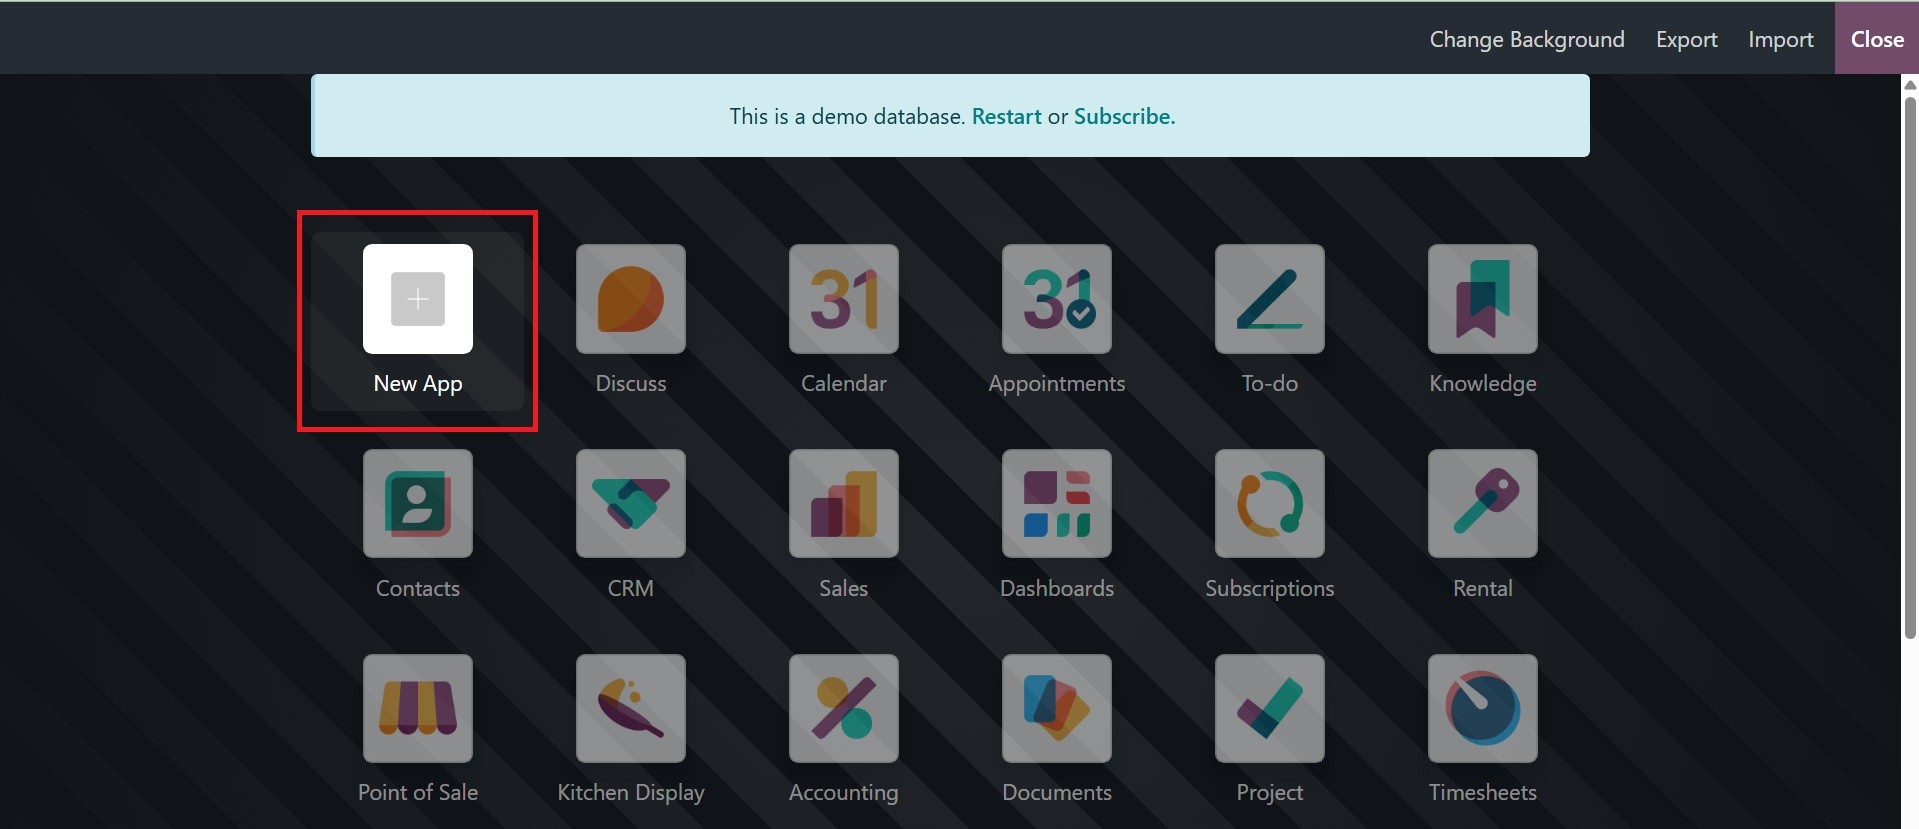
Selecting the Studio module
will allow you to add a “New
App," as shown in the
screenshot below, if you
choose to develop a new
application.
After choosing the Add New App
option, Odoo18 Studio will
open a window asking you to
design a new application
based on your requirements.
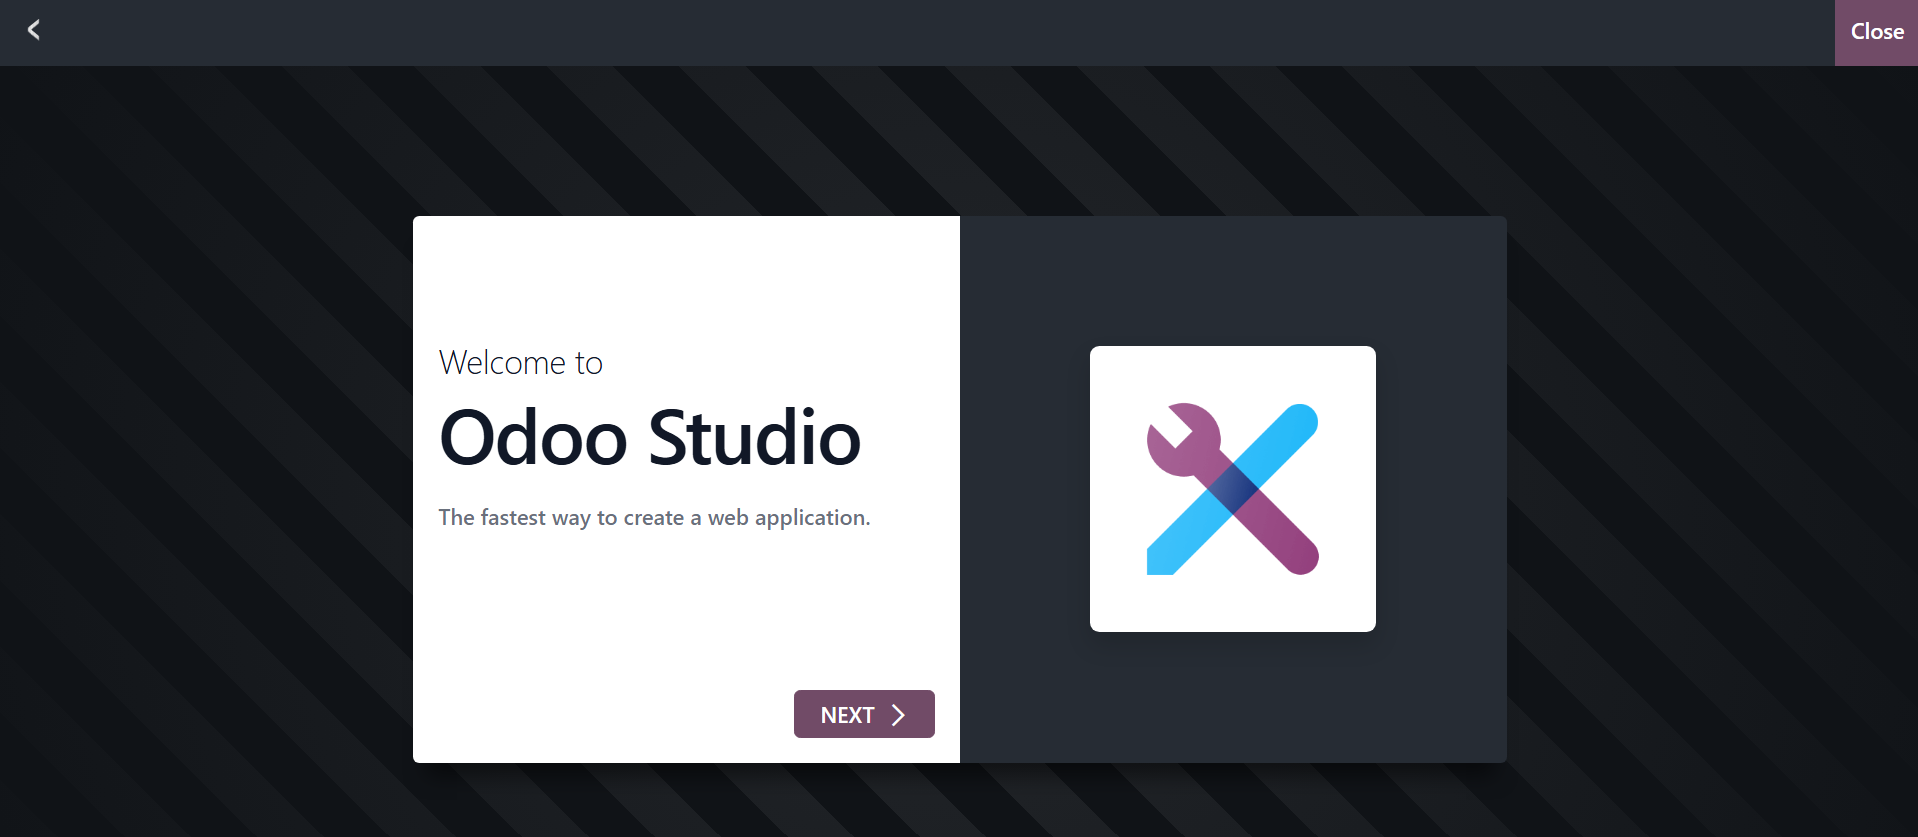
After selecting the NEXT option,
you may begin developing new
apps according to your
specifications.
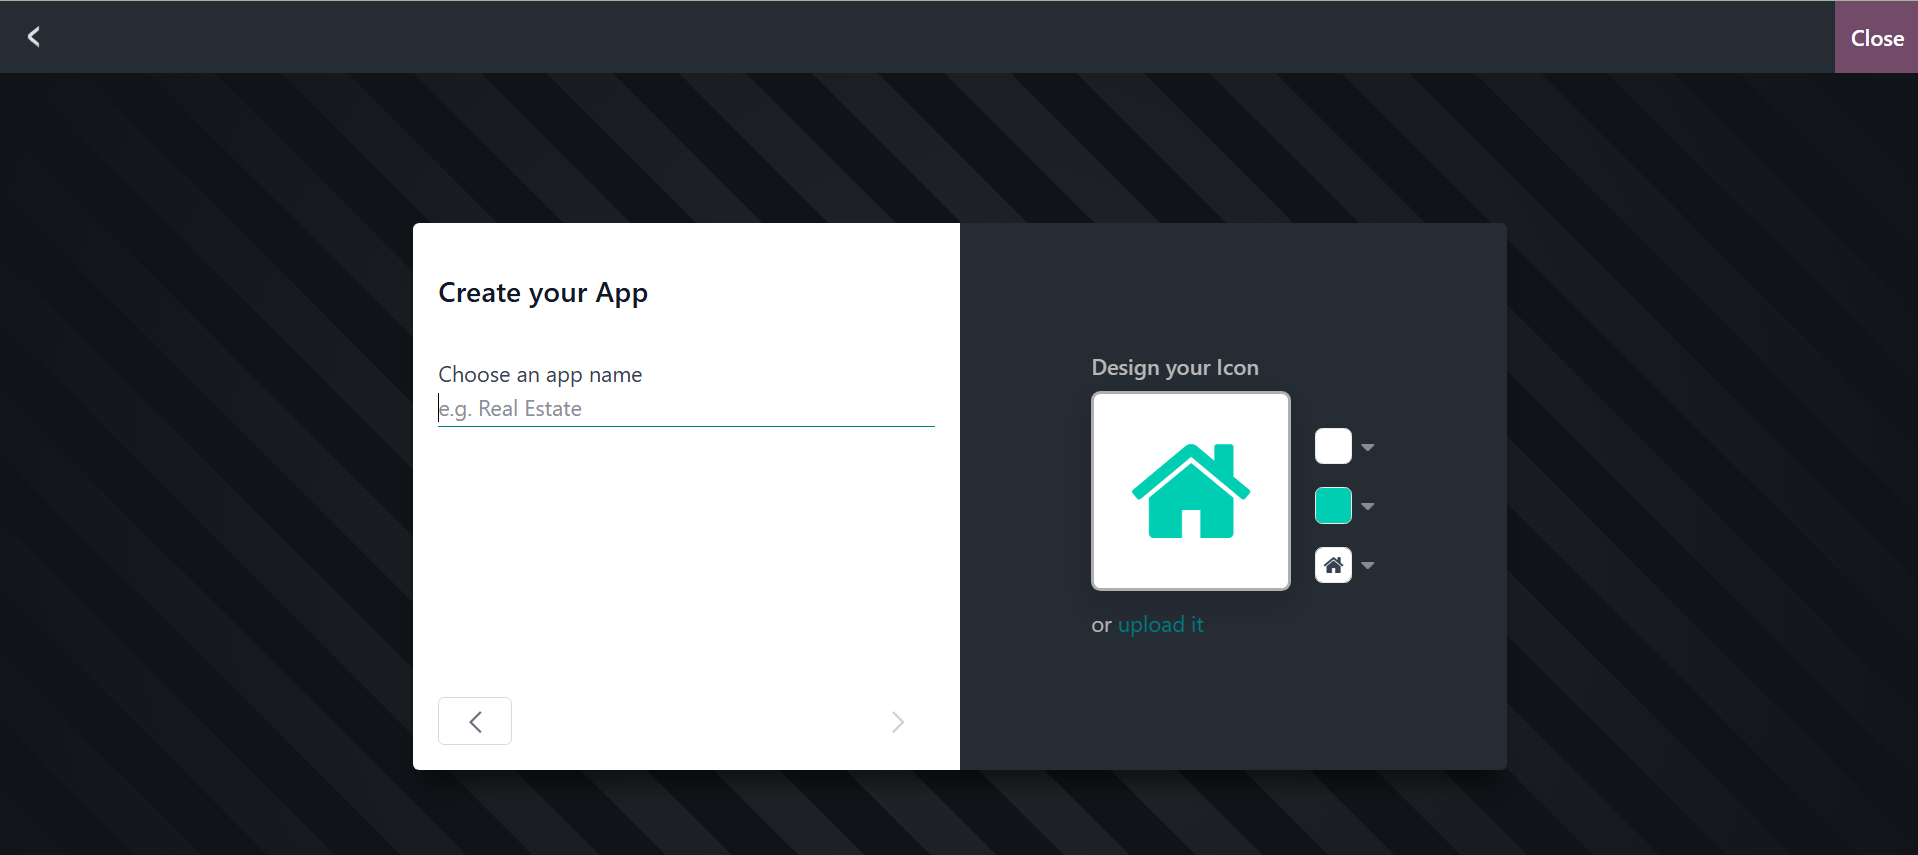
First, you need to give your new
application a name and an
icon. You have total control
over every other part of
creating the new application,
including creating these
objects with the built-in
tools or uploading a picture
from a local server location
to use as the icon.
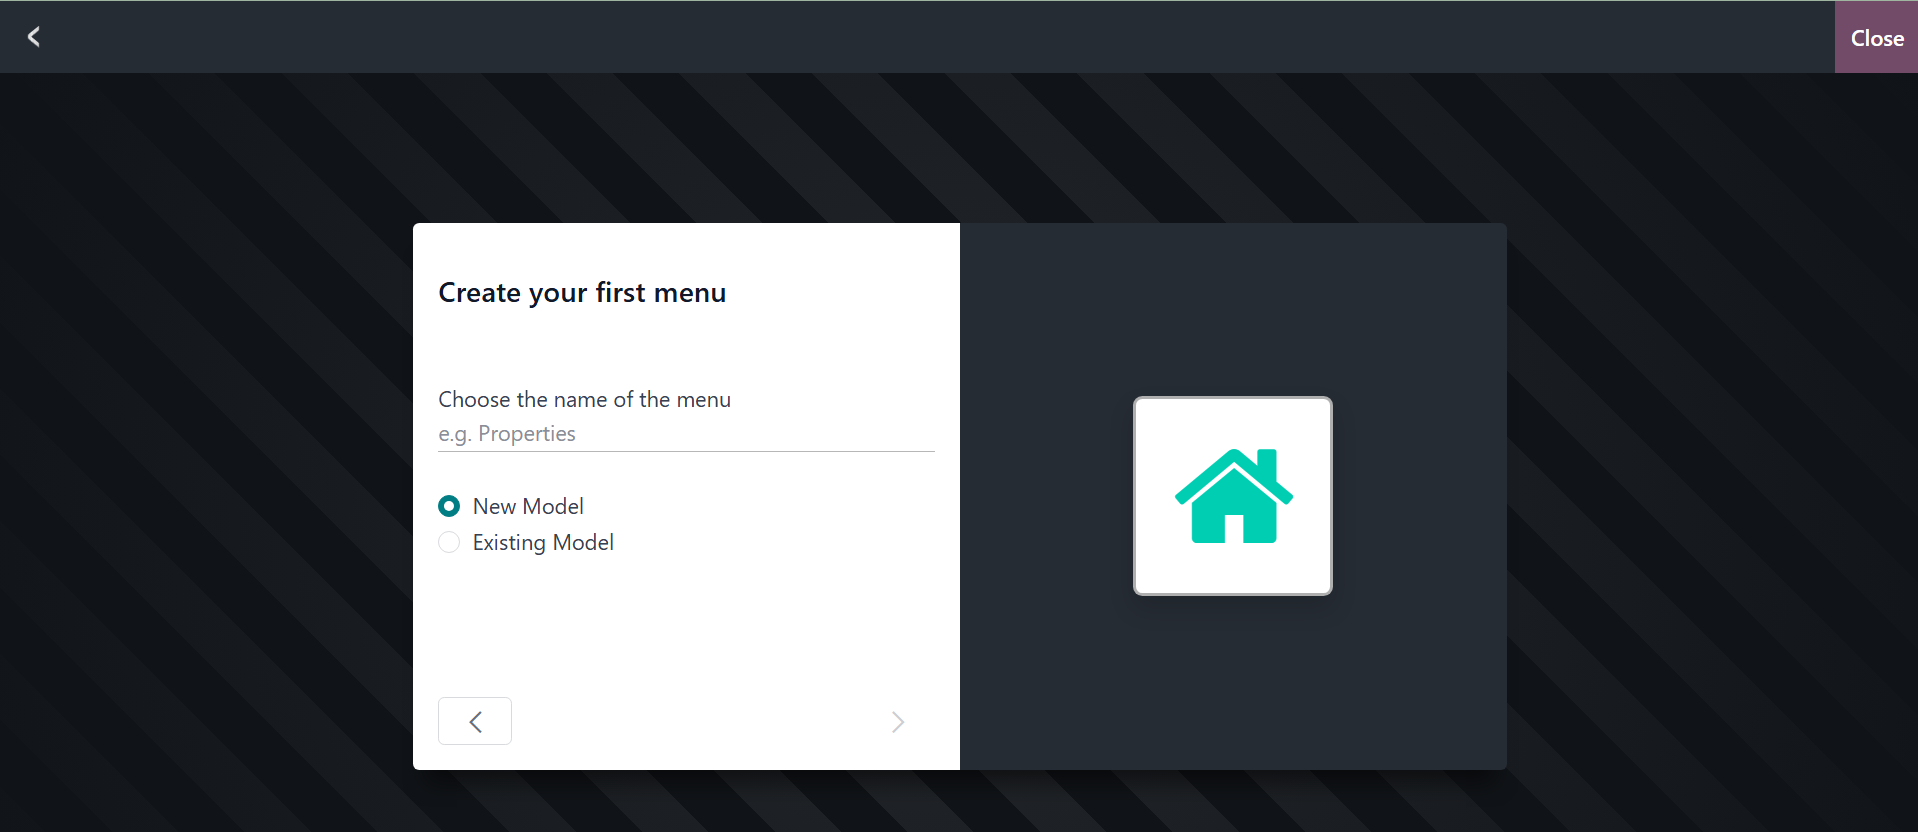
After selecting the NEXT arrow,
as seen in the screenshot
above, you must create your
first menu after the new
application's name and icon
are provided. The First
Object Name must be entered
here, as specified in the
relevant section.
Furthermore, you must mention
if it is a new model or an
old one. Lastly, to reach the
menu where you can modify the
Model, utilize the following
arrow choice.
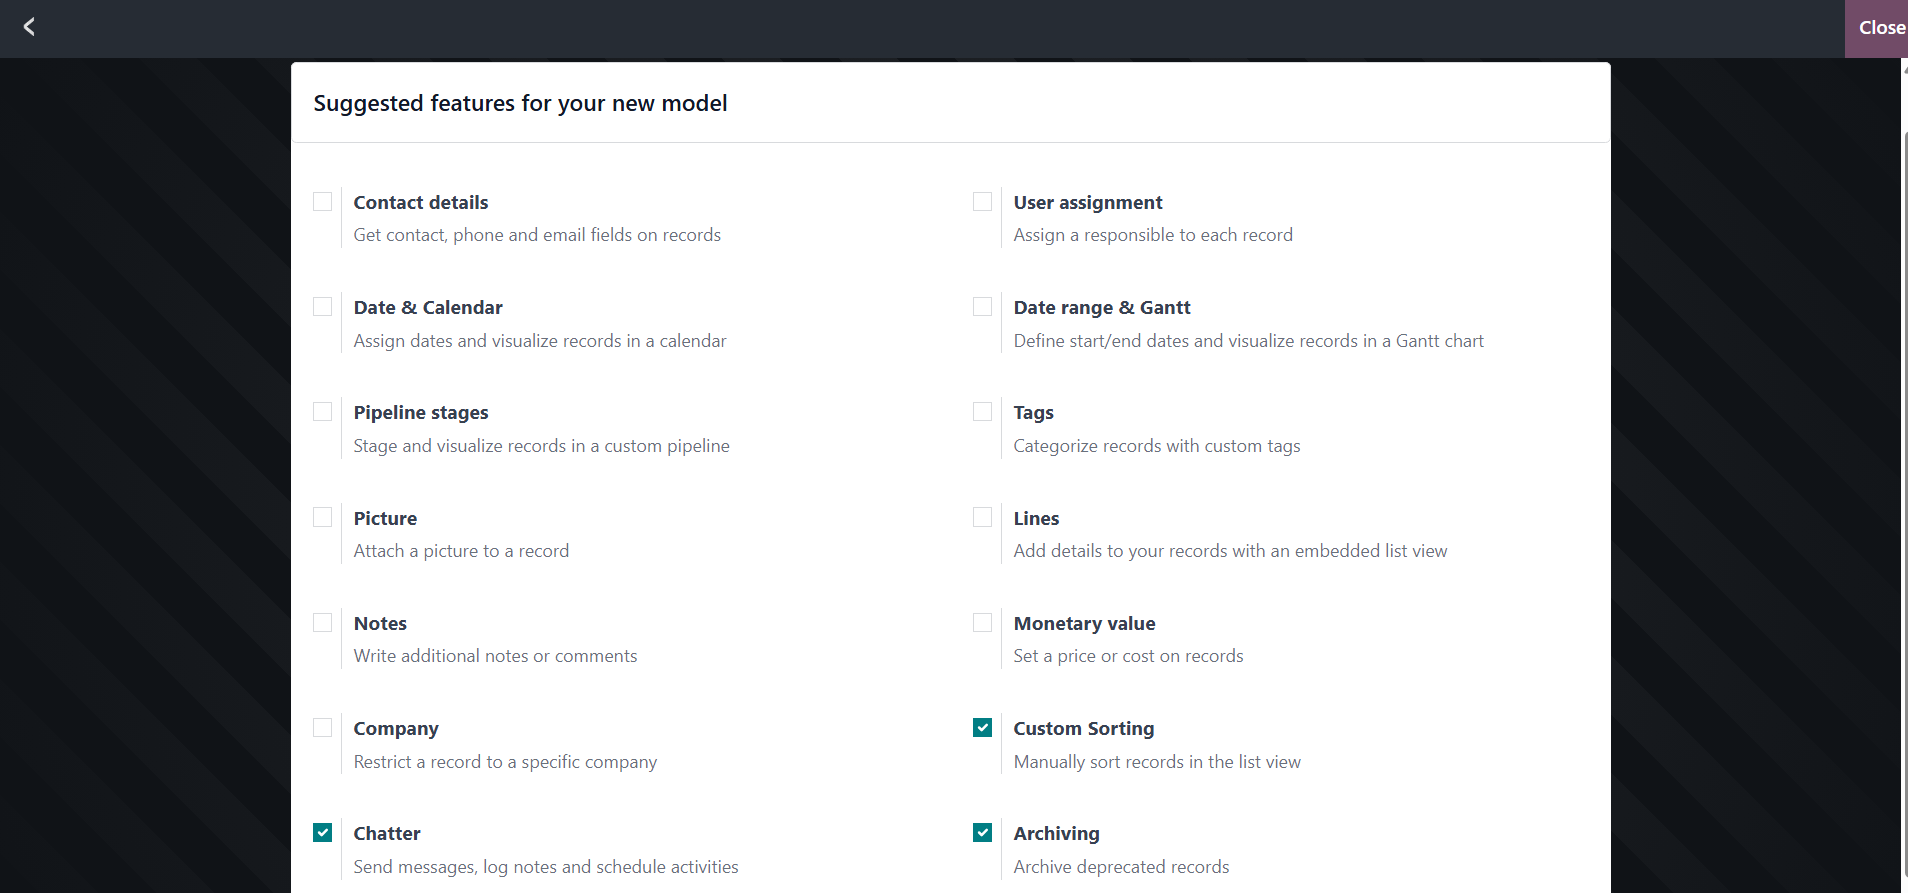
A few recommended features that
can be added to the model's
Configuration menu will be
displayed to you. These
features can be turned on or
off based on the platform's
functional and operational
requirements. Contact data,
User assignment, Date and
calendar, Date range & Gantt,
Pipeline stages, Tags,
Pictures, Lines, Notes,
Monetary value, Company,
Custom Sorting, Chatter,
Archiving, and many other
features can be enabled or
disabled based on the
recommendations provided.
It will be advantageous if the
Contact Details function is
enabled in a specific field
where the Contact Details can
be created for the relevant
menu if the consumer fills
out their information in the
application. Using the User
assignment tool, you may
assign an organization
employee or a dedicated User
to be in charge of keeping
and evaluating the record. By
using the Date & Calendar
box, the user can select the
date that will be shown on
the calendar. The Date range
& Gantt can be used to
express the Start Date and
End Date of the different
elements, as well as a view
of the dates in a Gantt view.
This will enable you to
comprehend the dates clearly.
This will make it easier for you
to comprehend the dates that
have been set. The Pipeline
stage is a field that has
been defined in operations to
indicate the stage of each
defined entry. Information
about the relevant menu item
will be shown, along with the
current stage, which can be
changed by choosing the
stages. Additionally, the
phases of the Pipeline can be
custom-modified according to
operating requirements. For
the purpose of filtering and
grouping, the Tags field,
which may be detailed in the
new application window, will
ensure that the defined
objects have tags linked to
them.
The picture of the pertinent
entry will be shown in the
Picture box, whether it is a
product or contact details.
The Lines section can be used
to identify the pertinent
lines of information or to
describe any aspect. This
could be the terms and
conditions, address lines,
product description, or any
other element related to the
entry being described. Users
and other users will be
alerted while they are
dealing with the relevant
entry if the defined notes on
the entries are described in
the Notes Field. The value of
money function will assist in
defining the cost of the
particular item, be it a
service, product, or entry of
any type. It is a file that
contains the product or
asset's value.
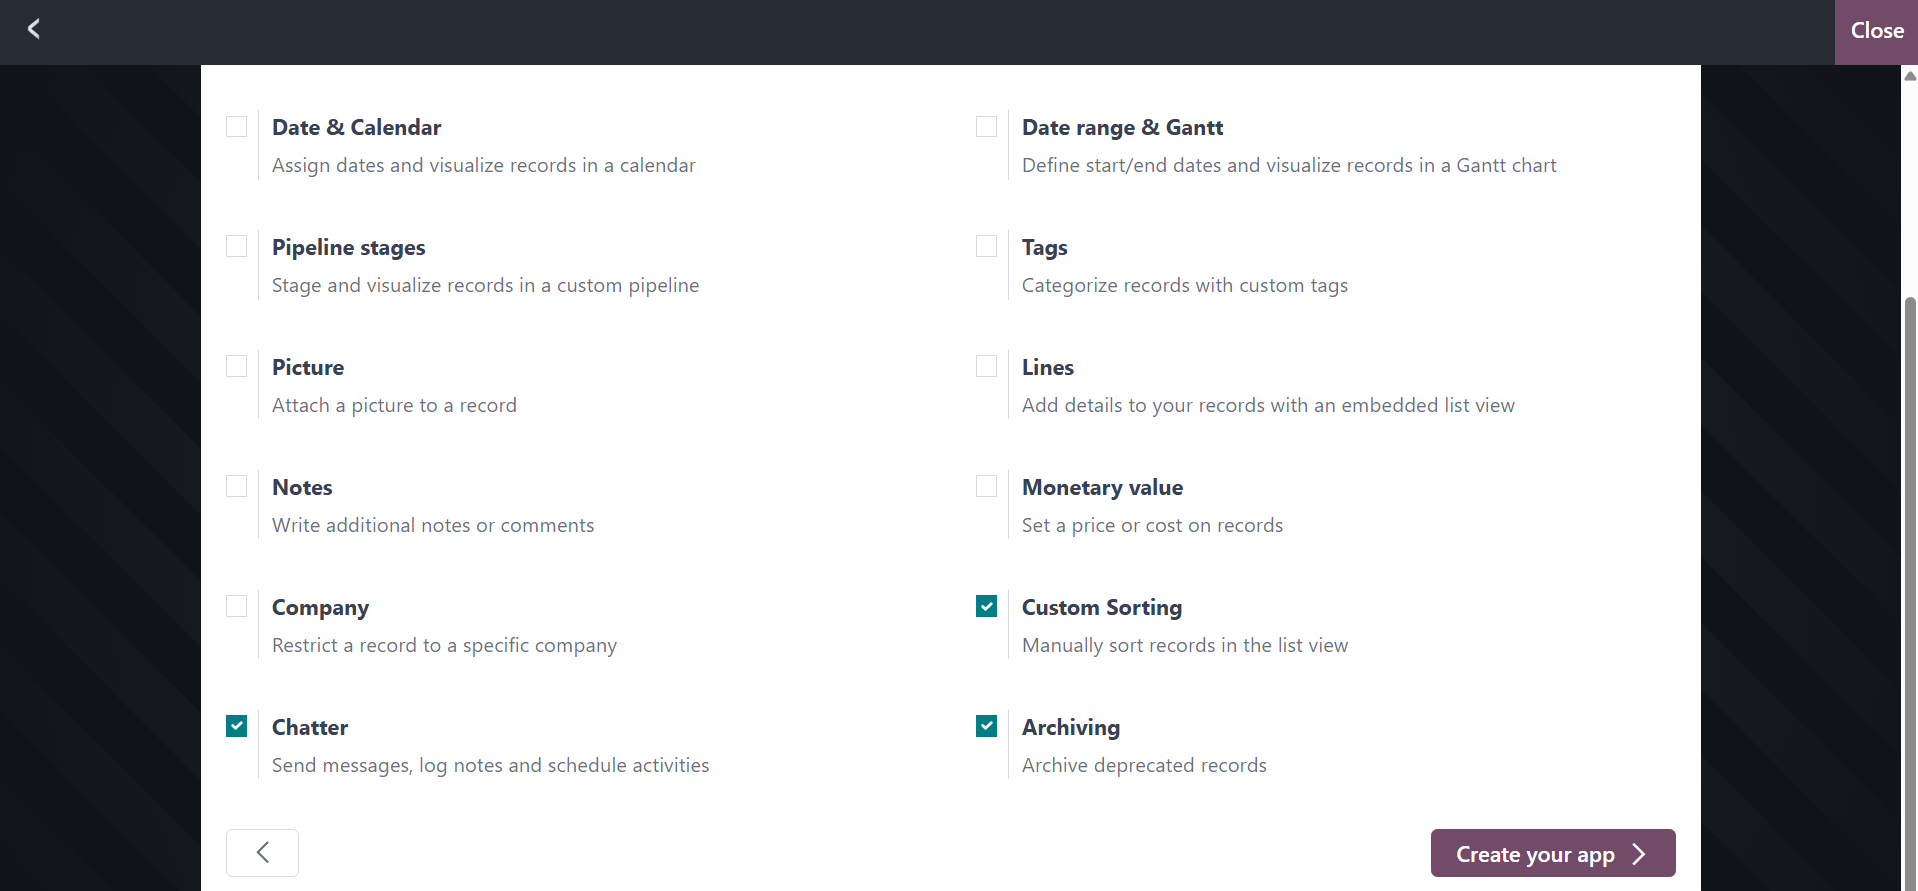
Here you can enable or disable
the features such as Contact
details, User assignment,
Date & Calendar, Date range &
Gantt, Pipeline stages, Tags,
Picture, Lines, Notes,
Monetary value, Company,
Custom Sorting, Chatter,
Archiving, and many more
based on the suggestions
provided.
Suppose the customer fills out
their information in the
application. In that case, it
will be useful to have the
Contact Details feature
enabled in a specific field
where the Contact Details can
be configured for the
relevant menu. You can
designate a certain User,
such as an organization
employee, to be in charge of
keeping and monitoring the
record using the User
assignment tool. The date can
be defined using the Date &
Calendar field, which will
open a calendar for the user
to choose. Along with a view
of the dates in a Gantt view,
the Date range and Gantt will
be useful in describing the
start and end dates of the
corresponding aspects.
This will assist you in gaining a
clear understanding of the
dates that have been
established. The pipeline
stage is a defined field in
operations that shows the
stage of the corresponding
defined entries. By choosing
the phases, you can alter the
current stage, which is shown
by the information about the
item in the corresponding
menu. Additionally, the
pipeline's phases can be
specifically tailored to meet
operational requirements.
In order to guarantee that the
entries being specified have
tags attached to them, which
will be useful for both
filtering and grouping, the
Tags field can be explained
in the new application
window. The image of the
relevant entry, such as a
product or contact details,
should be entered in the
Picture area. A description
of any aspect, such as the
product description, address
lines, terms and conditions,
or any other element
pertaining to the entry being
described, can be defined in
the Lines section.
When working with a particular
entry, all other users can
benefit from the information
provided by the defined notes
on the entries that can be
described in the Notes Field.
The Monetary value will
assist in defining the price
of the relevant entry,
whether it be a product,
service, or entry of any
kind, and is filed where the
value of the asset or product
can be stated.
You can choose the firm the
corresponding record is
linked with in the Company
Field. The operations of the
firm, where several companies
are operating, will benefit
from this. The menu where all
the entities are defined will
benefit from the Custom
Sorting feature of the items
being defined. Additionally,
the corresponding Custom
Sortings can be saved and
changed as needed. Enabling
Chatter capability will
guarantee that users or
customers have a Chatter area
where they can interact with
one another. By unarchiving
it, the Archiving field will
guarantee that the
corresponding items are
archived so they can be used
at a designated time of
operation.
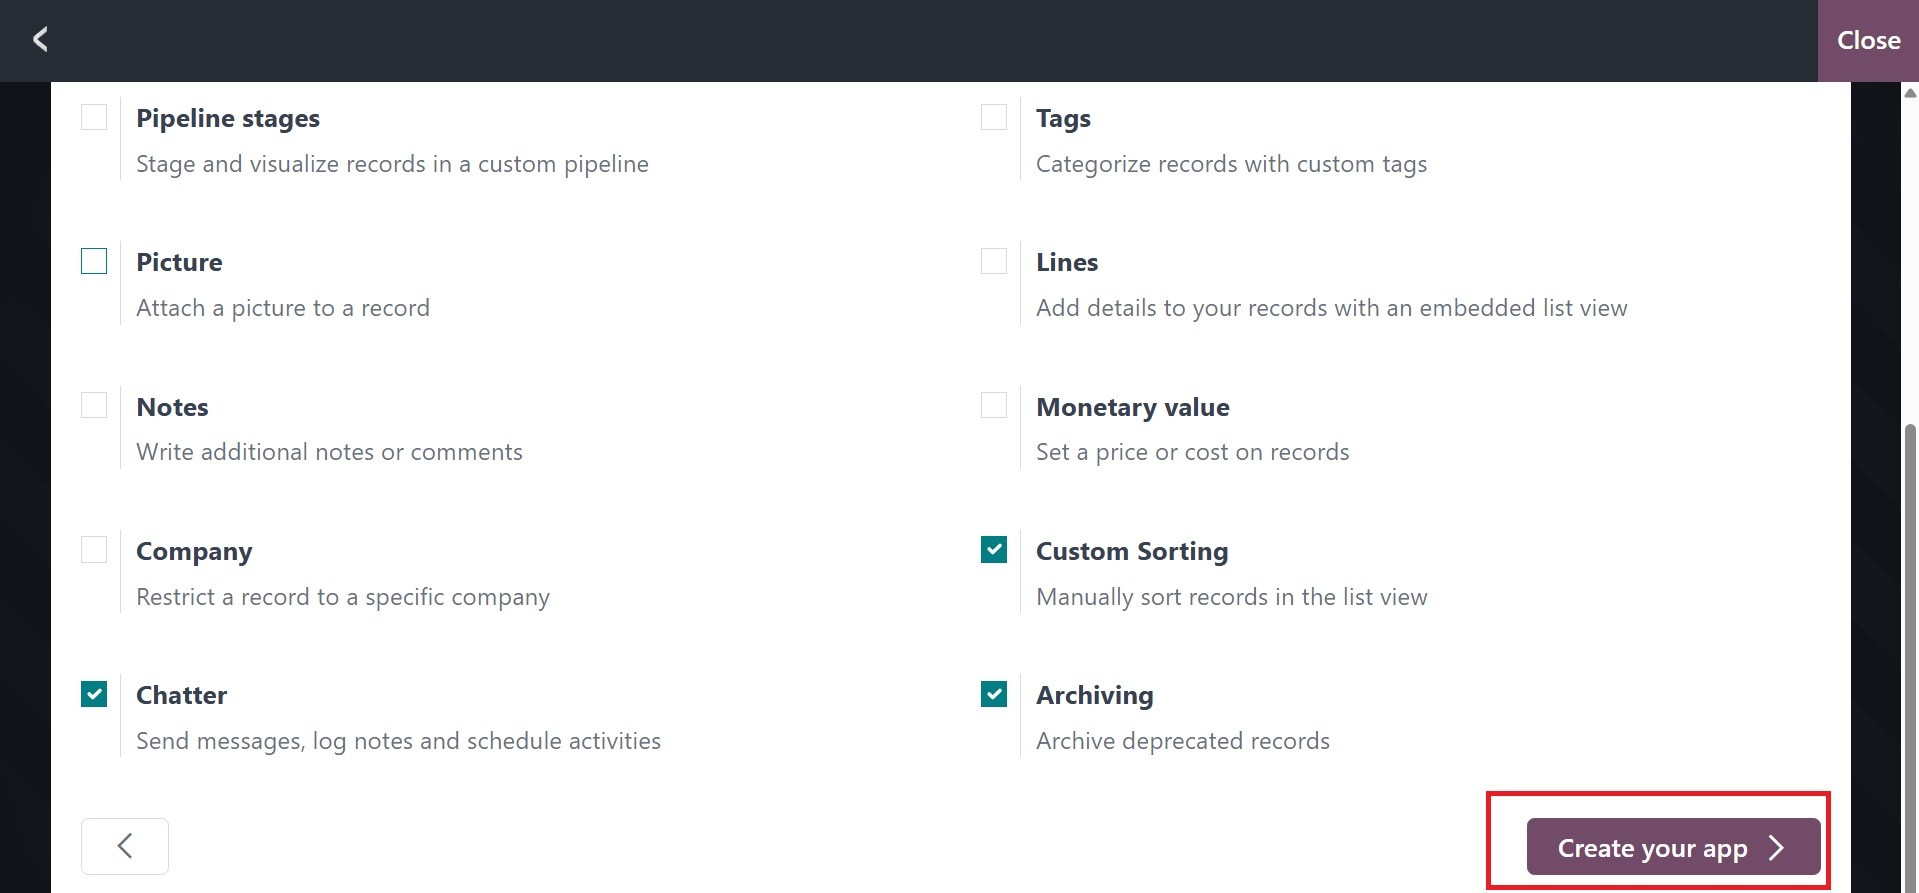
After the configuration-based
choices have been determined
and enabled, the next step
will involve the construction
of the new applications. The
Create your app option, shown
in the above image, is one
that you can select. The
app's configuration window
will open, as seen in the
screenshot that goes with it,
with the first model.
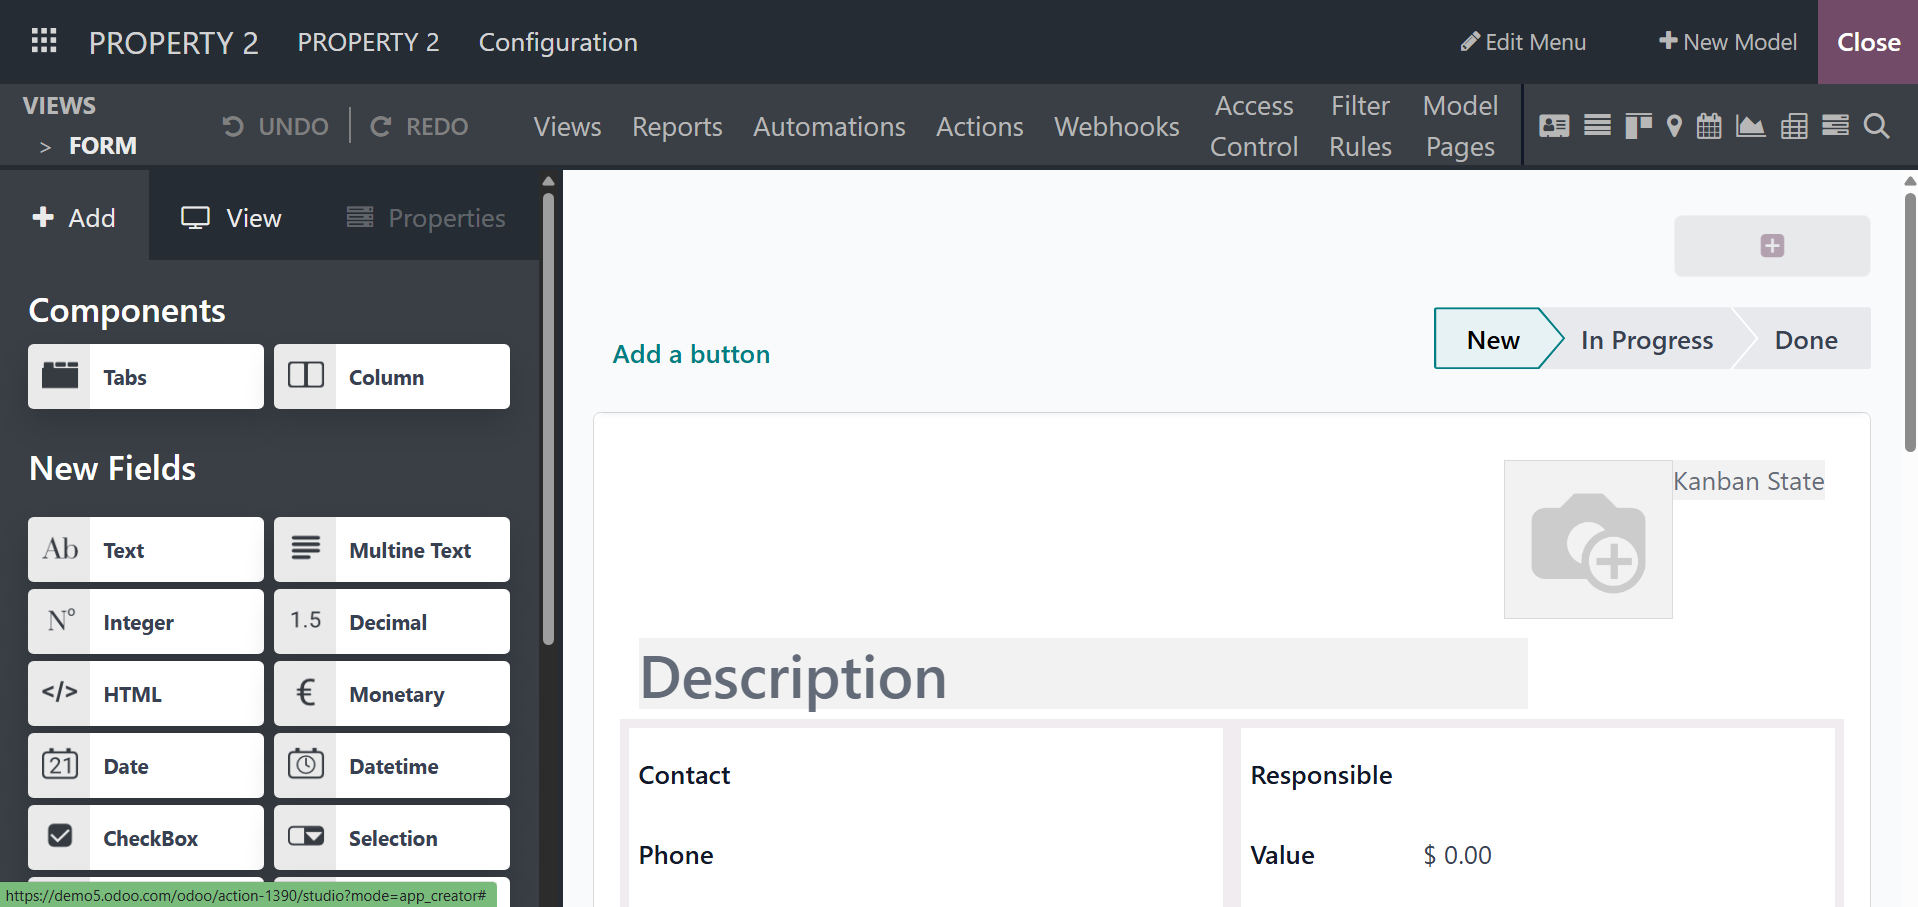
Depending on the activity's
needs, you might choose to
add the field here. The first
step involves selecting,
dragging, and dropping the
Tabs or Columns required for
the application's operations
into the Application window's
preferred location, as seen
on the screenshot's right
side. You can add new fields
by selecting the relevant
icon from the menu and then
dragging and dropping it to
the desired location within
the application. You can view
and utilize all of the
established fields based on
the necessary modifications
if you have chosen to use an
existing model for your
application.
Furthermore, the operation phases
of the menu of the relevant
application can be changed in
accordance with requests, as
can the Log features of the
menu, which are displayed on
the menu's lower side.
The + Add functional menu allows
you to add new fields to the
program window based on your
needs. You can add Tabs and
Columns based on the
application's first
functional requirements.
Several pieces of information
can be incorporated into the
developed application with
the help of the tabs.
Additionally, the
application's options can be
arranged on the appropriate
tabs based on functional and
operational requirements.
These could be specially
designed tabs, depending on
the program's requirements
and usage.
The different sections in each
application menu can also be
explained by creating a
number of operations columns.
This will also result in a
unique layout and positioning
of the related options in the
tabs and menus. Furthermore,
the Columns can be configured
in accordance with the
operating requirements of the
application and the intended
uses.
After the Tabs and Columns have
been explained, dragging and
dropping the relevant one
onto the application's
operations area will add it.
The operational aspects will
be based on your functional
requirements, thanks to the
additional configuration
settings for the applicable
Tab and Column. Lastly, the
fields must be described.
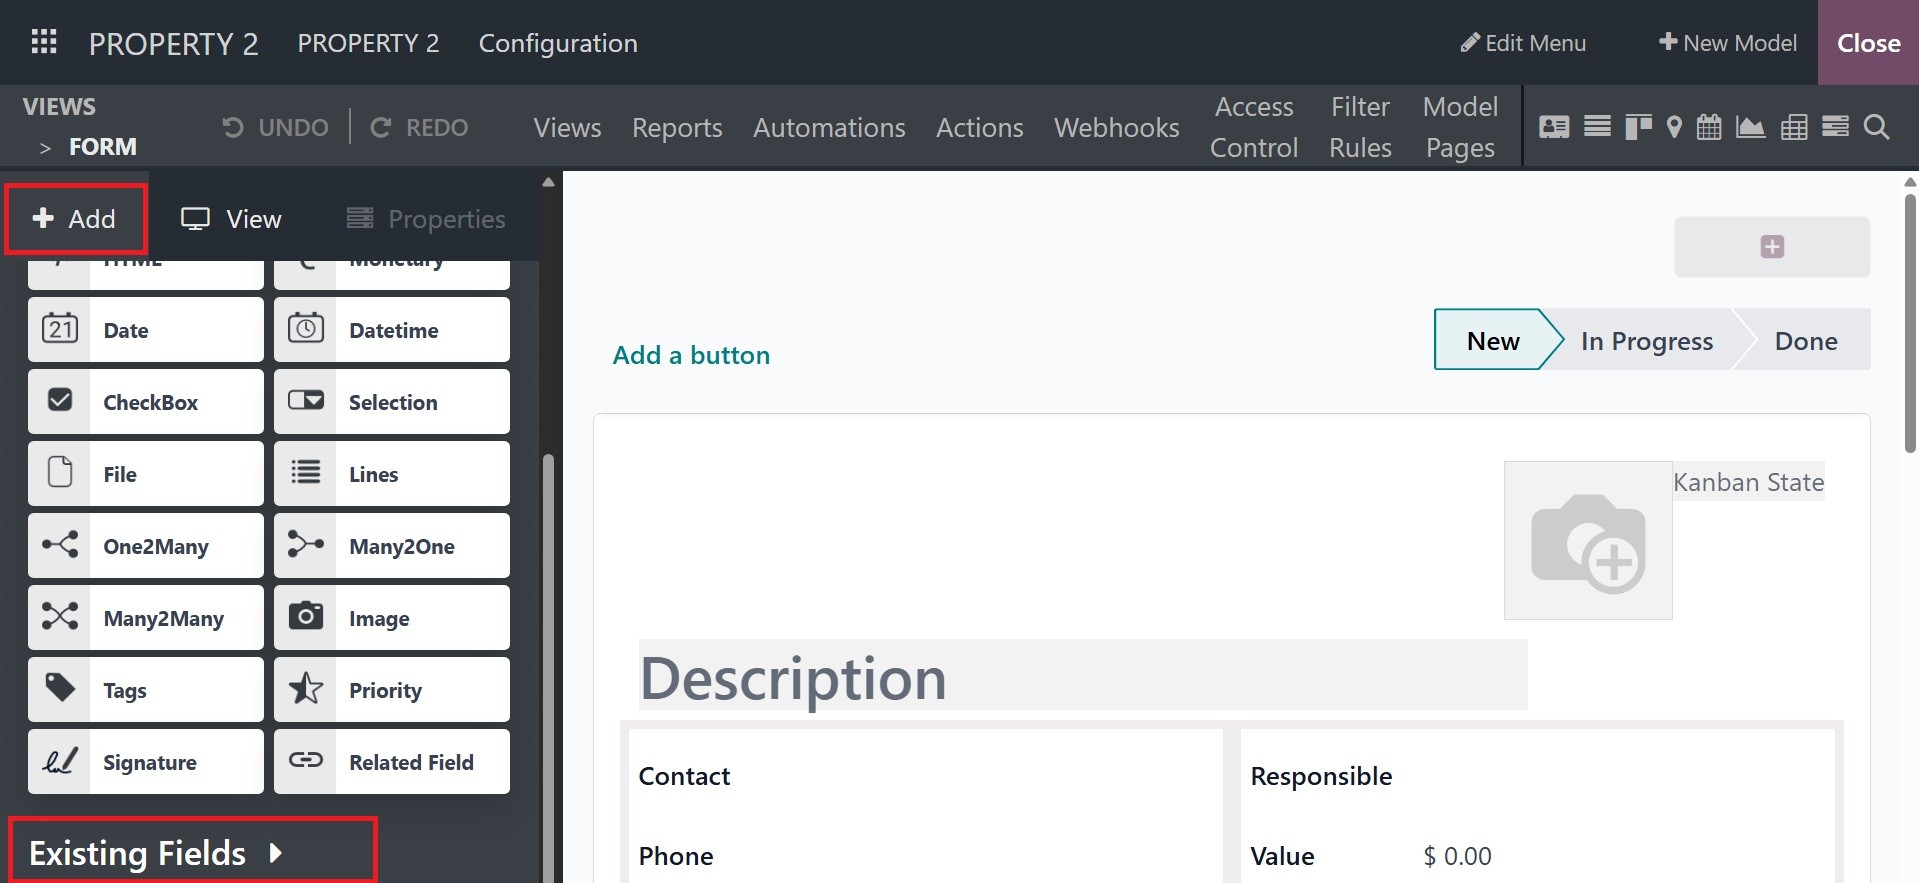
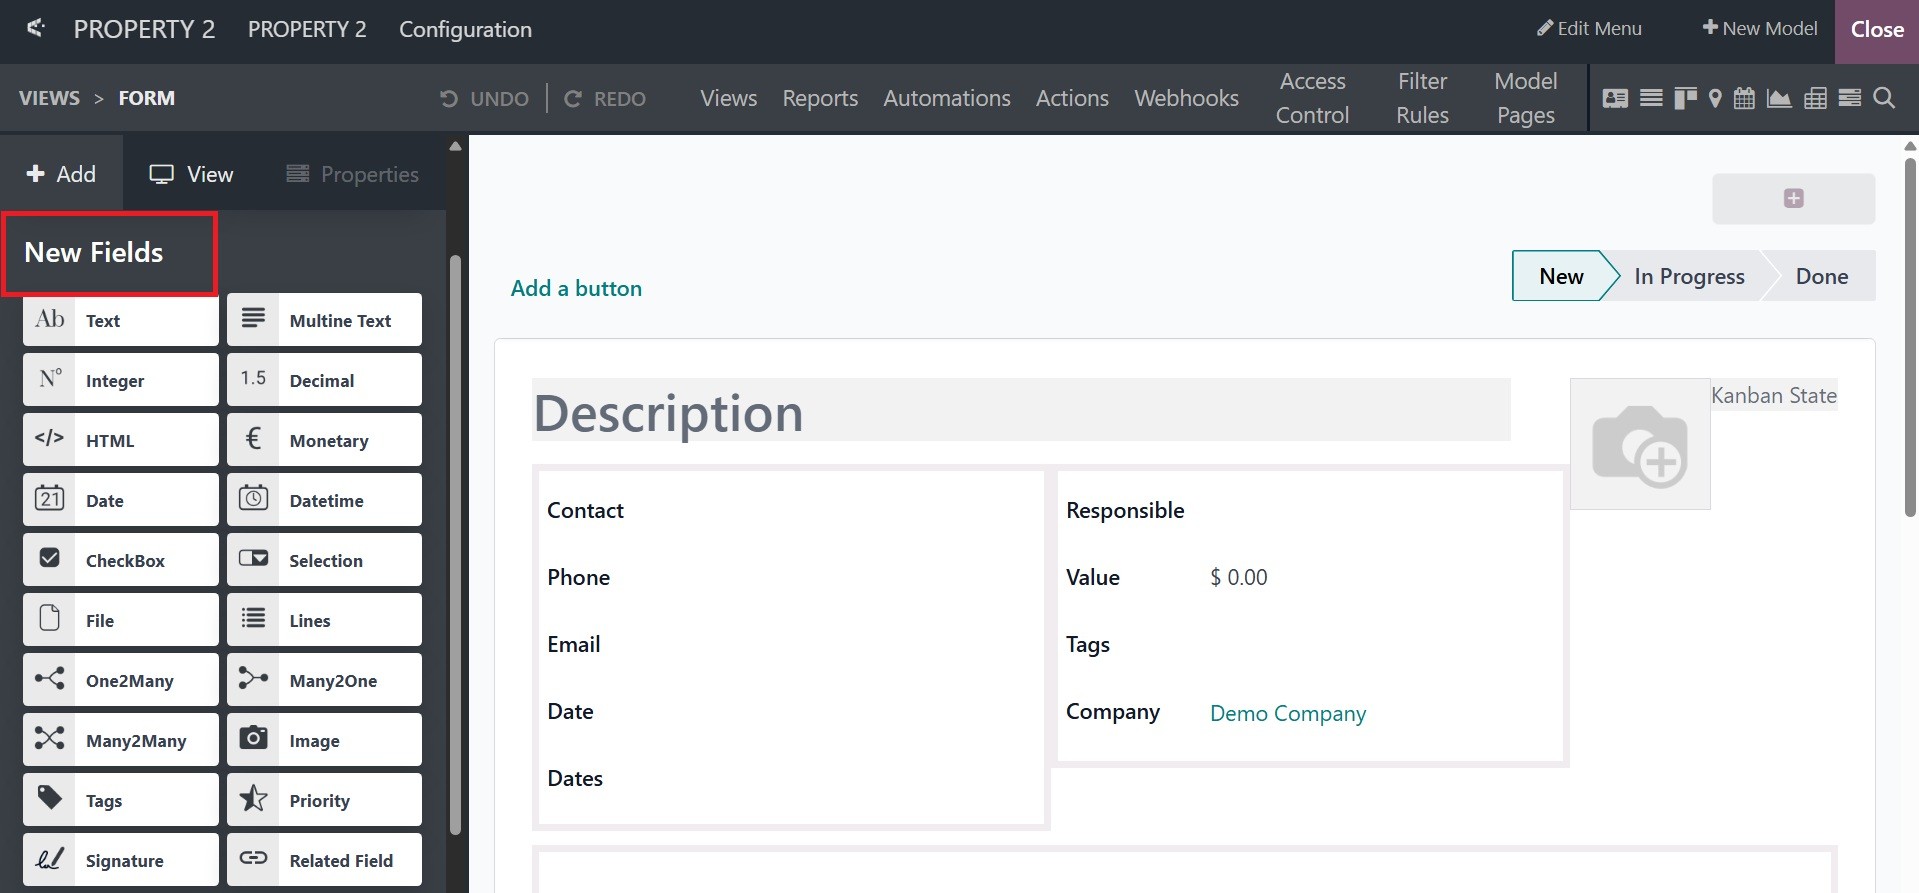
Here, you can create new
fields based on preexisting
ones, add new fields, and
clarify existing fields. All
of the fields not specified
in the application will be
displayed in the New Fields
section. The Existing Fields
are those that have already
been defined in the model you
have selected, if the model
is already in the Studio
application.
There won't be any Existing
Fields to be displayed,
though, if you choose a new
model to be used. You can
specify and use many fields
depending on the functional
and operational requirements
of the application by simply
selecting each Field and
dragging and dropping it to
the proper area in the
application window. You can
specify fields like Image,
Tags, Priority, Signature,
Related Fields, Text,
Multiline Text, Integer,
Decimal, Html, Monetary,
Date, Date & Time, Check Box,
Selection, File, One2many,
Many2one, Many2many, and many
more.
Image: displays an image using a
URL. The value cannot be
edited manually, but a
default value can be set.
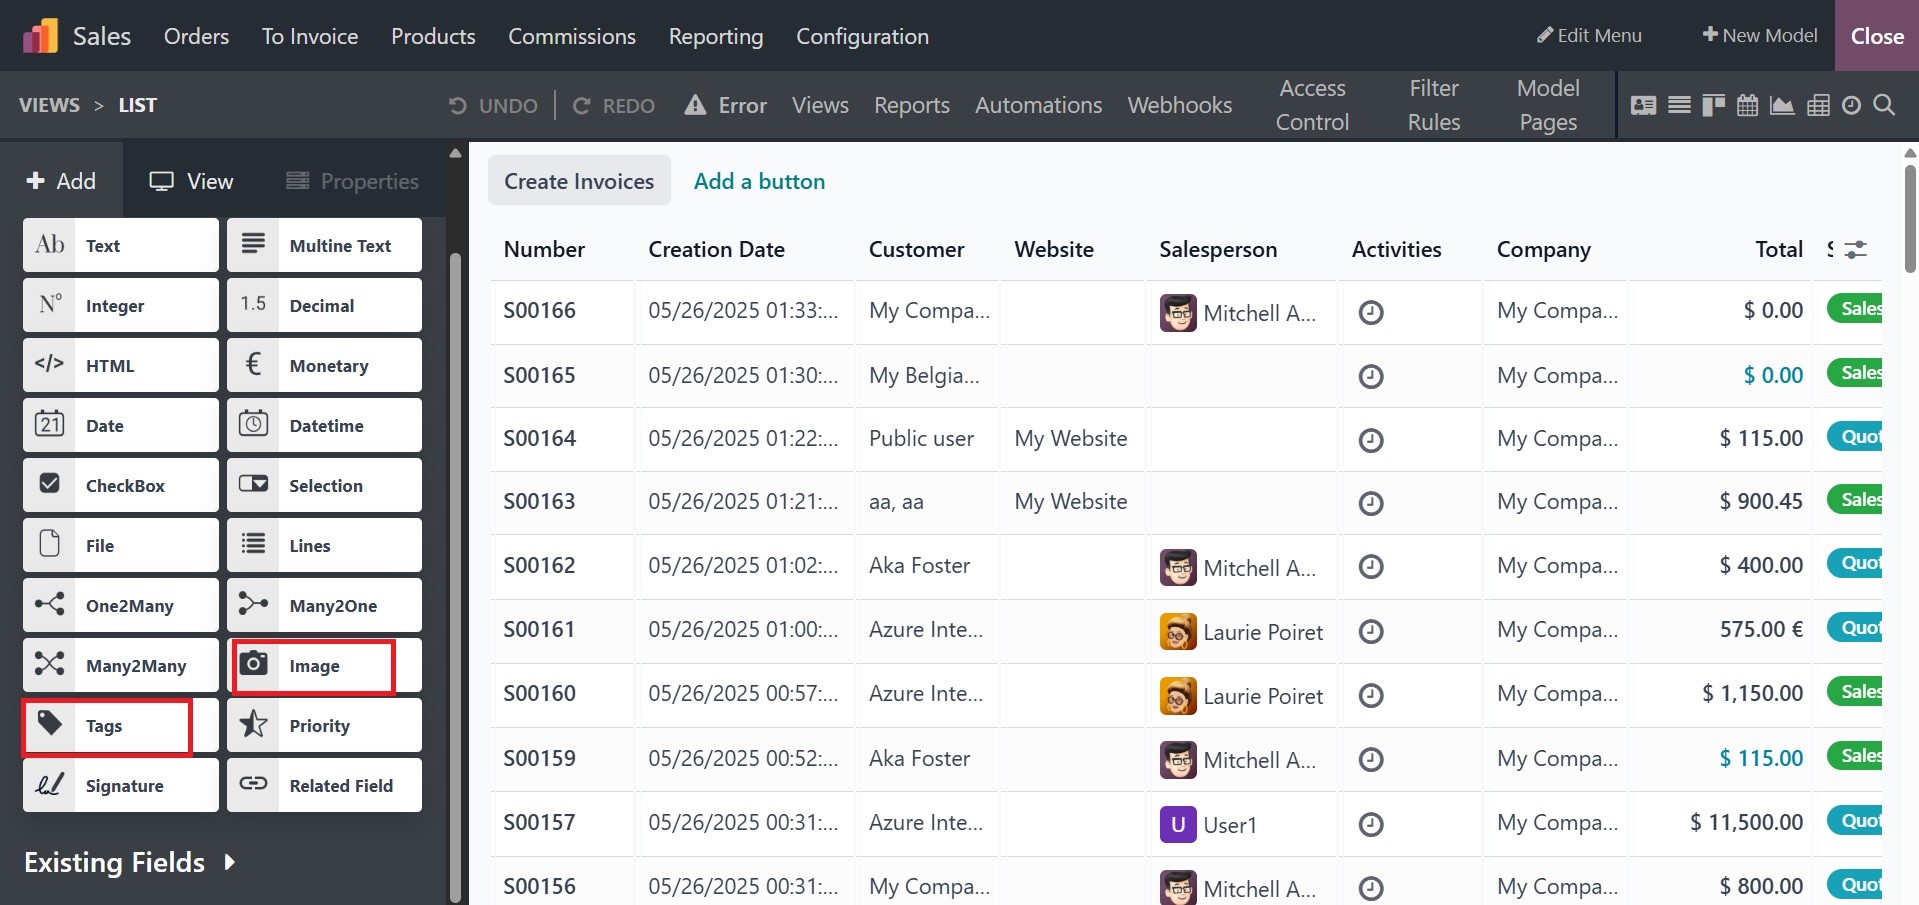
Tags: Tags in the Odoo Community
help categorize discussions,
making it easier to find
relevant topics. Below, you
can see the image and tags
added using the options.

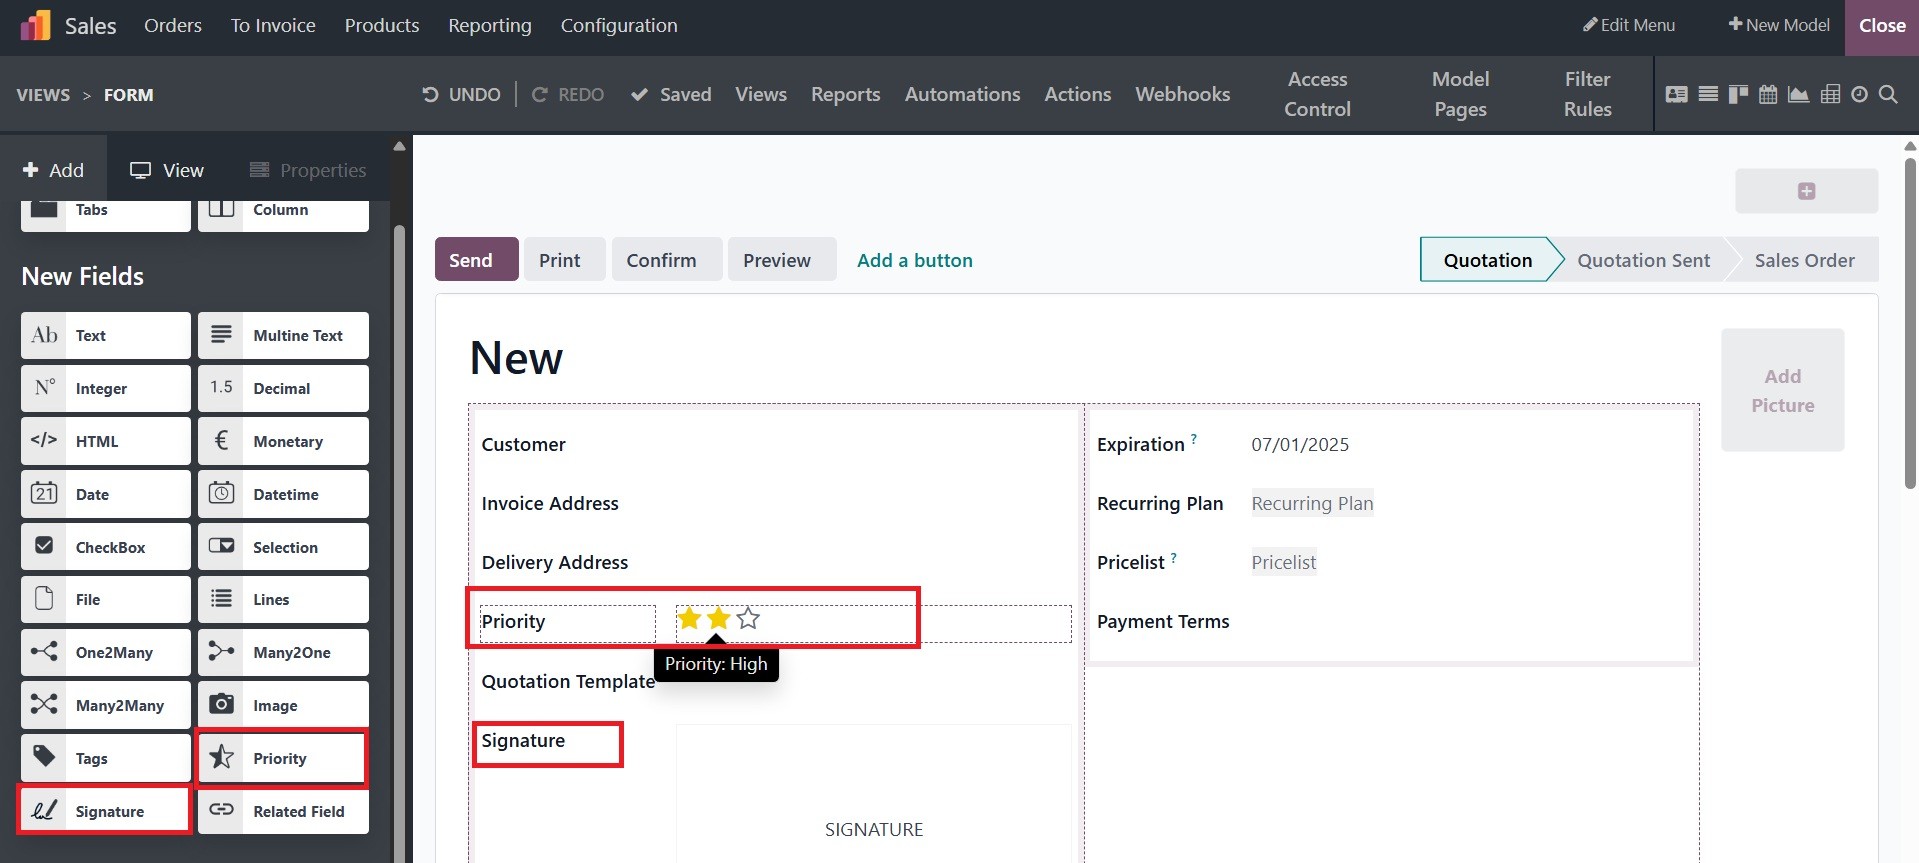
Priority: The Priority field is
used to display a three-star
rating system, which can be
used to indicate importance
or satisfaction level.
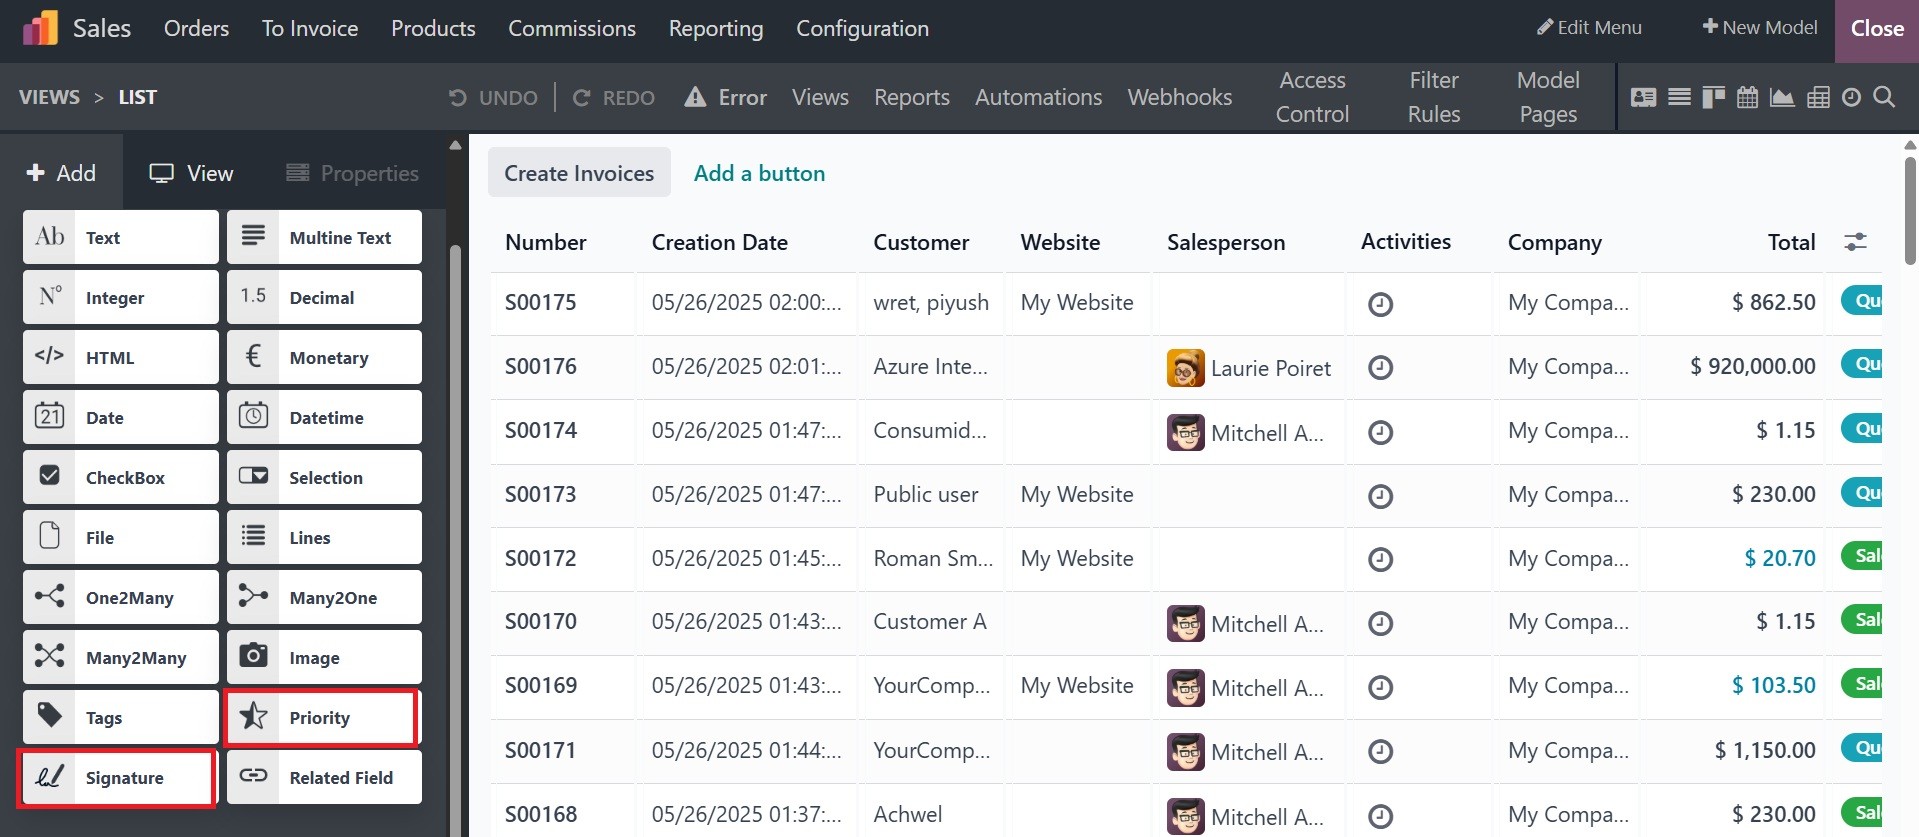
Signature: The Sign field is used
to sign the form
electronically. This field
type is a File field with the
Sign widget selected by
default. Consequently, the
File, Image, and PDF Viewer
widgets have the same effects
as described under File.
below options added can be
seen in the given screenshot
below.
Related Field: A Related Field is
not a relational field per
se; no relationship is
created between models. It
uses an existing relationship
to fetch and display
information from another
record.
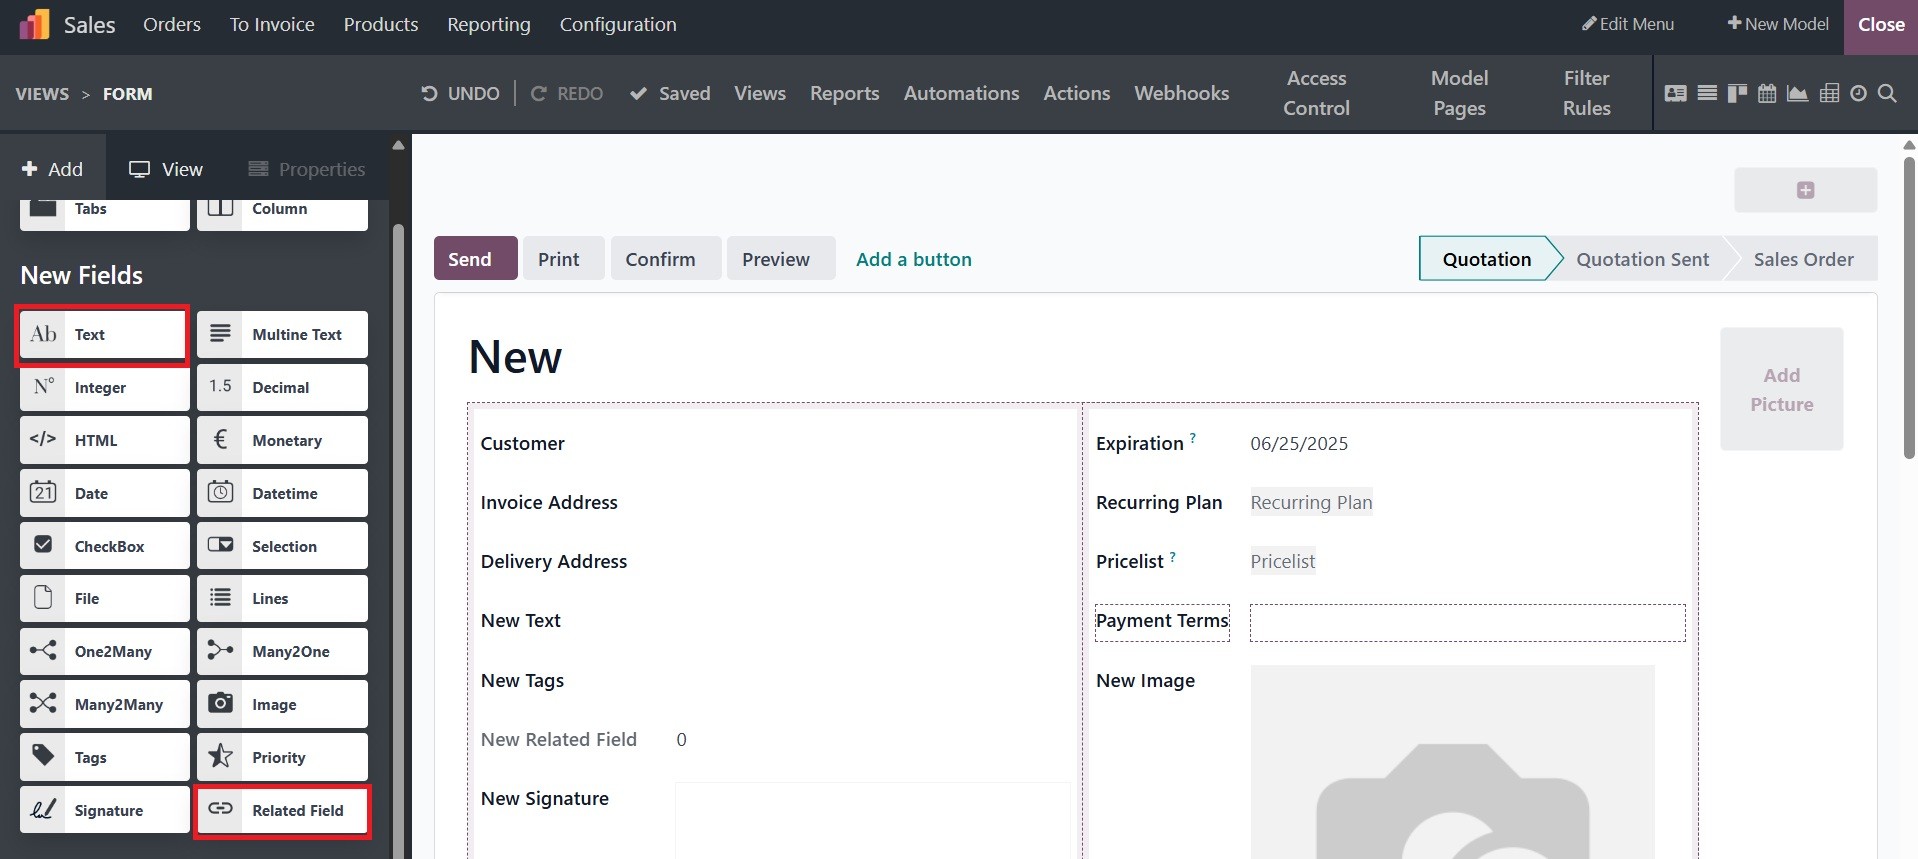
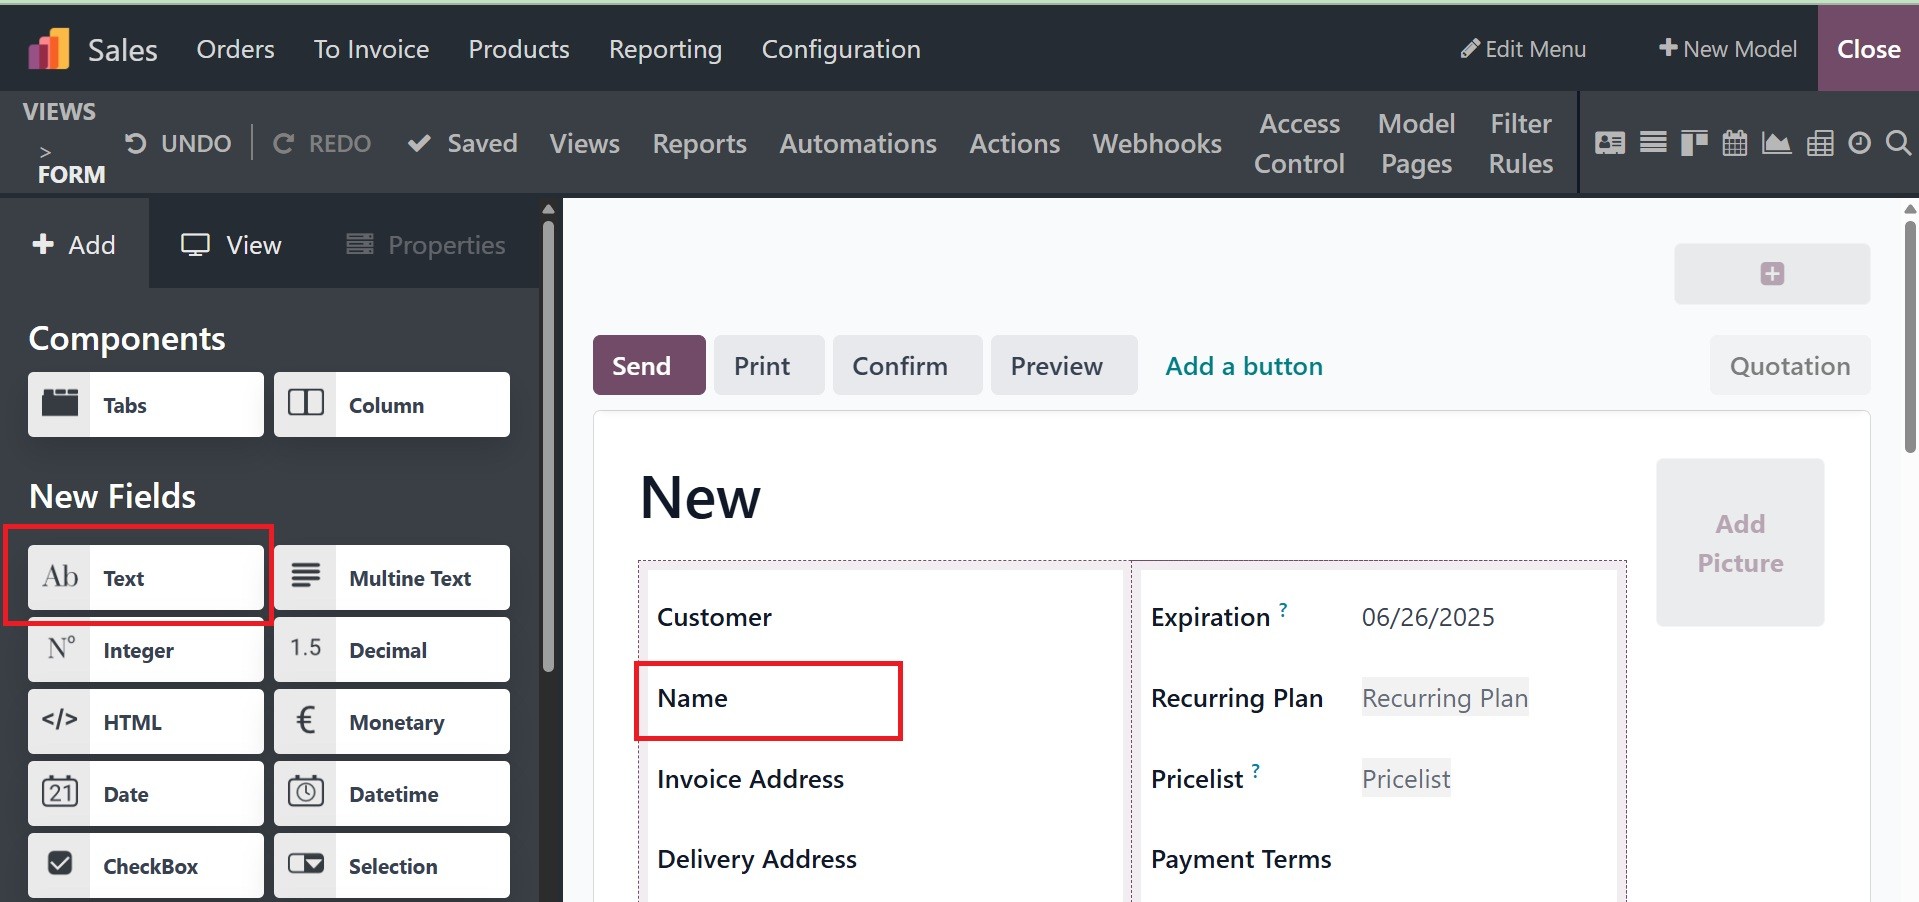
Text: The Text field is used for
short text containing any
character. One text line is
displayed when filling out
the field. Below, you can see
the text option added.
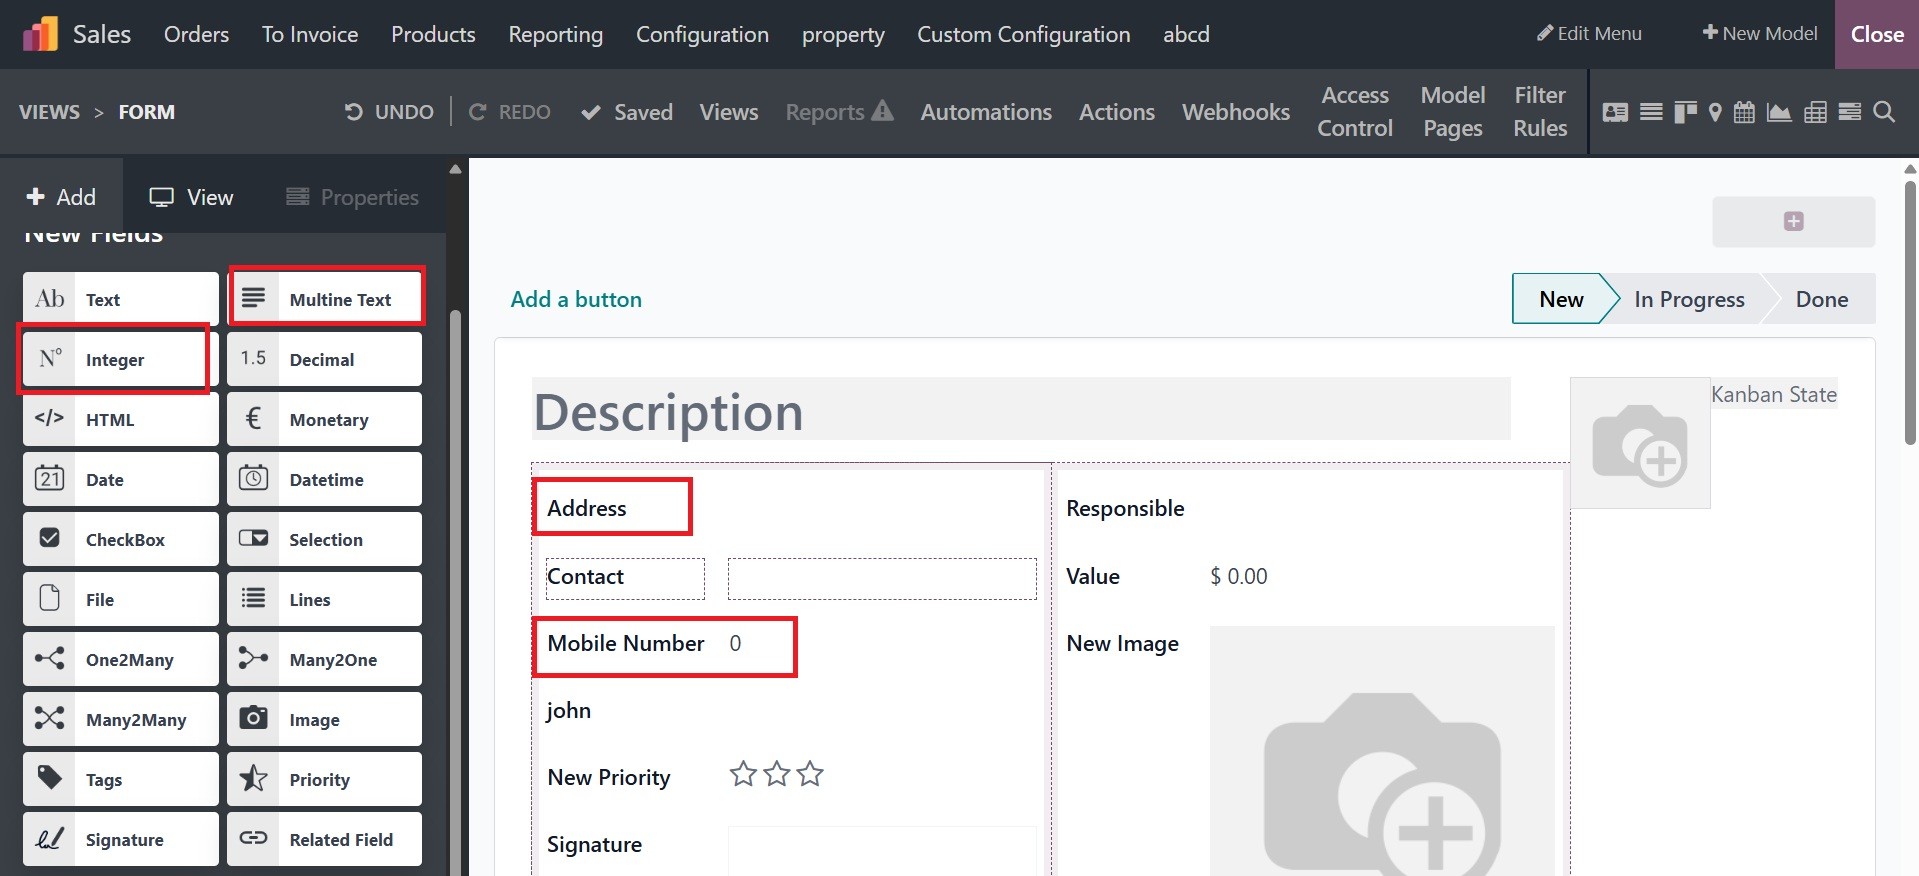
The Multiline Text field is used
for longer text containing
any type of character. Two
text lines are displayed on
the UI when filling out the
field.
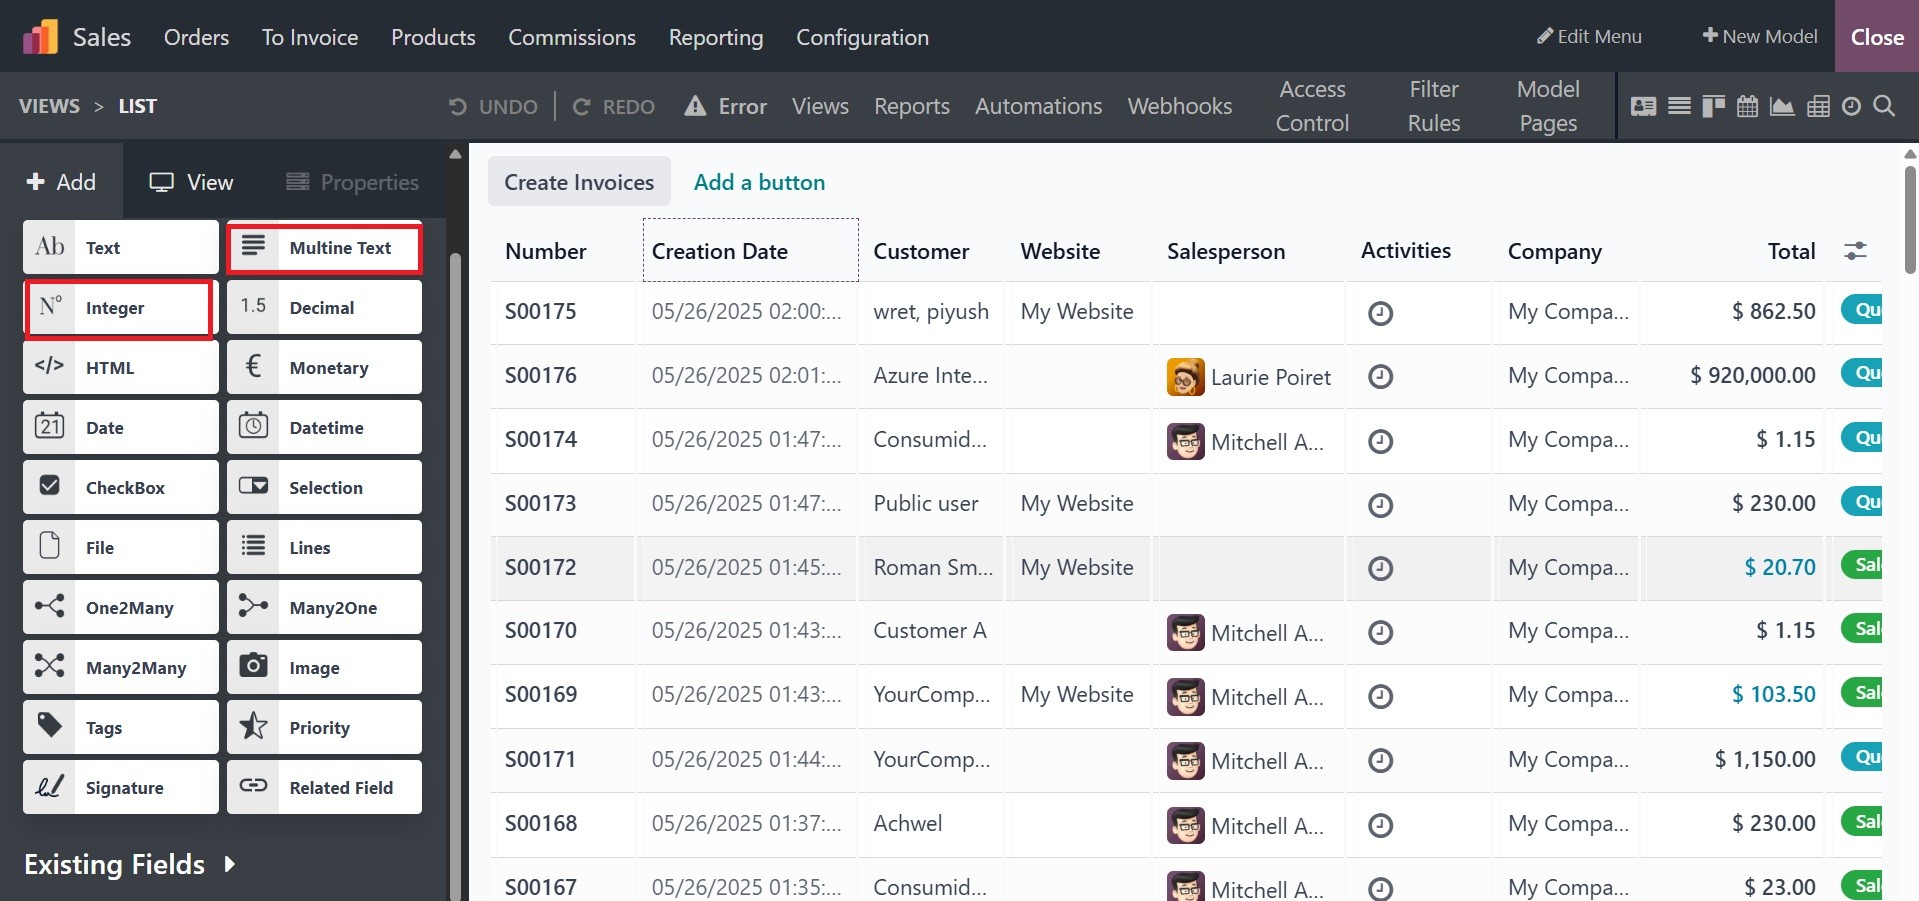
The Integer field is used for all
integer numbers. These
options can be viewed in the
screenshot below.
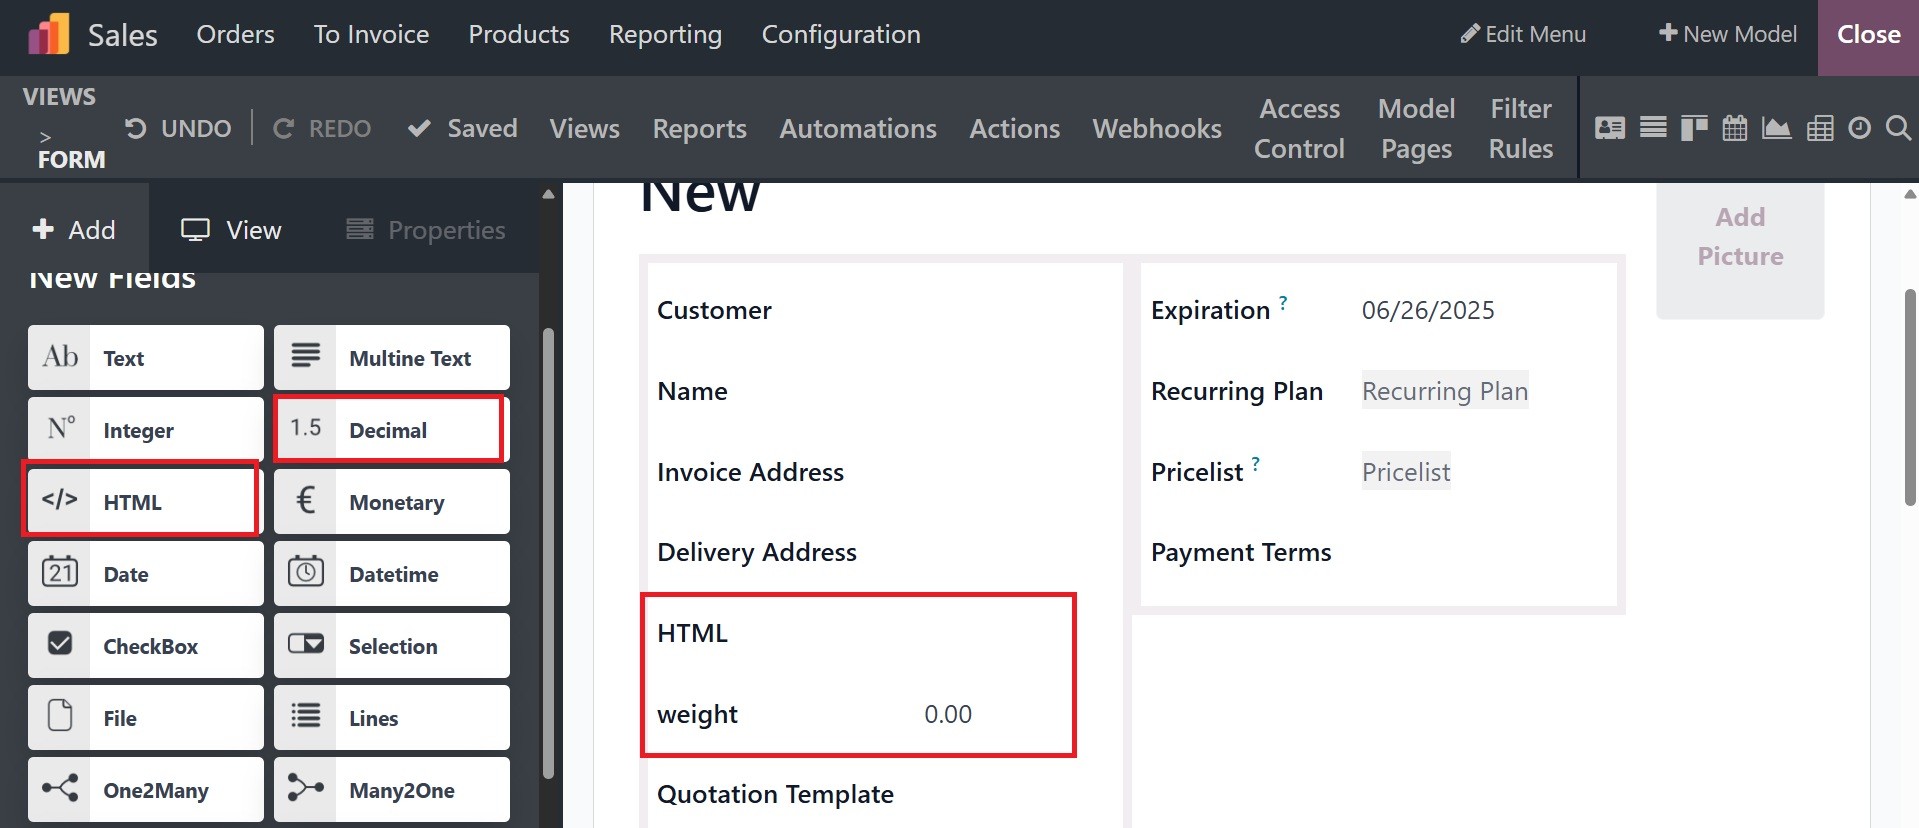
The Decimal field is used for all
decimal numbers.
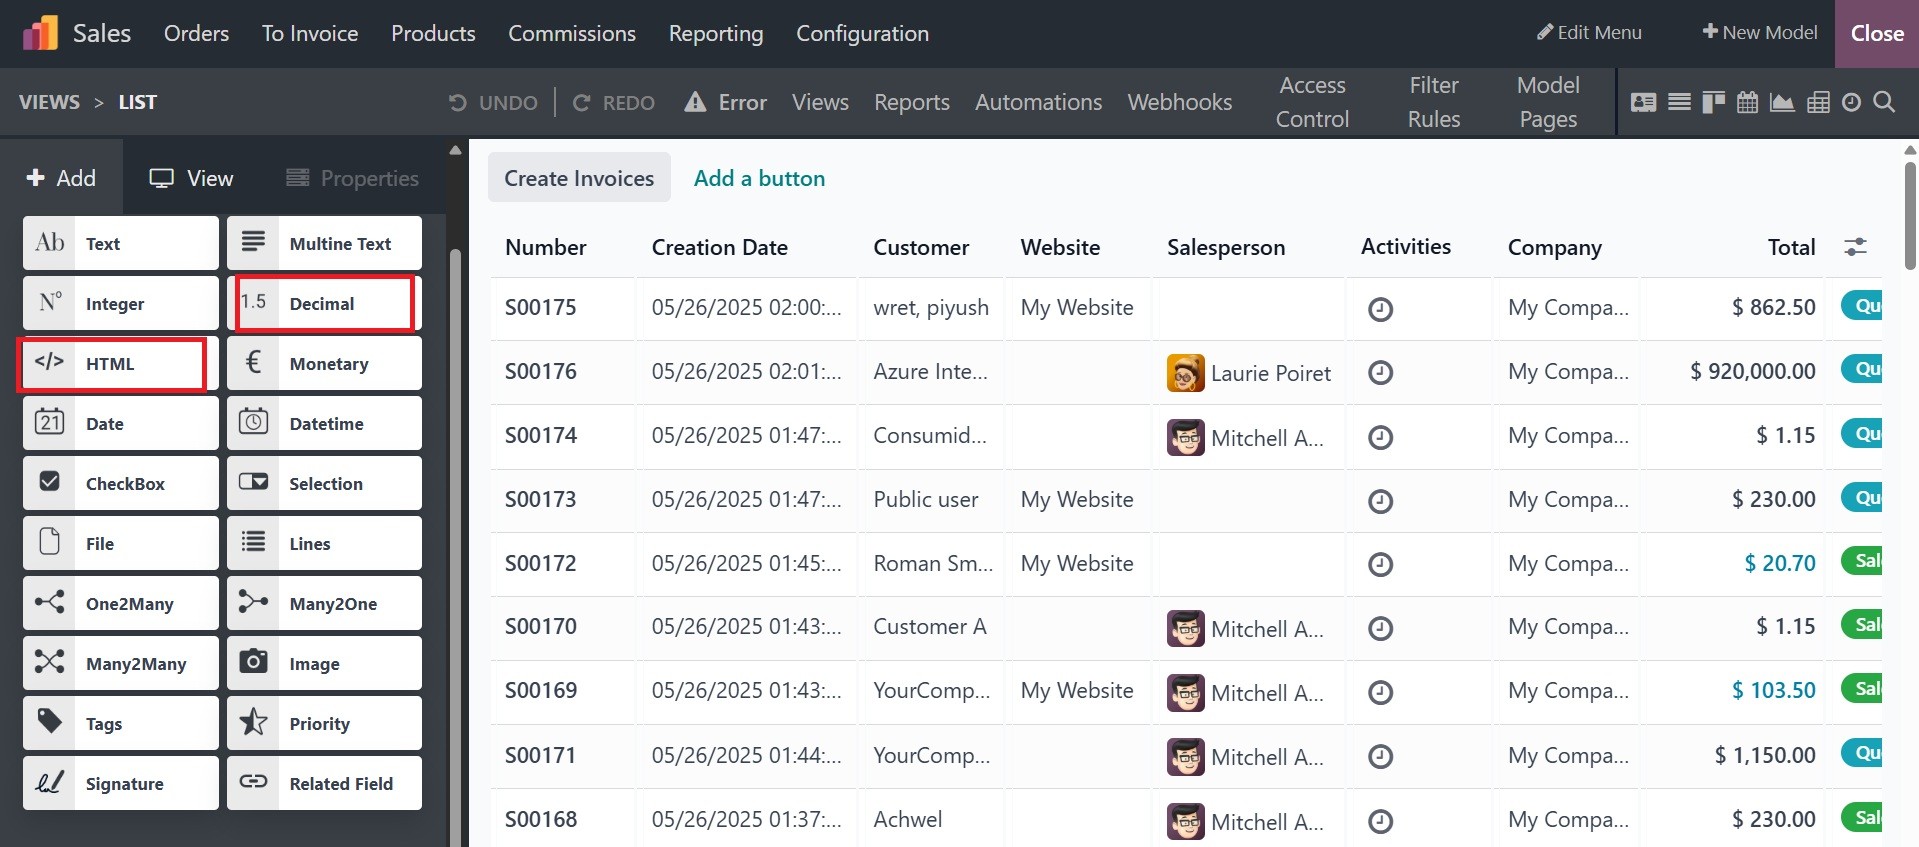
The HTML field is used to add
text that can be edited using
the Odoo HTML editor.
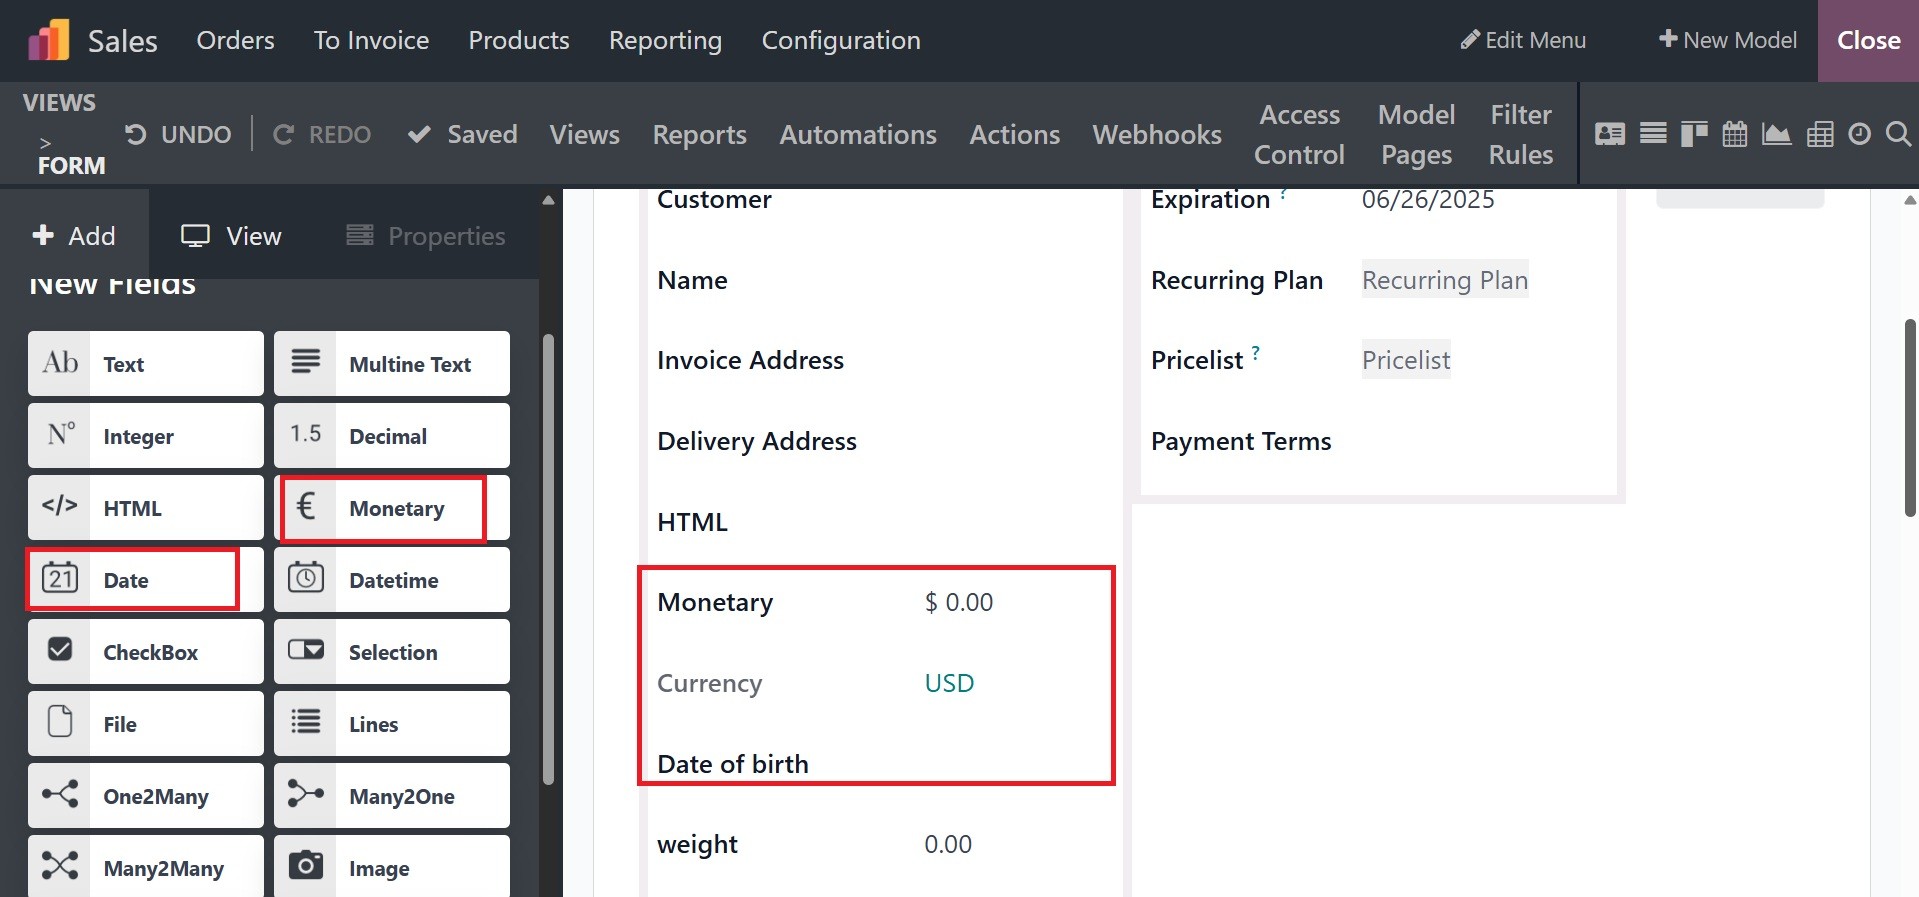
The Monetary field is used for
all monetary values.
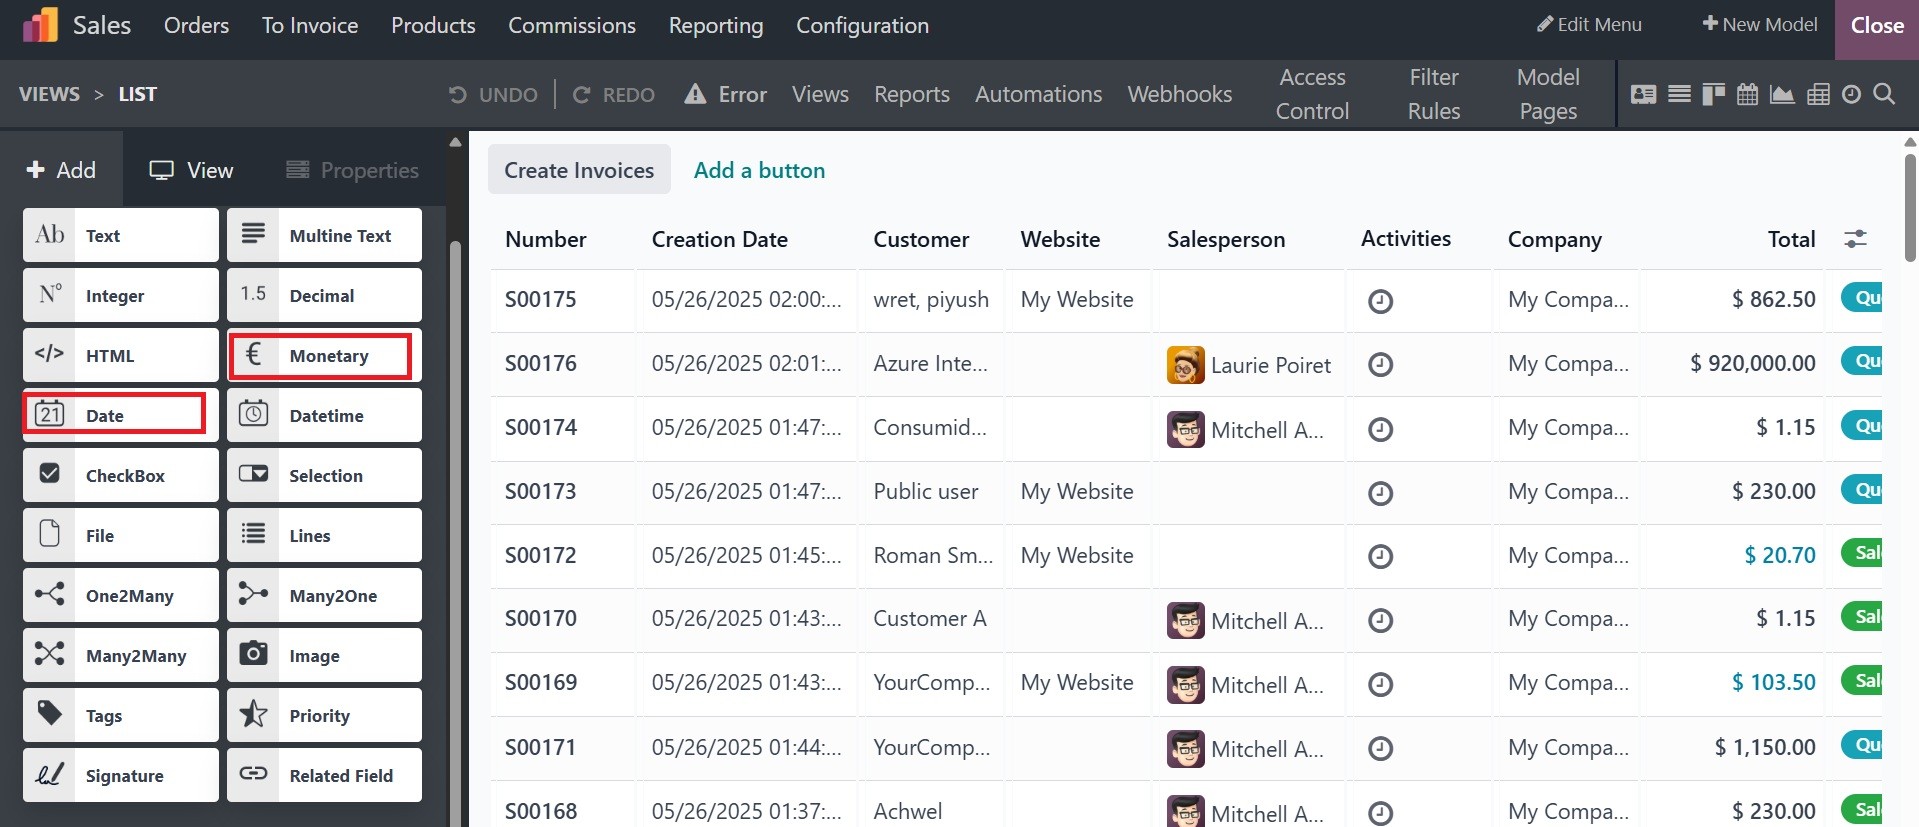
The Date field is used to select
a date on a calendar.
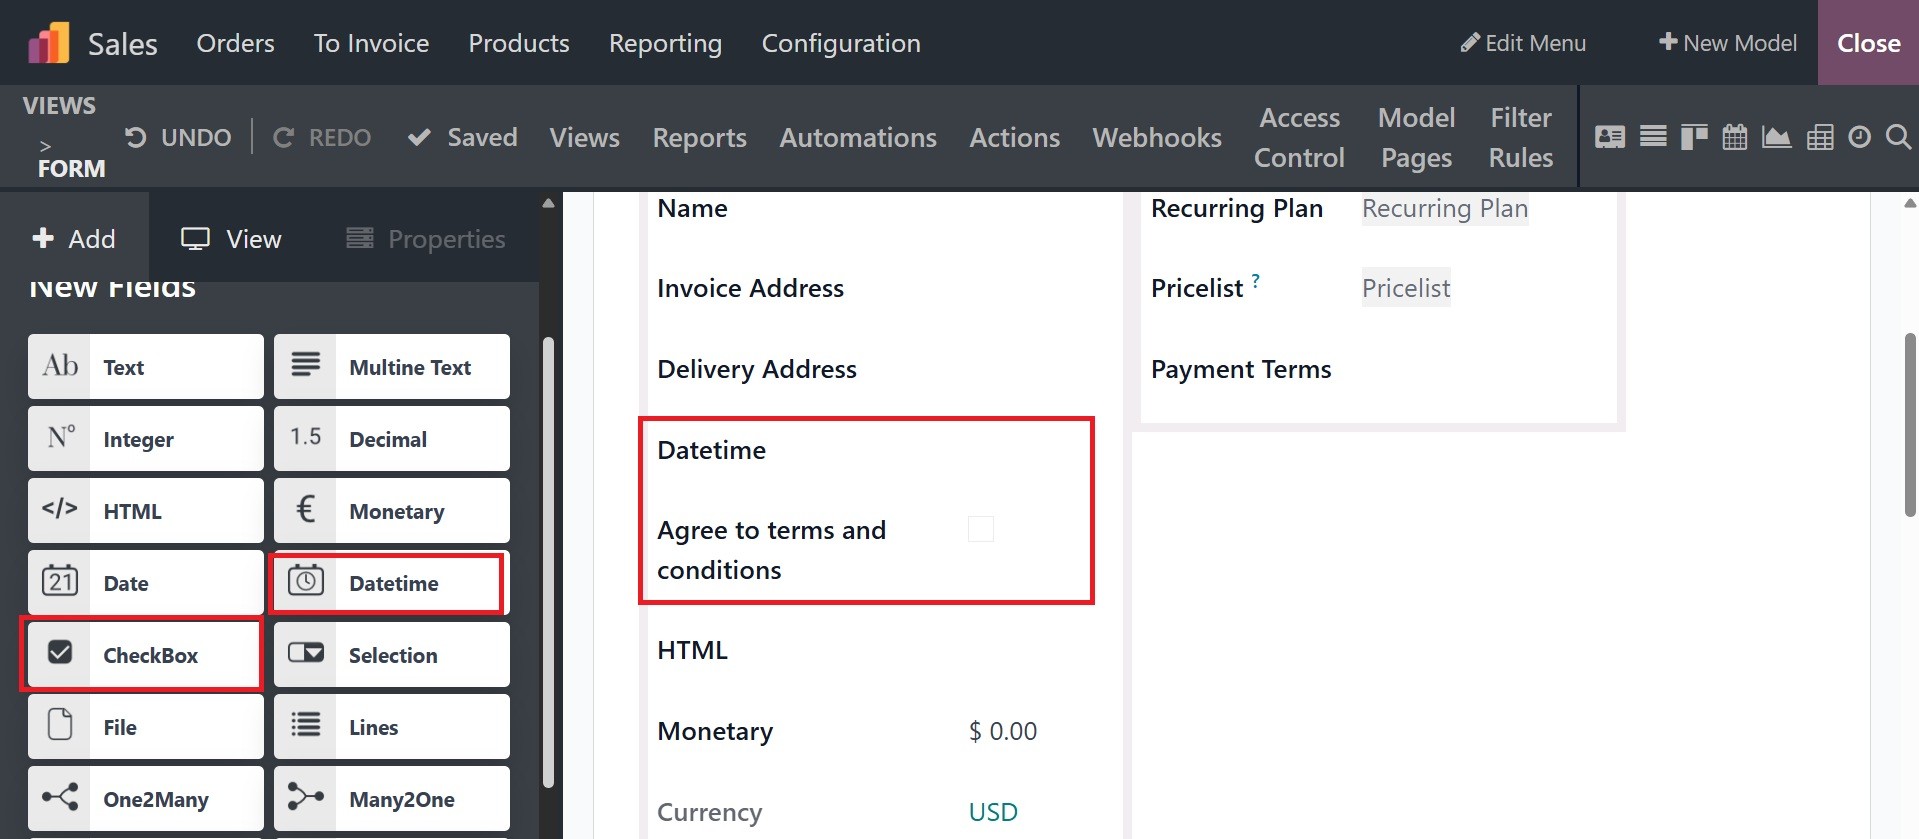
The Date & Time field is used to
select a date on a calendar
and a time on a clock. The
user’s current time is
automatically used if no time
is set.
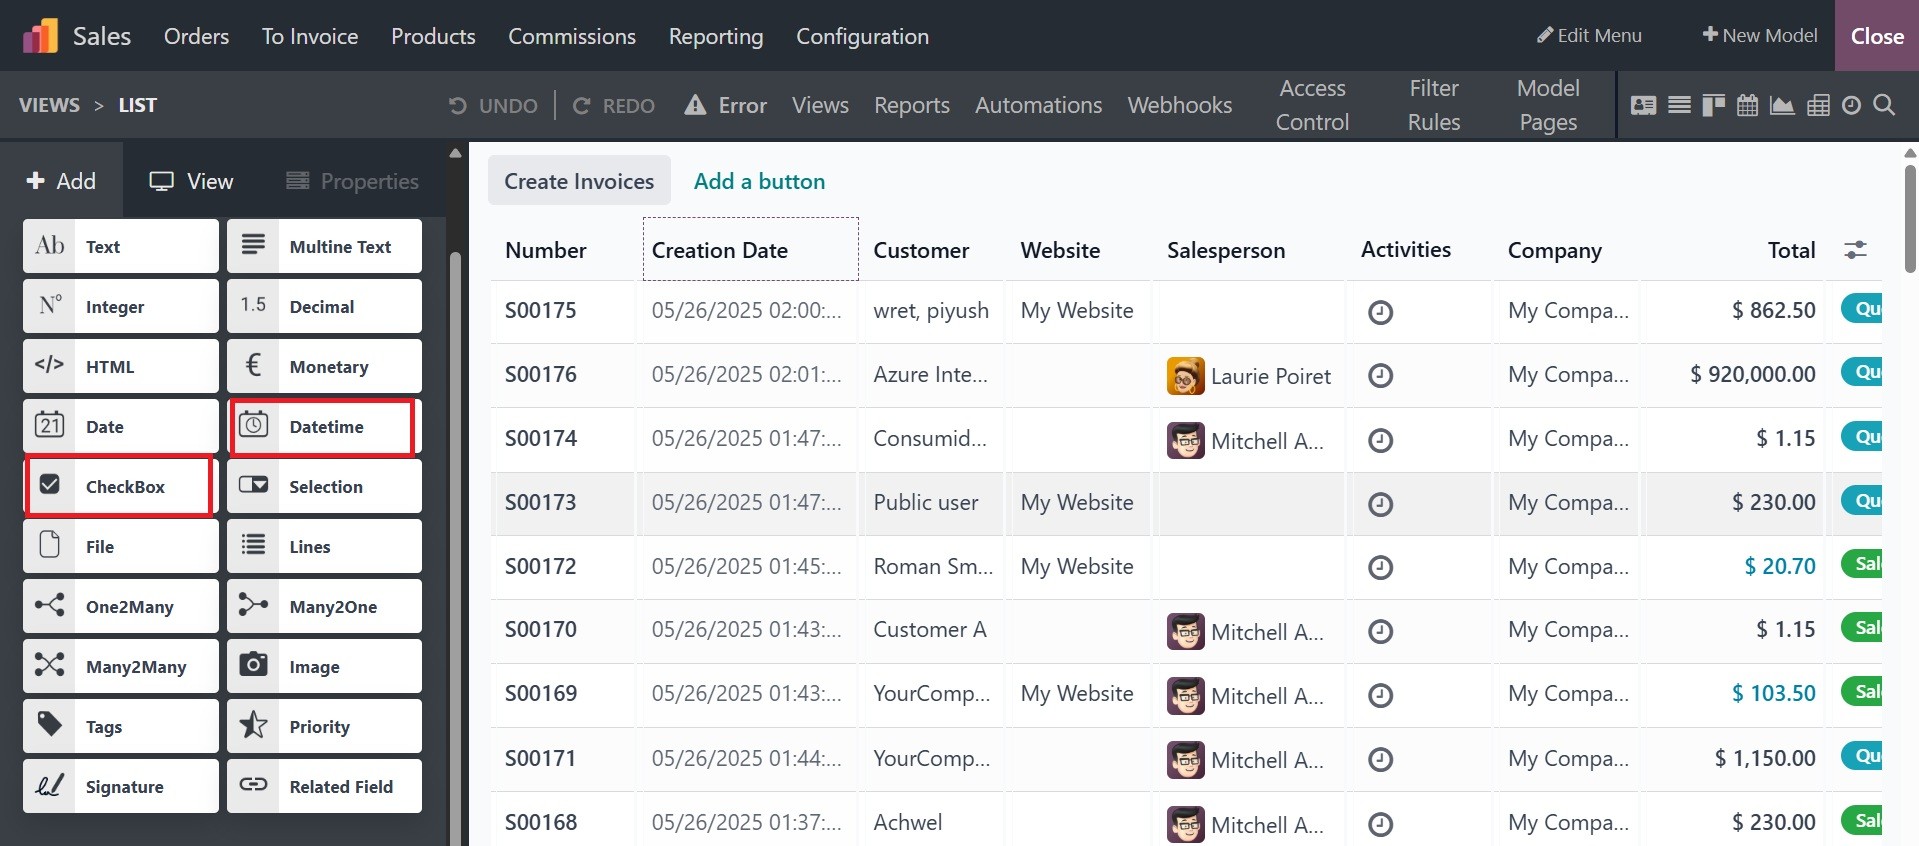
The Checkbox field is used when a
value should only be true or
false, indicated by checking
or unchecking a checkbox.
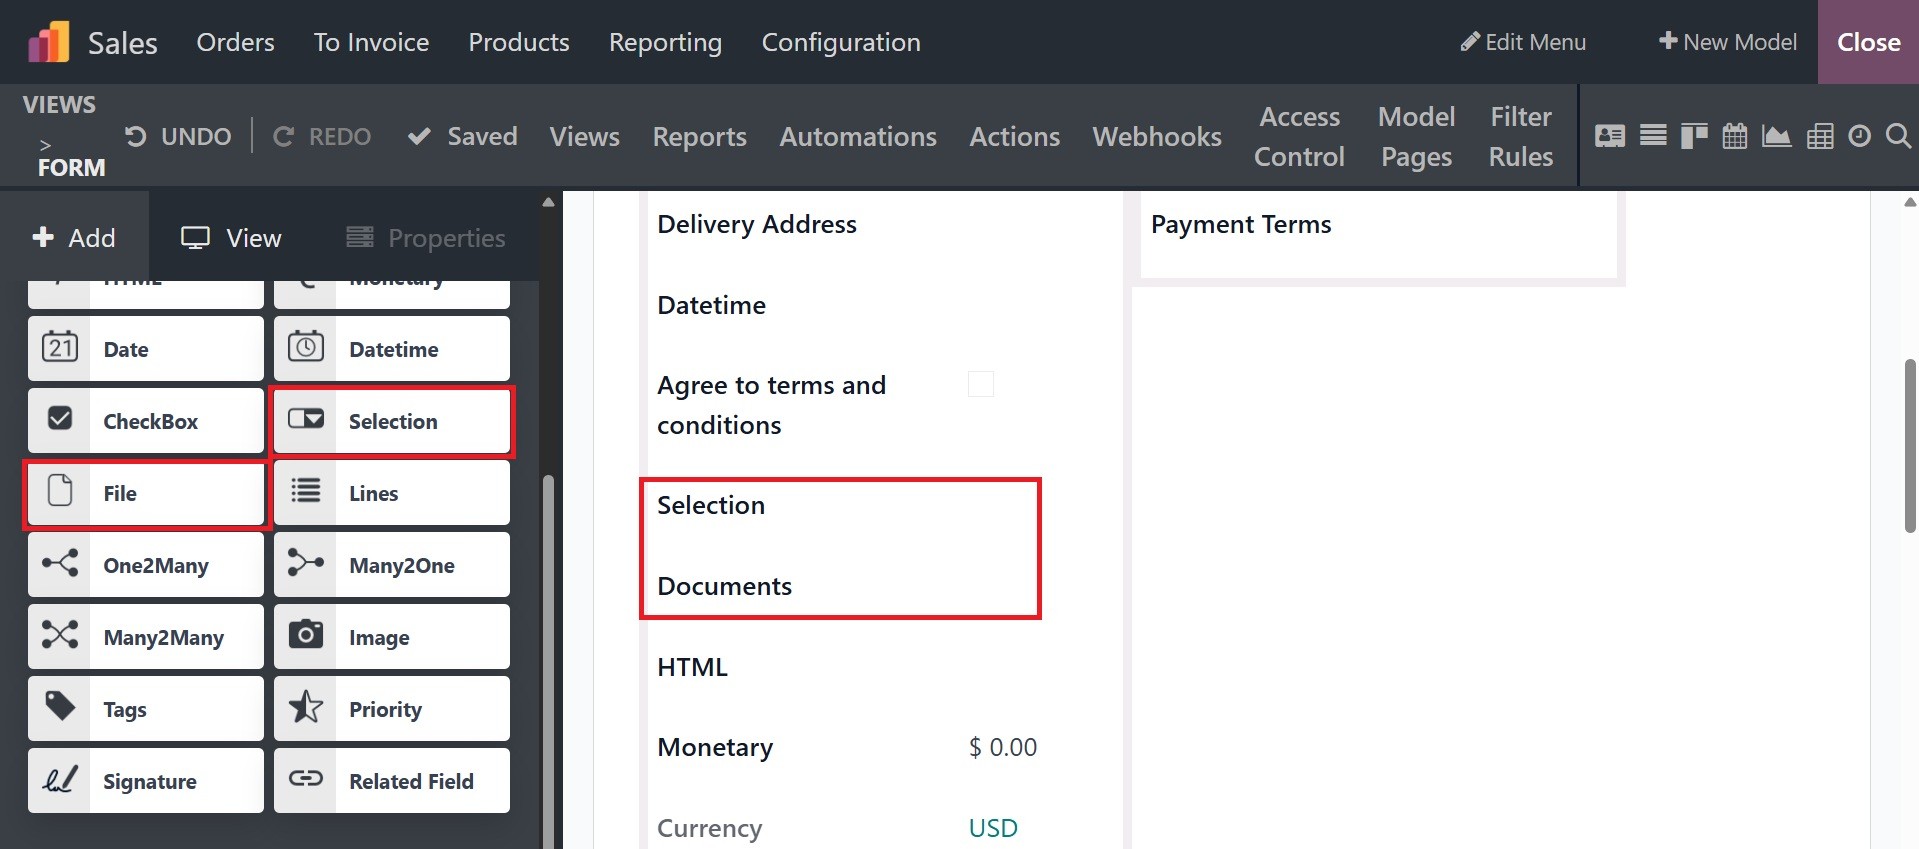
The Selection field is used when
users should select a single
value from a group of
predefined values.
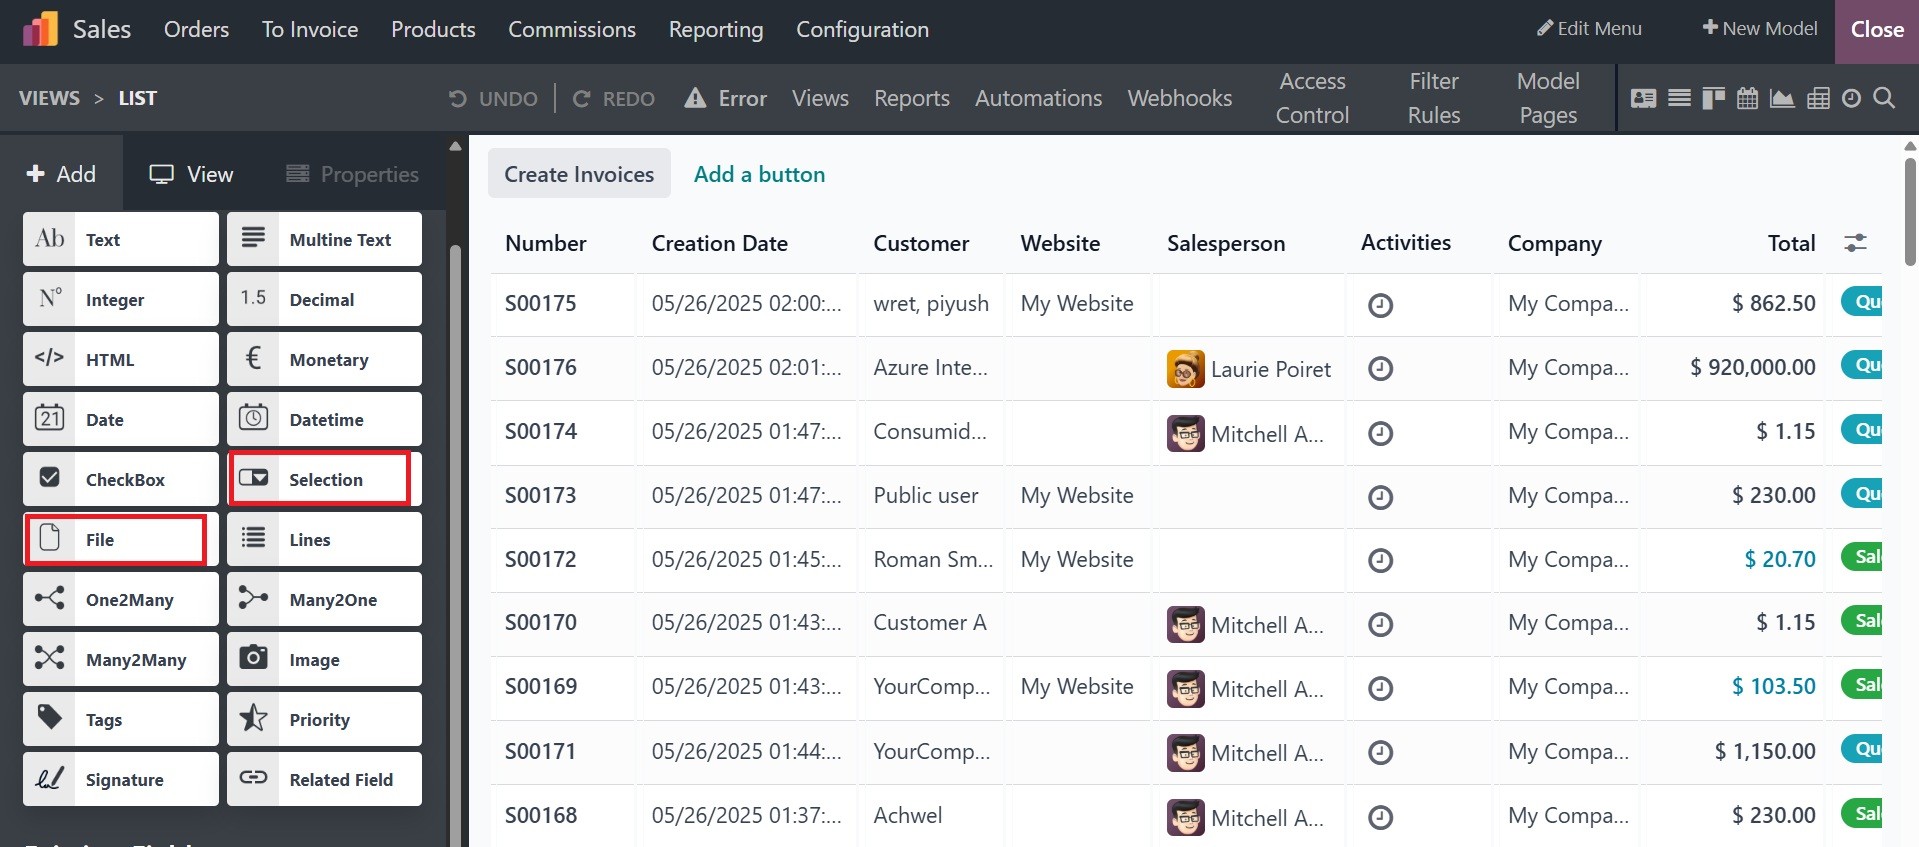
The File field is used to upload
any type of file or sign a
form (Sign widget).
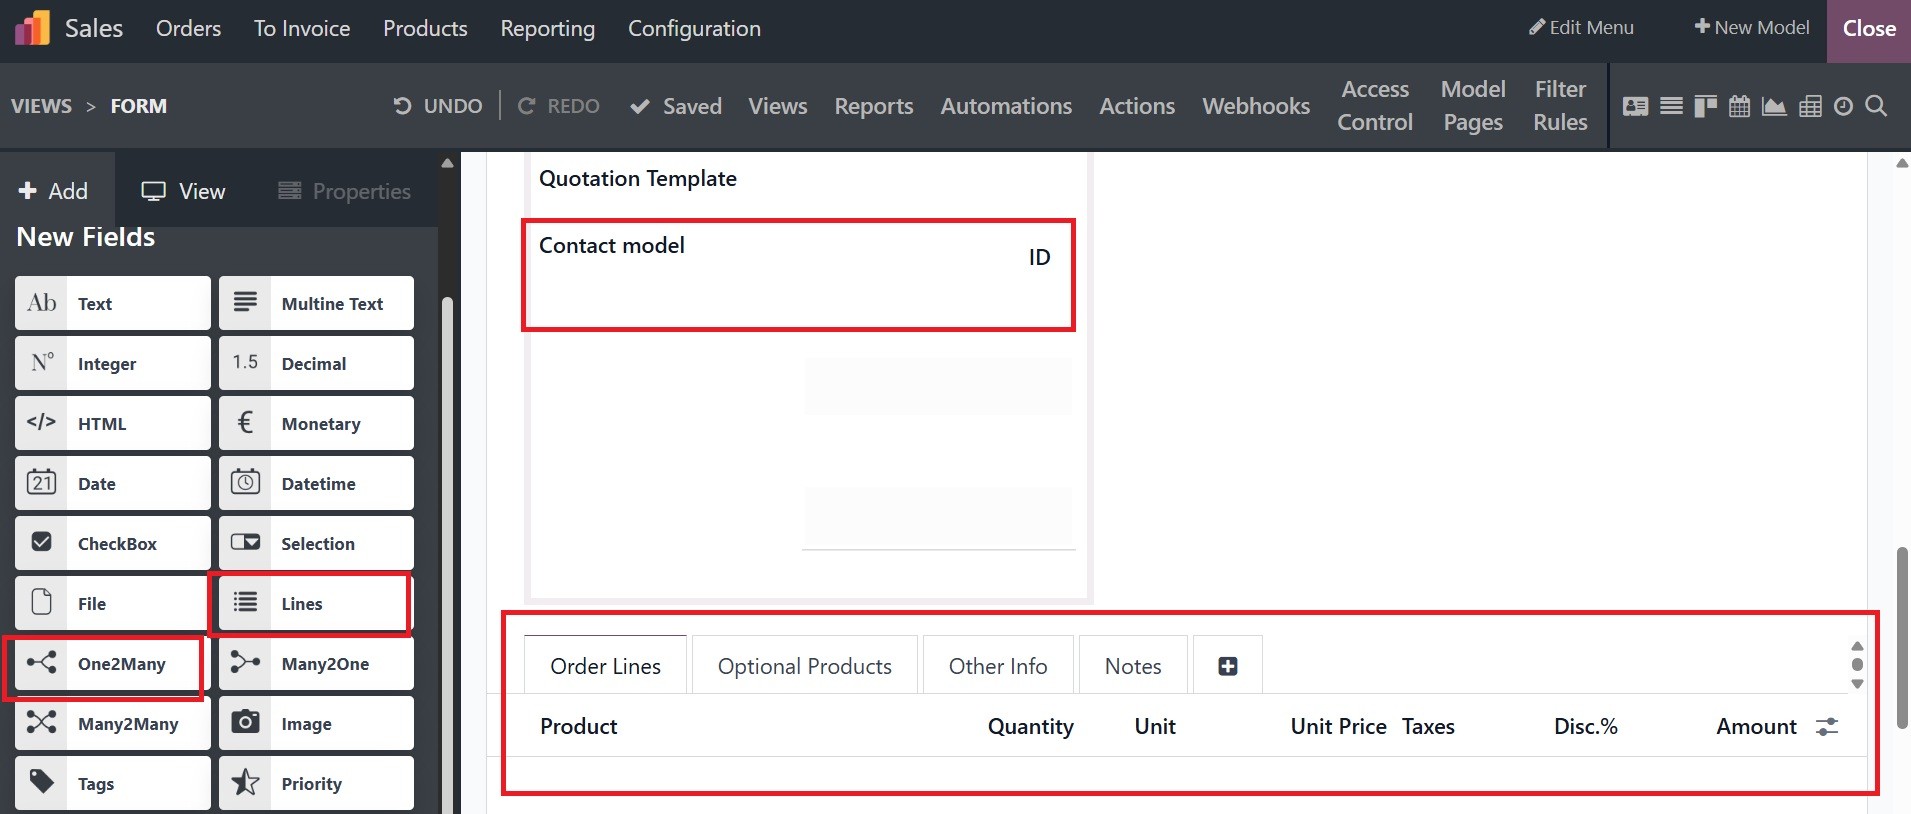
The Lines field is used to create
a table with rows and columns
(e.g., the lines of products
on a sales order).
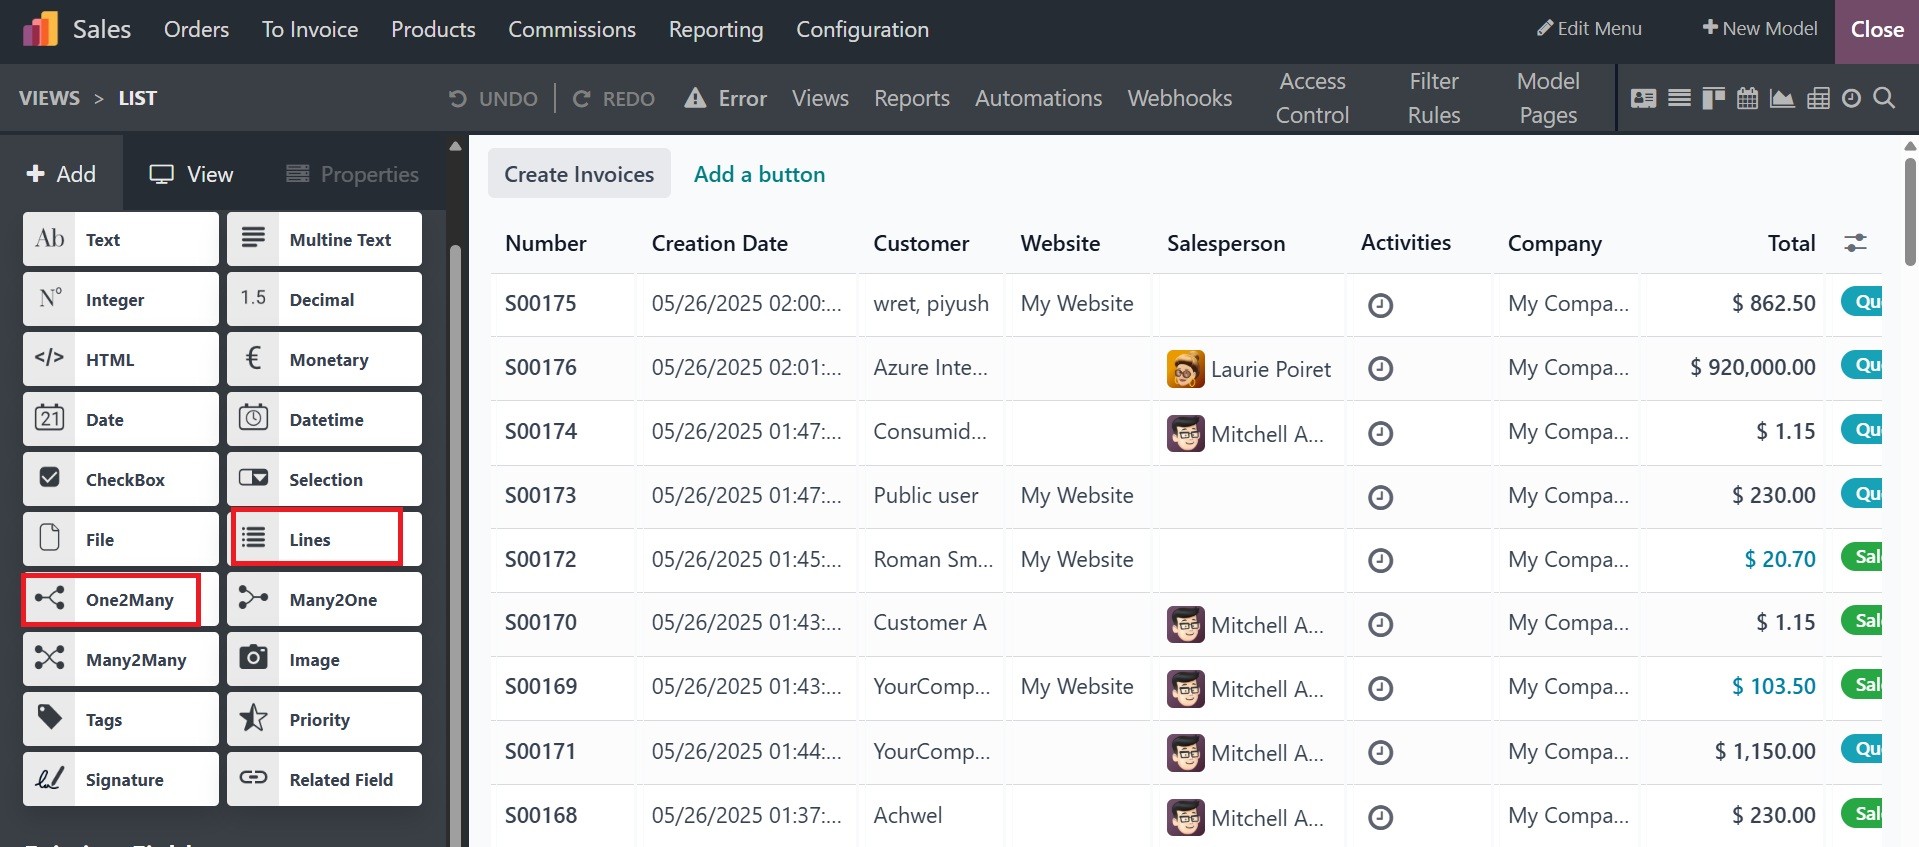
The One2Many field is used to
display the existing
relations between a record on
the current model and
multiple records from another
model.
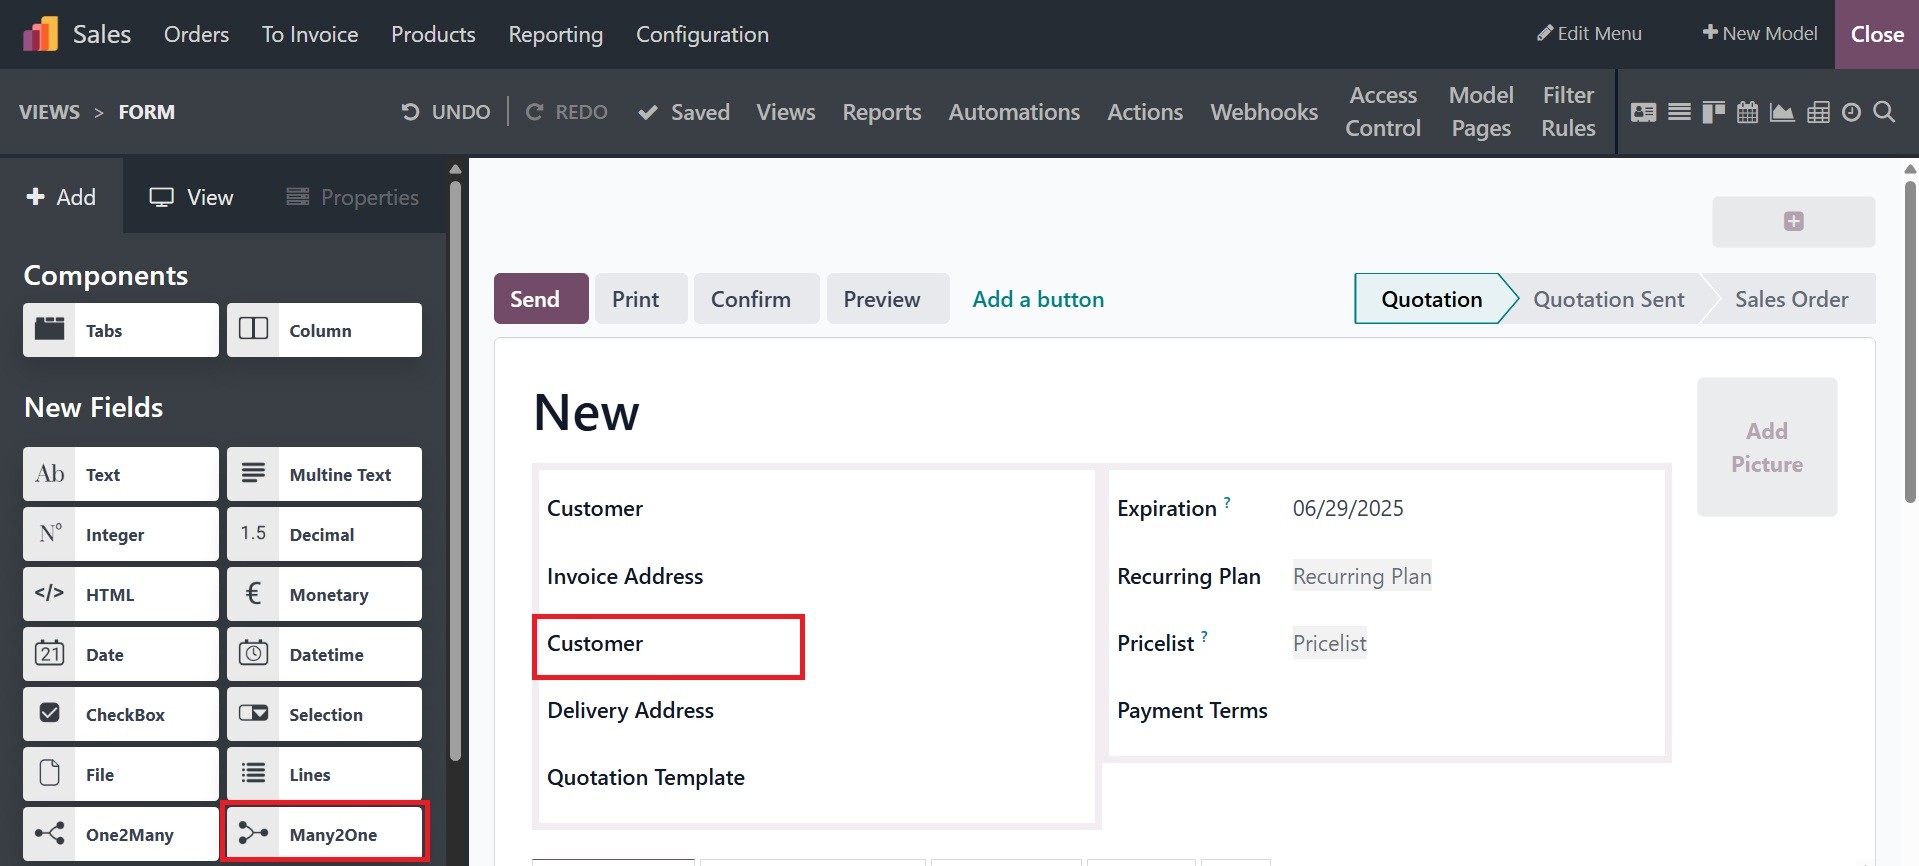
The Many2One field is used to
link another record (from
another model) to the record
being edited. The record’s
name from the other model is
then displayed on the record
being edited.
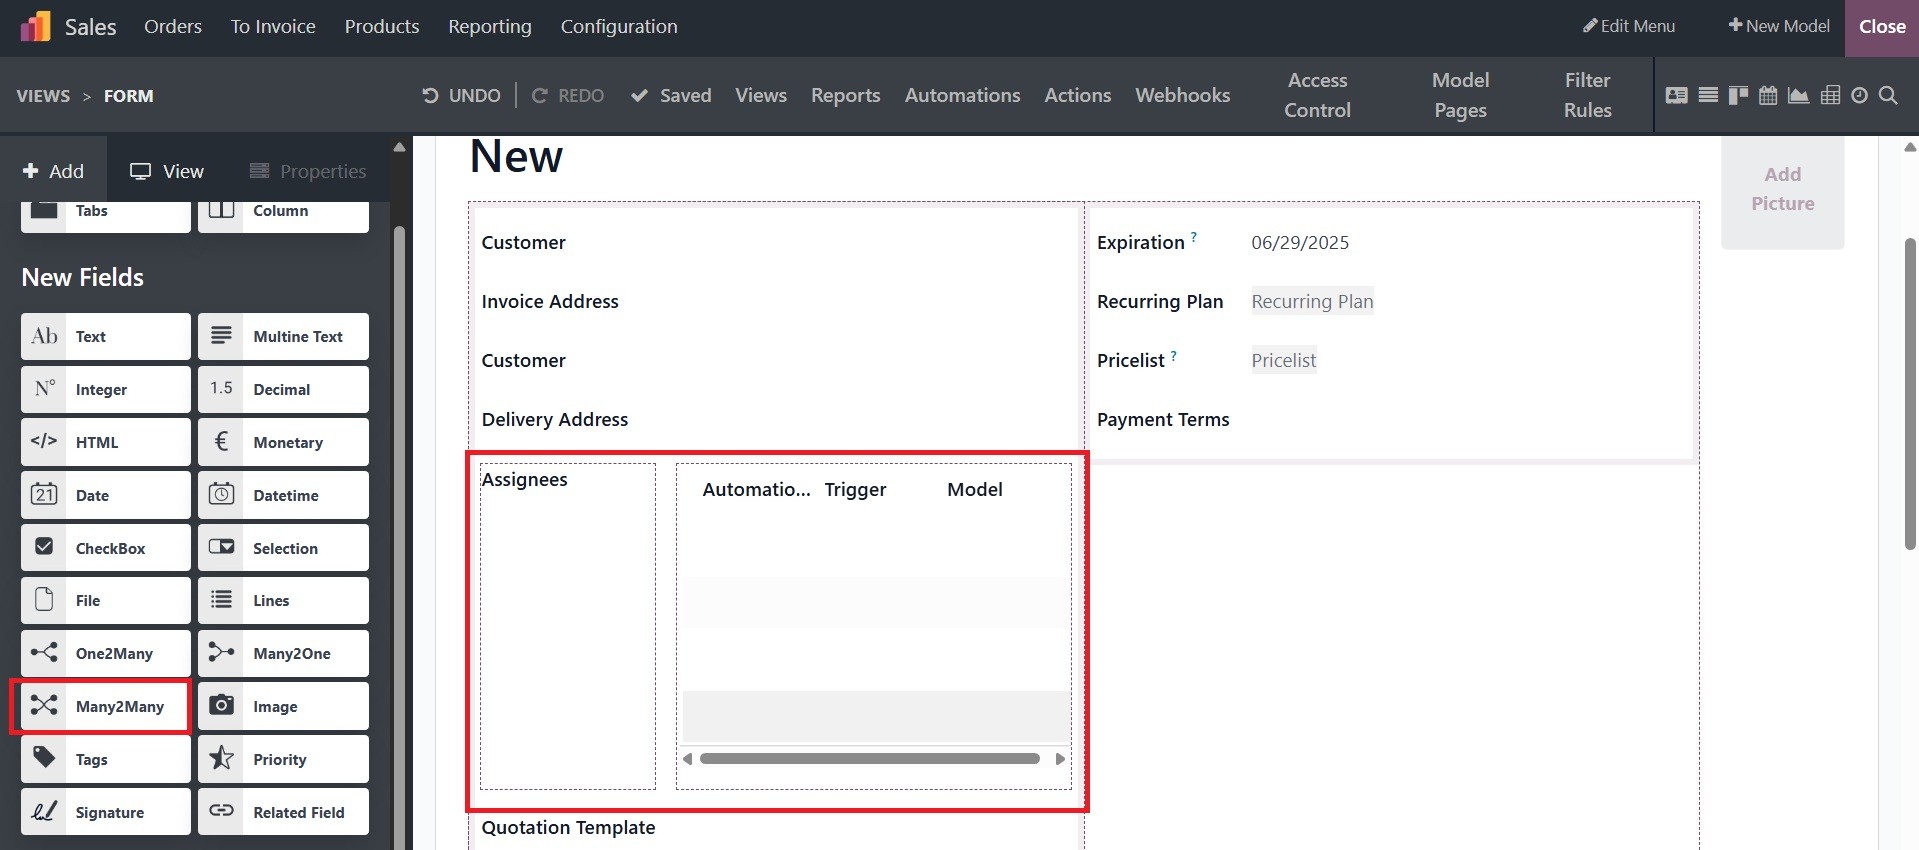
The Many2Many field is used to
link multiple records from
another model to multiple
records on the current model.
Many2Many fields can use
Disable creation, Disable
opening, and Domain, just
like Many2One fields.
The Existing Fields will contain
definitions for all the
Fields that are not included
in the New Fields.
Since we selected an
already-existing module for
the application that was
built, the Existing Fields
will be defined. All of the
specified fields in the
module will be shown in the
Existing Fields section over
here. You can enter values
for fields like happy,
abondend cart, access
warning, activity, activity
state, Action Needed,
Activity exception, Activity
Stage, Activity Type,
Attachment count, color,
Created by, Created On,
Display Date, Followers, High
Priority, Icon, ID, Is
Follower, Last Updated Date,
Last Updated Time, Main
Attachment, Next Activity,
add product, amount before
discount, amount to pay in
PoS, attachment count,
authorized transaction,
available quotation document,
average rating, cart
quantity, cart recovery email
already sent, closable,
commercial entity, contract
in exception, country code,
created by, created in app
rental, creation date,
currency rate, customizable
PDF form field, default sales
price include, delivery
amount, delivery cost should
be recomputed, delivery
message, delivery method,
delivery set, display late,
display name, and so on.
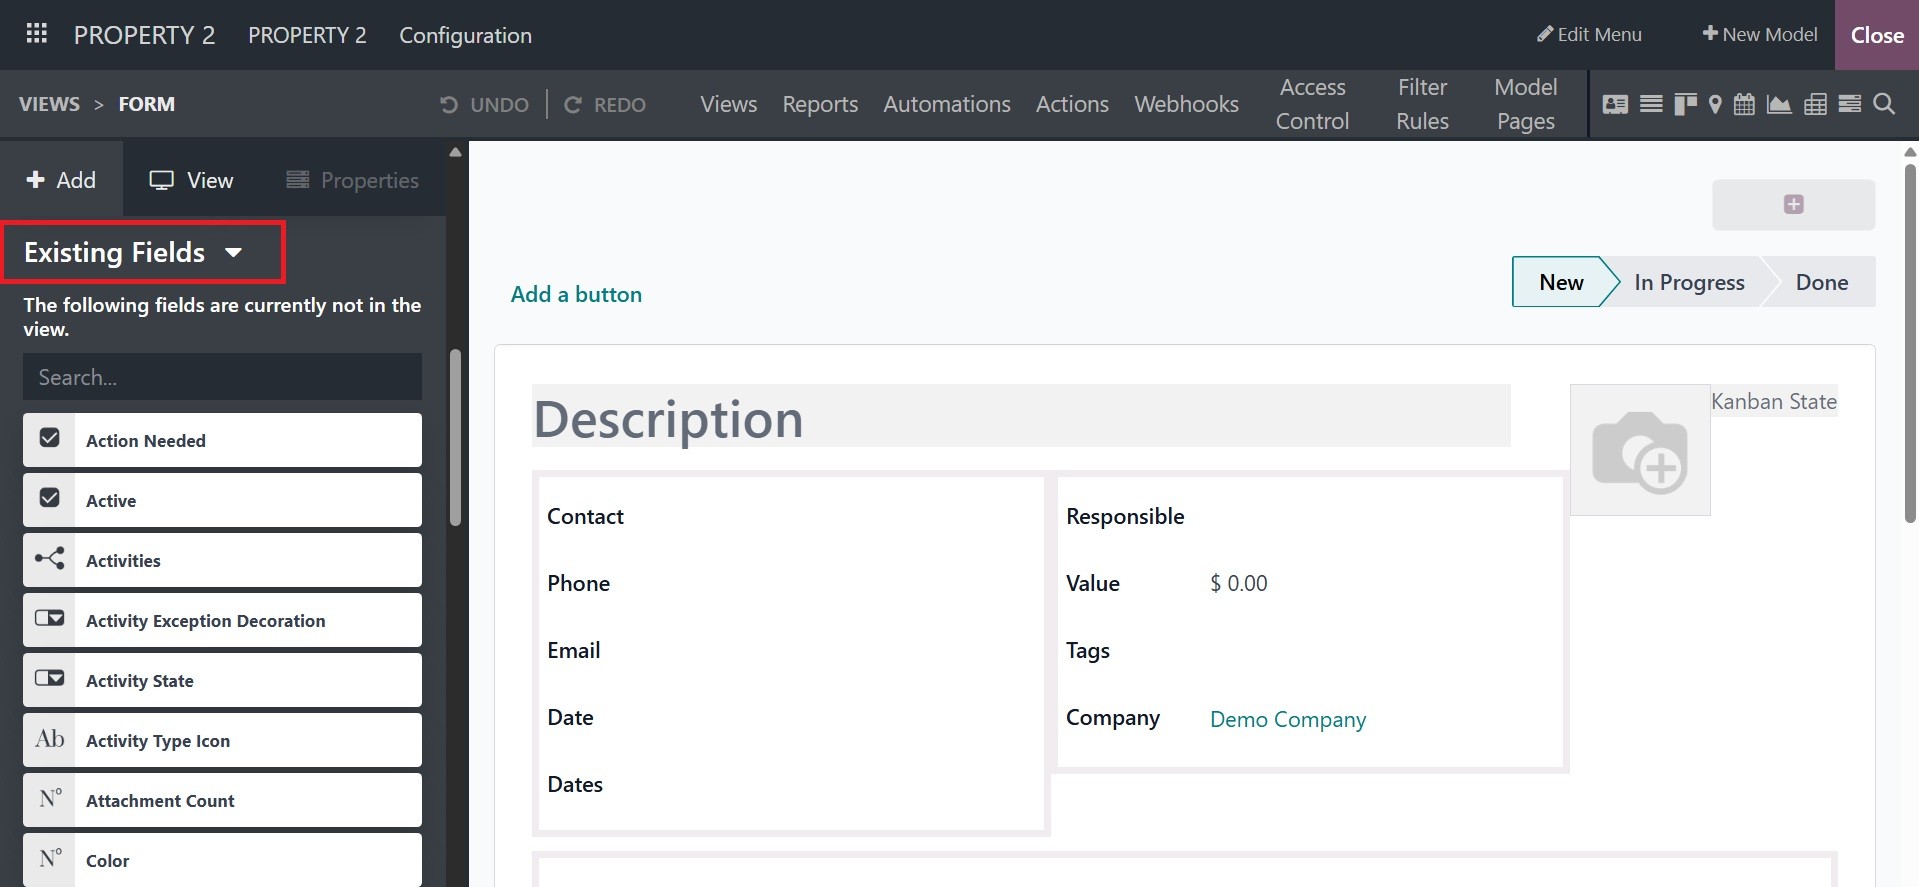
These fields are already defined
in the model we have
selected. Additionally,
depending on the capability
of the operational tools, any
field may be used multiple
times.
You can specify which
fields—whether they are new
or existing—are required for
the application by dragging
and dropping them into the
relevant sections of the
application window.
Additionally, an Odoo 18
developer can effectively
manage the functional
configuration parts of the
application's operations if
the user has control over the
operational elements of the
many fields as well as their
configurational aspects.
When you select the relevant
Fields, the Properties box
will appear. Here, you may
construct all configurational
elements associated with the
Field, enabling you to modify
and personalize its
characteristics.
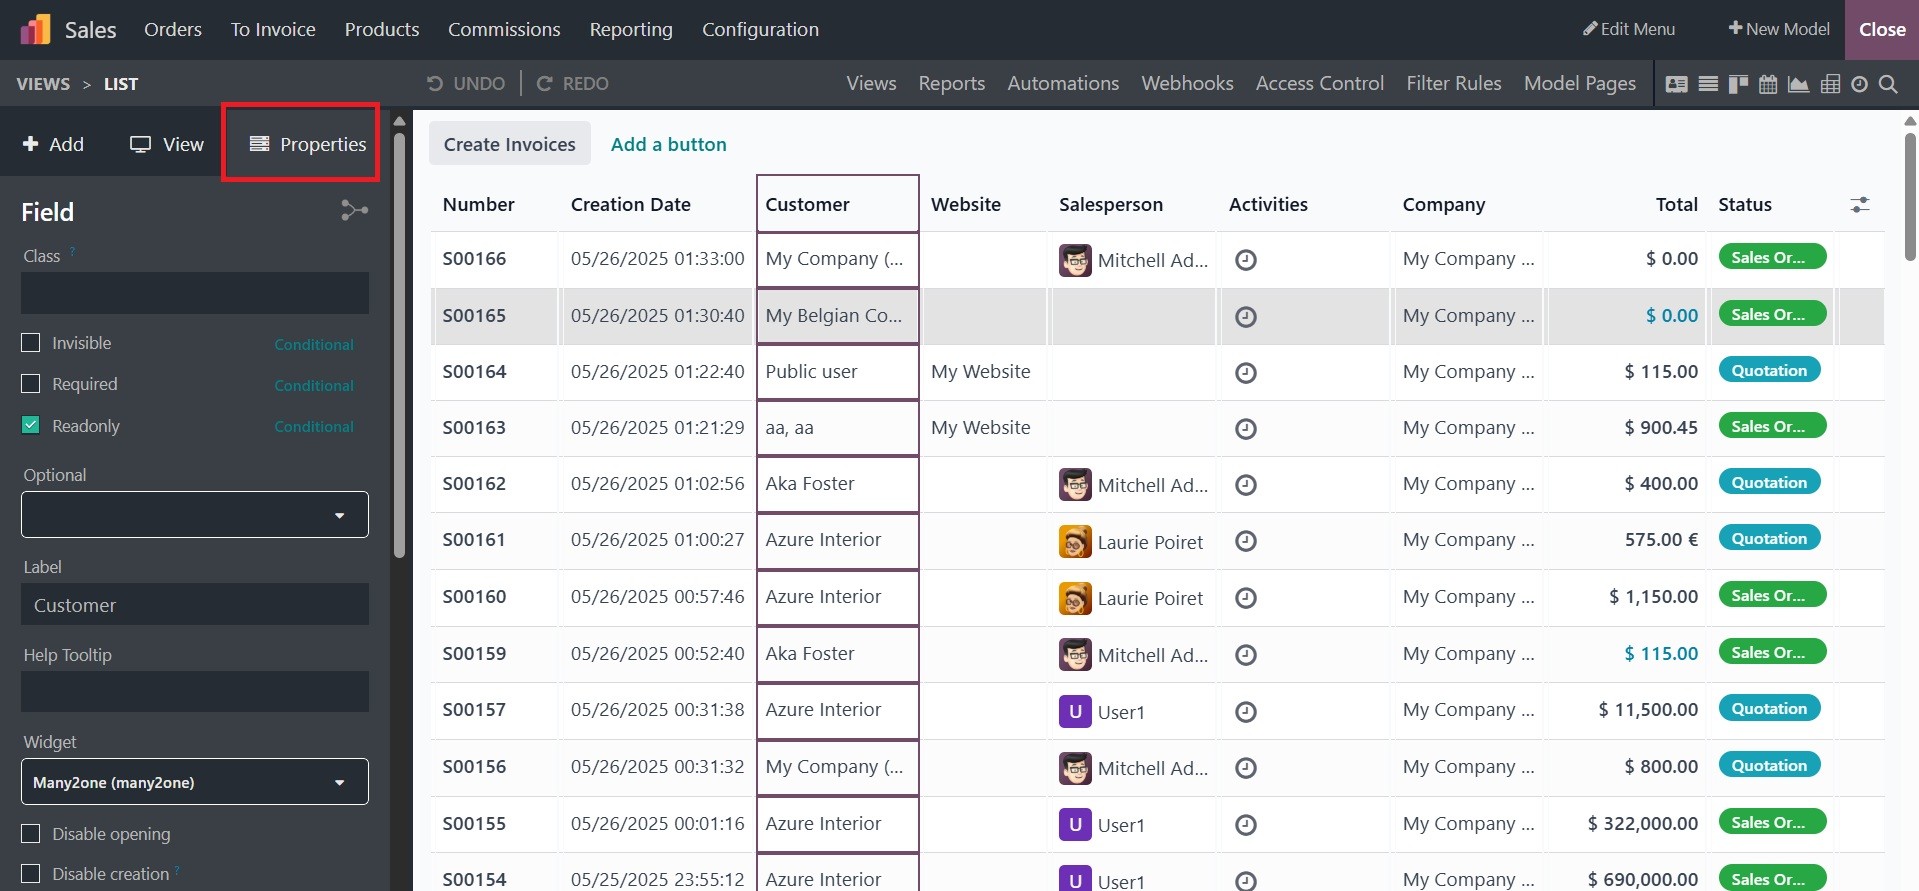
The relevant field can be
selected as follows:
You may ensure that the field is
hidden from users until the
Authorized User makes it
visible or if a user has the
authorization by turning on
the Invisible field.
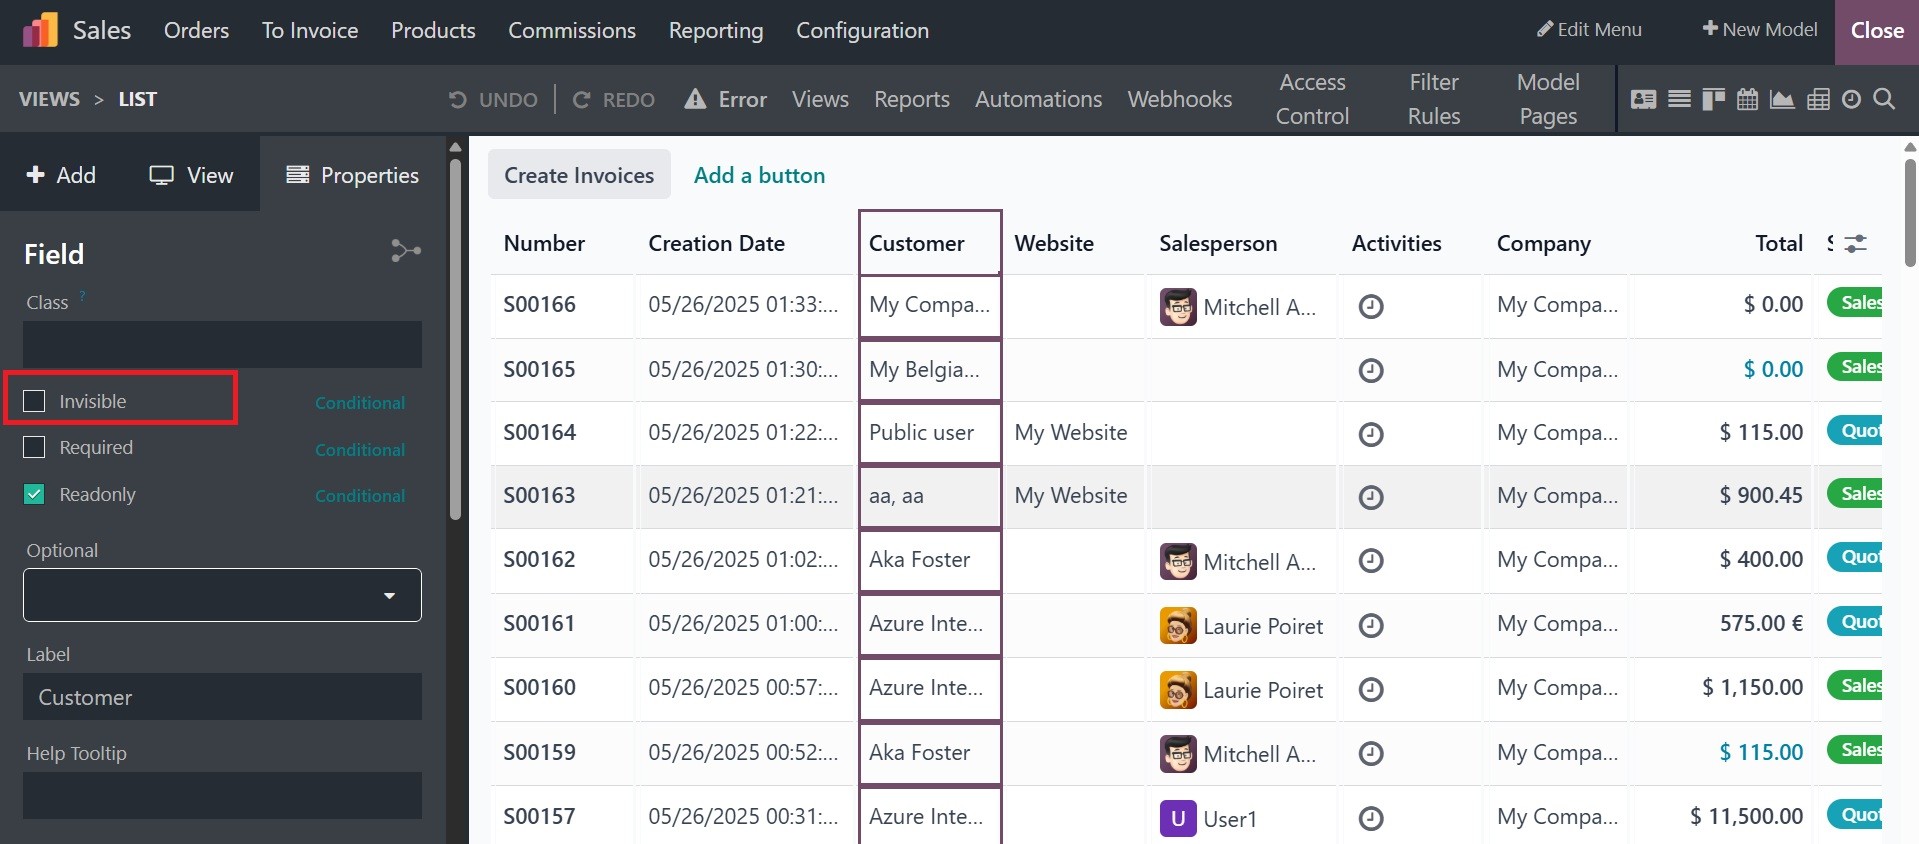
While the entries are being
specified, enabling the
Required Field will guarantee
that the relevant one is
required to be described in
the applications menu.
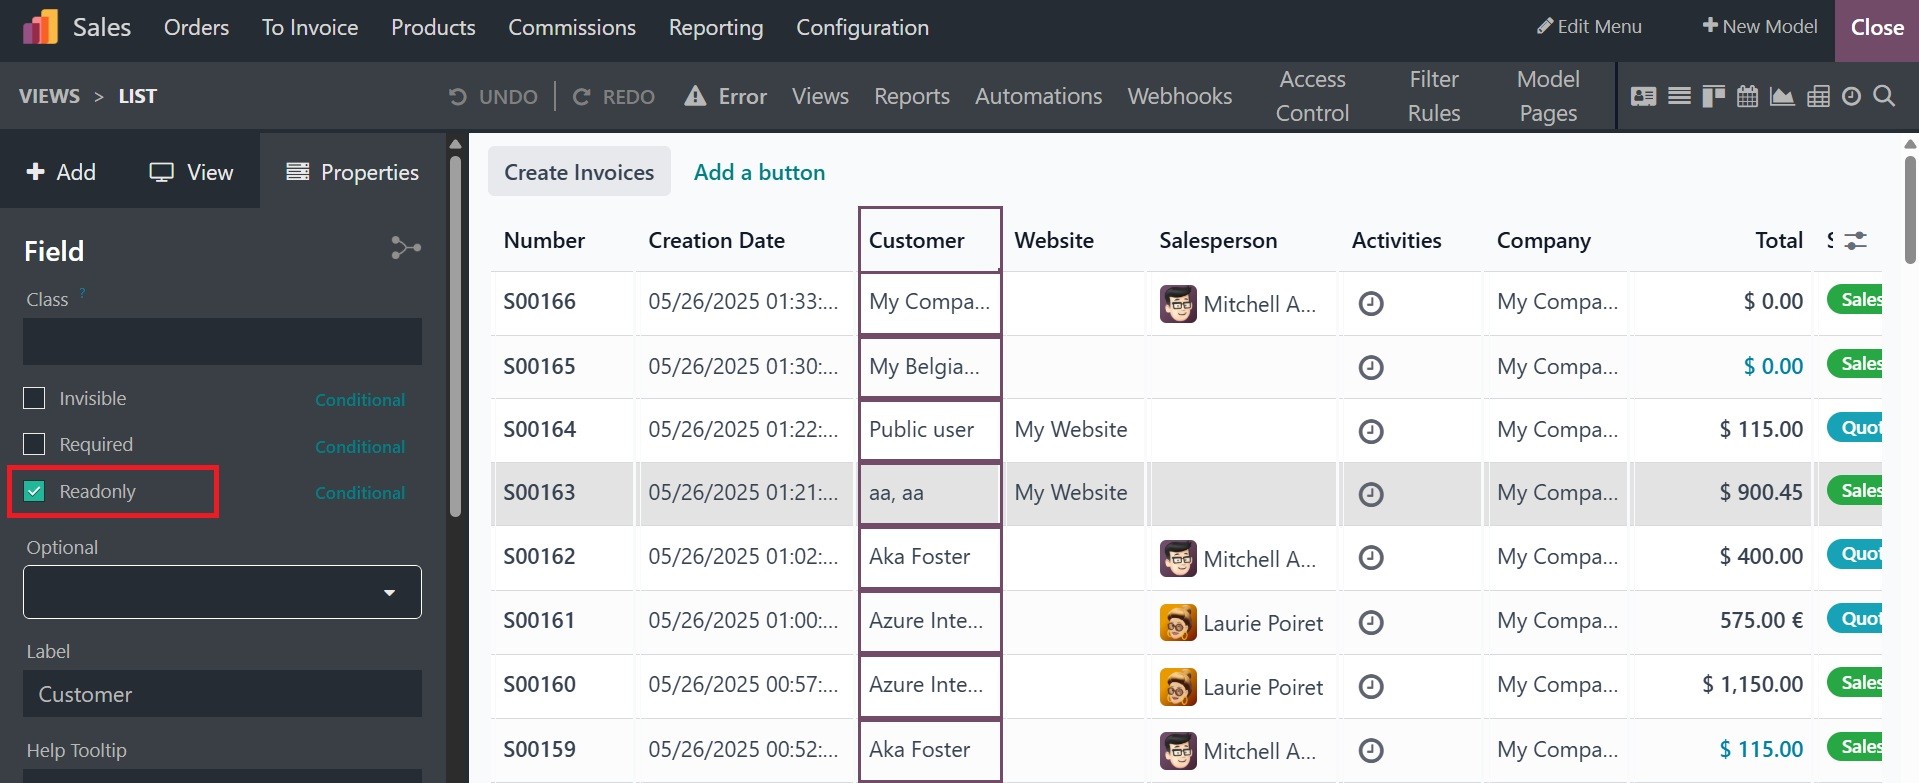
Only when the Read Only property
is enabled for a Field that
is being described will users
be able to see the Content.
They won't be able to add to
it or change it.
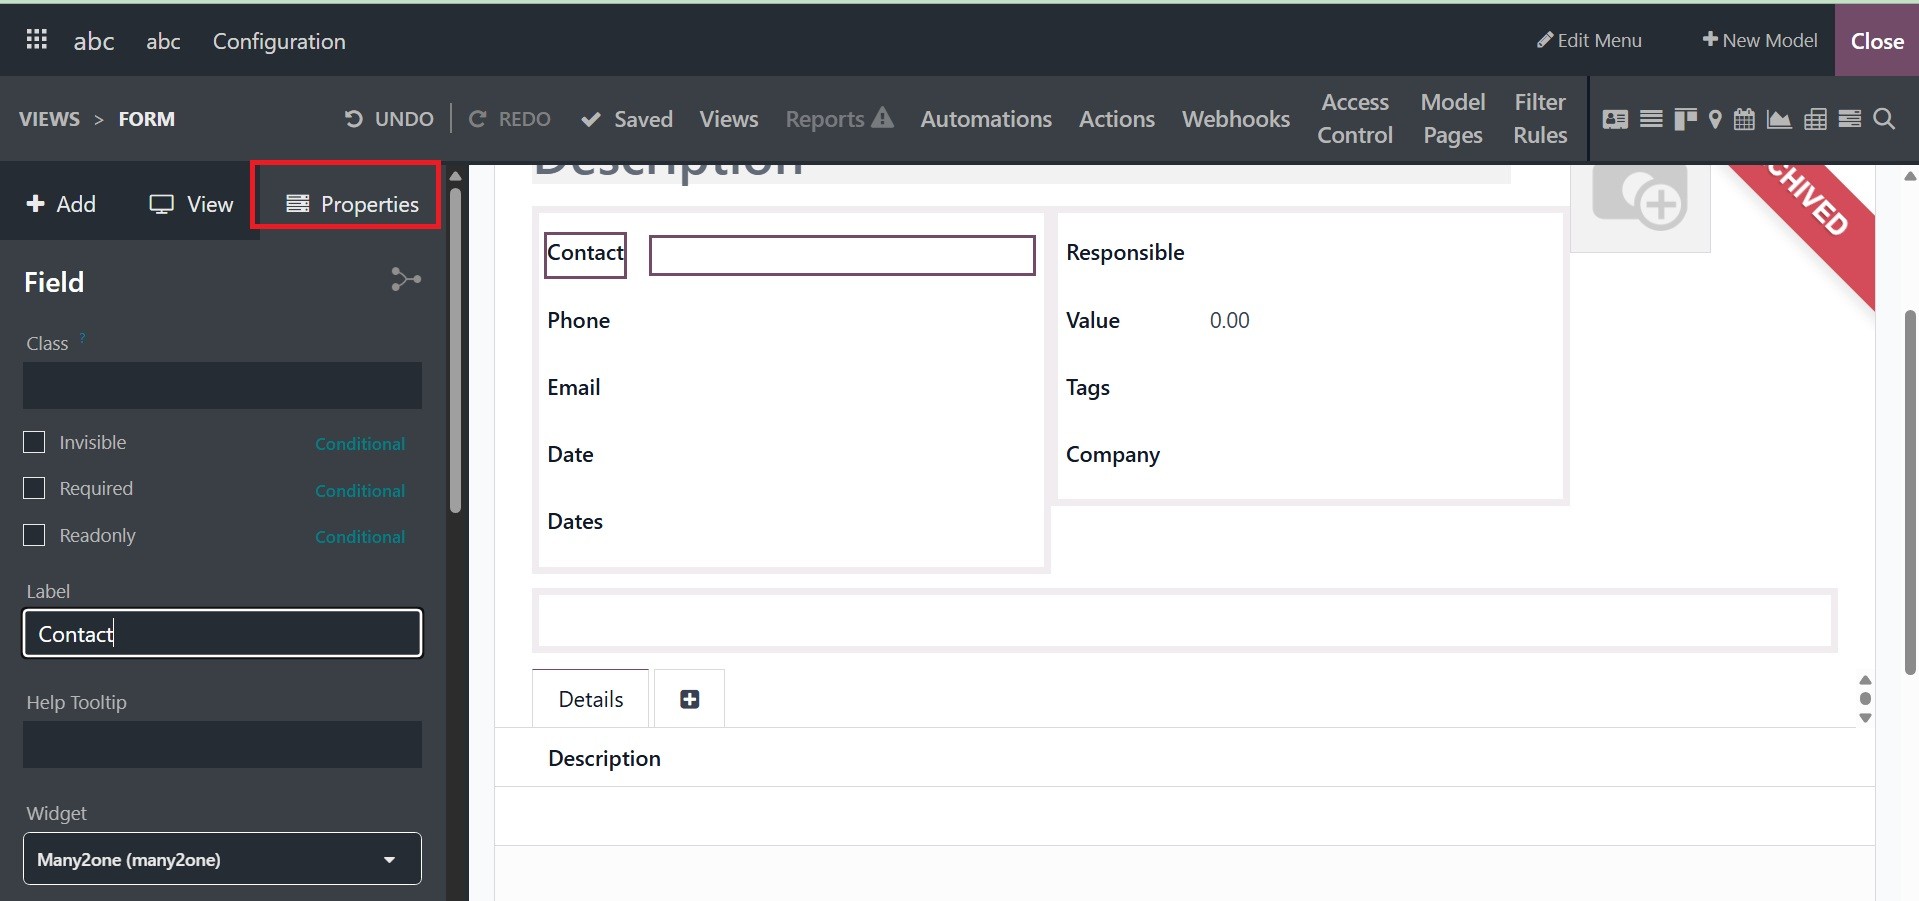
By defining the label, you can
make sure that the field is
being labeled according to
the given description.
By turning on the HelpTooltip,
users will be given practical
advice on how to complete the
fields that are mentioned in
the menu.
The Visitors can enter the
information in the text box
that initially displays the
PlaceHolder element.
Additionally, it tells the
viewer which details need to
be filled in.
This is where users can
choose the widget that should
be described in the menu for
the entry.
A field's default value can be
specified for the menu on
which the application will be
displayed.
Limit Visibility to Groups: Here,
you can specify which groups
should have this field's
visibility limited.
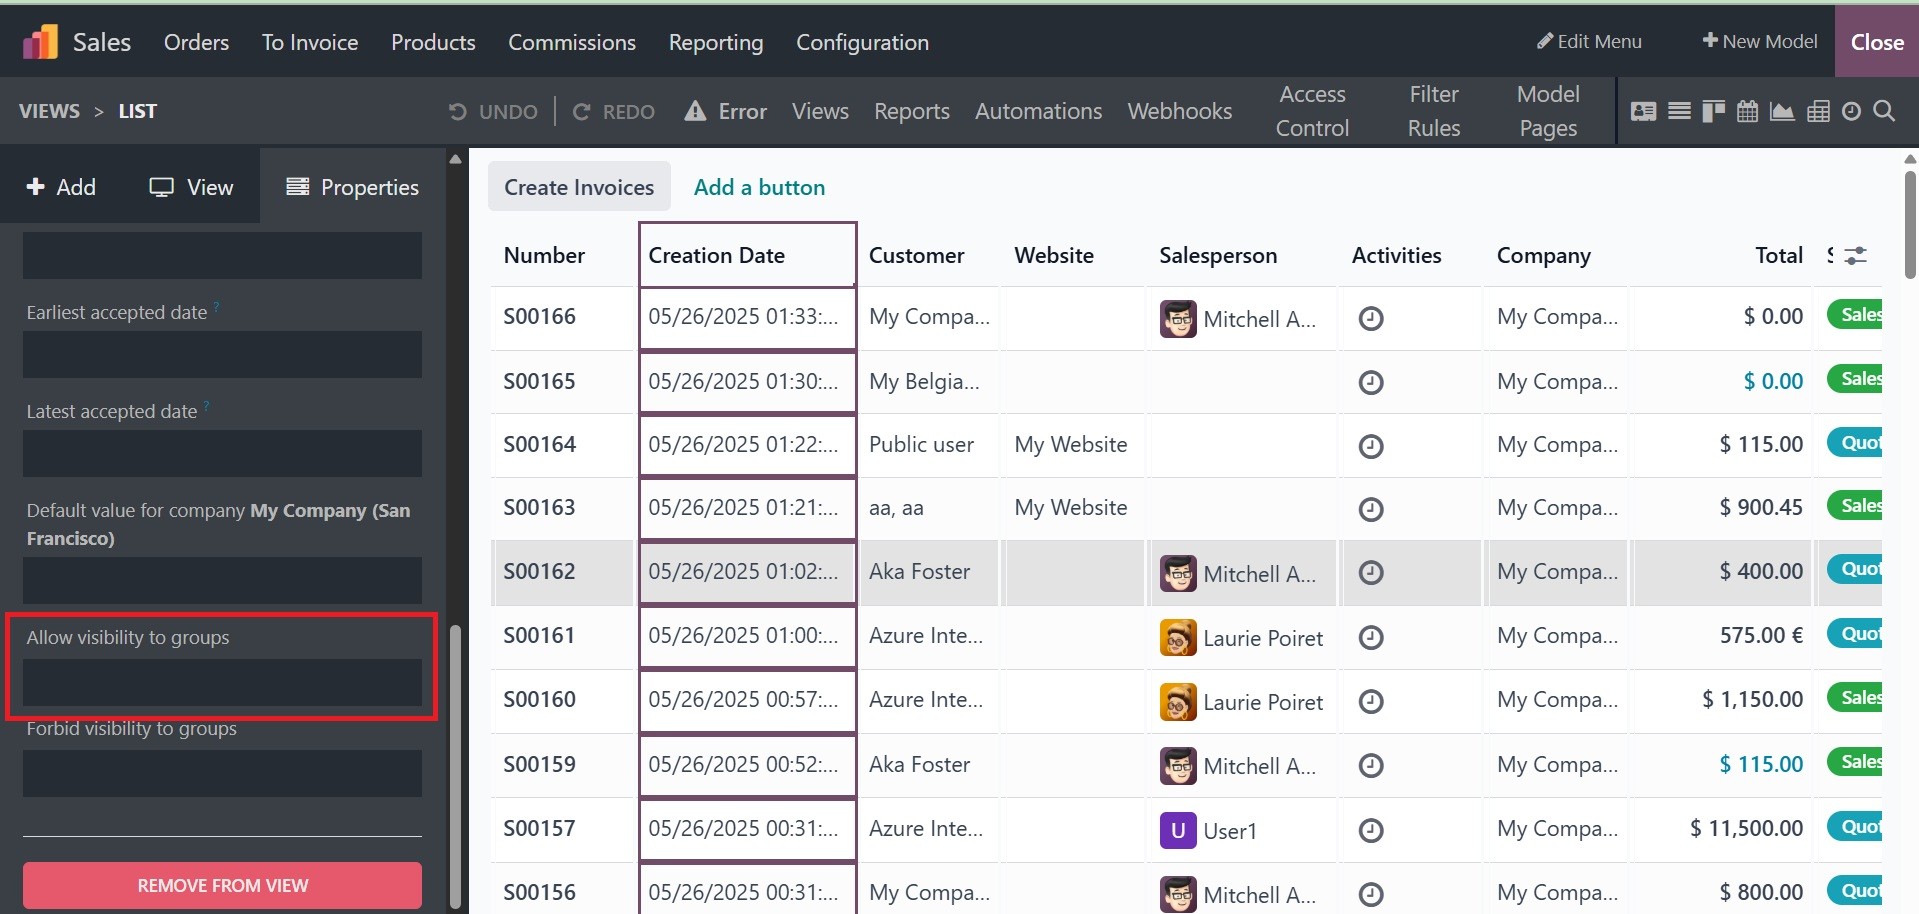
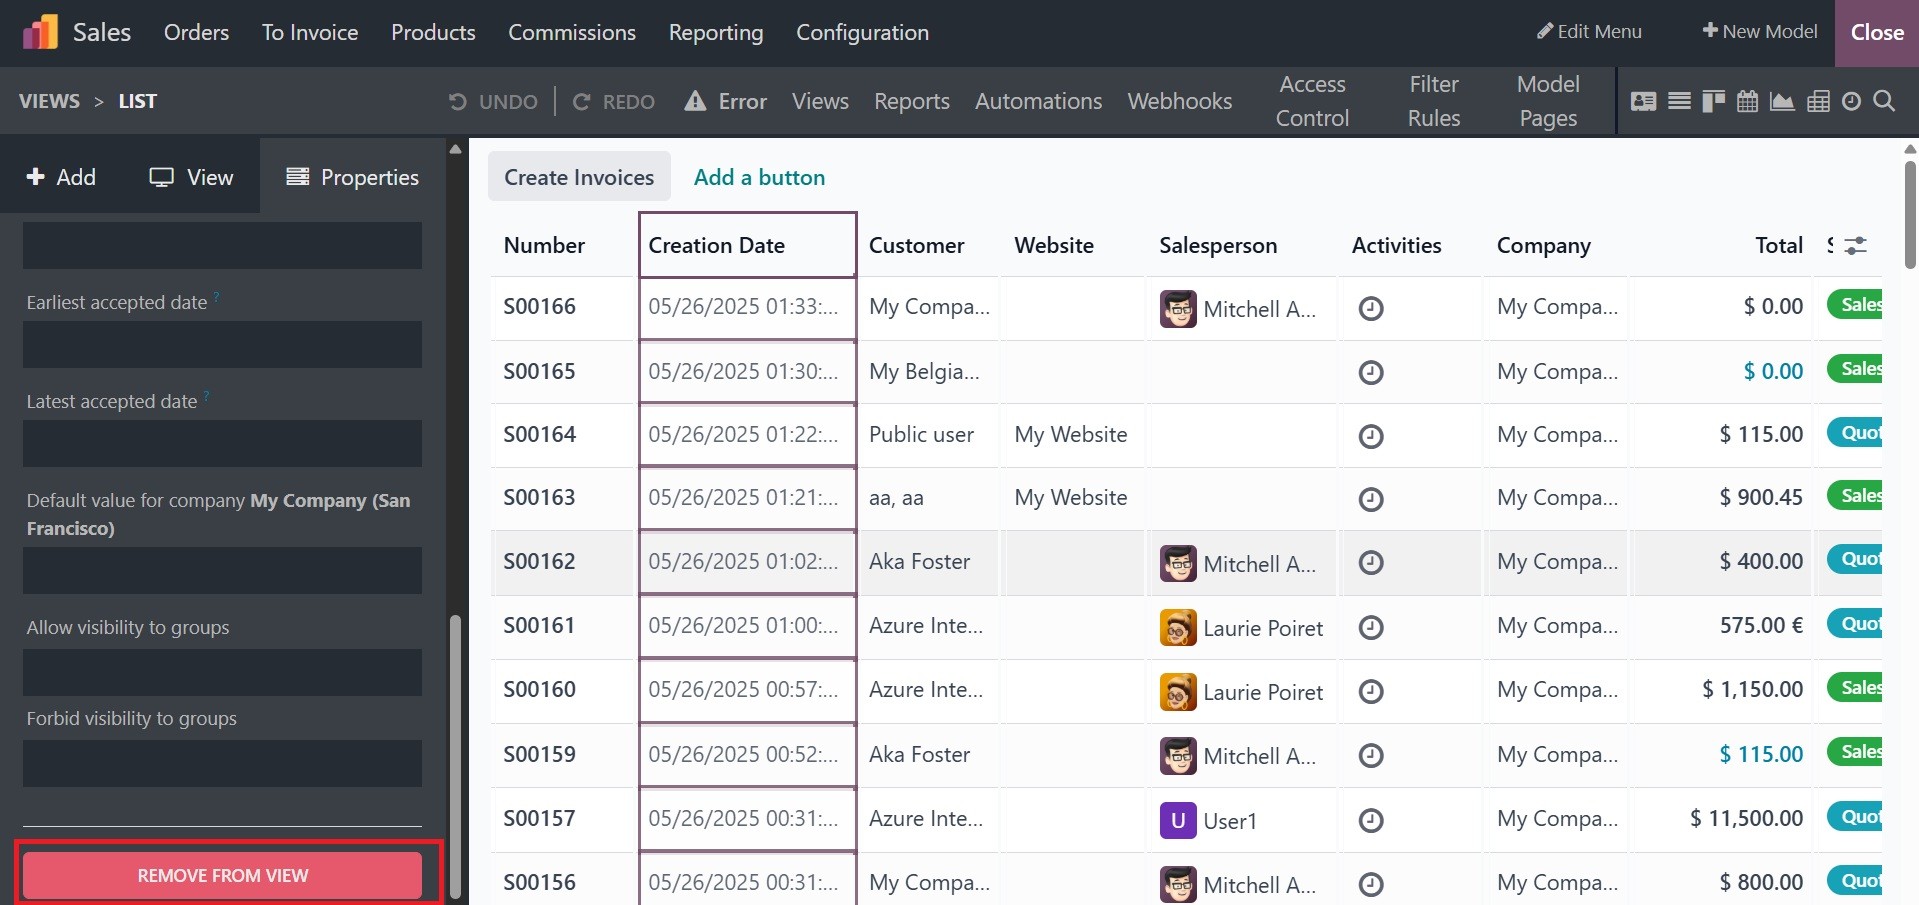
The field can also be deleted
from the application by
selecting the Remove From
View option.
With the help of the Fields,
Tabs, and Columns of
operation, you will now be
able to understand how the
new application is made using
the Odoo18 Studio Module. Now
let's use the Odoo18 Studio
Module to complete the
remaining stages in
configuring the new
application. Let's move on
and discover how to use the
Odoo18 Studio to define the
Smart Tabs in a particular
menu.